-
Posts
2,449 -
Joined
-
Last visited
Content Type
Profiles
Forums
Gallery
Events
Everything posted by dvm27
-

US Brig Syren by Gahm - Model Shipways
dvm27 replied to Gahm's topic in - Kit build logs for subjects built from 1801 - 1850
I must be the last person on this forum to stumble onto your log but your model is outstanding! Your wood and metal skills are first rate and I very much enjoyed the hour I spent viewing your log. -
Lovely work, Nick. At some point, you'll need to widen the opening on the transom to accommodate the sweep of the rudder. This might have been easier before planking but I've no doubt you're up to the task.
- 504 replies
-
- washington
- galley
-
(and 1 more)
Tagged with:
-
Lovely work, Gary. Closing in the hull is definitely a memorable milestone. With regards to fillers between the floor timbers, I've noted several separations on my Speedwell fully framed model. Obviously, filler frames made sense on the real ships to provide a solid wall of timber while immersed in water. But on a model, with expansion and contraction of wood due to changes in moisture and temperature, I suspect you'll have similar problems from time to time. Not a major issue, however, as this area is not readily visual once the deck beams, carlings, etc. are in place. Plus, once you get a few longitudinals in place (such as limber strakes) this occurs less. My workshop is in my basement which has a constant temperature and humidity. Most of my problems arose when I took the hull outside to fair or into a different room to photograph. If I were to build another fully framed model I would not remover her from the workshop until fully faired with deck clamps in place.
-

Model Machines Disc Sander for sale
dvm27 replied to Byrnes Model Machines's topic in Modeling tools and Workshop Equipment
Great job patching her up, Jim. For those who missed out on this gem, I fully anticipate my brand new Byrnes disk sander to be in equally rough shape after another decade of similar abuse. Stick around for another donation. -
Very nice, Chuck. Looks like you made good use of the grain pattern in your planning.
- 269 replies
-
- Queen Anne Barge
- Syren Ship Model Company
-
(and 1 more)
Tagged with:
-
Chuck, your work is impeccable as usual. Could you describe your painting technique and brand of paint? A flawless finish such as you achieve doesn't happen by slapping a coat of paint on bare wood.
- 269 replies
-
- Queen Anne Barge
- Syren Ship Model Company
-
(and 1 more)
Tagged with:
-

Echo by davec - FINISHED - cross-section
dvm27 replied to davec's topic in - Build logs for subjects built 1751 - 1800
Looking excellent, David. Your meticulous work shows up quitenicely in the symmetry of those ventilation holes. That doesn't happen without careful planning.- 127 replies
-
Just finished Video 14 Kevin. Great job on the counter timbers and framing of the quarter deck light. I'd spot glue a 5" wide plank across the aft cants to the outer counter timber at the toptimber line at this point. This will add strength to the area and may help prevent a stray elbow from knocking off the delicate timbers aft of the last cant. I've done this (as has Toni I believe) and it really ruins your day! Happy to see you've invested in the Veritas sharpening system. With regards to the mortises for the sills, try to keep them as shallow as possible, perhaps 2". They should be subtle. Typically, I make two total passes with the chisel to form each face, a shallow cut defining the angle and a final cut to the line. The deeper the cut, the more difficult it will be to fit the sills to them. Thanks for the acknowledgement to David and I for developing the practicum. We're happy you are enjoying building a model of this complexity and we are very appreciative of your video documentation. It took me almost a decade to build and photojournal my Swan class model. Doing these videos must add many hours to the project. I wish more MSW viewers would take the time to watch them because they are a really great resource.
- 1,104 replies
-
Wonderful work, as always Glenn. Couldn't help nosing around your workshop. What's the plank on frame model sitting behind Heroine? The wales date her to before 1750. Is she another version of La Belle?
-
The best blackening agent I ever used was ferric chloride and ammonia, based on a technique described in Model Shipwright. It was a very nasty concoction, however, and extreme caution was used while preparing and using it. I have had mixed success with Jax products and also very good success with automotive spray paint primer and matte or flat black finishes. Ken - your formula is for cast brass but I assume it works for other brass as well?
-
Nice job, Toni. Only three hours with no redo's. Impressive.
- 1,449 replies
-
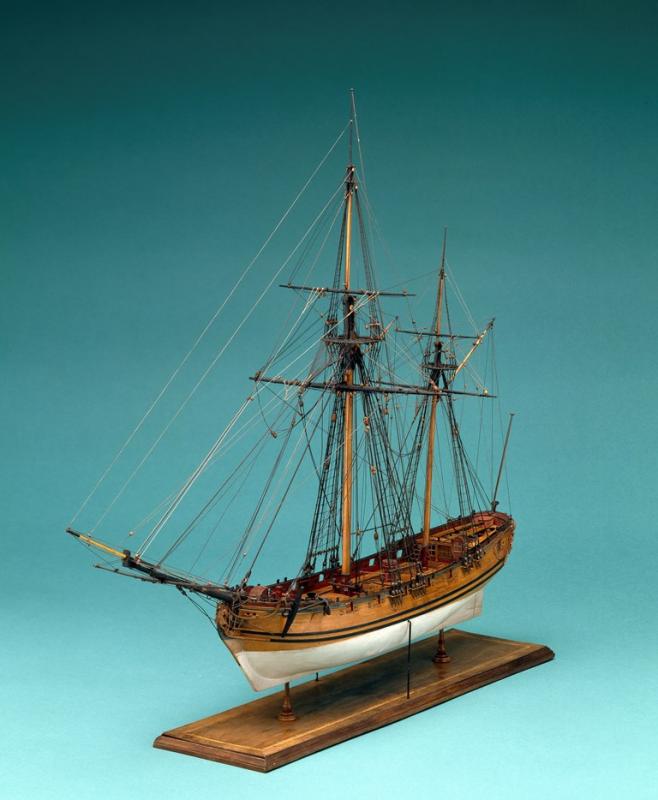
Toni, I am looking forward to rigging her. The only other ship I've rigged is Hannah. As a ketch rigged sloop, she's a relatively simple model to rig. I'm attaching a photo of the Speedwell model David and I have based our model on. I find her to be a simple, yet elegant ship. Photo courtesy of the National Maritime Museum.
-
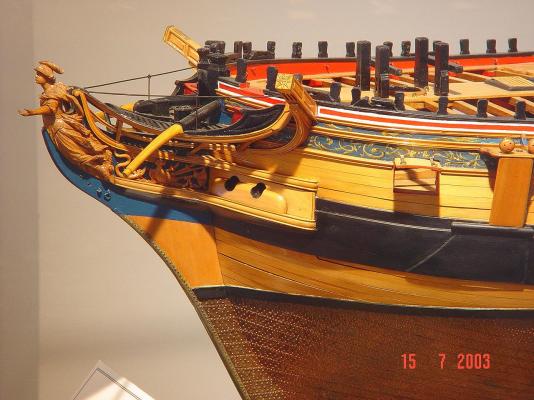
Tom, a rigged Speedwell is the perfect size for the last remaining space in my study. The shifted and cast toptimbers were definitely a challenge, even at 1:48 scale. She would be a very manageable model at a larger scale though. I prefer to build my armada to the same 1:48 scale in case a war breaks out in my study when I'm not home. That way the larger scale ship will not have a tactical advantage.
-
A photo from Gatean's log of the USNA Minerve shows the optimal coppering effect. Very small, evenly spaced nails. Might be very difficult to convincingly execute at a smaller scale. I agree with Druxey that less is more in this case.
- 1,208 replies
-
- great republic
- clipper
-
(and 1 more)
Tagged with:
-
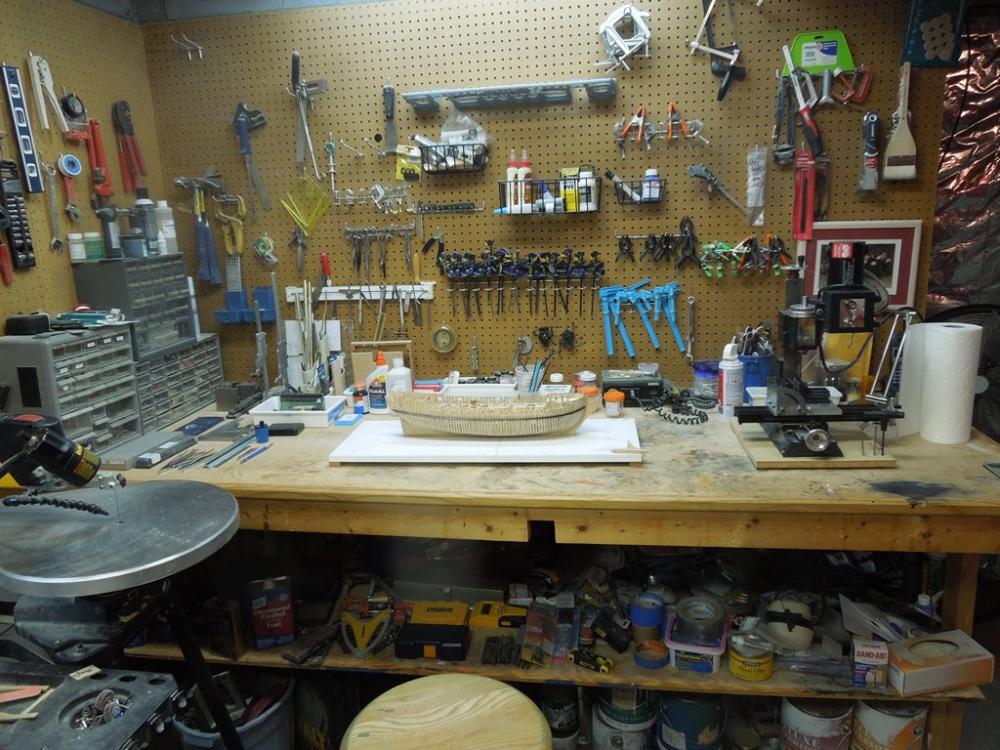
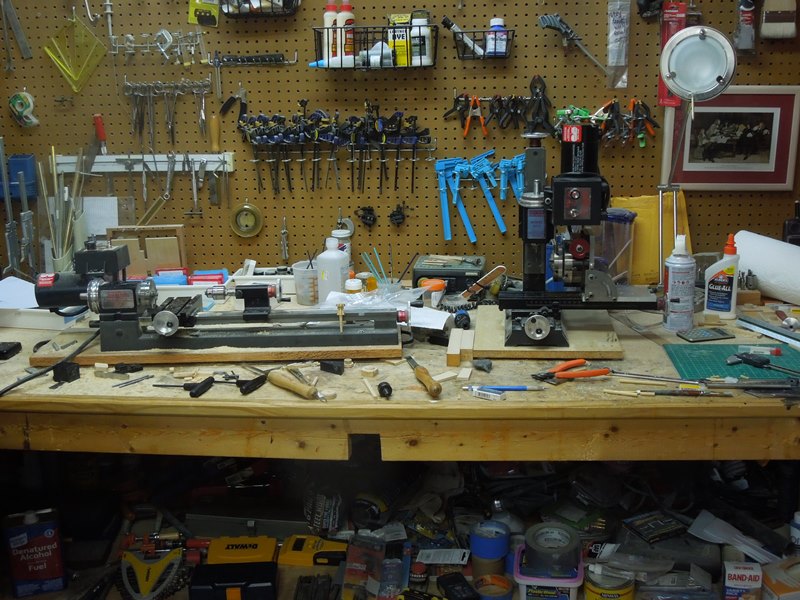
It was pointed out to me by the ever-observant Druxey that the lower chocks of my capstan were incorrectly shaped. The should indeed be concave. I was misled by some contemporary sources. After a short alcohol soak and they were removed and replaced with the proper shaped chocks. Also, a photo of my now pristine workshop (after an entire evening of cleaning). My new mantra - replace tools right after using them....(at least for a day or so). Thanks for all the like. David Antscherl is doing his part for the publication of the Speedwell book. I just need to catch up
-
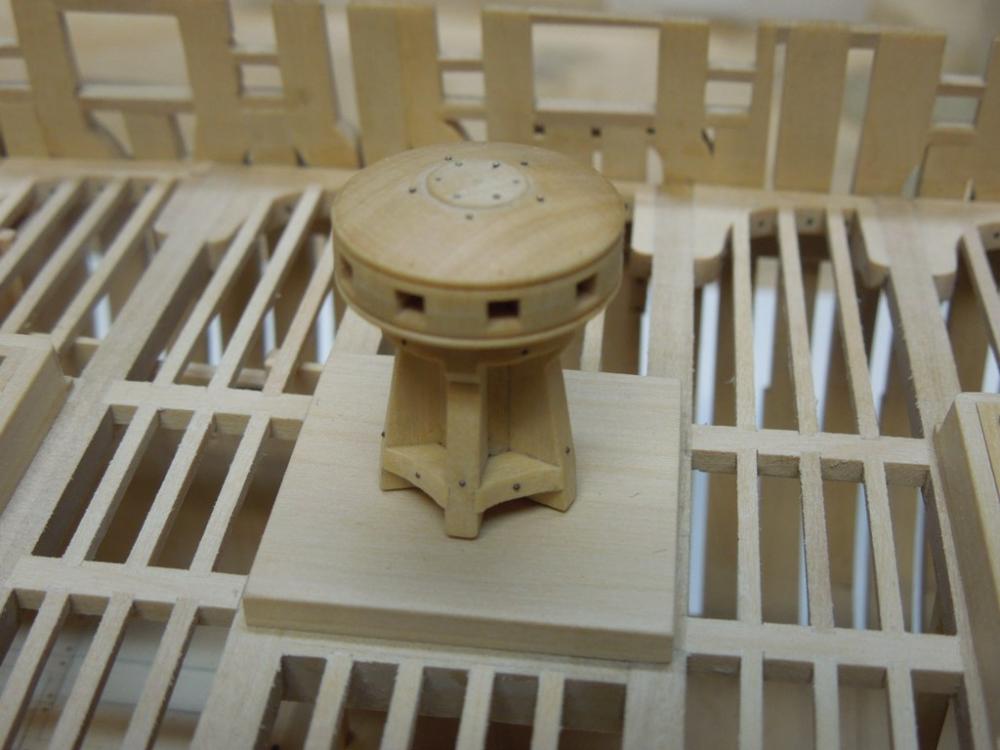
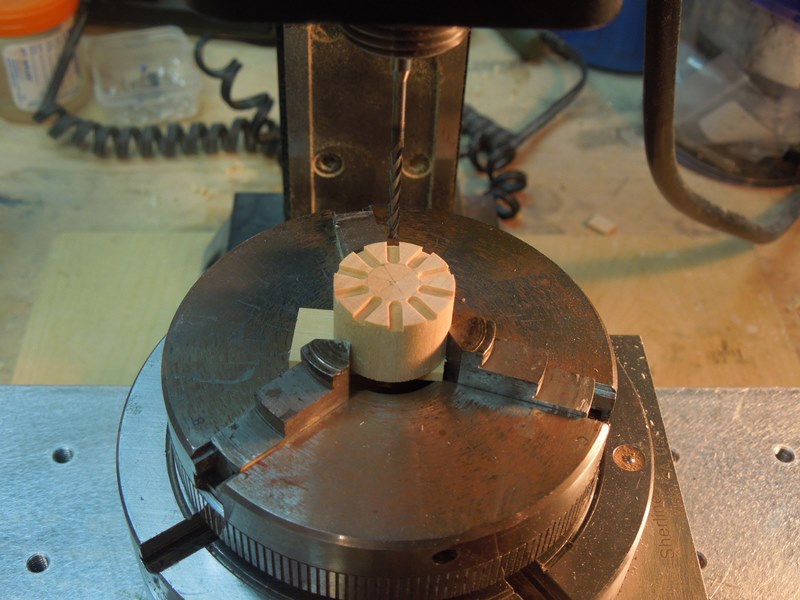
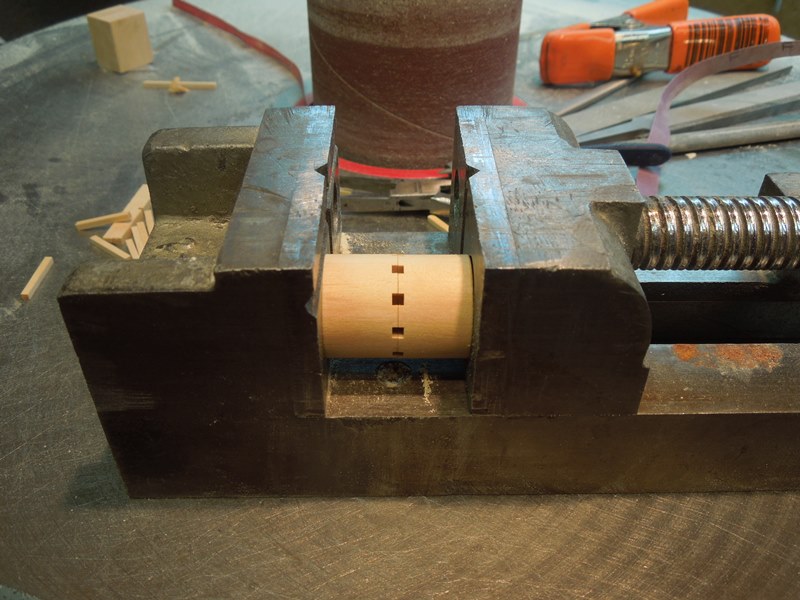
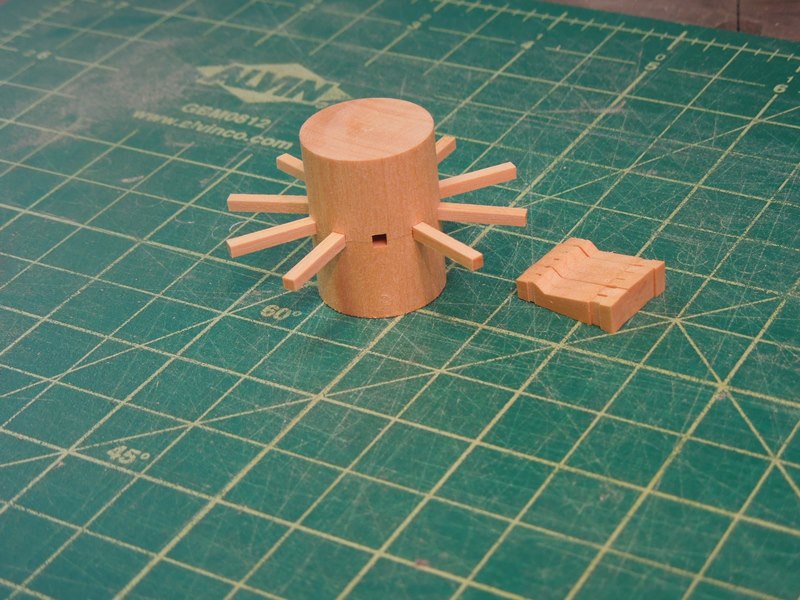
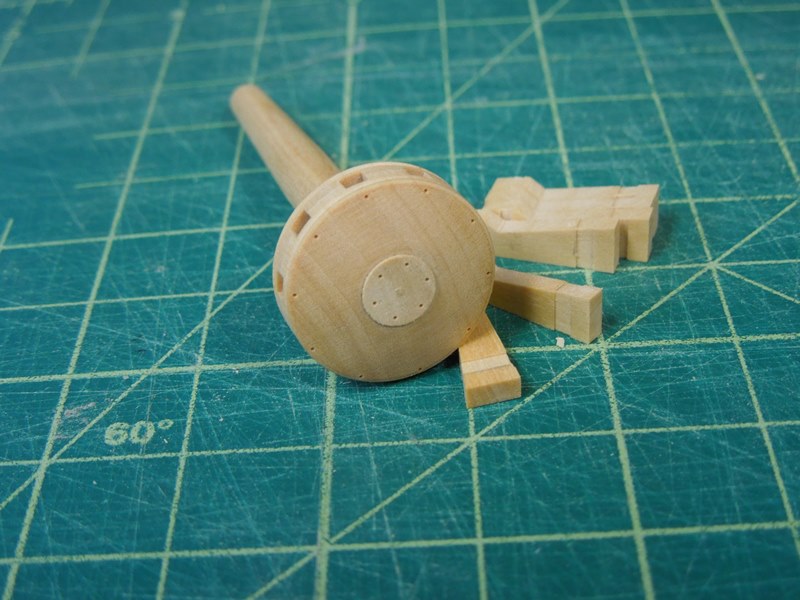
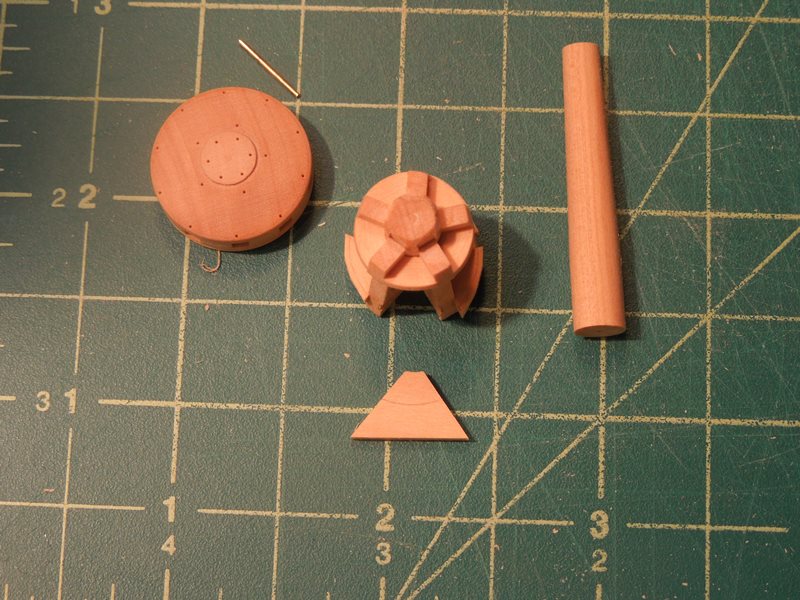
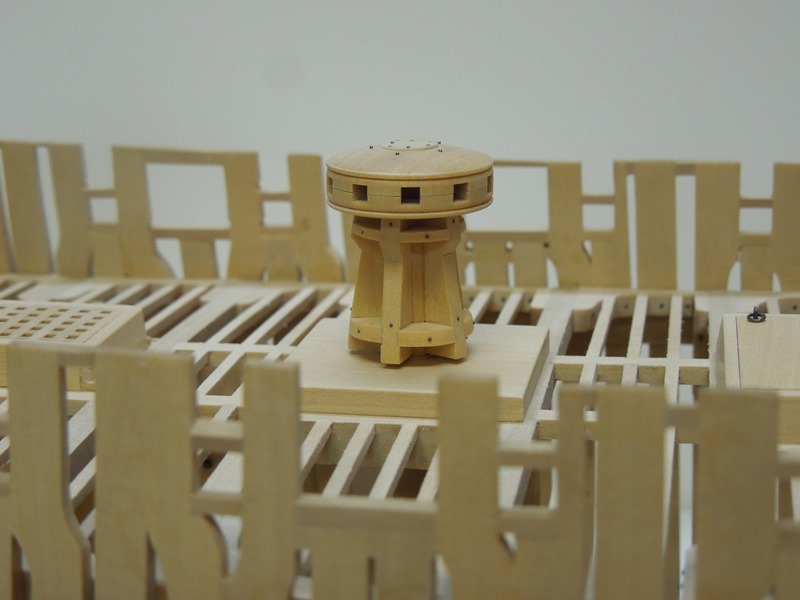
The recent post on using a mill inspired me to post this report of my just-finished capstan. I used both the Sherline mill and lathe for the several steps required. The square mortises for the capstan bars were added using a .079" milling bit and the rotary table. The top and bottom sections were milled to 1/2 of their 3 3/4" depth. Following the milling procedure the two halves were glued together. Once dry, the capstan drumhead was turned to it's final diameter on the lathe. The whelps were also milled in one long strip and sliced off on the table saw. The mortises for the chocks were added on the table saw. The capstan barrel was turned on the lathe and separated just below the taper. Each end was center drilled then drilled to receive a brass pin.The slots for the whelps were added with a .090" end mill on the rotary table at sixty degree intervals. The 3/4" bolt holes (#80 drill bit) for the capstan retaining bar pins and the cap piece were added with the drumhead again mounted in the rotary table. Further holes were drilled for the whelp bolts in the drumhead and the chocks are being fitted. The finished capstan (sans pawls). The carnage to my workshop bench for which I spent the evening tidying up. Apologize for the length of this post but I wanted to demonstrate how the fabrication of this complex piece could be accomplished by breaking it down to a series of small steps. For those without a mill or a lathe, I believe Chuck could easily make a kit of this by providing the drumhead in three slices. The rest would be straight forward with only shaping of the barrel (similar to Chuck's hexagonal pump) being required.
-
When well executed, clinker planking is a thing of beauty. Inspiring photo, Druxey!
- 641 replies
-
- greenwich hospital
- barge
-
(and 1 more)
Tagged with:
-
Very innovative build Alex. It seems like most of the Russian Master modelers make two of them at the same time.
-
Paint looks excellent, Glen. Hadn't noticed before but are you placing a slight chamfer on the edges of your planks?
-
I also had to relocate some beams and knees while building by model, Toni. Obviously no one will know when you're finished and your model looks awesome. Makes me wonder about some of the identification of Navy Board models based on measurements. Could the builders of these models possibly have been accurate to the plans with none of the cumulative errors experienced by us? As they were usually employed by the shipwrights would they have cared about a couple inches on the model one way or the other? I wonder how close the actual ship, as built, was to the plans. I suppose we'll never know but I doubt if they sweated a few inches so long as clearances were correct.
- 1,449 replies
About us
Modelshipworld - Advancing Ship Modeling through Research
SSL Secured
Your security is important for us so this Website is SSL-Secured
NRG Mailing Address
Nautical Research Guild
237 South Lincoln Street
Westmont IL, 60559-1917
Model Ship World ® and the MSW logo are Registered Trademarks, and belong to the Nautical Research Guild (United States Patent and Trademark Office: No. 6,929,264 & No. 6,929,274, registered Dec. 20, 2022)
Helpful Links
About the NRG
If you enjoy building ship models that are historically accurate as well as beautiful, then The Nautical Research Guild (NRG) is just right for you.
The Guild is a non-profit educational organization whose mission is to “Advance Ship Modeling Through Research”. We provide support to our members in their efforts to raise the quality of their model ships.
The Nautical Research Guild has published our world-renowned quarterly magazine, The Nautical Research Journal, since 1955. The pages of the Journal are full of articles by accomplished ship modelers who show you how they create those exquisite details on their models, and by maritime historians who show you the correct details to build. The Journal is available in both print and digital editions. Go to the NRG web site (www.thenrg.org) to download a complimentary digital copy of the Journal. The NRG also publishes plan sets, books and compilations of back issues of the Journal and the former Ships in Scale and Model Ship Builder magazines.


