DONATION DRIVE - SUPPORT MSW - DO YOUR PART TO KEEP THIS GREAT FORUM GOING!
×


dvm27
-
Posts
2,467 -
Joined
-
Last visited
Content Type
Profiles
Forums
Gallery
Events
Everything posted by dvm27
-
 Just finished Video 14 Kevin. Great job on the counter timbers and framing of the quarter deck light. I'd spot glue a 5" wide plank across the aft cants to the outer counter timber at the toptimber line at this point. This will add strength to the area and may help prevent a stray elbow from knocking off the delicate timbers aft of the last cant. I've done this (as has Toni I believe) and it really ruins your day! Happy to see you've invested in the Veritas sharpening system. With regards to the mortises for the sills, try to keep them as shallow as possible, perhaps 2". They should be subtle. Typically, I make two total passes with the chisel to form each face, a shallow cut defining the angle and a final cut to the line. The deeper the cut, the more difficult it will be to fit the sills to them. Thanks for the acknowledgement to David and I for developing the practicum. We're happy you are enjoying building a model of this complexity and we are very appreciative of your video documentation. It took me almost a decade to build and photojournal my Swan class model. Doing these videos must add many hours to the project. I wish more MSW viewers would take the time to watch them because they are a really great resource.
 -
Wonderful work, as always Glenn. Couldn't help nosing around your workshop. What's the plank on frame model sitting behind Heroine? The wales date her to before 1750. Is she another version of La Belle?
-
The best blackening agent I ever used was ferric chloride and ammonia, based on a technique described in Model Shipwright. It was a very nasty concoction, however, and extreme caution was used while preparing and using it. I have had mixed success with Jax products and also very good success with automotive spray paint primer and matte or flat black finishes. Ken - your formula is for cast brass but I assume it works for other brass as well?
-
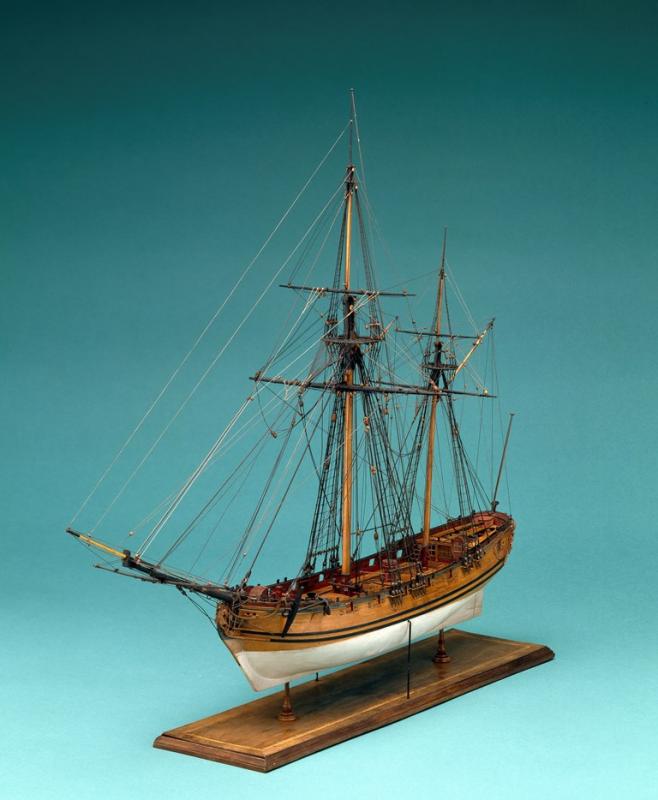
Toni, I am looking forward to rigging her. The only other ship I've rigged is Hannah. As a ketch rigged sloop, she's a relatively simple model to rig. I'm attaching a photo of the Speedwell model David and I have based our model on. I find her to be a simple, yet elegant ship. Photo courtesy of the National Maritime Museum.
- 345 replies
-
- 28
-

-
Lovely work, Gary. I started with some lighter colored chocks in Speedwell but after a couple years the wood tones are almost identical. Understand completely the potential issues with chocks in frames with extreme bevels.
-
Tom, a rigged Speedwell is the perfect size for the last remaining space in my study. The shifted and cast toptimbers were definitely a challenge, even at 1:48 scale. She would be a very manageable model at a larger scale though. I prefer to build my armada to the same 1:48 scale in case a war breaks out in my study when I'm not home. That way the larger scale ship will not have a tactical advantage.
- 345 replies
-
- 10
-
-
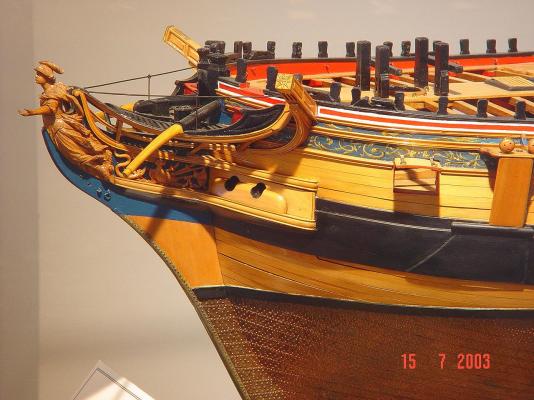
Interesting that most of the RC models I've seen have carved figures and it's clear in the paintings that there are many carved elements. But what about the friezes? Are they bas relief with painted background or are they painted?
-
A photo from Gatean's log of the USNA Minerve shows the optimal coppering effect. Very small, evenly spaced nails. Might be very difficult to convincingly execute at a smaller scale. I agree with Druxey that less is more in this case.
- 1,208 replies
-
- 5
-
-
- great republic
- clipper
- (and 1 more)
-
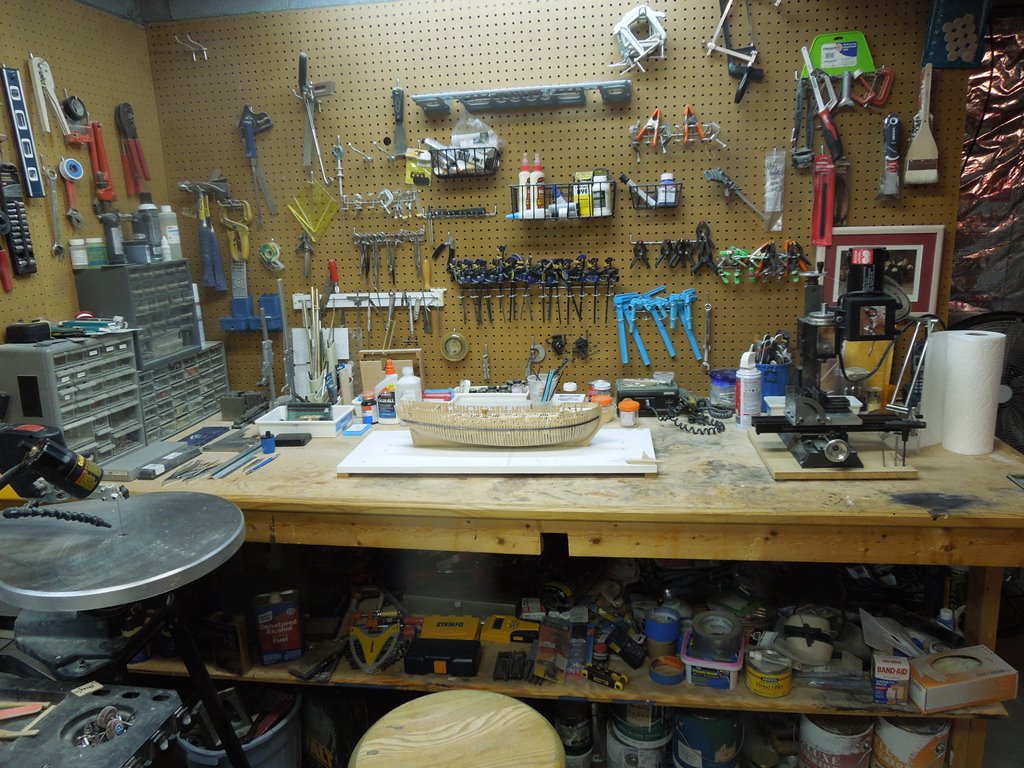
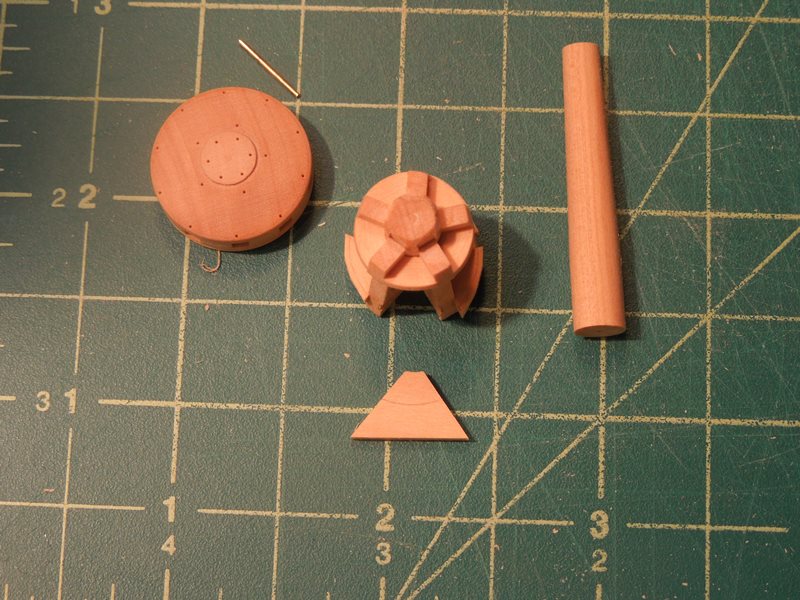
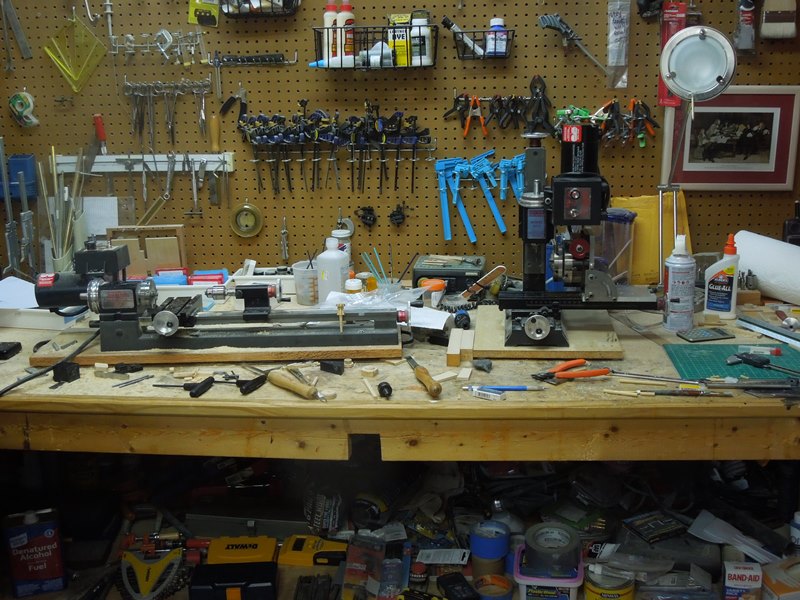
It was pointed out to me by the ever-observant Druxey that the lower chocks of my capstan were incorrectly shaped. The should indeed be concave. I was misled by some contemporary sources. After a short alcohol soak and they were removed and replaced with the proper shaped chocks. Also, a photo of my now pristine workshop (after an entire evening of cleaning). My new mantra - replace tools right after using them....(at least for a day or so). Thanks for all the like. David Antscherl is doing his part for the publication of the Speedwell book. I just need to catch up

- 345 replies
-
- 36
-
-
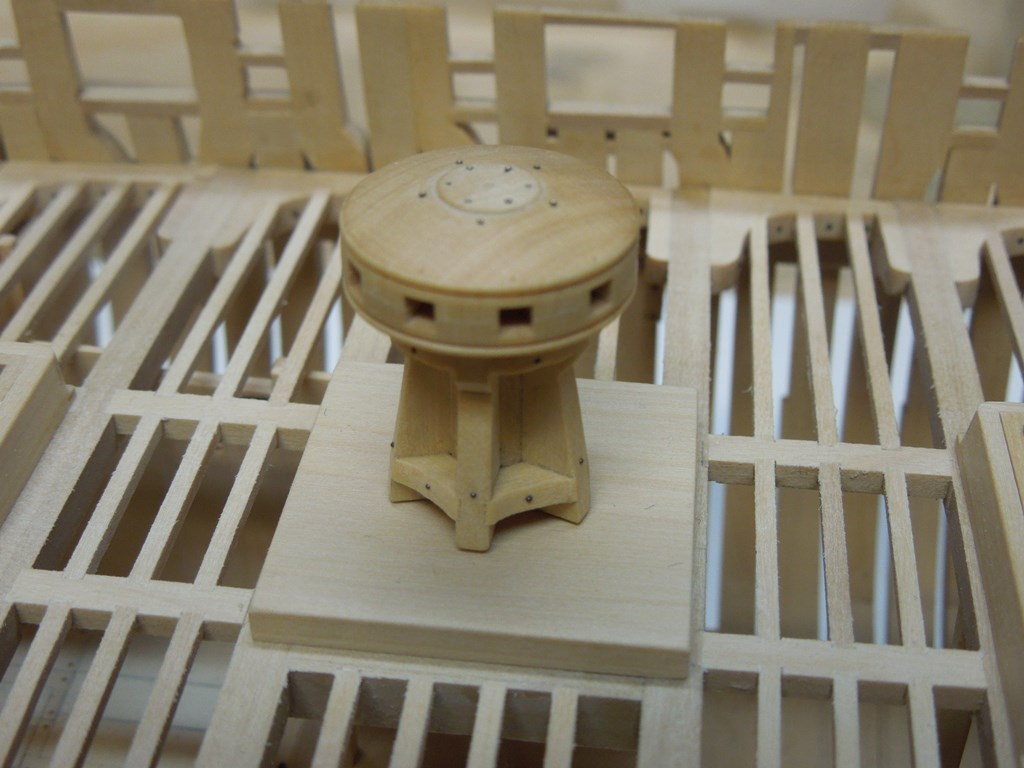
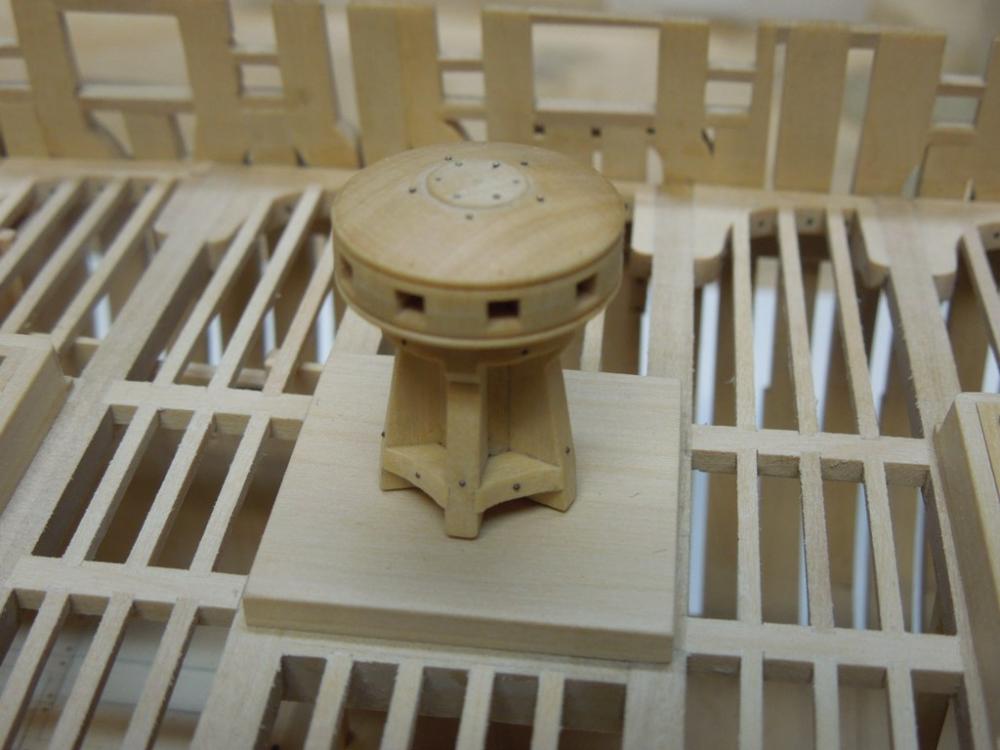
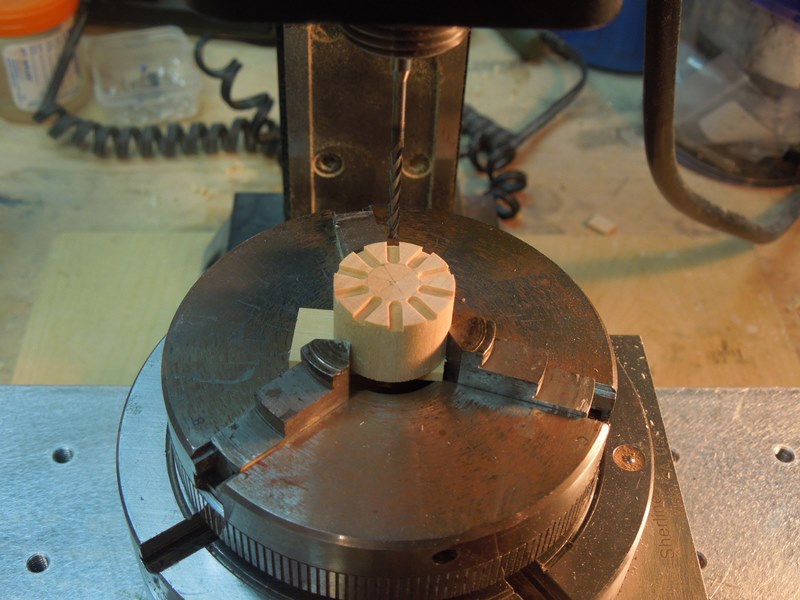
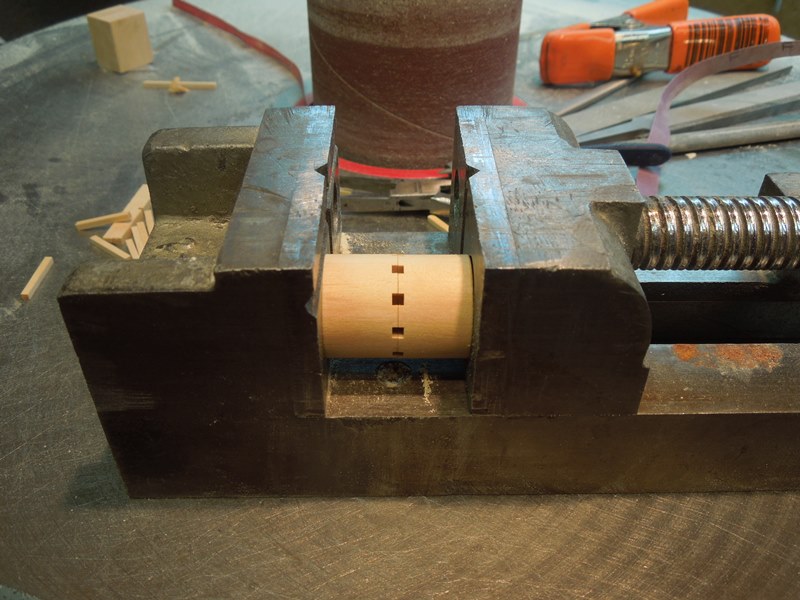
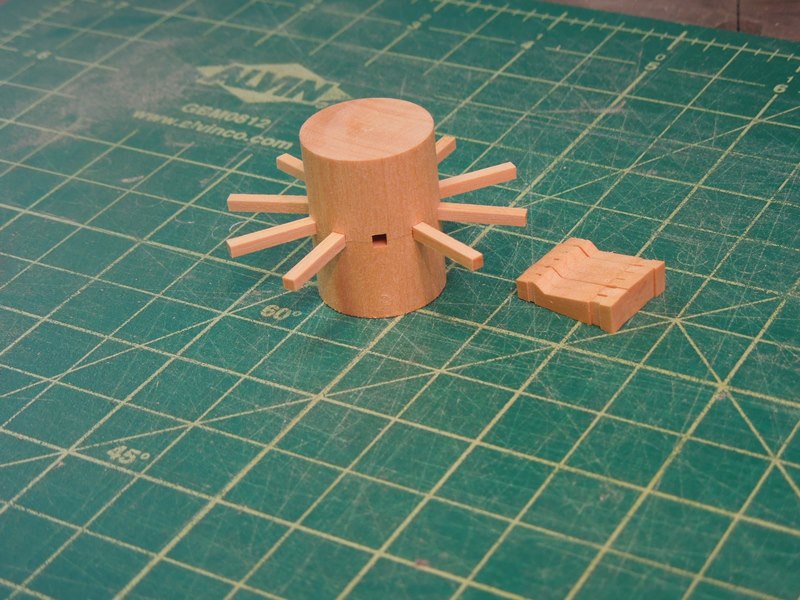
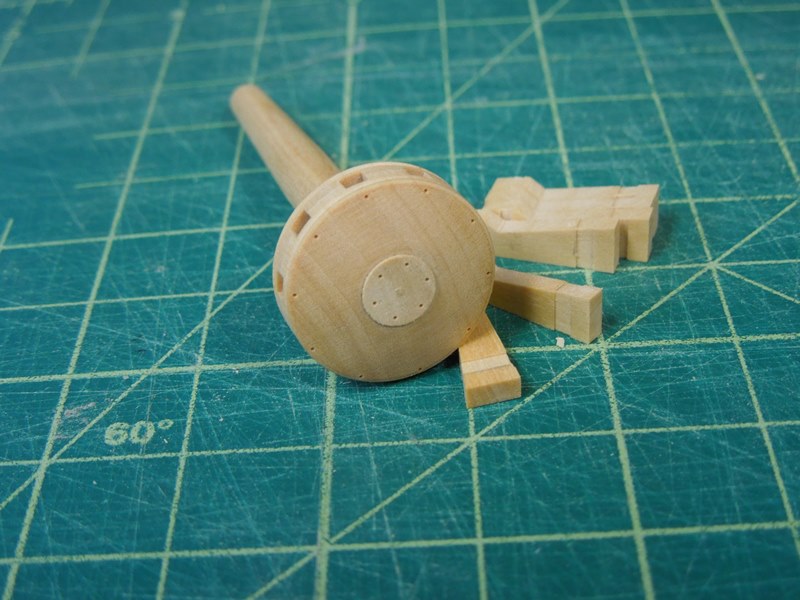
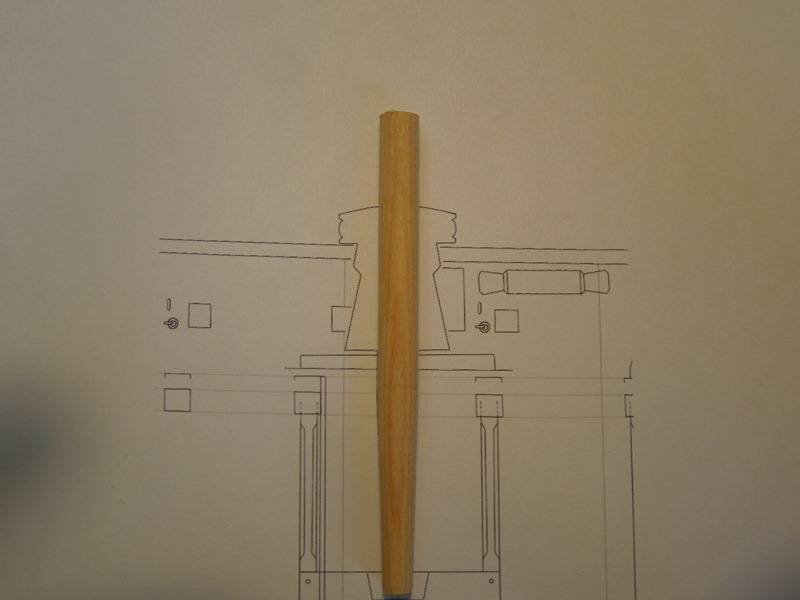
The recent post on using a mill inspired me to post this report of my just-finished capstan. I used both the Sherline mill and lathe for the several steps required. The square mortises for the capstan bars were added using a .079" milling bit and the rotary table. The top and bottom sections were milled to 1/2 of their 3 3/4" depth. Following the milling procedure the two halves were glued together. Once dry, the capstan drumhead was turned to it's final diameter on the lathe. The whelps were also milled in one long strip and sliced off on the table saw. The mortises for the chocks were added on the table saw. The capstan barrel was turned on the lathe and separated just below the taper. Each end was center drilled then drilled to receive a brass pin.The slots for the whelps were added with a .090" end mill on the rotary table at sixty degree intervals. The 3/4" bolt holes (#80 drill bit) for the capstan retaining bar pins and the cap piece were added with the drumhead again mounted in the rotary table. Further holes were drilled for the whelp bolts in the drumhead and the chocks are being fitted. The finished capstan (sans pawls). The carnage to my workshop bench for which I spent the evening tidying up. Apologize for the length of this post but I wanted to demonstrate how the fabrication of this complex piece could be accomplished by breaking it down to a series of small steps. For those without a mill or a lathe, I believe Chuck could easily make a kit of this by providing the drumhead in three slices. The rest would be straight forward with only shaping of the barrel (similar to Chuck's hexagonal pump) being required.


- 345 replies
-
- 39
-
-

-

-
When well executed, clinker planking is a thing of beauty. Inspiring photo, Druxey!
- 641 replies
-
- 6
-
-
- greenwich hospital
- barge
- (and 1 more)
-
Very innovative build Alex. It seems like most of the Russian Master modelers make two of them at the same time.
-
Paint looks excellent, Glen. Hadn't noticed before but are you placing a slight chamfer on the edges of your planks?
-
I also had to relocate some beams and knees while building by model, Toni. Obviously no one will know when you're finished and your model looks awesome. Makes me wonder about some of the identification of Navy Board models based on measurements. Could the builders of these models possibly have been accurate to the plans with none of the cumulative errors experienced by us? As they were usually employed by the shipwrights would they have cared about a couple inches on the model one way or the other? I wonder how close the actual ship, as built, was to the plans. I suppose we'll never know but I doubt if they sweated a few inches so long as clearances were correct.
-
Just read through your instructions Chuck. I must say they are really well written! Along with that you have included enough reference marks on the scantlings to make it an almost fool-proof build. If I may just make one recommendation to the builders that was passed from David Antscherl to me (and I'm sure you already do this) is to have a small cup with water and a few sacrificial brushes available at all times. Clean every glued joint with the brush and water (whether visible or not) right after clamping or applying pressure. It is very difficult to remove glue stains after setting. You will have a much cleaner model as a result. Just curious - is there any difference in joint strength when gluing charred pieces vs. scraped clean joint surfaces?
- 269 replies
-
- 8
-
-
- Queen Anne Barge
- Syren Ship Model Company
- (and 1 more)
-
Kevin, are your referring to the moulded thickness (inside to outside)? If so, it is 5" at top timber line and increases to the heel. Assuming you are cutting the frames anywhere near the lines then the moulded thickness should be fine after fairing. I'd be happy to send you the PDF files via e-mail. Just send me your e-mail address to dvm27@comcast.net.
-
Congratulations on your one year build anniversary, Kevin. The aft cants look great and were much easier than the fore cants for you. Experience counts here! I'm happy to see you finally got a copier instead of hand drawing each pattern. We now provide them as PDF files so you can print out as many as you need. Do you have these? There's a small but important step involved when setting a pair of cant frames. The heel of each cant frame may be 10" sided. If the step is 20" wide then both cants should fit on the step perfectly. However, remember that the heels are set at an angle thus the overall width of both raised cants will be slightly greater than double their width. The solution to this is to slightly bevel the inner heels so that their sided dimension does not exceed the step. David describes this in Volume I but I can't find the reference now. Considering he wrote this book as a virtual project (my model followed after the text) I think it's pretty extraordinary that he thought of every little detail like this.
-
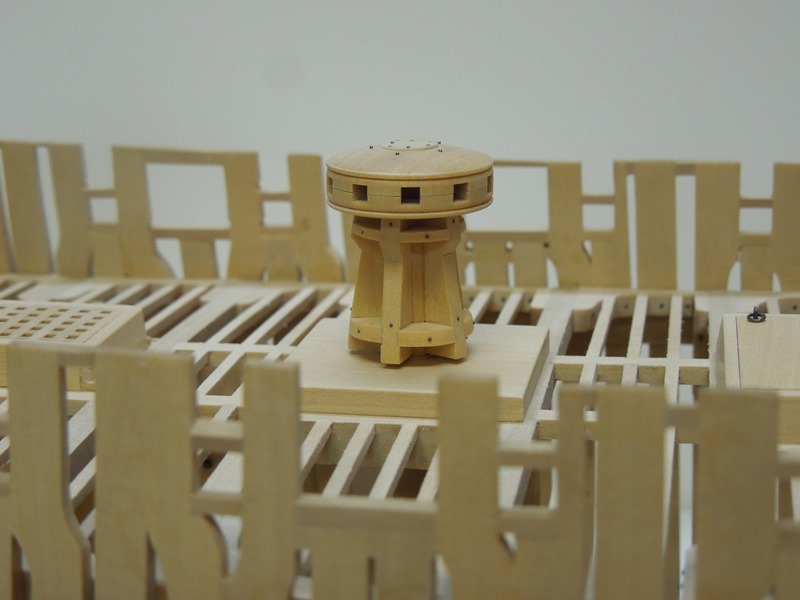
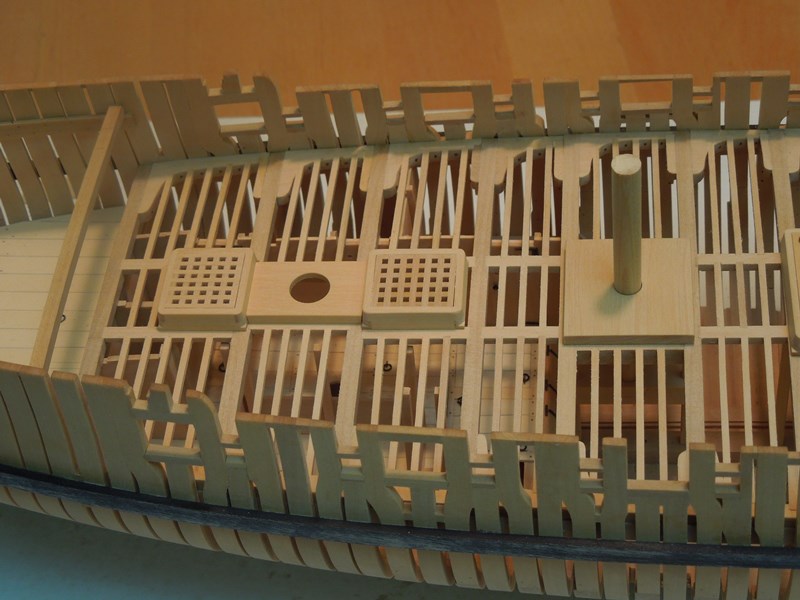
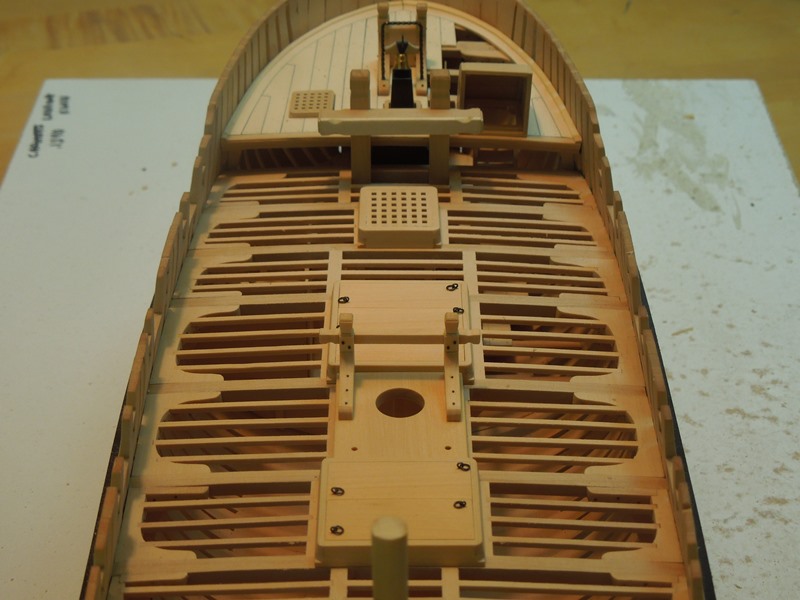
Here's a small update on Speedwell. Her main deck has been completely framed with beams, carlings, ledges hanging and lodging knees.That was rather routine but boring work which occupied me for a few months. As a change of pace I made most of the deck fittings but none are permanently affixed as yet. Currently, I am working on the capstan and have just finished the tapered barrel. Just a tip for you novices regarding gratings. Ideally they should have full courses all around (see photos). It is easier to cut your gratings to the the size that accomplishes this first. Then build your coamings around them. If the result is a gratings assembly that is a hair larger or smaller than the plan so be it.

- 345 replies
-
- 48
-
-
-
So how long does it take you to plank a wall. Is it one plank at a time, clamped with Tite Bond? Rapid fire planking with CA glue? There was an episode of This Old House recently where they CNC cut the stringers for a staircase in a factory off site. The contracter looked green with envy!
- 701 replies
-
- 11
-
-
I've used ebony for planking and am convinced it was spawned by the devil. But it does look very nice and finishes beautifully. The French have been planking with ebony for centuries. Just plan on sacrificing a blade or two and vacuum the area frequently as the dust ends up everywhere. Oh, and wear a mask, especially if using the thickness sander. You'll have to experiment if you want treenails to show. I made them from Swiss pear and they worked out well. If you have curved areas to plank, such as a bluff bow, you can laminate two pieces of ebony together over a form and it retains the curve nicely. This was Harold Hahn's technique and it worked very well for me.
-
Does your software and laser cutting capacity enable you to offer it in other scales, such as 1/4"?
- 269 replies
-
- 2
-
-
- Queen Anne Barge
- Syren Ship Model Company
- (and 1 more)