dvm27
-
Posts
2,449 -
Joined
-
Last visited
Content Type
Profiles
Forums
Gallery
Events
Everything posted by dvm27
-
 Terrific job , Grant. I've never used the radius turning attachment but it's perfect for this piece. A slight modification to your sequence might help in the future. After mounting the square and inserting the live center, mark the jaws with their concurrent ebony face (1-4). Then remove the blank and shape it to eight square or even sixteen square back to, but not including, the base portion in the head-stock. it's the same principle as making a mast. Now reinsert the ebony blank as before, matching up the numbered jaws with the numbered surfaces of the blank. You can now turn it to a round shape in just a few seconds and the dreaded ebony dust will be reduced considerably.
- 456 replies
-
- 6
-

-
- finished
- bomb ketch
- (and 2 more)
-
Echo by Maury S - FINISHED - Cross-Section
dvm27 replied to Maury S's topic in - Build logs for subjects built 1751 - 1800
The pump dale scupper needs to exit through the wale, so the deeper angle is appropriate. This does create a somewhat wider opening in the waterway but the pump dale covers this. The other scupper has a similar issue but the carriage also covers this up. In actuality, the scupper angle was 24 degrees and I note the shape was sometimes elbowed so that the waterway hole had less inboard lip to it. My advice would be to drill the inboard scupper opening at a steeper angle for a normal final appearance. Then drill the outboard scupper hole in the wale at an angle but don't try to connect them. They'll appear normal and nobody will know they're not functional (unless you immerse your model in water). Were I to do mine again this is the approach I'd take. You can see the somewhat elongated inner scupper hole in the photo.
-
Echo by Maury S - FINISHED - Cross-Section
dvm27 replied to Maury S's topic in - Build logs for subjects built 1751 - 1800
Whatever floats you boat Maury. Hacksaw or small slitting blade (.020-ish) on your table saw would do fine. -
Love your work, Augie. Very clean. Surprised you can find any shop time with the little ones probably all over the place by now.
- 2,191 replies
-
- 4
-
-
- confederacy
- Model Shipways
- (and 1 more)
-
Echo by Maury S - FINISHED - Cross-Section
dvm27 replied to Maury S's topic in - Build logs for subjects built 1751 - 1800
You could mill a veritcal slit from the bottom of the rhoding to just even with the top of the axeltrees. Once you've slid the rhoding down into place the remaining slit opening should be almost inperceptible. -
Echo by Maury S - FINISHED - Cross-Section
dvm27 replied to Maury S's topic in - Build logs for subjects built 1751 - 1800
Toni's right. Just position them inboard (like Toni did) and no one will ever know there's a clearance issue. Are you retrofitting the cistern rhodings? I see you have the surfaces shaped to receive them. -
Cutting recesses?
dvm27 replied to Redshirt's topic in Building, Framing, Planking and plating a ships hull and deck
Of course a mill makes this easy to do but you can accomplish the same result with a chisel. It needs to be very well honed (most newly purchased chisels are not) and the proper width for the mortise. Score stop cuts on the sides and bottom first then remove the wood in between with light passes. {practice on some scrap first! -
Echo by Maury S - FINISHED - Cross-Section
dvm27 replied to Maury S's topic in - Build logs for subjects built 1751 - 1800
Nice work Maury. Like the way you soldered everything with those rhodings in place. -
3D printer at Home Depot
dvm27 replied to twintrow's topic in CAD and 3D Modelling/Drafting Plans with Software
Actually, Tom, I believe lathes have been around for centuries in one form or another. There are some tasks that just can't be accomplished easily by hand tools. I also get considerable "warmth" from setting up my Sherline mill to make complicated cuts. I suspect that Nirvana and others using laser cutters and 3-D printers derive the same satisfaction, as it takes considerable knowlege and skill to set up and execute these programs. Chacun son gout! -
Echo by Maury S - FINISHED - Cross-Section
dvm27 replied to Maury S's topic in - Build logs for subjects built 1751 - 1800
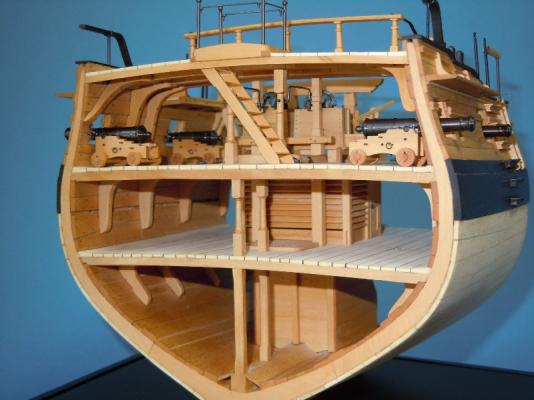
That's exactly what I did, Danny. I constructed a cross-section of my Swan class Pegasus model. It was a lot of fun and actually fits on a shelf above my desk.
-
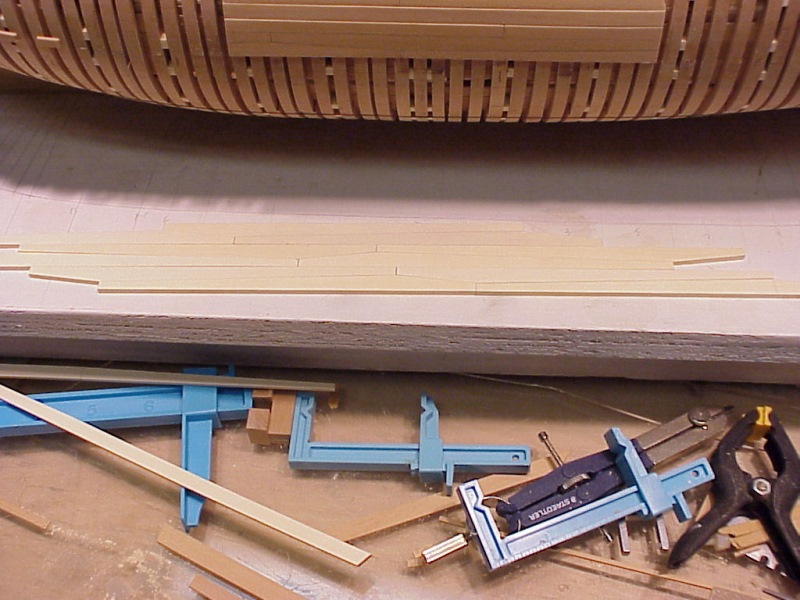
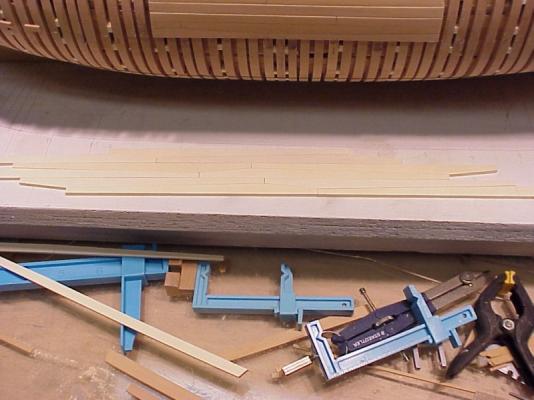
That's a clever jig for scoring the rising wood to accept the frames. Part of the fun of using a mill is figuring out the setups. I would make sure the pattern is marked out on top of the rising wood and checked every few passes. Even with the spacer, cumulative error can creep in and the last few mortices could be off by an inch or so. For those without a mill, you can accomplish the same result using a table saw with a .052 or larger blade set to the correct height. The pattern is affixed to the side of the rising wood with rubber cement (or your preference) and successive cuts made. Note - in the photo the sides are also scored.
- 504 replies
-
- 18
-
-
- washington
- galley
- (and 1 more)
-
Frégate d'18 par Sané , la Cornélie
dvm27 replied to JohnE's topic in CAD and 3D Modelling/Drafting Plans with Software
Looking forward to this build John. I am currently finishing an Echo class cross-section which has a very French influence. Very elegant lines. Thanks also for the cross references on the building terms. Some translations are easy somet terms such as elancement are a bit trickier. -
This book will be available in the US from IPG Publishers in October. The postal costs will be much diminished by purchasing it in the US.
-
Perfect, as always, Remco. Did you use a duplicator on the lathe for the pillars or freehand them? The sail room is magnificent
- 1,207 replies
-
- 3
-
-
- sloop
- kingfisher
- (and 1 more)
-
Ivan is an amazing talent, Karl. I often wonder about the wisdom of having such elaborately carved figureheads adorning ships of war (not Royal barges and the like - those I understand). With the high cost of the carvings and undoubtable high cost of replacement why would they be placed on naval vessels? If I were an enemy gunner I'd take personal pride in knocking it off. I seem to recall however, that the actual number of vessels that ever saw battle was quite low so perhaps damage to them was rather rare.
-
That look's terrific, Ben. You may wish to add a temporary batten at the toptomber line as the whole assembly is pretty fragile. I believe both Toni and myself have snapped off portions with errant elbows.
-
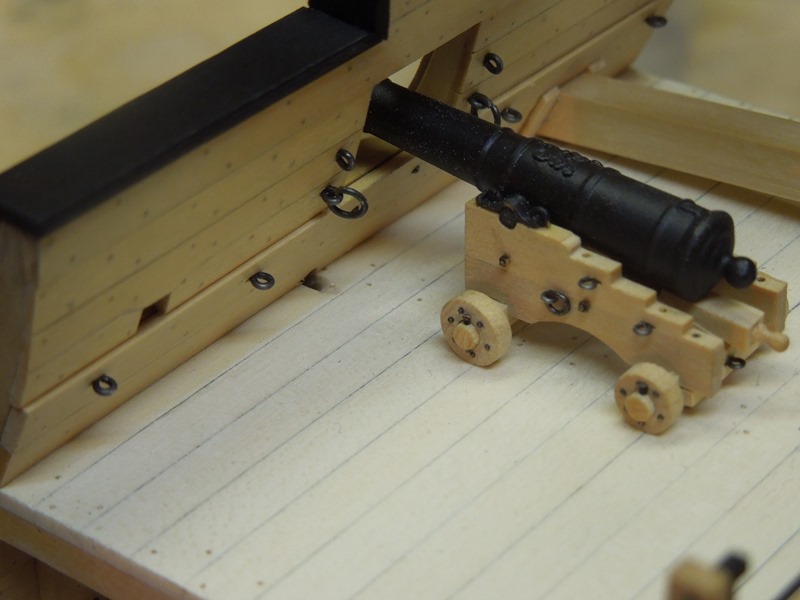
Well if you can't live with the results I would be happy to take it off your hands, Alex! Love especially the square to round galley cowl.
-
Beautiful, Alex. Not many models can stand up to close up photography like yours. The plated and riveted galley funnel blew me away.
- 227 replies
-
- 1
-
-
- cumberland
- 74 gun
- (and 1 more)
-
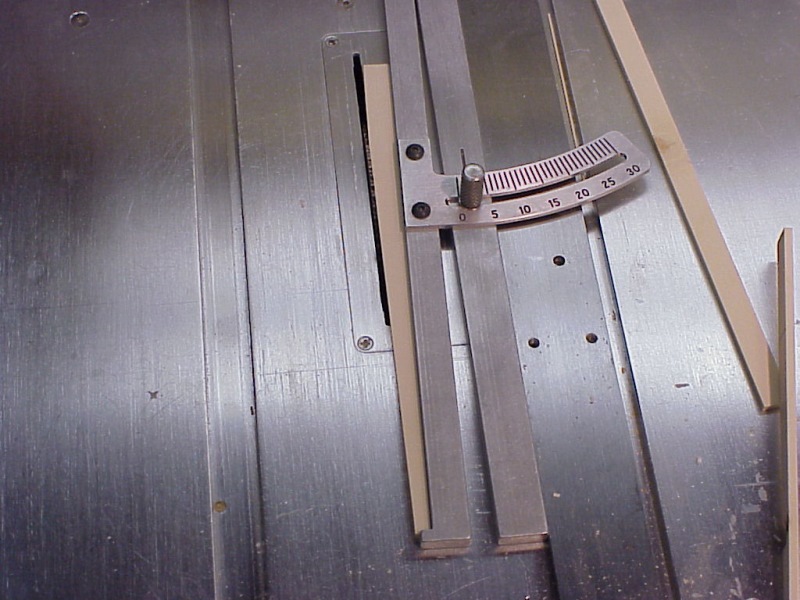
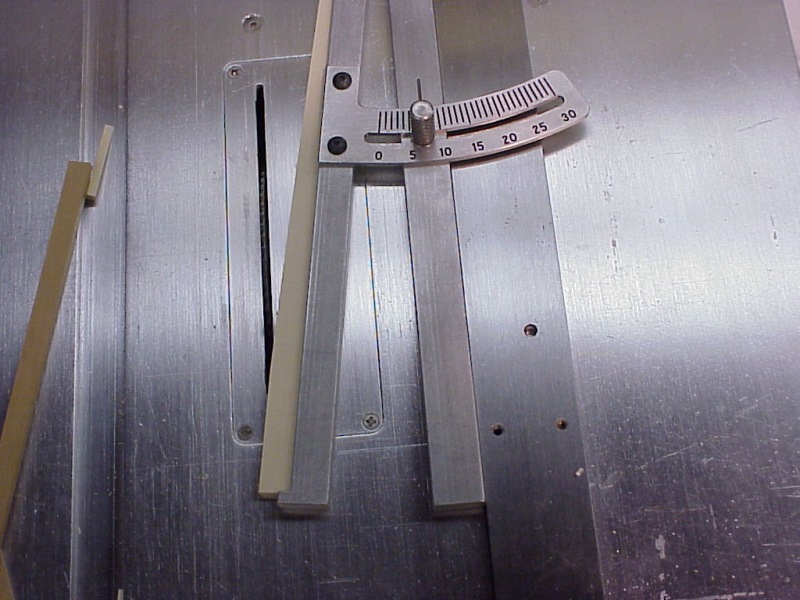
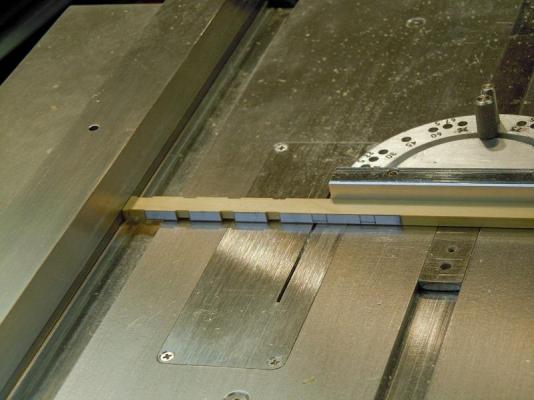
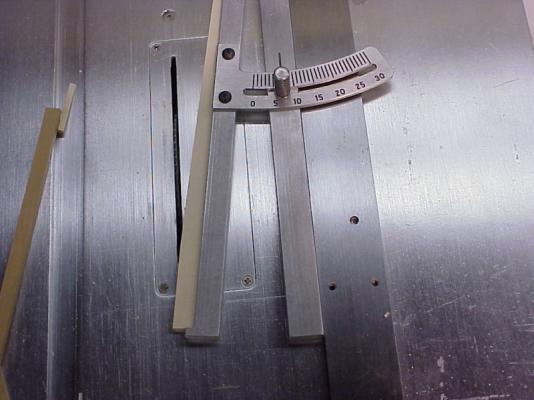
Using taper jig on Byrnes table saw
dvm27 replied to Landlubber Mike's topic in Modeling tools and Workshop Equipment
John - I use the knurled knob for moving the piece and just use a push stick to sandwich the end against the jig until the cut begins. It will stay in place once the blade starts cutting. The key, as always, is in the setup. It takes some trial and error to establish the correct angle and point of initial plunge cut into the wood. Once established, I make all the cuts on the blanks at the same time. Then the opposite end setup is established and the process repeated. Some adjustment may be necessary at the bow and stern due to tapering or widening of the strakes. However, my clever solution of only showing a small section of planked hull avoids this! -
Question about stoves and how the rotisserie worked
dvm27 replied to Modeler12's topic in Nautical/Naval History
Thank for the link to the beautiful model, Wayne. Certainly useful for anyone contemplating building one. I was trying to figure out the scale as it is so detailed.The size of the model works out to @ 13" x 10" x 10" so that explains the quality and level of detail. -
Using taper jig on Byrnes table saw
dvm27 replied to Landlubber Mike's topic in Modeling tools and Workshop Equipment
Here's how I did it. Cut all the fore faces then the rear ones. Just used a push stick.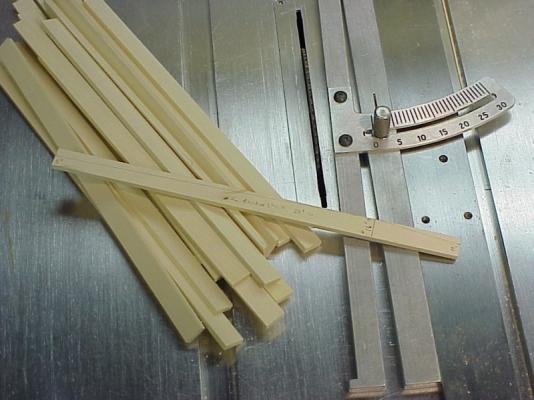

- 9 replies
-
- 14
-