dvm27
-
Posts
2,449 -
Joined
-
Last visited
Content Type
Profiles
Forums
Gallery
Events
Everything posted by dvm27
-
 Lovely metal work, Chuck. She's no turkey.
- 1,051 replies
-
- 5
-

-
- cheerful
- Syren Ship Model Company
- (and 1 more)
-
Never thought of using the thickness sander to finish the underside of the beam, Ed. Much easier than hand finishing each one to spec. Great tip!
- 191 replies
-
- 6
-
-
- young america
- clipper
- (and 1 more)
-
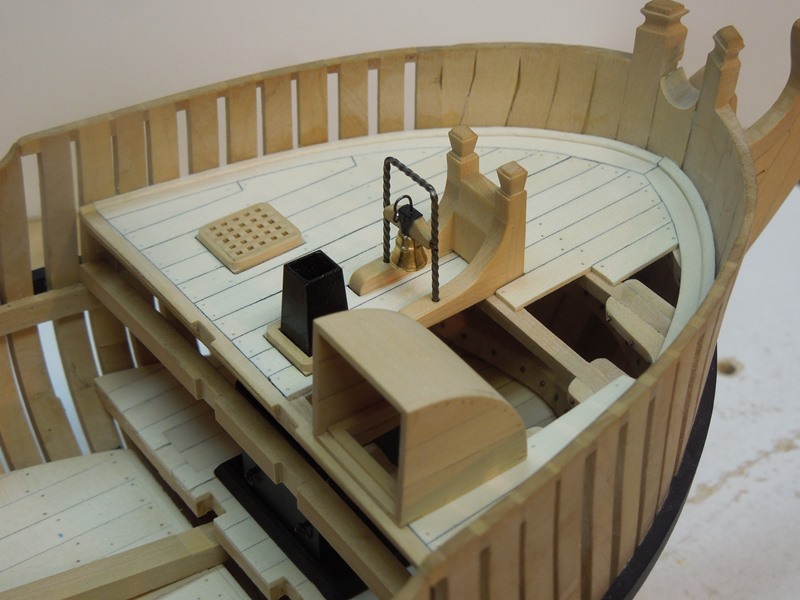
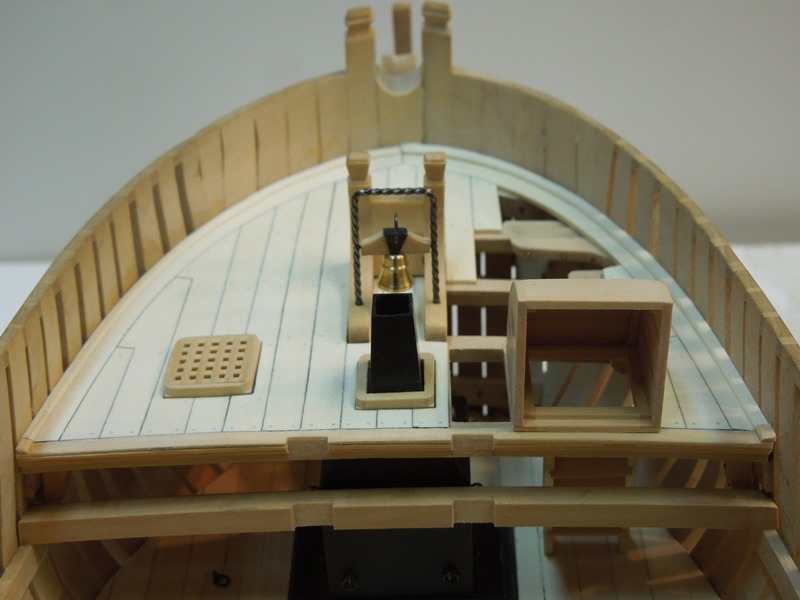
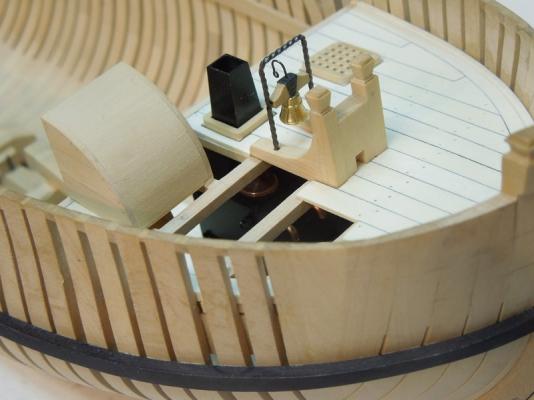
Been awhile since my last Speedwell update. Work on the forecastle has finished, for the most part. Caulking is black paper. It's a bit more work but a little cleaner than when I use a pencil. The wrought iron belfry is unusual but present on the contemporary model. I twisted 1/32" square brass bar stock with one end in a stationary vice and the other end in a pin vice. Consistent upward pressure while twisting insures an even result.


- 345 replies
-
- 43
-
-
Making a working hinge that looks exactly to scale is very impressive, Michael. Your work continues to inspire.
-
Very nice job, Tony. I don't use the rotary table often but I can't imagine doing a precision job like this without one. The other application where it is terrific is when constructing the ships wheel.
-
THE 74-GUN SHIP by Jeronimo
dvm27 replied to Jeronimo's topic in - Build logs for subjects built 1751 - 1800
Beautiful symmetry and geometry Jeronimo! After several plank on frame models I really believe that cutting in the sills after all the frames are raised insures the sweetest line of ports. In that respect builders of French models are lucky in that the sills are much easier to execute than the angled mortises on British vessels.- 194 replies
-
- 12
-
-
Problems brass blackening using Jax Pewter Black
dvm27 replied to mrmdpc's topic in Metal Work, Soldering and Metal Fittings
Since it's diluted and you only need small amounts I discard it after every use. -
So happy you joined our site, Glenn. It's clear why you do this for a living. Are you using a CNC attached to the mill for machining? It's so perfect I can't imagine you're not.
-
Simulated caulking
dvm27 replied to Nirvana's topic in Painting, finishing and weathering products and techniques
My nicest looking planking has resulted from gluing the tissue paper to the storck then slicing off planks of the proper thickness. See Remco's link here http://modelshipworld.com/index.php/topic/410-hms-sphynx-by-alex-m-scale-148-english-20-gun-frigate-as-build-1775/?p=4274. The only problem is that the stock must be thicker than the widest plank and premium grade holly is hard to find these days. -
Best wishes on your Birthday and wishing you a speedy recovery. Hopefully you can get back to Confederacy soon. She's a beauty.
- 2,191 replies
-
- 5
-
-
- confederacy
- Model Shipways
- (and 1 more)
-
THE 74-GUN SHIP by Jeronimo
dvm27 replied to Jeronimo's topic in - Build logs for subjects built 1751 - 1800
Beautiful work, Karl. those half-lapped upper side timbers blew me away! -
Damn, there are some seriously talented Canadians among this group! Beautiful model Maury.
-
Turn it into a Grandfather's clock case and your wife will be mollified!
- 172 replies
-
- 6
-
-
- druid
- sloop of war
- (and 2 more)
-
Lovely work, Mark. That's going to be one crazy looking case when finished.
- 172 replies
-
- 4
-
-
- druid
- sloop of war
- (and 2 more)
-
Wonderful to have your frequent updates back, Michael. Especially like the first few black and white artsy photos. Are you now dabbling in photography also?
-
enjoying your Swan cross-section. I think you'll enjoy the relatively simpler construction of the mid-ships area, starting with the V-shaped rabbet. And no spiling required later on during planking.
-
Very happy to have found this log even as you have finished the model. Spectacular model and build photos, Nils!
-
2015 NRG Conference Update - MYSTIC
dvm27 replied to Chuck's topic in NAUTICAL RESEARCH GUILD - News & Information
I sure hope everyone got to see those Jason! I've had a fascination for his clocks and watches ever since reading Longitute by David Sobel. A great read for anyone on this list. http://www.amazon.com/gp/product/080271529X?keywords=longitude%20by%20David%20sobel&qid=1445883796&ref_=sr_1_1&sr=8-1 -
2015 NRG Conference Update - MYSTIC
dvm27 replied to Chuck's topic in NAUTICAL RESEARCH GUILD - News & Information
Thanks for the photos Ryland. I immediatly recognized the beautiful model of Hannah, by William Wiseman, which won the Grand Award at the 1996 Mariner Museum Competition. I always wondered where it ended up. Was this one on display or relegated to a storage room? If the later - what a pity. Take a close look at those sails. They're made of wood. -
2015 NRG Conference Update - MYSTIC
dvm27 replied to Chuck's topic in NAUTICAL RESEARCH GUILD - News & Information
Really sorry I missed this one. Who will be the first to post photos? -
Beautiful work, Gaetan. Did you make a form tool for the reinforcing rings? Does your lathe have a digital readout for use when you are making repetitive cuts? Or are those wooden templates your hi-tech method for keeping all the cuts uniform?
- 728 replies
-
- 1
-
-
- le fleuron
- 64 gun
- (and 1 more)