dvm27
-
Posts
2,468 -
Joined
-
Last visited
Content Type
Profiles
Forums
Gallery
Events
Everything posted by dvm27
-
 Ben, I also had small gaps develop between my fillers, no doubt due to humidity changes in the environment. I did fill them by applying carpenters glue and sanding until they disappeared. However, I do suspect they'll open up from time to time due to expansion and contraction. I suppose a fully planked and fastened hull might diminish this. I believe it was Bob Bruckshaw who reported his framed hull shrank over 1/4 inch during an extended storage. His solution was to apply a wet cloth over-top for a day or so and it returned to it's original length. After applying longitudinals (wales and some planking) it remained the same.
 -
Yes, much fun fairing and knuckle bleeding, Ben. Keep applying pencil marks across the hull to pick up the high and low spots while fairing. When all pencil traces are done, so are you.
-
Proxxon Micro Planer DH40 - owner feedback??
dvm27 replied to rtropp's topic in Modeling tools and Workshop Equipment
It is easy to contain the planed shavings, Richard. Just aim them at the wall and scoop them up later. Works for me! Specs are listed on their site http://www.proxxon.com/us/micromot/37040.php. I believe you can remove up to 1/32" (0.8 mm) per pass or as little as 0.1mm. The blades are reversable which extends their life but I have honestly not changed them since I purchased it almost a decade ago. -
An Alex update is like a ray of sunshine on a cloudy day!
-
Wonderful work, Ed. Could you discuss how you handled the joggled planks? Were they fashioned and traced onyo the margin plank which was then cut to receive them or vice-verso?
- 3,618 replies
-
- 1
-

-
- young america
- clipper
- (and 1 more)
-
She's a fine looking ship model. Congratulations, Gary. What's next? I used the LumberYards laser cut package to build Hannah (Hahn style) after my FA. and it was very nice progression. Look at Toni Levines build log.
-
Since real ships were not made of boxwood or pear I find it unusual that the judge would find your choice of wood objectionable, unless the criteria was making a perfect model of an antique model. The choice of wood is purely aesthetic and the cherry is gorgeous. For those not familiar with no. 11 surgical blades, they are the same size and shape as the x-Acto blades, but thinner and rather flimsy for wood work in general. They are designed to cut skin and really do not hold up well for hobby work. However Gaetan seems to prefer them and perhaps they are ideally suited for very fine carving as they are certainly sharper.
- 728 replies
-
- 1
-
-
- le fleuron
- 64 gun
- (and 1 more)
-
Microscope cover slips are the perfect thickness but have you had success trimming them to size, Nigel? I have found no consistent way to cut them without their breaking.
-
Proxxon Micro Planer DH40 - owner feedback??
dvm27 replied to rtropp's topic in Modeling tools and Workshop Equipment
Both machines have their use in the workshop. For thicker billets that need to be quickly reduced the Proxxon planer is perfect. It makes very fast and smooth cuts. For dimensioned wood that is close to final thickness I use the Byrnes thickness sander. You could get by with just the Byrnes sander but it is designed to remove a few thousandths of an inch at a time (hence it's use as a precision tool). -
Proxxon Micro Planer DH40 - owner feedback??
dvm27 replied to rtropp's topic in Modeling tools and Workshop Equipment
The Proxxon planer is a first class piece of machinery. It cuts smoothly and consistently and the auto-feed feature is outstanding. You can affix the wood to a sled (thicker piece of wood) with a couple tacks of glue to facilitate the process of getting very thin pieces. -
You've clearly mastered the sail technique, both furled and set. The back lit photo could pass for the real ship. Have a great tropical rest, Dan! I think we've all had our fill of this winter
-
Cumulative error is a constant threat in plank on frame modeling. It's still a beautiful looking hull and you might consider fairing out any unevenness and planking her outside. That would cover most of what you are not happy with. It would make a very nice companion to your fully framed next effort.
-
HMS Naiad 1797 by albert - FINISHED - 1/48
dvm27 replied to albert's topic in - Build logs for subjects built 1751 - 1800
Sweet work, Al. You are going to need to invest in a camera with macro capability so that we can better appreciate your work! -
Beautiful work, as always. Love the planking detail of the port lid to match the billboard!
-
Damned sneaky, Mike. And quite brilliant solution to getting those transom slots perfect! Will definitely file that one away.
- 969 replies
-
- 3
-
-
- hahn
- oliver cromwell
- (and 1 more)
-
Well Chuck, you're in good company. Dean of plank of frame ship modelers Harold Hahn wrote that he never spiled a plank or needed a stealer strake.
- 1,051 replies
-
- 8
-
-
- cheerful
- Syren Ship Model Company
- (and 1 more)
-
I believe the Nobel Prize is in order for figuring out how to keep small sliced pieces from flying off the saw table! Also love that Sherline accessory. Does it have a special name?
-
Fabulous, Chuck. It's a pretty simple technique to do but not live in front of twenty guys! Your club is lucky to have a mentor like you.
- 1,051 replies
-
- 6
-
-
- cheerful
- Syren Ship Model Company
- (and 1 more)
-
For those looking for very small rivets and other fasteners in the US check out Scale Hardware http://www.scalehardware.com/miniature-rivets-c-10
-
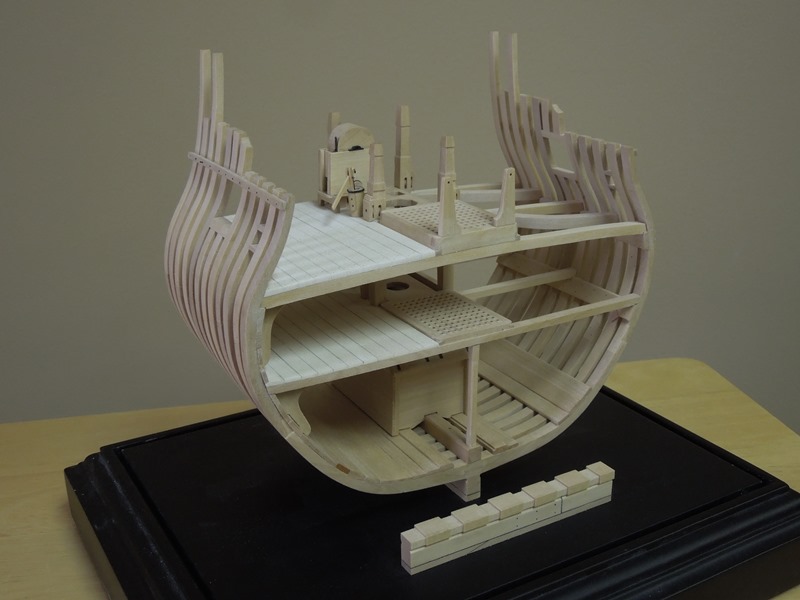
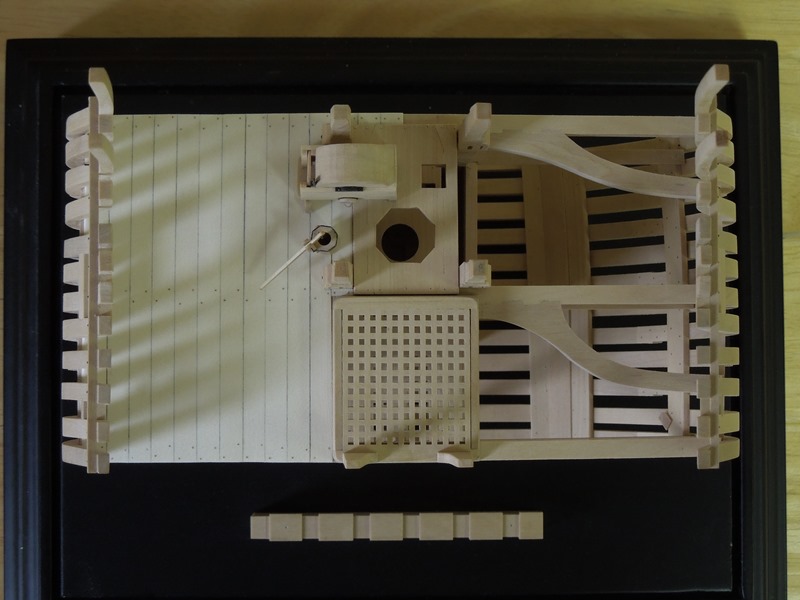
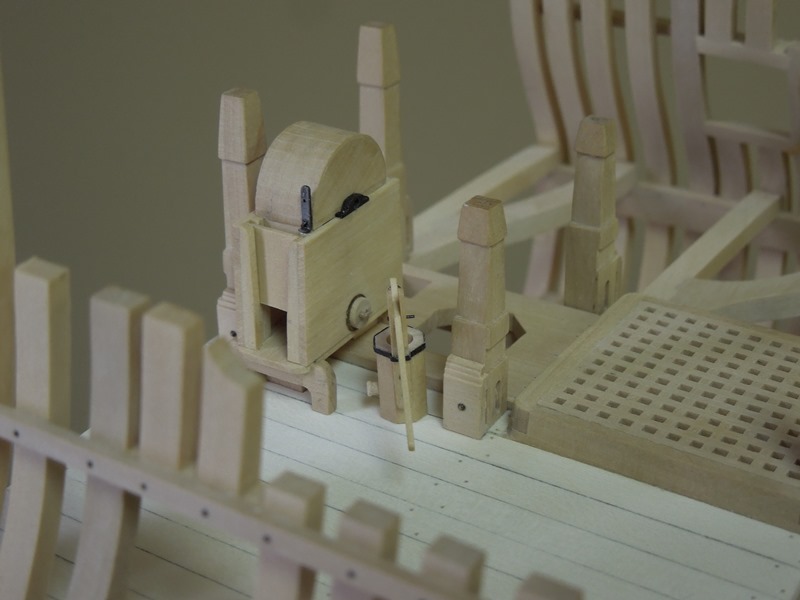
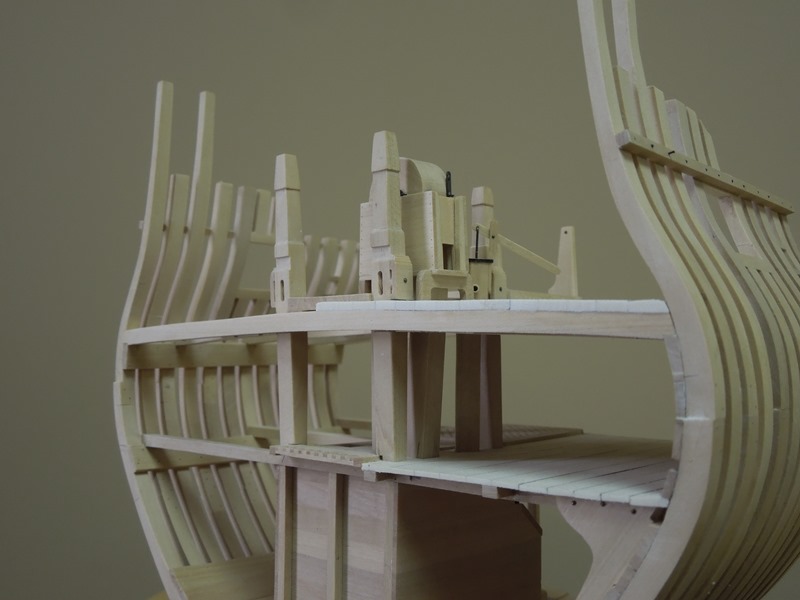
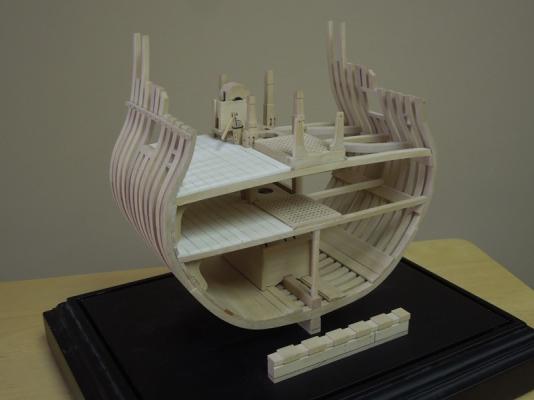
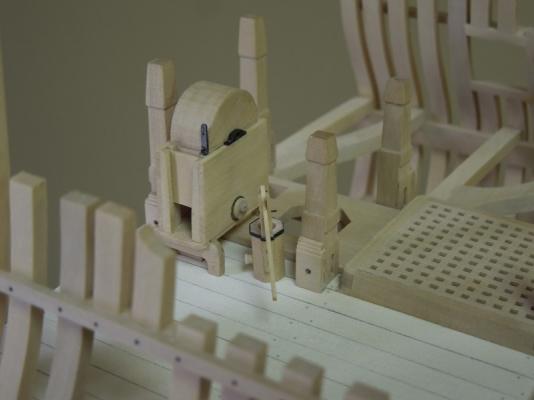
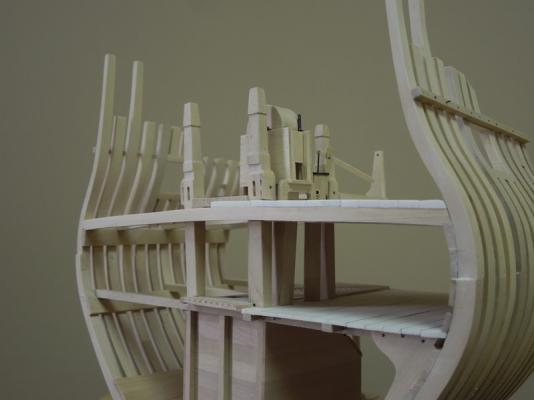
Echo update #8 is completed and posted on our website http://www.admiraltymodels.com. My version below shows the stock framing package on the port side and the fully fitted out version in progress on the starboard side.. Please keep in mind when ordering the framing package that it is the complete framing only. The fitting out instructions are free of charge and posted on our website every few months. We are hoping to develop and sell a fitting out package in the near future complete with laser cut deck beams, gun carriage and other details. Stay tuned.

-
Echo by jml1083 - 1:48 - Cross-Section
dvm27 replied to jml1083's topic in - Build logs for subjects built 1751 - 1800
Your chart is correct, Jim. Very useful. The framing plan below should correlate well. Just change the 8 1/4" toptimbers to 8". Pay special attention when shifting timbers. It's easy to shift them the wrong direction. Accurately dimensioned spacers and a dead flat surface (like glass) make this step a lot easier. Sided frame dimensions.pdf -
Looks terrific, Mark. Cumulative error is always lurking out there to bite us, especially in a fully framed hull.
- 172 replies
-
- 1
-
-
- druid
- sloop of war
- (and 2 more)
-
We all knew you'd nail those plates (literally). It was just a question of time. Your work inspires us all!
- 3,618 replies
-
- 7
-
-
- young america
- clipper
- (and 1 more)