HOLIDAY DONATION DRIVE - SUPPORT MSW - DO YOUR PART TO KEEP THIS GREAT FORUM GOING! (Only 20 donations so far - C'mon guys!)
×


augie
-
Posts
4,669 -
Joined
-
Last visited
Content Type
Profiles
Forums
Gallery
Events
Everything posted by augie
-
 I love the symmetry and just enjoy looking at this kind of framing. Maybe you should leave off the hull planking That one 'supervisor' looks capable of keeping things under control. Nice work, Wayne.
 -
You may be able to get some ideas here Rich. It's from Chuck's Syren manual: http://www.modelexpo-online.com/images/docs/MS2260/MS2260-Syren-Instructions-Chapter-16.pdf
- 1,756 replies
-
- 2
-

-
- constitution
- constructo
- (and 1 more)
-
I don't know the ship that well but the flush mount certainly looks appropriate. Shaping up!
-
Thanks Chris. That's helpful for future reference.
-
Glue sandpapers of different grits to the opposing sides and you have a handy sanding stick.
-
A weekend well spent!
-
Have been thinking of you, Wes. Get back on at your own pace --- and welcome home.
-
Sit back and relax my friend. I'm still waiting for the patina to develop on my Syren. After 1 1/2 years, it is darkening but still has a ways to go.
- 1,616 replies
-
- 2
-
-
- caldercraft
- agamemnon
- (and 1 more)
-
Isn't that for copper pots and pans? Might work !
- 1,616 replies
-
- 1
-
-
- caldercraft
- agamemnon
- (and 1 more)
-
That head on shot takes courage. In your case, it's perfect. Haven't seen anything from Sam since July. Hope he's ok.
-
HAPPY ANNIVERSARY, Rich. You should certainly be proud of all you have accomplished over the course of the year. Now on to the fun stuff!
- 1,756 replies
-
- 1
-
-
- constitution
- constructo
- (and 1 more)
-
Welcome home!!!!!
-
Better than expected????? It looks perfect. I like your addition of the knee joints...should add rigidity just like the gussets on airplane joints.
-
Thanks everyone for the complements and bon voyage. Have a few days left before leaving. Mark - sorry, no fishing. Just going to be a tourist. JP - belt sander has been around for years. Actually one of the low end models from Micro-Mark. Nice part is that there is no vibration so it makes it possible to do some fine work.
- 2,191 replies
-
- 1
-
-
- confederacy
- Model Shipways
- (and 1 more)
-
Yup, heat shrink tubing. Cut your 'band' with a razor, slide it on and shrink with a hairdryer. You can find it in flat black and it accepts paint well if need be. It's even great on things like anchor stocks where you may have some unusual angles that need 'bands'.
-
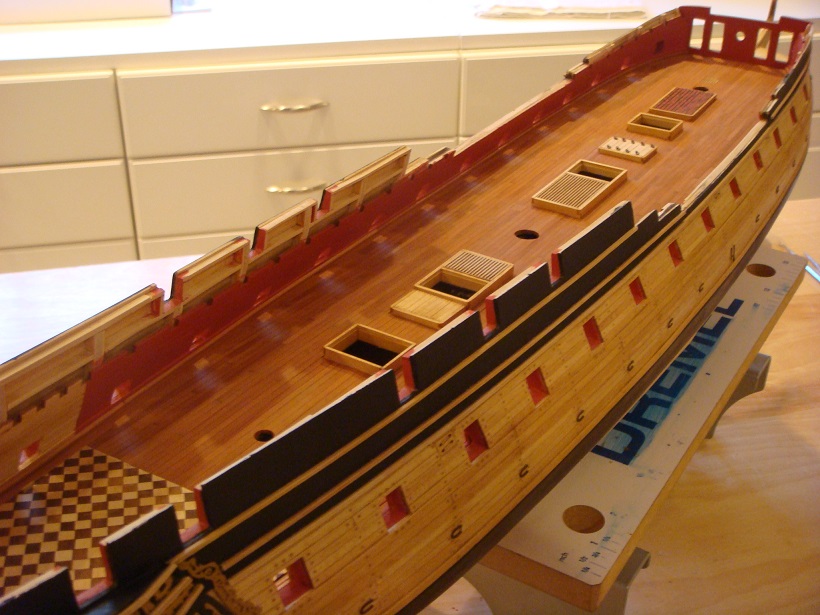
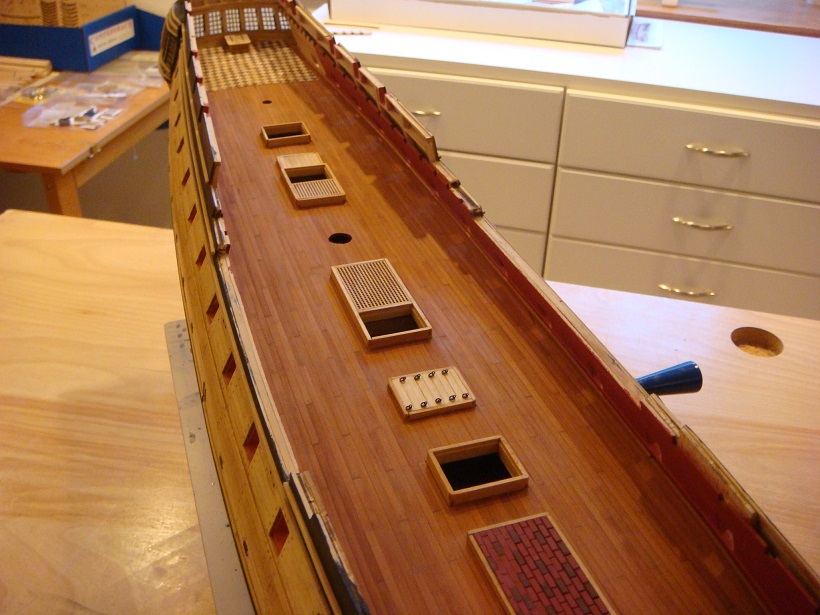
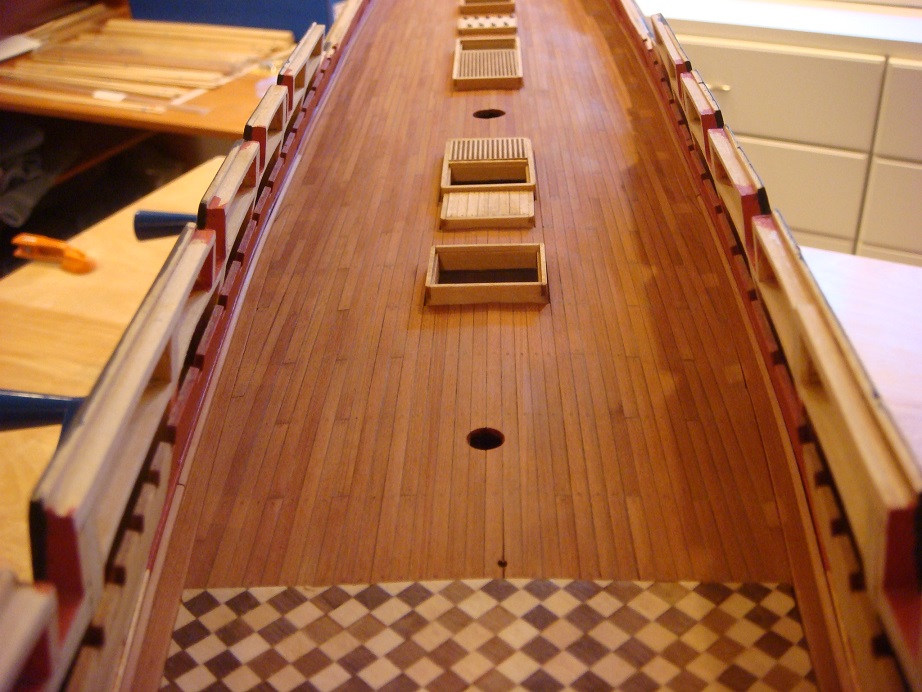
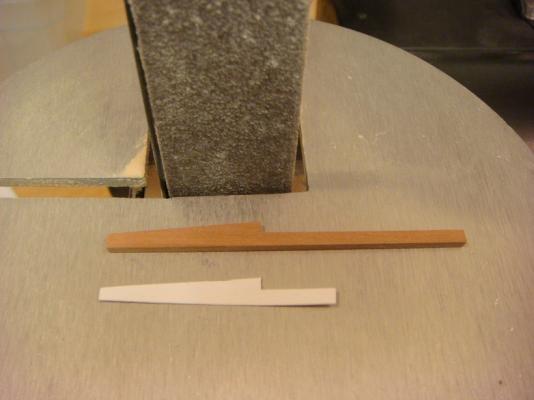
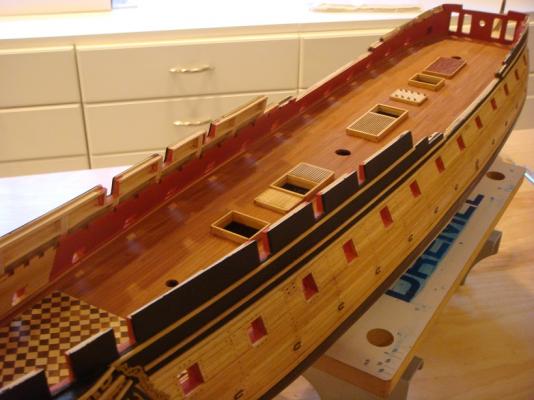
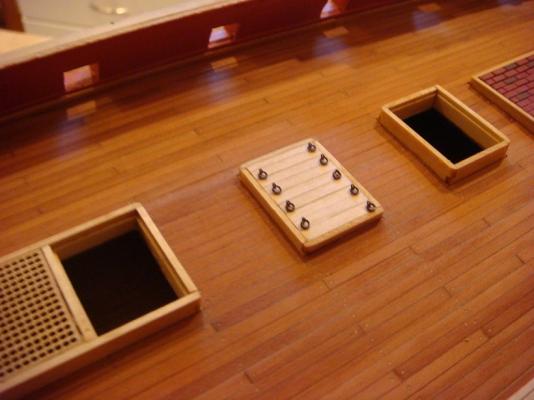
Never let it be said that I kept Popeye waiting------ The installation of the gun deck has been completed Just to review (since it's taken so long), the deck is Swiss Pear supplied by Jeff at HobbyMill. Fantastically uniform material -- BIG thanks to him. The planks are all scale length of about 25 feet. The meeting of the deck planks to the margin planks was carried out using hooked scarph joints. I received some queries on these: As I came to discover, Swiss Pear is pretty tough stuff but it holds an edge very well. After going through several Social Security checks worth of Exacto blades, I came up with the following procedure: A card stock template was carefully fitted into the spot to be filled and, using double-sided tape, attached to the plank. The outline was then cut using a fine belt on a belt sander. Takes a steady hand. Given my aversion to power tools, I was surprised how well it worked. So here are a series of photos showing the deck from different perspectives: The treenailing was created using the 'drill and fill' method using #75 pin vise drills. There are about 1200 holes (but who's counting). The fill material is Hobbylite that I dyed with some acrylic paint to get just a tiny bit of contrast with the deck itself. The entire deck was finished using the sequence of Minwax Pre-Stain followed by Natural stain, 2 coats of WOP and 2 coats of Testor's Clear Flat Acrylic: A lot of this deck will be obscured by the partial upper decks and deck beams. I need to do some touching up here and there on the ship and install some ladders in the hatchways. At that point the shop will be closed for about a month as the Admiral and I are off to do some globetrotting After that it will be on to the cannons. Thanks to all for stopping by. Enjoy the upcoming change of the Seasons !


- 2,191 replies
-
- 39
-
-
- confederacy
- Model Shipways
- (and 1 more)
-
Absolutely dazzling! Nice job, my friend. Onward to starboard
- 1,616 replies
-
- 1
-
-
- caldercraft
- agamemnon
- (and 1 more)
-
Spouts? Come on Dave, do you want everything????? Adam --- they look really great. Next time you're faced with making iron bands you might consider the possibility of using some really short lengths of black heat shrink tubing like they use on wire connections. They come in a huge variety of diameters and I've used them with good success.
-
Hello Jack. Thanks for stopping in. On the photos, I'm afraid those were lost during an MSW glitch earlier this year. However, I didn't save the originals so I can't replace them. If you have a specific question I will try to help out.
-
Yikes---- Sjors is right. Don't finish the mast just yet. Just stand them in at their proper angles temporarily so you can set the chainplate angles. It's not a bad side ....... it's the wall side. We all have one. (My ships sometimes have four).
-
Model Shipways Bluenose or Benjamin Latham for first kit
augie replied to Hog2sail's topic in Wood ship model kits
Hello Ed ..... and welcome aboard MSW. I haven't built either of these kits but Model Shipways puts out a good product. The Latham is a little larger scale which means extra detail is possible. My advice would be to pick the one you like best.....for whatever reason. You'll be spending considerable time with her! As a scratch model airplane builder myself, many of your skills will translate to model ship building. There will be a lot of new things to learn but you'll pick them up fairly quickly. I'm sure you'll hear from a few who have built these kits. Once you make a decision, start a build log so we can follow along. It's the best way to receive feedback and ask questions. Best wishes on your maiden voyage!!!! -
Very nice. That bell really stands proud.
-
I see he has multiple lawn mowers as well.