HOLIDAY DONATION DRIVE - SUPPORT MSW - DO YOUR PART TO KEEP THIS GREAT FORUM GOING! (Only 20 donations so far - C'mon guys!)
×


augie
-
Posts
4,669 -
Joined
-
Last visited
Content Type
Profiles
Forums
Gallery
Events
Everything posted by augie
-
 I'll be following you new Darksiders. Best of luck to all. When does Rusty begin gun manufacture?
- 456 replies
-
- 2
-

-
- finished
- bomb ketch
- (and 2 more)
-
Thanks all. MARK- I'll be painting the barrels. That way it will be reversible. I need to check Ben's log to see if he used only 20 coats.
- 2,191 replies
-
- 3
-
-
- confederacy
- Model Shipways
- (and 1 more)
-
HMS Victory by JPett - Corel - 1:98
augie replied to JPett's topic in - Kit build logs for subjects built from 1751 - 1800
"they need to taper just before the stern and then flare" And here I thought I was the only shipwright to face this phenomenon. Ah, the joys of planking. Coming along nicely JP. No filler for you!!!!! -
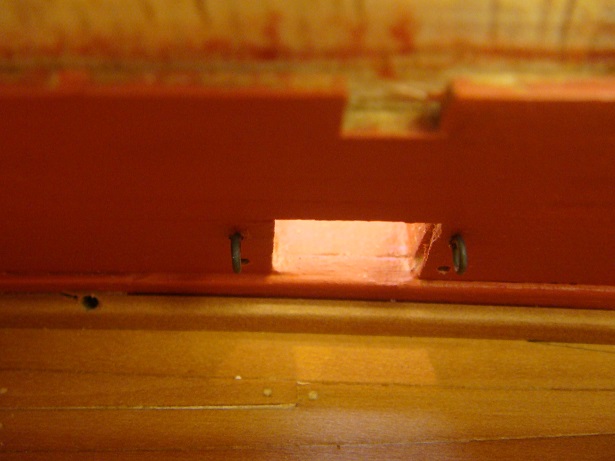
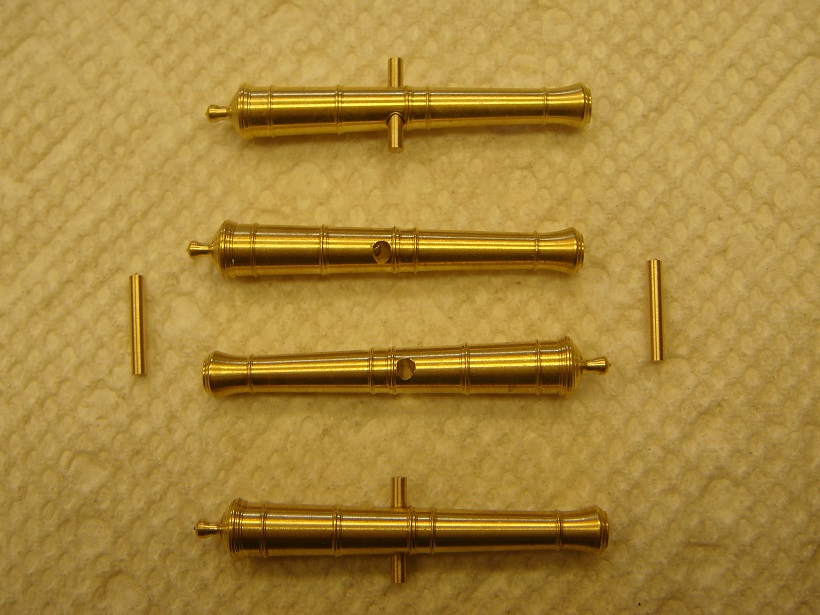
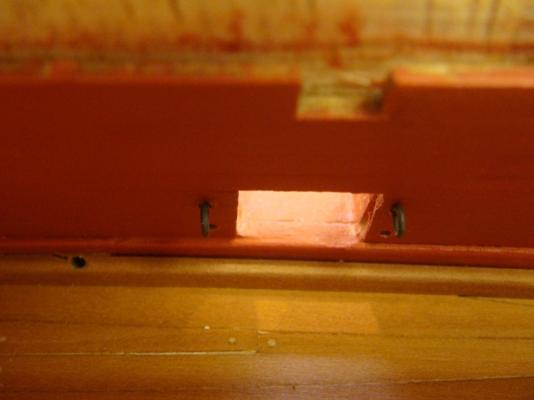
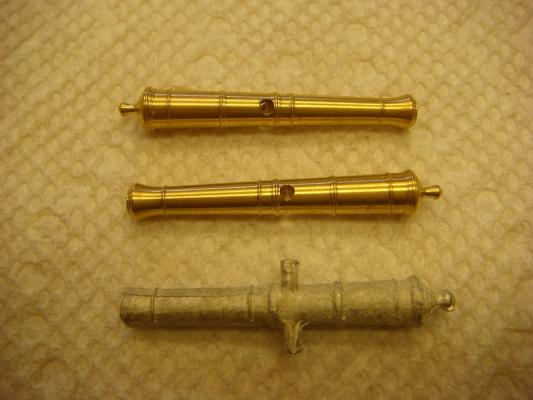
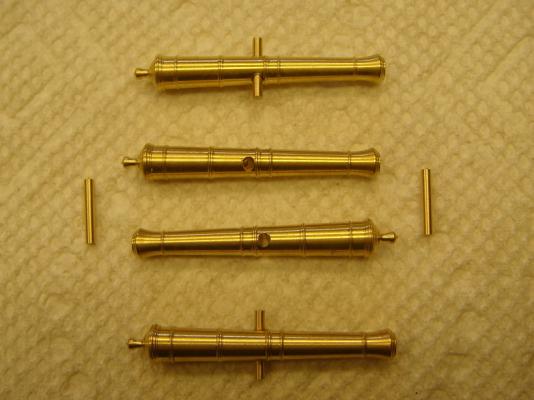
Gun Preparation Each gun port on the gundeck requires 4 eyebolts to secure the gun tackles and breech lines. The holes were drilled and the upper eyebolts fitted. The lower eyebolts will go in with the breech lines: As a review, I'll be using Chuck's brass canon from the Syren Co. in place of the kit-supplied white metal canon: You can see a small bit of flashing in the trunion hole in the uppermost canon. For this purpose, keep a 1/16" drill bit handy for (gentle) easy removal by hand (12 pounders) . In the case of the smaller 6 pounders, a #67 bit will suffice. Also, keep a small sanding stick ready to smooth the ends of the trunions. I cleaned the guns by soaking in acetone before fitting the trunions. Here's what the guns look like with the trunions installed: Although one could choose to solder in the trunions, I chose to simply use the smallest dab of thick CA for this purpose. It gives you time to work . The next step will be fitting the brass rings for the breech lines to the guns.
- 2,191 replies
-
- 32
-
-
- confederacy
- Model Shipways
- (and 1 more)
-
Hi Larry! I'm looking at the starboard side and don't see a fashion piece. Am I missing something? On the hatches, I usually paint black beneath the grating but the paper looks good. On attaining a 'camber', rather then try and bend the hatch, I find it easier to sand it into the hatch. This can be done by putting a piece of sandpaper (rough side up) on the deck and rubbing the hatch back and forth -- it will soon match the curve of the deck.
-
Maritime museums are not really big out here, Robbyn. Unless you like Prairie Schooners . But if you contact DSiemens here on MSW, he's a member of Rocky Mountain Shipwrights and he might have some suggestions for you
- 2,191 replies
-
- 1
-
-
- confederacy
- Model Shipways
- (and 1 more)
-
PM on the way.
-
Ben gave me the same advice when I got to this point and Chuck chimed in as well. I was sure glad they did --- alignment is critical here. So take every bit of time you need. It's worth it in the end.
-
Looking forward to the 'unveiling' !
-
Magnificent. Thank you for sharing her, and all your tutorials, with all of us. It's been a true pleasure watching her come to life. WELL DONE, mate!
-
Thanks Pete. How about brightening our day with a build log???
- 2,191 replies
-
- 3
-
-
- confederacy
- Model Shipways
- (and 1 more)
-
Book me a seat on the CONGRATULATIONS train. Just a masterpiece Tony ----- take a well deserved bow, with great pride. I'm sure we'll cross paths in future. Best of luck on the Dark Side!
- 1,279 replies
-
- 1
-
-
- agamemnon
- caldercraft
- (and 1 more)
-
Wishing you luck with your new challenge. Keep your spirits high and you'll move right up the new learning curve. Will patiently await progress on your beautiful HMS Victory.
- 1,319 replies
-
- 1
-
-
- caldercraft
- Victory
- (and 1 more)
-
Spacing is looking good. Might want to tweak that one deadeye (6th from the left) a hair to align the upper holes with the others.
-
Almost anything is possible, Dr. Per !! The decking strips supplied in the kit are 1/16" thick and the false deck is 1/32" so you would obviously need 3/32" thick planks. However, as you have the kit right there, you will see that the false deck includes deadly accurate laser engravings for positioning the hatches, masts etc. It also provides a nice solid base to lay your planks over. When I did Chuck's Syren, there was no false deck and that worked out fine. But to be honest, laying the Confed planks on top of the false deck just went a lot easier. So, IMHO yes, it's possible ---- but I wouldn't do it myself. Can't wait to see your rendition of Confed. She's a fun project.
- 2,191 replies
-
- 1
-
-
- confederacy
- Model Shipways
- (and 1 more)
-
Your point is very well taken, Alistair. Took a closer look myself and yes indeed, they are inconsistant. The plans are correct. The fault is totally mine. Since the hatch coamings are installed down through the decking onto the false deck, I will not attempt to change them at this point --- but this error shall never be repeated due to your eagle eye. Thank you for your close attention.
- 2,191 replies
-
- 1
-
-
- confederacy
- Model Shipways
- (and 1 more)
-
Would suggest you bring in a consultant (aka Kevin) for transport outside for photos. Be CAREFUL !!!!
- 1,873 replies
-
- 3
-
-
- occre
- san ildefonso
- (and 1 more)
-
US Brig Syren by Gahm - Model Shipways
augie replied to Gahm's topic in - Kit build logs for subjects built from 1801 - 1850
Nice job on that mast coat! -
Can't wait to see those sails up at the head. Nice work!
- 1,873 replies
-
- 1
-
-
- occre
- san ildefonso
- (and 1 more)
-
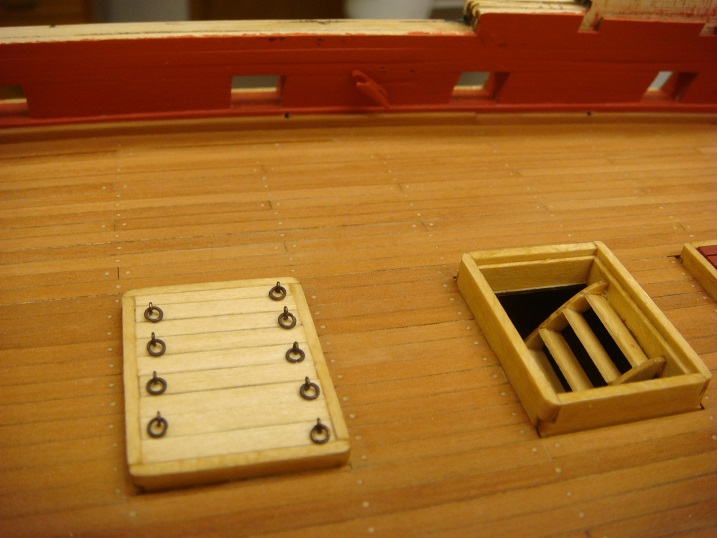
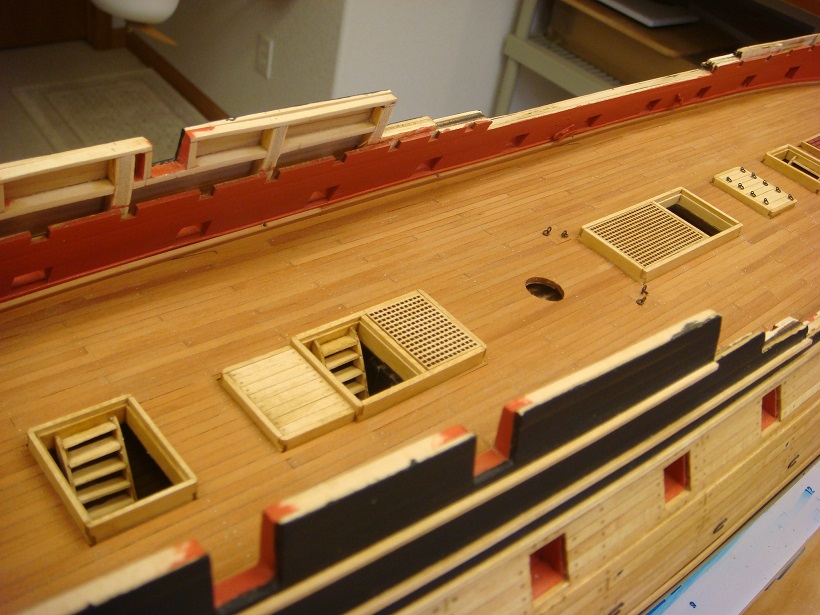
A fresh breeze has come up slightly abaft the beam and we're once again underway. A quick update on some minor items. Ladders have been fabricated and installed in the 4 companionways leading down from the gun deck. Some eyebolts and rings have also been fastened on deck: A series of 10mm cleats were also added to the bulwarks. They are all pinned with wire to prevent surprises down the road. The scuppers were also added along the waterway and exiting through to the outside of the hull: We will now begin work on the guns, first mounting the bulwark eyebolts for the gun tackles and breech lines.


- 2,191 replies
-
- 32
-
-
- confederacy
- Model Shipways
- (and 1 more)
-
Thanks for stopping by, Alistair. And thanks again for the generous comments. We'll be back underway shortly.
- 2,191 replies
-
- 1
-
-
- confederacy
- Model Shipways
- (and 1 more)
-
If you're going to deal with Jeff at Hobbymill you had better hurry!!!! Not much insight to offer as I did Syren with all MS supplied material. Used Jeff's help on Confederacy. If you need some quick input you might PM Bob (Rafine) as I believe he used Boxwwood and Holly supplied by Jeff for his Syren. Glad you're feeling better.
-
Looking good. Be a bit cautious on the stain for the exposed frames. The run of the grain makes them take up the stain a little differently than you might expect. As always, test a small sample before you commit.