augie
-
Posts
4,669 -
Joined
-
Last visited
Content Type
Profiles
Forums
Gallery
Events
Everything posted by augie
-
 Always a sight to behold. Congratulations on the milestone.
- 1,319 replies
-
- 1
-

-
- caldercraft
- Victory
- (and 1 more)
-
I'll lay you dollars to donuts that you won't leave it at one coat. The appearance at that point will disturb you and you won't want to leave it that way for 3 months !!!!!
-
Thanks again, Wayne. I've hooked up the fellow who sent the inquiry to your log.
-
You can never have too many boats! Going back to our discussion on capstan bars, I came across an interesting photo on Trippwj's Essex log (posts 82-85) and posed a question to him about the length of the bars on his Essex plans. You'll see he responded and may do some follow up. Have a look: http://modelshipworld.com/index.php?/topic/5089-us-frigate-essex-by-trippwj-aeropiccola-170-scale-pob/page-6?hl=essex
- 227 replies
-
- 1
-
-
- syren
- model shipways
- (and 1 more)
-
Thanks. I'll wait to see if you find something else. The reason I ask is that someone is looking for some guidance on that exact point. Once I have an answer I'll try to remember who asked and get them the info.
-
We missed you Wayne...but hope you're having a great Summer. False deck looks great. Question - on that forward capstan, what is the approximate length of the capstan bars?
-
I use a very similar process on my first deck, Larry, including the slight bevel. On my latest one I'm using a 'harder' pencil (4H as opposed to 2) and am only putting it on one side and the 2 ends of each plank. This has helped me in eliminating what I call 'smuding' (assuming that's a word).
-
You're right, Richard ---- it will be darker than the hull planking but I just love the look of it. It will also contrast with the open deck beams. I thought long and hard about it and decided to take the shot.
- 2,191 replies
-
- 7
-
-
- confederacy
- Model Shipways
- (and 1 more)
-
You've done a fine job on them and David makes a good point.
- 1,756 replies
-
- 1
-
-
- constitution
- constructo
- (and 1 more)
-
Looks about right. Just keep going! And don't try doing it all in one sitting.
-
Mayflower by SawdustDave - Finished
augie replied to SawdustDave's topic in - Build logs for subjects built 1751 - 1800
For what it may be worth, I think the bamboo is spectacular......both in grain and color. -
I'm with Larry on this. MS paints work for me. I usually dilute them quite a bit and use many thin, rather than just a few thick, coats. They usually do not give much of a 'shine' (which I hate on a ship model). If they do, a quick coat of Testor's Clear Acrylic Lacquer (Dullcoat) solves that issue.
-
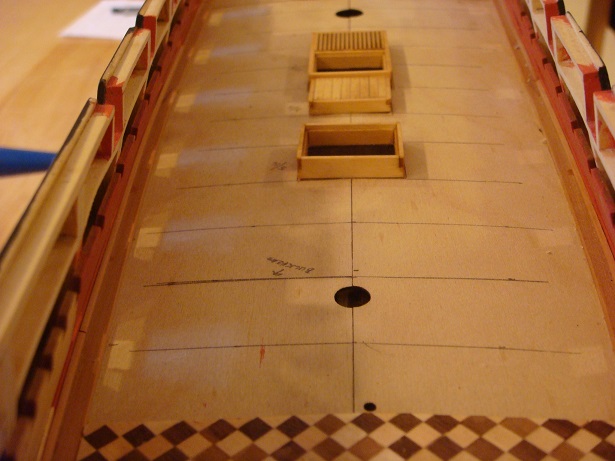
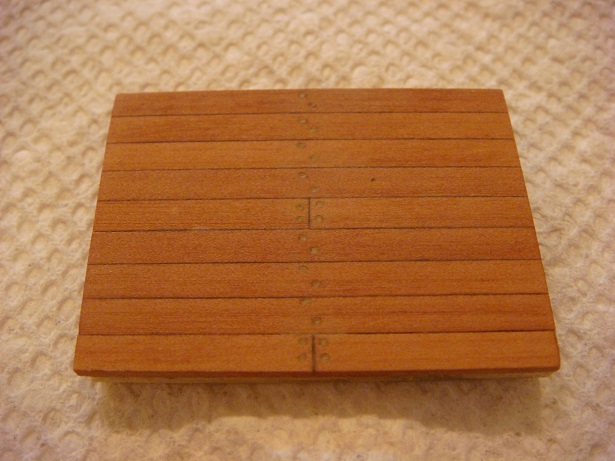
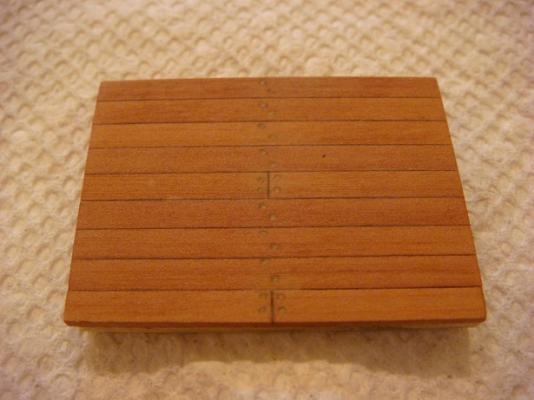
Haven't gotten much done of late. But I did manage to line out the deck where the bulkheads are. The decking planks will end on these lines. In addition, I prepared some sample decks as I'm not familiar with Swiss Pear. Here is what I've settled on: These are 1/8 x 1/16" planks supplied by Jeff @ Hobbymill. Beautiful stuff. The planks were lined on one edge with #2 pencil (ends also). The simulated treenails were drilled with a #75 bit and filled with dyed filler to almost match the plank color. The finish sequence was Minwax Pre-stain, one coat of Minwax Natural stain and a coat of Testor's Clear Acrylic Dull lacquer. I'll be using a 3 butt shift on the deck. Work will commence next week and may take a little time . You all stay the course !!

- 2,191 replies
-
- 34
-
-
- confederacy
- Model Shipways
- (and 1 more)
-
US Brig Syren by Gahm - Model Shipways
augie replied to Gahm's topic in - Kit build logs for subjects built from 1801 - 1850
Truly well done! -
Enjoy the trip. I'll bet you come home with 2 good ideas for the ship!
- 1,756 replies
-
- 1
-
-
- constitution
- constructo
- (and 1 more)
-
It's good to have you 'home' Larry.
-
You might also wish to consider not attaching the lines to a common eyebolt on the bulwark.
- 1,756 replies
-
- 2
-
-
- constitution
- constructo
- (and 1 more)
-
Looking terrific. Where do I send the order for hammocks ???
- 227 replies
-
- 1
-
-
- syren
- model shipways
- (and 1 more)
-
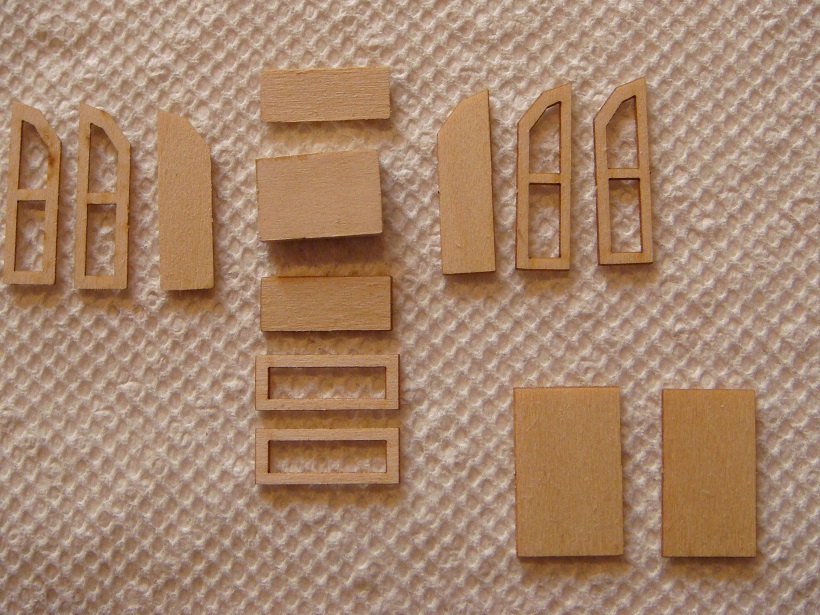
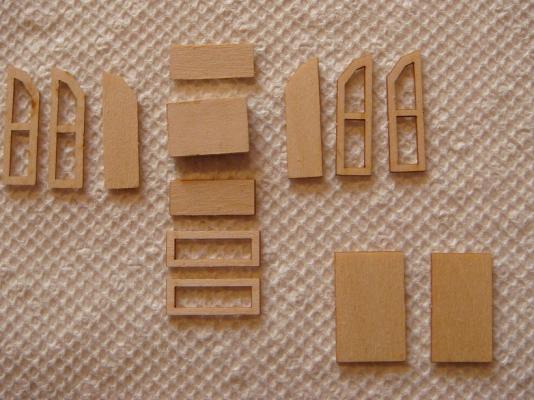
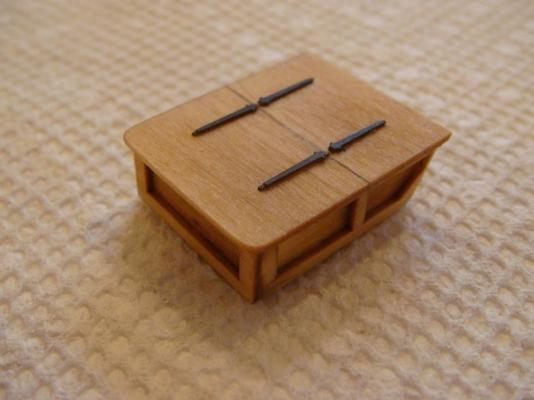
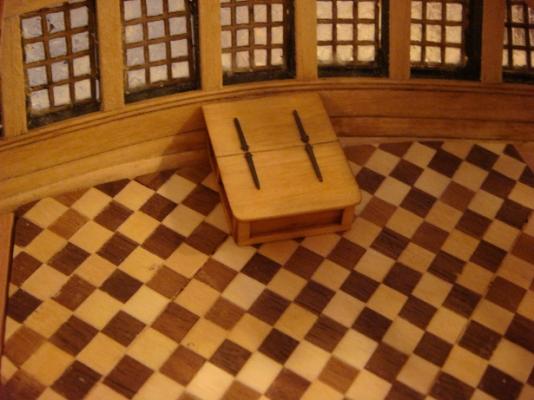
Sorry to say that summer activities have taken a toll on shop time. I did manage to complete one small piece of deck furniture -- the rudder trunk in the Great Cabin. The kit supplies laser cut parts, some in duplicate: Assembly of the basswood parts is fairly straightforward and the usual pre-stain, diluted Golden Oak stain, WOP and dullcoat was used . The brass hinges were blackened with Blacken-it. The trunk sits in the rear of the cabin tight against the stern lights: Will be carrying out some deck finishing tests prior to laying the deck itself.
- 2,191 replies
-
- 28
-
-
- confederacy
- Model Shipways
- (and 1 more)
-
You might consider making the rails themselves out of wire?
- 1,756 replies
-
- 4
-
-
- constitution
- constructo
- (and 1 more)
-
Stern is looking very nice indeed.
-
If you have the proper chain, and that's what you like ----- why not?
- 1,756 replies
-
- 1
-
-
- constitution
- constructo
- (and 1 more)