


Wintergreen
-
Posts
993 -
Joined
-
Last visited
Content Type
Profiles
Forums
Gallery
Events
Posts posted by Wintergreen
-
-
"Happy wife - Happy Life" ? True that, my friend!
Glad to see you back here Mario.
Whatever the build, virtual friends are always a treat to meet.
- Cap'n Rat Fink, mrshanks, cog and 3 others
-
 6
6
-
Jan, well the larger table was the source of inspiration for the smaller one that I made for the boat.
They also asked me to build a communion table in the same style. The large table was initially purposed for this but was made static with the water fountain at rear left corner.
So, I will make them a table, that fits under the larger one, for them to use in the services.
-
-
-
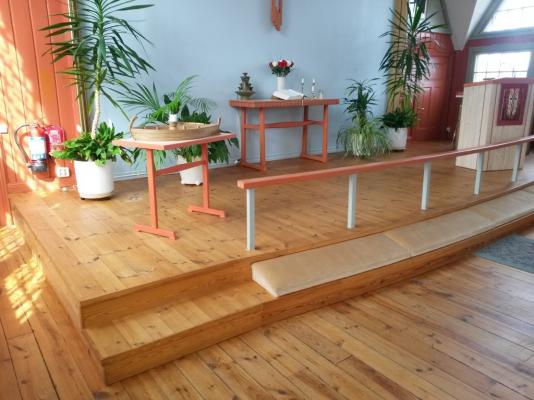
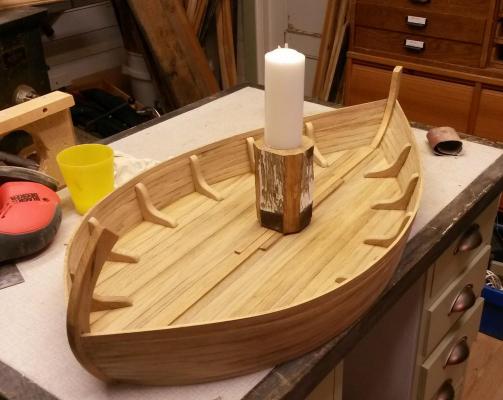
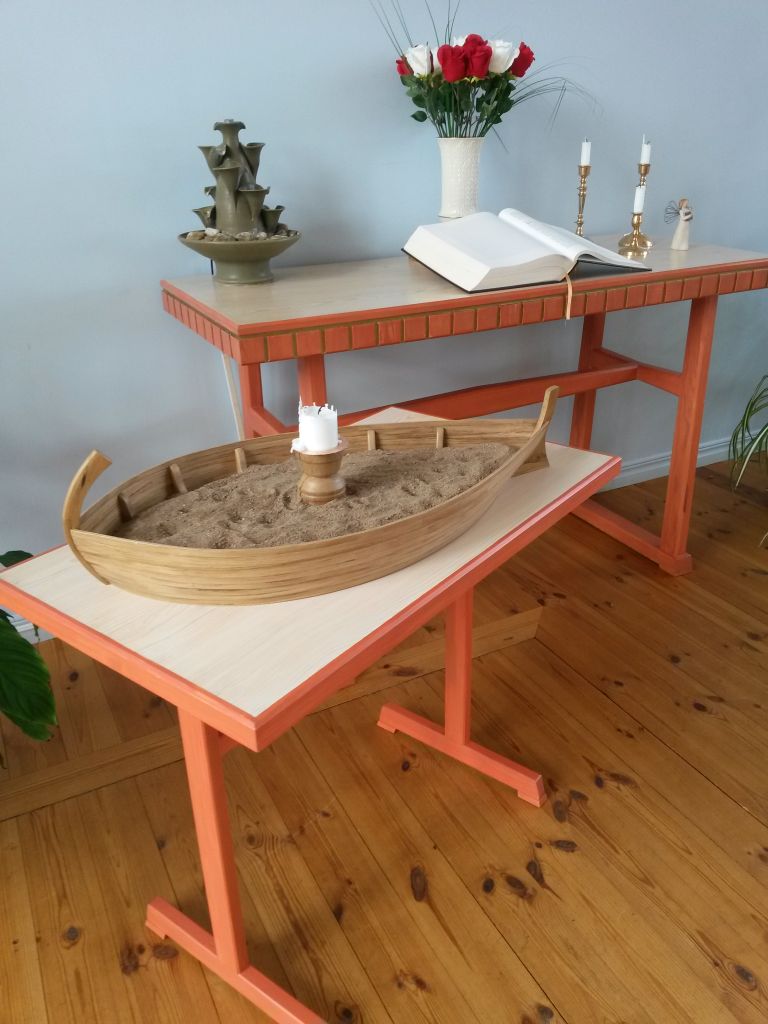
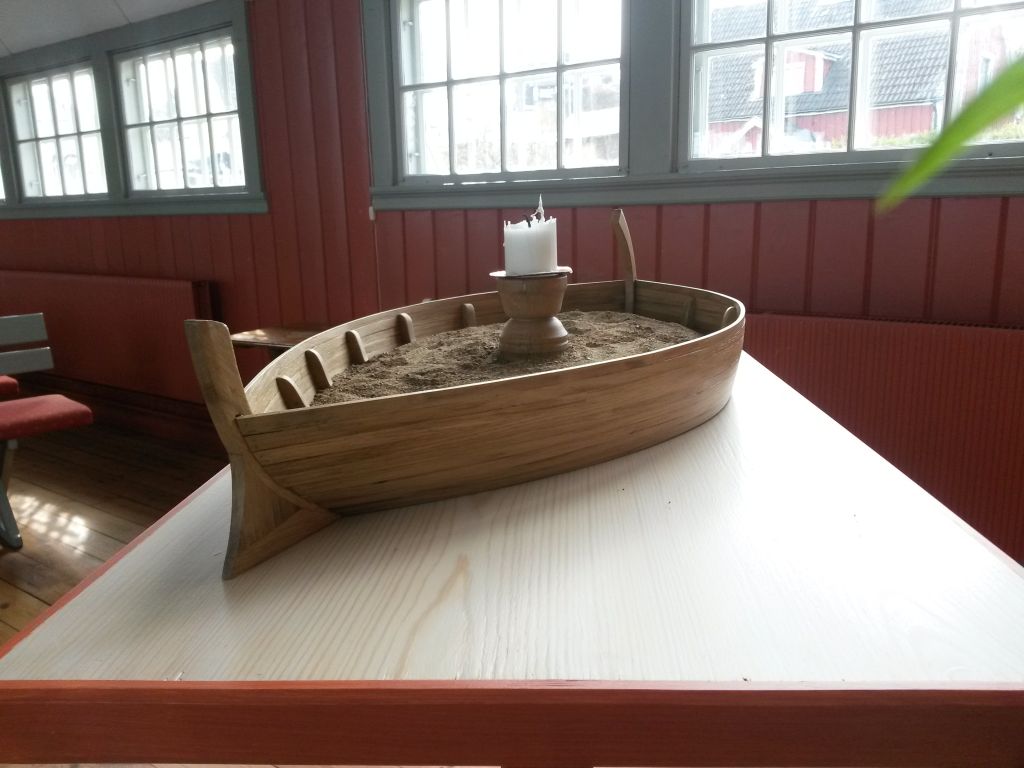
So, time to conclude this thread...boat and table in place finally!
It took some takes to get a close match on the color. First I had matched it as good as possible with these small samples you can get from the painters. That was far off when it came to reality. So four or five tries later I was very pleased with the result. AS you can see from the candle it has been in use a couple of weeks (they were so so eager to get it that they didnt care about the table not being ready
 )
)


Thank you for following this small build, and thanks for all the "likes" as well.
Til next time - Ta!
-
-
Lovely!
Yes, the blue sticks out a bit too much. But I wouldn't go with regular black. Instead blend green with black or go with some blue-black. The main thing is to keep in the color range of the green and red. I cant express in words what I mean, but the blue and green as of now doesn't play together in my eyes.
There is probably some university degree in color matching (which I don't have) but think cars. "Wow, that is a black car." and then you go up to it and discover it is actually very dark green och very dark blue. Something like that.
- WackoWolf, captainbob, Jack12477 and 4 others
-
7
-
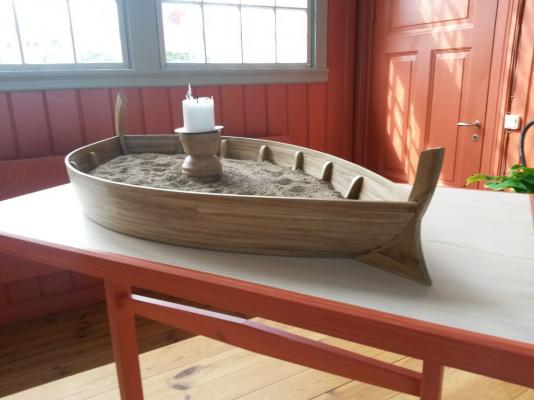
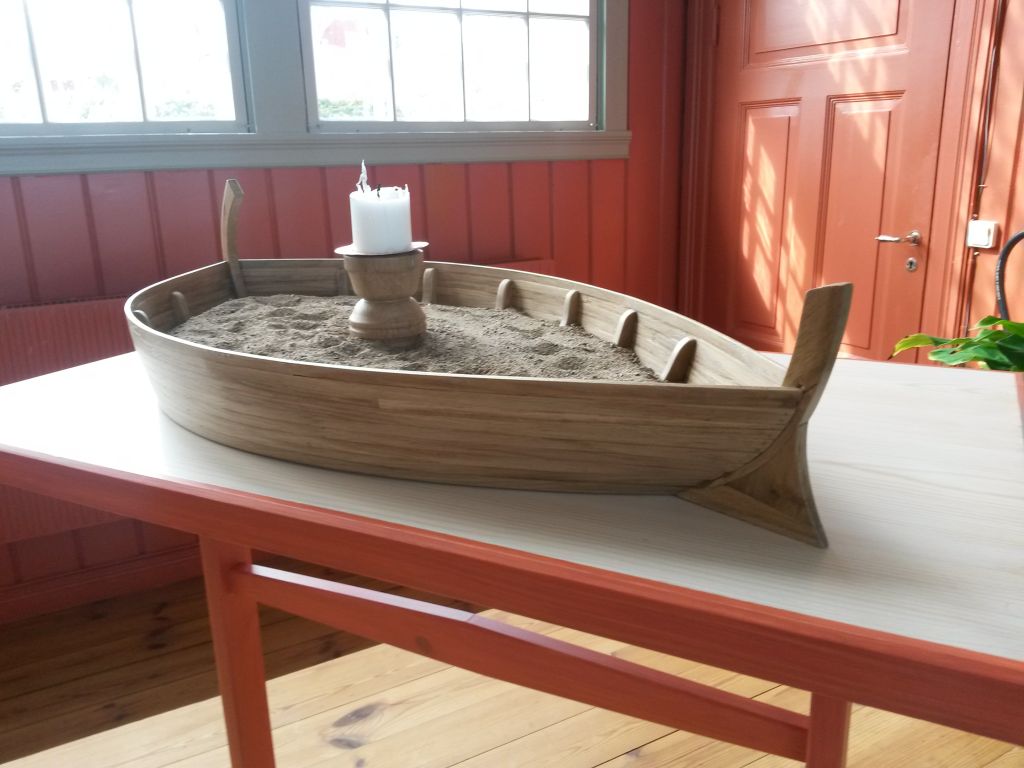
So, the "boat" is finished. However, I wont publish any overall pics until I have the surrounding items in place.
The boat will have a dedicated table to sit on. The table will match the other items at the podium.
It also needs a small box to have the candles in. The first one I put together were far to chunky in appearance to please my eye.
The finish is a clear lacquer, matte or satin. This to protect the wood from the anticipated far too many greasy fingerprints...
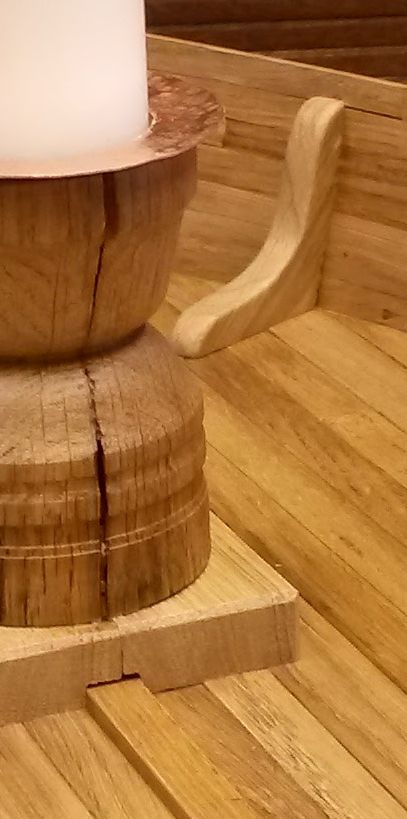
The candle-ring is just some plain copper that I went over with a ball point hammer.
Nothing on this boat is "perfect" in the meaning of alignment, appearance, finish, wood texture (for instance, see the crack on the candle holder...). Why? Well, my thought is that we, as persons, are far from "perfect". We all have our small dents, cracks, soft spots and so on. And the boat reflects all that... (Rev 21:5)
Nuf said.

To be continued...
- mtaylor, GrandpaPhil, AON and 2 others
-
5
-
I find it interesting...there is nothing in this build log that whatsoever reveal that there is somewhat of a temper involved. On the contrary, you seem to have all the patience, perseverance and endurance in the world when I look your ruler straight deck structure. Meticulously made long boats and everything else.
Inspirational!
-
-
So, I just randomly clicked the "San Felipe" link in your signature. I must say, every now and again I get dumbfounded of the skill some people show in their logs. It didn't look like much in the beginning with the big chunks of lumber resting on your big table saw. I read a few pages and then skipped to the end...and Wow! What a ship you have build!
Hats off and bow deep!
- Sjors, Piet, popeye the sailor and 5 others
-
8
-
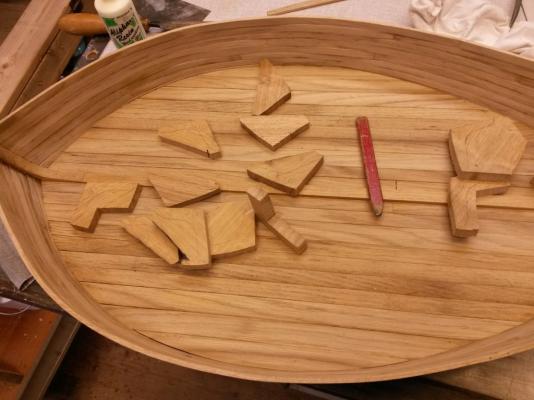
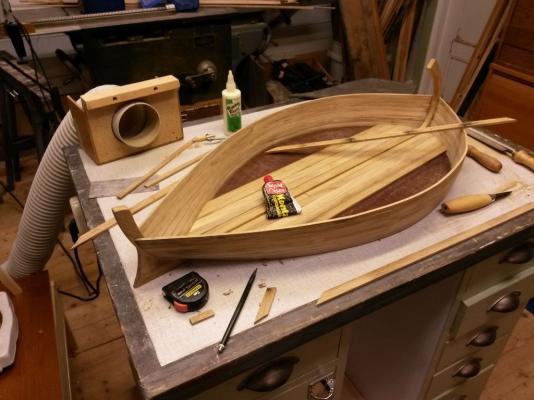
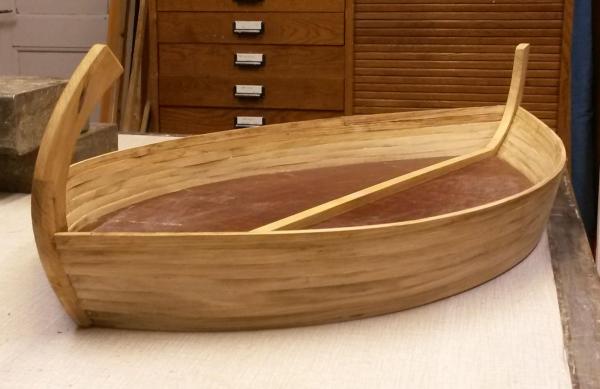
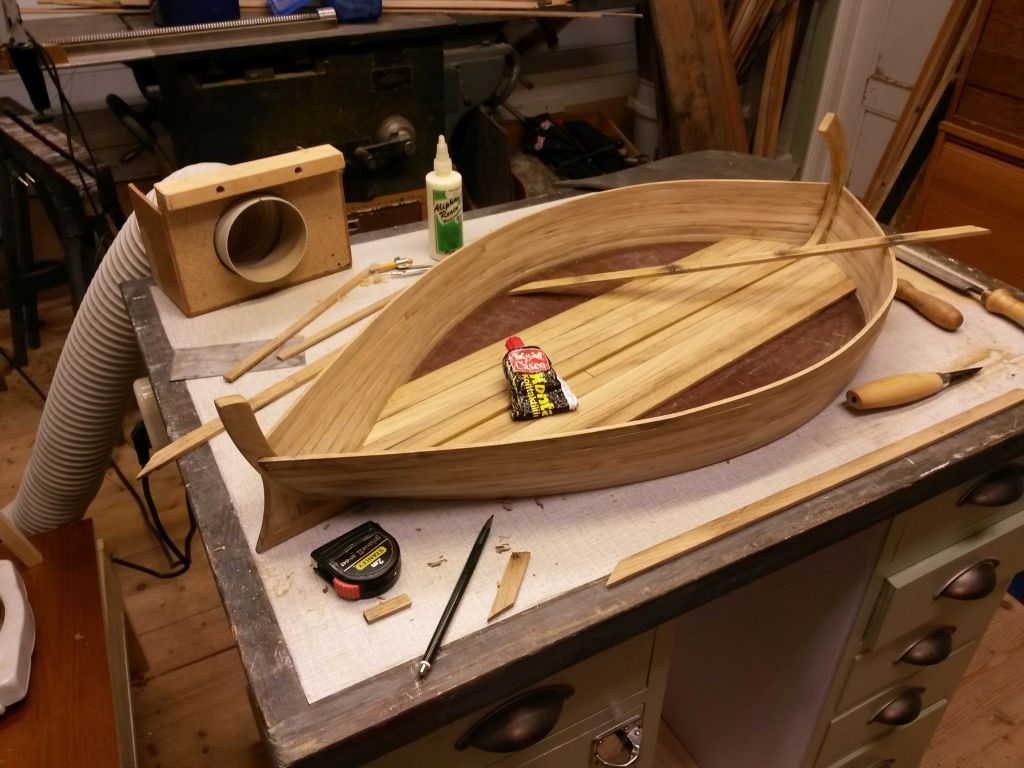
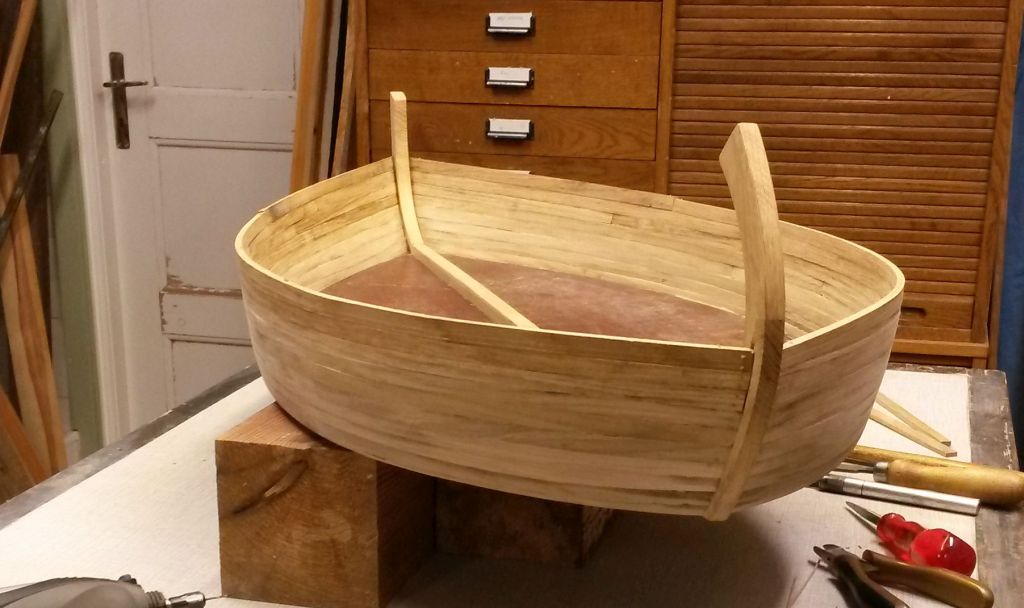
Work continued with the internal supports.
First I used card to make a template for each support.
Then rough cut the blanks on the band saw.
Next was a grand premiere for my disk sander...it even have dust extraction...
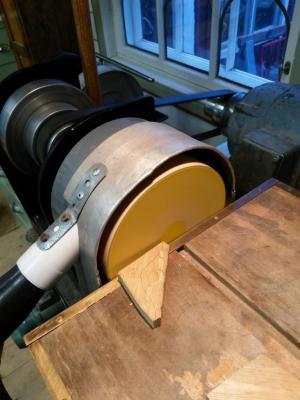
When the mating faces were decent, again off to the band saw to cut the shape.
And continued shaping.
After that focus turned to the central candle holder. I had an idea and needed some lumber to fulfill my need.
The oak piece is actually the old samson post from the same boat as the other oak I've used...
After some trial and horror (a couple of close calls due to the porosity of the old oak) it looks like this.
It is not yet glued in place. The square base needs some attention even though it will be hidden under sand.

- GrandpaPhil, cog, egkb and 4 others
-
7
-
Thanks for the "likes" and comments.
Alan, regarding my dust extraction system. The motor unit sits in the adjacent room, aka "garage". From there the outlet is led to the gardening tools store. That area is not insulated and well ventilated thanks to crappy door and walls.
-
Hi, an update again.
Work is progressing rather good now.
To show that I care for my health since contact cement smells heavily.
I mounted the big sucker (I know, I know, it is called something like dust extractor, not as fun though) on the edge of my work area.
The second picture shows the floor glued in place. A bit damp in the picture after wiping off dust.
Next up will be "frames", or more like "L"-shaped side supports.
To be continued...
-
-
-
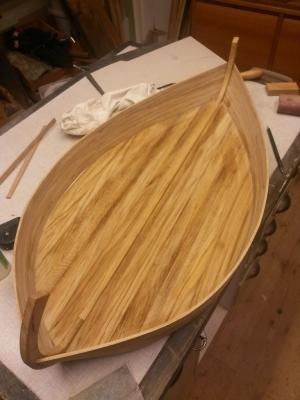
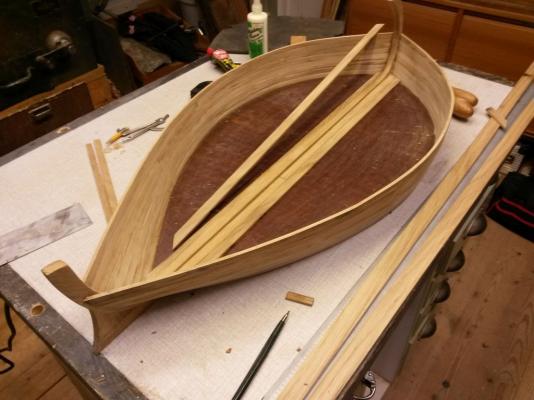
A while ago I descided to add floors to the hull. Not that it will be visible when on display filled with 3-4cm of sand. But the again, how many builders here on MSW add stuff that will be forever out of sight?
The floor boards are 5 mm thick and varying width.
I use contact cement to stick to the brown bottom and ordinary white glue on the edges.
- michael mott, ScottRC, cog and 5 others
-
8
-
Thanks for the "likes" and to Carl and John.
Yes, "if at first you don't succeed, try and try again..." planking is a skill which I'm only in the beginning of acquiring. Of course I could have selected a softer wood than oak for a start, like birch. But I wanted the durability of oak since the item will be on public display in our church.
Note to self - "don't be hasty" as Merry puts it in Lord of the Rings. Planking cant be rushed. Well, well, it can only be better next time.
The over sized planks will also take a lot of sanding and then it will look much better.
now what? ... humm, where did I put those notes...
-
-
-
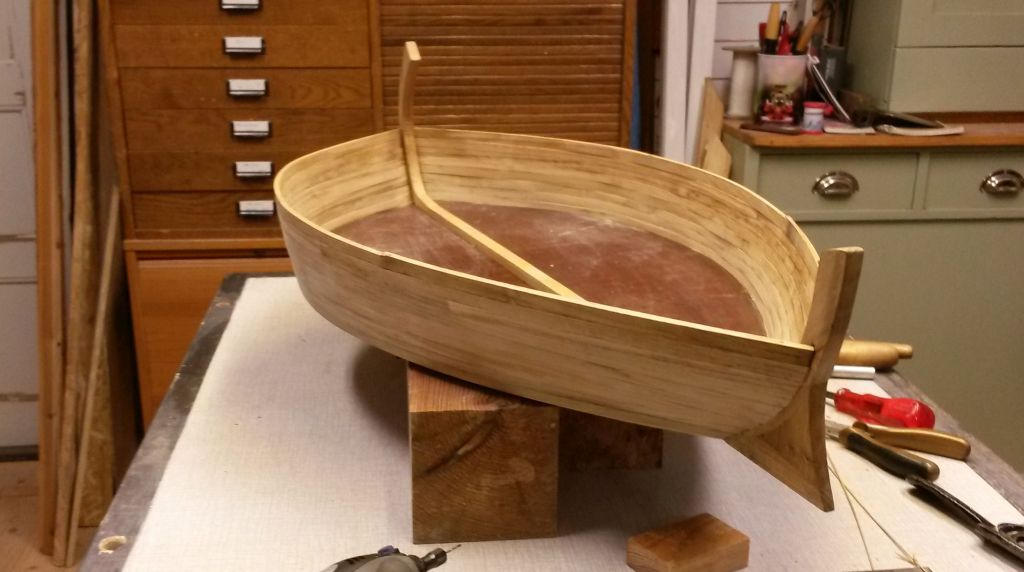
Before I called it a day, I decided that cleaning was a good idea.
This is how it stands now. Two more strakes to go and after that it is time for some frames. Well...actually more like 'L'-shaped supports than frames. (note to self - dig out that compass timber you have out in the garage...)
-
Since Michael nicked my idea for a steam chest, I decided to come up with something new...(just kidding Michael, I keep you in the highest respect, seen your abilities to construct small engines...fantastic).
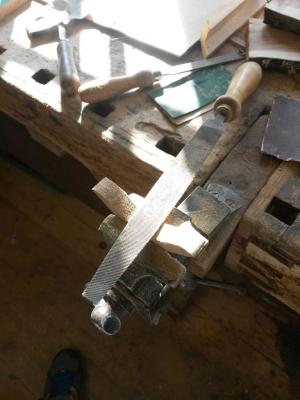
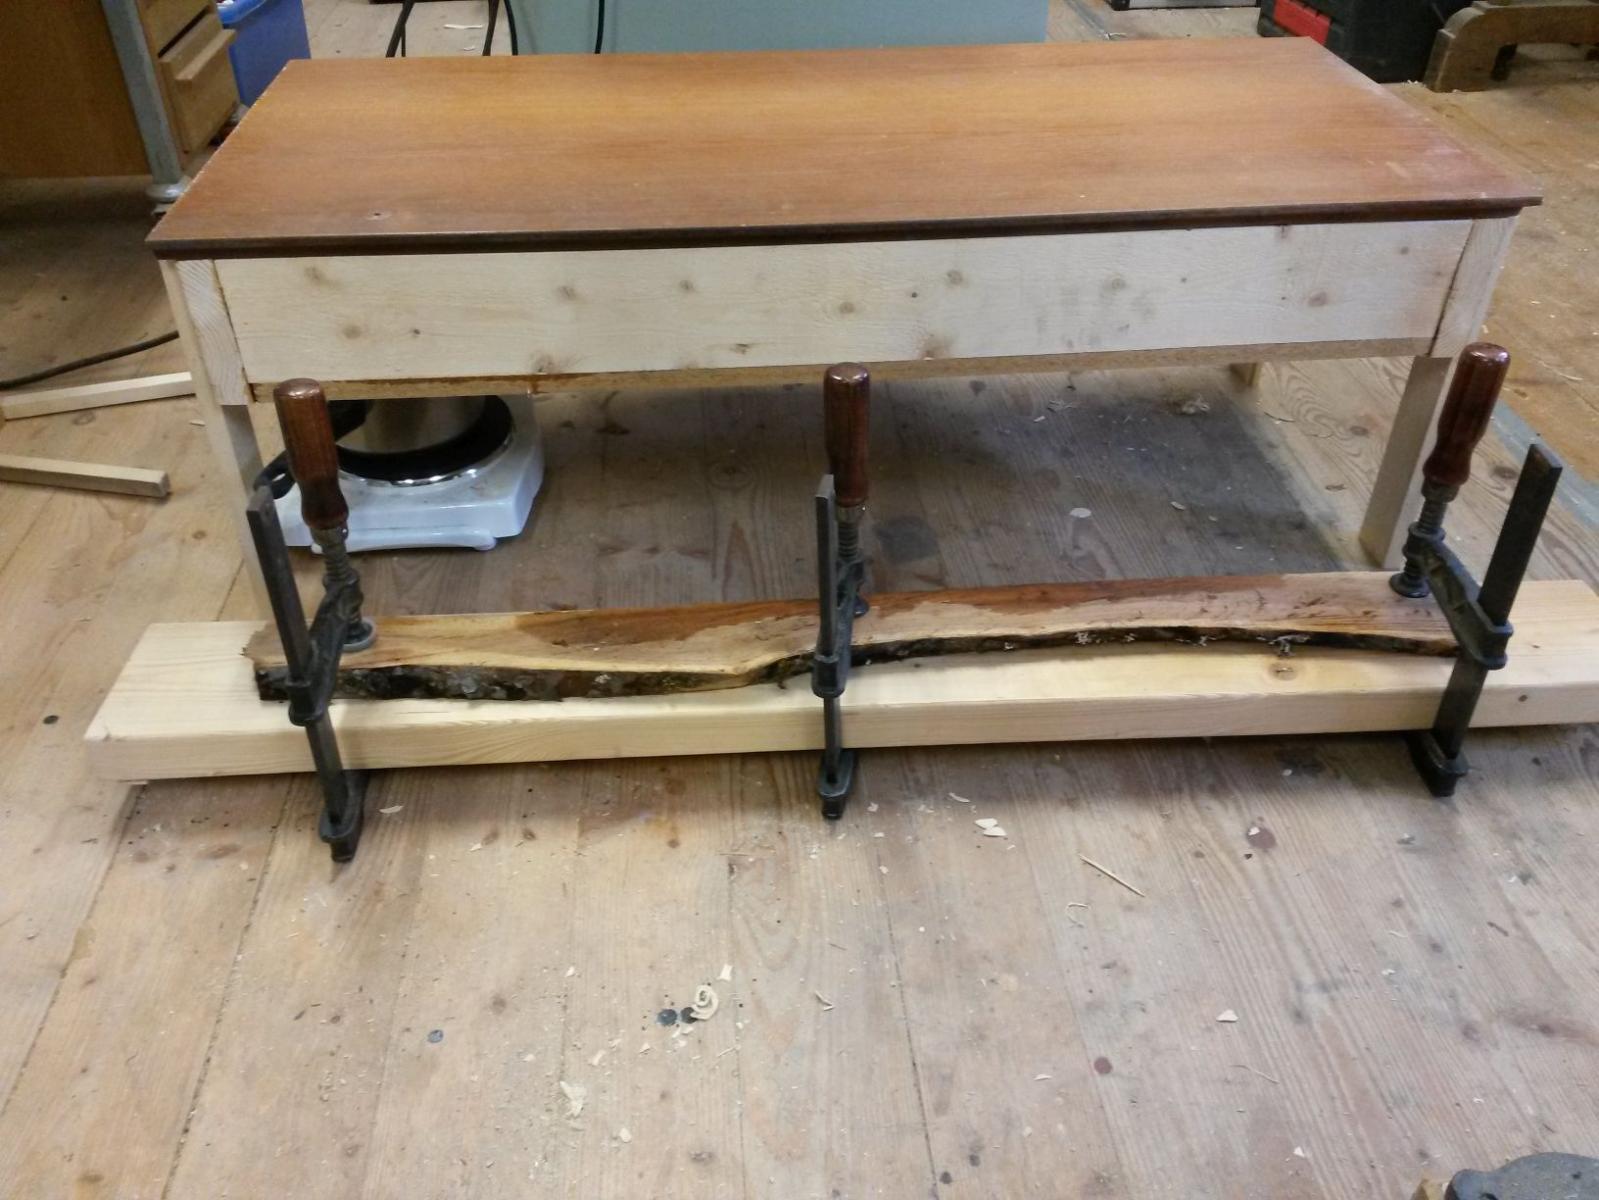
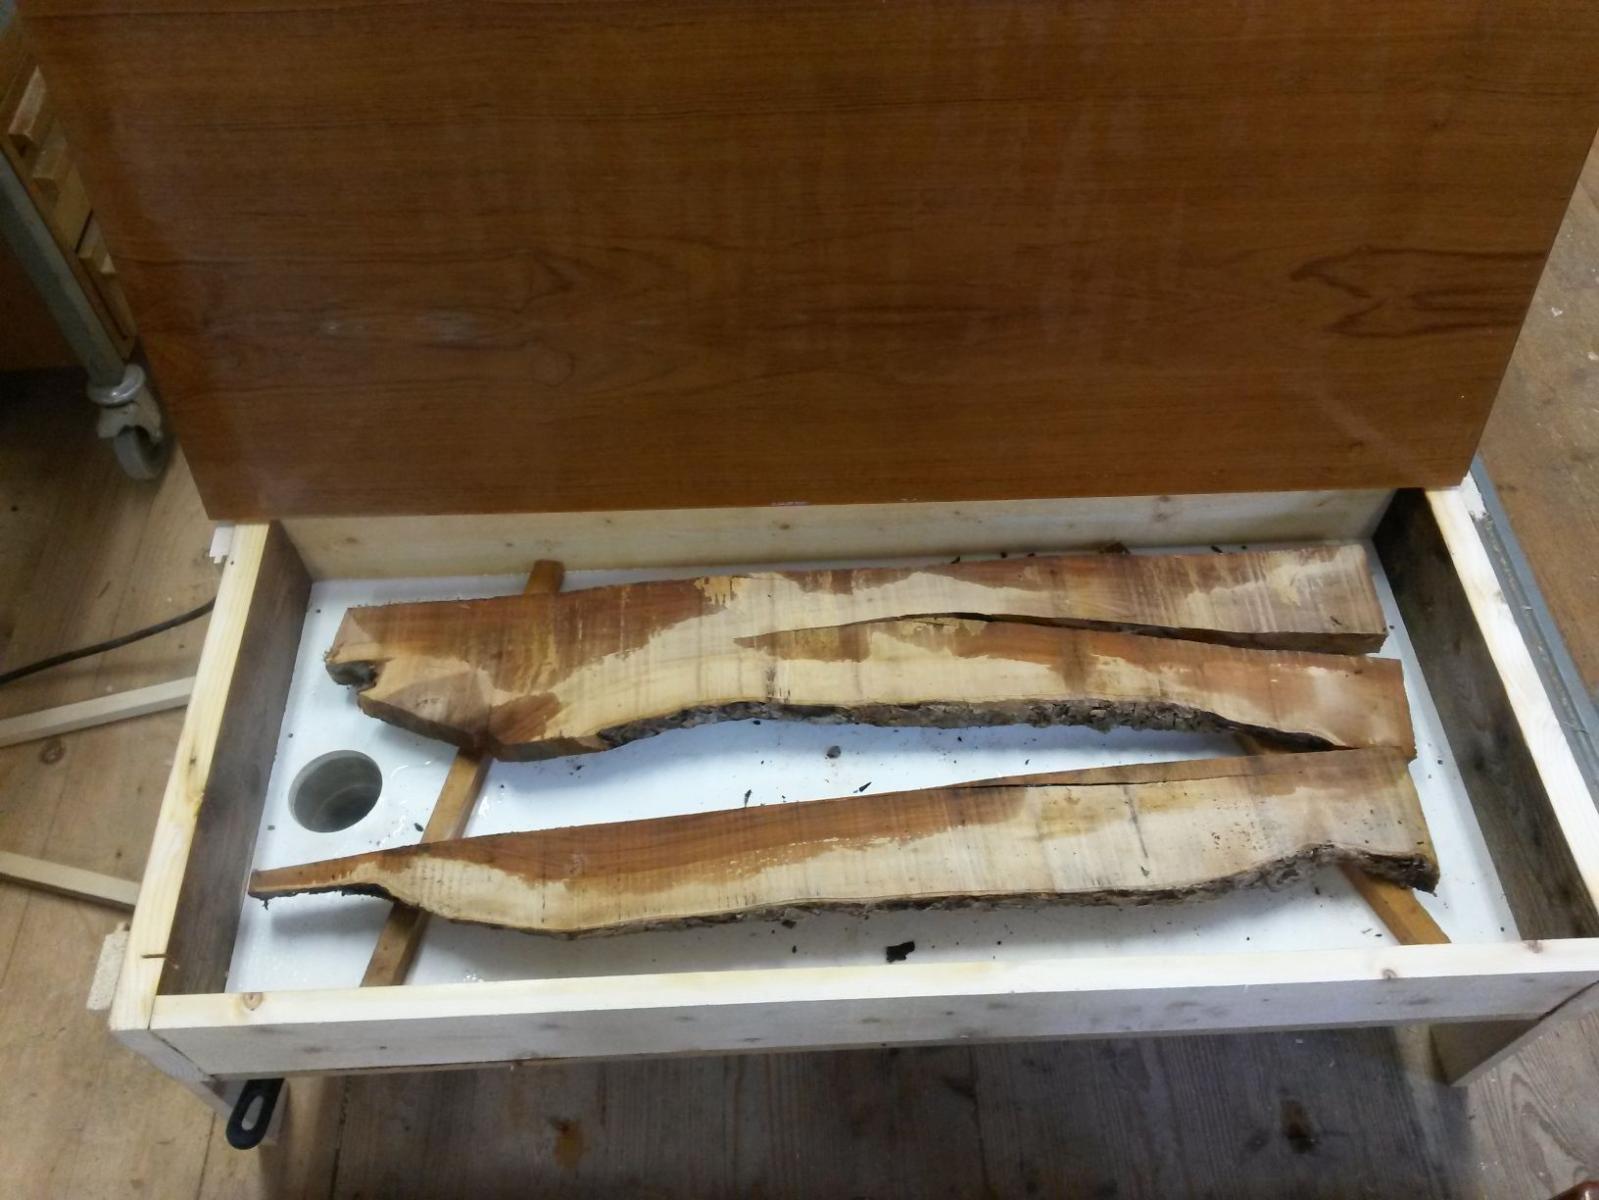
The apple tree I harvested, several years back now, warped during seasoning. It has bugged me all along. Today I put together a "slightly" larger steam chest to facilitate steaming of these billets/timbers.
It is ca 95x45 cm (3' by 1'6").
After an hour in the Turkish sauna I clamped the pieces to some sturdy timber for drying out. I will let them be there for 24 hrs.


Oh, another milestone passed this week as well...Gods wonder in a small child, my first of the "grand" type ;-)

- michael mott, aykutansin, cog and 7 others
-
10
-
-
Hi Christian,
I've missed your updates since last summer. Very nice and convincing half model for a start.
And 1:32...that's Geatan style, impressive.
Clean job on the keel so far, very nice.
- AnobiumPunctatum, Eddie and mtaylor
-
3


Greenwich Hospital barge of 1832 by druxey - FINISHED - 1:48 scale
in - Build logs for subjects built 1801 - 1850
Posted
Exellent work, as everyone else already have stated. Truly excellent.
Maybe a little late about the sweeps and their artwork.
From one picture it is clear that all dolphins are painted equal on all twelve sweeps. Doesn't that imply that half the population will swim up-side-down when the sweeps are at their stations?
Unless you've painted them on both sides and the picture fooled me somehow.