


popeye the sailor
-
Posts
16,007 -
Joined
-
Last visited
Content Type
Profiles
Forums
Gallery
Events
Everything posted by popeye the sailor
-
 very nice start! looks very well done. how was the bow shaping......pain to do? I recently bought this kit.......nice to know there will be a build to follow the deck looks great too!
 -
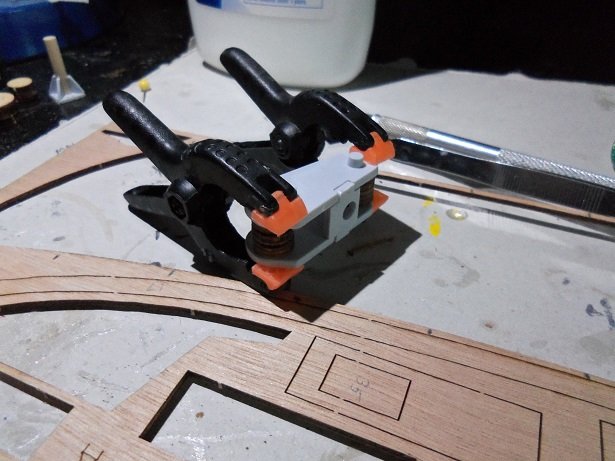
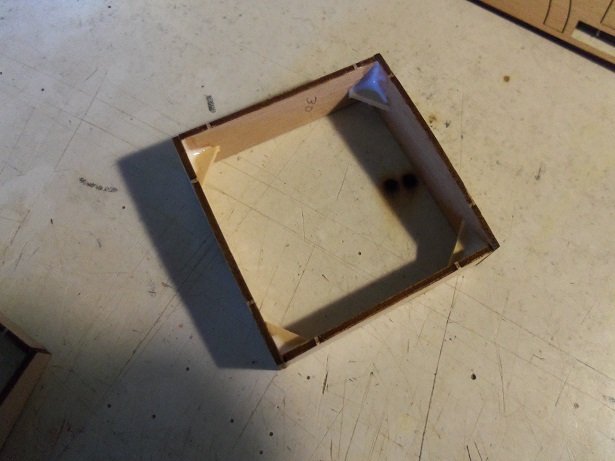
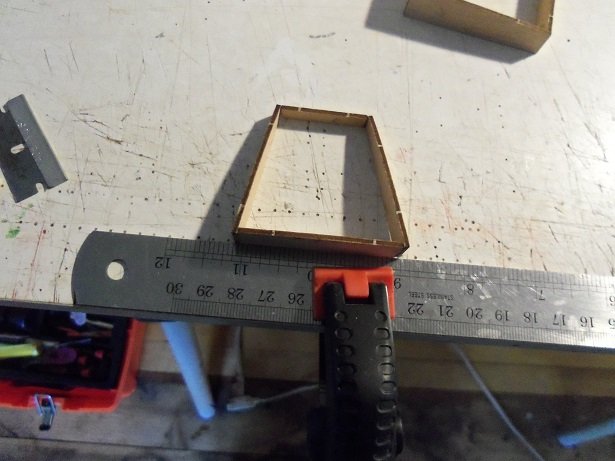
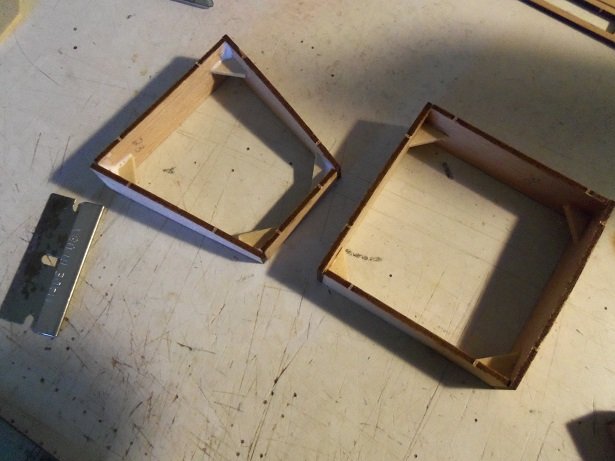
as mentioned, I'm not going to follow the instructions on the hull planking. I'll assemble the two halves together first, then plank it this was a pain......assembling the winch body. I had assembled the reels, and then sandwiched them with the sides of the body, so I could cement the bottom of it in place. while I was waiting for things to dry, I though to assemble the two main structure bases. I made a mistake on how the sides were located, so I had to take them apart and correct them.....good thing I saw this before they were completely assembled. in the end, I got the pilot house base done. I added corner brackets to make it a bit stronger. the forward structure is like a cabin, with the companionway to go below deck I would say that this is a form of vent for the cabin structure brackets were added to the cabin structure, to give it strength as well.......they both are set aside to dry. meanwhile, the winch was dry fitted onto the base, and the two half moon parts were added to the body, on the larger end. I will be working on the supplied reels, to see what can be done. if they don't look right......I will have to experiment a little to find the look i'm looking for I didn't get any pictures of my deck platform goof up.......I thought I had taken some. I'll show you in the next update. I'm not sure what upgrades the site underwent.......but it did not bode well for picture uploading. I had several failed uploads posting these updates. has anyone else experienced any problems?

- 378 replies
-
- 8
-

-
- t78 norden
- billing boats
- (and 1 more)
-
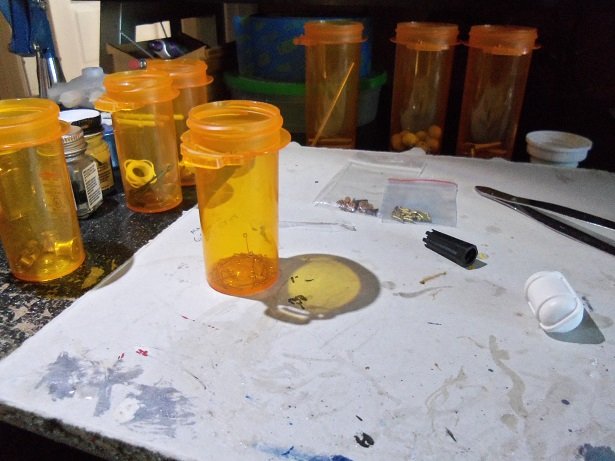
the bag of fittings was separated and put into some sort of order. I tried Ca on the life raft locker......it seems to be holding well enough. the starboard side hull frame is finished by now I got the parts for the winch together, and began to assemble it.......the base is done. the supplied piece of dowel for it was too big to fit the holes, so I substituted a smaller diameter that fit. the round part next to it is half of the reel......when put together, it looks like a short barrel. I'll explain more when I get to work on them. next to the winch body parts are the half moon looking pieces....the parts that I feel that are wrong in the kit picture. I checked in the camera........there is still a little bit more to show
- 378 replies
-
- 7
-
-
- t78 norden
- billing boats
- (and 1 more)
-
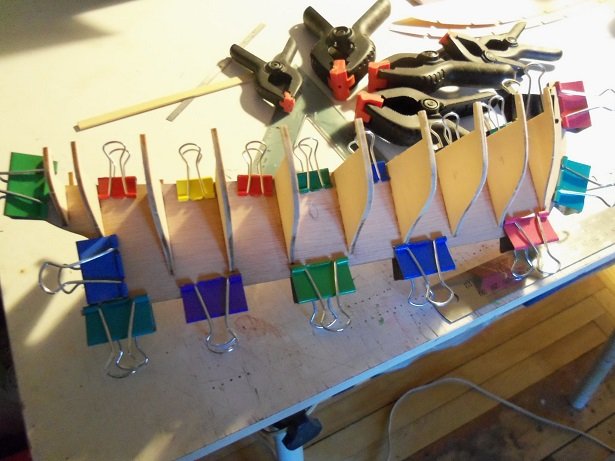
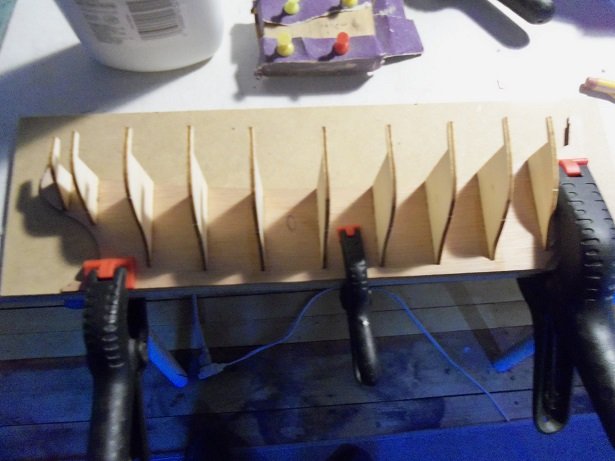
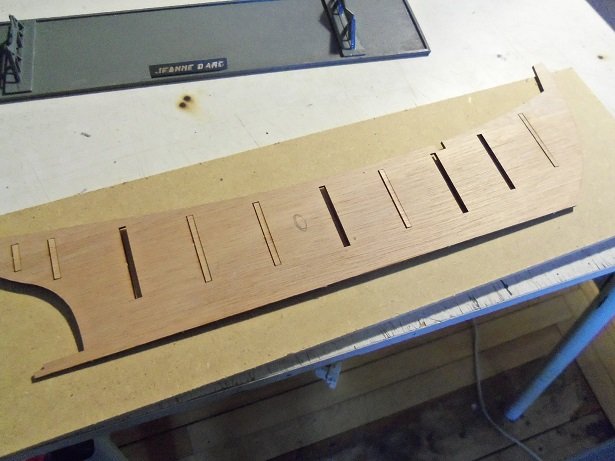
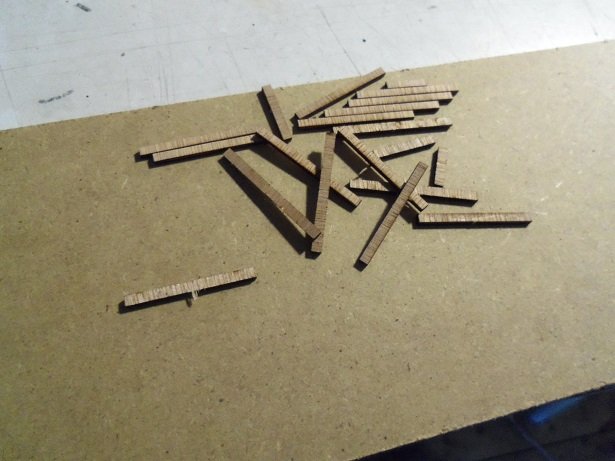
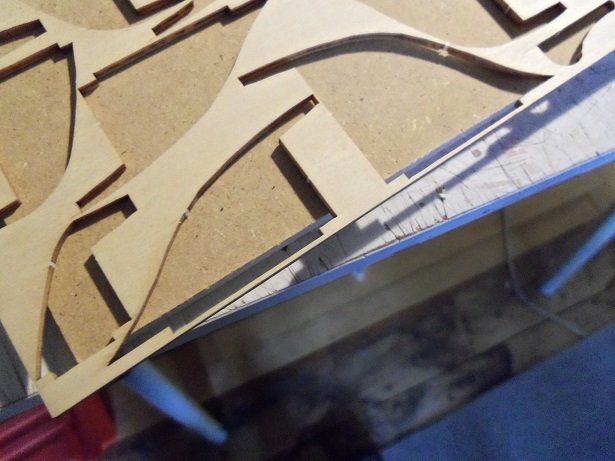
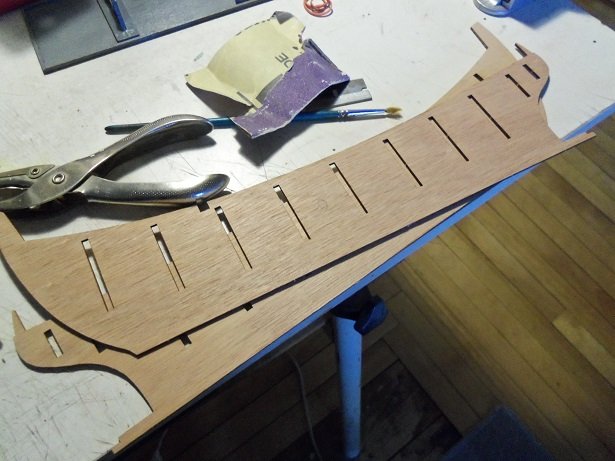
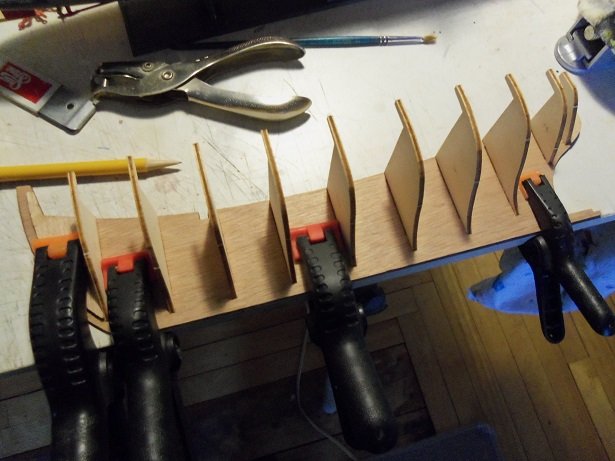
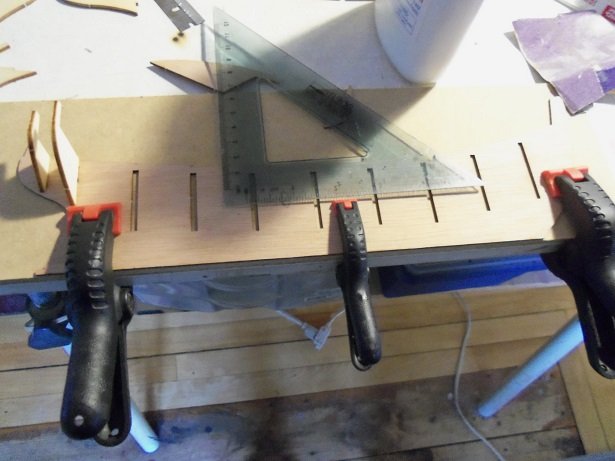
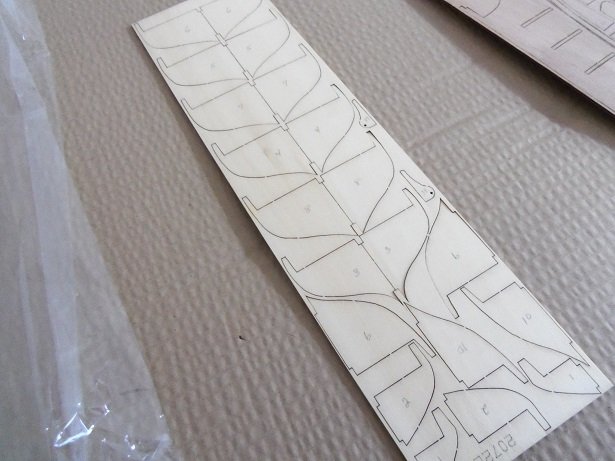
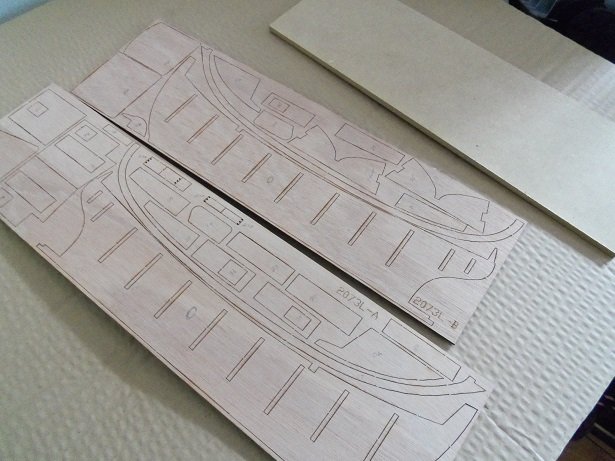
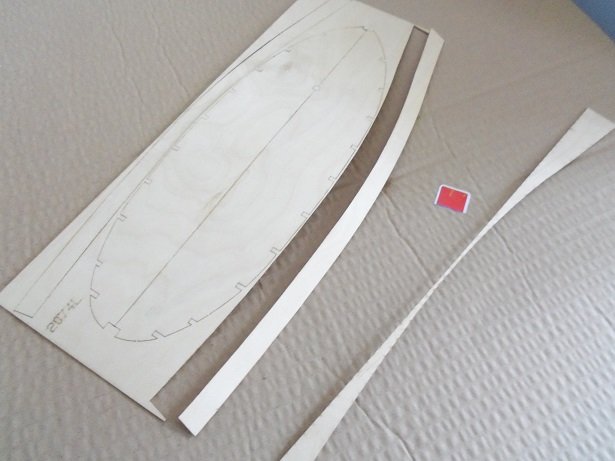
the hull frame is in two halves.........I have already gone and pre-numbered the parts. as I've pointed out in other build logs.......I save everything......right down to the punch out cast off bits. I might used them on something for the boat......if not....they might be used somewhere else. Billing did their best to utilize the wood panel......I will need to put a frame around the panel, to preserve it. they also supply that piece of board under the panel, to assemble the frame halves on. they instruct you to nail the frames to it......I prefer to clamp it to the table. with the keel halves punched out and ready to go.....the board is set up with the first side. there is a rabbit cemented to the bow and stern ends. once dry, the other half will be set up. the other side will be done as the starboard side {bow facing the opposite direction}. as I was assembling this side, I did some faring to the port side. the instructions tell you to plank both sides separately......the AmericA reissue kit is done the same way, but I chose not to follow the method. I don't think I will on this one either.

- 378 replies
-
- 9
-
-
- t78 norden
- billing boats
- (and 1 more)
-
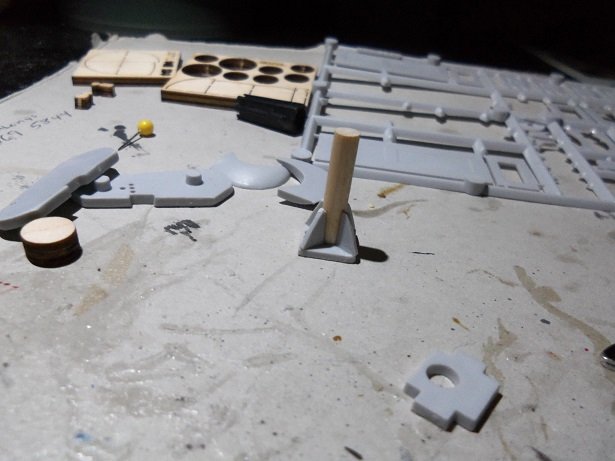
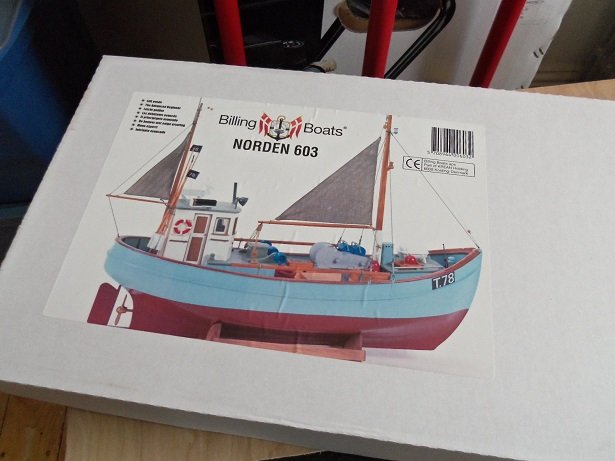
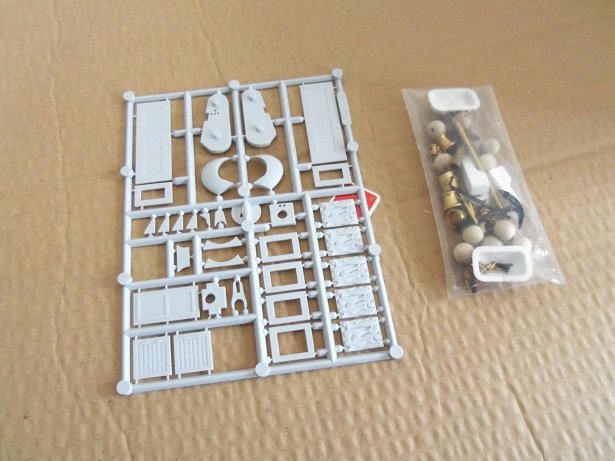
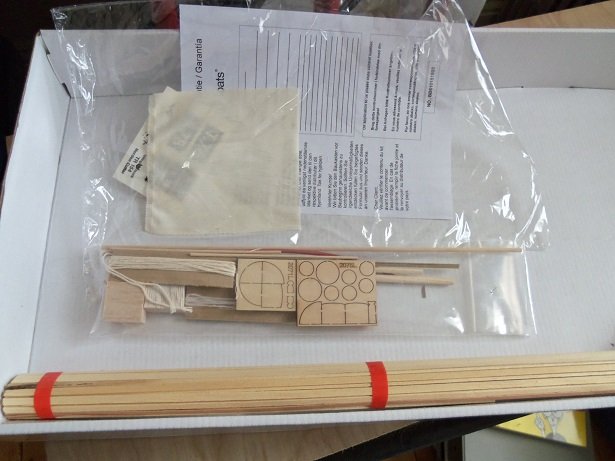
sorry about the delay.......the site must not have fully functional last night. I wrote the reply and then I got timed out!?!?!?! wow! I'm glad the site is up and running tonight........ to be honest.......I've seen so many different boats, that I was considering modeling one of those boat with the kit....I still may. I did my best to save the parts panels......if I can clone another hull from them......I just may anyway.......since there are no detailed build logs on this model, I will do my best to create one. this is an advanced beginner's kit.......believe me......there is more than enough challenge, if you think outside the box a little. that's how I'm going to do it. I did a bit of work on her already.......but first........this is the kit contents: hmmmmmm.......uploads are a little slow...is there a problem? it's probably me.....but the kit seems to have a toy=ish look to it. I think, with some extra detail and flat paints, the appearance could change quite a bit. there is a plastic sprue of parts, along with a bag of all things brass.....the fittings. then of course, the wood parts . there is the usual bundle of strip wood, and a small amount of sail cloth.
- 378 replies
-
- 7
-
-
- t78 norden
- billing boats
- (and 1 more)
-
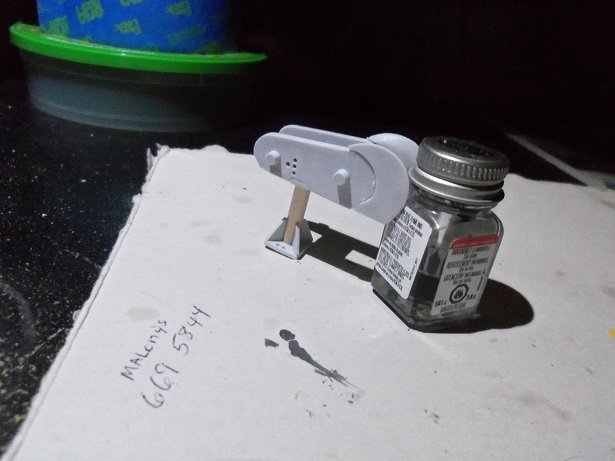
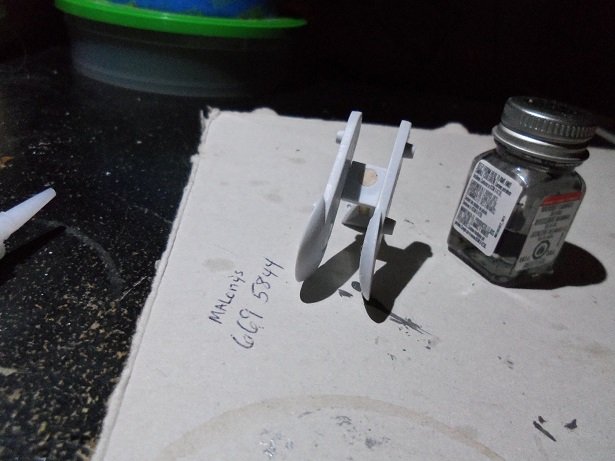
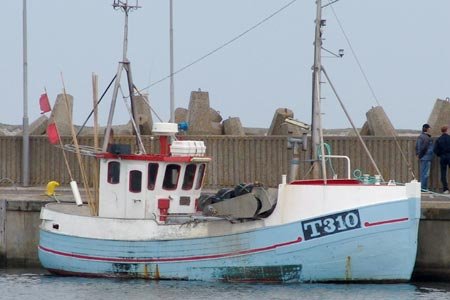
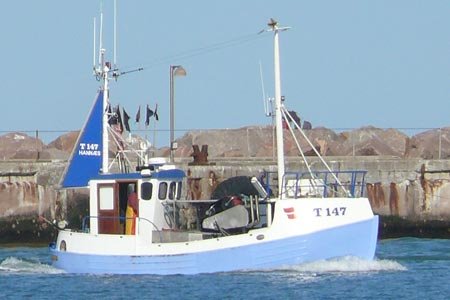
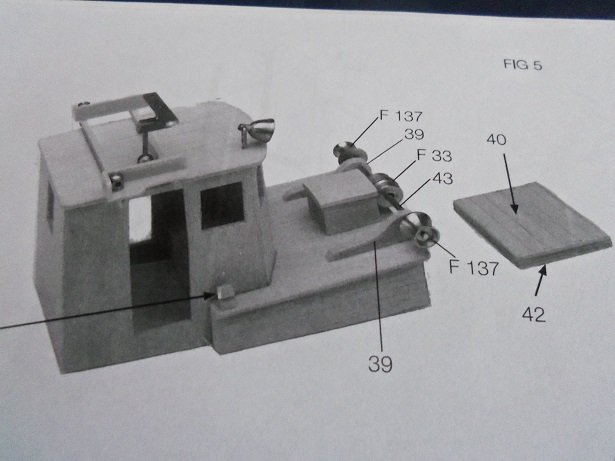
hello Robert........and a Merry Christmas to you and yours! it's getting close....the admiral has been teasing me. I have no idea what she has done......I suppose I'll find out soon enough hope Santa's good to you too! hello John........the boat is too small to be a trawler......although I did read about the power winch. it's the position of this winch in these boats that has me baffled....is it used for purse seining, or is it use to pull the boat on the beach after a day's work. this boat dates back to 1930...it would be hard to 'americanize' it, since it has the shape of a dutch boat. Billing used this basic style of boat for a few of their models......the Cux, the Mary ann, and one other that I can't think of at the moment. yes......I would like to know how it was rigged. especially, since all of the models I've looked at did absolutely nothing with the reels......they didn't concave them, of give them any shape, to give them the look of a reel. I also note that in the assembly of the winch, they have the two outer pieces, located at the larger end of the winch body......backwards. in most of the winches I've seen {you can see it in one of the pictures real good}, those two parts fan out away from the winch body. this would be logical if it was used for netting....they would act as guides, to bunch the netting on the spool. the boats changed through the years.......in the more modern boat, the hull was a few feet longer. I need to do a bit more research, but I have been hitting a brick wall, as far as seeing anything of the deck layout, or pictures of these two winches operational and rigged. I did some work to the winch.......I show you what I've done as soon as I can get the camera free of the charger.....I haven't taken the picture yet thanks for the help...I hope you'll follow along as mentioned, I built up the main part of the winch. I think it looks much better, and in line with some of the winches I've seen. I had a bit of a scare yesterday.......I almost destroyed the hull frame when I cemented in the deck platform. I was using super glue......the platform halves were giving me a tough time, so I got a bit liberal with the CA.........and then had to run an errand. when I got back, I found that a few of the clamps had been cemented to the frame! I broke a few posts and gouged the platform. I have it back together....fixed up...made me almost sorry that I started it. if it wasn't that I can't use the kitchen table for laying out the plans, I would have picked back up with the Thermopylae again. so I'll have to wait till after the holidays, before I can do so.
- 378 replies
-
- 5
-
-
- t78 norden
- billing boats
- (and 1 more)
-
USS united states instructions?
popeye the sailor replied to Seadogrich's topic in Plastic model kits
I remember seeing the kit......I believe it was on oldmodelkits.com we used to have what I considered the best hobby shop in Manchester.........the 606 hobby shop. I moved to Fla. for five years.......came back and it was gone! I bought all my stuff there.......the first Connie.......numerous cars and planes. they used to have planes hanging from the rafters..... they had a large scale B52 that was so aWESOME! I bought the first Connie there....and it's where I saw all the others........at $89.99 a kit, I had to save! the admiral got me the Santa Maria the year before last for Christmas.......it's an old kit in 1:83 scale. they have a couple 1:16 scale funny cars I wouldn't mind getting. check out the site....see how many kit you've built. it's like walking down memory lane -
USS united states instructions?
popeye the sailor replied to Seadogrich's topic in Plastic model kits
to my knowledge, Revell never reproduced a model of the President. there were several in the series, but there may have been one other.....the whaler Morgan. I have never seen the kit, but I've seen all the others. I've built all but three......almost bought the Thermopylae.....the Kearsarge and the Spanish Galleon -
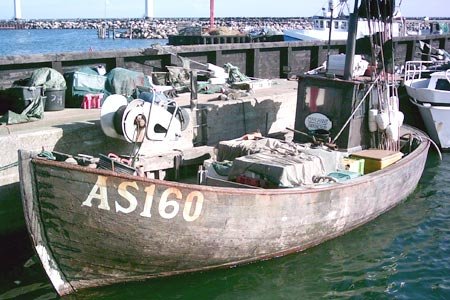
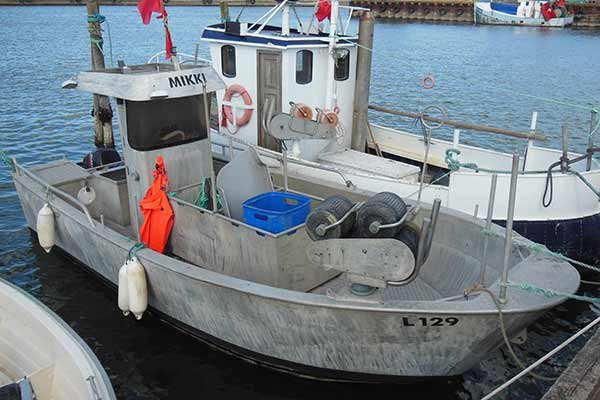
these past couple of weeks, I've been looking through the logs to see what others have done with this kit. so far, none of them answer the questions I have concerning the winch that sits on the deck, or the winch like apparatus that sit on the base of the pilot house. I went looking for Danish coasters online, to see how these pieces of equipment were rigged.......if they were rigged.......and what their function is. I found a salvage site that showed many different types of winches......but they weren't on board a boat or set up in any way. they are a weather detailer's gold mine! I also found a site...a data base, if you will, of all boats in Danmark that were either for sale, or have been decommissioned and scrapped. here is a real good picture of the apparatus, on {what we would see here in the southern states} what could be considered to be like a swamp boat. what are the shape of the reels? in the kit, and what I've seen so far on models online, none were given much detail......even the picture on the box. if this is a winch use for seine fishing, I would imagine them to have a concave look to them. on the other hand, these types of vessels are usually pulled on shore at the end of the day. the boat is ran to shore as far as the tide will take them, and beached further with the use of a rope or cable, tied to a post onshore. the other question I have, pertains to the use of this winch, located on the base of the pilot house. I have found no pictures of it......this is all I have to go on. hopefully, someone will be able to help me out with this........I think this model has quite a bit of promise, being an advanced beginner's kit. I think a little more depth and detail my enhance the model. I also did not find anything on the Norden either.


- 378 replies
-
- 10
-
-
- t78 norden
- billing boats
- (and 1 more)
-
she's coming along splendidly Bob.......the masts look sweet. I don't use any power tools either...only use an airbrush for the large areas. super job!
- 682 replies
-
- 4
-
-
- halifax
- lumberyard
- (and 1 more)
-
hey there Frank.......saw it's your birthday! whooohooo!
") have a great day my friend and I hope you get lots of surprises!
have a great day my friend and I hope you get lots of surprises!
https://www.youtube.com/watch?v=ogtmb94Dz1Q
-
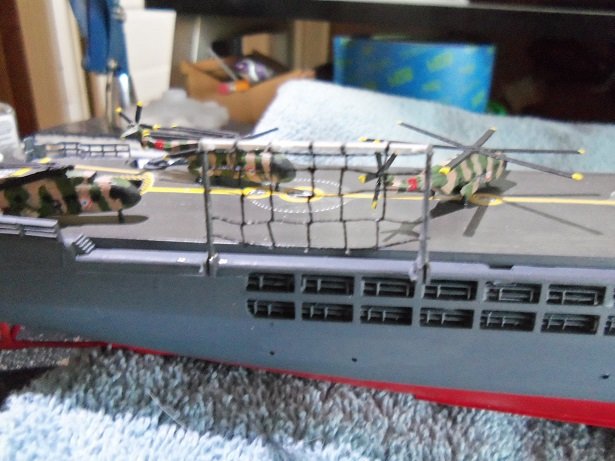
the net thing is done.......it isn't touched up yet. I'll do that when I add on the um-teen antennas......and then I can call 'er finished!
- 133 replies
-
- 9
-
-
- jeanne d arc
- heller
- (and 2 more)
-
USS united states instructions?
popeye the sailor replied to Seadogrich's topic in Plastic model kits
I want to get the two of them on the table. if I'm correct, revell cloned the United States from the Connie. all they needed to do was make the mold for the extra parts.......I think only several pieces. I also want to find out why they deleted the galley parts from the United States...I'm sure there is room for them. they didn't have to alter anything to add in the poop deck. probably to balance the kit weight........ie...the price. does anyone know the going price on a coupla grams of plastic? -
to think about it, it hasn't been that long........just look at some of the other projects. some of mine are over a year old! I recently acquired this kit.....bought it for the unbelievable price of $15.00! modeling has always been a leisurely thing.....and its not supposed to be a race. take care of your family and life issues first...we'll always be here waiting for your return. I'll be following along
- 106 replies
-
- 2
-
-
- constitution
- revell
- (and 2 more)
-
I missed that you gave it a clear coat afterwards.......see......you have things well in hand
-
don't be hard on yourself....paint can be very unforgiving. flat and gloss is two different compositions.......flat lack the suspensions that gloss paint has. if that's a resin hull, then that would account for more heart ache. resin isn't enamel friendly, so I've read. I've never dealt with resin before.....I have the Polar Lights Batmobile and it comes with resin figures of Batman and Robin.....guess now I have my chance. I also have a few bottles of Copper paint......bought way back in the mid 90's. I did the bottom of my United States with it, with no ill effect. of course, it needed to be thinned down a bit more than if it was a fresh bottle, but I'm good with that the tip of giving the hull a clear coat before paint is a good one, it will give the paint something to adhere to {be sure to use a flat and not a gloss}. metallic paints are also different.....anything added to a compound will either weaken it or change it's structure. it has the suspension additive, but when the metallic additive is added, it slows down the curing process and dries to a soft finish. it needs ample time......I didn't touch my hull for at least a day or so. even then, it can be prone to finger prints and scuffs, unless it is given a clear coat {I use a flat or semi gloss lacquer}. very nice kit you have here.....small, but all the processes are there, so there's no loss of experience {just because it's a small scale kit}. look'in good!
-
USS united states instructions?
popeye the sailor replied to Seadogrich's topic in Plastic model kits
for this ship, he might do well with the originals. I met a fellow who is doing the Revell Cutty sark.....I have those instructions as well. the kit he bought is sold by Revell /Germany.......come to find out, they have been reproducing some of the 1:96 series kits. the instructions are terrible and poorly done.....I suspect the ones I downloaded for the Connie are the same degree. the extra parts that distinct the United States from the connie are an added poop deck, railings,and roundhouse badges. I think an extra pair of gun port lids as well. they also did away with the stern galley detail......aft bulkhead, partitions, the table, and whatever else was back there {not that this matters, but the holes and slots are still there}. -
if they were rings, I'm surprised they weren't laser cut, since this is a kit. all the kits I've done had laser cut collars, with the exception of the Sergal kit. they look great none the less
- 455 replies
-
- 2
-
-
- slightly modified
- greyhound
- (and 1 more)
-
coming along really nice Russ......I like the way the roof beams jut out over the windows. the frame looks good too. are you going to use clear cello? I found some window tint film for cars that works really well for the window panes {found it in the field next to our house....of all places}. if your interested I can send you some. a piece the size of an envelope should do the trick
- 420 replies
-
- 2
-
-
- captain roy
- lugger
- (and 2 more)
-
look'in pretty sweet now OC! mast collars came out nice too
- 455 replies
-
- 3
-
-
- slightly modified
- greyhound
- (and 1 more)
-
yea.......he's OK........kept ask'in for the number of that truck! I got that darn thing rigged.......had to clear my desk so I could eat supper. I even sleep here too!
- 133 replies
-
- 4
-
-
- jeanne d arc
- heller
- (and 2 more)
