
HOLIDAY DONATION DRIVE - SUPPORT MSW - DO YOUR PART TO KEEP THIS GREAT FORUM GOING! (Only 20 donations so far - C'mon guys!)
×


popeye the sailor
-
Posts
16,007 -
Joined
-
Last visited
Content Type
Profiles
Forums
Gallery
Events
Everything posted by popeye the sailor
-
 super progress Tom.......the bow rigging looks really good!
- 1,350 replies
-
- 1
-

-
- constitution
- model shipways
- (and 1 more)
-
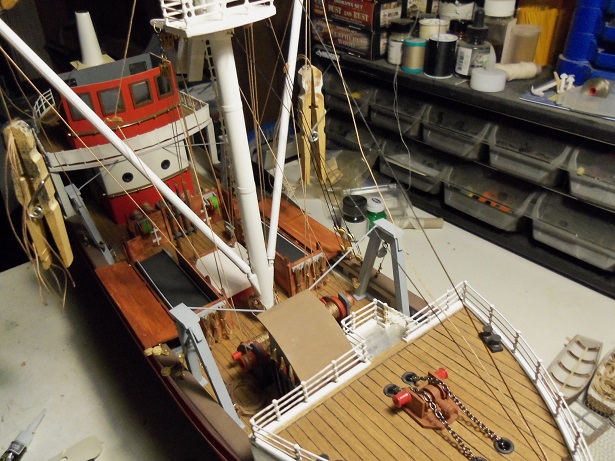
I'm amazed by the comments.....thank you I'm glad I let my imagination get the better of me, instead of just doing the bare bones, like I was going to. I still have more to go, till I can get to the aft section. one more day of work thanks to all who hit the like button as well thanks Dupree..........when you begin you next build, please let me know. you have me curious now thanks Derek......I normally use brass rod, but I had run out. the MIG wire would have been thrown out anyway, so I put it to good use. it solders well to boot and fit in the Billings stanchions. I've not seen TIG wire, but I'm sure there isn't much of a difference. should you see anything else you'd like to try, be my guest. it's all about sharing, here at MSW thanks Pat.......still a ways to go.......so I won't be seeing the finish line any time soon. glad you like the progress there are kits around Medic.......Billing's has a few. although, they are generic and lack certain qualities. I have many pictures of fishing boats and trawlers......they give me the ideas, to add in some of the aspects of detail. for Christmas, the admiral got the the Billing's Norden. it's an advanced beginner's kit. it makes a nice model out of the box.......but add some rope coils, buoys, and other bits.....it really makes a difference. if you settle on one, let me know.......I'd like to follow along thanks for the good word! thanks Rob! I wish I knew how to that....I have pictures of models done up like that. really neat stuff! thanks Lawrence thanks Kees.........I'm dying to see yours! I hope you are well and getting back into the ship building groove again thanks John.......yea.....getting all that rope off of it did wonders actually, that's a good picture of the fore deck I need to make some vents for it, just like the ones I made for the A.G. more to go my friend....... again....thanks for the kind comments. hope to have more progress soon.
-
thanks Patrick........I have been trying to do a little planking over the week end....but I haven't been able to. that's OK........tomorrow is my 'Friday'.......playtime is coming! I was confused at first to your post.......then I realized what you meant. I still have to level out the aft bulwarks, and then I can sand it to the proper height. then she'll look nice 'n trim. thanks for the good word thanks for the likes too!
- 453 replies
-
- 7
-
-
- thermopylae
- sergal
- (and 1 more)
-
I didn't put a like to the results of your trying to cut out the designs.......I can sympathize with you......I know what petrified wood cuts like but after seeing what you did........I don't feel so bad for you........you did a far better job, IMHO! very nicely done.....the rest of your structures look splendid as well. can't wait till you do more
-
hello J welcome to the log on this fine vessel I do it both ways actually. I've gone down the frame enough.......I don't think there's much of a threat that it will warp out on me. it's not a big hull either. I just concentrated on one side.......which is done now. folks do both sides at once, so both side can be done alike. once stained, the planking shows and looks more appealing to the eye. where this hull is to be painted, it's really not going to matter much at all. I have a few visible plank line that I need to get rid of, since I plan not doing the second planking. I have a good idea of what I want the hull to look like, I should flip the plans over {I have them pinned to the wall}, and work on the structures. they are similar to what your doing, but I have some photo etch, that I got for it. I will most likely assemble them both ways and see how they look. the extra ones won't go to waste..... not a problem Dr. Per.......as long as your comfy enjoy
- 453 replies
-
- 6
-
-
- thermopylae
- sergal
- (and 1 more)
-
glad to see your back Bug..........she's look'in awesome!
- 2,191 replies
-
- 4
-
-
- confederacy
- Model Shipways
- (and 1 more)
-
your definitely on a mission now but do be careful......balsa is a great impressionist .....dings very easy. I am glad that you didn't think I was being pushy or something........purely suggestive other folks have done it this way as well.......Capt. Bob, on some of his builds......Nenad, on his Cutty, and Catopower {Clare Hess}, on some of his as well. due to the scale of the model, the plug might have been the best alternative, but I know you can do this. Billings assembles their pilot houses.......the odd shape with windows and doors openings. I get a kick out of doing those they use a sort of plywood though......but it gives a flat surface. what you've done so far looks real good.........gonna be interesting to see
- 258 replies
-
- 1
-
-
- harriet lane
- model shipways
- (and 1 more)
-
welcome Dr. Per.........I consider it an honor I hope you brought your couch with you I may need therapy I hope you enjoy.
- 453 replies
-
- 7
-
-
- thermopylae
- sergal
- (and 1 more)
-
How much are you willing to pay
popeye the sailor replied to Worldway's topic in Wood ship model kits
I think the most expensive kit I've ever bought, was like $249.00. I've got this habit of saving the parts panels and tracing out the hull parts for other hulls. I outfit them any way I want. all I buy is wood and fittings. I did get a kit for Christmas........that keeps the 'gene pool' fresh. he...he...he -
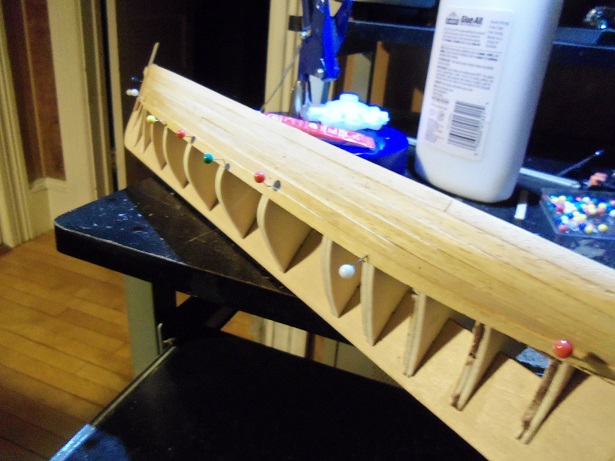
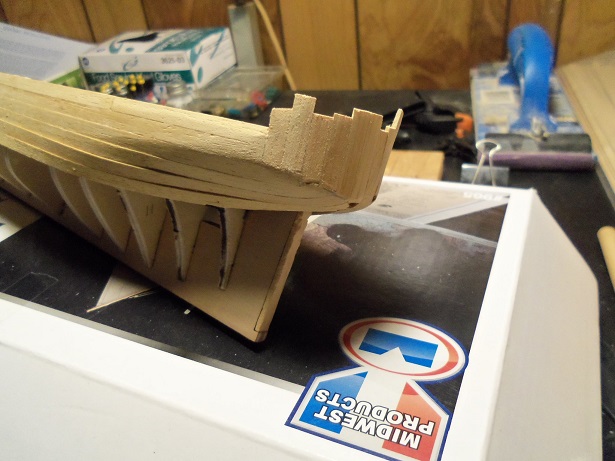
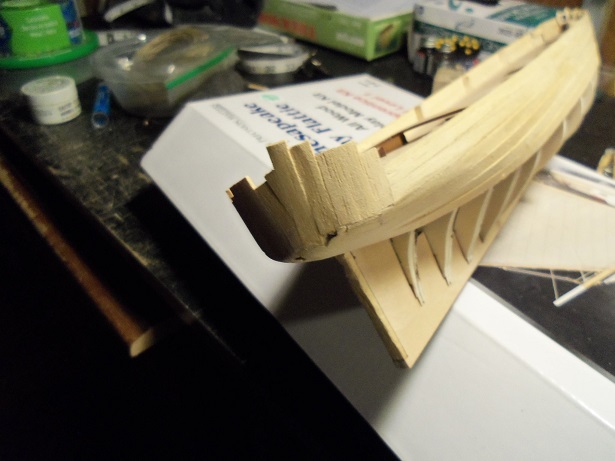
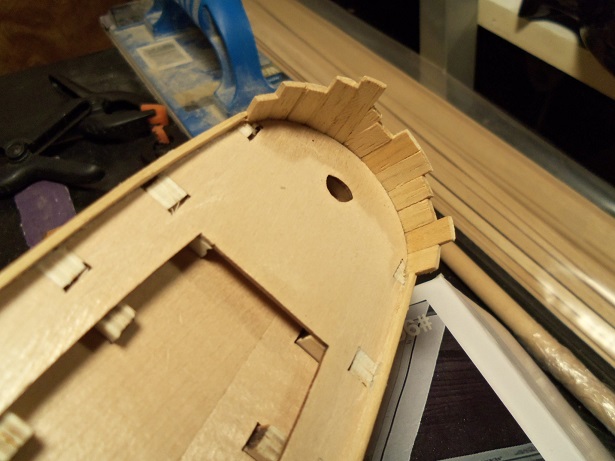
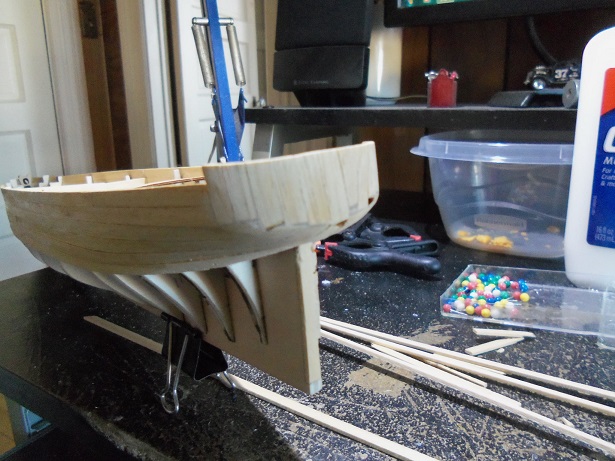
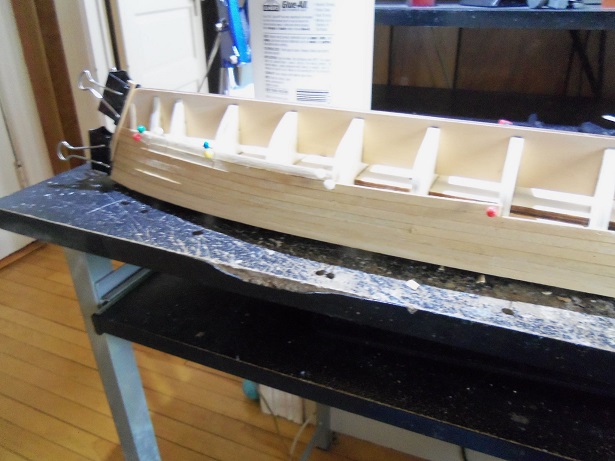
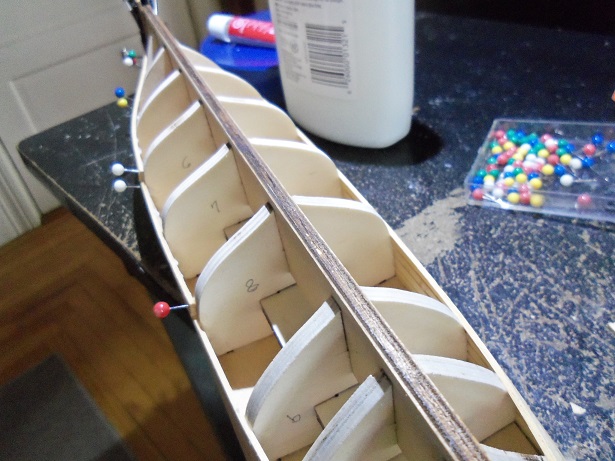
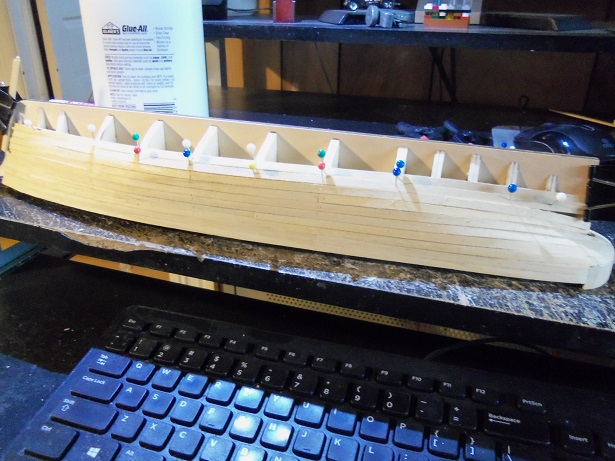
I've put together an update for 'ole Thermie.........still in a kind of rough state. I've done a bit of sanding......not a lot...just a nervous twitch I got. it bothers me if I don't see glimmers of hope, while I'm progressing along. so, from my last update, I was at this point with the planking. equal on both sides, the counter area was pretty much planked, making way for the planking of the transom. this is to be done with vertical planking. the planking at the counter did not go as well, as I would have liked, so the transom planking was beveled slightly at the root, so they would fit better in the recess left all around. there are a couple of chiggers, where the planking cracked and broke, but with a bit of filler, they will be gone. it looked like a pick-ed fence. some sanding made it look a bit better. I was critical with the deck line inside.......I have one picture, where this area looks like it was carved....and not very defined either. I have what I want to do here in my head.....if it works out, I'll be a happy camper. a little more sanding was done, before I gave it a haircut. it was left with a rise, so I can add to the bulwarks and level them off to the poop deck. from here, I settled on the starboard side, and began planking to the keel. I'll get one side done....and then the other. after a while, the starboard showed a noticeable difference to the port side....best seen in this view. so now, it's focus on this side and close 'er up. then I;ll have a good idea of what to do for the other side. still planking away........making sawdust
- 453 replies
-
- 16
-
-
- thermopylae
- sergal
- (and 1 more)
-
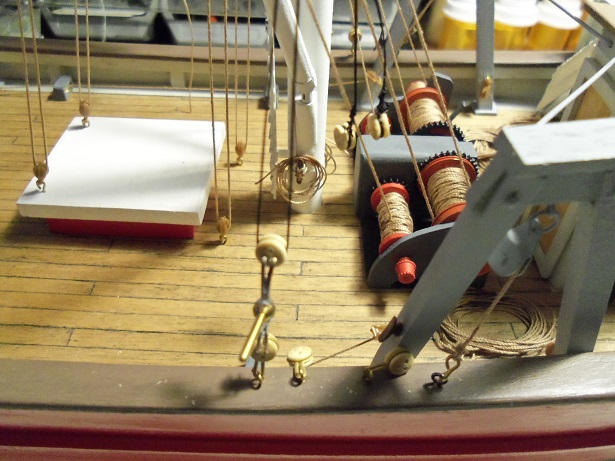
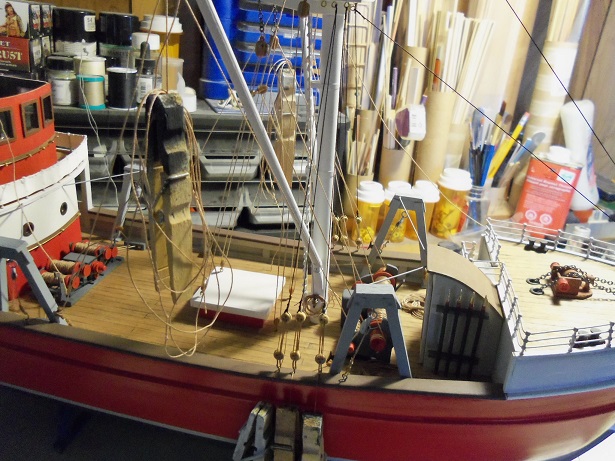
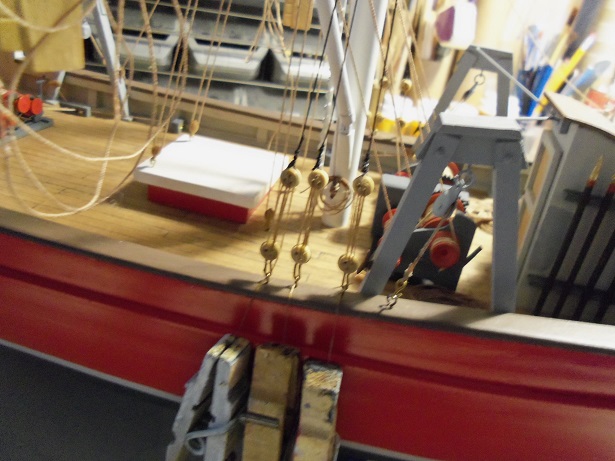
thanks Nils......and to all who hit the like button there is a small update.....hoping to get more done today. the starboard side is to get the shroud treatment. added here are the fore stays at the bow. the jig I made works great....yea......I'm kick'in myself for not making one sooner. the shrouds are all tied now........waiting to be made permanent. so tie them off and add the spreader bars are all that needs to be done.......then I can tie off the forward haul lines and make rope coils for them. oh........and the few other things
- 747 replies
-
- 14
-
-
unbelievable work Nils! very impressive!
- 2,625 replies
-
- 4
-
-
- kaiser wilhelm der grosse
- passenger steamer
- (and 1 more)
-
thanks Pat......yep.....I am adding one. this will be where I will tie off the base net line. thanks for confirming that as well
-
look'in cool bob.......I'm gonna have to learn to clove hitch. guilty of tying the regular knot. great job!
-
multitasking never faired well with ship modeling....careful now, or we'll be seeing you on the 'what if' forum
-
thanks for the kind comments and all the likes! I'm a bit flattered. jes' my b-b-b-boat. thanks Mark and piet........gee, here I was thinking about the railings. guess I was look'in at the horse from the wrong end so, really......you think I'd be spinn'in my wheels doing ratlines. not even part way up? {I know.......it sounds like I'm begging for it, HuH! } thanks for clearing that up for me thanks Lawrence...I really appreciate the kind comment
-
I love H.L. for that..........you can find eye bolts in the jewelry isle........buoys in the bead isle.......deck calking writing isle {the isles of wight} {a pun....who knows!} you never know what you'll find. I wish you luck {let me know if you find anything good } I be wait'in ta see
-
I be look'in............jes' sniff'in that sawdust! good ta hear yer mak'in time
-
there's quite a few folks who aren't happy with scribed or printed decks....I use to get complaints when I helped Tom @ Billings {fielding problems} about it. you planked the deck though......right? you can sand down those pieces and plank over them. another thing you can try with the structure, is paint the plug, then paint up some narrow thin strip....and then map it out. cut out those windows or use 1/8 screen mesh {cut out little squares} to put in. with what your doing........you can sand them after they are cemented to the template.......but stripping them from the template......is that going to ruin the windows? you got a plan......and I shouldn't pry
- 258 replies
-
- 2
-
-
- harriet lane
- model shipways
- (and 1 more)
-
don't worry Sam.........Gibbs loves everybody! good to have you following along! either that, or your admiral is a playboy bunny if that's the case.....lucky man! thanks OC! awwww.....you haven't missed much Patrick. I like hull planking, but it can be boring sometimes. enjoy hey there Hof........besides Midwest, this is the only other model brand I've tried, besides Billings. I'm finding it to have slightly different learning curves, but it's not too tough to figure out. so far, I haven't had the need to soak planks........the counter / transom seems to be working out alright, now that I filled in the stern tip. it won't be but a few more planks, and then I'll be head'in down the stem anyway. and I'm really glad I chose to go with the wider thicker planking.......these thin planks would have been a nightmare. oh well......with any luck, I can get the hull planked quickly and get 'er squared away. thanks everyone for the good word and the likes!
- 453 replies
-
- 9
-
-
- thermopylae
- sergal
- (and 1 more)