popeye the sailor
-
Posts
16,007 -
Joined
-
Last visited
Content Type
Profiles
Forums
Gallery
Events
Everything posted by popeye the sailor
-
 interesting conversation with the admiral last night........I told her about part of the idea that I thought up........and she actually tried to get me to keep the roof. yes Piet.......a different take on the roof might put her back on the road to probability. the height alone is the problem....kinda thought that myself after I made it. I'll have to play with it to see how it will work thanks for the good word! thanks again for all your nice comments.....and for the likes! next couple of days are going to be busy for me.......hope to have an update soon
 -
galley structure looks sweet Peter.......nicely done!
-
thanks to everyone for the kind comments....and to those that hit the like button. I tried to keep fantasy and probability in balance...it's obvious that I've strayed more towards the fantasy side of things. still......quite a bit can be done to make it all come together. to try and reclaim the probability aspect, I would need to do some reconstruction. ........a thought just came to me I agree with you..........the height is the factor here........keep everything else, but ditch the height thing. .....and I've thought up just the thing
-
totally agree Bob.......you've made some super progress. how far do the plate{s} jut out?
- 348 replies
-
- 4
-

-
- pequot
- cable ship
- (and 1 more)
-
thanks Patrick George and Ed I started in the stern wall.......I can only do a few before they get too unruly and I have to clamp them. when the walls are done, I'll either give them a coat of flat lacquer, or I have some poly urethane. that should bring out more of the color thanks for the good word!
-
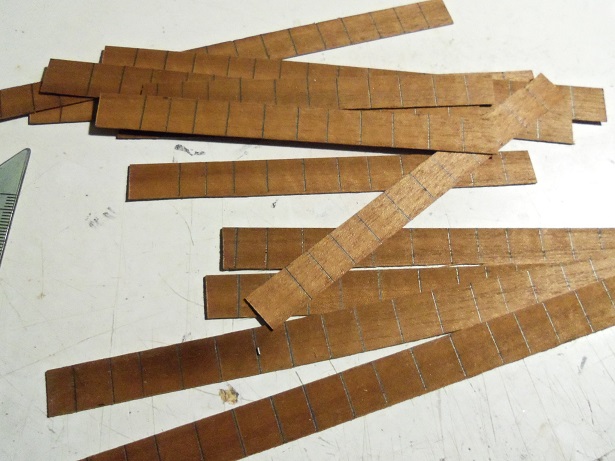
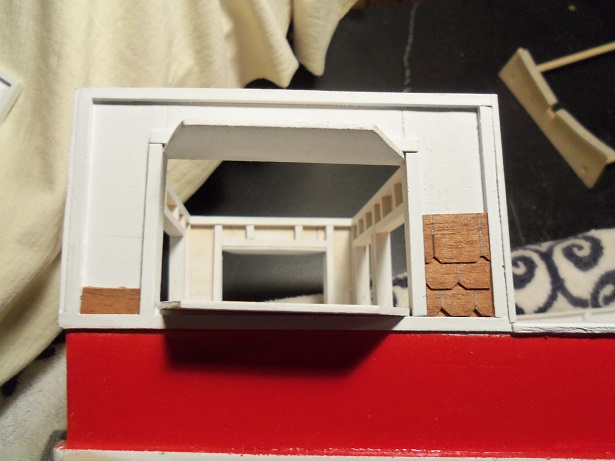
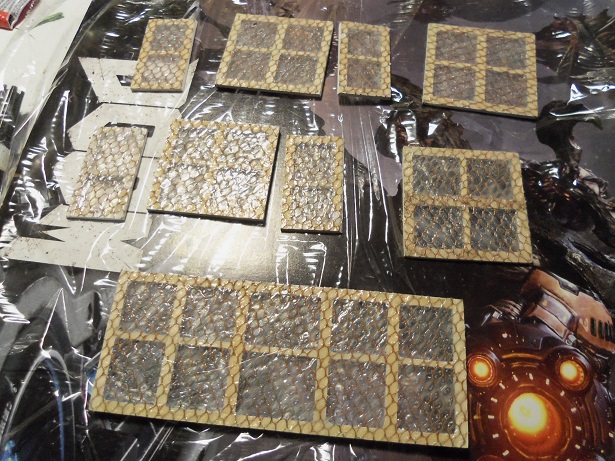
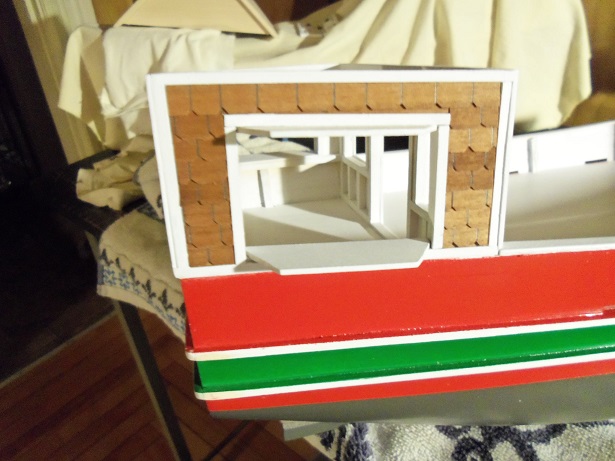
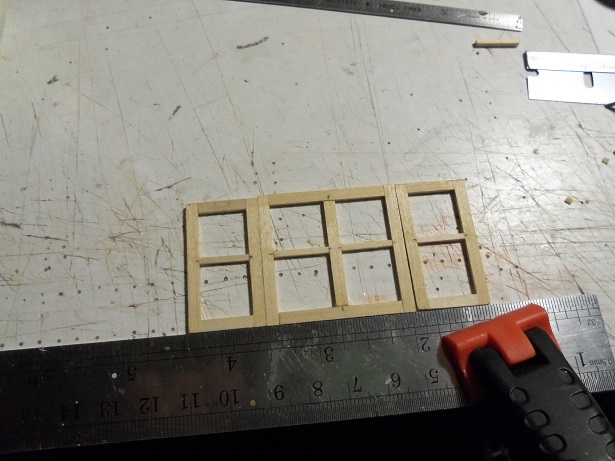
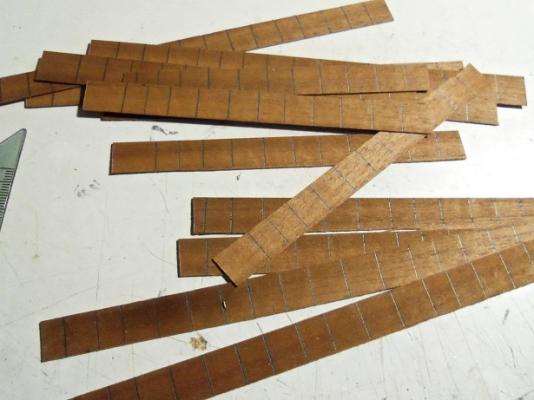
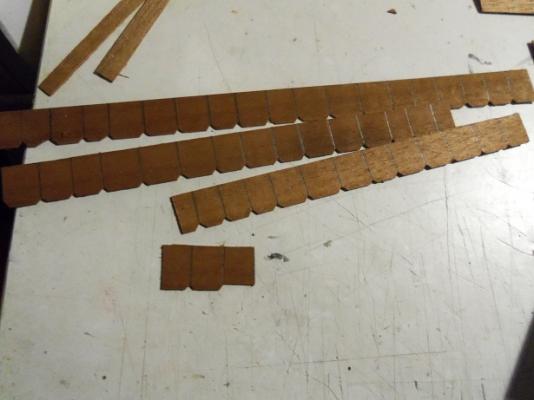
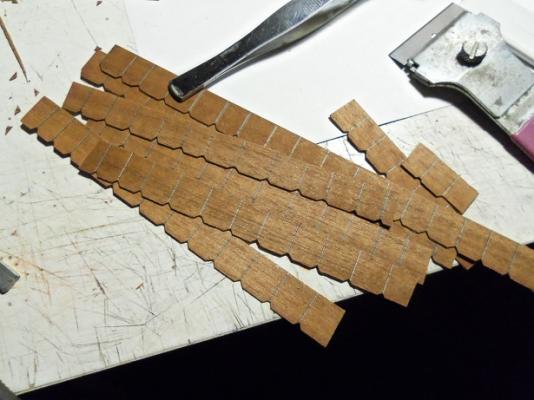
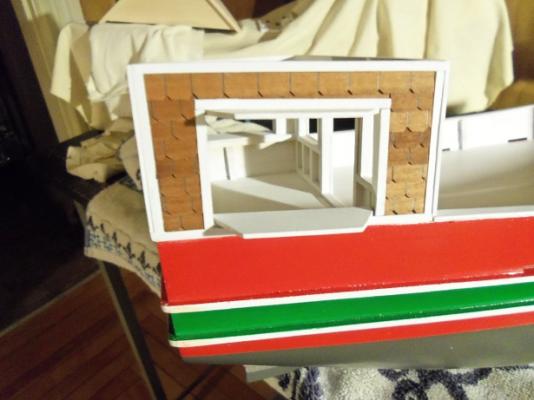
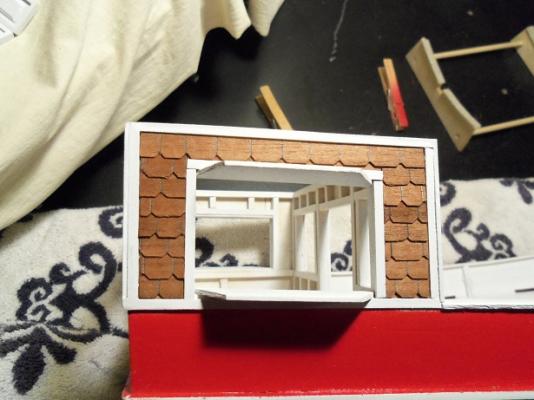
I got a bit more done today......wasn't sure what I wanted to do first. I settled on some shingle work......finally do something with all that mahogany I chopped up. setting up the ruler again, lines were drawn on the strips.......I used 10 mm as a guide, but they are different widths. they will give the appearance of separation lines between the shingles. this isn't all of them......just enough to start off with. for the next step in preparing them, I took a razor blade and cut triangles out at the ends of the lines. I started with the starboard wall........cutting one of the bare strips into narrower strips. these strips I will line the bottom of the wall 'field', in between the trim. then the first shingle strip is cut and placed, it will act as a backing for the triangle cutouts, and won't show any white. I kept the stagger of visible shingles @ 8 mm....don't know why I chose it.........seemed like a good increment. as they climbed up the wall, they presented a problem. originally I was going to make them from basswood...individual shingles, and I was going to taper the thickness. but, I used the mahogany instead, and I didn't taper them. now the shingles wanted to jut out from the wall. to cure that, I cut short lengths of odd pieces of planking, and clamped them, in an effort to make them lay flat on each other. as you can see, the triangle cutouts are also staggered. the windows got shuffled around while this was going on......first on my desk.....later on the main table. I examined them at that point and flipped them over. they came free from the plastic wrap easily......now they can get some air, if they need it. they're very shiny finally, the wall was done and had time to dry........I could remove all the clamping stuff. the 8 mm spacing was good all the way up. three walls left.........that's not counting the roof


-
looking great Mark......good to see thing going your way gonna be a sweet looking transom when your done
-
hey there Frank! thanks a lot.......... lease...........I dunno........can ya sing? B.Y.O.O. {bring your own otterman} thanks Mark flipped them back over this morning.......they stuck to the plastic wrap, but peeled right off with no trouble. I'm giving them more time to cure........look really shiny I started the siding shingle work ........gonna be a bit slower than I thought. tell ya when I do the update
-
thanks Ed and urmilla {I hope I spelt your name right}....you just keep watch'in. just a little more to go, and I'll hopefully be dress'in 'er up. you'll think it's Christmas in July! thanks for look'in in and the good word! thanks George......got my fingers crossed!
-
thanks slow2cool.......I know my plastic modeling friends use it as well. I've never used it...... I'm pretty sure though that future or an equivalent, could be used for window maker. I've used that product too........put out by Testor's. we'll see how this works out. thanks for looking in
-
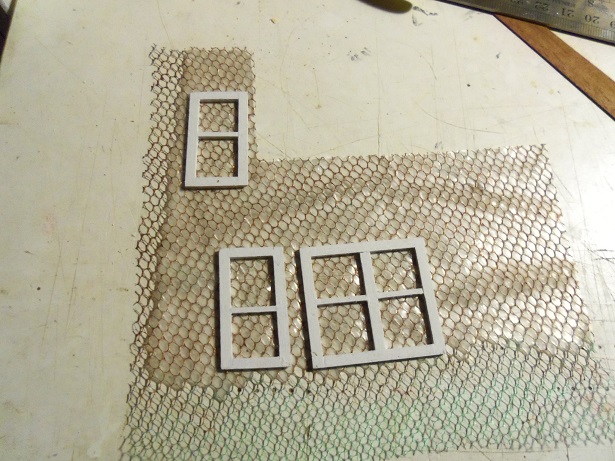
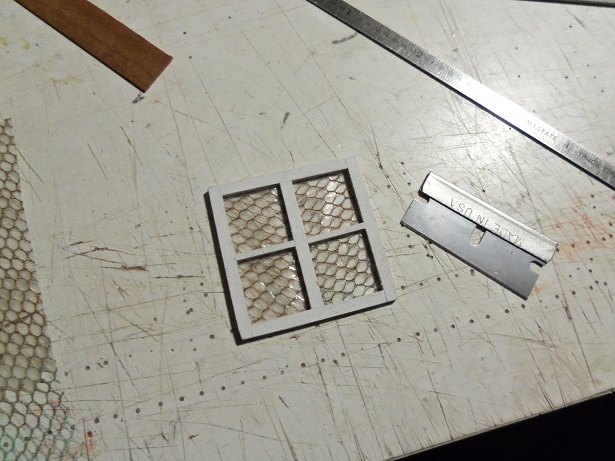
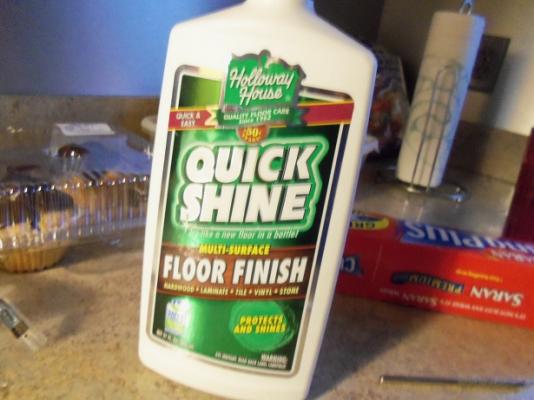
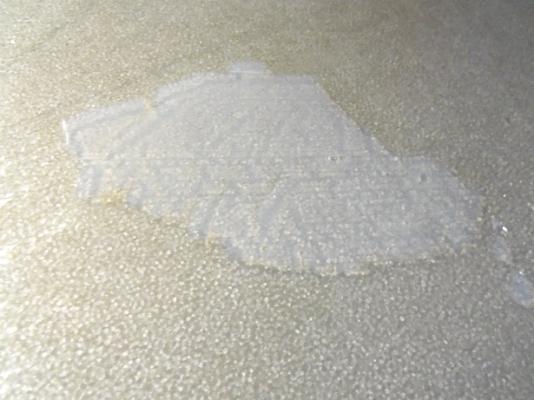
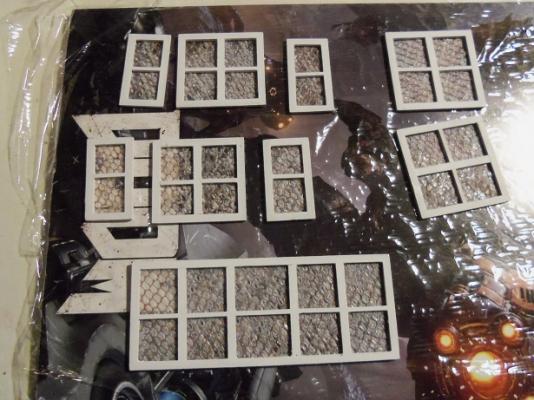
thanks Piet...you might say I thought of you when I did the doors. I pre drilled all my holes.......sanded any drill leaving from both sides of the 'brass plate'. ......didn't solder though.....figured it would be too hot I'm glad you like 'em........makes me smile thanks for the good word. I did things rather quickly last night.......never got a picture of the door in place, in normal lighting. I finished the last set of port 'badge' windows.... .....took 'em down stairs and got them painted right away......then I got the bottle of that stuff I bought and read the label..... never knew that about the future......guess they should have changed the name to 'the past' {'once upon a time' probably wouldn't have fit on the label}. I saw this stuff ......it will even shine stone......might be great for the man cave {ba-dum-bump!}. I poured some on a piece of plastic wrap and spread it out....took 1/2 to an hour to fully dry. then again, it may have been too thick....but that's me though......always lay'in it on too thick kind of a change of pace...not watching paint dry....but errrrrrrr, {between you 'n me} just as boring. wanna watch with me...........OK! OH! I forgot.........I dry fitted the windows before I took 'em to be painted......... anyway.......after they were painted {this time for real}......the window film was cemented on.....I'm not going to change the windows......I'm going to paint this stuff on the back of them. I even took out the part of the front window, that I colored, and put in some new film. when I painted the floor shine on......{I was informed, it is not 'stuff'.......it has a name}, I put the windows face down on the plastic wrap. after I done a couple more, I noticed that the film on the ones I had done, were looking like they were beginning to sag. so, I flipped them over and lightly blotted the film onto the plastic wrap. this should straighten them out. so now they are all done......they need to dry I should add that the ingredients of this floor shine....doesn't have any wax either......it has what they call a plasticizer. it also activated the white glue.......it was seeping through a little....so it was good that I flipped them over. the big test will be tomorrow........


-
thanks Patrick.......I was hoping that it bring words like those to mind. after all........'tis the season thanks for the good word! thanks for the head's up Bob......I didn't know that. I bought this other stuff.......did a test with it this morning. the ingredients says that it has a plasticizer in it......sounds like it's right up my alley thanks for the good word as well thanks Bug........they were a quick thought. kinda neat......a sort of scrooge / marley thing definitely worth adding into the build. good to have them finally where they should be......before they get lost or something. thanks to you as well no worries Nenad......it's a synthetic fire thanks!
-
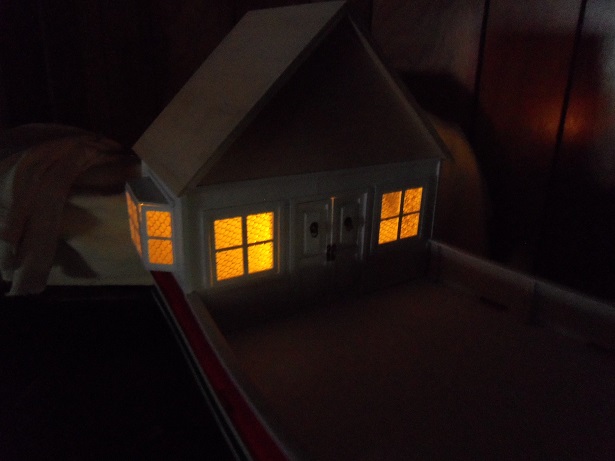
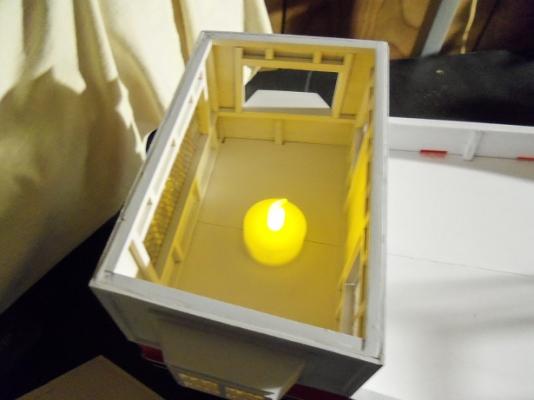
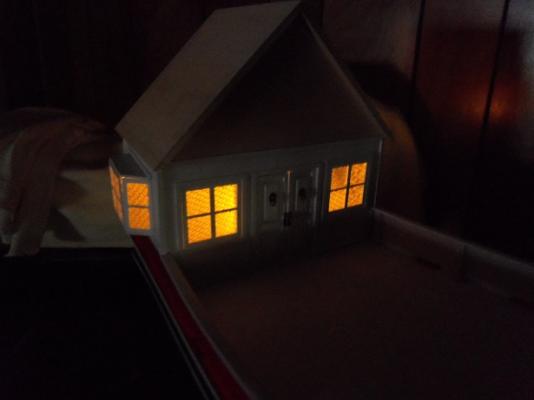
thanks George.......I was surprised how much light the single candle light gives off. the roof really helps out with that. I still haven't quite figured out what function this boat has during the 'off' season thanks for the good word!
-
hello there Ed........glad to hear that my favorite reader is doing better! I hope she's following this build.......I'm sure she'd enjoy it.......I'm hoping it gets a bit more interesting. Once the warming house is close to being finished, I can then get into more boat oriented stuff......like the pilot house I'm keeping her in my thoughts, to be sure....tell her I hope the trend continues for her. give 'er a hug for me. you two kids stay off the dance floor.......no jitterbugg'in.......OK!?!?!?!?!
-
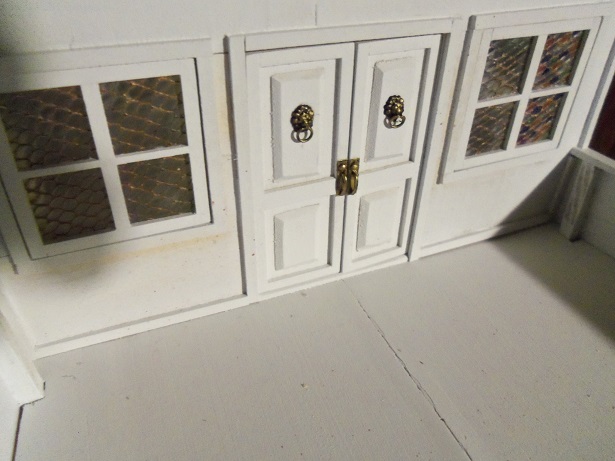
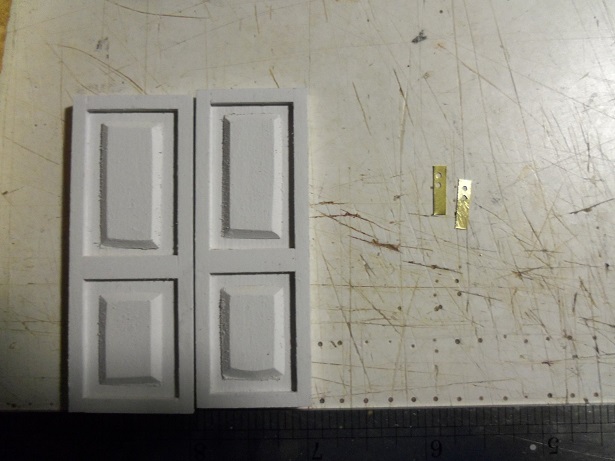
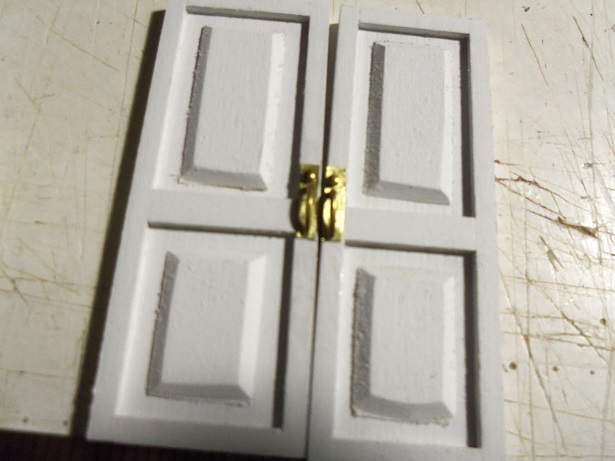
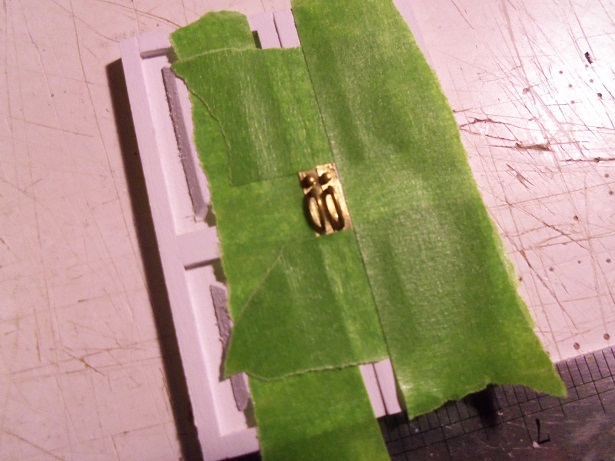
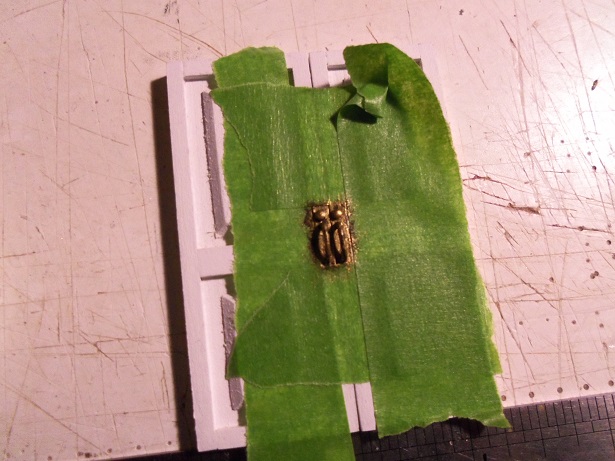
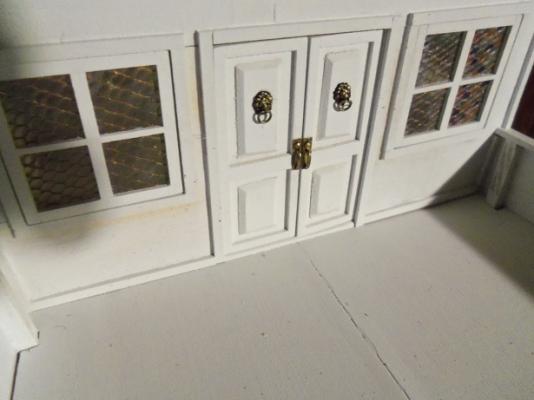
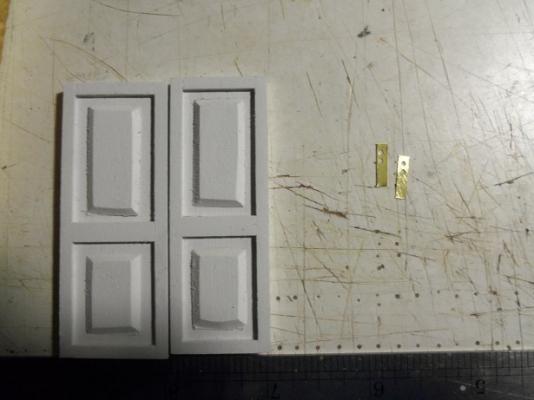
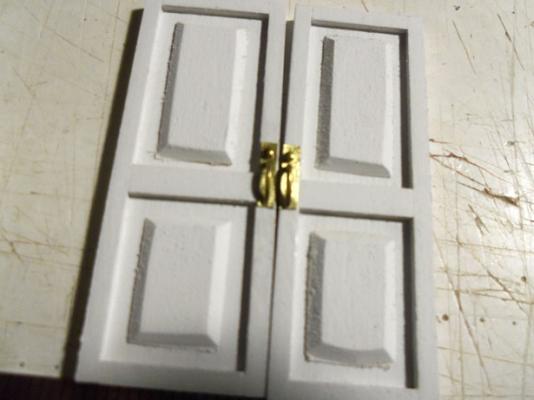
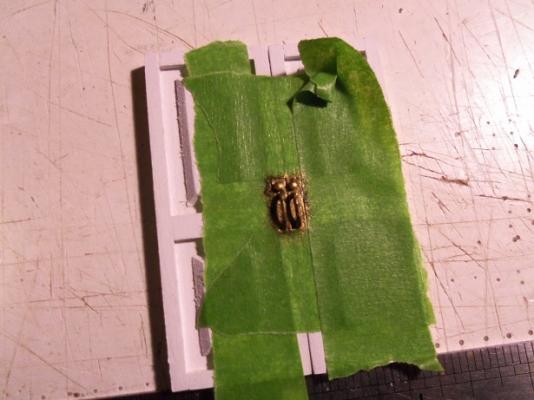
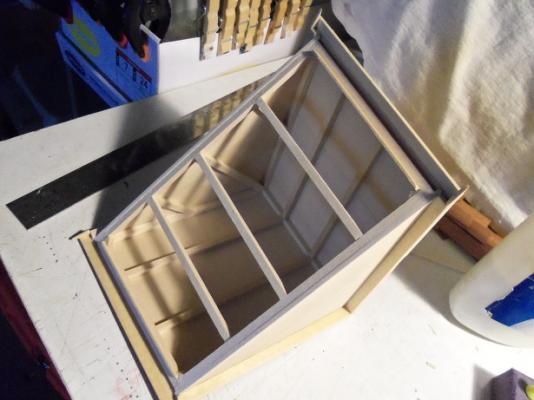
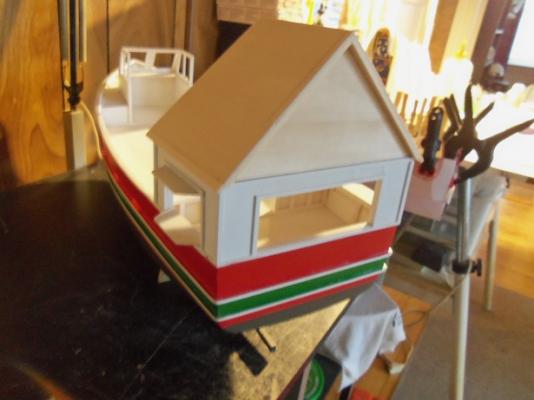
I don't know if I mentioned this before.......but I was looking for future floor wax, and do you know that neither of the two big grocery chains carry it! I did find something though......I haven't done anything with it yet. I was looking at the windows and resumed finishing off t he last set for the port side. I also picked up the doors....they still need to be finished as well. so, I set up the ruler again and laid them out. I made up a pair of door handle plates.......pre drilled them so not to cause any adverse damage to the doors. the top hole is for the door locks and the bottom is for the handles themselves. the heads of two 10 mm brads and two shaped pieces of brass rod, will serve the purpose quite nicely. cemented in place, they look like this. as I did with the door knockers, I now have to do to them......so I masked up the doors. first painted with flat black, and them dry brushed with gold.......I'm hoping to achieve sort of an antique brass then.....of course, to finally find a home for those door knockers as I was doing this, I was putting the windows, that were already finished, back in place. I had shown the candle lights I'm planning on using. one crapped out on me, so I only have one left. now that the roof is assembled, I can show you how the structure will look lit. the effect with the roof makes it all worthwhile the admiral really liked the lighting effect. still more painting to the hull and cap railings.......not to mention the siding and getting the roof finished........and of course, the windows.... I swear, it will NEVER end


-
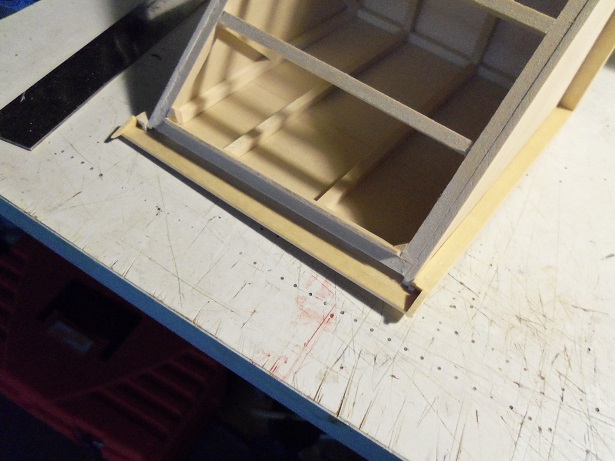
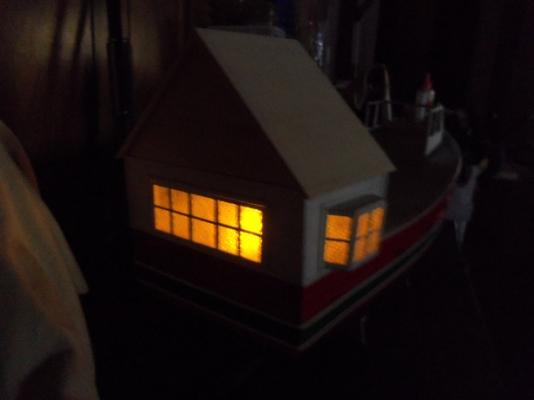
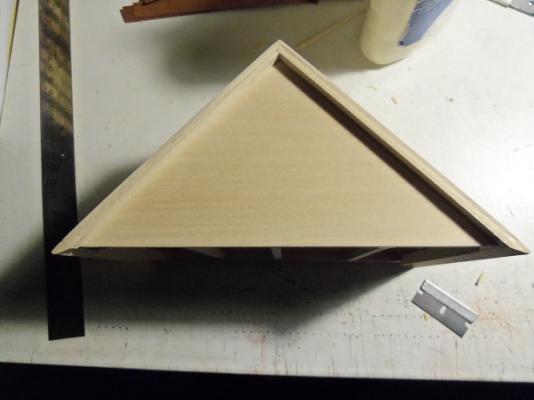
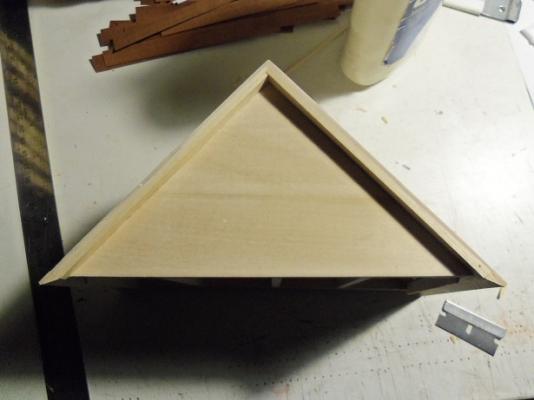
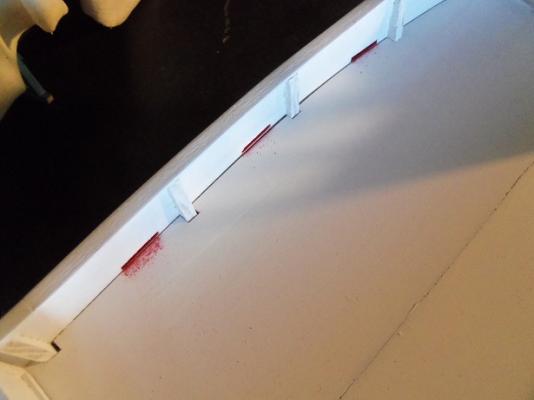
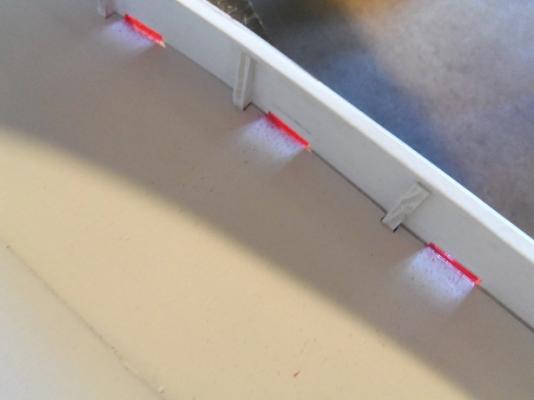
since I started to do the drip edges, I'll finish them. both drip edges are in place, and at each end, I matched them up with triangular pieces of planking. these will be trimmed and sanded flush with the mating at each end. trimmed and sanded, they give the edges a beveled look.......front and back. with the roof put on the structure, both pitches of the roof now lap over the edges, like they are supposed to. next I'll have to see if drip caps can be done to close them. there's still more to go yet for the roof

-
your right Michael......since every house has got 'em don't know why I didn't figure them in. I guess you could consider it a casualty of freehand modeling. thanks.........and thanks to all who hit the like button.
-
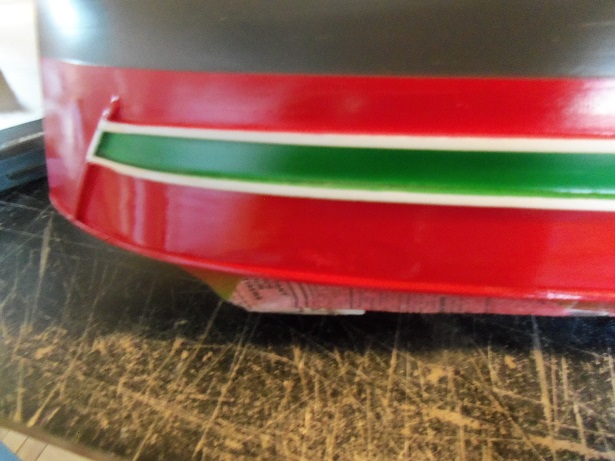
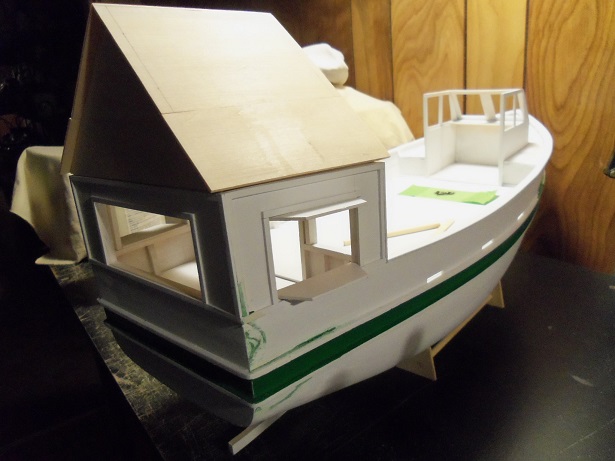
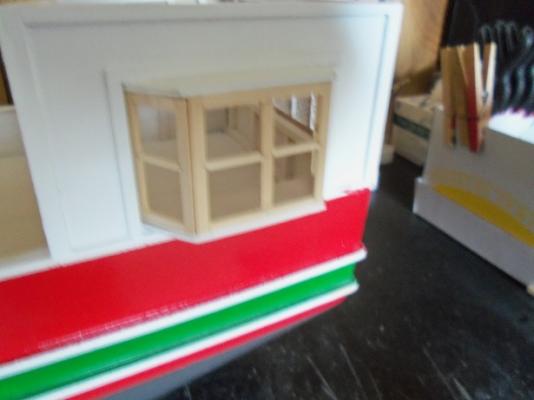
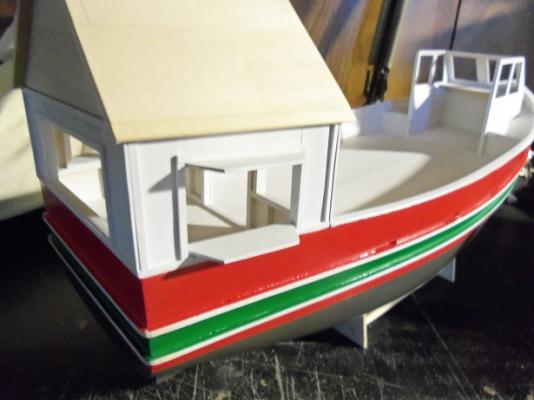
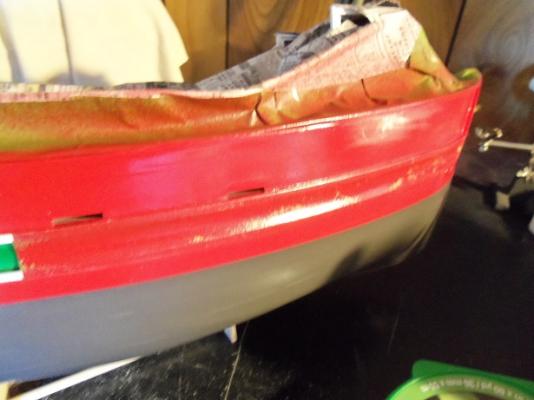
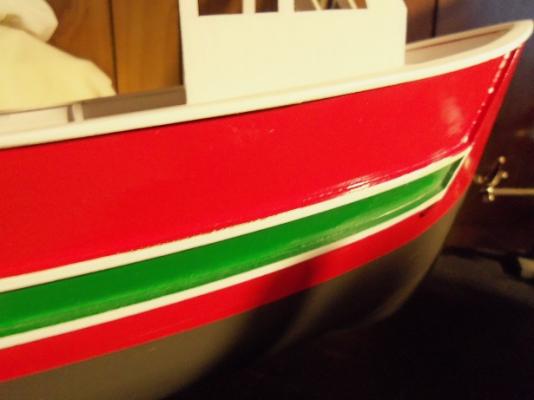
hello Lawrence.......always glad to see you yea......going through the boring stuff right now.......watching paint dry {and hoping it won't ripple in a certain spot}. your just in time to catch an update.......I think we can move on now thanks for the good word my friend........and thanks again for those who have been following along. I've been hoping that ideas would be coming to me a hundred miles an hour {like the Andrea, or the M&M}......but with this build, I seem to be flying by the seat of my pants. who would have thought that it would be so hard to nail down a concept here? I'm going to keep going with this build.......perhaps I'll get a brainstorm ......and off I'll go but for anyone who is new to the hobby, of those who want to try something different.......I like to think that I'm doing this to let you know that there's more than 'a' ship in that kit you bought. look at that hull you just created and think of how many ships have that same hull construction. hopefully, you saved the parts panels, or traced out the bulkheads, just for chuckles and grins. then make that other hull, and see where your imagination takes you. I have the perfect kit to further show this....{actually, I have two}...........I can't wait to get to them! anyway....................last week began to show us a splash of color for the Jingle Belle. there is one 'fly in the ointment' though......hopefully I can fix it and move on. three colors are already on the vessel......there are two more that will adorn the outer hull. OK.......sand the offending area....again......... it was then brought back down stairs and given another shot. to my amazement, it looks like it's starting to come back! knowing that I had to work last night at the airport, I decided to let it dry and see what happens. I did rip the masking off the top part of the ship. I was very happy to see that there was minimal over spray in the scuppers. I will have to decant some primer paint to remedy the situation, but a light sanding will remove most of it before the touch up. so, let this be a lesson to you.......never leave your scuppers open. now, I've cleaned up the front and rear roof edges along the walls.......they look good.......but what about the roof edges along the port and starboard sides? for this, I'm going to add drip edges. I did get to finish this before I had to leave..........I can fine tune this when I get home. I took one last look at the drying process, and was amazed to find that the nonconformity had almost disappeared! there is a slight blemish from the sanding.......the spot can be seen, but only at certain angles. I can live with that we'll move on from here!


-
I use an air brush........wouldn't do without it. I have a very low cost spray outfit which is sold by Testor's.......does just as good a job, as a high priced brand. it's a kit called the 'Amazing Air' airbrush kit. it run with a can of compressed air, but I adapted it to my 25 gal compressor. I also have a spraycraft gravity feed, and an Aztek 320, which I have all the accessories and two of each tips {never used} to know more about the Testor's airbrush kit: http://www.testors.com/category/136949/Airbrushes I thought I had another link........but I guess I deleted it. here is an old friend of mine.....he's tried many airbrushes and may give you more info on them. https://sites.google.com/site/donsairbrushtips/home
-
super progress Tom........cannonades and bumpkins look great!
- 1,354 replies
-
- 2
-
-
- constitution
- model shipways
- (and 1 more)
-
would there be sailors tending the capstan while this is going on? interesting that it's the messenger that is wound 'round the capstan and not the anchor rope itself........to be honest, until I came to this site, I was not sure how this process worked. you've done well in shedding light on the process.
-
hey there Jesse.......I see it's never a dull moment at your ship yard. I hope you recovered most of the parts......naughty kitty good to see though that your making some progress.......and looking very nice in the process super job with the head rails.
- 1,306 replies
-
- 6
-
-
- syren
- model shipways
- (and 1 more)
-
I dunno Pat........I think your shrouds are excellent! in real life, it's hypothetically impossible for all of the dead eyes to be the same height.......not if they've been periodically adjusted for tension. same as the gun port lids {I'm sure that was drilled into their heads during gunnery practice}. I feel it's the tiny things like this, that gives it a life - like look. I know we try to shoot for perfection, but I think life - like and realism is harder to achieve. I still have a long way to go, to get where you folks are, with your wonderful builds
- 517 replies
-
- 3
-
-
- Endeavour
- Artesania Latina
- (and 1 more)
-
looking very nice Jens.........the Dolphin striker looks super. really great pictures I have the Sergal Thermopylae.....can't wait to start it
- 188 replies
-
- 1
-
-
- cutty sark
- billing boats
- (and 1 more)
-
really coming along nicely Sjors so good to see you back in the work shop!
- 1,616 replies
-
- 3
-
-
- caldercraft
- agamemnon
- (and 1 more)