


popeye the sailor
-
Posts
16,007 -
Joined
-
Last visited
Content Type
Profiles
Forums
Gallery
Events
Everything posted by popeye the sailor
-
 thank you Nils and george! it won't be whipped cream and nuts, but I'll try to keep that sweet tooth of yours in check I'm done getting caught up..........now off to the table!
- 956 replies
-
- 3
-

-
- andrea gail
- trawler
- (and 1 more)
-
the Scharnhorst isn't finished yet?????.........is it? hope to see more of your superb workmanship soon glad to hear you'll be back soon!
-
your more than capable in my book. you were probably like me......daunted about starting one, until you did you've done a superb job thus far.......no doubt that it will finish in splendor! whale boat looks good by the way....very nice~!
- 2,250 replies
-
- 3
-
-
- model shipways
- Charles W Morgan
- (and 1 more)
-
very nice start I was trying to get the plans for this one through my friend Tom @ Billing, but he's not there any more...so that out the window I'd be pleased to follow your log
-
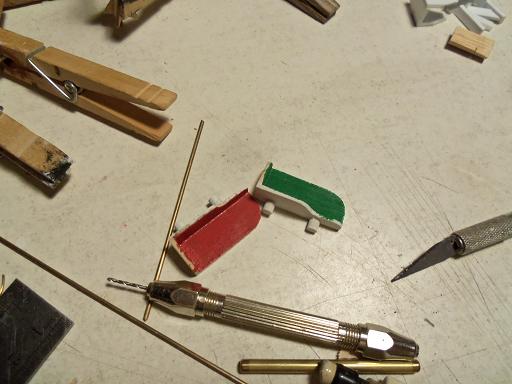
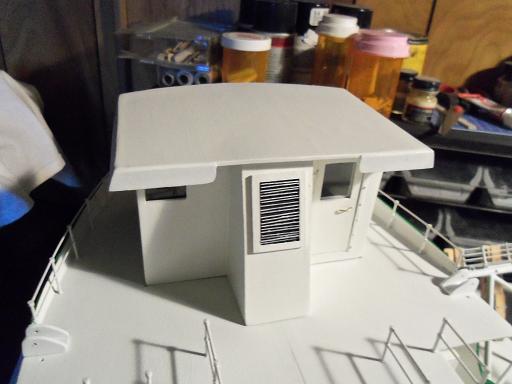
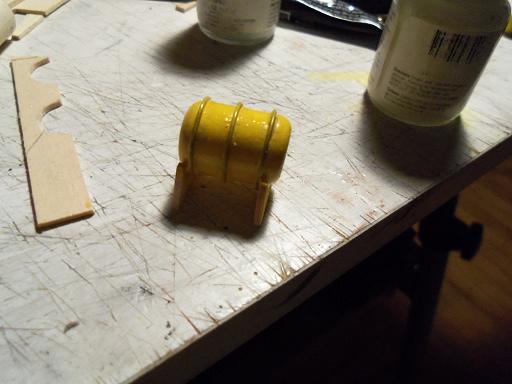
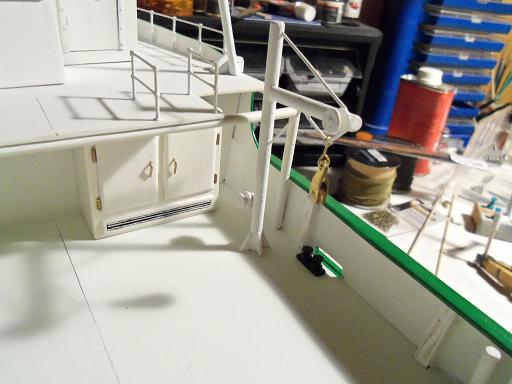
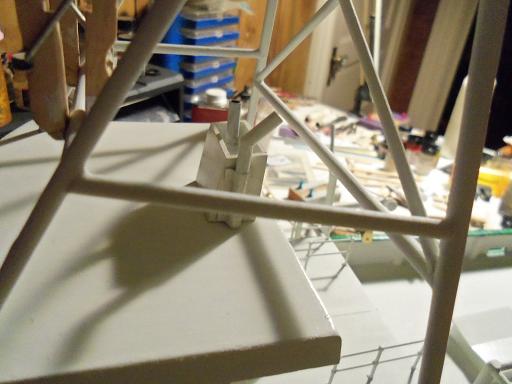
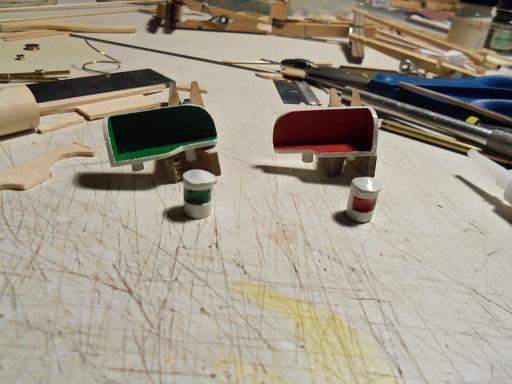
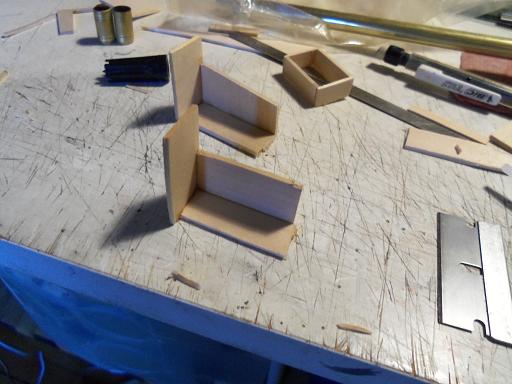
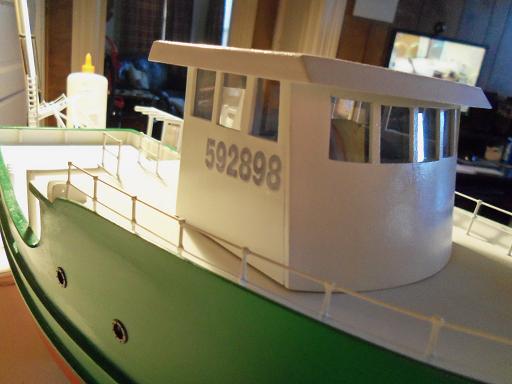
I really want to thank all of you fine folks again for following along and being so supportive. back in the day, before the internet, ya built a model......enjoyed the experience and then it would languish on a shelf until the parts fell off. the internet changed a lot for the hobby.....it opened that closed up space where we build, and allows a vast audience to view your work. it's taken it to another level! it's also allowed us access to information, which helps us to become better modelers. this site, and you fine folk, make it a win / win for us all after my last post, I went back at it, and made more progress. those two pieces of dowel you saw earlier......well, in looking at the instructions, I found that I only needed one of them. I began to make the parts for the life raft locker. what I had done to the light boxes earlier had dried, so I did a bit more paint work on them. the pilot house is closed now........the roof is cemented in place. with the dry fits, came the conclusion that interior views are restricted to what you see. it'll speed things up.......there are bigger fish to fry later on. I still have the Boulogne......with her larger windows {I can even do wipers} time was juggled between the life raft locker and the funnel addition for the roof. the locker was assembled and paint work had started. the funnel addition was bland.......nothing went in the cavity in the top of it. I made it a bit wider too, thinking that something did. so far, I added a vent tube.....I'll think of something else to utilize the space. there is another pipe {the actual exhaust stack, I believe}, that runs up the side of it. brackets were added to it for support. the stanchion is finally in place. the pulley was added and received it's final touch up of paint. it will be rigged later when dry. this may look like the start of the next wave of parts to be added to the model.....but no. there are a few more parts that need to be made......the roof is the focal point now. the funnel addition is cemented in place.......I can add to it there, just as well as on the table. the nav lights are next.......they are done after the window maker was dry, a dab of Signal Red and Emerald Green inside the lenses, was enough to finish them. the boxes got the final paint and touch ups. the focus now is to get the roof fitted out and do something I have been putting off.......more ladders

- 956 replies
-
- 18
-
-
- andrea gail
- trawler
- (and 1 more)
-
glad to hear everything is looking up again very nice progress Michael!
-
I don't got one 'o those Piet.........I'll look and see if they have one at the craft store. glad to have made you smile......I'll get into metal work yet! a big thanks to all for the kind comments and the like button. I went right back to work after my last post, so there's more to see......but tomorrow though........I'za tired! thanks!
- 956 replies
-
- 3
-
-
- andrea gail
- trawler
- (and 1 more)
-
you certainly are a master in your medium.........they look so real
-
thanks Nenad and George....they are both done.......painted, and have the window maker already in the lense. I just have to let them dry I put the legs on the light boxes too. more later when they are finished thanks for the good word! too late on that Frank.......Billing's has two kits out on this vessel. I'm using the instructions for the R/C version {with ABS hull} to build this one from scratch. the other one is a smaller scale static kit.....I have those instructions too, but I'm only comparing the two for parts references. this is an exercise to see if I can reproduce a build using existing instructions....I guess it's what you can call it. thanks for saying that though.......I guess I'm doing alright
- 956 replies
-
- 12
-
-
- andrea gail
- trawler
- (and 1 more)
-
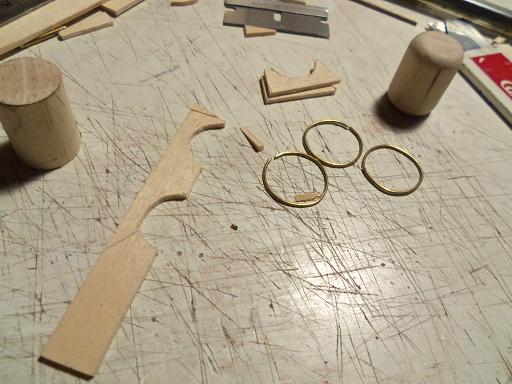
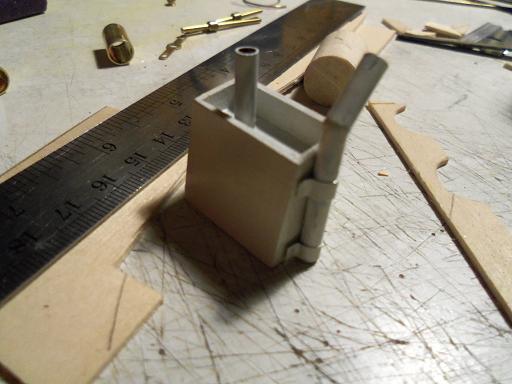
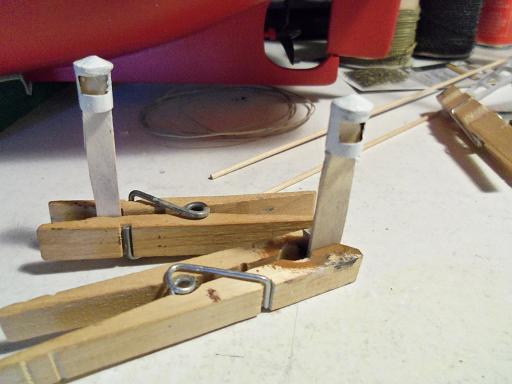
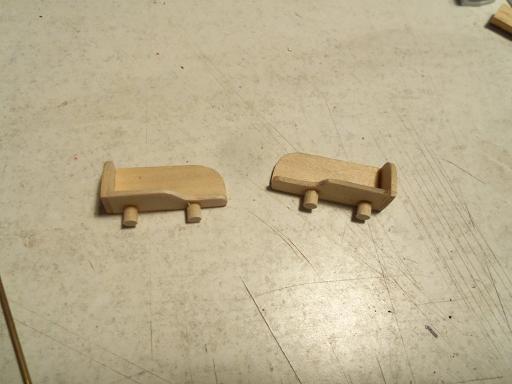
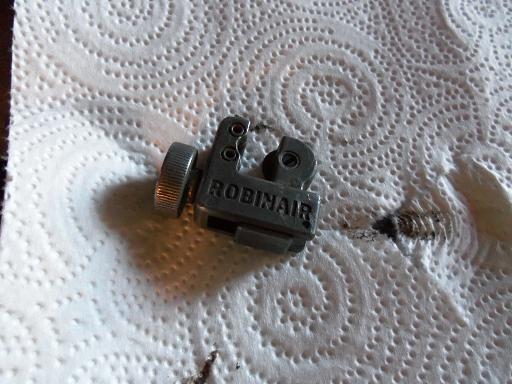
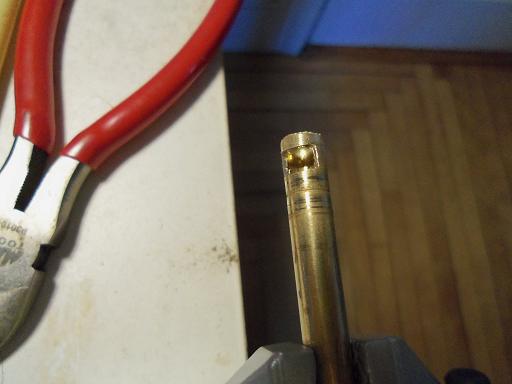
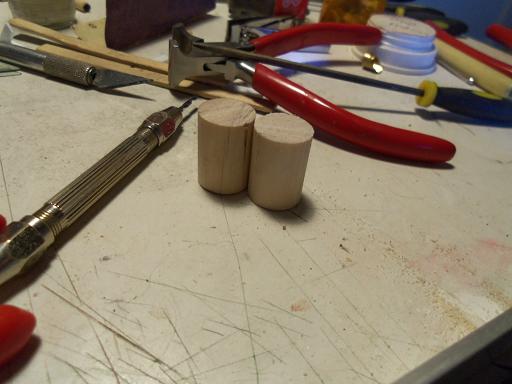
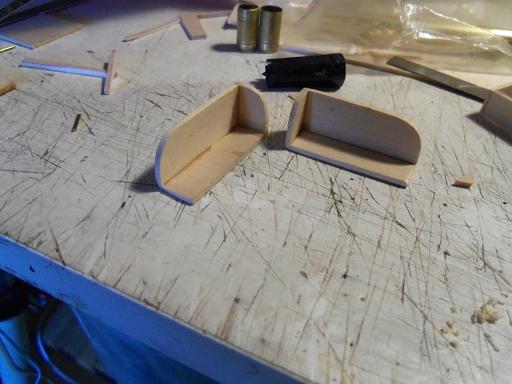
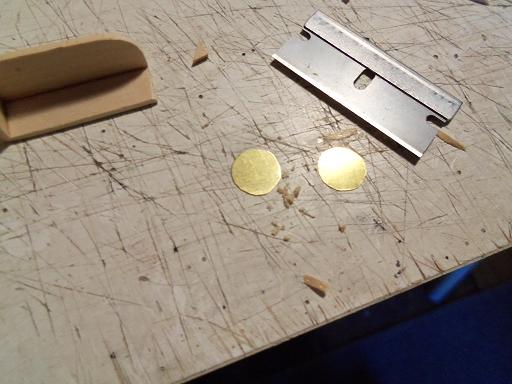
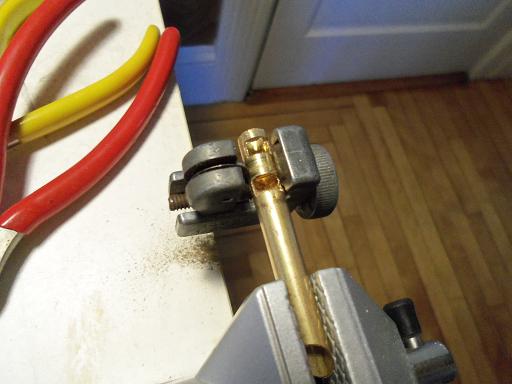
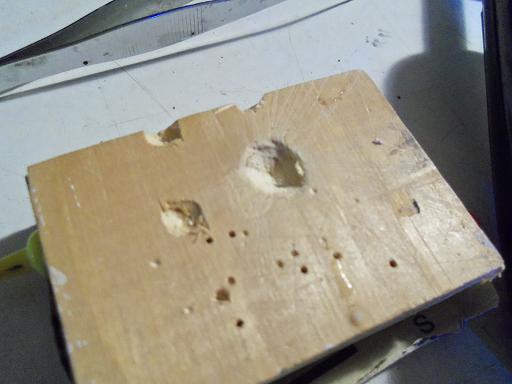
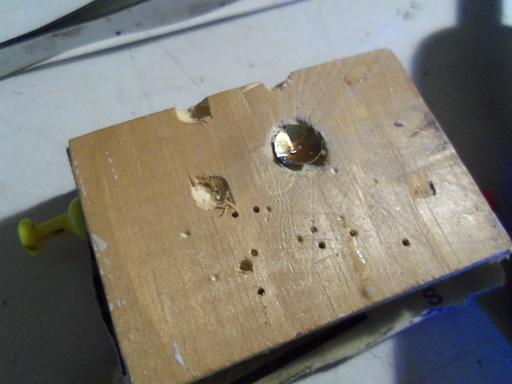
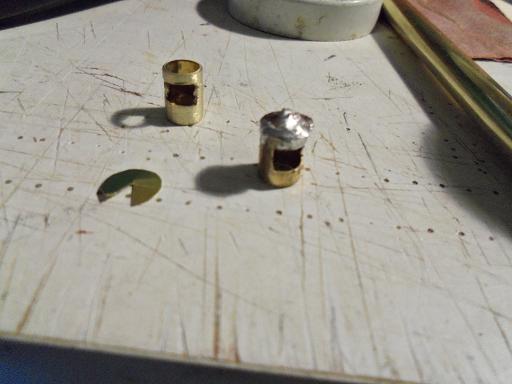
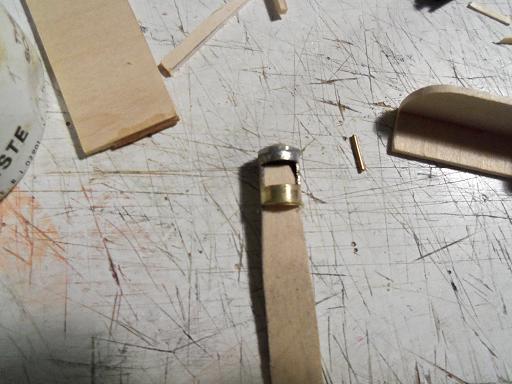
another aspect that I'll need to get on there, to gauge the decal, are the nav lights. I got this idea during the drive to and from the garage yesterday. I can make the boxes alright......but it's the lights themselves that I had to ponder over. I dove in head first I saw a tubing cutter at the hobby store during my last visit. it would make my task a lot easier......but I didn't buy it. I have two of them at home.......I use them to cut tubing for brake lines and other such stuff in automotive repair. I cleaned this one up and made sure the rollers and blade were in good shape. taking a piece of tubing {of suitable size} and locking it in the vise, I made two cuts and removed the center. then with a flat file, I squared up the opening. you might be able to see where I marked it when it's time to cut the part off. the boxes were roughed out......I'll give them time to dry a bit. I cut these two pieces of dowel........they are for something else at this time I did some of the trim work to the boxes. using a pair of scissors that I use for this task, I cut a few circles from some really thin brass flat stock. the second light was created.......now they will be cut from the piece of tubing the circles are going to be molded to form the top of the lights......I hope your watching this Piet.....I'm going to try and make you smile once they are molded, they will be soldered on the light bodies. first, I took a drill and made a pit for the tops to fit in. then, cutting a pie shaped piece out of the circle, it was fashioned into a dome, and placed into the impression. the idea worked great until this point........kinda went down hill from here. to hold it in place was a pain, then to dip the tip of the iron in flux, get a drop of solder on the iron, and apply it to the light, was another.......but I managed to get the job done. no virgin ears in this house....I can tell you that! I will use rough sandpaper to clean it up....I don't want to use a file......liable to ruin it. it cleaned up fairly well......I went over it with some finer paper. they'll be painted gloss white when I am done.
- 956 replies
-
- 13
-
-
- andrea gail
- trawler
- (and 1 more)
-
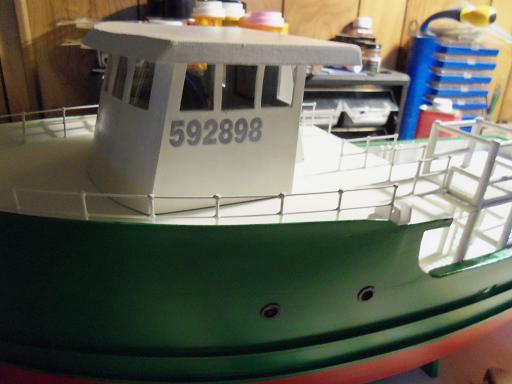
the pilot house numbers worked OK.......not the color I wanted, but they will serve the purpose. I didn't get as much done as I wanted to........ferried my son back and fourth to my brother's garage, to have his car repaired. I could have fixed it, but I don't have a 2 ton press. there is one more that goes up on top of the roof. the roof has been painted with gloss white, so the decal will stick better. I need to place a couple of aspects to the roof, so I can get a good idea where to place it. one of the aspects that I speak of, is the small funnel addition that will align with the compartment in the back of the pilot house. it's rough at the moment......I may even need to cut it and make it shorter. it's a start......

- 956 replies
-
- 9
-
-
- andrea gail
- trawler
- (and 1 more)
-
if they were brass, I'd say there should be no problem.......but they are coated. I do wish you luck in doing it more fine rigging.......looks super! your moving right along at a good pace!
-
awesome Daniel..........never a dull moment at your table! such wonderful detail.........really....really nice!
-
very nice work on the tube Tim........got some very nice detail and will look great painted!
-
a prime example of what I've been experimenting with.......with a little modification to the bulwarks, this hull could be made into either ship! very nice
-
awesome progress John.........your moving like wildfire!
- 2,250 replies
-
- 2
-
-
- model shipways
- Charles W Morgan
- (and 1 more)
-
gee........and here I was thinking that a simple shelf, would be sufficient to berth my builds, when I'm not working on them?!?! great space saver!
-
nice work on the start of your rigging.....are you planning to put sails on her? I ask because I notice the lion heads along the side....did you drill holes in them? there are tack lines that go through them. I got some from Corel for my Billing's build.....and I had a heck of a time doing them off the model........it would be hard to do them on there.
-
super progress.........paint work looks great! that's quite a gloss you got there.......evidence of a really smooth hull *nice* !
-
super looking masting Kees........really neat how it's put together even without clear pictures, you have good attention to detail...I love It!
-
glad to hear everything is looking up Michael! she'll recover better at home plugs look sweet~!
-
I thought I had mentioned it before.......looking back in the log, I see I did gotta follow my son to the garage......he needs work done on his car.......I'll get to see my brother
- 956 replies
-
- 2
-
-
- andrea gail
- trawler
- (and 1 more)
-
well I glad you do Sjors I will be calling for the update today.......I will be asking about compatibility. along with the info I found on the Lady grace, I checked out the Hanna Borden and the Andrea Gail. now, the articles state that the Lady Grace was used, because she resembled the A.G. .......but even stranger, was the statement that they were built together. I only found one article that suggested this, but all the other articles state that the Andrea Gail {1978} and the Hanna Borden {1983} were both built in Panama City Florida. the Lady Grace {1978} was built in Ocean City Maryland. it's trivial......but I found it interesting got a busy morn........but later, I will get to the table. thanks for following along Sjors.......it wouldn't be a party without you
- 956 replies
-
- 1
-
-
- andrea gail
- trawler
- (and 1 more)