


popeye the sailor
-
Posts
16,007 -
Joined
-
Last visited
Content Type
Profiles
Forums
Gallery
Events
Everything posted by popeye the sailor
-
 I kinda went through a 'block' in the later part of this past summer.....I know what it's like. it doesn't last forever, my friend........you'll get some idea brewing.......and then , off you go! are you getting a lot of snow?..........we SURE are!!!
 -
thanks for the kind comments gentlemen.....I enjoy this part of the build. being able to permanently install all these parts show that I've made some progress I've had that window maker George since my plastic days......works well with making small windows and cementing clear parts in place. I use it here for the light lenses and such......just fill the voids and let it dry. it can also be painted, as in the case of the nav lights. now to get the pilot house roof on.........then I can work on the trawl rig! I can't wait to start getting it on there! more to do with the reels, but they'll be on there soon! thanks again and also to all who hit the like button.
- 956 replies
-
- 6
-

-
- andrea gail
- trawler
- (and 1 more)
-
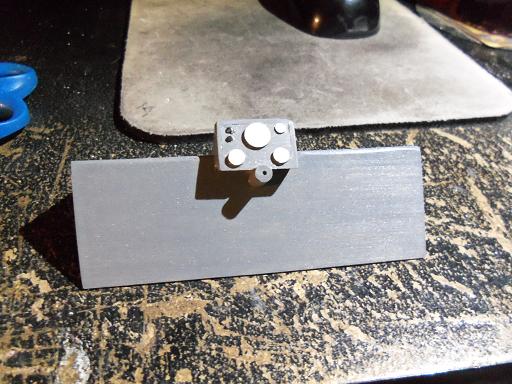
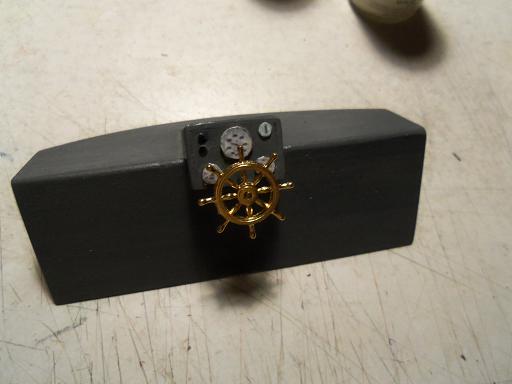
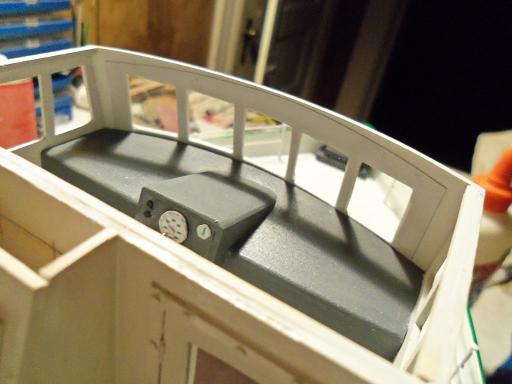
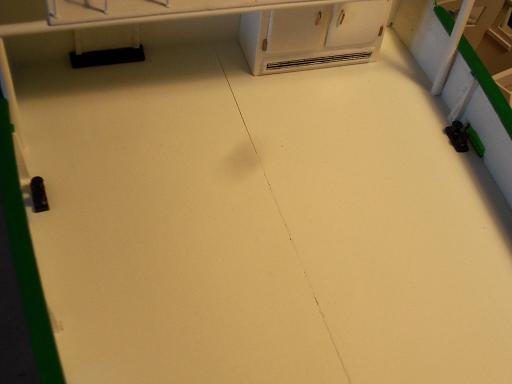
I still need to do something about those crack lines.........have no idea what the shadow is in one of the pictures. made me go look at her in the light......I can tell ya I had finished cutting out the gauge decals for the dash they were added and the ships wheel as well the pilot house was finally cemented in place........took care of most of the foredeck crack line. it was a bit of a trial, but I got the dash in place. pretty tight tolerance, and the framing I put around the top edge didn't help either. I thought about the front windows. I simply took an oversize piece of clear cello and slid it between the dash and the inner wall. then the dash was pushed the rest of the way to the wall, trapping it in place. I think several hours has passed since I did the portholes. I may have made a couple a little too thick......I've had this bottle for quite some time...it might be getting old.
- 956 replies
-
- 17
-
-
- andrea gail
- trawler
- (and 1 more)
-
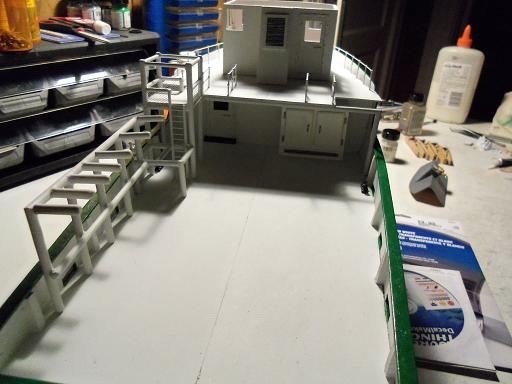
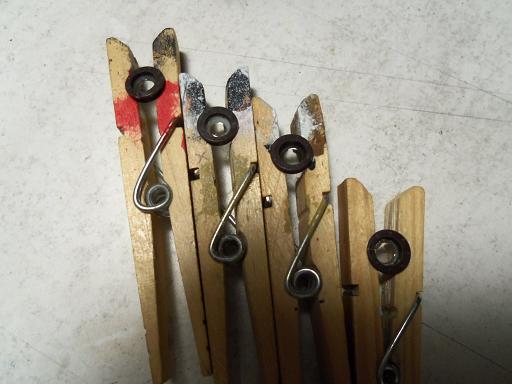
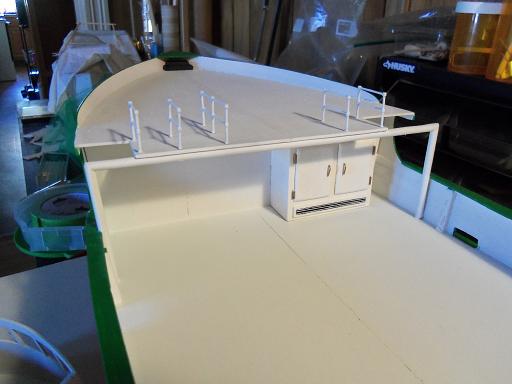
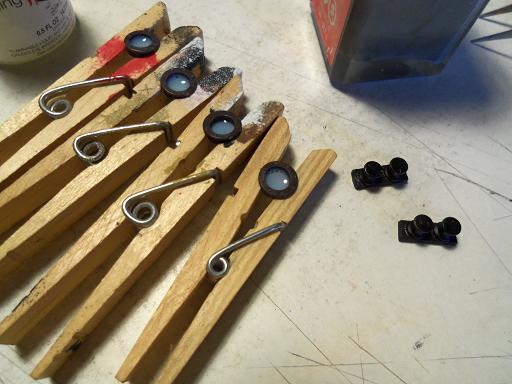
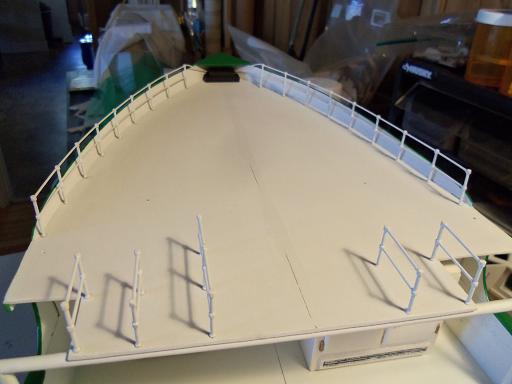
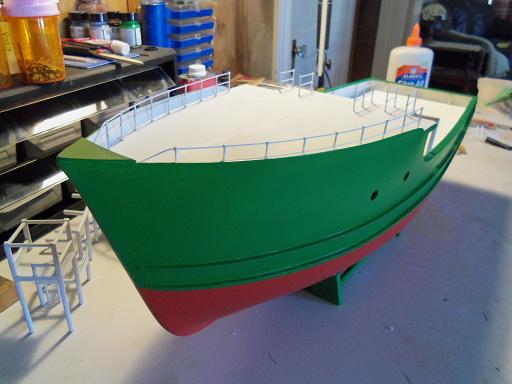
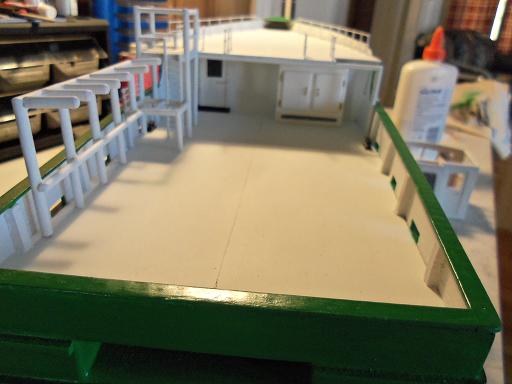
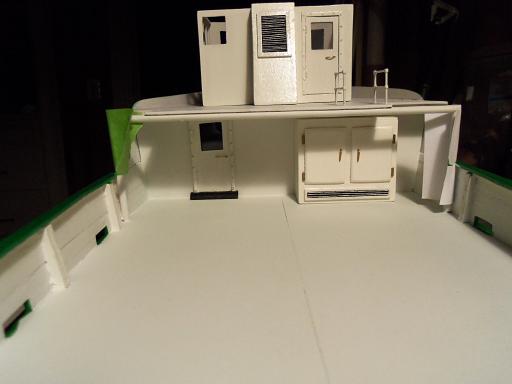
I finished doing the touch ups around the deck, and I began cementing in place the sub assemblies I've done so far for the build. first to add was the rest of the smaller railings and the ice machine. the portholes were dug out of the box and Testor's window maker was used to fill them in. when this dries, it will become very clear. the bollards were painted as well. the main deck entrance was next.......the touch up around the port side forward corner came out quite well.......even the small section of cap rail was done too. the bollards were then added to the deck. the fore deck railings were cemented in at this time. I hadn't checked to see if the black box I added to the bow would be in the way. glad to see they were a good fit. time to add the rack / podium to the build.......I believe I've done everything. whatever I've missed, I can add still

- 956 replies
-
- 16
-
-
- andrea gail
- trawler
- (and 1 more)
-
I like your work! you have a way with plastic.......which is a 1-up.........you can imitate steel better than I I love the wooden ship, but again.....there is style and grace with the steel ship as well. I also think that there are other lesser known ships, that are worthy to be modeled. there is a challenge in that...don't cha think? this build is a dual experiment 1) using a hull of similar construction, and create an entirely different vessel {making use of those parts panels from kits} 2) using known kit plans to scratch build a model from them {putting some of the ones I have to good use} I appreciate the kind comment........now if I could only learn to weather like you do
- 956 replies
-
- 1
-
-
- andrea gail
- trawler
- (and 1 more)
-
sounds like you've tried a few different ways....to be honest, I've been out of the loop {working with plastic}, for quite some time. I still kick myself for taking the hiatus from modeling in my mid life. it's cool to see other concepts of shape. looking at your photos again...I see the rail structure continues aftward, making the judging of radius harder. darn nice work!
- 205 replies
-
- 1
-
-
- kw49 antje
- trawler
- (and 1 more)
-
there are many here on the site that are way above me..........I see something cool.....try it myself, but I still have times where it doesn't come out as good. it's all technique, my friend. honed skill through the years.....they deserve the respect I'd say though, that if we enjoy what we do, and remain open and experiment with new ideas.......then I'd say we're following right along in their footsteps
-
thanks Sjors and John.......it will look better when I can get the rest of the part I have ready on her thanks to all those who hit the like button!
- 956 replies
-
- 2
-
-
- andrea gail
- trawler
- (and 1 more)
-
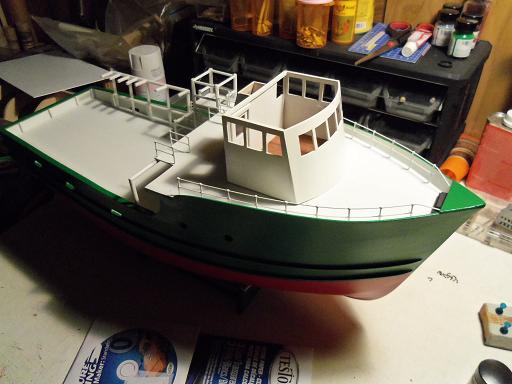
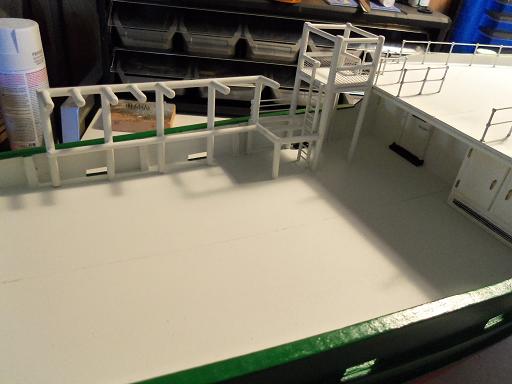
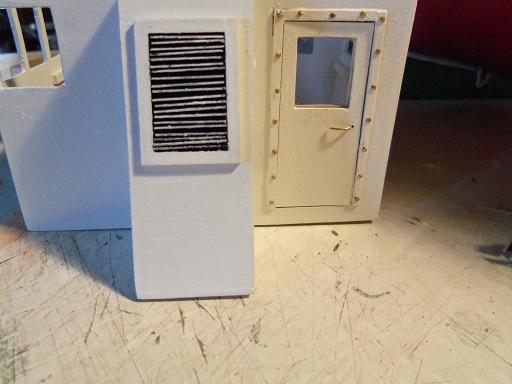
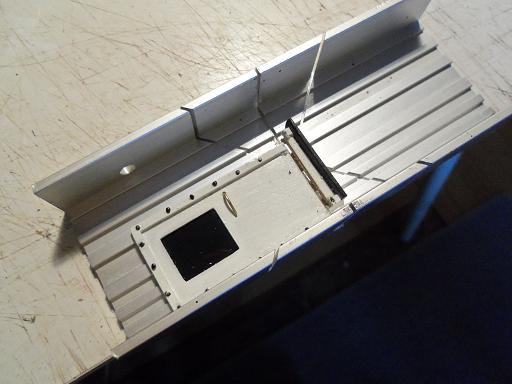
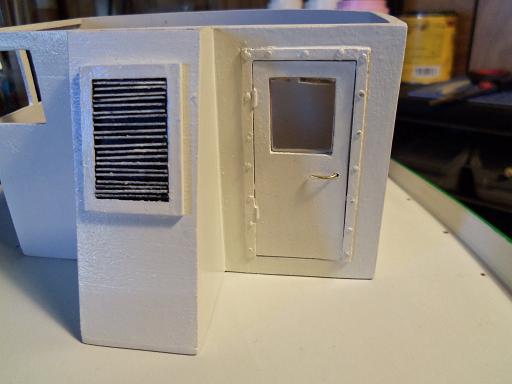
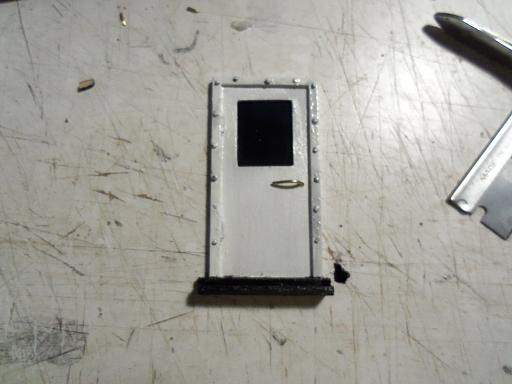
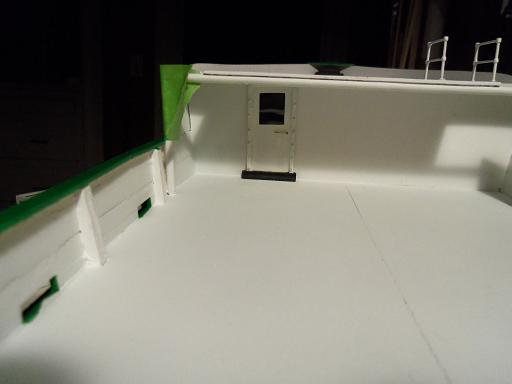
I did manage to do a little at the table......a nice diversion from shoveling snow and truck issues. I waited til there was something worth reporting........it's not much. taking cue from a few of the thoughts collected here, doing the rivet work in white confirms the logical approach. the rivet work was done on the pilot house entrance. the vent was cemented in place as well. there was also the suggestion concerning the threshold of the main bulkhead entrance.......more thickness was added to it. trimming the threshold flush to the frame on one side, the bottom of the door was measured and cut off. the door was made with little to spare, in relation to the height of the bulkhead. on the pilot house, bits for the hinges were added, and then painted. the same was done to the main bulkhead entrance......the flat black decided to become solvent again though....second touch up needed. touch up was done around the cap rails........and the over spray in the port side forward corner was taken care of. I still need to do the section of cap rail under the right side forward corner. then I can do the scuppers. the bulkhead entrance was set in place for a look see then I thought I'd put a couple of other aspects in the mix.......figured it might be interesting to see. soon.......this and hopefully a lot more will be permanently cemented in place.
- 956 replies
-
- 18
-
-
- andrea gail
- trawler
- (and 1 more)
-
thanks Lawrence......no......no wreck or anything...just broken down. turns out that there is more engine damage than meets the eye. I have it at a facility at the moment........and so far, they have confirmed everything I've thought about this truck.....and more! I feel that I not only bought a lemon........but a reconstituted lemon! {the admiral laughed when I said that to the guy over the phone} I appreciate the concern......I yam OK.........jes' fe-um'in 'bout what I've learned! thanks Lawrence and Patrick
- 956 replies
-
- 3
-
-
- andrea gail
- trawler
- (and 1 more)
-
that's OK.........you just put me up there about three notches! ........oh....sorry Piet........errrrrrrrr, five!
-
that looks pretty sweet Kees! could you have used a heat source to make the bends around the corners? I like what you did, but I'm thinking it might have saved you the sanding and putty work, your going to be faced with. Like the shape of the structure very much..... very well done :im Not Worthy:
- 205 replies
-
- 1
-
-
- kw49 antje
- trawler
- (and 1 more)
-
very nice progress Jerry......I had a lot to catch up on then again, it's been hard to keep up with ALL the builds I watch...lately ! looking very nice!
-
thanks for your interest Kilo......it has been a bit harder lately. there have been lags in building that I didn't anticipate on......usually I'm a one-armed paper hanger! then there's my imagination.........that always seems to get the best of me......and that accounts for the cornucopia of builds that I have established. would you believe........I have my second build of the Cutty Sark sitting in the hallway.....all I need to do is repair a few lines from the move we did to get here, and do the braces and studding sails, to finish her. she's been in the hallway since 2009! some knucklehead brought me a wooden kit.........and I've been a spinning top ever since! I do thank you for the poke......does make me smile that there is an interest in her. I have the wooden deck clamped to their plastic counterparts, so they don't lose their shape........I didn't like what happened to them after the last break in the build this does give me time to see what some of the other fine builders are doing with their Connie builds......some of these features apply to the United States, even though Revell chose not to add them in. At the moment, the top spins around the Andrea Gail....moving quite well and with no signs of stopping. but as anyone knows, poking a spinning top, can cause it to go in another direction you never know, my friend. thanks for looking in and the good word!
- 165 replies
-
- 4
-
-
- united states
- revell
- (and 1 more)
-
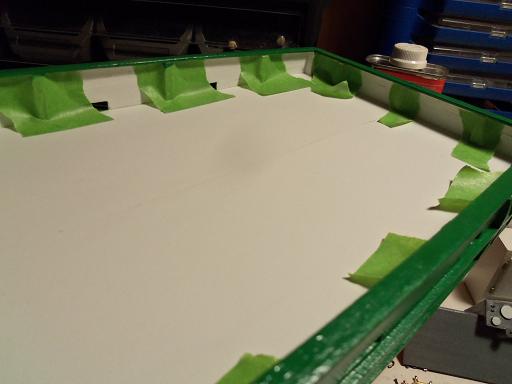
I've always loved this Revell series......too bad the Connie was the only one to survive. I've built the Connie once, the Cutty Sark twice, the C.S.S. Alabama once, and now I'm starting my second build of the U.S.S. United States. I agree that the deck of all these kits had a lot to be desired........this build of the United States is going to sport a wooden deck...already done with it at this point. I tried the blue tape....terrible! I now use the green Frog tape...I've had some good results so far.
- 42 replies
-
- 2
-
-
- Constitution
- Revell
- (and 1 more)
-
very nice progress John........rigging looks sweet!
- 2,250 replies
-
- 2
-
-
- model shipways
- Charles W Morgan
- (and 1 more)
-
congrats Jesse....such a finer looking ship!
- 607 replies
-
- 1
-
-
- scottish maid
- artesania latina
- (and 1 more)
-
your doing a great job with the V2.........and even a greater job at sorting the wheat from the chaff!
-
kinda surprising that the mast holes weren't already drilled {I get some of my best detail bits this way} glad to see your up and about!
-
sounds like a plan.......remember, with all the rigging that will be there, it might be hard to see. only you will know the wiser
- 525 replies
-
- 3
-
-
- cutty sark
- mantua
- (and 2 more)
-
very nice work on the bow spirit Augie..........believe me, it's not a primitive thing to wrap sandpaper around a dowel......this is what I use. I have four different sizes. I use a semi rough paper though to speed the job up a little. you've done such a wonderful job so far my friend.......it's a true testament to your talent!
- 2,191 replies
-
- 2
-
-
- confederacy
- Model Shipways
- (and 1 more)
-
no fear Piet.......you'll work your 'metal magic' on it and it'll work just fine! glad to see your back and making progress
-
looks very nice........love the added touches!