


popeye the sailor
-
Posts
16,007 -
Joined
-
Last visited
Content Type
Profiles
Forums
Gallery
Events
Everything posted by popeye the sailor
-
 she looks awesome John........adding the mechanics to a ship is always the most satisfying part
- 2,250 replies
-
- 2
-

-
- model shipways
- Charles W Morgan
- (and 1 more)
-
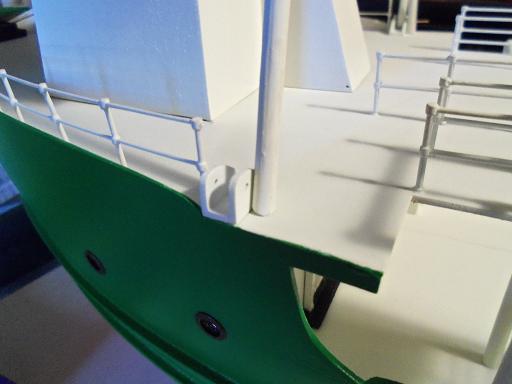
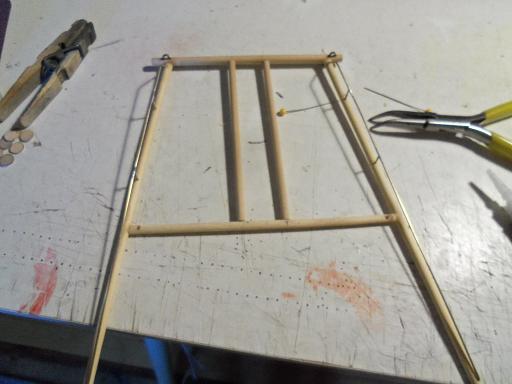
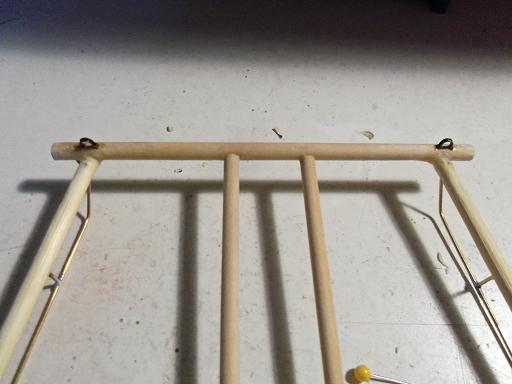
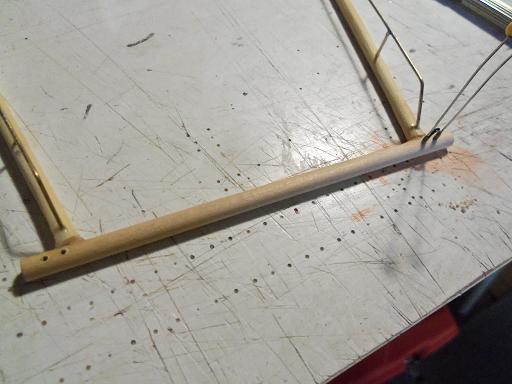
I was ahead of myself when I did this........I had to disassemble it to get the first picture. not to worry, I didn't go all the way with it......if you look close, you'll see I cheated. I thought you may get a charge out of this......it all started when I cemented the boom brackets in place. after .....I put the boom back in place I was glad to see that I didn't goof on the yokes......they fit in there snug enough, so I won't have to worry about them falling out before I get the chance to rig them. I also did a bit of work to the aft section.....drilling the holes for the eye shackles. two center supports were also cemented in. these will be for the support cables to the first section assembly. flipping it over, two more were added for cables that will attach to the bulwarks {or the deck}. the plans don't show it, since the aft section is cocked in such a silly way......and they don't even show you how to assemble it. I saw this in the pictures, and so I found a use for that second ladder I made. before these parts went down to be painted, I added this bar to the gangway. in the plans, there is use for this part.......I'll see if I can dress it up somehow I brought two of the parts up from the cellar already.......guess I better go get the other two, before the cellar monster gets hold of them


- 956 replies
-
- 12
-
-
- andrea gail
- trawler
- (and 1 more)
-
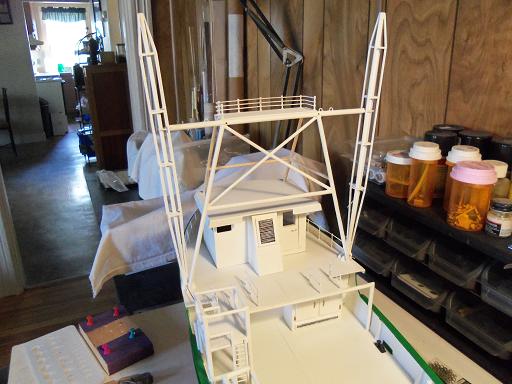
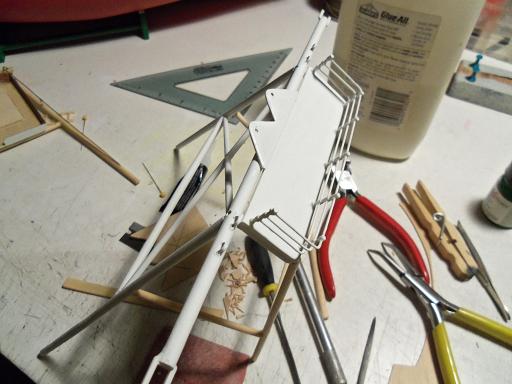
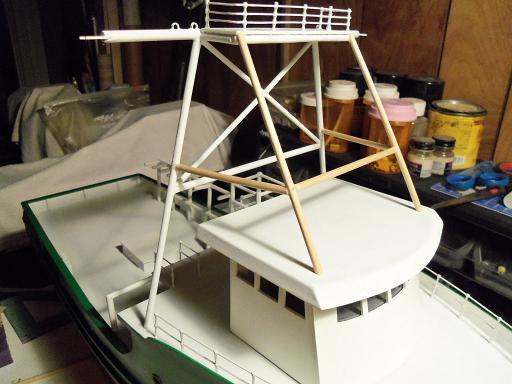
thanks to all of you fine folks for the kind comments and the likes. I am feeling better.......just a dry cough....something new in the evolution of the common cold. I have been busy today........I have something really neat for you to see. of course it's just a dry fit, but when everything's ready....it will be the next barrage of parts to be cemented in place. where would this hobby be without those pesky little problems? thanks again to you all......now off to go paint........and get that darn pilot house in order!
- 956 replies
-
- 1
-
-
- andrea gail
- trawler
- (and 1 more)
-
Cutty Sark by NenadM
popeye the sailor replied to NenadM's topic in - Build logs for subjects built 1851 - 1900
super job Nenad! WOW!- 4,152 replies
-
- 1
-
-
- cutty sark
- tehnodidakta
- (and 1 more)
-
nice progress since I last looked in Jerry.......looking really good!
-
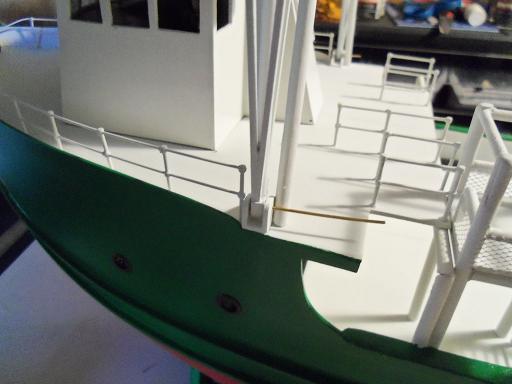
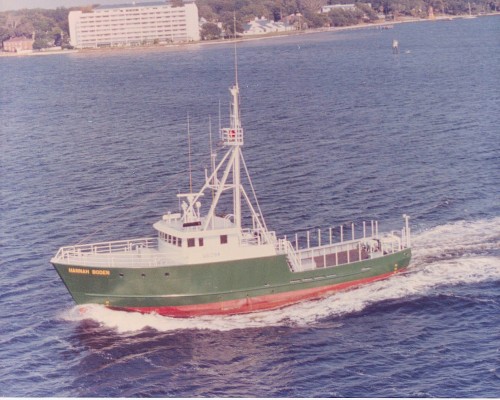
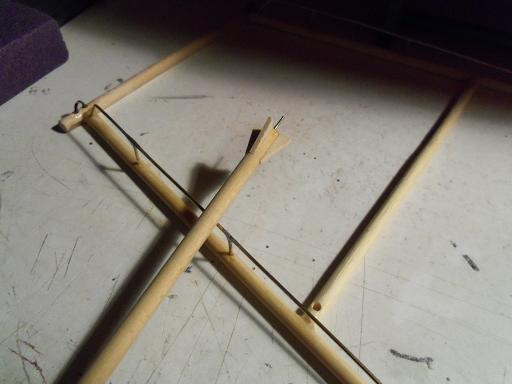
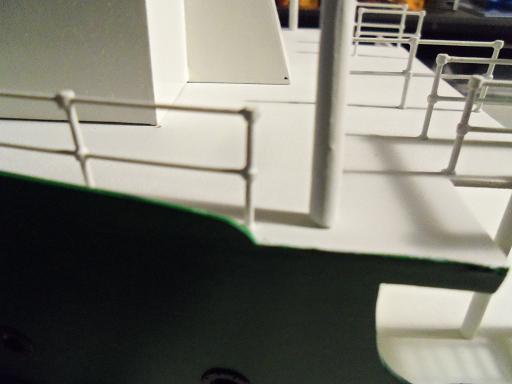
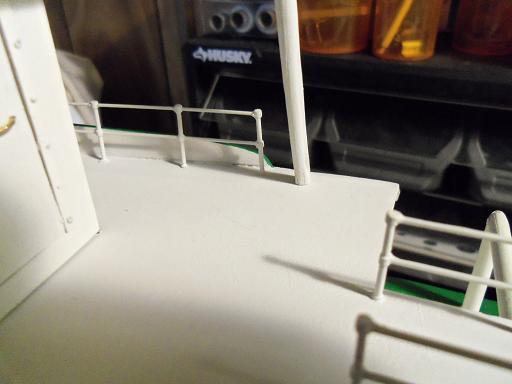
it's been a couple of weeks since my last update........been down with a cold. it's not the cold so much, but the meds to fight it make me so drowsy. another thing that brought me to a crawl, is when I did some dry fits, I found a few things that are off with the build.....I'm trying to figure out how to work around them without having to alter what I've done so far. the one solace I can take from this, is that in looking at the Andrea Gail, what I'm actually seeing is the Lady Grace. my thought is, that while these two ships bore a resemblance, the Andrea Gail may have been configured differently. looking at the Hanna Borden, you can see the difference the Andrea Gail was built at the same yard......the A.G. in 1978......the H.B. in 1983....eastern ship builders in Panama City, Fla. the problems I've run into are small really......it's a real fudge figuring out how to do it, and keep with the configuration. I've already solved one of them. I did get those eye shackles in place. I used two long pins and stuck the shackle in place, through the channels on both sides. first a small drill, and then a drill the same diameter as the shackles. I have a few others to do......I'll be using the same method. the first problem I saw pertains to the tall ladder the will go up the side of the first and second section. I wrapped the railings all the way around the face of the gangway......I originally thought it looked better that way. now that I have the front uprights and supports assembled, to put the ladder where it's supposed to go, will be blocked by the railing. what makes this worse, is that I made it too wide, and the ladder will also interfere with the boom bracket. I will most likely put the ladder on the back part of the assembly...you'll see more about this in a moment. another problem is the stanchion I made.......don't know why I didn't see this one sooner. with the stanchion in place, the tilt of the aft section is going to interfere with it. the reason why.....is that it's way out of scale! the instructions had measurements of the parts, and that's what I went by to make it. too bad too.........I dressed it up a bit more with some supports at the base. so.....it will be back to the drawing board with this piece of the puzzle, and scale it down so it's at least the same height as the podium / rack {should have been a dead give - a - way } to be able to put the boom brackets where they needed to go, I had to trim the bulwark fenders back even with the fore deck railings. then they will fit in the proper place. the alteration was touched up after the changes were made. still need to finish the pilot house roof........got a bunch of stuff to make that go on top too. I've done a bit more this morning.......should have it up later. thanks for looking in
- 956 replies
-
- 16
-
-
- andrea gail
- trawler
- (and 1 more)
-
looking super Patrick.........welcome back to the table!
-
good to see your making progress again Henry. on the cannons, I think you have an interesting idea. perhaps not a good idea in an actual battle situation......but as a model, it would be real neat to show how the cannon look in both positions. I've been toying with an idea as well. would it be practical to show the cannons in 'batteries'? the side of the ship divided into three batteries....the bow, the mid ship, and the stern. in a small skirmish, have the bow and stern batteries in the closed position, and have the mid ship battery open and ready to fire. would this be a practical practice for a ship's gun crew? glad to see your back at the table......and I like how you modeled the cannon. there is some great detail it it
- 196 replies
-
- 2
-
-
- plastic
- soleil royal
- (and 2 more)
-
awesome planking Sjors really making some headway with the deck layout.......really nice!
- 1,616 replies
-
- 3
-
-
- caldercraft
- agamemnon
- (and 1 more)
-
quite a bit of detail in there Kees........the assembly looks just super! it's amazing what your gleaning from mere pictures very awesome job indeed! I was looking at your railings again.........made me think of my last visit to the craft store. I saw some 'parts'.......resembled the stanchions you made. I really like the way you put on the cap rail. definitely food for thought
- 205 replies
-
- 2
-
-
- kw49 antje
- trawler
- (and 1 more)
-
#2 deck looks great! the King plank is a nice touch I've done something similar, using thin strip mahogany.
-
Cutty Sark by NenadM
popeye the sailor replied to NenadM's topic in - Build logs for subjects built 1851 - 1900
very nice work on the bow stem decorations........the trail boards will compliment them really good I've built model ships for many years now......and I still don't know all the terms and names.- 4,152 replies
-
- 1
-
-
- cutty sark
- tehnodidakta
- (and 1 more)
-
I built this kit back in my younger days.........now trying to find this kit, is like looking for a needle in a haystack! back then I had no idea of the inaccuracies......it will be interesting to see what you uncover I've always wanted to build another.
-
very nice work Kees.....love the detail you've put into it. well done indeed!
- 205 replies
-
- 1
-
-
- kw49 antje
- trawler
- (and 1 more)
-
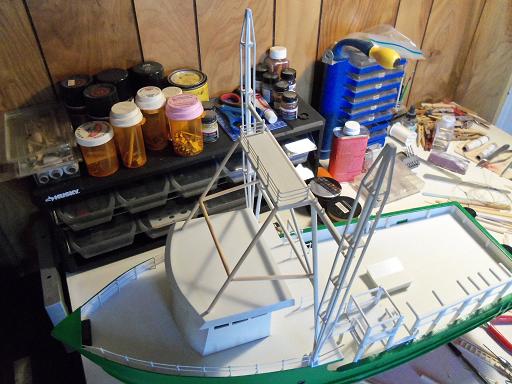
yes......when the masts are assembled, it will put them into perspective. at least your not hearing what I usually hear........."you care more about you boats, than you do me!" my answer varies from time to time
-
they look really awesome John........sweet build!
- 2,250 replies
-
- 2
-
-
- model shipways
- Charles W Morgan
- (and 1 more)
-
I think that it's a combination of the year the kit came out and the information base they had to work with. you would think though, that with every upgrade of the molds, new information and detail would have been tooled into them......I'm sure the molds were remade a couple of times. well done on the fore thought
- 446 replies
-
- 1
-
-
- Revell
- Constitution
- (and 1 more)
-
looking very nice Kester.........cleanly well done!
-
nice.......I see you started a bit of planking have you though about how she's to be viewed? if you planked the cut a way side and left the other side open, you could position a light over the other side and illuminate the lower deck......that would look really neat! super job your doing here!
-
thanks Michael...........coming out better than I ever expected more progress soon.......I got a heck of a cold, and didn't get much done yesterday.
- 956 replies
-
- 1
-
-
- andrea gail
- trawler
- (and 1 more)
-
fantastic job with the spark plugs Michael......how much clearance at TDC? very sorry to hear of your admiral's health problem.......I wish her the best
-
very nice build here Steve......the level of detail is fantastic! I noticed the different color in plastic.......are you using some parts from a kit? looking forward in seeing more
- 45 replies
-
- 1
-
-
- saratoga
- aircraft carrier
- (and 1 more)