
HOLIDAY DONATION DRIVE - SUPPORT MSW - DO YOUR PART TO KEEP THIS GREAT FORUM GOING! (Only 51 donations so far out of 49,000 members - C'mon guys!)
×


popeye the sailor
-
Posts
16,007 -
Joined
-
Last visited
Content Type
Profiles
Forums
Gallery
Events
Everything posted by popeye the sailor
-

Cutty Sark by NenadM
popeye the sailor replied to NenadM's topic in - Build logs for subjects built 1851 - 1900
that's some serious paint work your doing there Nenad.........looking great! you can almost see it at the bow!- 4,152 replies
-
- 1
-

-
- cutty sark
- tehnodidakta
- (and 1 more)
-
super job on your fitting her out Nils........some really nice rigging there. I had to laugh when you mentioned there were some lines missing..........how can you tell! very well done!
-
makes perfect sense........done thing like that myself don't know what I was thinking calling it a center board housing.......with that keel, where would you put it?!?! {don't mind me.......I've got a bad case of 'truck brain' }
-
looking sweet Bob.....no matter how large the update.......it's always good to see progress
-
guess I don't have to worry about that Carl........tearing into it, I found that everything I've done was all for naught! the engine is junk! ....I have some lovely pictures of the damage! >just in case<
- 956 replies
-
- 2
-
-
- andrea gail
- trawler
- (and 1 more)
-
very well thought out Patrick......added detail can even relate to thickness as well. I notice the center board housing looks to be a bit thicker {1.5 mm ?} in relation to the rest of the build, do you plan on keeping it that way?
-
just came in from all that shovel'in.........what a workout! we've also been looking up info on the water pump and timing belt for this crazy rig of ours........I'm very sure this is what happened to it. more later they both open to the outside Carl........I don't have all the hardware on them yet. you are the first one I thought of when I wrote that Nenad :D I think we all have a hothead.......just at different heats I think I mentioned something about detail in your build log........it's good to add detail, but one has to be careful with it's degree, or you may hide others, or cause them to be too pronounce. there has to be balance, for the overall deck layout to flow evenly. it's a very good point Tom.....one of the aspects that I thought about as well. when I did plastic kits, I would do this in order to add extra detail in some cases. I followed the same rule......like when I made the ice maker. here the detail looks too pronounce, especially because the doors are not made to the plan specifications. the detail looks good....but would look better if dulled down a little. thank you! the problem here Bob, is that the door is already the height of the bulkhead. I can cut down the door another 1.5 mm and add the thickness.......I probably should make it a little more pronounce as well......I don't think I have it coming out far enough the thickness of the piece I have on there now, is about 1.5 mm {1.7 according to Billings wood specs}.....I'll just double it, and that should correct it. thanks to all the nice comments.......now that I've had some lunch and rest, I'm going to go and tear into this piece of work, I call a truck. hope to perhaps do a little more tonight, and finish up on the doors
- 956 replies
-
- 3
-
-
- andrea gail
- trawler
- (and 1 more)
-
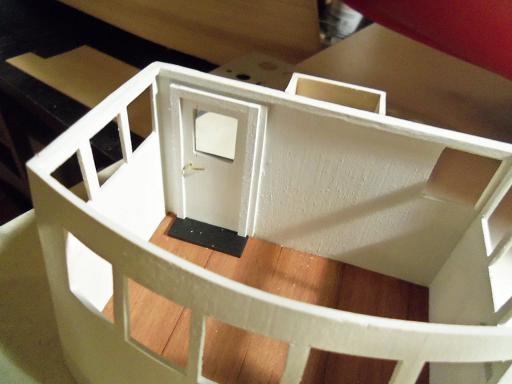
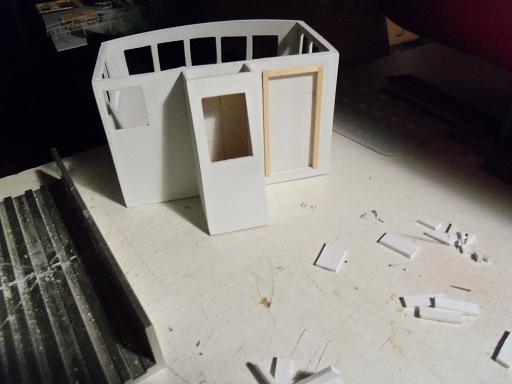
I was just outside with Gibbs........MAN......we are having a BANNER year for snow! it has been said that when spring comes around, you see the Robin, a bird known for it's charcoal back and orange red belly. I told the admiral that it wasn't true, and proved it to her last year. going out the door with Gibbs, there were two really fat ones perched in the tree in the back yard.....don't think they're liking this storm one bit! they were content to stay there.....that is, until I threw open the lid on the trash bin and it slammed against the garage wall! I could thrash my son right now.........the way our driveway is situated, the only way to plow it is to back drag the snow, plowing it off to the side at the beginning of it. he talked to the plow guy, and he put the first run, right up in front of the garage door! NOOOOOOOOOOO! now I gotta shovel all that into the back yard! Kevin won't be much help......he has to work tonight, and he needs to sleep. oh well! {hope he doesn't do THIS again}. anyway........I did do a little on Andrea yesterday {a continuance of the day before}. I have a decision to make concerning detail. on the inside of the pilot house, you wouldn't see the hinges for the door, but I did add the door handle. there will be no rivets around the door frame, like the outside frame. here is my dilemma......in doing the rivets for the outside bulkhead door......it looks OK.......but, I'm wondering if painting them black, makes the detail stick out like a sore thumb. as I looked at it, I was beginning to think that this detail should be a bit more subdued......perhaps by painting them over with white. the dimples would still be there......but they wouldn't be so ........startling. the window glass is what I mentioned earlier. thanks to Peter Visser for this really great idea......he did this on his Zeeschouw build. this is floppy disc film, cut to fit. it looked so cool, I had to try this out.....this was the perfect opportunity. I will be beefing up the threshold.....per suggestion from John......thanks for that my friend I even thought to do the windows in the pilot house with it, but no........it would take some of the realism out of the build. true, it's just a model, but it would deter the direction I'm going with it. the pilot house door is assembled now.......just need to do the hinges and rivets. there are cases where added detail should be as pronounce as other forms of added detail. what are your feelings on this, as it pertains to your modeling style?
- 956 replies
-
- 6
-
-
- andrea gail
- trawler
- (and 1 more)
-
thanks to everyone for the kind comments........and to all who hit the like button as well. I didn't do much yesterday......didn't even look at the truck. I need to find out what happened though......get that bad girl back on the road. I'll keep ya in the loop as to what it is yea, I'm leaning toward a map of sorts as well.........although......I do have that avatar size picture of a pirate lady, that my friend Bob sent me.......very well done >let's see that instant replay< I did the pictures in the Nordkap as kind of a joke for my friend Tom @ Billing Boats {when he owned the store}. I made two pictures for that build......Popeye and Olive dancing, and a portrait of Poopdeck Pappy I thought the sill was high enough John.......I can change that. now that I look at it, the entrance for the pilot house is higher......probably not a critical area for it to be done, but that's OK. the door just fits under there, so I probably can slice some off the bottom and put on a new threshold........funny thing is.....I never took a measurement of how tall the door needed to be.....I just guessed! MAN!!! you got a Tee Shirt for your troubles Piet! I GOT GYPPED! I did get frisked by the state trooper, and got to sit in the back of the police car.......did you get to do that? I don't blame him though........with all the riff-raff we got running around these days. thanks for the good word the doors don't open or close Sjors....I did one build with movable doors.......perhaps the next one it's OK Mobbsie.........I'm already buried with build updates I haven't looked at yet.......still very glad to see your following along thanks for the good word
- 956 replies
-
- 4
-
-
- andrea gail
- trawler
- (and 1 more)
-
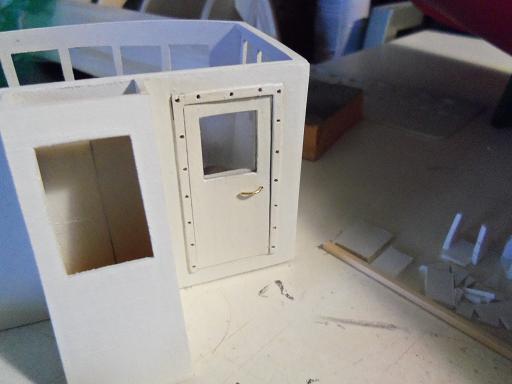
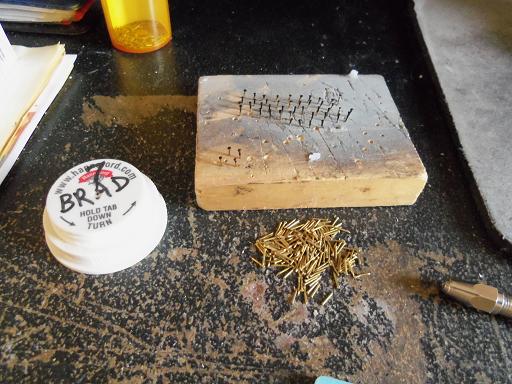
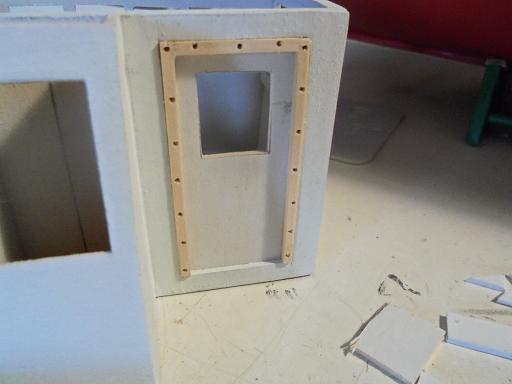
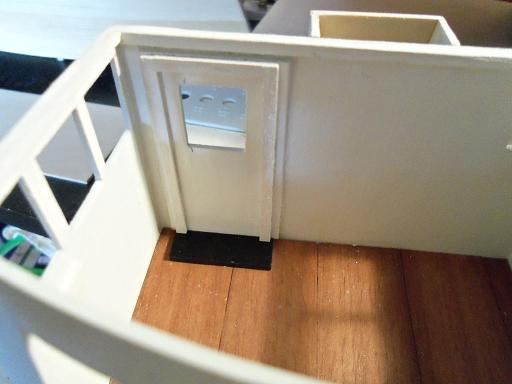
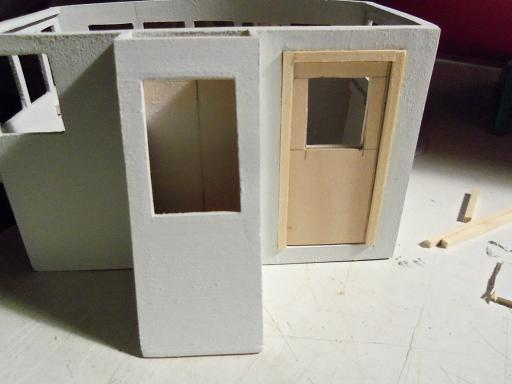
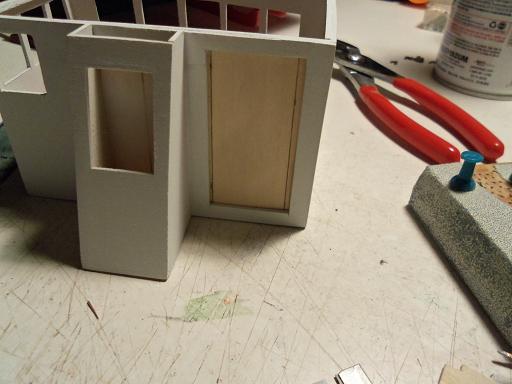
my work week {this week} has really been interesting. who would have thought that a trip to work, would end up being stranded on the highway! well, that's what happened to me......on the way home, the truck broke down in the middle of nowhere. I stayed with the truck for almost an hour, before deciding to walk, which the State Trooper estimated was about three miles....before he caught up with me. the admiral was frantic.......called the shop.......called the State Police. left work around 5:30 PM.......didn't get home until after 8:00PM. the end of it came, when my son pulled up as I was talking to the cop. luckily, I have towing in my insurance policy....my son met the fella at the truck......got it home. it now sits nestled in the garage, where I can tear into it to see what happened. anyway......back to Andrea {I'll burn the truck later!} the door that will be located on the main deck bulkhead needs to have a threshold. after it was trimmed to size, and the edge rounded off, it was put in place to see how it would look. it was primered and rivet holes were drilled......a bit of added detail for inside the pilot house, I thought to keep it simple. since the outer door panel will show on the outside, I thought just to make the door frame, using the outer door panel as a template. the inner looks of the door will require a threshold as well.....I had this part from another build, that I didn't use. it found a use here....painting it flat black. I'm going to use 7 mm brads for the rivets......they were painted flat black as well. the door jam {frame} on the pilot house was drilled for rivets as well. the inside door frame was cemented in place and painted. the bare wall is very tempting......I have an urge to put a picture there, like I did the the Nordkap. the thought is there......I'll think on it one thought I had, is that there are to be decals on the pilot house.......they do not like to stick well to flat paint. the pilot house and the door parts were painted with gloss white. the door recess of the pilot house, and the outer door panel, is going to create a sort of sandwich, so I thought this would be a perfect way to install the glass. I have some really thin clear cello, cut to the size of the door opening. I wasn't too sure if the white glue would adhere to the cello, so I used a hole punch to create openings for the glue to get through to the outer panel. I have more to add.......but between being side tracked a few times......supper......and taking Gibbs out, it slowed down a bit. I will put this together and show you in a bit. I also forgot that I needed to touch up the port side from the over spray. Since I'm not working today......and I'm off Monday {scheduled time off}, I can finish up with what I was doing. I'll be back!

- 956 replies
-
- 9
-
-
- andrea gail
- trawler
- (and 1 more)
-
thank you Gerty.......welcome! always glad to see new folks looking in I can say that it will get more interesting.....I can start adding aspects permanently now, instead of the usual dry fits. thanks for the good word! hope you follow along
- 956 replies
-
- 1
-
-
- andrea gail
- trawler
- (and 1 more)
-
thanks John and Augie.........I was rushed to go to work yesterday, so I couldn't drop a line to let you know I appreciate your kind comments. I have much more to show. Patrick.......scale, in my opinion, has nothing really to do with it. detail is only relevant with the amount of creativity a person has. the scale in which you build at, and the detail that you've envisioned for her, is amazing. kits don't even come close, to the amount of detail that you've packed in there! the scale that I work with suits me well....due to my big fingers to me.......if you can envision it and make it appear on your table {or in your model}, I think that is about the greatest asset a modeler can have. there is much I want to add to this build.....I hope to see much more in yours thanks for the good word my friend!
- 956 replies
-
- 2
-
-
- andrea gail
- trawler
- (and 1 more)
-
good to see some progress Kees.........nicely done Hawse hole. deck structures are 1/2 the fun....can't wait to see how you'll detail her out!
- 205 replies
-
- 1
-
-
- kw49 antje
- trawler
- (and 1 more)
-
the best solutions seem to come from sitting back with a beverage, to ponder. I'm sure you've thought of something to do with the cork .......that is, unless it's plastic I used to follow car modelers quite a bit.......they have some cool methods for seat coverings. great progress Bob!
-
I still love the way she looks a couple of your photos show the shape of the hull very well.......contour lines are very well done! your dry fit is a feast for the eyes!
-
very nice work Nils......sails are looking splendid!
-
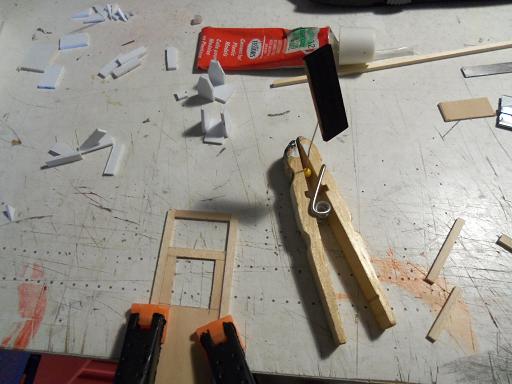
could be Augie......I'm following the instructions. who ever heard of using instructions to build a scratch built model......that is.....unless you drew them up yourself I shouldn't laugh......it's probably been done before I'm using what's left of a old tube of Testor's red...I do have two fresh tubes, I bought for the Titanic. I also have the liquid cement in the applicator bottle {black}, but I don't use it too much. more door work is going on.......
- 956 replies
-
- 3
-
-
- andrea gail
- trawler
- (and 1 more)
-
thanks Matija........I have a few sub assemblies done........when they are all in place, then the build will really look like I've gotten somewhere! glad you like the build! thanks George.......evergreen is one of the biggest suppliers for HO scale train materials and supplies. I was looking through the display they have at our local HobbyTown.....they even have structural parts.....girders and trusses. love to do a tanker somewhere down the road! another product is Plastruct, also found in most hobby and craft stores. they too have just about anything you can think of...square stock.....solid round stock .....hollow round stock.......angle, quarter round, half round.........I can go on and on. I usually go to Hobby Town, Hobby Lobby, Michael's, A.C. Moore......just a few of the places in my area. doing a search might produce more, even places that specialize in decorative moldings for doll house and such. if I remember correctly, I even recall seeing the old Ambroid company......name changed to Northeastern scale lumber is still around.....haven't looked in lately, but they did supply wood sculpted moldings. I'm sure you'll be able to find what your looking for thanks for the good word!
- 956 replies
-
- 3
-
-
- andrea gail
- trawler
- (and 1 more)
-
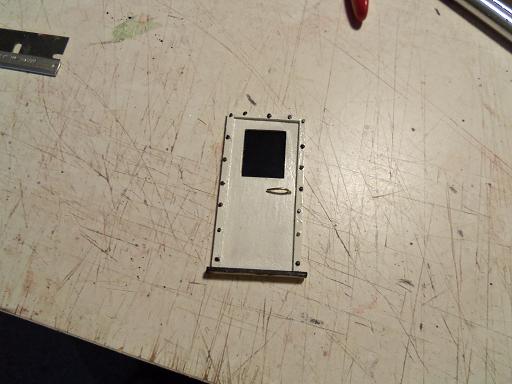
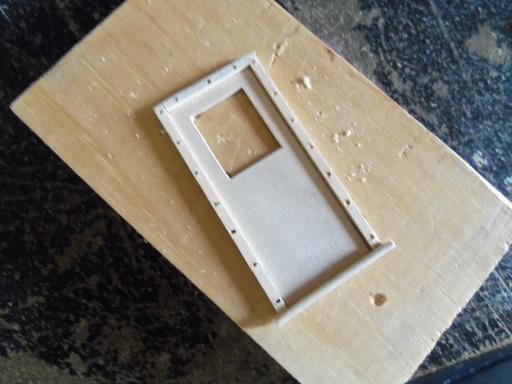
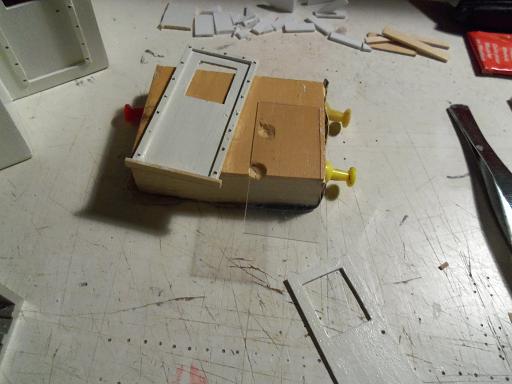
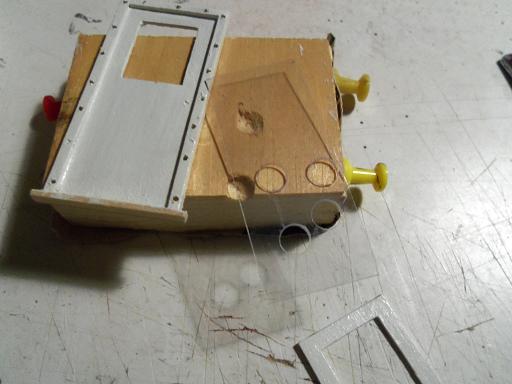
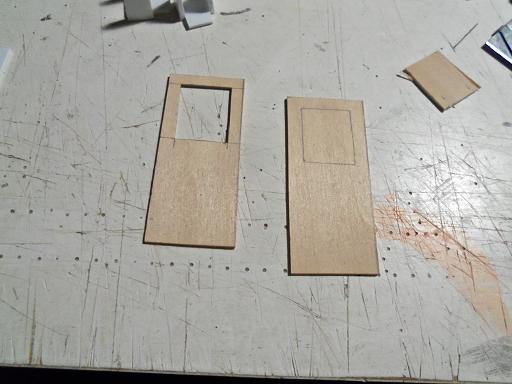
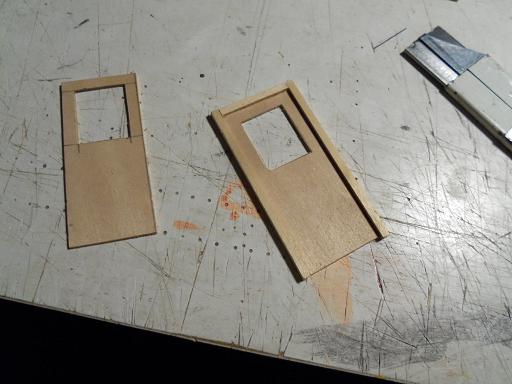
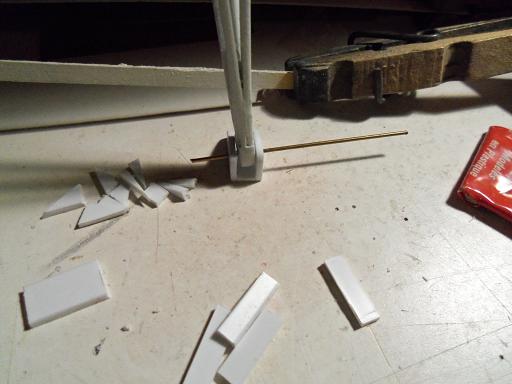
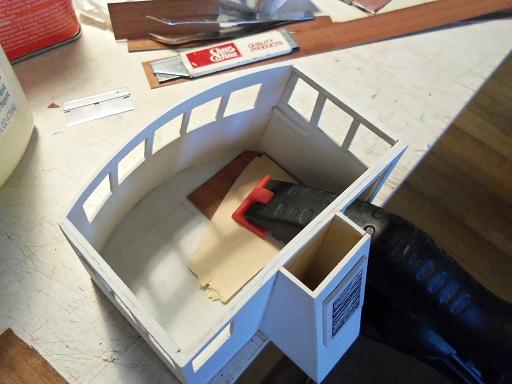
I tried not to leave too much clearance.......I'll take it up with some thin stuff. by the time I get back to it, the cement should be fully cured. the other thing I was thinking about, was the doors......the one on the pilot house, and the one on the main deck bulkhead. now that I have an indented area to work with, I'll see how this is going to flesh out. it starts with 3/16 square stock, to make the door jams. then the door itself. with this one, since it is inset, I won't put a threshold at the bottom. it's already there. I had cut out the window........this square was traced onto the blank and later cut out. believe it or not, this was pretty easy to do.......I had the thought that the blank might break free or something worse. the door was put back in place. at the bow, under the small cap, there is a black box-like object, in the plans. I'm thinking it's some concept of a windlass / winch for an anchor........but there is no mention of an anchor in the plans or kit. I added it in anyway. I started to do some detail work to the dash......but more important, id that the railings are now being cemented in place. I'm figuring to do the over spray touch ups as I go along. ....meanwhile, back at the doors....... I should make two of these......one for inside the pilot house, but this one is slated for the main deck bulkhead. the door part is cut out. the window has been cut out, and the jams have been installed. I have a very neat idea for the window........tell ya more when the process gets there


- 956 replies
-
- 8
-
-
- andrea gail
- trawler
- (and 1 more)
-
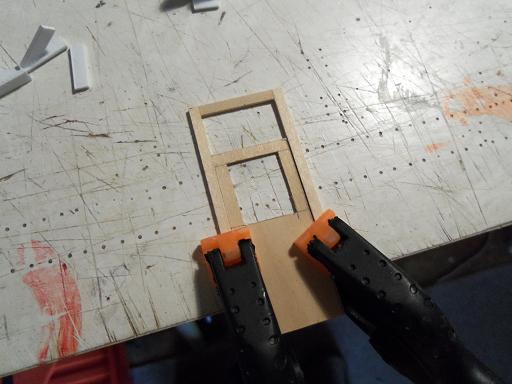
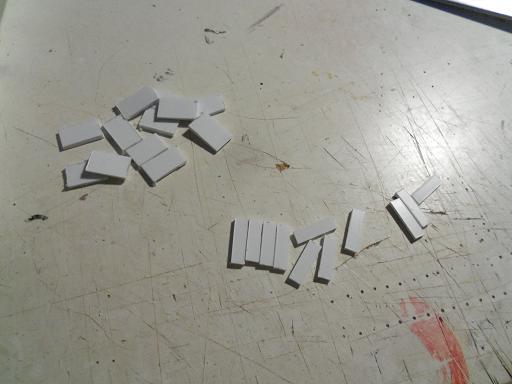
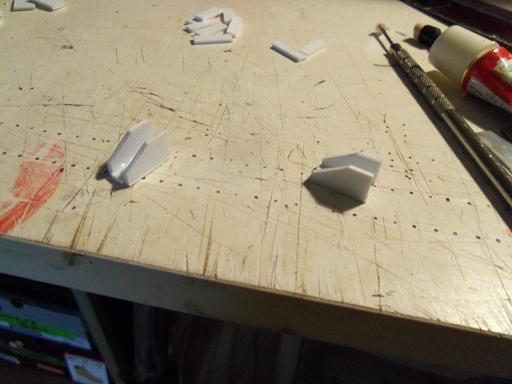
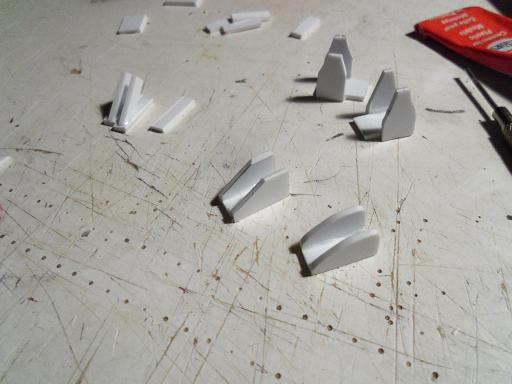
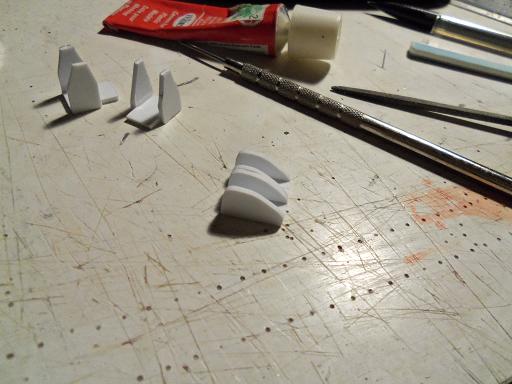
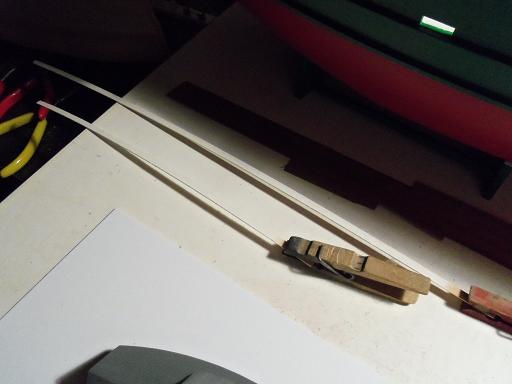
Yesterday was a time thing.......when I started.....was good, but when I went to the glue part, I had to play the waiting game. {I guess I forgot how slow styrene cement can be at times} cutting the strips I needed was OK........once I found my Utility knife! I knew i had put one in my tool box! rough the sides out and cement the parts together........ then made a couple other parts that I will be needing......again, once they are dry, I can begin shaping, like the one I did in the foreground when I had removed the railings......I saw again what happens when one paints round parts. I had to touch up the undersides of them. by this time, I had the pair of stabilizer boom brackets shaped out.......a bit more refinement to get them to look more alike. the hole that needs to be drilled in them was figured out and done sadly, I have to wait till the main part of the trawl rig is in place before any more can be done with this. .....call it incentive to get my butt in gear!
- 956 replies
-
- 8
-
-
- andrea gail
- trawler
- (and 1 more)
-
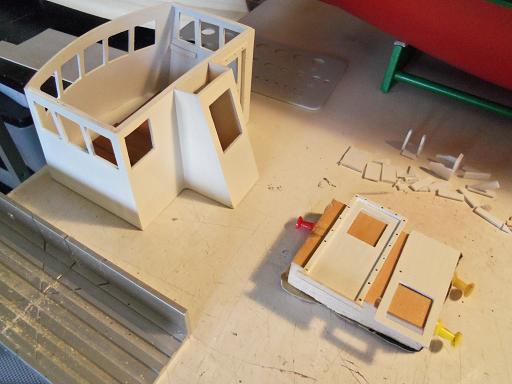
thank you very much for the wonderful comments gentlemen! now that the major paint work is done, I thought to put a dry fit together, but of course, I'm getting side tracked at this stage of the game......it's better to simply cement everything in place rather than play 'dress up' the work on the pilot house is in full swing, and I've also got a few other sub assemblies in the works as well. thanks to all who hit the like button as well ! thanks George......it's not me anymore......the build is in control now! I may try my hand at being creative, but when I add it to the build, it magnifies it. it's like I said.......when I thought of this vessel when I made the hull for the Boulogne.....I never imagined that it would turn out as well as it has. took a little to get to this point, but it is worth it! that's OK Piet........the floor will most likely be very hard to see in it's entirety......the blotch doesn't even come close to what I did to it last night. I touched up bare spots around the pilot house, and primer spattered onto the floor! end of the world......not likely. I put the brush in the bottle of dirty primer.......and brushed down the floor got rid of them pronto.........by blending them into the floor. I already had a coat of semi gloss on the floor......the whole process seemed to make it look better........and it didn't harm the floor either! I agree.......ya gotta love this color combination! I'm going to see enough of it though, when I get the Holiday boys painted
- 956 replies
-
- 1
-
-
- andrea gail
- trawler
- (and 1 more)
-
Patrick.......you are quite the 'micro maniac'.......your pack'in quite a bit of detail in this little hull! looks awesome!
-
looks awesome John......very nice 'plank planning' indeed! love the shape of the hull
-
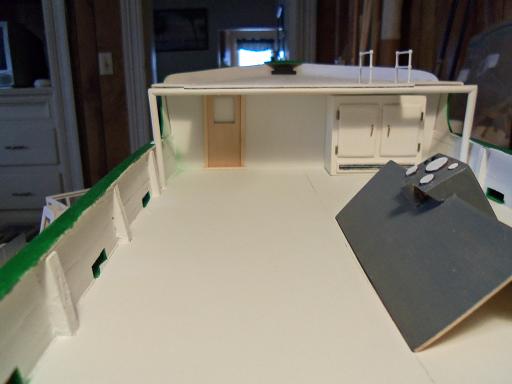
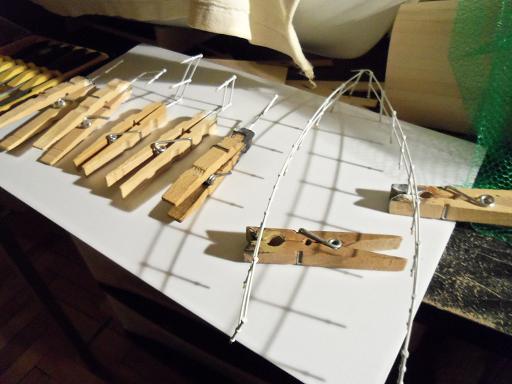
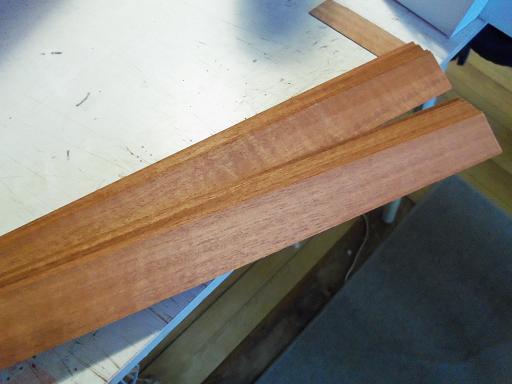
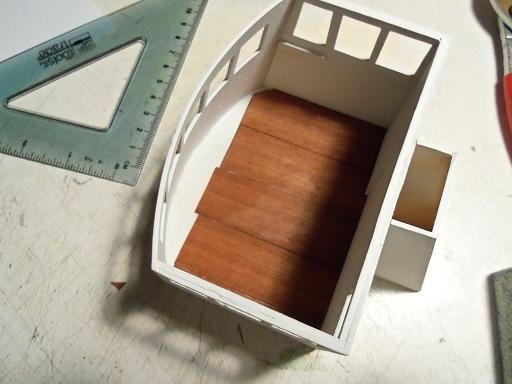
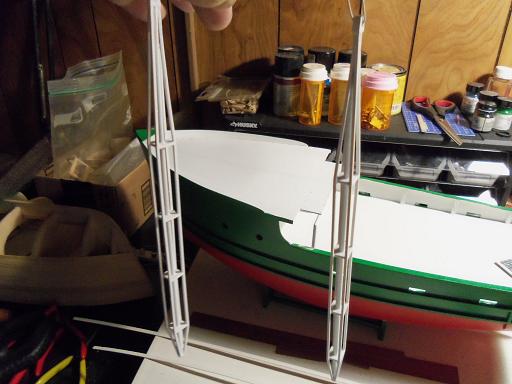
it was a broken day at the table.......kept getting pulled away.......and then having to go for the dreaded hair cut. death for the living when the admiral gets together with 'the girls' {I'd rather be cooped up in some stuffy craft shop} Tuesday night, I did get a chance though to fix the stand, so the hull could be put on without scratching the keel....just stuffed some felt in the slots. ...not a flattering picture, but there she is. as mentioned, the pilot house is the next point of interest, since it need to be in place to continue the trawl assembly. I had mentioned these wide strips of mahogany, that I have. I'll use a strip to do the floor. I really should use a different glue......white glue is water based......and we all know what happens to thin wide wood when water is applied.....curling! very hard to work with! I also found another bottle of paint that had met it's maker. the caps have this plastic cone in it.......I suspect it gives the cap a very poor seal. previously, I tried working with brass to make some of parts I'm going to need. I found that I'm poorly set up for that at the moment, so I'm going to settle with making the parts from sheet styrene. I'll see how this works for me the second bottle of 'dark ad gray' was good....so I painted the dash it's base color. I don't think the interior will have the visibility factor.......but I'll do a little in there anyway. the floor is finished......but not as well as I would have liked......not to mention the white glue blotch in the middle...which I failed to adequately clean up. looking from a few angles......only snippets of the floor will ever be seen....so the heck with it. I gave it a coat of semi gloss.....I may give it another to bring the sheen factor up....it will hide it better. I also cemented in the blank for the entrance.......I knew I had cut the opening a bit too large, but I had some bone headed idea about counter-sinking the door .......to add demention {if that's a word}. but it turned to dementia........and equated to nothing more than an indention. go figure.......and then the thought about a window kicked in.......... I still have those planks strips that I had ripped {thickness-wise} with the scroll saw. I painted the best parts and threw the rest away. ....and that's when the camera tried to lie to me.......think you know someone this long.....and they try to stab you in the back! I had painted the stabilizer booms.......when I took the picture, it tried to tell me that I had not painted one side, on one of them. OK......I'll give you the benefit of the doubt......bad light and angle.......white is such a suck - up! here is a better picture.....I hope I'll see what I can do today.......it's snowing again. may have to run out and buy some new shovels...my son broke the home made 'pusher' shovel.......the shaft was made from 1 1/2 inch round stock. I made it to push the loose stuff down the driveway, after the 'first wave' shovels had remove the bulk of it. it wasn't made as a 'digger' shovel......and that's what he was doing......broke in three pieces. oh...well!


- 956 replies
-
- 13
-
-
- andrea gail
- trawler
- (and 1 more)
-
hard to say without measurements of the sill. I would suggest making a few test steps and see what would fit the bill
- 525 replies
-
- 2
-
-
- cutty sark
- mantua
- (and 2 more)