popeye the sailor
-
Posts
16,007 -
Joined
-
Last visited
Content Type
Profiles
Forums
Gallery
Events
Everything posted by popeye the sailor
-
 thanks Mark.......When I got the kit, it was duly noted that there were parts missing.........so it was orphaned from the get-go. since all the major hull part are here.......heck, I might do well to build it and have fun with it I know what your saying though, I'm hoping that someone who has built this kit before chimes in and tells me how their build went. I'm interested to see if they found the same problem. the parts that are missing equals one complete part's panel, so this tells me that someone got shorted with their kit. the hull will come out, but I'm finding the same problem with the port side, so I'm thinking that the first two ribs are off in dementions towards the bottom of the hull. the upper dementions are ok.......or I wouldn't have been able to plank the bulwarks and fore cabin. I have three planks on her at this point, and it's beginning to ocurr again......the plank wants to pull away from the rib. I'm doing this without the use of joggers, and with tapering the plank, I can steer the planking as to where I want it to go.........I can achieve the curvature needed to follow the bow rabbit. as long as I keep the start of the plank perpendicular to the rabbit, I can compensate the run. nawwww! I can't throw it out now.........what fun would that be? true.......my inventory would look all the better for it......but I would end up feeling like I've forsaken it........a kit is a terrible thing to waste I'll whip this bad boy in shape! I'm one of those thick headed yankees.......never could figure that out.......we are yankees.........but we have red sox........we're suppose to hate the yankees. I'm not a sports fan.....I'm doing America's REAL past time right here!

-
yes!!!!! good to hear that it is not much of a problem. actually, it a good head's up for when you do the S.F.........it's all the same spacing.
-
I had to look again.........that curved railing is really an eye catcher........I do have to agree with the others as well........that's some pretty fast work, on some pretty small details....very nice
- 1,279 replies
-
- 1
-

-
- agamemnon
- caldercraft
- (and 1 more)
-
dooough! thanks Mike for the correct terminology of the anchor ring treatment.......what I described....goes around the mast! so many new words....I can't keep them straight! LOL! you got twins......and your still building!? gee.....I have two boys {6yrs apart}...and I had to stop for a while. build while you can.......when they get mobile.......game over man! Frank........I made an error on the term for it..........listen to Mike.......puddening........I'm writing that down.......
- 389 replies
-
- 1
-
-
- supply
- caldercraft
- (and 1 more)
-
very nice build.........glad to see your back!
-
gee Frank........they look great! they look weathered........the wood part came out especially well. I'm not an expert Frank, but I think they do....I believe it called wooling. I'm going to do it on the Goth........dampen the thread with diluted white glue and wrap it aroung the ring evenly.......should be tacky enough to hold the thread in place as you do it. that is the method I thought of, perhaps someone else has something better. glad to see your making some progress.......look forward in seeing more.
-
the most logical suggestion would be to scratch make them....to find those parts might be a tall order. you could go here and try the parts replacement path. Revell - The leader in replica plastic kits since 1945. you might have this info: H-399 part numbers #78 #79 (2) I'll keep my fingers crossed for you, but last I heard, they were in the process of phasing it out. doesn't hurt to try though.
-
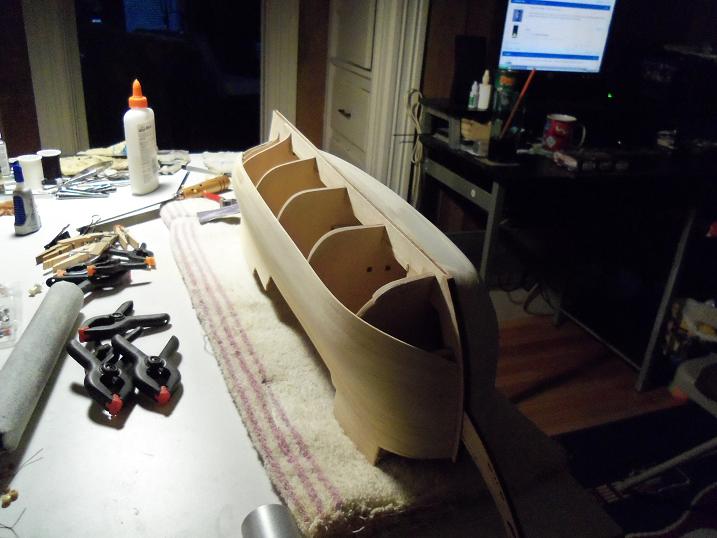
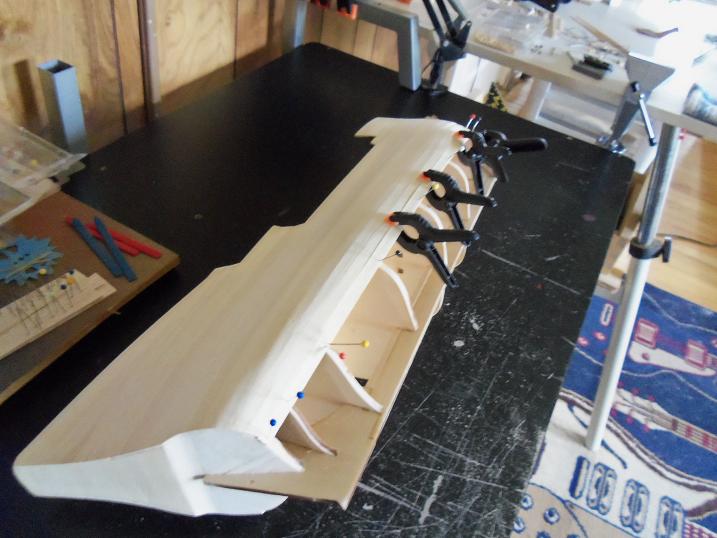
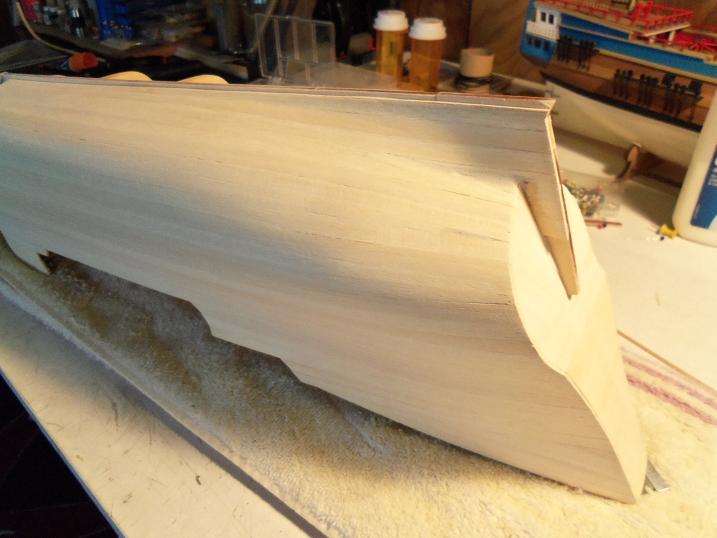
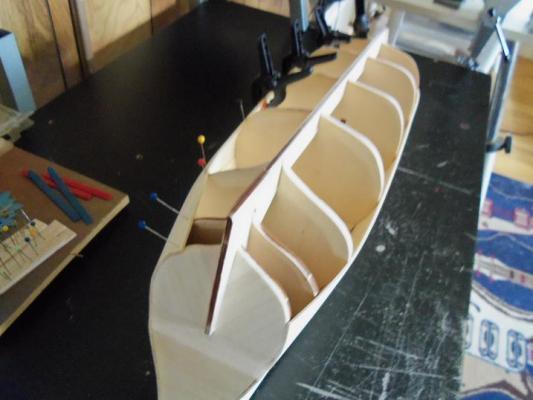
thanks Sjors and Anja....I'd say it's a little of both........what would be considered a small design flaw by some, and me, with little experience with this type of hull. no excuses.......just an assessment. I will fix it though........no hull will be left behind thanks to you as well Frank, Adam, and John.......you folks are too kind I have the starboard side done as you can see.......I really like how rounded it came out. so far, the port side is coming along well...the contour of the bow is matching perfectly. hopefully, I can get the planking finished soon. thanks again for the good word folks......I'm still having fun!
-
great work on the shrouds........she's looking beautiful!
-
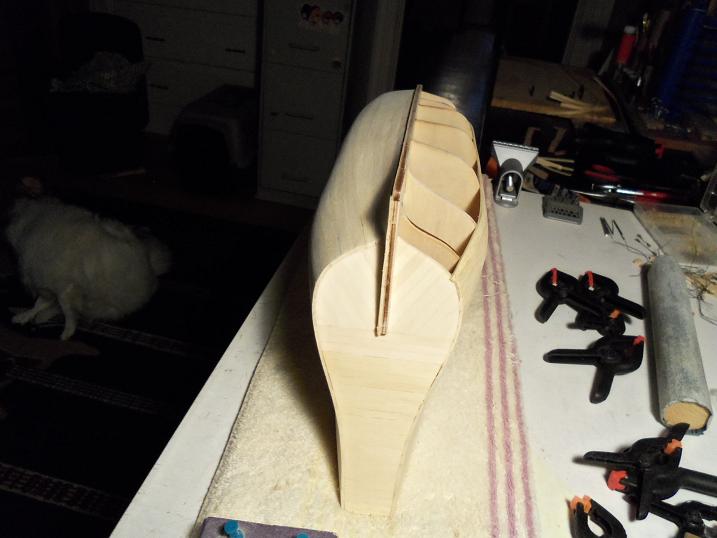
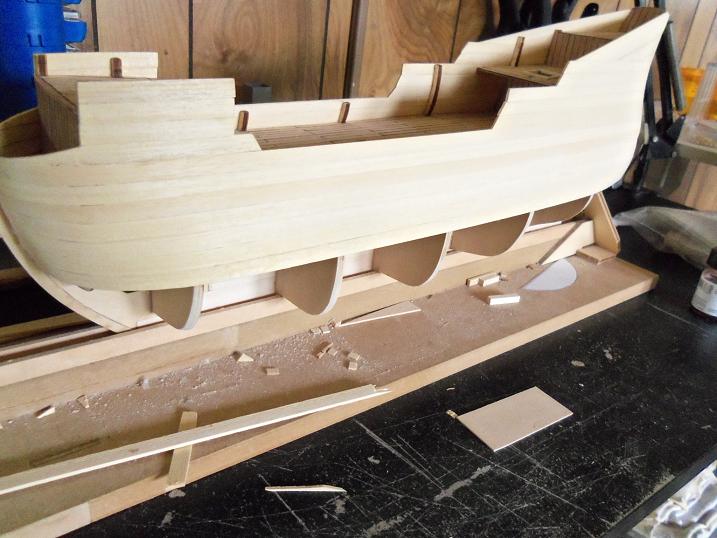
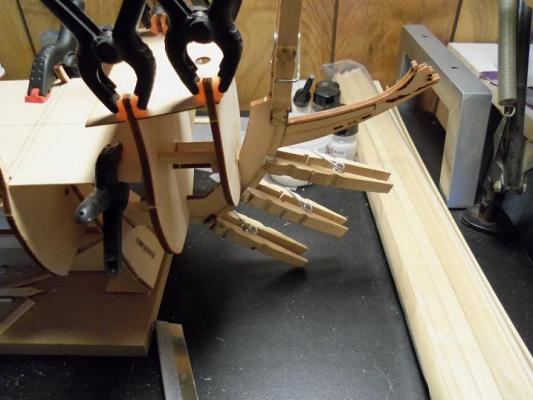
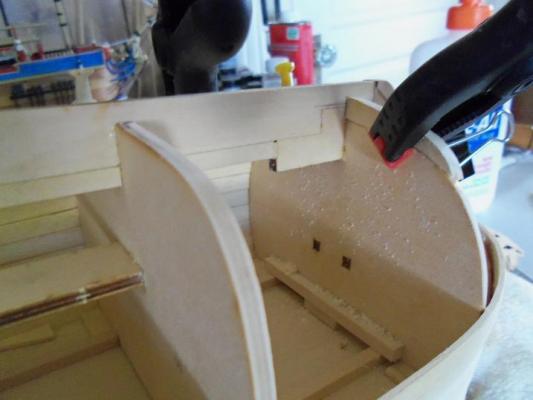
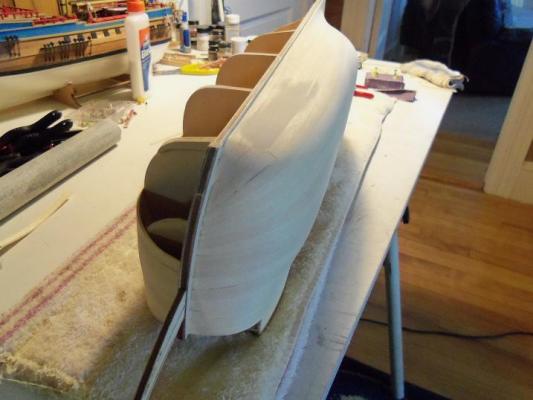
just a small update with this build......but first, I want to show you sort of a review. see anything odd here? back when I did the bow rabbits, I should have seen this.......like how far the first rib was to the rabbits themselves. it might be hard to see, but it equates to about 1/4 of an inch. a more recent picture........what do you see? you can clearly see the shortcoming with the first rib, but what about the second rib.....it's off too. since I have pre bent my planking, the first rib is not that big a deal......leading off from the bow rabbit, the contour is ocurring, none the less. but, the further down I planked, I found that the planks kept wanting to pull away from the second rib, no matter how much I tapered. to remedy this, I made up a pair of fillers to bring the line consistant with the keel. this picture really shows how far off the first rib is.....it will get buried with no trouble at all. these fillers {at least the starboard side at this time} seem to do the trick. the starboard side is done now. once the port side is done, I can do the final tweaking. I did have to use a little filler, it's ok though, since the bottom below the waterline is to be painted a darker color.......although I have seen a red bottom. I will do a bit more surfing to make sure of the color, but none of this will be seen.


-
bottom's up Sjors...........putting rows in between would be a good solution. super job on the ones you already have though
-
very nice work Mobbsie.....clean, neat, and ship shape!
-
sweet looking rigging Michael.......you've achieved realism. that's the beauty of it! if you were to put weight on it, does it conform to shape? perhaps that's all it lacks...........nicely done!
-
very nice.......no gaps! to limit the rounding of edges, take a piece of sand paper and glue it to a flat board. rub on it with very little pressure........you'll get a squared edge every time you make pulling out that Marine Models PT boat kit I have very tempting Tim, but with all the projects I've got going at the moment.....I'd better not. looking forward in seeing more of your progress
-
.......the house guest that never leaves..............LOL!!!
-
safe travels Andy.........let the next chapter in 'the adventures' begin!
-
Yea BABY! make us proud!
-
I don't have all those wonderful tool either........my work shop ia about as primative as it gets. I like it that way. I bought the admiral a sewing machine.......oh......she told me all the wonderful things she could do with it. as of right now........I've used it more than her The admiral love what I do with my ship modeling......I also do a lot {underline a lot} of bash work. I know that if I finished my last build, and had nothing new to work on........I would have a kit in front of me in no time! that's just the way we roll.......of course, it would start because she would see me looking at a plastic kit....she doesn't want me doing plastic any more, and will do anything to keep me from them. {I think it's cute and very funny} "oh dear.......all I have left is this old Trumpeter kit....guess it will have to do." "WHAT!!!! I thought I could smell plastic........here....take this Norske Love.....and go back in your hole!" "OH!! Thanks dear........your a peach!"
-
it's with the same company....right?? is this common to go from ship to ship?
-
the shrouds look great! you can string the ratlines while your waiting for parts
-
well, I'll be dipped in do do! Happy Birthday Ron..........have a great day!
- 240 replies
-
- 1
-
-
- supply
- caldercraft
- (and 1 more)
-
hey Sjors....you can send him this one.......I never tire looking at it....so cool!
- 1,038 replies
-
- 2
-
-
- King of the Mississippi
- Artesania Latina
- (and 1 more)
-
wow.......that's a lot of missing parts! good you found out early........hope they are quick to supply! I'll be watching your build of this fine vessel
-
I heard he had a new album out........miss the old CCR days. don't leave her too far away......it's a great tension reliever, I have come to find