


druxey
-
Posts
13,369 -
Joined
-
Last visited
Content Type
Profiles
Forums
Gallery
Events
Everything posted by druxey
-
 Just catching up. Her lines are so sweet. Congratulations on a great trophy. What does one have to do to win it?
 -
Looks A1 to me.
-
Looks perfect to me. I always think it's a pity that all that accurate cutting work will be hidden later....
-
NAIAD 1797 by Bitao - 1:60
druxey replied to Bitao's topic in - Build logs for subjects built 1751 - 1800
Off to a great start! -
One way to round a square section stick is to gently whittle off the corners at 45 degrees with a sharp blade first. Then take a small strip of sandpaper (150 grit will do), loop it with the grit inside and hold both ends between your left finger and thumb (if you are right handed. The stick is inserted in the loop and moved up and down, revolving it a little every few strokes. Keep the sandpaper loop fairly tight around the stick while you do this.
- 12 replies
-
- 1
-

-
- Model Shipways
- Lowell Grand Banks Dory
- (and 1 more)
-
I'm fortunate in that my clients are discerning people. Many have built models themselves and are aware and appreciative of what goes into one. For me, the pleasure is in the building and problem-solving rather than the keeping! So, no sadness. Well, perhaps a twinge of nostalgia for the first professional model I built.... Thank you again, everyone, for your interest, comments, questions and encouragement.
- 433 replies
-
- 14
-
-
- open boat
- small boat
- (and 1 more)
-
Cross-lock style is the answer.
-
True, Maury. But I resisted all temptation to pre-fair anything.
-
Um, if you are woolding, it is far easier to apply the rope before adding the hoops. You'll see why when you come to completing the rope turns. I assume you'll add the tapers to cross and trestle trees? The new bibbs angle (or lack of it) looks much better!
-
The teenaged version of you had done a very neat job of the original fore course, including the bonnet. The new robands look as if they are separate items rather than a continuous spiral. Nice!
- 740 replies
-
- 2
-
-
- Tudor
- restoration
- (and 4 more)
-
Thanks again, everyone, for your kind and positive remarks. It was a fun and challenging project to do. The model will be leaving port and going to her new owner shortly.
- 433 replies
-
- 10
-

-
-

-
- open boat
- small boat
- (and 1 more)
-
Nice strategy using tape to space the floor boards! She's looking sharp.
- 160 replies
-
- 3
-
-
- Model Shipways
- norwegian sailing pram
- (and 1 more)
-
Mast lengths usually include full length from the top of tenon on mast head, but not the tenon on the step. Don't ask why!
-
It's tempting to pre-fair frames, but.... However, I'm sure that there were occasional shims in a real ship as well!
-
Proper blade for 2mm acrylic rod
druxey replied to modella's topic in Modeling tools and Workshop Equipment
For small diameter rod, I've had good success using a sharp scalpel blade. Place the rod on a flat surface and roll it under the blade using a little pressure so that the rod is scored all around. Then simply snap the rod at the line. -
HMS Discovery 1789 by Don Case - 1:48
druxey replied to Don Case's topic in - Build logs for subjects built 1751 - 1800
Stern davits were not really a thing until around 1800. -
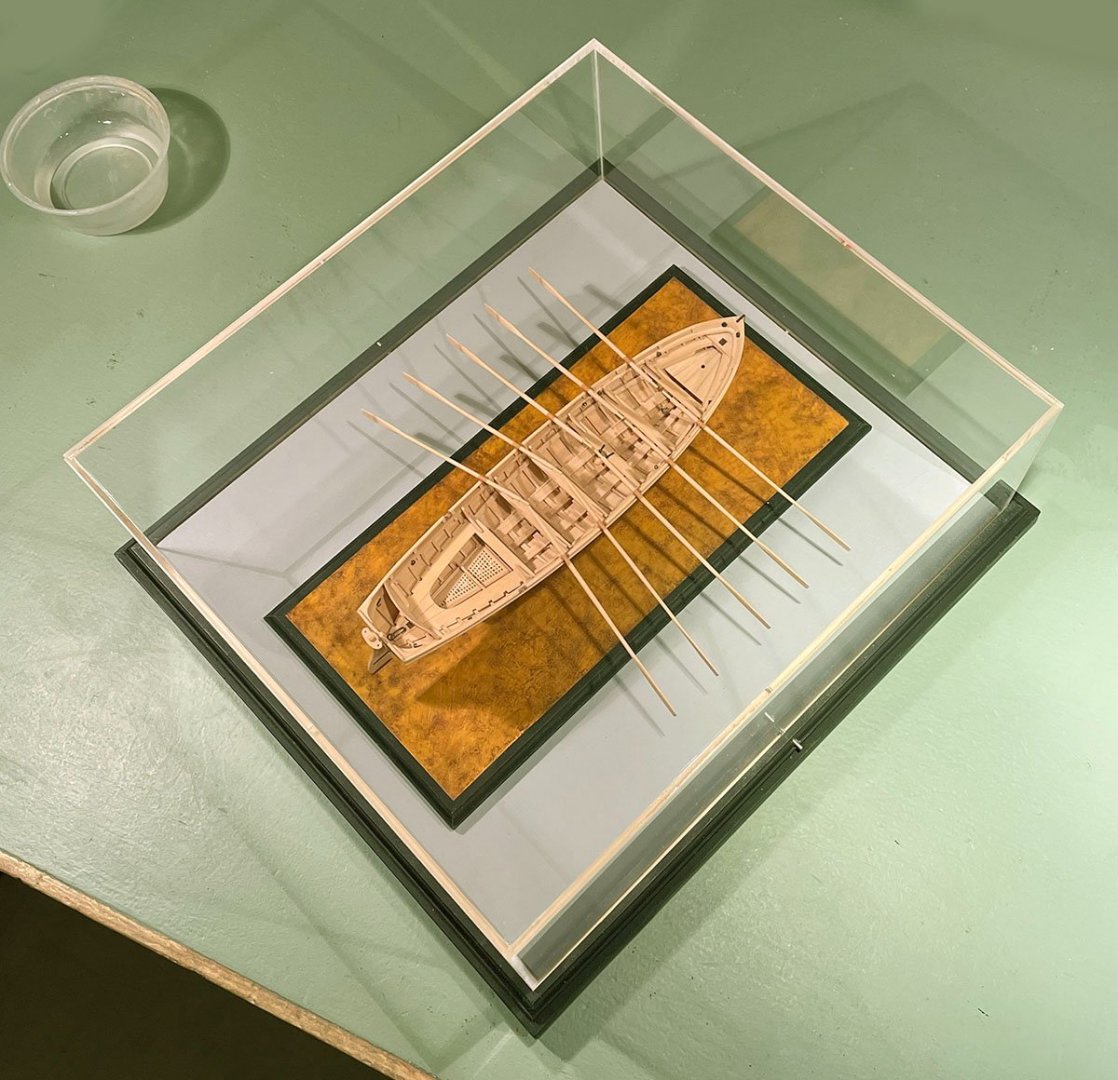
Shipman: Gosh, some folk are never satisfied! Here are some lower viewpoint pics. Hard to do through the acrylic. Thanks again everyone, for your interest and kind comments.

- 433 replies
-
- 23
-
-
-
- open boat
- small boat
- (and 1 more)
-
Thanks again, all. Mark: I wish I had more insight as to the rudder and yoke arrangement, but unfortunately I don't. If anyone out there can shed further light on the mystery, I'd be grateful.
- 433 replies
-
- 7
-
-
- open boat
- small boat
- (and 1 more)
-
Thank you, everyone. So, we come to the end of this particular journey. I appreciate all who have followed along. Happy model-making to you all. BTW, I've no idea what might be next - yet.
- 433 replies
-
- 37
-
-

-

-
-
- open boat
- small boat
- (and 1 more)
-
First, no book is entirely error free! It's not, alas, an ideal world we live in. The further we get historically from what we are trying to study, the harder it becomes. There is also a great difference between primary and secondary sources. Primary evidence comes from the time and place of the subject we are studying. Whoever wrote, produced an artifact or model is likely more reliable a witness to how things actually were. In the case of a model, things might be stylized or simplified, so one needs to be careful. Secondary evidence is from a later time and place. The creator may draw lightly or heavily on primary sources, but transcription and interpretational errors can creep in. As a history research professional friend observed; "Read elsewhere and read critically, always." He is so right!
-
Good progress there, Toni. It's difficult not to knock a chip or two of paint off during construction, but I'm sure it will clean up nicely in the end!
-
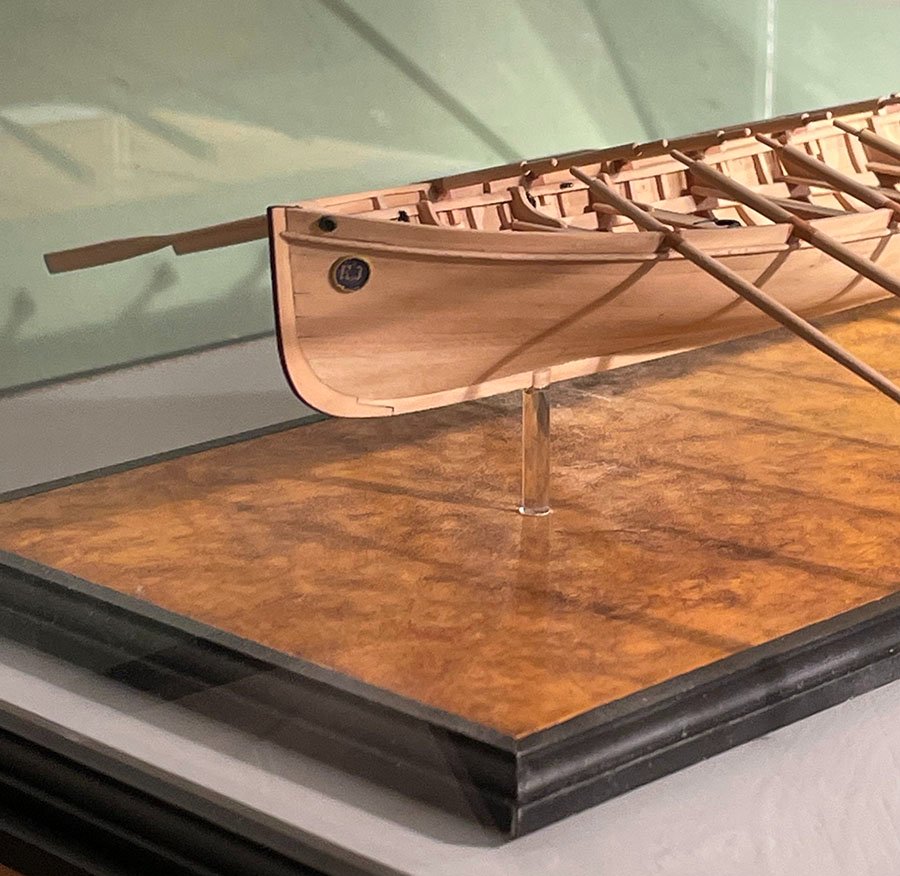
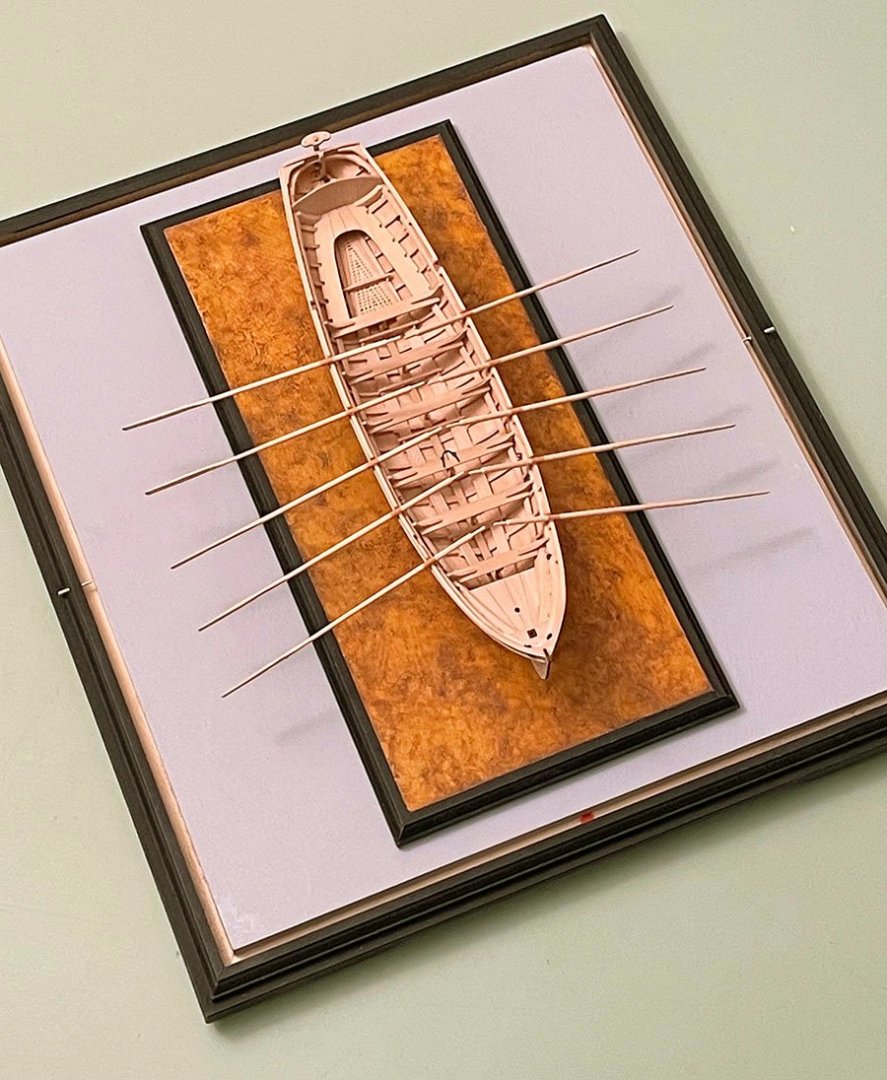
Yes, Eberhard, there are 'tin' bands on the oar blades, but it's hard to see them in the photos. Alan: There is no tiller, just a yoke with two lines attached. As I don't know the run of those lines, I'm omitting them. Steve: The oars are attached using both a dab of epoxy backed up with PVA. Belt and braces!
- 433 replies
-
- 5
-
-
- open boat
- small boat
- (and 1 more)
-
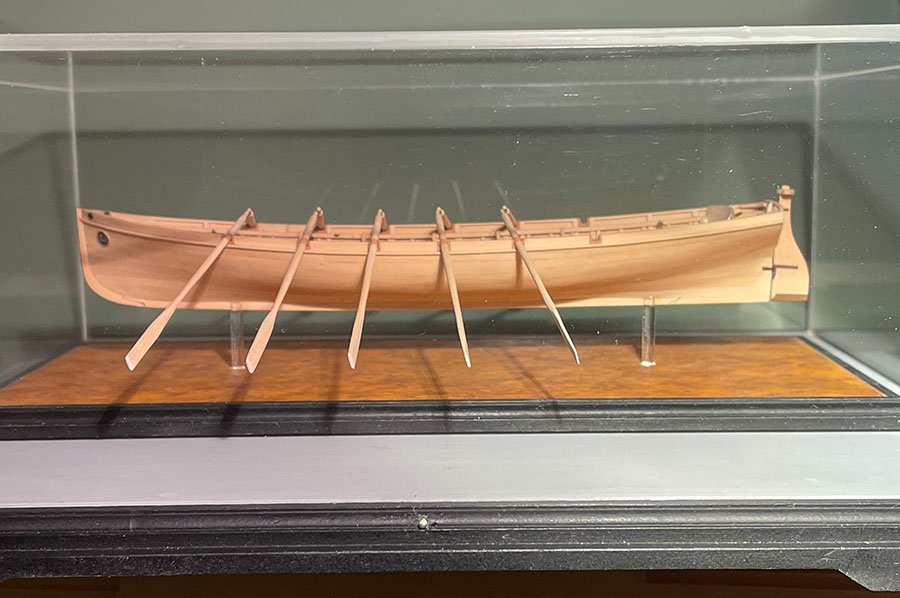
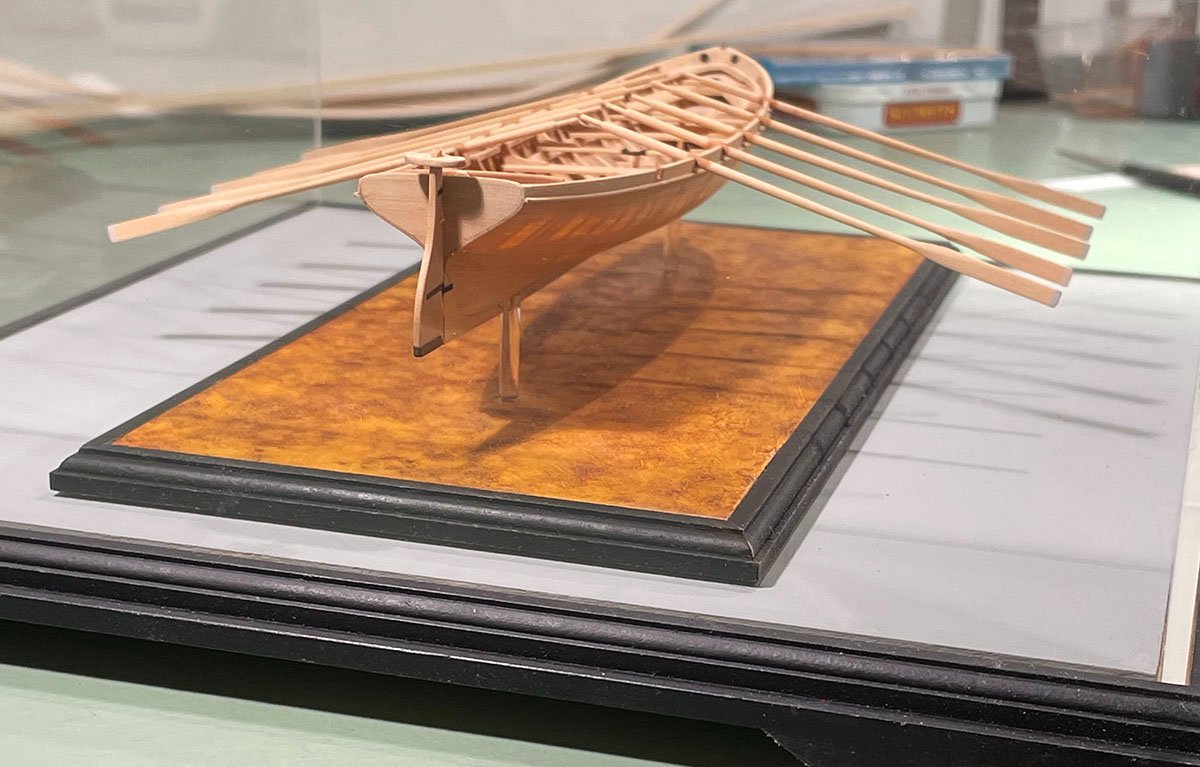
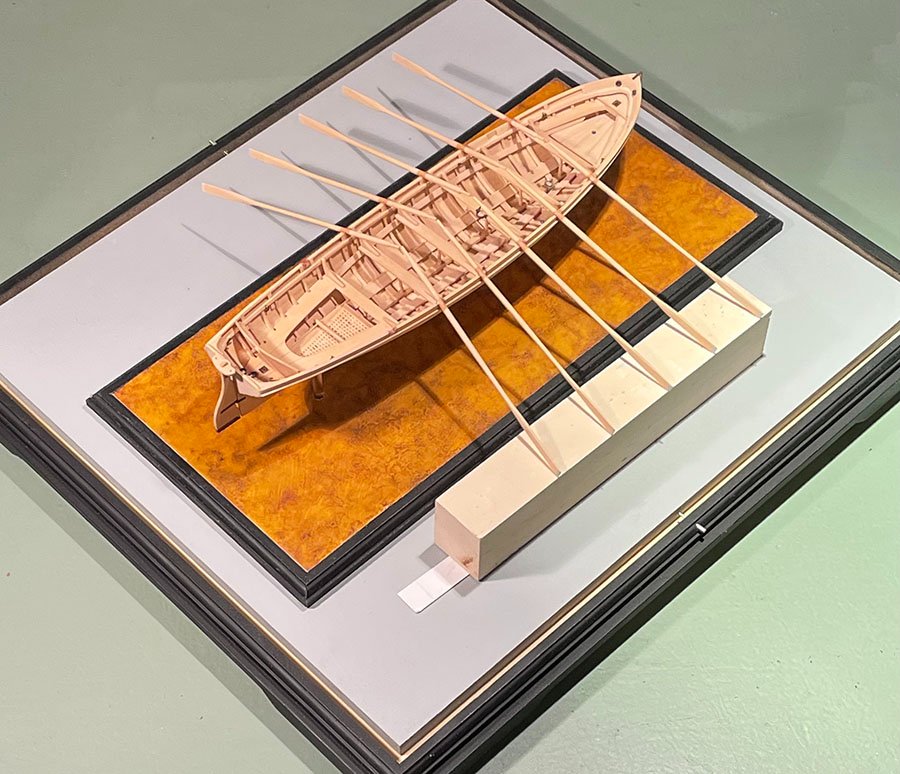
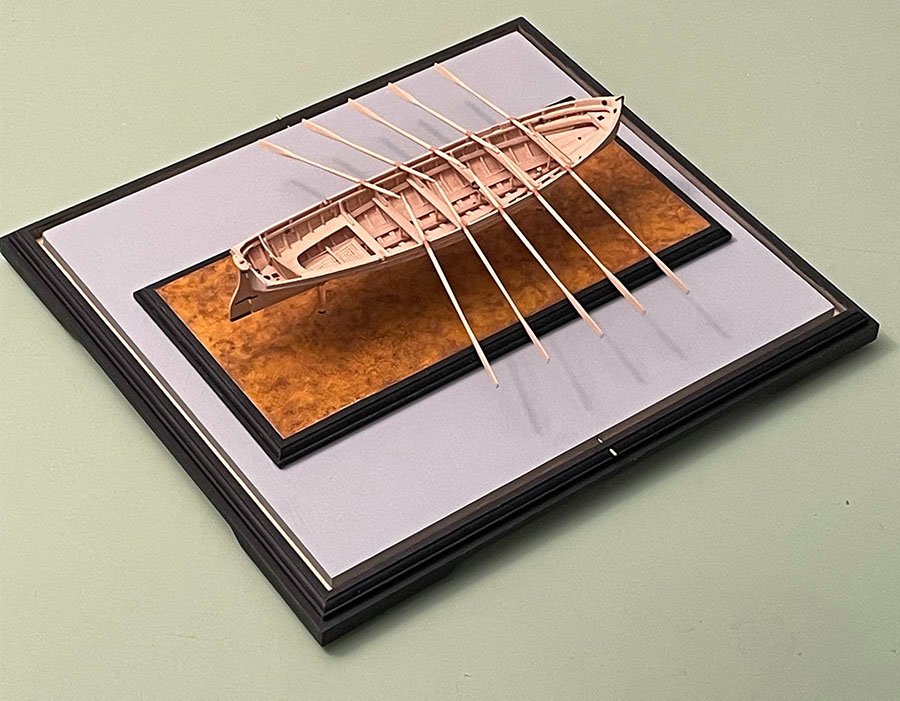
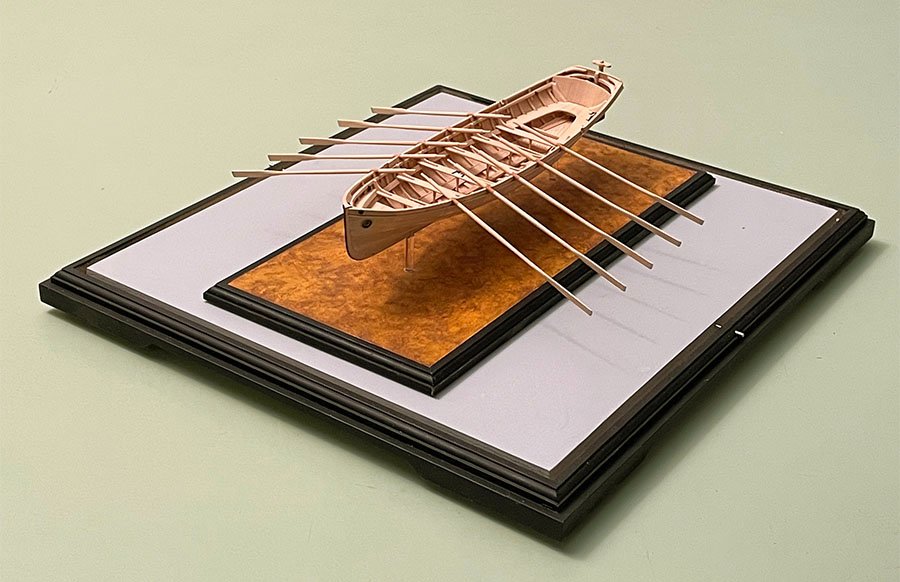
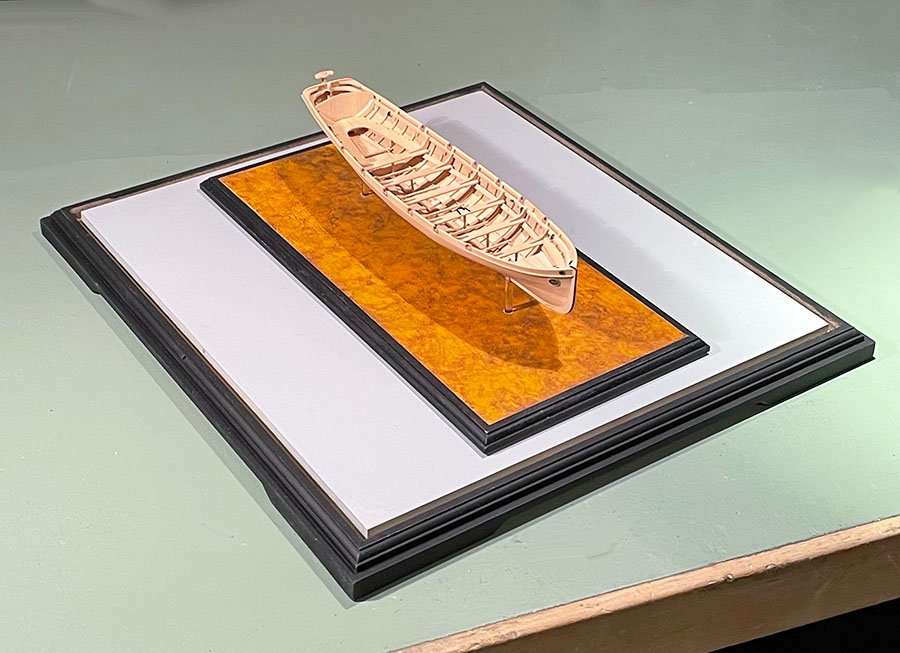
Thank you, one and all. Almost complete now! The oars have been installed and all that remains are final touch-ups, dusting and adding the case over the model. In the first photo you can see the second bank of oars going in, resting on a block of suitable height and shimmed with card. The retaining pins for the acrylic case are also done and temporarily inserted.
- 433 replies
-
- 26
-
-
-
-
- open boat
- small boat
- (and 1 more)
-
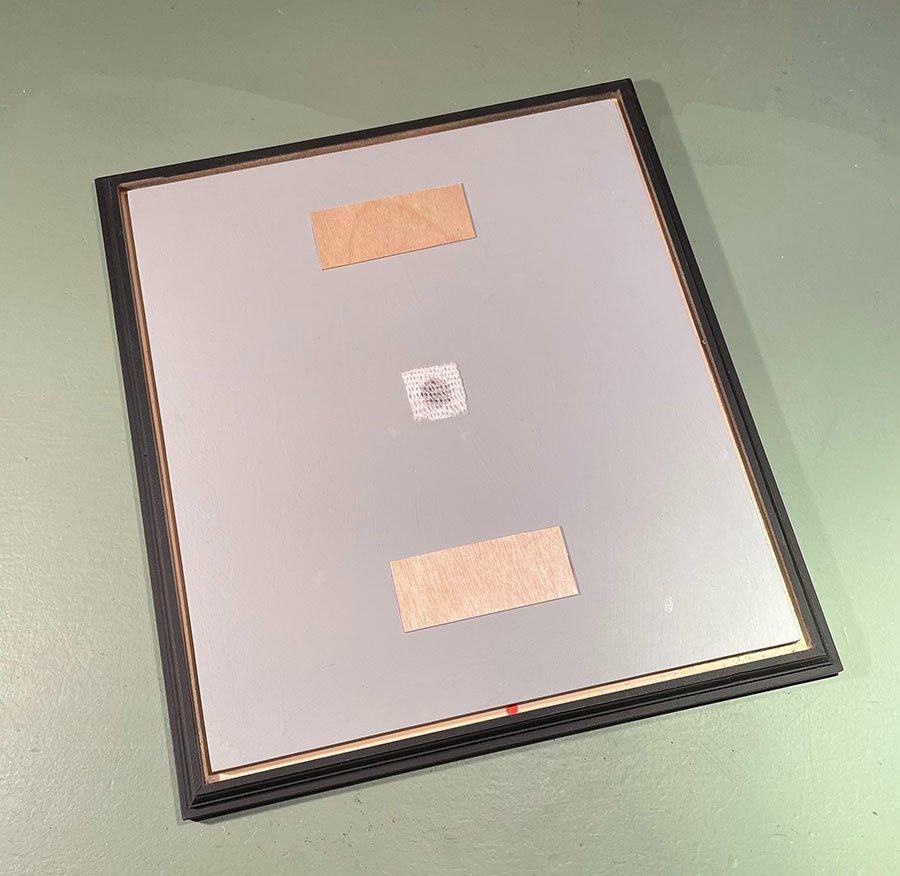
Thank to all for the discussion and comments. Finally some progress to report! The sub-base is complete to fit the acrylic case. For those curious, there is a central hole for air circulation with gauze meh to discourage insect infiltration. The two pieces of 1/64" ply act as an air gap between the sub-base and base of the model. Oars will be added tomorrow.
- 433 replies
-
- 27
-
-
-
-
- open boat
- small boat
- (and 1 more)

