
HOLIDAY DONATION DRIVE - SUPPORT MSW - DO YOUR PART TO KEEP THIS GREAT FORUM GOING! (Only 66 donations so far out of 49,000 members - Can we at least get100? C'mon guys!)
×


druxey
-
Posts
13,317 -
Joined
-
Last visited
Content Type
Profiles
Forums
Gallery
Events
Everything posted by druxey
-
 Good points, Trevor. However, there are compromises on a beginners' level kit. However, if a model-maker can add those refinements to their dory, that would lift the model into another class!
- 28 replies
-
- 3
-

-
- Lowell Grand Banks Dory
- Model Shipways
- (and 1 more)
-
The model Patrick quotes has a contemporary hull but modern rigging. The latter has some oddities such as the small spreaders at the peak of the headsails.
- 77 replies
-
- 5
-
-

-
- Royal Yacht
- card
- (and 1 more)
-
A simpler explanation: 'sighting top' was a typographical error for 'fighting top'!
-
When I wrote 'deeper' I meant in depth, not width. The sash would be tight laterally, but the depth of the grooves would remain parallel. I'm sure that in damp conditions the sashes would have been sticky! I've seen images of ships with raised 'sashes', but they could equally well have been hinged deadlights.
-
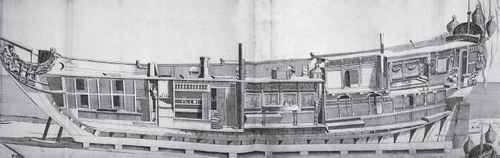
Ab: you have opened a large can of worms here! The plans for Fubbs are for the rebuild of the 1720's and differ somewhat from the earlier Stuart classic yachts. As you may know, Effie and I are working on a book covering all the yachts of the Stuart era. There is scanty hard evidence of internal arrangements. The most detailed 'plan' (and perhaps showing artistic licence) are the Vincenzo Coronelli plates of Isabella that include a longitudinal section:
- 77 replies
-
- 7
-
-
- Royal Yacht
- card
- (and 1 more)
-
Lovely work and an interesting technique for producing curved moldings. Matthias. I suspect that the grooves for the sashes became slightly deeper in the upper section so that the sashes would not bind.
-
Using oak at scale makes the level of difficulty soar! A masochistic choice.... Looking good, though, Steven.
-
Looking good, but the run of your forestay looks too steep. It usually runs out to about a little over halfway along the bowsprit to a closed heart. Lashed to the bowsprit itself by the forestay collar is an open heart (allowing the jibboom to pass through). The hearts are joined by a laniard and the stay tensioned. Also, the mainstay usually runs past the starboard side of the foremast.
-
scissors, shears, cutters for rigging
druxey replied to palmerit's topic in Modeling tools and Workshop Equipment
Castroviejo scissors are the way to go, either straight or curved. They may be used either right or left handed! Kurt: A surgeon can tell the difference in quality, but so might the patient! -
Watchmakers' escapement files are another possibility.
-
Photos like that make me smile! Lovely progress.
-
Patrick: I'm sure that the builders of Mary Rose didn't have access to laser levels and probably the forecastle was a bit 'off'. You may have had it right the first time!
-
A very nice, clean finish, Paul. Well done!
- 201 replies
-
- 4
-
-
-
- Oyster Sharpie
- first scratch build
- (and 1 more)
-
Beautiful work, as usual!
-
I tension to a high pitched 'ting', but haven't tried to figure out the pitch! The finer the blade, the more tension is needed to prevent deflection in curved cuts. Have you tried black dye on your scrap wood?
-
A very interesting approach to small-scale modeling. Your machine file system is interesting. How do you keep the file teeth clog-free?
-
Isn't it a fun challenge, Mark? Look like you have things well under control there. I'm currently working on upper quarter galleries that are even more of a challenge. In plan view they are the shape of half a teardrop. Be thankful for small mercies!
-
Very impressive!
-
Wow! So many problems with that diagram of the 'Naval Gun'. Carriage is wrong, the hanging knee is under the beam, port much higher than usual.... etc. At least they got the outhaul tackle with two single blocks correct, unless it represents a 36 or 42 pounder! Oh, and how is the breeching secured to the cascabel?
-
Fokker D.VI by ccoyle - MPModel - 1/33 - CARD - TERMINATED
druxey replied to ccoyle's topic in Non-ship/categorised builds
Chris: Full marks for persistence - and masochism! -
And, in British ships, the names, when painted (this would be the 1760's to about 1790) were simply painted on, never in 3D. This is a conceit of kit manufacturers.
-
The name on the stern does not look original in style to my eye, vossie. But it's your call!
