.jpg.f26acc9a74319261612561bfa7da1303.jpg)
vaddoc
-
Posts
1,601 -
Joined
-
Last visited
Content Type
Profiles
Forums
Gallery
Events
Everything posted by vaddoc
-
.thumb.jpg.6fd4c1b78768bb3efd745ab810936005.jpg) Bob, it will be interesting to see how many coats you ll need to cover the grey primer. Hand brushing it took me a dozen or so Regarding marking the waterline, this is the method I used. Advantage that you can just wipe it clean and start over. https://modelshipworld.com/topic/18455-another-way-to-mark-the-waterline/?tab=comments#comment-567858
Bob, it will be interesting to see how many coats you ll need to cover the grey primer. Hand brushing it took me a dozen or so Regarding marking the waterline, this is the method I used. Advantage that you can just wipe it clean and start over. https://modelshipworld.com/topic/18455-another-way-to-mark-the-waterline/?tab=comments#comment-567858 -
If it wasn't for the rudders, I d say that the stern is only vertical at the midline, and gets a gradually steeper slope as it extends sideways. Maybe I am completely wrong though, difficult to orient on the photo of the plans
-
This is very interesting. I must admit it is not easy to visualise how the ship will take shape but it is indeed fascinating to follow
-
Looking very good Kevin. I really like this boat. Mahogany is not only difficult to work with, it is very difficult to finish. I remember with a mahogany deck I struggled a lot, then after a few years the red colour has faded and is almost brown.
-
Being a newbie
vaddoc replied to Edwardkenway's topic in Using the MSW forum - **NO MODELING CONTENT IN THIS SUB-FORUM**
What a wonderful way to describe modelling! These last few weeks I seem to spend more time on my knees looking for pieces on the floor than on my stool. -
Change Theme
vaddoc replied to cog's topic in Using the MSW forum - **NO MODELING CONTENT IN THIS SUB-FORUM**
Sure, no problem! -
Change Theme
vaddoc replied to cog's topic in Using the MSW forum - **NO MODELING CONTENT IN THIS SUB-FORUM**
Well, with the grey one, it just scrolls down, no issues With the brown, as it scrolls down it keeps the strip with the "browse, Gallery, group projects etc" buttons locked and carries it down. You see on the photo I have scrolled down to the bottom but that strip is still there
-
Change Theme
vaddoc replied to cog's topic in Using the MSW forum - **NO MODELING CONTENT IN THIS SUB-FORUM**
A minor problem with the new theme is that there is a wide strip with buttons that does not disappear as you scroll down, this eats valuable screen space on my 14 inch monitor. On the old theme this bar is not present. -
This is one nice hull Bob! I ve never used an airbrush and know nothing about it so I am very interested to follow your learning curve with it. You do loose the therapeutic effect of brush strokes though!
-
I always seal the wood before painting, it leaves a very smooth surface, I do not like to paint raw wood. I often use primer, to improve adhesion but mainly to have a uniform colour as a base and reduce the number of coats of paint needed I ve used automotive primers in the past and they are not very good for modelling. They spray very thick, take a long time to cure and are smelly. For a long time now I ve been using Humbrol primers that come in red, white and grey, the latter I find is the most useful. They are expensive but very nice-no nasty smells. It leaves the surface smooth but a quick pass with 400 grit could be done. My experience is that trying to fill imperfections with primer will not work, I remember spraying layer after layer of thick automotive primer and sanding in between, still the imperfections were visible. Really the surface needs to be prepared before the primer goes on
-
Thanks Moab! Due to the large scale, it is easy to find a fabric that looks ok-ish. This one is curtain liner, off white, £8 per square meter.
-
Welcome Rick! Have fun building your boat.
-
Dear both I am really very grateful for your help. Now, I need some time to digest your advice and explanations. One way or another we ll get this boat rigged!
-
Indeed, mahogany and walnut are not the best woods for modelling. Especially walnut has a wavy interlinked grain and tears easily. Finishes fantastically though
-
Kurt, how many coats do you usually apply to get good coverage and depth of colour?
-
Rod's advice above is good. If you look into my Deben log, you ll see all these steps-I hand brushed though. I have the same issue with the raised edges. I just live with it. Apparently it is possible to wet sand the paint with 2000 grit or similar to get rid of these edges but it is too terrifying to do on a finished hull. I think this is something I should experiment with. One think that needs attention, the paint will find its way to even the tiniest of creases. If you suspect the masking tape is not firmly stuck to the hull, start over. Also remember, any imperfection after painting will be much more visible.
-
New 1:48 scale POF kit of the Cutter Alert from Trident Models in China
vaddoc replied to MSW's topic in Wood ship model kits
Will this really be a kit? It looks great! -
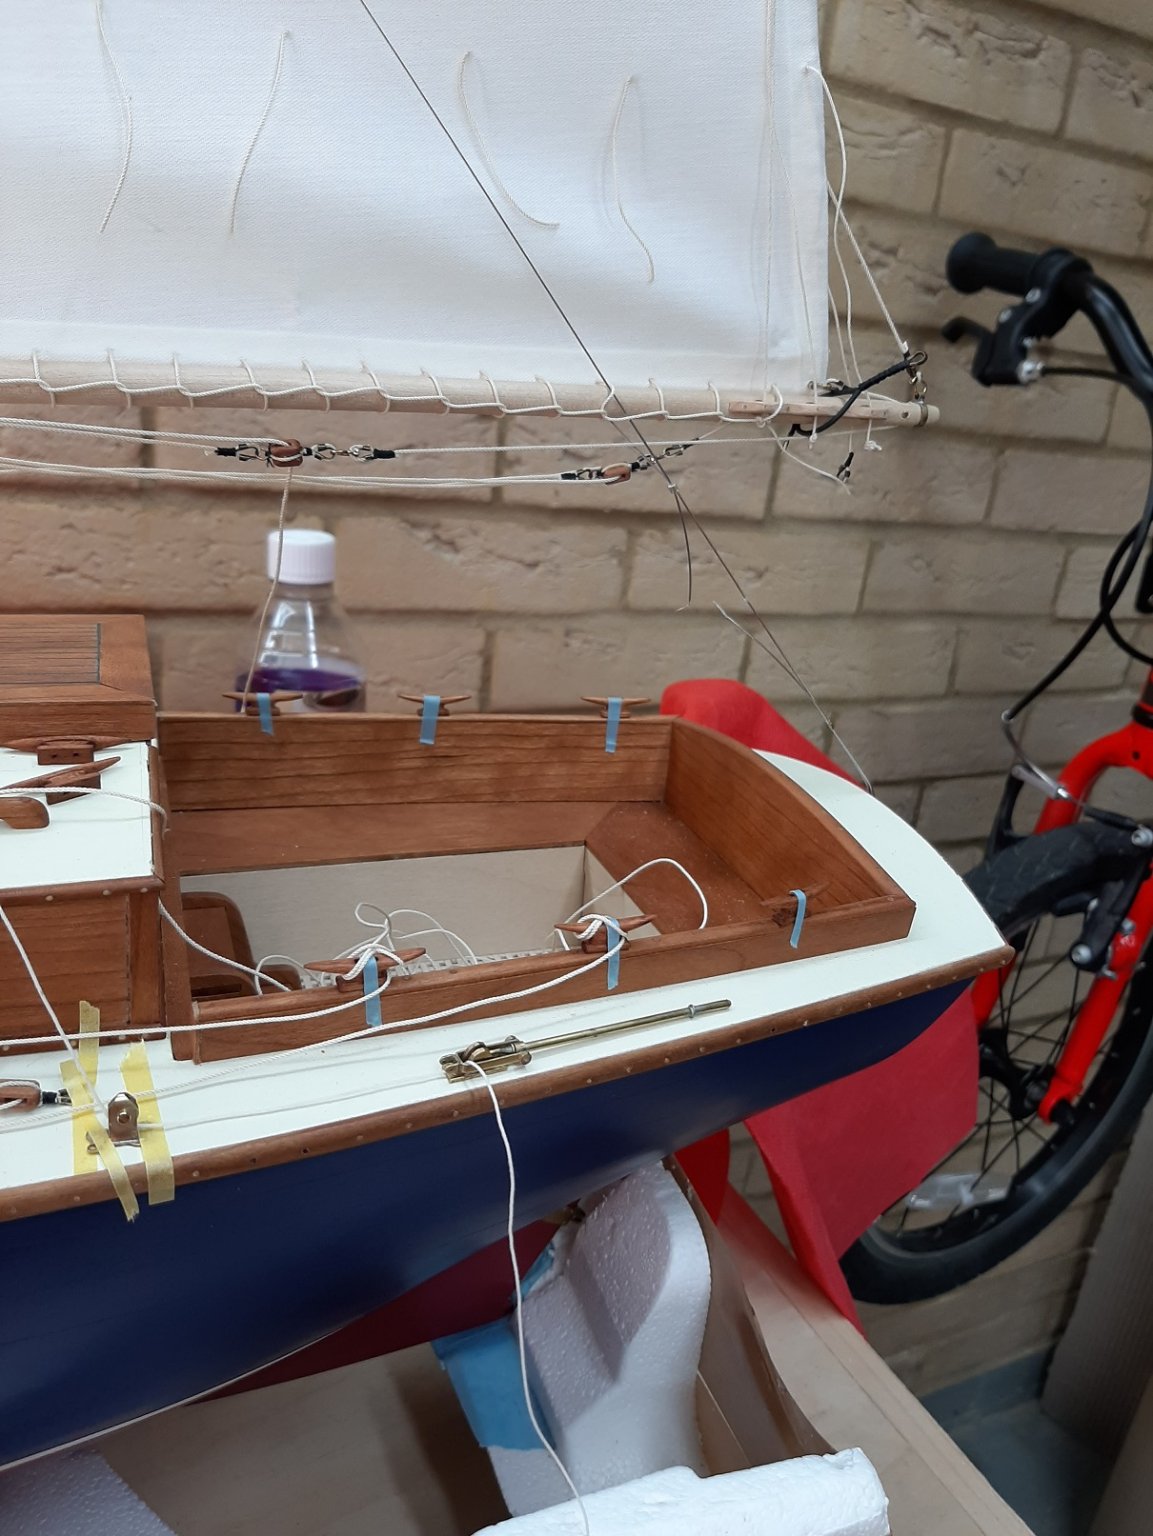
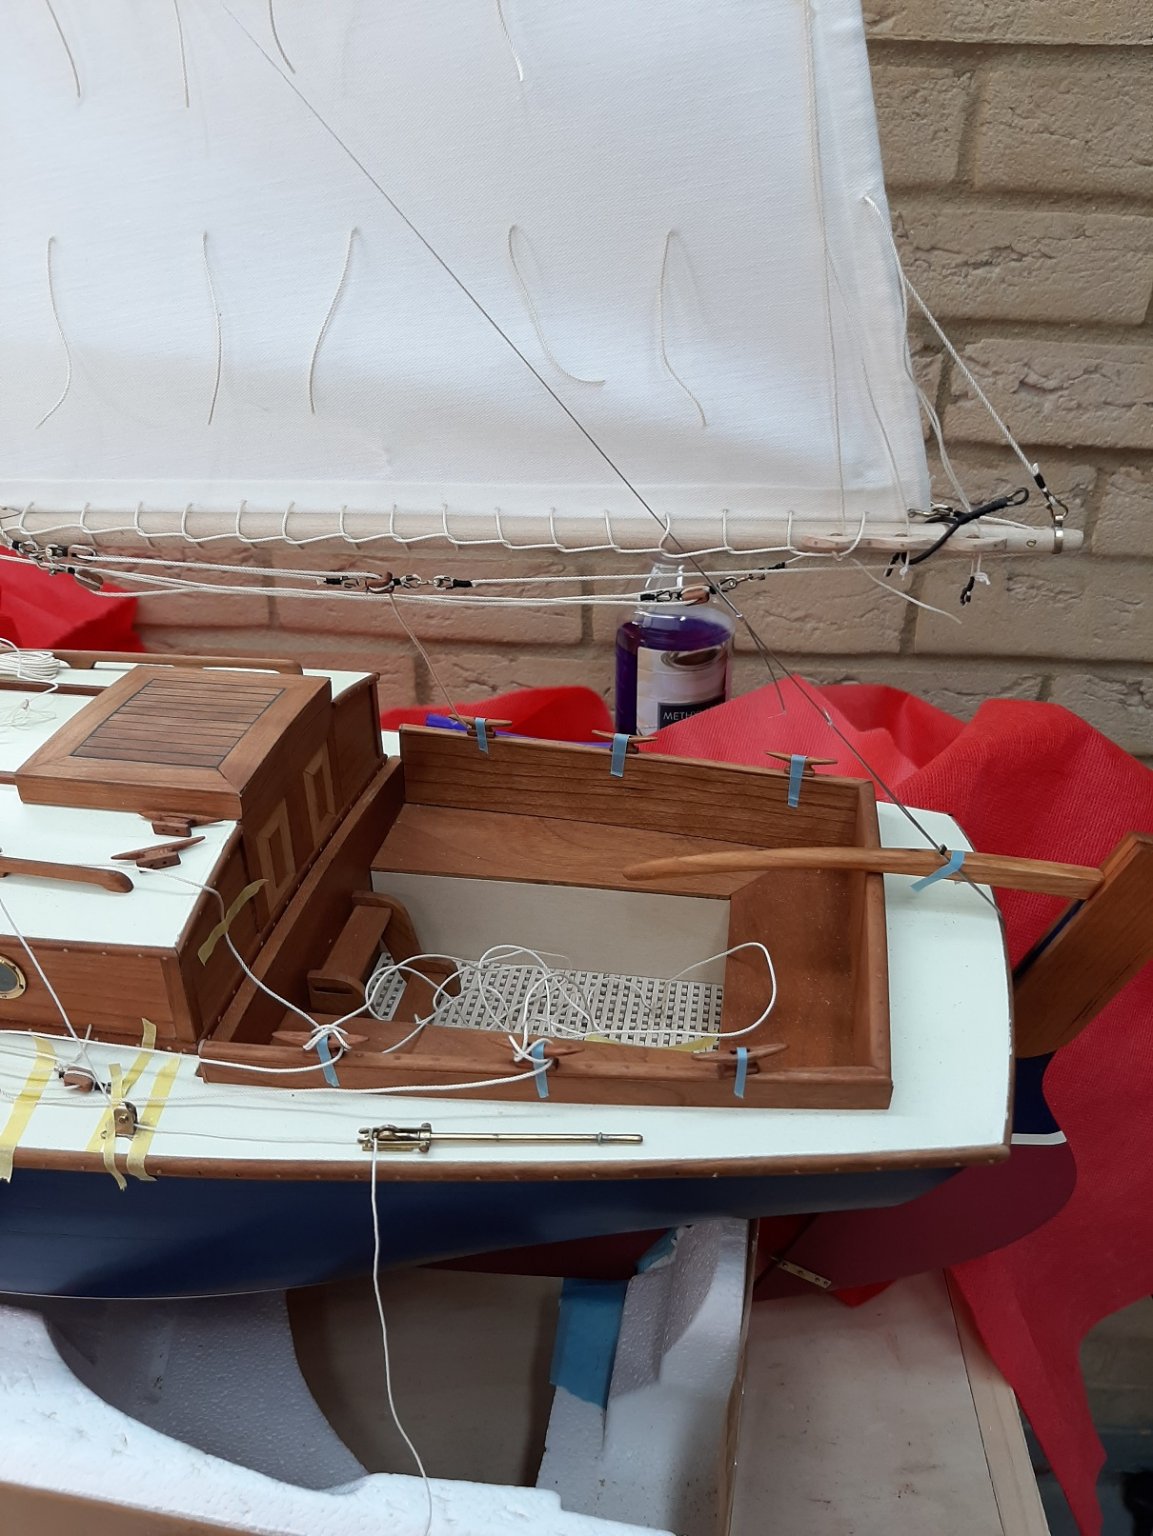
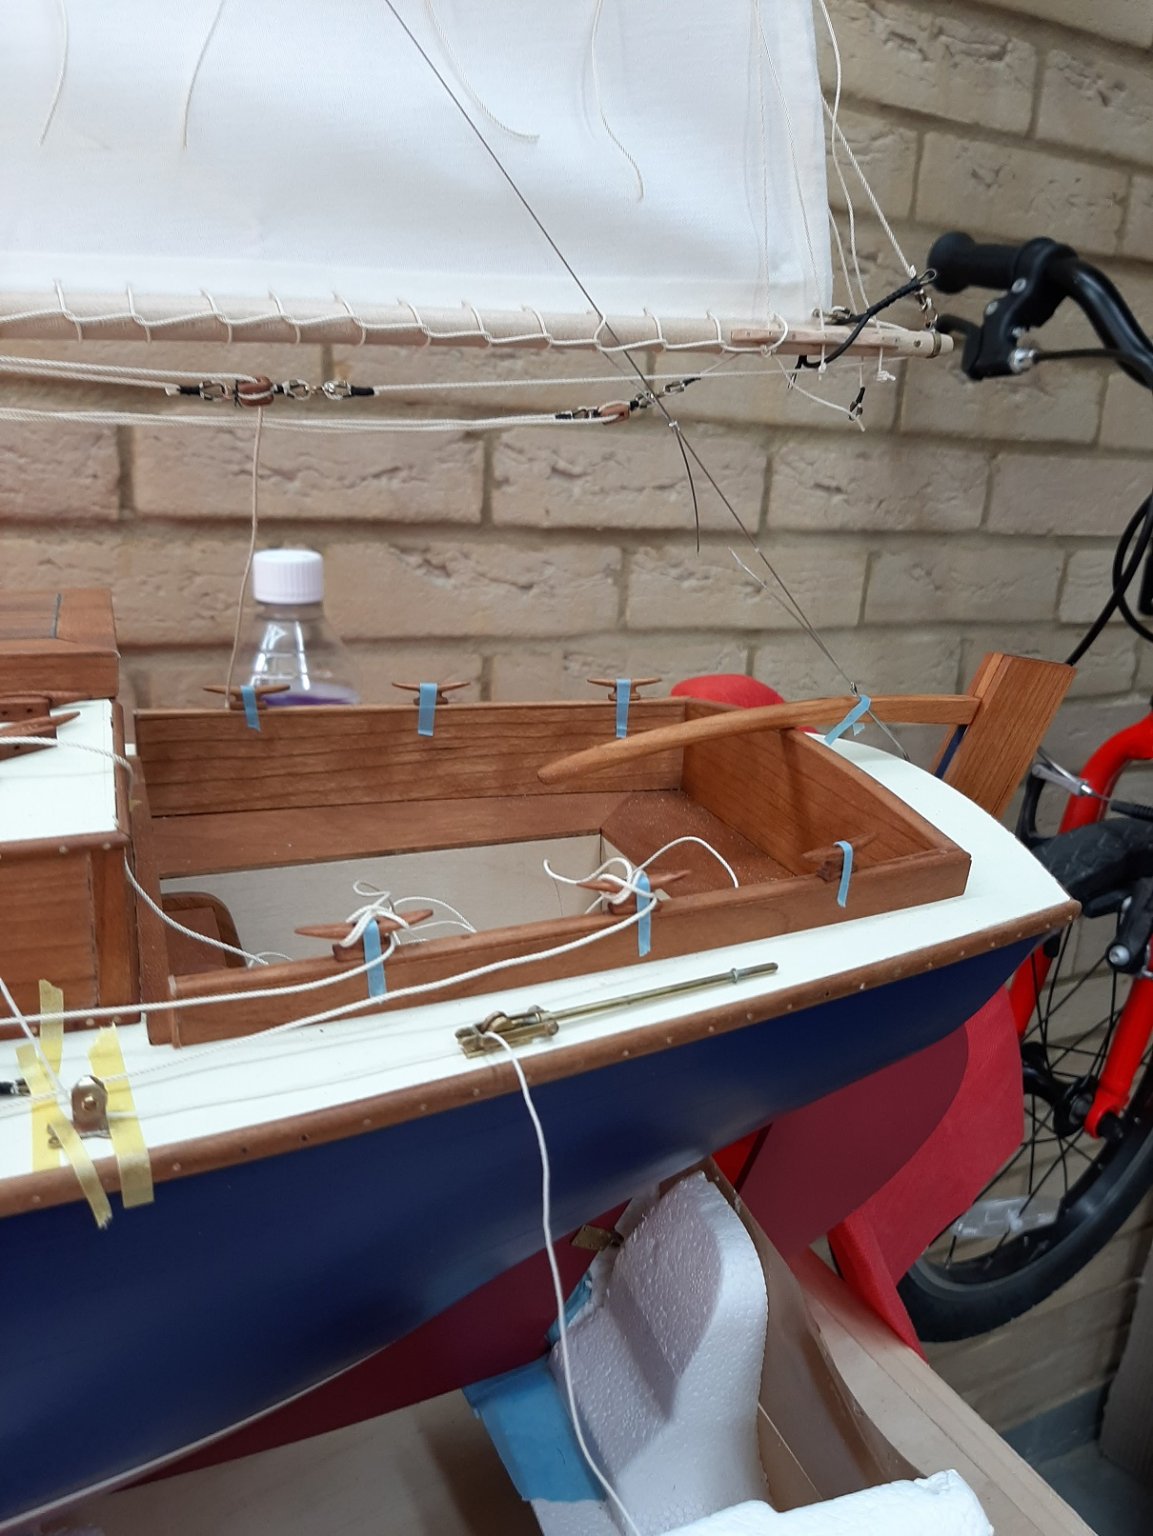
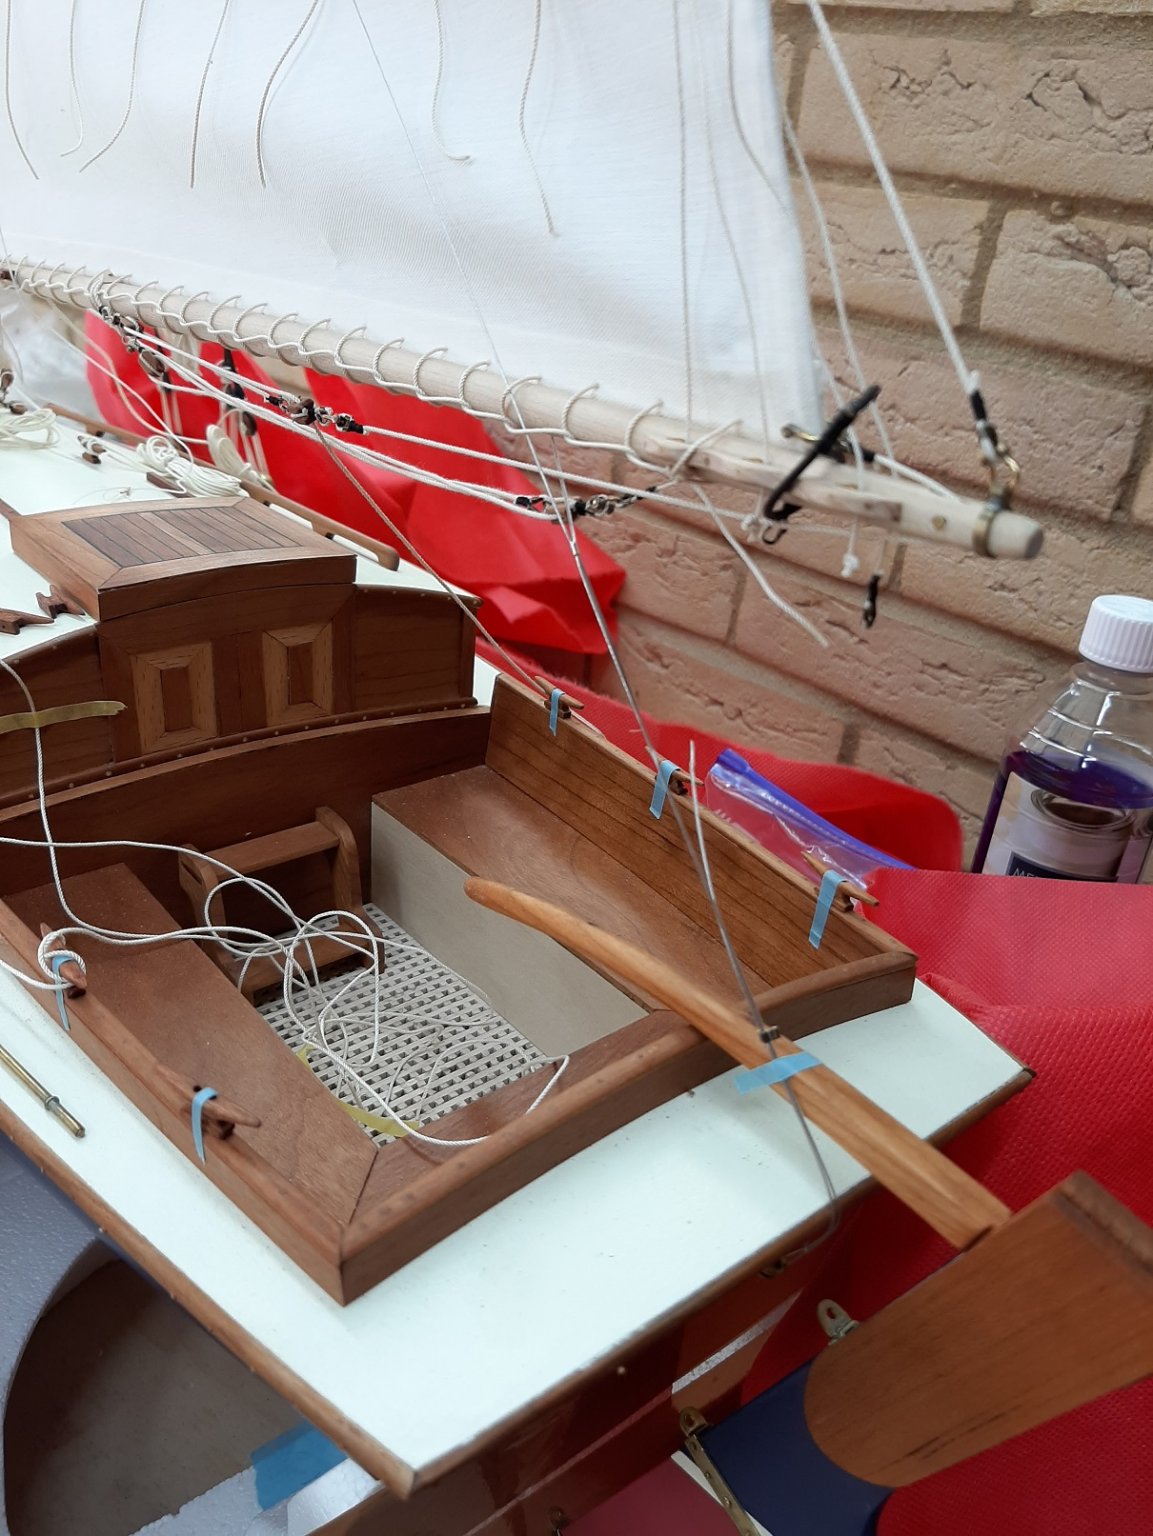
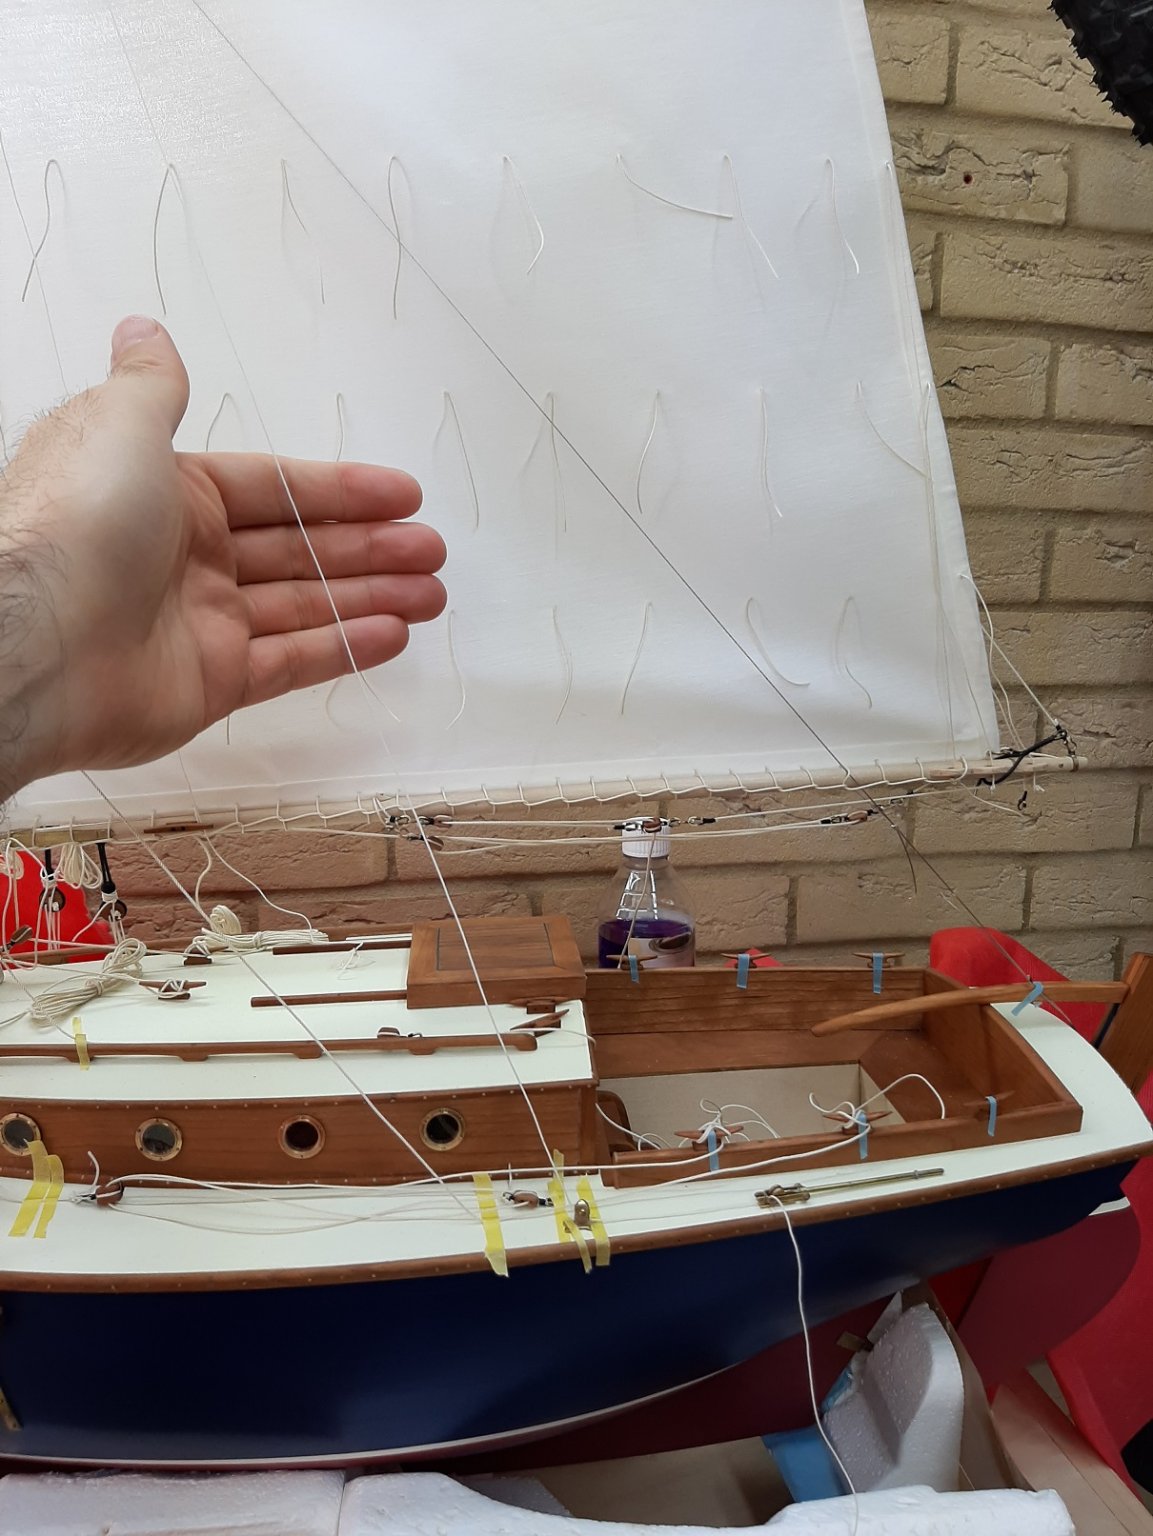
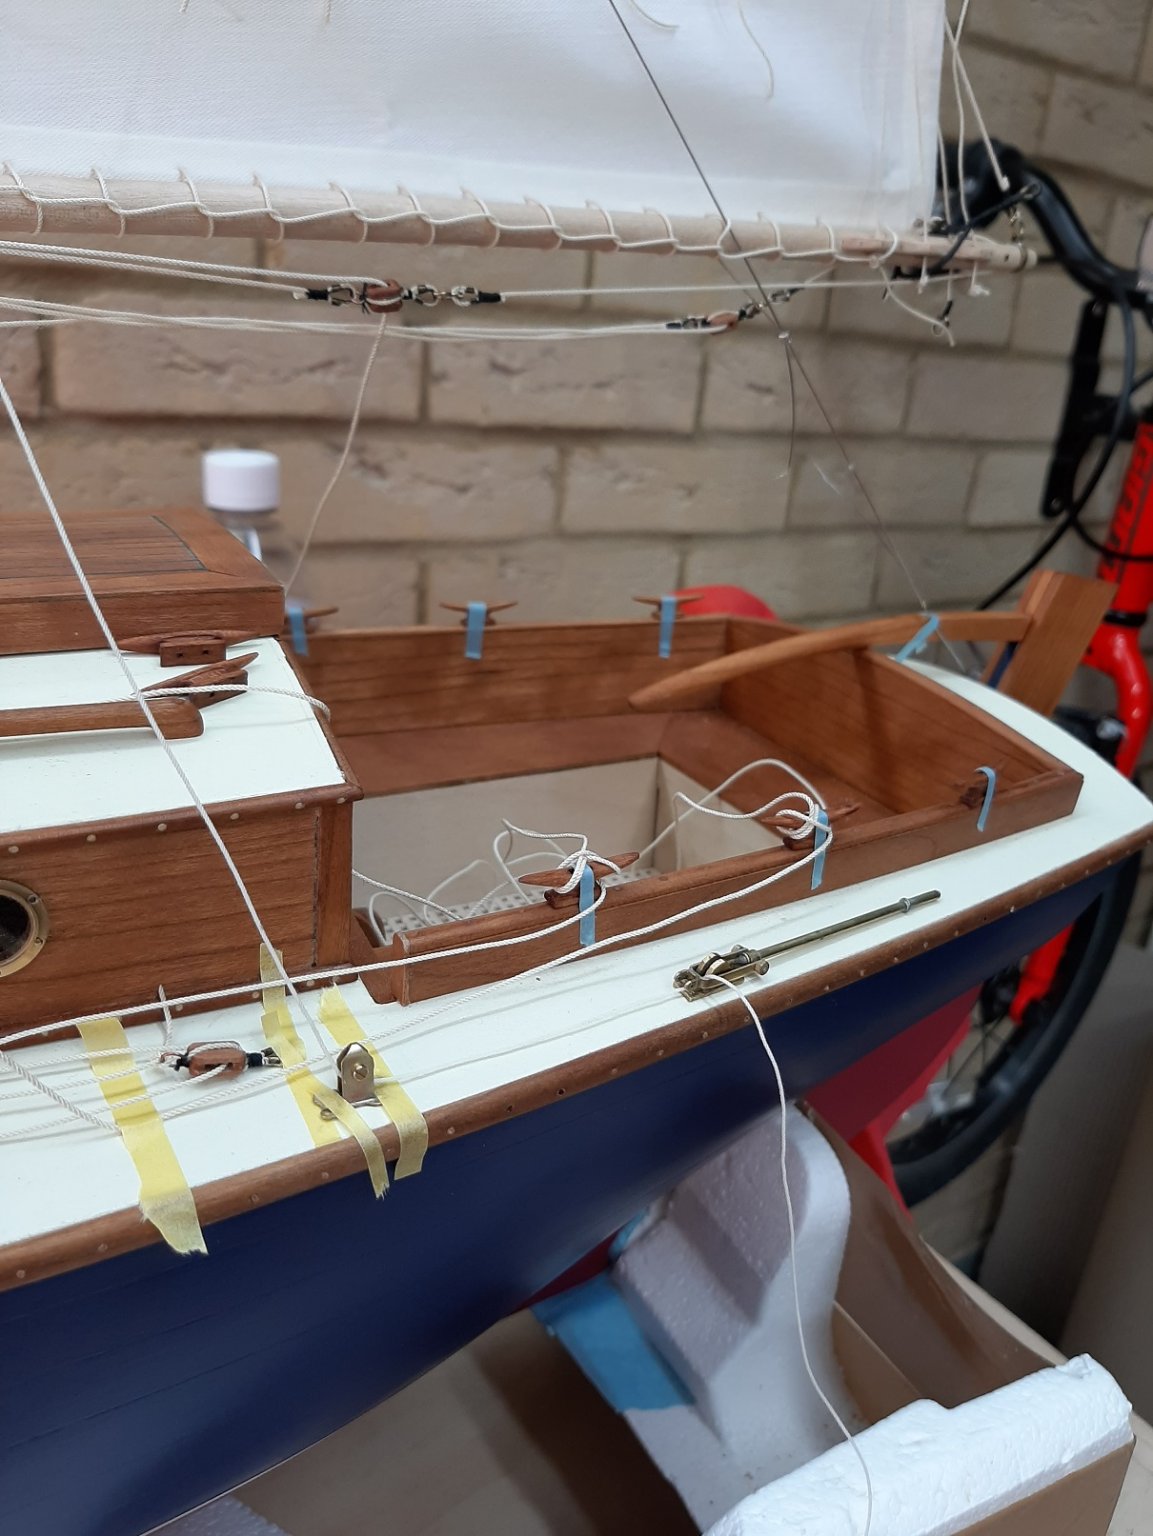
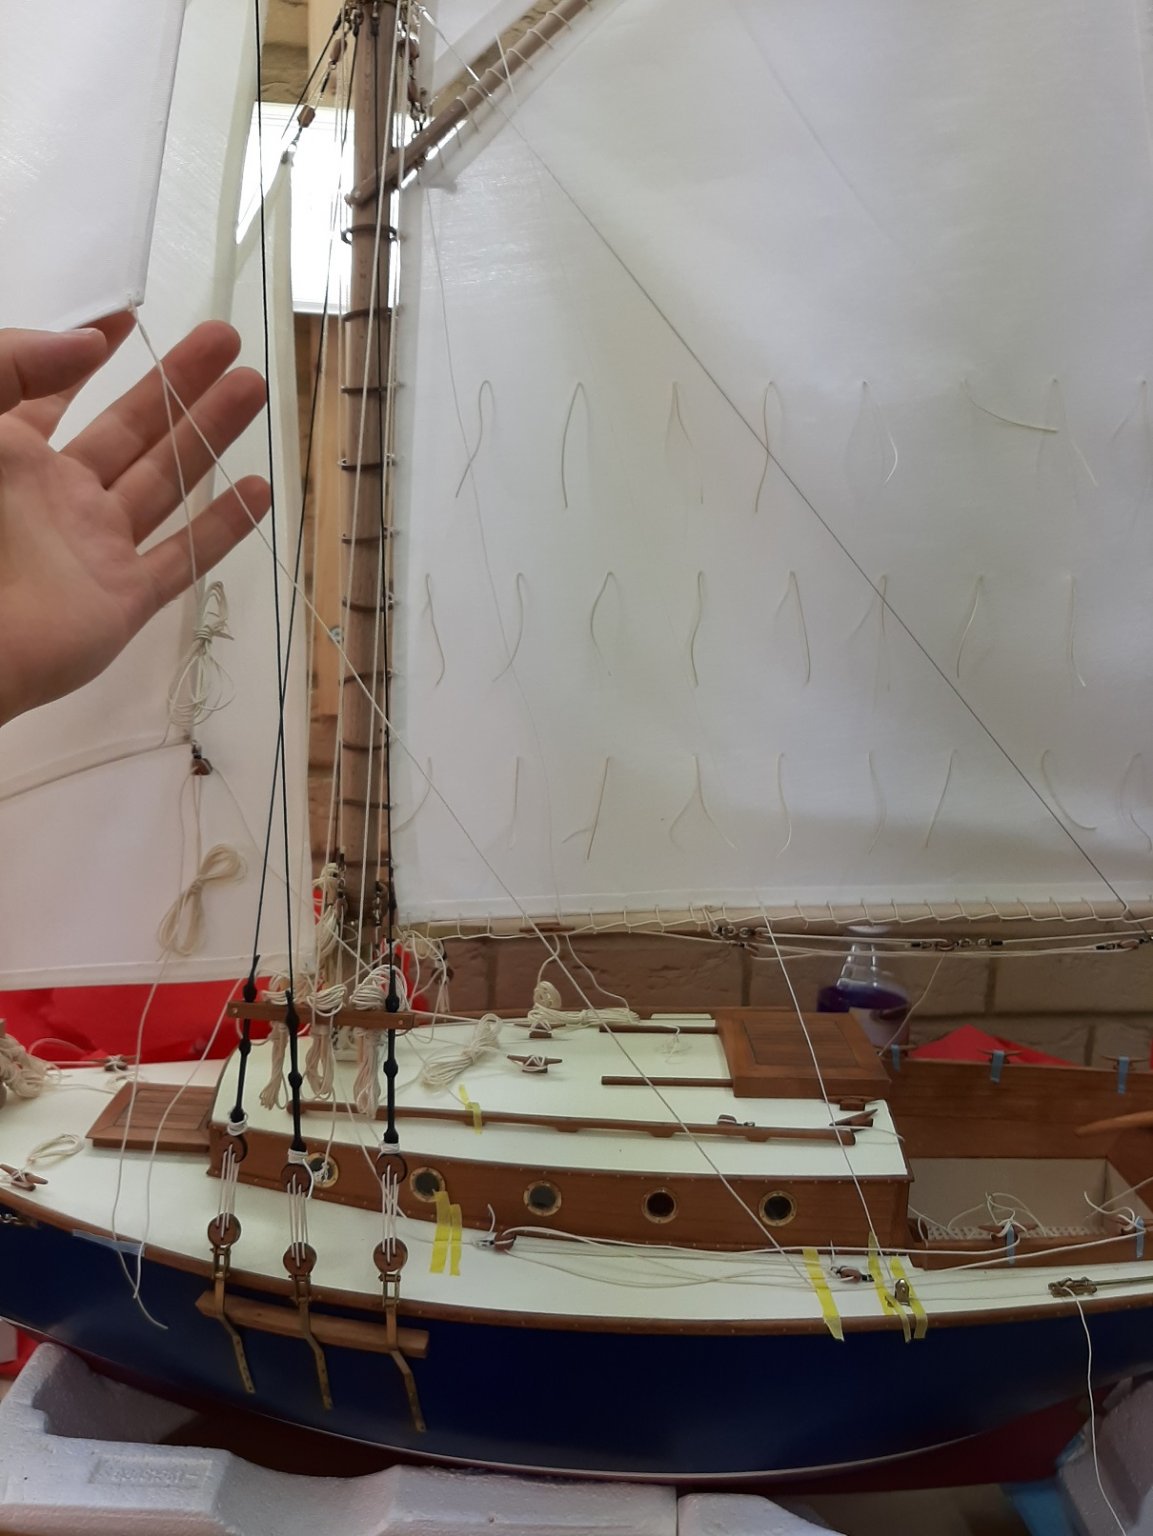
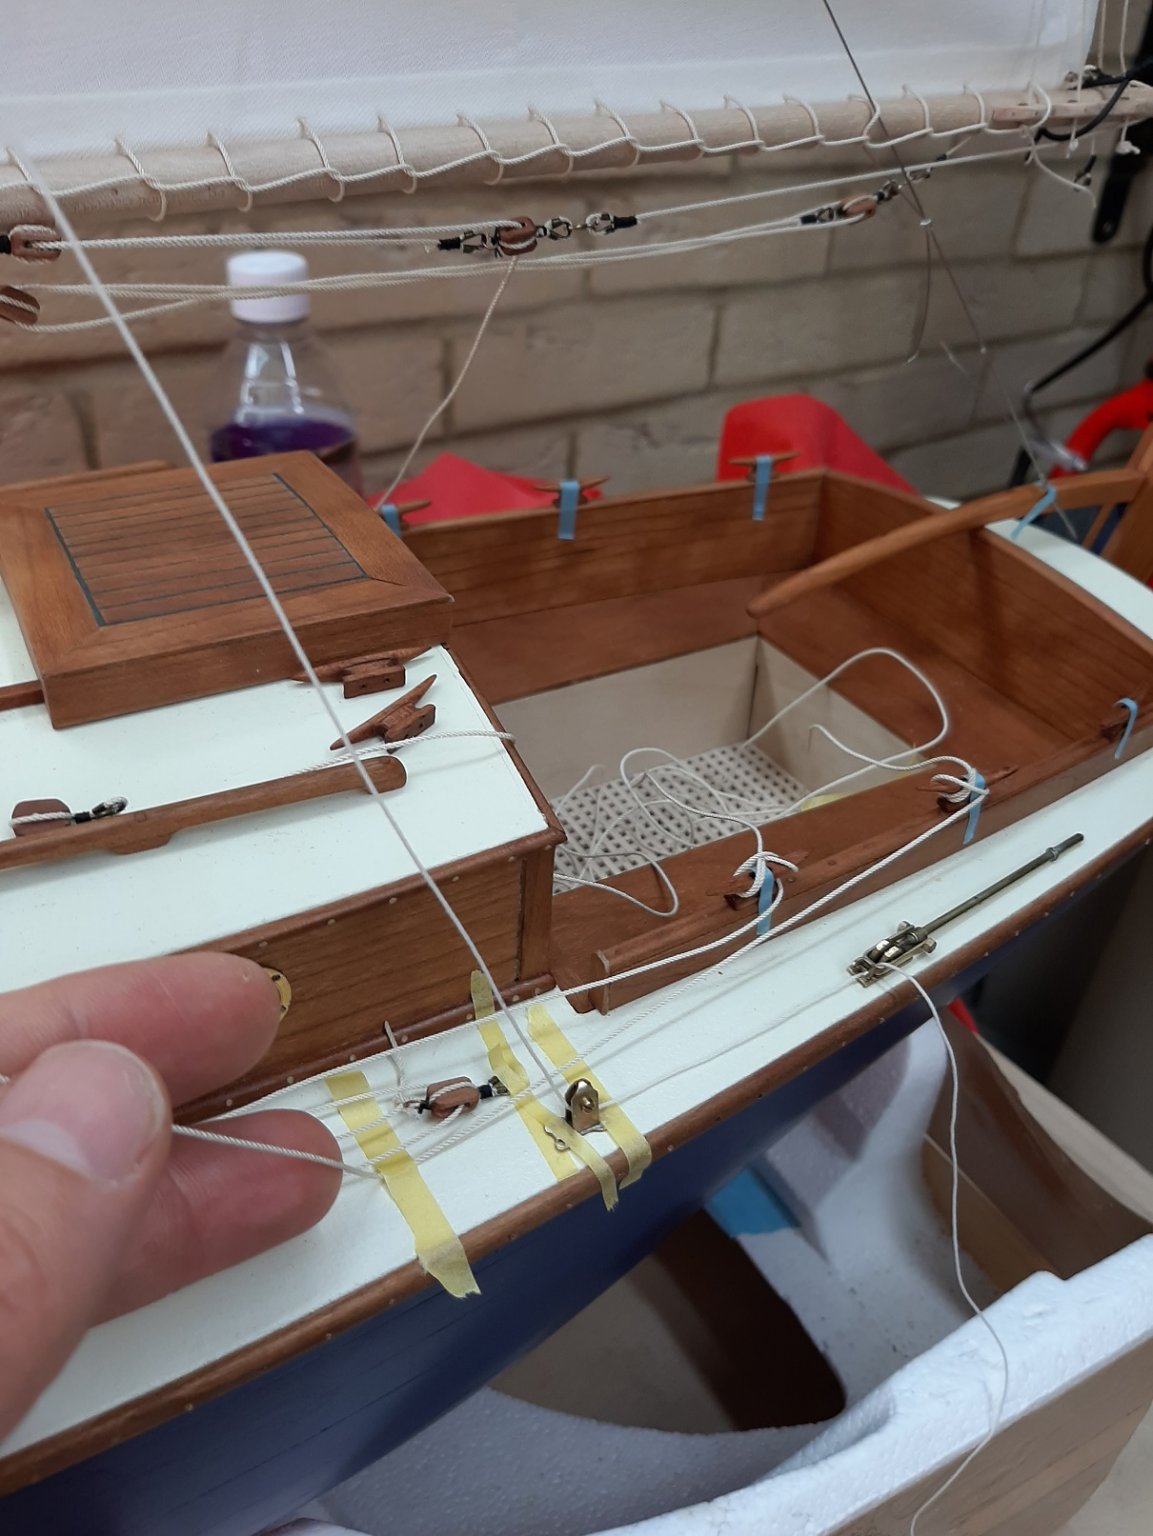
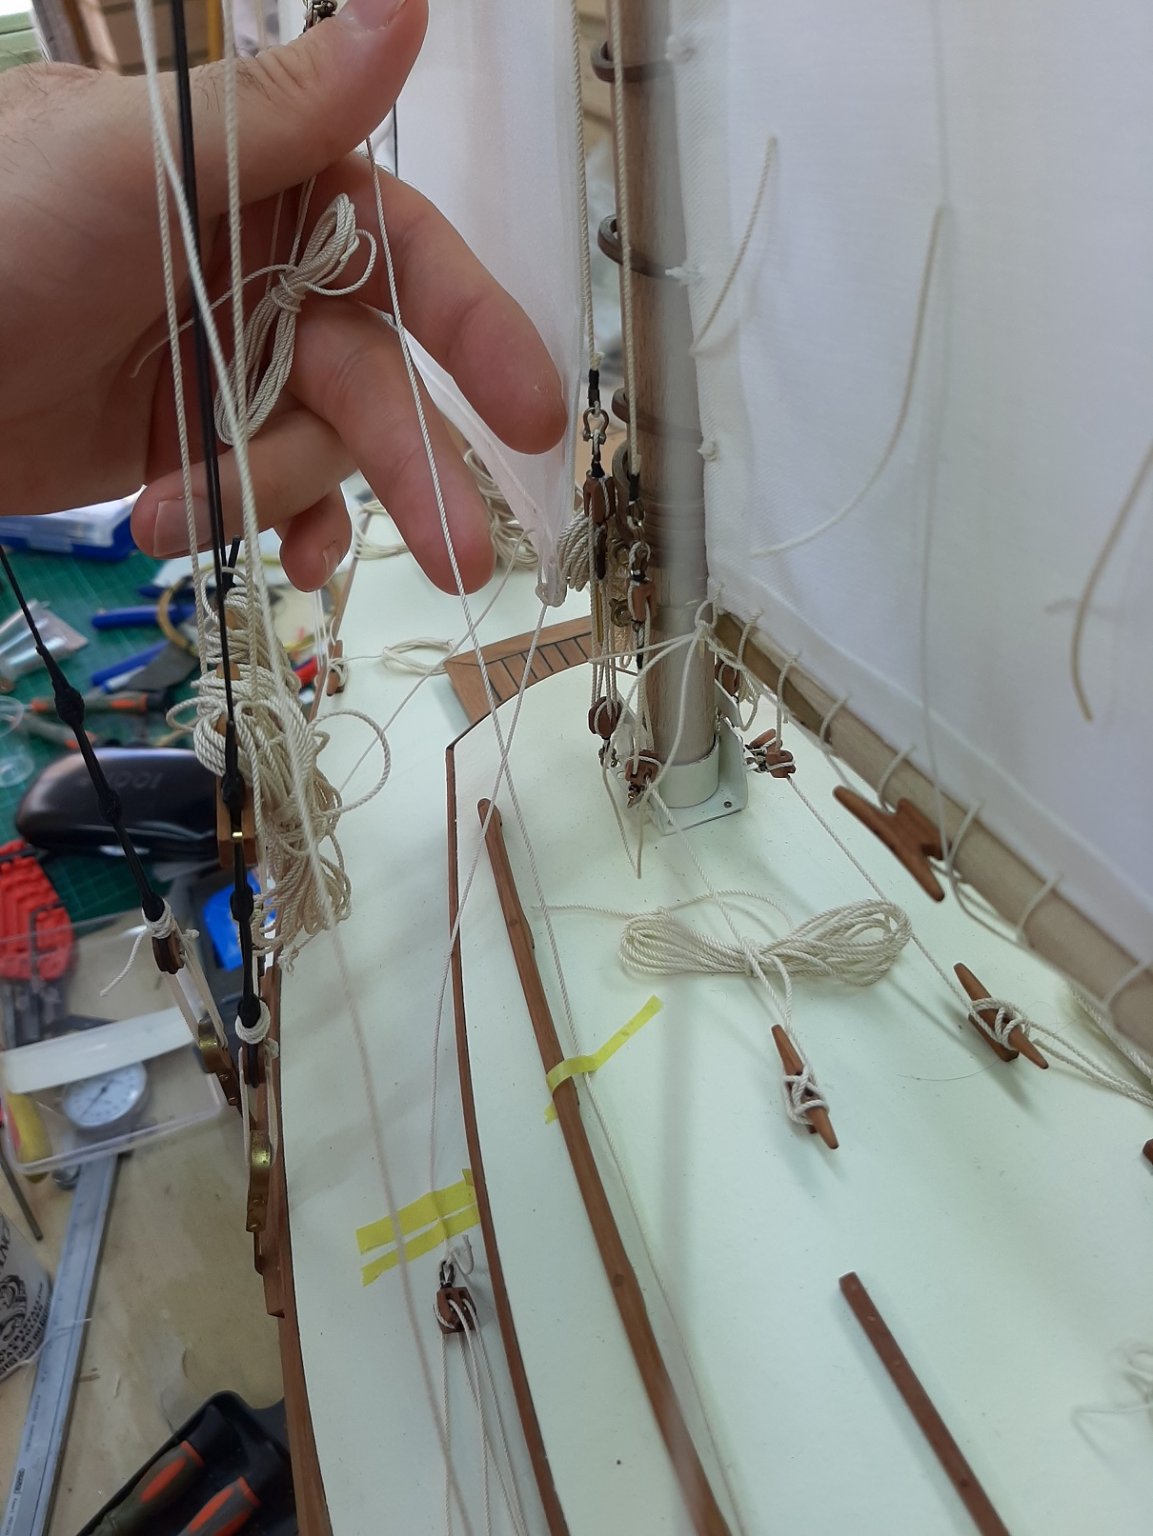
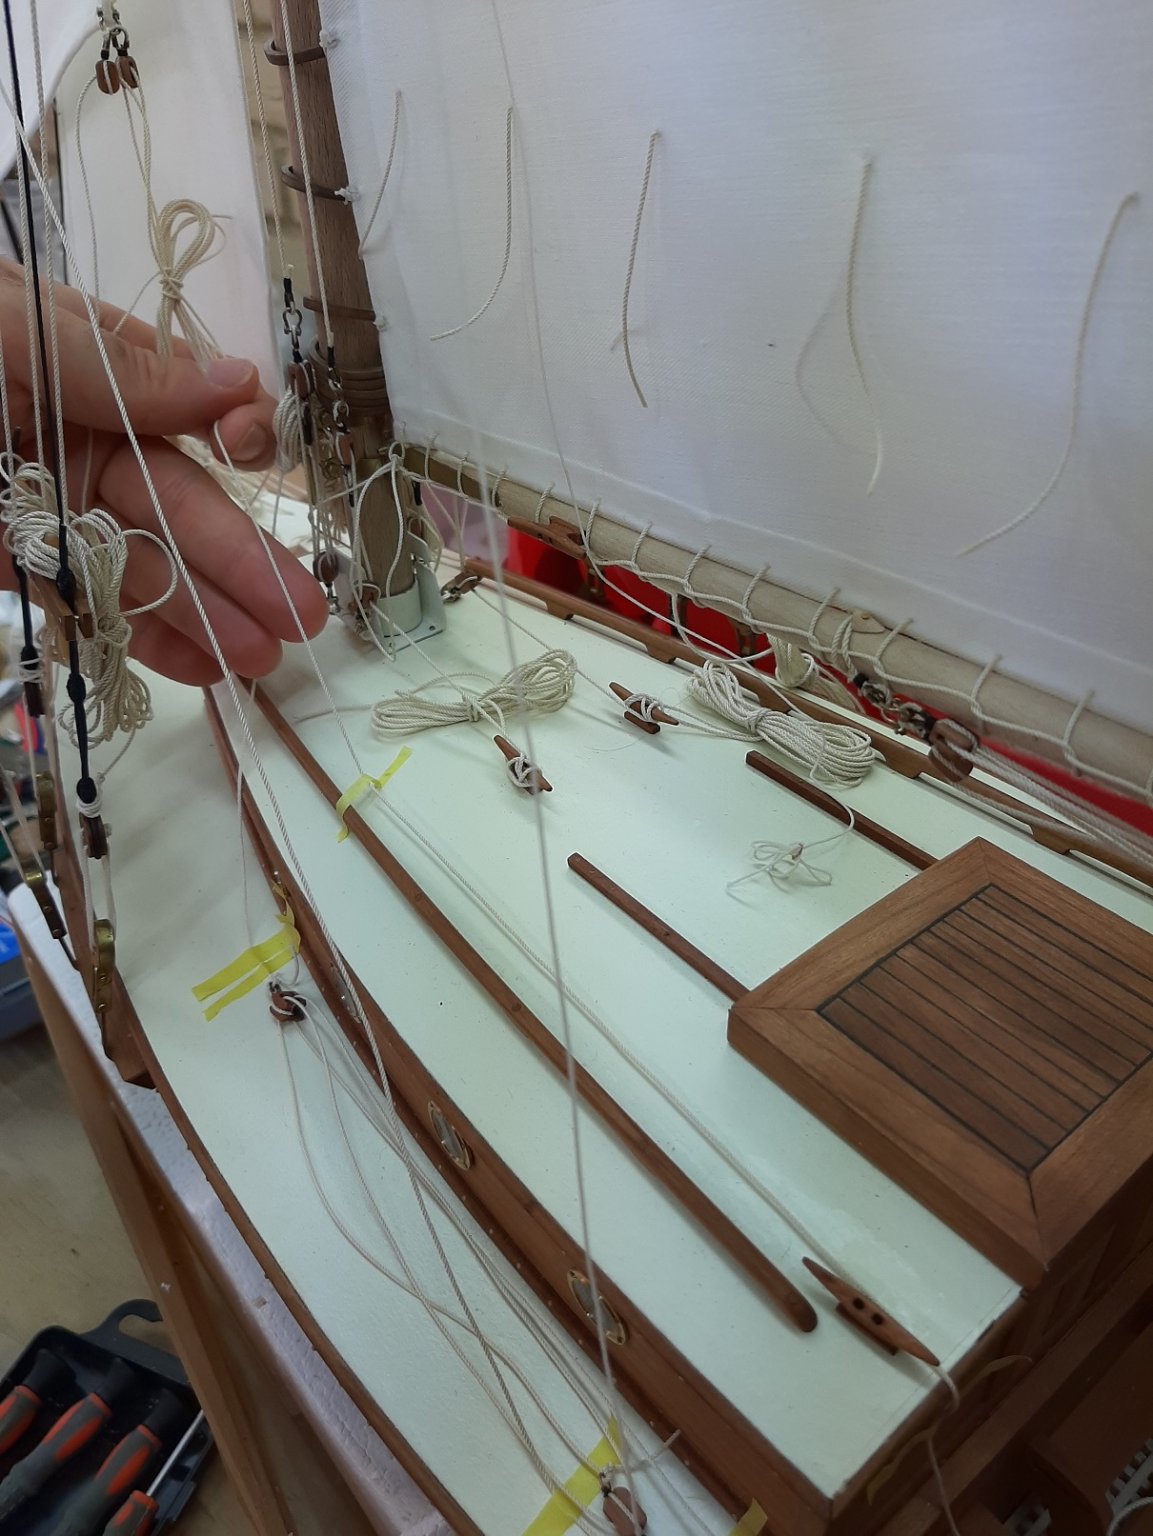
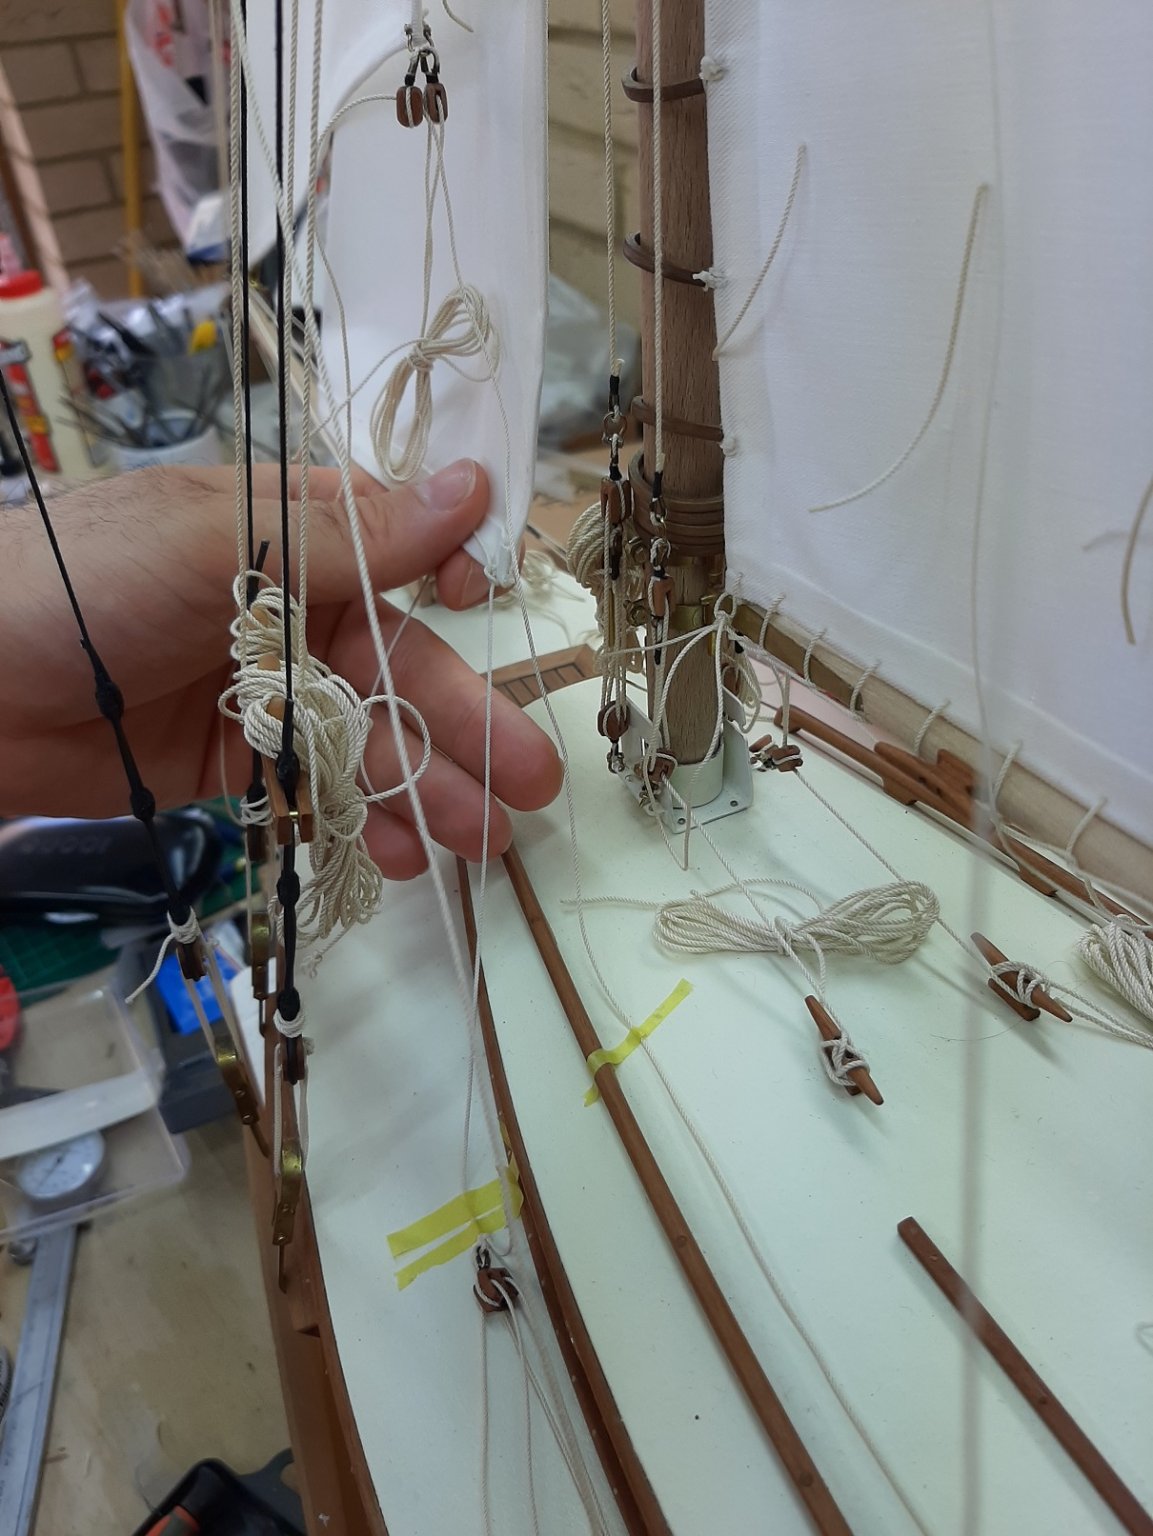
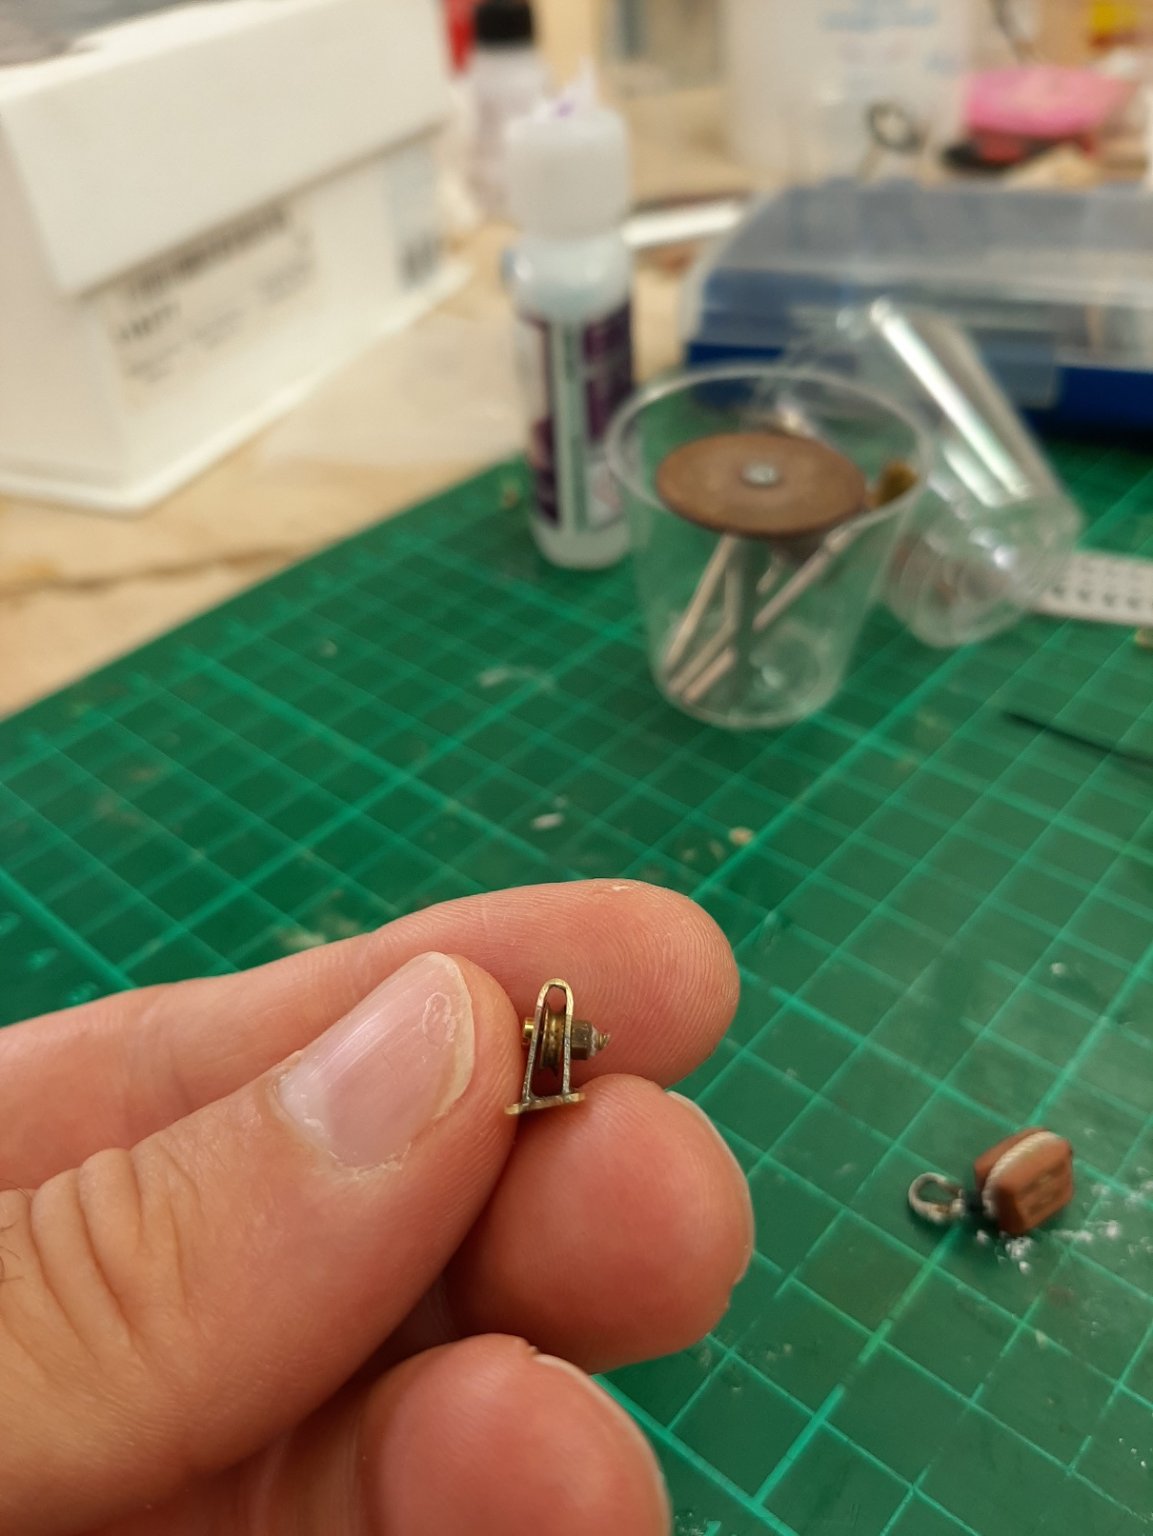
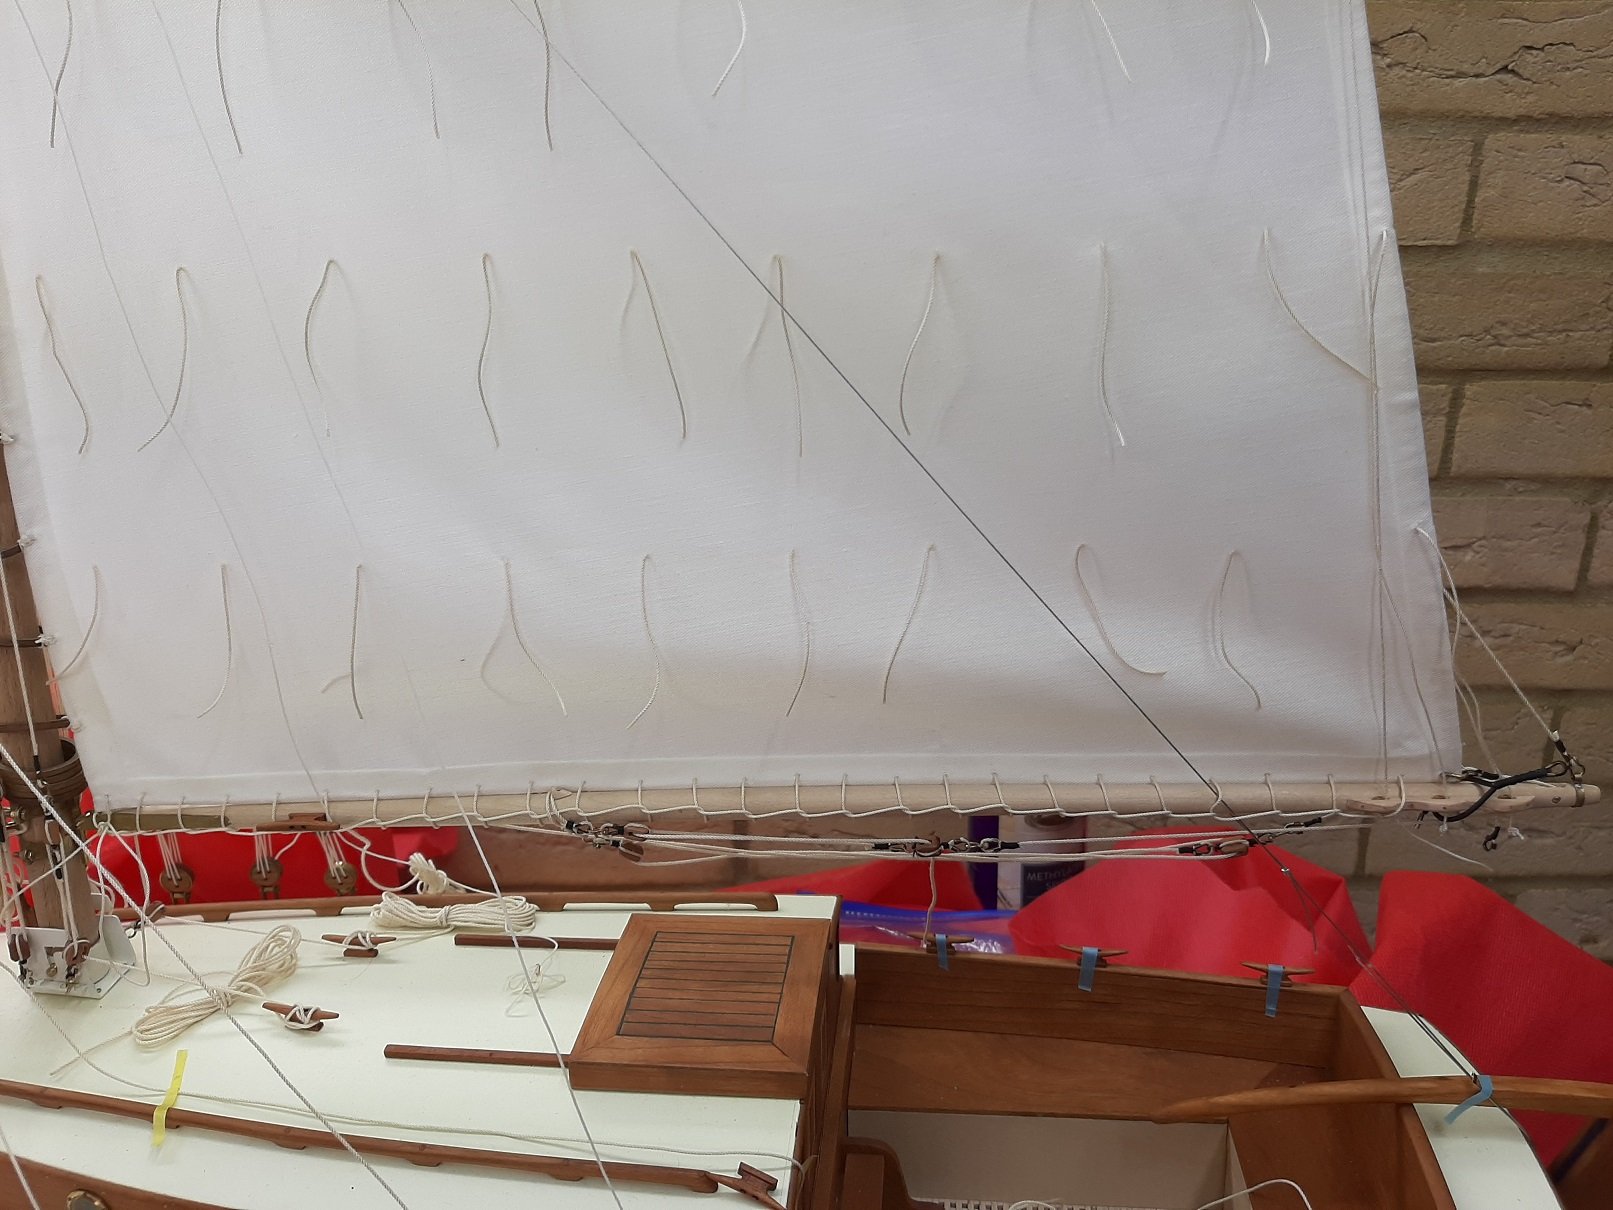
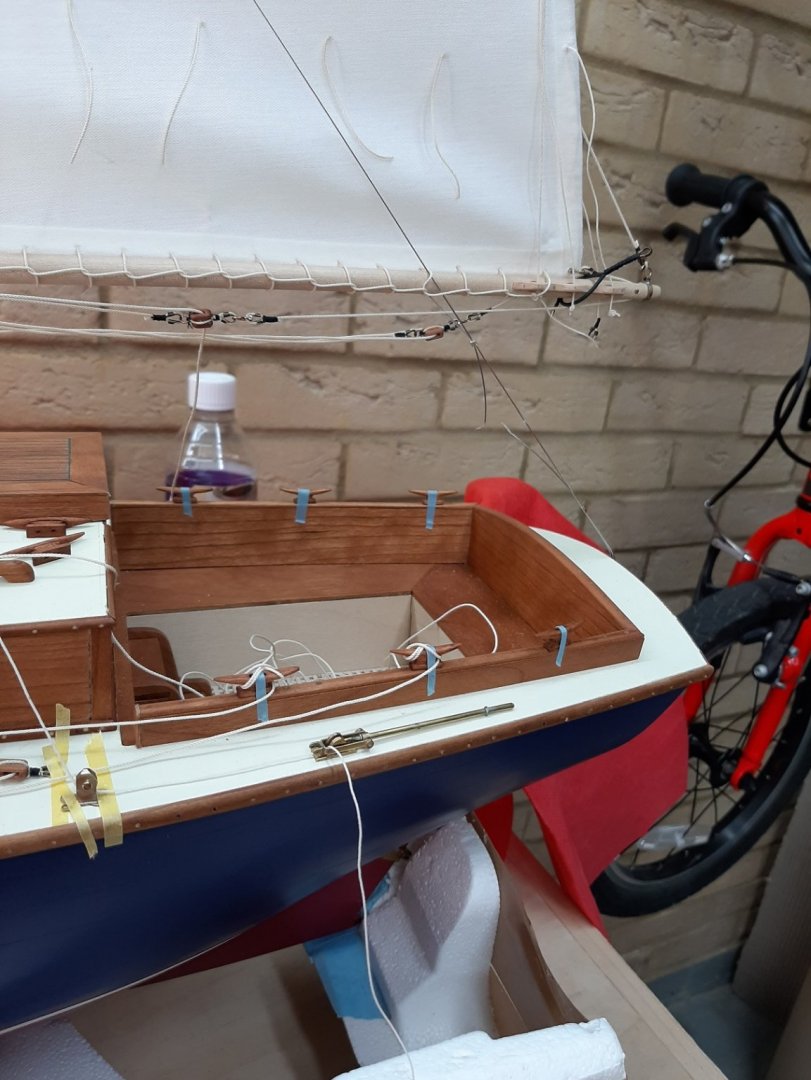
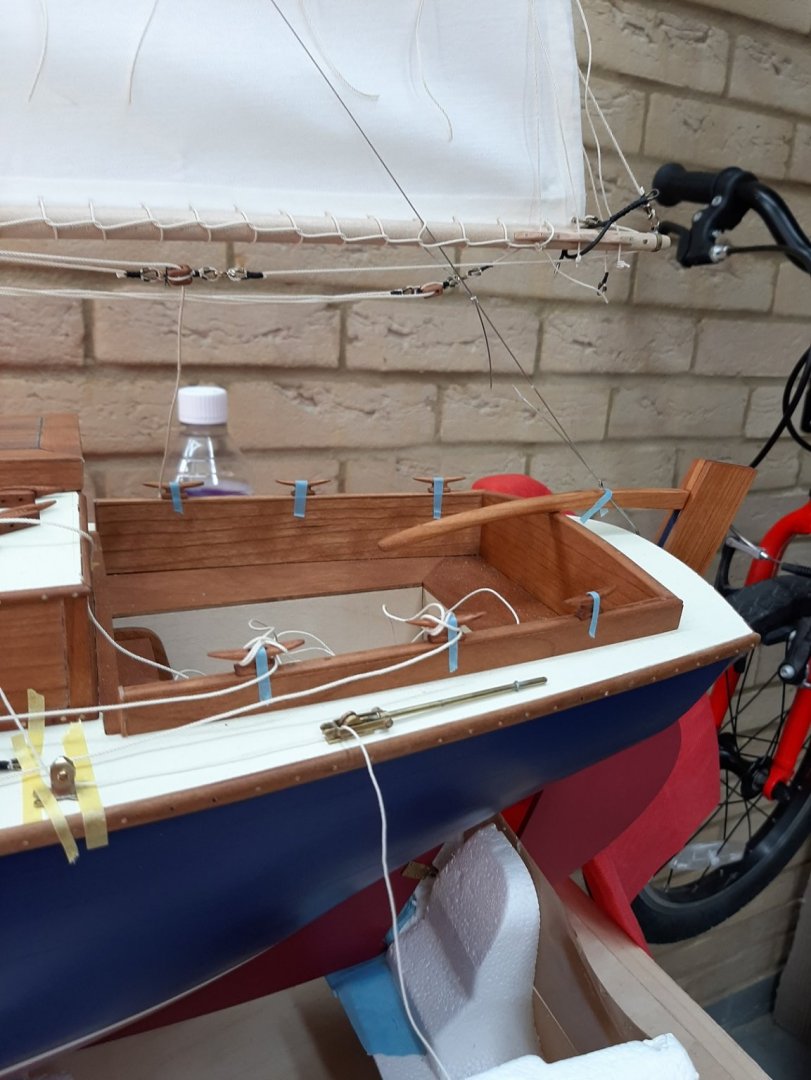
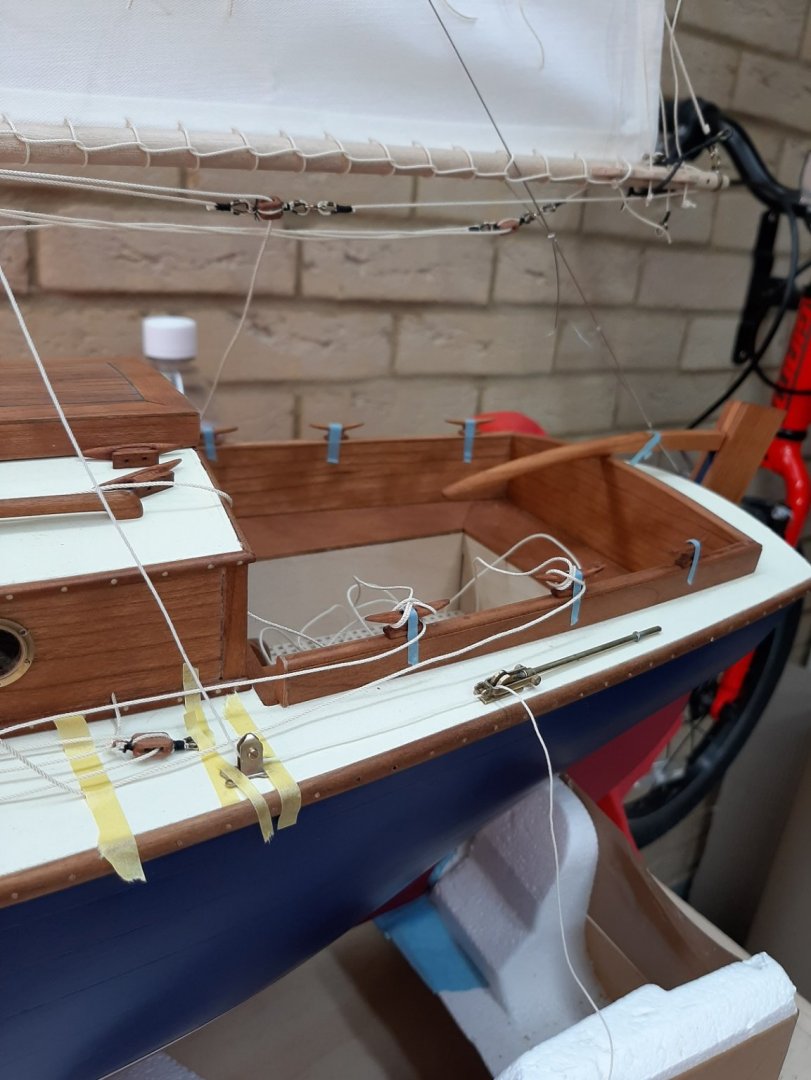
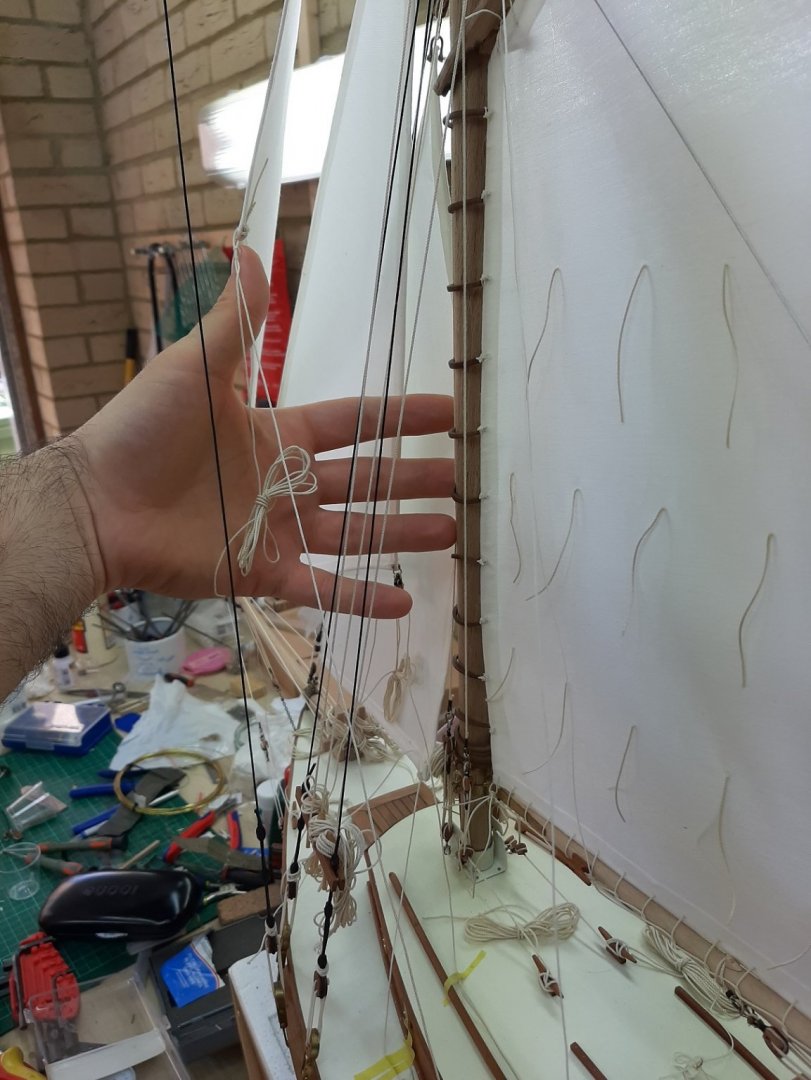
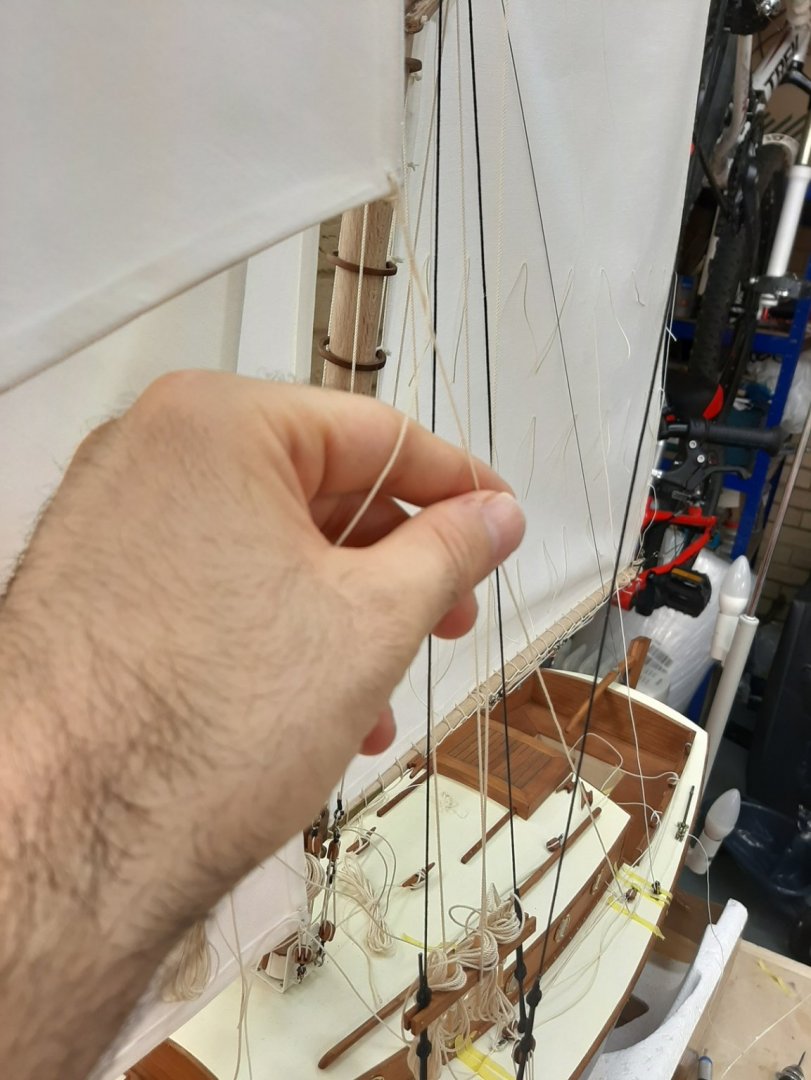
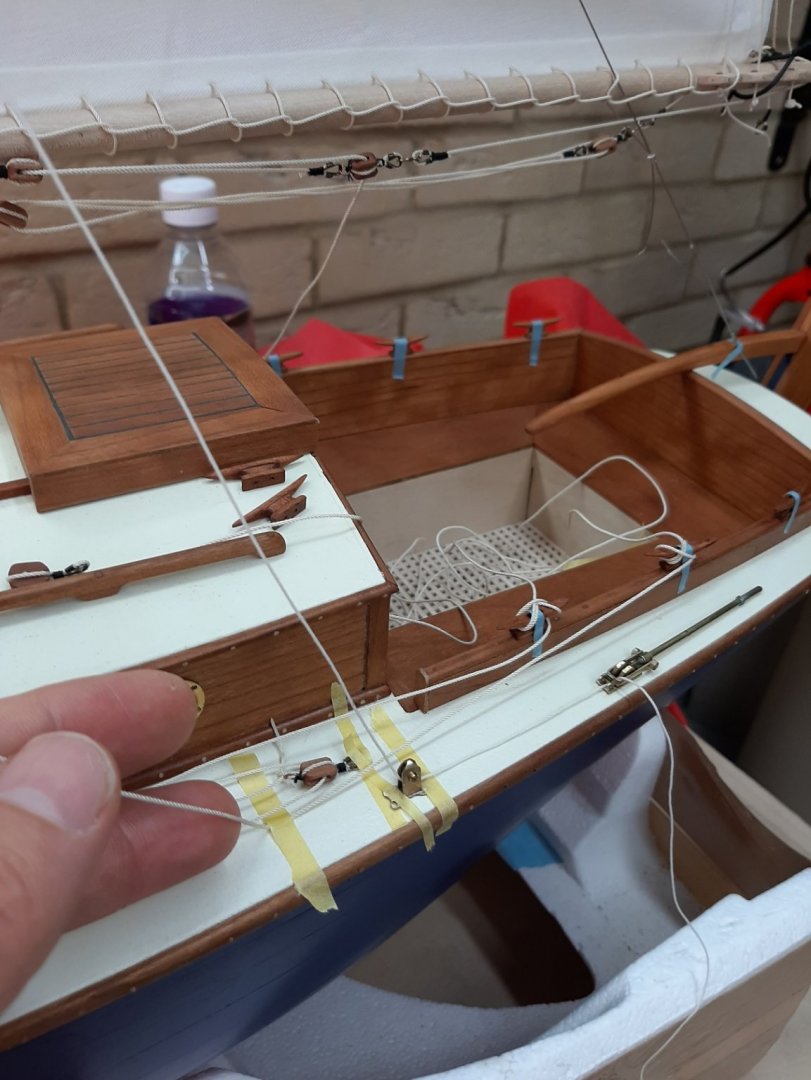
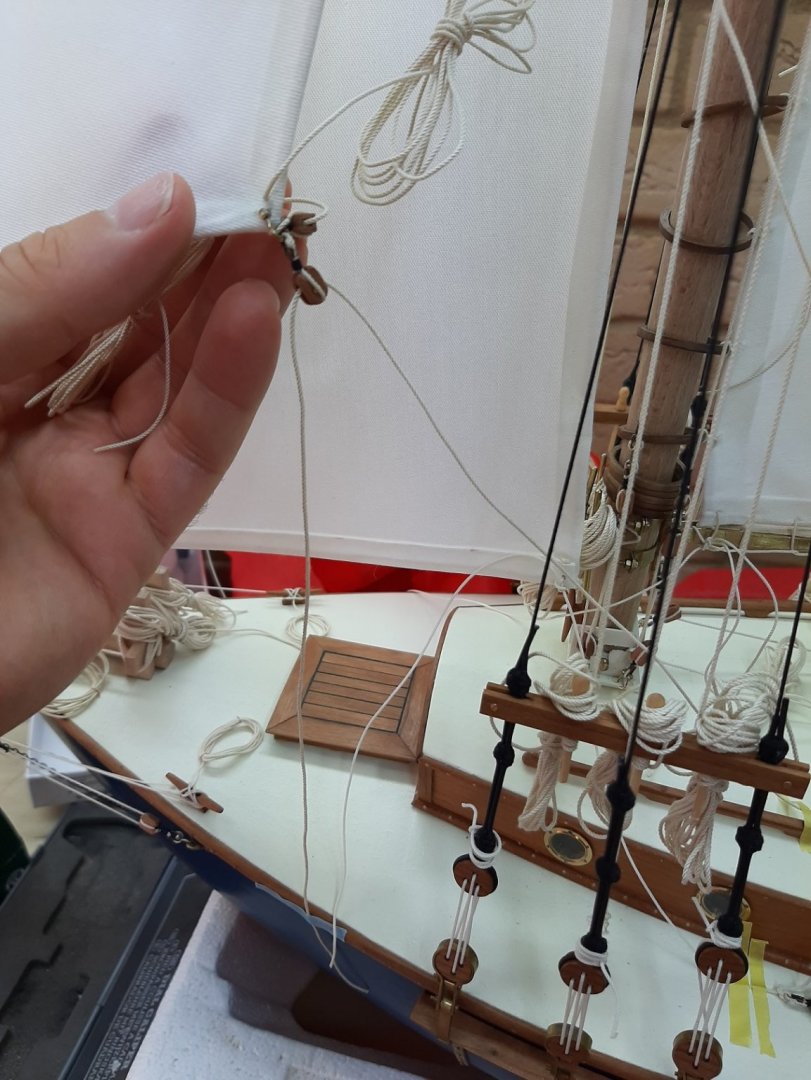
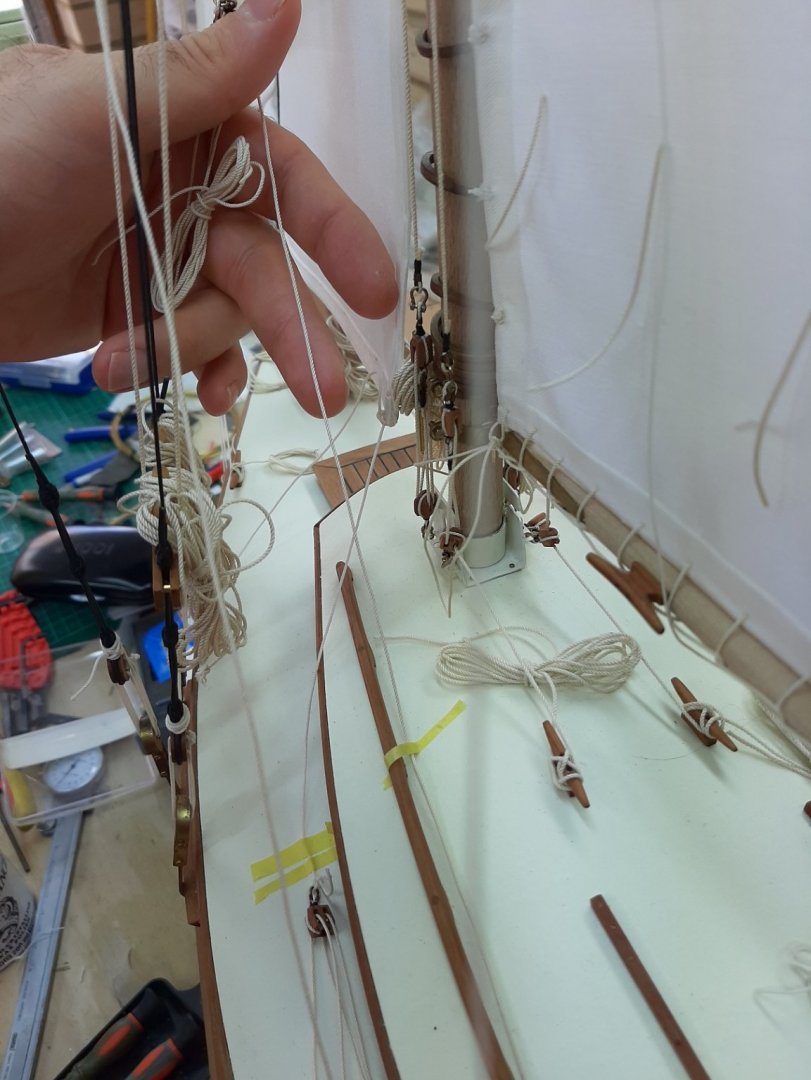
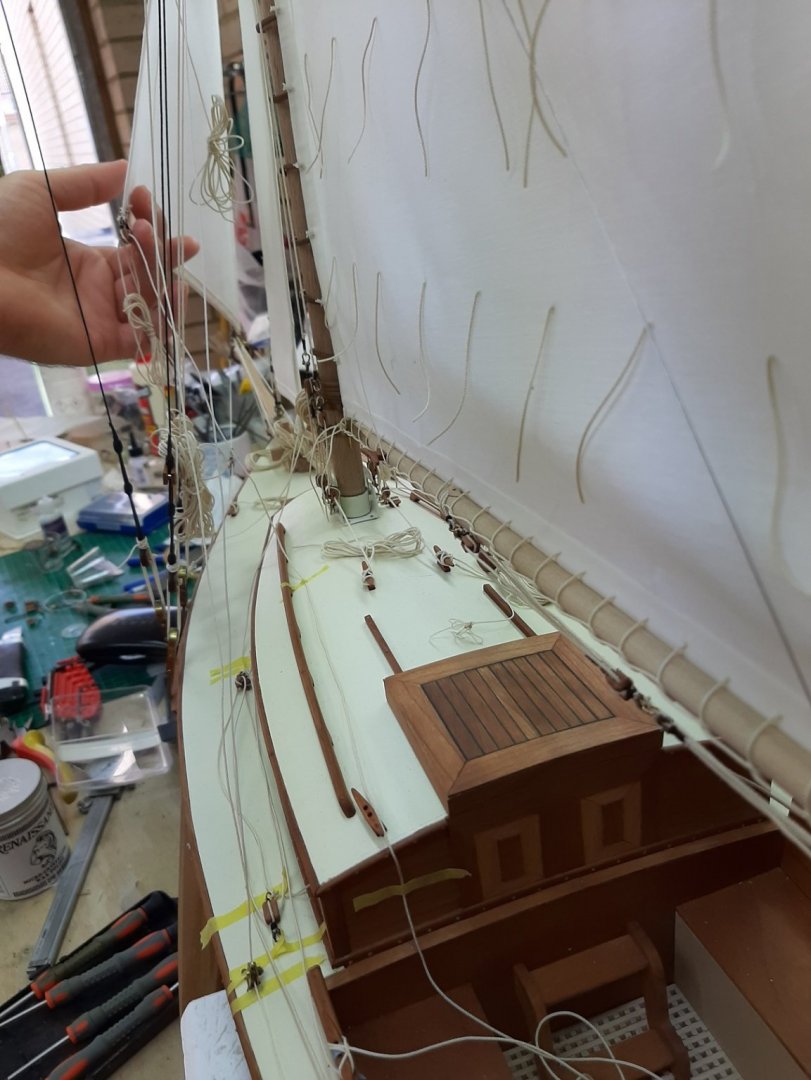
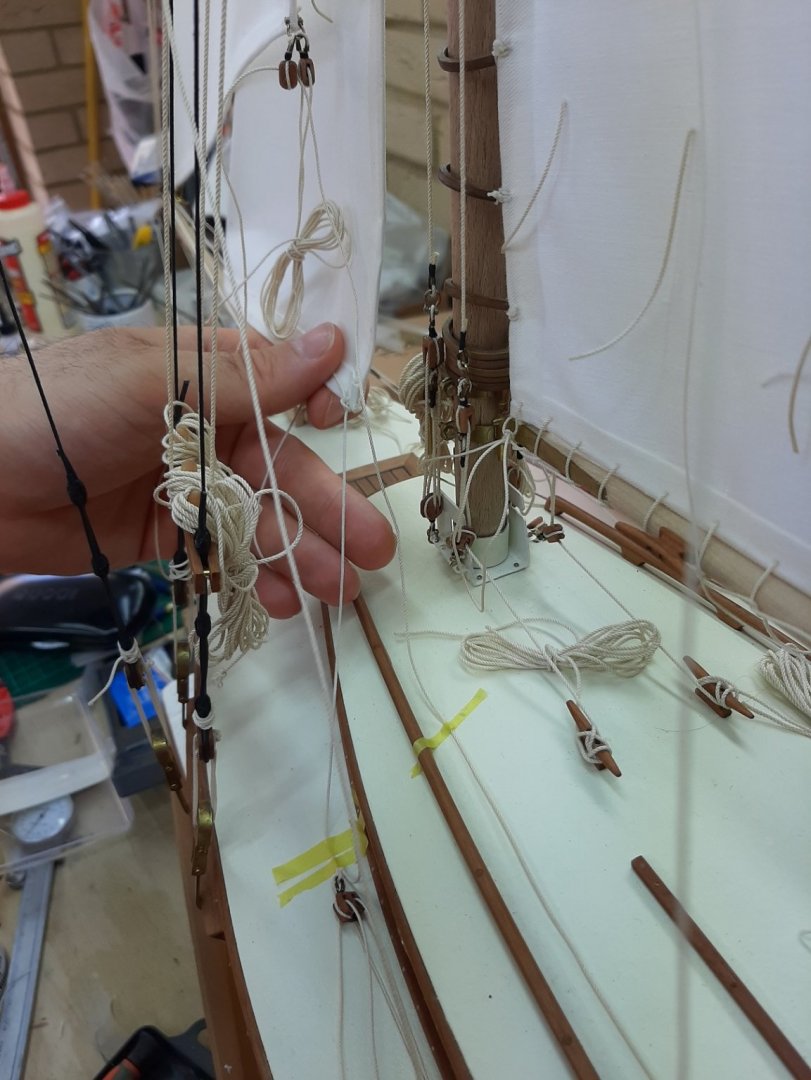
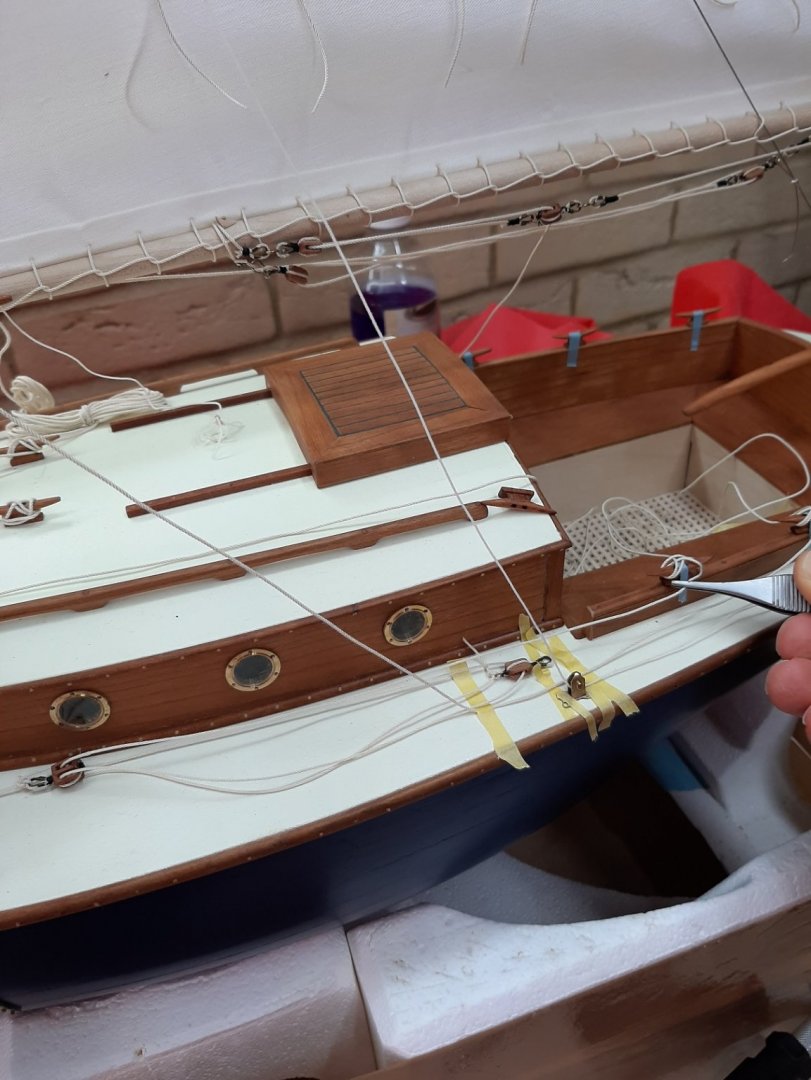
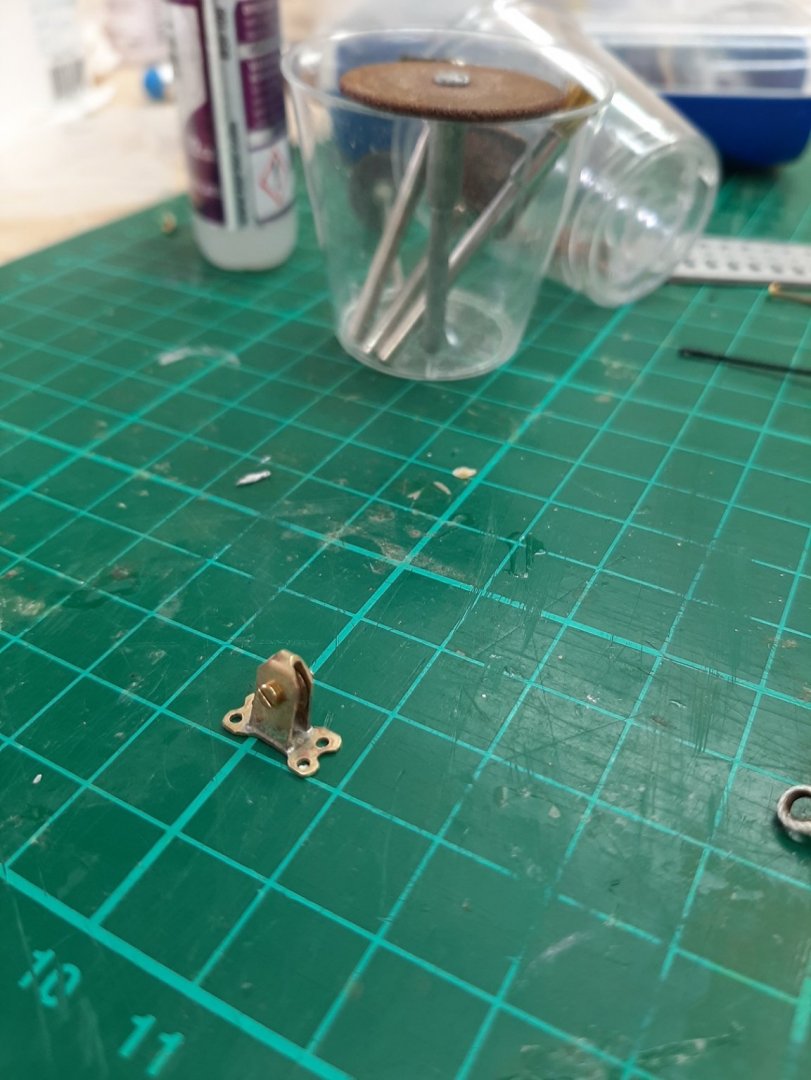
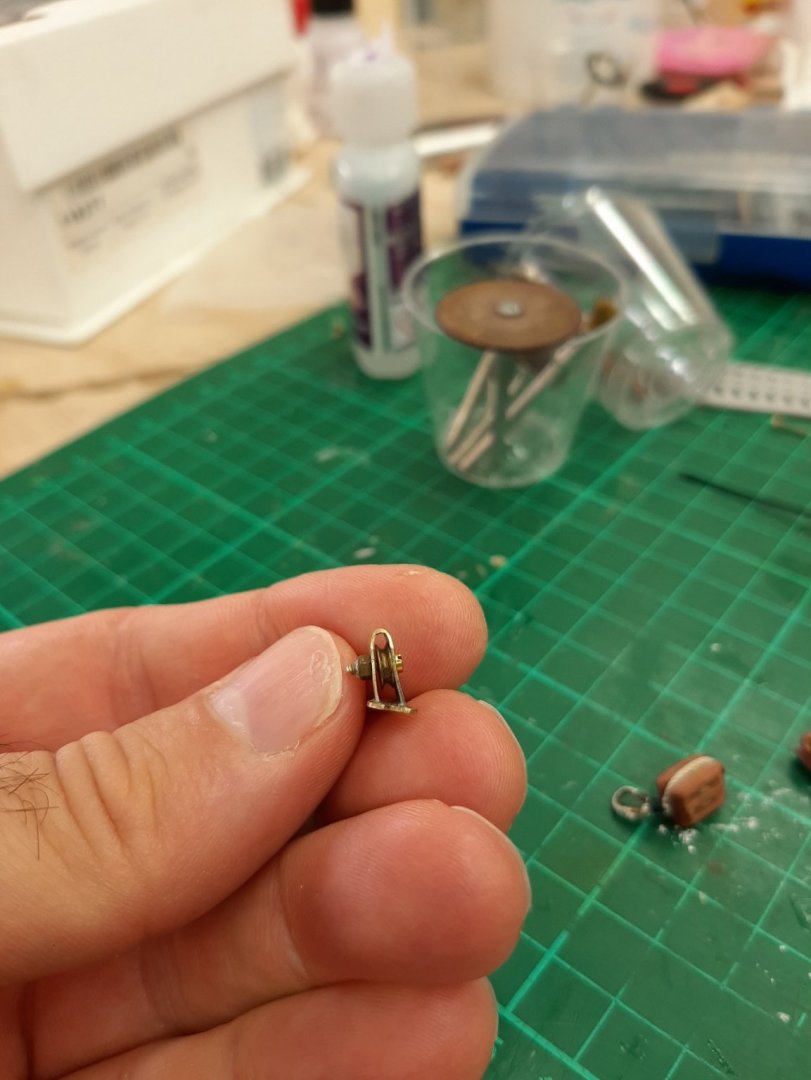
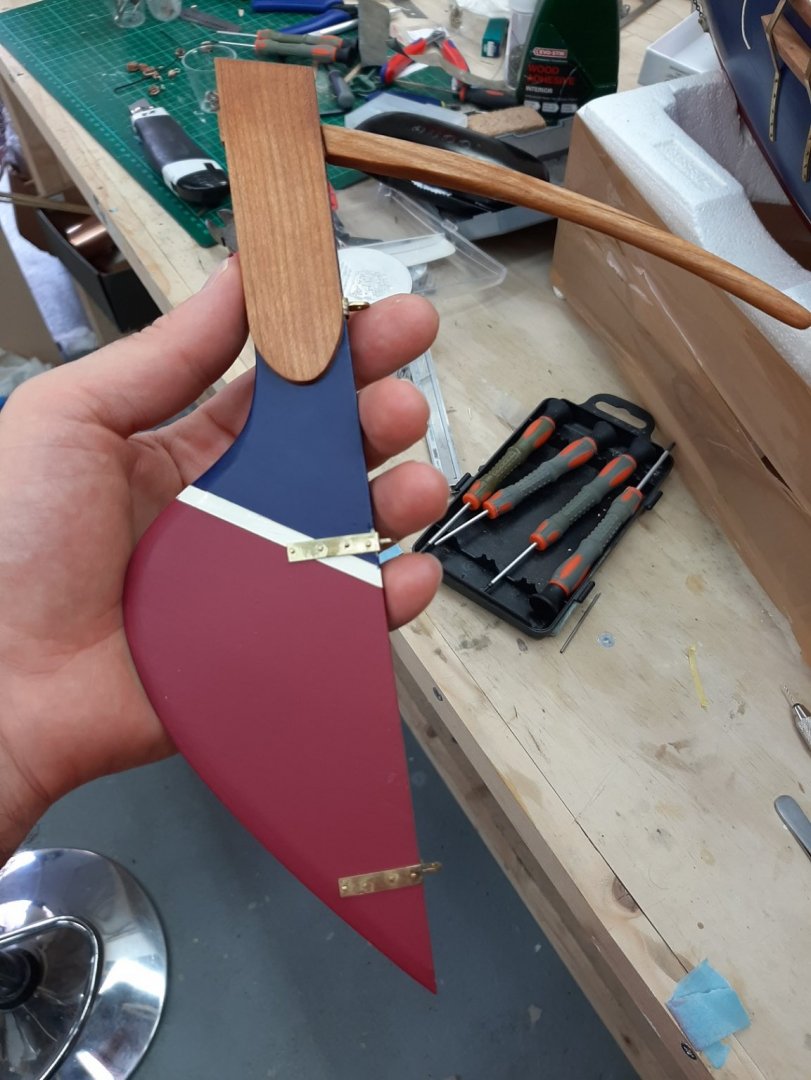
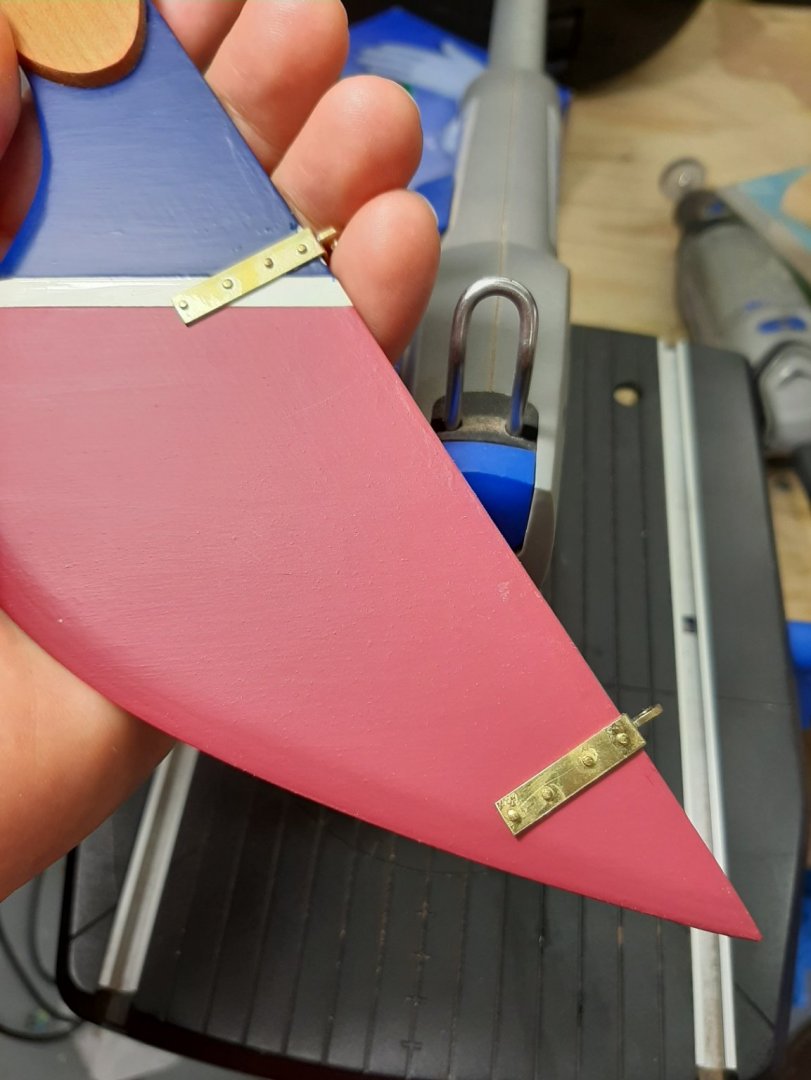
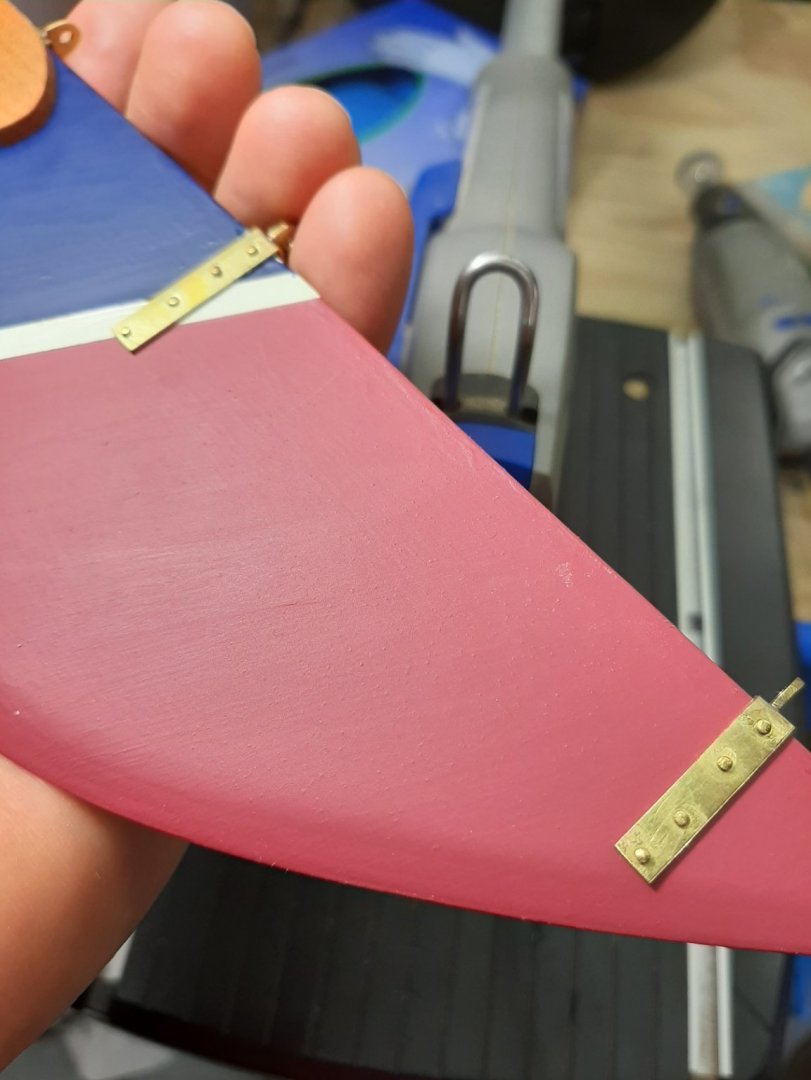
Well, the end is very near but I am struggling with the rigging and I badly need some advice! I will try and explain as best as I can and have taken a few pictures but please bare with me, the boat is large and my photo skills bad so if further pictures are needed to explain the situation please just ask. First of all I laced the boom I also made a brass pulley to re route the backstays from vertical to horizontal. These are offset inwards to follow the course of the backstays to the mast. There will be quite a lot of tension so I ll use screws to secure to the deck I took out the rudder I ve made a very long time ago, it is quite huge! It is painted with Valejo acrylics and satin and matt polyurethane varnish, no brush marks at all! Modern acrylics are amazing. Now, to get to the problems 1. I have very little space for cleats, I need at least three on each side. Is the position of the cleats on the coaming acceptable? If not I could make some round bases attached to the outside of the coamings to screw the cleats on but the coamings are very thick, as thick as the cleats. The next questions are about the sheets of the three fore sails, the top jib, the flying jib and the staysail. 2. The only way the sheet from the topjib will not rub and catch on anything is to go in between the shrouds that go to mid mast and the shroud that goes to the top of the mast. The sheet then will go through an eye on the deck and then to a cleat aft. Is this ok? 3. The flying jib will have a single block on the clew, one end of the sheet will go to the deck. However, the sheet, in order to clear other ropes, has to go to an eye or block on the cabin top and then to a cleat aft, next to the companionway. I ve never seen a jib sheet going to the cabin top, is this acceptable? 4. It seems that the staysail sheet is the easiest one. The books say that this is a powerful sail so two blocks will be needed to tension it, the sheet going aft to a cleat. How do people feel about this? The cleat that is closest to the bow in this proposed arrangement will be used for the mainsail sheet. Very many questions I know, I hope I ve explained adequately, any advice will be greatly appreciated! Regards Vaddoc


-
Epoxy glue
vaddoc replied to Zooker's topic in Building, Framing, Planking and plating a ships hull and deck
It is a very thick putty, thicker than play doh or plastelin, and is the colour of porcelain. It hangs on to the rough edges of the broken pieces and cures rock hard. A tiny amount will be needed so invisible. It is very cheap. I tried to find that repaired piece but it has moved on. -
Superphatic is actuallg marketed as CA glue alternative I ve used the Cornwall model aliphatic glue extensively, it is very nice but just an alipharic PVA, nothing more. I now use Titebond that seems to have a bit faster opening time.
-
Epoxy glue
vaddoc replied to Zooker's topic in Building, Framing, Planking and plating a ships hull and deck
Never used BSI epoxy, but their CA glue is fantastic. -
Epoxy glue
vaddoc replied to Zooker's topic in Building, Framing, Planking and plating a ships hull and deck
For porcelain, best to get epoxy putty. It comes in two pieces of soft material (actually not too soft) that you mix well and then use to glue the pieces. I repaired a porcelain plate, the repair was invisible and rock solid. Google Milliput -
How to seal acrylic paint?
vaddoc replied to Bill97's topic in Painting, finishing and weathering products and techniques
Oh dear, I completely missed the plot then!