
HOLIDAY DONATION DRIVE - SUPPORT MSW - DO YOUR PART TO KEEP THIS GREAT FORUM GOING! (Only 51 donations so far out of 49,000 members - C'mon guys!)
×


mtaylor
-
Posts
26,273 -
Joined
-
Last visited
Content Type
Profiles
Forums
Gallery
Events
Everything posted by mtaylor
-
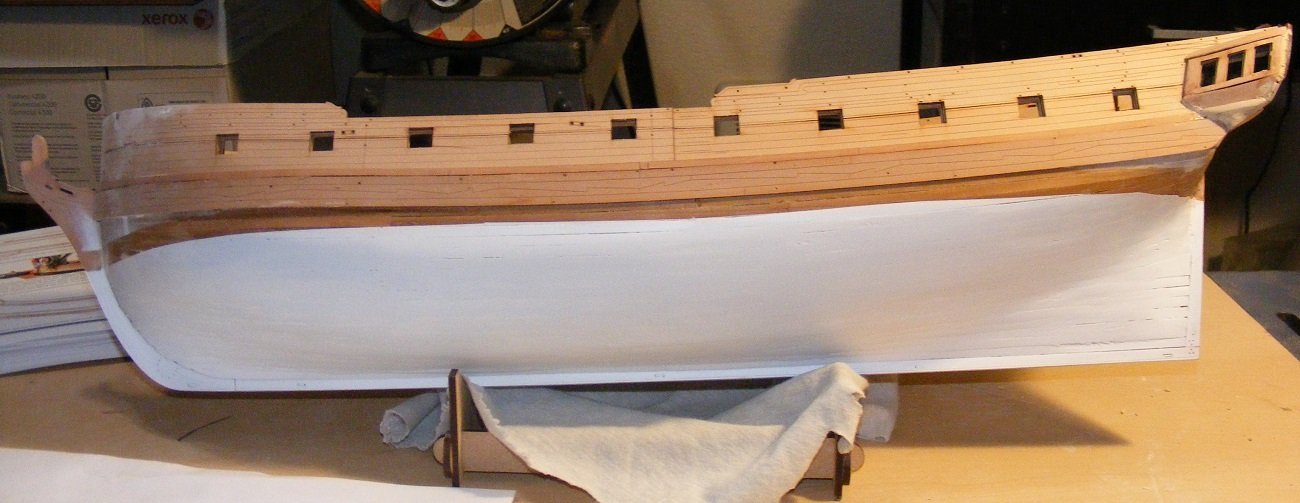
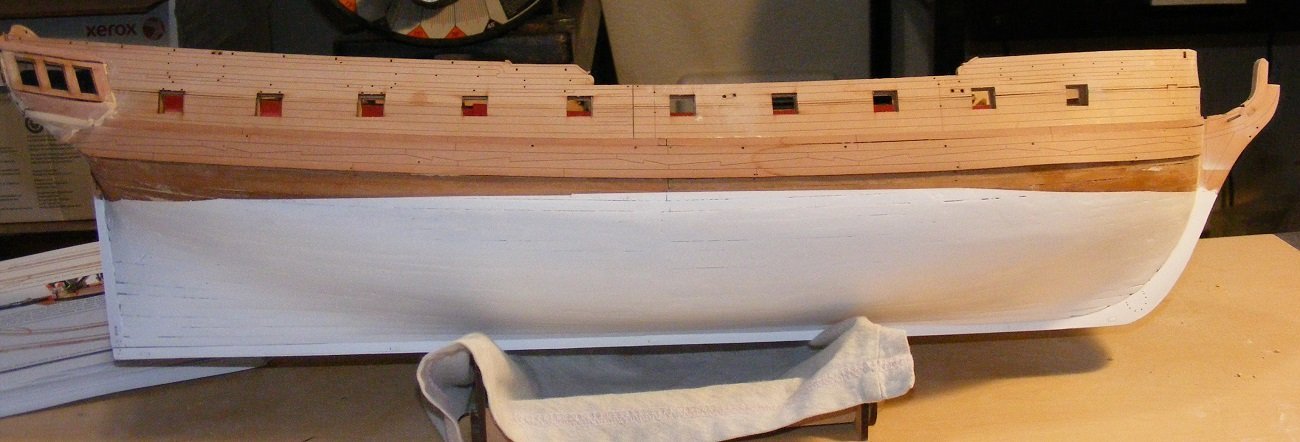
Humidity seems stabilized and I've filling, sanding, checking, rinse and repeat seemingly forever. But, the white is done. and coated with two coats of flat clear. Needs a bit of touch up in a few places but that will wait until I'm done with the black just in case some gets pulled up with the tape removal. I did notice some areas where the tape didn't fully seal and one where the tape dipped a bit low... I'll fix when I do touch ups. So, I'm taking the rest of the day off to let everything sit and then attack the black wales and down to the waterline. I'll probably do the blue on the gallery windows but I may hold off on that.
- 505 replies
-
- 20
-

-
- vanguard models
- Sphinx
- (and 1 more)
-
Only sometimes? It's nice for details but still shows every flaw.
- 419 replies
-
- 1
-
-
- Victory Models
- Pegasus
- (and 2 more)
-
I'm not sure if this applies to the SR or any other vessel of that era, but I've read that many of the larger ships had the ladders removed for action. The crew would then have to use other means.... like climbing up through the grate areas.
- 2,696 replies
-
- 4
-
-
- heller
- soleil royal
- (and 9 more)
-
And the hides were taken as there was big market for those.
- 2,696 replies
-
- 4
-
-
- heller
- soleil royal
- (and 9 more)
-
Let's shut down the discussion of motivations, money, kit designers, etc. as it's really off topic.
-
Lovely work, Keith. I don't envy your eyes on this mini-project. Mine would cross after the first one.
-
Very true that. No power tools just hand tools usually an adze. Close did count for something back then.
-
Brass piano hinges
mtaylor replied to Chariots of Fire's topic in Metal Work, Soldering and Metal Fittings
Do you have a drill press or milling machine? Pretty easy with one of those to drill holes where you want them. If using a Dremel, do a search for their press. Be careful on those though as the ones with plastic parts are basically useless. -
Kevin, I'd consider using a variable pot or rheostat for the LED's. That way you can brighten or dim them depending on what you want at a given time.
-
I'm not sure about this period, but the French often used charcoal for cooking. The officer's food was done over a low fire on the larger ships. Still a bit confusing to read what they cooked and how they did it, but like the English, the officers had their own meals.
- 2,696 replies
-
- 5
-
-
- heller
- soleil royal
- (and 9 more)
-
Lots ways to make them.... cut tubing, copper wire wrapped around a drill bit. They can also be purchased from hobby suppliers as "rings".
-
I did a quick search and most use a toothbrush for cleaning. However, I did find this:
-
And speed should be furlongs per fortnight. On the serious side... either way works for me or even both. Back in the '70's, I had two cars, one American and one Italian and both for some reason had a mix of hardware. Some things were "English"/"Imperial" and others bits were metric.
-
The old front page (pre-crash) was model of a Japanese battlewagon. It was huge. True that. Harold Hahn did several different scales. I find the scale of the plans is something that can be ignored since I convert them to my preferred scale of 1:64 due to space. If I had the room when I started, I would have gone larger.
-
Maybe the kid who hangs around the garage was offered a dollar or so to grab the pressure washer and hose down the shop?
- 189 replies
-
- 11
-

-
-
Welecome to MSW, Chris.
-
Same here. Very nicely done. Once the wheels are on, the pilot can land right side up.
-
More truth to that then probably most of us want to hear.
-
A very well done model and beautifully displayed, Cathead. I think your stepfather will be very pleased and happy with it.
-
Looks great, Yves. Is the whole hull double planked in the kit or "parts of it"?
-
Why masts are square at the top?
mtaylor replied to Tommy Vercetti's topic in Masting, rigging and sails
Good on not asking "why"... I've made that deep dive into the Internet some time ago and ended up in many places. Some were not a good place to be.
