mtaylor
-
Posts
26,273 -
Joined
-
Last visited
Content Type
Profiles
Forums
Gallery
Events
Everything posted by mtaylor
-
Today's progress and the adventure continues..... much head scratching, much smoke blowing out the window... fed the scrapbox as I sorted out my approach but success I do believe. Rather than trying to attack the whole deck (center area) at once, I decided to break it into logical sections. So.. aft section first as that's my anchor point for measurements. I spent the better part of last couple of days setting up the drawings for this with the deck plan as a basis and adding reference points and checking and re-checking measurements. I finally produced a drawing showing what I thought I needed, printed it out, cut out the section and.. rats... off... Recheck measurements, reworked the drawing and repeated the test. Got it. Or so I thought. I cut a piece of thin basswood and the fit was pretty good. I then cut a piece of pear with etched in planking lines thinking... "one piece.. it should look good.". It does look good (first picture). However, not quite as good a fit as I'd like. I mis-calculated the kerf of the Deathstar. Different woods and different thicknesses affect the kerf. It's not a constant but a variable as thicker wood needs more power which gives a bit of a wider kerf... a "Doh!" moment. Back to the drawing board. I ran some cutting tests (3 altogether for consistancy) using pear of the appropriate thickness to check the kerf and then ran those numbers into the calculator WITHOUT rounding them and got the correct kerf. While I had the drawing in the rework process, I decided instead of one piece and trying to get it to conform to the curve of the deck beams, I choose to cut individual planks. Re-checked 3 or 4 times my calculations and it worked... (See pic 2). A light sanding to remove the ash but leave some of the char gives a nice fine line for the caulking. It's been glued down into position and still needs some more light sanding to remove a bit of smoke stain and also to smooth out decking's surface. Hopefully, tomorrow's efforts on the aft midsection (the next section forward) will yield good results. I think it'll go a bit faster once I get into the rhythm of things. It may seem like more trouble, but with the tapered planks on the deck I think this can produce a more uniform planking than trying to mark up the beams with the tapered widths and match them.
-
Good grief that beast is huge... If you'd made it from metal it probably could haul cargo overseas. Or maybe use it as a rowboat? Seriously nice and complex work, Kevin.
- 56 replies
-
- 3
-

-
- sd-14 cargo ship
- card
- (and 1 more)
-
What is your preferred work height?
mtaylor replied to Nirvana's topic in Modeling tools and Workshop Equipment
I have different heights depending the work station.. My main build table though means I have to stand as top of the build board is approximately 1 foot above the work surface yet it matches the other work areas. Top surfaces of all the work areas (including my build board) are 36". I do have a wooden "bar" stool that allows me to sit if I don't feel like standing. -
Lately it doesn't seem to work no matter how many times I measure and cut. The part is still too short.
-
I think you made the right choice, Hamilton. Yes, plans can give you misleading info. As Grant said, find the 90% or better stuff. If it's not in the hardware store, look in the medical supply departments of some of the big box stores and/or pharmacies. Down here, it's usually either at Wal-Mart or Target and just about every pharmacy.
-
Congratulations on another masterpiece, Bob. I too, am marveling at the details at such a small scale.
- 348 replies
-
- 5
-
-
- pequot
- cable ship
- (and 1 more)
-
Good point about the brush.
-
Try a rotary brush on a Dremel??? I remember (again.. senior moment) someone doing that and it cleaned things up. But you will have to have a light touch.
-
Patrick, The 1/8th inch is real measurement and not scale. At scale the difference is about 4".
-
Michael, It doesn't work for me either. I suspect that the problem is the latest version of Flash. I wouldn't try to roll back to an earlier version as Flash is rated as one of the most insecure pieces of software ever. So the more it's been patched (the later the version) the better. Note I'm running Win7 and now use Chrome as IE11 has issues with MSW. I also do NOT have Flash on any of the computers here at home... just too risky and it is being phased out by Firefox and Chrome around the end of the year. I've not heard when MS will phase Flash out of IE.
-
That's a tough decision, Hamilton. The question really boils down to: "What can you live with? Will you look back and regret not redoing the keel?". I don't evey this decision as it's a tough one. Been there, done that and ended up with 2 years work hitting the scrapbox.
-
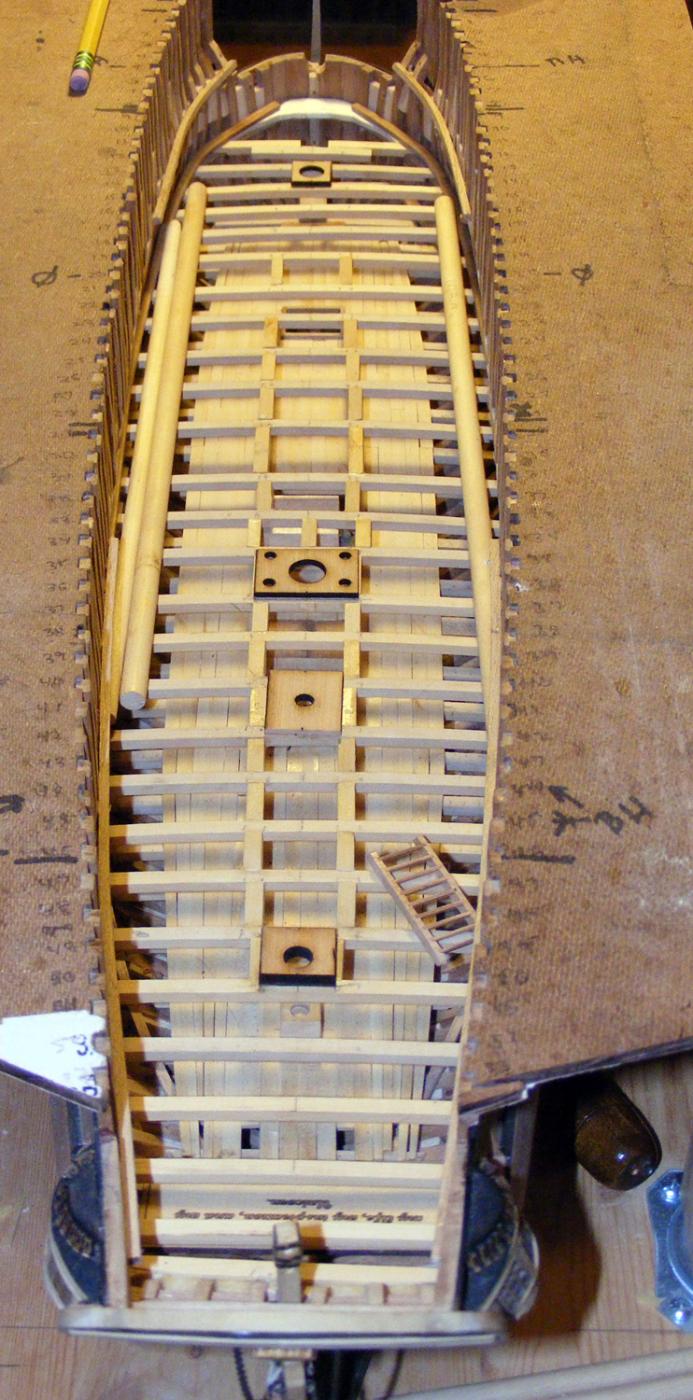
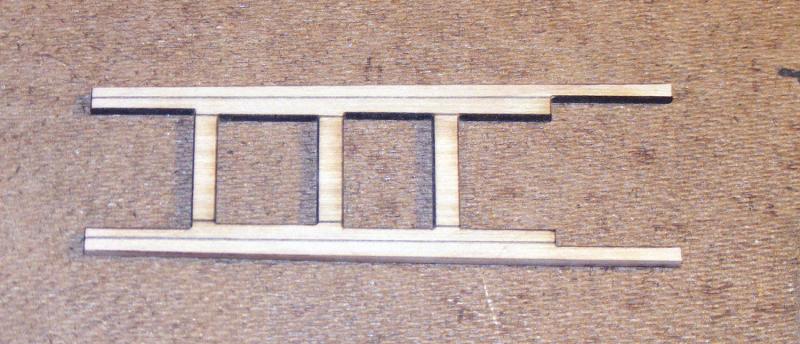
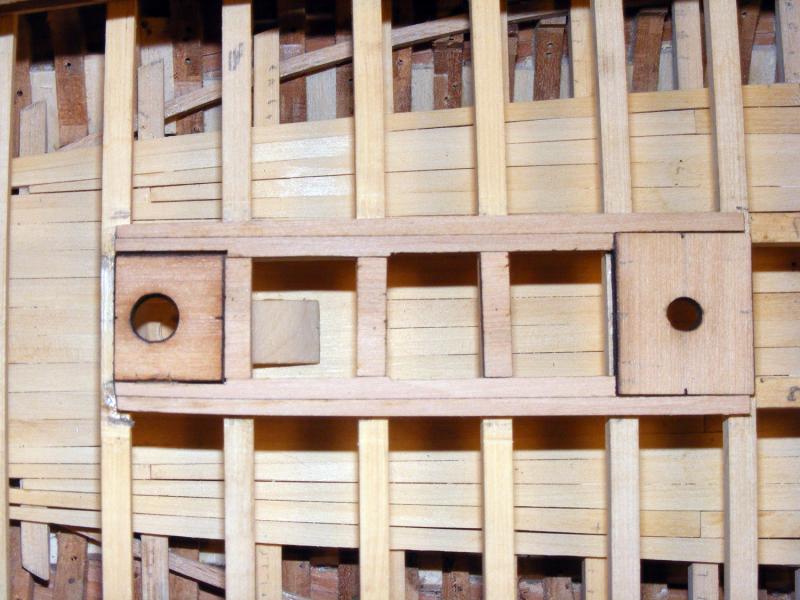
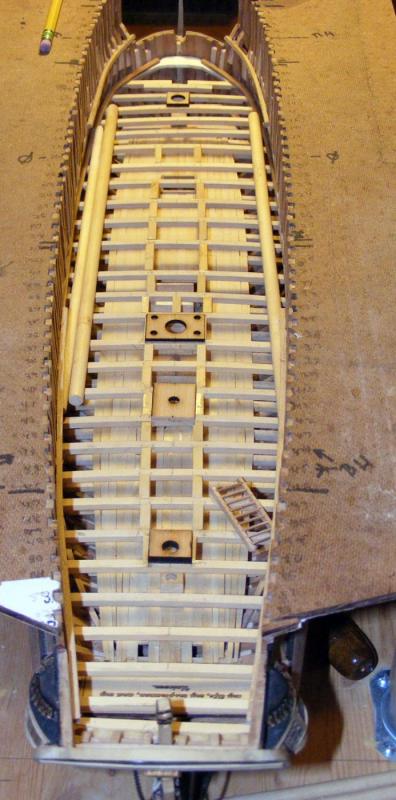
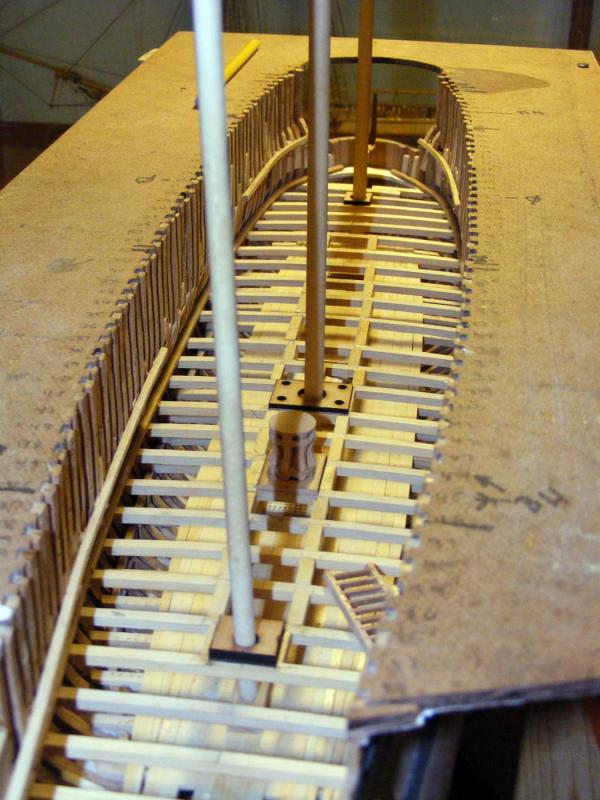
Thank you for following along on this adventure and for the comments and "likes".... Update weekend... I've added the carlings where there will be a hatchway or ladderway. Since the French laid their planks and then put the coamings ontop of the deck planking, the carlings will seen. I've also added the mast partners, the capstan partner (I think that's the right term) and have started making bits and pieces while sorting out the deck planking. The officer's ladder from the gundeck to the lower deck can be seen laying on the beams, the crew's ladders are in work and both fit in between the main mast partner and the oven on the lower deck. I was 1/16th of an inch off on the making of the various deck pieces and planning the centerline planking (thick stuff). It should be 3/32" of an inch instead of the 1/8" I mentioned previously... a miscalculation on my part. I left the mizzen mast partner at the thicker size to better fit the pantry around it. Pictures show things ready for the next step. The second picture is just a reference shot with dummy masts and the capstan in place to get an idea of things... As always, comments, corrections, and critiques are welcome. I'm still learning this art...
-
OC, those pics look pretty good. One wouldn't know it was an "old" camera phone unless you told them. Oh wait.. you told us...
-
Not a bad smell then? I would hope you have enough planks...
-
That wonderful news on the grandson and about Kevin. Hopefully the weather doesn't keep you and Phyl from going to see the grandson.
-
Now that should ring everyone's chimes. Looks like an English bell and not a Tibetan bell.
-
Teak? Yep.. very pricey and very lovely. To reduce the images, there's some freeware out there. If you're using Window, then Paint can handle that. Just do the "resize' function nd drop the image size down to 1600 X 1600 (not the file size as that will drop when the image is reduced to the forum parameters.
-
Beautiful pictures, beautiful ships, and the shipyard is fascinating. Thanks for doing this Jack. It give those of us not familiar with these vessels a new perspective.
-
Great to see you back, Matt. Nice work.
-
I'm grabbing a seat also. I shudder to think how something that size got knocked over.
- 749 replies
-
- 3
-
-
- albertic
- ocean liner
- (and 2 more)
-
Guys...nothing like pressure, eh? Seriously, I don't think I could do the work you're doing. I'm in total awe... As for keeping me busy... I'm currently buried. So.. I'll take any abuse like being called "chicken" .
- 743 replies
-
- 10
-
-
HMS Beagle by johnb72 - after 1831 refit
mtaylor replied to johnb72's topic in - Build logs for subjects built 1801 - 1850
John, Internally, whitewash seems to be the "paint" (if it can be called paint) of choice. It was cheap.