mtaylor
-
Posts
26,270 -
Joined
-
Last visited
Content Type
Profiles
Forums
Gallery
Events
Everything posted by mtaylor
-
A beautifully done bulkhead, Sjors. I see lots of progress there on the deck and beams... looks great.
- 1,616 replies
-
- 2
-

-
- caldercraft
- agamemnon
- (and 1 more)
-
Well done on the visor. Sometimes a heavy hand and desperation are our friends. And that ice maker... a 1953 Hotpoint? Has that look to it...
- 956 replies
-
- 3
-
-
- andrea gail
- trawler
- (and 1 more)
-
Mike, You might want to post this in the Books section and open a topic for the AOTS Endeavour book. I suspect that anyone who's not following along or a new builder might not see these logs.
-
Thanks for the "likes". Thanks Pat. I've still got my fingers crossed... Next ship won't be French so hopefully the planking will be easier. Thanks Augie. It is a challenge.. But, I wanted the wale's line to highlight their curve. Thanks George. It's the way the plank runs and twists. I am going to run a file over it and get it looking more even as well as sand everything since there's some unevenness in thickness due to the bends and twists. Since this is the first side, I may use it for the "wall side" as I'll do my experimentation here. :D
-
I'd say either Olson or the blades from Sawbird. I don't have a link as they dropped off my "Favorites" for some reason.....
-
Druxey, I would assume they had it figured out somehow.. maybe men below keeping the rope hanging down from tangling? I seriously doubt that cable reels (like power and telcos use) were available. I have a hard time just comprehending that they floated the masts to the ship and using manpower and sheers got the masts installed. Moving all that cordage out to the ship for rigging would have been an operation unto itself. I wish there was more historical info, it would be fascinating to know how the heck they did things like this.
-
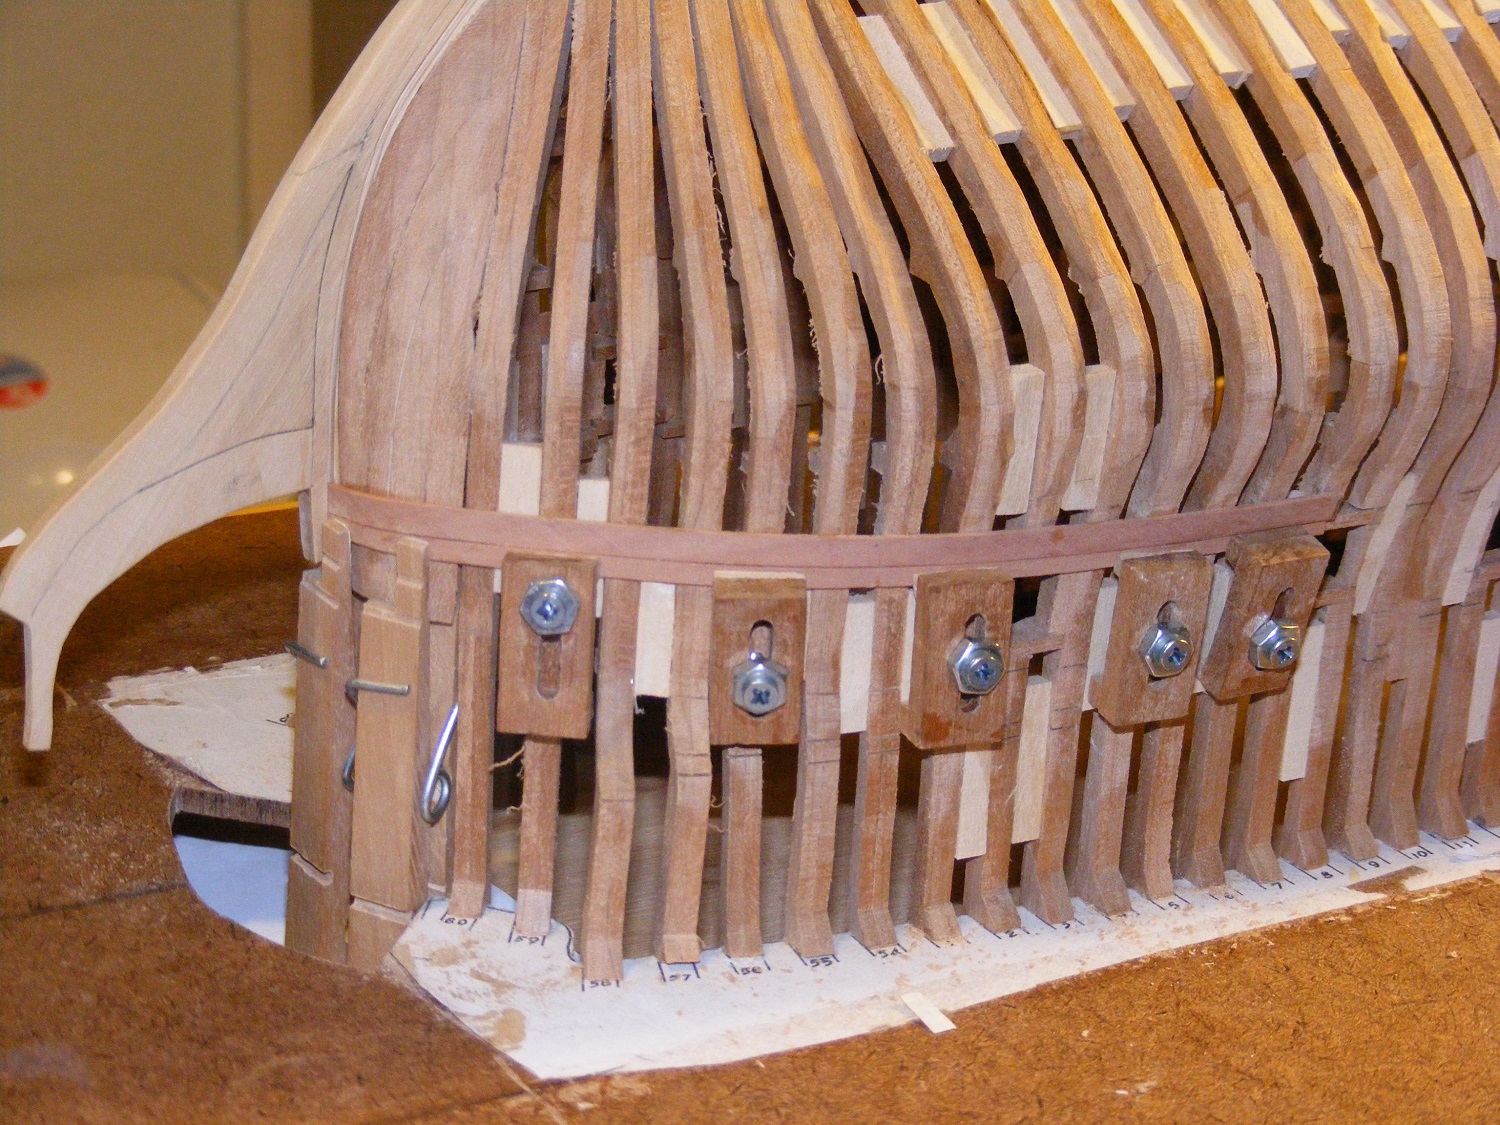
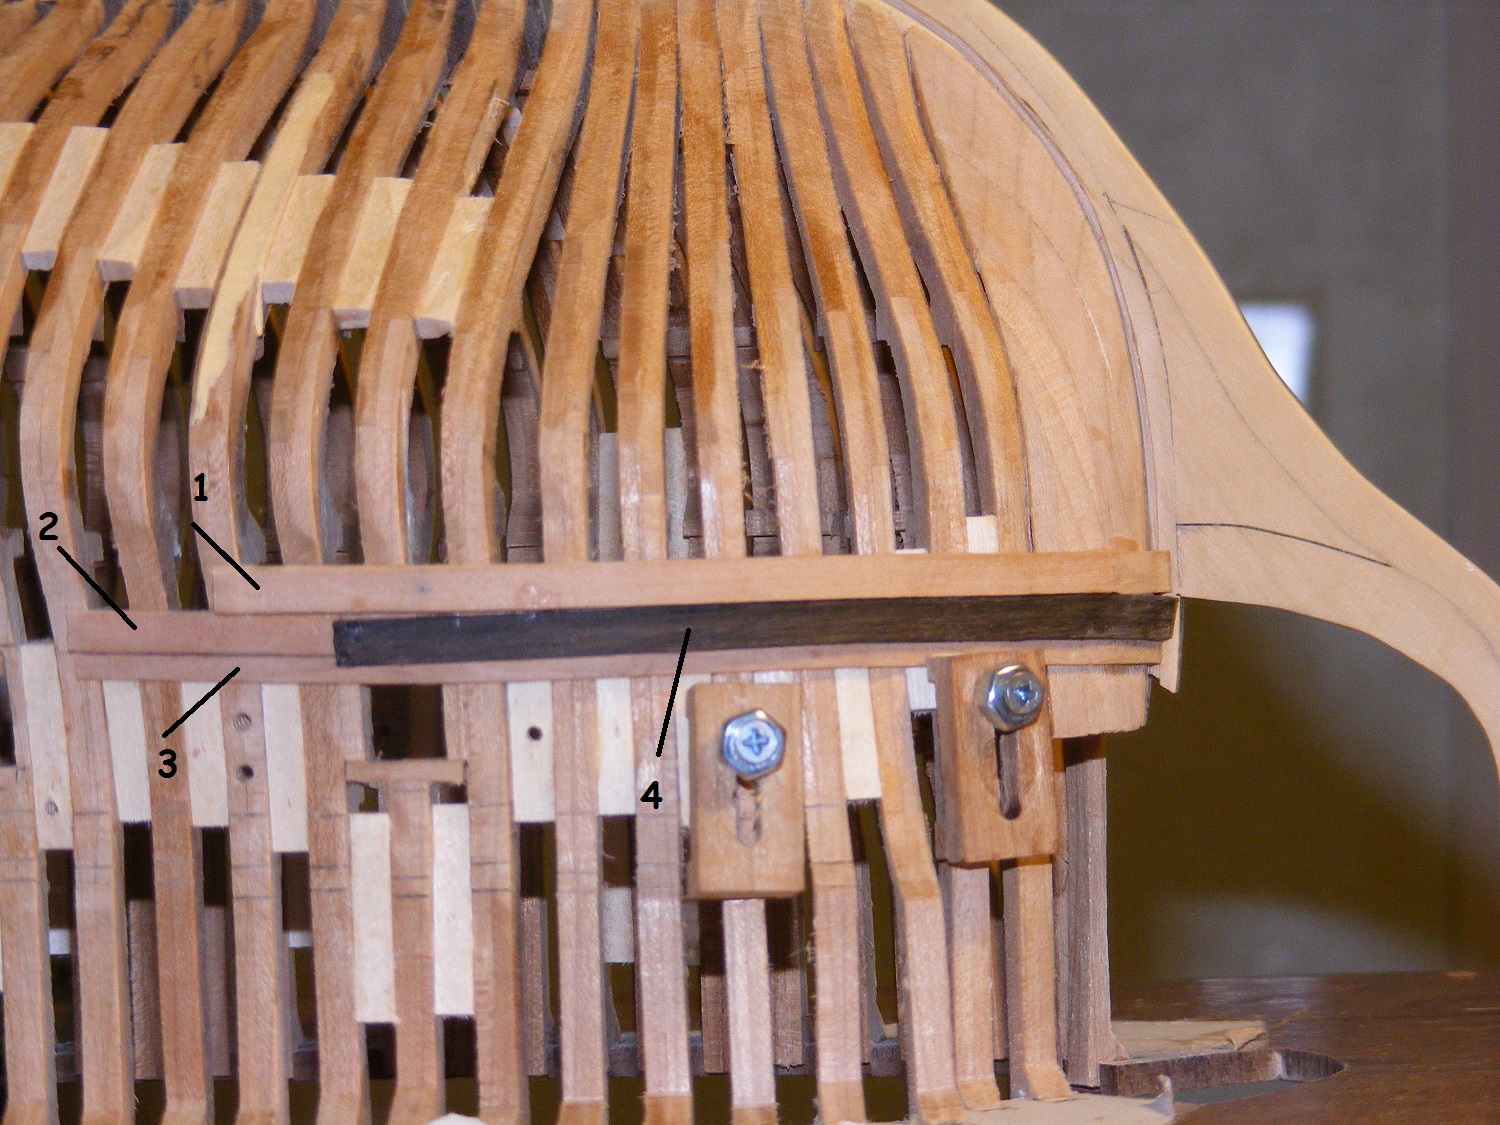
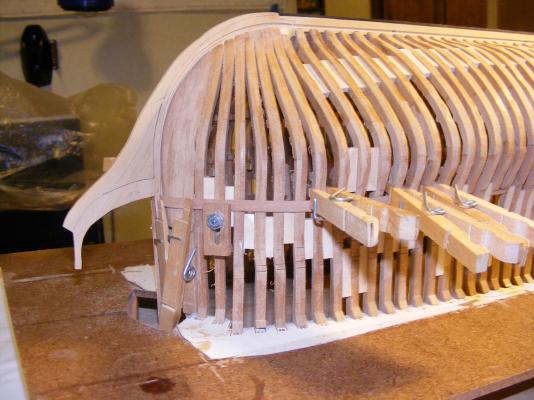
Update.. we ain't dead in the water yet..!!! After milling my wood, I spent a fair amount of time sorting out how to put this together.. the wales. There's 12 strakes that start off a 3/32" thick and as they go down to the main hull planking, they thin to 1/16" which is the "normal" planking thickness. Above the main wales, the upper works planking is 1/32" thick. After much experimentation and sorting things out, my approach is below. First two pics are how I clamp things down... This one shows the actual planking... hang with me, there's issues that I know have to be resolved due to some gaps. 1) is the second strake of wales. Solid swiss pear. 2) is the underlayment of 1/32" thick Swiss Pear. This is for the top strake of wales. 3) is the first of the planking for the upper works. Forward of the first port will be heavier planking going from the wales upward (last photo which is from Karl's build of Bohomme Richard.) 4) Ebony for the top wale. It's 1/16" thick to make it easier to bend than the full thickness of the strake. The issues are the end of the ebony needs adjusting. For some reason it drooped while getting it into place. And there's piece near the stem on the second wale where pear split. I'm not overly concerned about it as the bolster for the hawse pipes goes over that. The whole thing will need sanding and smoothing but for now, I'm going to continue on and finish running these to the stern and then get the other side done. I'm also still sorting out clamps. Seems I broke two frames in the process of getting things glue up. I have to not put so much force on those clamps. As always, feel free to click on the pics to enlarge and criticism, different ideas, etc. are always welcome. I'm still learning this stuff.


-
Cutty Sark by NenadM
mtaylor replied to NenadM's topic in - Build logs for subjects built 1851 - 1900
Well said, Nenad. Enjoy the book.- 4,152 replies
-
- 1
-
-
- cutty sark
- tehnodidakta
- (and 1 more)
-
Looks nice and smooth, Popeye. You best keep it indoors for now as with the snow coming, you might lose her.
- 956 replies
-
- 3
-
-
- andrea gail
- trawler
- (and 1 more)
-
I'm with Carl and Bob.. except my jaw is still on the floor. My mind is duly boggled.
-
I'd have to make an assumption that there wasn't any kind of affair like a mountain climber's or rappelling gear, so maybe a bosun's seat run up to the euphroe? Or one who had climbed the stay though how he would have hung on is the question. Then two men, one on the top and the other at the euphroe? Slackening the stay for them to work from the top, to me would have been problematical as the stay would have to have been loosened to allow this. Though that might be possible. Yes, there would have been much rope hanging off the top to be fed back and forth but when you consider the amount of line, shrouds, etc. being hung and run through everything, it was obviously doable for them. After running the line, I could see men down on the deck pulling the line to tighten everything up.
-
Cutty Sark by NenadM
mtaylor replied to NenadM's topic in - Build logs for subjects built 1851 - 1900
That's two items of good news... the Cutty is looking great. I think you've got it!!!! And the strike is over.- 4,152 replies
-
- 2
-
-
- cutty sark
- tehnodidakta
- (and 1 more)
-
Looking good, Popeye. I have no idea what's what there, but I'm sure that when it's all together, I'll know.
- 956 replies
-
- 3
-
-
- andrea gail
- trawler
- (and 1 more)
-
Nice to see you resuming work on this one, Dave. I would think you're right about the decals. Beats trying to paint them and get them all the same size and in the right place. Looks great!!!
-
Jason, The frames are pretty much made of smaller timbers the way the plans show except they also used chocks. You might go to the scratch build area and have a look at EdT's Naiad: http://modelshipworld.com/index.php/topic/232-hms-naiad-by-edt-160-frigate-38-1797/page-1?hl=naiad or any of the Swan class scratches such as Danny Vada's Vulture: http://modelshipworld.com/index.php/topic/230-hms-vulture-by-dan-vadas-1776-148-scale-16-gun-swan-class-sloop-from-tffm-plans/ or Toni's Atalanta: http://modelshipworld.com/index.php/topic/198-hms-atalanta-by-tlevine-1775-148-scale-from-tffm-plans/ Wooden treenail and iron bolts were used. Also look at some of the other logs (not mine as didn't do treenails) in the Triton area. Such as EWEK's, Rusty's, Rafine's, bbrockel's, scottacus's and pete38. You might want to get a quick look at the others just in case I missed some of the ones that are finished.
-
Nicely done on a not so easy to do kit.
-
CA adhesive, which one do you use?
mtaylor replied to Modeler12's topic in Masting, rigging and sails
Jay, I see it as a toss-up question. One of "what works for you may not work for me". I use mostly PVA for some applications, CA is the ticket. I've tried the Locktite Gel Control and like it as well as the LHS branded CA (the same stuff ME sells) in various viscosities for various jobs. They all seem to work well. However, I'm just not a fan of CA due to the fumes. On the other hand, I'm still wrestling with epoxies to find something I can work with. But.. what works for you..etc... etc... -
It looks great. I may have steal your method...
-
PLANKING STEAM TANK
mtaylor replied to Walter Biles's topic in Building, Framing, Planking and plating a ships hull and deck
I don't blame you. I've already committed* myself for this model. The next one... I'll do something else. * - Both to the project and to the local mental health ward. -
Nice work, Mike. And that is an excellent fix for the sander.
- 943 replies
-
- 1
-
-
- hahn
- oliver cromwell
- (and 1 more)
-
PLANKING STEAM TANK
mtaylor replied to Walter Biles's topic in Building, Framing, Planking and plating a ships hull and deck
For all but one wood, I would agree Druxey. I'm thinking of getting a pressure cooker for ebony, though. I love the way it looks but that stuff is a <fill in expletive of choice> to work with. -
What Patrick said... goes for me too.
-
Nothing like having a good set of instructions, isn't there?
- 943 replies
-
- 1
-
-
- hahn
- oliver cromwell
- (and 1 more)
-
Cutty Sark by NenadM
mtaylor replied to NenadM's topic in - Build logs for subjects built 1851 - 1900
Nice..... I think you've got it. I agree with Popeye.. you're not a dummy but very logical.- 4,152 replies
-
- 5
-
-
- cutty sark
- tehnodidakta
- (and 1 more)