HOLIDAY DONATION DRIVE - SUPPORT MSW - DO YOUR PART TO KEEP THIS GREAT FORUM GOING! (Only 13 donations so far - C'mon guys!)
×


Old Collingwood
-
Posts
12,098 -
Joined
-
Last visited
Content Type
Profiles
Forums
Gallery
Events
Everything posted by Old Collingwood
-
 Thank you kindly Mark - I really appreciate that, I am quite pleased with the decs so far. OC.
 -
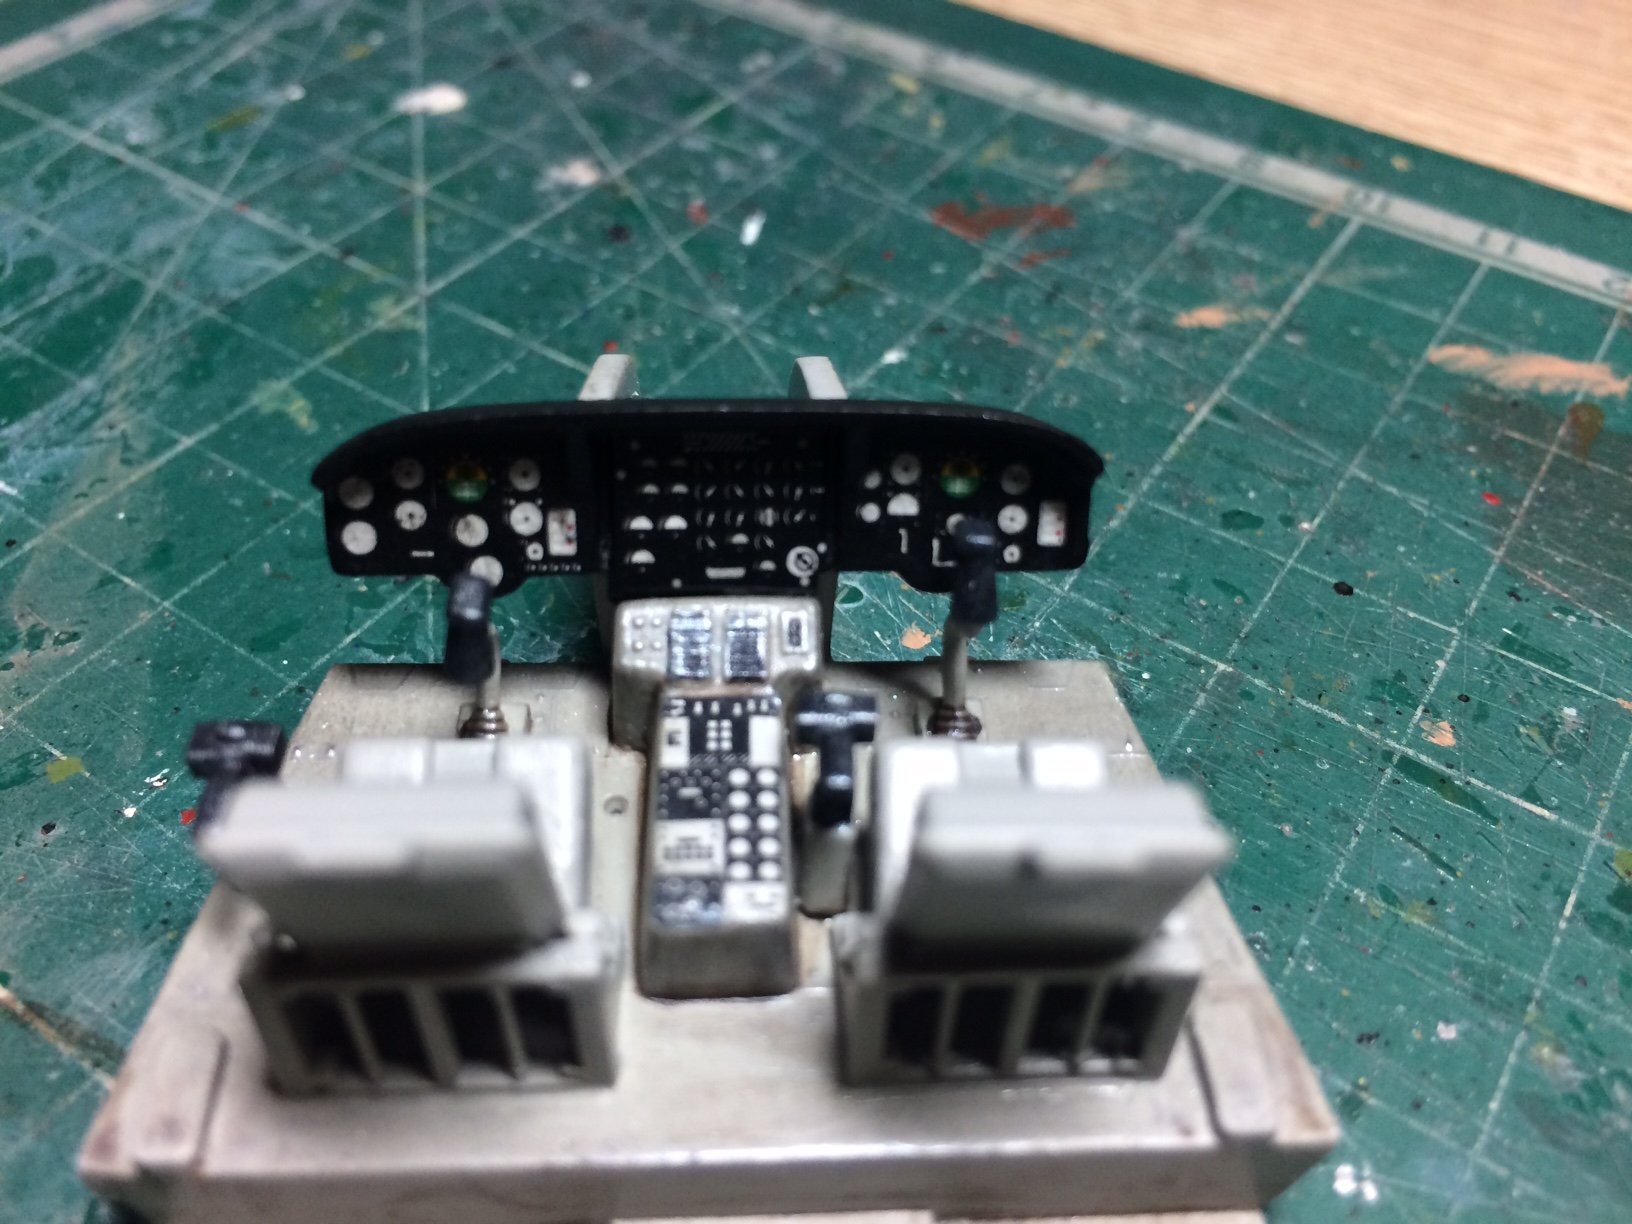
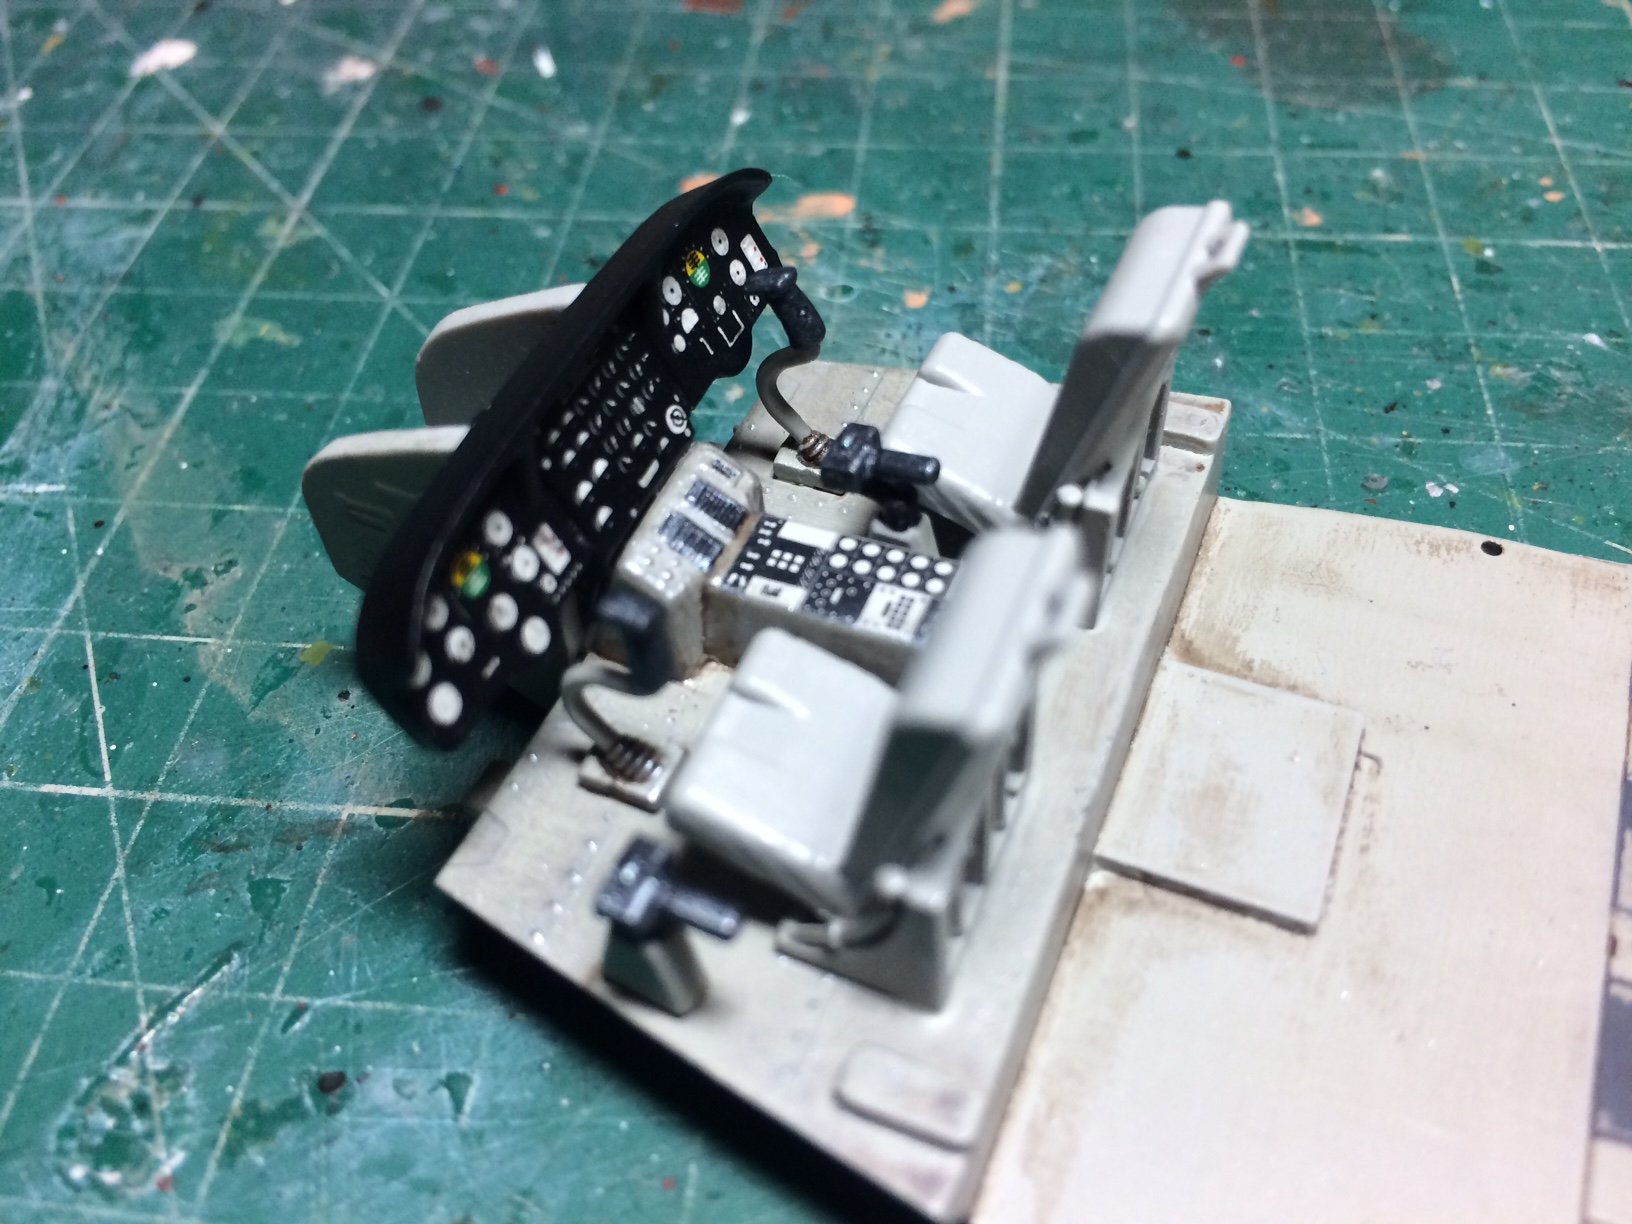
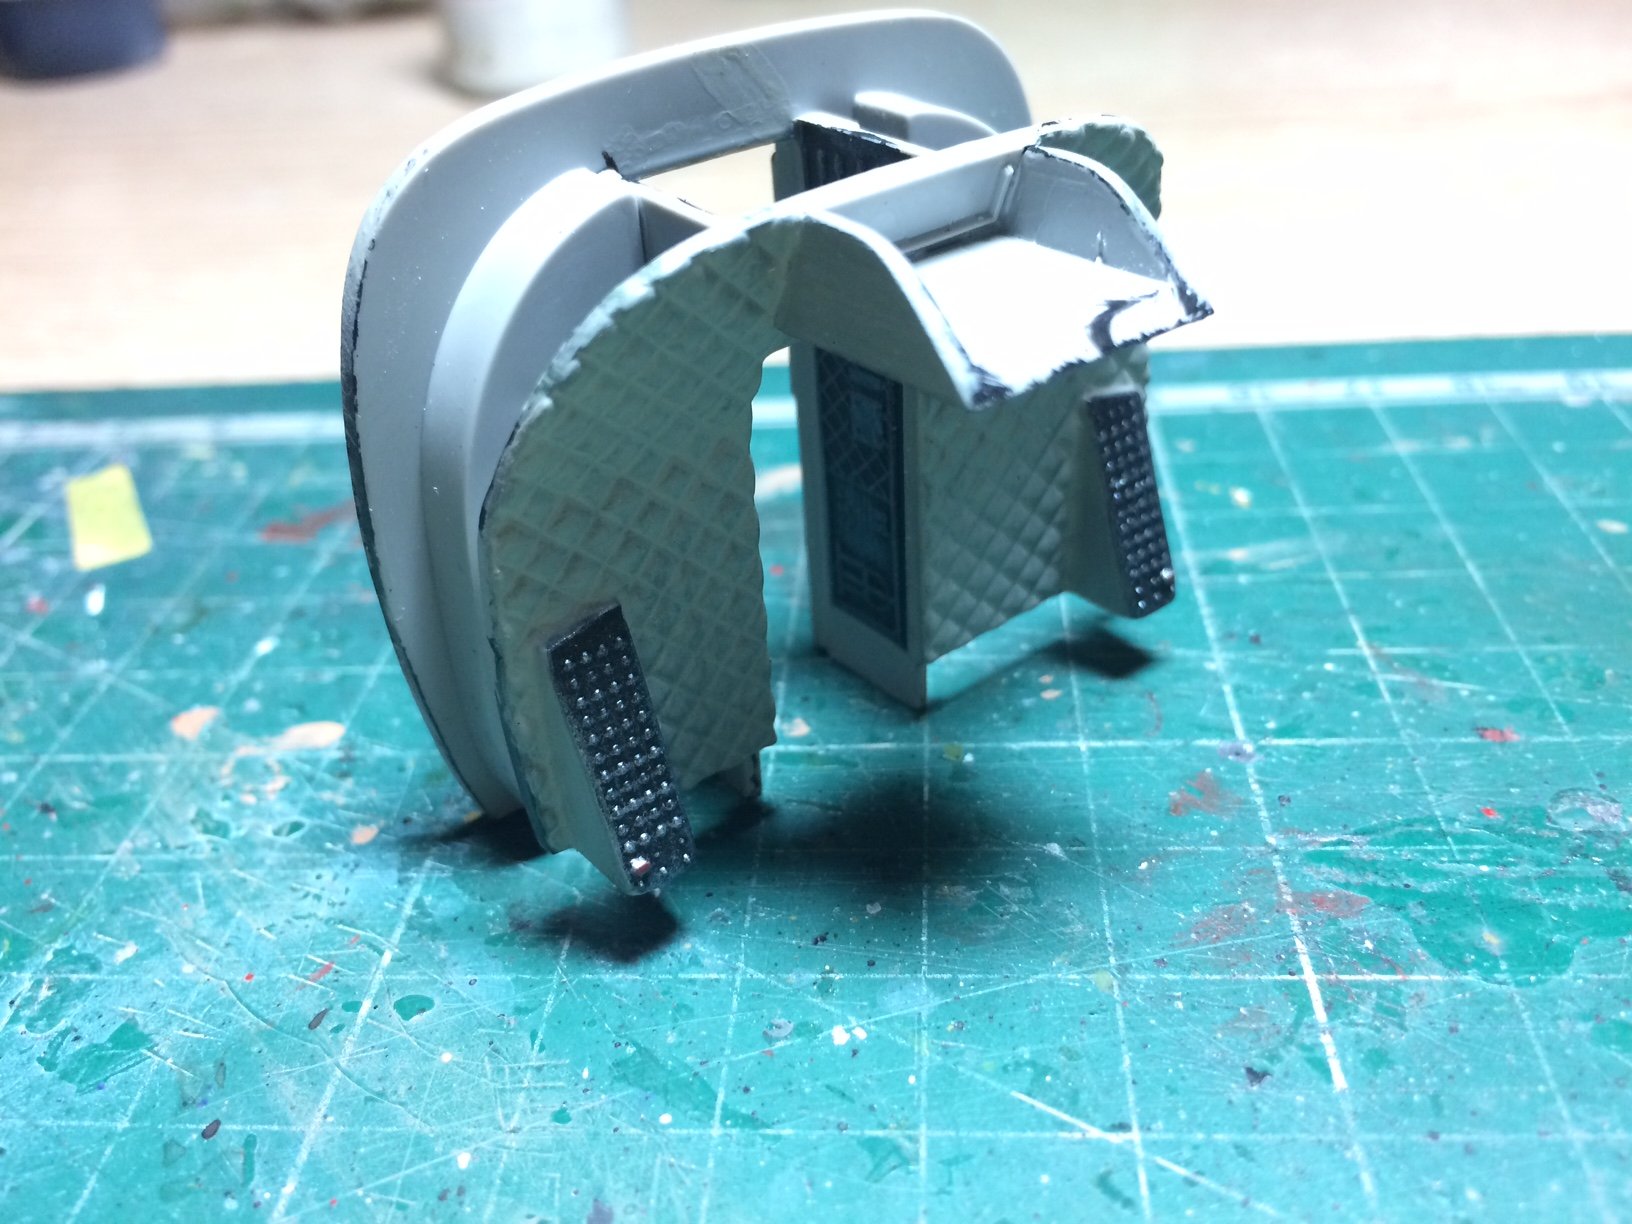
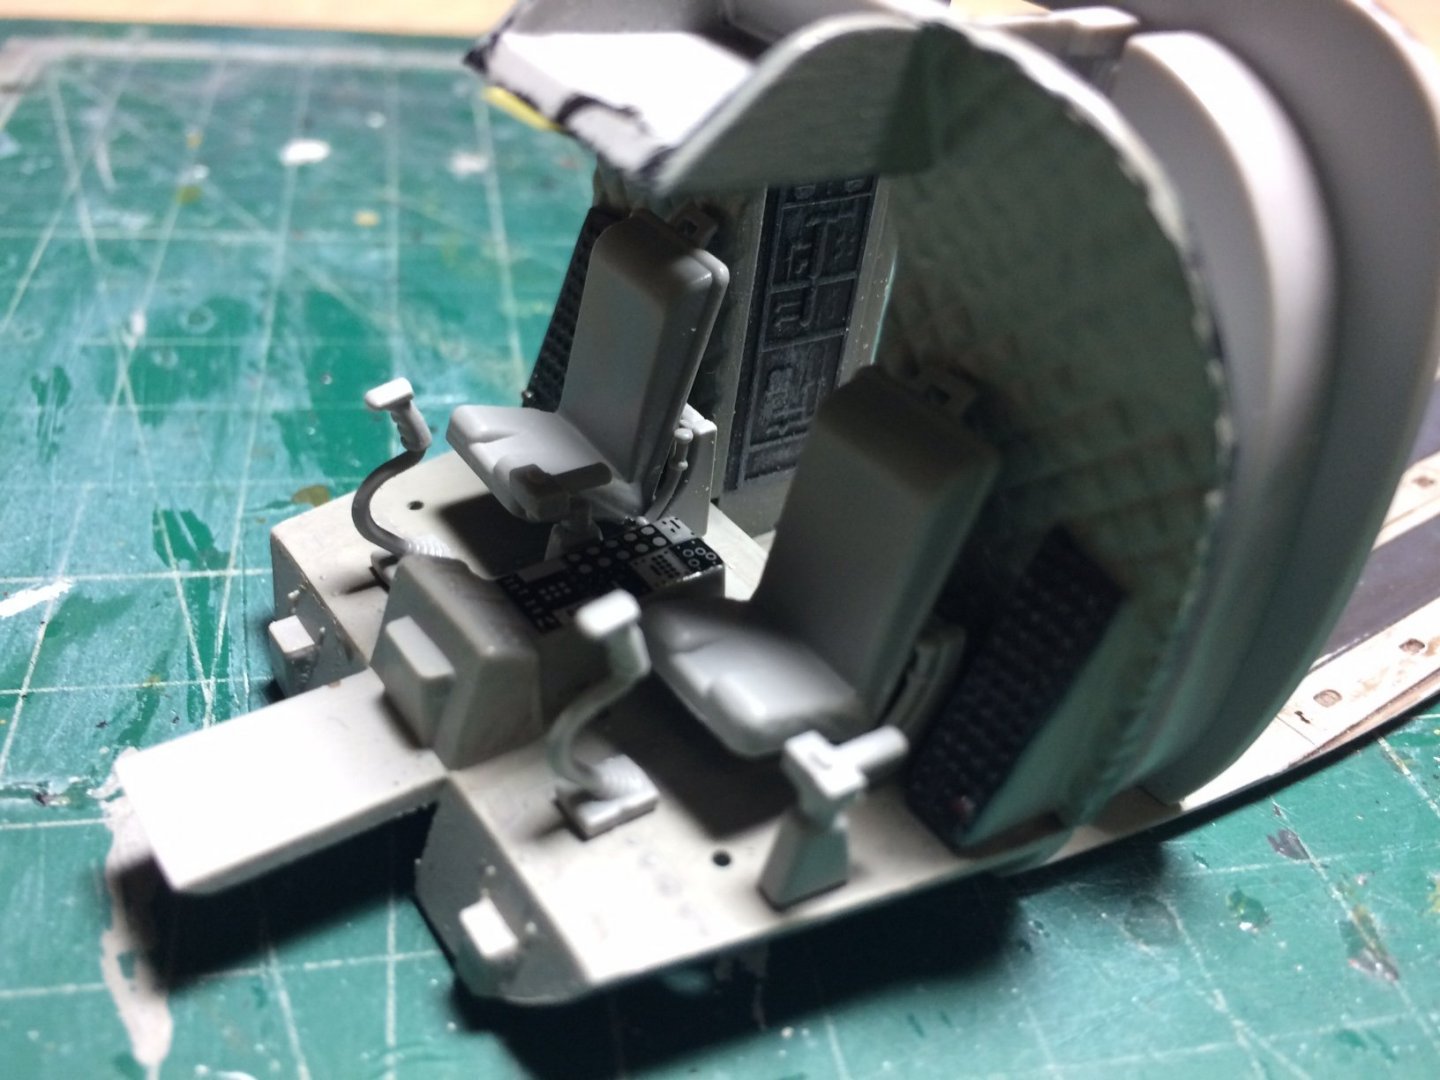
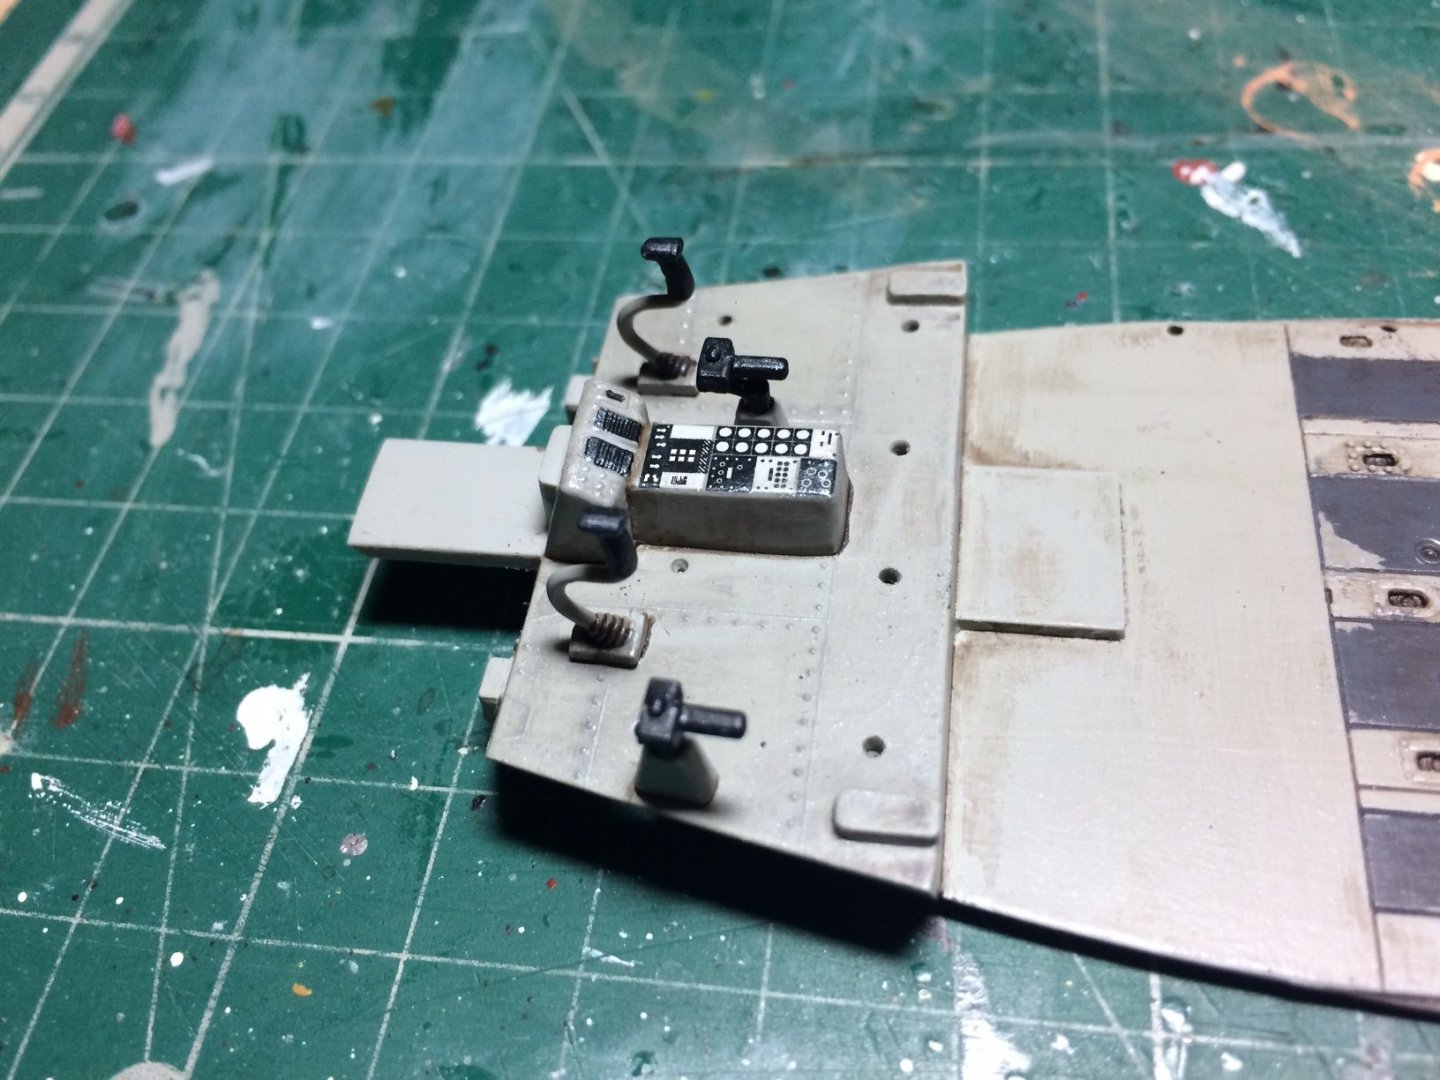
Evening all, more progress - firstly I glued down the Two seats then gave thier frames a few coats of Grey (still need the cushions painting) then I worked on the Two consol supports these have sone subtle wiring that after fitting I picked these out with Silver dry brushing, then it was the turn of the Instrument consol, this was given a few coats of Black then when dry it was decal time - these are Three seperate pieces for the instruments - they went down without fuss, then when set I brushed over a few coats of flat top coat. I then glued it in place and nest will be to paint the seat cushions. Bulkhead still just dry fitted. OC.


- 283 replies
-
- 10
-

-
Mark will be along with the pop corn later - he now owns a Huge pop corn maker, that might have to sit on the deck also.😃 OC.
-
Thats a good start - and that frame looks like it will make a lot of difference in taking the worry out of any miss-aligned frames. OC.
-
Thats a really tidy well executed job of your first planking - very nice progress. OC.
- 42 replies
-
- 3
-

-
-
- first build
- artesania latina
- (and 1 more)
-
Very nice tidy work on the tree nail work. OC.
-
I always wanted a full size replica Mortory Sword but the admiral wasn't too impressed by the idea. OC.
-
Thank you Roger. OC.
-
Same as me. OC.
-
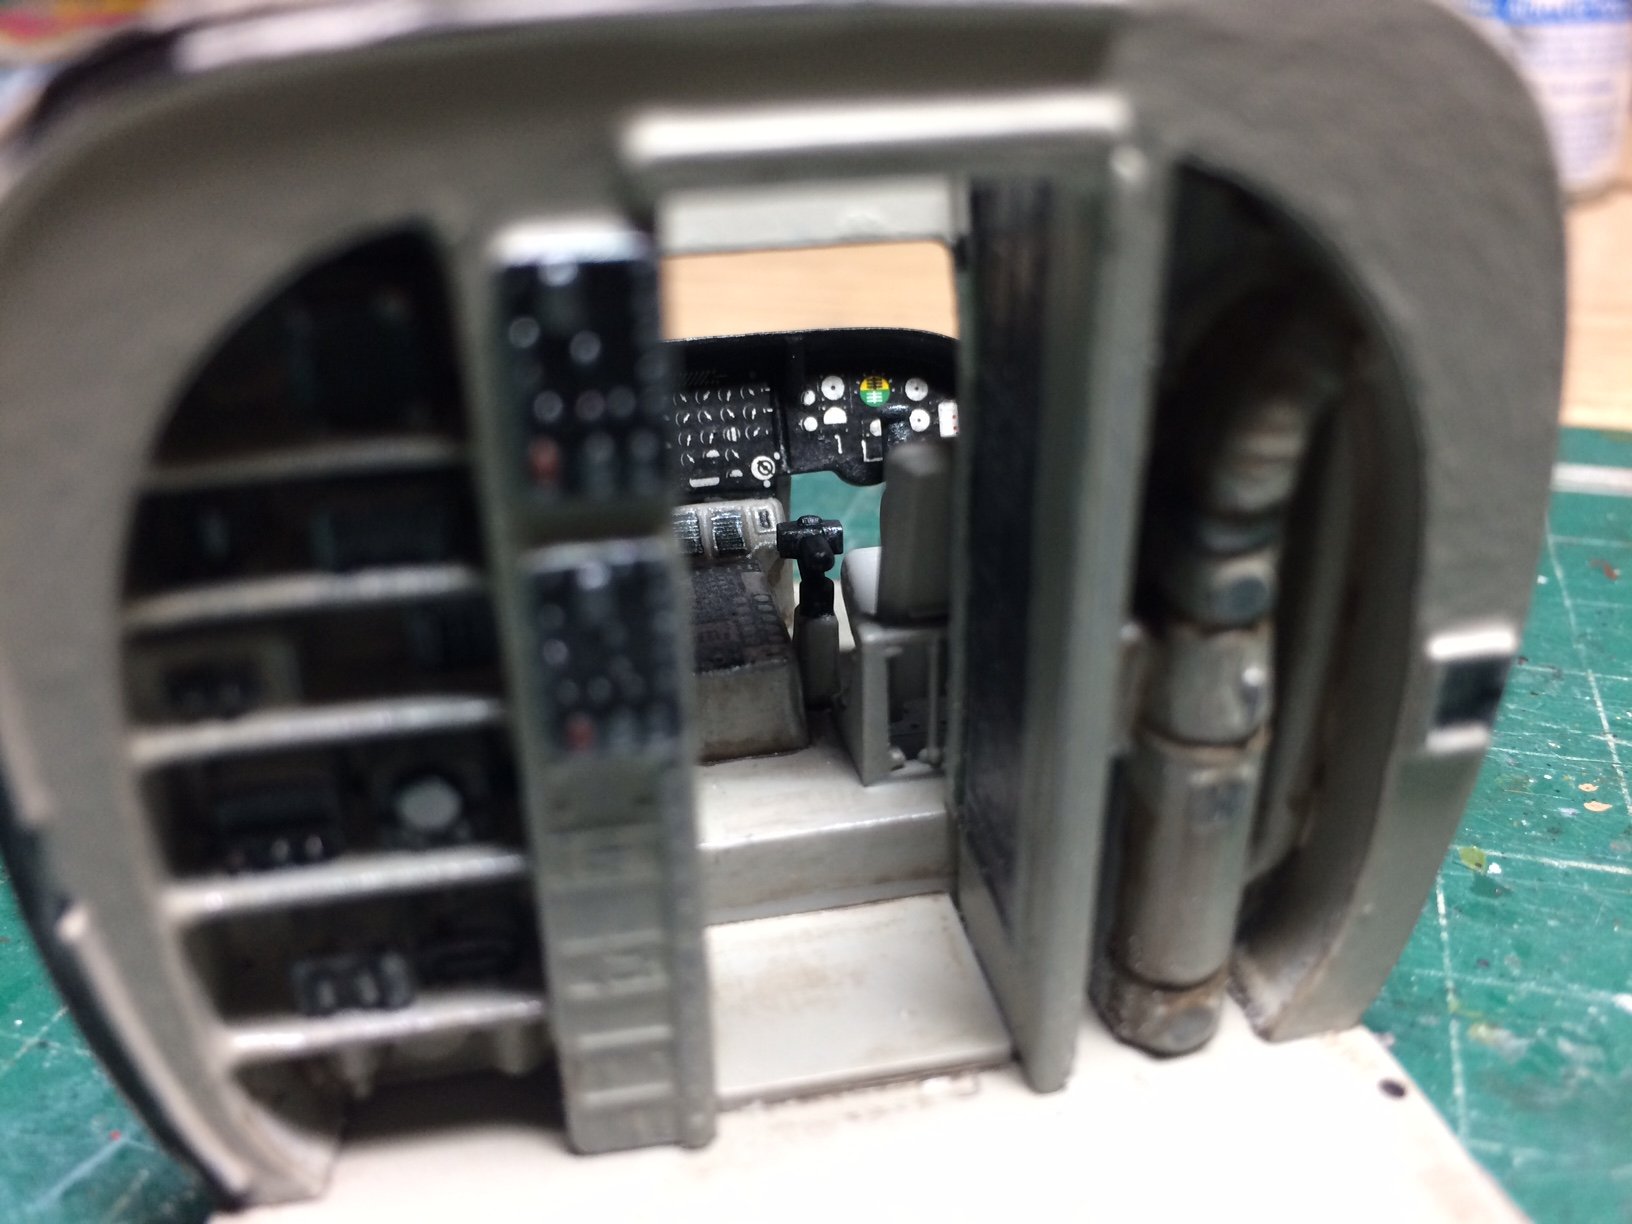
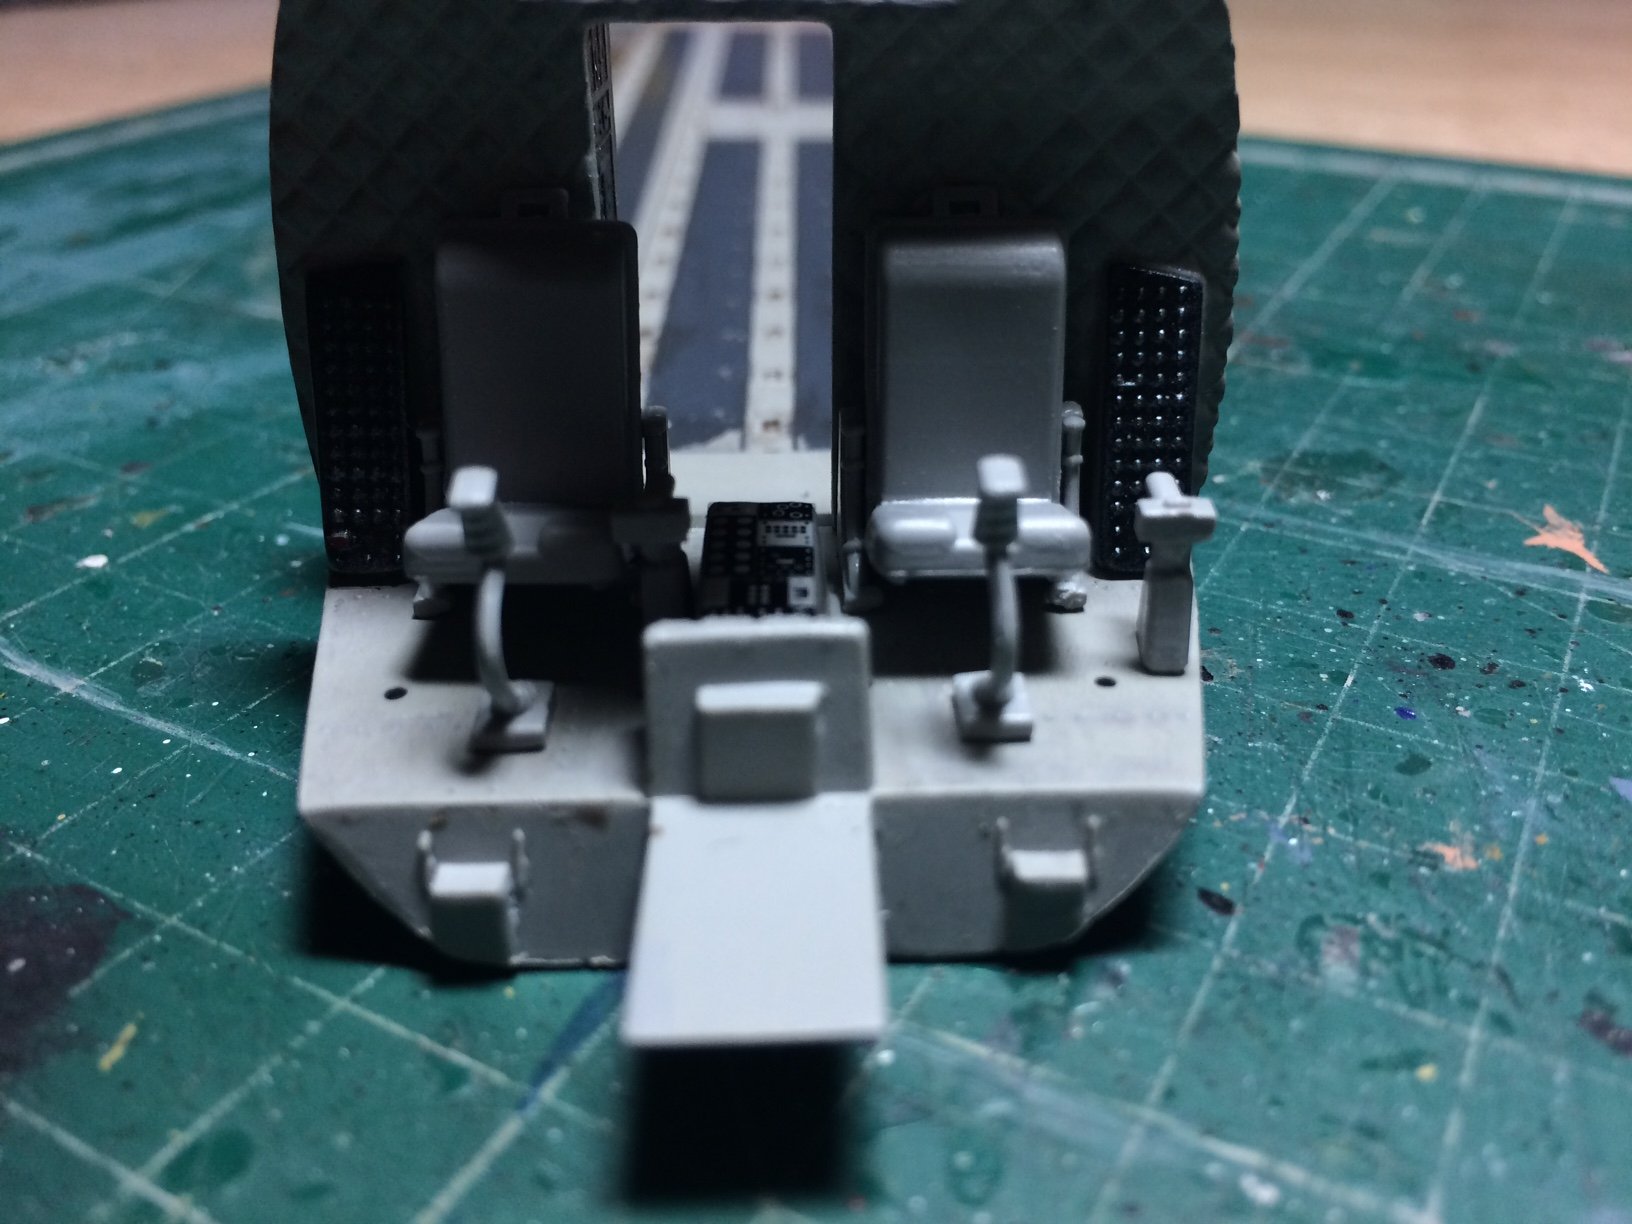
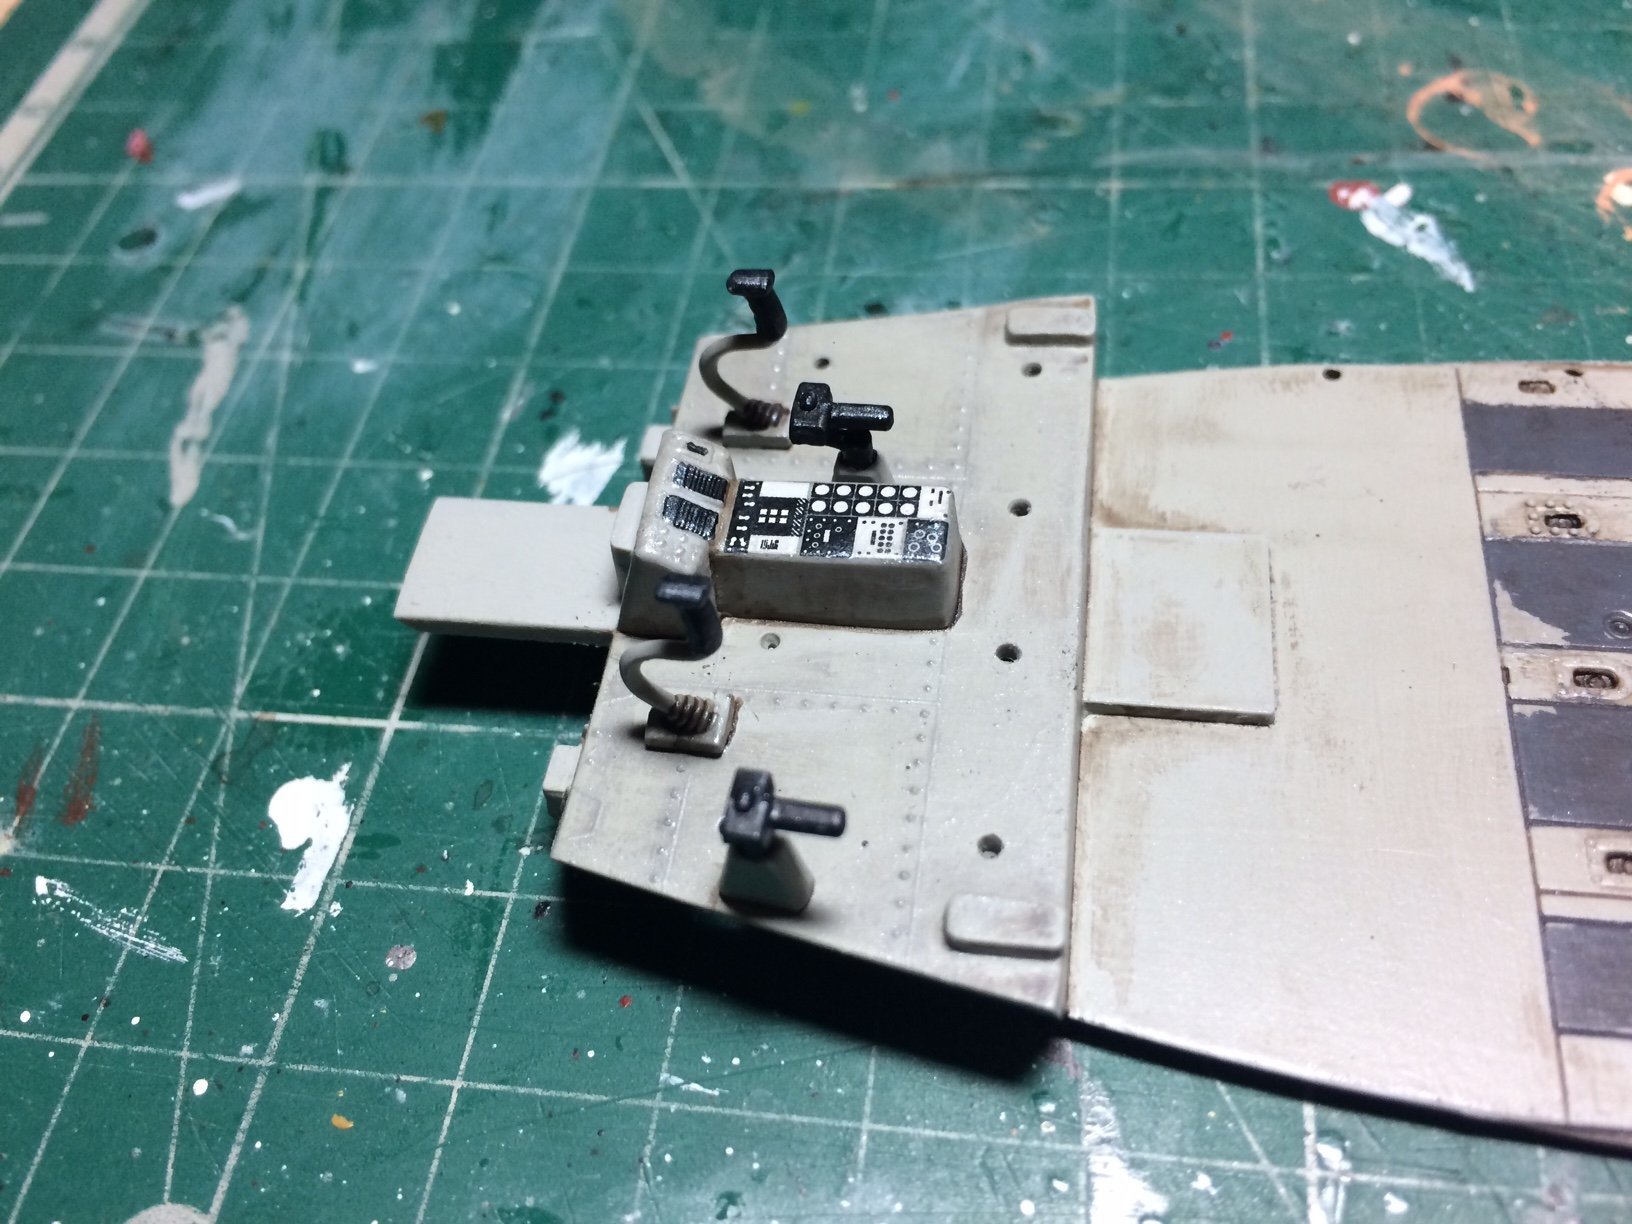
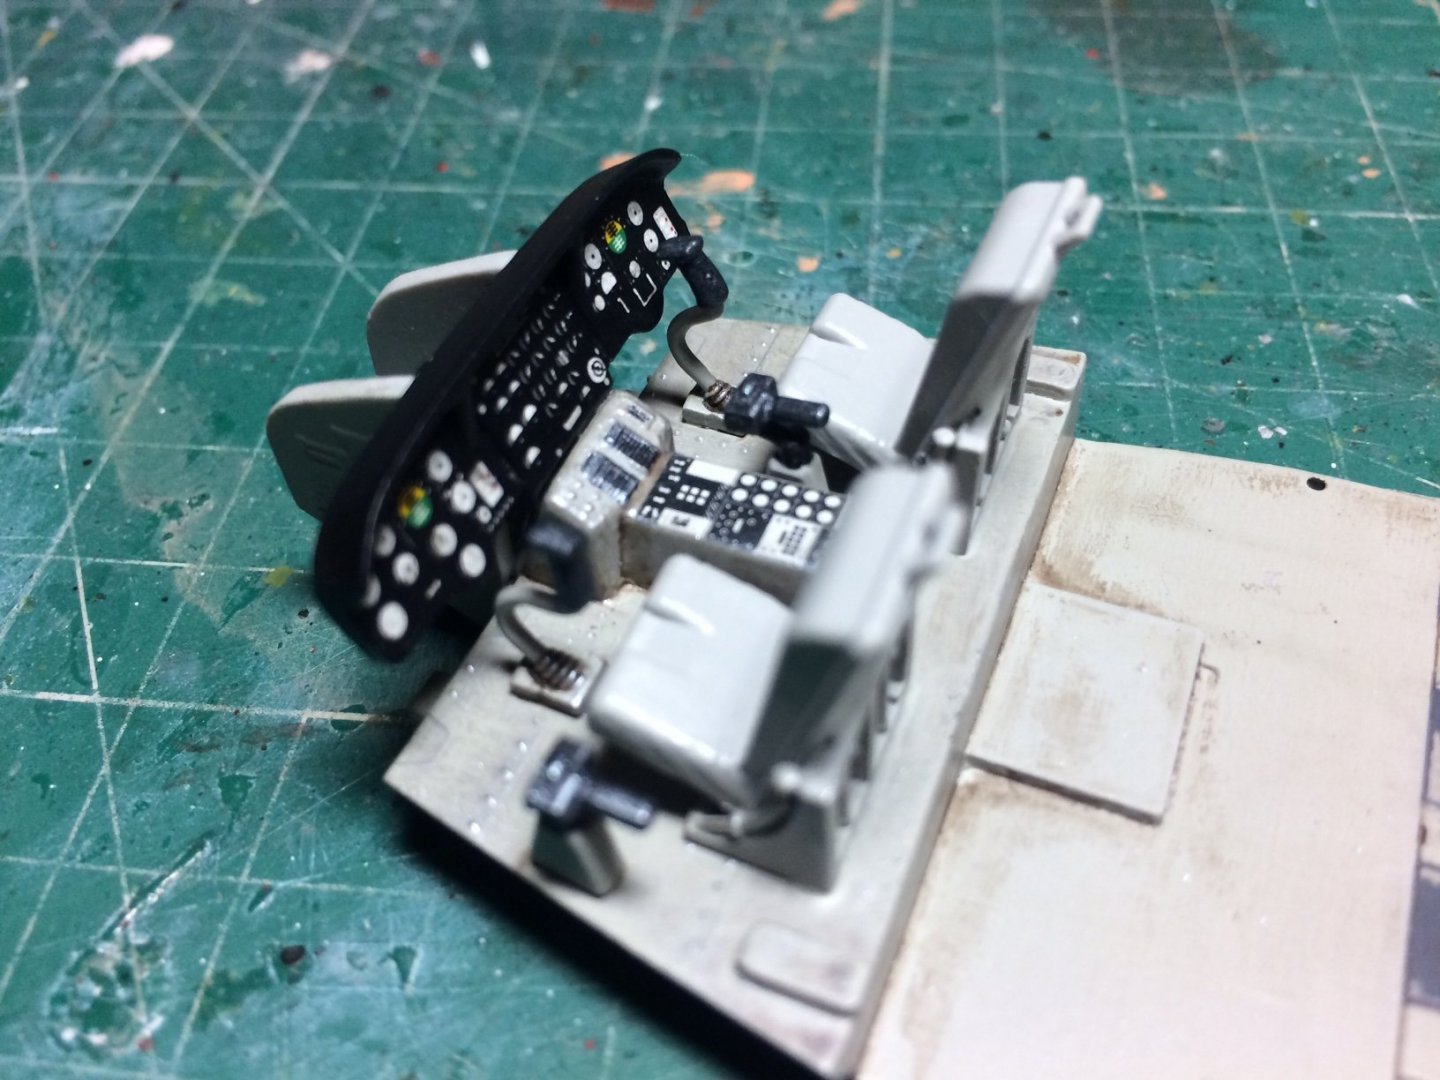
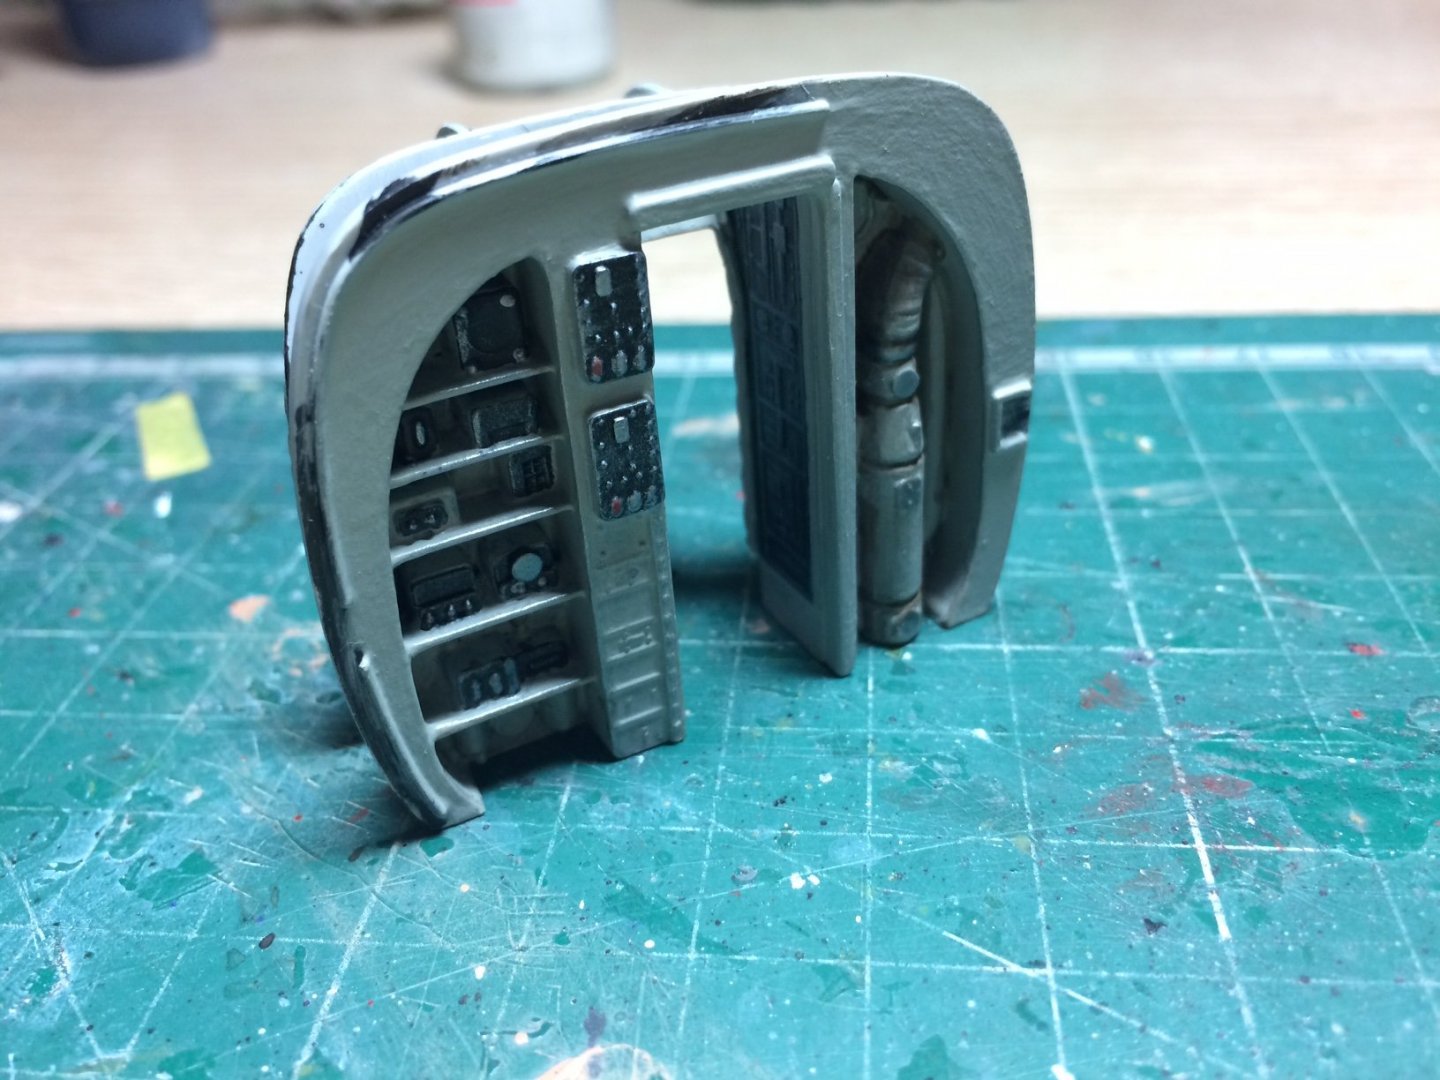
Evening all, I got some good progress on this today, remember I had masked up? well I applied a few coats of a mid Grey then dried them - this allowed me to remove the tape fairly quickly, it turned out ok with just a tiny amount of seepage - just a quick touch up fixed this, then I decided to weather the floor a bit as it would have seen a lot of movement - basic Earth wash all over then using a wet brush I removed most of it - then finished off with a rag the dried - doesn't look too bad. Next was to work on the cockpit parts - simple process cut them off clean them up - glue in then down, then they were painted Grey/Black and dried, next I painted a few details and did a wash and a bit of dry brushing. The pic with the cockpit bulkhead is just dry fitted as it will go in when the seats are painted and fitted. OC.

-
New to modeling where to post a kit build for advice?
Old Collingwood replied to bosco72's topic in New member Introductions
Yep at Chris said - just drag and drop them here in the box below your writing from your picture album. OC. -
Looking like a good start. OC.
-
Yep, I know some who would spend months even taking thier family on skirmishes they would turn into long holidays, you would see them all dressed fittingly. OC.
-
Also good for smoothing round masts using the inside curve. OC.
-
Was going to recommend heat with a plank heat bending tool - they type thats like an electrical soldering iron with a rounded section on the end to heat the planks - works well on soaked planks. OC.
-
New to modeling where to post a kit build for advice?
Old Collingwood replied to bosco72's topic in New member Introductions
What type of kit/kits are you building or want to build? Welcome by the way. OC. -
Indeed Roger and very costly if you take it to extremes, if you are just a basic pike man - its quite an easy and cheap way in - they will even lend you some gear/clothing till you can either maker your own/have someone make it for you or buy it. OC.
-
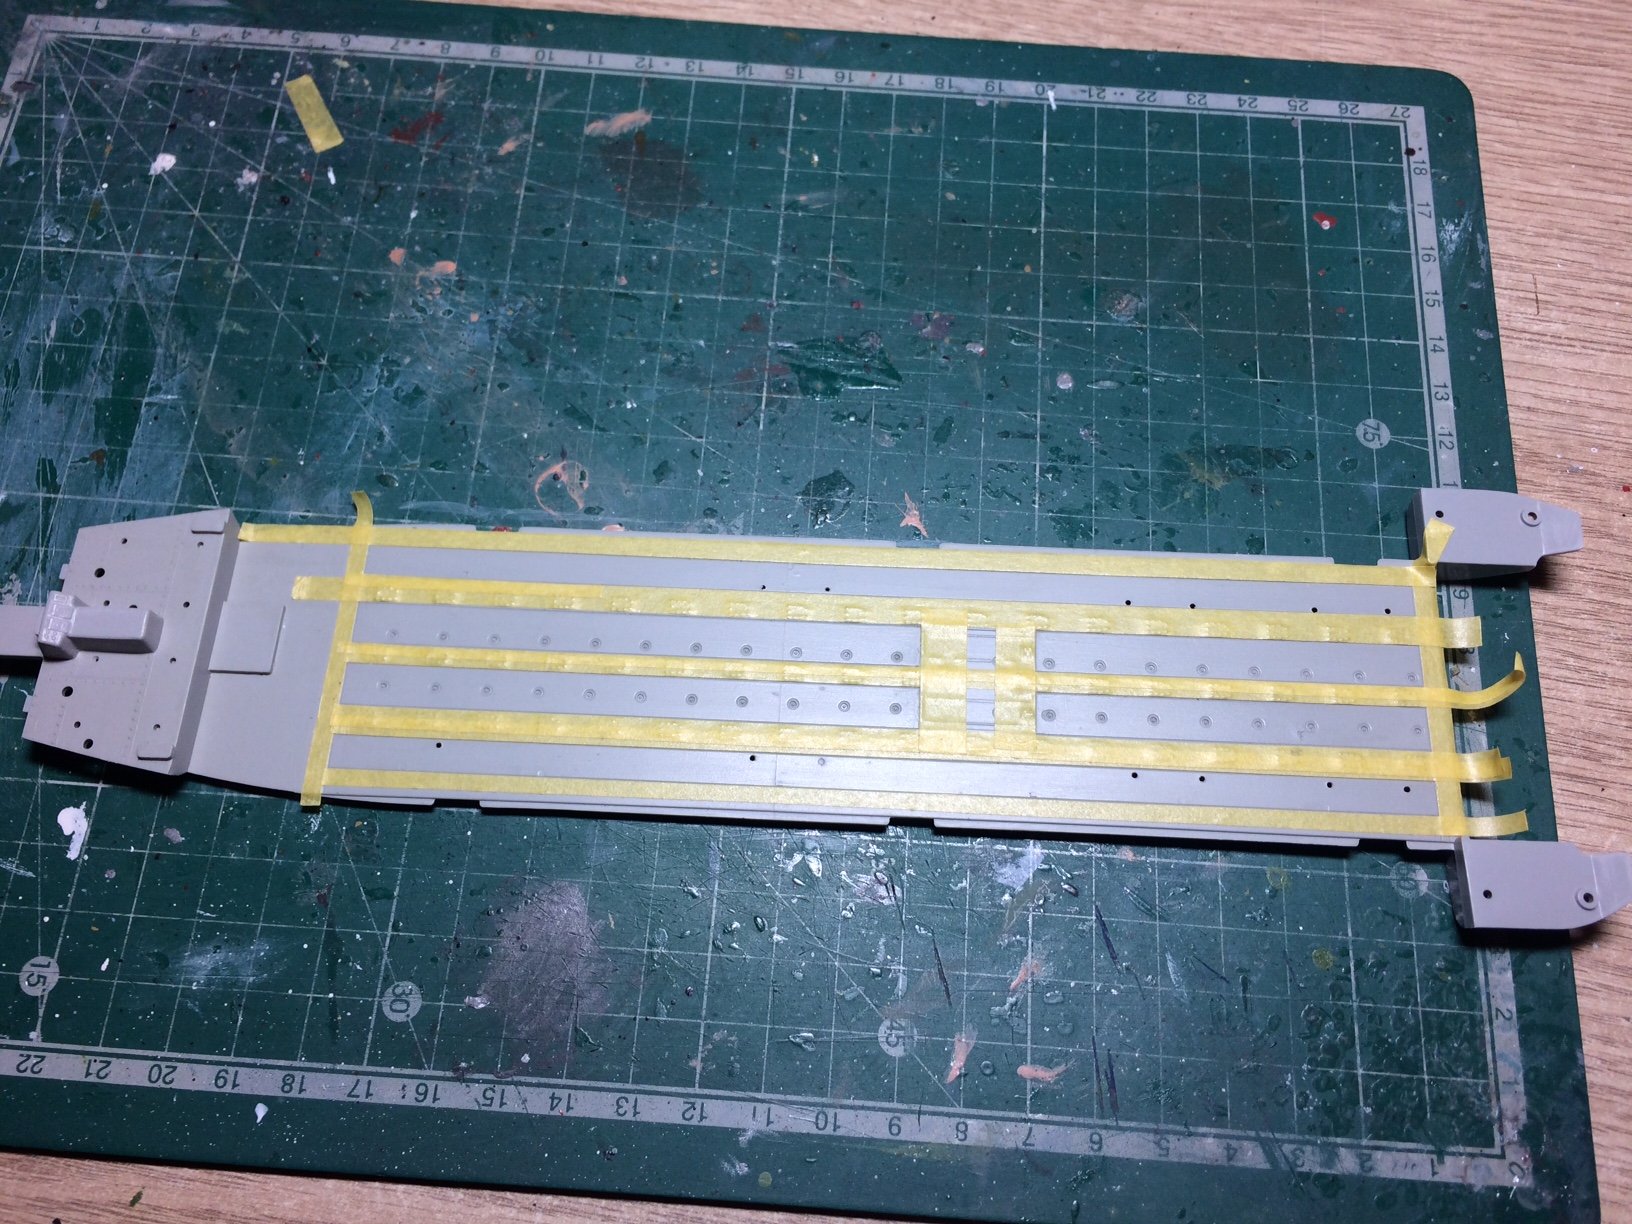
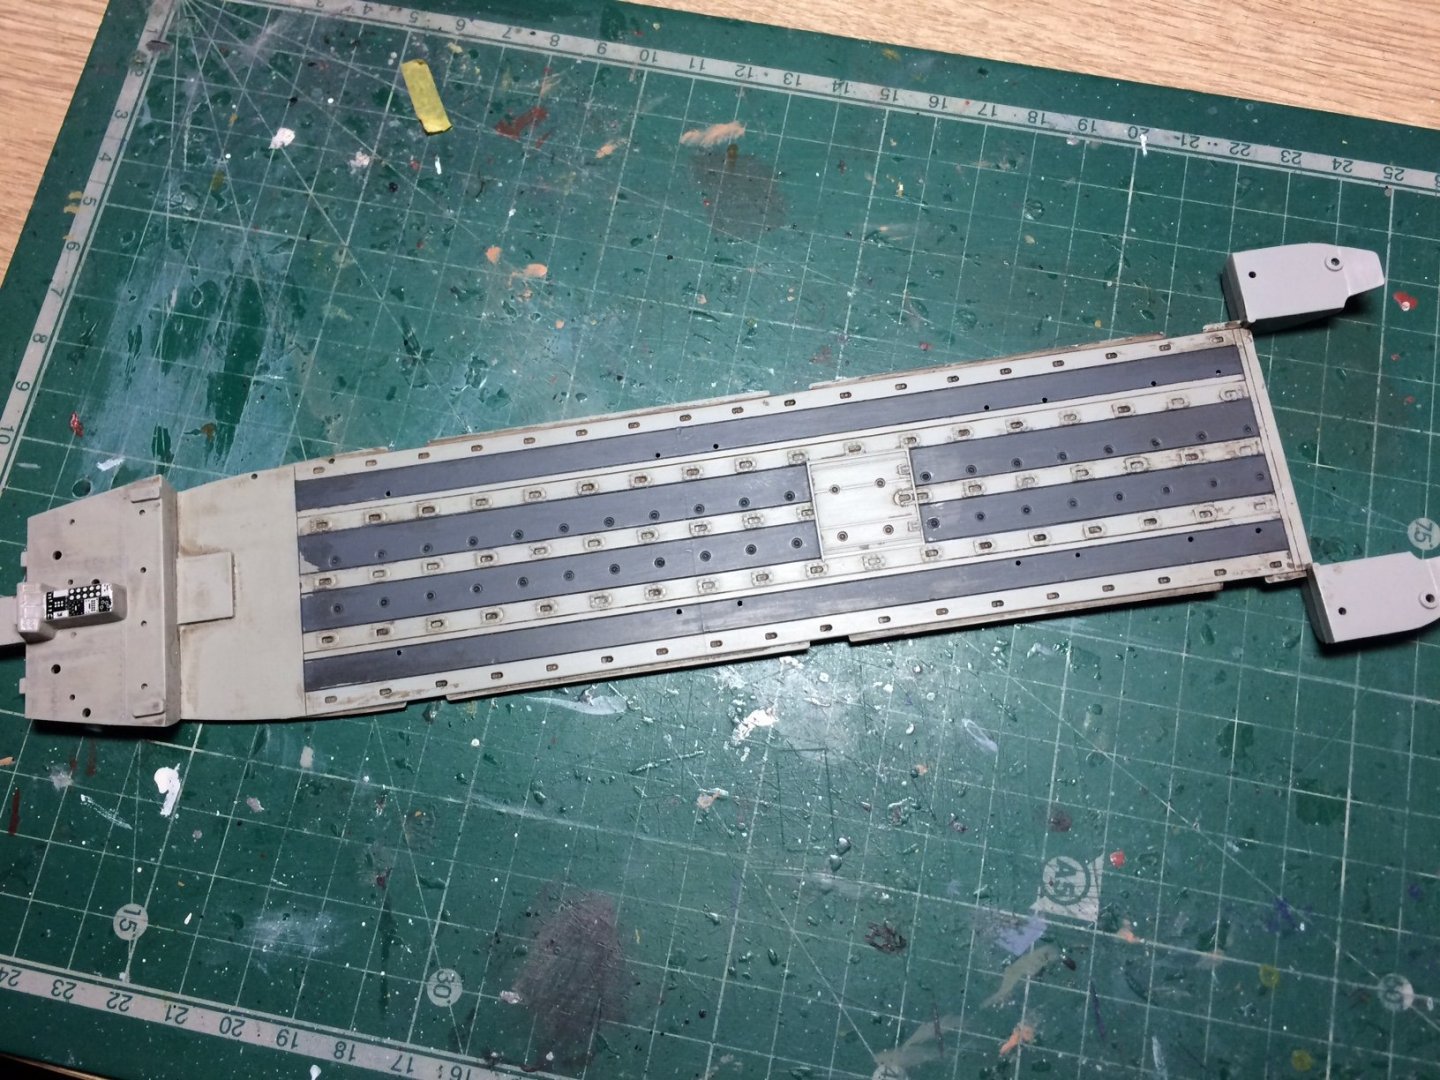
Evening all, I got a bit more done on the "Wokka Bird" first I glued the two sections of the cabin bulkhead together, then I removed the rear cabin floor and did small amount of tidy up around the edges - then I applied a couple of coats of the main Grey colour, then when dry I have masked out the floor ready for the darker Grey colour. OC.

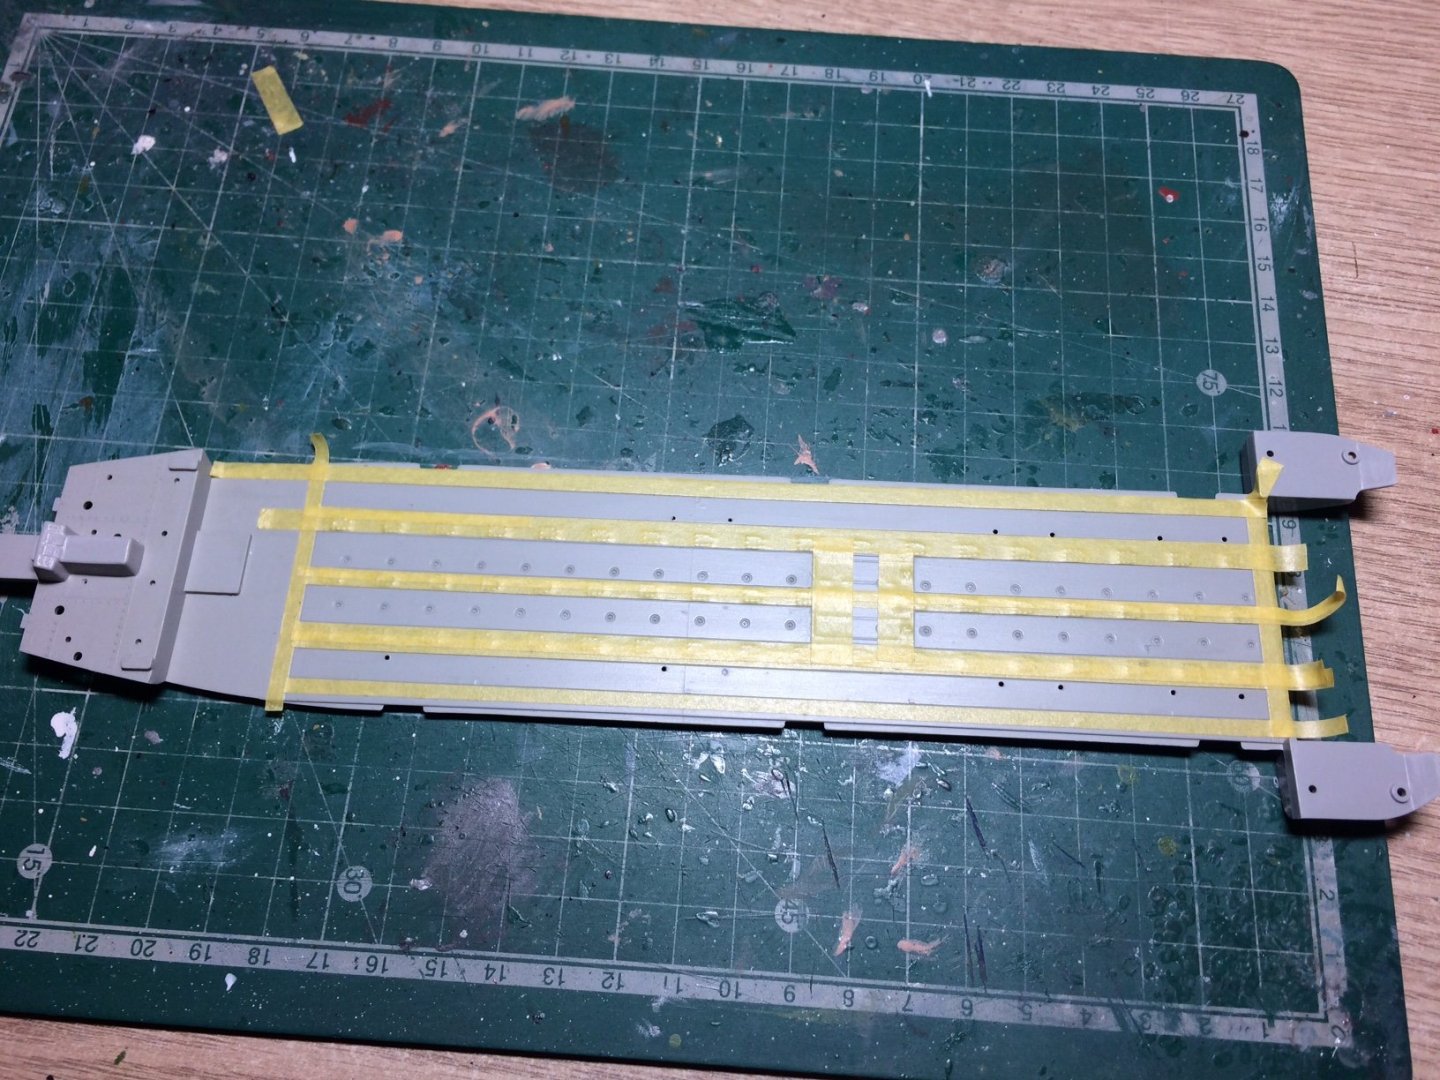
- 283 replies
-
- 10
-
-
More than welcome Mike. OC.
-
Amazing work - truly museum quality. OC.