


Old Collingwood
-
Posts
11,572 -
Joined
-
Last visited
Content Type
Profiles
Forums
Gallery
Events
Posts posted by Old Collingwood
-
-
It rasises interest and question as to what version was corrct - rounded or square bulwarks between decks?
OC.
- md1400cs and FrankWouts
-
 2
2
-
Excellent job looks swell.
OC.
-
-
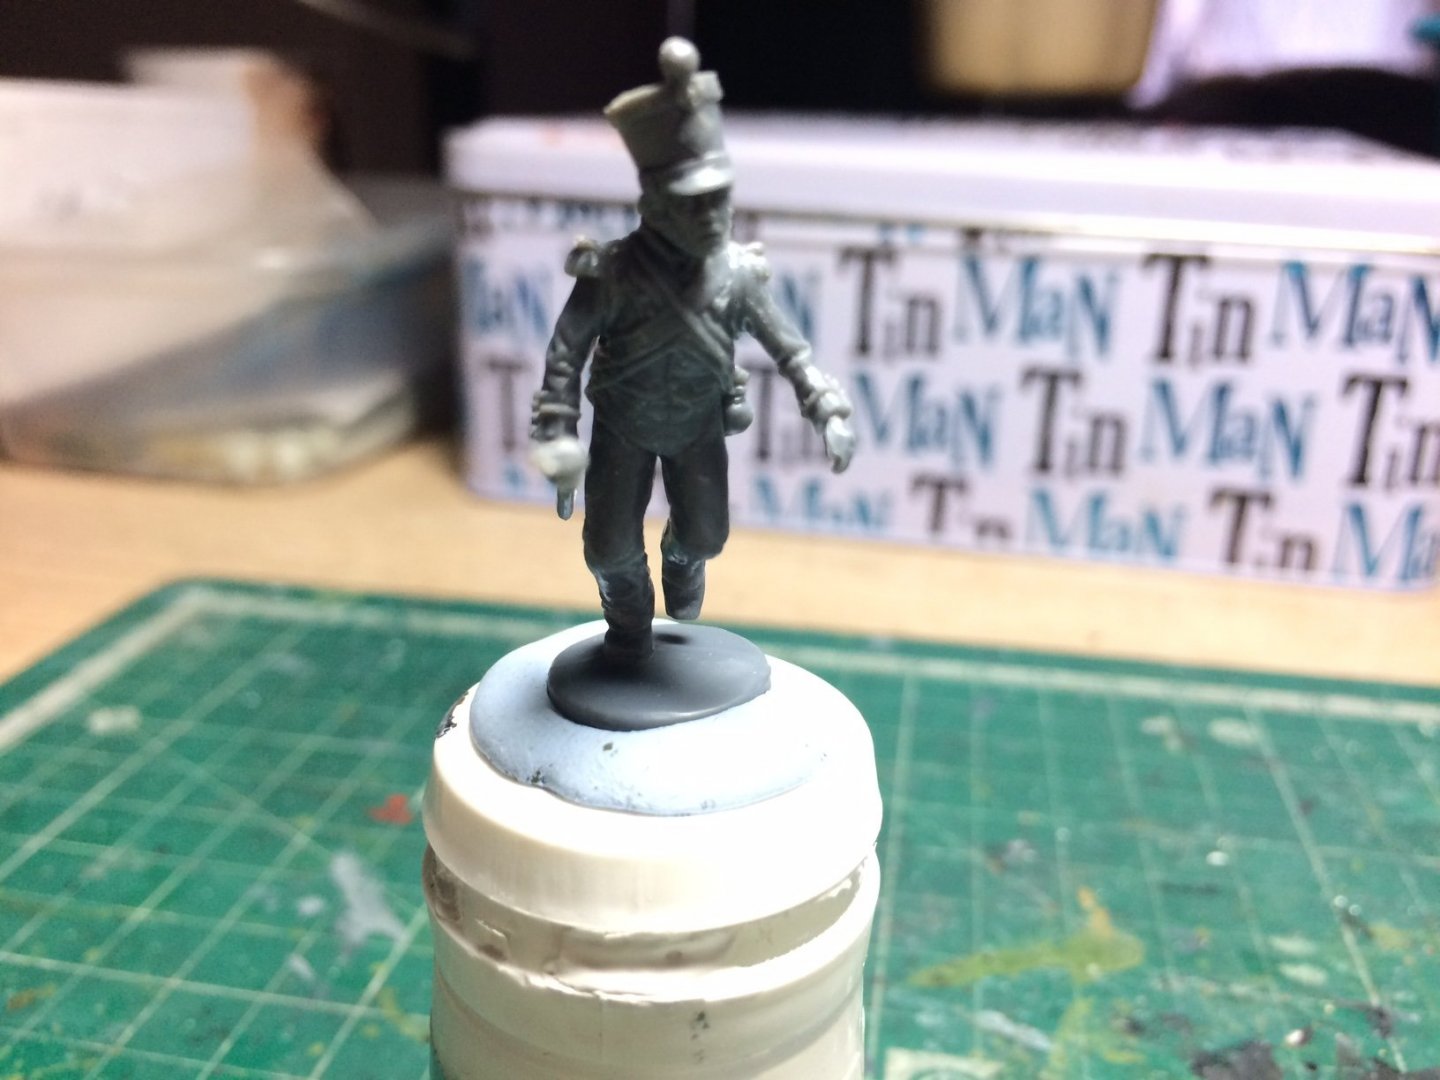
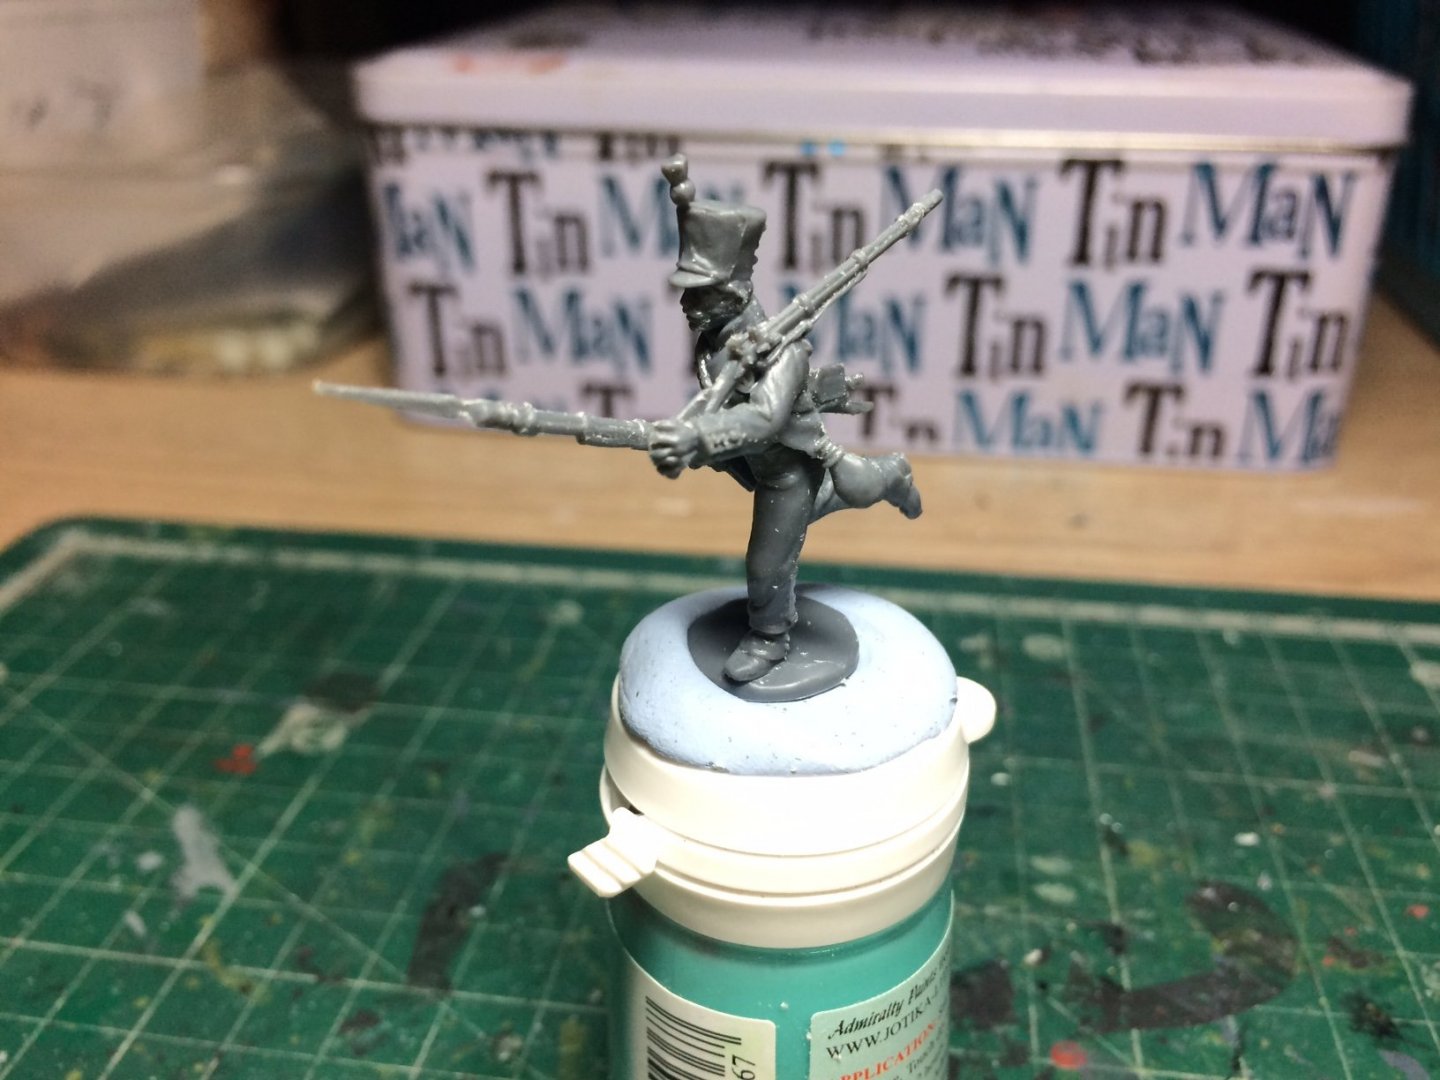
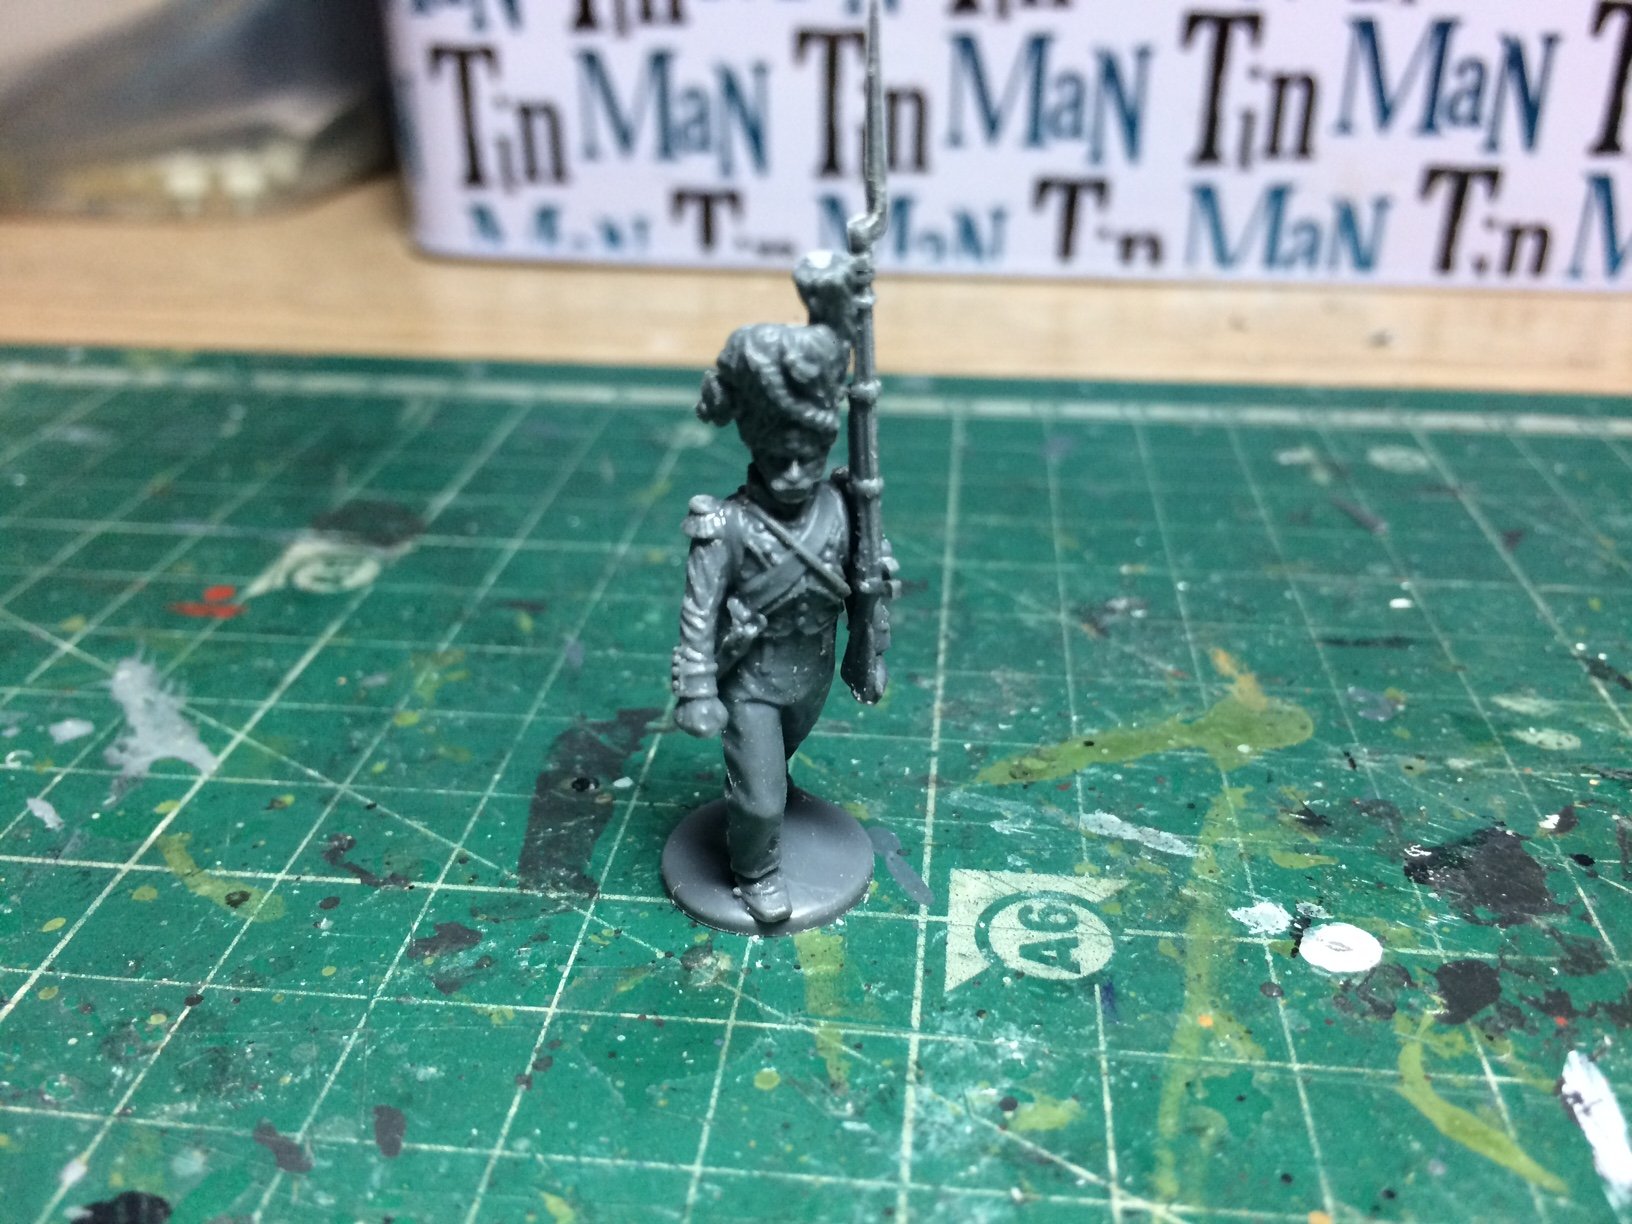
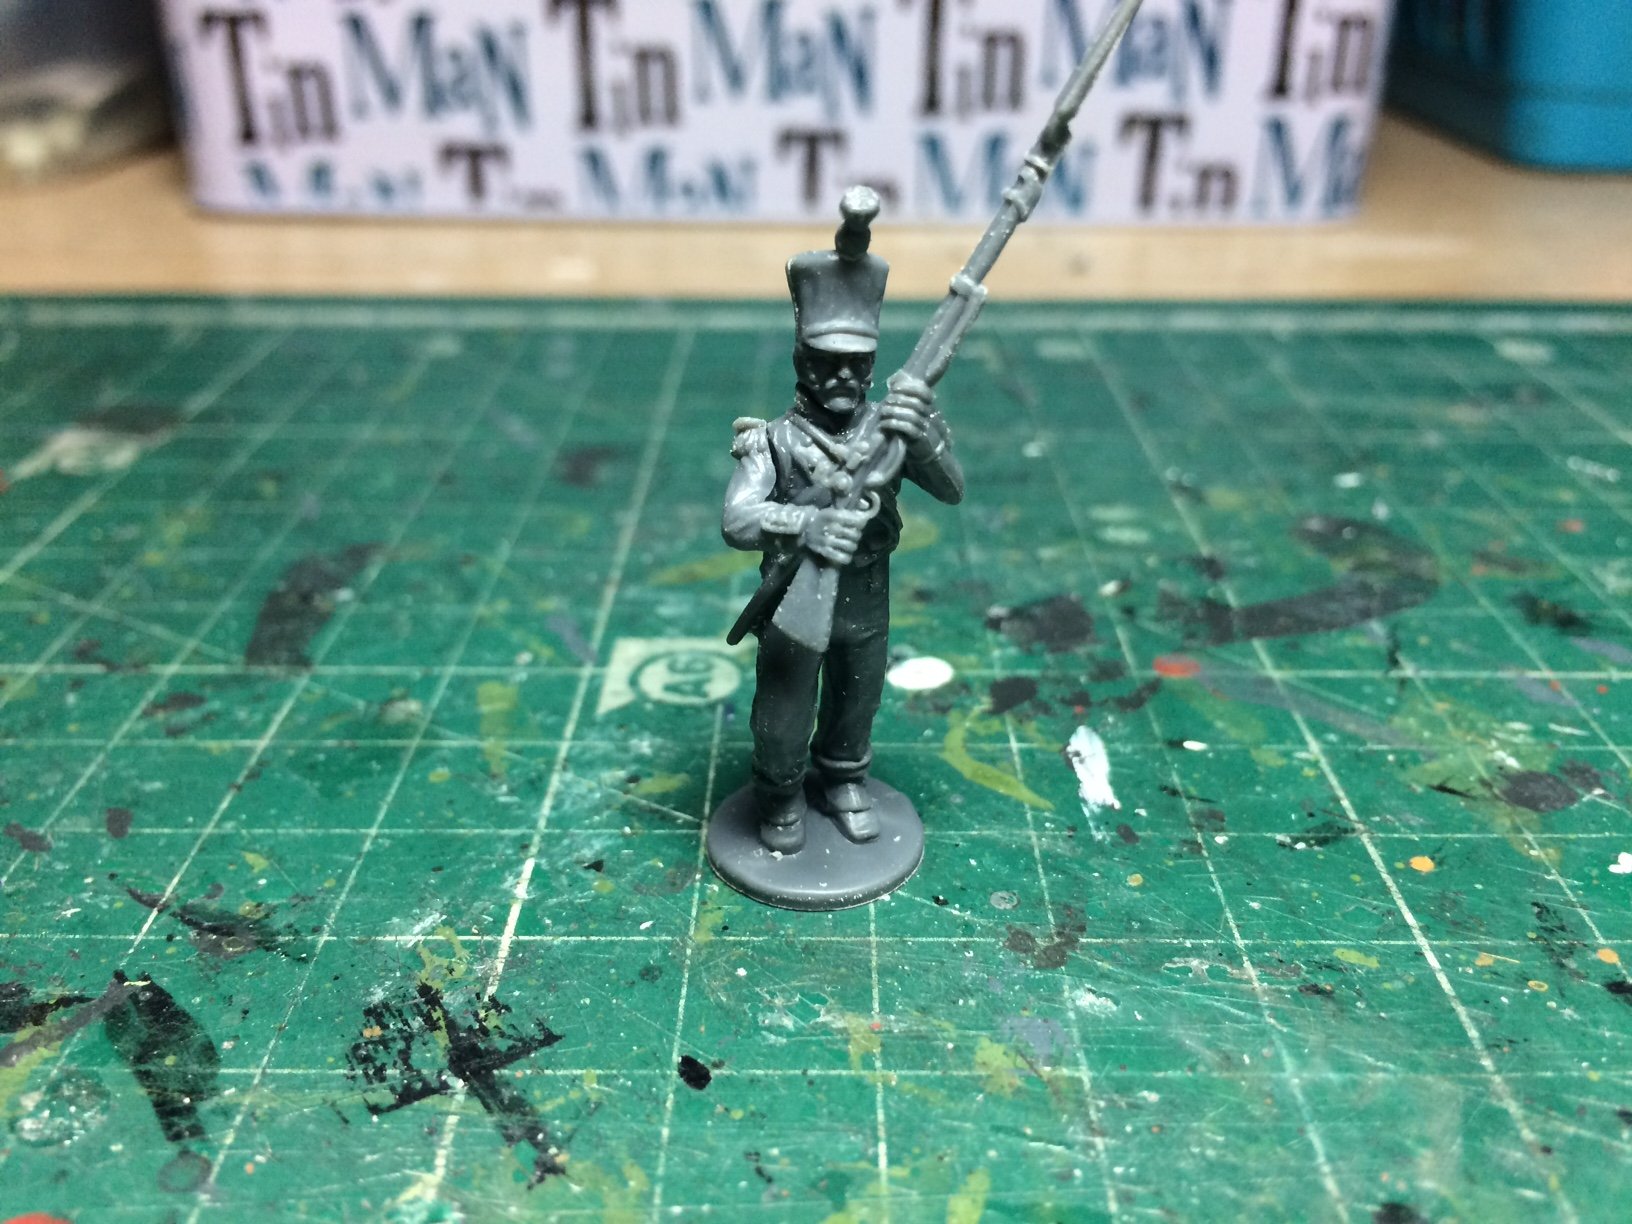
Evening all, I decided to have a change from my aircraft and have a go at a few of the figures, as I have a sprue of French Line infintry this is what I have started with, they come as torso's and seperate heads/arms/legs and back packs, the main theme of the sprue is line walking infintry however I was able to make a few in attacking role position by slightly correcting there hand positions - sanding the arm faces a bit this sometimes created a gap but was easy fixed with putty.
I decided to mix them up with a few different poses including one soldier who picked up another rifle and is running with Two.
They are not primed yet just assembled.
Oh - I have also made one as an Elite Guard just to see how they look.
OC.


-
6 hours ago, Backer said:
This will be fun to follow.
Thank you - welcome.
OC.
-
12 minutes ago, mtaylor said:
I recall many years ago, there was a series (on old PBS maybe?) that had battle reenactments using figures on a terrain board of huge size. Hills, trees, building etc. were on it. They would walk through the battle showing before and after movements and other important details. I don't recall Waterloo but I do recall some American battles (Revolutionary and Civil War) along with some WWI and WWII battles.
Its a massive hobby still Mark, so much investment goes into it - real stratergies go on with the war gamers.
OC.
- Canute, Egilman, popeye the sailor and 2 others
-
5
-
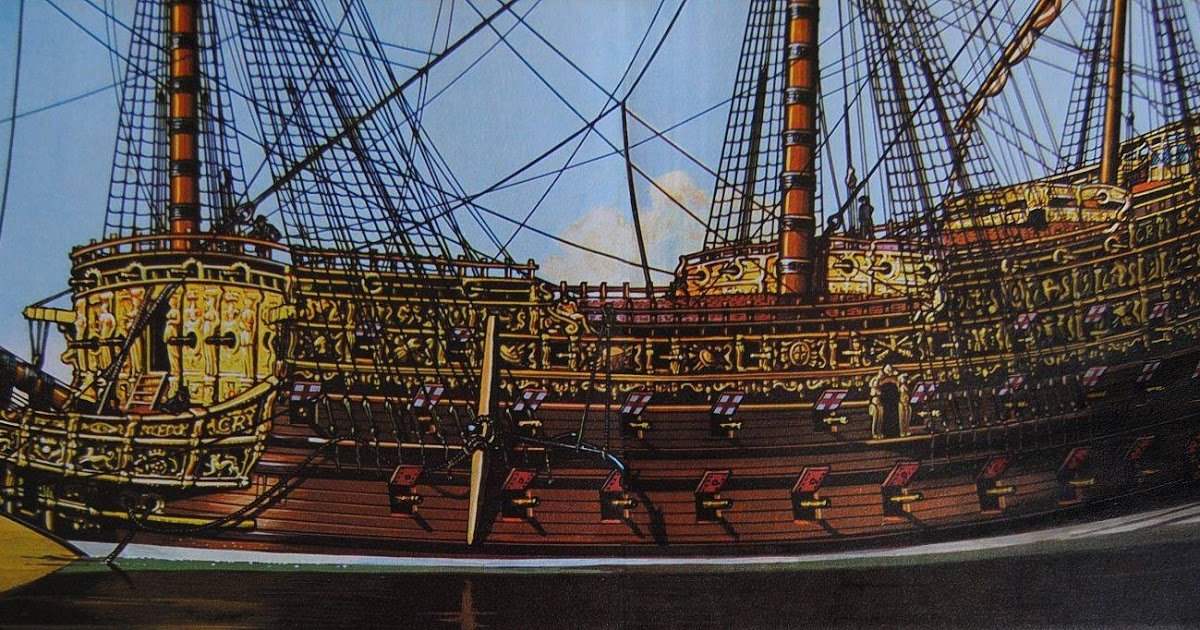
What I mean is the bulkhead on the decks between each deck, on a couple of pics on the net I have seen this shown as flat across the front from port to starboard as apposed to the rounded profiles where the canons point out facing forwards on the decks.
This is one of the pics on the net showing flat bulkheads.
OC.
- FrankWouts, J11, GrandpaPhil and 1 other
-
4
-
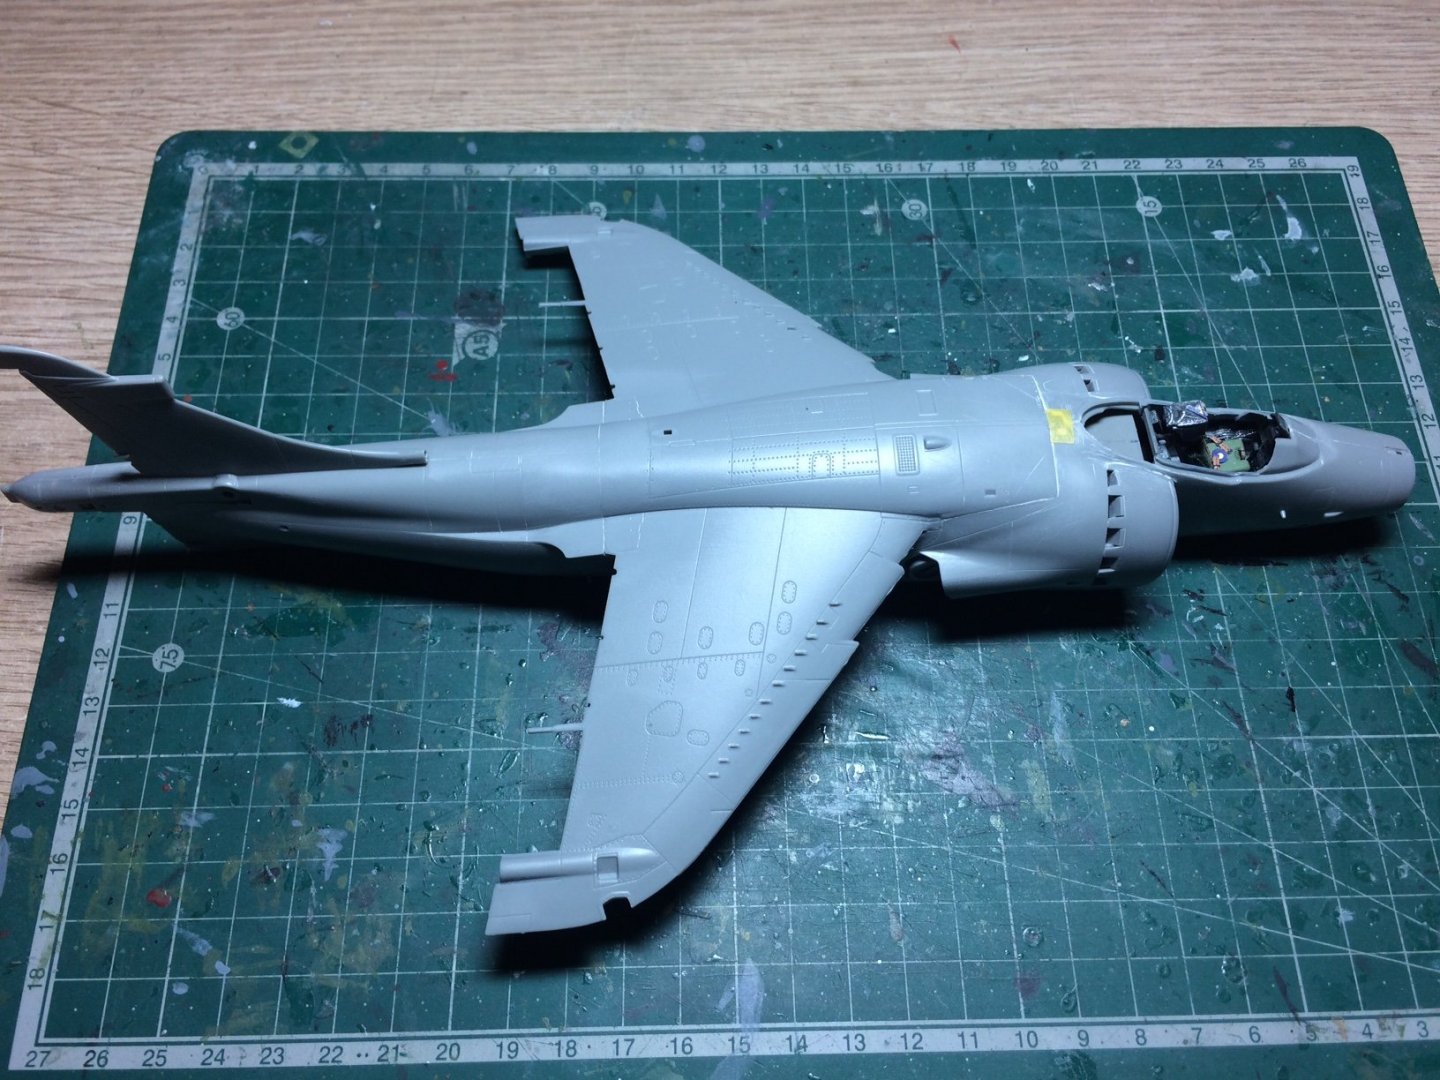
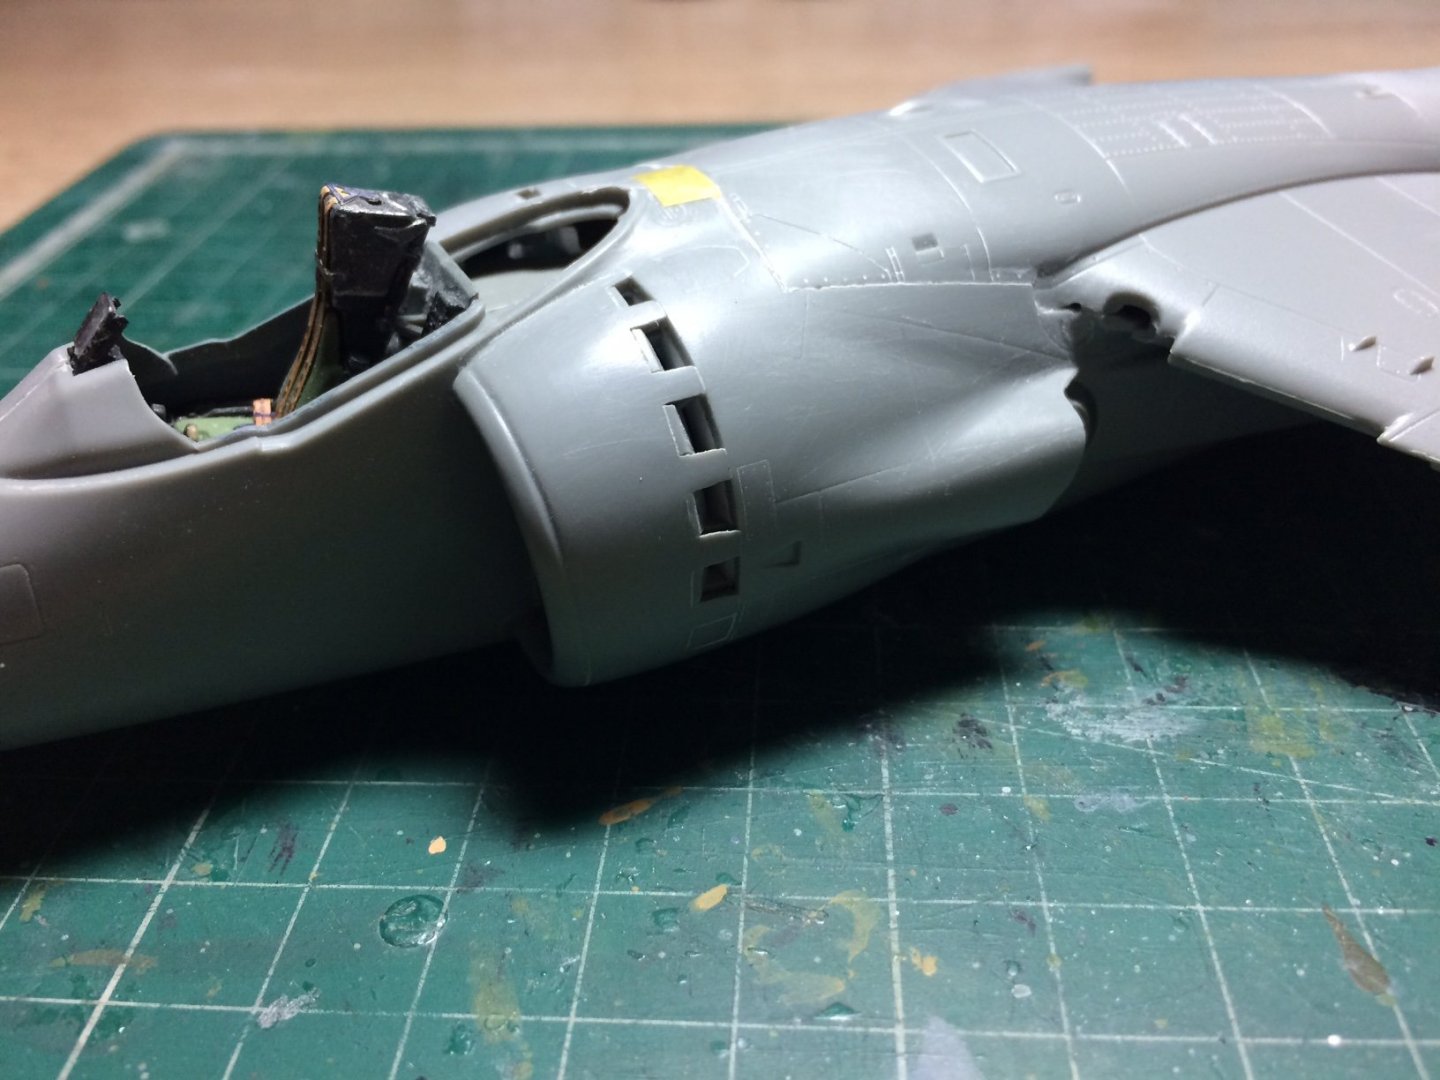
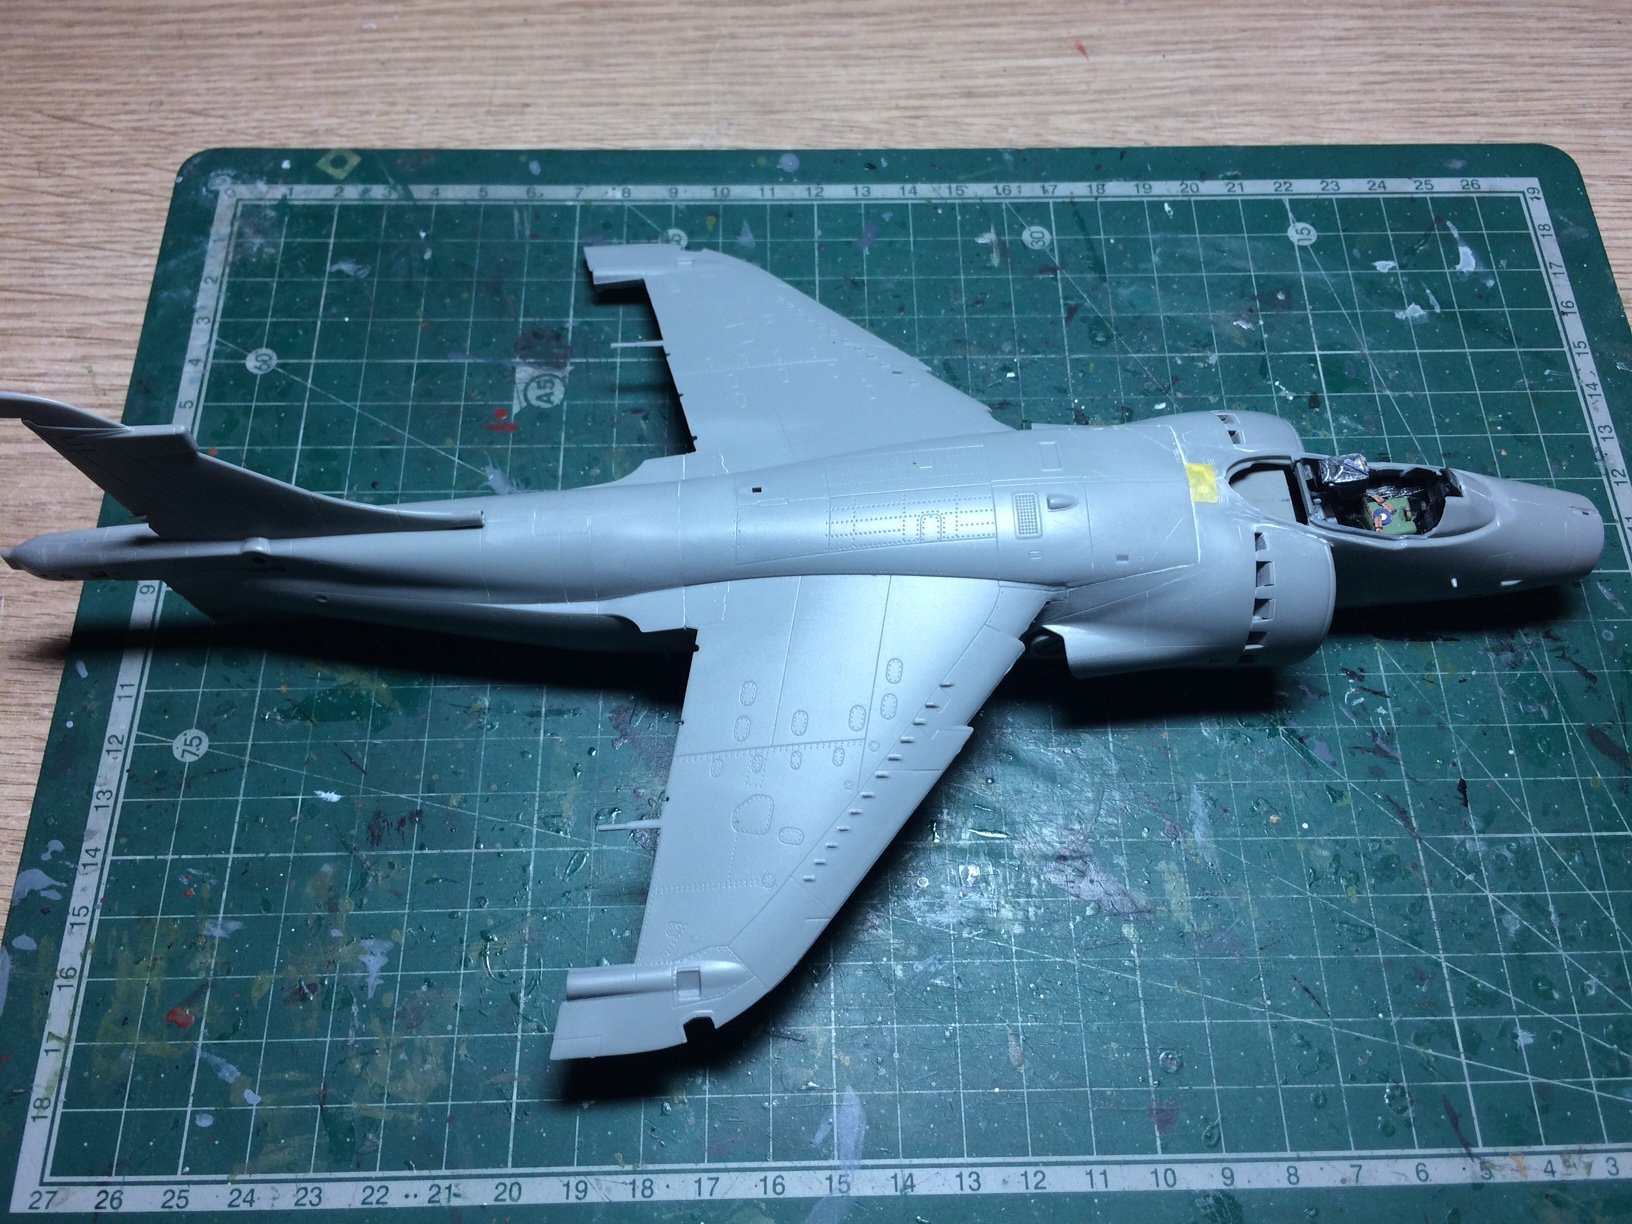
Evening all, some good progress today I think, the fuselage had set well (nice and solid with no flex you sometimes get) next off was to fit the swivel frame inside for the Four jet exhausts, these are linked by a swivel bar linked to Four hubs that stick out each side that in turn have the exhaust units glued to them (I will leave these off till the main painting is done). I thought I might have some trouble as the instructions call for this to be done before both sides are joined, but I managed to ping them into position as there was a bit of flex in the bars, I set the ngle I wanted then glued the bar in place.
Next to be done and an area where I was expecting troubles (as its a commen akward area in other kits of the Harrier) the engine intake surrounds with blow in doors, these doors in the kit come Two options 1) Fully open as in hover 2)Patial open as in ground position, these doors/flaps are gravity affected so when on the ground the upper ones fall open leaving the lower ones shut, but in the hover the draw of the air from the engine forces then open. These units come in Three parts - the main casing - the doors and an inner trunking, putting these together was not an issue and went togther well, but the fiddly bit that normaly creates a head ache (Tamiya 1/48 SHAR) is getting a clean fit on the fuselage, as the sections in between the doors need to sit flush with the fuselage, anyway no such worries with this kit - just some dry fitting and some gentle sanding and the fit was fine, so I glued them in position and just did a small amount of clean up from the glued joins.
So far so good - so I thought "Go for it with more" next up the wings, again on the Tamy kit this was a problem with wide gaps here - there and everywere, after gluing the one piece top to the Two bottoms - not mutch tidy up was required, the wing unit basically just went down glued into place.
The only issues I had was making sure the front edges of the engine acess cover part of the wing sat down into a ledge in the wing, to aid this I trimmed away slightly along the edge till the wing sat nice and level.
The only alarming fault with the kit is - ontop of the wing at the front is a T piece shape section that should just be square in shape, when the wing is in place this leaves quite a noticeable gap that is not really any good for filling with my filler as it sinks, so I came up with a fix with ca underneath and a small square of Tamiya tape held in place by the ca (doesn't look too bad)
So here we are at the moment - wing on joins sanded - not looking too bad - a very enjoyable build if im honest.

OC.

-
14 hours ago, Edwardkenway said:
Bernard Cornwell (author of Sharpe) also wrote an account of the battle, "Waterloo, a history of four days, three armies, three battles" I can recommend it.
Thank you Edward, I will look him out.
OC.
-
1 hour ago, Canute said:
Reenactments or land warfare in the Napoleonic Era?

I started reading Cornwell's Sharpe's series years back and got hooked on the Peninsular War novels. Several other authors cranking out some good stuff. Nasty guerilla warfare across the area. Small British and Portugese units versus Napoleon's very capable Marshal's. All very interesting. Osprey has a booklet on the Peninsula War if your interested in the basic history.
Both Ken, I also used to watch Sharpe when he was on tv - loved the series, used to have a few books also.
I have been reading through this timed account from the Battle - very interesting reading -
OC.
- mtaylor, Canute, Edwardkenway and 2 others
-
5
-
-
11 minutes ago, lmagna said:
Not my cup of tee I'm afraid, but I will be following what you do, if for no other reason than it is unique, (to me) and therefore interesting. Lead on McDuff.
Thank you Lou.
OC.
-
-
All the best mate, only thing I would add - do what I didn't - take it real easy with the second layer take all the time with each row, wish I had when I did my Gryhound Frigate.
Loving your work Edward.
OC.
-
19 minutes ago, lmagna said:
Figures,horses,farm houses, Waterloo, diorama.................. Waiting for you to start talking about something I have two words of knowledge about. I think I would have to go back to school just to follow this build.

Check out some of the videos on painting 28mm figures and also the ones about the 2015 Waterloo reinactment - Superb event.
OC.
-
26 minutes ago, Egilman said:
So your doing just a piece of the battle, cool, Infantry supported by heavy Calvary... Will still look spectacular..... 👍
Maybe you could give a few step by step tips on how you do your figures so those of us not figure friendly can learn how....
I will do my best but trust me I'm no expert at figure painting, I was watching a video on an expert painting these figures at this scale - what he did was amazing and without uisng glasses - even down to painting the eye details and shading for cheek bones.
OC.
-
3 minutes ago, Edwardkenway said:
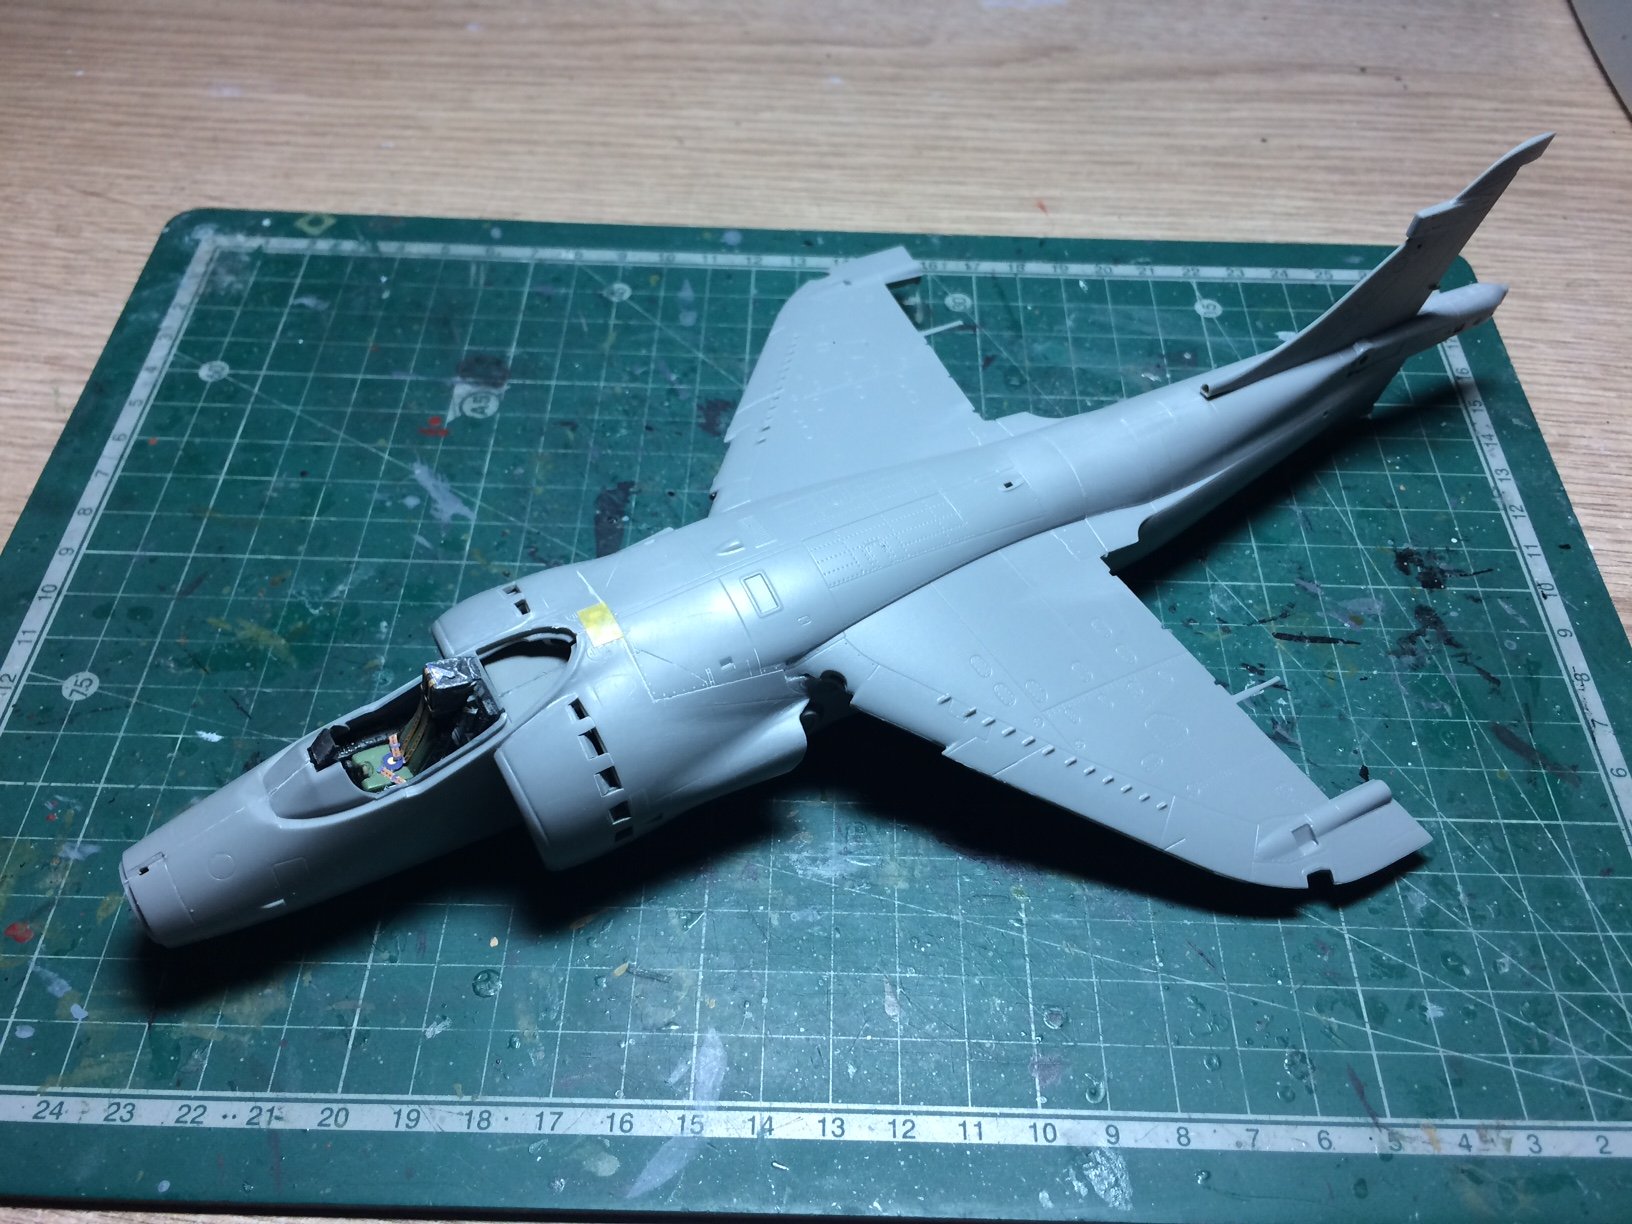
Great stuff OC. such an iconic shape to the fuselage, even like that there's no mistaking it's a Harrier.
Thank you Edward, I think she is one of the most beautiful planes ever made - and so so loud, I stood about Twenty feet from one at a show even when they spooled them up - what a sound.
OC.
- Canute, mtaylor, popeye the sailor and 2 others
-
5
-
I think you "Nailed it" with that finish - great stuff bro.
OC.
- Canute, popeye the sailor, mtaylor and 2 others
-
5
-
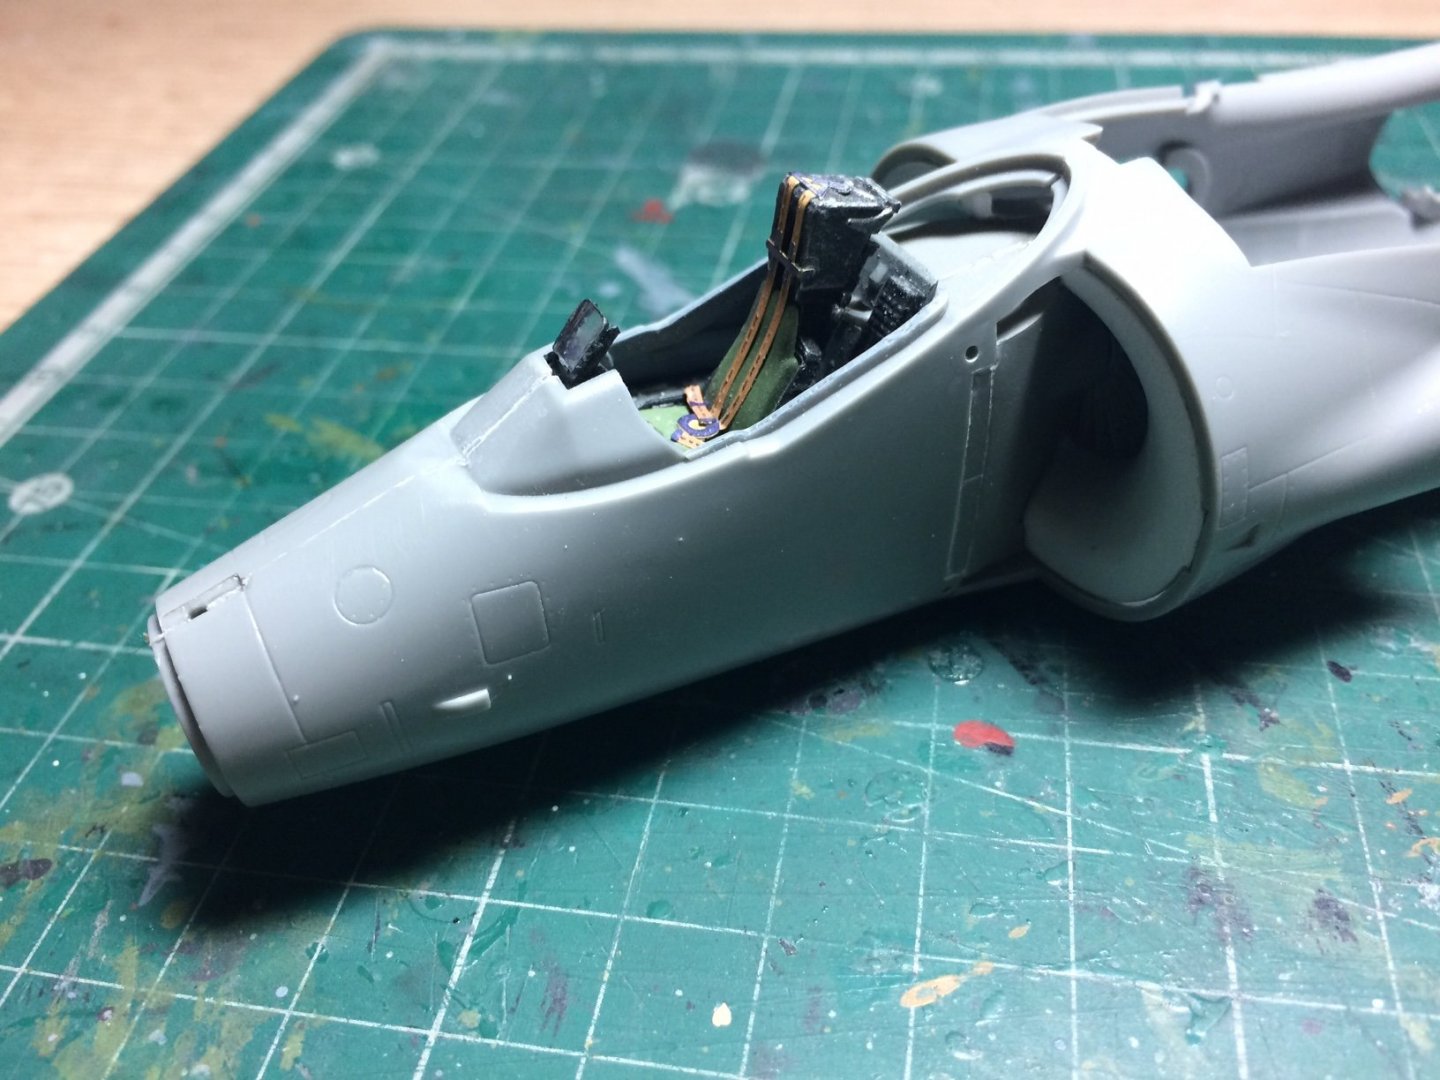
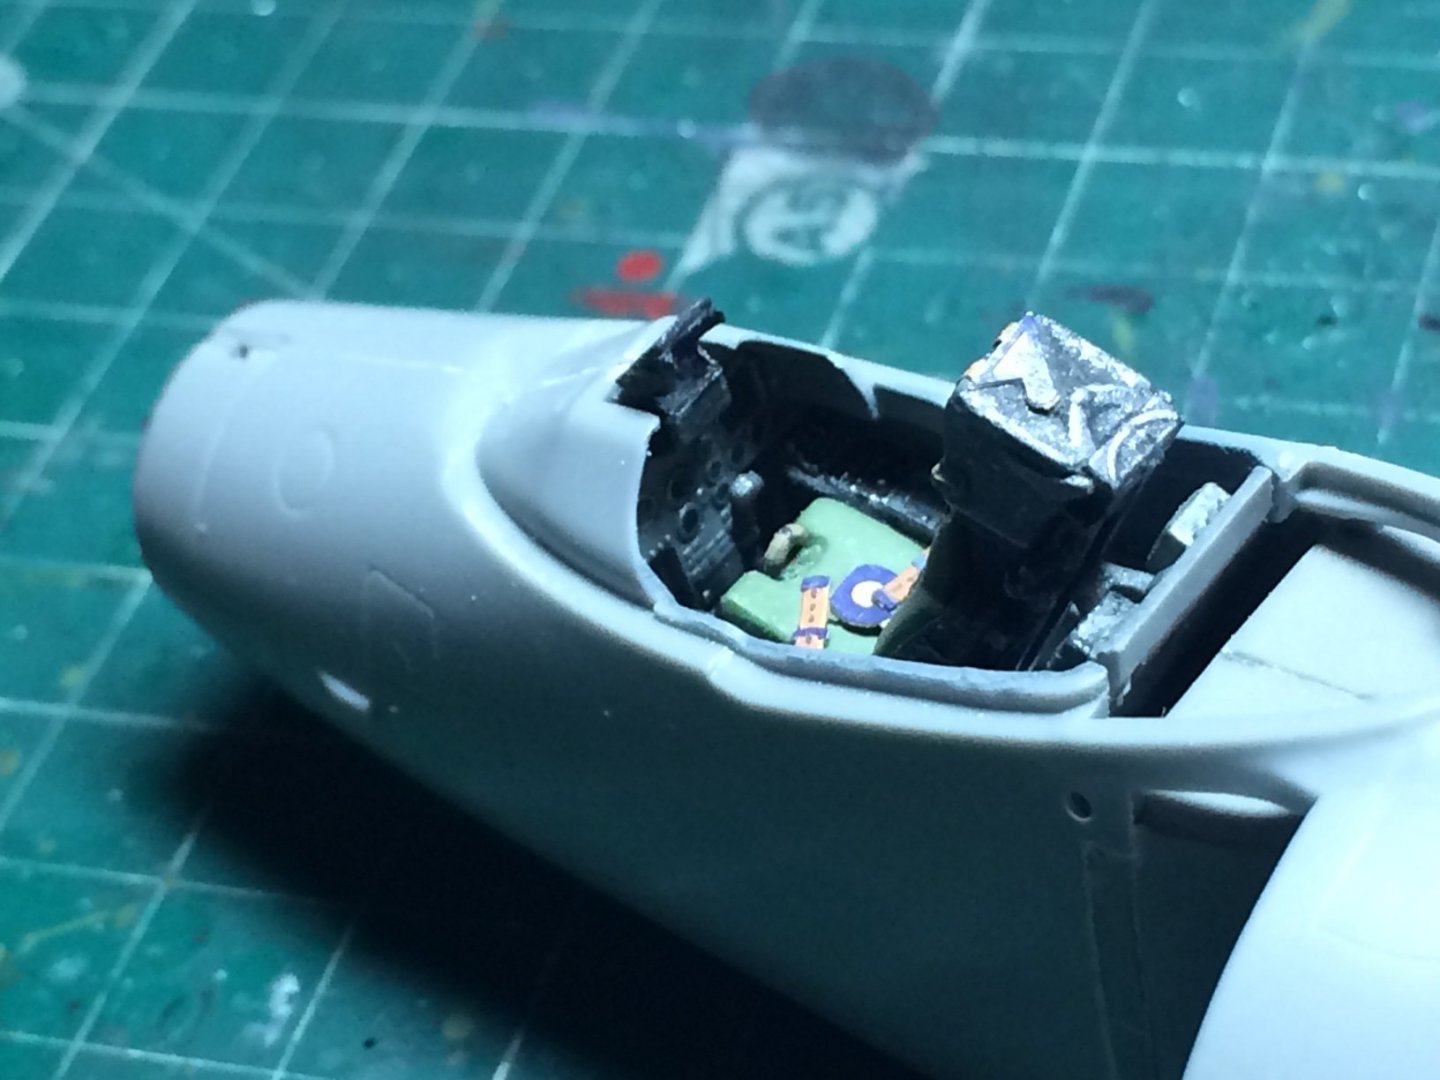
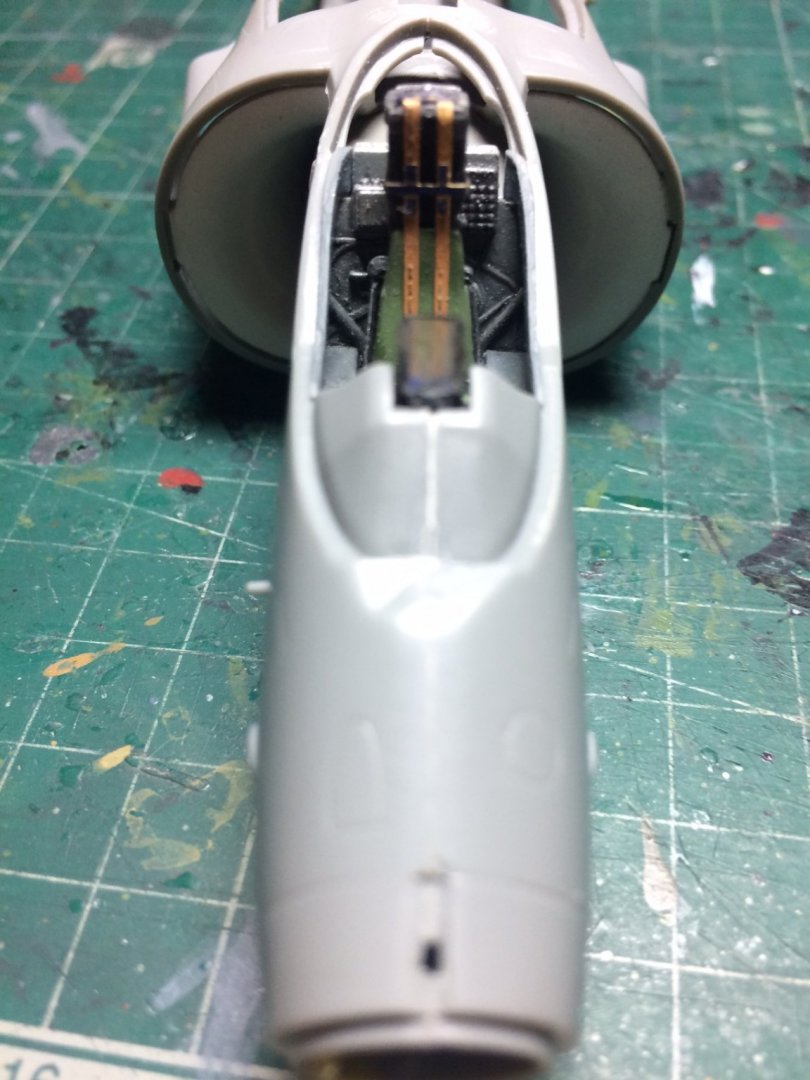
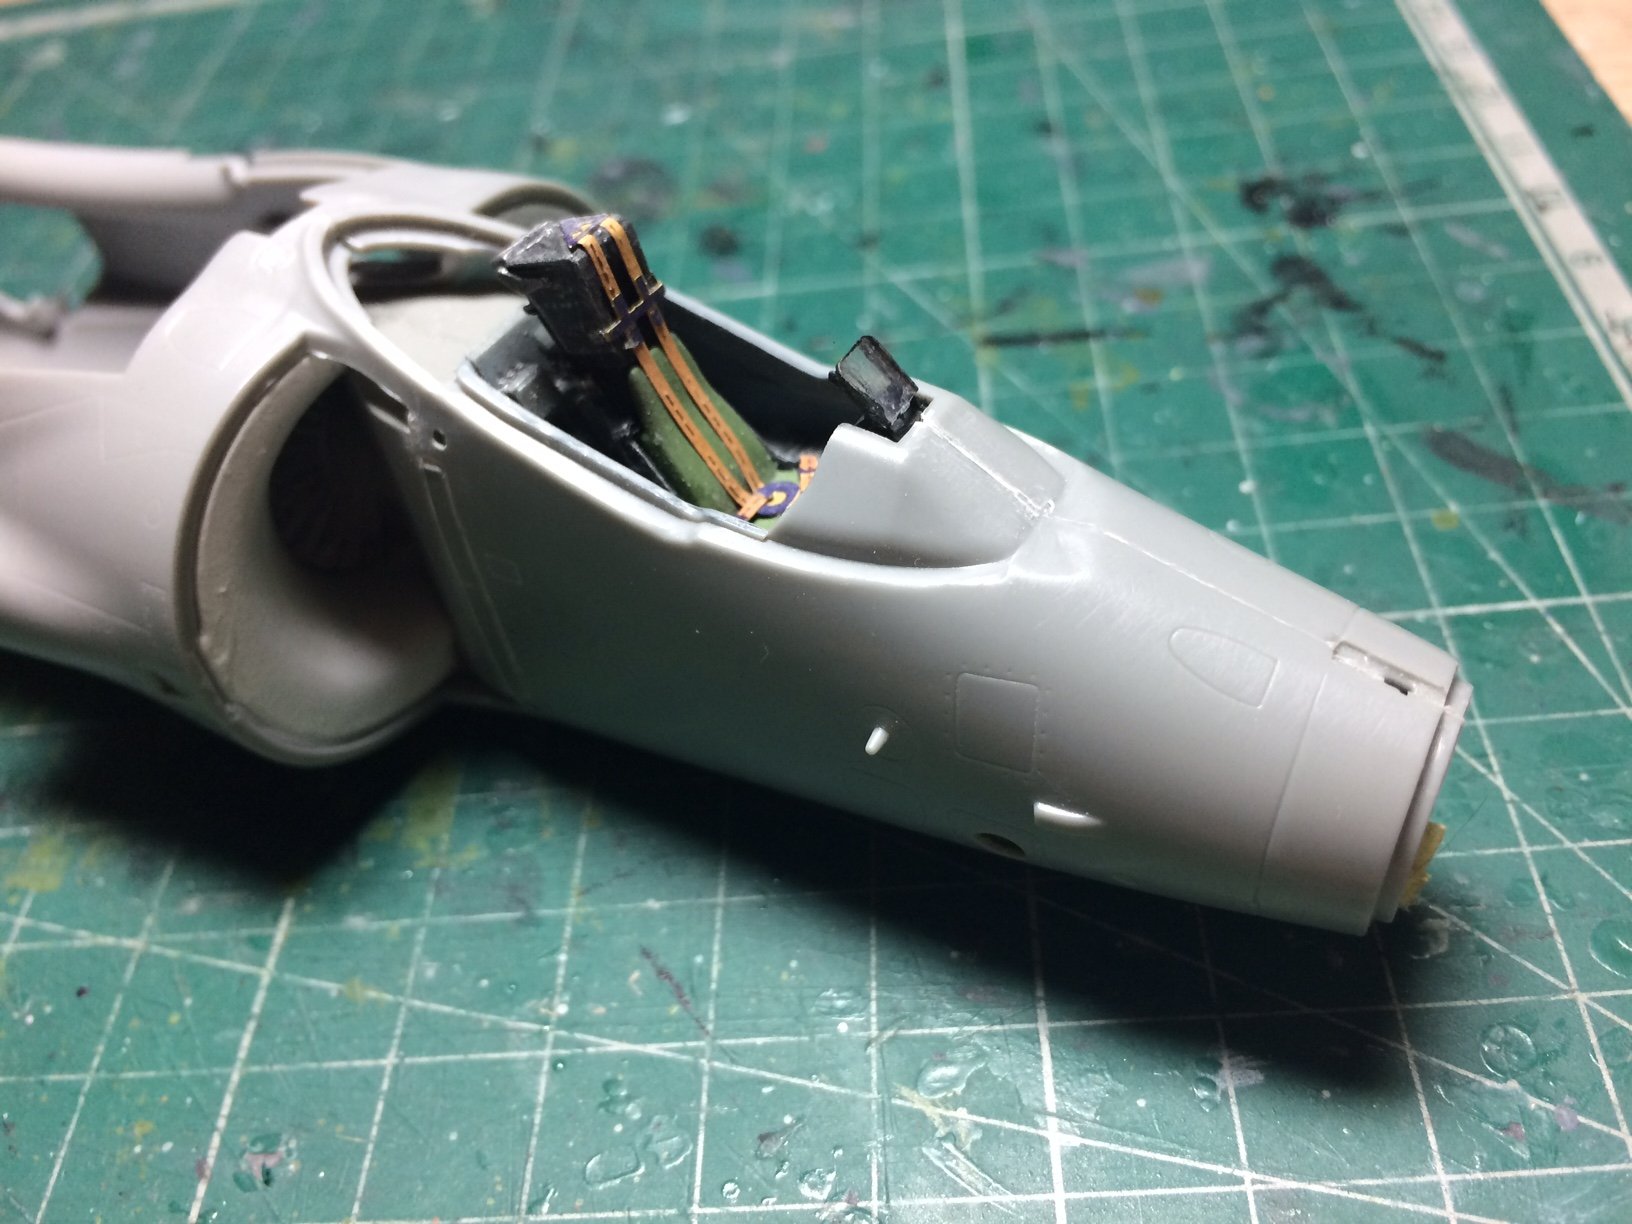
Evening all, I decided to crack this open again and try to progress it further - Firstly I had to do more dry fitting of the two internal sections (Front cockpit bath/front u/c bay) and the rear main u/c bay, it took a lot of testing / fettling - testing / fettling rinse and repete several times, as the Two fuse halves were just not meeting smoothly, eventualy I got them how they should be.
I decided to glue the sections in the one side first - then some more checks and all was ok, so I added a slight bevel on the edges and applied glue to the one face and offered them up together, I used some tape and gentle hand presure to line them up while they set.
After I worked on the seems with my knife and fine wet and dry.
So his is where I am at.
OC.


-
2 hours ago, Egilman said:
So your talking what, 200 to 300 figures.... lets see the Germans, British, French, there were some Austrian and Flemish troops as well I believe... Relying on memory here cause I'm too lazy to look it up...
One heck of a task my friend, will look spectacular when done though...
It will literally only be just the cut down farm and a small amount of room at the front - it will have to fit a board no longer than 2.5 feet long and just under 2 feet wide, as it will have to sit on our side unit in a case that I will have to buy later.
Thats why I am estimating a head count of between 50-100 consisting of - KGL (Red coats) KGL Light (Green and Grey) 95th Regiment (Sharps) (All Green) French Line Infintry and a few French Heavy Cavalry.
OC.
- Jack12477, Canute, Edwardkenway and 3 others
-
6
-
I did touch up the "None slip" on the wing - looks better will post a pic later.
OC.
-
I used to build 1/144 scale airliners - looking forward to this.
OC.
-
Thats looking mighty nice bro, nice and smooth also - keep up the great work.
OC.
- Edwardkenway, lmagna, Canute and 3 others
-
6
-
5 hours ago, captain_hook said:
Very nice. How many troops will be included? Are you going to paint every soldier included in that diorama in representative way? That will sure be very time-consuming.
Thank you Captain, yep I will probably have around 50 - 100 - ish figures from all sides (just centered around the Farm) everyone will be painted aswel as I can, when I start it I cant see it being finished soon.
OC.


Battle of Waterloo Attack on La Haye Sainte Farm by Old Collingwood - 1/56 (28mm)
in Non-ship/categorised builds
Posted
Yep he is Ken, he wont (very much doubt) be in the Dio as they attacked the main Britiah lines later in the day, and mostly avoided getting caught up in the action against the Farm.
OC.