


Kevin
-
Posts
6,919 -
Joined
-
Last visited
Content Type
Profiles
Forums
Gallery
Events
Posts posted by Kevin
-
-
-
good evening everyone
thank you for comments and like
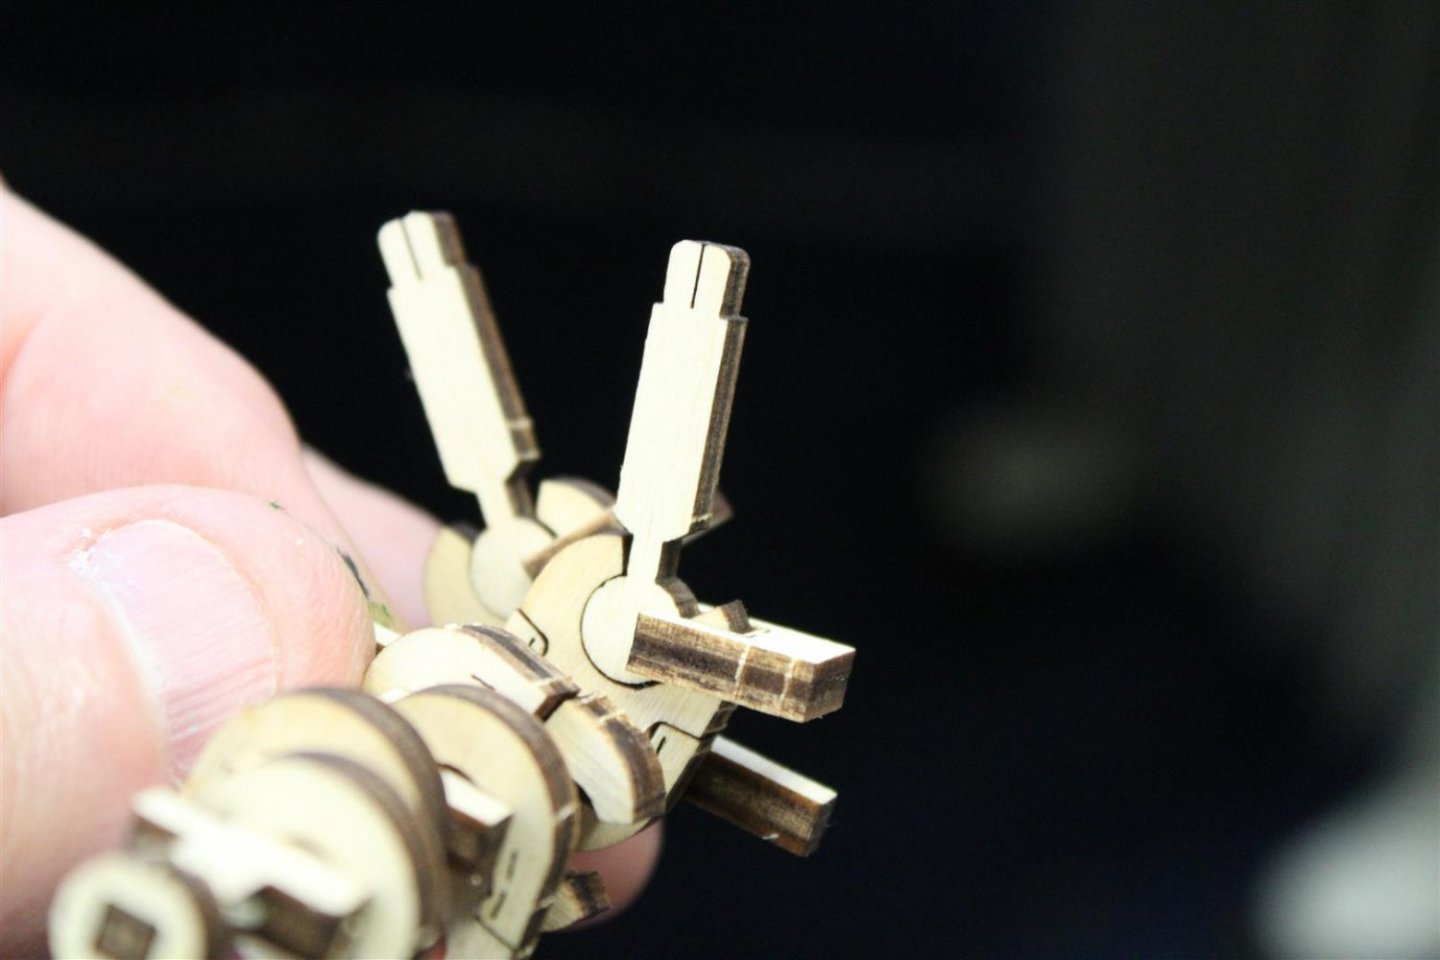
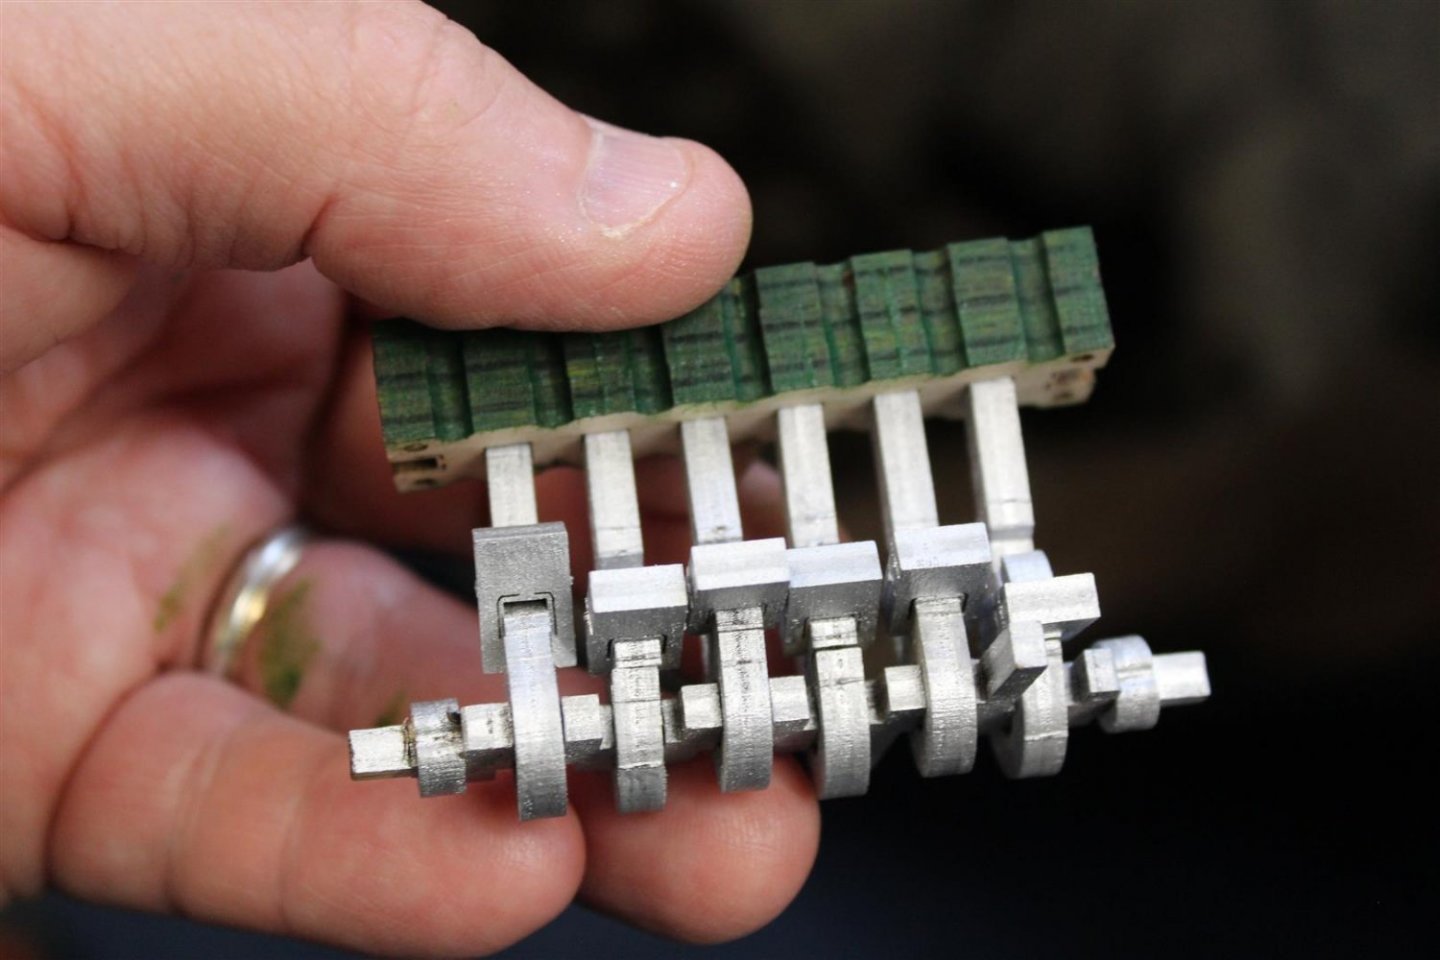
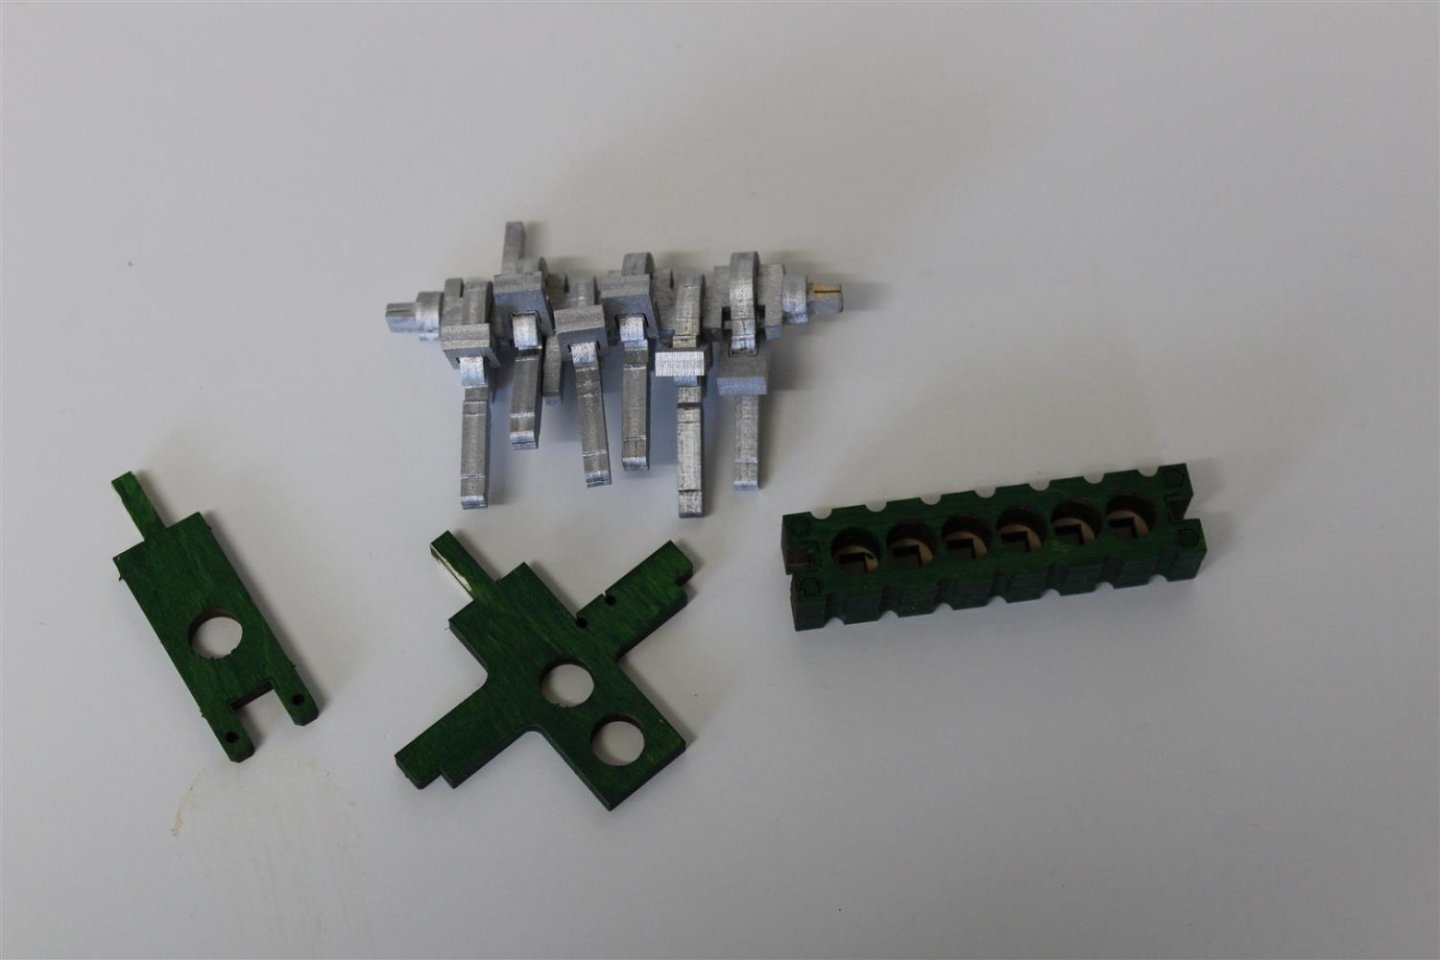
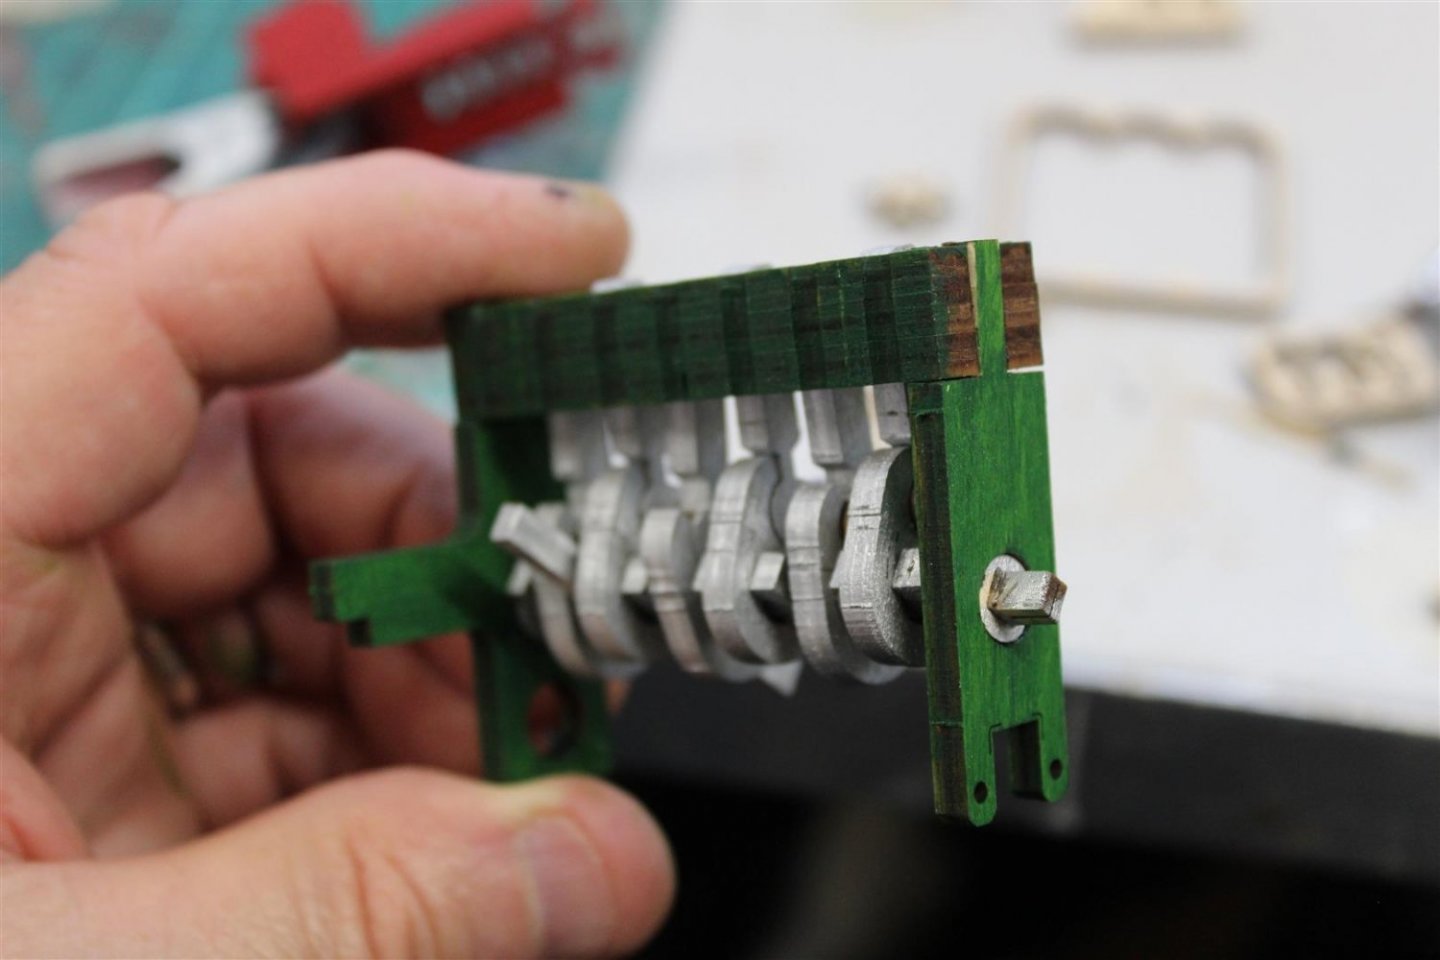
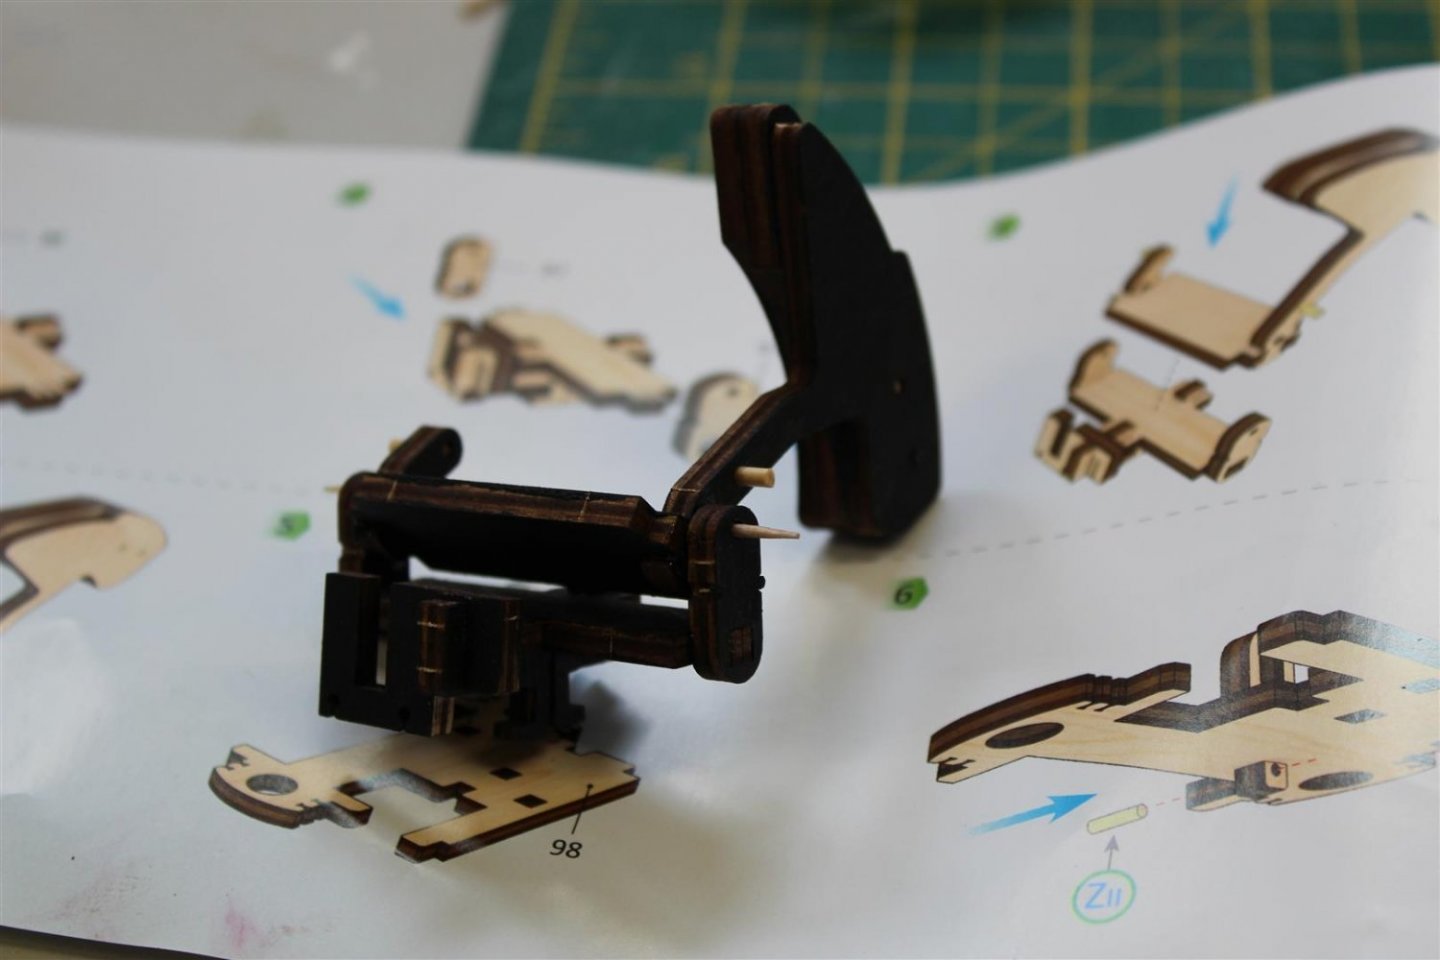
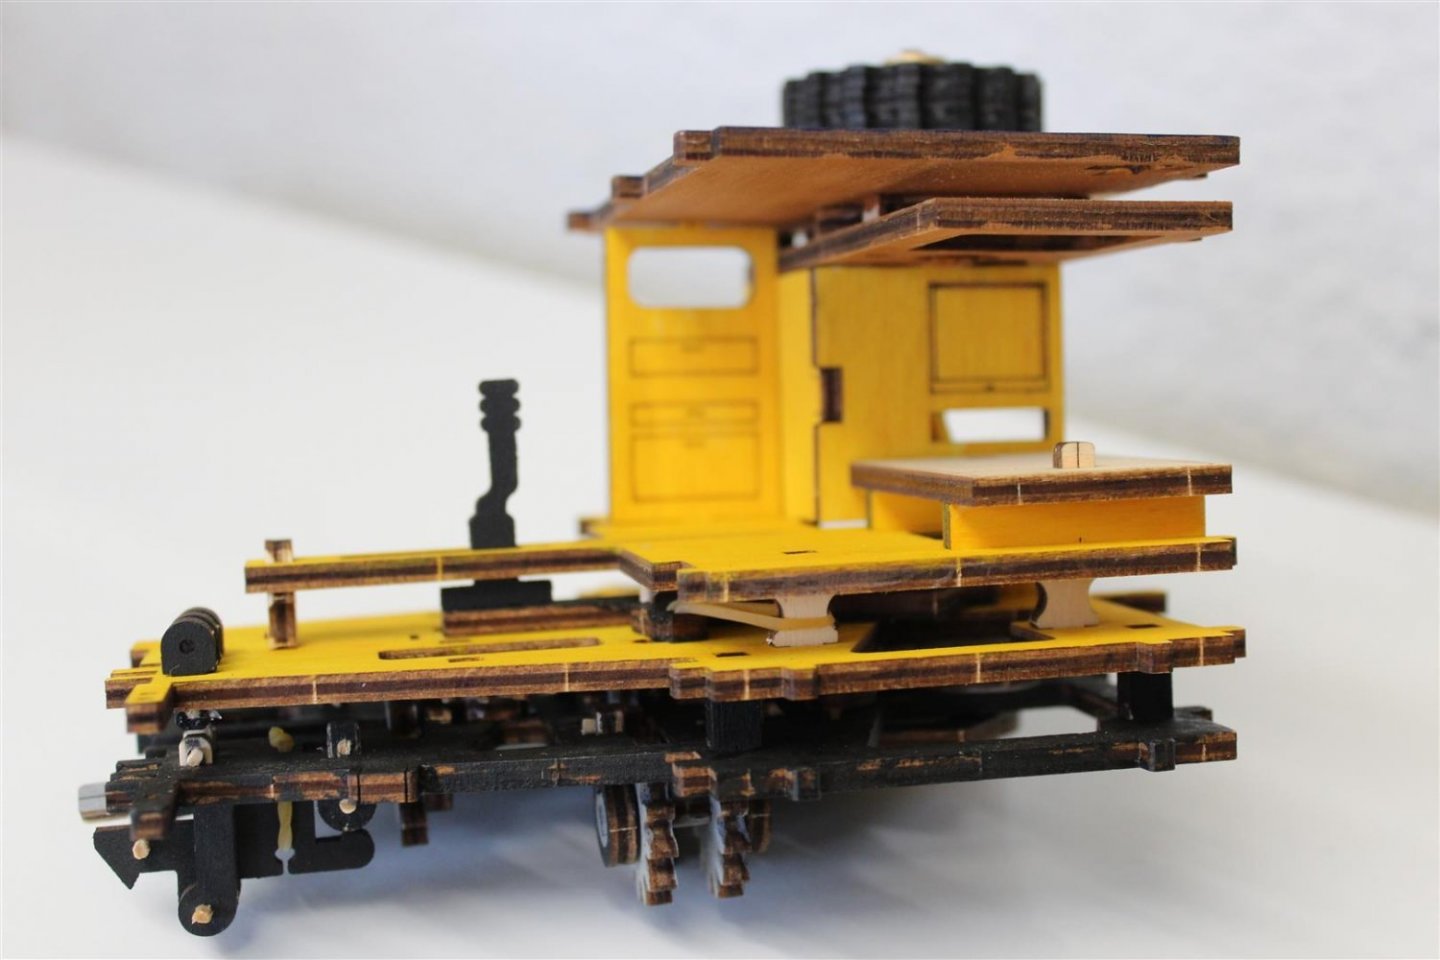
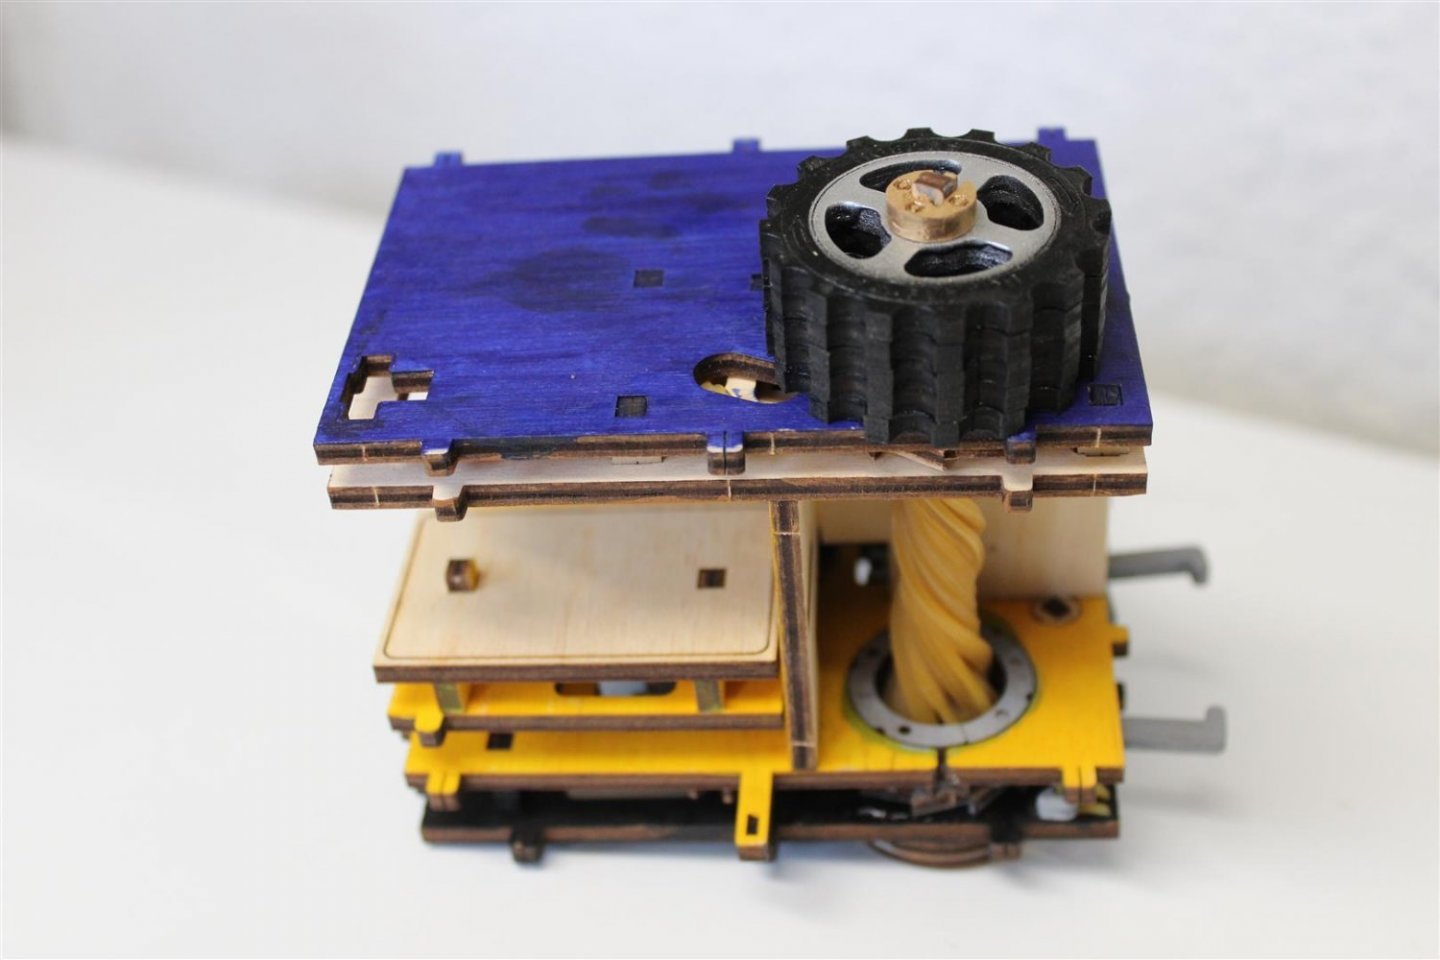
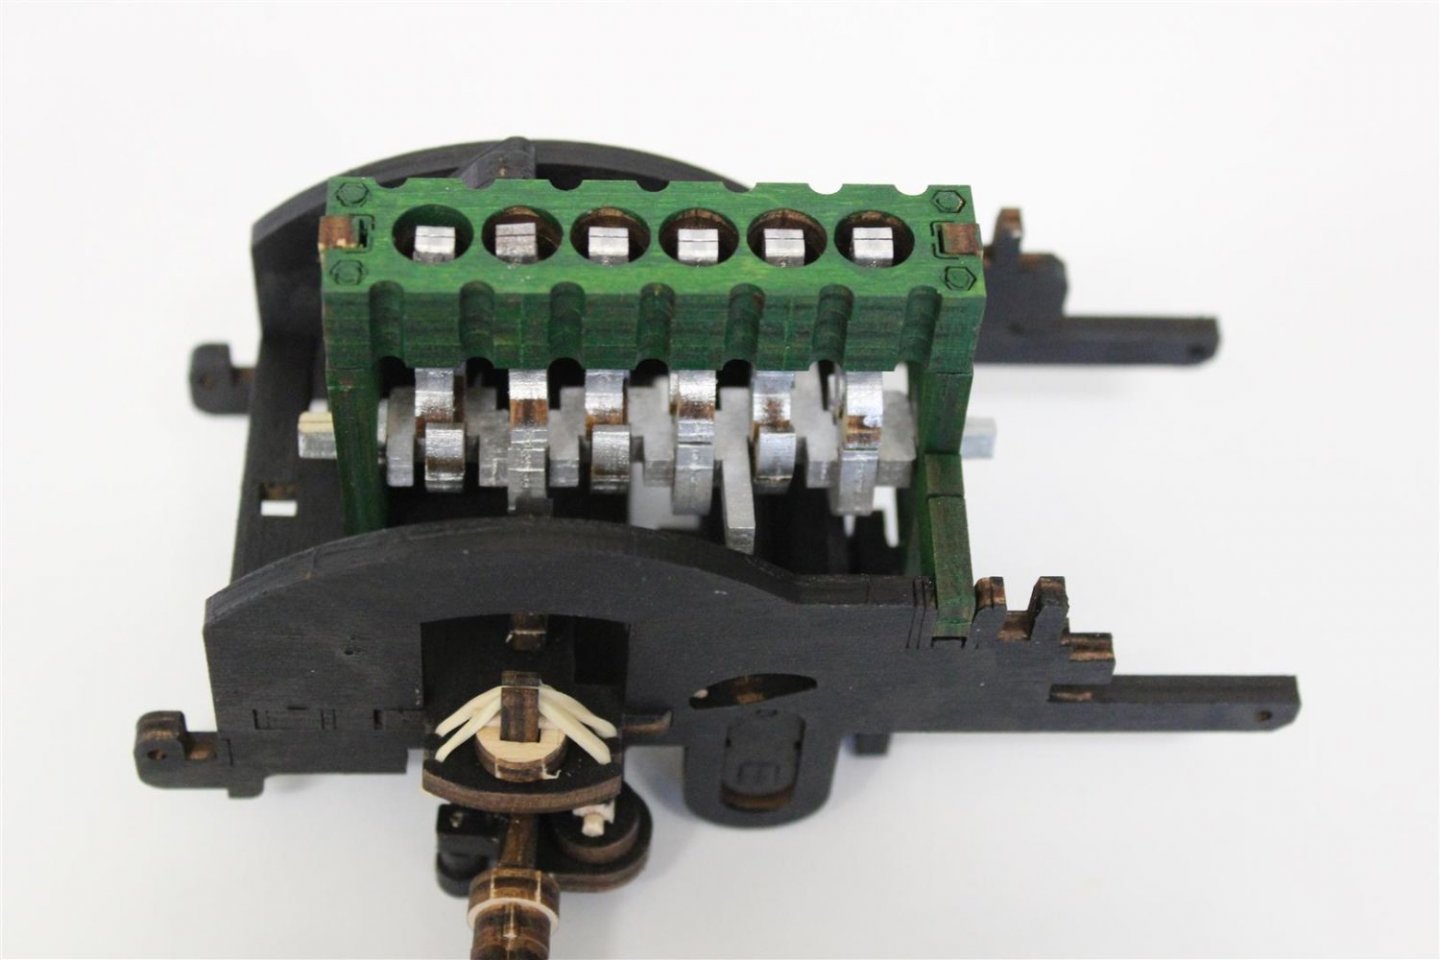
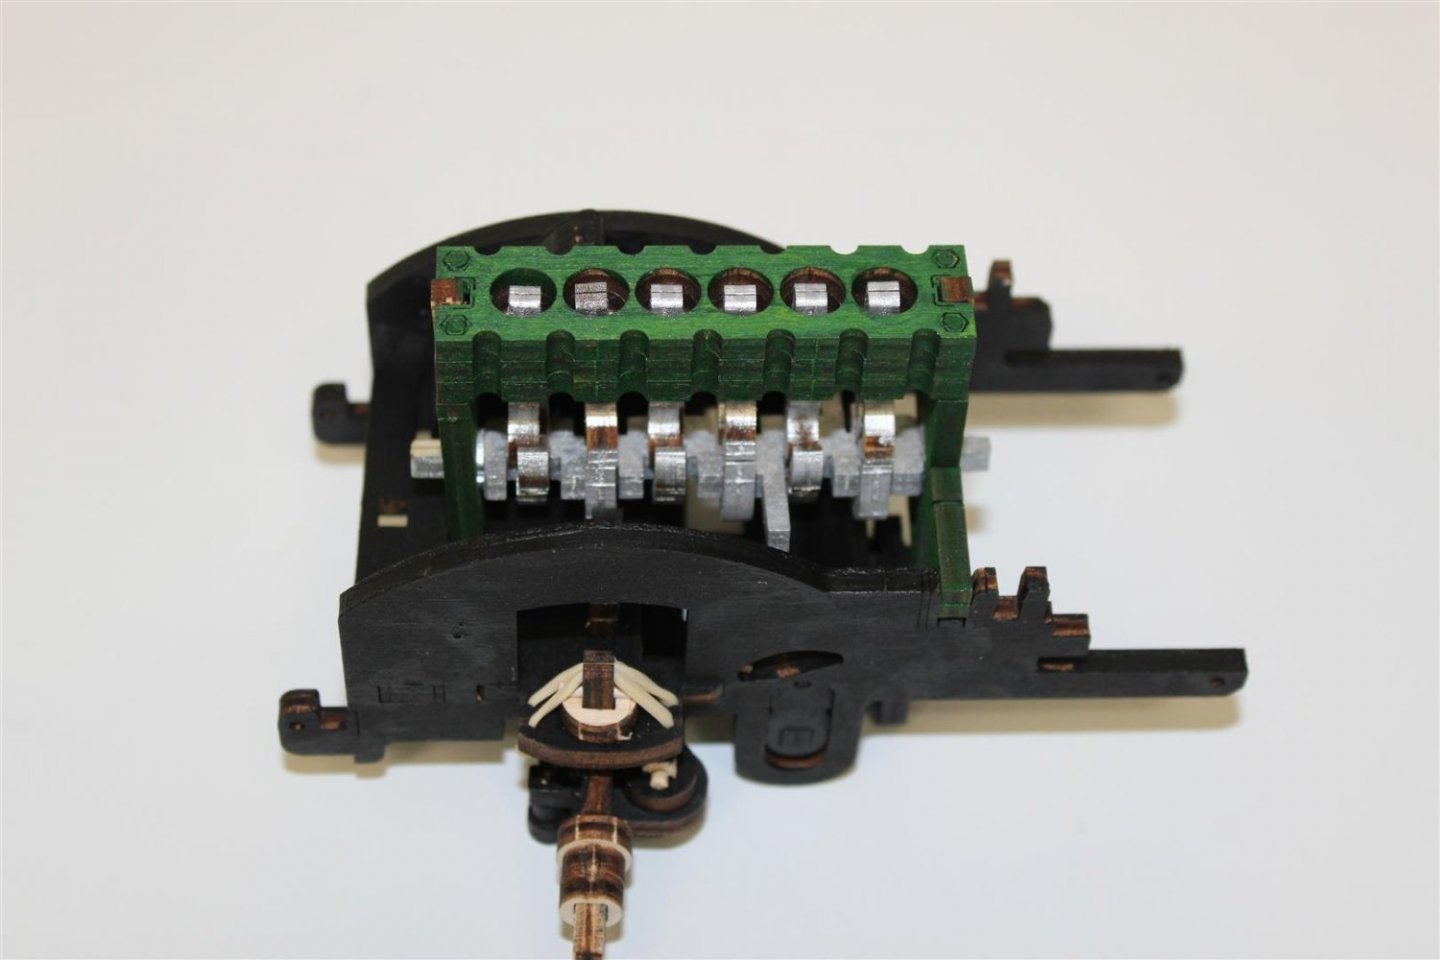
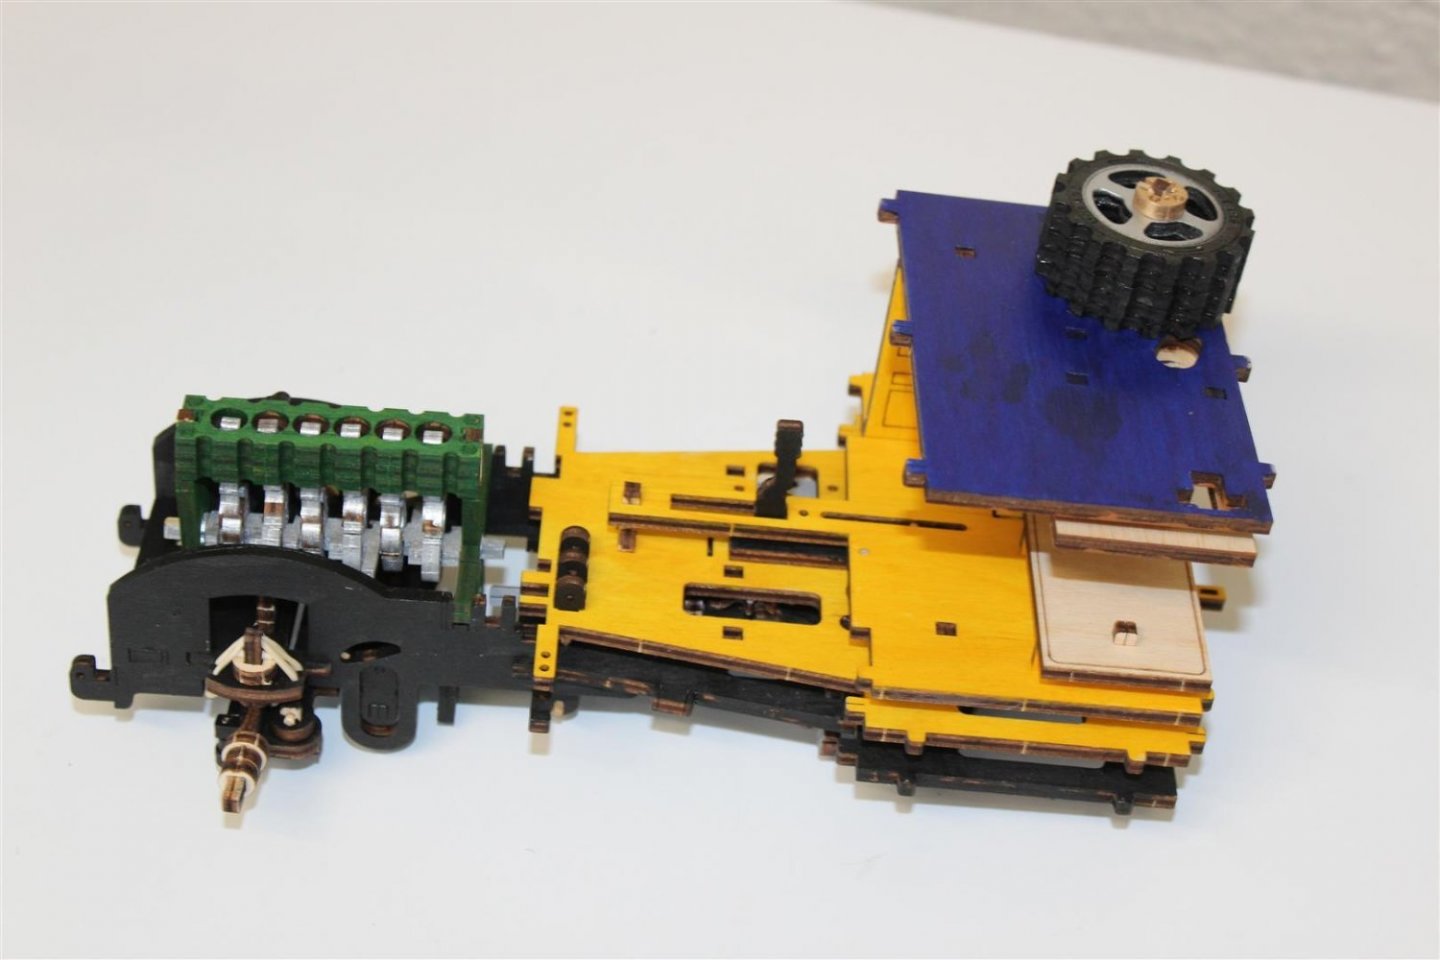
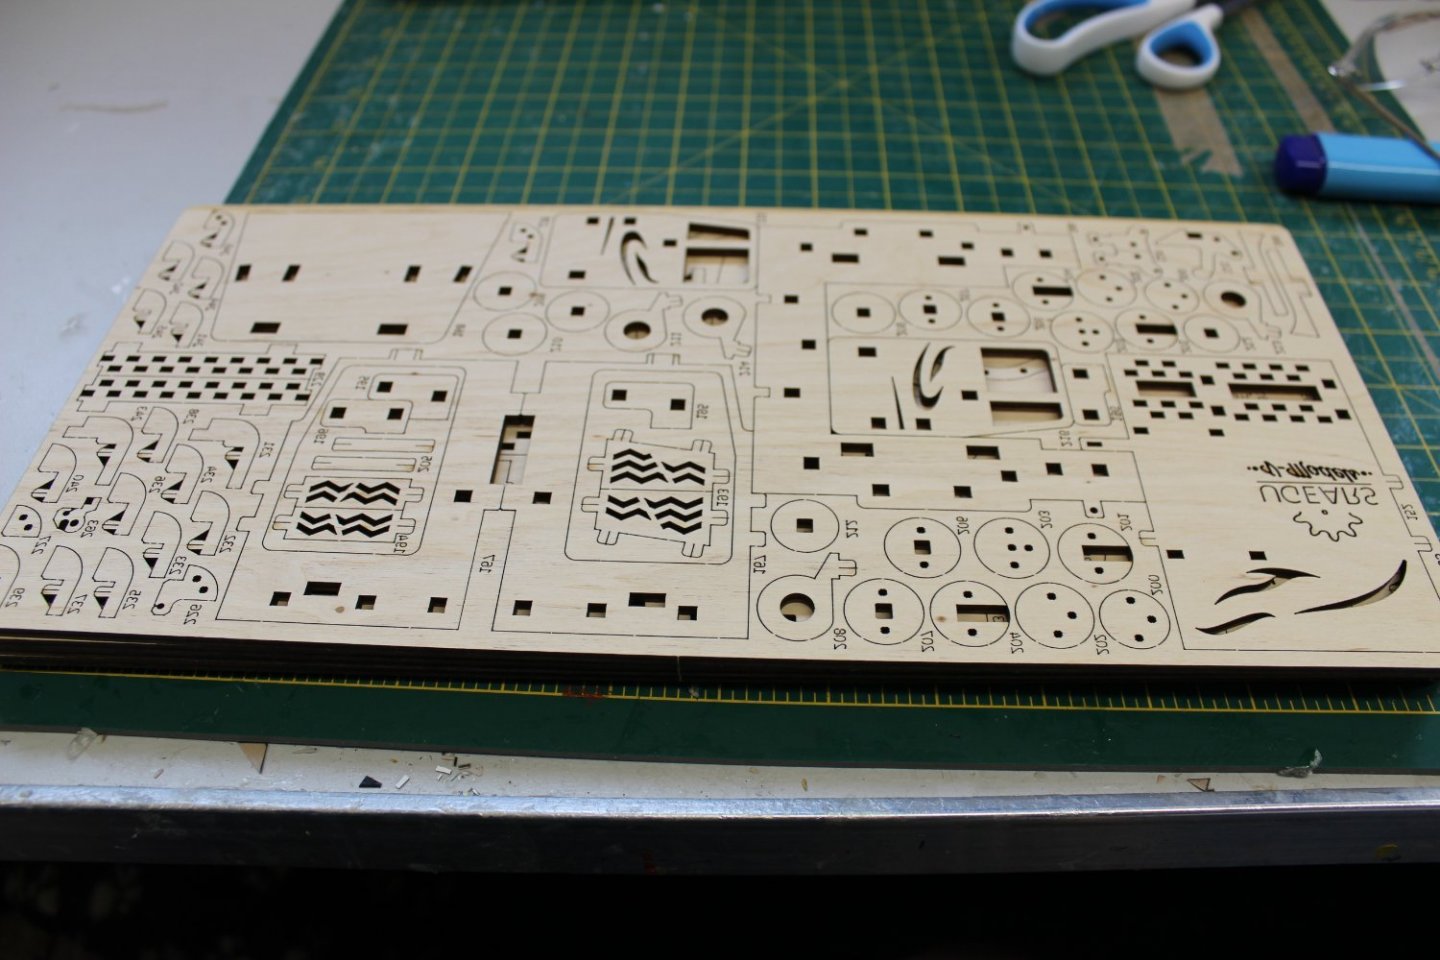
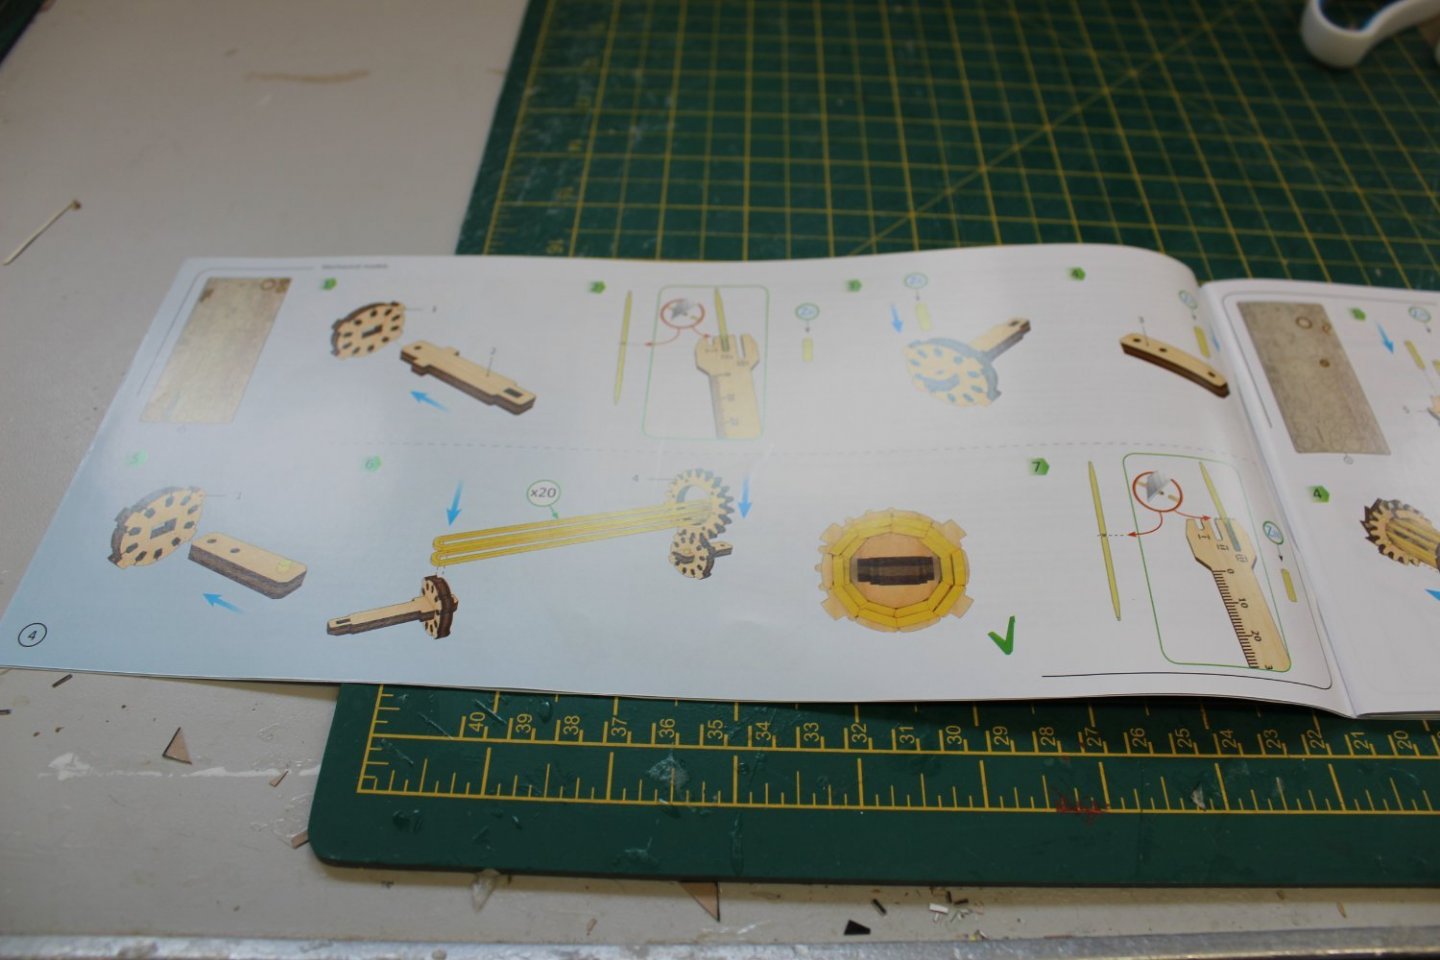
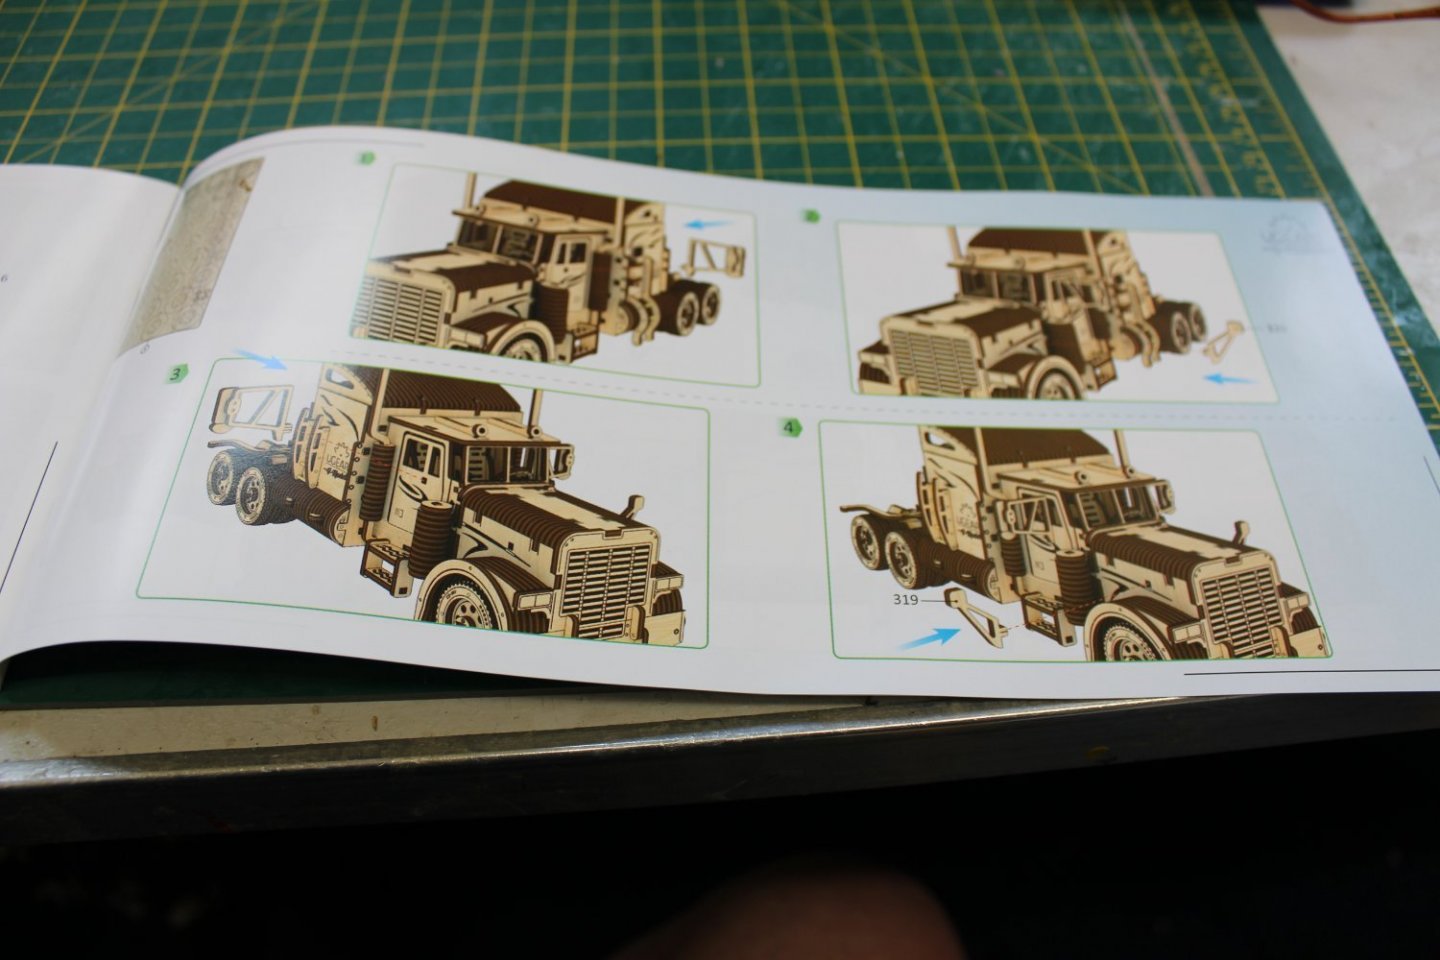
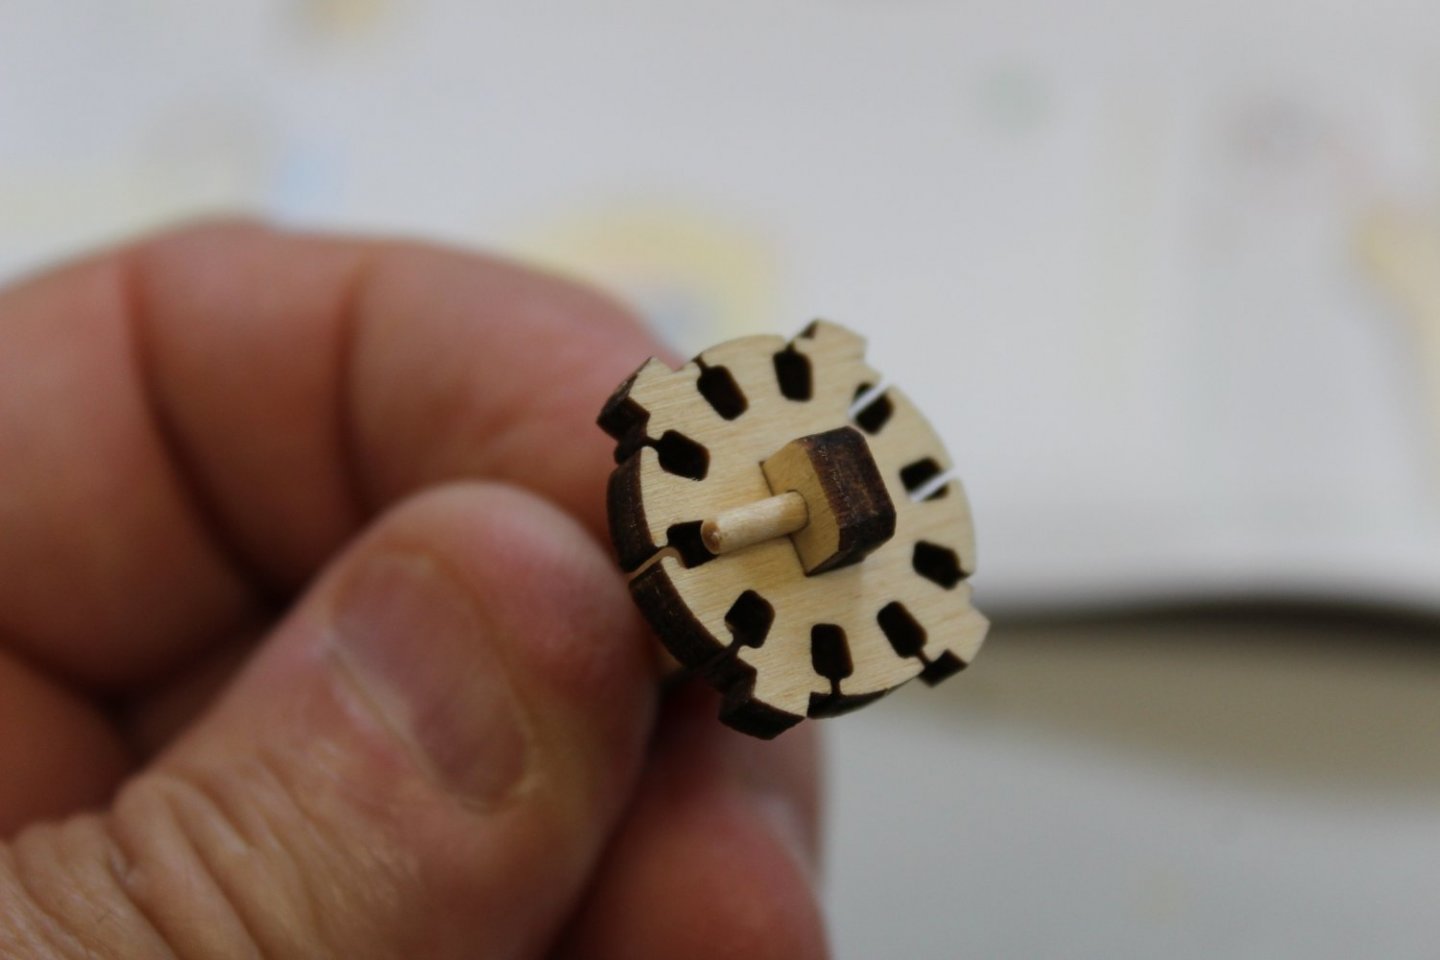
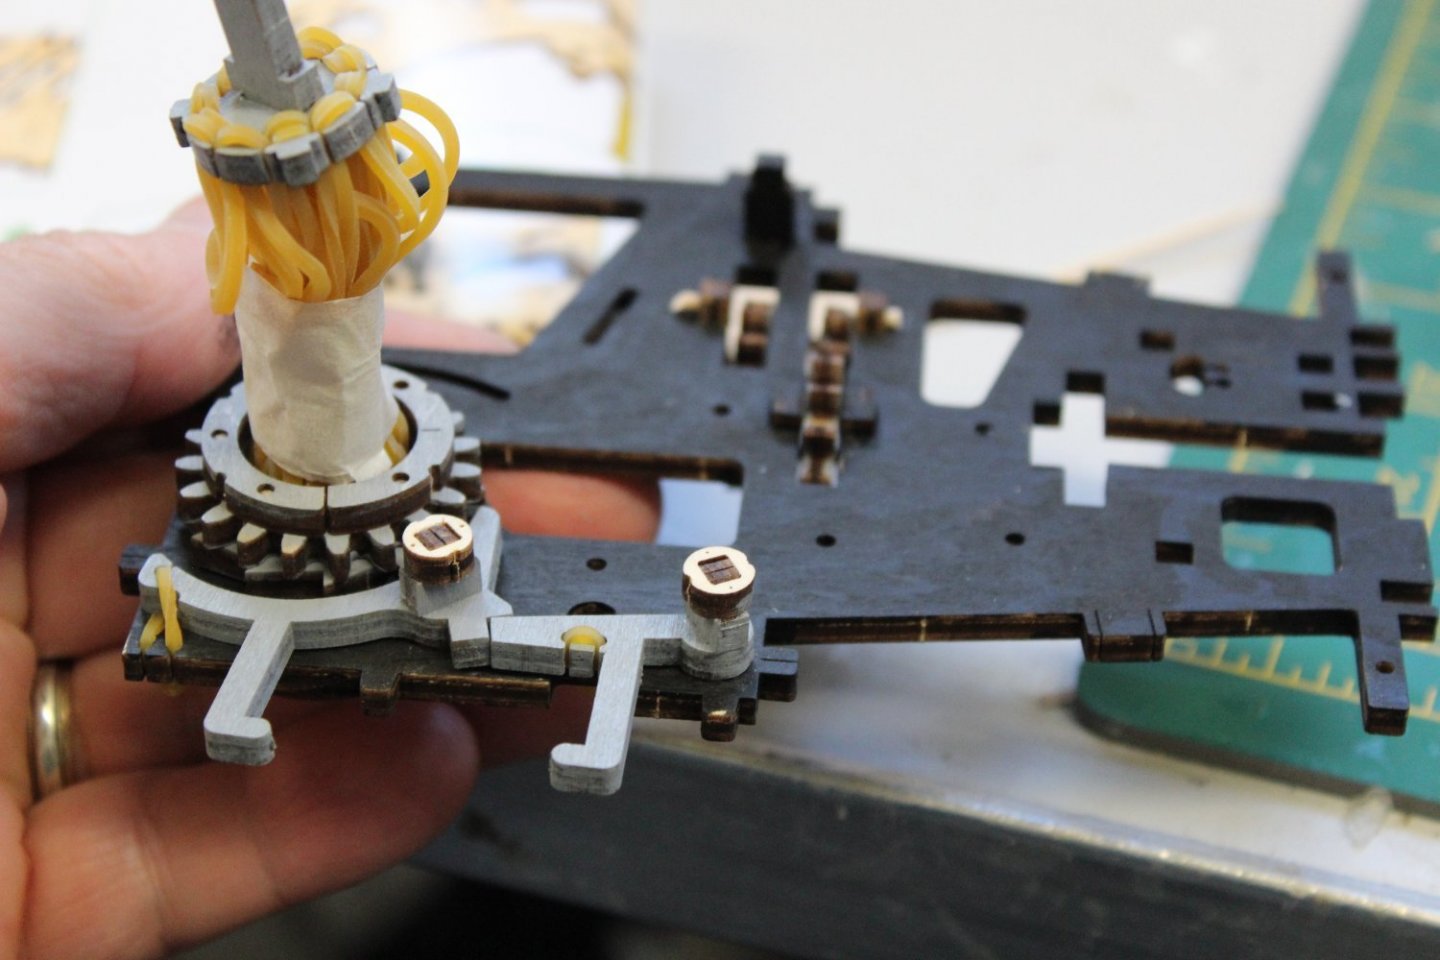
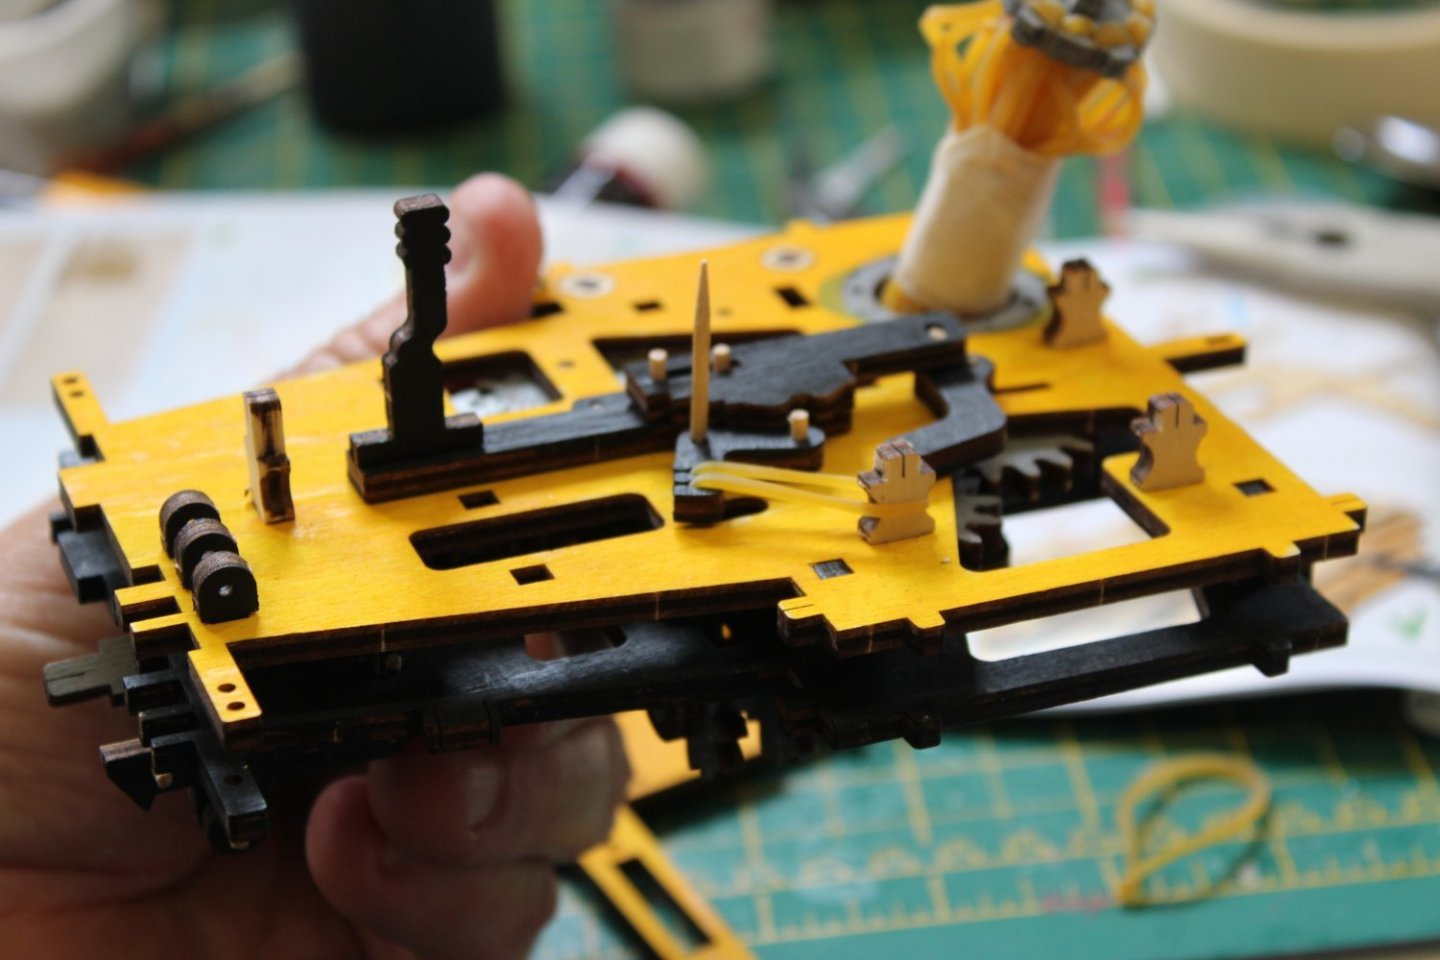
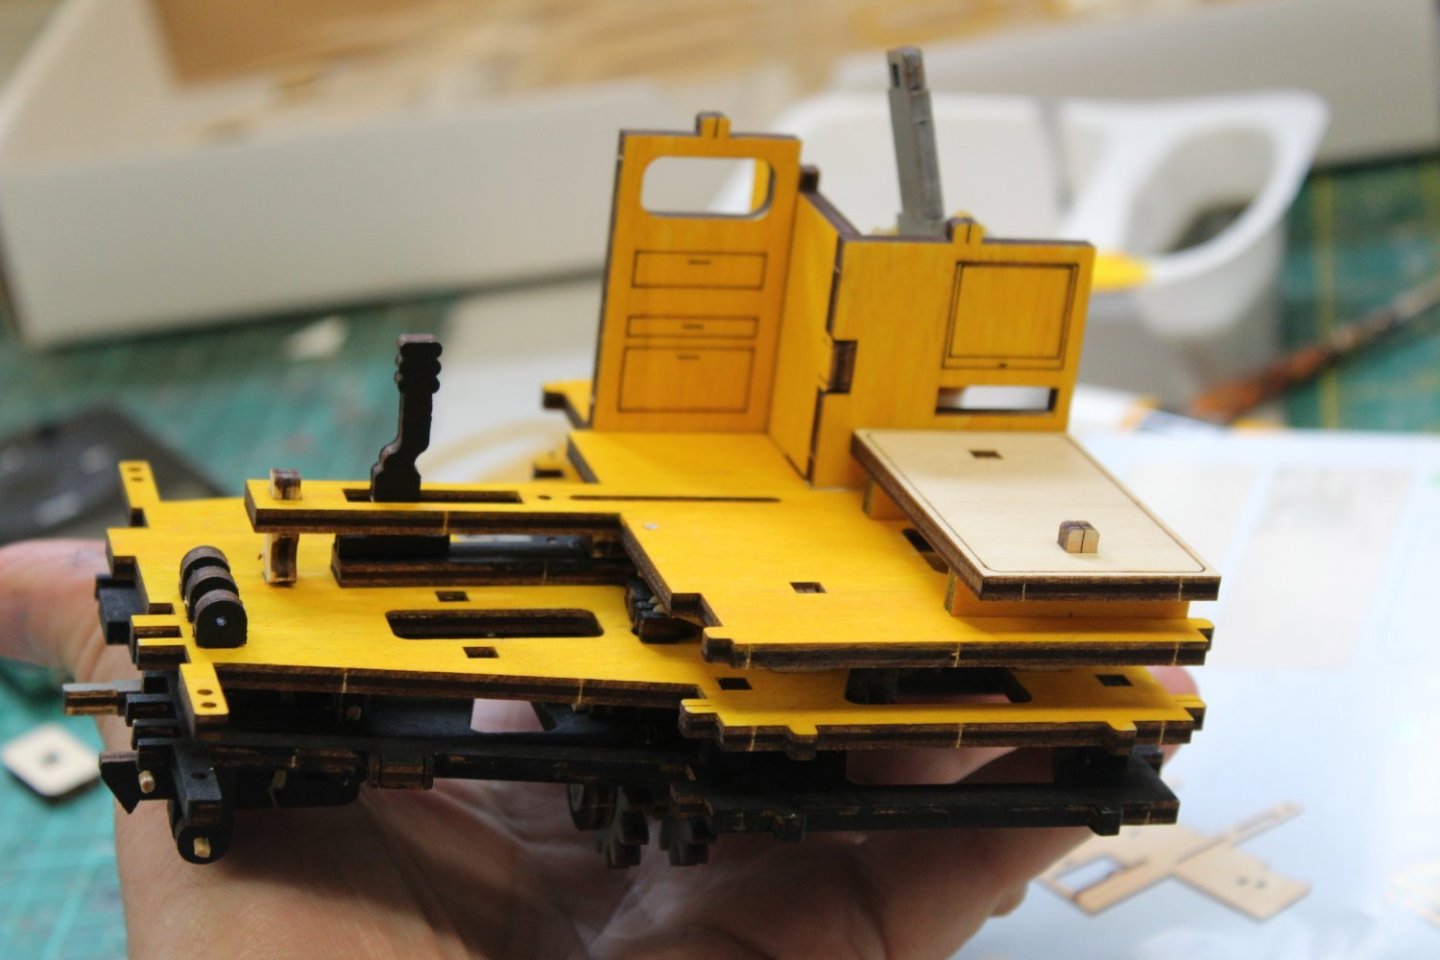
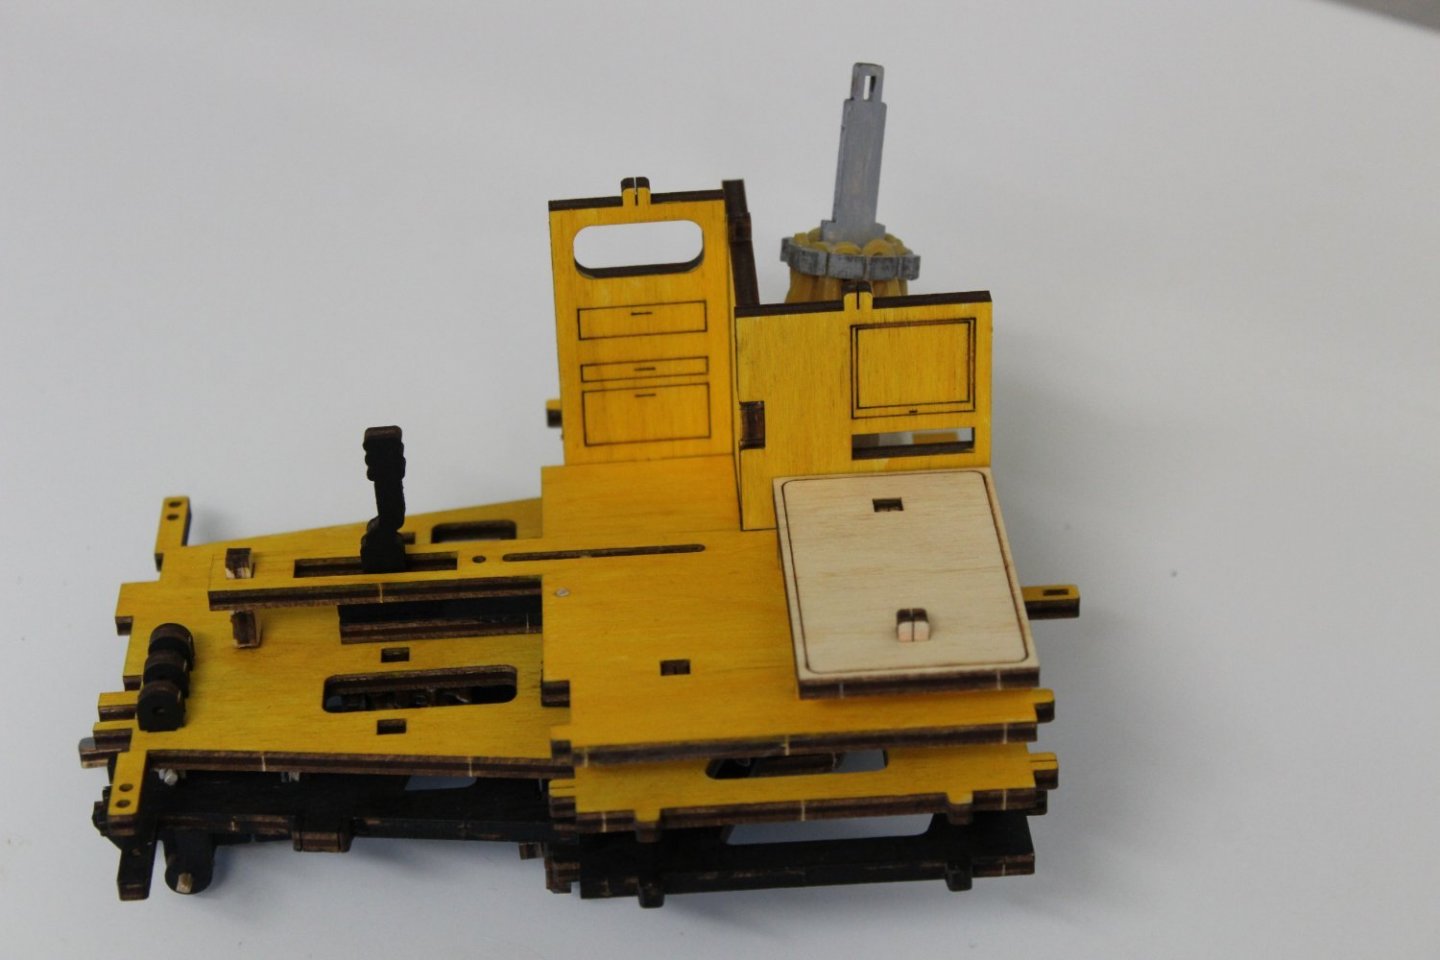
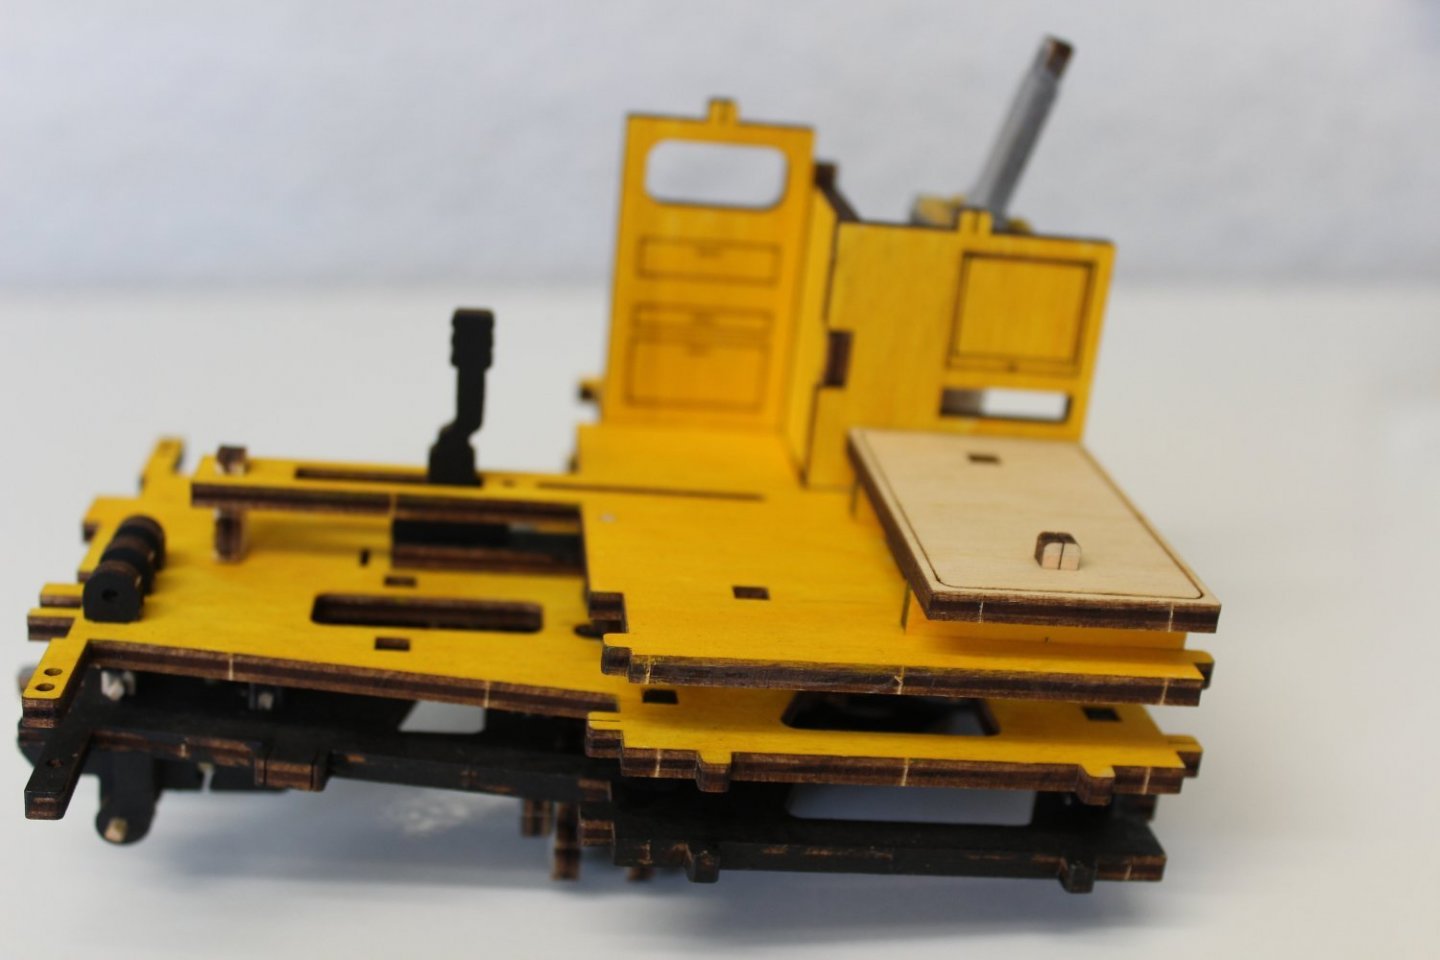
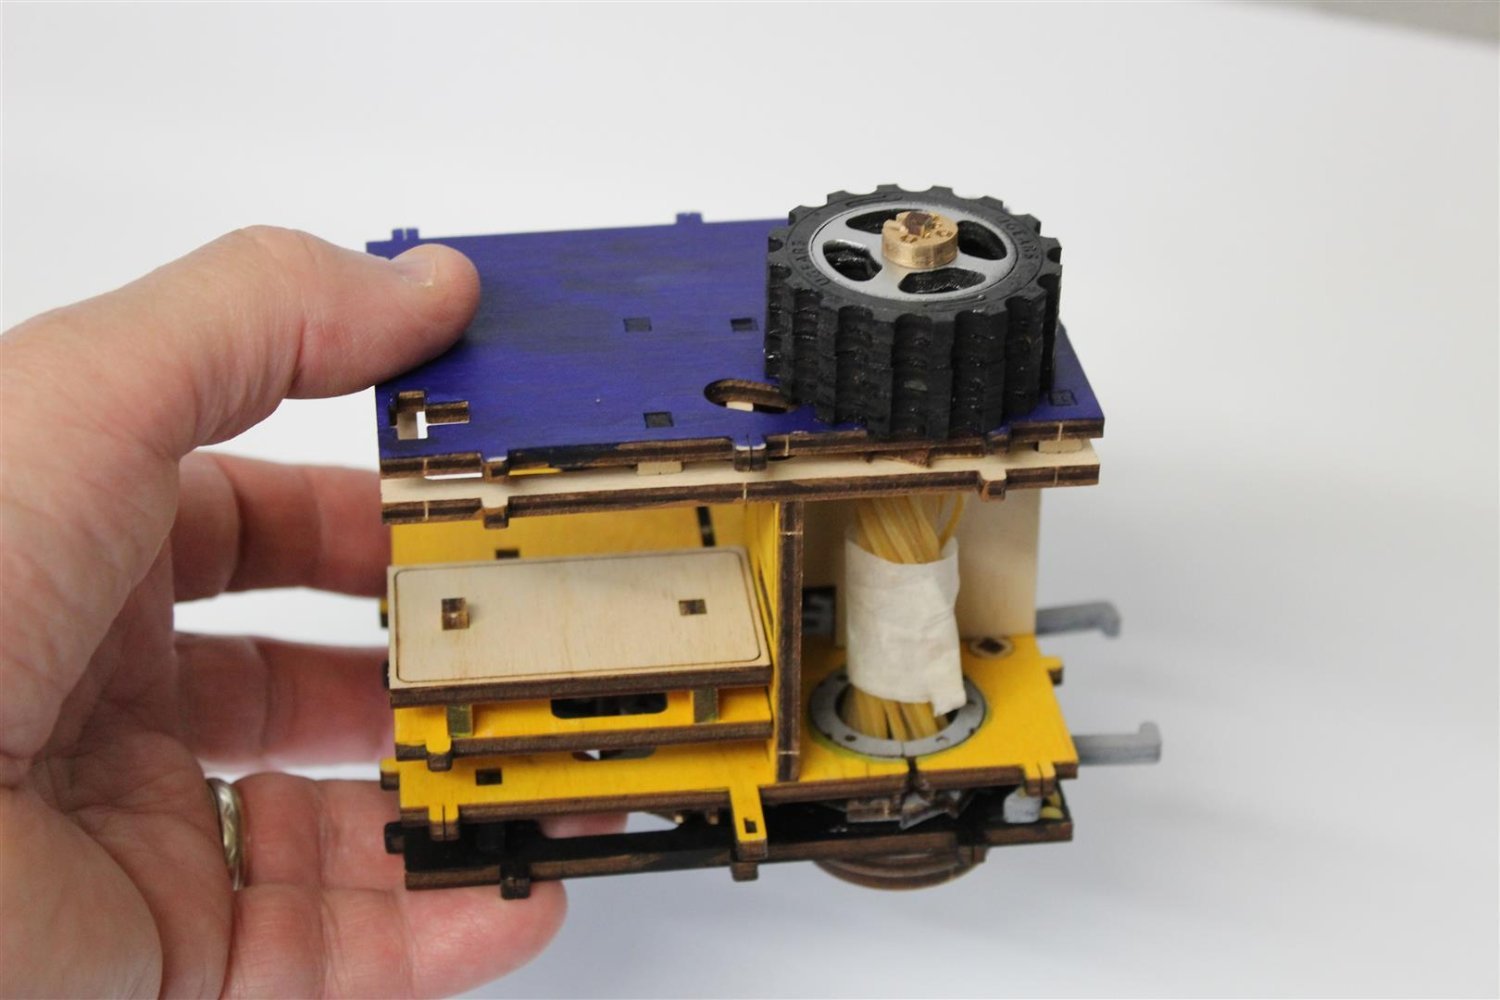
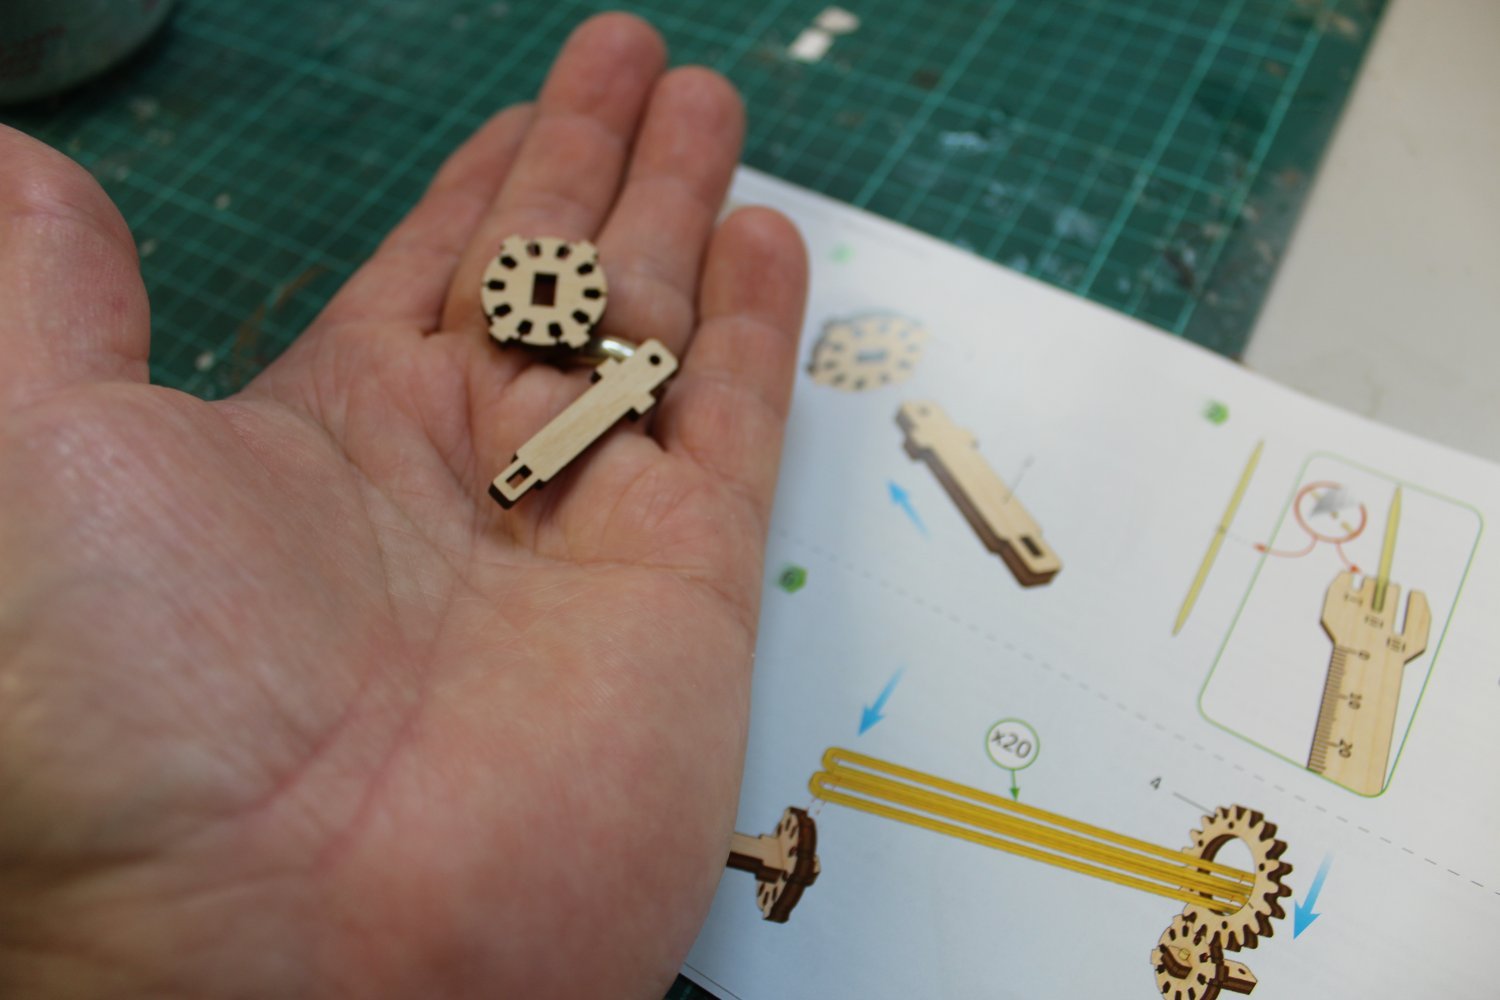
Truck day 3 cab, front chassis and engine
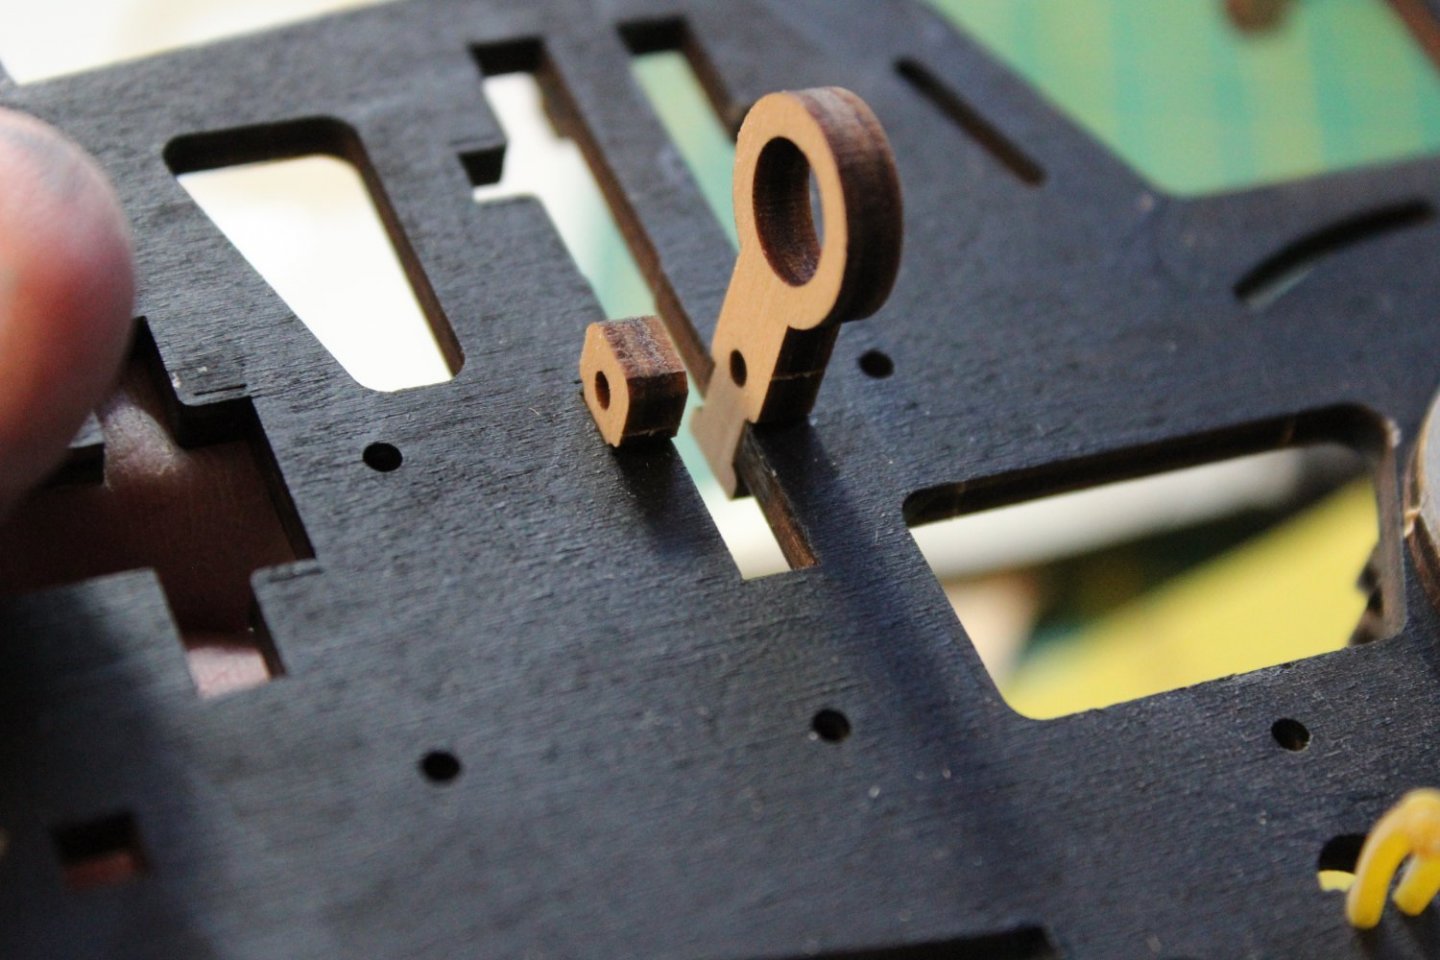
engine was a fun little project, everything has to be left a loose fit
even temp clamps are to allow the pistons to be fitted into the head with out falling out, they are then removed
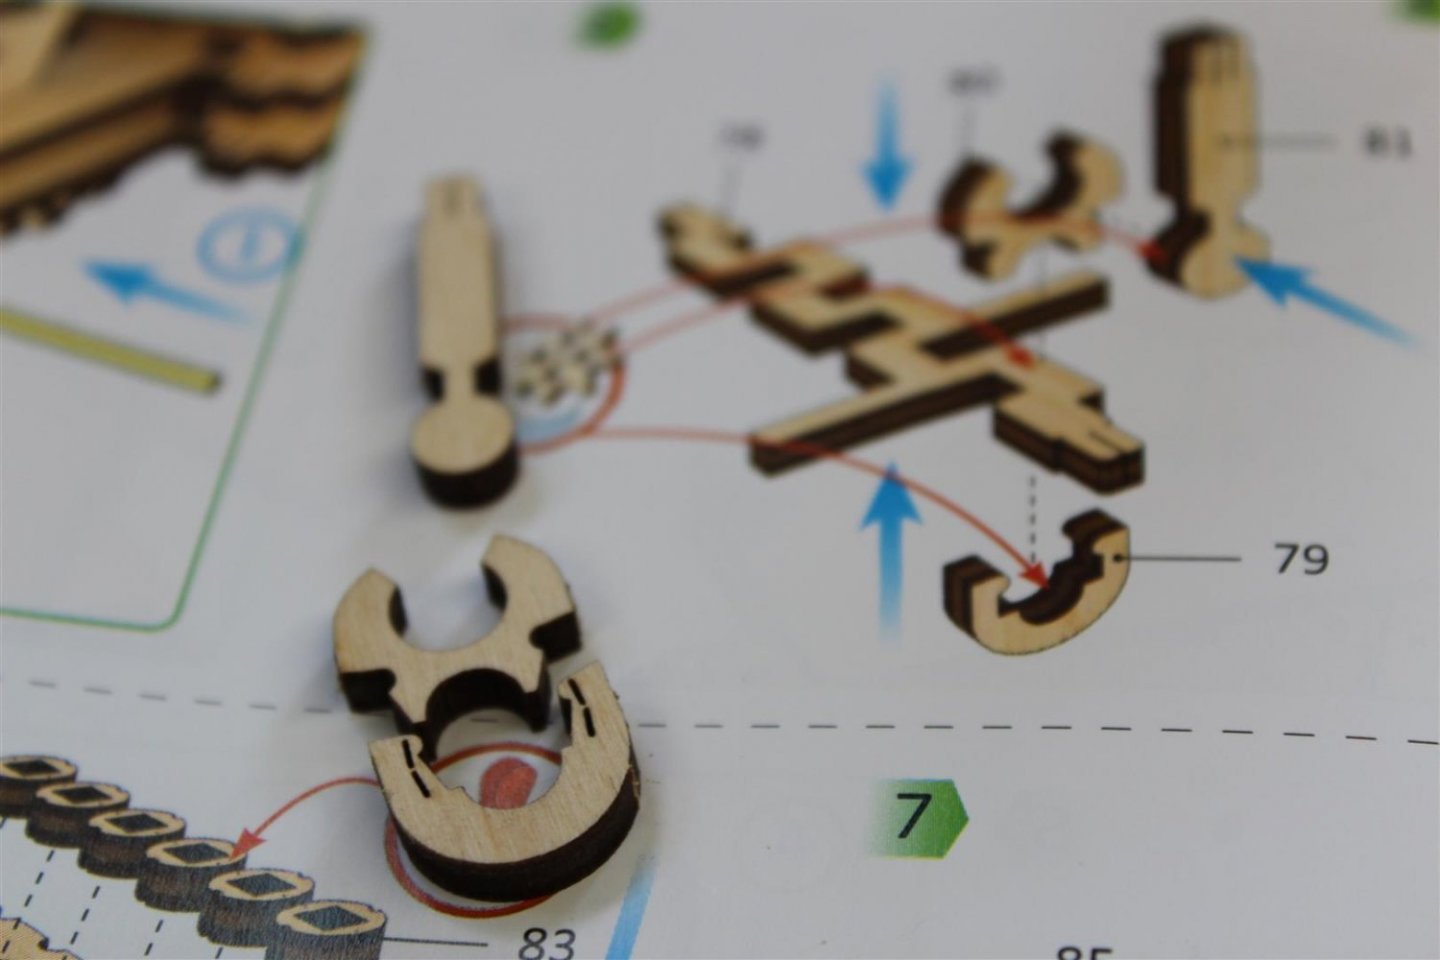


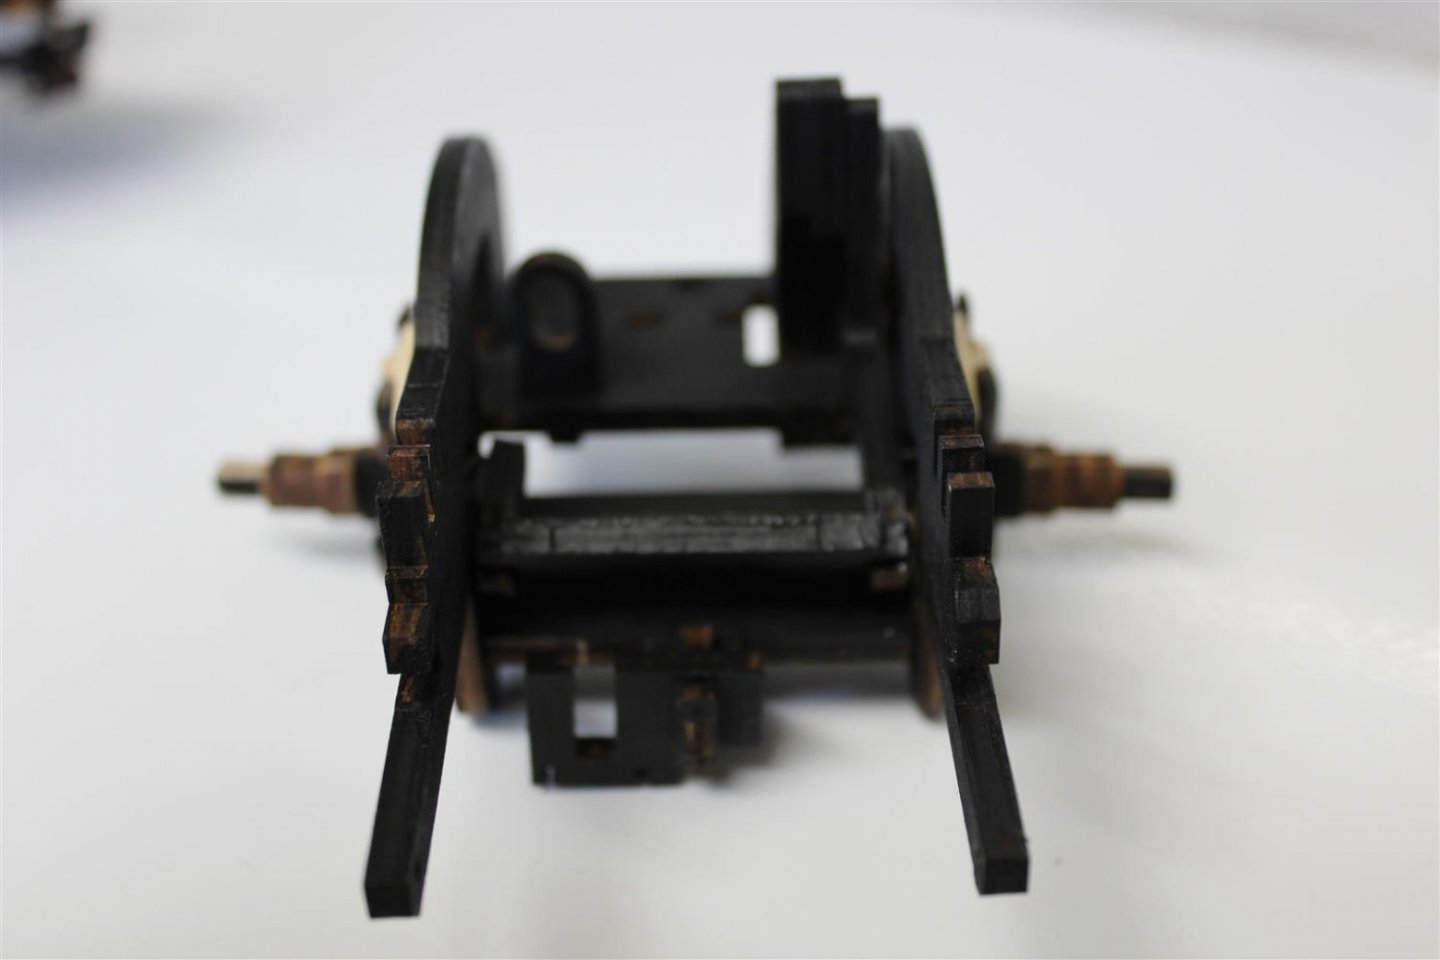
front chassis build up, with moving steering rack


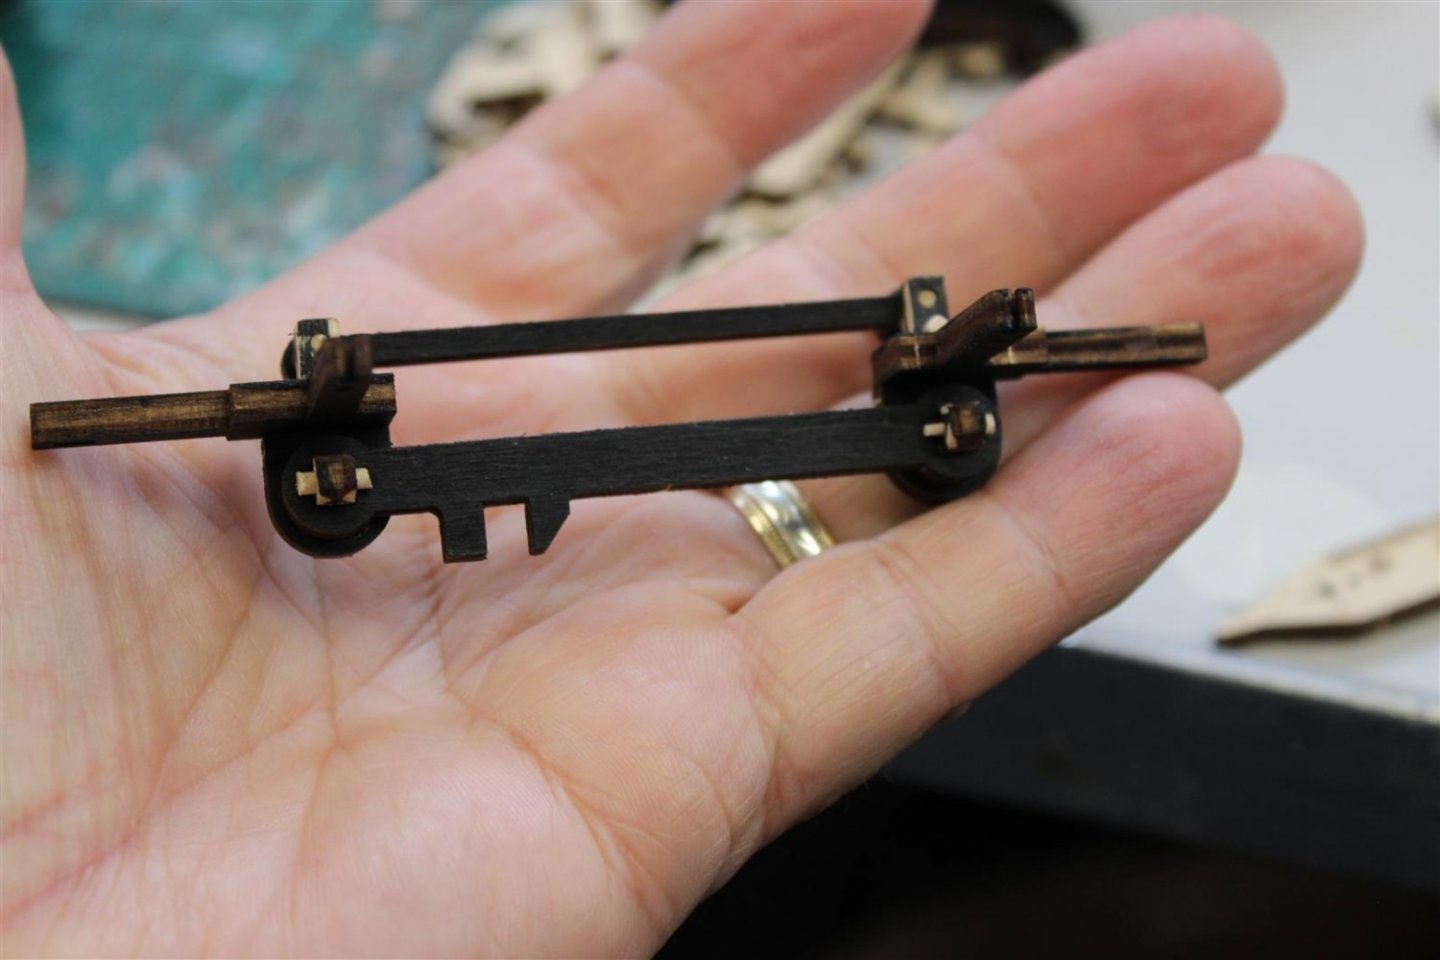
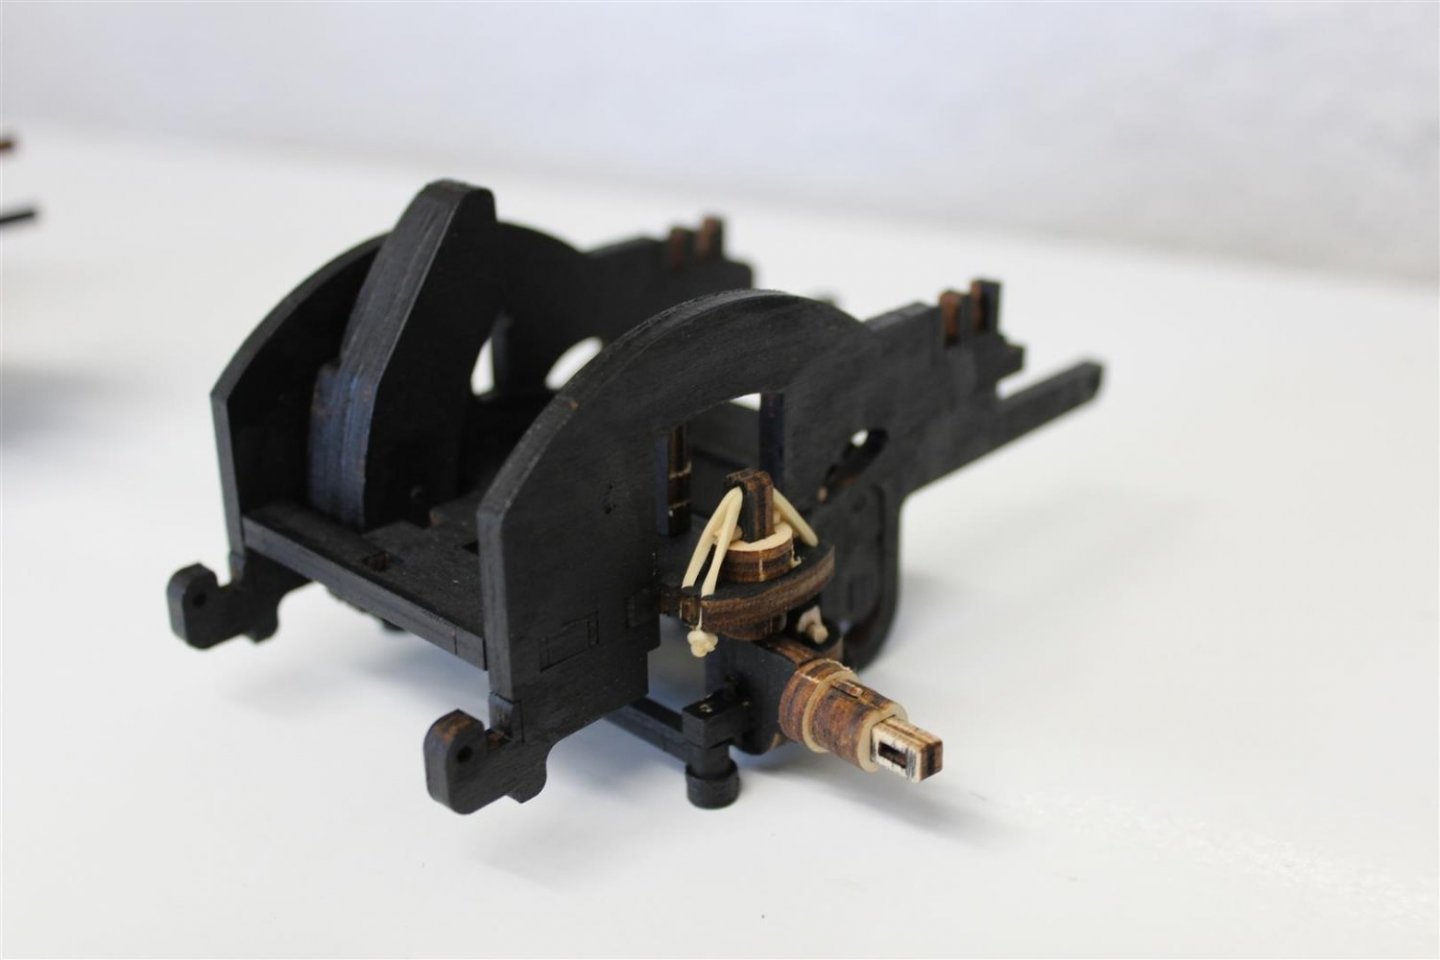
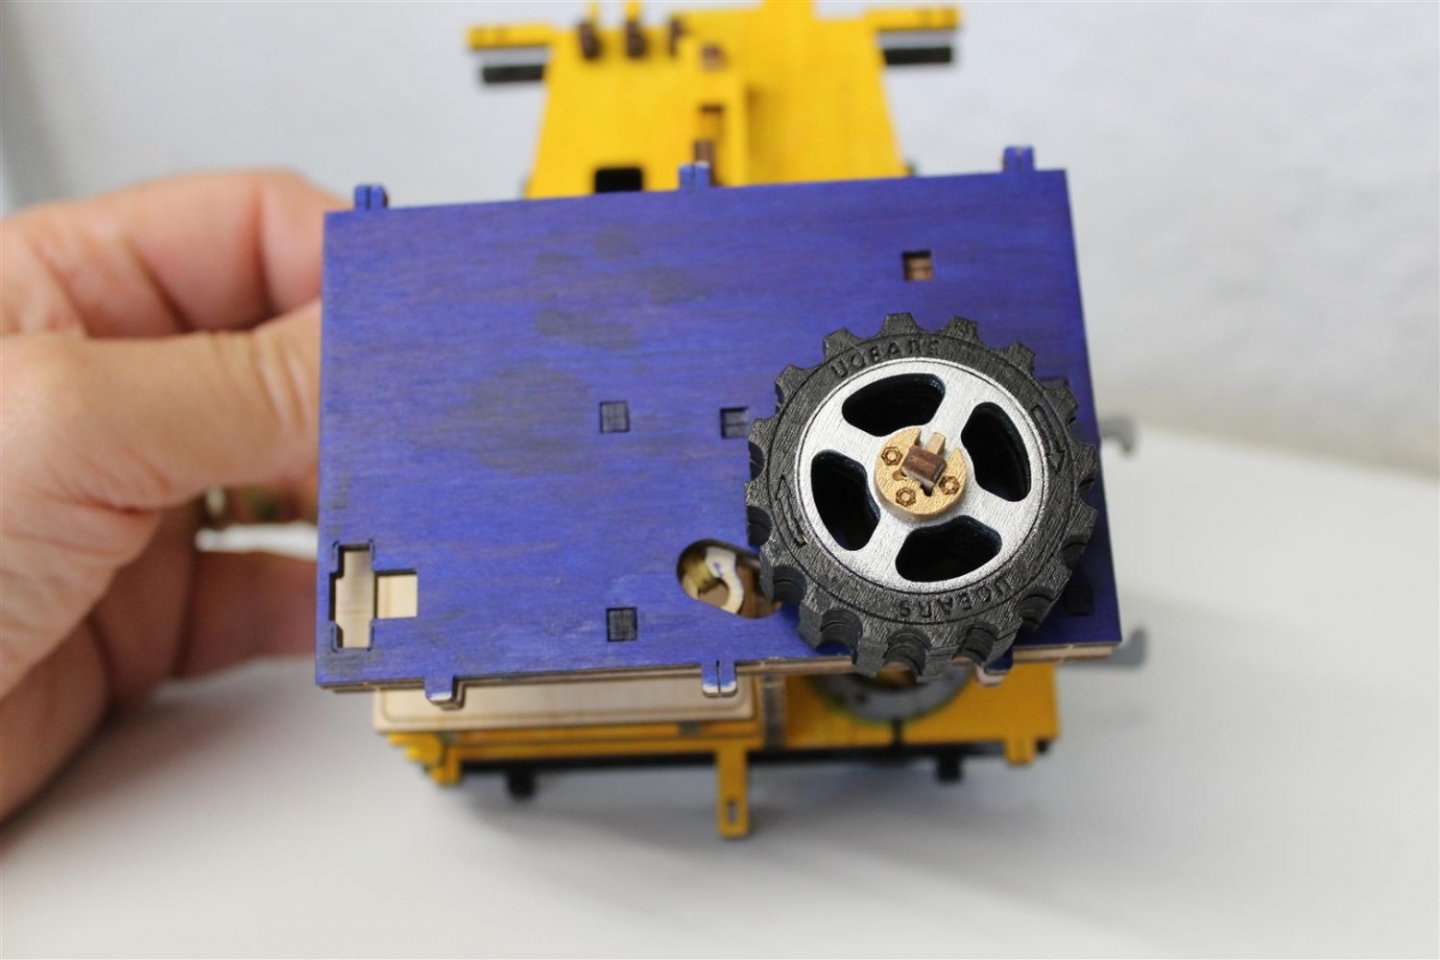
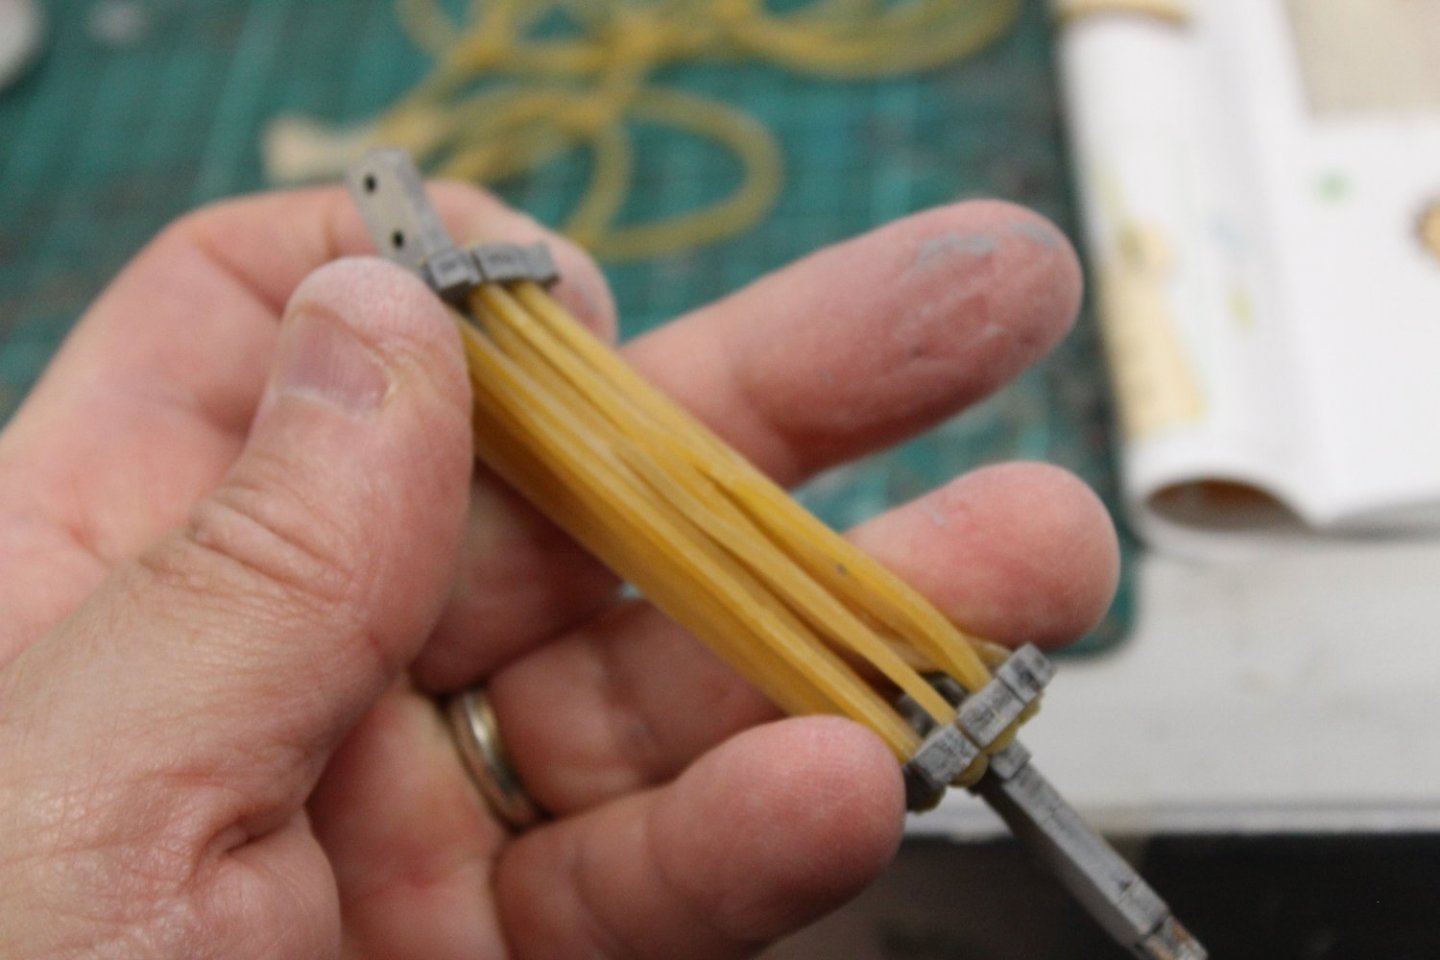
spare wheel on cab roof fitted and connected to the rubber bans tension unit

-
-
UGEARS’ journey began back in 2014 as a startup, in Kyiv, Ukraine. In 2015, UGEARS launched a hugely successful Kickstarter campaign, which yielded twenty times more than the original goal. UGEARS’ patented plywood joint design has proved to be popular among our models, as it makes them straightforward and simple to assemble, with no special tools required.
UGEARS is a Ukrainian company with its own manufacturing facilities found on the outskirts of Kyiv. All of the UGEARS range has had a considerable amount of time being designed, developed, and brought to life through the hard work of all us who work at UGEARS. Today, the UGEARS range is represented by 25 unique models, which are forever growing.
The UGEARS model kits have everything you need to assemble them. Our models are made from high quality, sustainably sourced wood – which are laser cut from plywood boards. All components are already cut, making them simple to detach from the boards. The instructions describe the construction of the model in a very detailed step-by-step process. They also come in full colour and in 10 different languages.UGEARS Models in United Kingdom
Good evening everyone
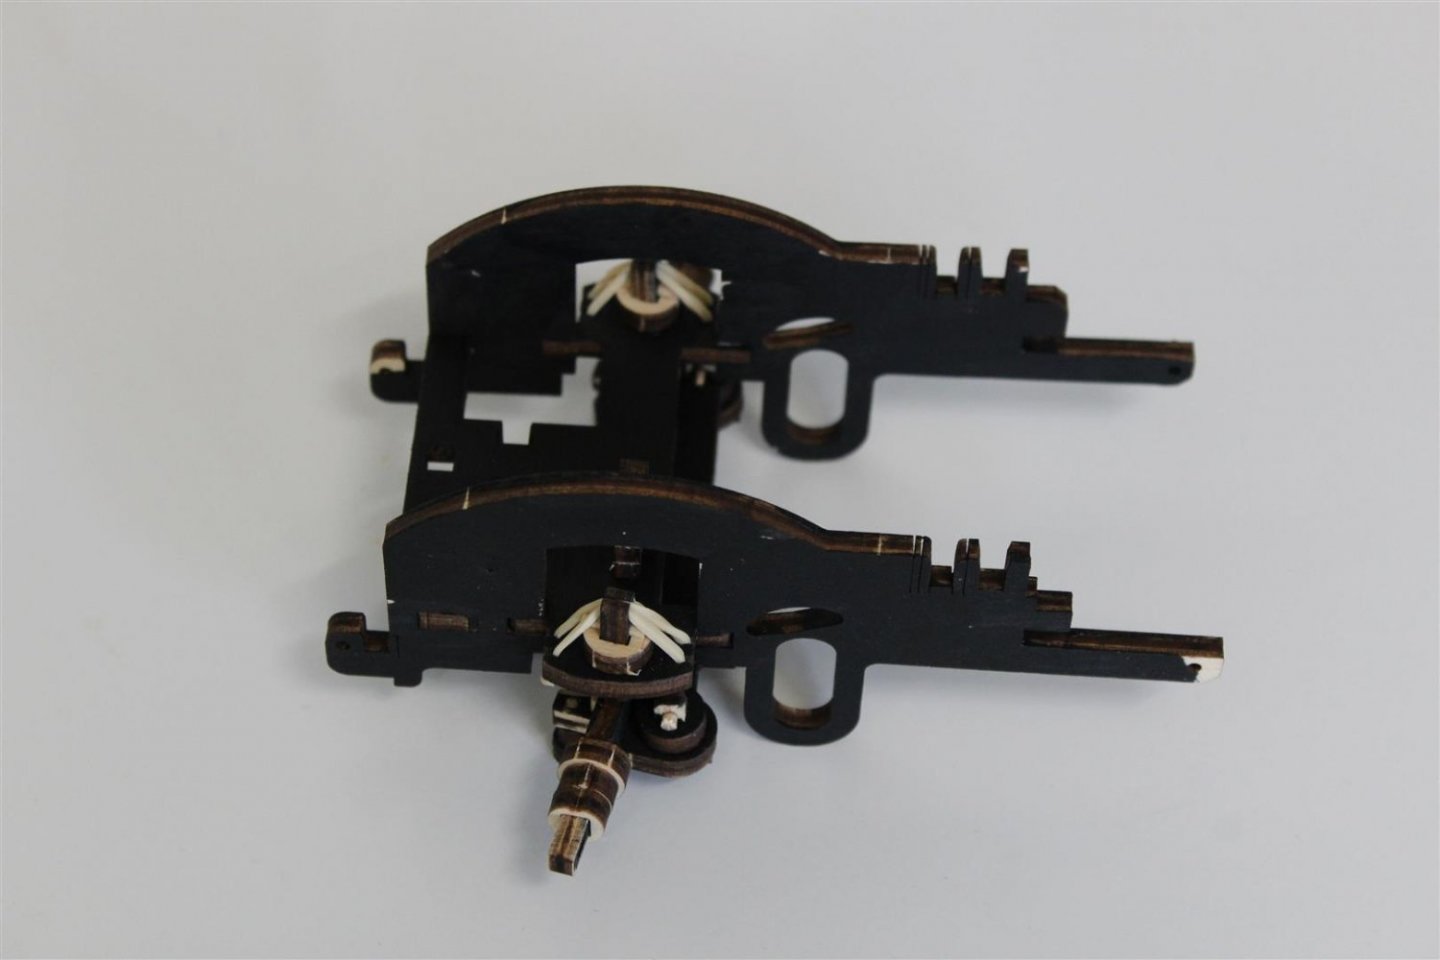
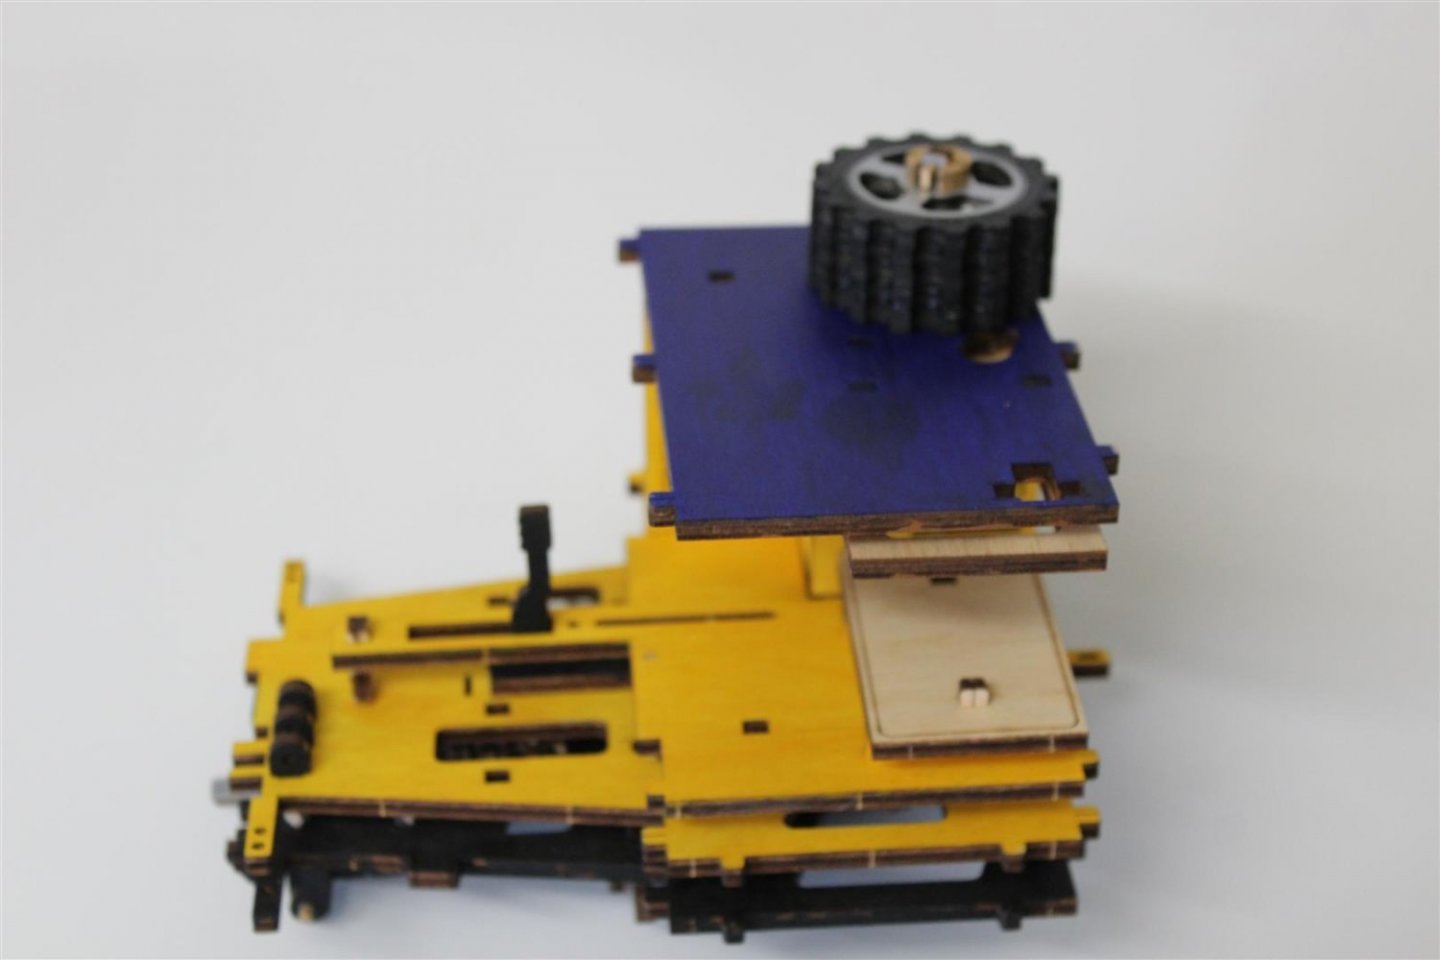
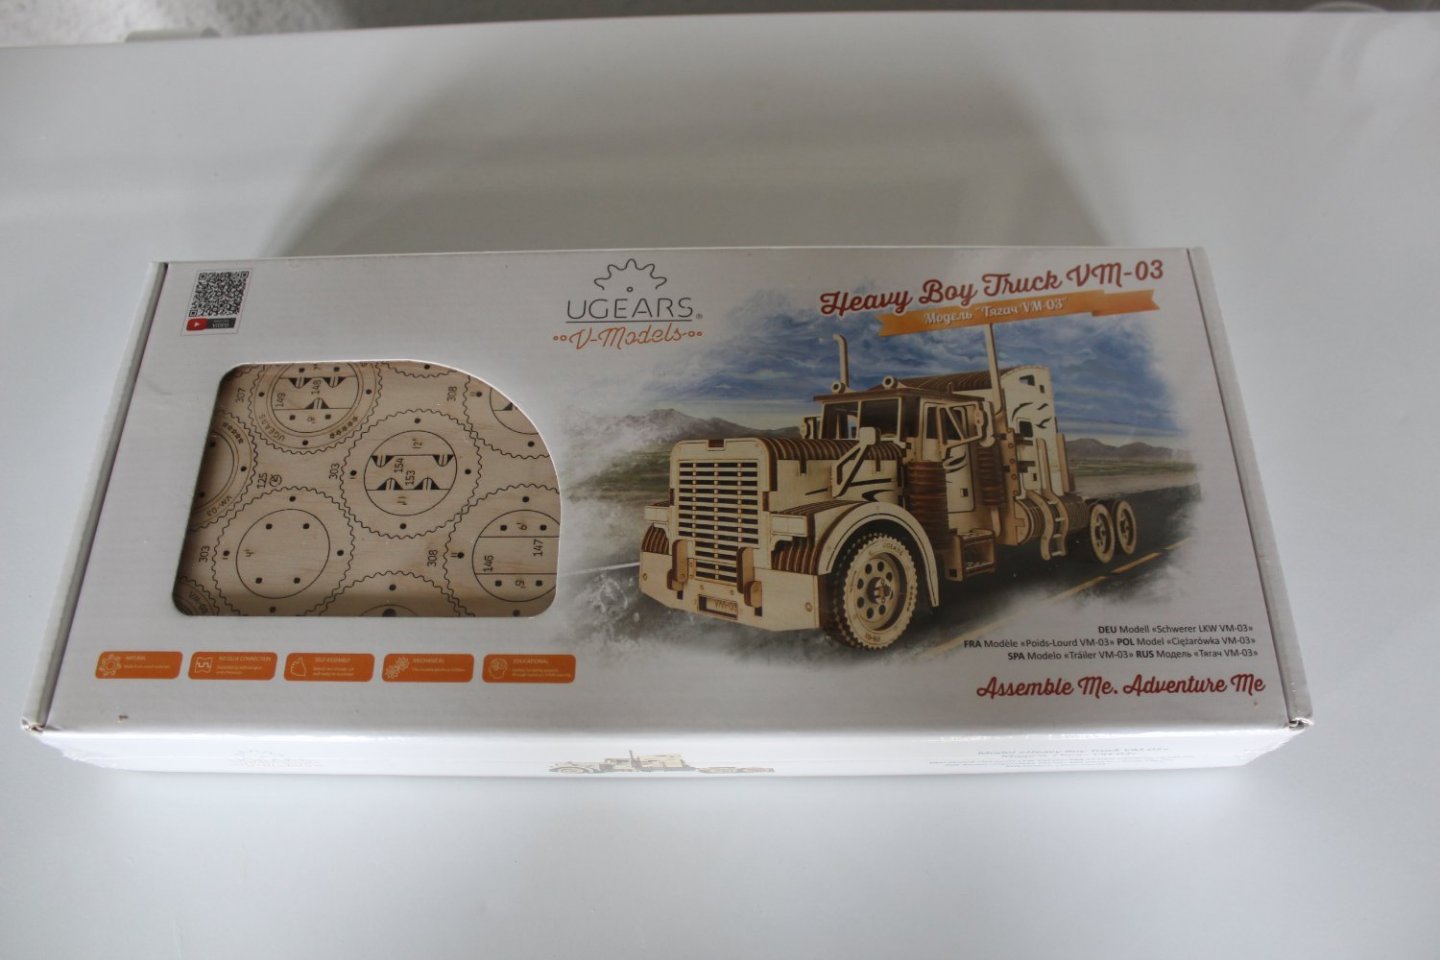
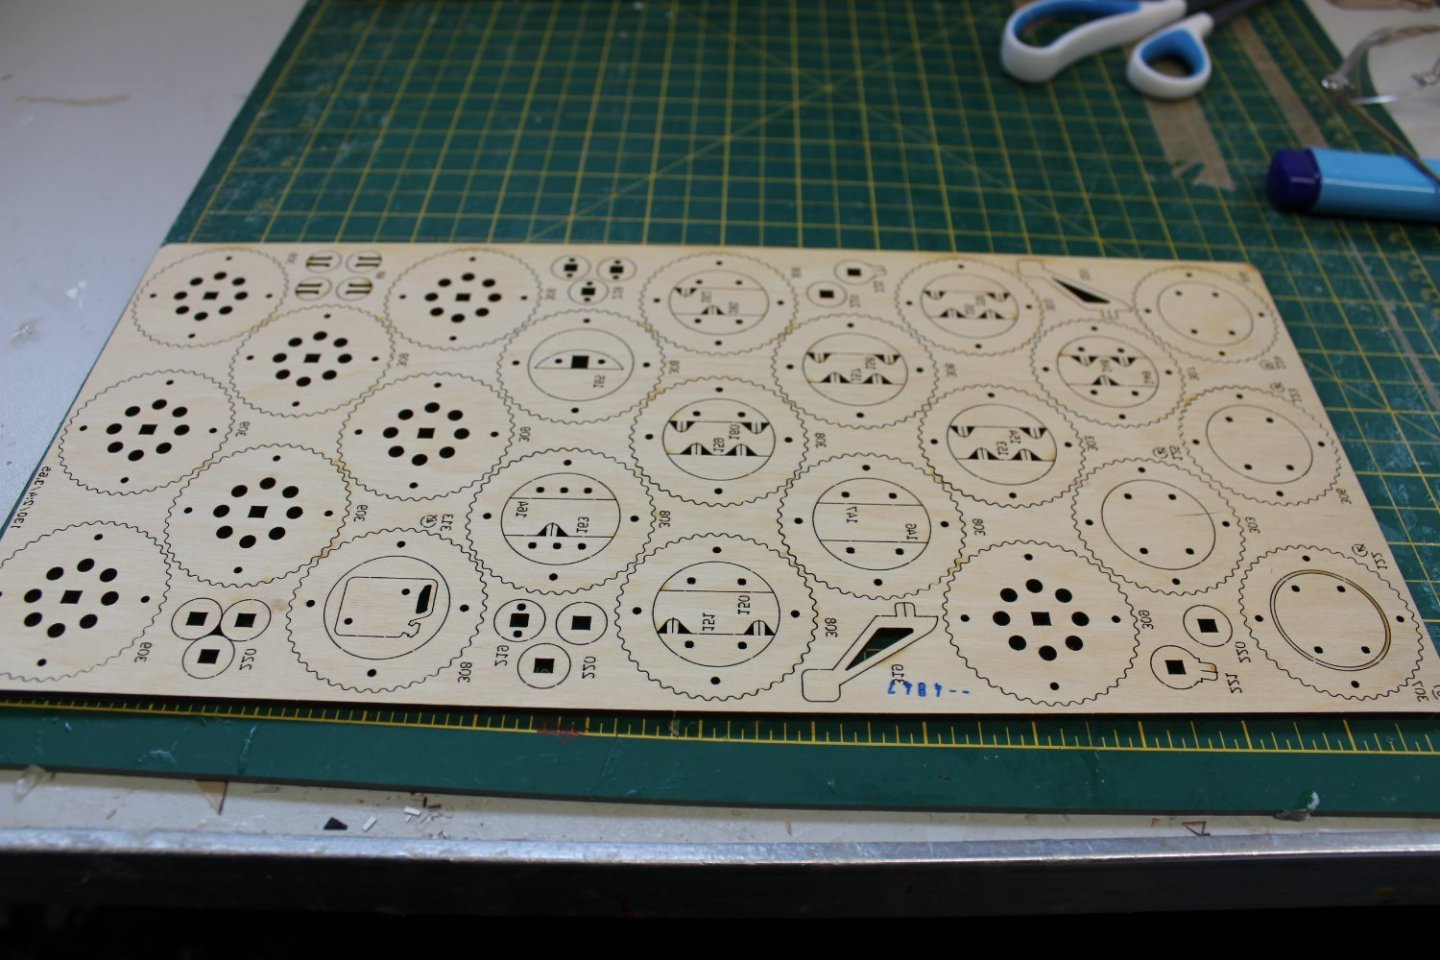
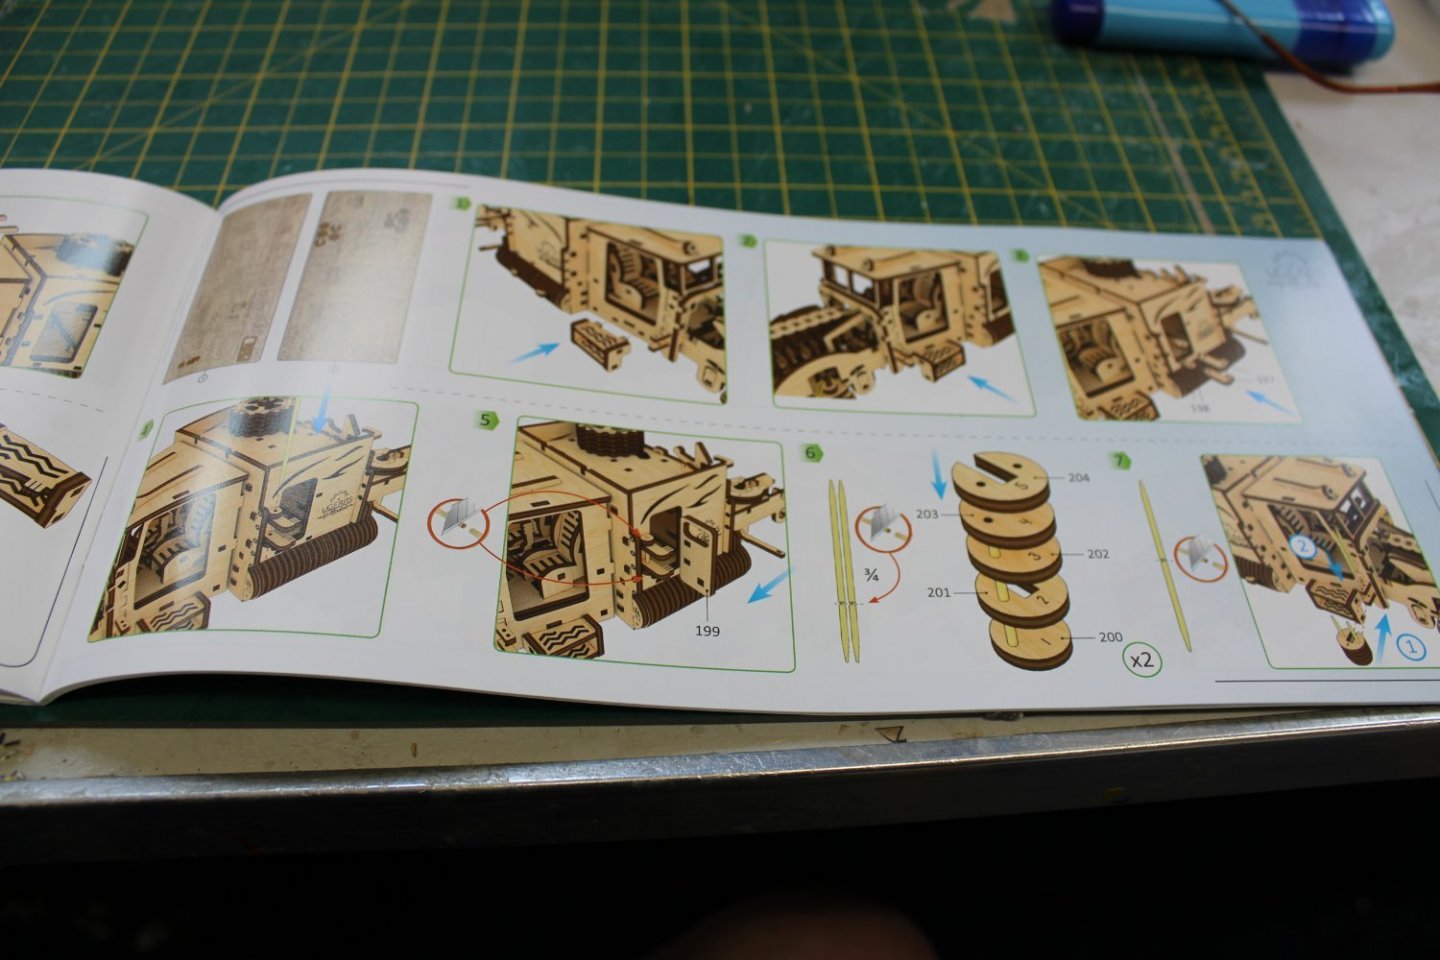
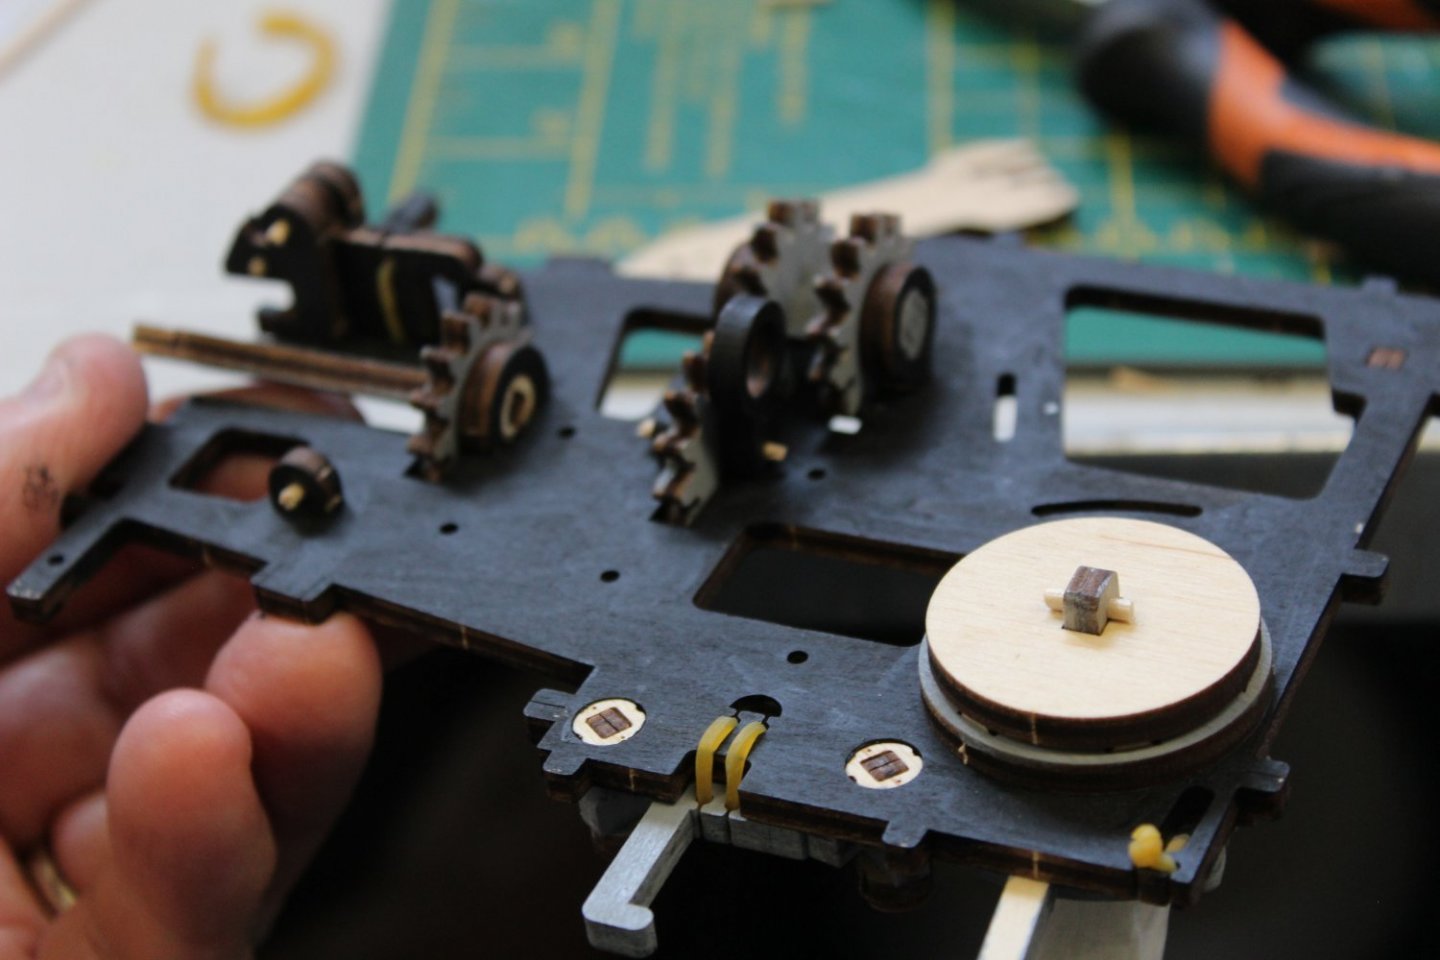
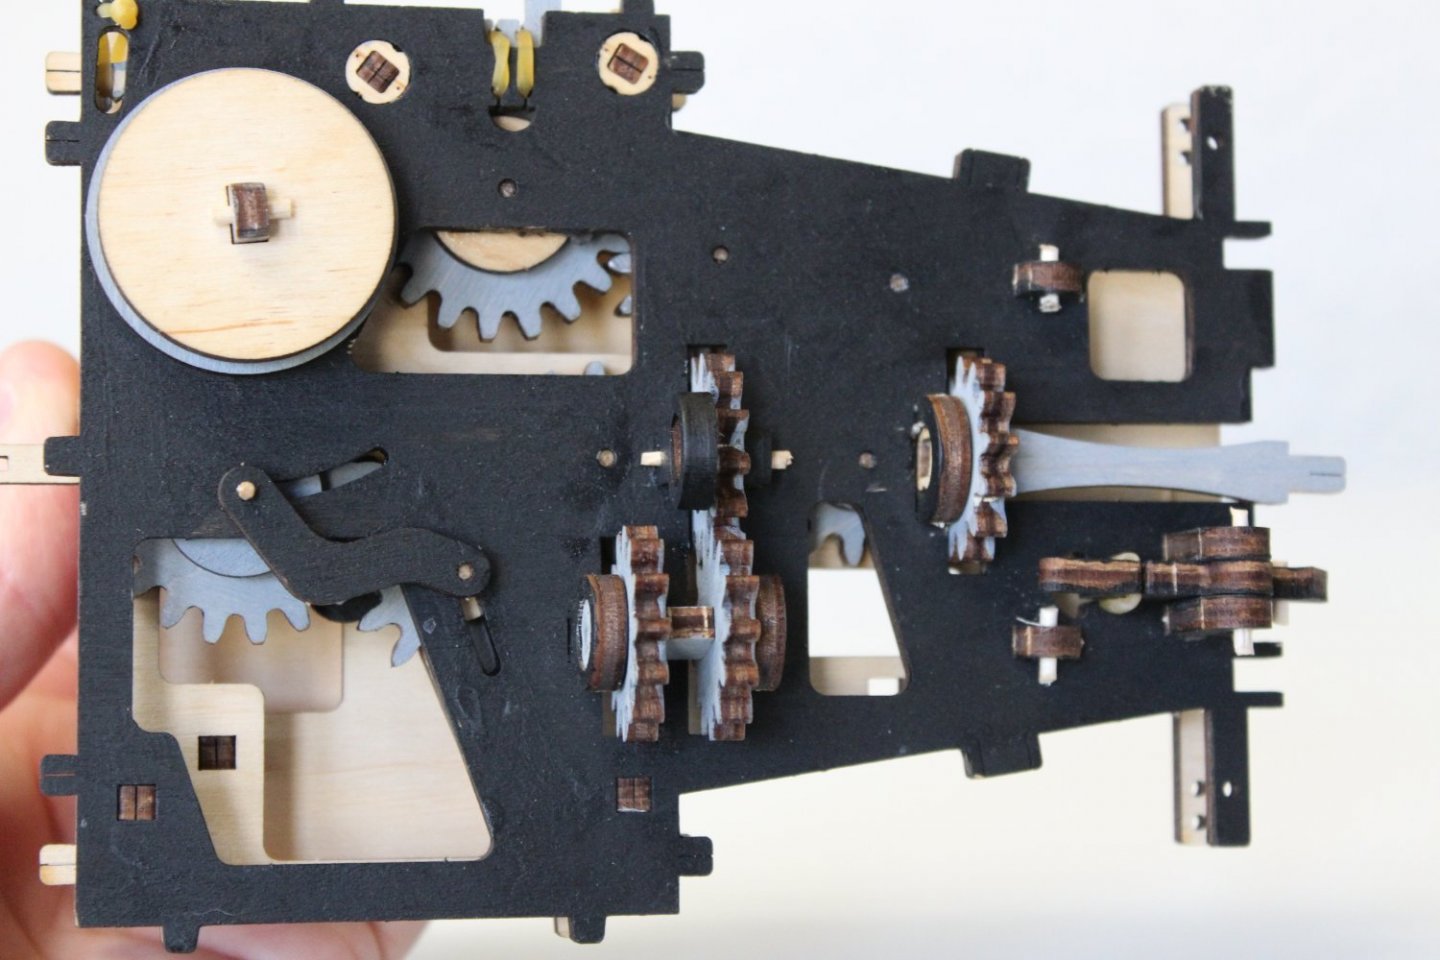
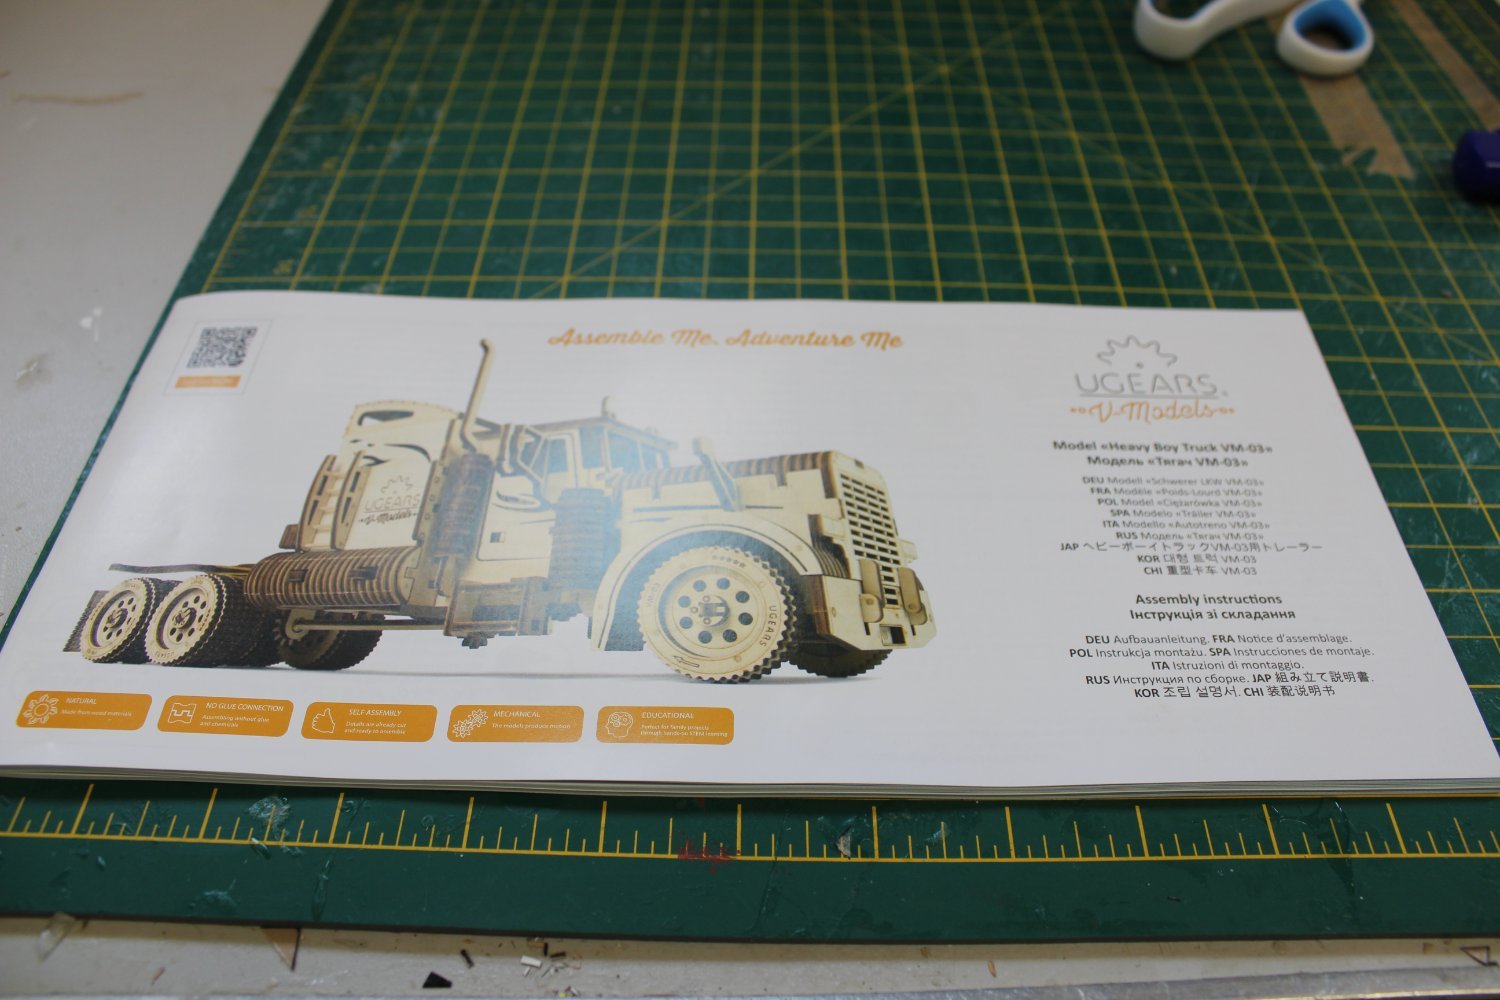
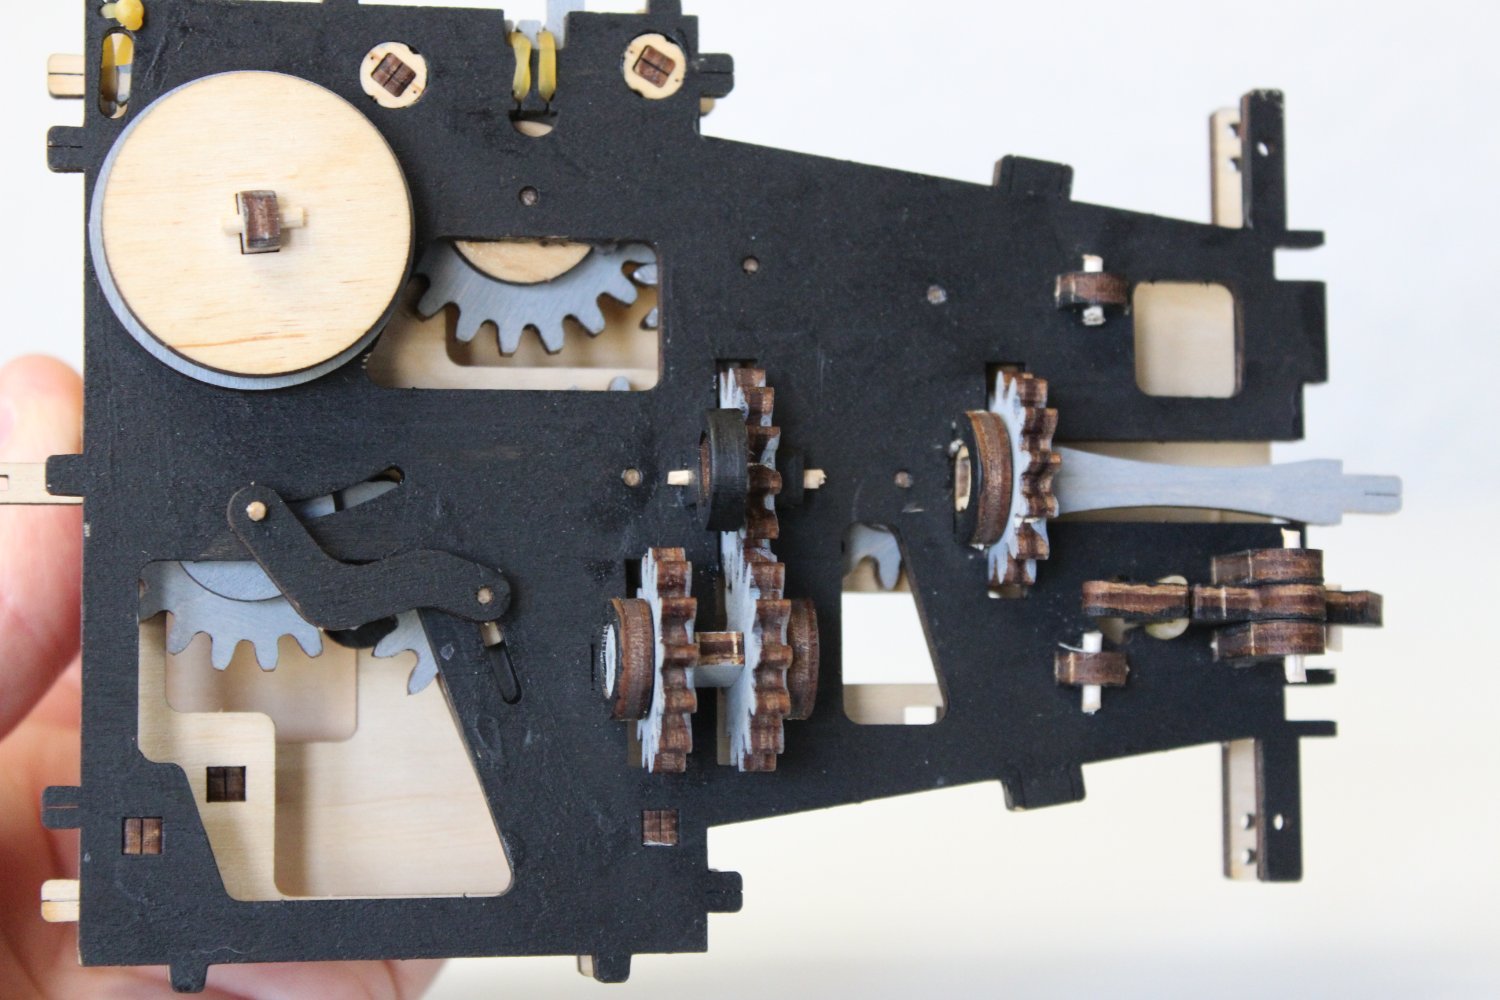
heavy truck day 2
something different from me as a break from the SD14
i know nothing about truck, and possibly less about ships, but this kit looked a nice kit to put together
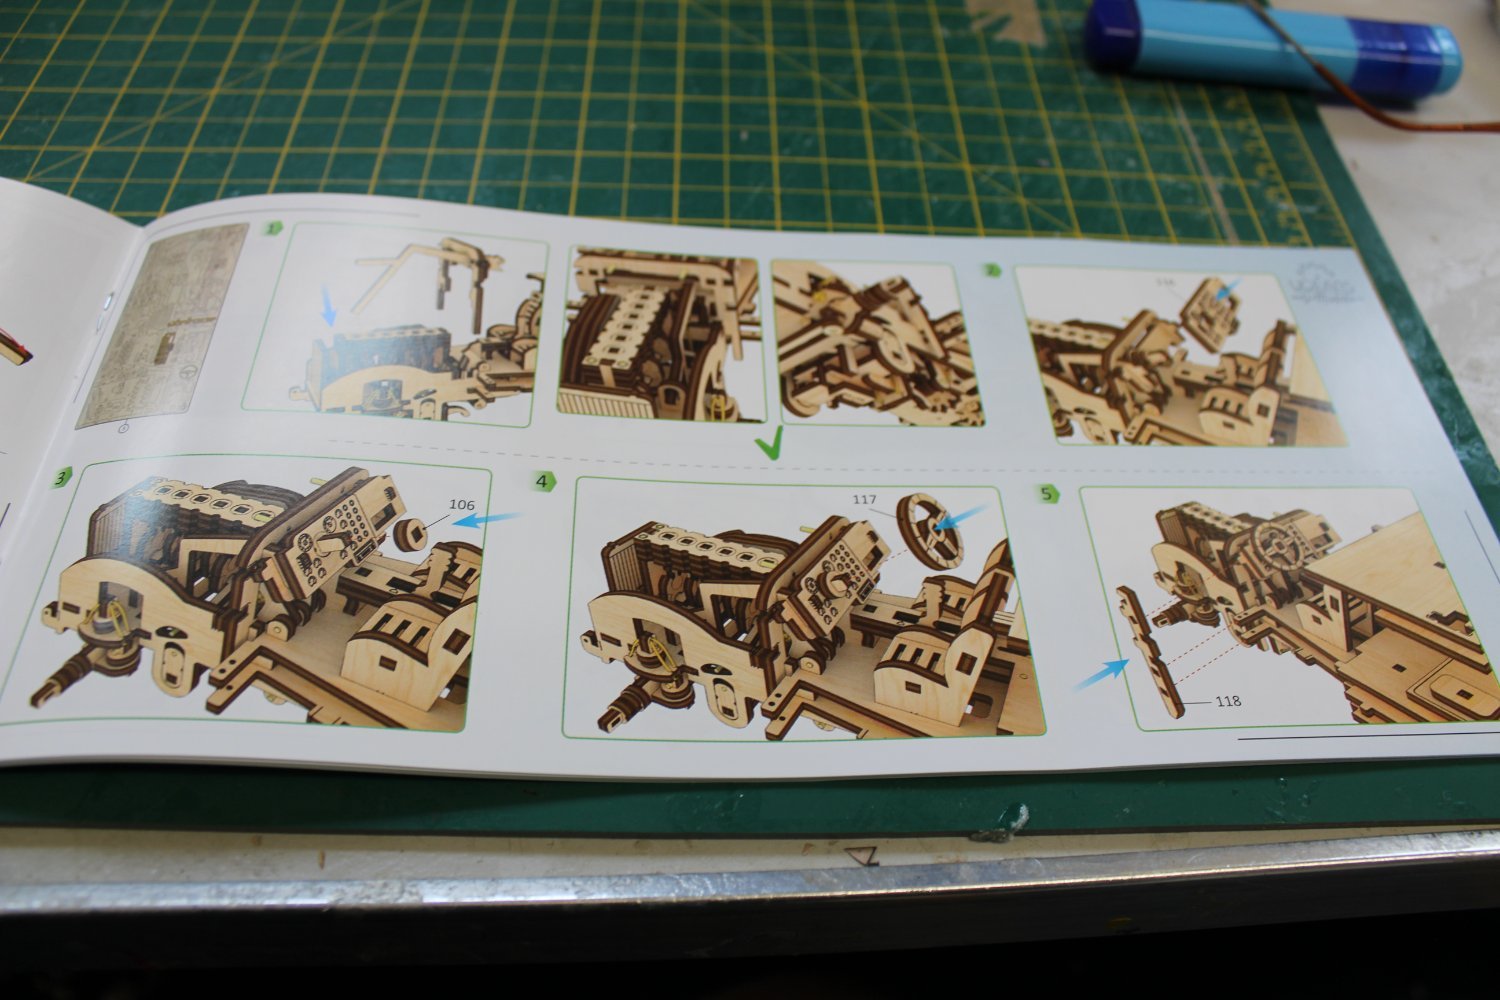
its not hard to assemble but bits to get right are, it takes quite a time to get the gears to mesh properly, but so satisfying when it does work
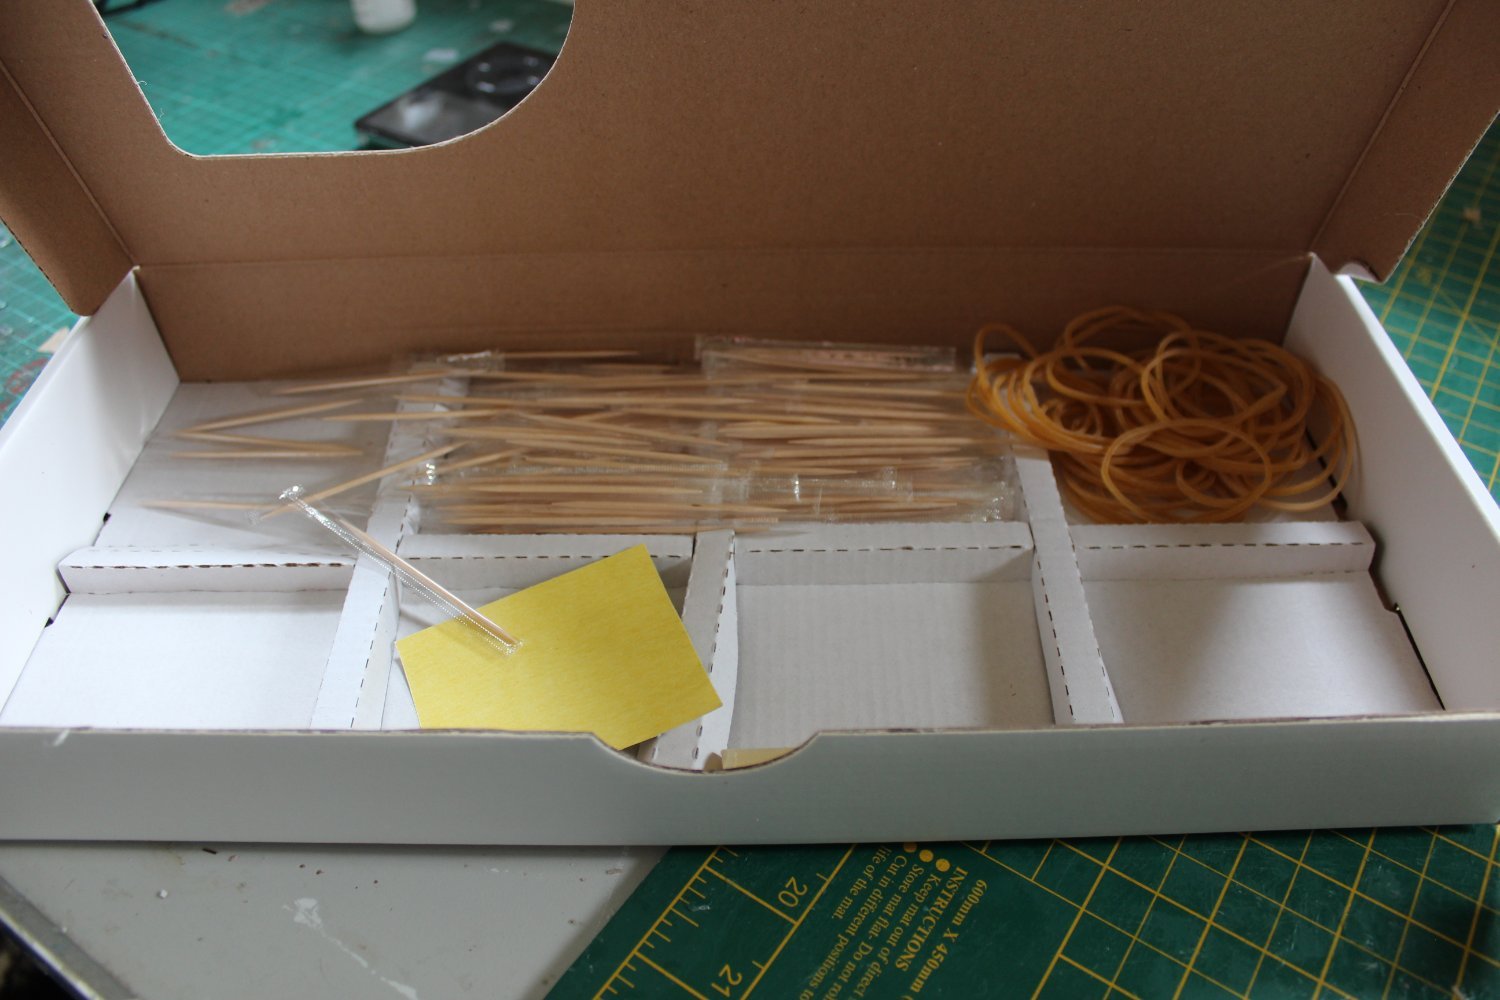
each kit they produce get give a build time to put together (10 hours on this one) 3 difficulty level this being a 3 and number of parts (541) on this one
below the cab is all the running gear which gets its energy from the rubber bands which are tensioned via the spare wheel on the cab roof
lol i have already put in more than 10 hours but rather than leaving the plain wood my will be painted


- mtaylor, GrandpaPhil, Canute and 6 others
-
 9
9
-
lm going to enjoy building mine. counting down the days
- thibaultron, mtaylor, hollowneck and 3 others
-
6
-
17 minutes ago, hollowneck said:
True.
Finding ships plans in the "updated" site has become a struggle and there are a number of sad MSW members who've expressed frustration about this new reality- including myself.
However, I was searching "ships paintings" just today and had surprisingly good results - albeit a slog as their host server(s) are obviously over-burdened and it was very slow; worst case, the RMG site breaks as is the case this evening, at this very moment as I enter this post. The site currently is not functioning. I suspect the part of this problem is the massive amount of high-resolution content that the servers struggle to deliver to one's browser.
Perhaps there's a dreadful Summer heat wave in the U.K.? Or, perhaps they were hacked by an angry FSB? Hot, in' it?
Yeah im sure it is the British Summer heatwave we are suffering, 18 degs here yesterday LOL
-
-
-
After reading naff comments about the release of the Yamato i just found this
1:200 WWII Japanese Navy Mogami Heavy Cruiser Model Kit – 3D-WILD
-
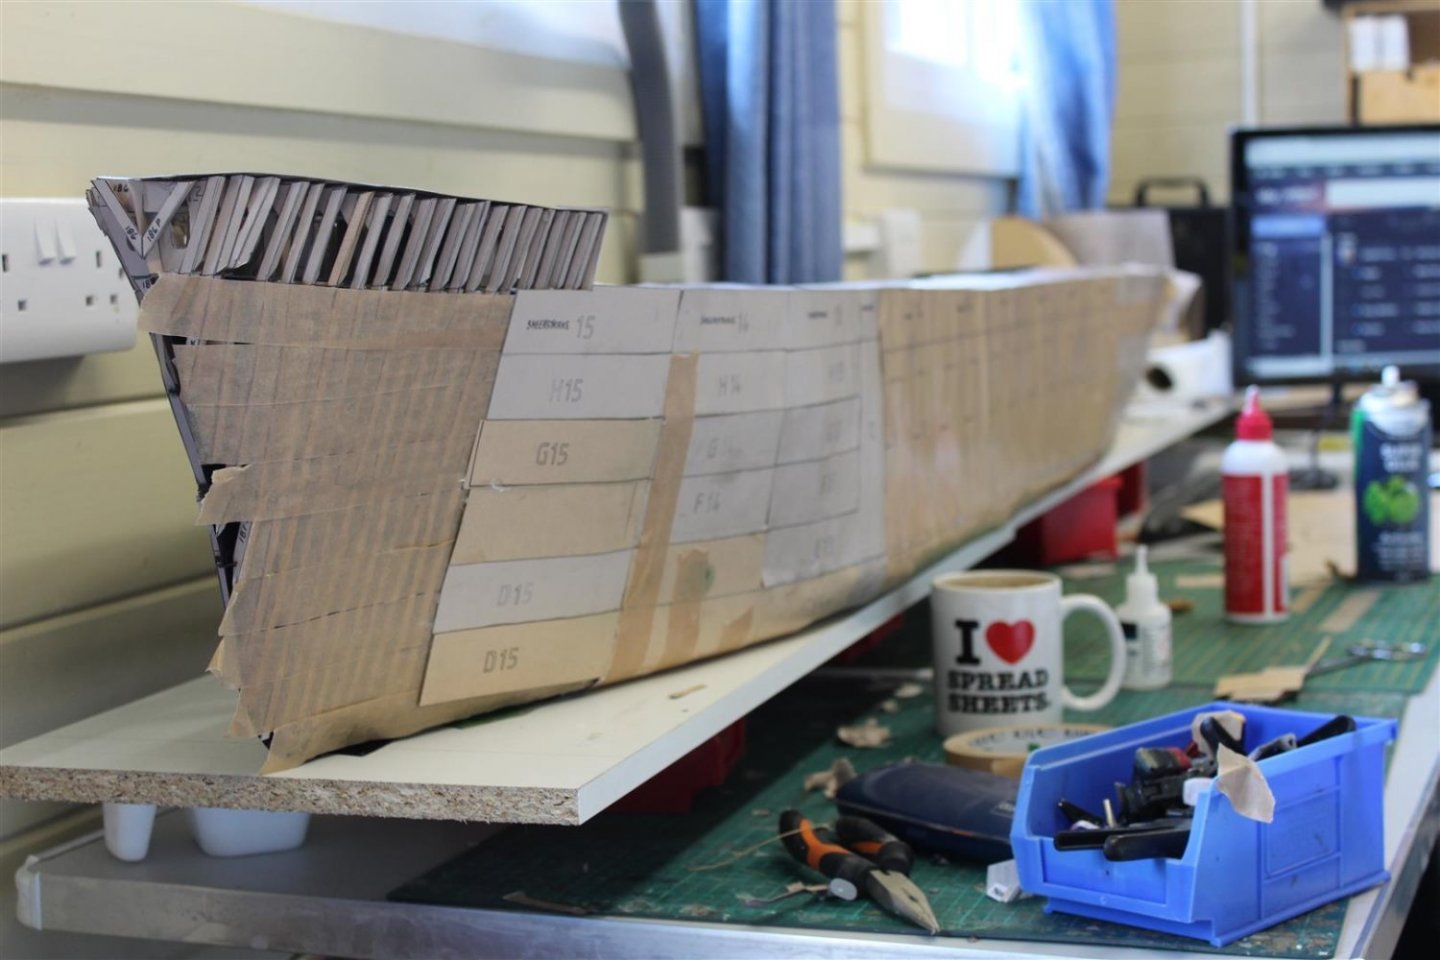
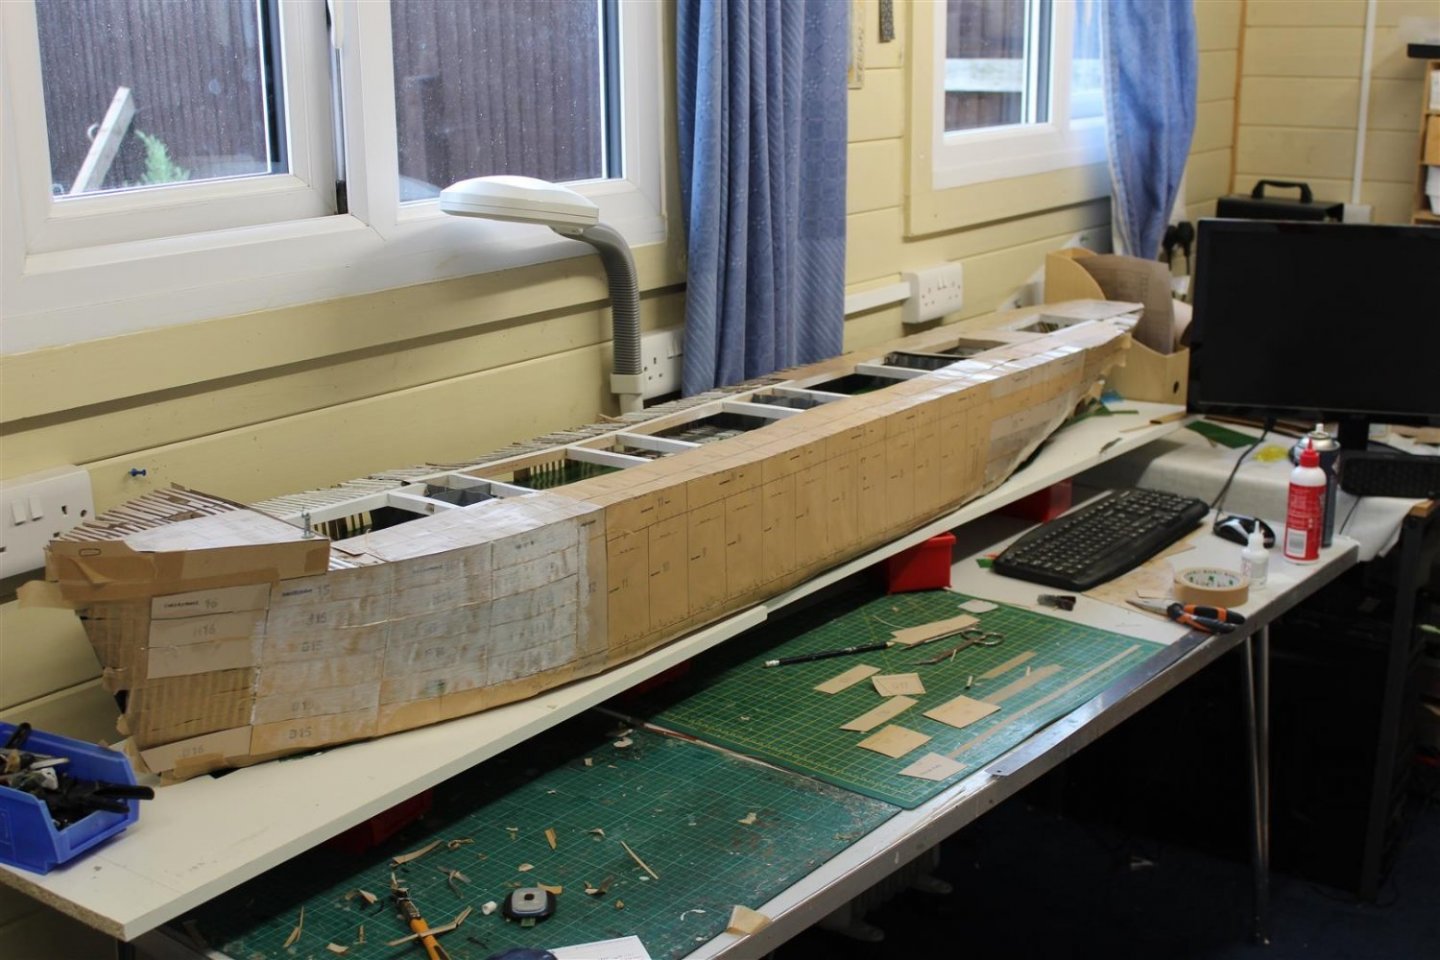
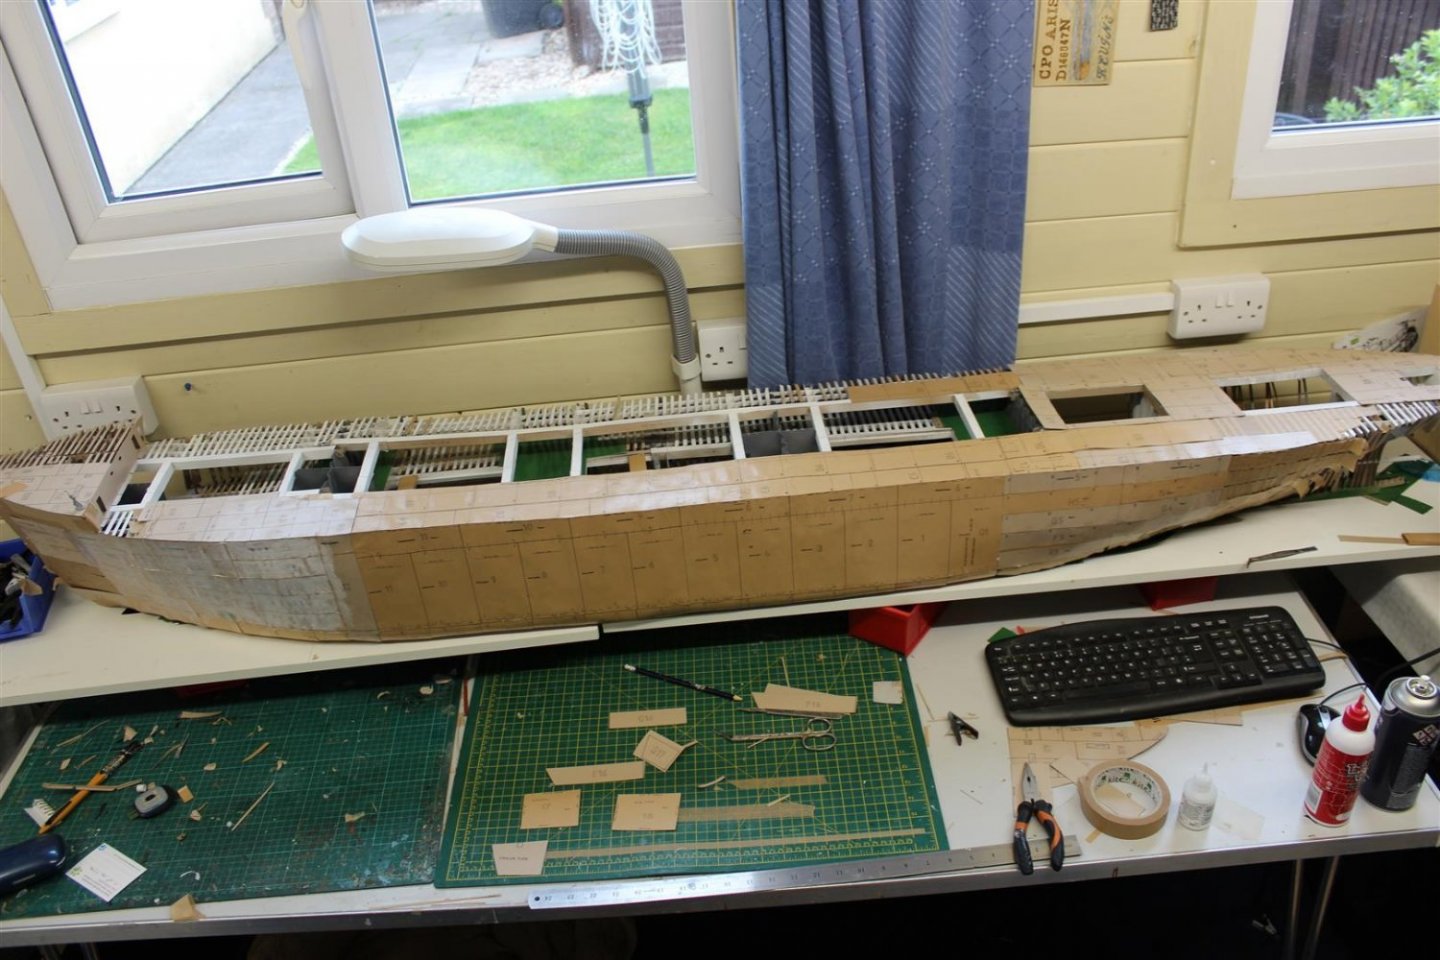
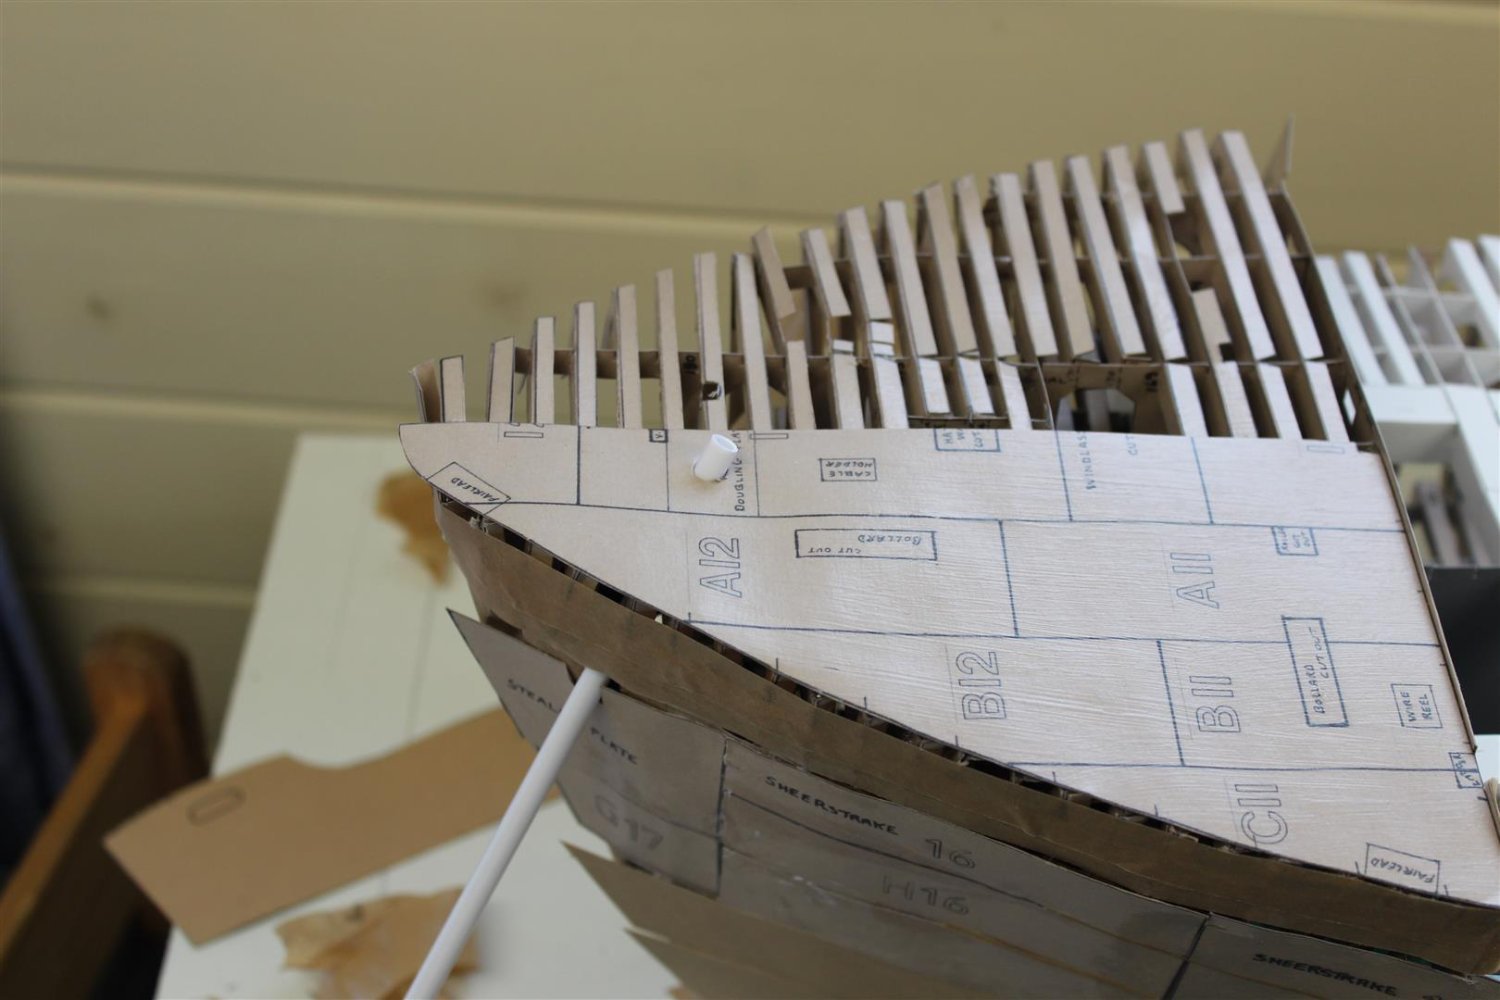
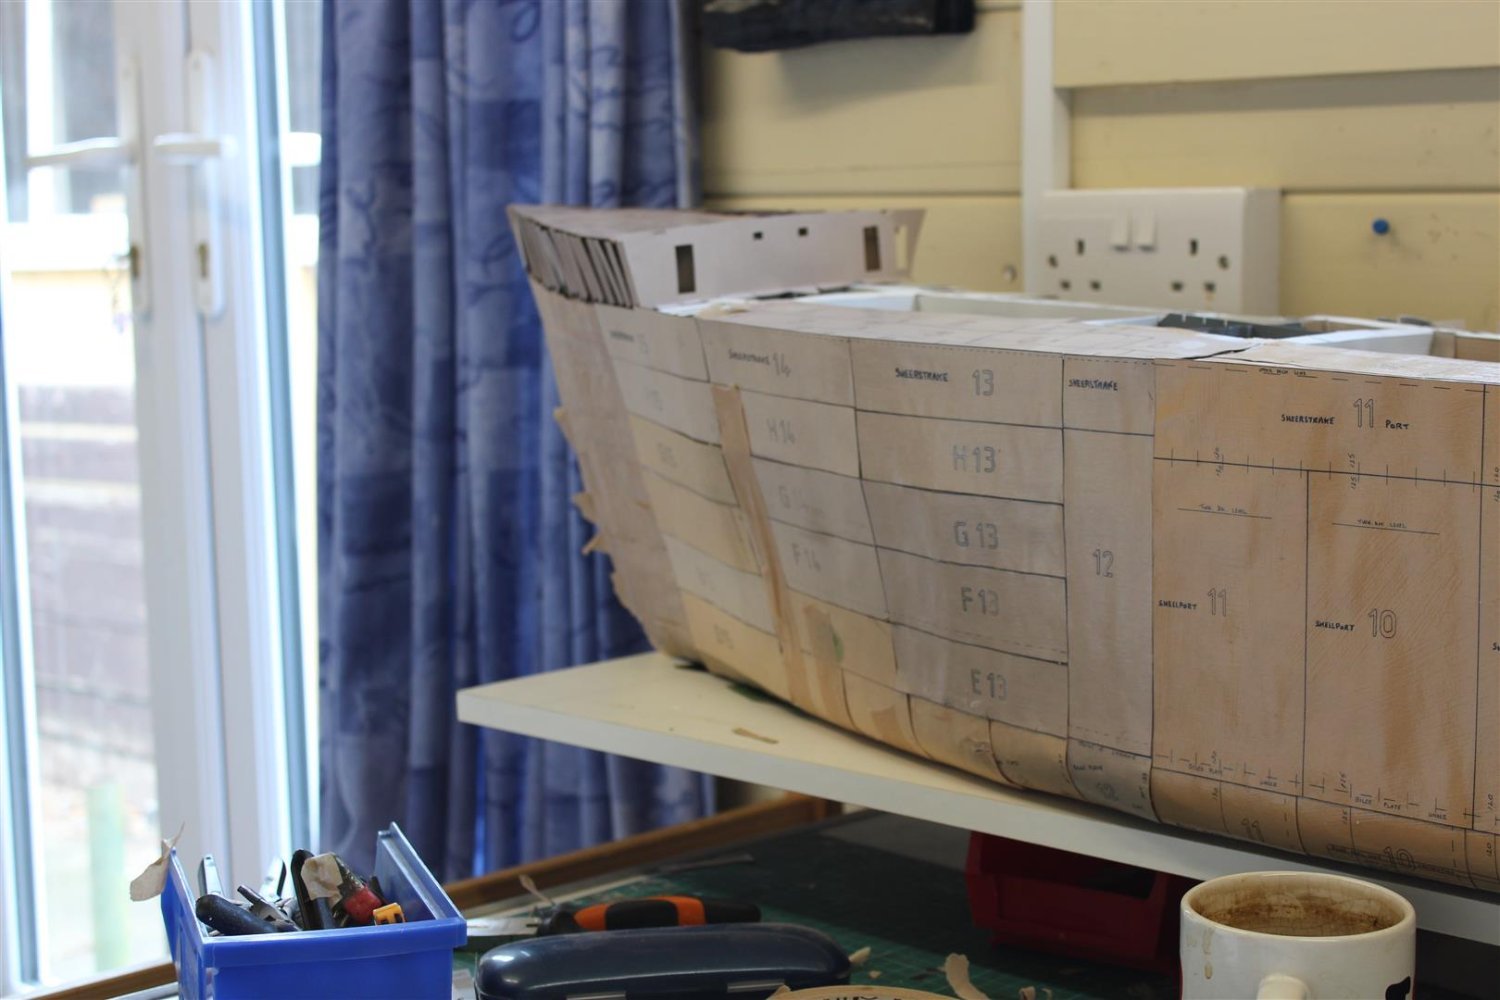
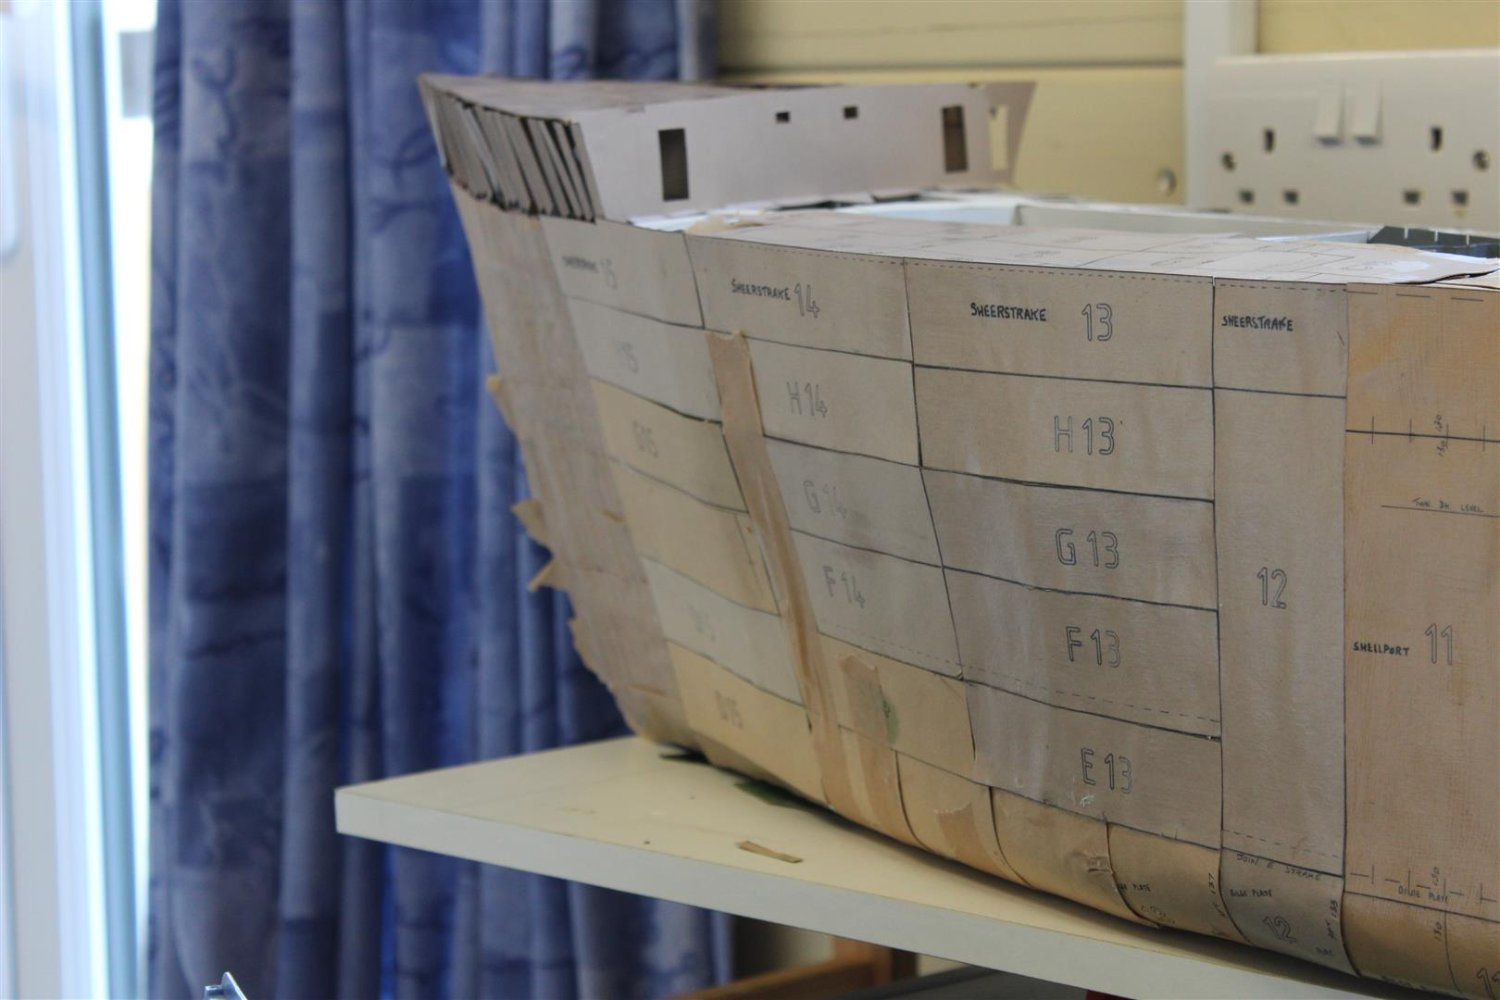
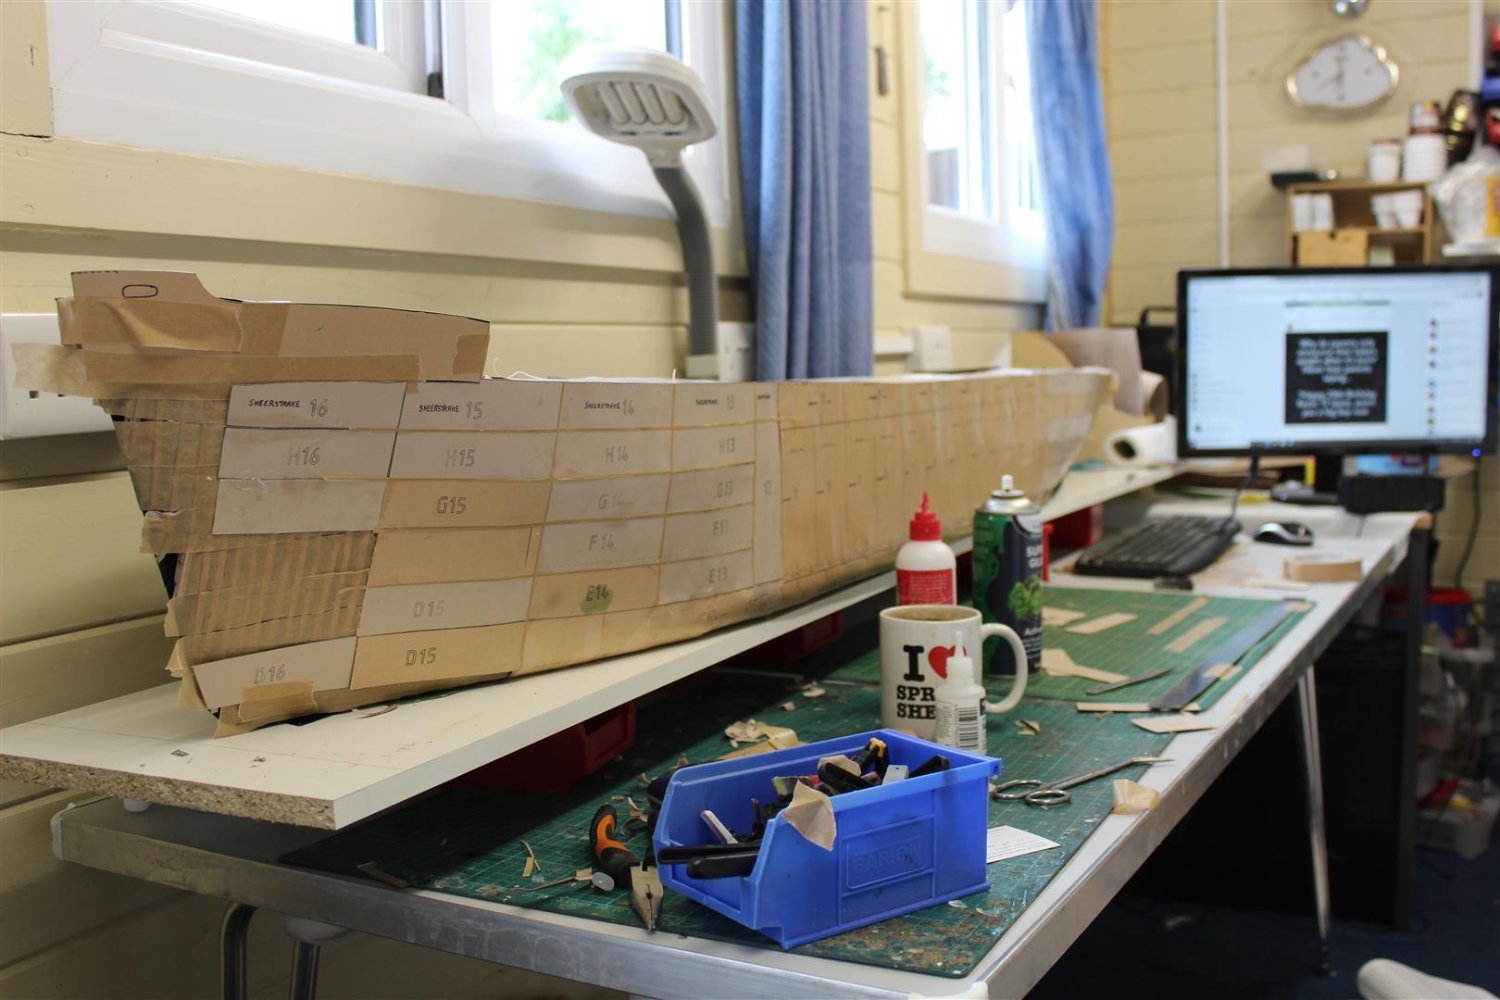
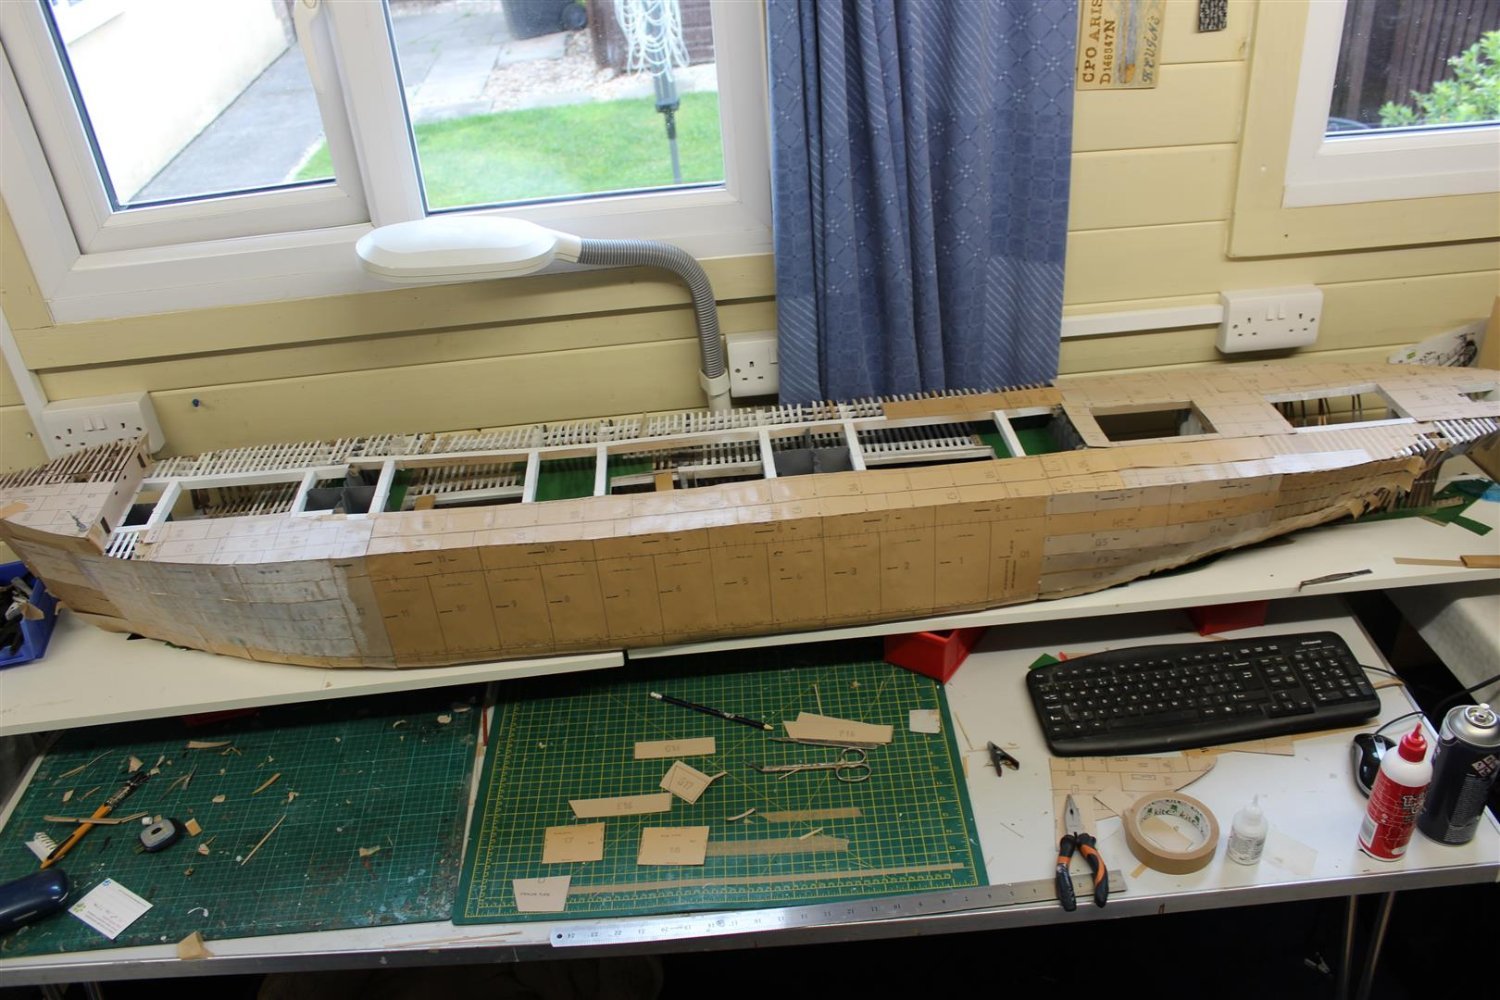
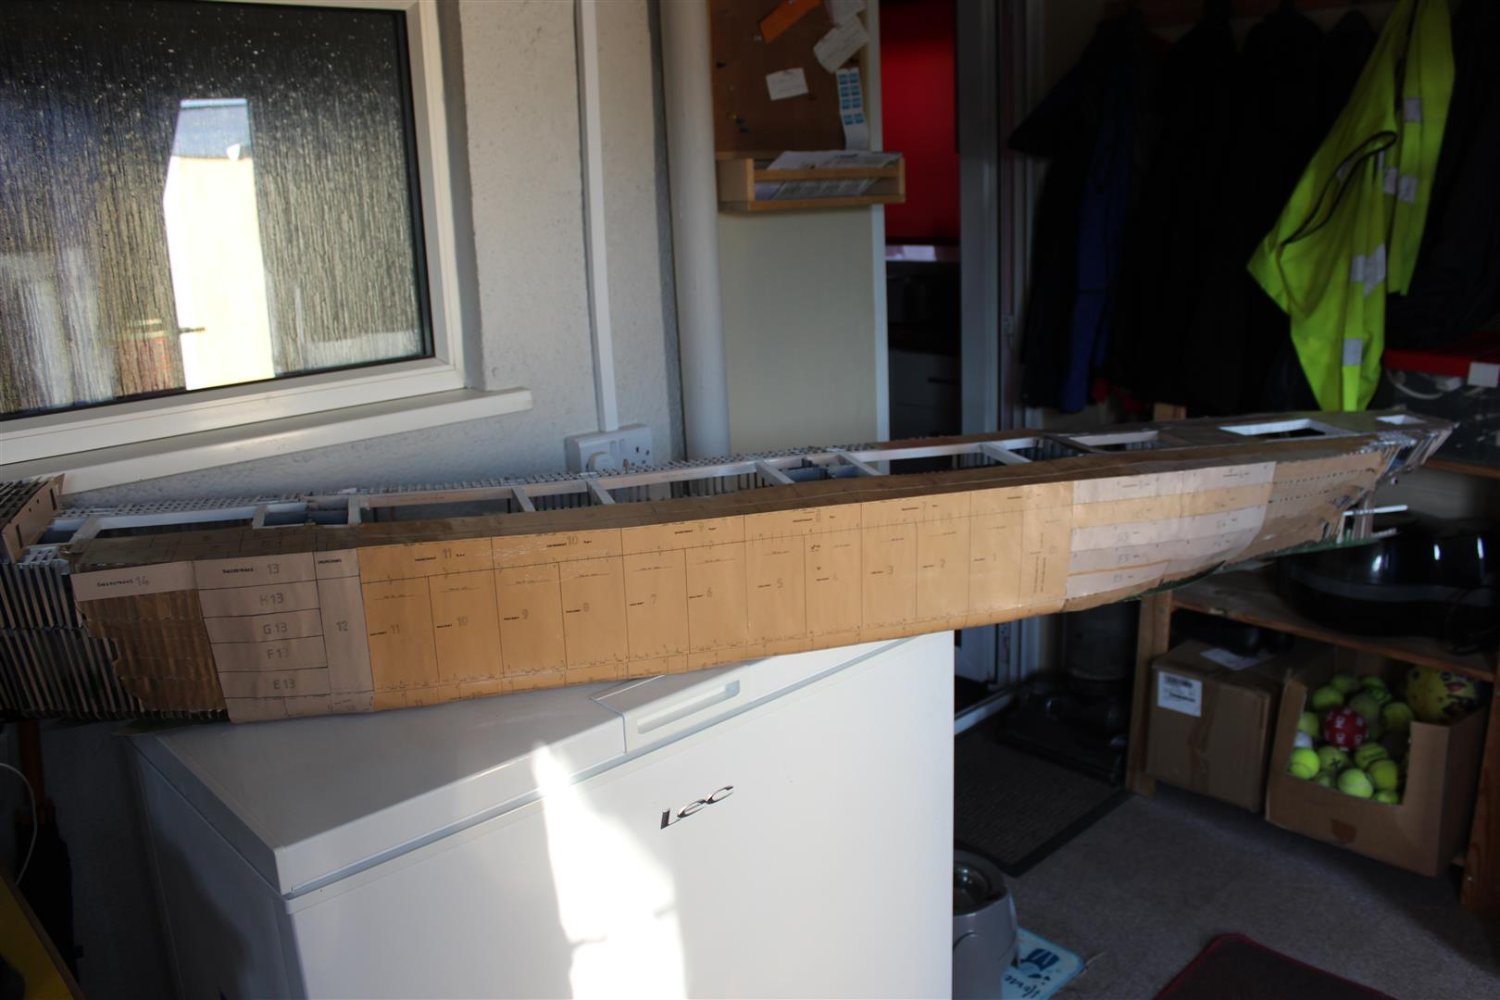
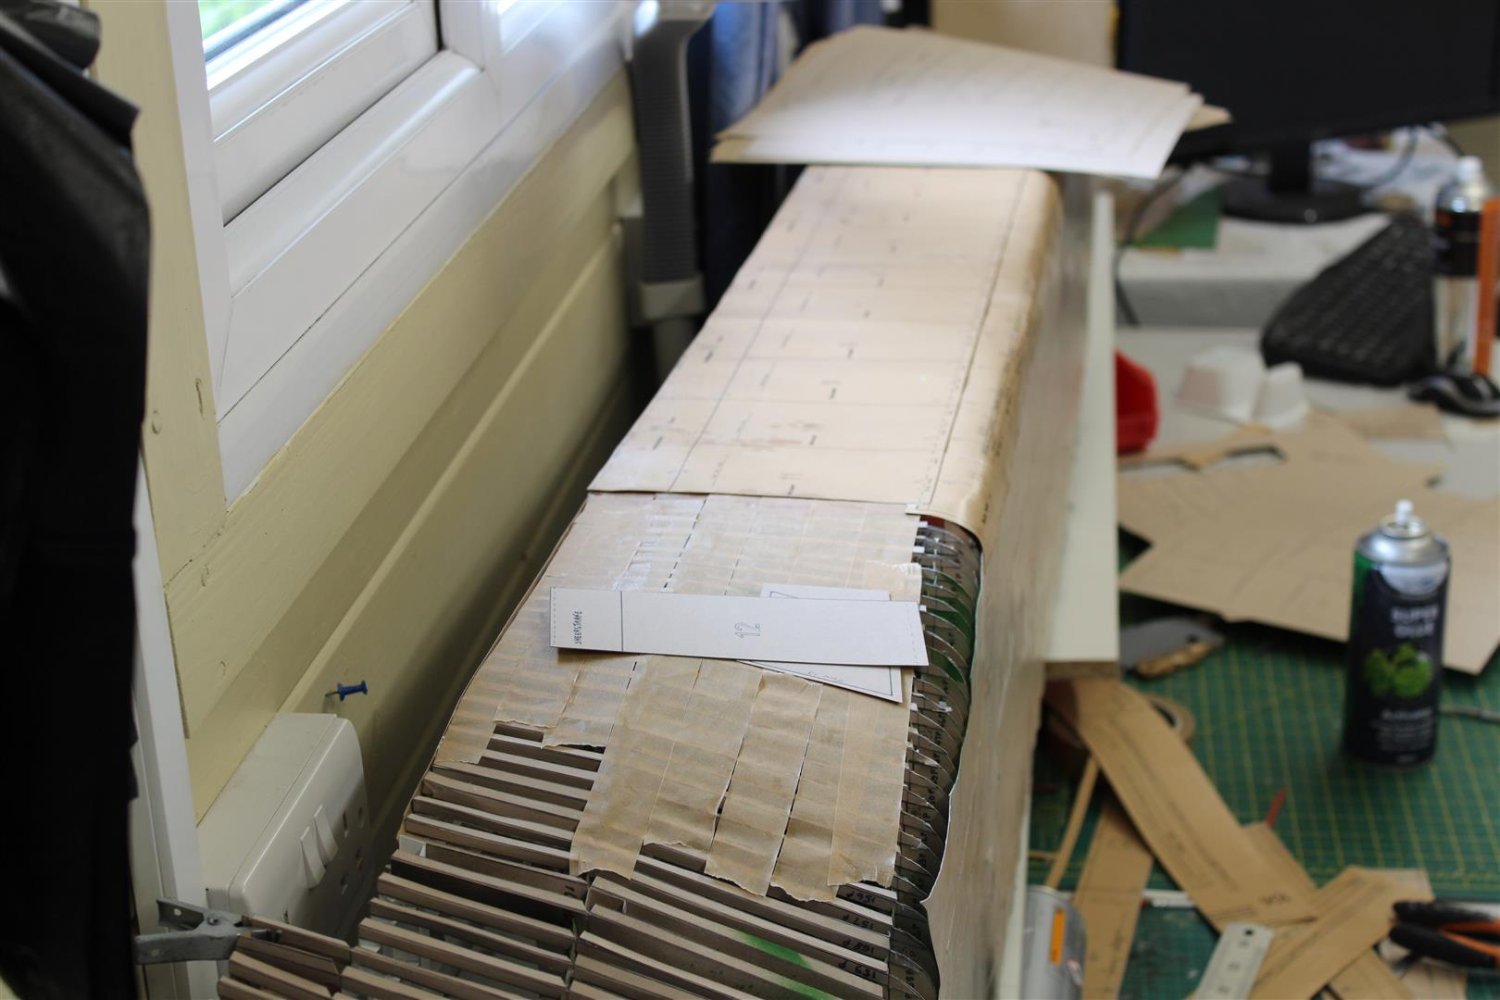
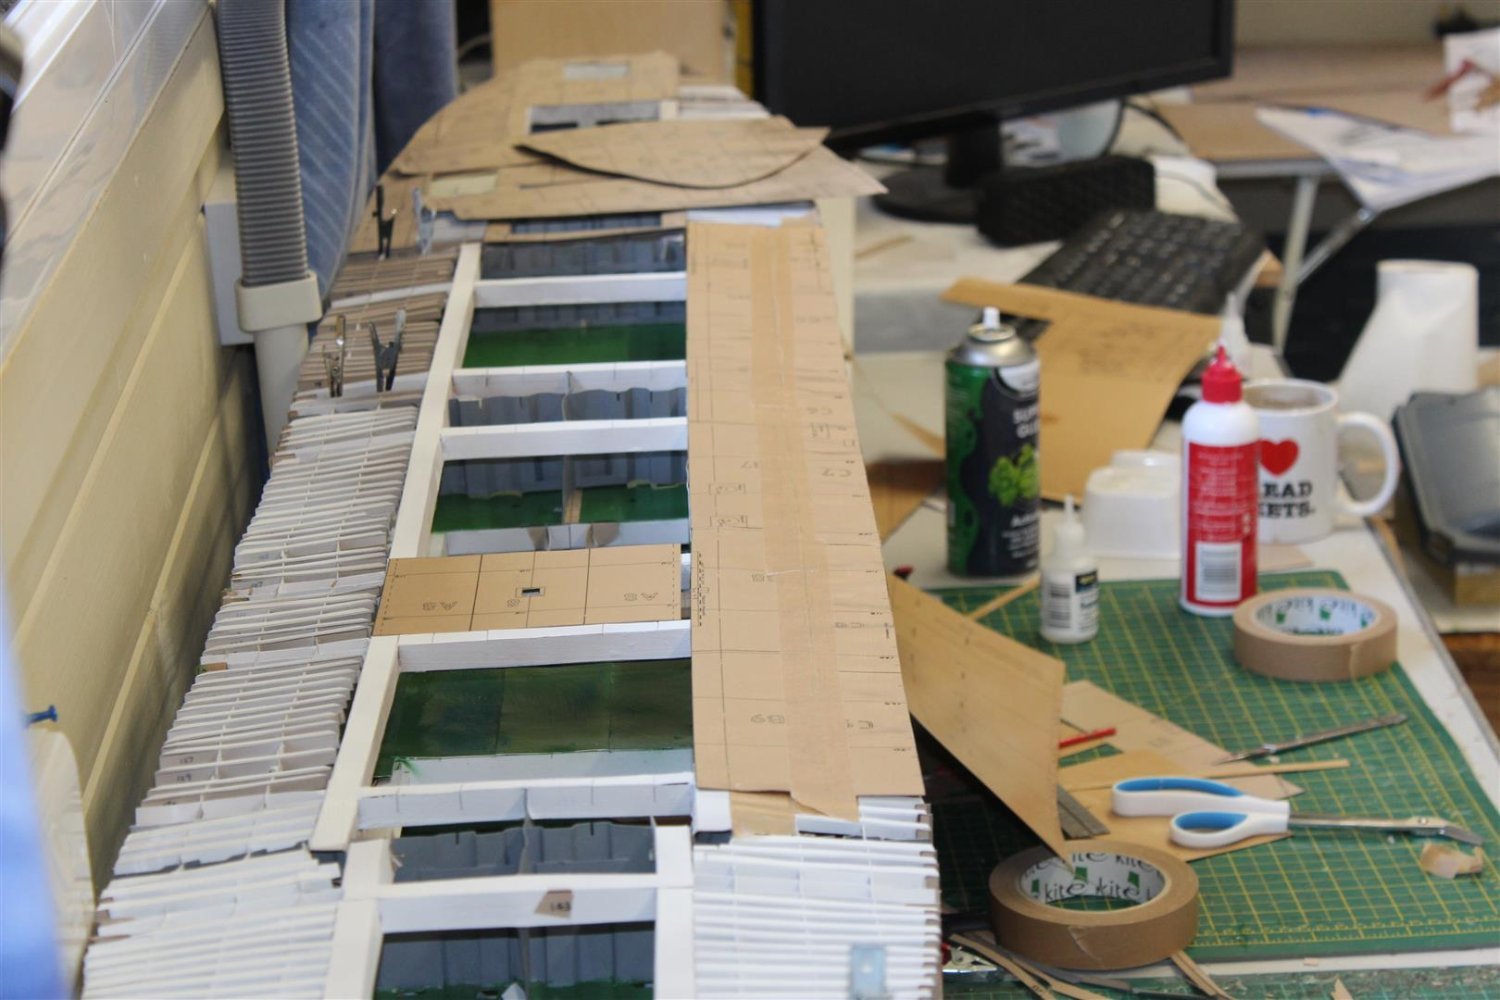
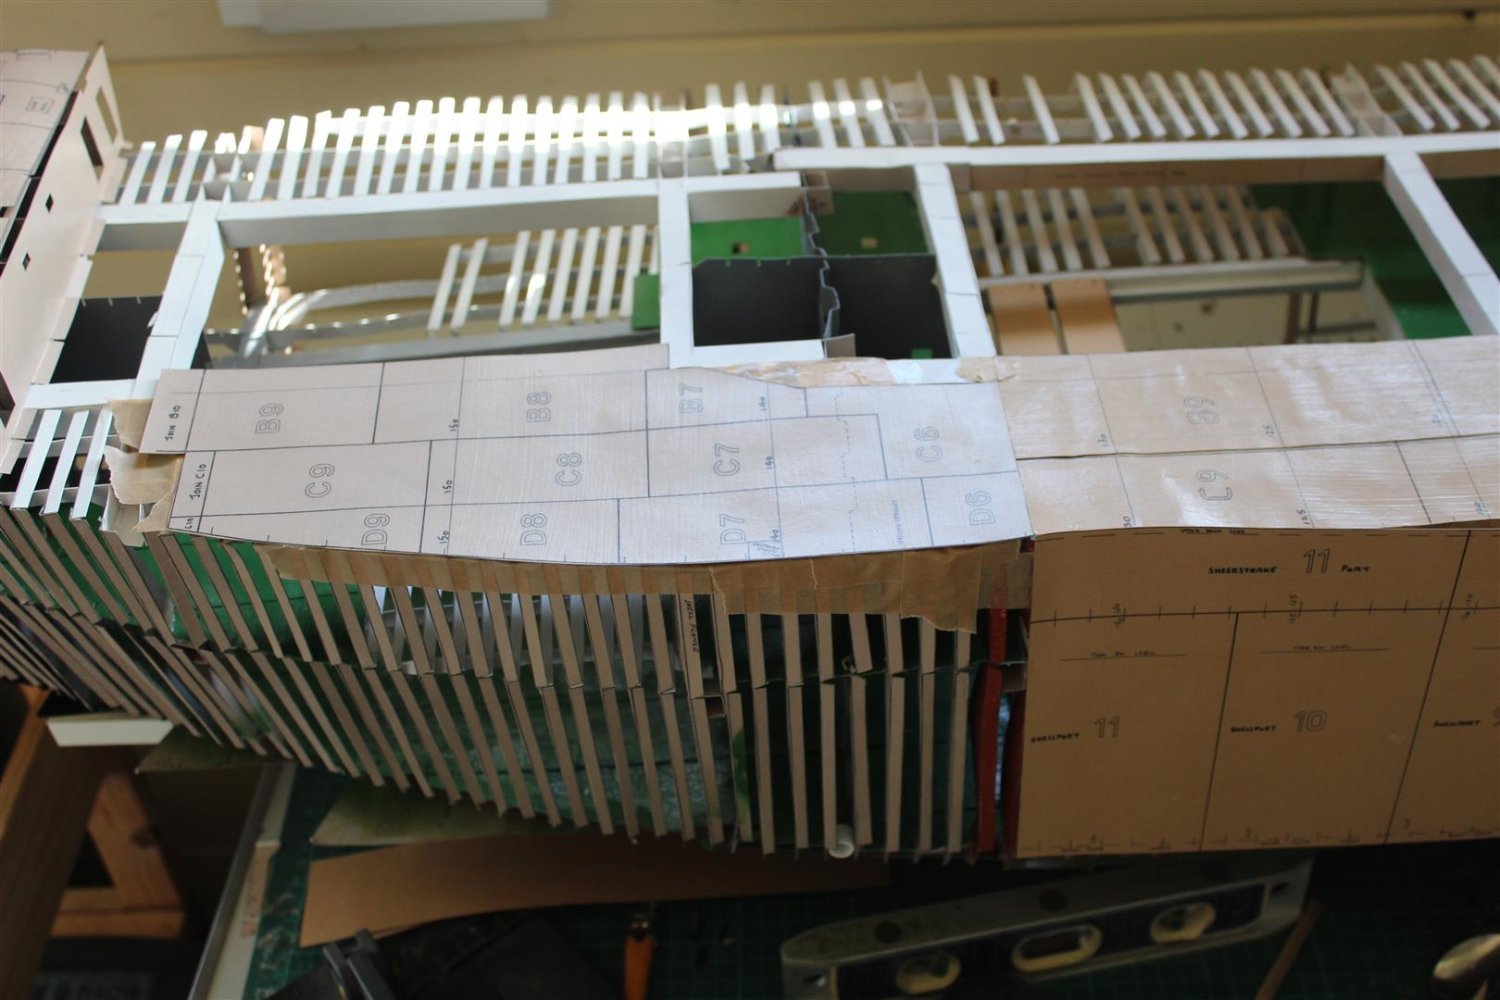
good evening everyone
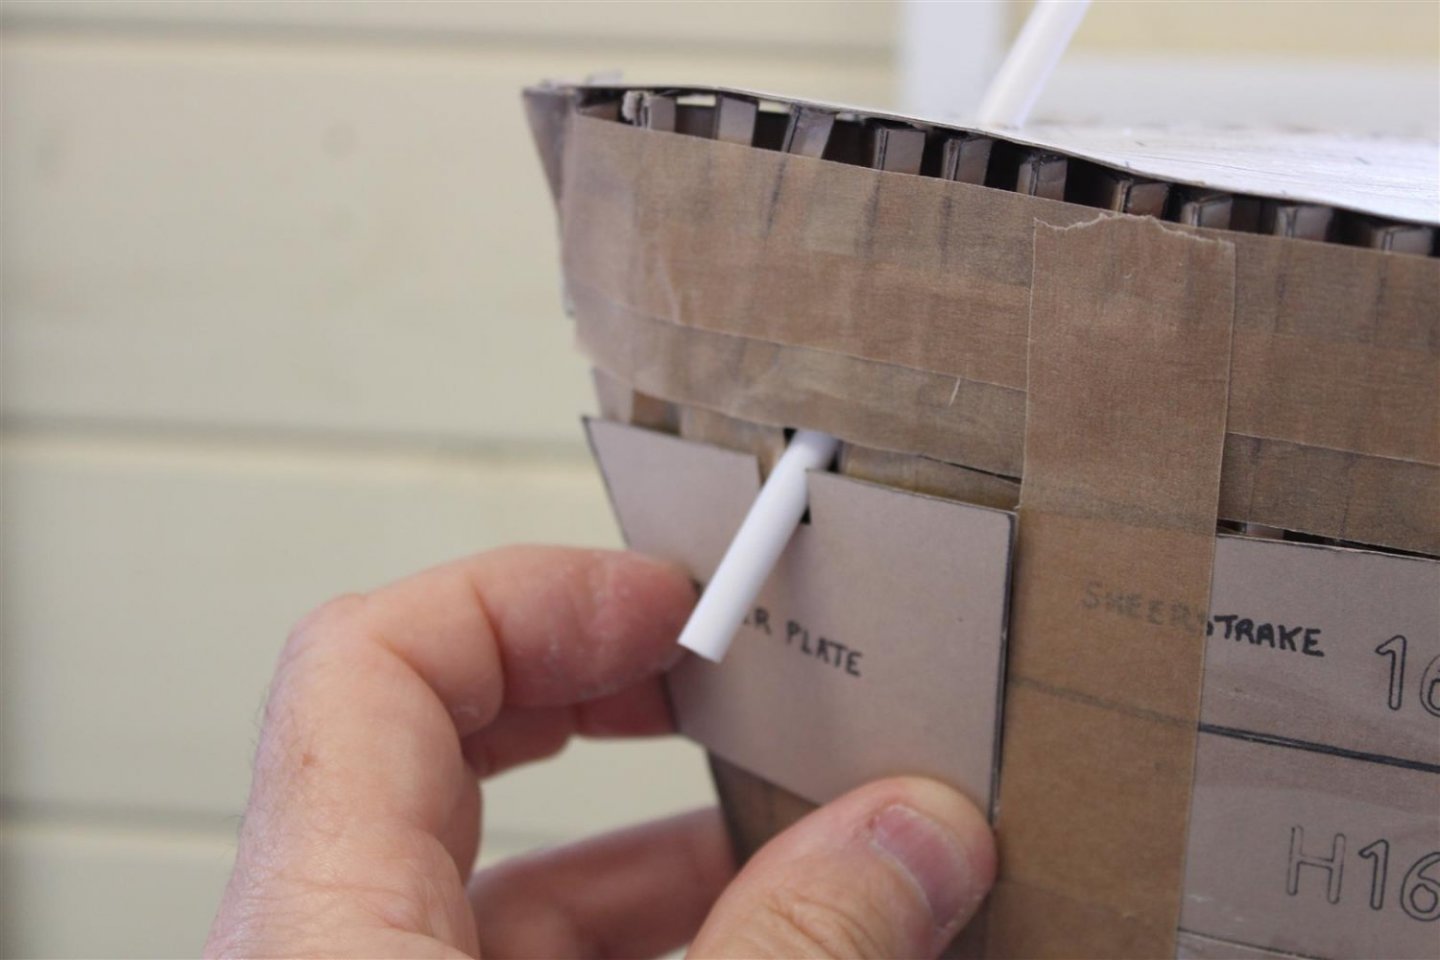
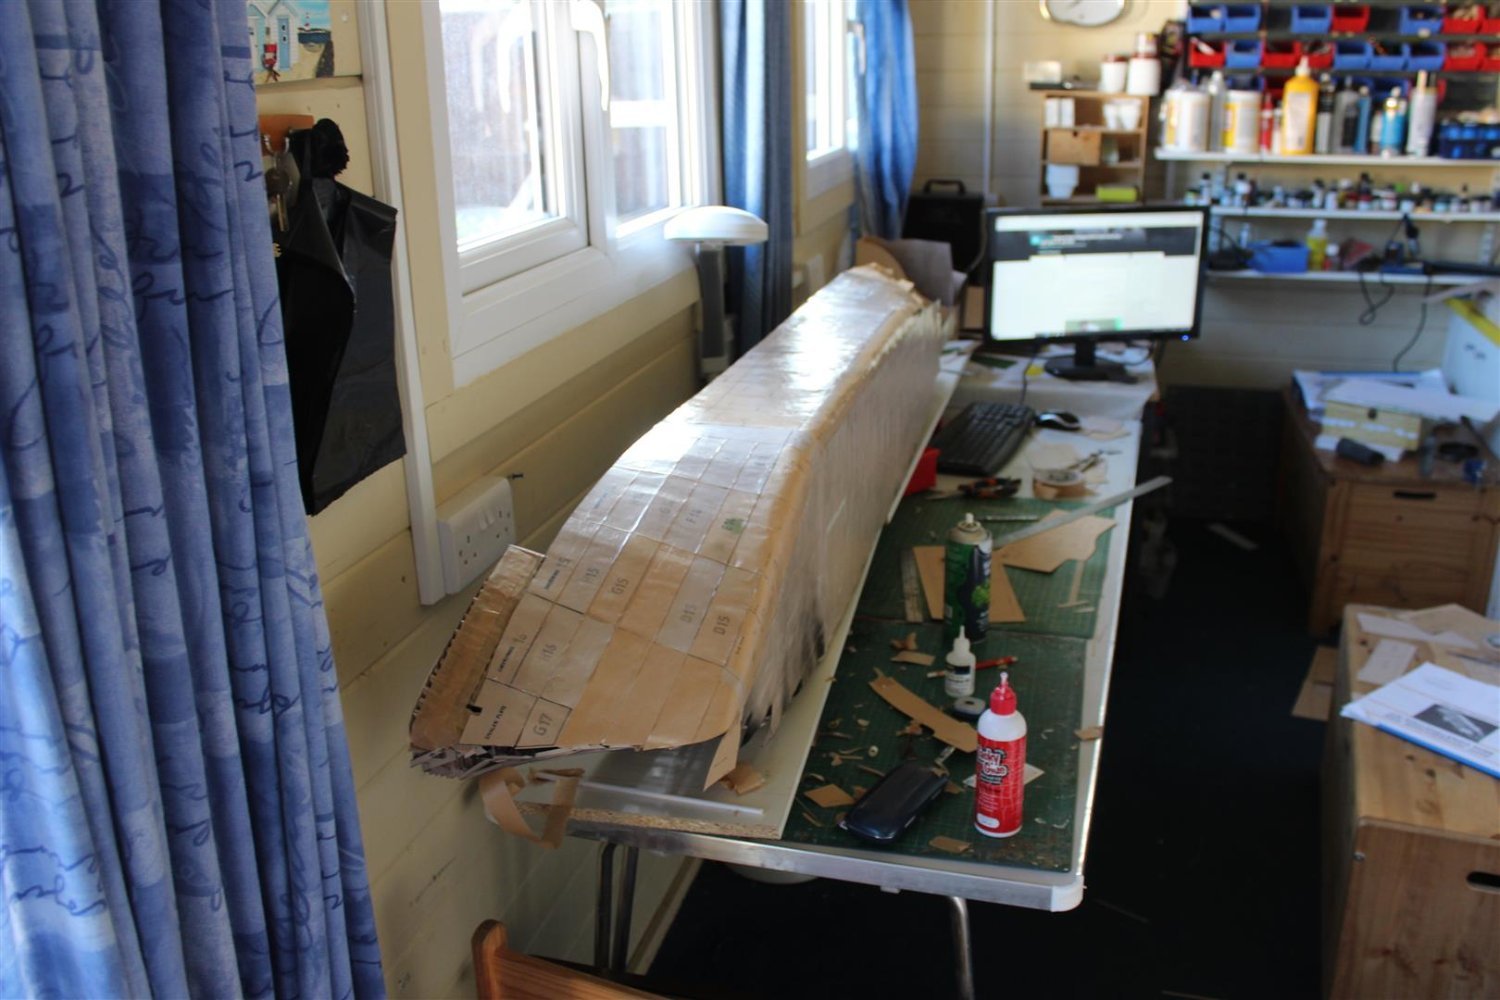
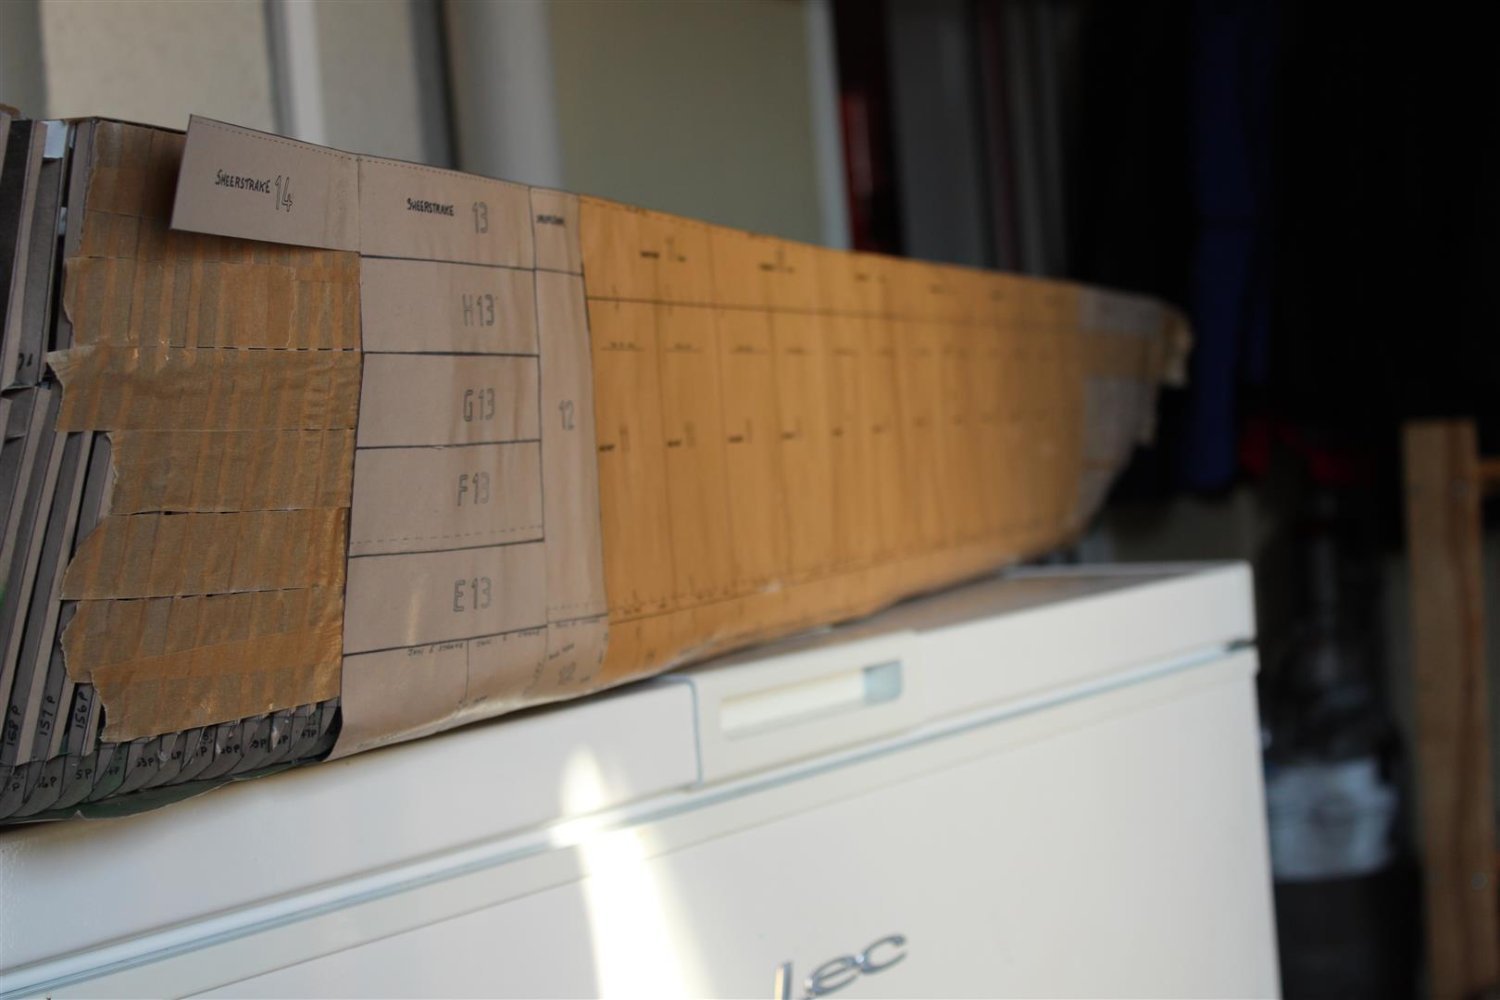
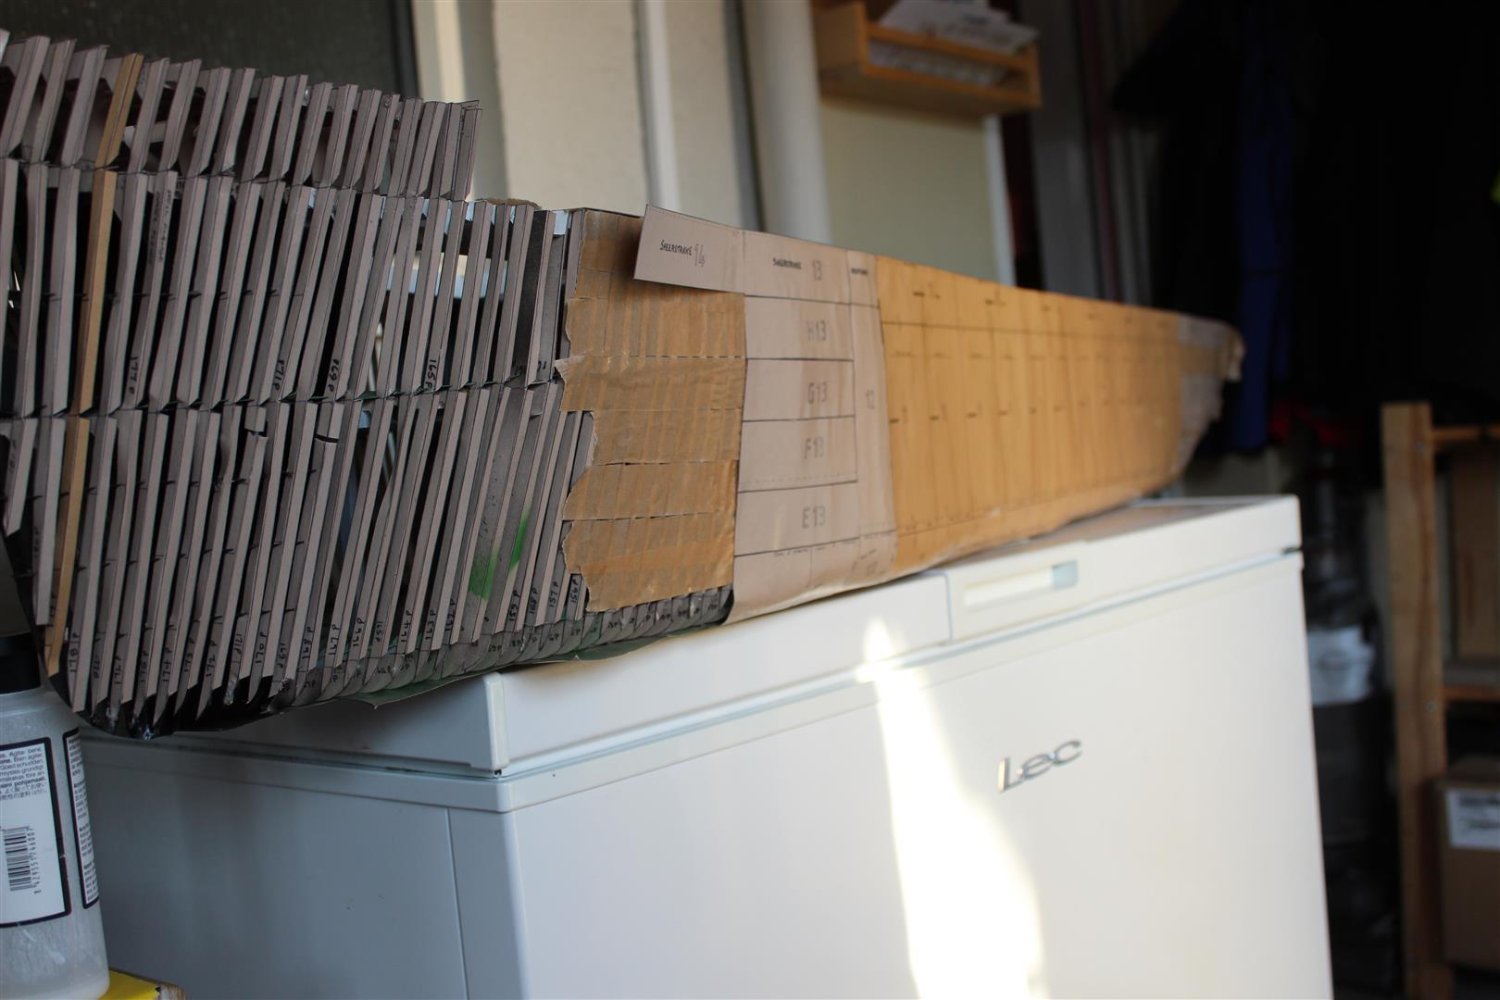
day 97 pointy end 99% complete
well that wasnt to bad in the end, after all its just card and easy enough to make bits that fit, even the Hawse holes lined up


-
On 6/24/2022 at 12:46 AM, Roger Pellett said:
What do people find so fascinating about these ships? Compared to the Iowa’s they are rather ugly with their humpbacked sheer. Both were sunk by aircraft and neither distinguished itself in battle. And, they didn’t represent what many would consider to be a good cause.
My last comment would apply to Bismarck and Tripitz too.
Roger
at least we are getting choice of new retooled kits
On 6/24/2022 at 2:54 AM, Kelp said:Same with the Titanic. The Trumpeter model is beautiful, but I’m not sure if I’d like to look at a ship that had such a historic tragedy in my house every day. Maybe Trumpeter can come up with a large scale Queen Mary?
Don
now thats a great idea
-
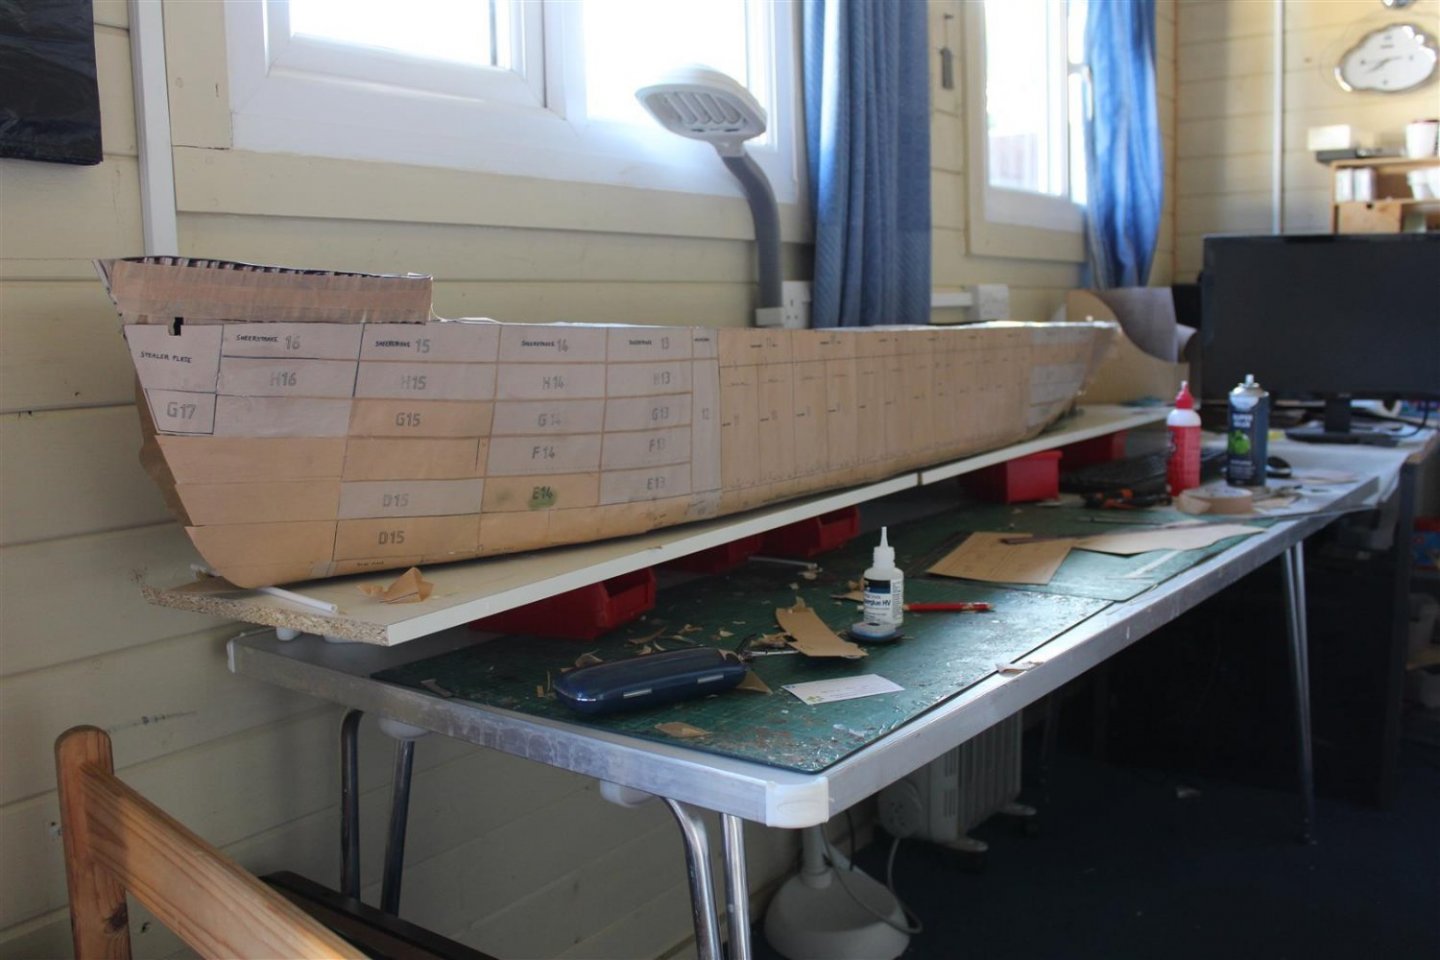
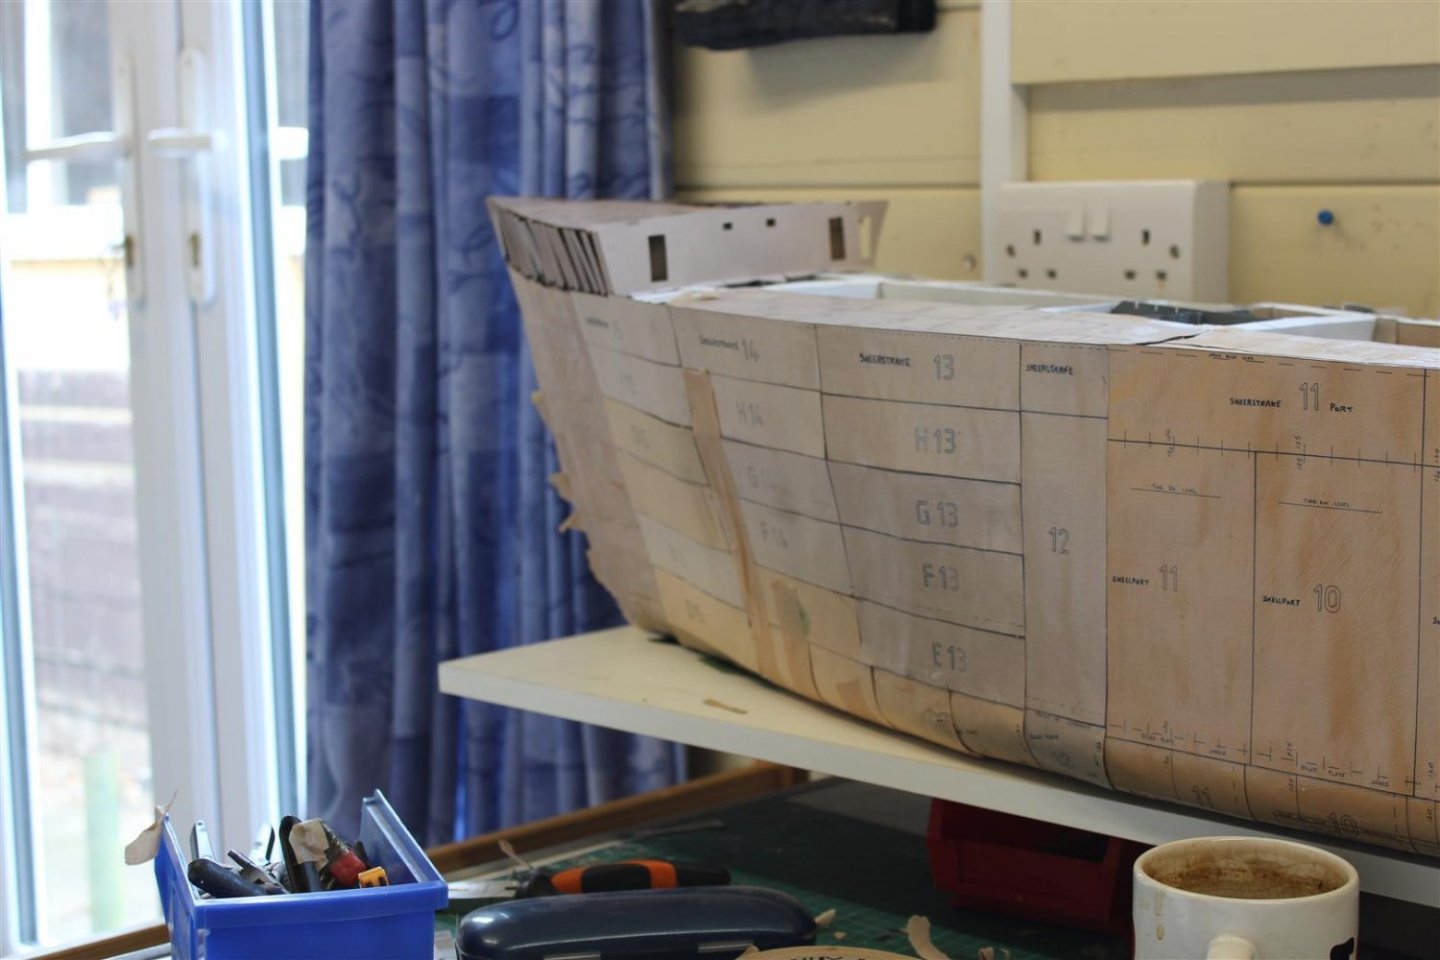
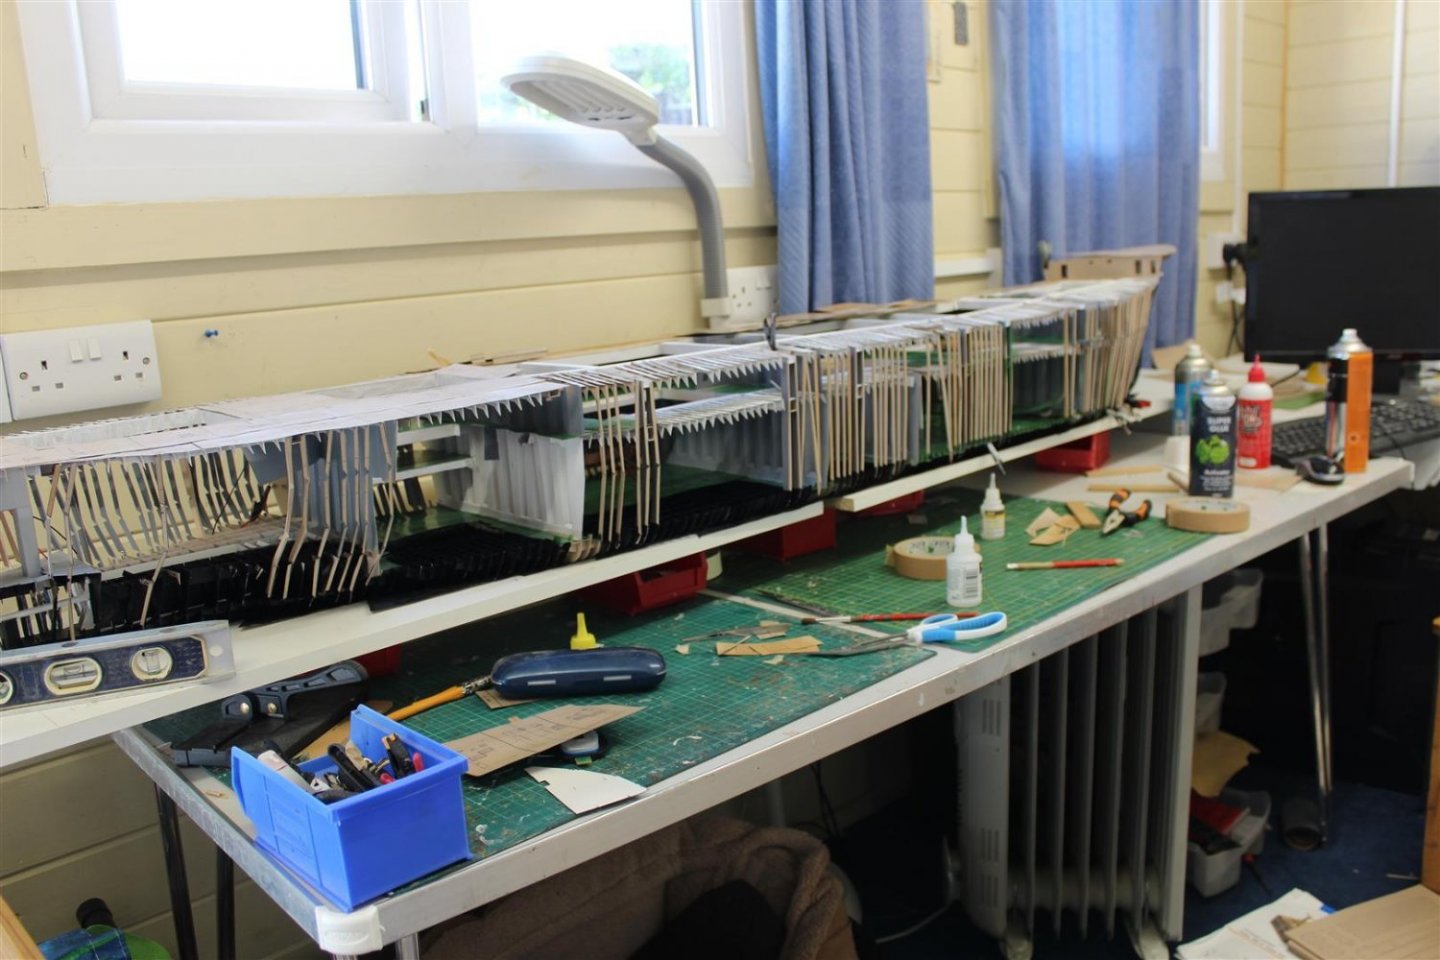
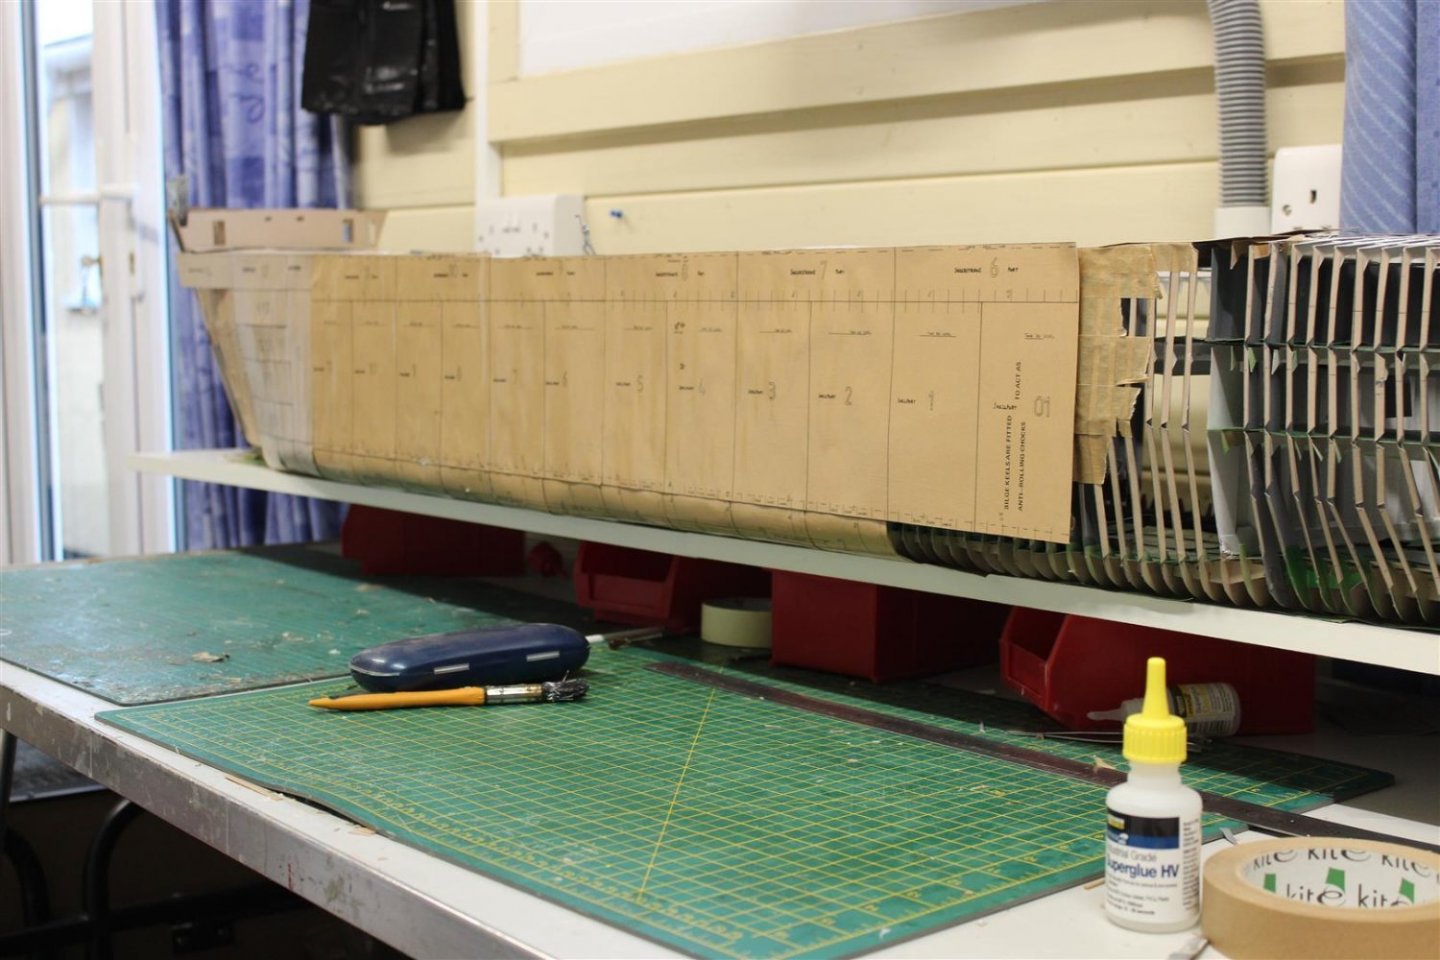
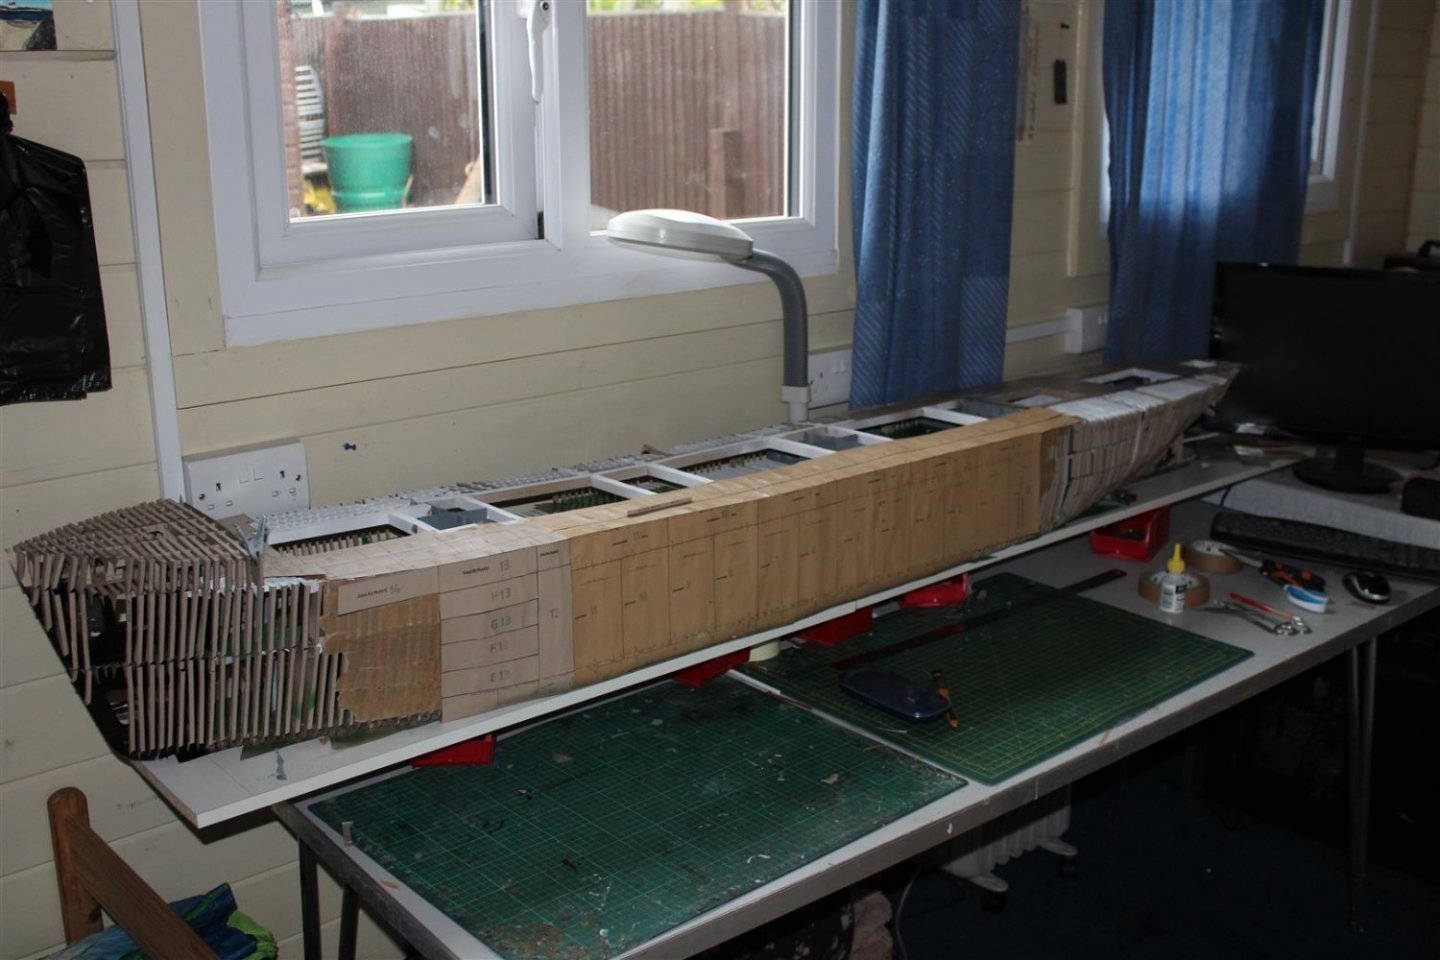
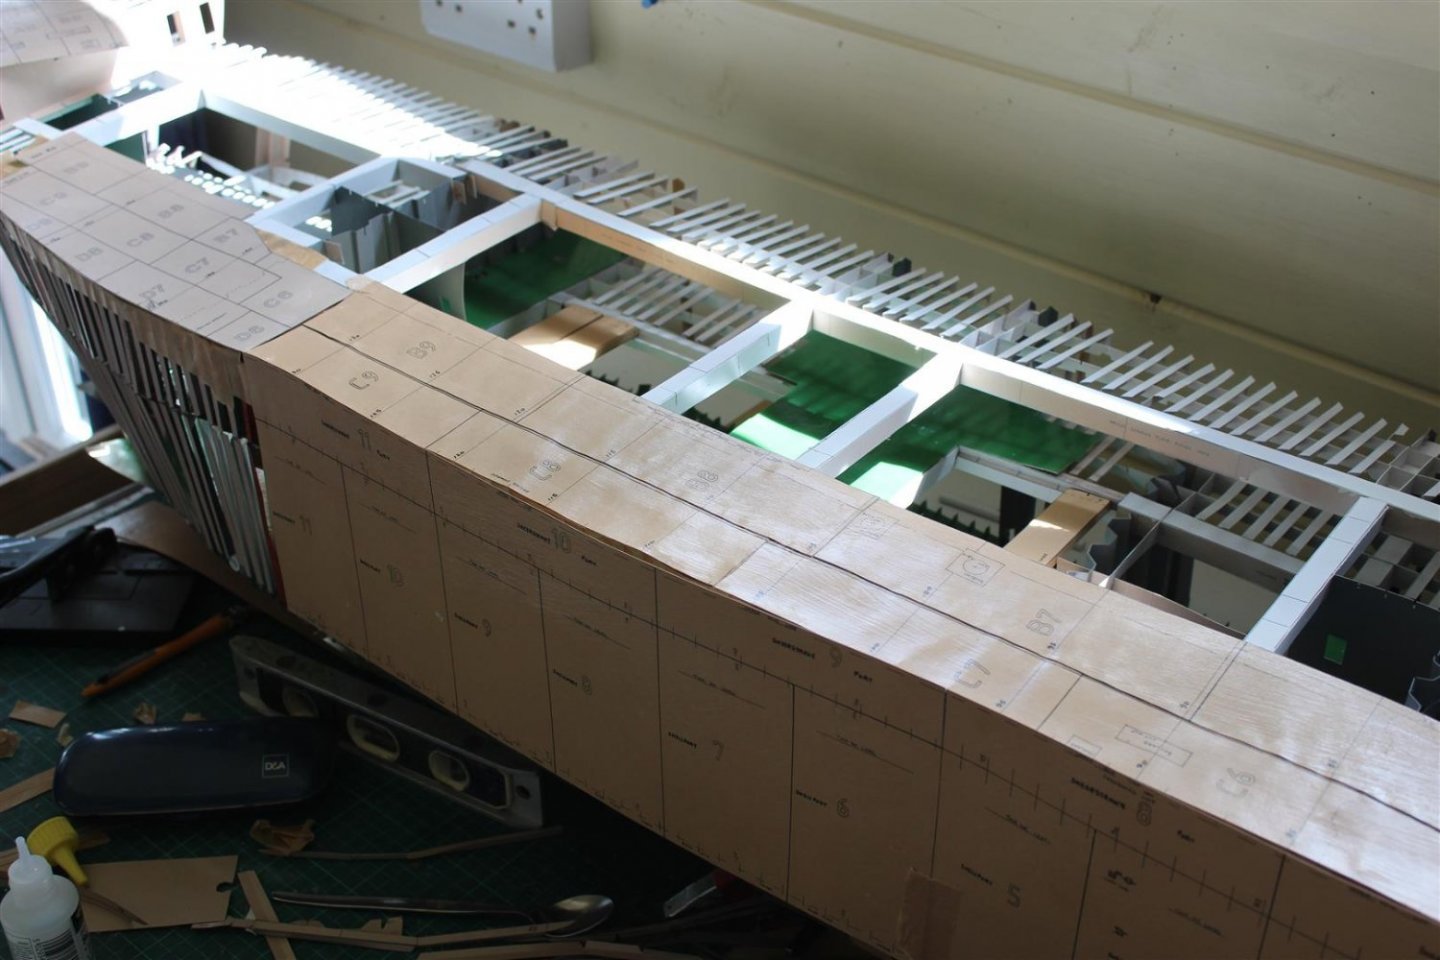
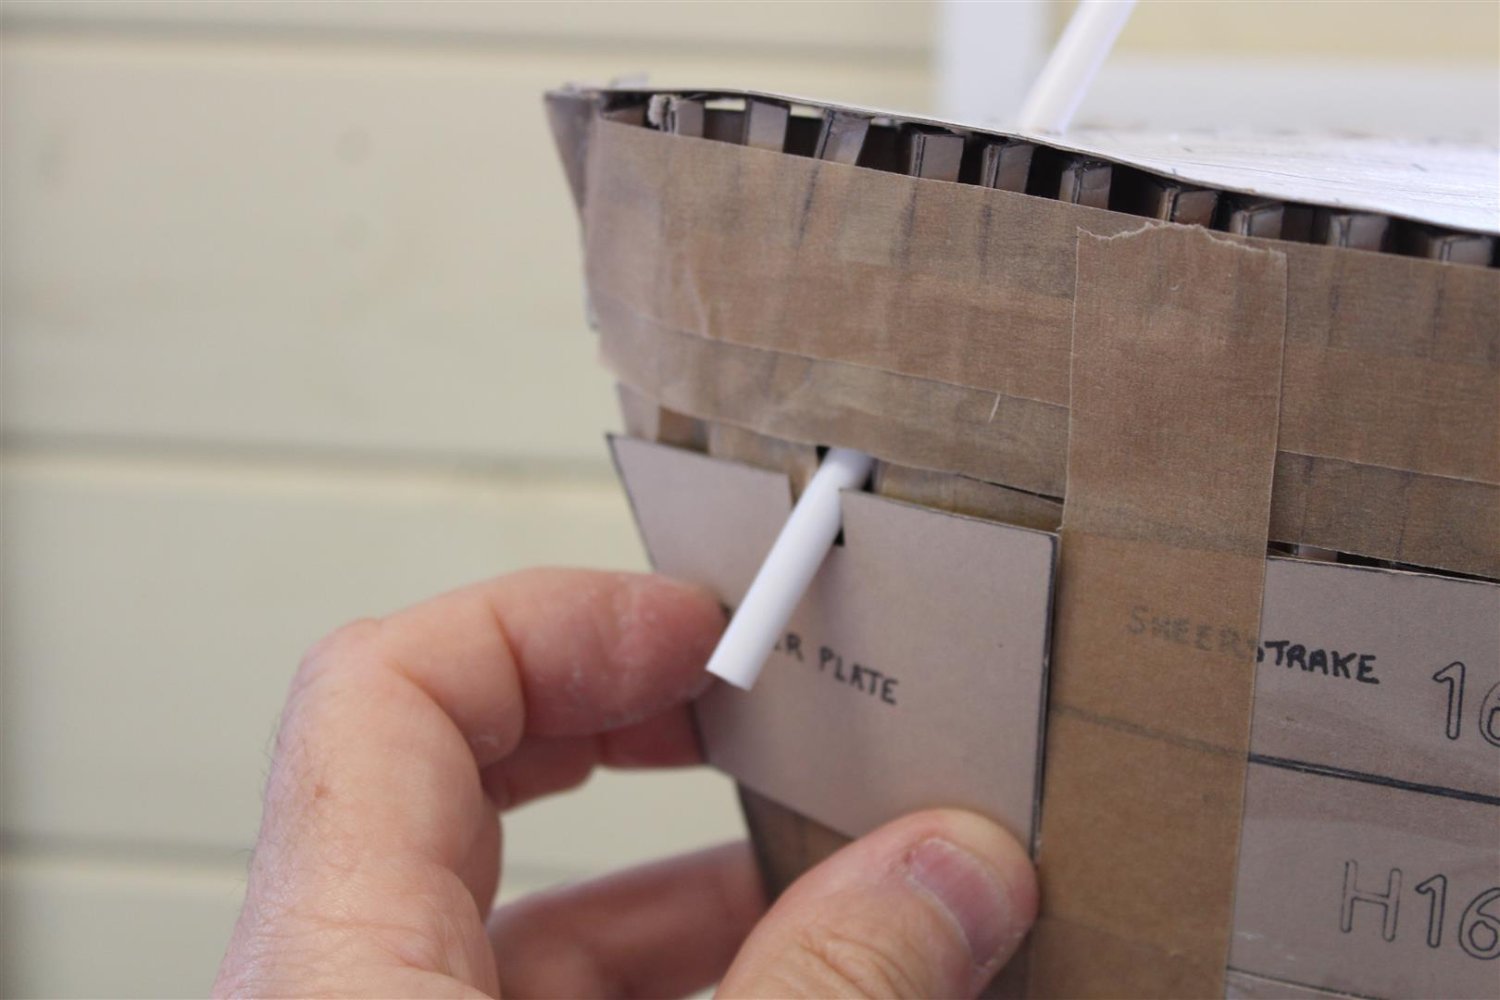
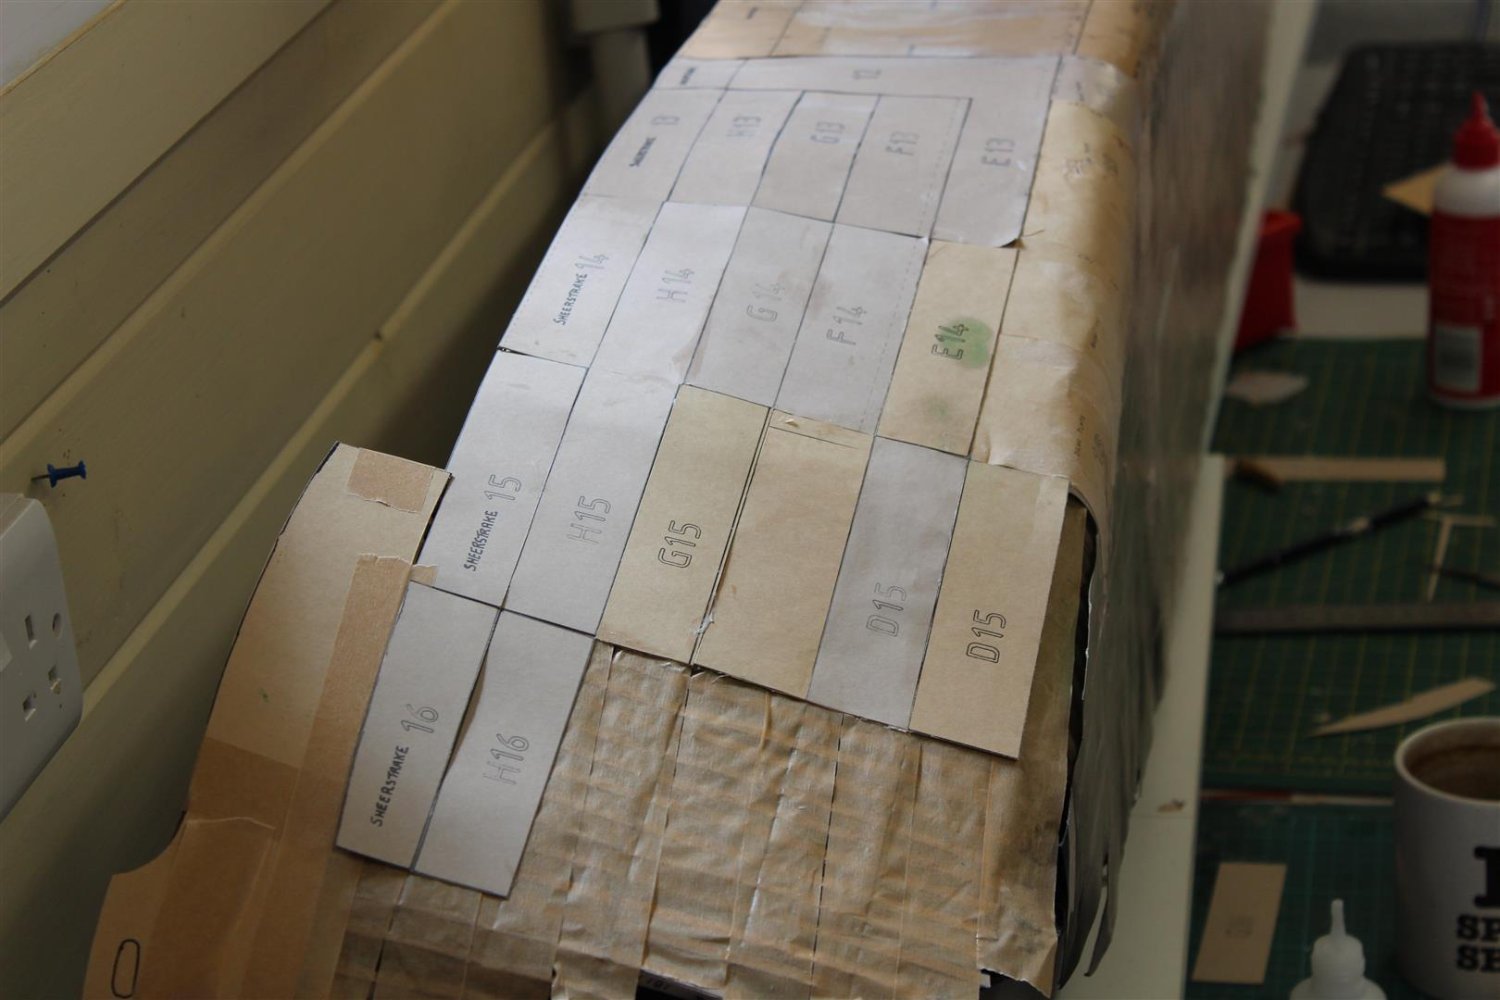
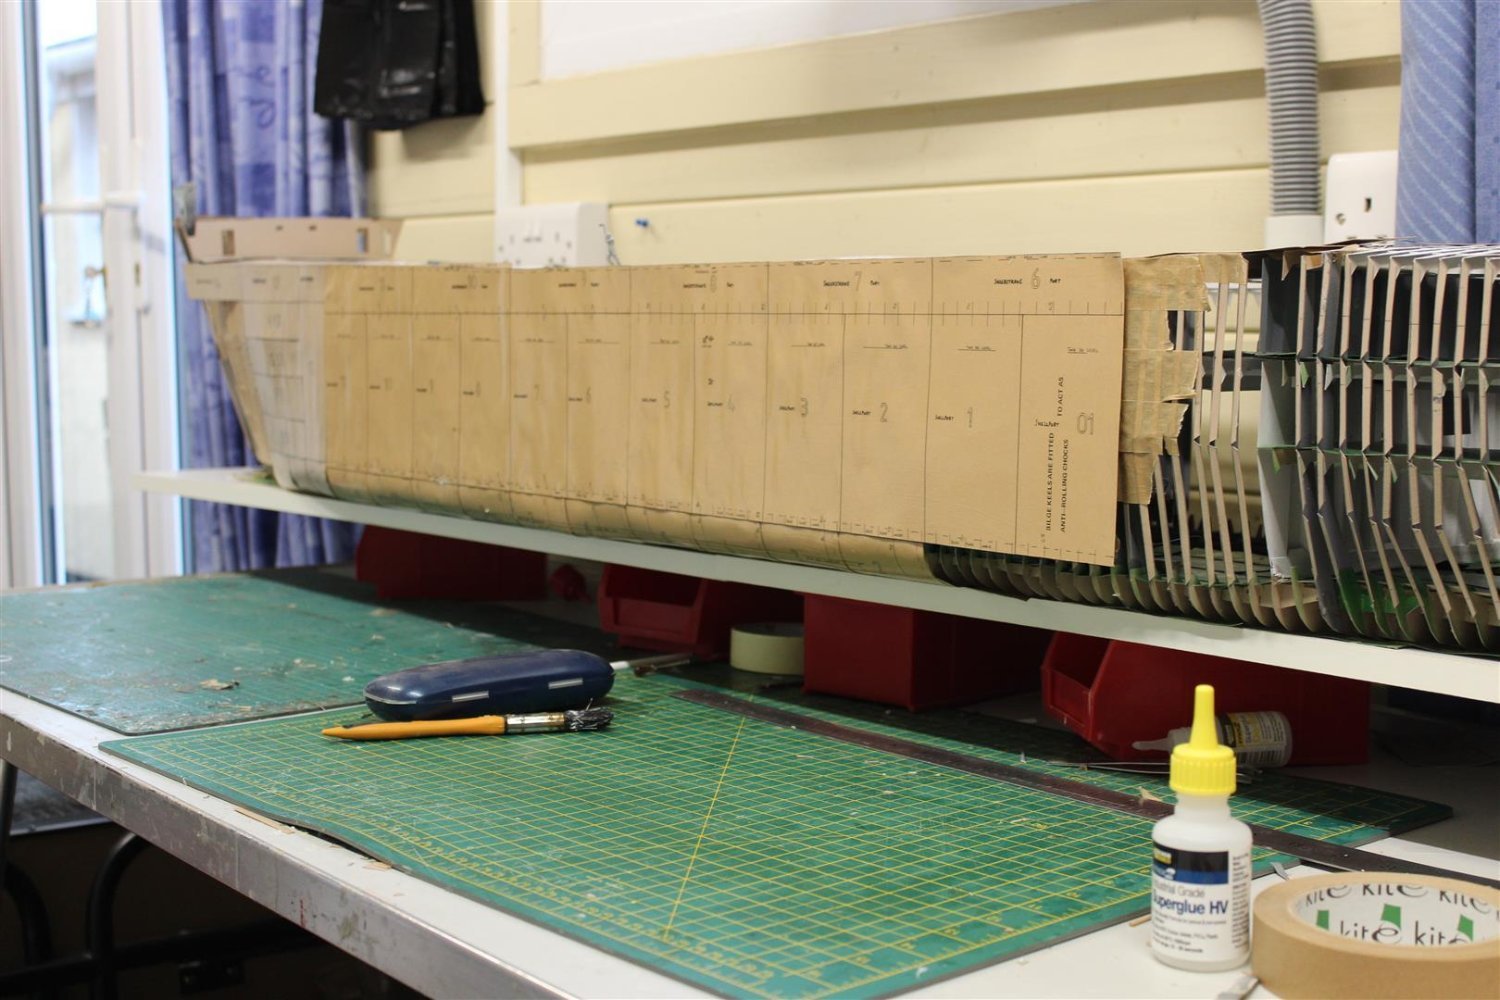
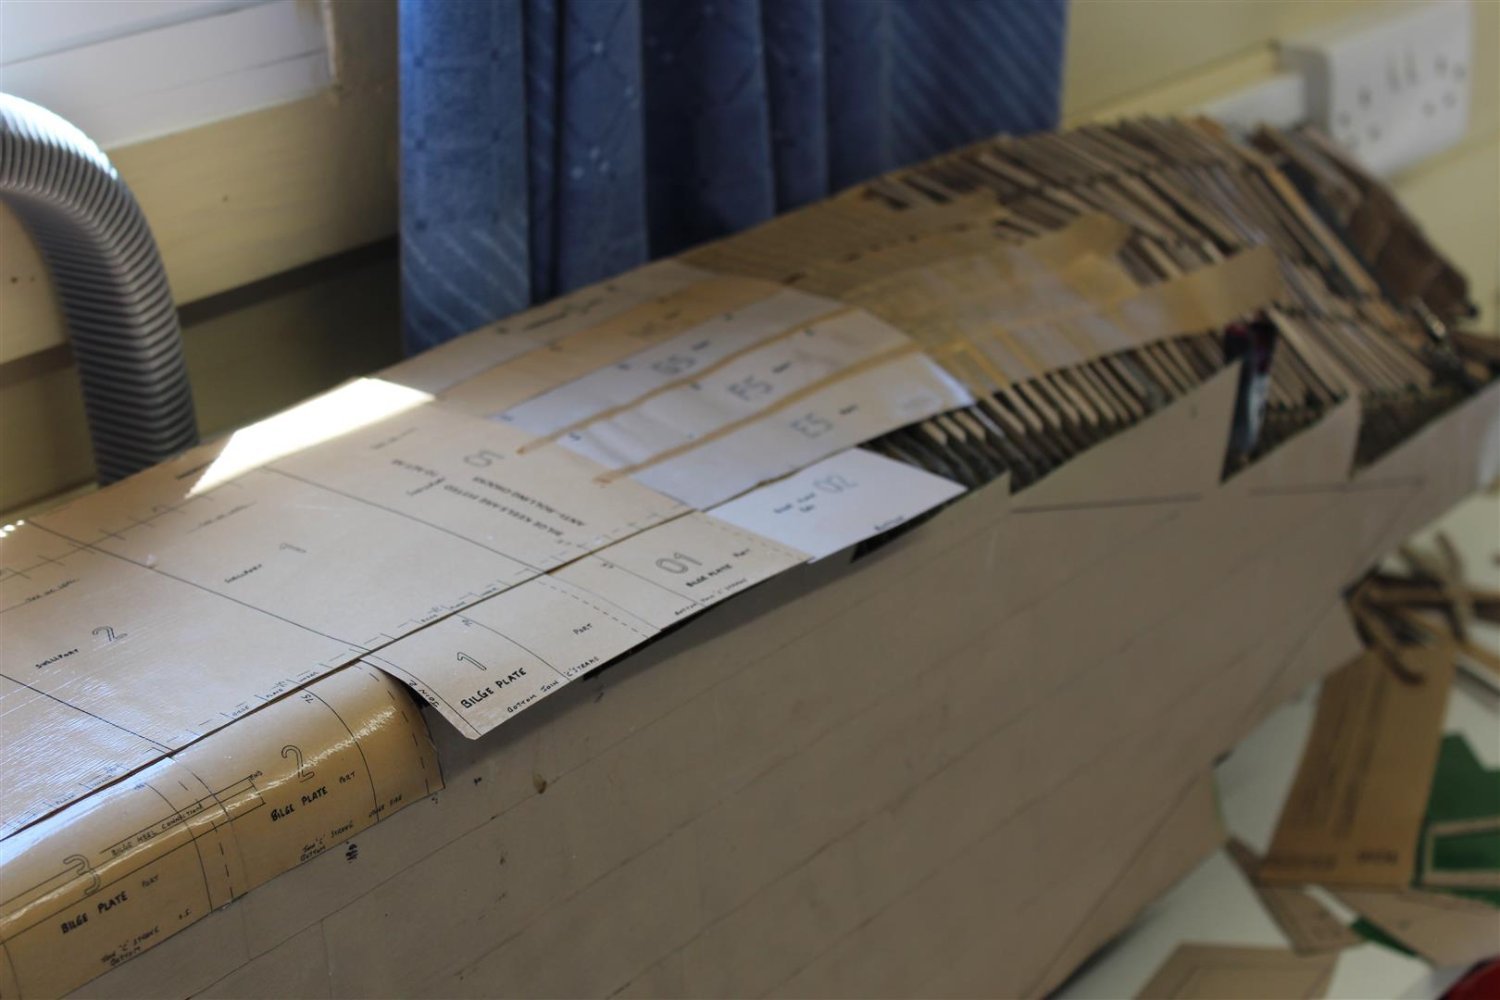
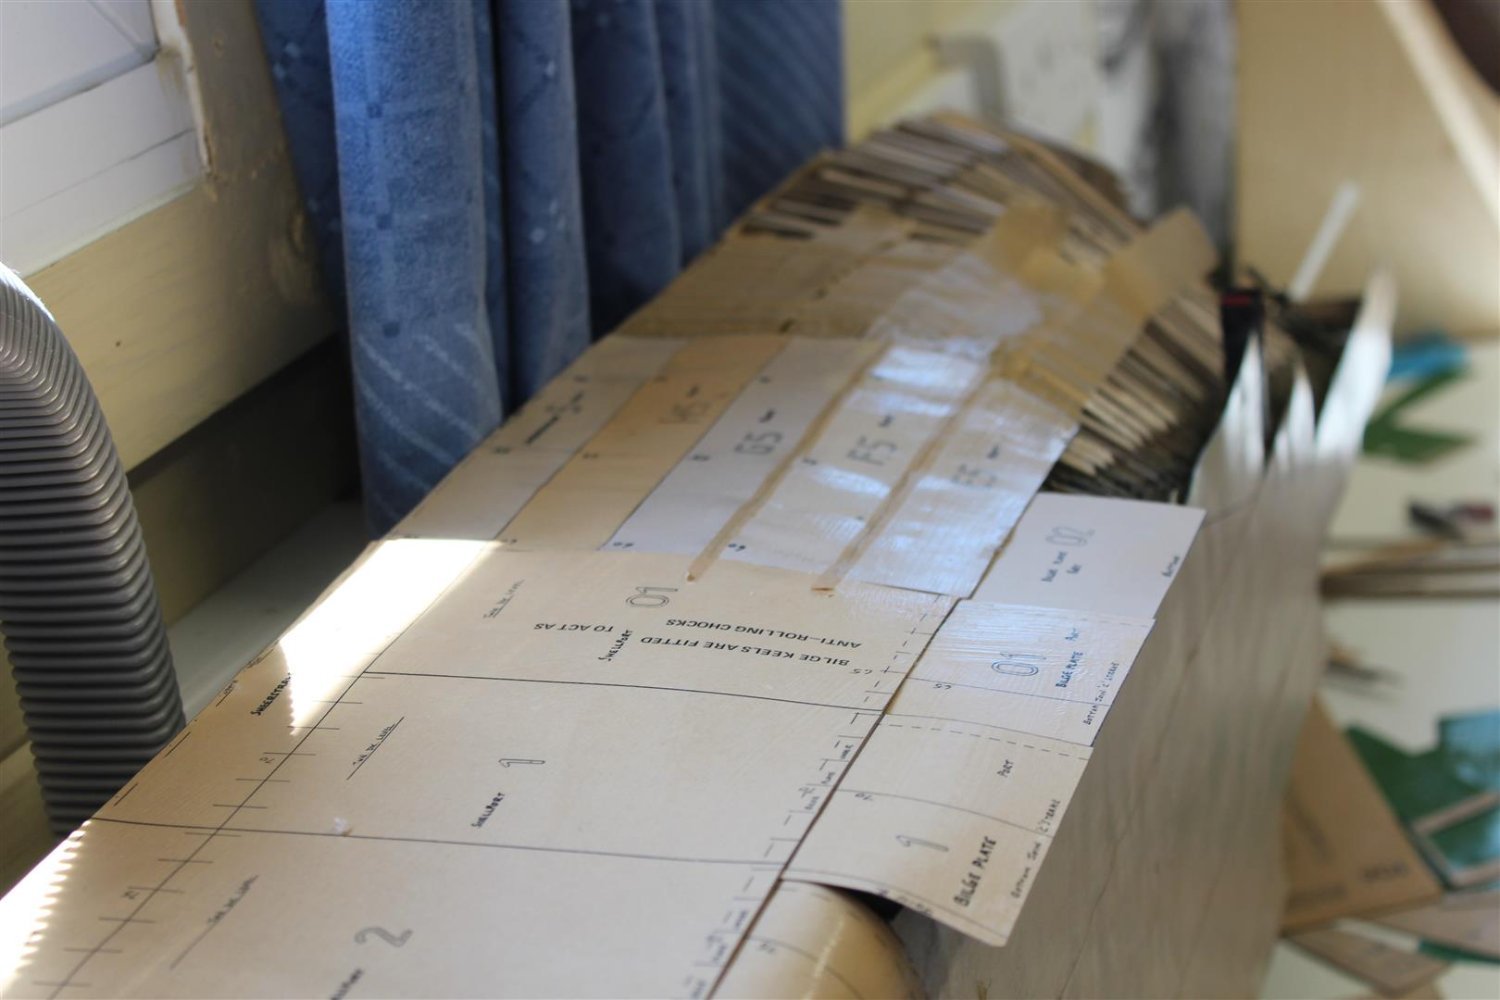
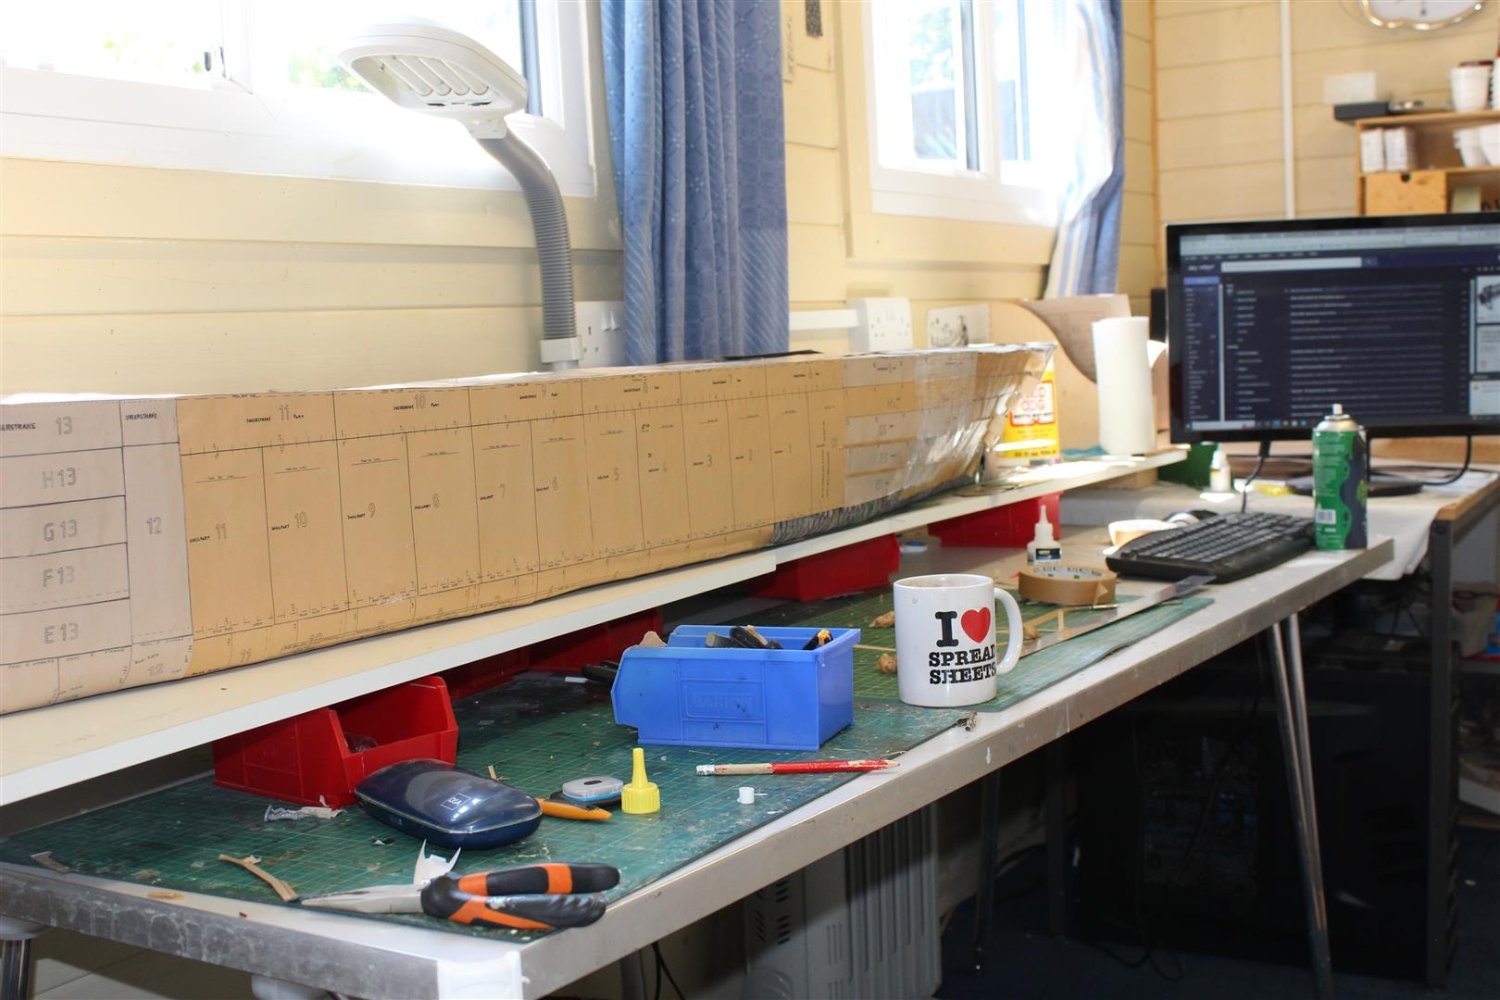
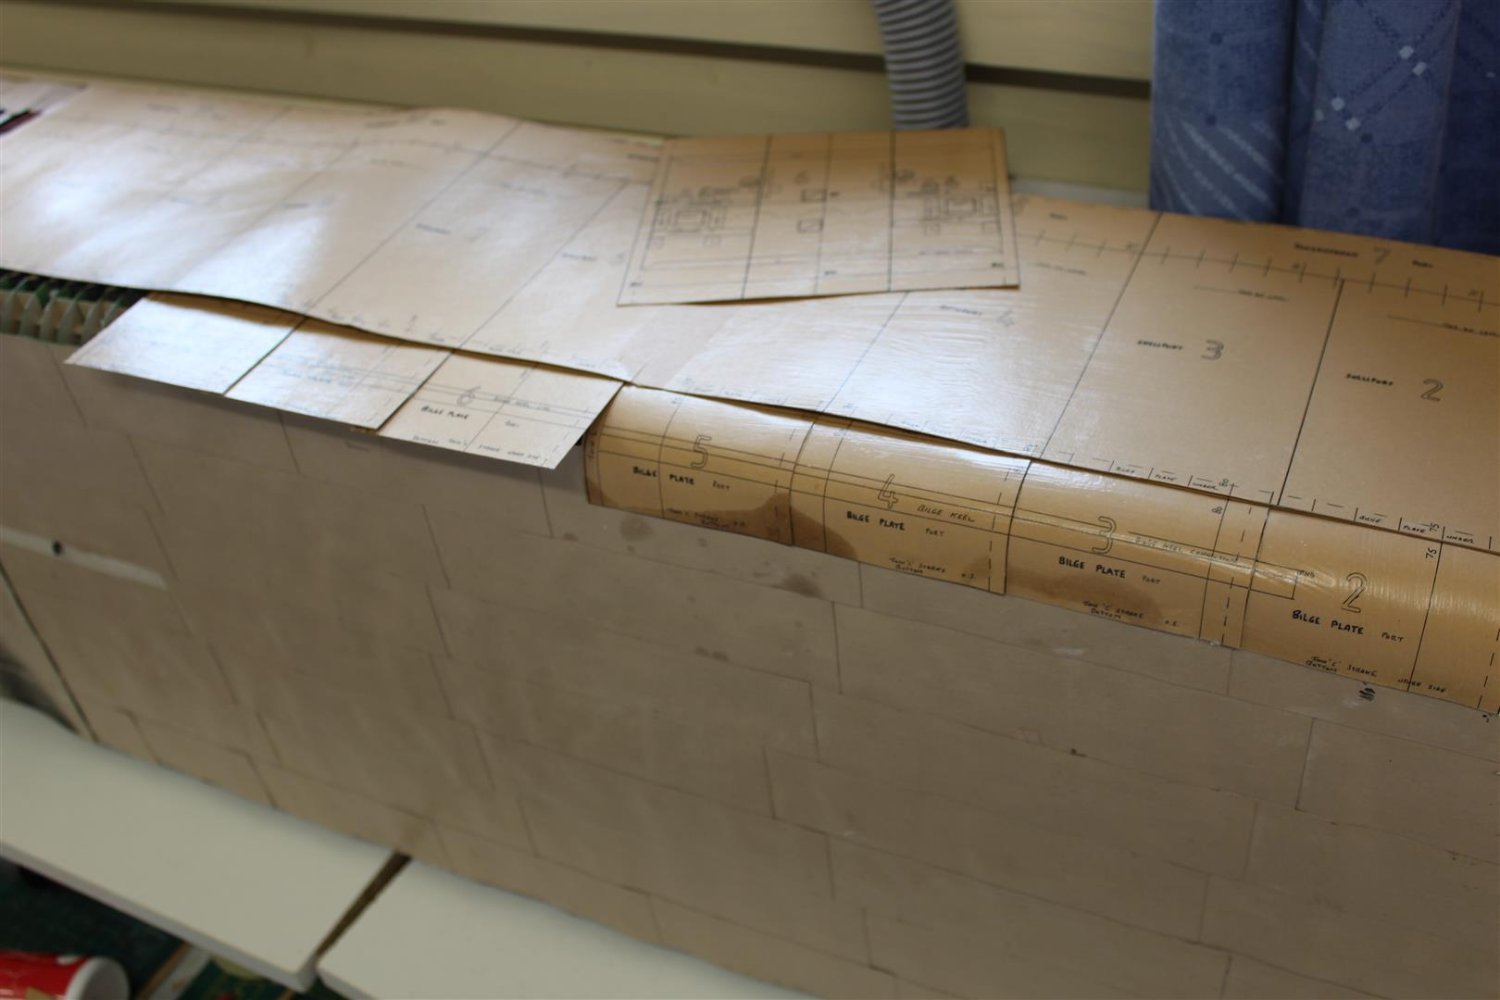
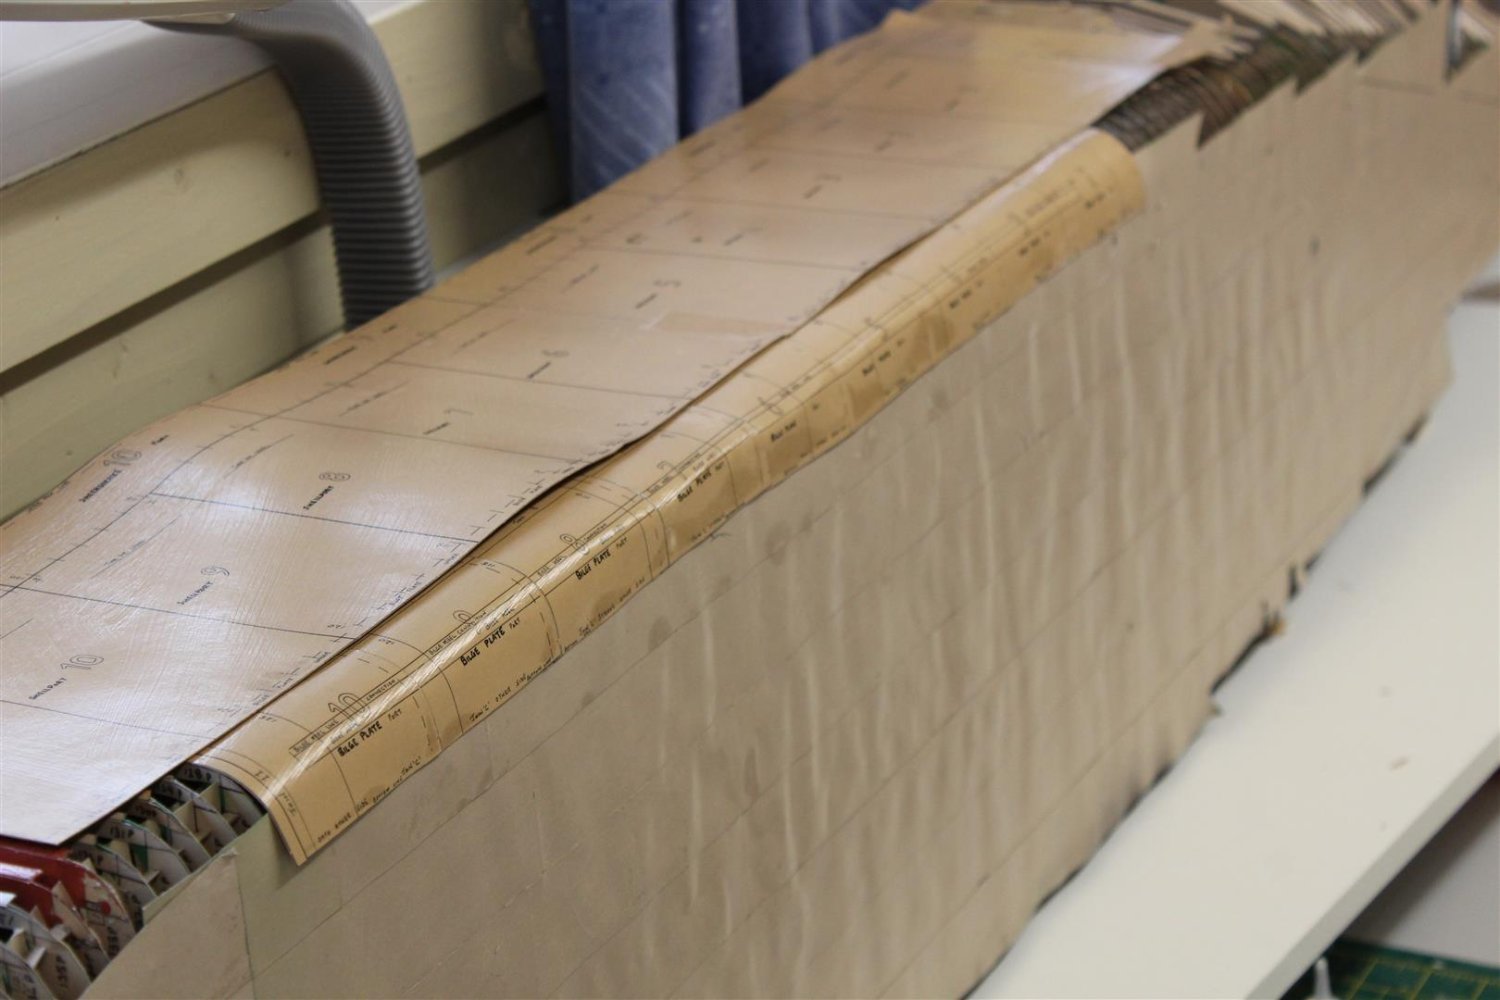
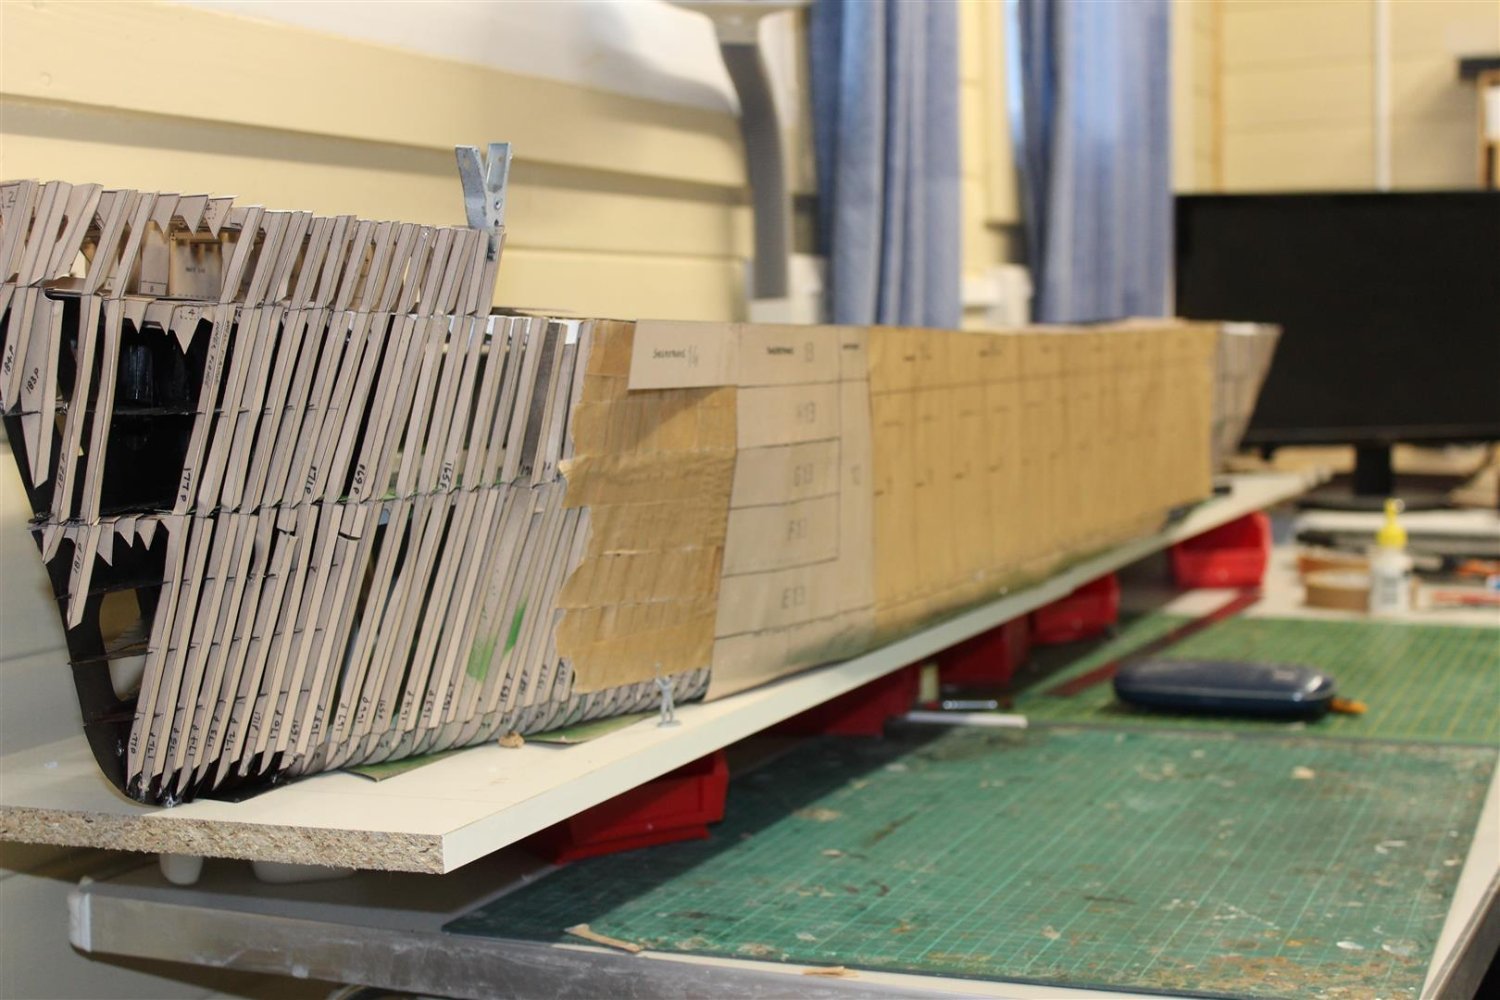
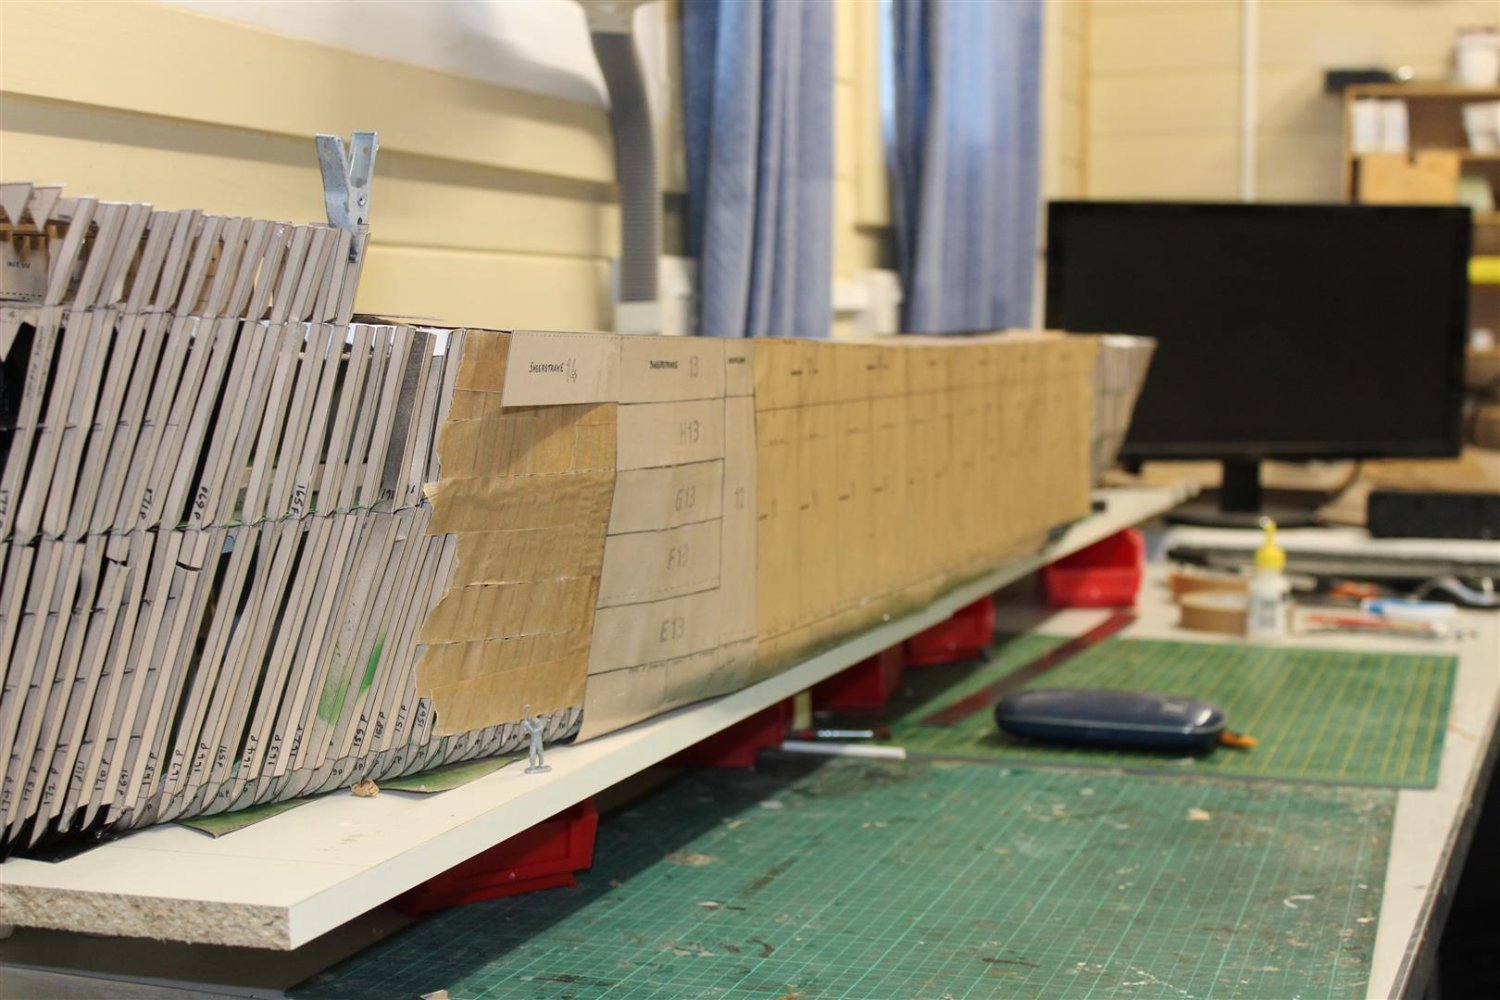
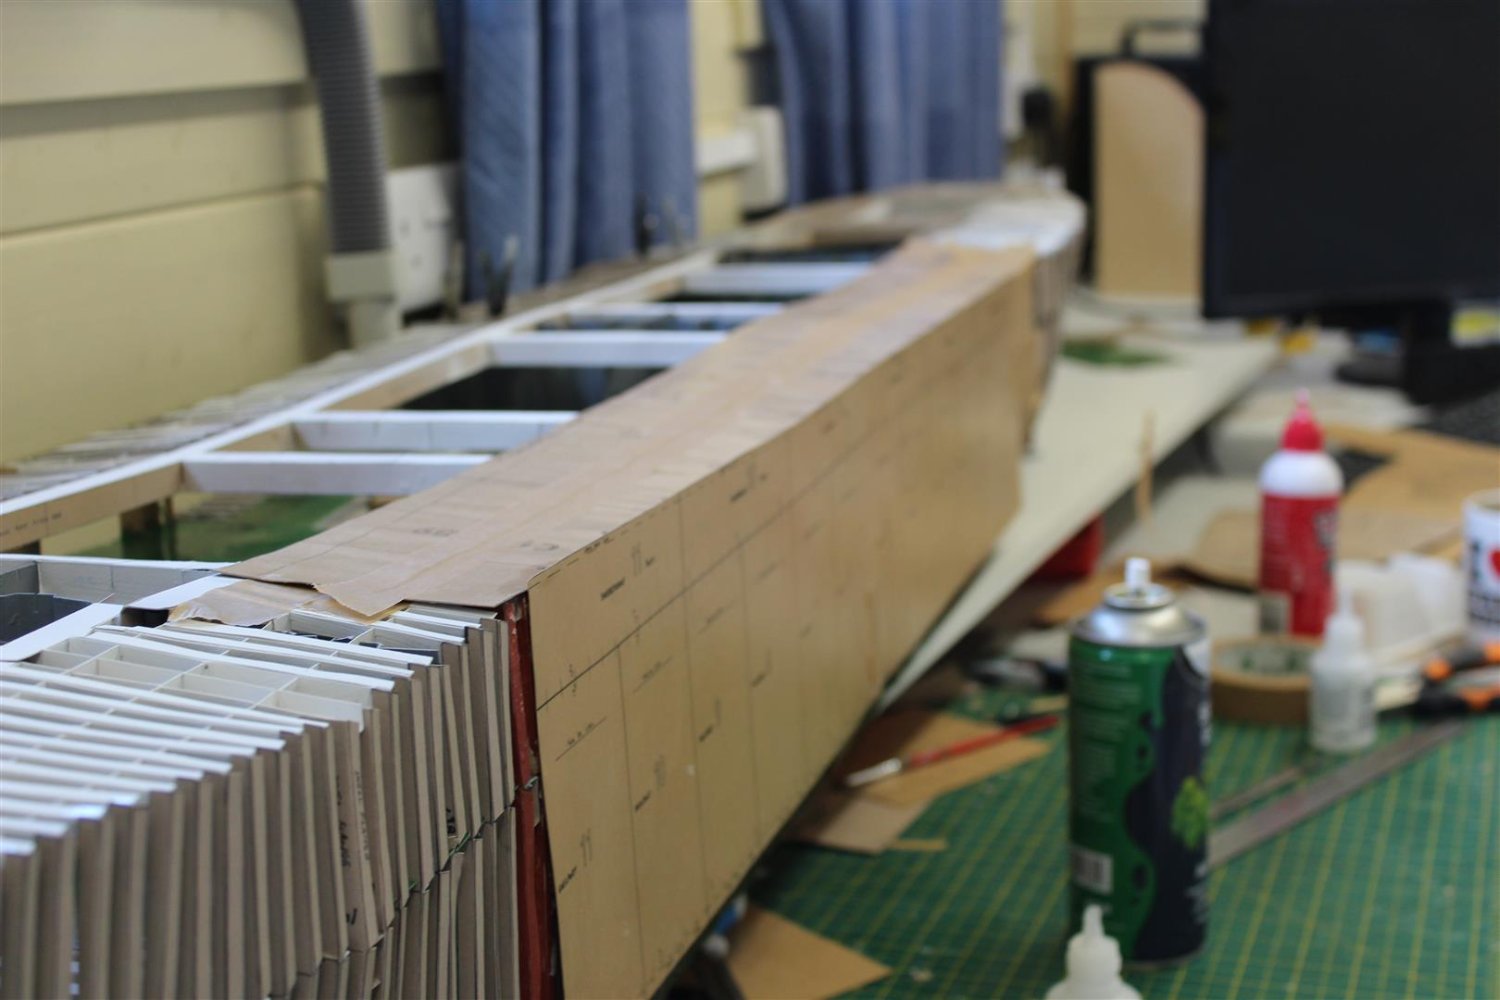
Good evening everyone
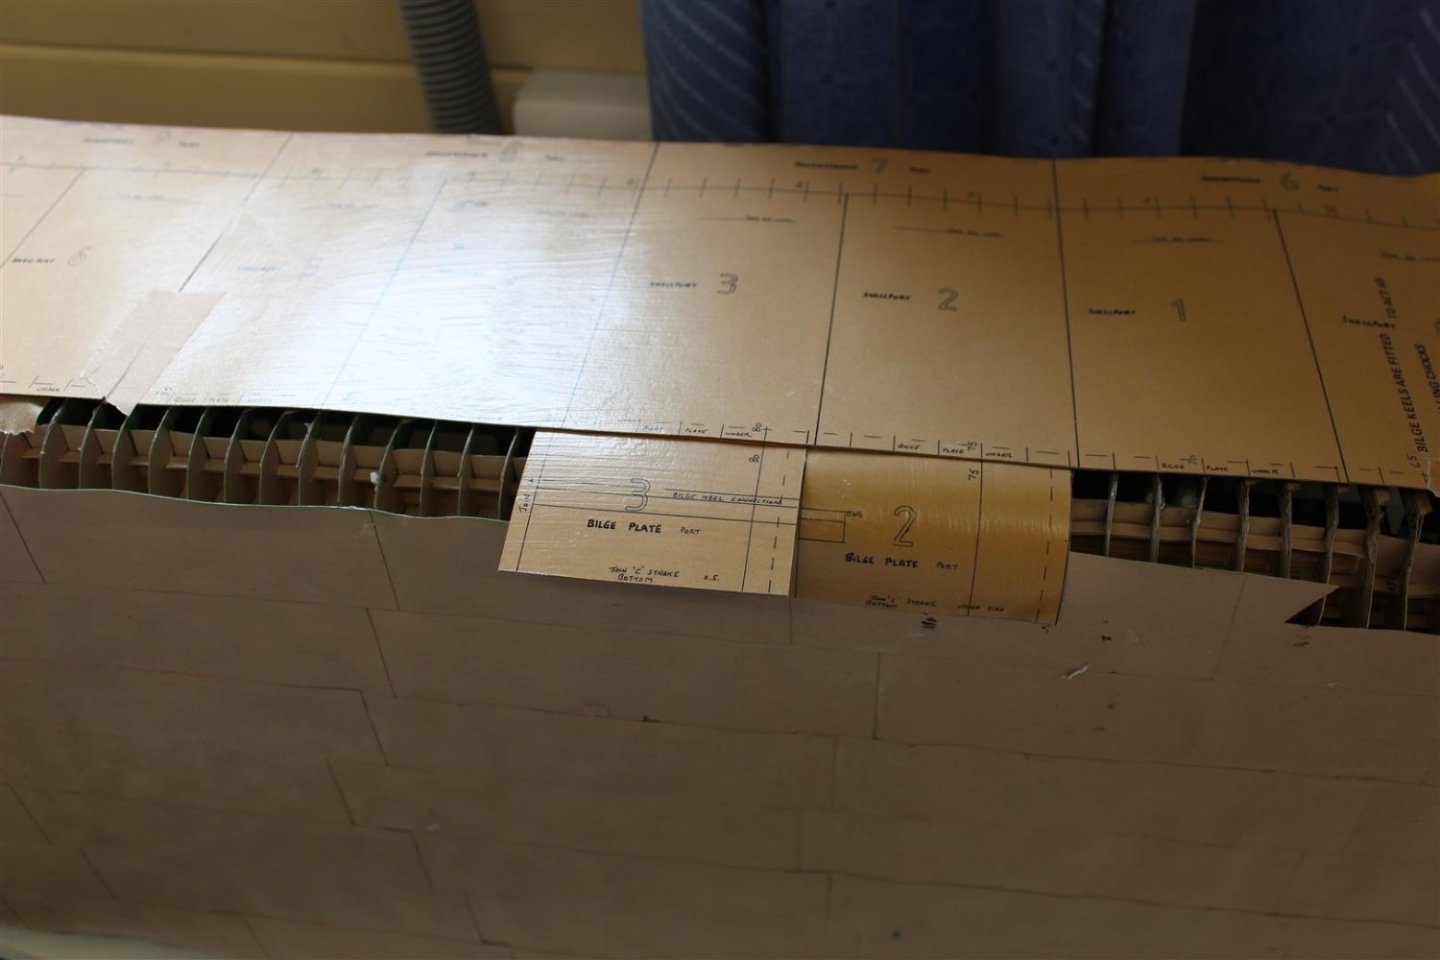
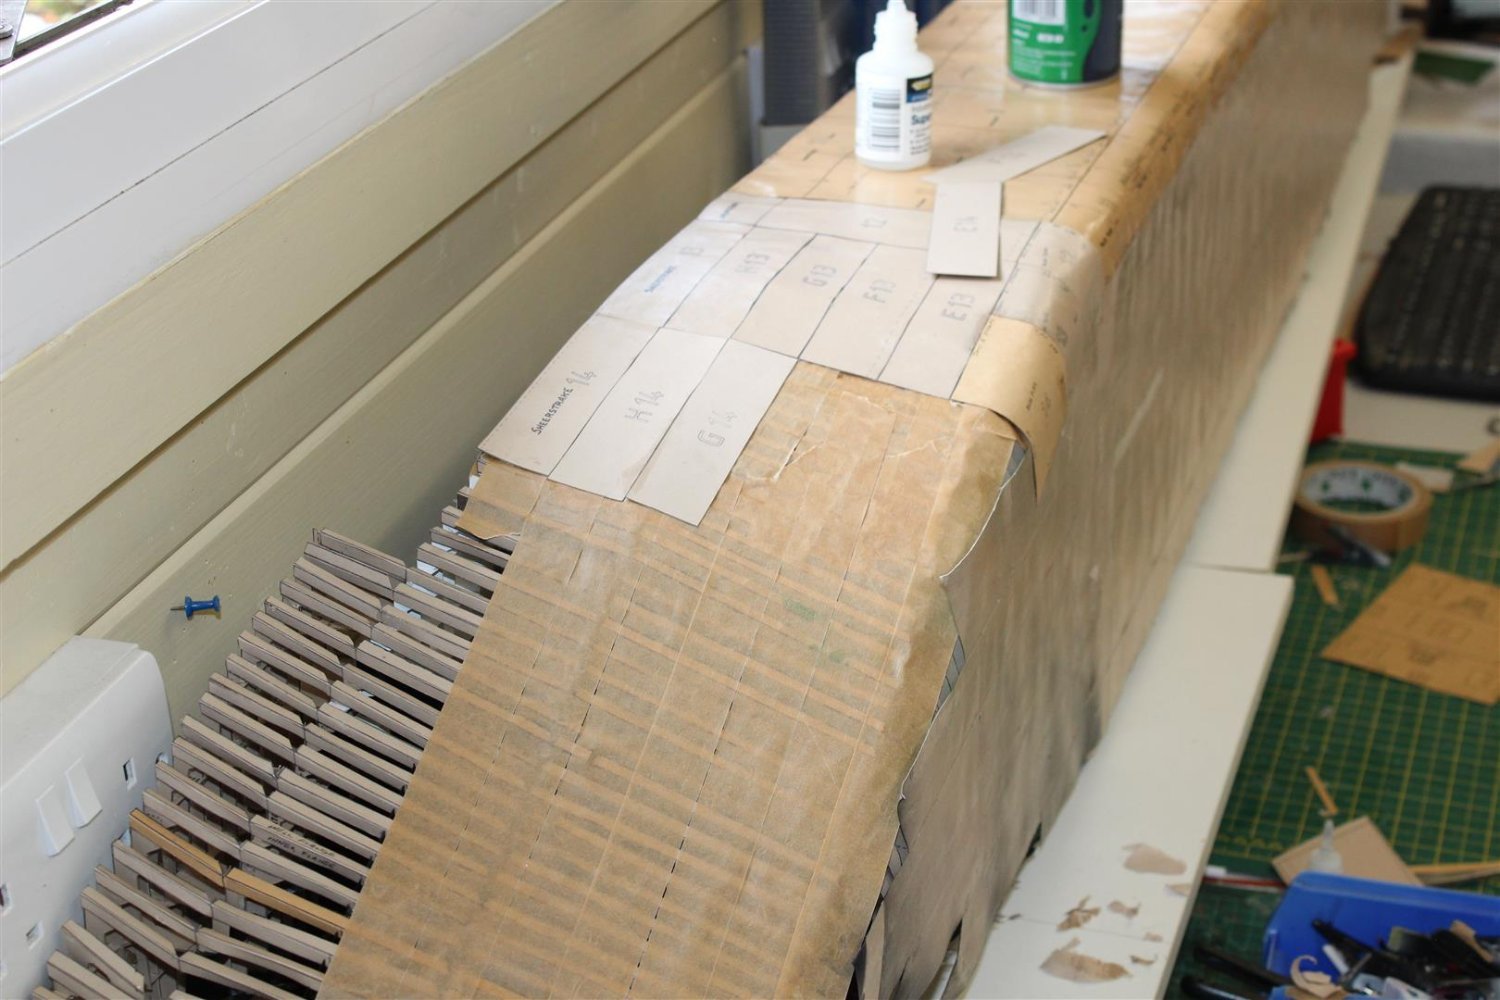
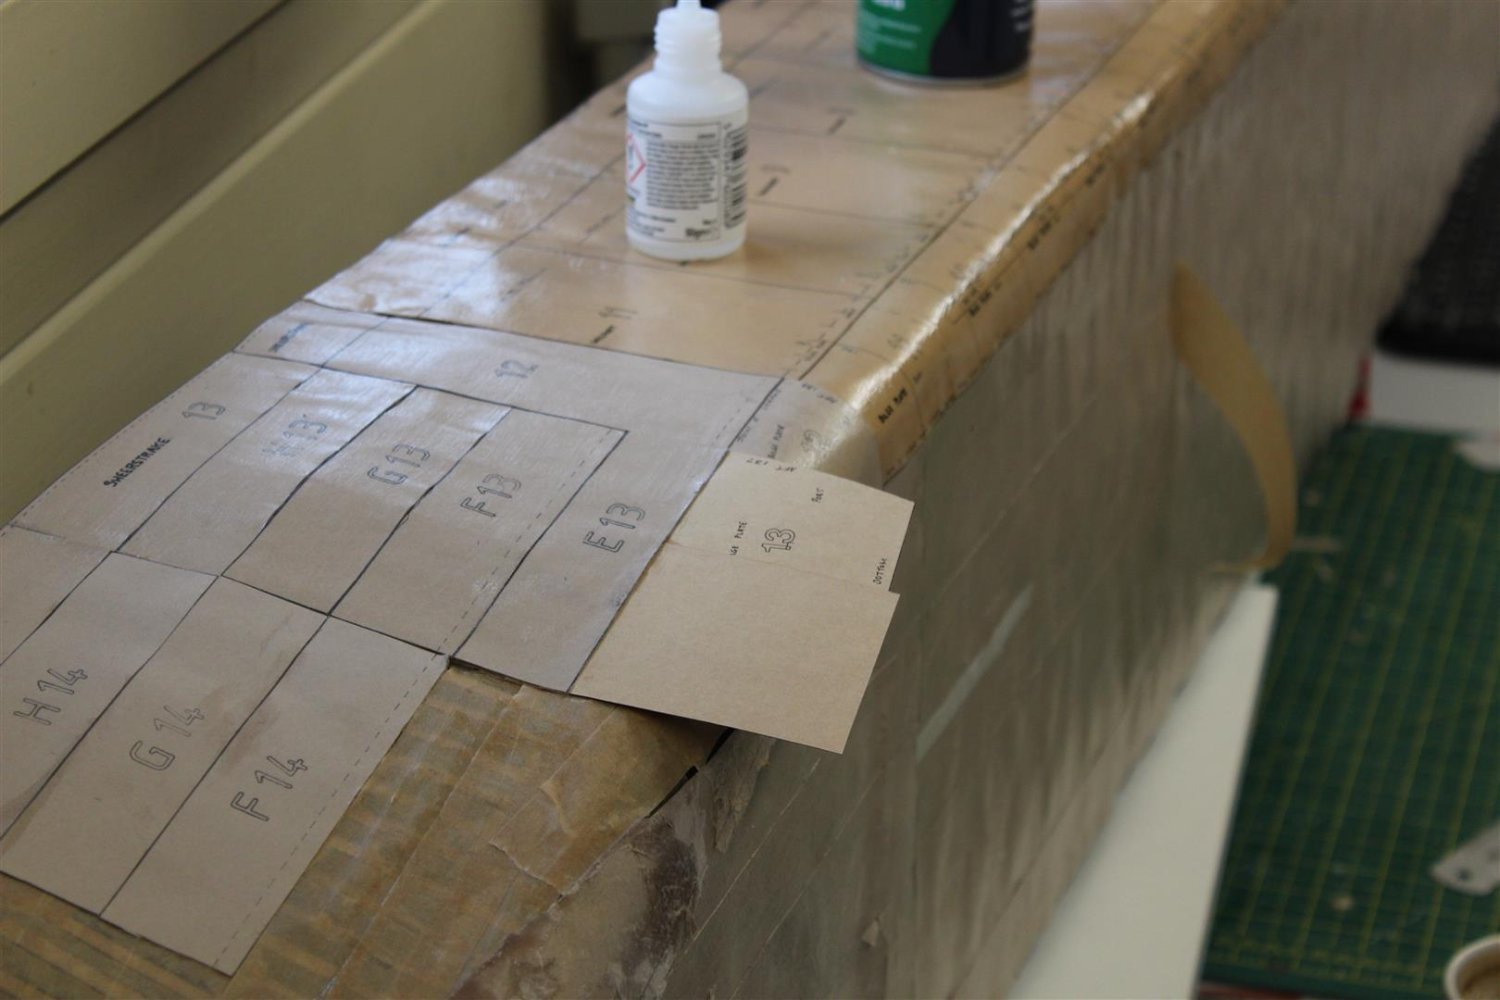
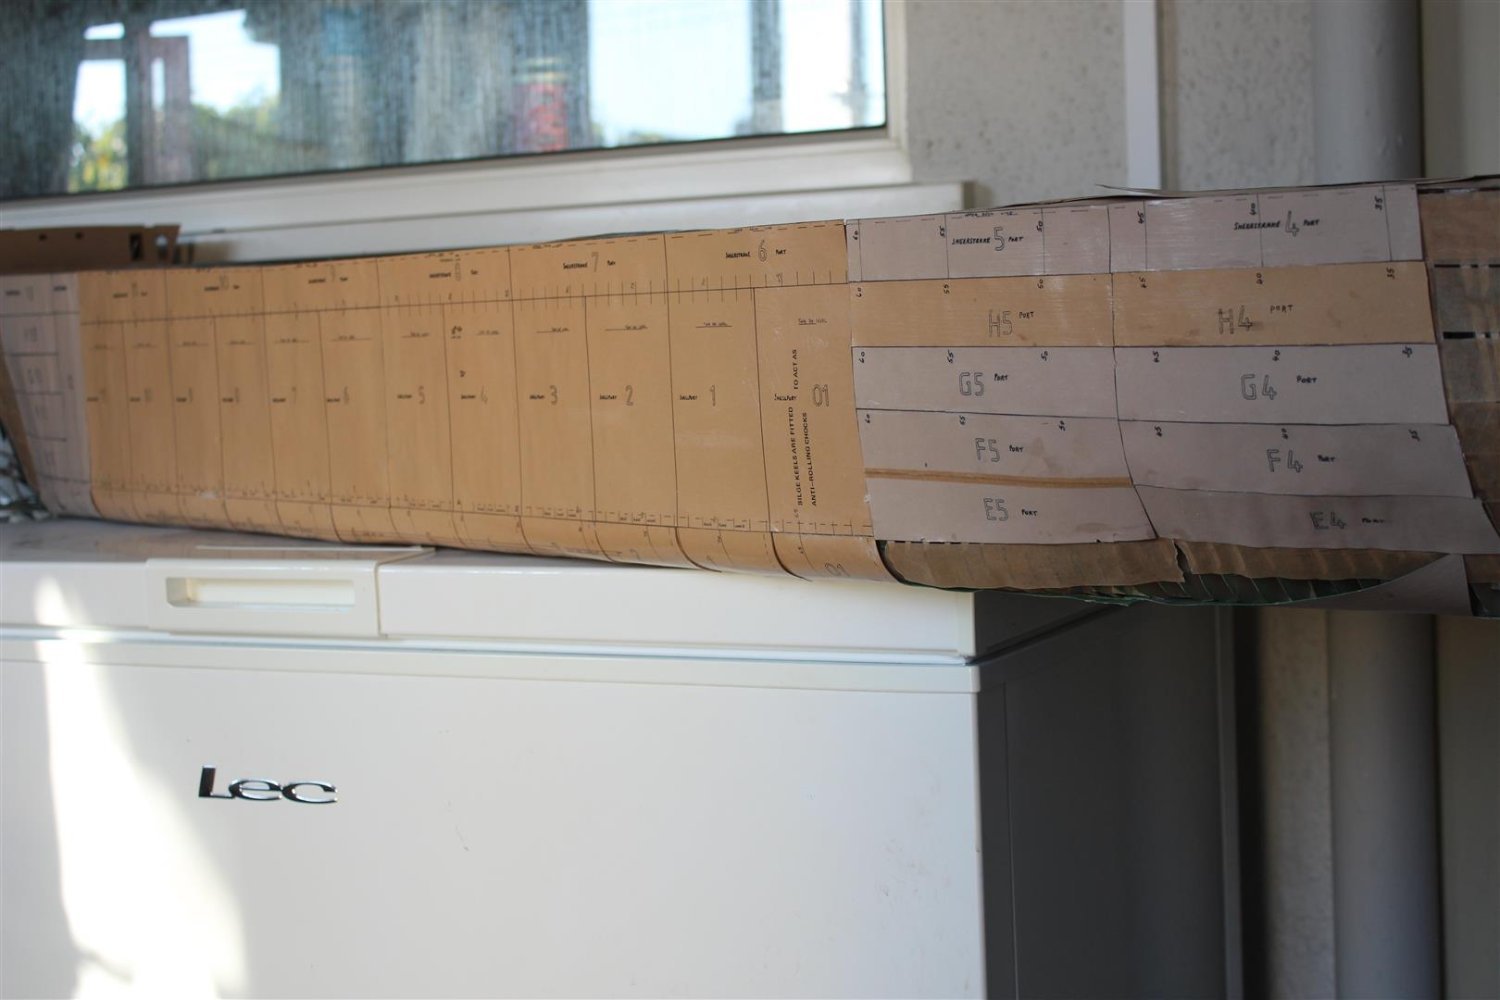
Day 96 hull plating forward Port side
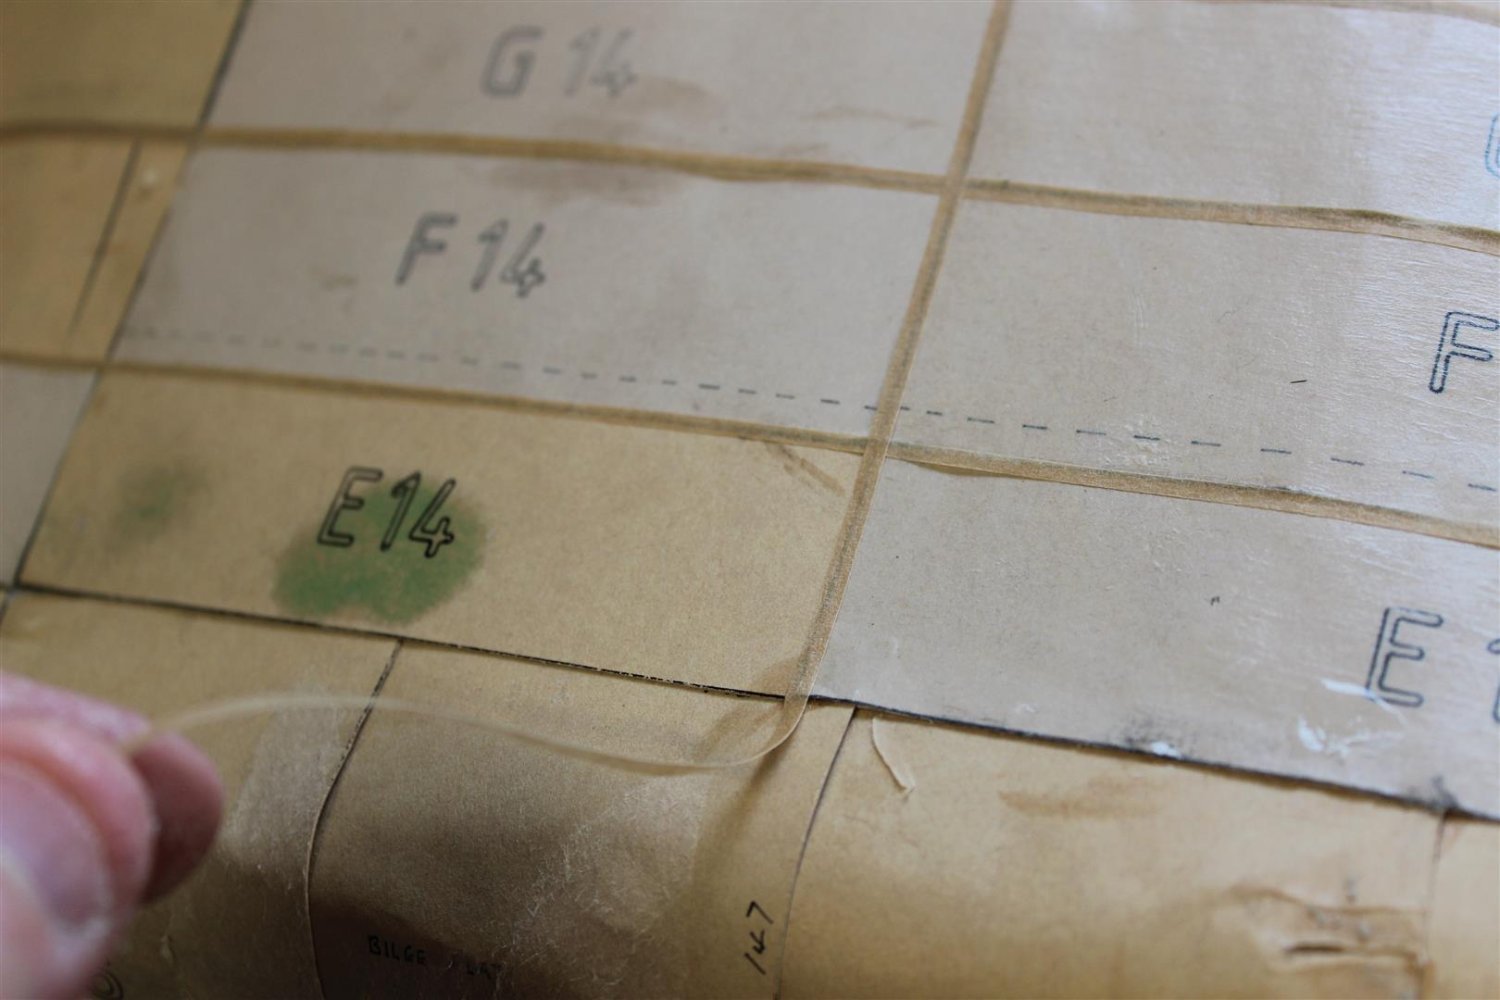
the kit is wrong and it messed me up quite a bit
some of the hull plates are marked up incorrectly and the hull plates that overlap the bilge plates are also incorrectly identified, and the wrong size, so i had to remove some and make others to fit, I think it is right now


The dotted line on the F plates should be on E, and as a result i forgot to over lap the bilge plates, so ripped them out
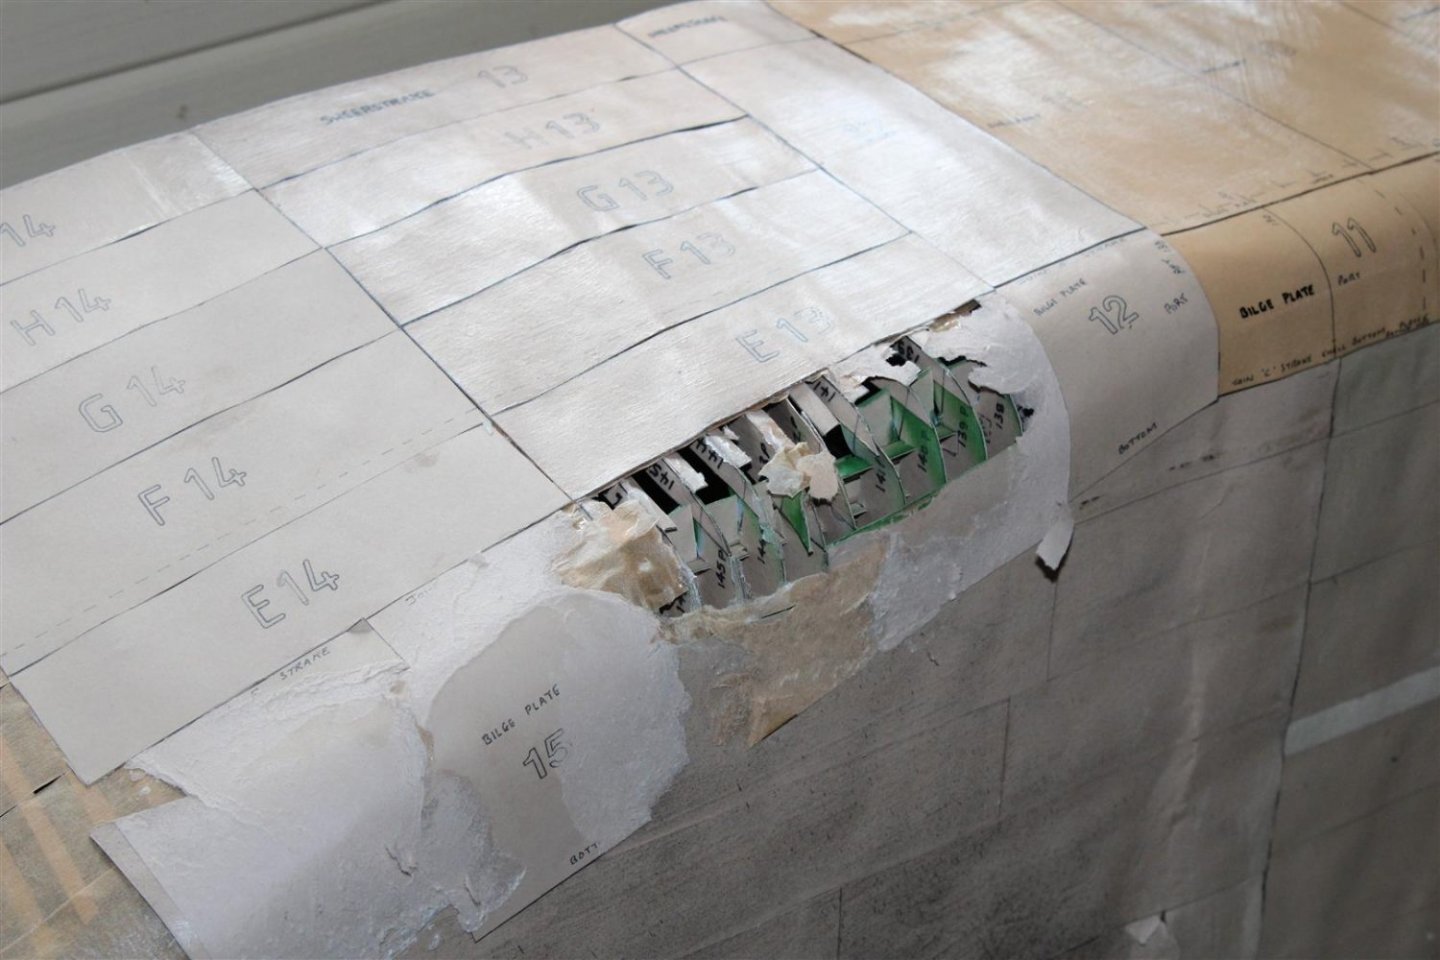
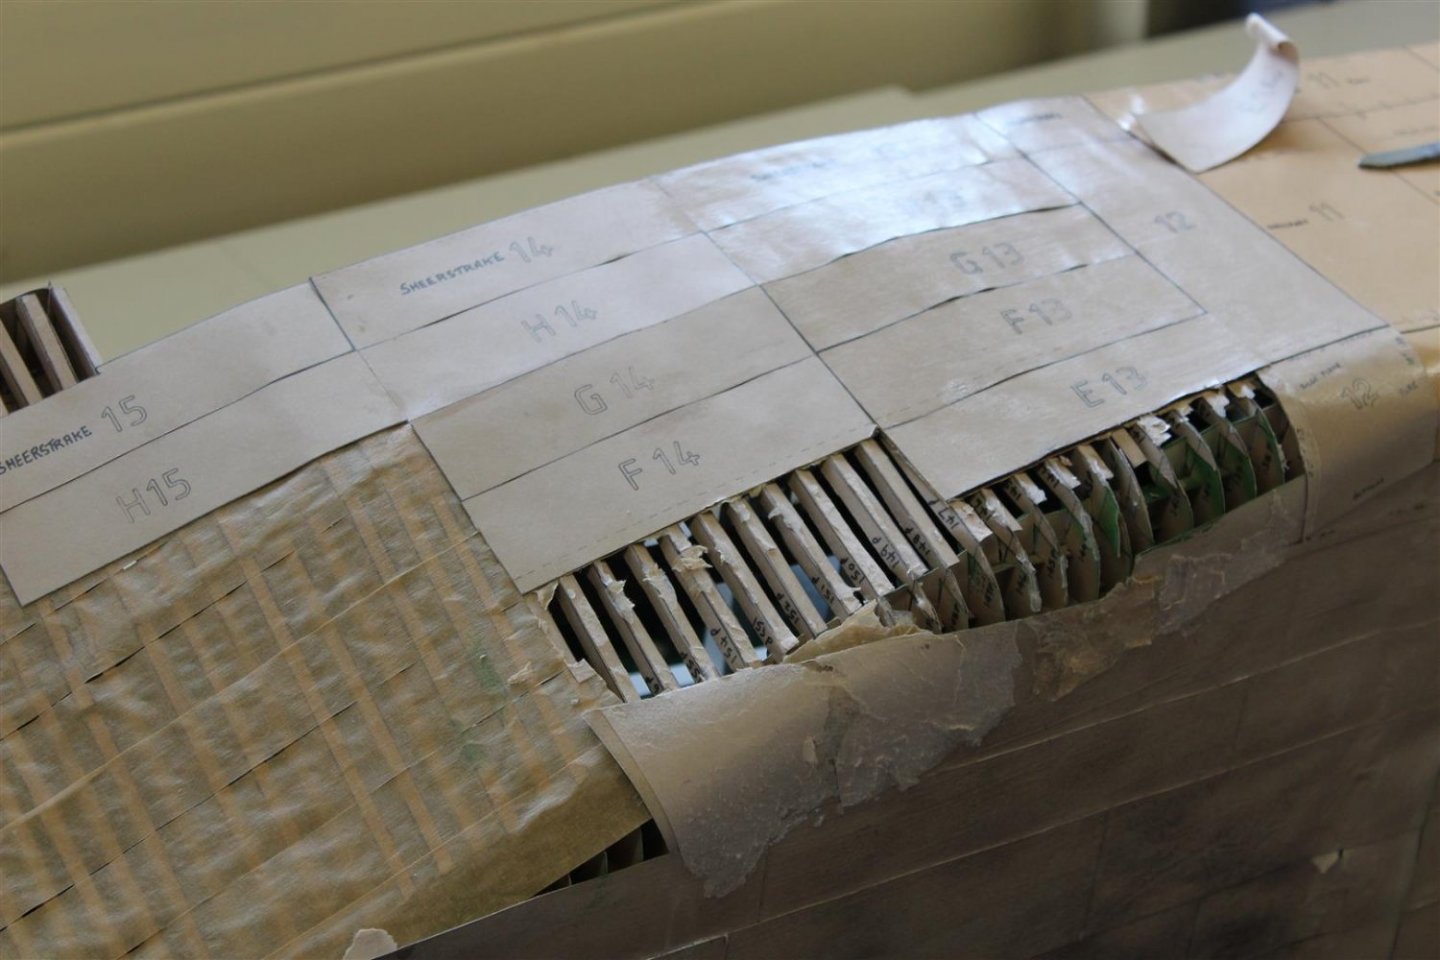
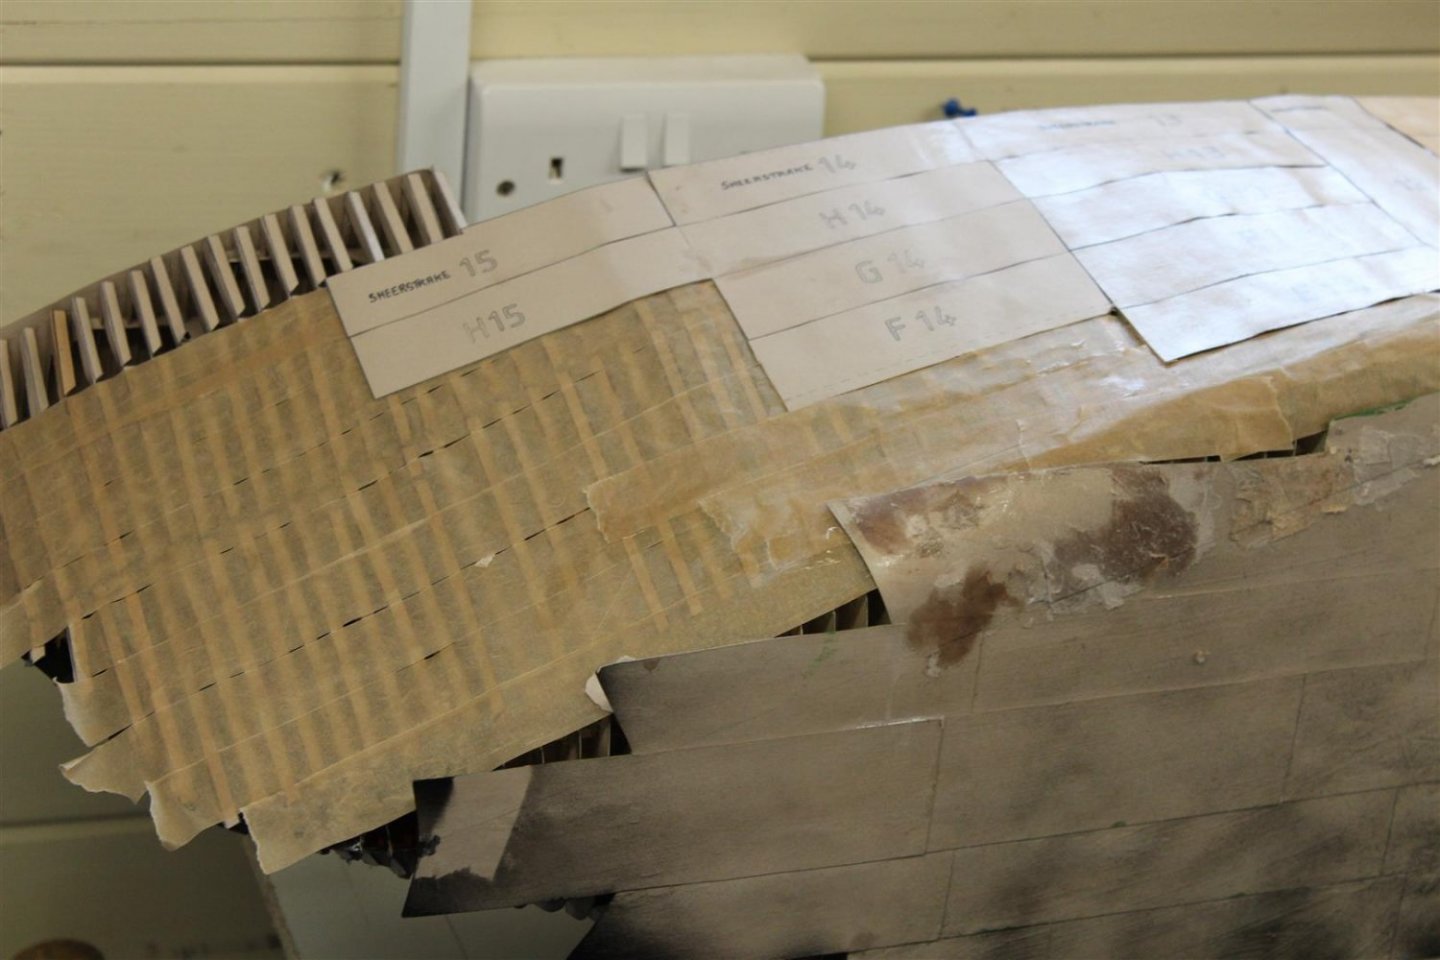
and did them again
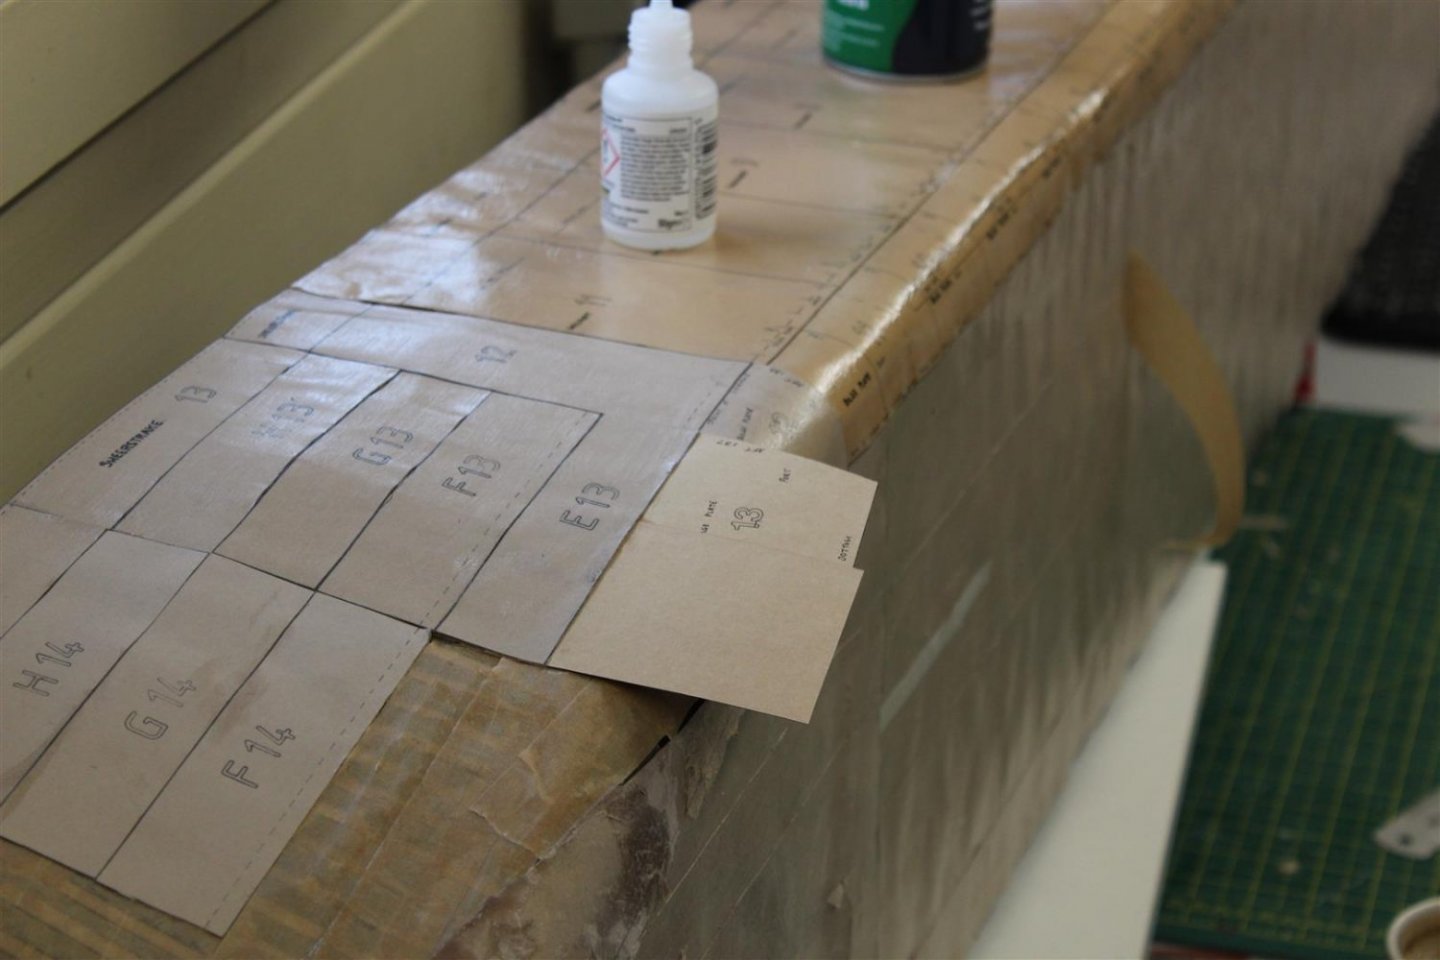
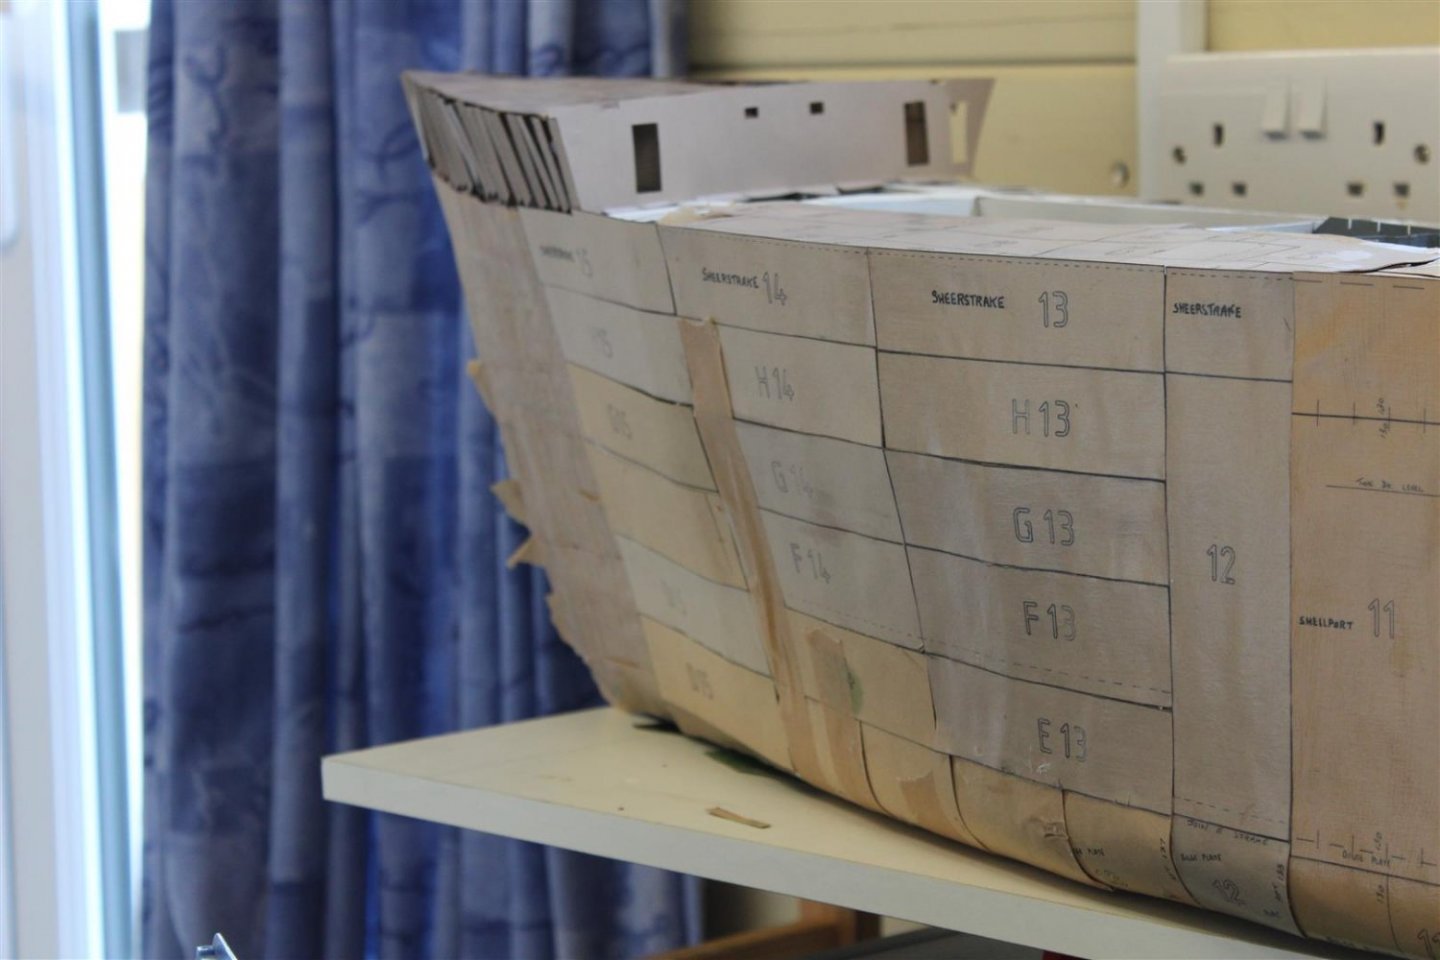

all the G plates have to be made taller as they then forgot about the overlap
tonight's experiment hiding the seam lines, paper tape and then varnished


the milky look is wet varnish
-
On 6/23/2022 at 4:16 AM, Old Collingwood said:
Kevin - my word my friend you are doing an Amazing job - of probably the most delicate medium you could work in, to me its looking genuine and realistic just like a ship would be.
OC.
thank you OC
-
-
-
-
oh no,
no i must not, buy this
I dont build 1/200, (turned round to take a photo of my stash to prove it , and fell over the 1/200 Titanic) lol
- scrubbyj427, chris watton, yvesvidal and 6 others
-
3
-
 6
6
-
8 hours ago, amateur said:
Impressive!
I know it is part of the fun, but it is a shame that alll thise frames and deck structures are disappearing behind the outer skin
")
Jan
morning Jan only on the port side, a lot of stbd will be left opened up, i, just finding a way around of doing it, without the upper deck collapsing under the weight
it wont be this much as the bow/stern will be skinned
-
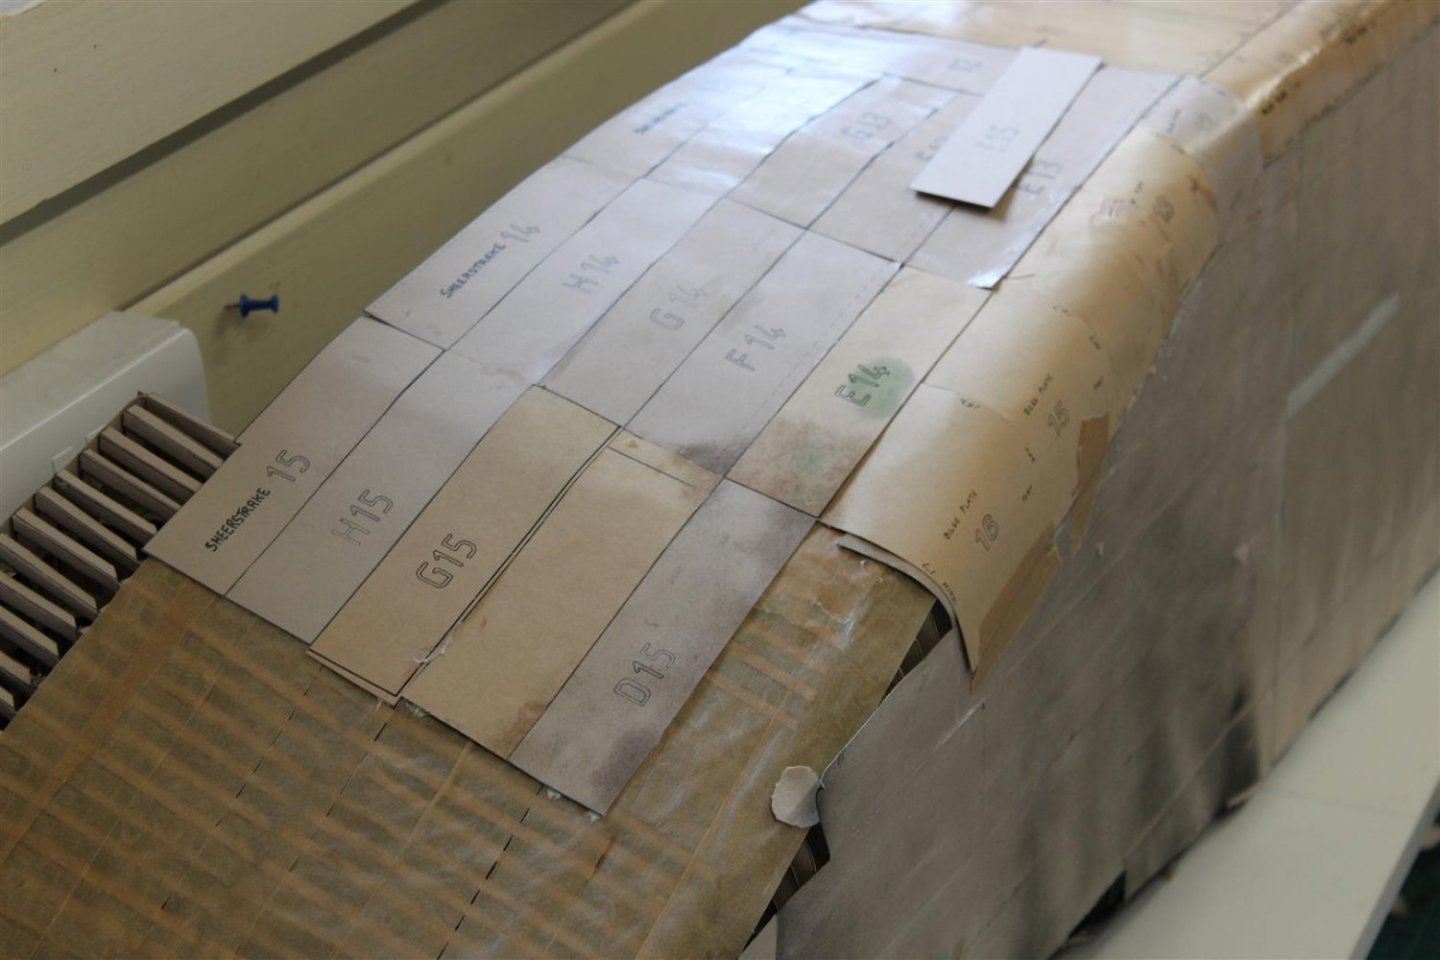
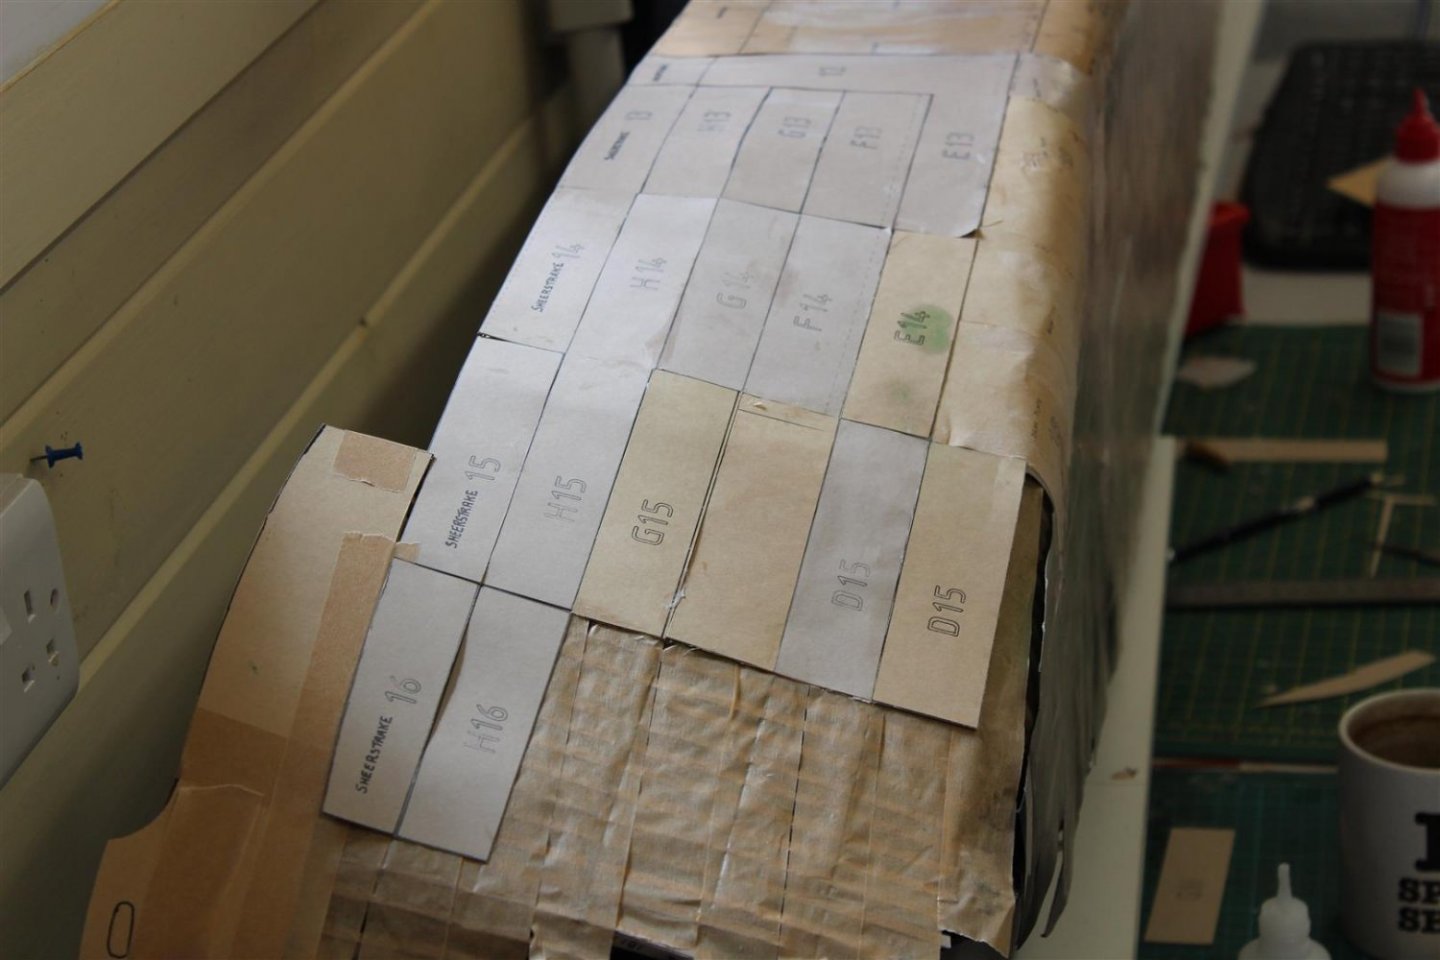
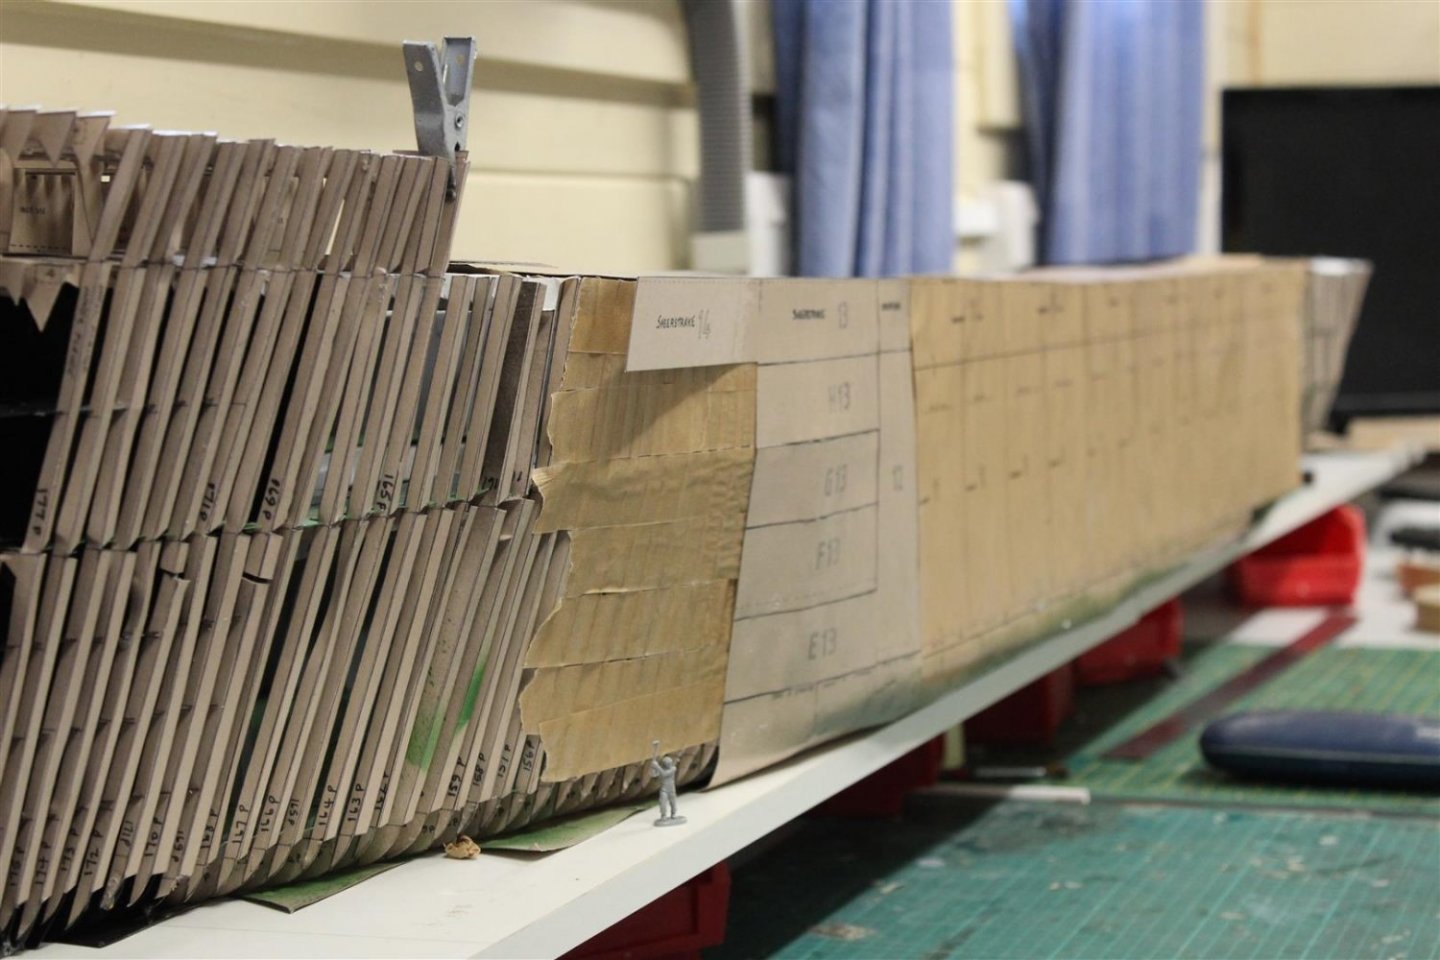
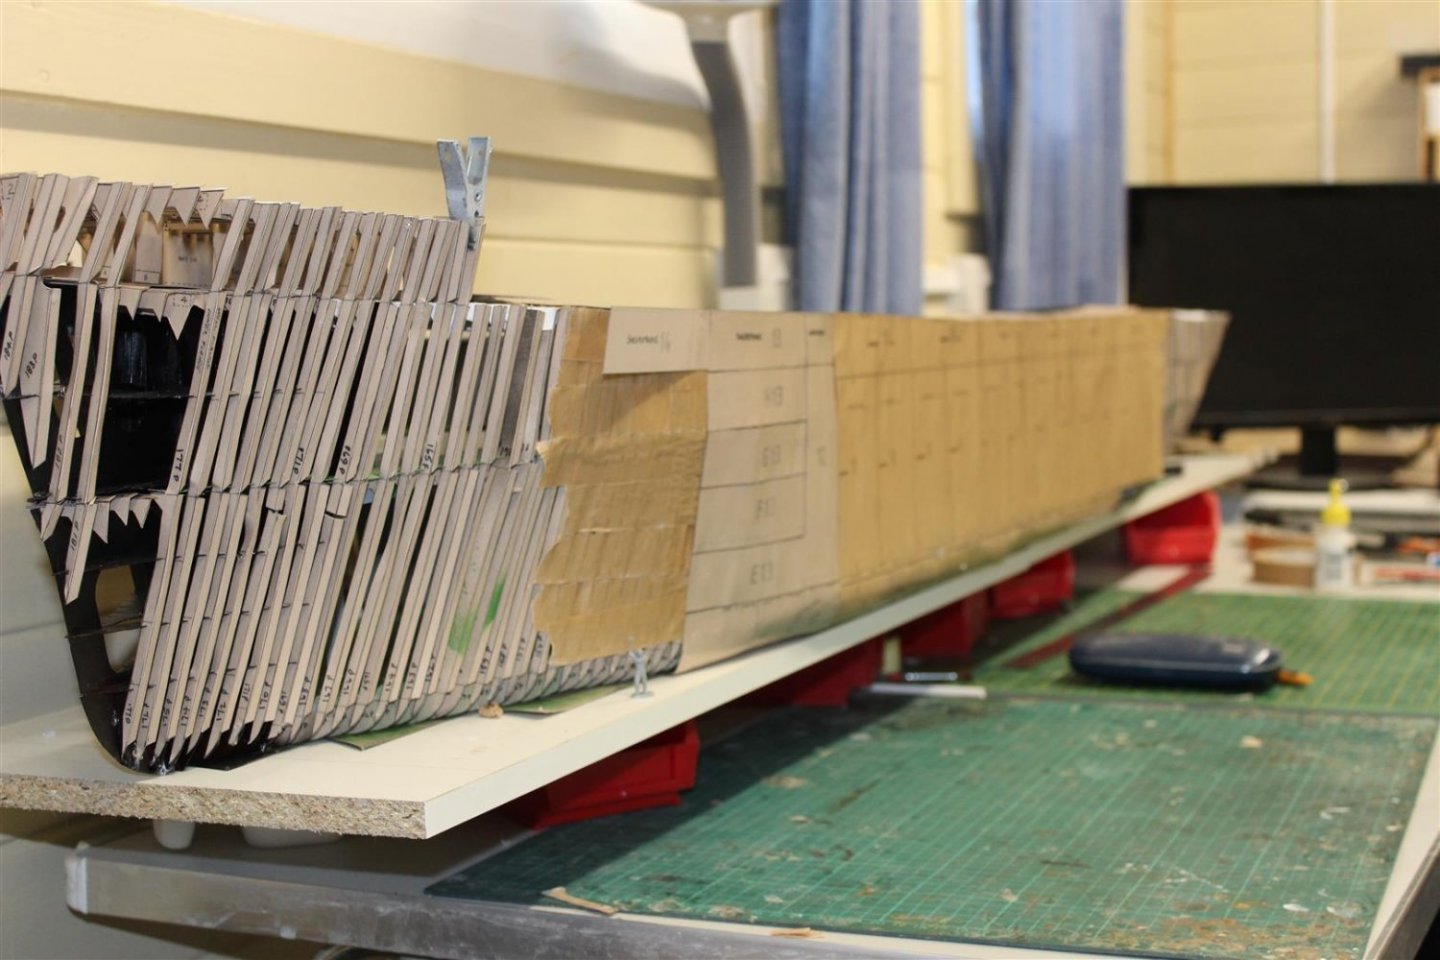
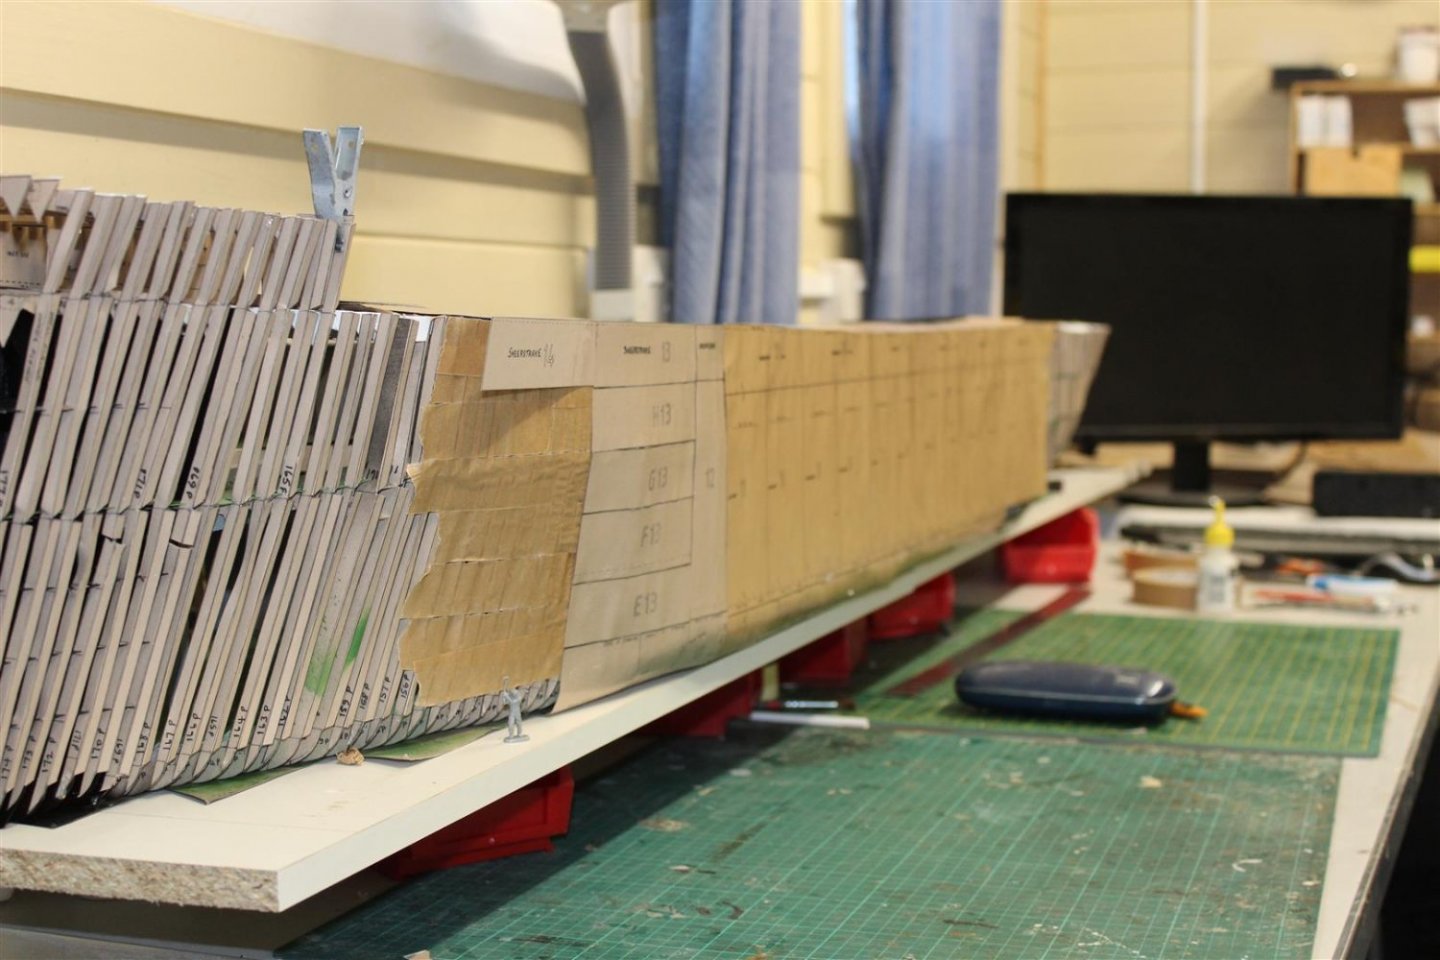
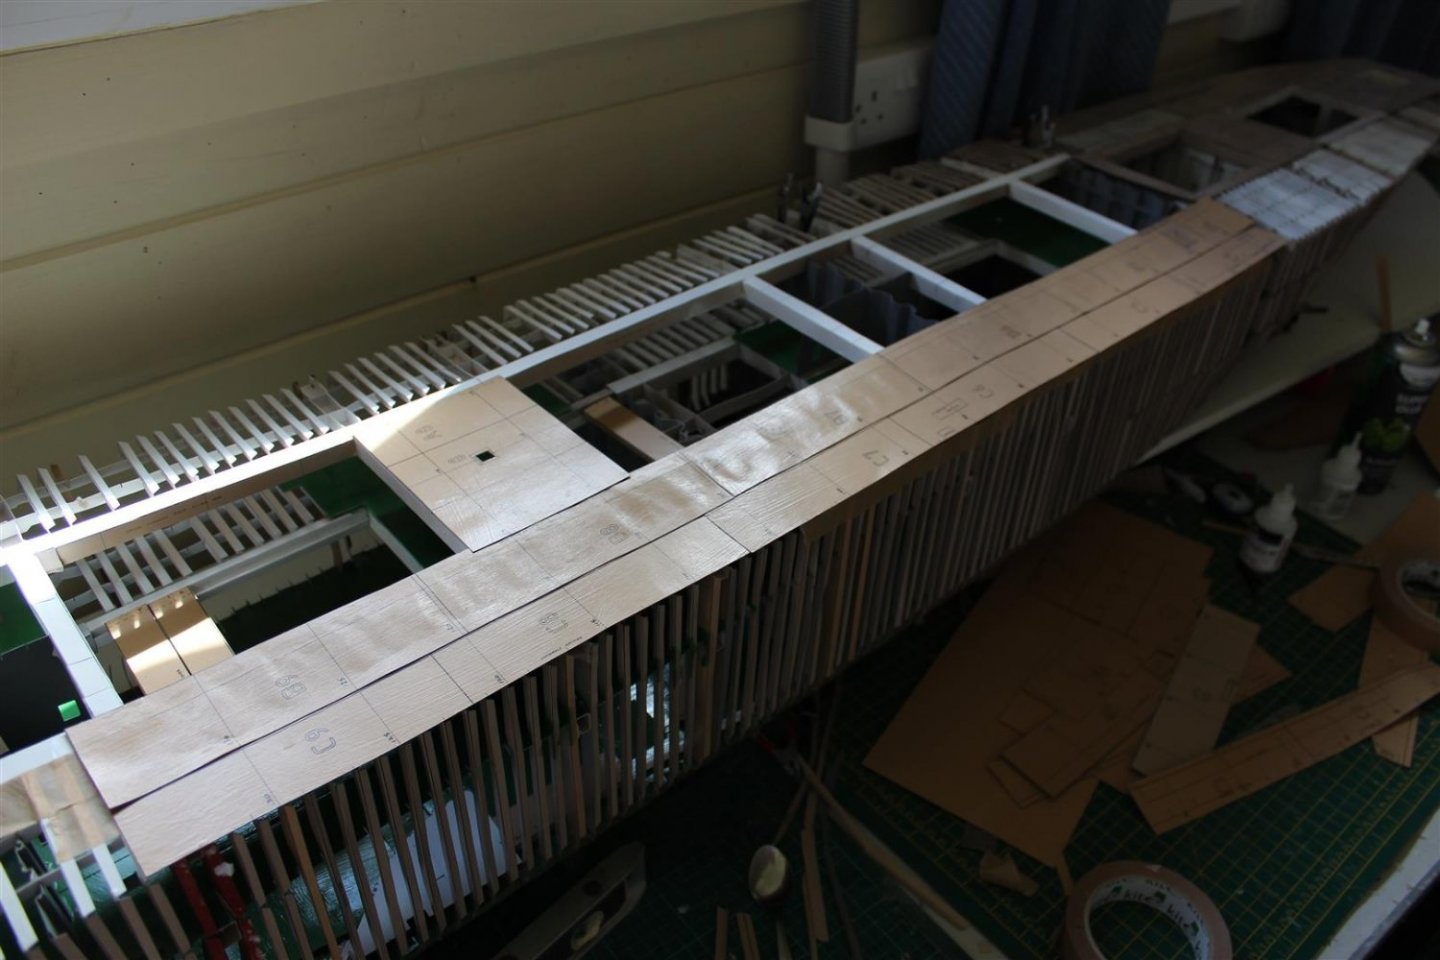
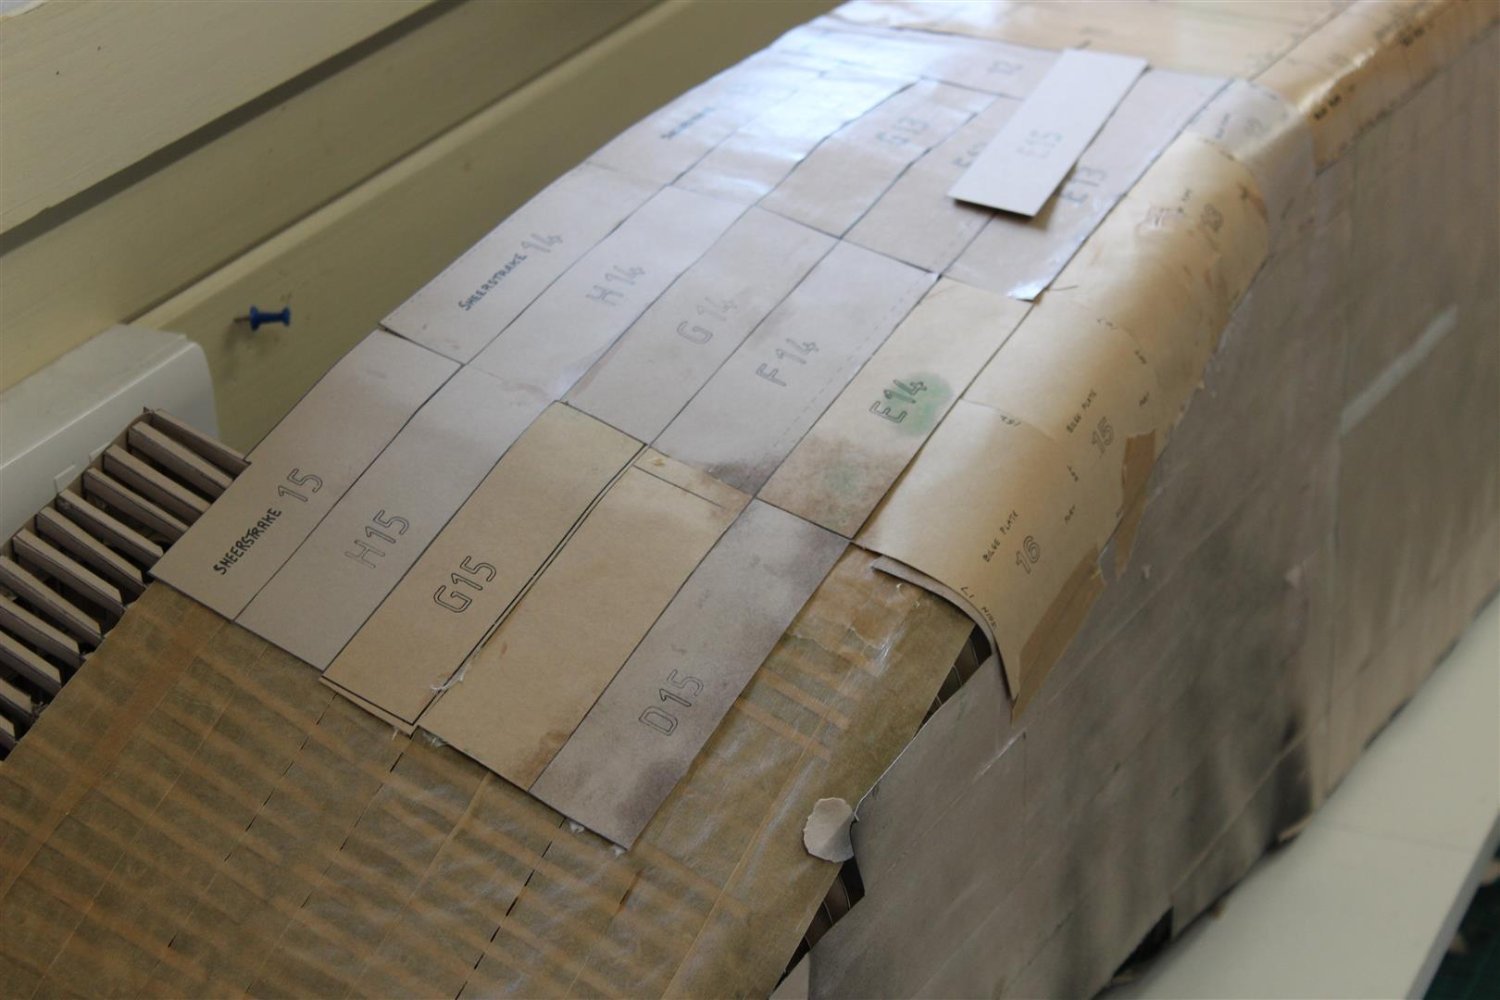
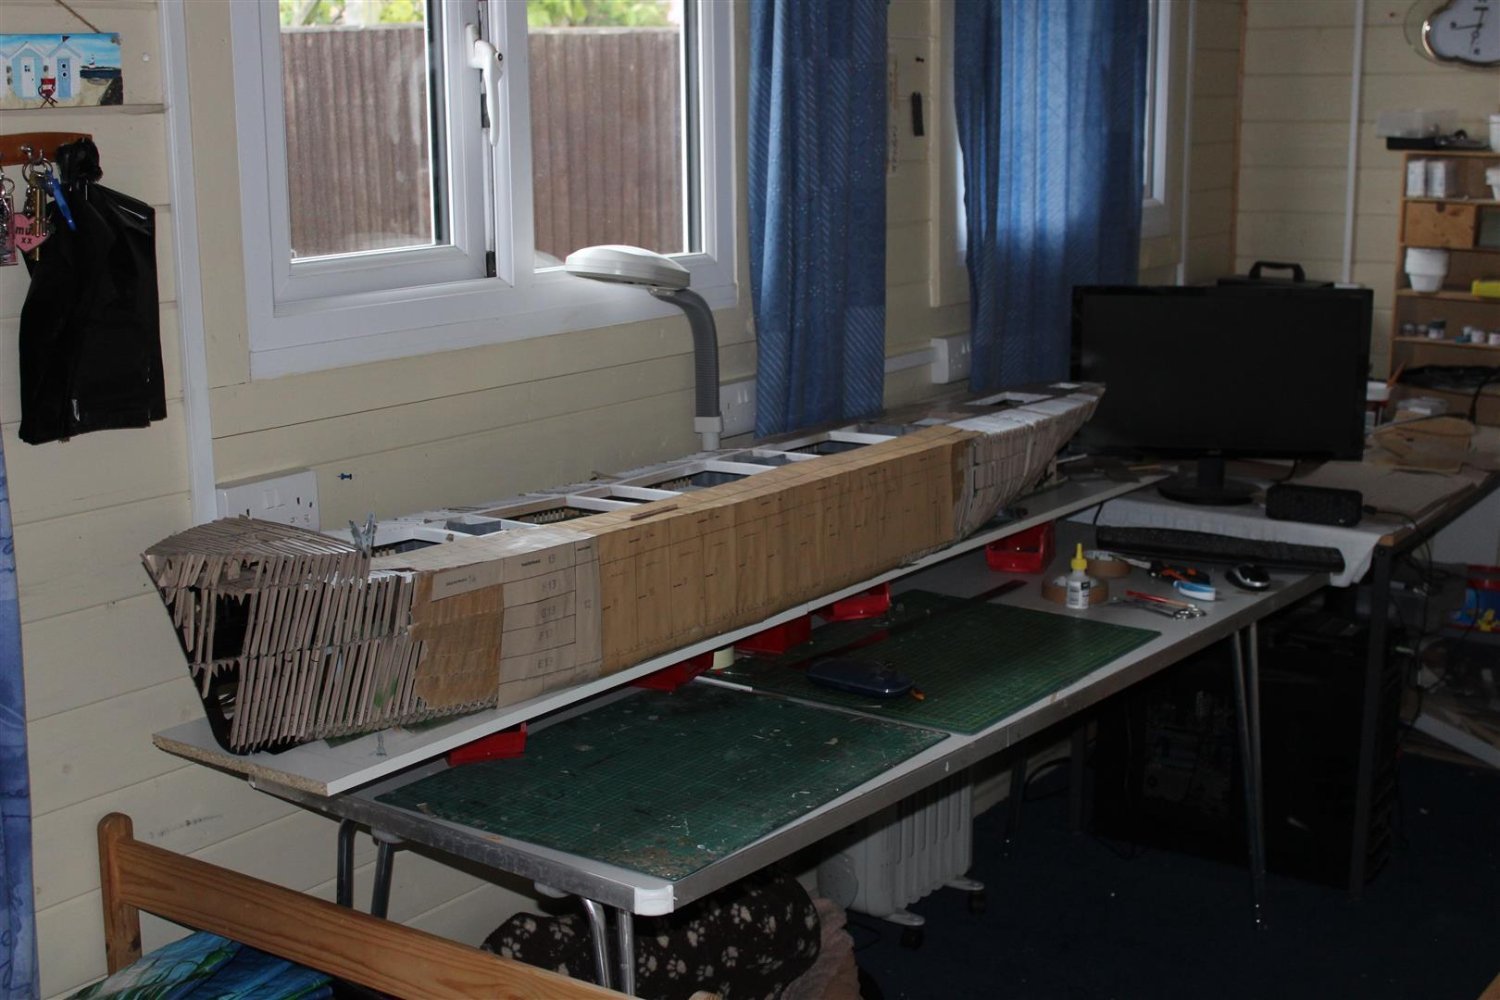
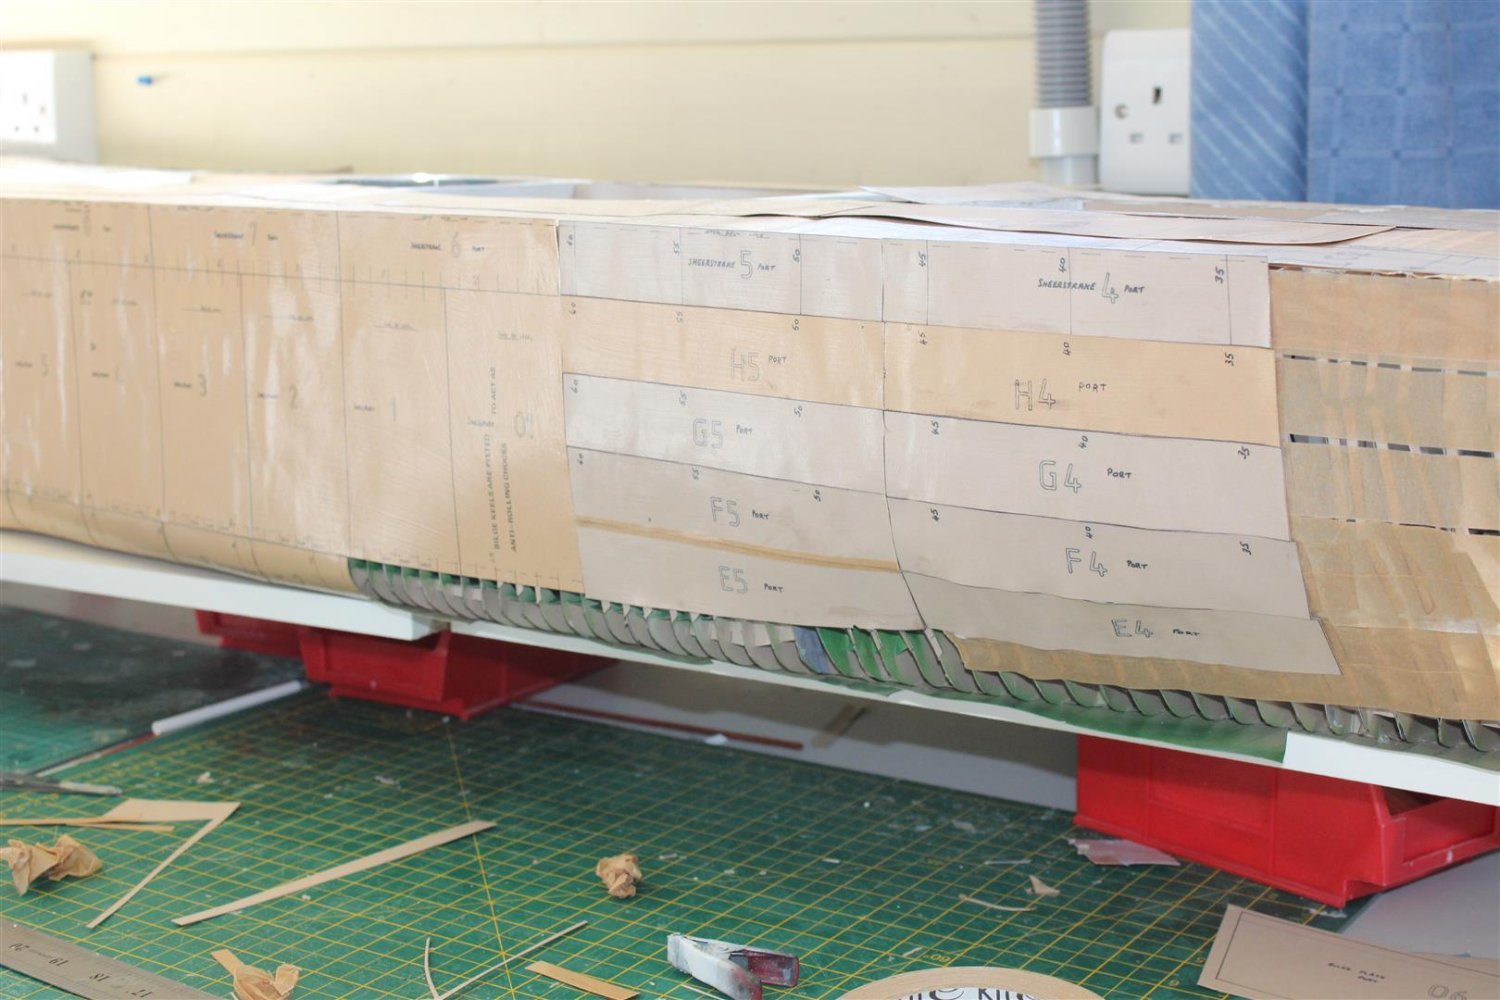
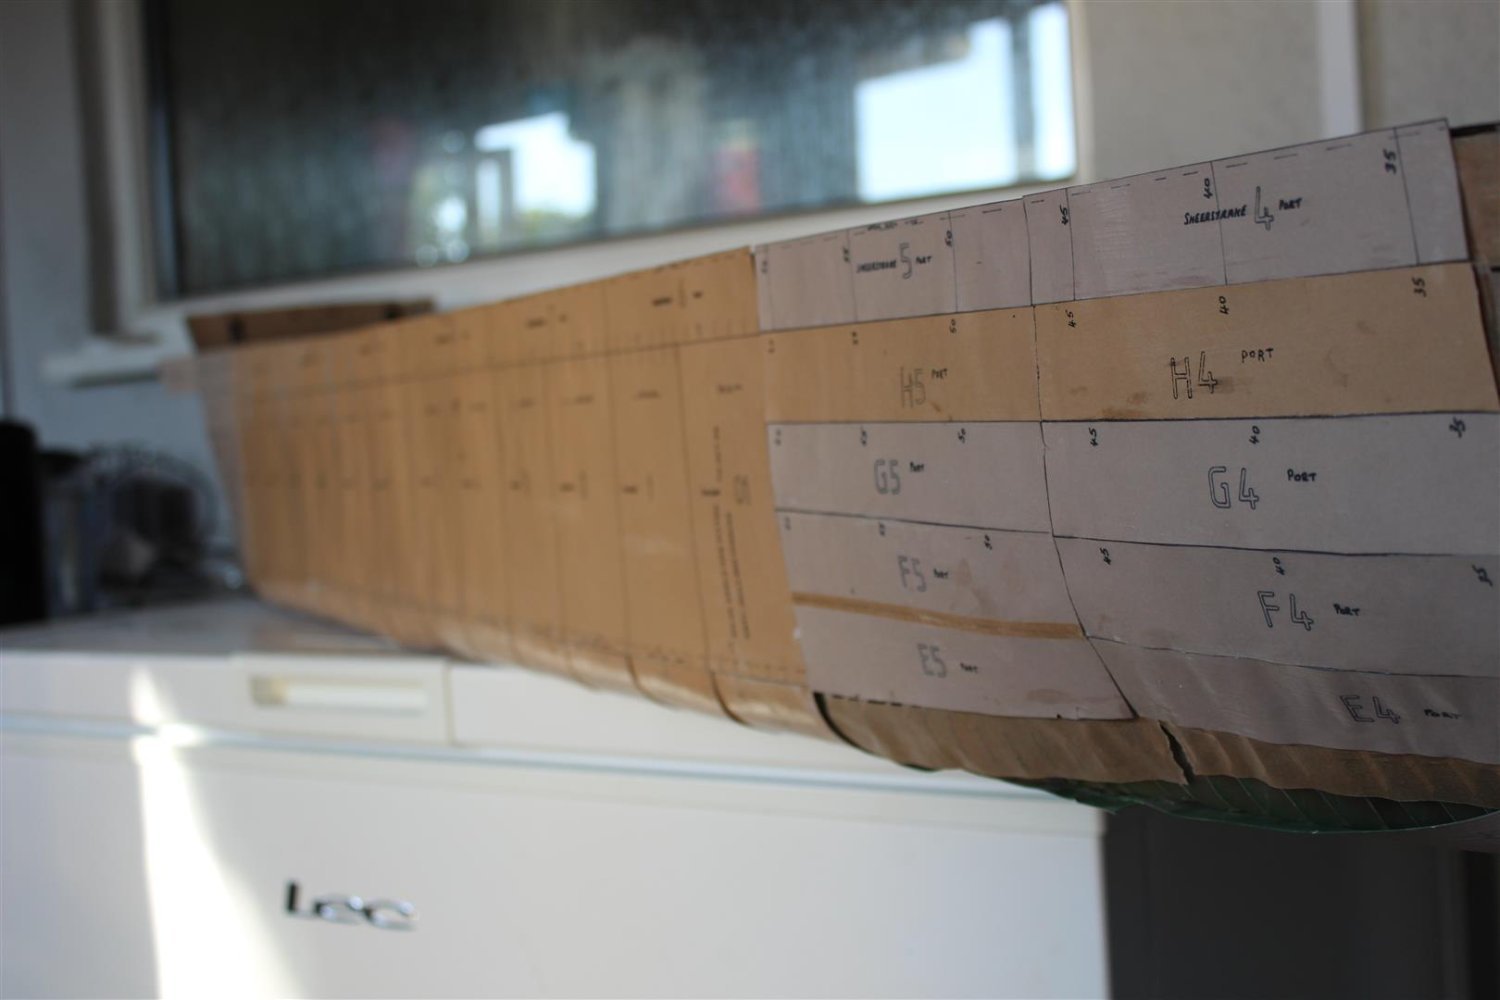
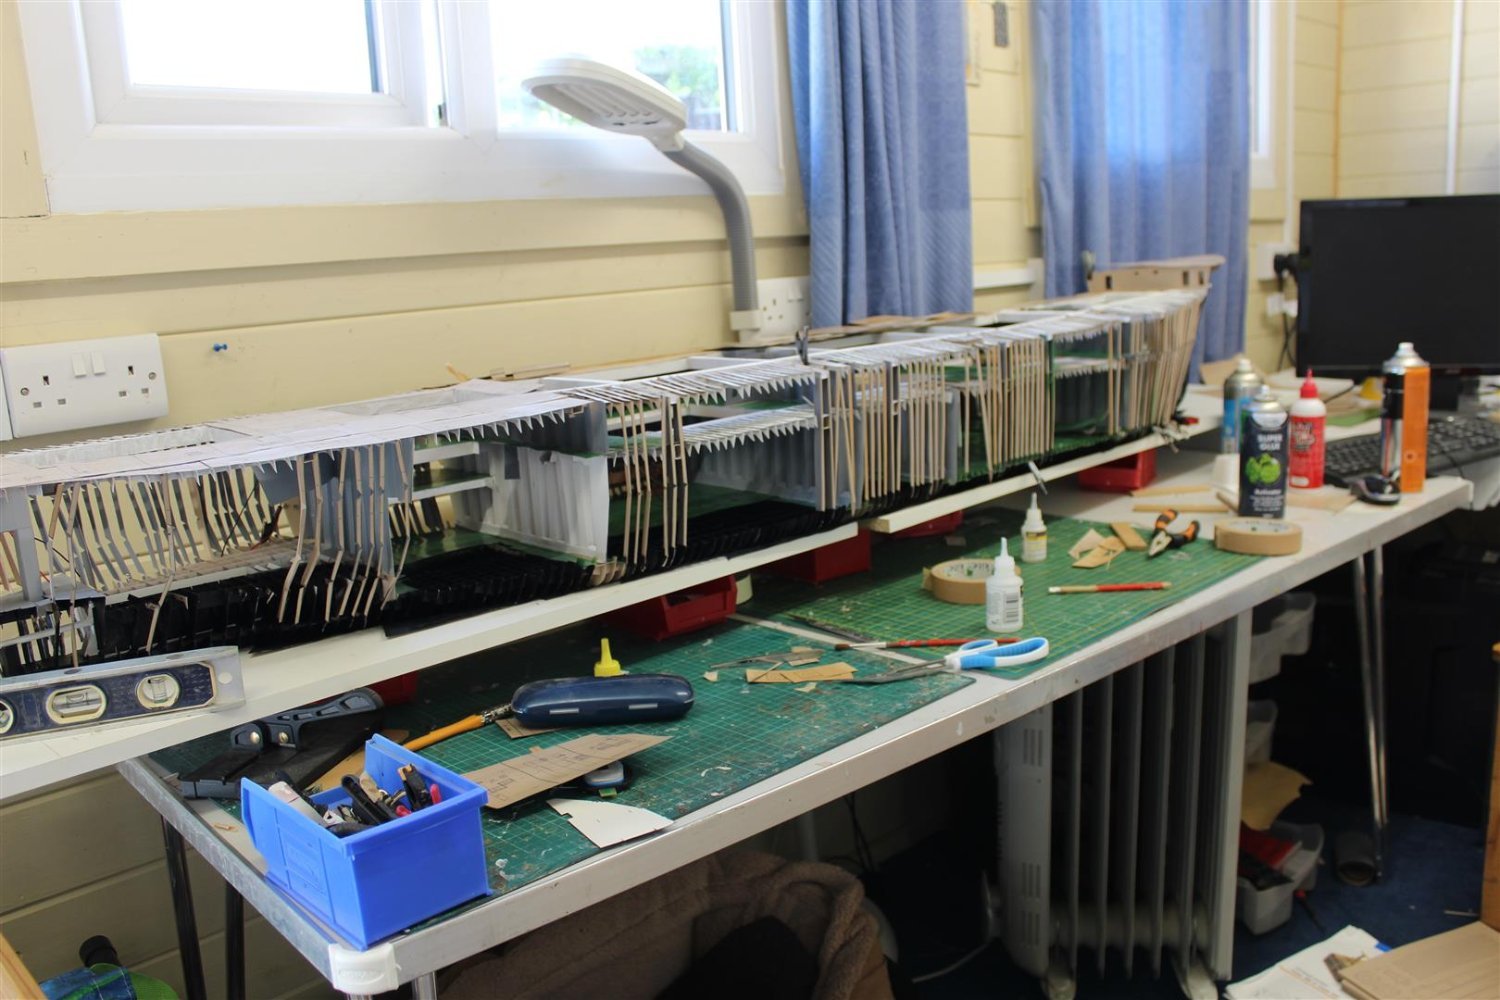
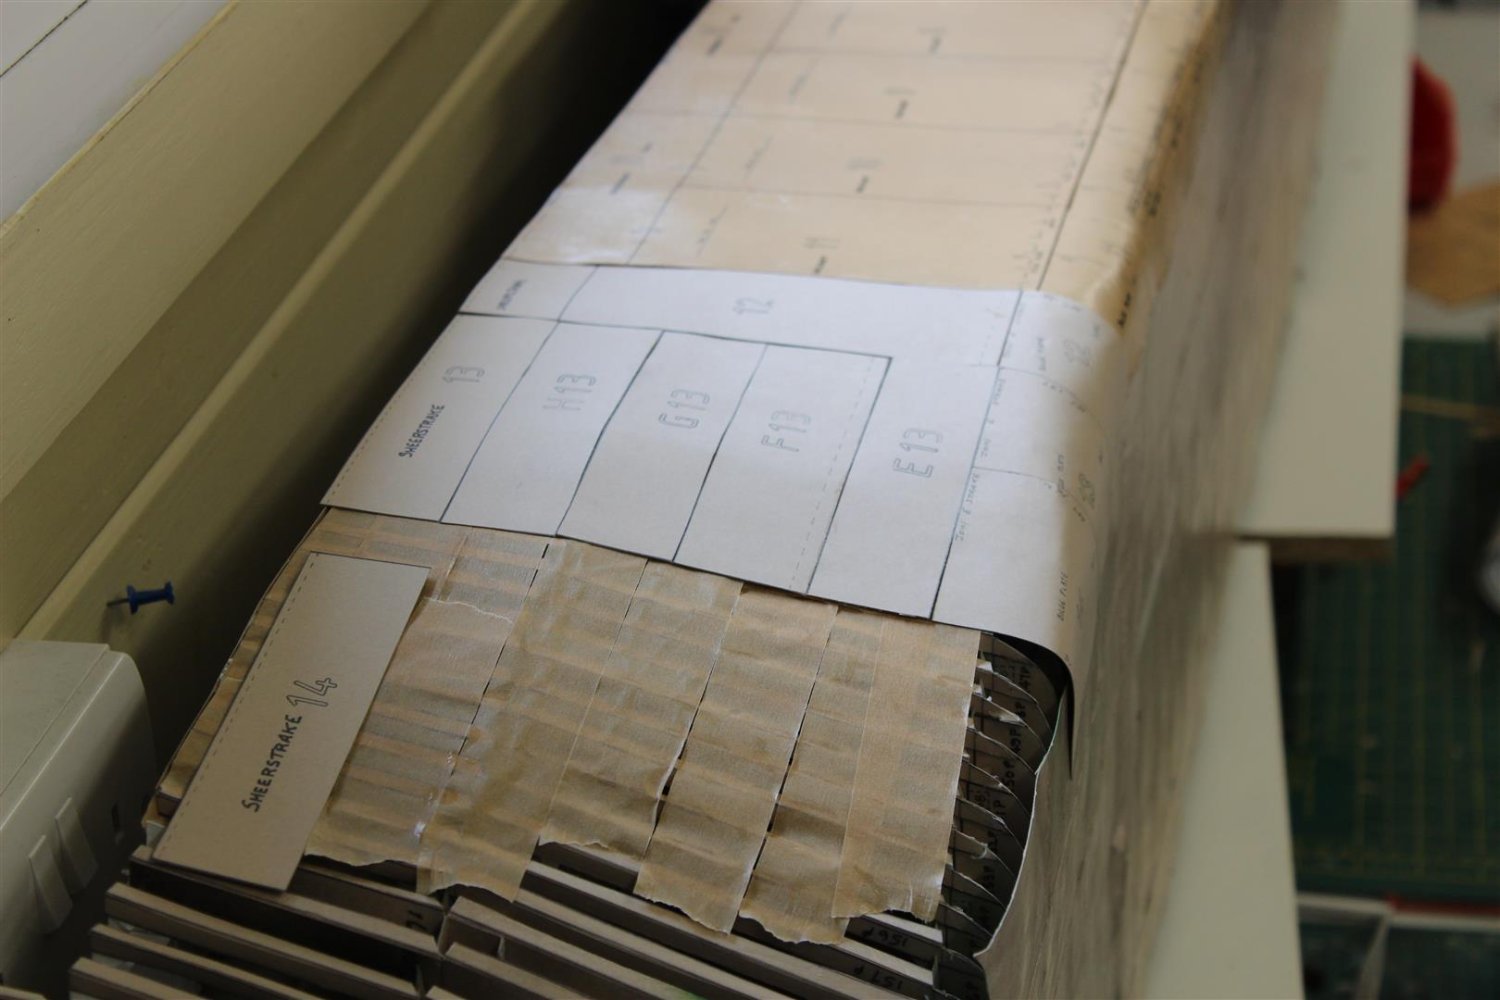
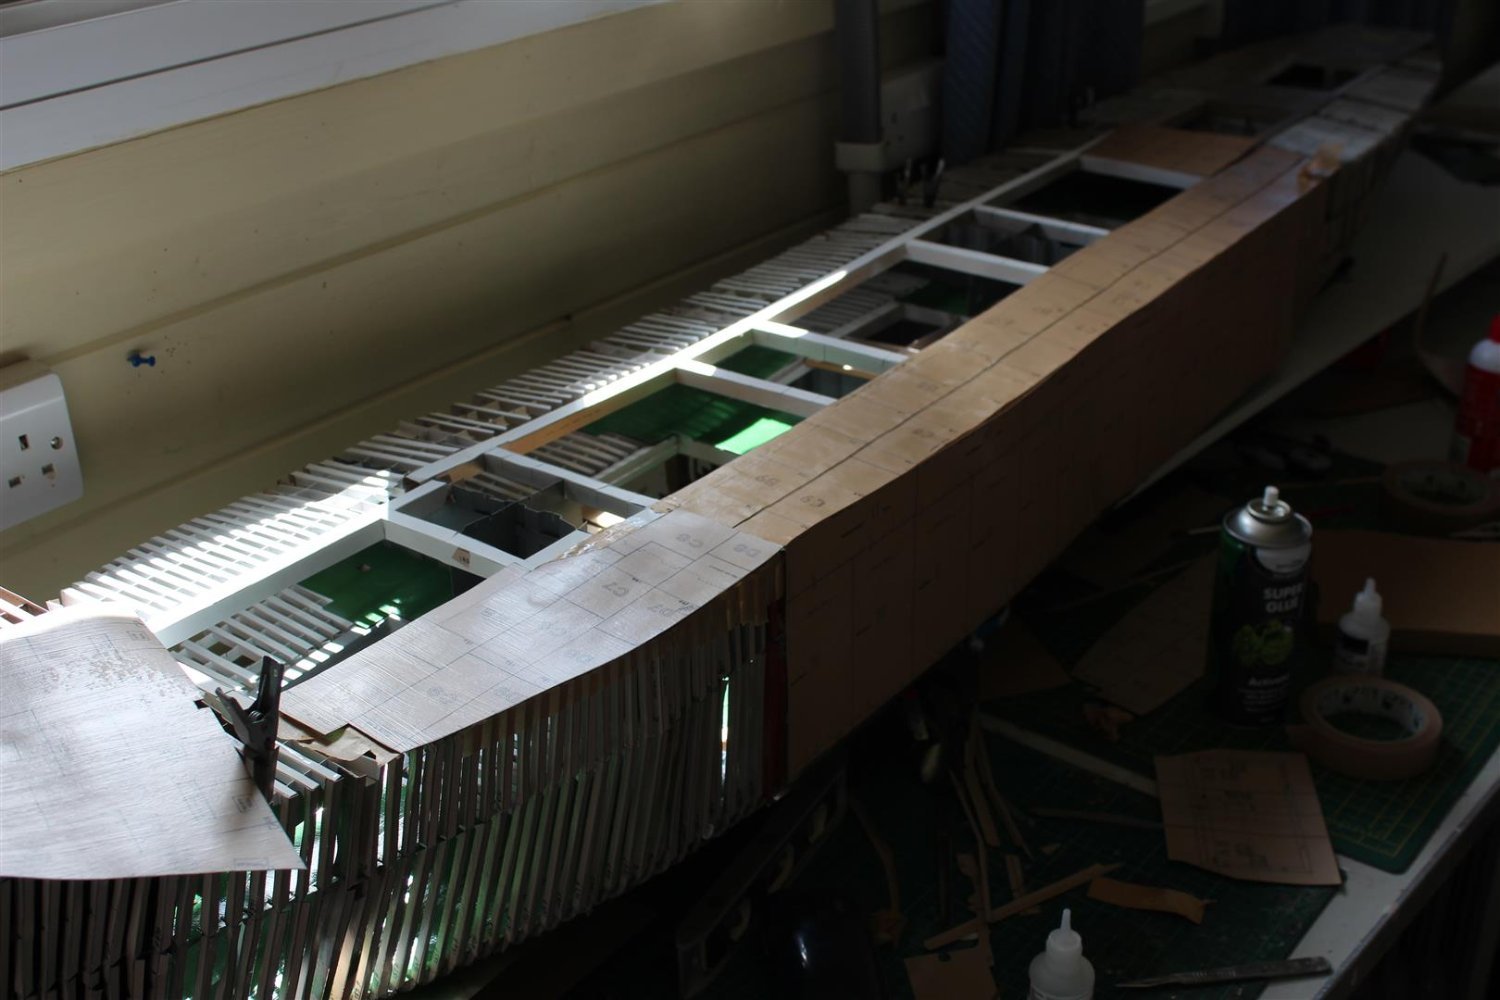
good evening everyone
thank you for comments and likes, the wife is much better now
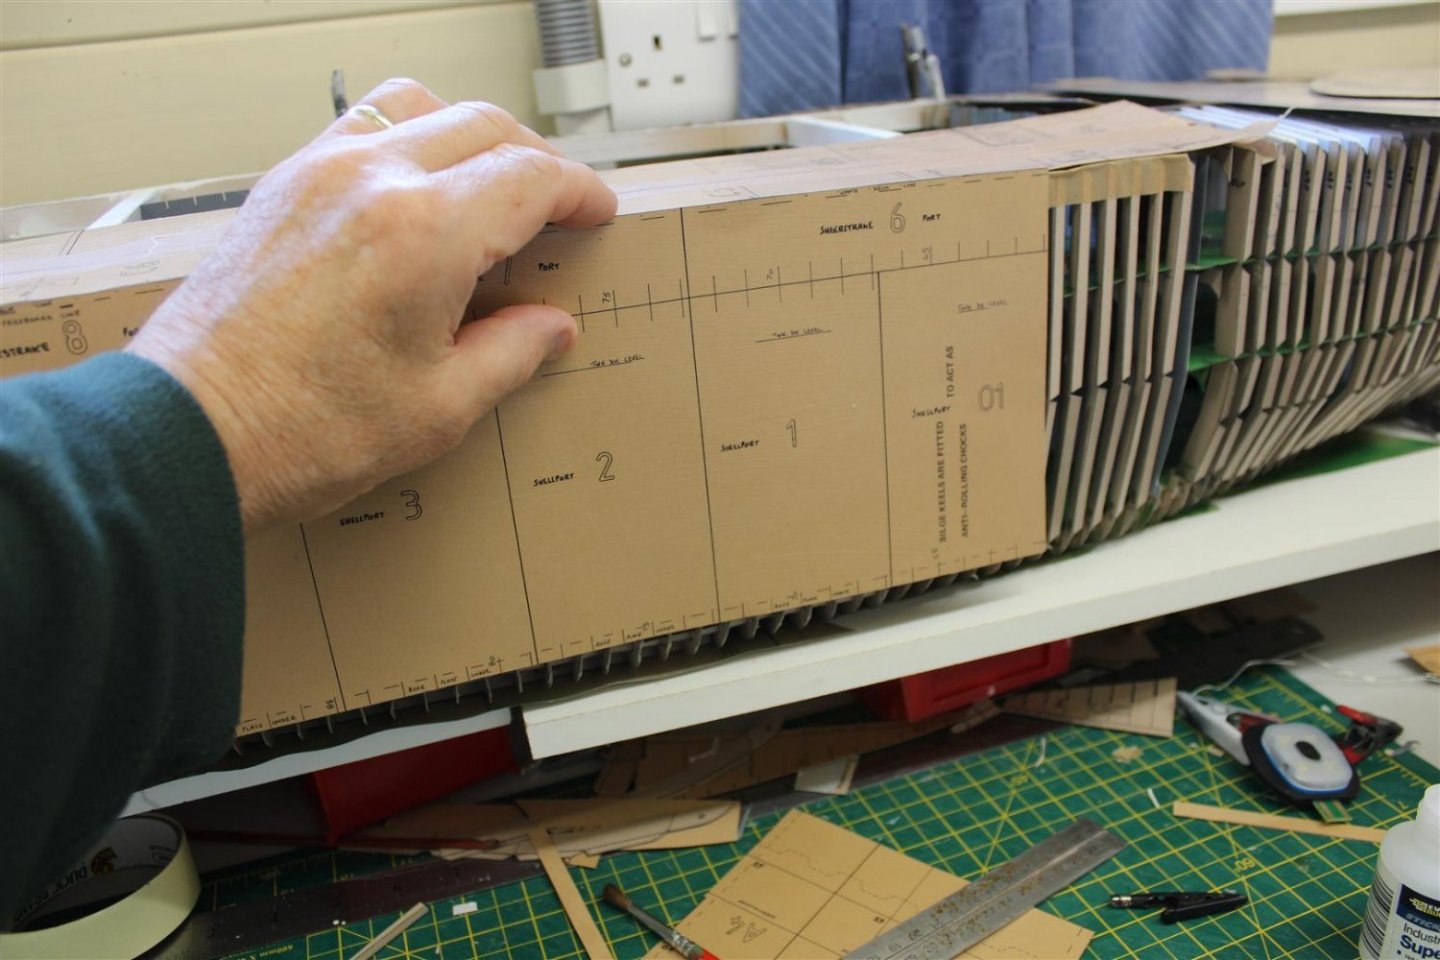
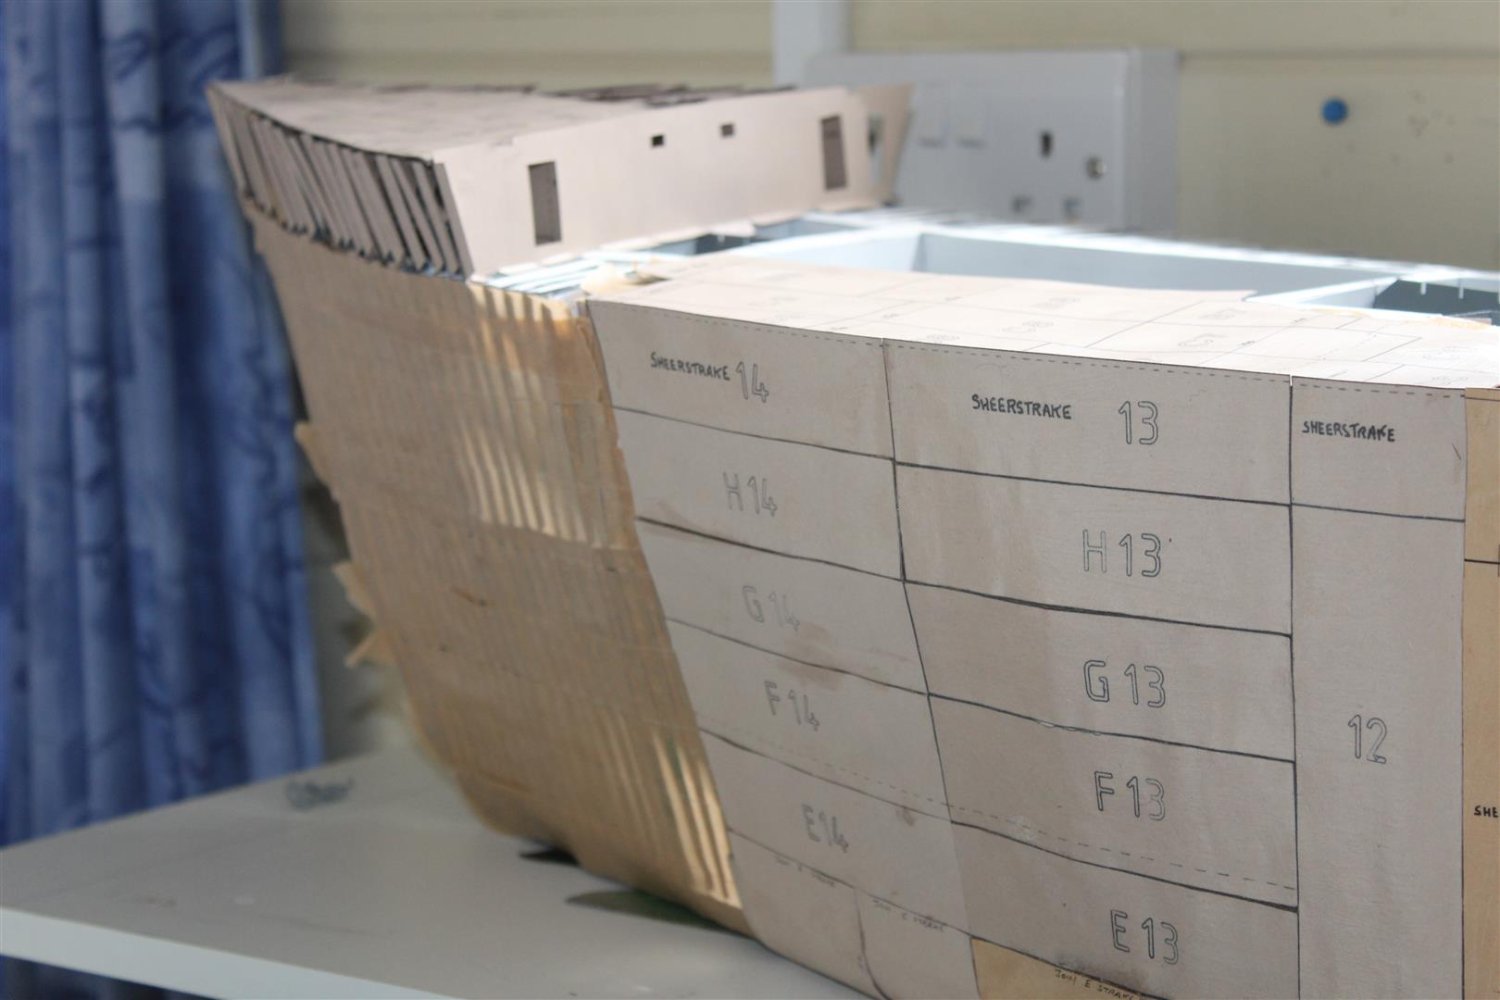
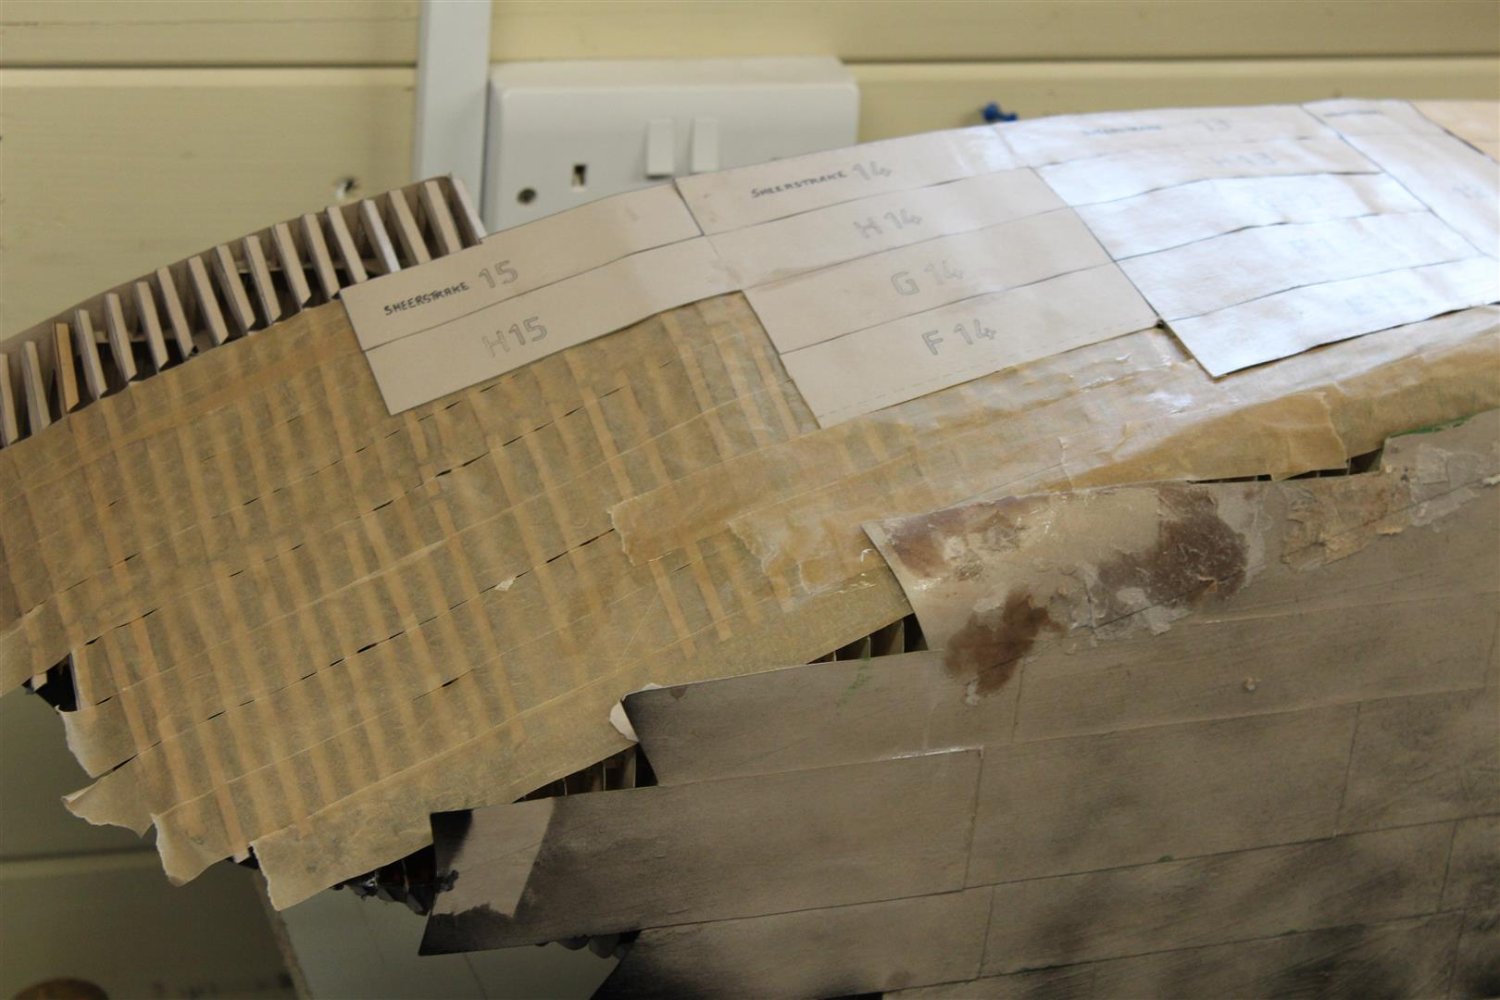
day 91 stbd side hull and bilge plates
even though the wife was ill, i still made sure a did a bit on the the build every day, maybe an hour tops, but back on it today
the kit is quite clever considering, its my modelling that lets it down, but even that seams to have been taken into account, and so far the plates have gone on ok
the sticky tape under the plates is my idea, and im happy i went down that road, i have ensured a better contact with the frames, and yes the tape has been glued as well so that the whole lot does not fall off
the bottom of the hull plates shows the position for the top of the relevant bilge plate
once i was happy the bilge plate was in the correct position i secured the hull plate over it


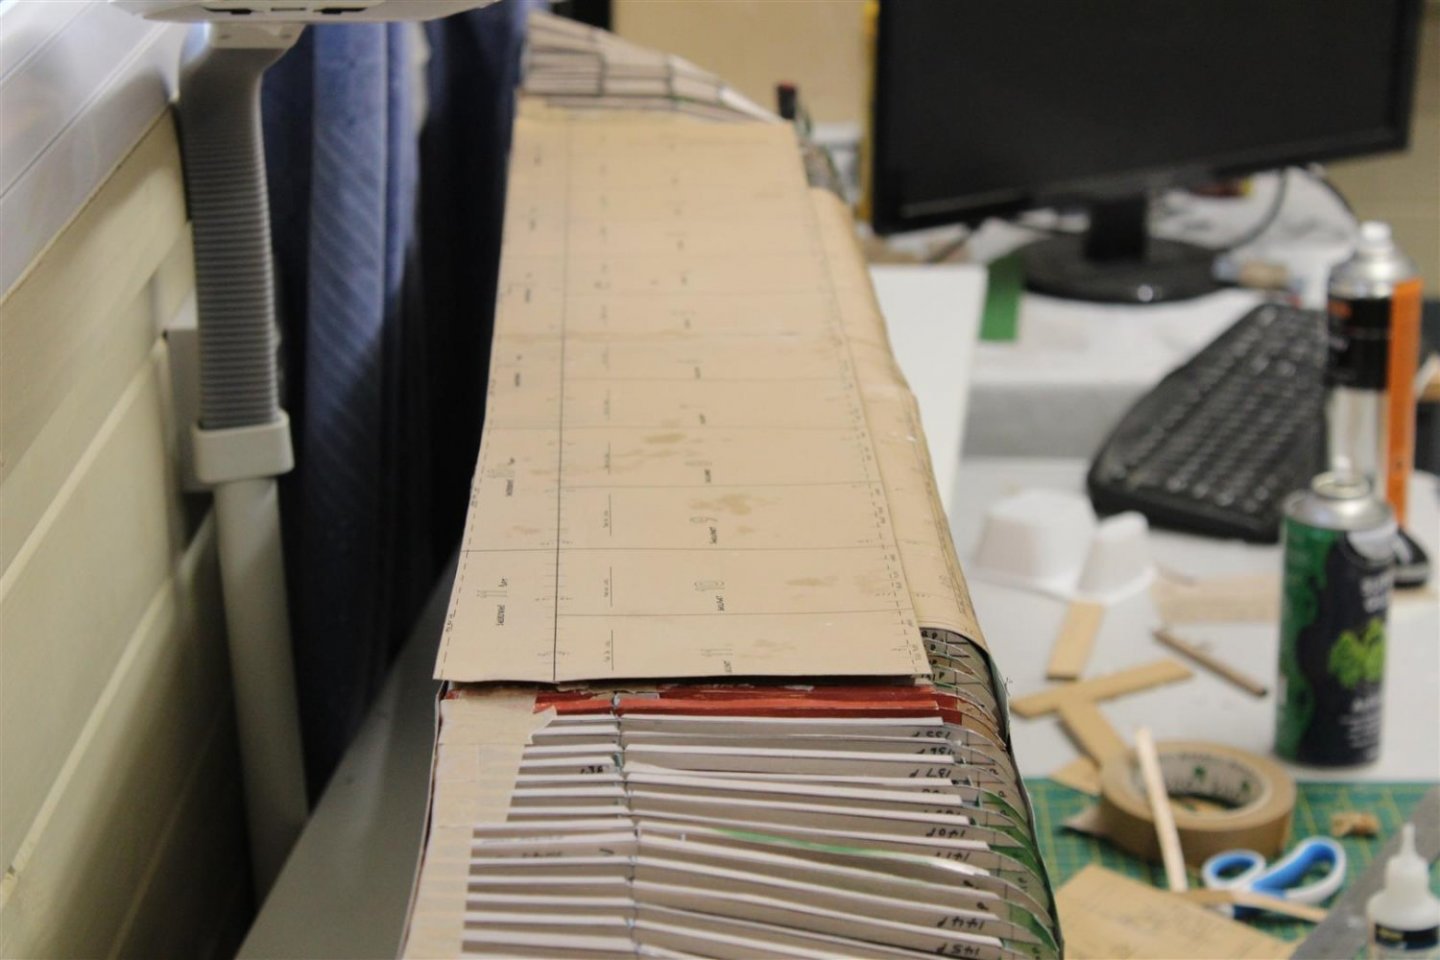
as we get to the pointy end smaller plates are laid under the sheerstrake, these take a bit of adjusting to sit properly i will tape over these butt joints later on

i just laid another coat of varnish over, hence looking a bit wrinkly

- hof00, GrandpaPhil, chris watton and 13 others
-
13
-
 3
3
-
hi guys
thank you for comments and likes
been quiet in the boatyard the last week or so, the wife has been ill with a bad viral infection, although she is well on the road to sarcasm (a sign of being back to normal)
-
-
Very Nice indeed, he will look great looking over my shoulder whilst i build mine
- thibaultron, mtaylor, Dave_E and 3 others
-
6
-
-
good evening everyone
thank you for comments and likes
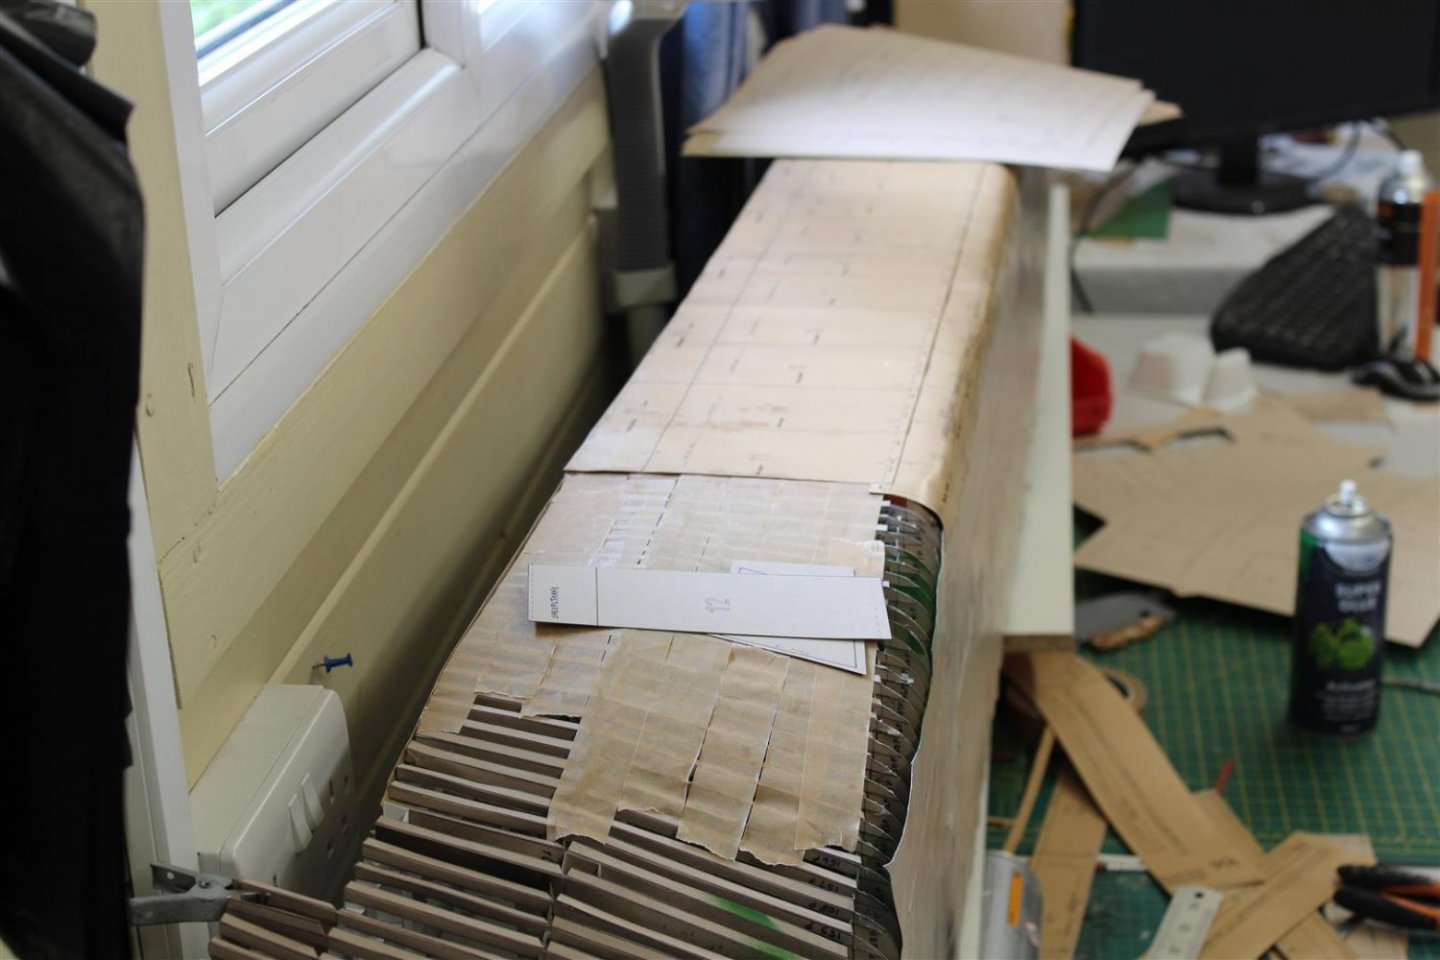
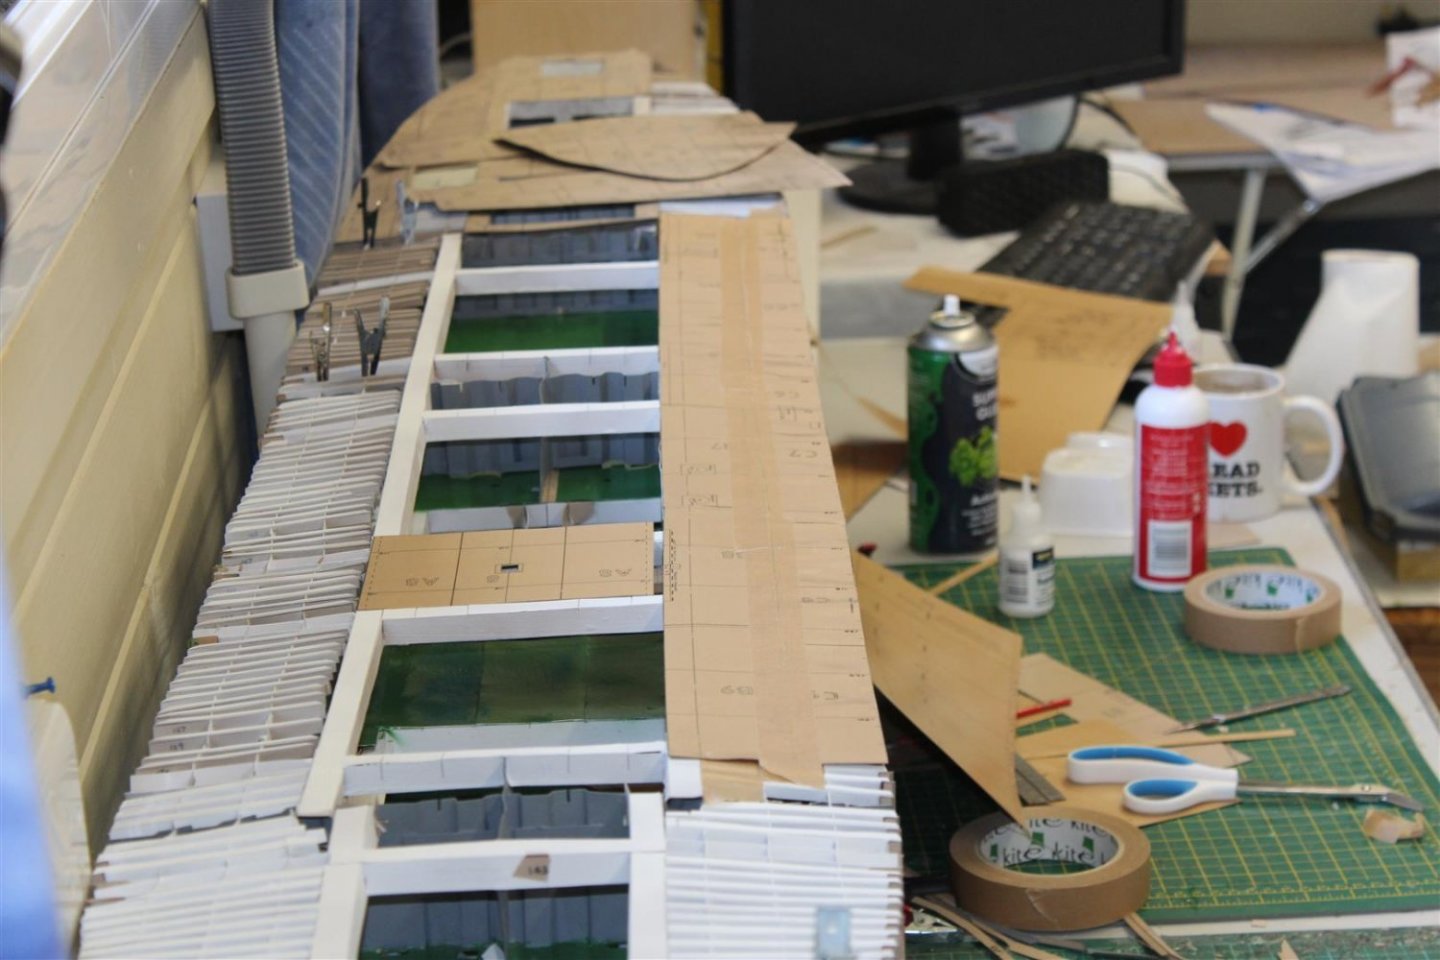
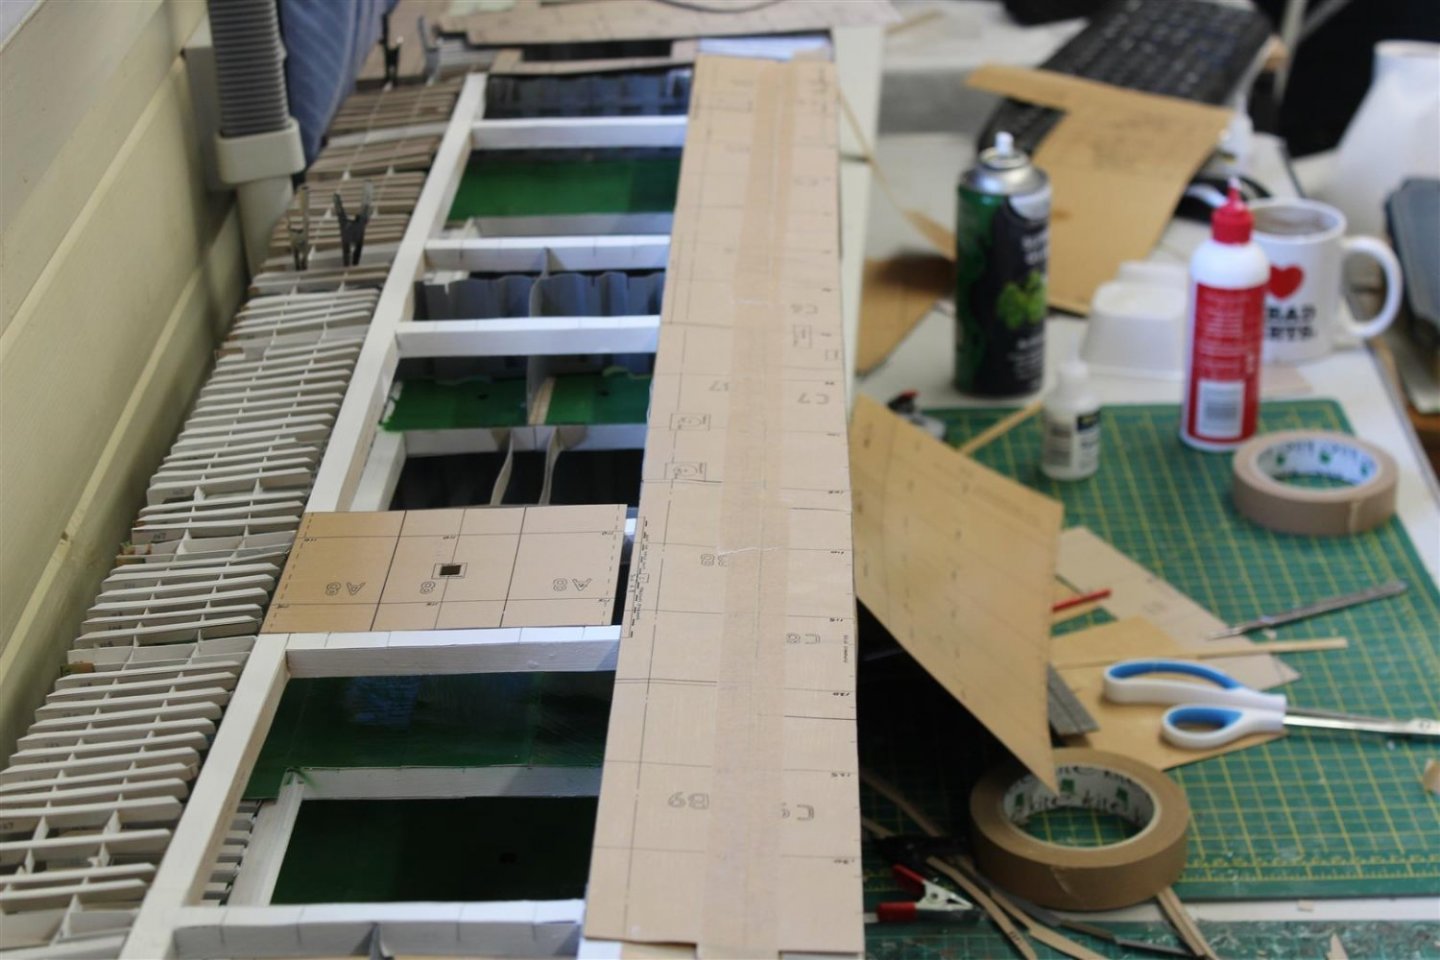
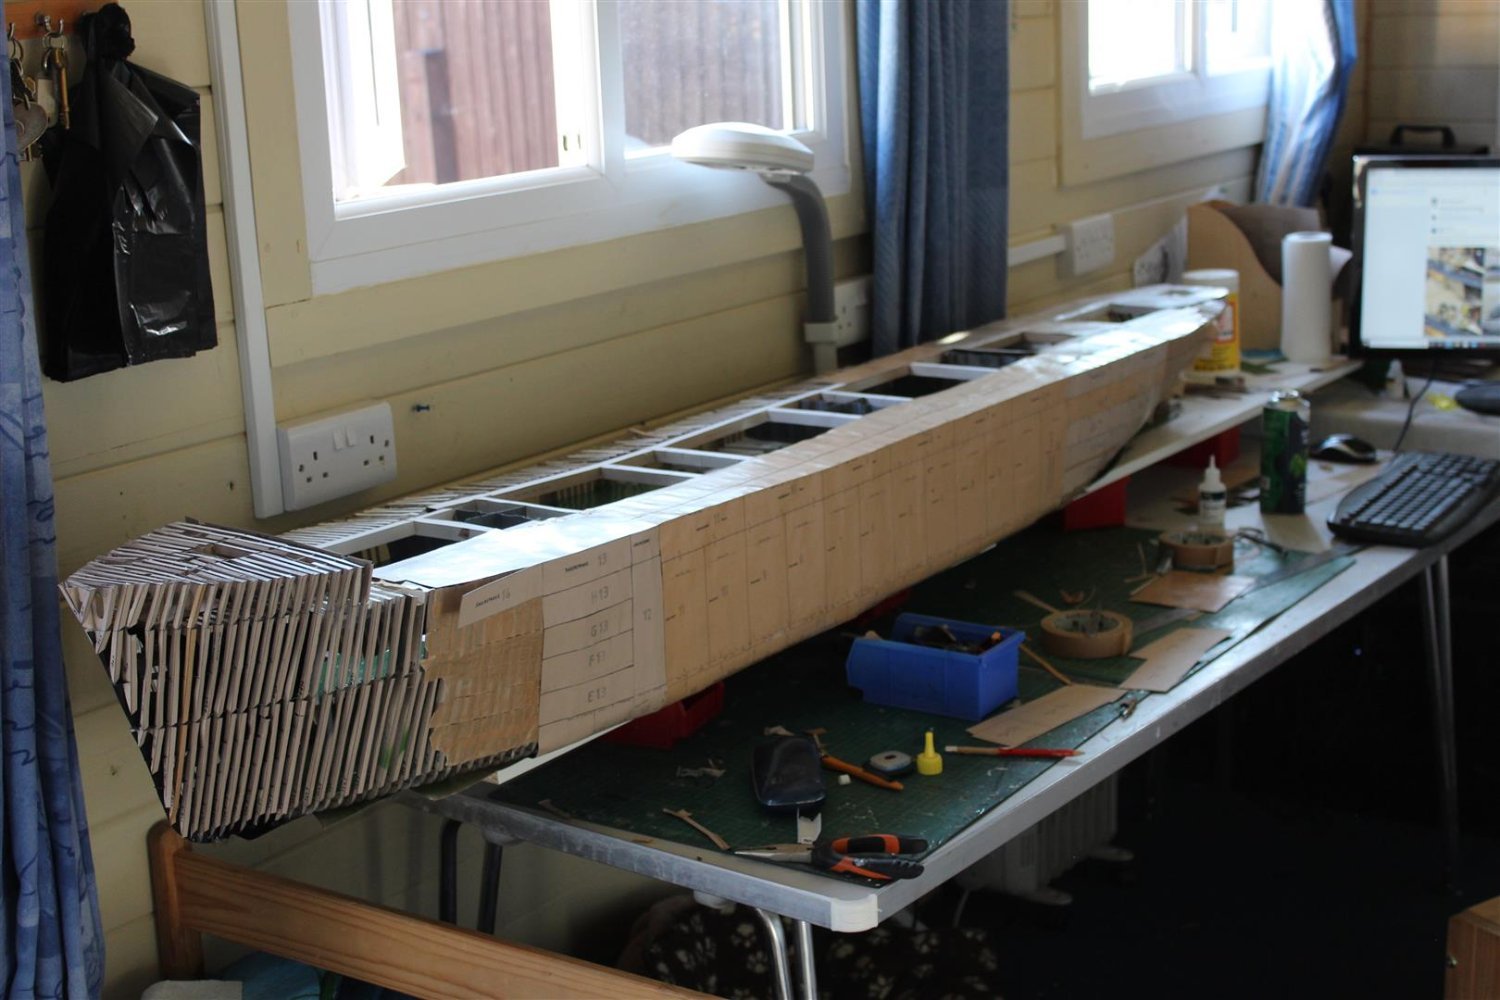
Day 83 deck and hull plates
continuing with the stbd side i have put a few deck plates on
i am using tacky glue which is just a thick PVA and i am finding it was dropping between the transverse beams, so i changed the way i am doing it by putting a brown tape over the beams with ca glue and then pva on top of them to put the plates on, it seams to be going down ok
update
the plates that were dropping slightly between the beams has now sorted itself out now its dry
the hull plates are just tacked on, as the bilge plates are still to be found, cut out and put on
loving this build


HMS Indefatigable 1794 (prototype) by James H - Vanguard Models - 1:64 - FINISHED
in - Kit build logs for subjects built from 1751 - 1800
Posted · Edited by Kevin
Great updates thank you @James H