Beef Wellington
-
Posts
2,249 -
Joined
-
Last visited
Content Type
Profiles
Forums
Gallery
Events
Everything posted by Beef Wellington
-
 Your maquette looks fantastic, very well done.
 -
Fascinating project Rob, Would love to try my hand at this, suspect its rather addicting and very educational, but the cost of the 3D software is a little beyond my limit...one day!
-
Thankyou for sharing your approach Alan, you've convinced me that this may be a possibility for me in the future....and congrats on your article in the Nautical Research Journal!
-
Some great detail there David, lovely work and the proportions look spot on. The iron bands and woolding are almost a model in of themselves which you've executed so well. Great stuff.
-
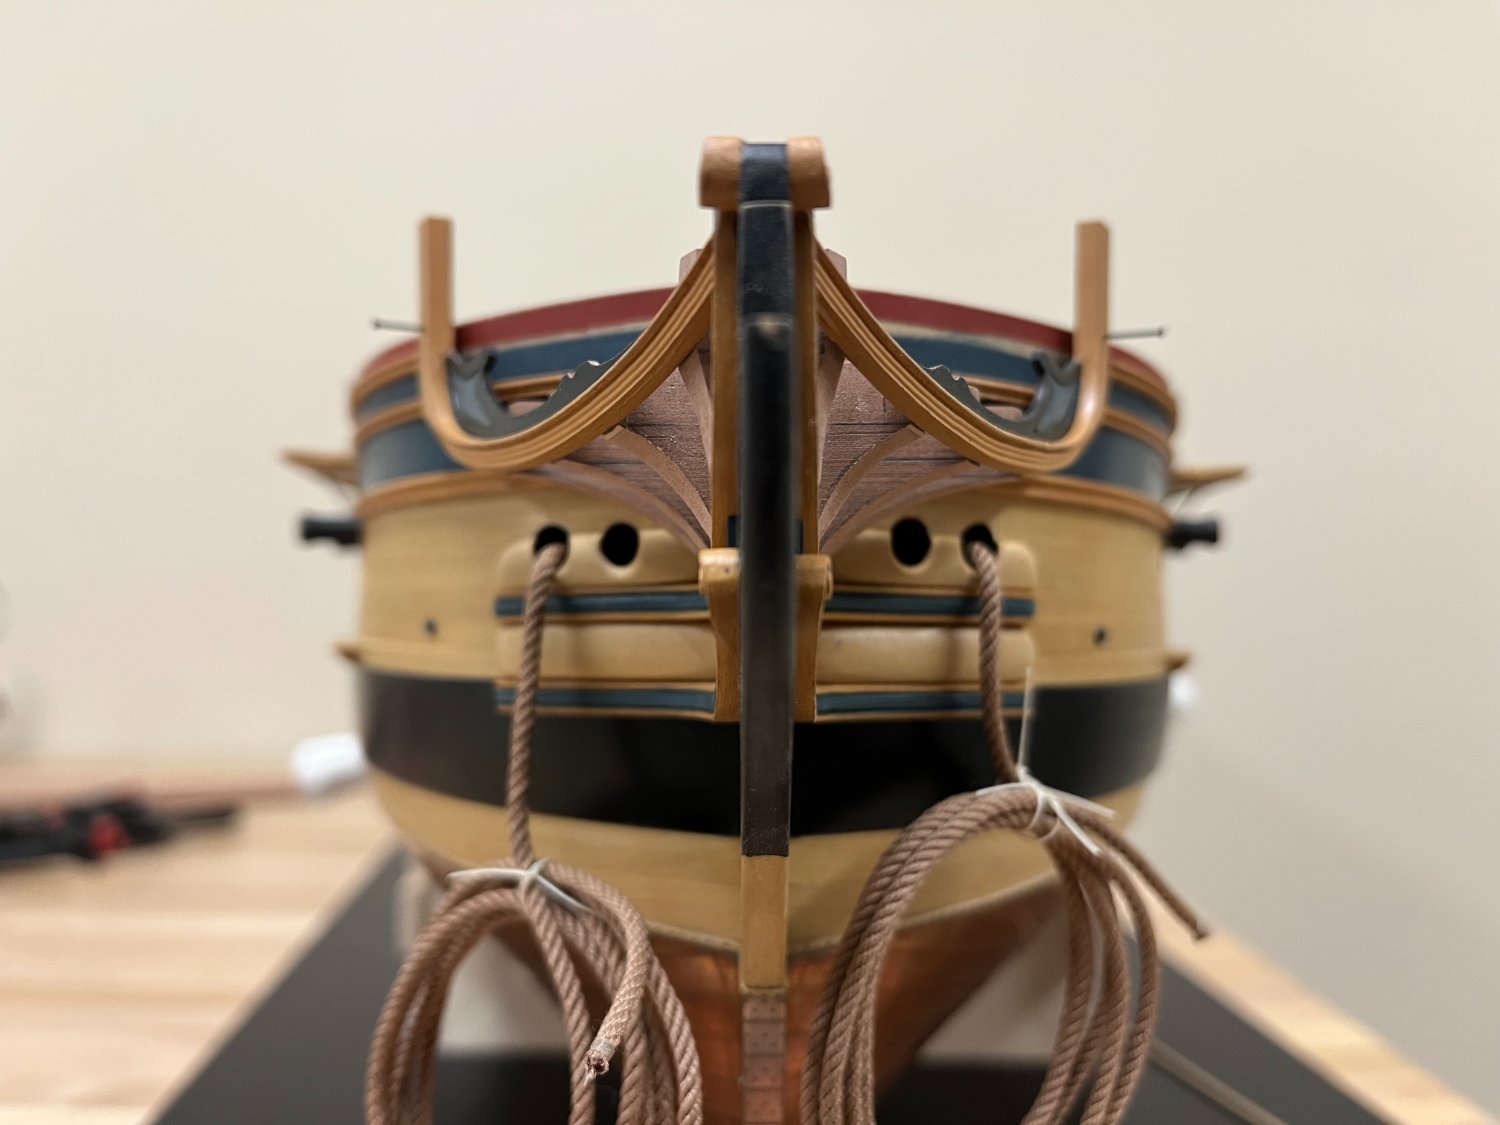
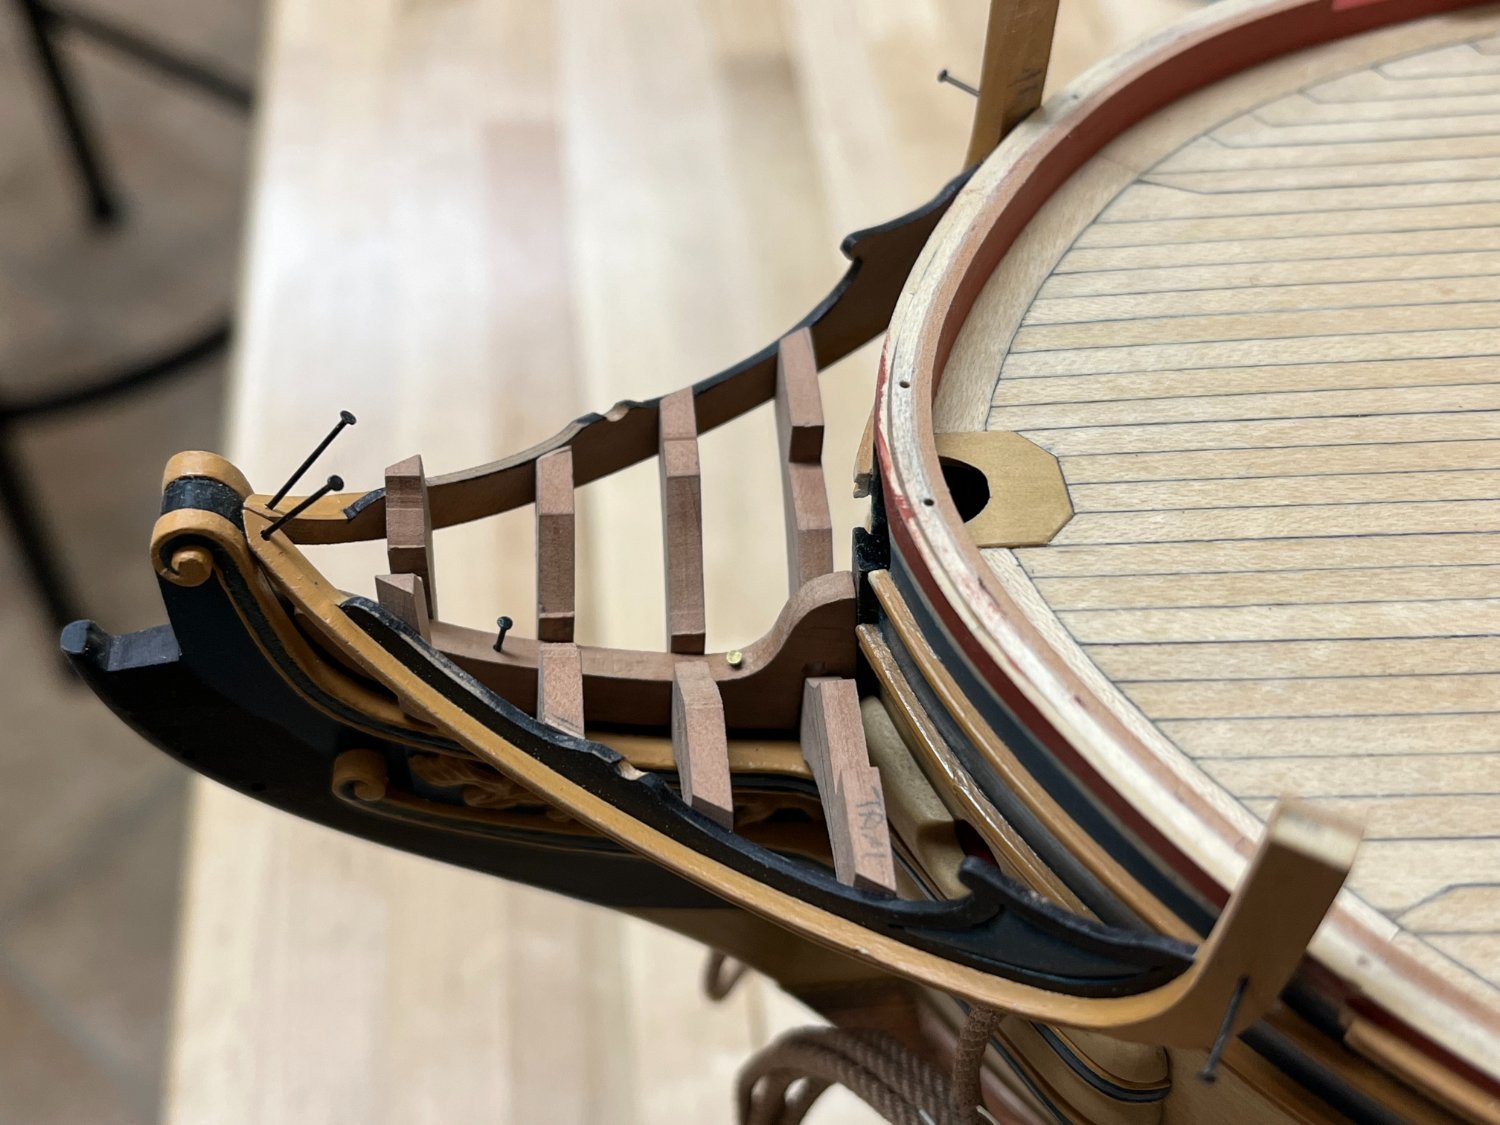
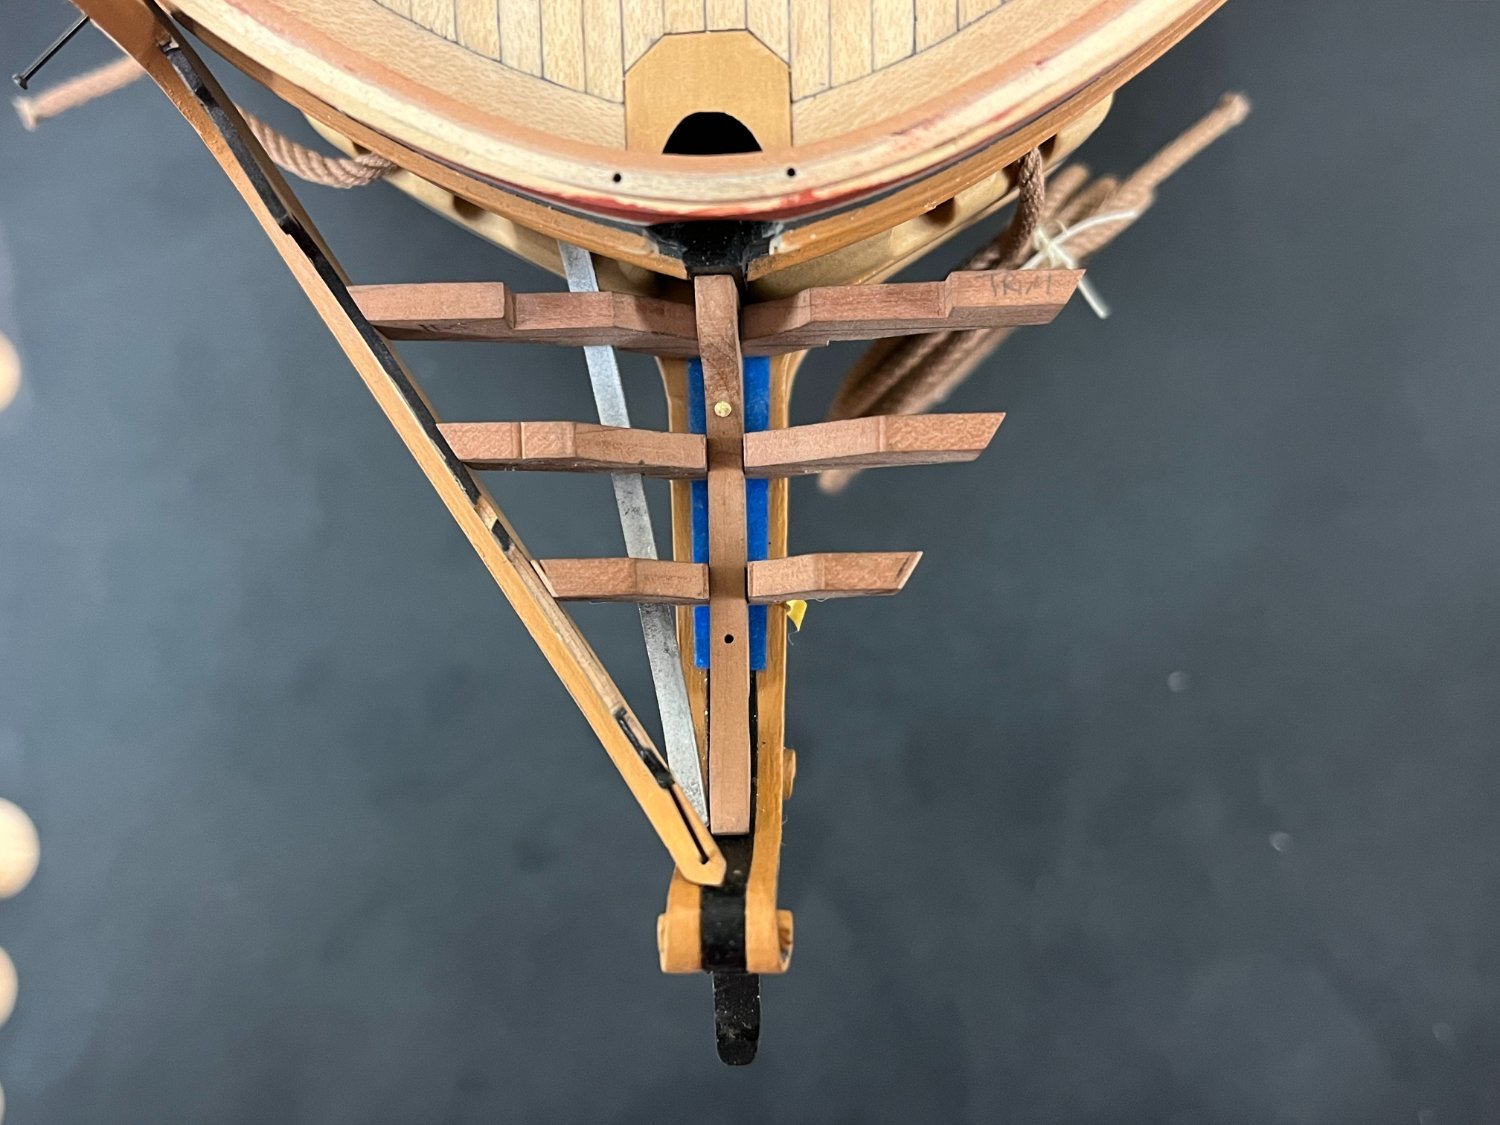
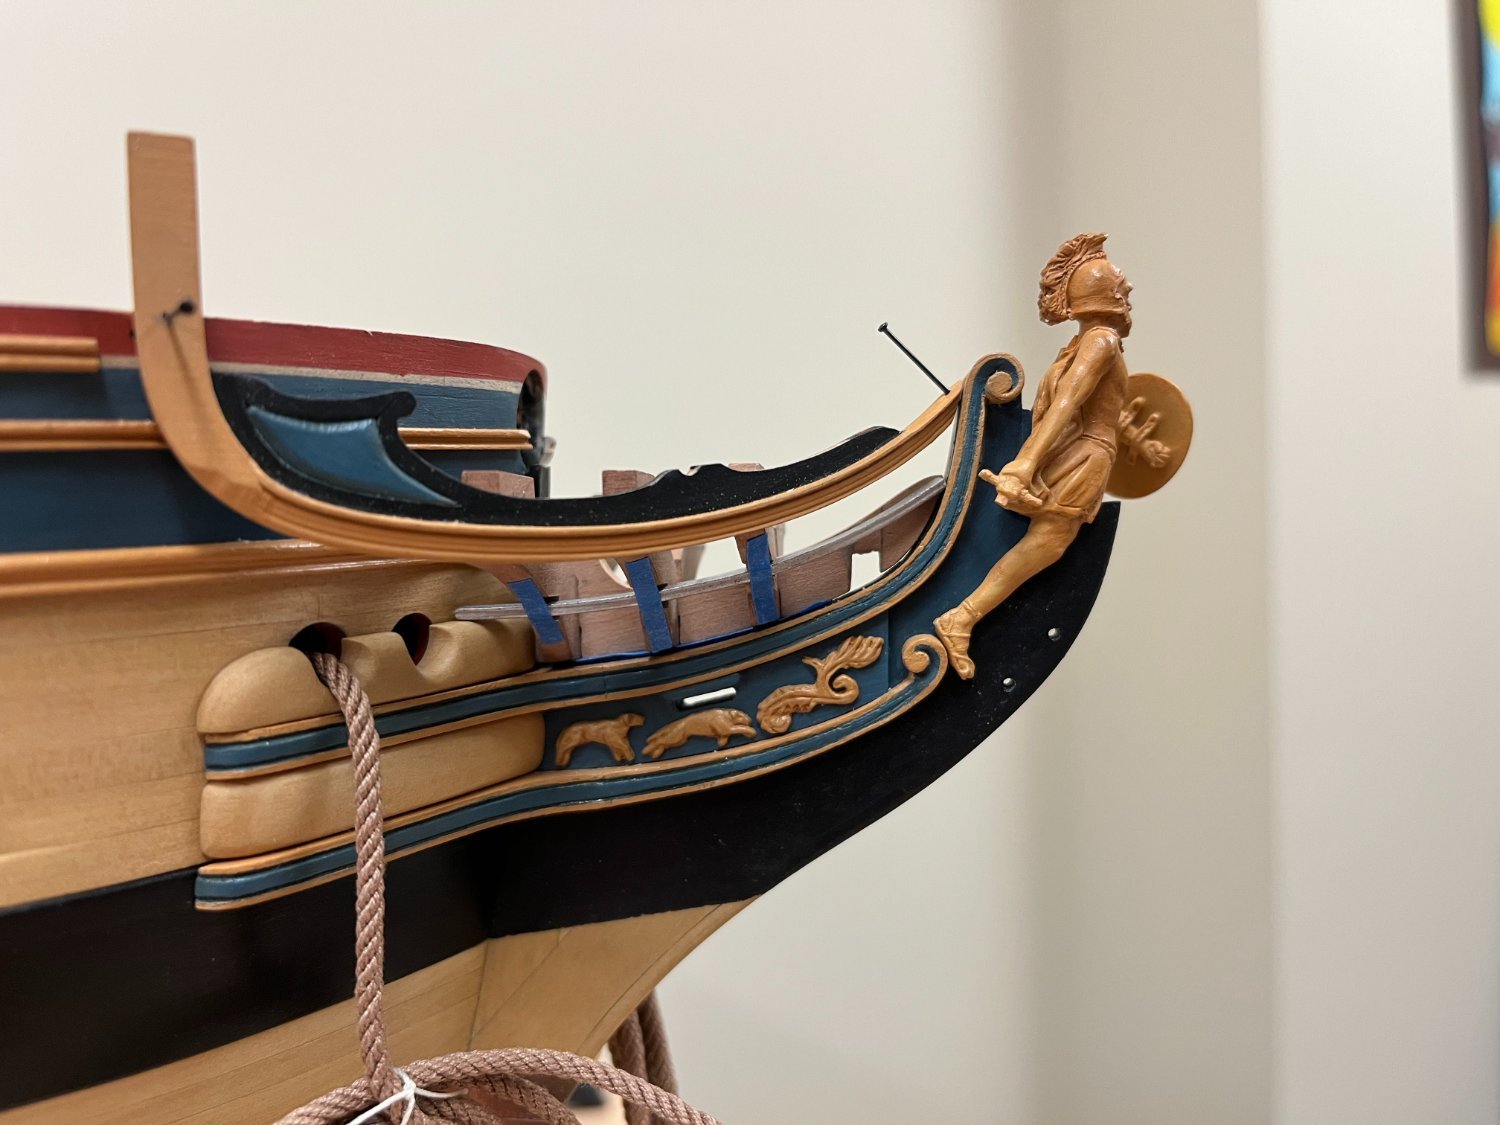
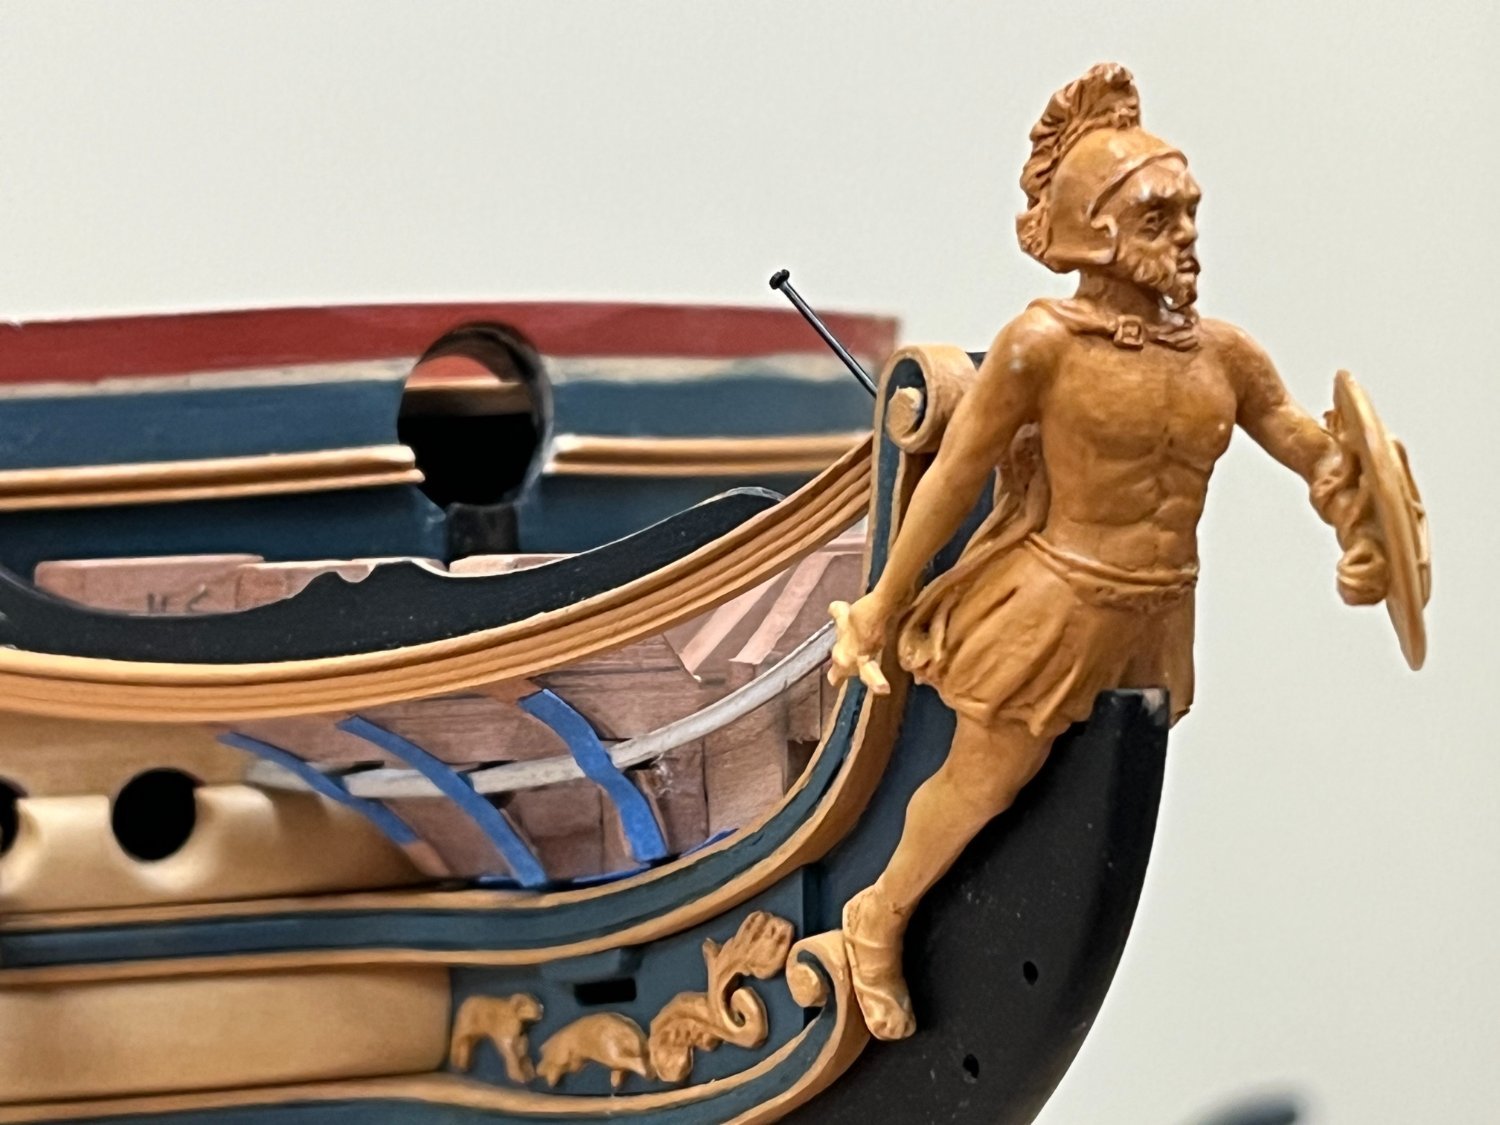
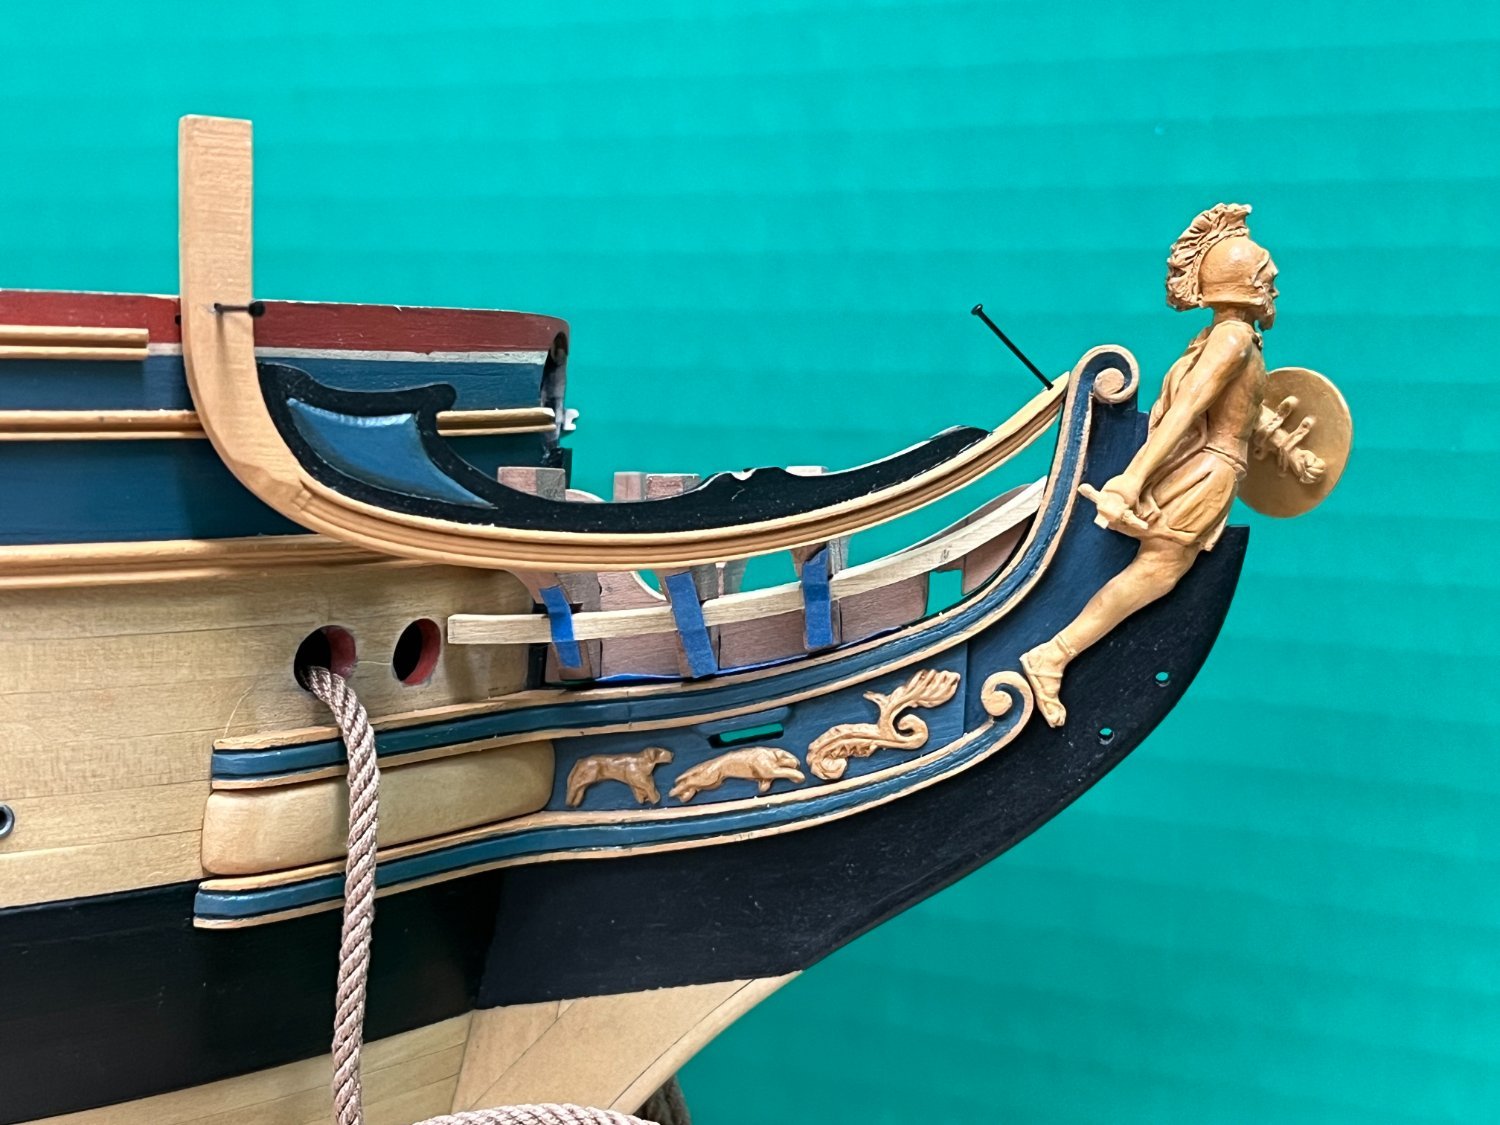
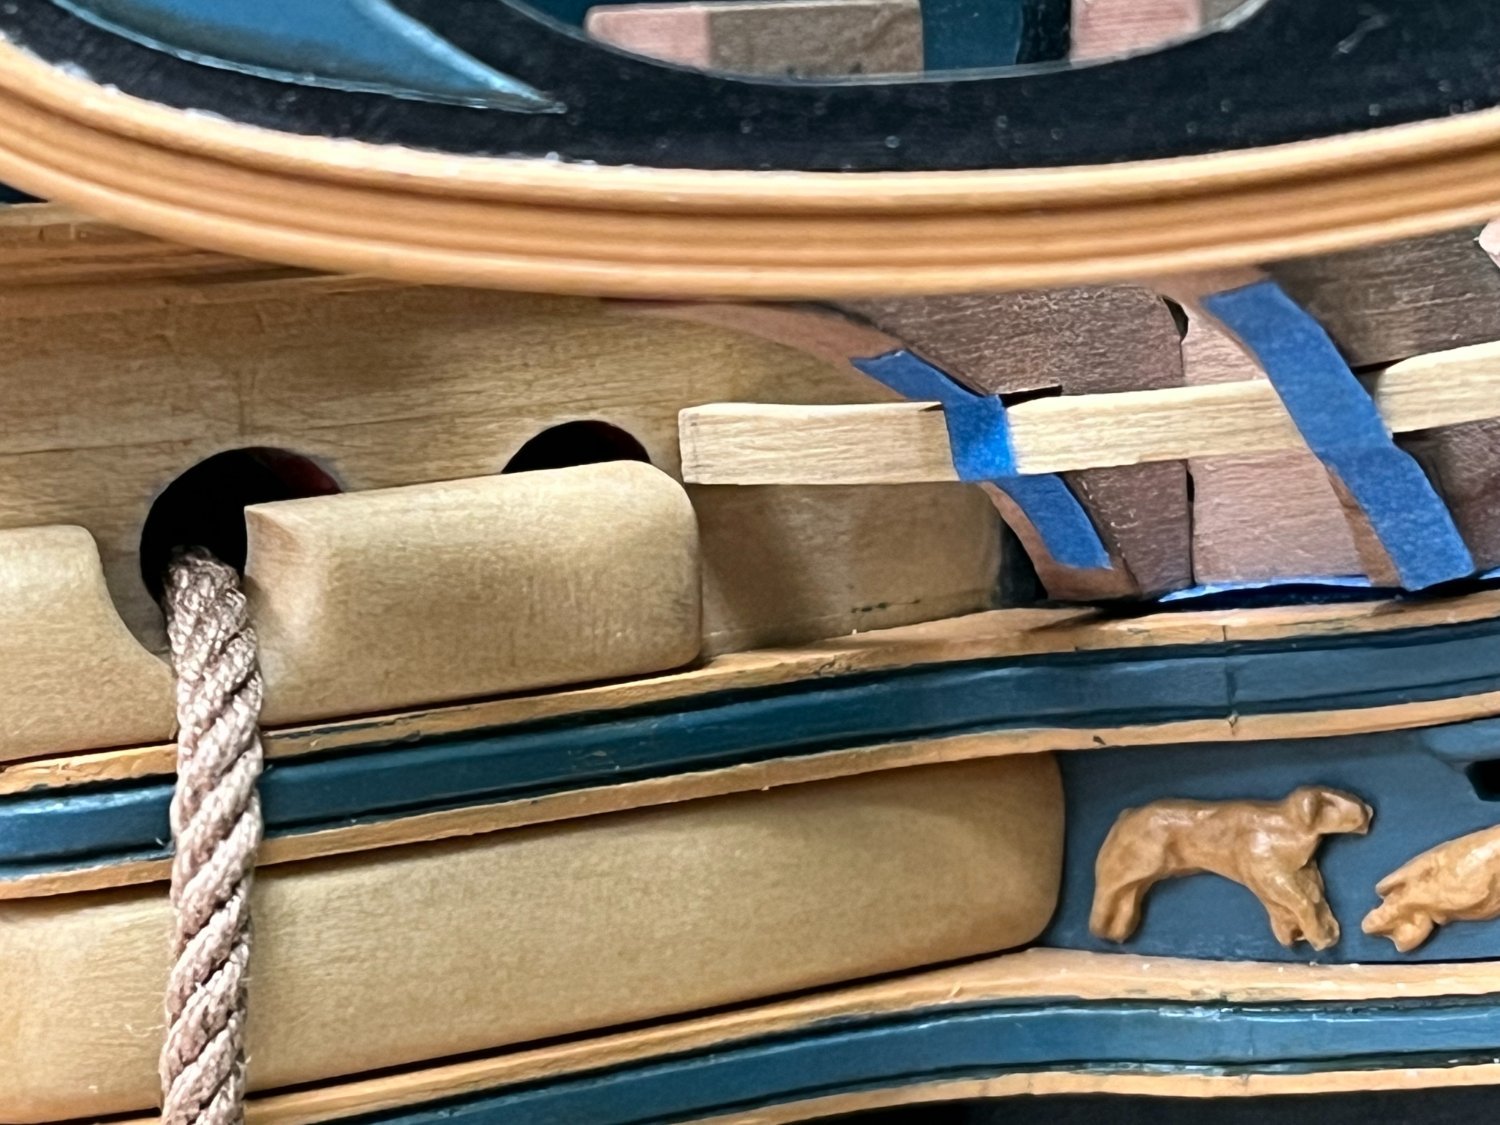
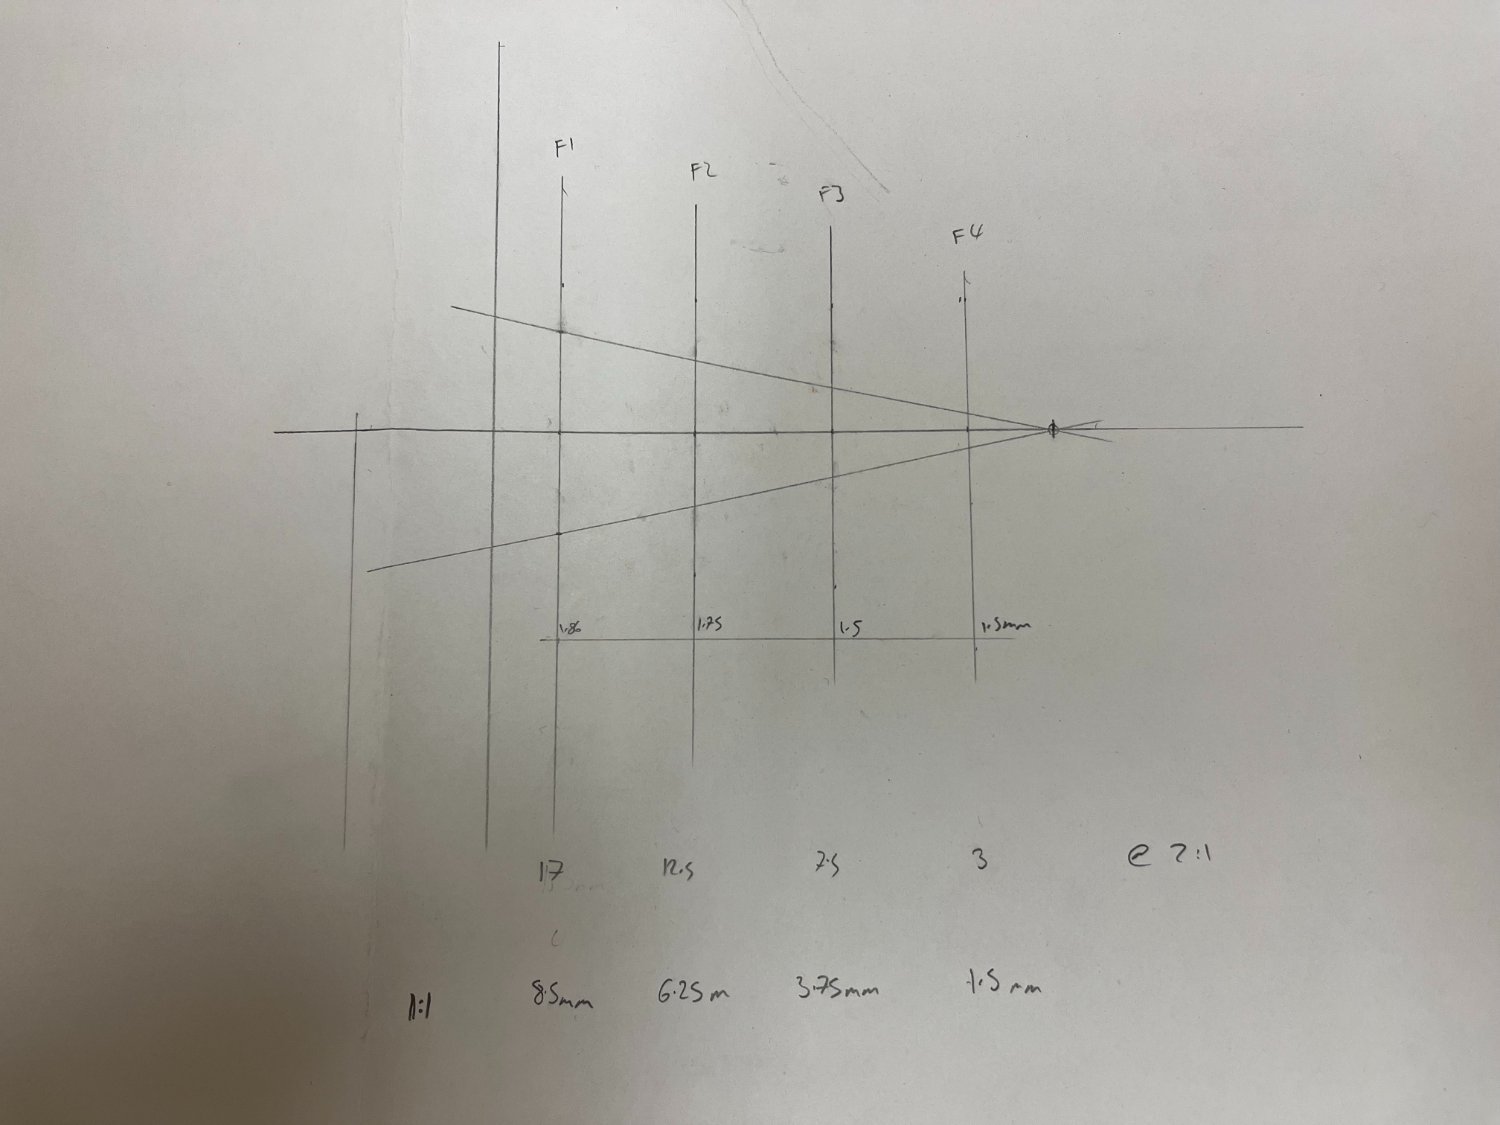
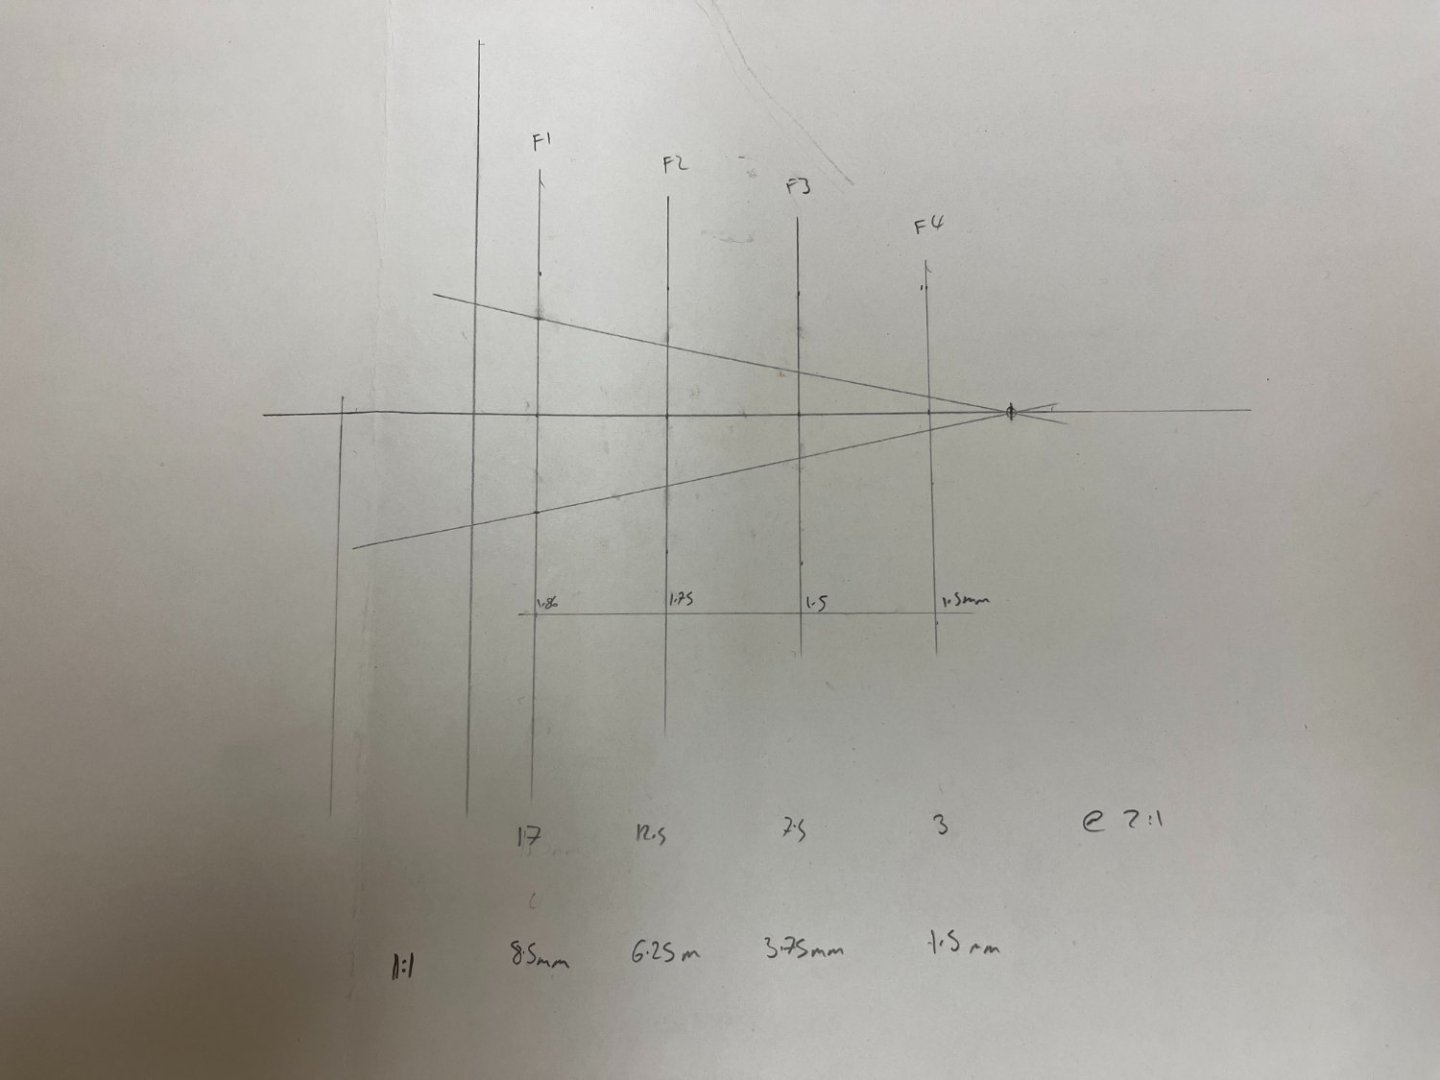
Headworks (Part 1): The shipyard has not been very active recently, partly due to lack of time, but also trepidation of the fact that I can no longer delay work on the headworks - something that has caused some anxiety if I'm honest given that this is another aspect of the model that is so important to the overall look of the ship (...and especially considering that the TFFM devotes 17 pages to this!). I had completed the main rail back in 2018 (Yikes!) which are detailed here (Post #513) for reference. I tried to follow the guidance and approach described in the TFFM as this will all need to be scratch to replicate the original plans as closely as possible, but did probably simplify some steps. With the final profile of the bow having been finalized, the position of these can be determined. This was done by eye in the absence of any definitive measurement, ensuring that the head of the mainrail is perpendicular to the keel and vertical when viewed from the bow. These were drilled and pinned to hold in position for now. Together with the standard, the 4 head timbers were rough cut and sized to their respective position, the outer face being cut to the angle formed by the head rail. The curvature of the head timbers was estimated from the AOTS diagrams, but left a little oversized at this stage (the interior profile has also been ignored for the present and will be cut to final shape later). The main consideration was to ensure that the position of the bottom of the main rail was determined, and this was done by multiple fine tunings and a sanding stick. The position and fitting of the lower rail proved to be the more challenging aspect. The TFFM indicates that it should be straight when viewed from above, and the plan profiles suggest that it should be position midway between the main rail and the upper cheek.. On top of that, it needs to clear the interior hawse hole, and will also need to taper in profile at the bow. The seats of ease on the Artois class are outboard, and will also clear the lower rail. I do not know the thickness of this piece, but estimated it should be 2mm thick which seems consistent with the proportions shown and described in TFFM for the Swan class. I started by drawing my own simple scale mini-plan using the measurements of the hawse hole, position of head timbers and length of the lower rail. This allowed the depth of the slots to be determined on each head timber, at the point mid way between the bottom of the main rail and top of the upper cheek (This will also determine the required final curvature of the head timbers to ensure that the lower rail sits neatly behind the covering boards which will need to be added in the future, Once these had been roughly determined and cut into the head timbers, the theory and application was proved using some of the kit supplied white metal decorative strips which are very easily bent. (The kit indicates that these should actually be used for the lower rail which seems to be a very reasonable compromise, but think Jason deserves to appropriately proportioned and profiled wood rail). The curvature of this metal rail can then be used to determine the curvature of the top of the lower rail that will be cut from wood. (Note: The forward head timber has been ignored for now, I will need to recut this piece so it extends higher over the standard, as it is, its not think enough to accommodate the lower rail). The white metal strip is also very useful because it allows the length of the lower rail to be determined. A cut first approximation of the lower rail was then cut from some boxwood sheet and temporarily placed in position to again prove the approach. This proved to be successful, and I was happy with the general profile that resulted. This looks overly bulky to my eye even though the dimension are appropriate, but I suspect that this will be corrected once it has been profiled. The next step will be to cut and profile the actual pieces. This also shows that I will likely need to adjust the hawse bolster to allow the lower rail, and the yet to be fitted eking rail (see last picture, the lower rail does not clear the top of the bolster. Even though there is still much to do in this area, I'm feeling more optimistic with this complex area.


-
Hi Dave, have fun with the experimentation. Hope you don't mind me jumping in with a comment on your wood selection dilemma. The Tanganika supplied with my kit also had terrible grain which prompted me to go down the maple route. I had sourced maple from Cornwall Model Boats, and the initial supply provided was generally OK, but the edges were rough and did require tidying up - there were also quite a few unacceptable strips. In retrospect, I did not order enough at that time and underestimated wastage/QA failures, and had to purchase more to finish the decking on the quarterdeck and foc's'l. Despite purchasing again from CMBs, I had to make multiple purchases as I got some really poor quality wood. In retrospect I wish I had ordered enough at the start to ensure consistency and quality between the decks. I also found that the wood provided often wasn't even maple - and can be further confused with the various species (hard maple being desireable, the soft maple having a much more pronounced grain). That may well have been a covid era problem that is now resolved.
-
An amazing model, thanks for sharing your progress. I can understand why this has taken so long!
-
I know its not my pocket making the decision, but good call on the boxwood! Love the carronade, is it an antique or replica (asking jealously)?
- 648 replies
-
- 2
-

-
- Indefatigable
- Vanguard Models
- (and 1 more)
-
Sorry, I was not entirely clear. There is no issue with the area where the steps are, I did however make a silly mistake by placing the larger gap in the wrong spot (its all in my log in gory detail!). As for the foremost frame, yes, I strngthened with the added ply to allow the gunport placement to be correct (in my judgement 🙂 ).
-
Will be following this one closely, you are a lucky man!
- 443 replies
-
- 5
-
-
- Indefatigable
- Vanguard Models
- (and 1 more)
-
Hi Dave, glad to see another Diana build get started, I must confess that I have been less than active recently (both online and in the shipyard!), so I'm sure you'll finish well before me. One general comment that I'm sure you're considering but worth repeating is that the dimensions of kit parts and plans, NMM plans and AOTS diagrams are not completely consistent, so compromise and estimation is needed. Thinking well ahead will save a lot of pain. Couple of specific comments on the topics raised above: Keel - David (DAvidEN) is spot on with his comment on the profile of the keel. This is easily addressed once the hull has been planked which is really only when you can see what is needed. Without building up the depth of the keel, the profile is much too shallow and will not look correct. Stern post - will be easier early on to adapt the sternpost to more prototypical dimensions if thats a path you want to go down (wider at the top, tapering to the keel) rather than the consistent 5mm thickness dictated by the keel former. Gunport alignment - the ports follow the alignment of the frames, which means the mid-ships ports will be perpendicular to the keel, and those toward the stem and stern will be perpendicular to the hull so AOTS can help with this. As for placement, adjusting the foremost frame as described above is pretty straightforward if you decide to go down that route. From memory, I seem to recall looking to directionally follow the plans with equidistant ports (except for where the steps are). All the best. Jason
-
Dave, first off - wonderful work, continue to be amazed at the detail you're pursuing which are projects in of themselves. Not sure if you have seen it, but the well known Bellona model made for George III shows the same launching system in a very nice display along the same lines. There are some other contemporary examples illustrated in Brian Lavery's "The ship of the line" book to peruse for ideas. Looking forward to see where you land.
-
Congratulations, and best wishes for future continued success!
-
Excellent work on the masts, wolding, and tops David. The detail on the hounds us especially nice. I know I'm not going to mast 'Jason' (in this lifetime anyway) so will need to live vicariously through you. Have you considered putting swivel guns in the tops?
-
This method of construction appears deceptively simple, but definitely still needs planning and experience to execute well as you have shown. Glad I'm not the only one that requires 'redos' 🙂 . Looking great BE.
- 131 replies
-
- 1
-
-
- Medway Longboat
- Syren Ship Model Company
- (and 1 more)
-
Looking good...but of course would have expected nothing else!
-
Looks like a very interesting subject. I'm loathe to post this because of clogging up this thread...but, I wonder if it would make sense to start a new thread specific to each new kit project? Hopefully that will keep people on topic and focused, and reduce the inevitable back and forth with parallel development activities, pet peeves etc.
-
Thanks for the very kind words and likes everyone - sadly no further progress (or even pent-up progress). @westwood The colour is 'red ochre' from the Admiralty paints series sold by Caldercraft.
-
I was also impressed with their service. If you are concerned, I would suggest ordering just one to see if you like the product before committing to the full complement.
-
Agree with everyone's comments, your barricade is so much more in keeping with your model. Nicely done!
-
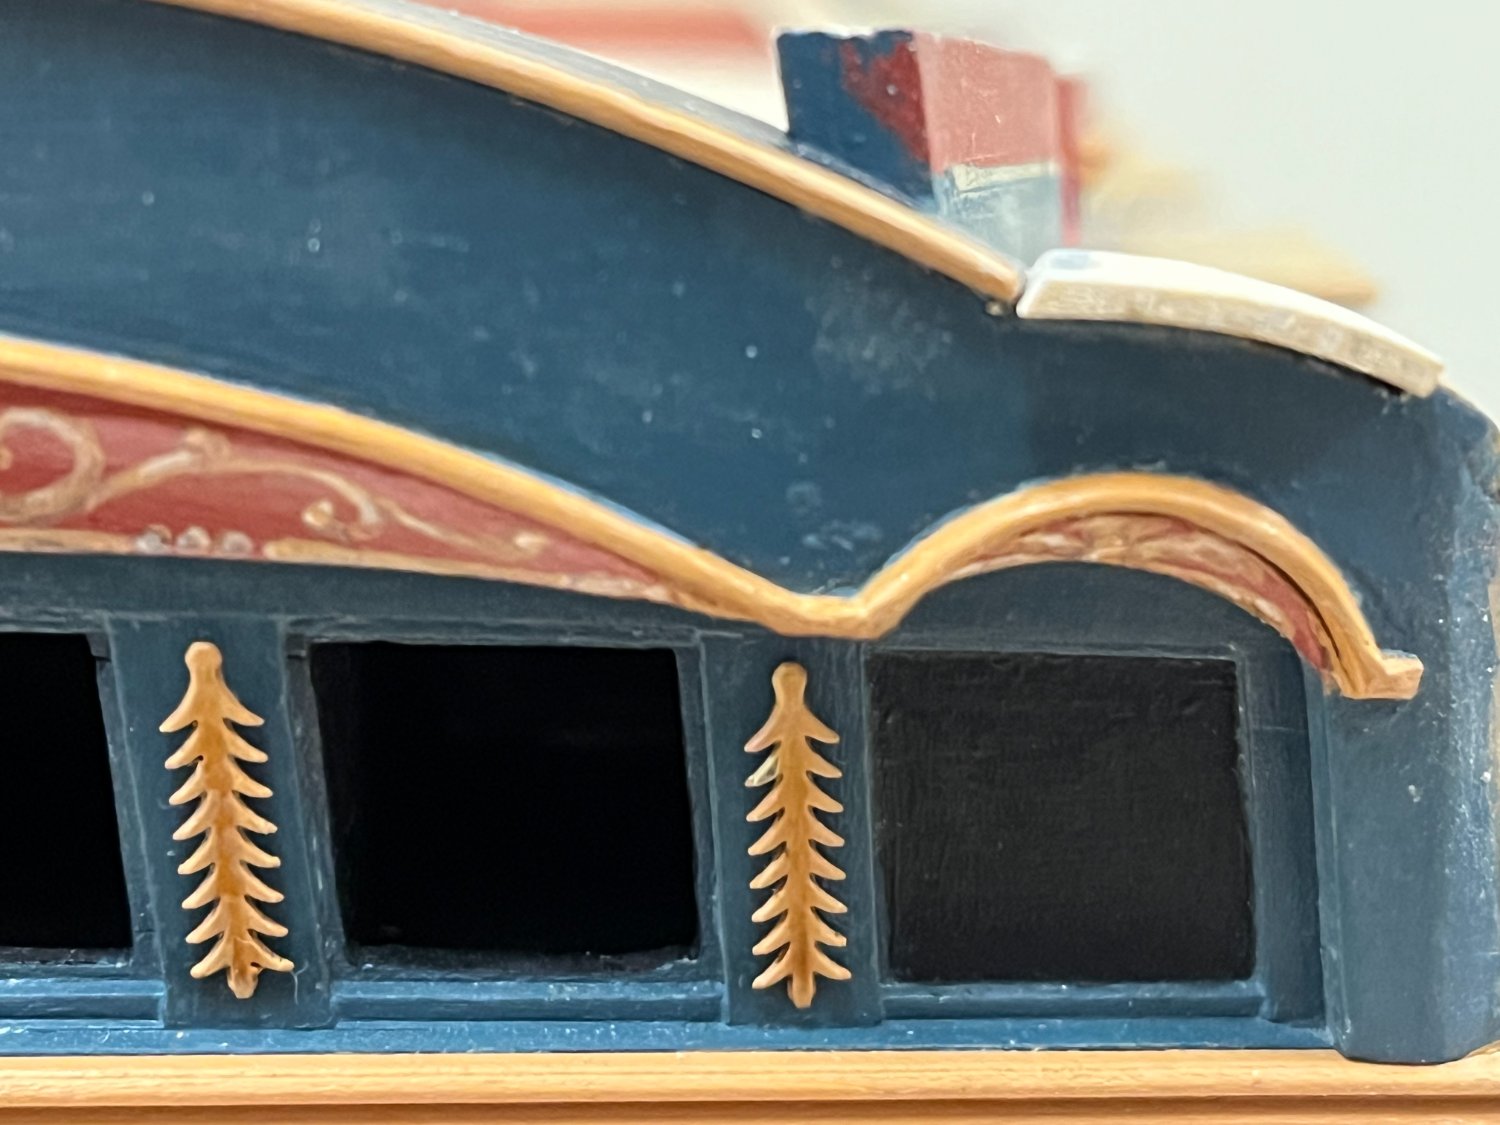
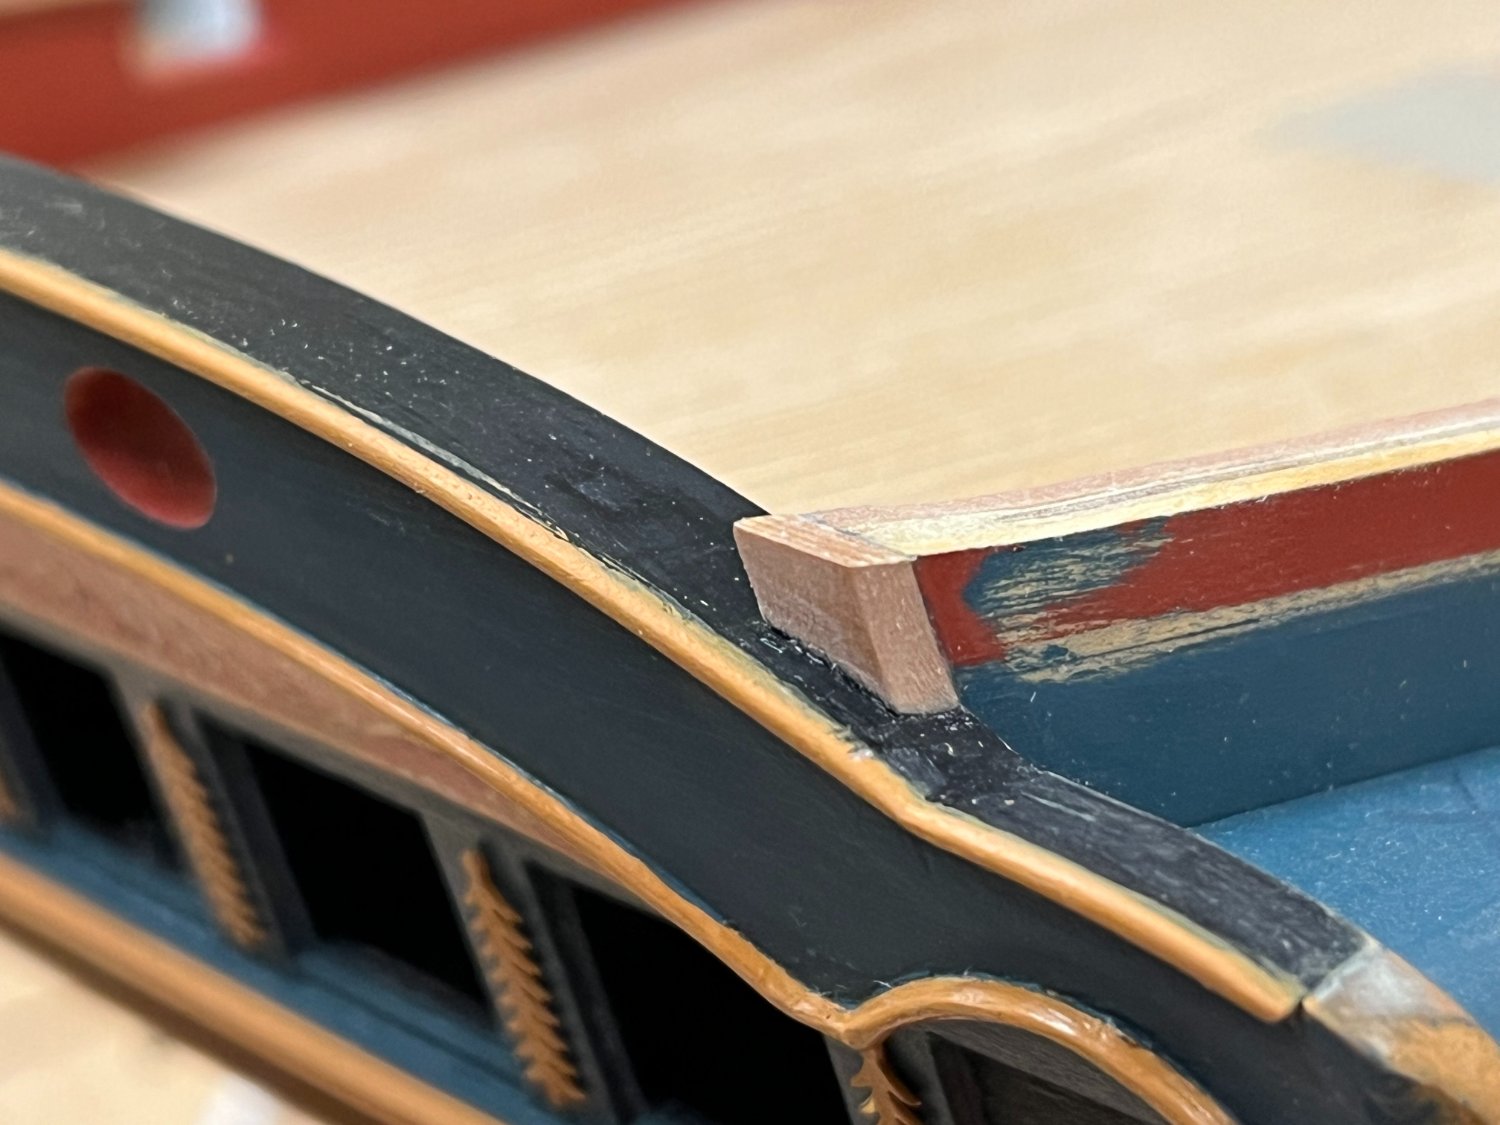
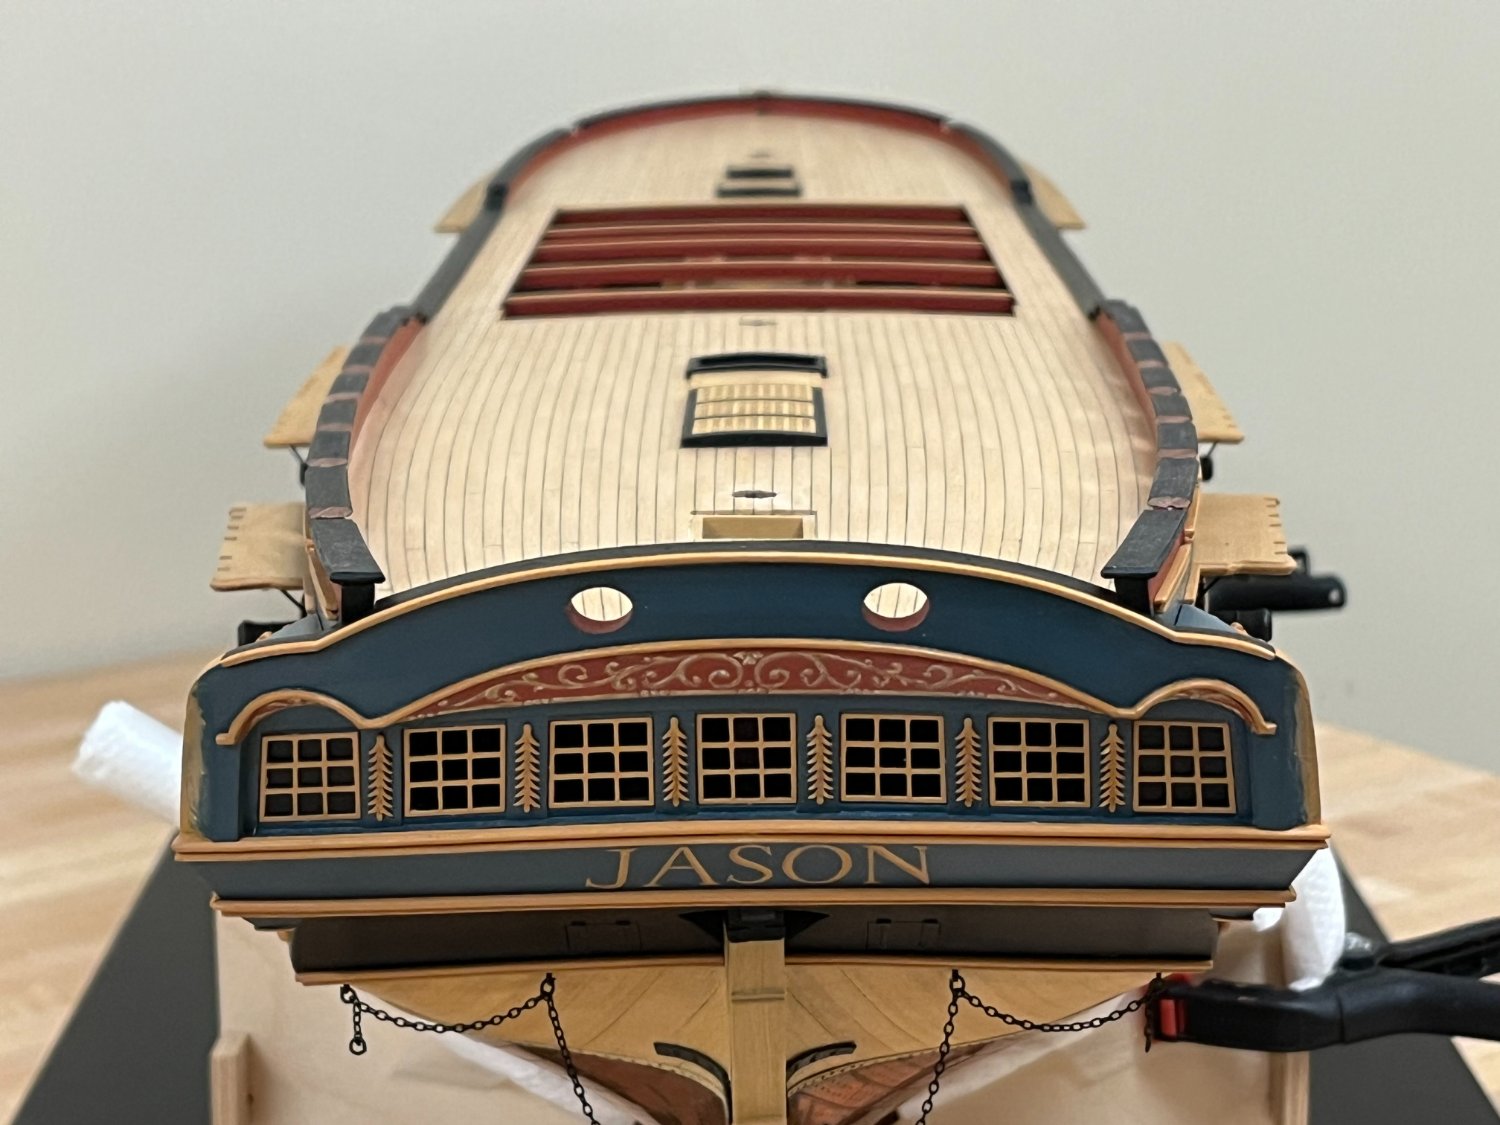
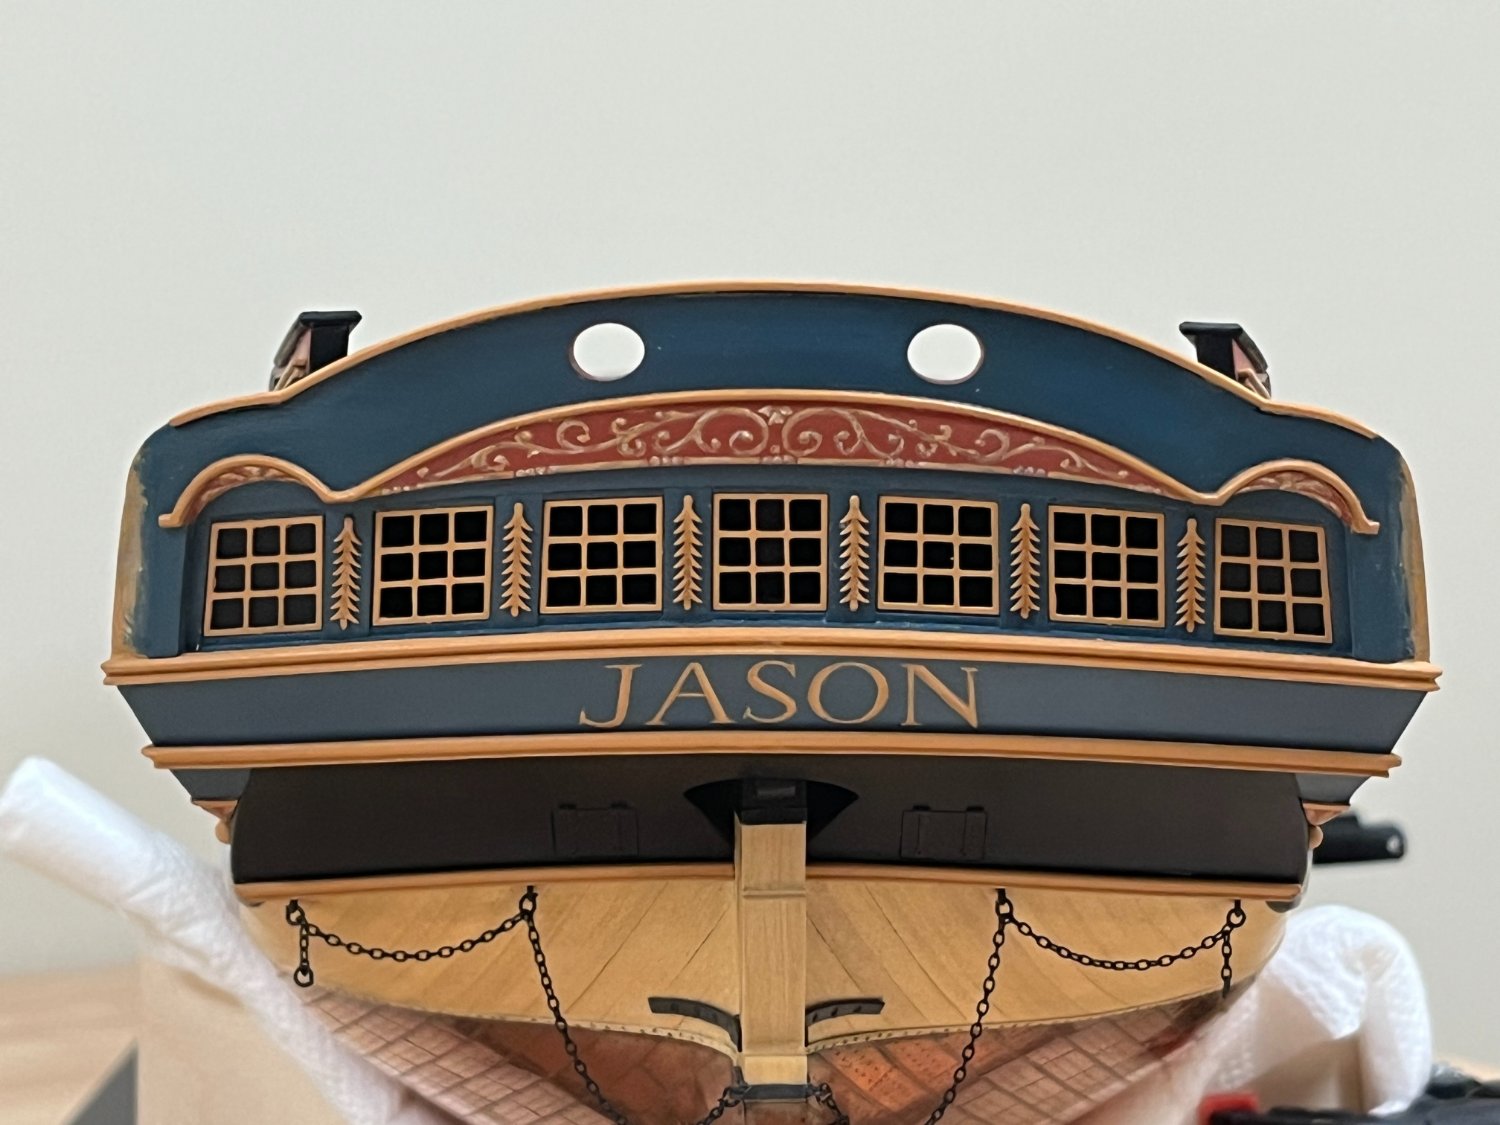
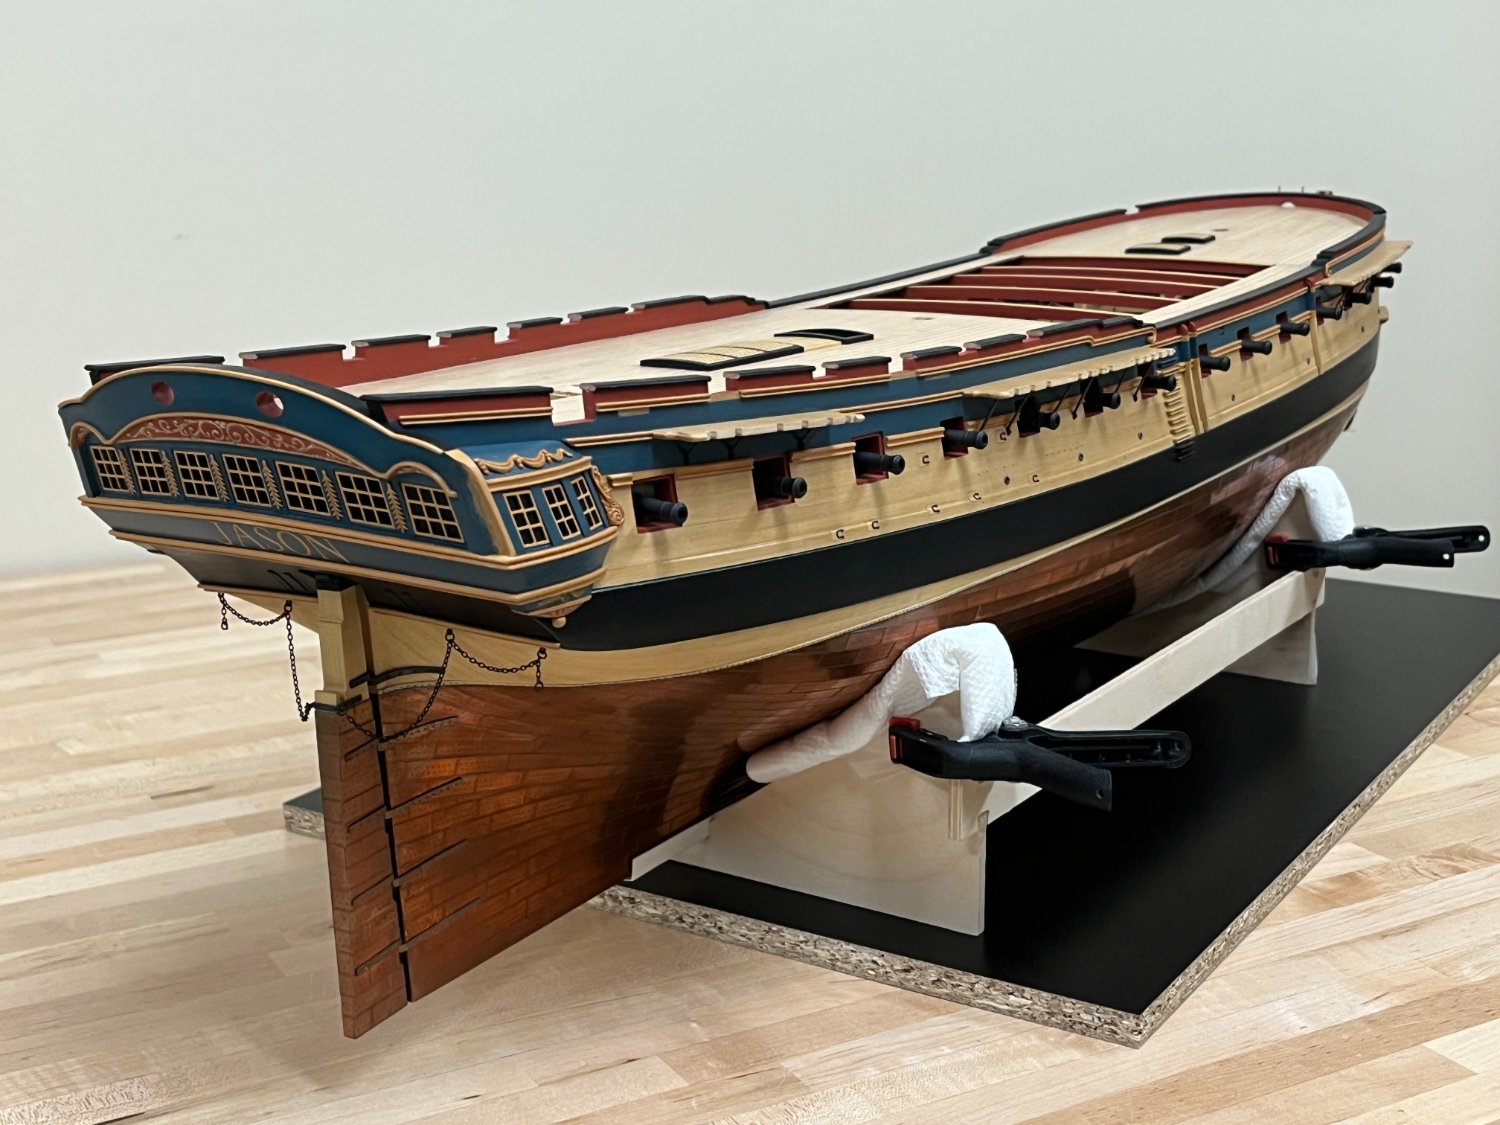
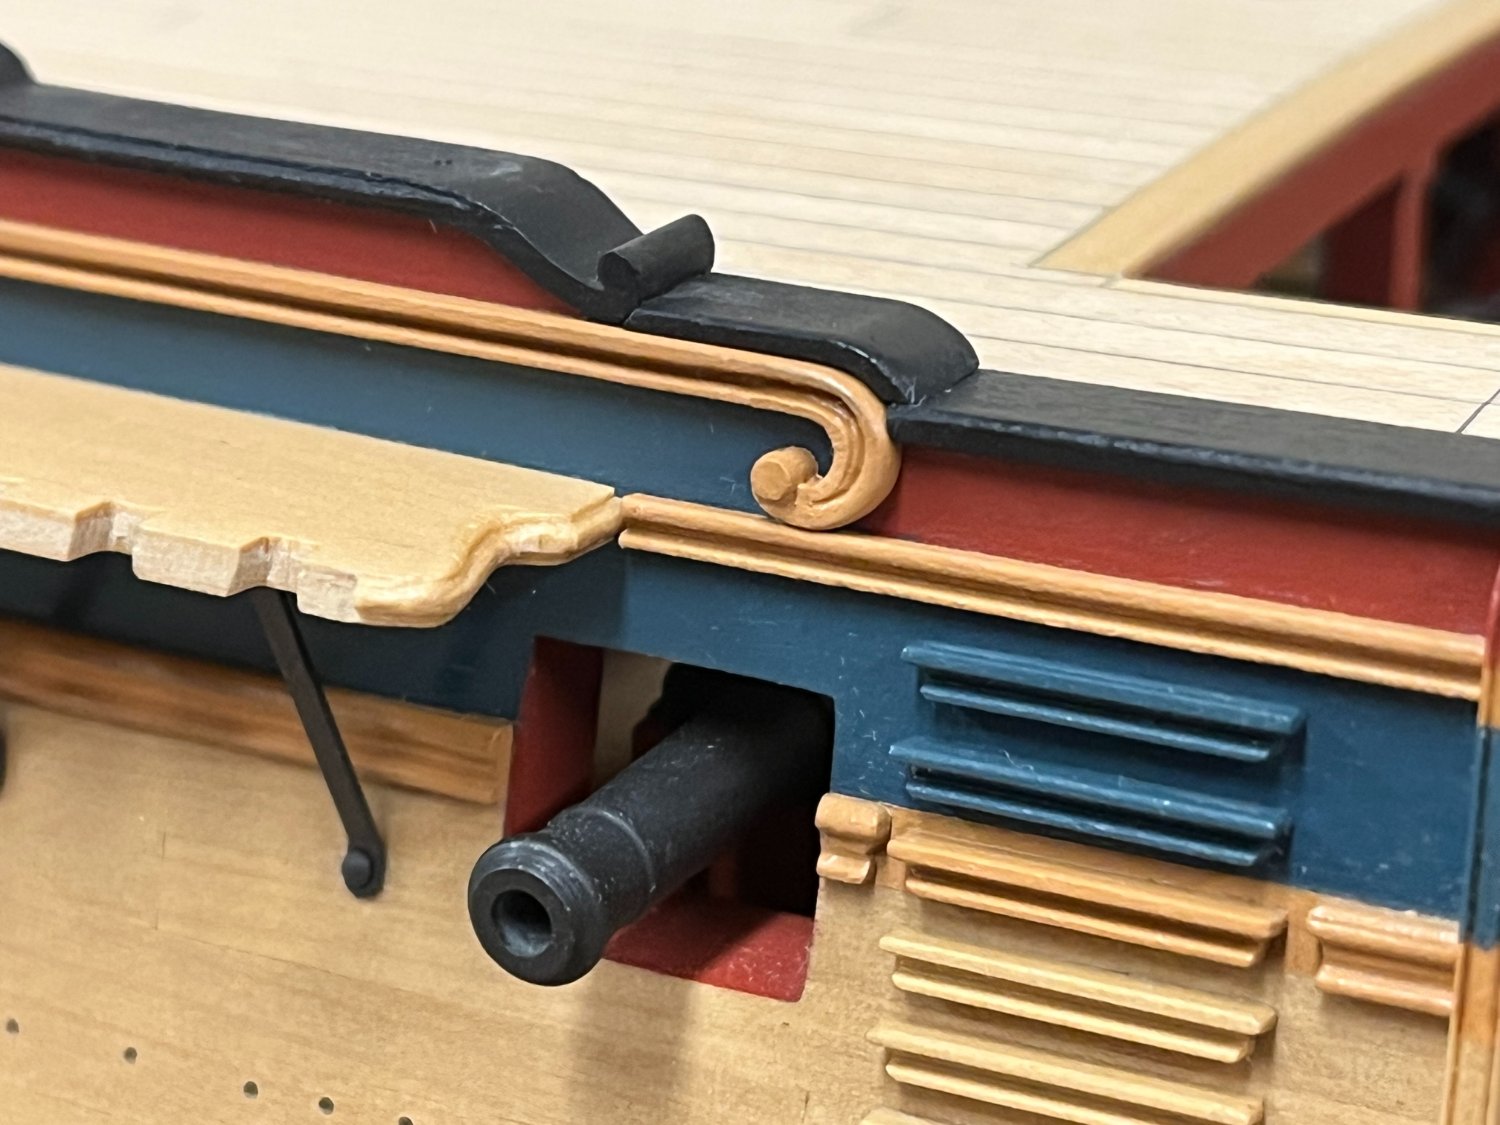
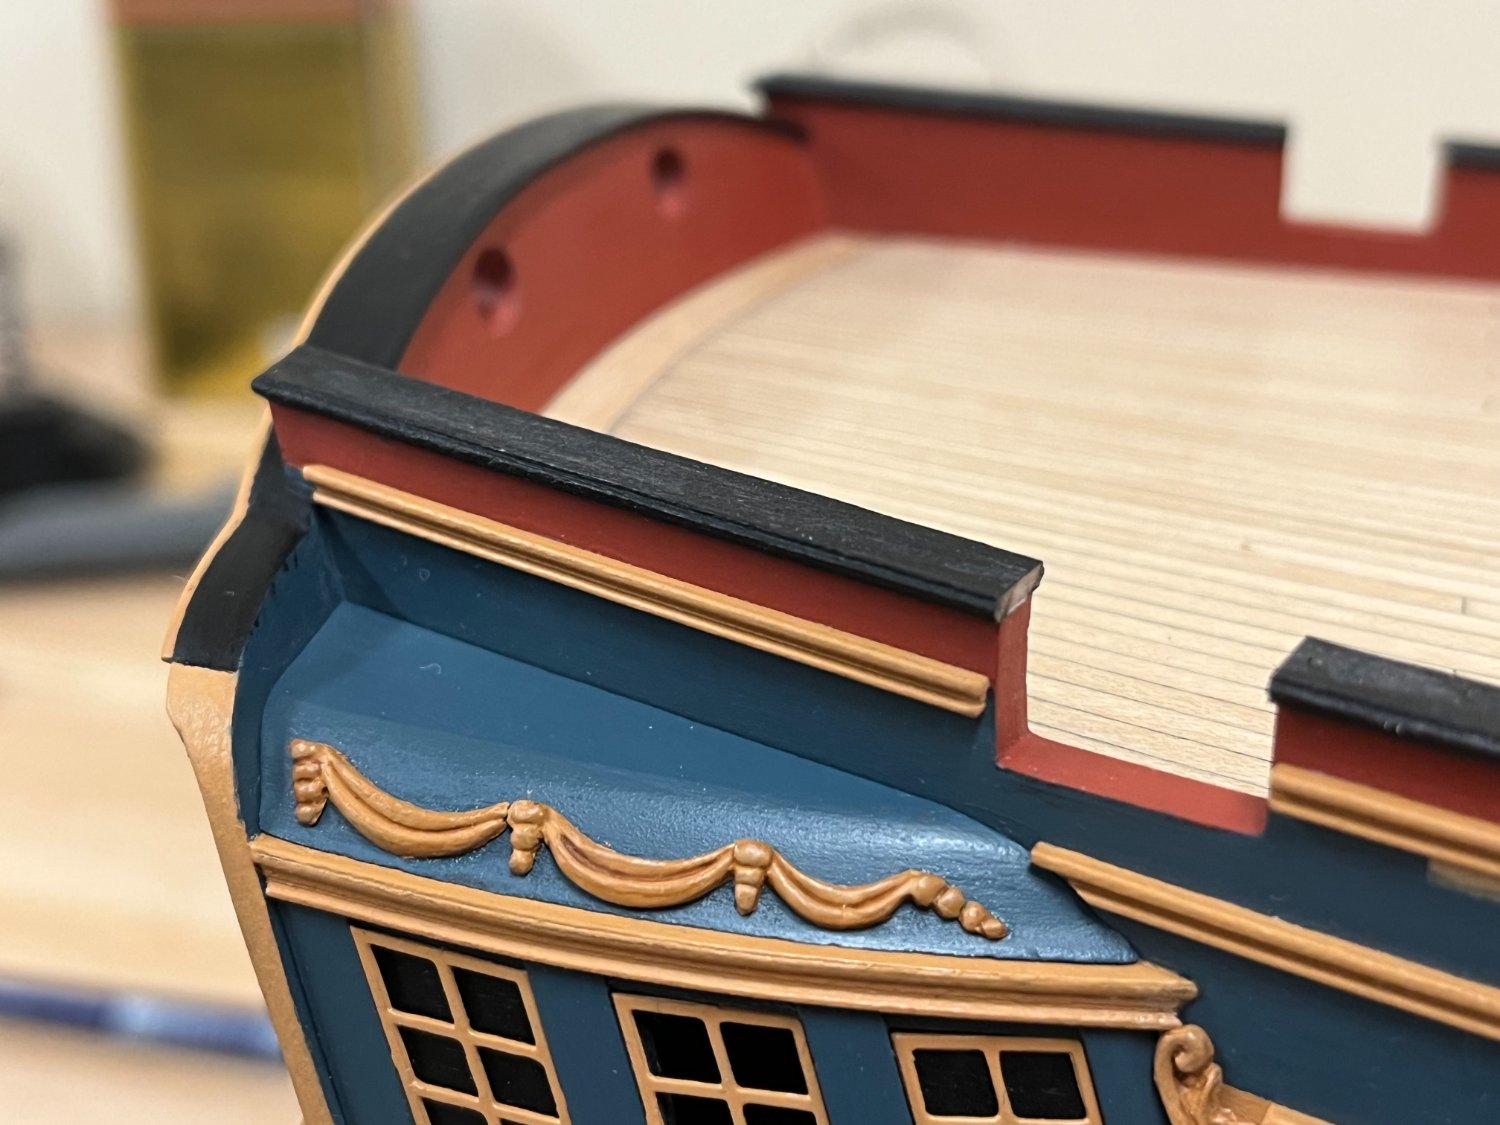
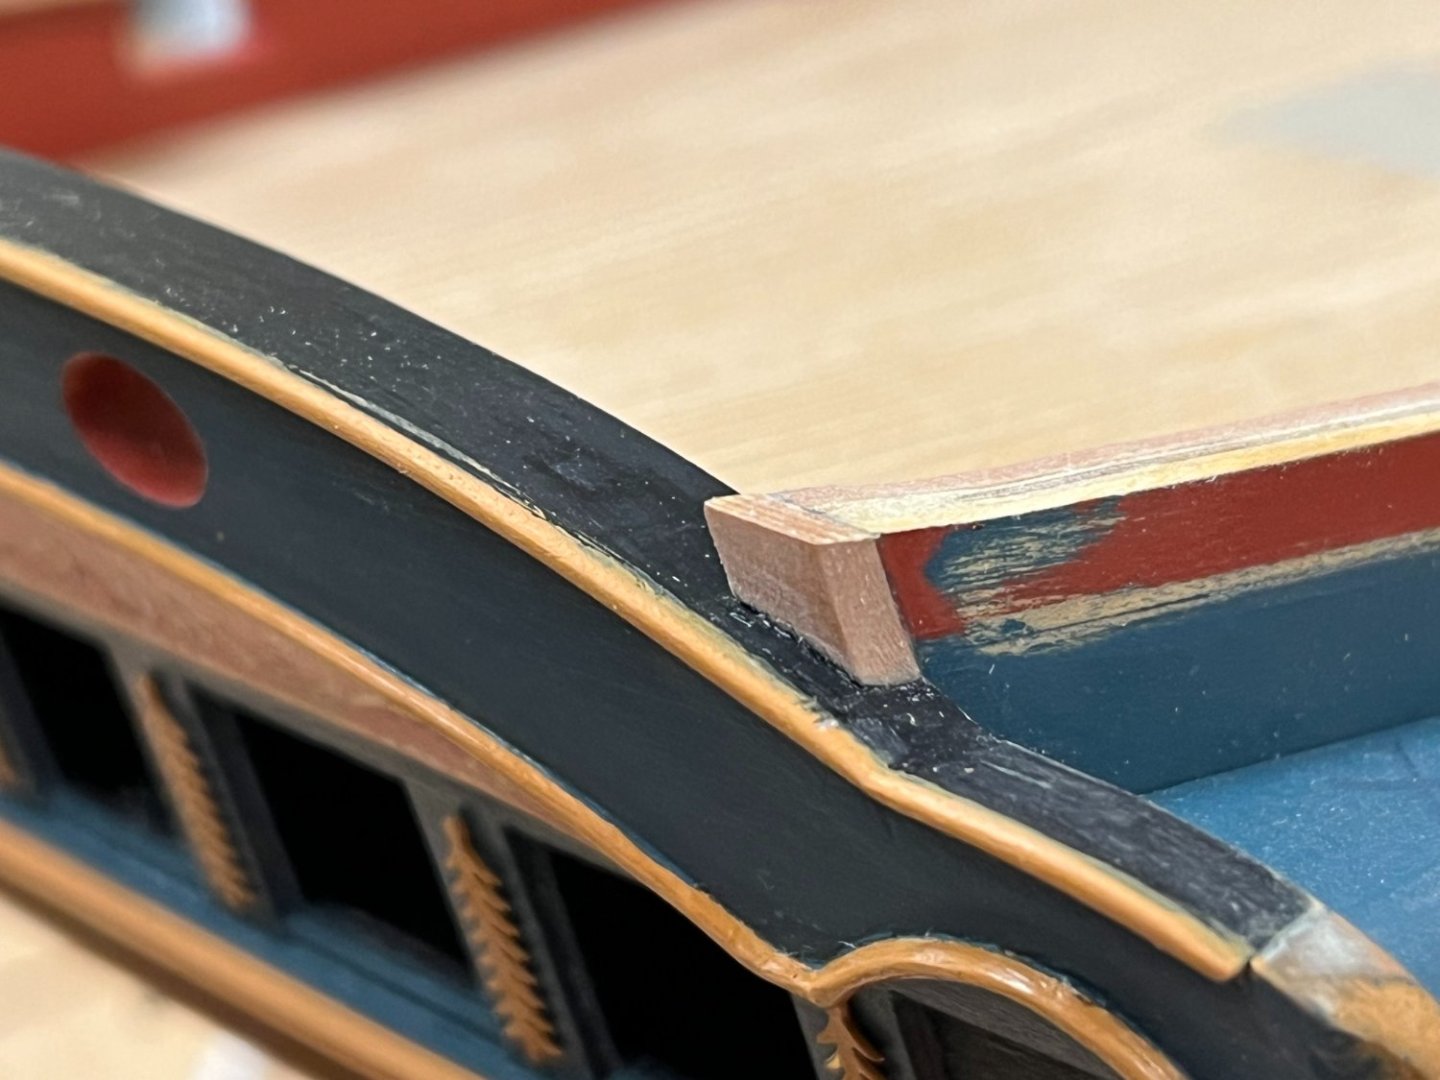
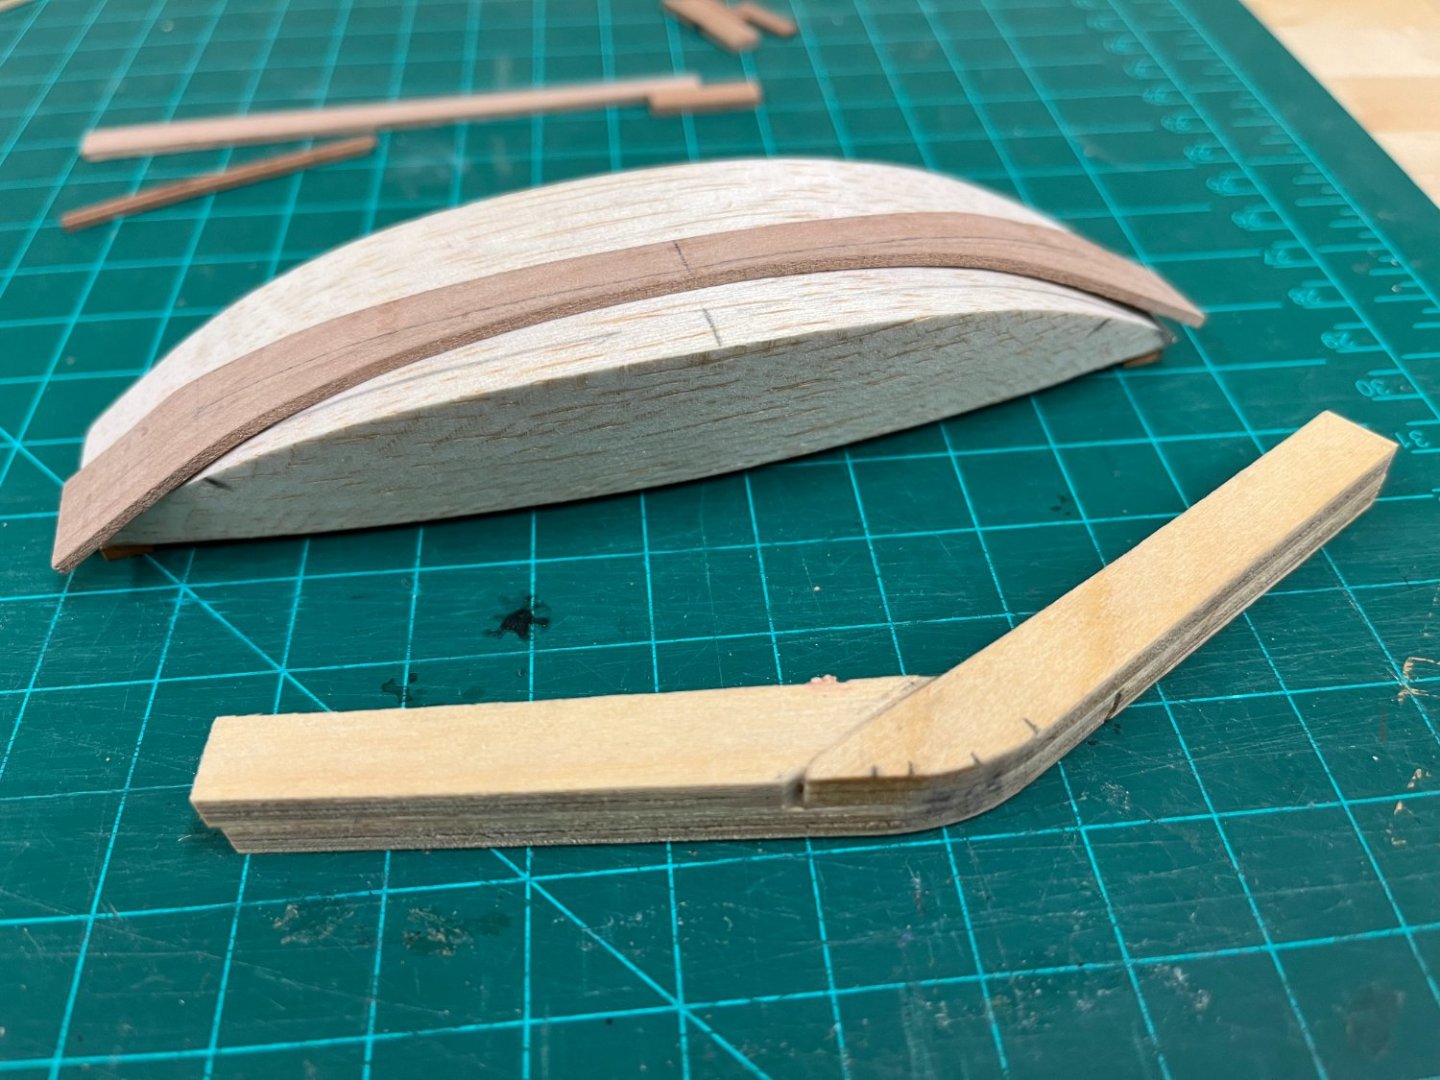
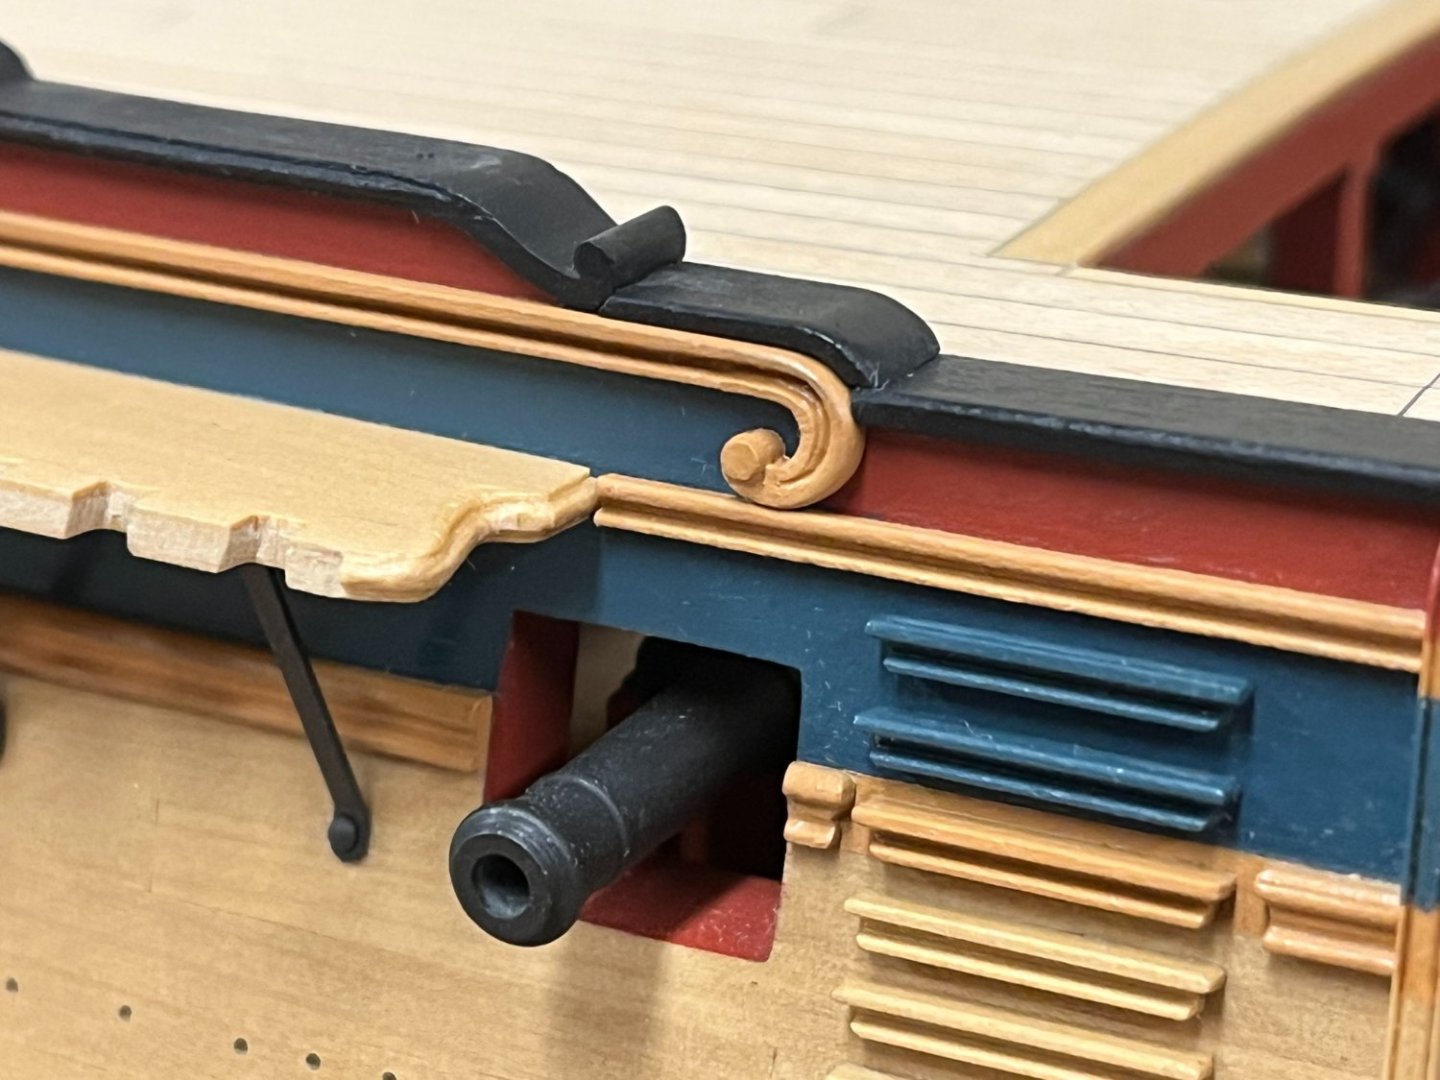
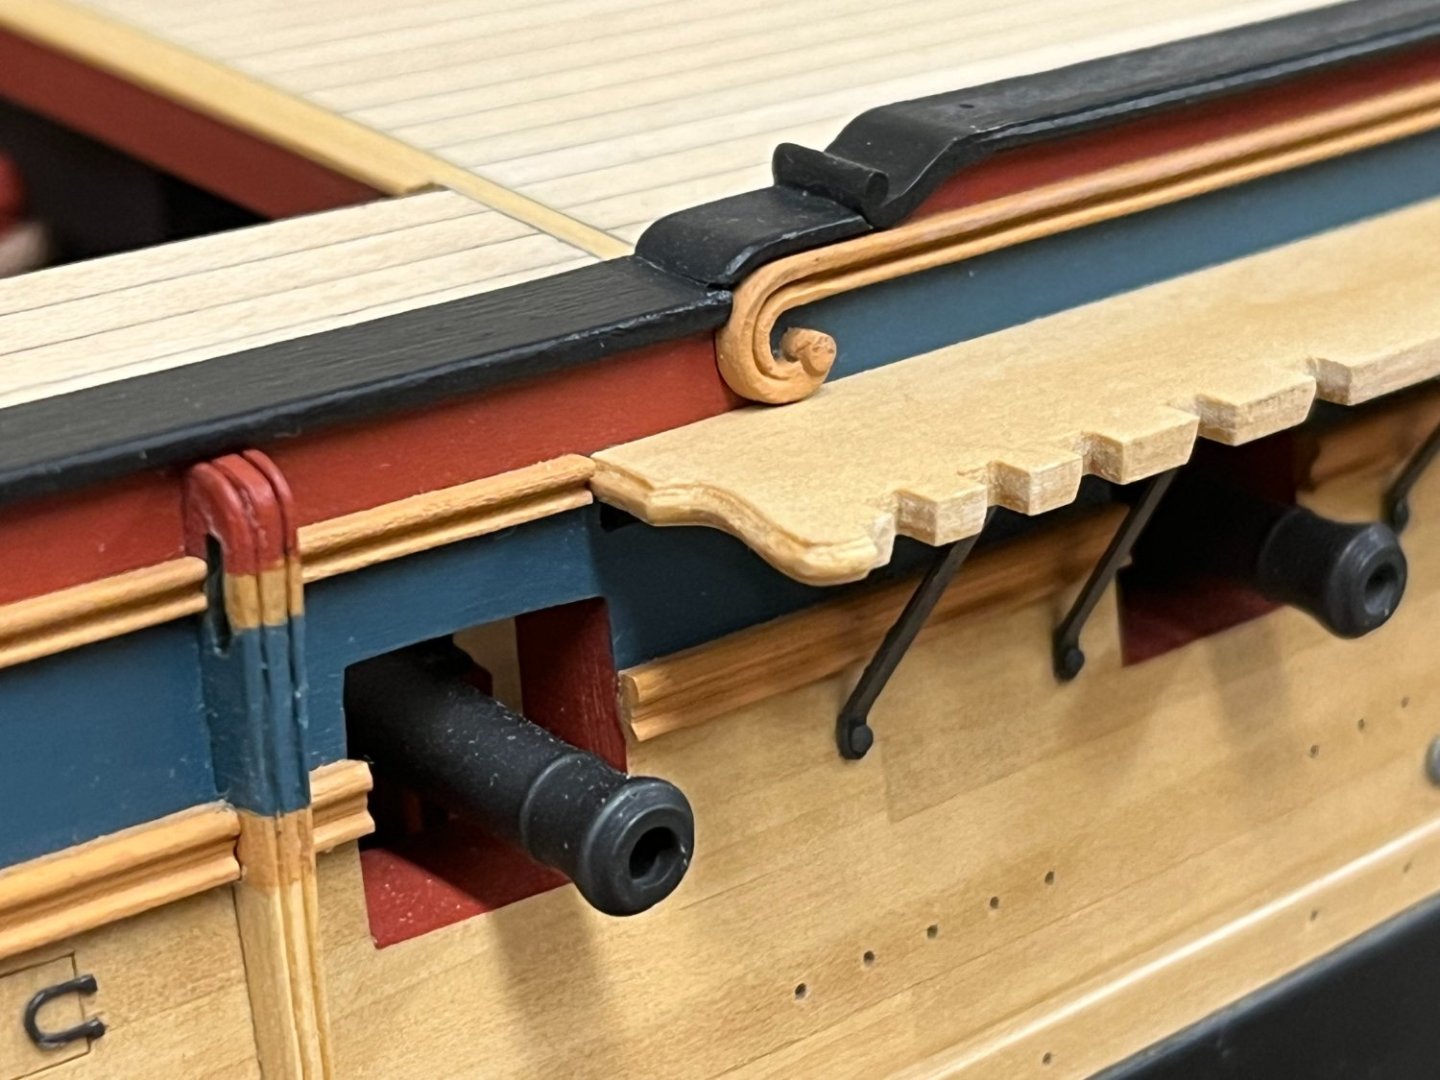
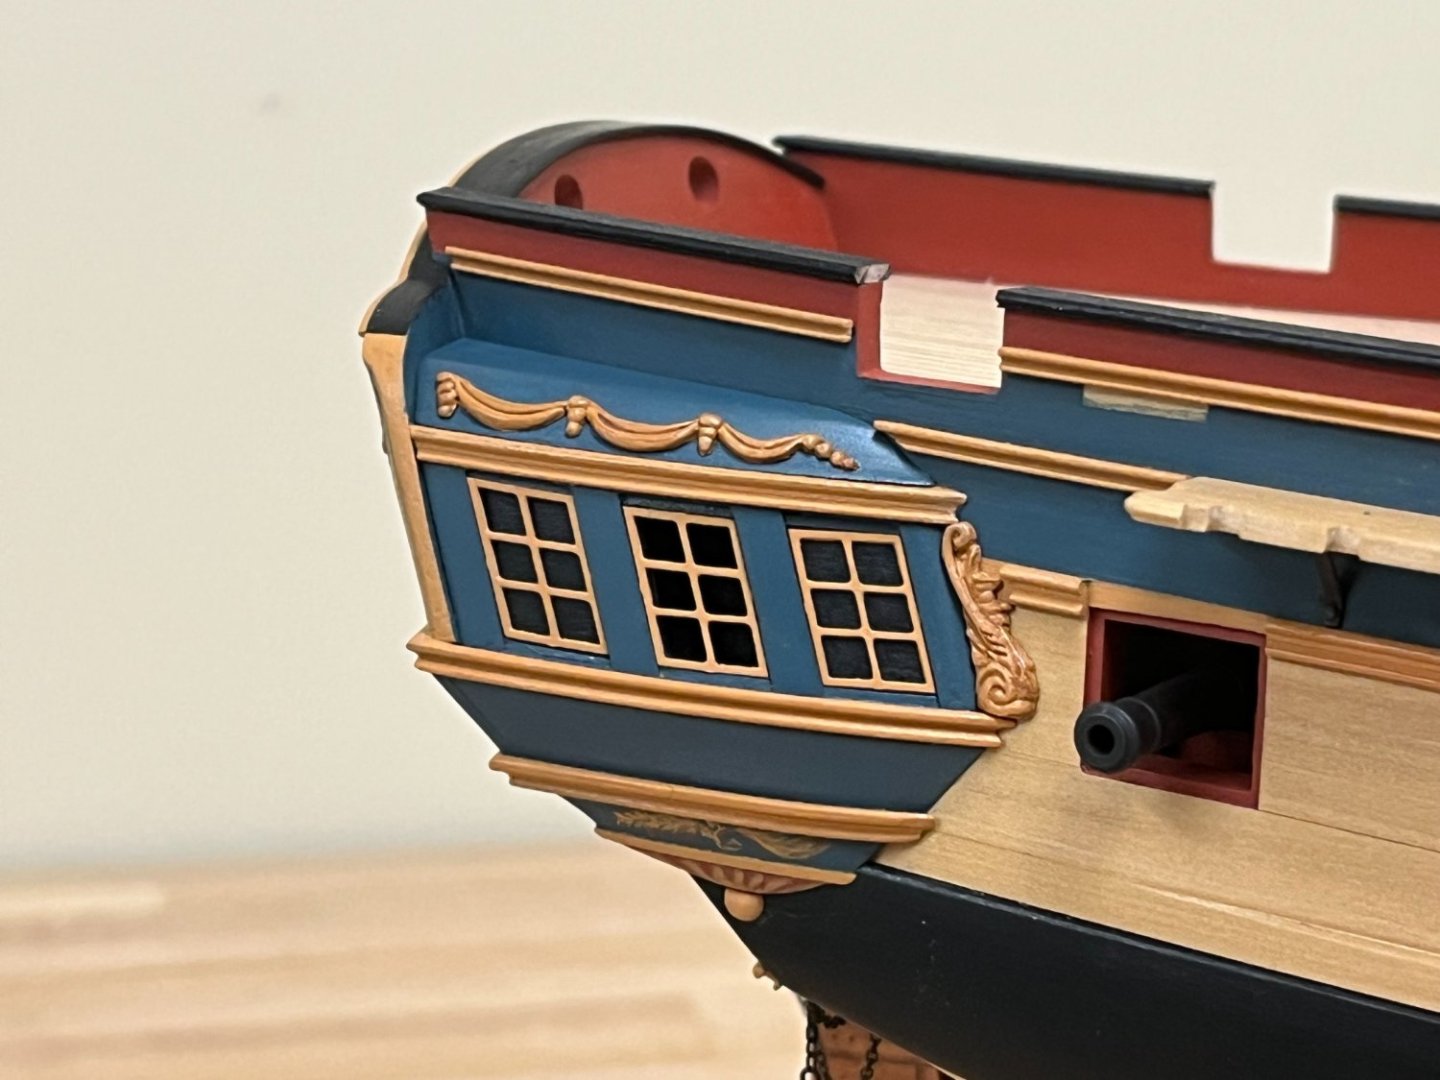
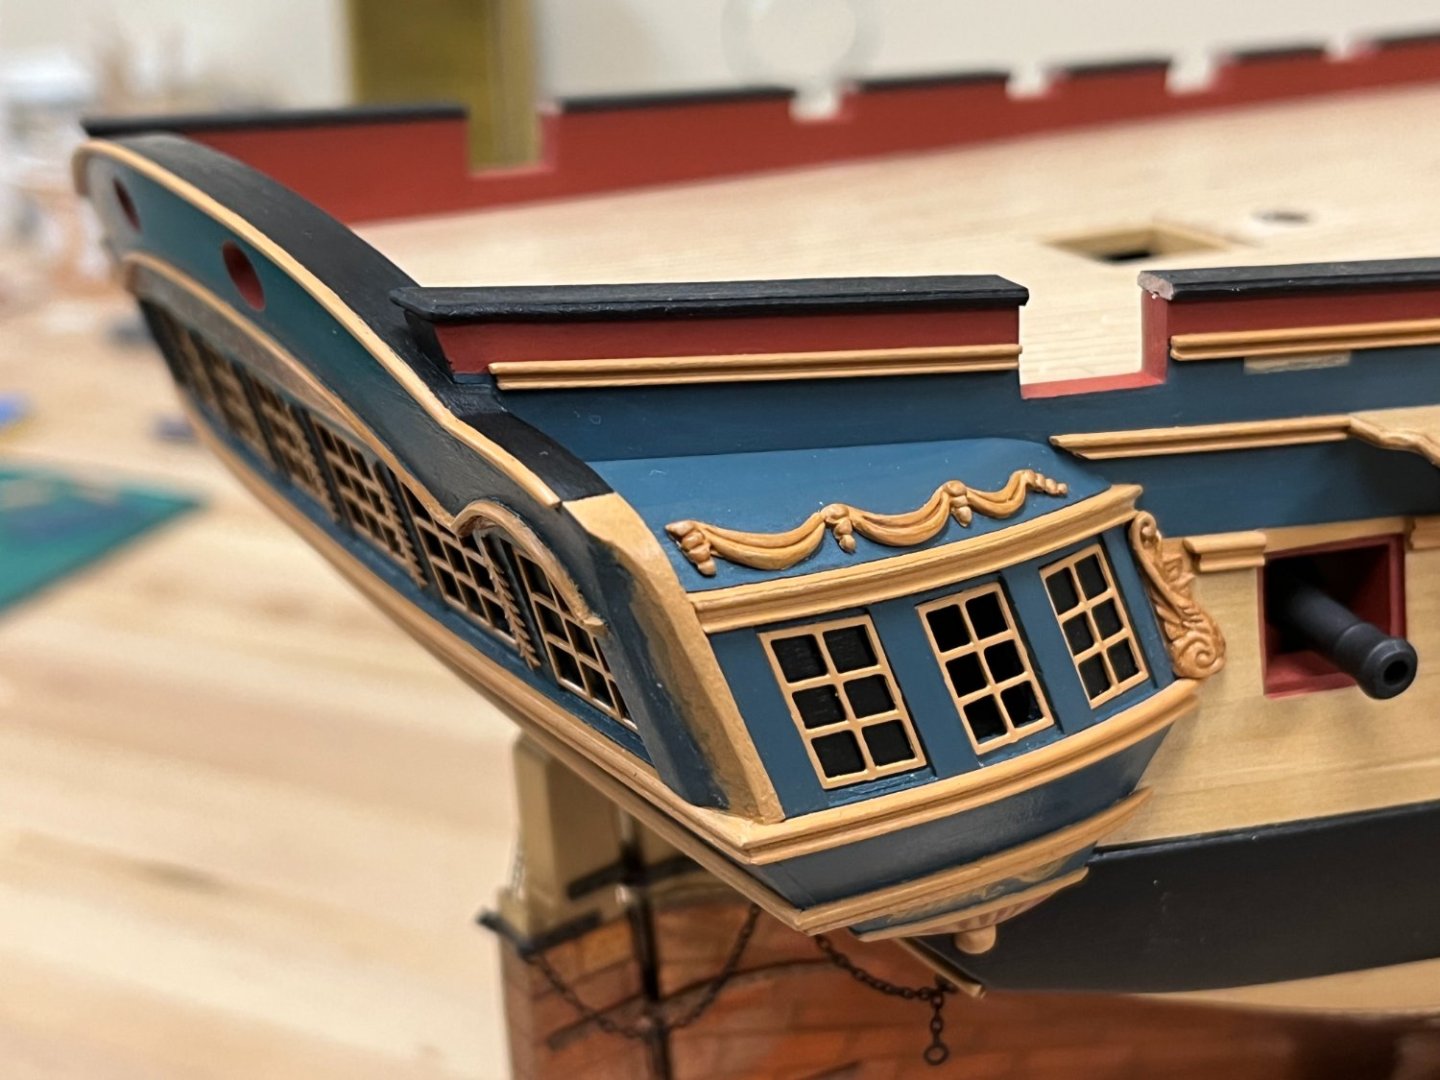
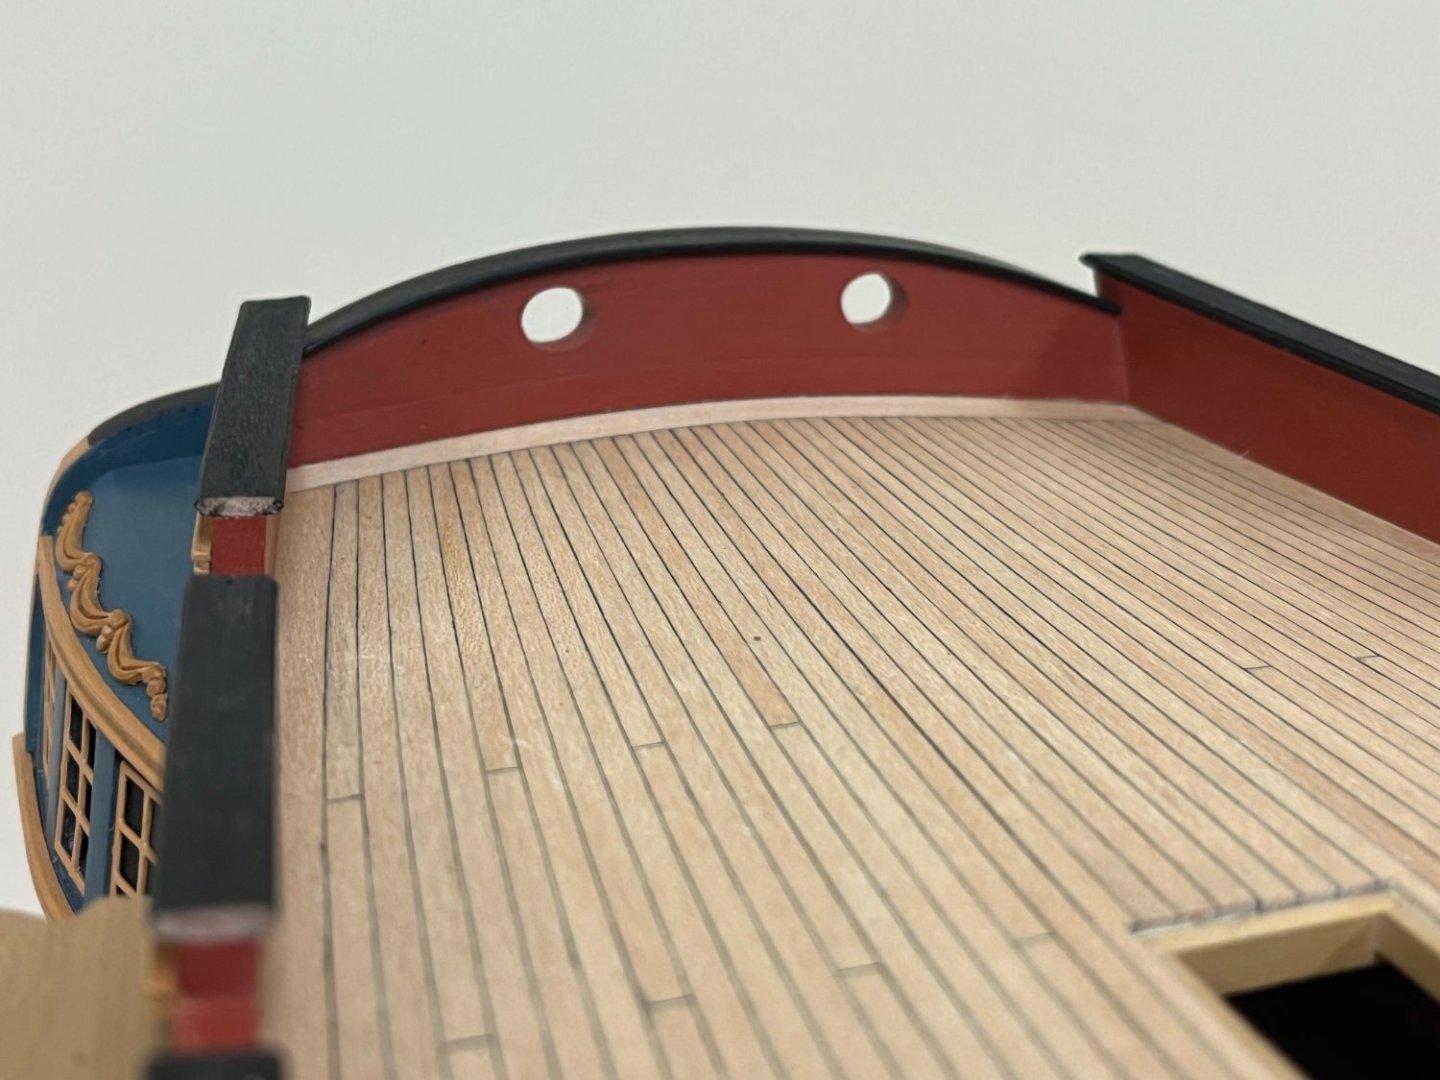
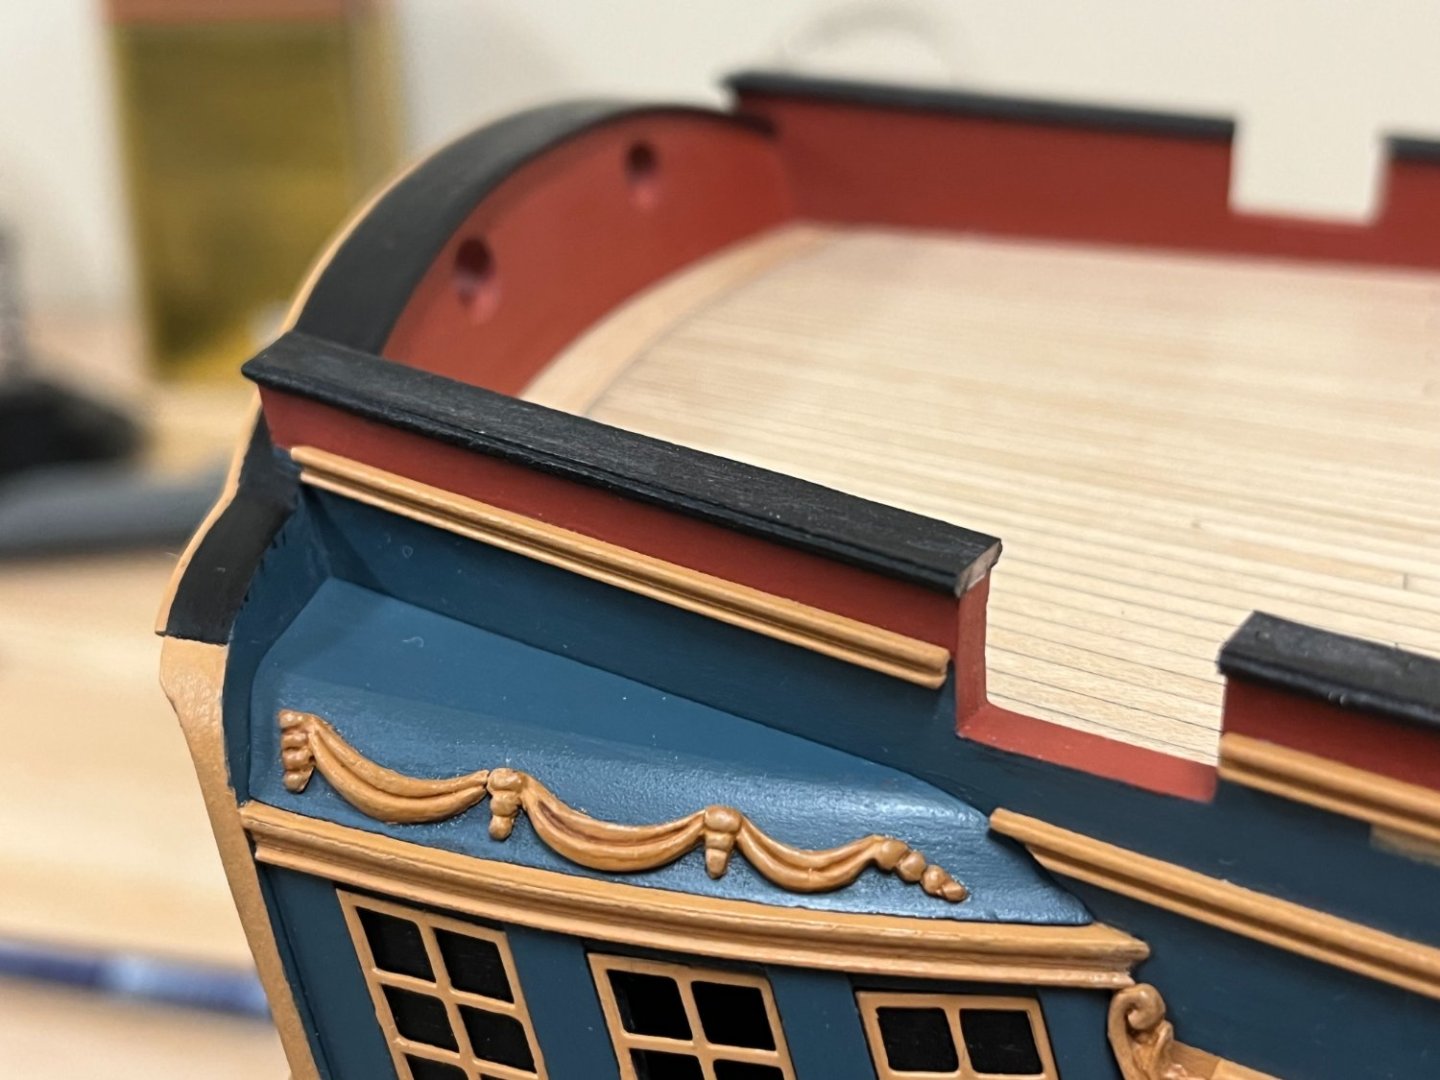
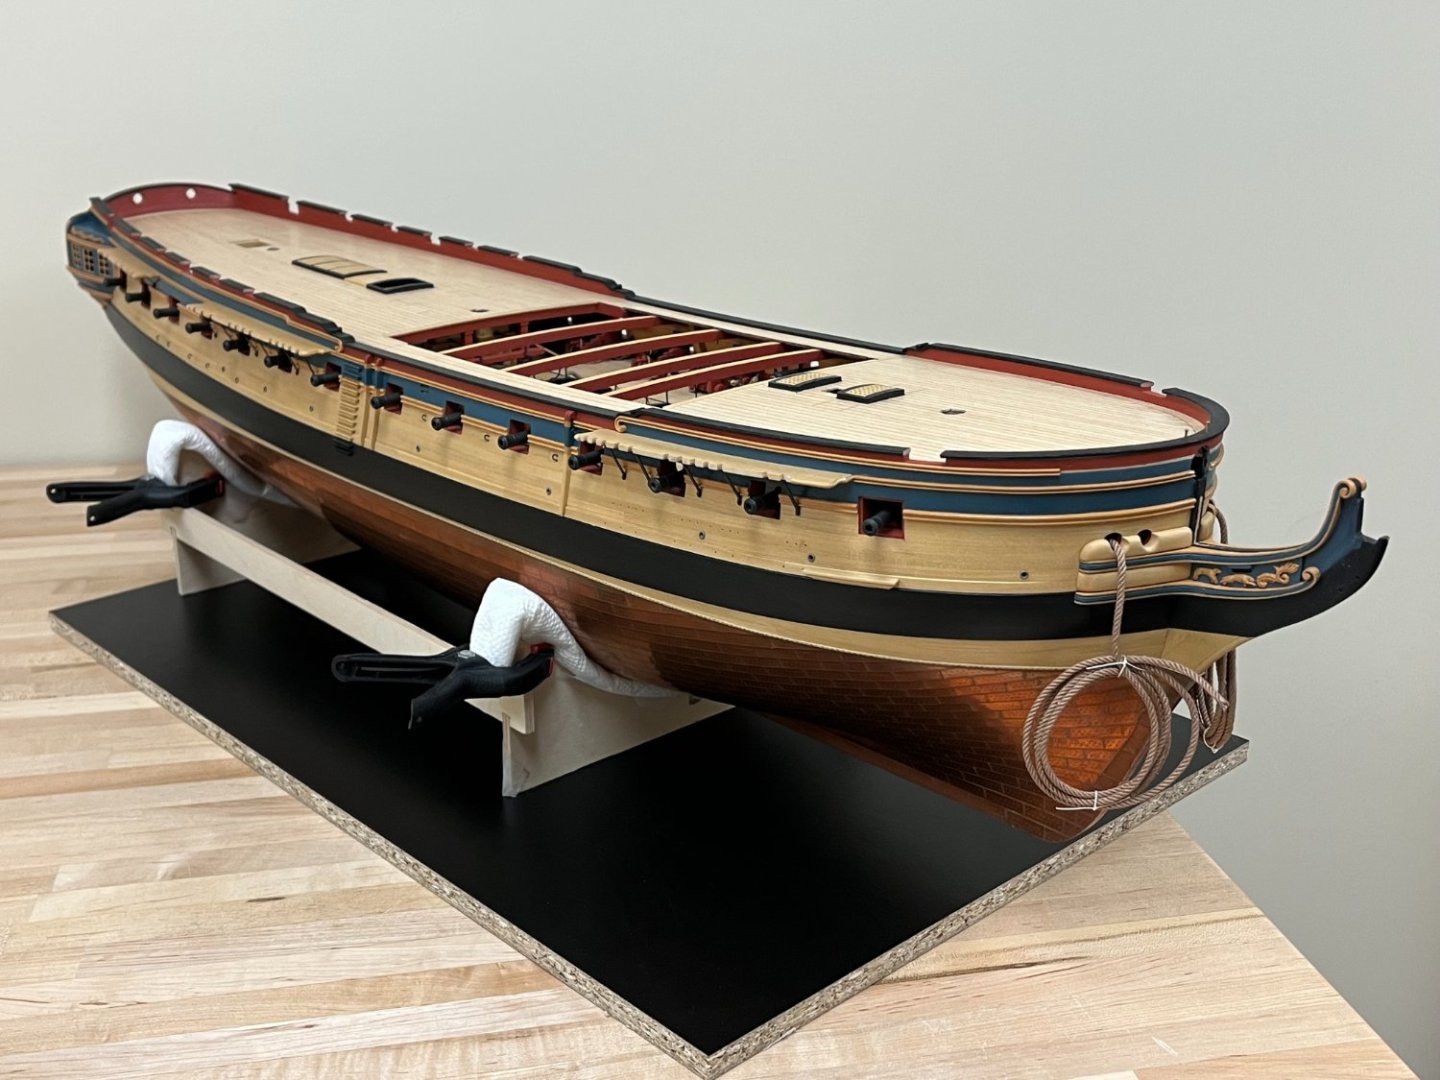
Final shaping of the hull, installation of tafferal and plansheer: Happy New Year everyone! Lots of work over the holidays has finally resulted in what I consider to be a major milestone, namely the final shaping of the hull, installation of tafferal and plansheer. Before I could proceed, had to finally deal with some cannon dislocations that I had been putting off for a while - two of the rear cannons has become loose, the carriages were still firmly fixed luckily, but the barrels had broken away. Thank goodness for those long thin CA tubes that allowed these to be re-glued through the gunport...panic over. Once the volutes had been installed and the gunports were cut out and finished (photos below show the aft and fore positioning), it was possible to install the remainder of the quarterdeck drift which was installed parallel to the main wale. This then allowed the final shape of the upper hull to be determined, once again parallel to the main wale. The topside of the bulwarks should be horizontal, and I found that the easiest way to do this was to use a long enough file that would reach from one side to the other, fine tuning one side at a time. The upper edge of the tafferal was also tweaked to ensure it was parallel the keel (even on the original NMM drawings, it was not possible to determine whether this should be parallel to the sheer of the quarterdeck or keel. After making a template, the tafferal was cut out of a pear sheet, and pre-bent on a template previously made when originally making the stern fascia - this needs to be made from 3 pieces. This seemed the most reliable way to get this done given the compound curves, and the pear wood was soaked and steamed on the former before being left to dry for 24hrs to ensure it was fully dried. Once the main section had been installed, the two small sections over the quarter galleries needed to be made. To do this, a separate former was made up to introduce the different curvature - these pieces are small, and proved to be quite challenging to shape (The second photo illustrates this step, but shows a 'reject'). Painting the edge highlight also proved 'challenging' to say the least. It was also realized that the rear edge of the hull planking needed to be extended further aft - this is needed to account for the counter timbers which of course are not present in the POB kit. I debated doing this, but felt it would be necessary to ensure the tafferal fife rail can terminate properly and not be left hanging in space. The tops of the counter timbers will not be added until the tafferal fife rail is installed down the road as I suspect this will be a magnet for damage. Not much more to be said, here are some overall shots of the finalized stern and quarter gallery area. I am satisfied with the way this turned out, but as anyone who has built this kit can testify, getting the positioning and sizing of all these elements 'right; is a challenge. Overall, it has been an exercise in constant compromize and adjustment between the original plan dimensions, the AOTS diagrams (which are not all consistent or fully representative of 3D reality) and the kit dimensions. I will likely need to reduce the dimensions shown on the plans of the decorative upper finishing fretwork that will be installed on top of the quarter gallery roof by 1mm or so to avoid it protruding above the stern fascia - another decision for down the road. Gunports were tested with anticipated armament, in this case Vanguard 9lb carriages and Syren barrels. Had I been only using these, I'm sure I would have used the Vanguard barrels as well, but I wanted to keep the use of brass barrels for consistency... ...and finally some overall shots of where things stand, the lights are only temporarily installed for now.


-
I think the specific problem though is that the beams really hinder the ability to fair the interior face. Is it possible to mount and fair as you go, e.g starting midships and adding a couple of frames immediately fore and aft and fair these, then add a few more. The access will diminish, but there would theoretically be less and less to fine at each step.
-
Love it, love it, love it. You've excelled yourself on the period feel once again, well worth the effort!
- 106 replies
-
- 1
-

-
- Admirals Barge
- Vanguard Models
- (and 1 more)