Beef Wellington
-
Posts
2,249 -
Joined
-
Last visited
Content Type
Profiles
Forums
Gallery
Events
Everything posted by Beef Wellington
-
 Nice work Peter, I found the rigging and configuration of the martingale to be one of the harder things to figure out, even with Lees as as reference, so glad you have a plan.
- 366 replies
-
- 2
-

-
- bellerophon
- victory models
- (and 2 more)
-
Beautiful work Glenn, those colours really pop against the boxwood. Appreciate you sharing your chisel philosophy and tools, I really need to invest in some of these rather than chewing through exacto blades.
-
Going...going...gone? The London wreck.
Beef Wellington replied to druxey's topic in Nautical/Naval History
Interesting development...Divers are making a digital map of 17th century warship 'The London' -
Hi No Idea, very much enjoyed reviewing your progress to date. I can't believe that this is your first scratch build, as everyone has said your work is so clean and precise. I especially appreciate you sharing how you do some of the basic wood working, that often seems to be 'assumed knowledge' and seeing what you've done here definitely has shown that it might just be possible at some point in the future to attempt something like this. Will be watching closely from here on in as this will surely be a beauty.
-
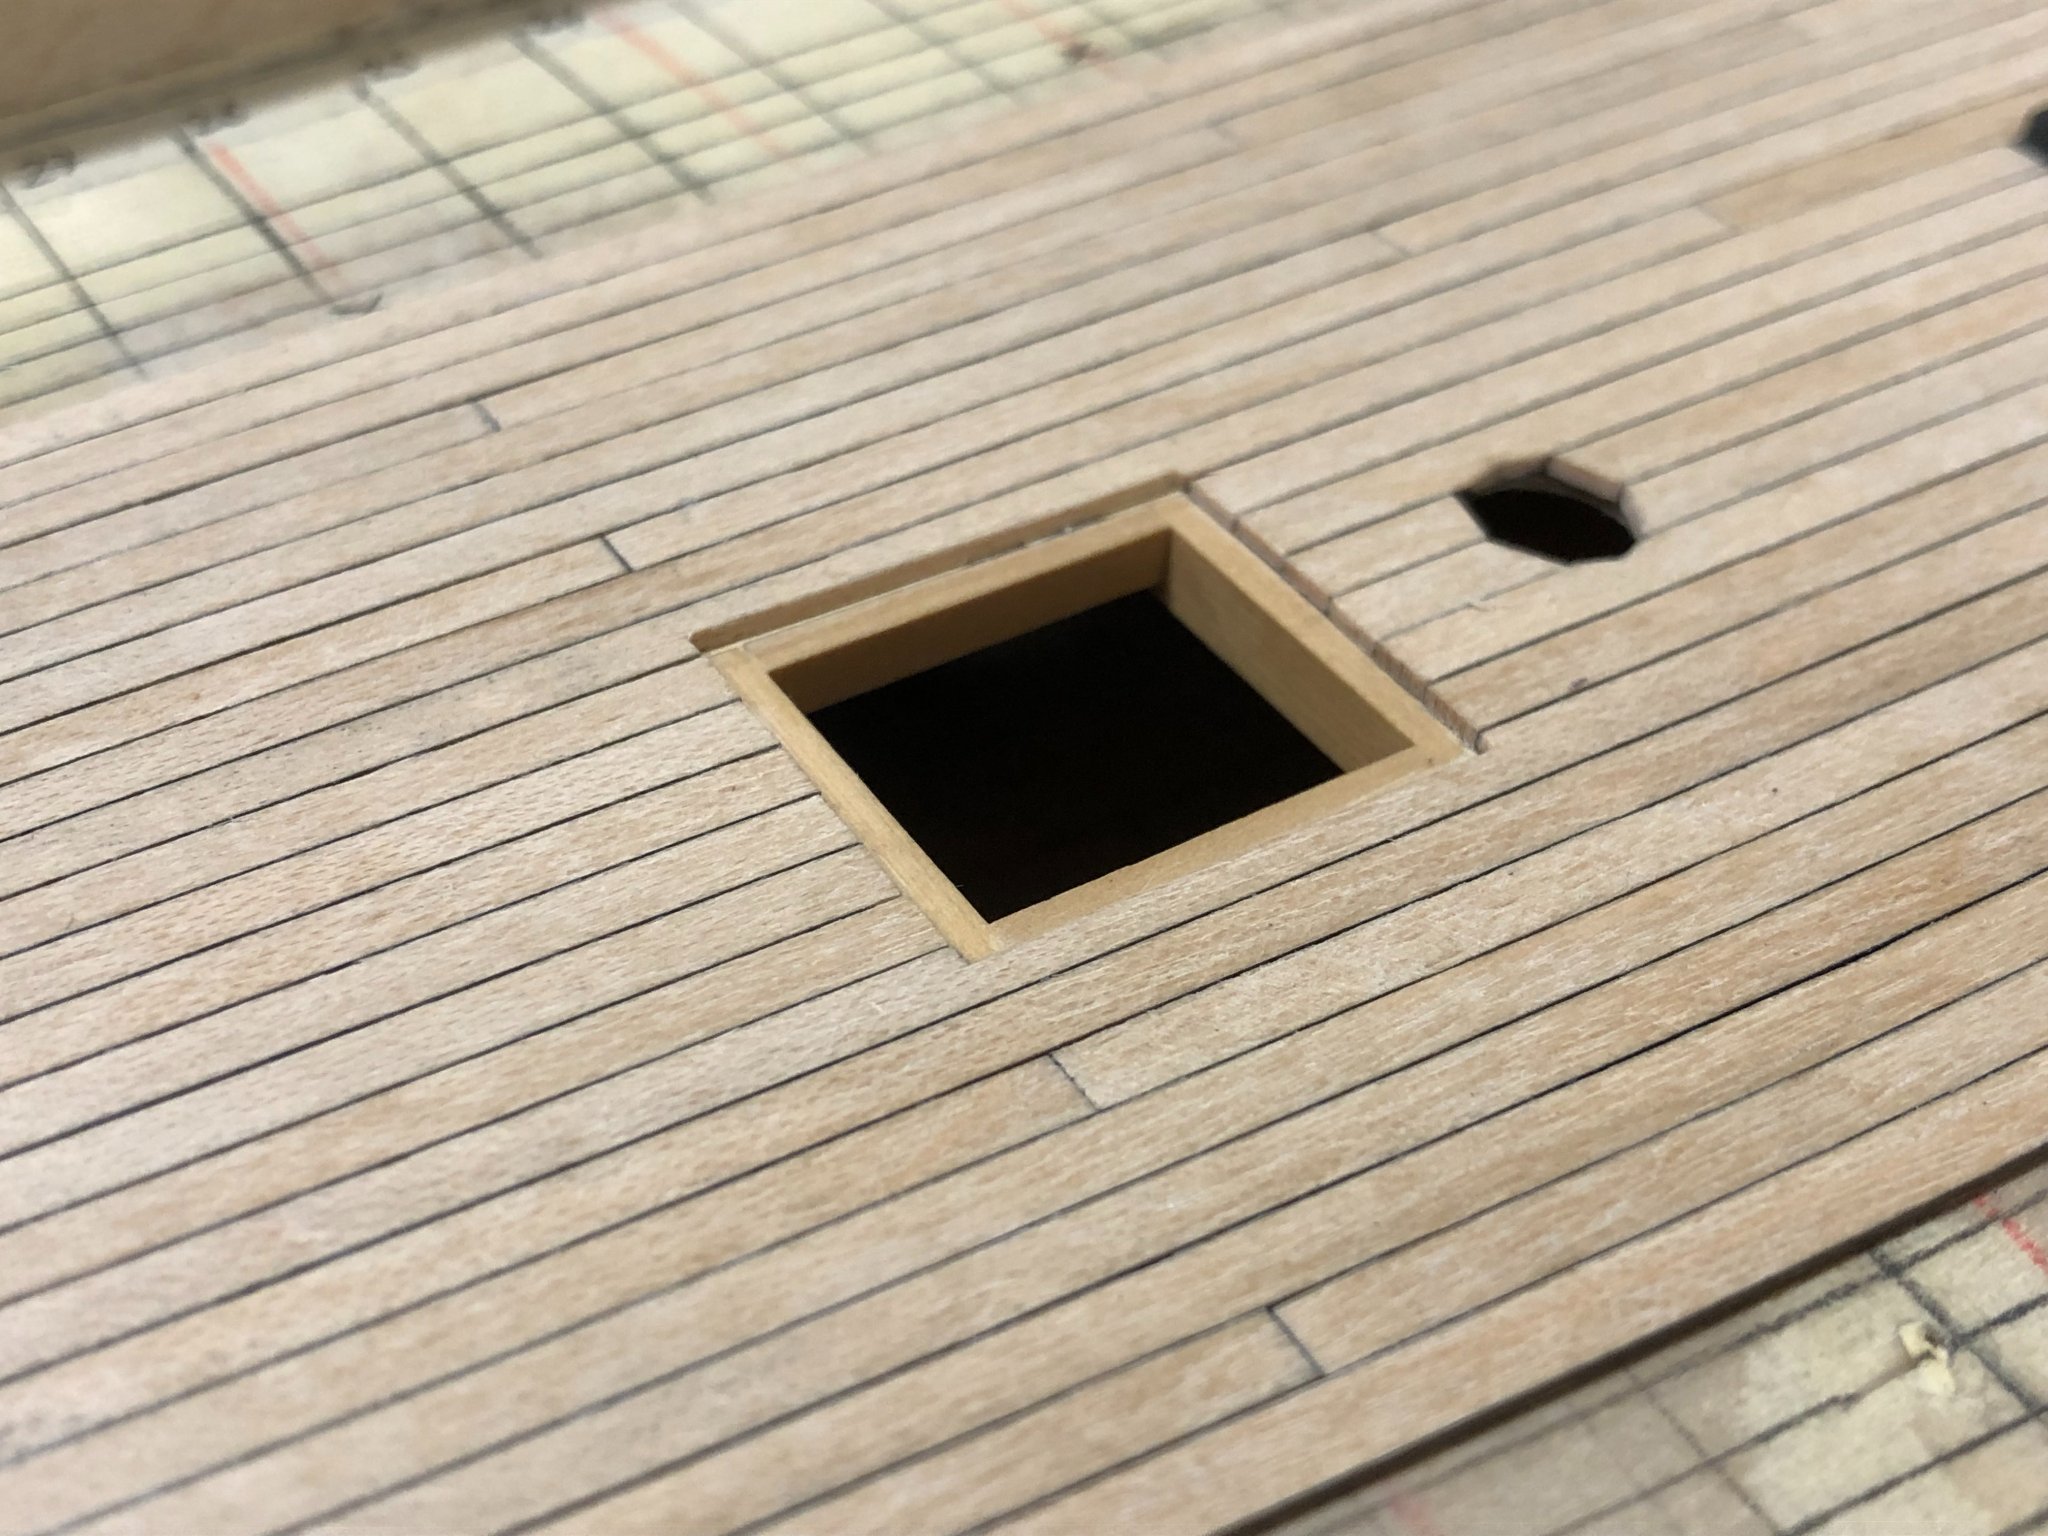
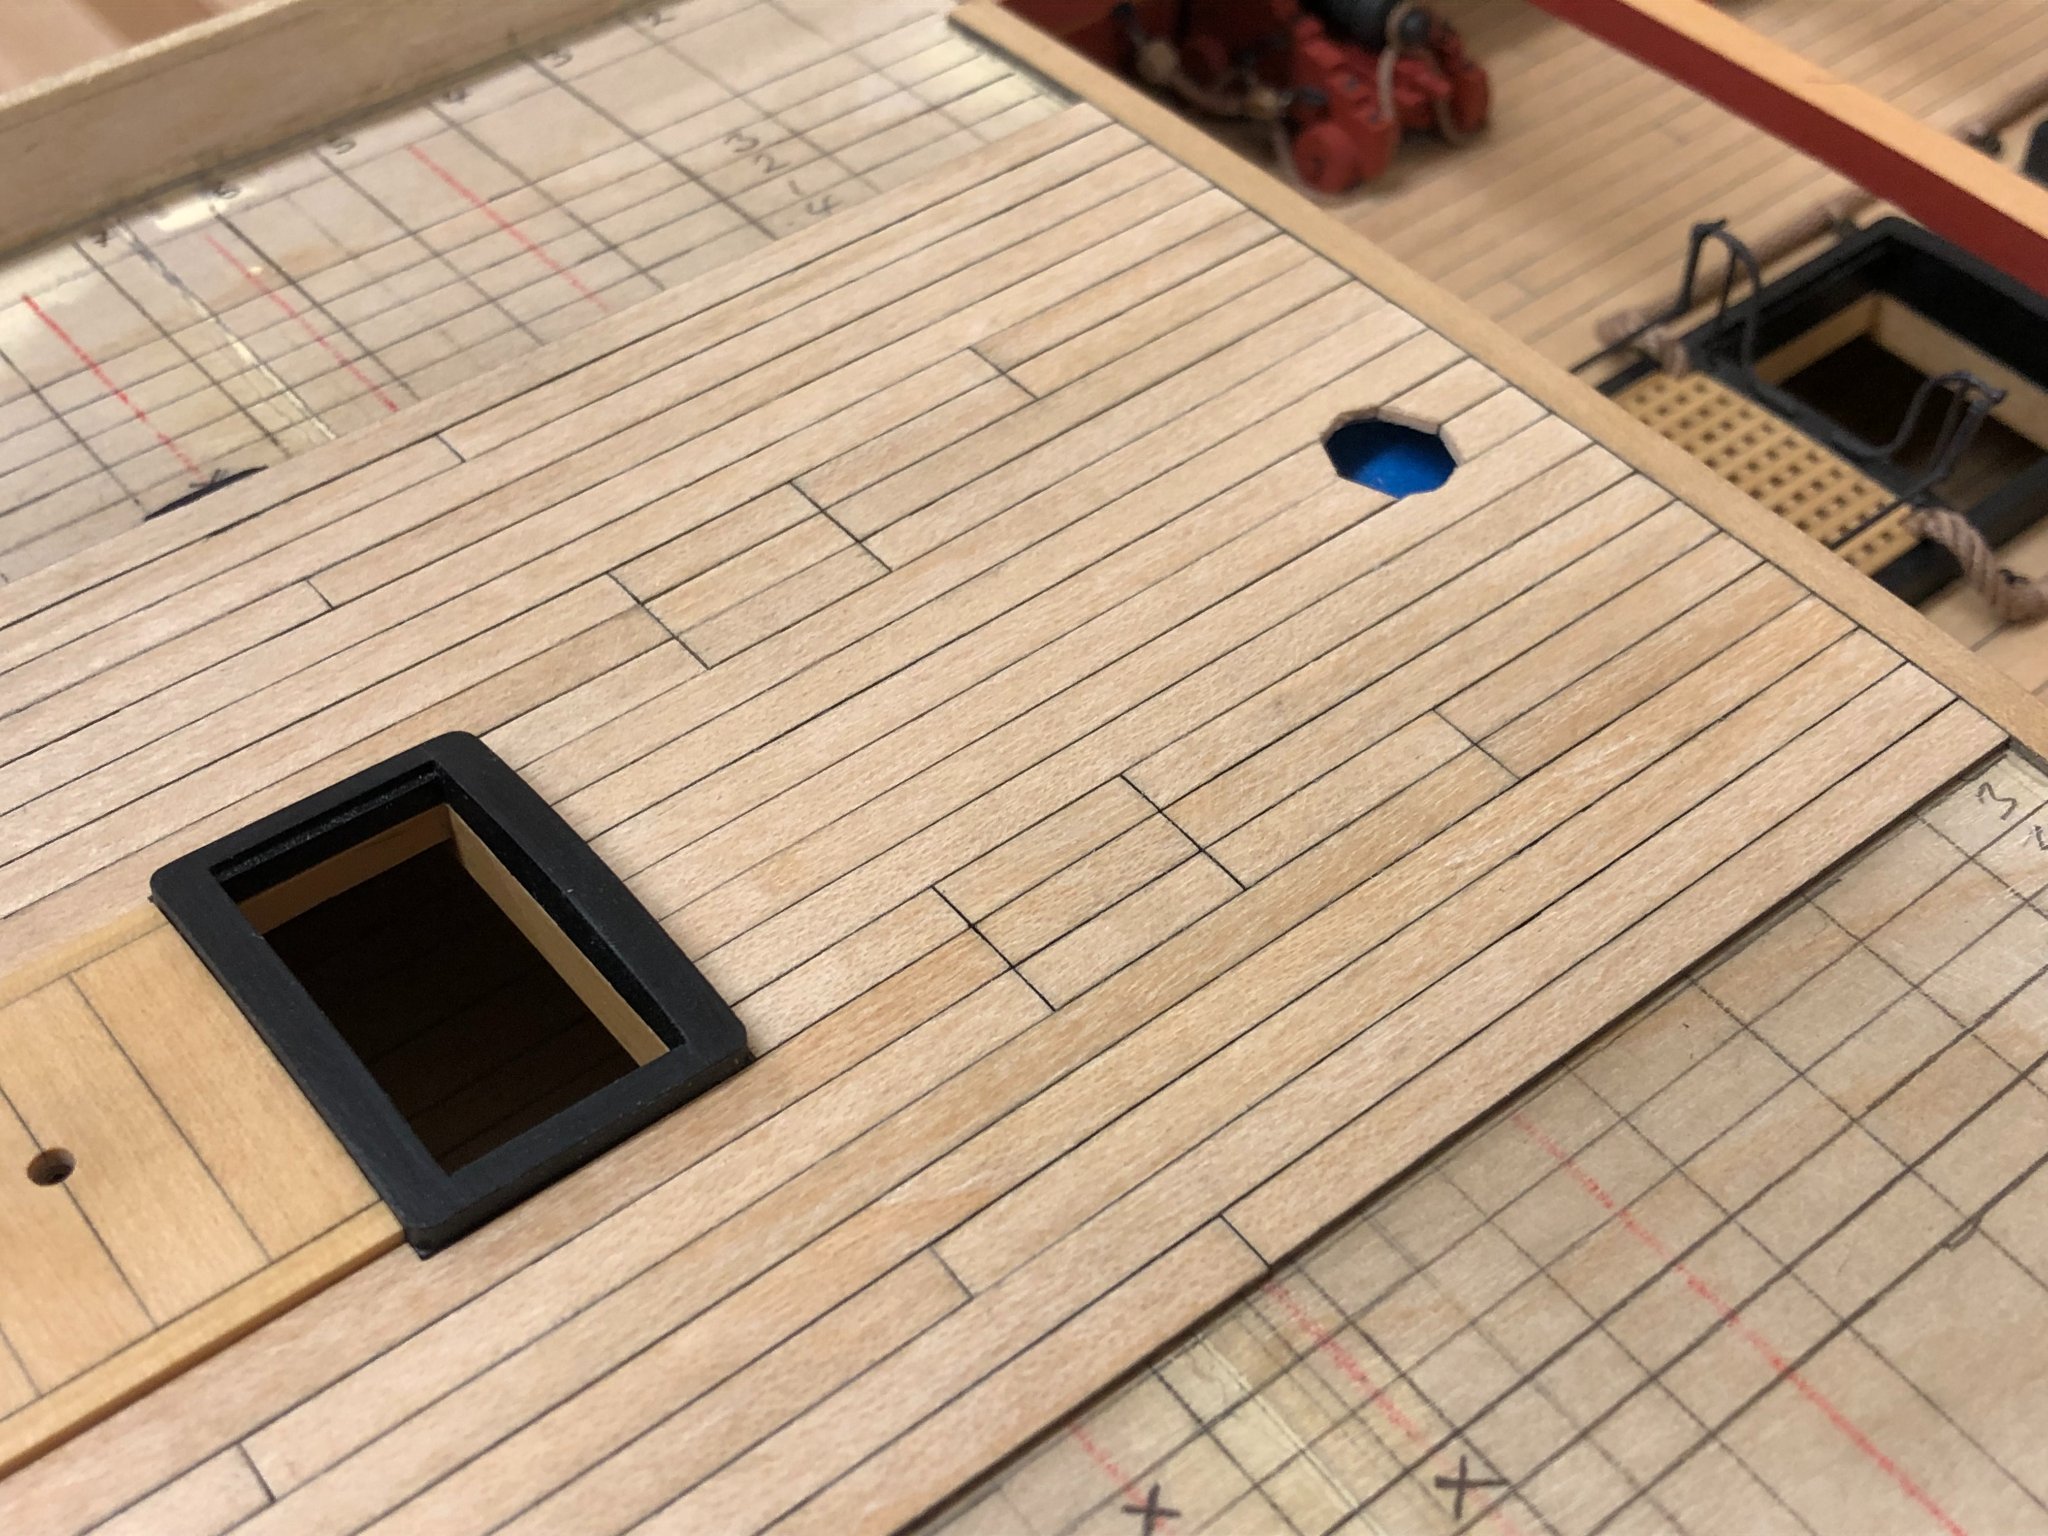
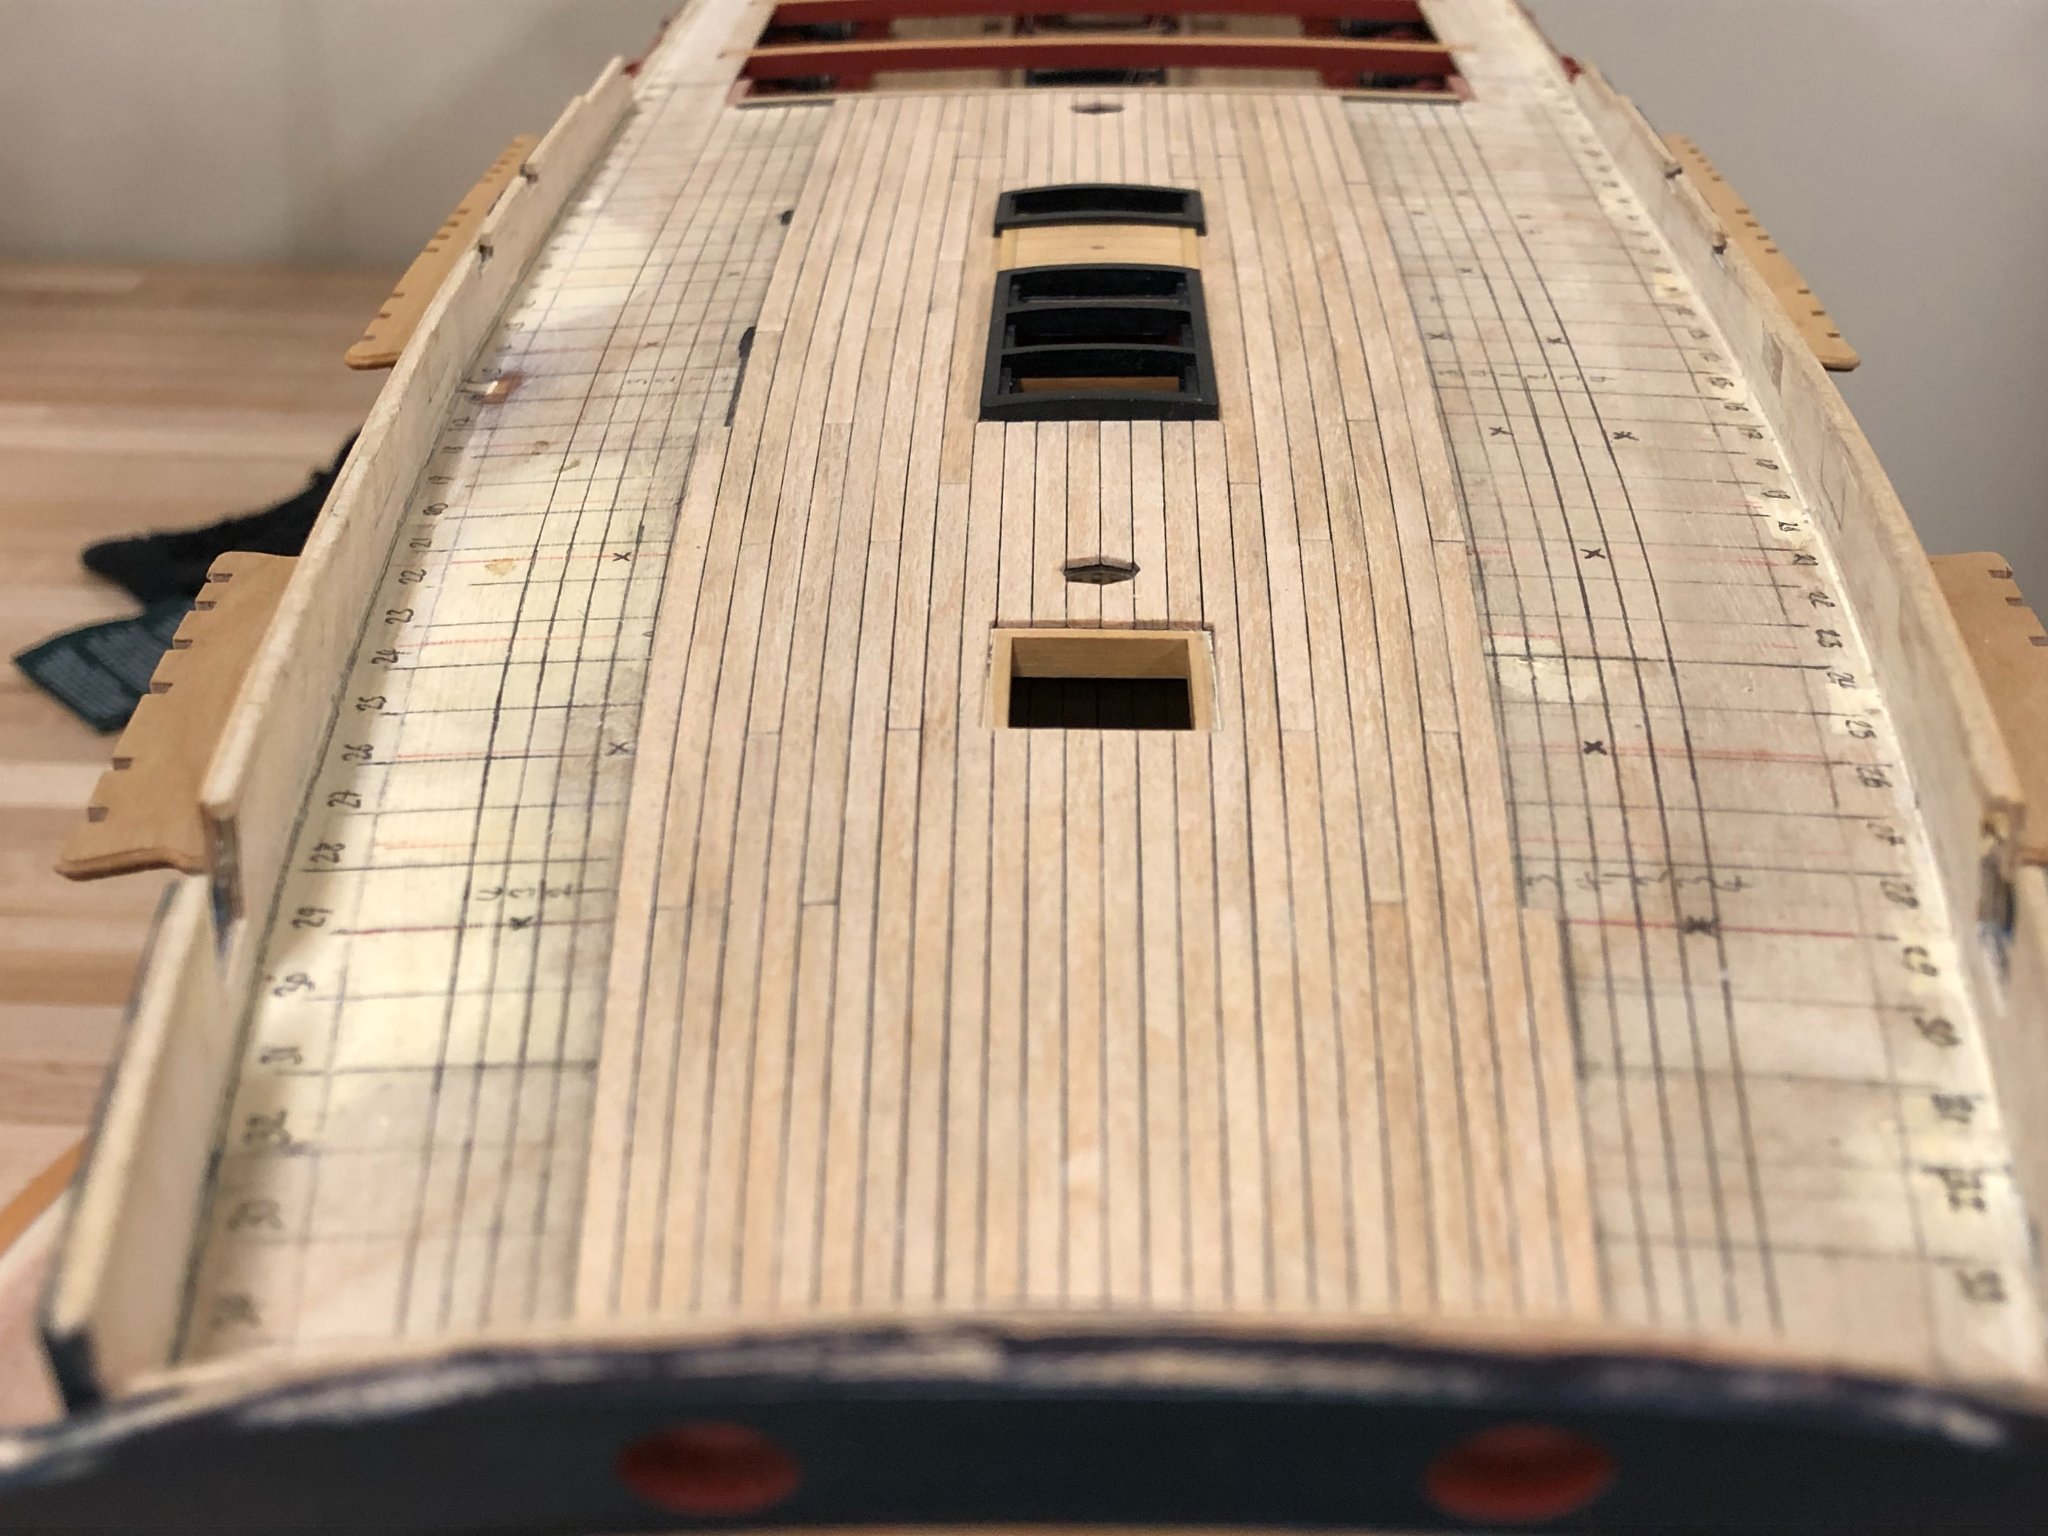
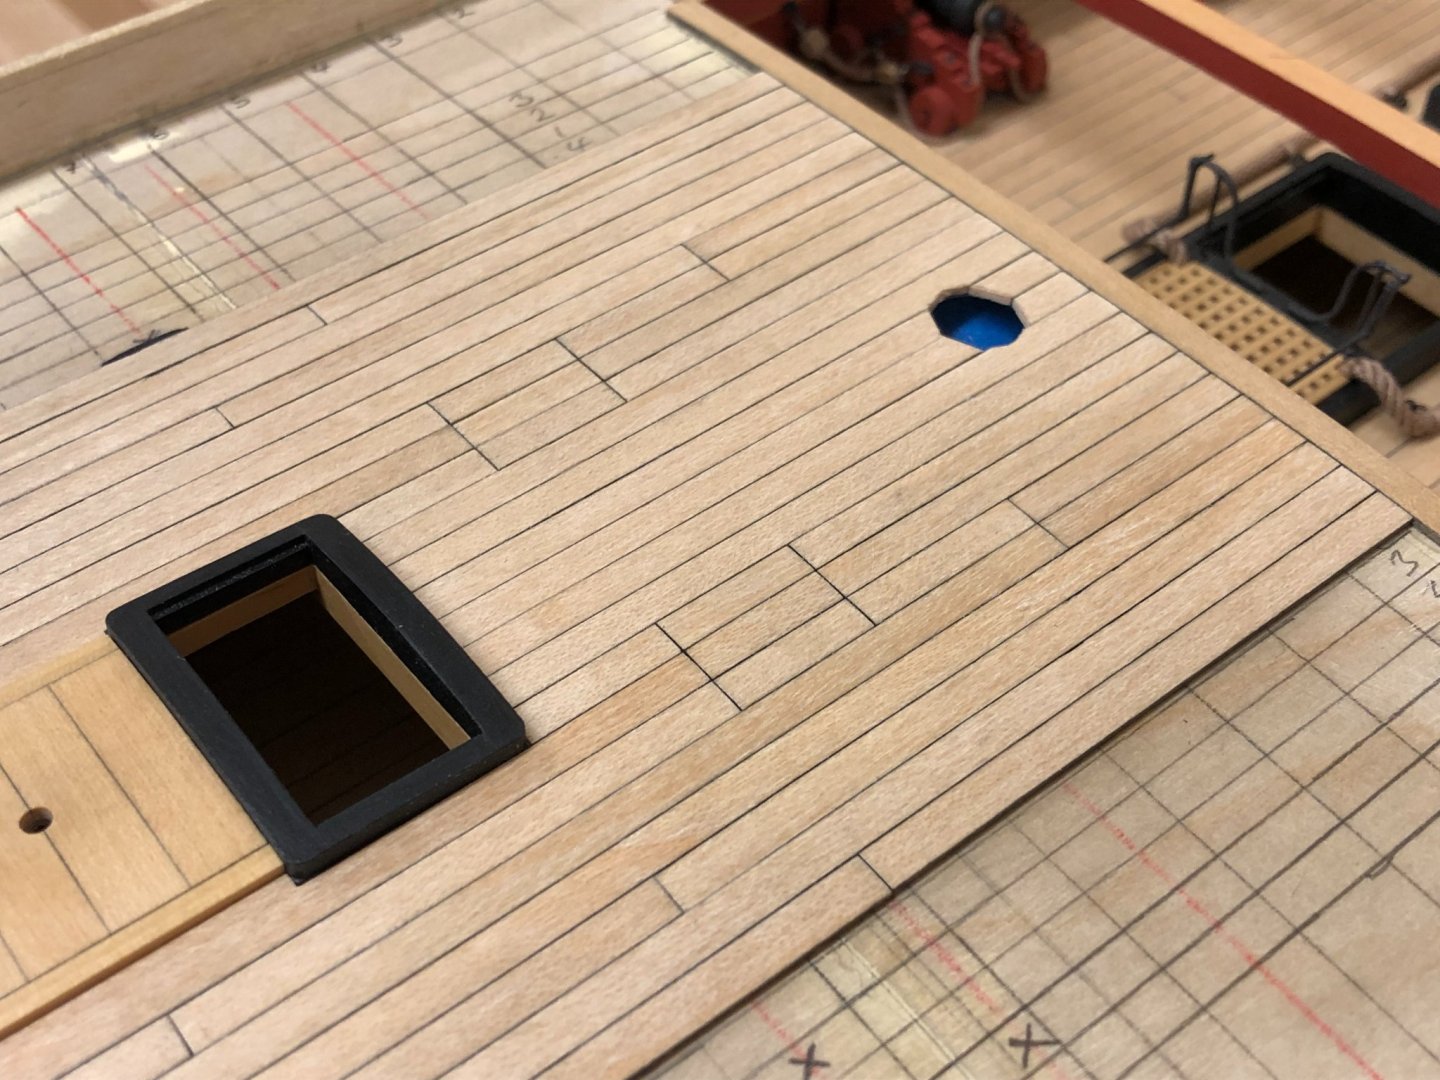
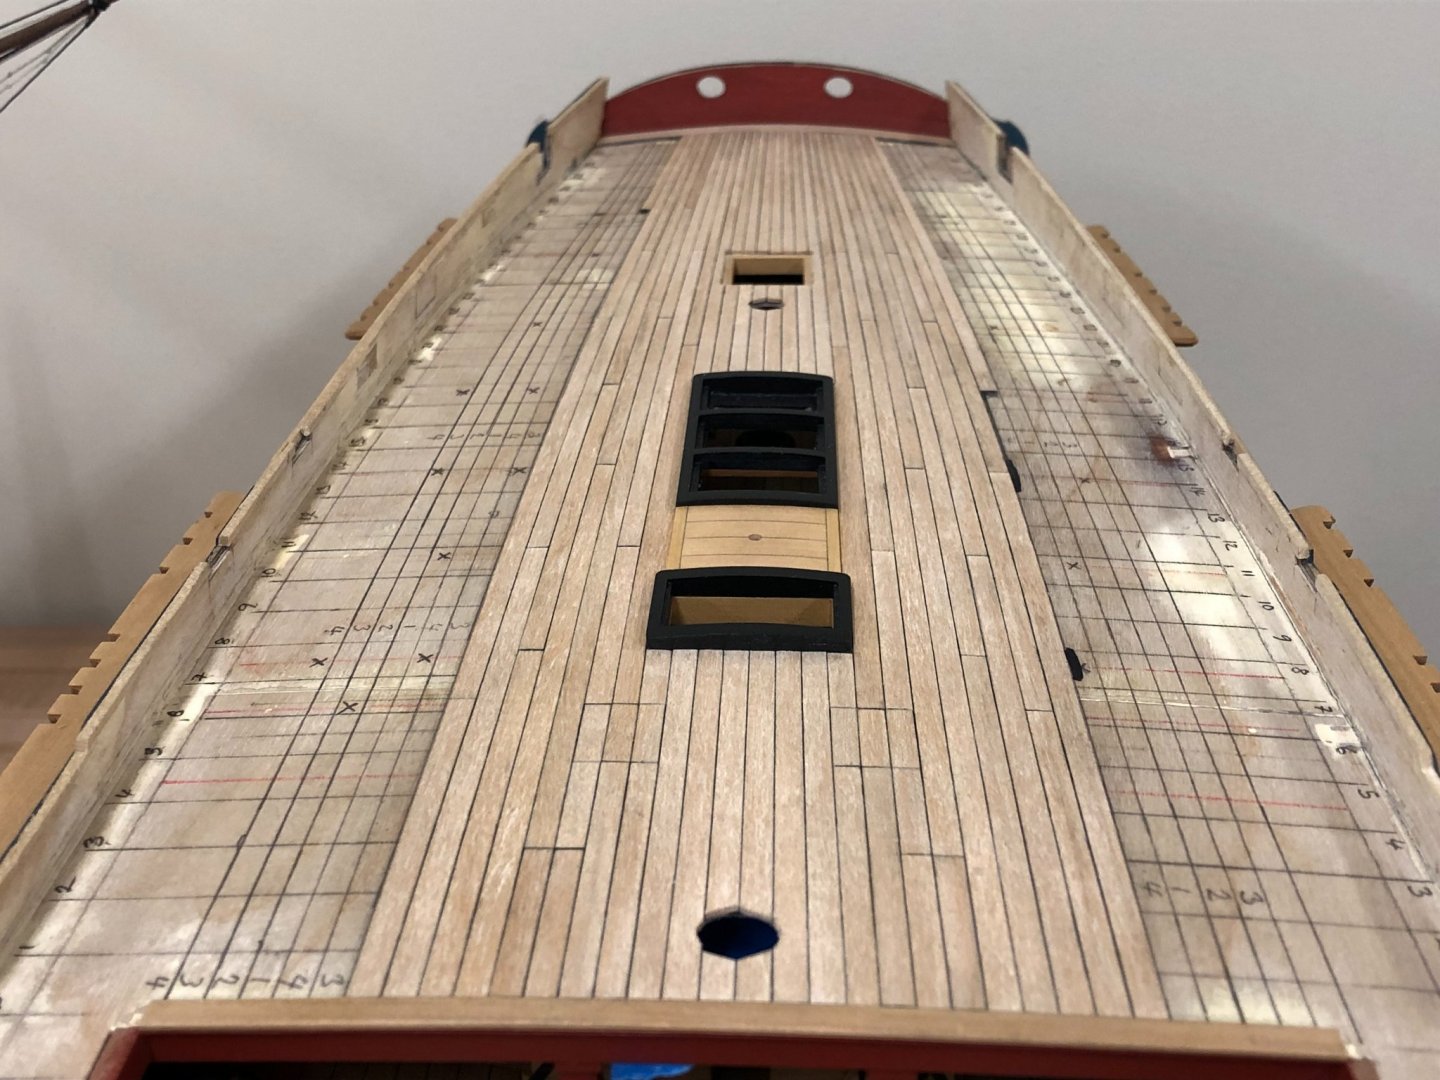
Finding a little time to update some (small) progress, thanks everyone for the interest, comments and likes. @Eamonn, @Mike - One comment off the bat, certainly would not want to be claiming this approach as my own. I think we all stand on the shoulders of others, and it was Rob's Ethalion build that inspired me to try this approach...how's it going? Read on.... Before pressing forward with the deck, I had to decide how the companionway cover would sit. While not being quite sure how much would be visible through the tiny windows, the decision was made to once again install some false beams and carlings for the companion cover to sit on. This sits quite nicely in place, and is once again put aside for final detailing. Jumping into planking proper, it quickly became clear that initial steps required a bit of fine tuning. Once the various coaming are glued into position, quite a bit of care is needed to ensure alignment to the centerline, and also address any potential symmetry issues. It was necessary to re-attach the rear hatch coaming as it was clear that this was slightly off-center and the misalignment would have been emphasized by the run of the planks. The only other slight complication was the need to cut custom planks to flank the hatchway, capstan step and rear grate coamings. Not difficult, just time consuming to ensure a fit and keep the necessary curvature for the run of the planks. Overall, pretty happy with how this is turning out. The only other thing to comment on is that the decision was made to plank the top-tackle and pump scuttles which seems more consistent with the original plans, rather than the raised gratings suggested by the kit. Note - The planking lines drawn onto the subdeck are not 100% accurate, and they're there just to help plan the butt-shift and get a better sense for the how the alignment will eventually run into the waterway. There's also a little bit of pencil lead smudging from the caulking which always seems unavoidable and hasn't been cleaned up yet...


-
Here you are! Great start Sjors, as to be expected. And you also have Snake still in progress?...I just don't know how you do so much so quickly 🙂
-
The Constellation storage arrangement does not seem to make sense. With spars stored as they are, this would severely impact the ability to mount any armament in these areas so just doesn't seem to pass the practicality test. I'd also be very interested in seeing primary source suggesting how spars could be mounted on the channels, intuitively this seems rather cumbersome approach for anything but the smallest. I have nothing specific to point to, but would a more practical solution be to store larger yards amidships in the waist area amongst and of the ships boats?
-
I'm sure you'll do Chris' kit proud BE...and I also suspect that there will be a number of further enhancements so I'll strap in for the ride.
- 857 replies
-
- 4
-
-
- Sphinx
- Vanguard Models
- (and 1 more)
-
Those are very impressive, clearly a different size at pretty much the same scale. I had the same experience with the CC plates on my 'Snake' build, I cleaned/polished the surface hoping for a patina which seems to be very slow developing, I wonder ifs the metal composition that causes that, the Amati plates seem to be much more copper rich.
-
Looks great Rob. I'd love to see the plates before they go on, that sounds like incredible attention to detail that they supply multiple different kinds of plates for the different locations.
-
New member from Scotland (Falkirk)
Beef Wellington replied to Razorbill's topic in New member Introductions
My suggestion would be to find a subject that you are passionate about. Mistakes? You'll make them, and I think we all have and continue to do. The most important thing to remember is that there are very few mistakes that can't be solved. Don't underestimate the time required, and think about you feel about doing repeated items. Zulu looks like a great kit, and there are some great buildlogs here to help you along. -
Yves, fascinating project....I've got nothing to add here but would like to watch and learn. Great results so far.
- 321 replies
-
- 7
-
-
- Finished
- Flower-class
- (and 1 more)
-
Congratulations on completing another amazing build, once again a gold standard in build logs and execution. I love how you the figures came together, they really add to the aura of the model. The technique of using fixative on the flags is definitely something to store away in the memory banks.
- 185 replies
-
- 3
-
-
- queen anne barge
- Syren Ship Model Company
- (and 1 more)
-
Hi Mitsuaki, your deck is beautiful and very well executed. I think you made a good choice! I'm currently planking the upper deck of the Diana kit and will be taking exactly the same approach you did to the gangway planking (the plans are not very clear in this area for this ship either).
- 126 replies
-
- 3
-
-
- victory models
- amati
- (and 2 more)
-
Hi Sziggy, not sure which paint you'll be using, but assuming it will be some sort of acrylic. You seem to have masked off the deck pretty well, worst case scenario is you get a couple of areas bleeding through, but this can be easily scraped off gently using the sharp end of a scalpel blade once dry and no-one will be any the wiser (at least that has been my experience with the Admiralty acrylics). Applying multiple, thin layers will help lower the risk of bleed as well as give you a better finish. Something to consider for next time is to simply paint the lower plank prior to installation and then you don't have to deal with it, above a small amount of touch up where you don't need to worry too much about perfect masking.
- 27 replies
-
- 1
-
-
- Ballahoo
- Caldercraft
- (and 1 more)
-
I'm sure another masterpiece in the making. I suspect that this would be a very disappointing kit without the PE given the extensive lattice structures.
-
You have a beautiful model coming together there Richard, nice attention to detail and great execution.
-
Try not to overthink it Stergios, I know you'll be just fine. If you don't permanently secure any if the ropes with glue, you can always detach and refix it. Until you have the ropes on the model, its very hard to get a sense in 3D for how they all lay out, so don't think you've made a mistake if you need to redo something, think that is just a natural part of the process.
- 1,144 replies
-
- 2
-
-
- snake
- caldercraft
- (and 1 more)
-
Alan, that is some pretty amazing detail at 1:64, and its nice to see detail normally omitted or obscured by paint. Very nicely done indeed.
-
NAIAD 1797 by Bitao - 1:60
Beef Wellington replied to Bitao's topic in - Build logs for subjects built 1751 - 1800
Beautiful work that many can only aspire to, would love to follow your progress. -
The other consideration outside of the wood itself, is where the wood is sourced from, and in what form. I don't have any tools to mill my own sheets and strips, and as a result I'm dependent on suppliers of strips. My experience with finding consistent maple (for example) has not been a good one, and have found many cases where I've been supplied a wood clearly not what it should be. I've also seen huge variation in Tanganika, some looks very similar to maple, some has very conspicuous orange-brown stripes in it which is far less satisfactory. Walnut seems to be a similar challenge, it seems be of an acceptable quality in some kits, but in others it splinters and snaps just looking at it...
-
Hi Stergios, not sure I can impart much advice given this seems to come down a lot to personal preference. I can't tell exactly where you are, but I think I put the lifts on the yards first, mainly to get these secured squarely. The sheets and cluelines came next and then the braces and tacks. Check my log to see if you can tell from photos there, but in general I seem to recall working top downwards, and then mizzen to foremast. The primary concern was just leaving the deck open enough to have access to secure lines (the upper yards tend to follow the line of the masts for belaying. For example, the forsheet clue, sheet and tack lines pretty much limits any access to the deck once in place, so this was done last. I think I took a different approach to you on the bowsprit as I didn't even install the jib-boom until most, if not all the other rigging was in place...,mainly to try and avoid a disastrous break. I did find using a little swiveling turntableto be very helpful at times (think its call a 'lazy susan')...but all personal preference I suspect. Good luck!
- 1,144 replies
-
- 3
-
-
- snake
- caldercraft
- (and 1 more)
-
Very nice update Kevin, there seems to be a lot of soldering required for the various fittings, that alone would scare me away but you've done a great job. Seems that the more modern sailing ships and non-military have no armament to worry about, but looks like the work needed on the more complicated metal fittings seem to more than make up for that.
- 273 replies
-
- 3
-
-
- panart
- amerigo vespucci
- (and 1 more)
-
I keep looking at this model and forcing myself to forget what I've seen...CAF look to be providing a whole range of a type of hybrid kit and I strongly suspect one will be in my future. Love what you're doing to expand on the kit, seems this would be hard to discern from a true scratch build frame model. Glad you managed to overcome the early challenges, even the best kits of this complexity it seems have their own foibles to work through. Know you're working on you Amerigo Vespucci, but can't wait to see more progress here.
- 322 replies
-
- 4
-
-
- enterprise
- caf
- (and 1 more)