Beef Wellington
-
Posts
2,249 -
Joined
-
Last visited
Content Type
Profiles
Forums
Gallery
Events
Everything posted by Beef Wellington
-
 Hi Bob - I don't. I re-looked at a number of AOTS books that I have and they all seem to differ (none at all, through to battens on all 8 faces with cleats on the battens). Bottom line, think I'm completely wrong and looks like you've built exactly to the plans. My apologies for having caused any panic, all my fault!
 -
Nigel, there a is an easy and guaranteed solution to your problem. Simply carve some replacement items and as soon as you're finished, your original carvings will miraculously be found. Works every time!
-
Bob - very nice work on the yards and the batton things (not sure what they are called). Hope I'm not throwing in a hand grenade, and forgive me if I've misinterpreted the photo, think that the cleats on the front of the yard (forget their name as well) should attach directly to the yard itself and protrude between the battens which are offset by 45 deg either side.
-
Stergios - sorry, not able to take photos at the moment as Snake is hidden away temporarily , will let you know when that changes if it would still be of help.
-
I looped these in pairs, through the 2 rear-most holes in the cross tree and belayed them around the top-mast shrouds at the dead-eyes. That's how its shown in the Petersson book. I also decide to put ratlines on the top-gallant shrouds even though they are not shown on the plans - without them there would be no access to the topgallant mast and yards, which doesn't seem to make sense.
-
Really nice Wayne, the scale is giving you a chance to put some really nice detailing. How did you get the profile onto the various trim pieces? Love what you are doing!
-
Stergios, you did exactly as I did with the shroud cleats. Will all look great with the rest of the rigging in place. I've not seem catharpins on the topmast shrouds, so think you are OK to move on elsewhere. Nice progress by the way, looking great.
- 1,144 replies
-
- 1
-

-
- snake
- caldercraft
- (and 1 more)
-
Really nice result Mike...must get back to my own planking which is really starting to look like Frankenstein's Monster
-
Mark P, that is very helpful indeed. Thankyou!
-
Mike - I know I'm looking enviously at your work, yup, we're in step (at least until you shoot past ) Ray - you're so right. What I actually really like about this kit is that it allows you to try things that maybe aren't necessary, but is a good proving ground for the future. One thing I know, I won't be spiling a full hull until I'm retired! The planking udner what will be copper will 'utilitarian' - i.e. something best covered by copper - which of course is as much work, if not more, than another layer of planking. Here's how I dealt with the planking at the tricky plank at the counter. I'm planning to use strip for most of the planking where I can but the first one required a spiled one. Shaping planks with a steam iron is definitely something that helps. Spiled planking at the bow pretty much done, walnut will be used below here. Without wishing to waste any boxwood, I'm going about 8-10mm below where the waterline will be just to be on safe side. This has had a quick surface sand to convince myself it will look OK in the end... The tricky transition at the counter and the wale. Spiled plank next to a 4x1mm strip for comparison.


-
Ian - just caught up on your log, beautiful work Sir, looks like you are well on the way to wonderful model of a ship that deserves better than Corel suggests. Definitely want to see how you move forward and I appreciate you sharing all your techniques.
-
Dave -are you uploading the photos all together? I tend to load a picture, hit 'enter', then load the next to ensure they appear in the order I want them. Alternatively you can copy and past the links when uploaded.
-
Wow, you're moving fast Mike but looking great, think you're correct. I spent a long time trying to figure this out but I took a less authentic approach. I think in TFFM the suggestion is to use a thicker piece of wood and shape the inside to the contours of the hull which would then allow you to shape the outside. It seems that the inside curve is very tightly concave, but the out side much less so to continue the outside of the wale more vertically. Believe the last plank was shorter for this very reason in that it would have been a highly custom piece of timber. Doing all this and leaving an appropriate face for the regular planking needs some fiddling I think. Will leave you to ponder...
-
Well done Mobbsie, all look great but think Grenado takes the biscuit.
- 255 replies
-
- 5
-
-
- granado
- bomb ketch
- (and 2 more)
-
Bob - would probably make sense to put the boarding pikes in, although you seem to be entering the 'damned if you do, damned if you don't' zone..if you are anything like me its more likely the former. No reason to beat yourself up over the deadeyes, they look really good from here.
-
Thats a very nice spiled plank Mike. I shied away from the top and butt but I'll take my hat off to you! I used a slightly different technique (because I don't have any french curves) which seemed to work OK, but I'll stick that in post in my log later.... Definitely agree with the above, "Jason" will soon be looking even more like Frankenstein's monster for the same reason. I've got a real mix of stuff going on right now that should come out OK in the end.
-
It seems that there are various references to lead being used to sheath the leading edge of the knee of the head extending above the waterline and "down to the gripe" (AOTS Diana). The Minerva model in the US Naval Academy collection 'appears' to show a single piece of lead as described but this does not seem to be a common feature on other other period models. I say 'appears' because there is no way to differentiate the colour of this to the copper plates This raises some questions that I hope that those more studied than I can answer: What purpose did the lead sheathing serve? - protection seems the obvious answer What time period would this haven been used in, and is it unique to British ships? Haven't seem this referenced much at all Probably a given that there would need to be some sort of material between the copper and the lead due to galvanic corrosion risk (?) Insight anyone?
-
Dave - may be worth checking out the Caldercraft belaying pins, they are much more in scale in (1:64 scale), they have 2 types one is very stubby and probably similar to what you have, but the others are around 10mmx1.5mm a look much better.
-
Vey nice planking there Mike, would love to see how you spiled those top and butt planks.
-
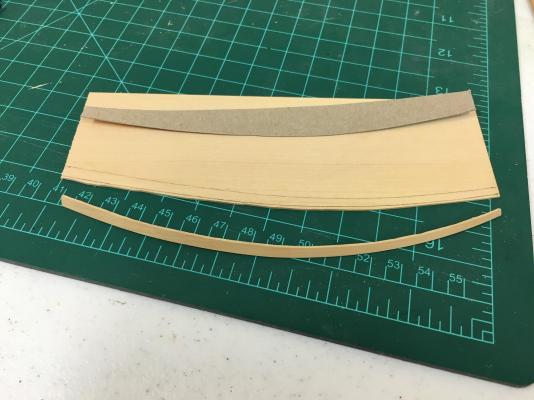
Thanks to all for the 'likes' Pat - welcome aboard! Nigel - great point Nigel, I think this will come down to balancing two evils, eliminating the risk of damage during sanding or the risk of introducing a gap. The dimensions of the walnut strip are not very precise, and I was orginally hoping to use the much tighter dimension of the boxwood as a guide. Either way, I'm going to try to finish the planking near the wales as much as possible before installing to reduce potential damage to wale. Will ponder this further... Mobbsie - welcome back, jedi master! I'm going to do what any self respecting ditherer will do, avoid making the decision until I absolutely need to, think I've got plenty to do in the meantime Big step for me today, managed to spile my first plank. Used masking tape to get an approximate first cut at the needed shape, and then made up a cardboard template to fine tune. Because the cardboard bends I made a 'master' template shown for final marking of the profile. Hopefully the kids won't notice, I had to raid the cereal cabinet for cardboard supplies...Initially I made the plank 4mm wide full length to match the strip to be used elsewhere, but changed this to reduce to 3mm at the front end to look a bit more in keeping with contemporary models. It should probably be less than that, but any thinner would likely be too hard to work with. The outside edge was cut and fine tuned first as its convex and easily done with extra to hold on to. The inside edge was gradually nibbed away (very carefully) using a dremel sander. Think I'll leave the fine tuning until its glued on. Plank was bent using a steam iron to approximate shape to make glueing easier. In position....not glued yet.

-
How to avoid twisted lanyards
Beef Wellington replied to Captain Al's topic in Masting, rigging and sails
My thinking is a little different and purely from a physical standpoint. If the deadeye in the channel is "free to swivel" the shroud will be free to twist, and it will do as you describe because the aft side of the deadeye will have a greater force on it, and hence will always have an element of torque - no way to change that no matter how the laniards are laced. The simple solution is to simply ensure the deadeye on the channel fixed and the problem will disappear, the tension in the lanyards will keep the top and bottom deadeyes parallel. -
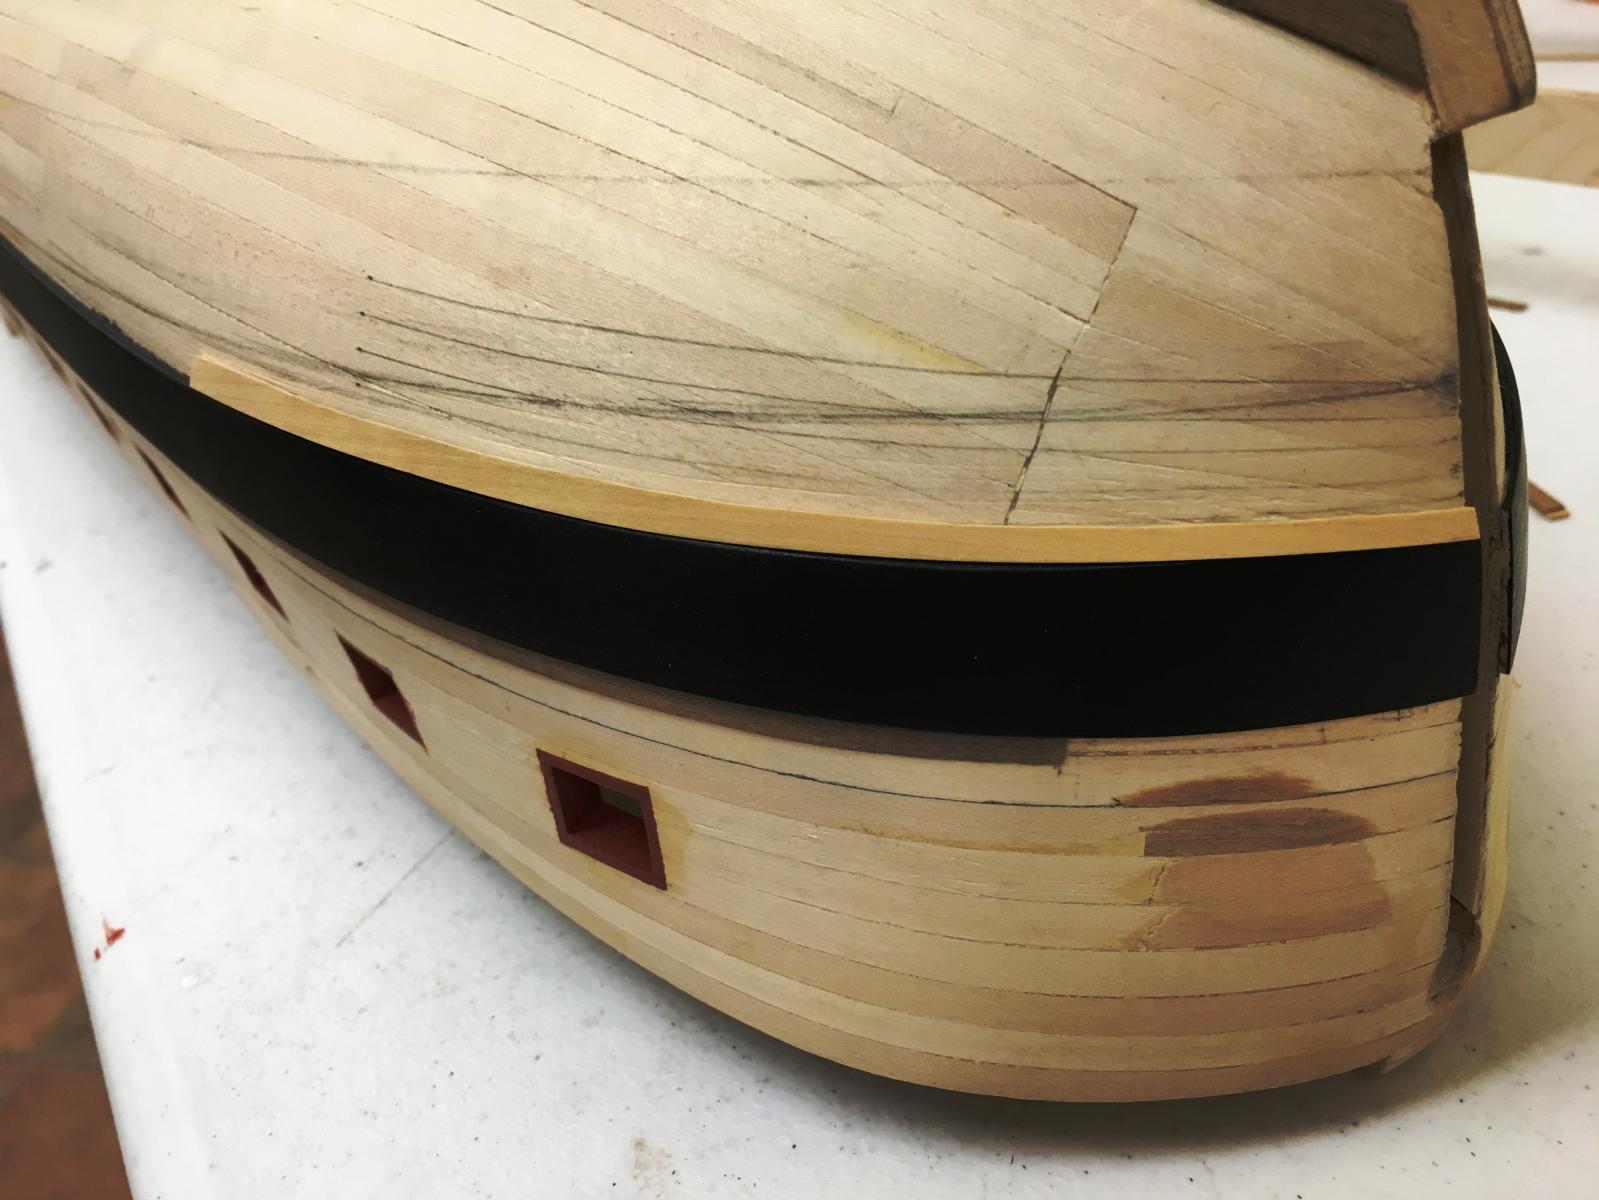
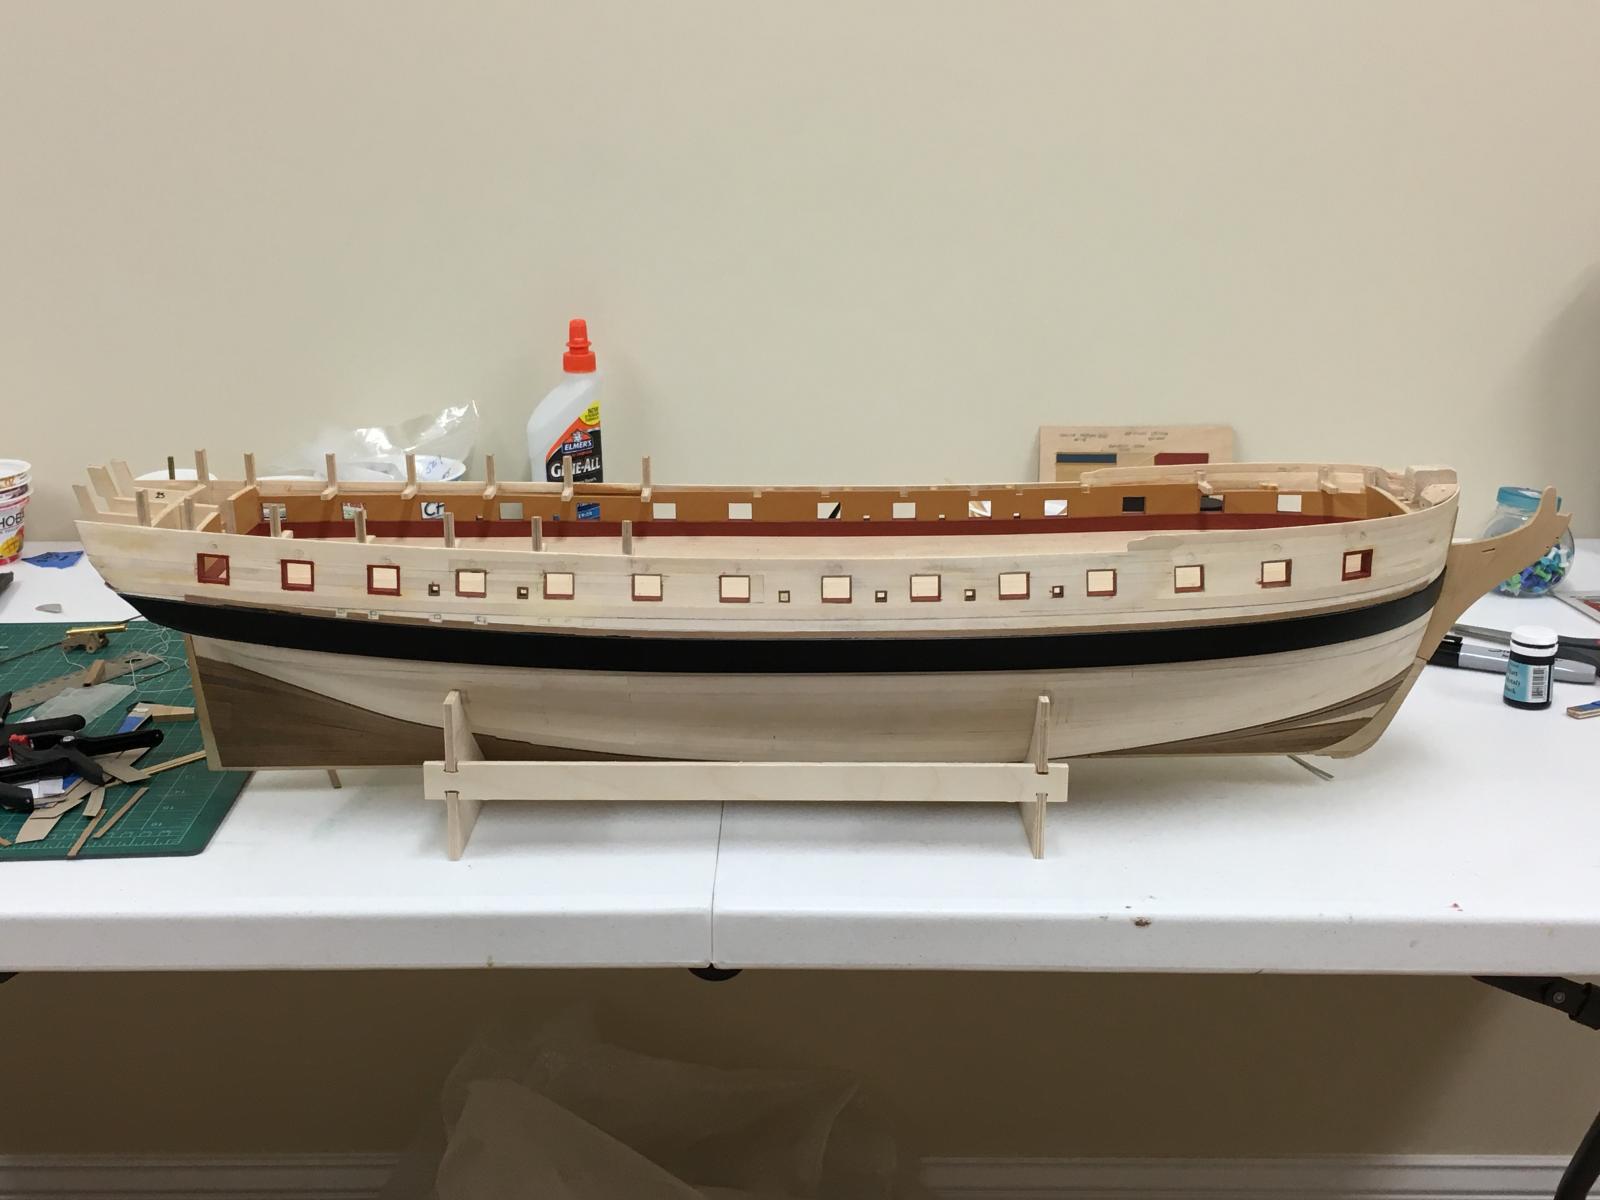
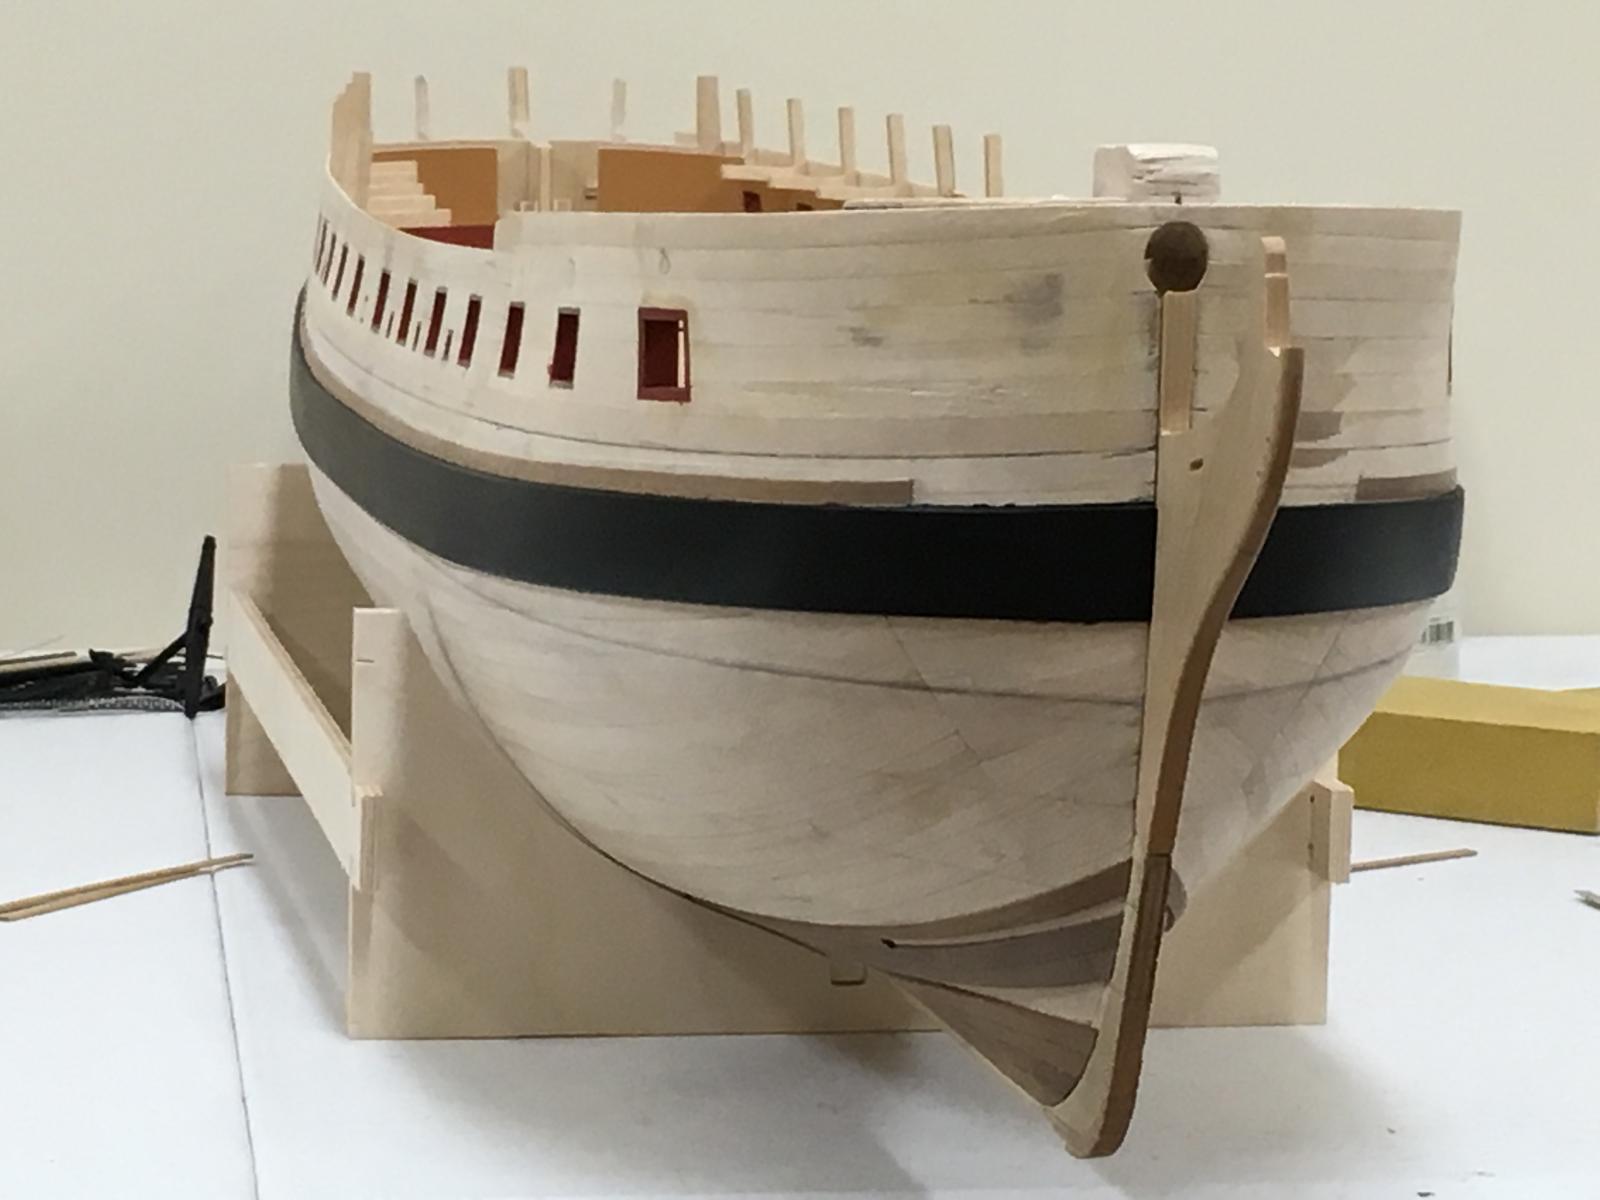
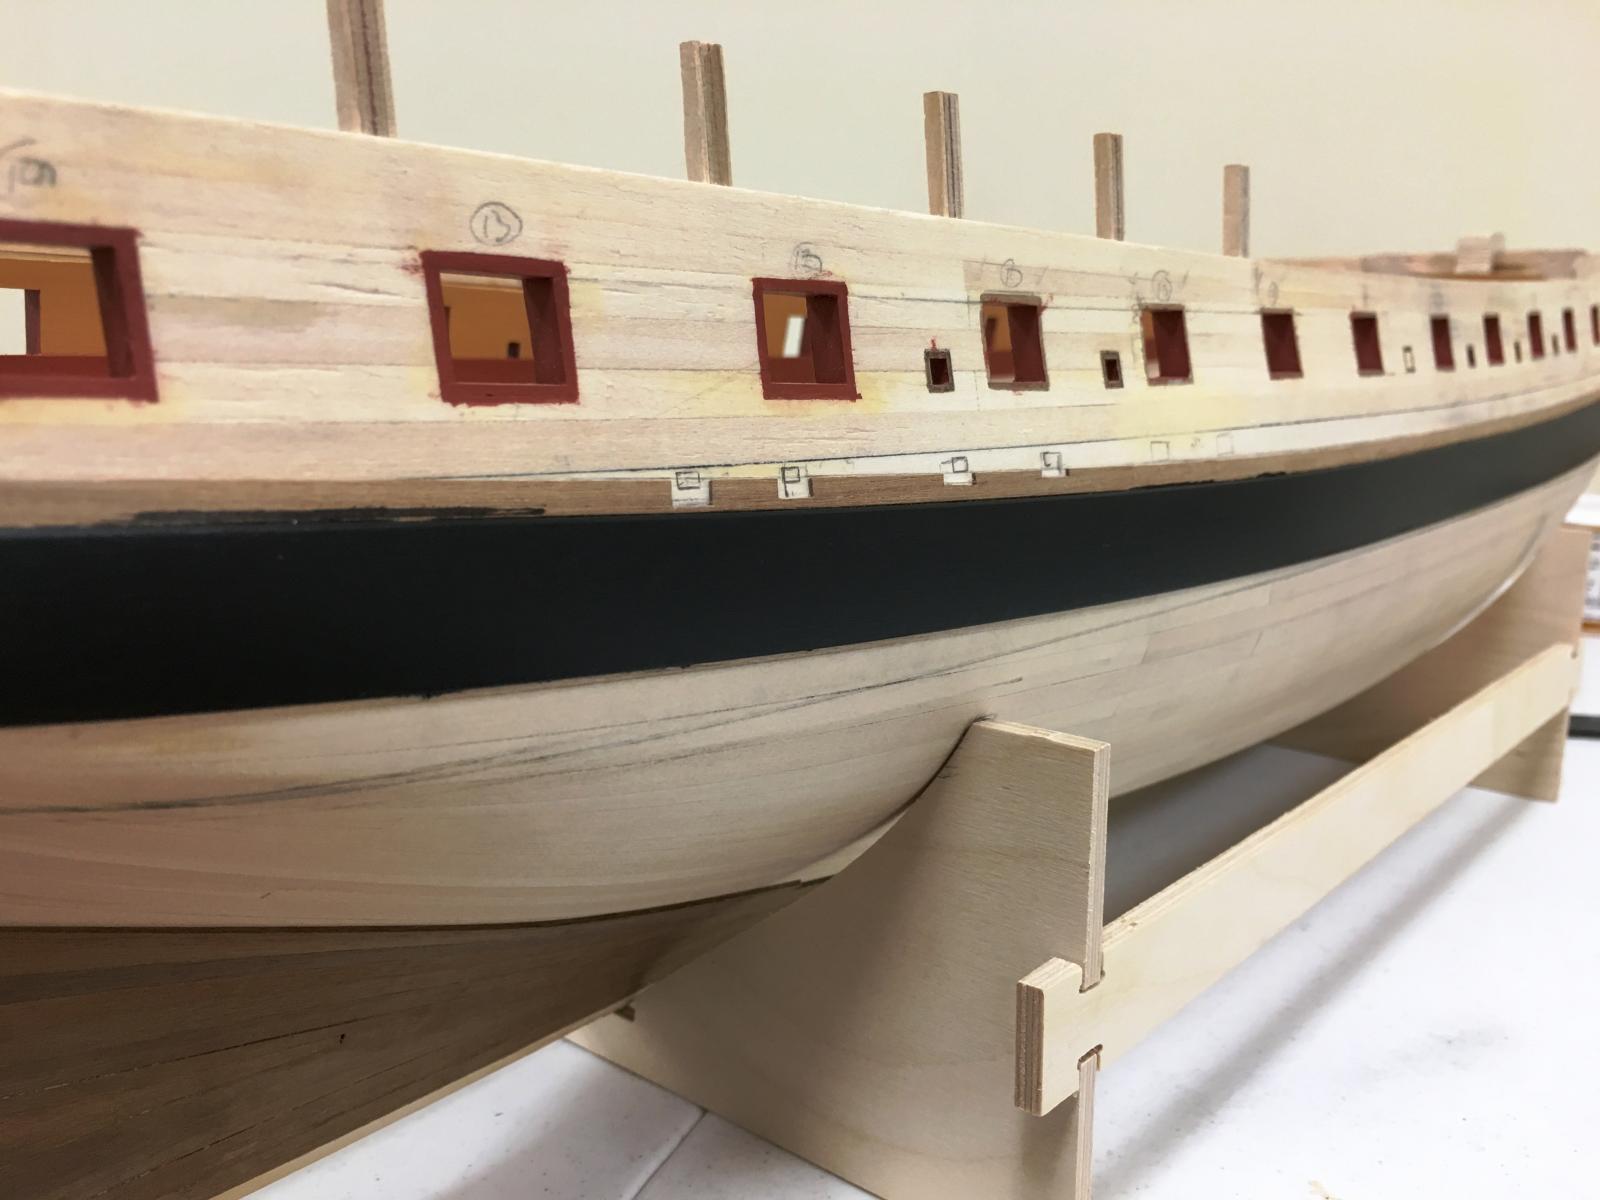
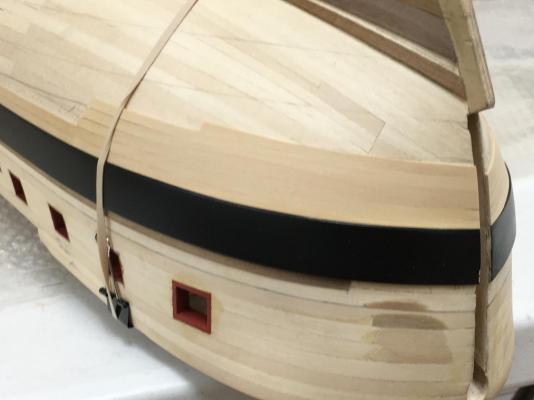
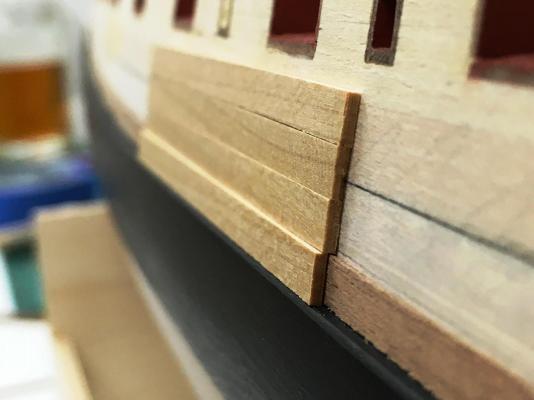
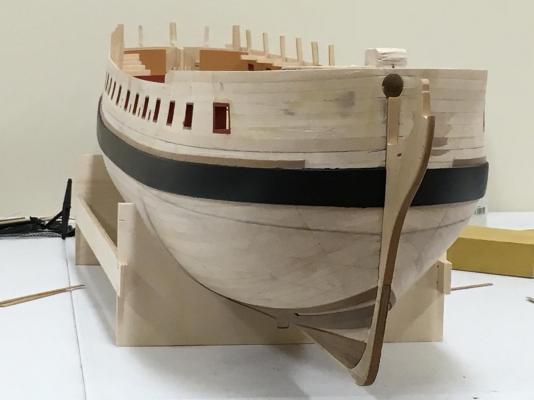
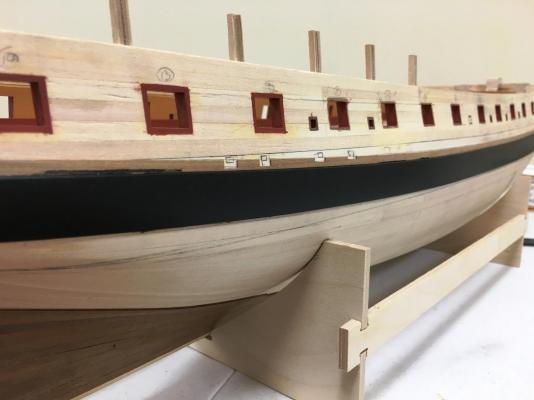
Bit more work to show. Wales have had a fair bit of work done on them to significant imperfections. Couple of coats of paint were put on undiluted, followed by 3 coats of 50% diluted with surface finishing in between. I need to see the finish in daylight to confirm whether I'm done or not... Once again, I'm taking a different approach to the blackstrake from the instructions indicate a 0.5x3mm wide strip on top of the wale. Estimating from the AOTS it looks more like 4mm which I think will sit better with the other 4mm planking. Given I only have 1x4mm boxwood strips, I installed a 0.5x4mm walnut strip directly above the wale onto which I'll lay the boxwood strip. This did (of course) introduce another wrinkle to deal with. 6 airing ports are needed, but these will encroach onto the blackstrake. Not sure how exactly I'll handle these yet (they are small, ~2x4mm) but think I do want to try to install these rather than just simulating by scoring the planking which I know I'll not be happy with. Interestingly, NMM models omit these ports and I am considering that as well - maybe less is more here. Opinions anyone?

-
Dang, I missed your recent posts as I didn't get the notifications. Nothing else can be said other than wonderful work and results. Simply stunning! Any chance of a change to HMS Erebus with the recent news?
- 346 replies
-
- 2
-
-
- terror
- polar exploration
- (and 2 more)
-
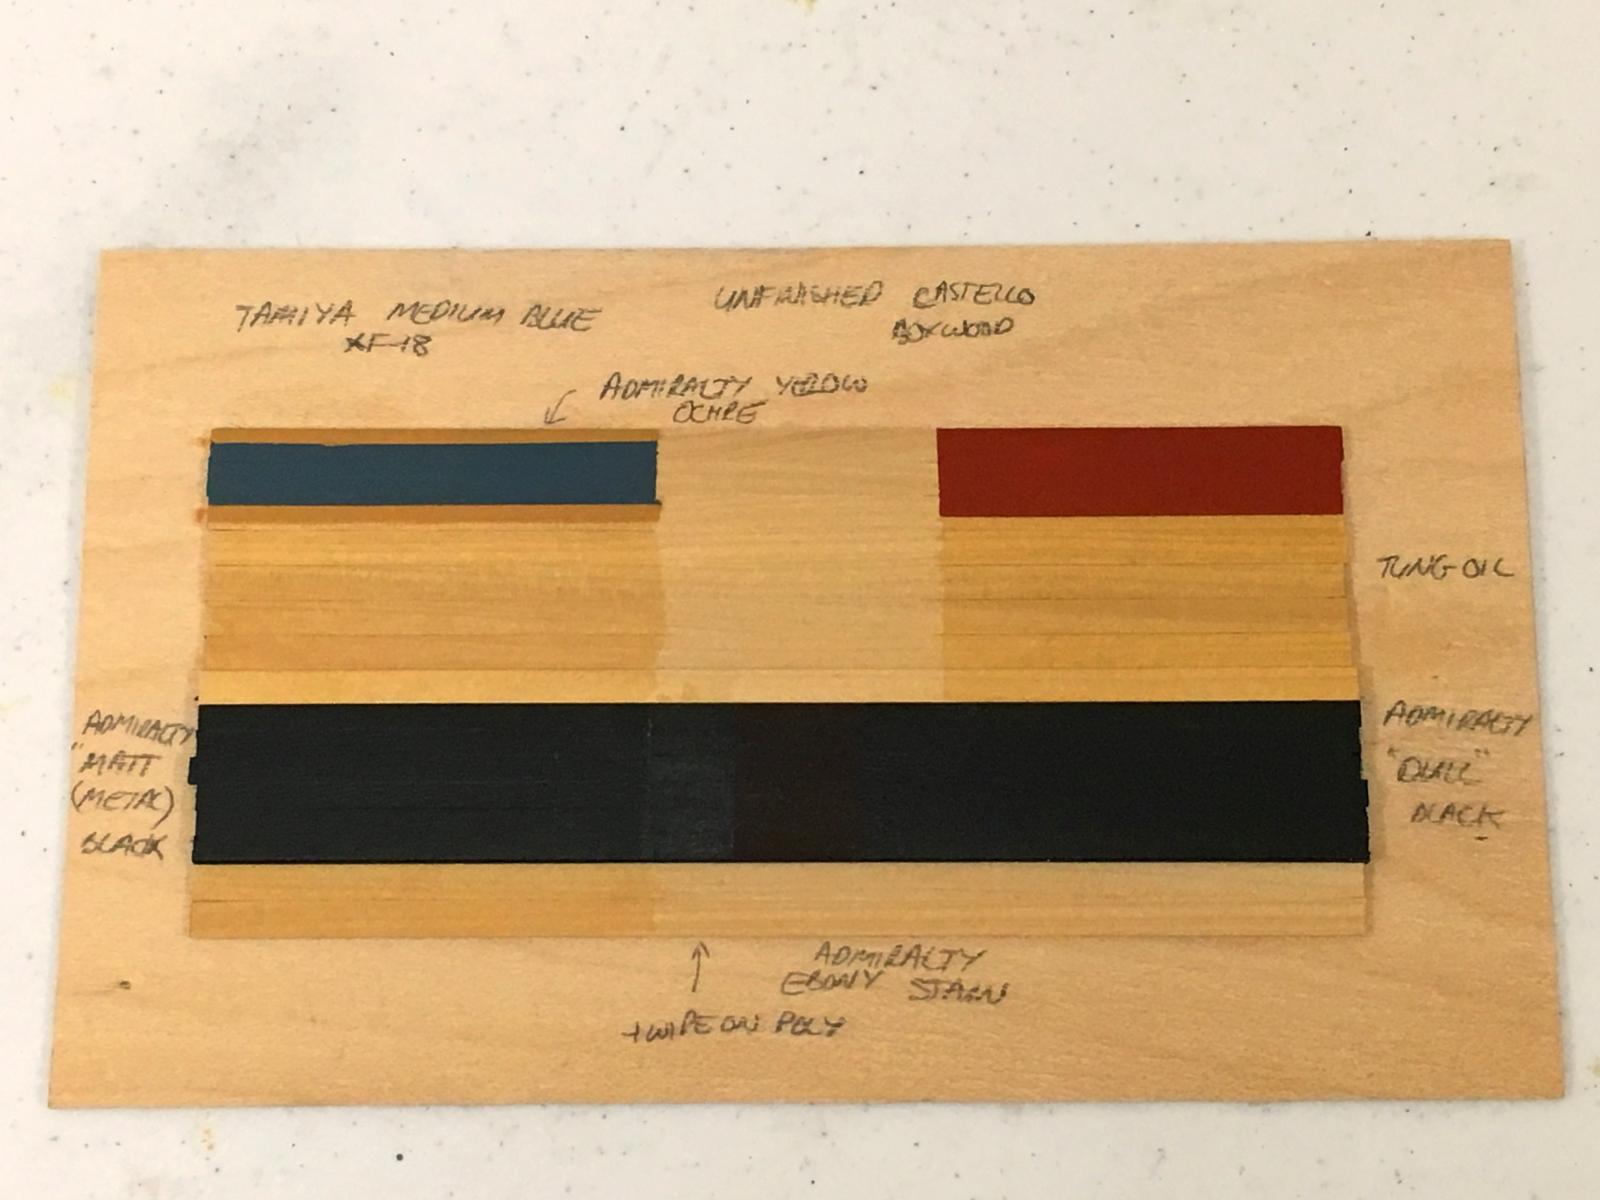
Little bit of experimentation with colours and finishes. I've used water based poly up to now on the decks, but I have noticed that brush marks are harder to avoid, and also that it doesn't enhance the colour of boxwood as much as I'd like. Tried both wipe-on poly and tung oil which seemed to give similar results visually (interstingly the tung oil seems to be a little yellower in the photo even though I can't differentiate to the wipe on poly on the sample). I've heard that tung oil will continue to gradually yellow over time, but does anyone have any practical experience with that. It also seems that some people use wipe on poly and other tung oil, are there really any other factors to consider as I must confess I wouldn't really have noticed a difference if it wasn't labelled on the tin Its impossible to get a photo to show accurate colours on a PC screen, if anything the castello boxwood is a little yellower that it appears and blends very nicely with the Admiralty yellow ochre. The Tamiya medium blue is a little greyer than it appears, happy I found a blue that with a period feel directly from a tin, mixing is not something I want to have to worry about when touch ups are needed). Going to ignore the recommendation from Admiralty paints and use the matt (metal) black on the wales rather than the 'dull' black which is recommended and what I used on Snake. Impossible to get on a photo,but the dull black has more of a shine and has tendency to catch the light and amplify any miniscule surface imperfections and grain even in tight grained boxwood. The ebony stain looked OK with poly applied, but in my opinion would look best on a model with natural wood finishes only. I suppose I need to get moving and get some planking done....