Beef Wellington
-
Posts
2,249 -
Joined
-
Last visited
Content Type
Profiles
Forums
Gallery
Events
Everything posted by Beef Wellington
-
 Really nice Wayne, the details you've added really enhance the hull. Did you spile the planking, especially the top and butt planking on the wales? Looks fantastic . I'm jealous you have a copy of the 'Irene' book, looks to be very insightful. Trying to make out the name on the stern - "Harrier"?
 -
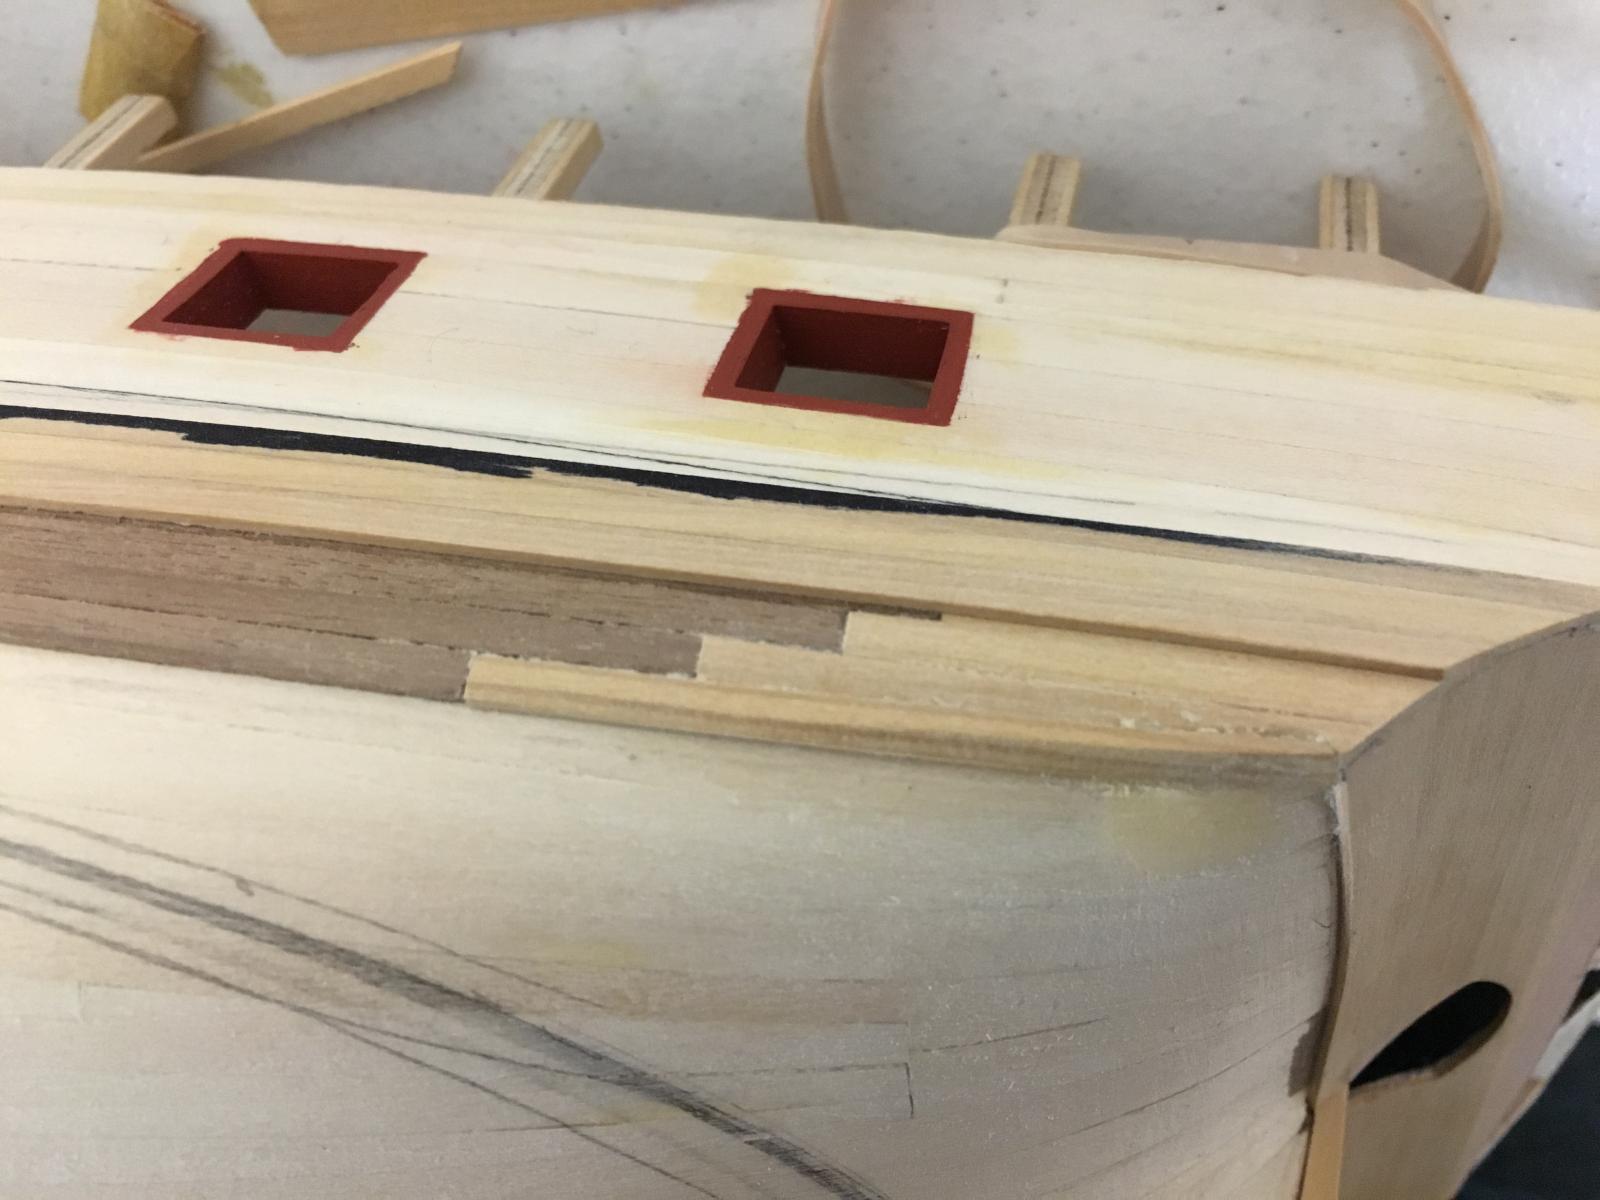
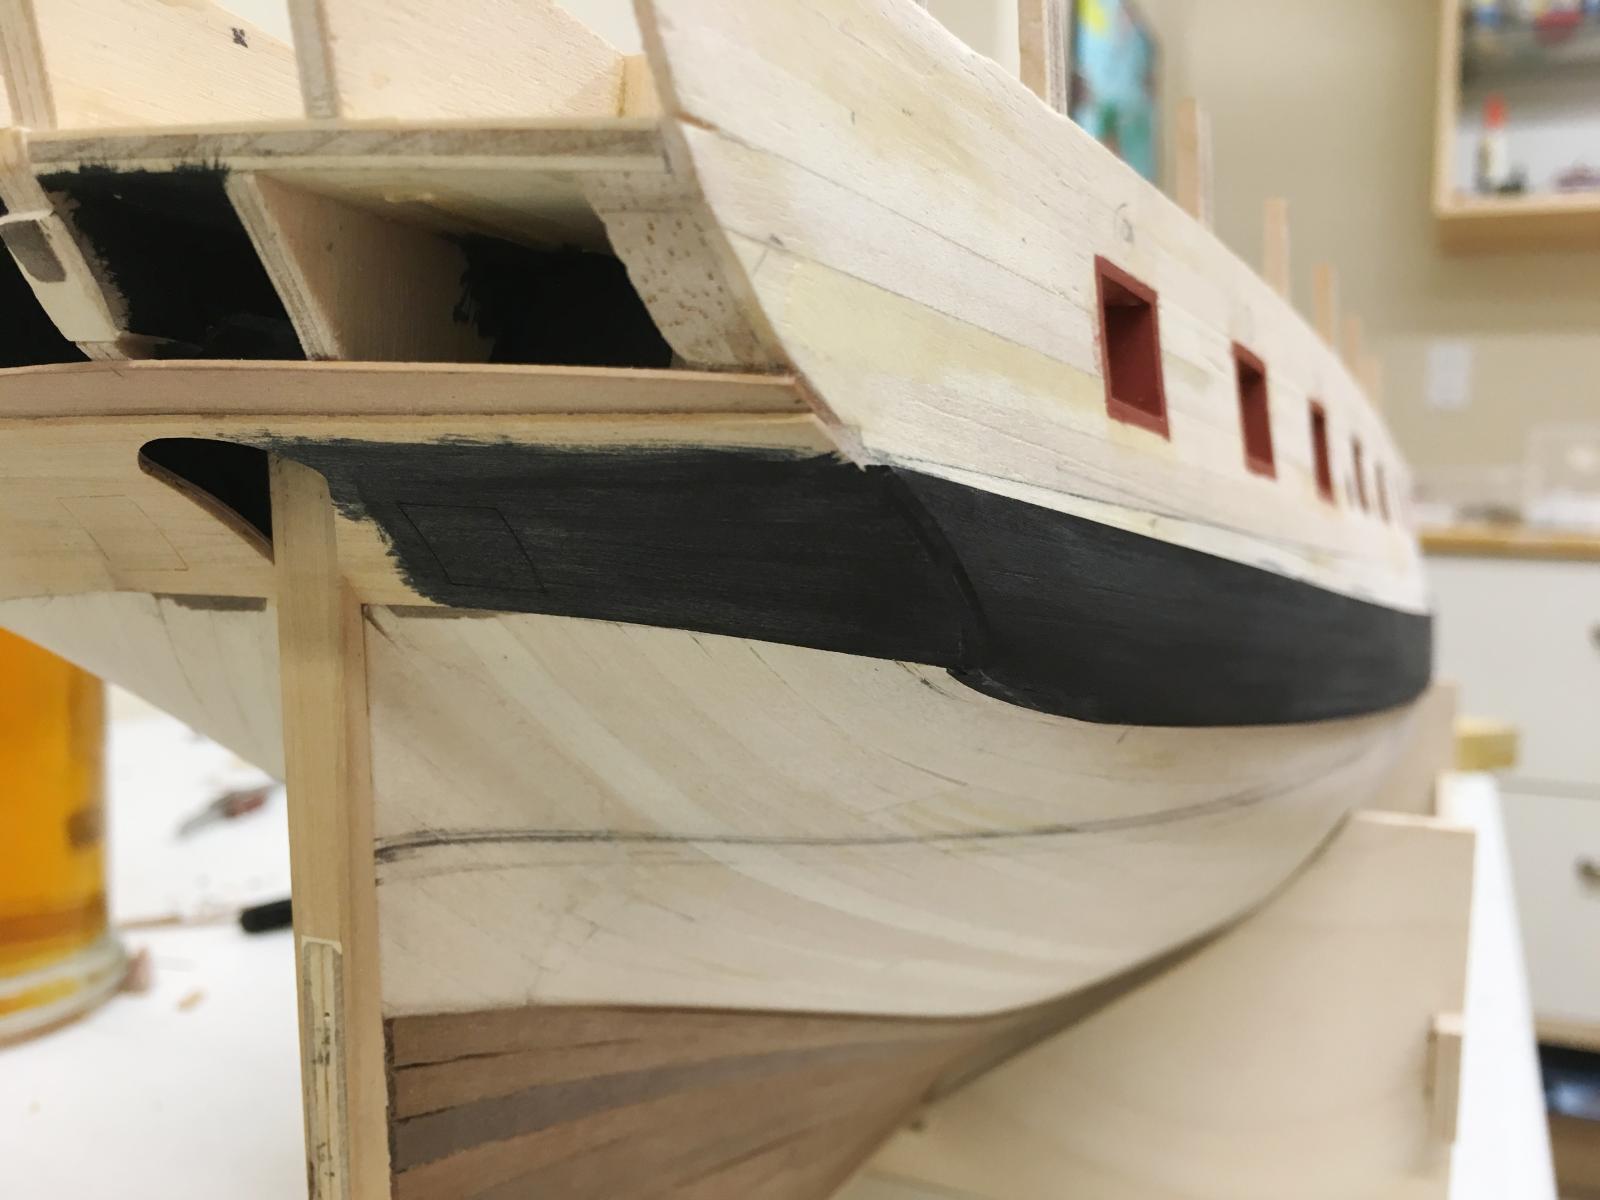
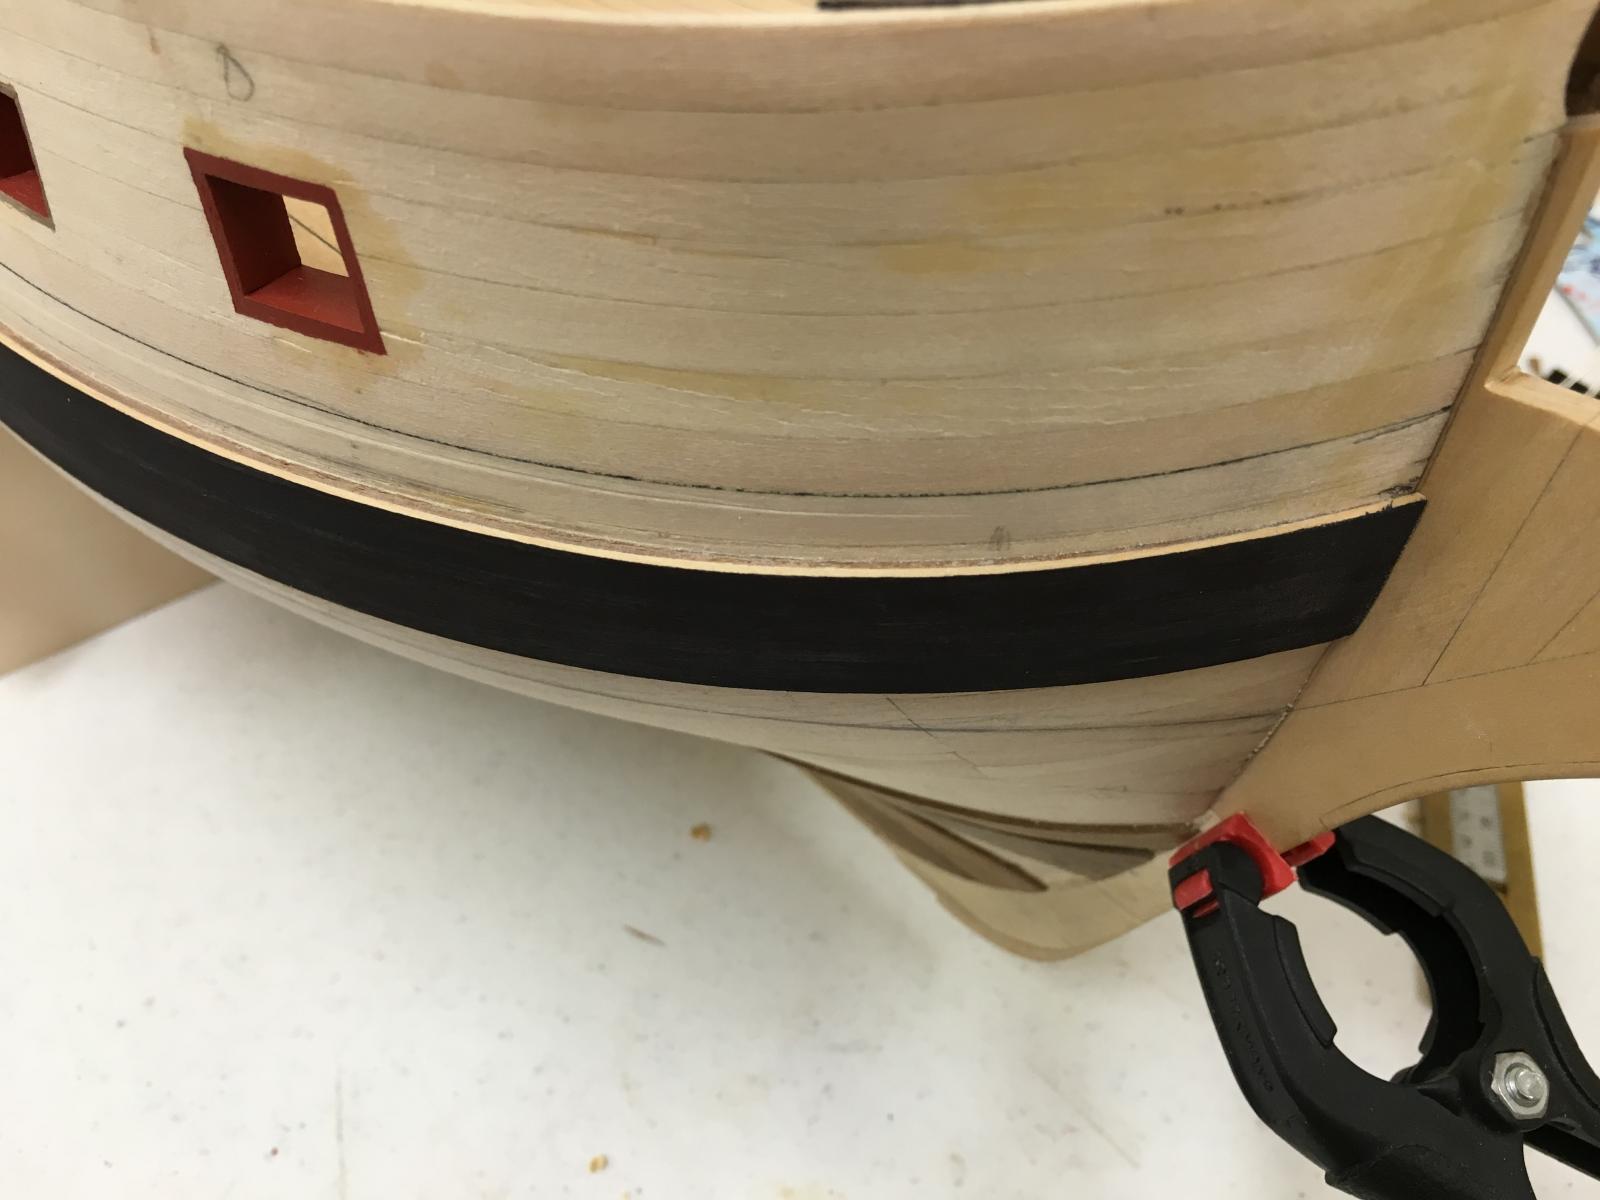
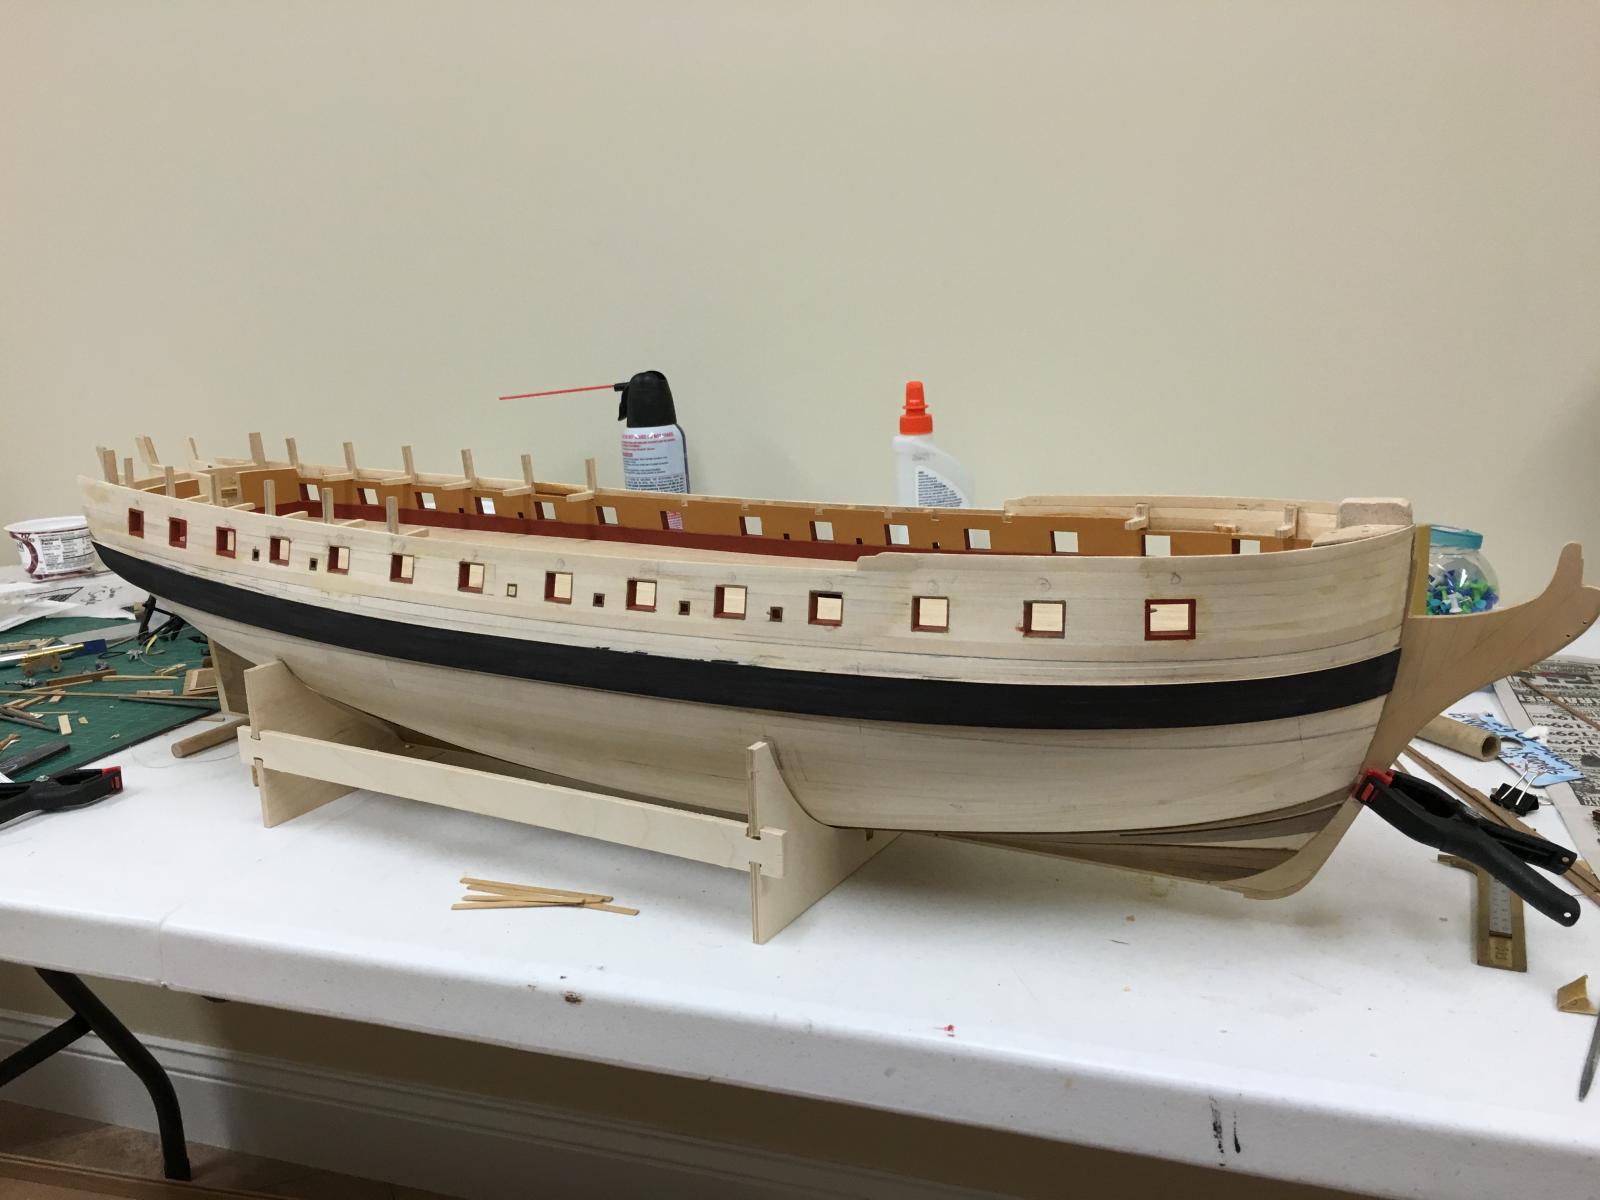
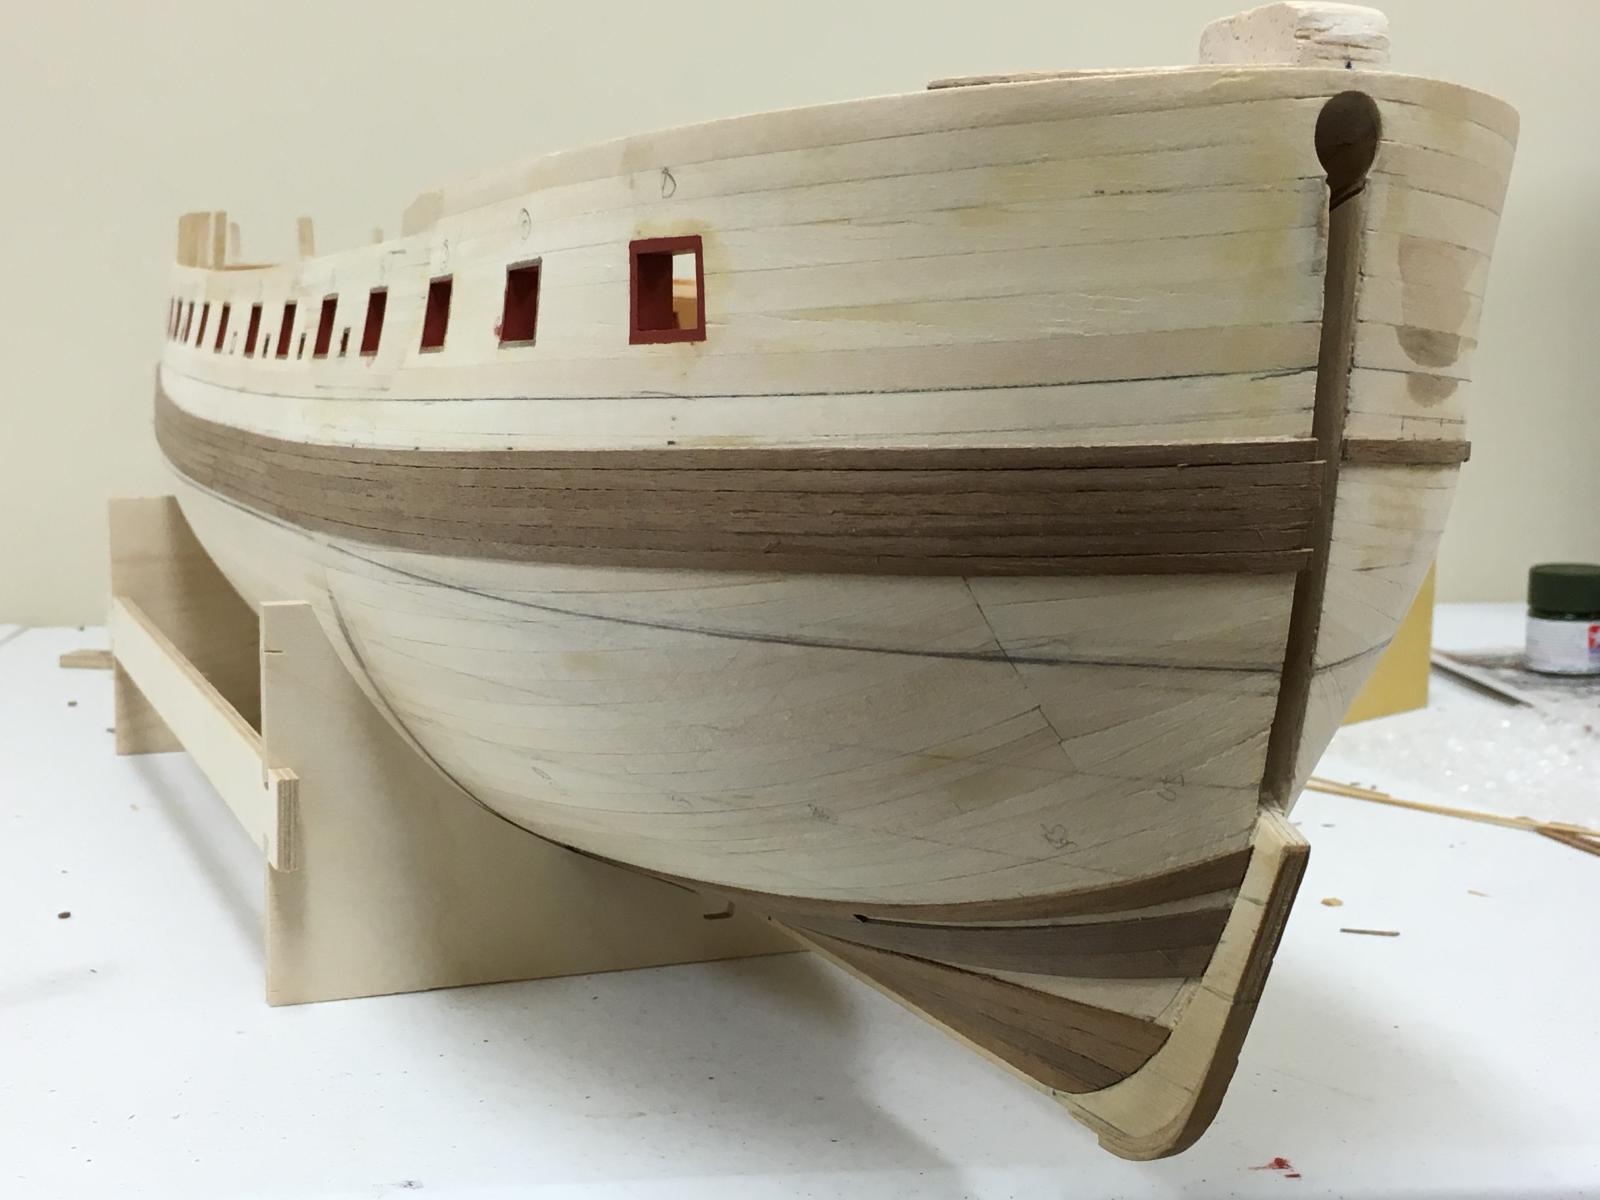
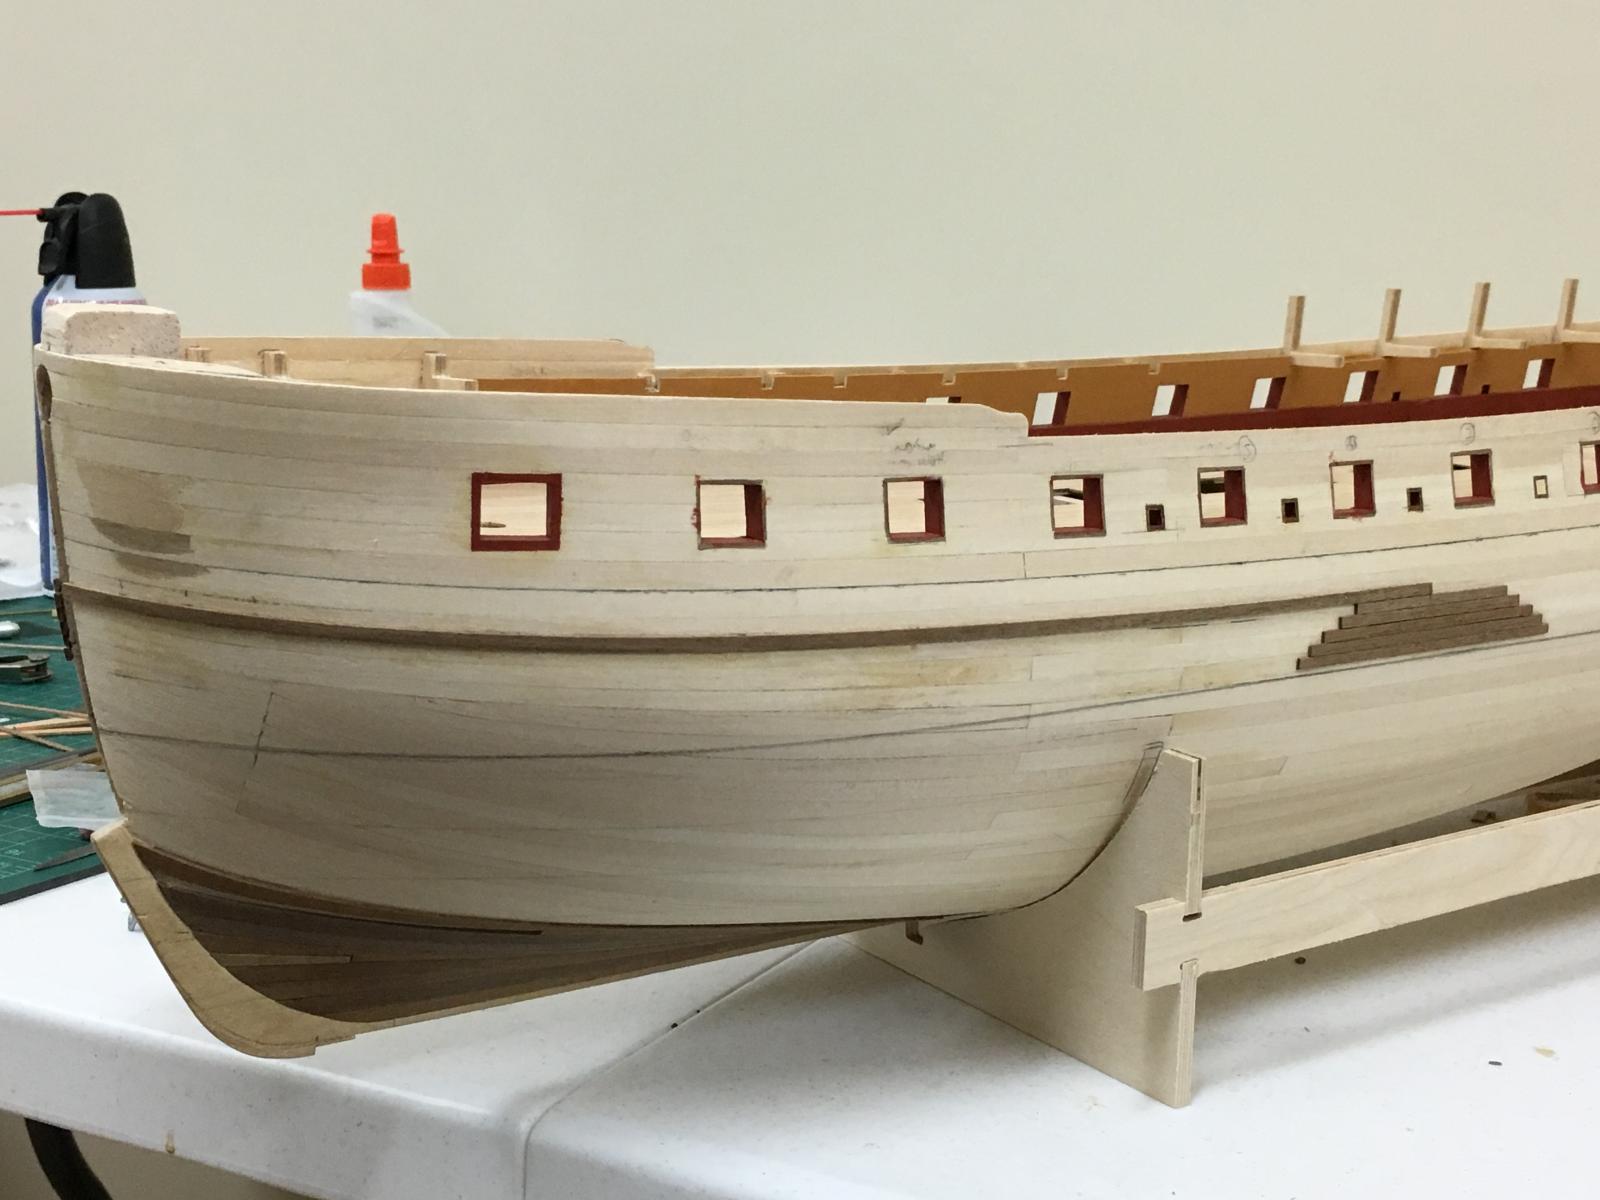
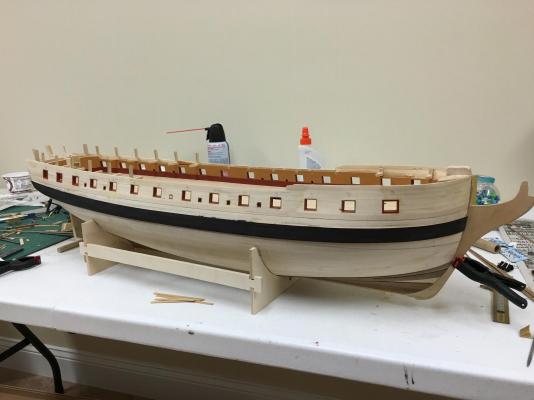
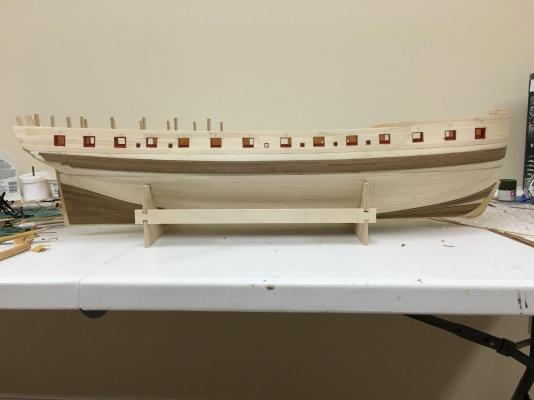
Thanks all for the continued interest and kind words! The counter planking was put on before the wale could be finished, the ports on the counter took a little time to get right. I got bogged down completing the wale, the tuck around the counter left me struggling for a bit to figure out how to handle it. The second layer on the wales went on easily enough, except for the challenging lower plank. In the end, to ensure that the regular planking will have an edge to bed against, I ended up cutting a profile in the plank above and champfering it, and then twisting the plank below through 90deg. After shaping this, the outer plank can be installed and shaped. Not very elegant, but was the closest I could get to simulating the real wale. At the bow, the first walnut planking was thinned before installing the second layer so that the wale would sit in line with the regular planking at the stem. After some finishing, tried the Admiralty ebony stain to see how it does, pretty impressed with the coverage, even with only one application. Some more finishing will be needed but will leave as is for now. As I'll be using paint elsewhere, I'll probably paint over this but can delay that decision for a bit. Beginning to look a little more like a ship now.


-
Wow, the Santisima Trinidad looks huge, what scale is that? The thinner gunport templates looks like a great idea, should make getting them in place properly easier. Also, what is the 'box' sitting on the top, if its to allow the hull be put upside down flat on a worksurface then that is a another great idea.
-
Glad I found this build before you got too into it, looking really nice so far.
- 652 replies
-
- 1
-

-
- royal william
- euromodel
- (and 1 more)
-
It might be tedious, but the effect is well worth it Jesse. Really nice work on the pintles and gudgeons.
- 1,306 replies
-
- 8
-
-
- syren
- model shipways
- (and 1 more)
-
That's just amazing carving Dave, well done.
-
I would have to say yes - last time I was there I was dragging my kids around as well but they had a blast, between Victory, Warrior and the multiple museum exibits, harbor tours etc there is plenty to see and do just in the dockyard. Add to that walks along the waterfront and the other historical sites (not forgetting maybe a few stops at 'The Still and West' pub) there's a lot to experience if the weather cooperates. Of course depends on your pace, but everytime I have been I've never felt I had enough time to get around everything at a comfortable pace.
-
Sorry to see you mishap. I don't think its possible to un-dent the plates without replacing them, I'd probably try gradually working very small quantities of paint into the scratch and see where that leads, it may just hide it enough. I'm a fan of the Admiralty copper paint. Best of luck.
- 2,250 replies
-
- 3
-
-
- model shipways
- Charles W Morgan
- (and 1 more)
-
Just another option, Admiralty make a copper paint that has micro flecks of copper in it and it is supposed to darken over time. I really liked the colour, as its a different, but not a complete contrast to the copper plates.
- 1,306 replies
-
- 5
-
-
- syren
- model shipways
- (and 1 more)
-
That is looking really sharp Jesse. The copper should continue to develop a patina as long as its exposed to air, so once you seal it should stop. Opinions on this seem to be very diverse, my taste is to allow the plates to patina to their full. I have no experience with the tape you used but I could see how the sealer might also act as some protection to the edges of the plates. I plated Snake nearly 3yrs ago and left as is, and it still has not developed the rich deep brown I'd like it to. I found fingerprints developed quickly if they were going to from the oil on ones skin. I didn't use gloves, but washed my hands a lot keep the dry (and oh yes, getting any stray CA glue off my fingertips, rubbing alcohol dries skin more than is healthy...) Side story, had to replace my mailbox this spring and got a great deal on a copper one, so nice and shiny, fingerprints abounded right away but after 7 months, its completely brown, sun and rain really accelerate the process.
- 1,306 replies
-
- 9
-
-
- syren
- model shipways
- (and 1 more)
-
Never seen deadlight installed there Dave, makes complete sense and is a very nice detail. Beautifully executed.
-
Ray, those shots are stunning, my favourite has to the second to last. You've managed to pack so much detail into those small boats. Well done.
- 536 replies
-
- 1
-
-
- diana
- caldercraft
- (and 1 more)
-
The other benefit I found doing it that way is that it actually helps maintain the tension which allows adjustments to be made just in case anything gets pulled out of alignment, and before finishing of any of the lashings. Looks great either way.
-
Great stuff, looking forward to seeing how you will surpass yourself once again Danny, if that's even possible.
-
Great progress and pictures. I had to chuckle when I read your comment above, the Farside cartoon below pretty much sums up my permanent state of mind You my friend have no reason to worry!

-
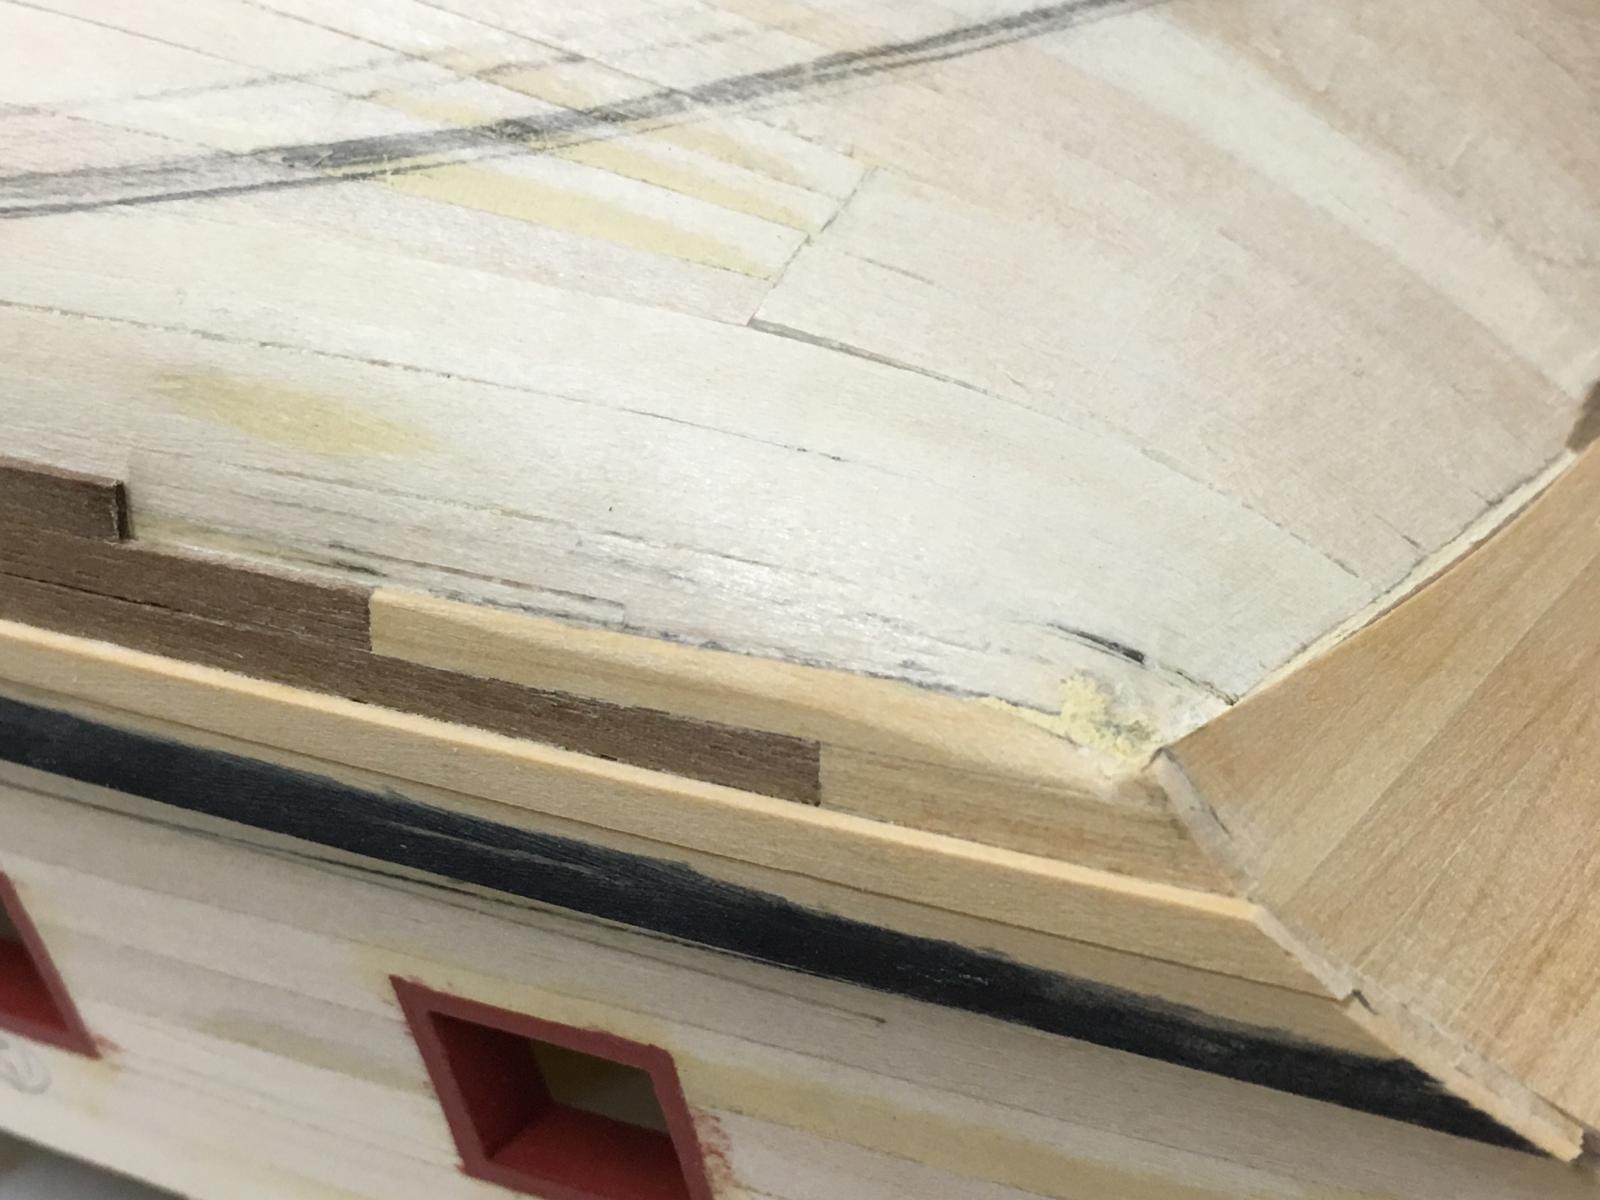
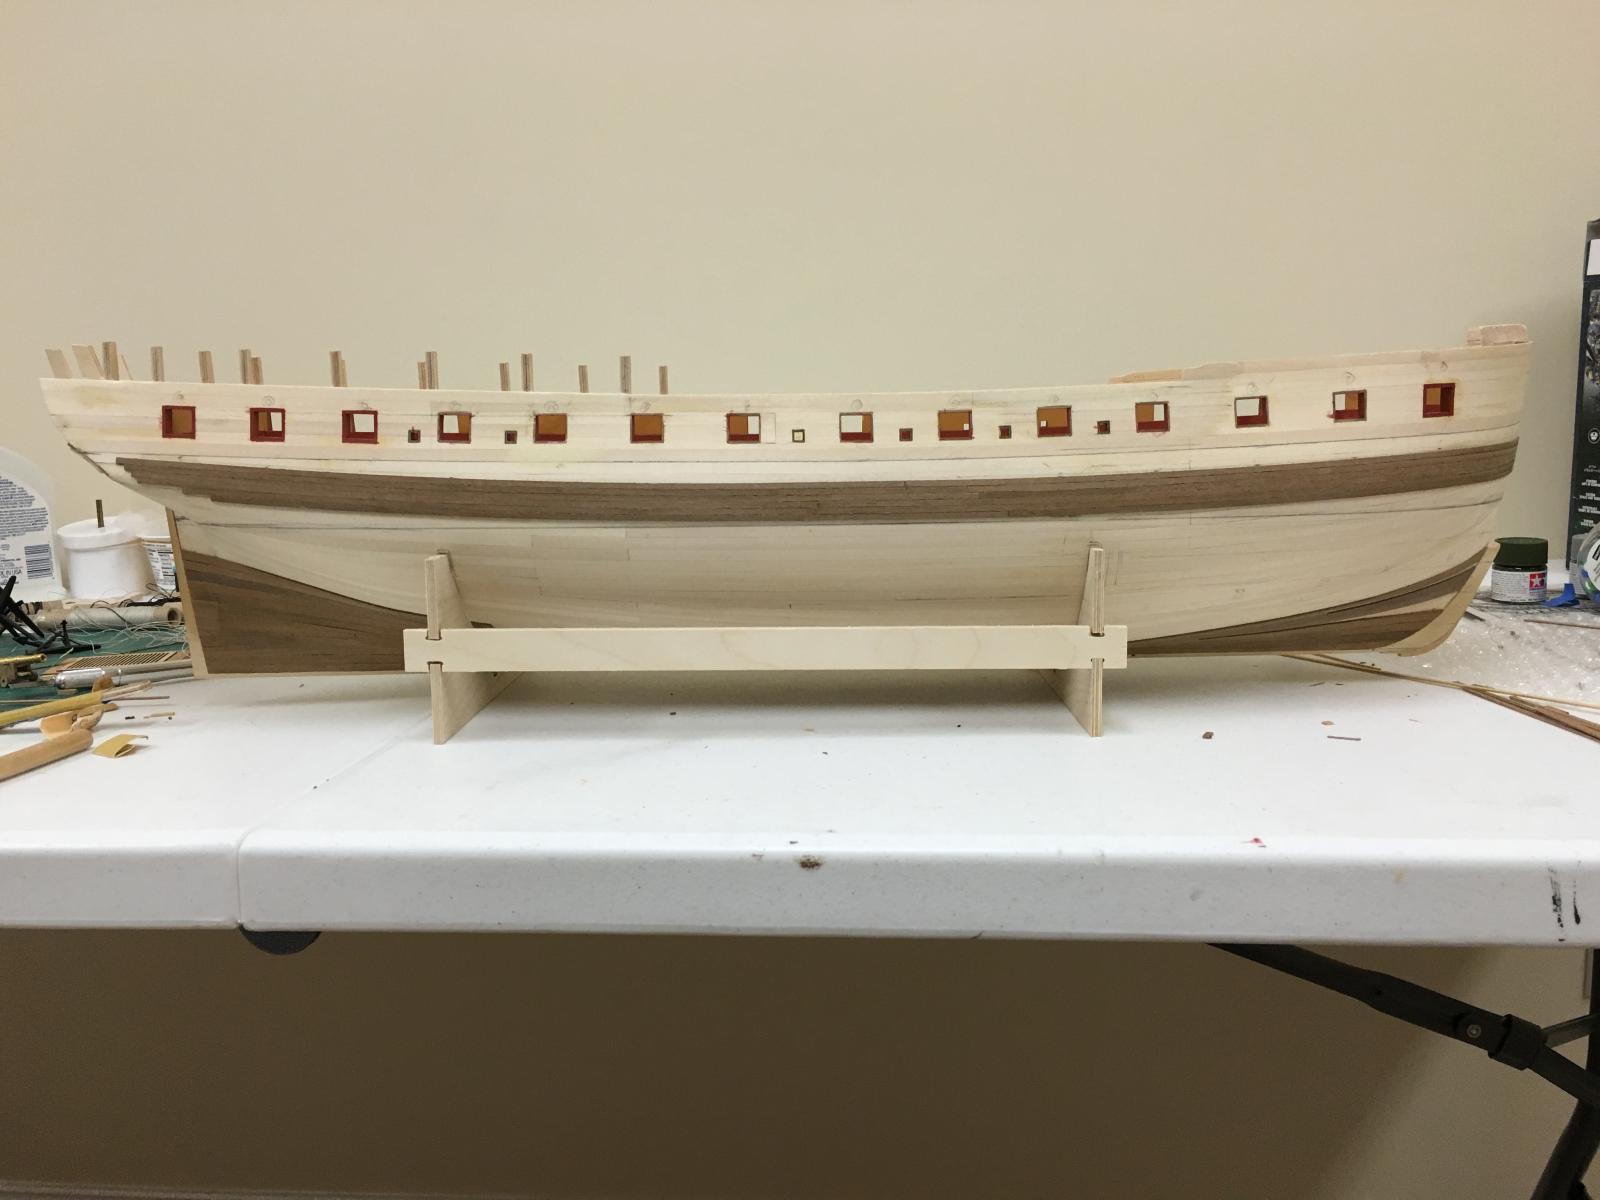
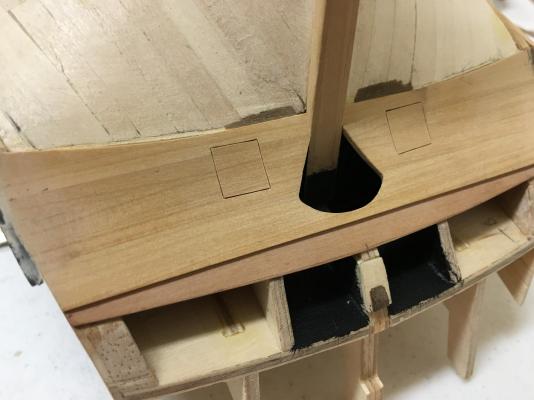
Wales: Thanks for support and interest chaps. Started building up the wales, rather than putting these on over the 2nd planking as the instructions say, I want to build these up first and then have the lines of the 2nd planking follow the wales. I know that this will definitely require some spiling at the bow, but would like to give it a go. Looking at many pictures of the Artois models, the position of the wale seems very important. I decided to use the waterline as the basis for positioning this for a couple of reasons: Eliminate any potential issues creeping in because of differences in gunport positions between the model and plans, and also with AOTS. After countless measurements, I'm convince that the upward curve of the upper deck is slight less than indicated in the plans, however, this really shouldn't cause any issues. Establish a point of consistent point of reference to ensure both sides are as symmetric as possible. Gunport ply patterns definitely have their challenges, but they do provide a little more consistency as an upside. First attempt resulted in failure and stripping off of the wale, all because I had let the hull tilt over when marking the waterline which resulted in a 3mm difference, not noticeable until I tried to position the second side...... . This is where I was thankful I was using PVA glue as the offending strips could be removed without too much damage with rubbing alcohol and a little filler. One item I noticed by accident was that the load line requires the stern to be slightly lower than the bow, I estimated approx. 6mm. The wale position was determined by placing some short lengths of wood strip 2mm above waterline at low point and plank upwards to establish the topmost edge at this point and then estimate position while ensuring a smooth curve. Last tricky point was the shape of the wale at the bow. Although the AOTS Diana book does not illustrate this, I have to assume that the wale would flatten slight at the stem from looking at contemporary models. This was trickier to do than simply allowing the strip to follow the line of the hull, but possible with 1x3mm strip and patience. Next step will be to build up the thickness of the wale before continuing with second planking.


-
Very nice boats Christian -I remember seeing a picture showing how the ships boats were hoisted in/outboard but of course can't remember where now . It would add a nice touch to do that.
-
And mighty fine do those shrouds look Bob! What size is that line you used? The boats look great from where I'm sitting.
-
Caldercraft are now selling an Ebony stain in their Admiralty range, I have some, but haven't used it yet.
- 255 replies
-
- 4
-
-
- granado
- bomb ketch
- (and 2 more)
-
I attached those particular blocks with rope to the mast above the shrouds (looping it around it), the block was then lashed to the shroud to keep it in position. If you look at post #703 in my Snake log, 7th photo down that may help you visualize.
- 1,144 replies
-
- 2
-
-
- snake
- caldercraft
- (and 1 more)
-
Great result Mobbsie, you make it look a lot easier than I'm sure it was.
- 255 replies
-
- 5
-
-
- granado
- bomb ketch
- (and 2 more)
-
Looks good Stergios. How firmly built is the the jib-boom? It may be much easier/less risky in the long run to remove it and replace later. My experience was that bowsprit can take a few of the inevitable knocks but the jib boom is a bit more susceptible. I think Jim managed just fine though.
-
Futtock positioning looks much better Stergios, nice work. My suggestion would be to get the bowsprit installed before you go any further. Looking great!
- 1,144 replies
-
- 1
-
-
- snake
- caldercraft
- (and 1 more)