


Ulises Victoria
-
Posts
1,790 -
Joined
-
Last visited
Content Type
Profiles
Forums
Gallery
Events
Posts posted by Ulises Victoria
-
-
In reading all the posts in this thread, it is obvious that the vast majority of us ship builders do enjoy the part of the rigging.
On a side thought, it is hard to believe that the whole operation and in some cases the life of such majestic man creations, was dependent almost totally upon the humble hemp rope.
Cheers
Ulises
- EJ_L, flying_dutchman2, toms10 and 5 others
-
 8
8
-
-
My opinion:
I like ships of the pre-1800 era. Vasa, Soleil Royal, Sovereign of the Seas, etc you get the idea. Lots of ornamentation and bling.
I would love to see well made ornamentation. No matter if wood, resin or metal. Only to be accurate. They can be painted anyway.
I am still looking for a good POF kit of a ship of this style.
Price range: I know quality comes with a price, so that would not matter much or in any case, would be understandable if priced high.
Detailed instructions (or lack of) is something many builders complaint about too often. Accurate plans.
Scale: A very tough question. The bigger the scale, the better the detail and the harder to find a place to build and display the ship. (The opposite for small scale.)
Thank you Chuck for your interest!
- Seventynet, Canute, EJ_L and 1 other
-
4
-
Hello Hank. You don't need to respond to notifications. They are just informative so you know who has liked to your posts, etc...
You can tun them off if you wish. Just click the "Options" button in your Notifications window.
- WackoWolf, mtaylor, Old Collingwood and 1 other
-
4
-
-
Writing that address directly in my browser window, takes me to a blank page with a hosting logo in the middle. Nothing else.
Edit: However a search in Amazon for Vincenzo Lusci yields several items.
https://www.amazon.com/s/ref=nb_sb_noss?url=search-alias%3Daps&field-keywords=vincenzo+lusci
Edit II. Unfortunately, the book you mention is "Currently Unavailable"
-
Rigging is the best part of ship model building for me. (Well, except maybe starting a new project
 )
)I find the rigging part to be extremely fun to do, (well, except tying several thousands of clove hitches on the ratlines
)And especially because that is the last step before finishing the project, (and start a new one
)Best regards
Ulises
- Rick01, popeye2sea, CaptainSteve and 4 others
-
7
-
-
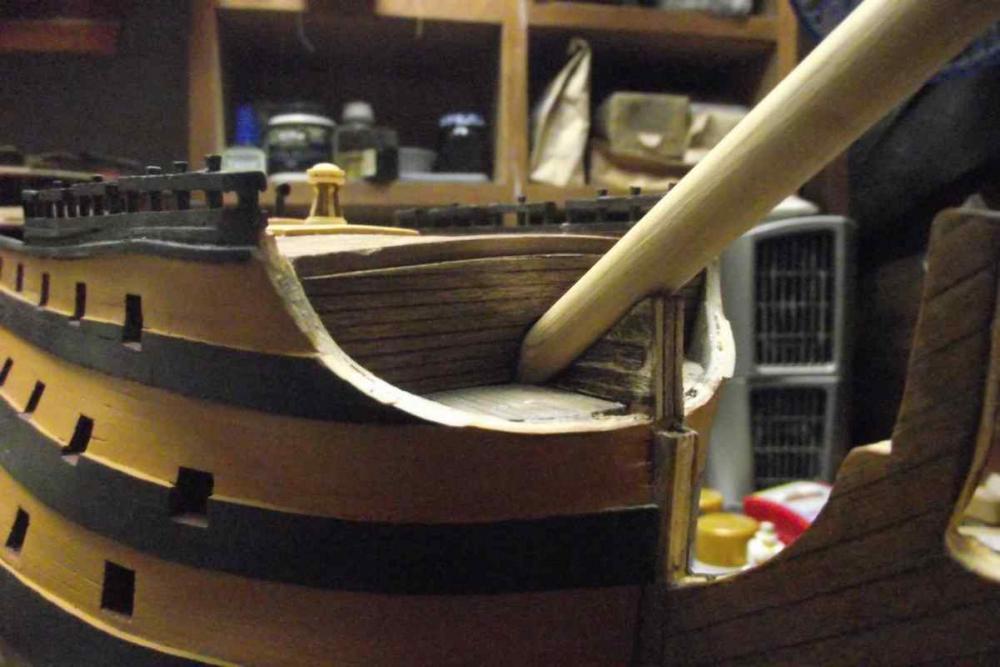
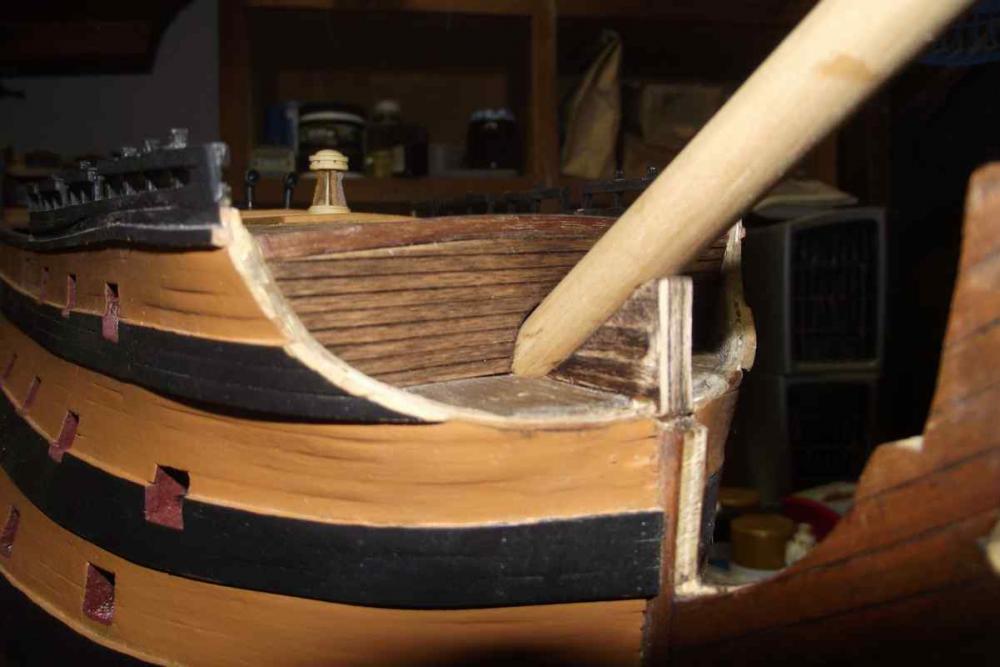
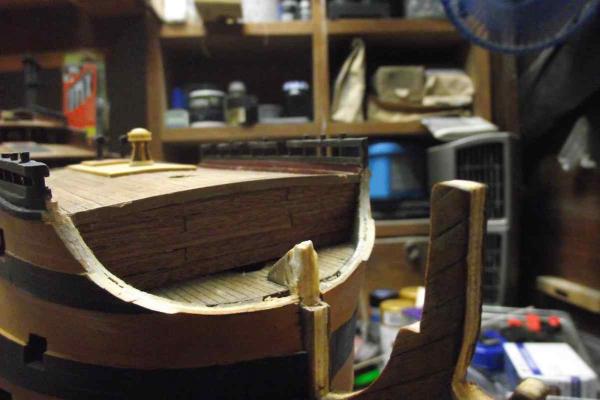
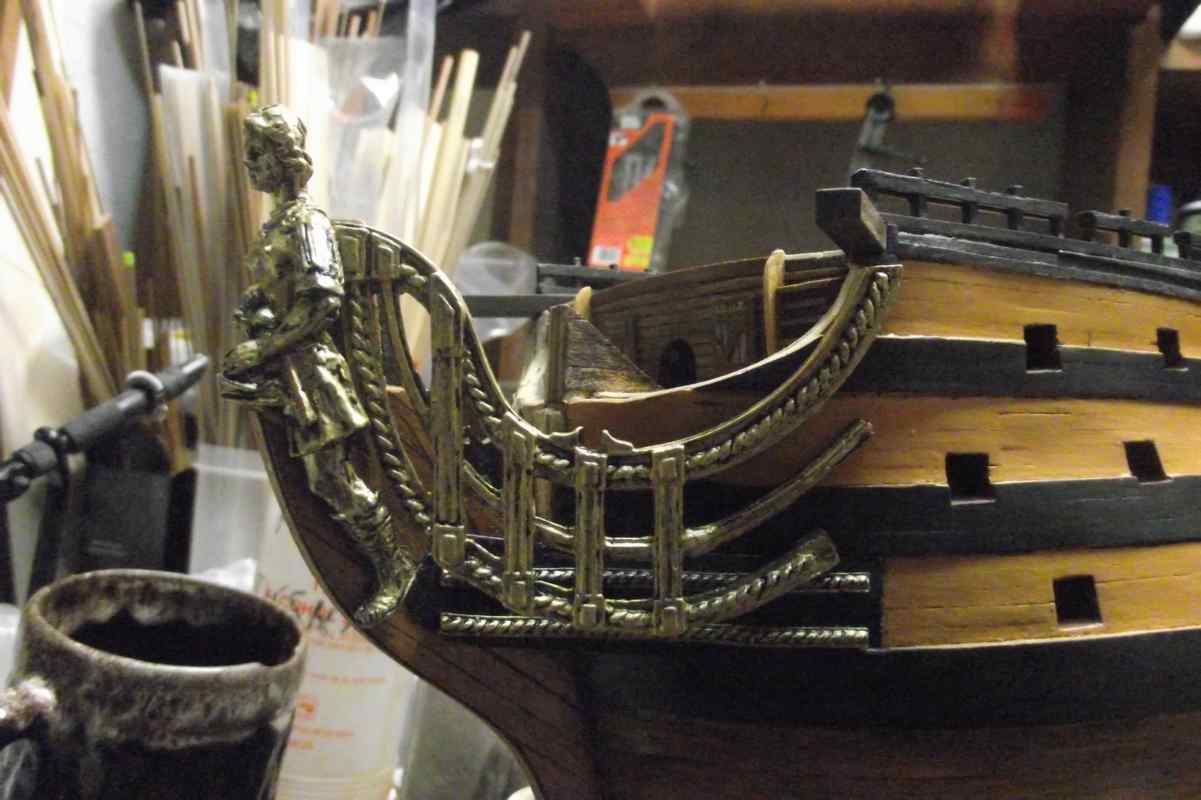
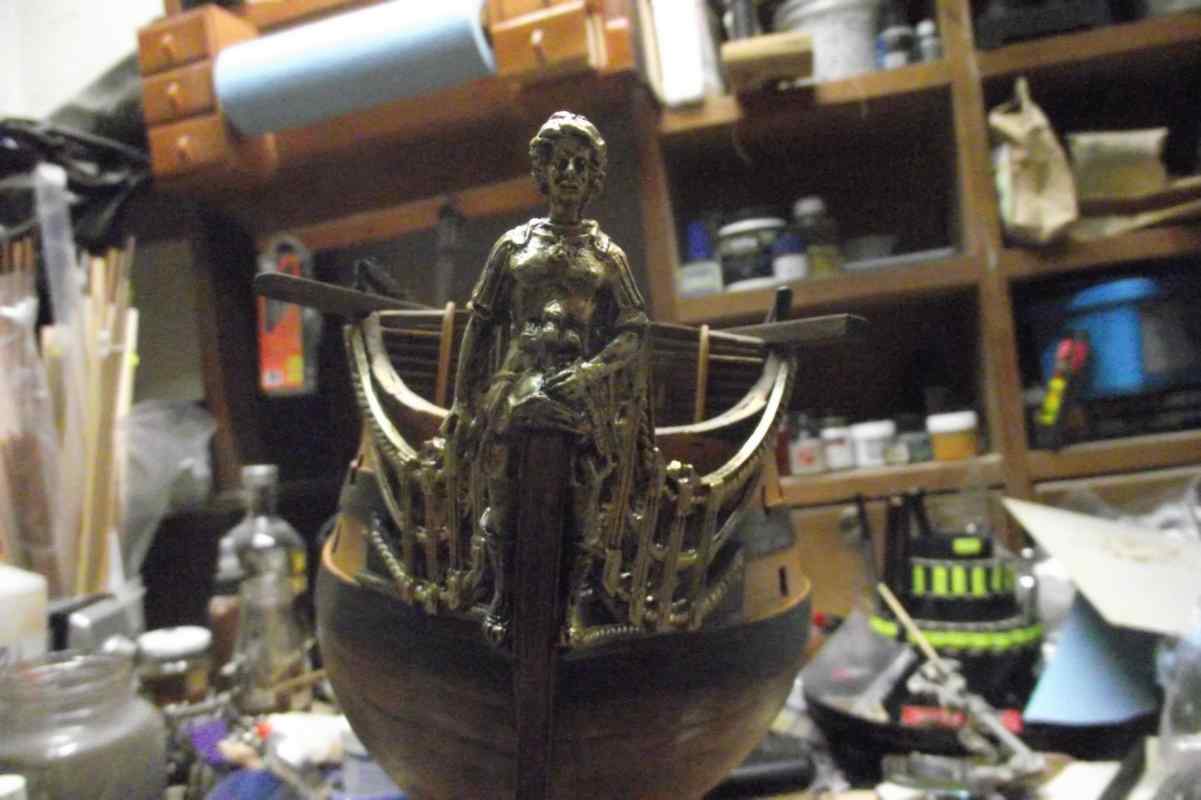
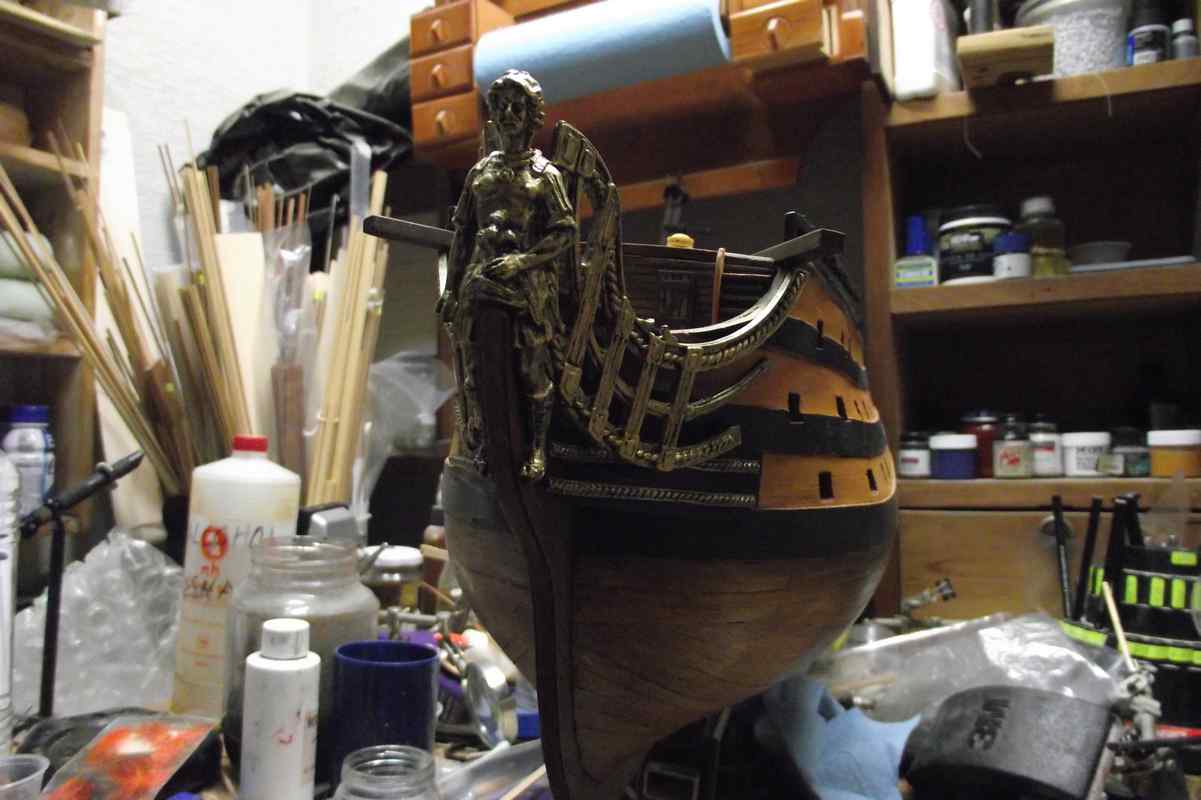
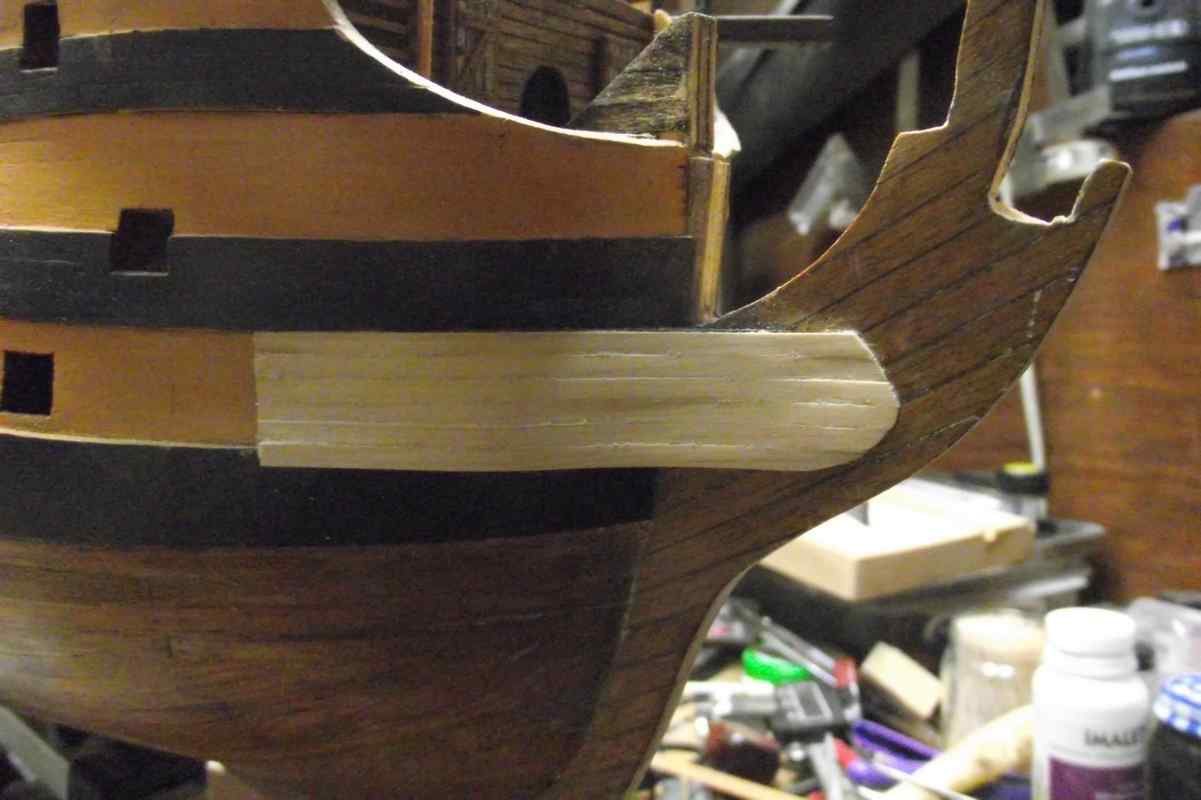
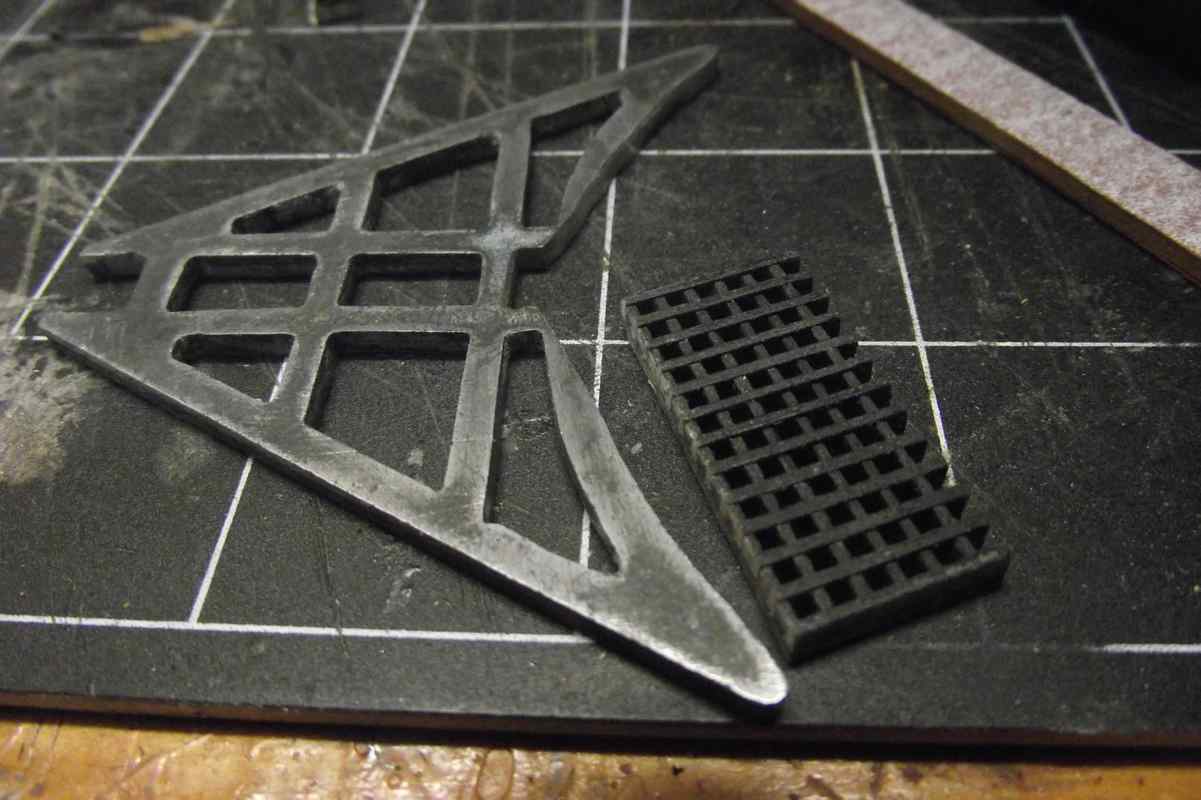
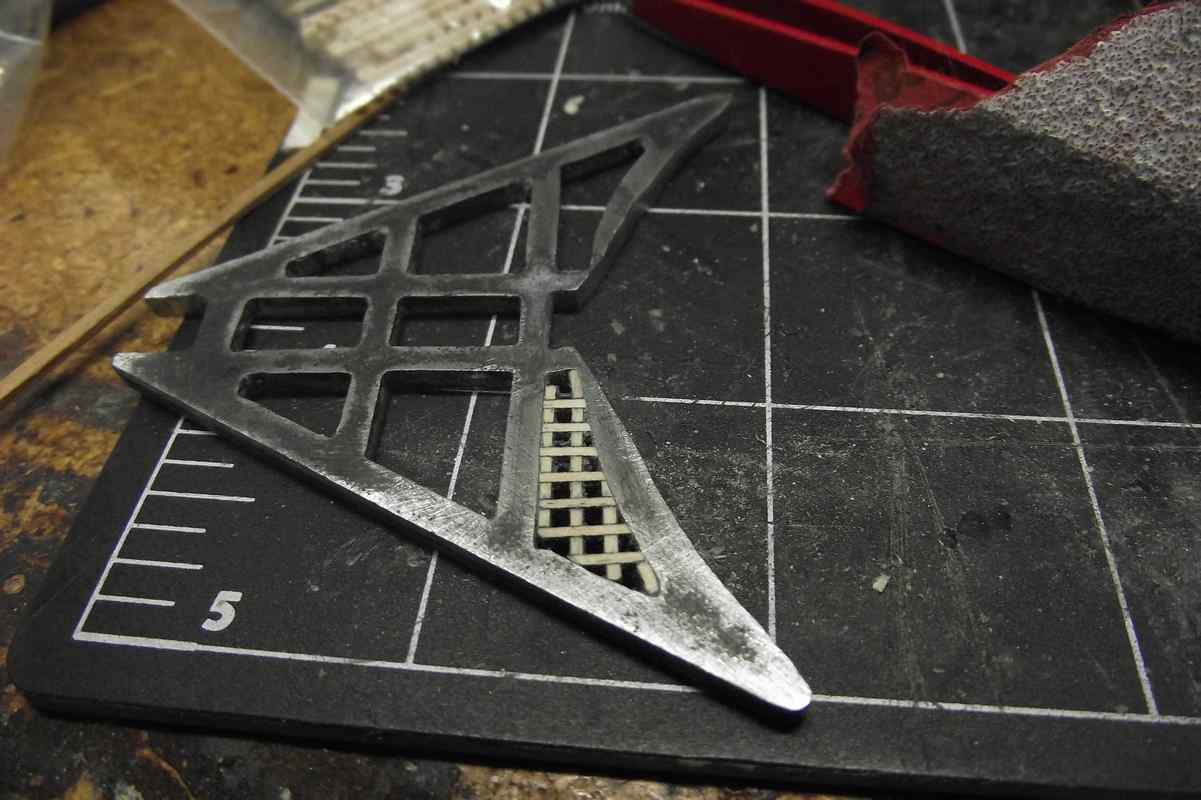
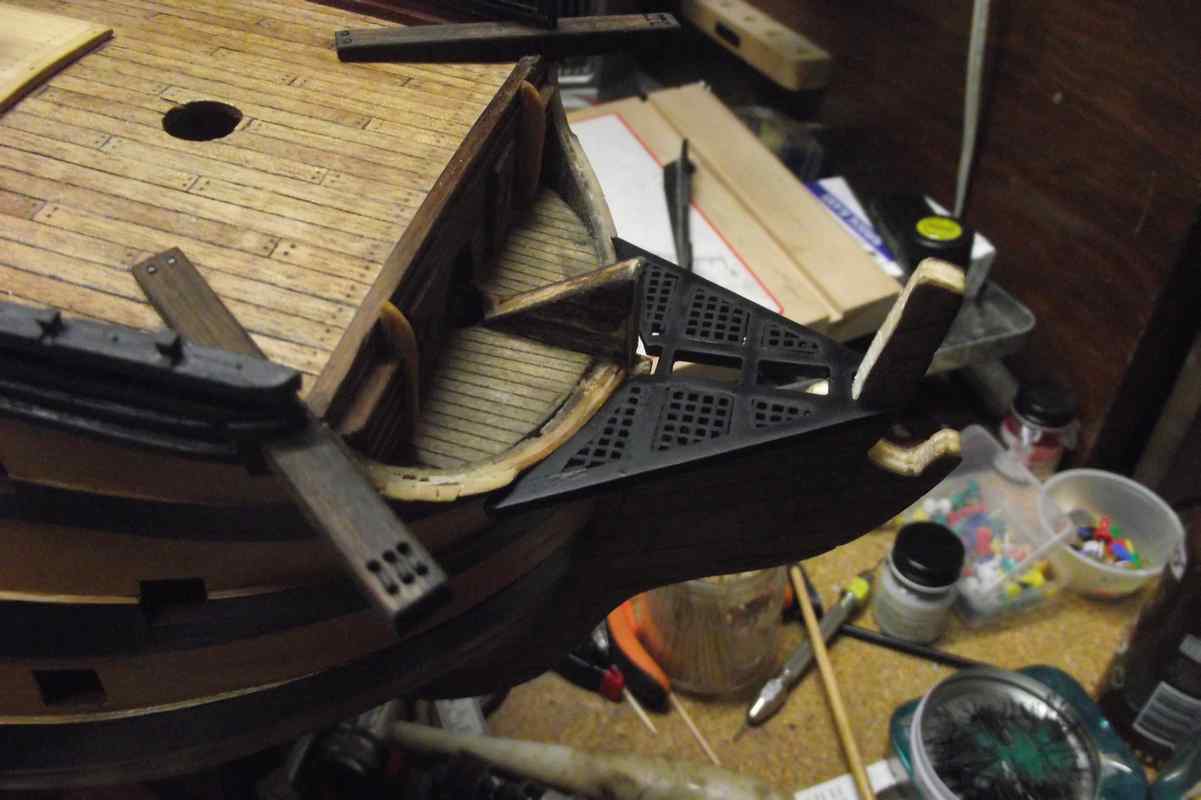
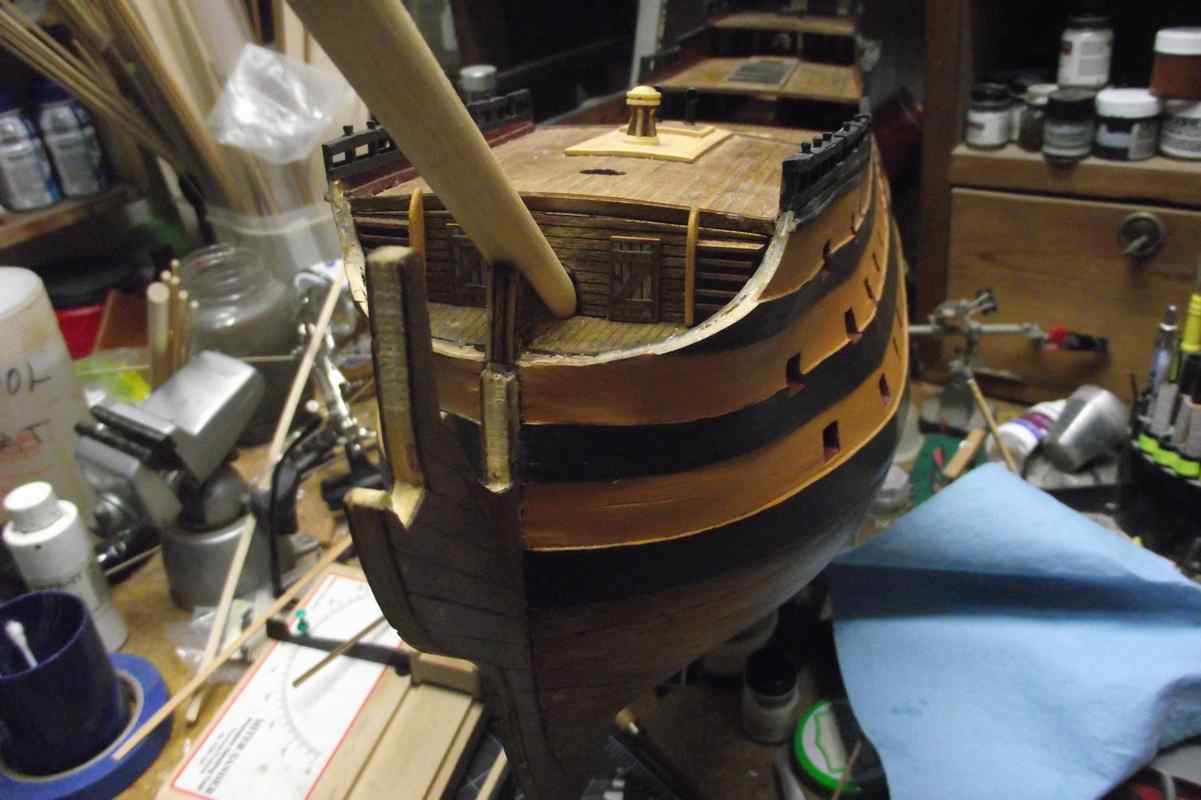
Hello all. Update.
Worked the metallic parts in the bow.
I fixed these parts like this. With thew upper part level with the top part of the keel.
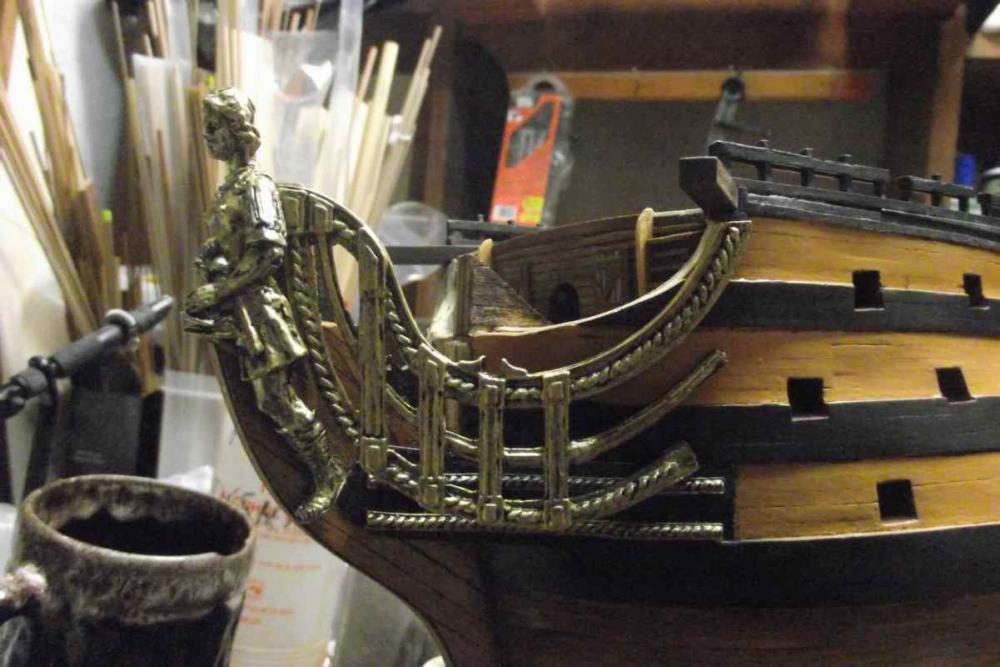

Then I realize they were too low. No room for the anchors holes.
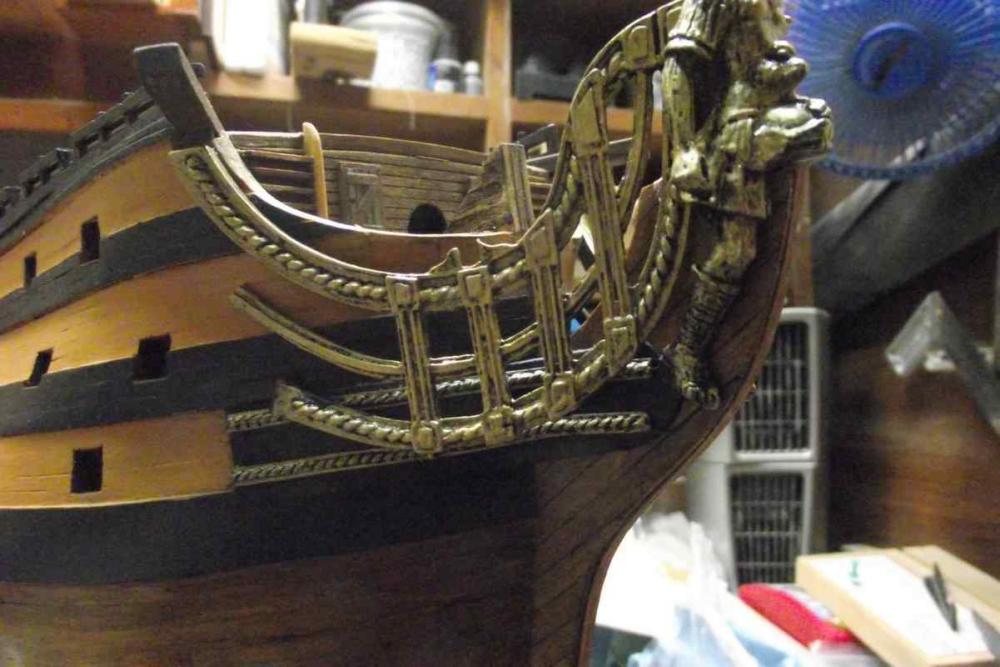

Then I looked more closely and saw that they should be higher: The top part in line with the back of the neck of the figure.
I unglued them and fixed in their new position
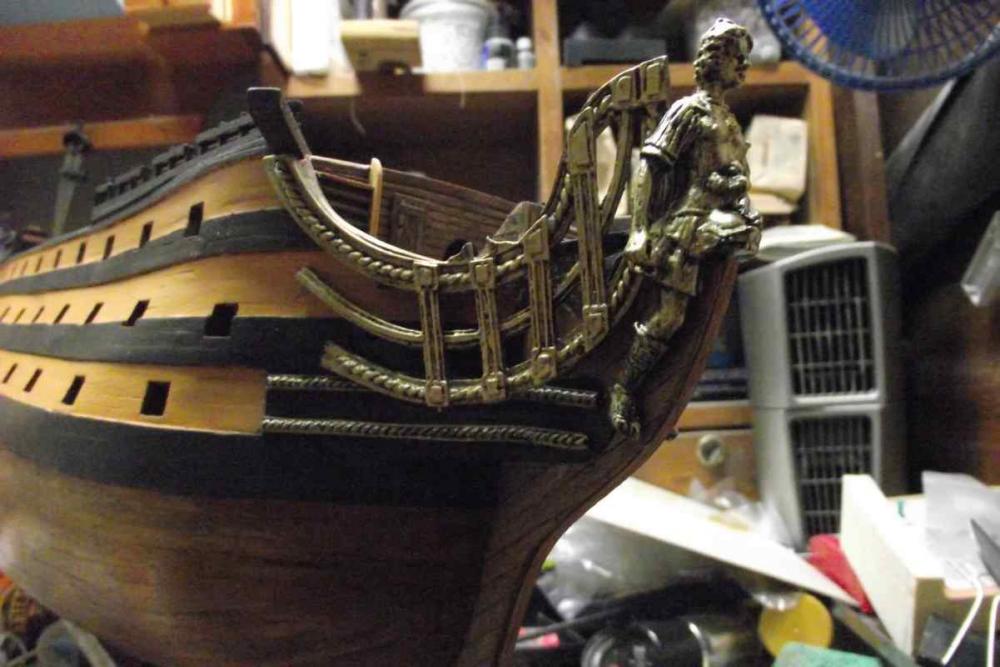
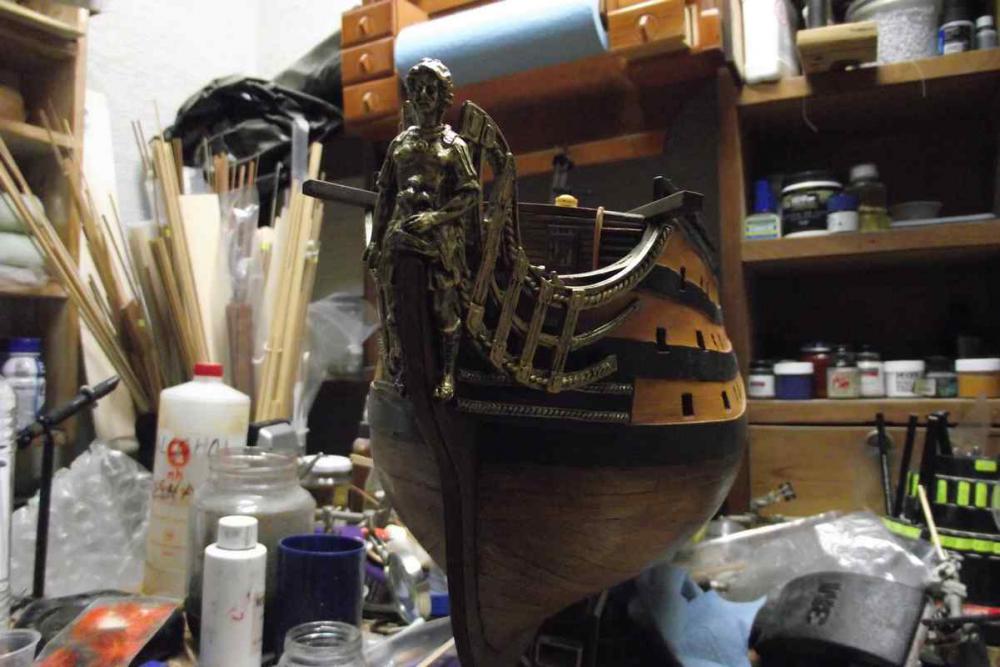
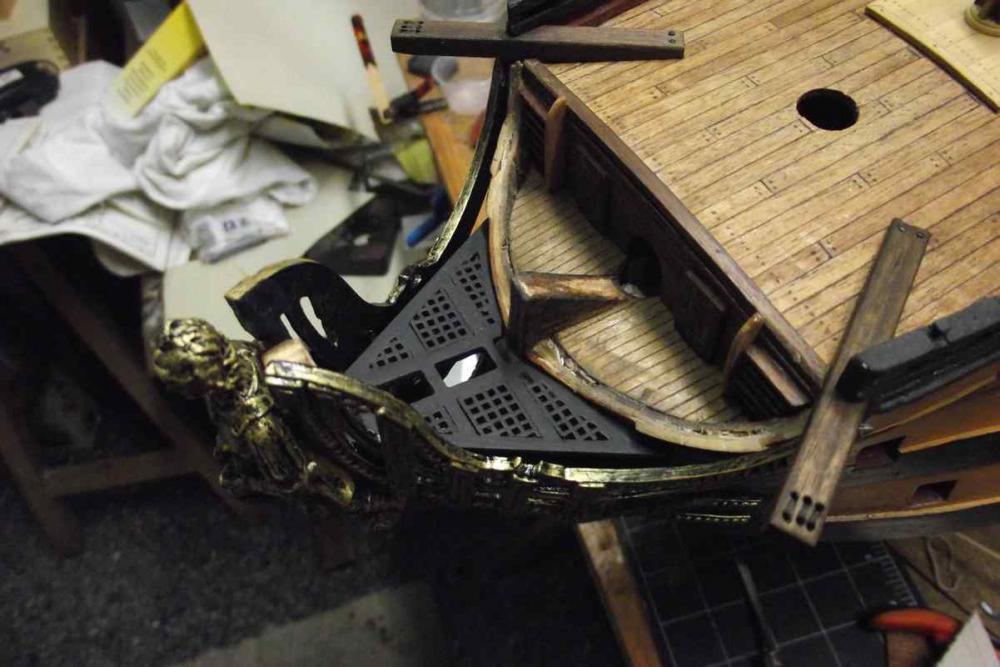
They look better now.
I painted them black and then drybrushed the gold so that some of the black showed out. I like the "old" effect.
Thanks for watching!!!
Ulises
- CaptainSteve, Aussie048, edmay and 12 others
-
15
-
Nicely put, EJ; I can not add anything to that!

Don't give up, kpnuts,
Ulises
-
-
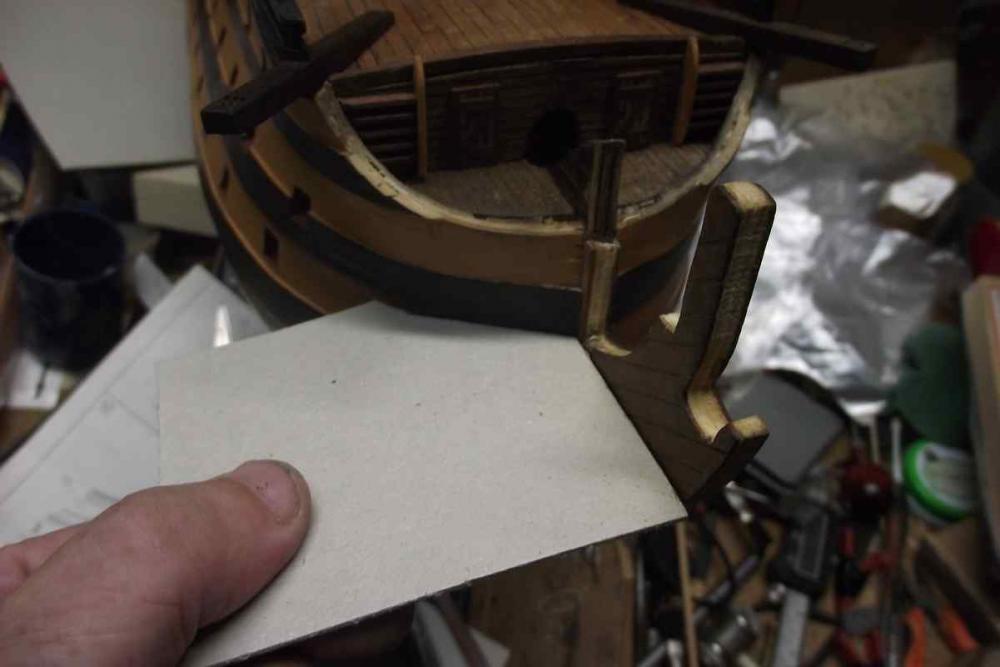
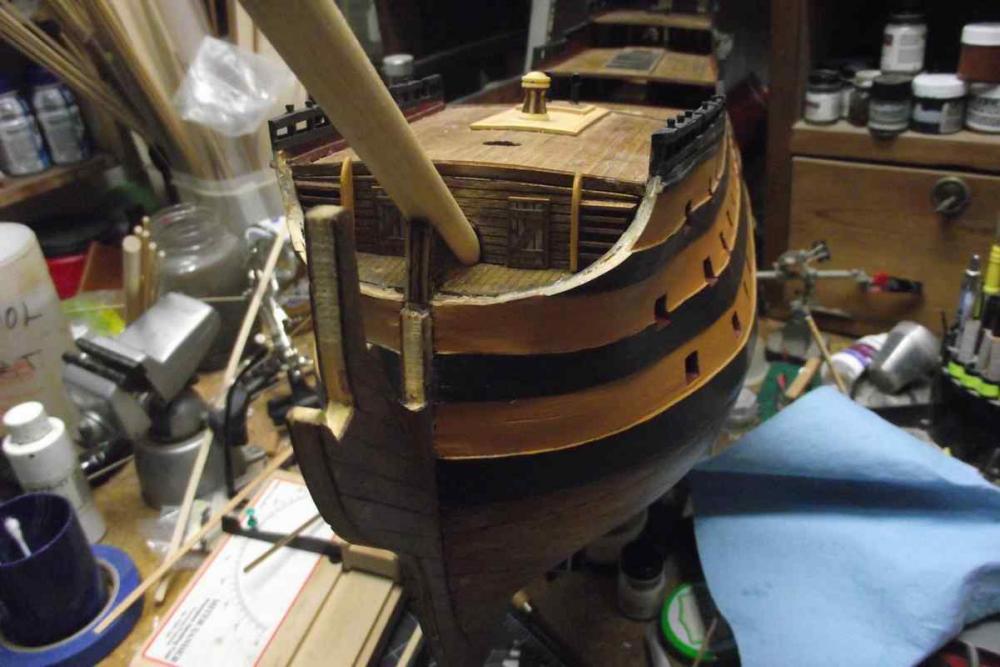
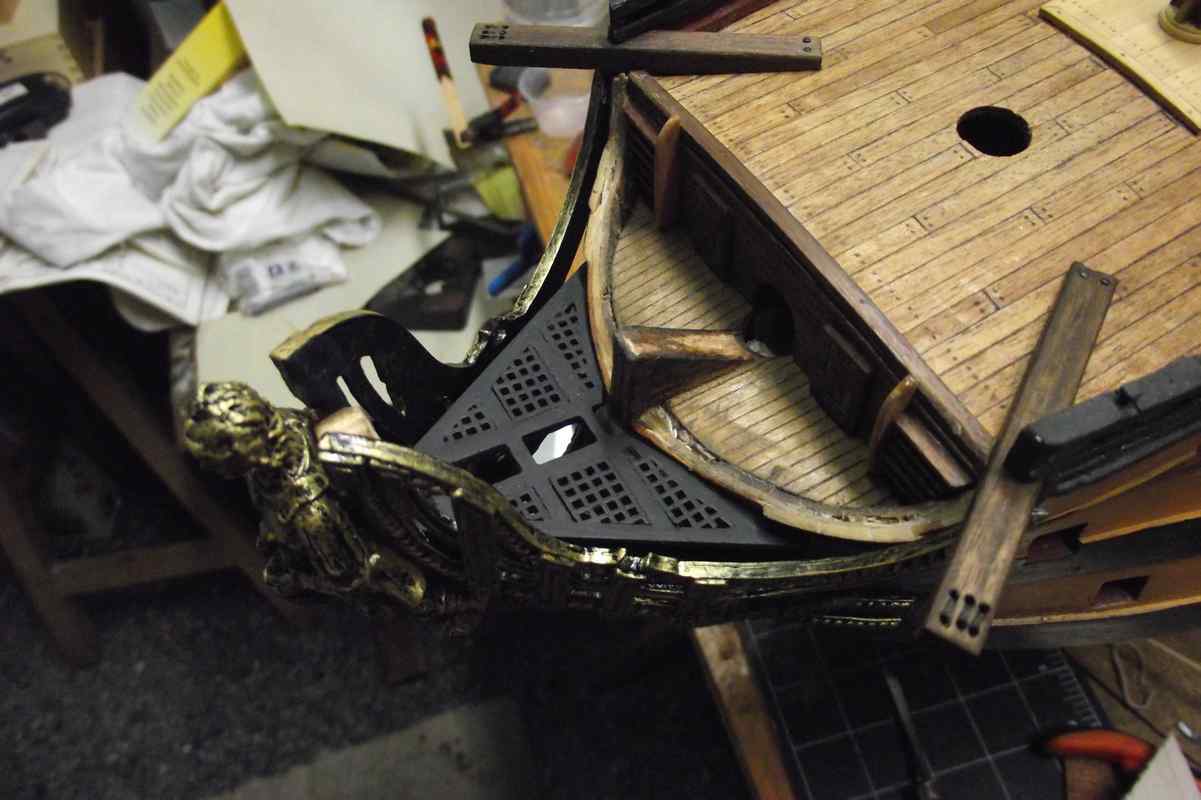
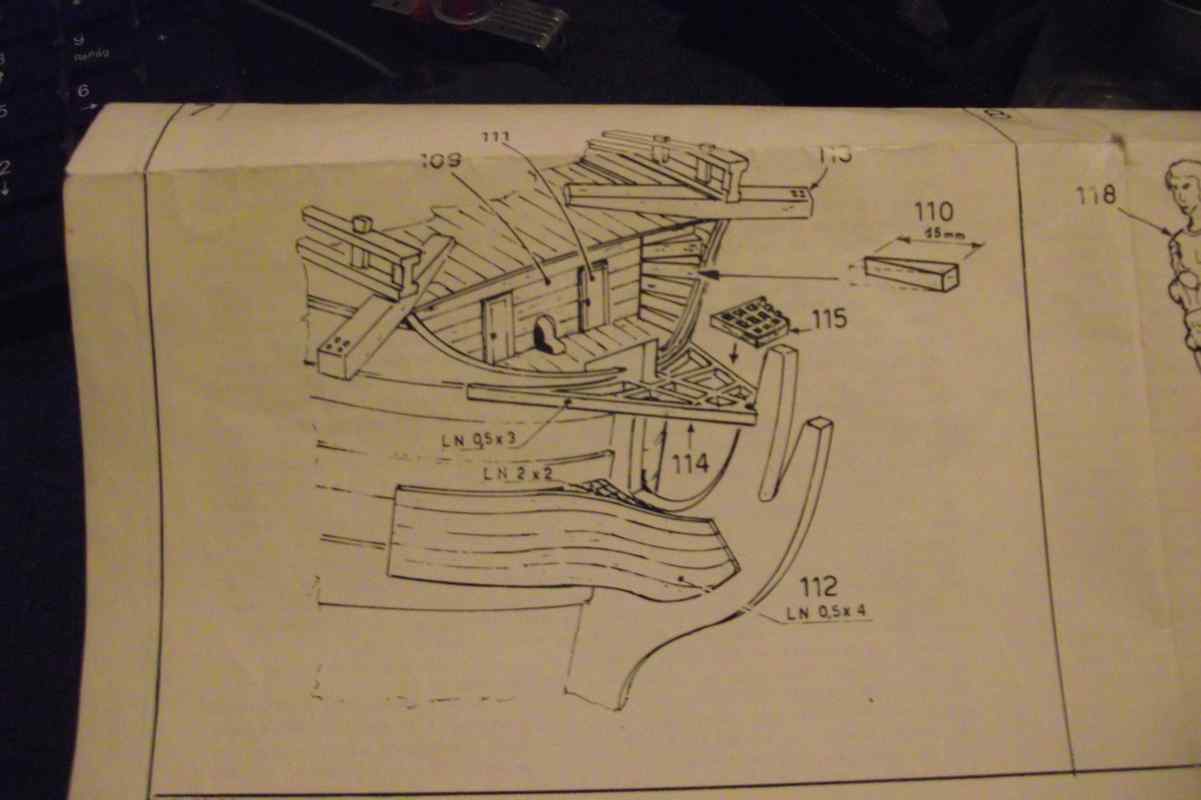
Hello all.
Finally the dreaded part 112 is done!!!
I am happy with it although it has its flaws. As you can see there is some unevenness here and there. I'm gonna' have to live with that.
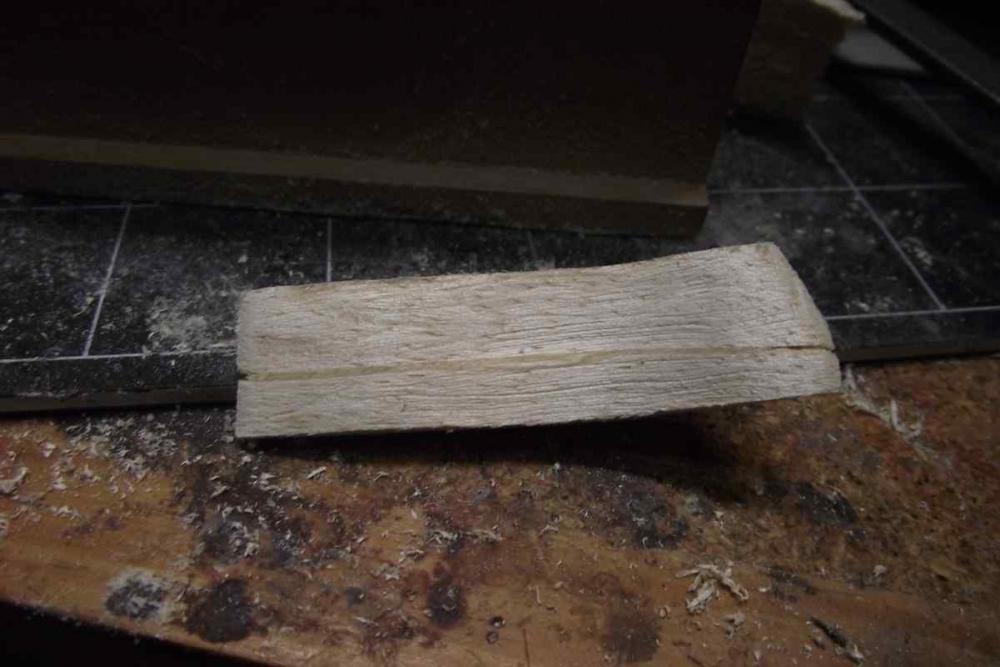
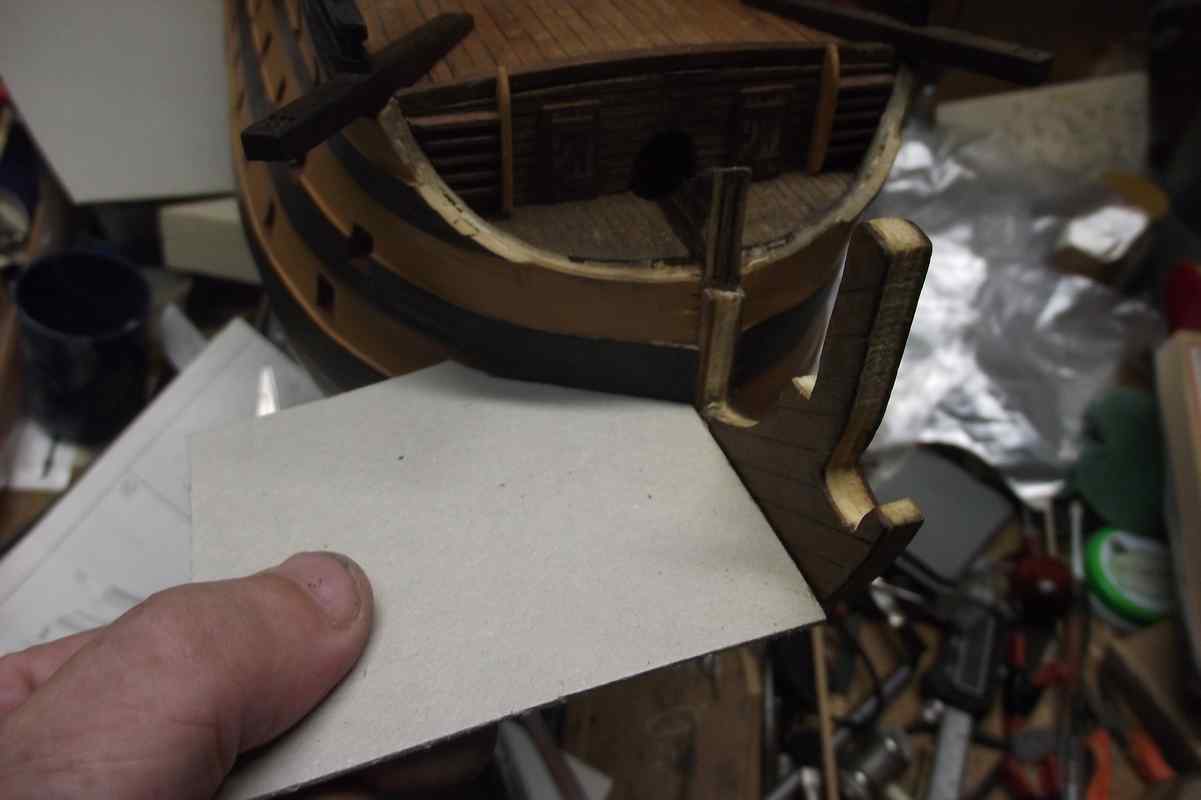
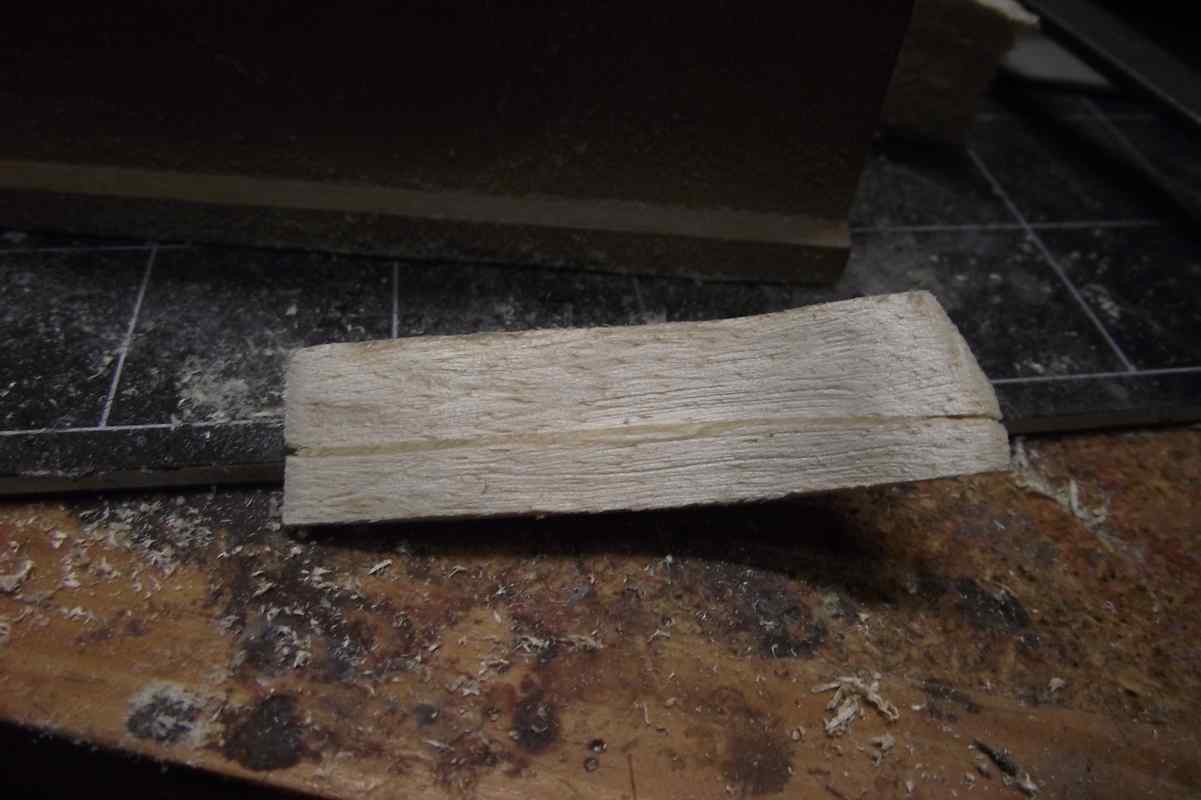
As you can see here, the instructions say to use several 2x2 woods to fill the space and then shape accordingly. I decided to use a piece of balsa instead.

Here I am making a shape with cardboard of the profile.


Planking starts. Due to the nature of the shape and the difficulty to properly clamp these planks, I decided to use contact cement
to do this job. Worked wonderfully. I also changed the size of the planks from .5 x 4 mm to .5 x 3mm.
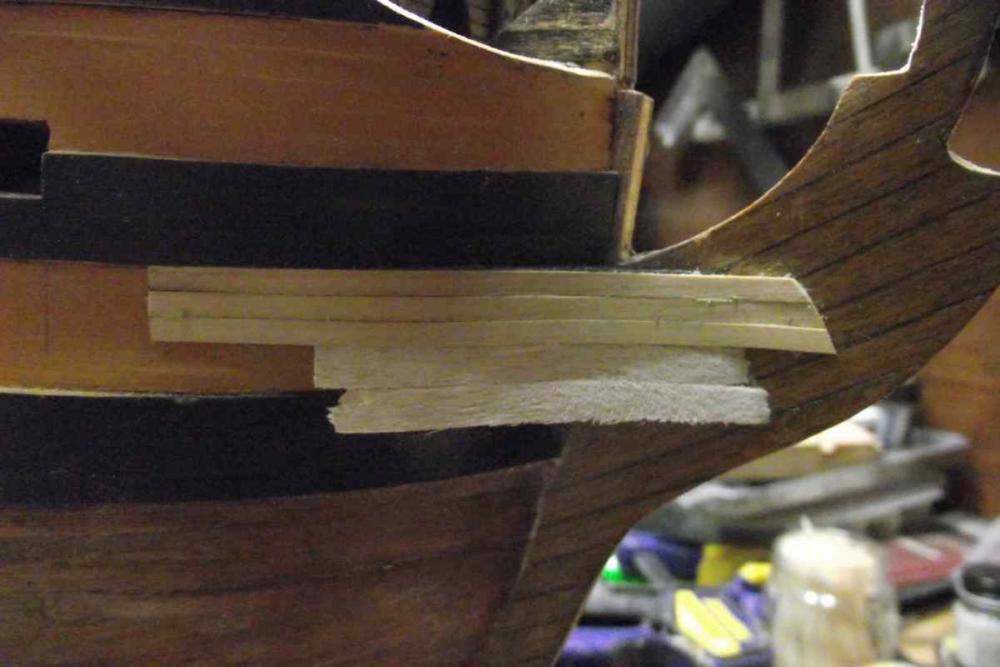
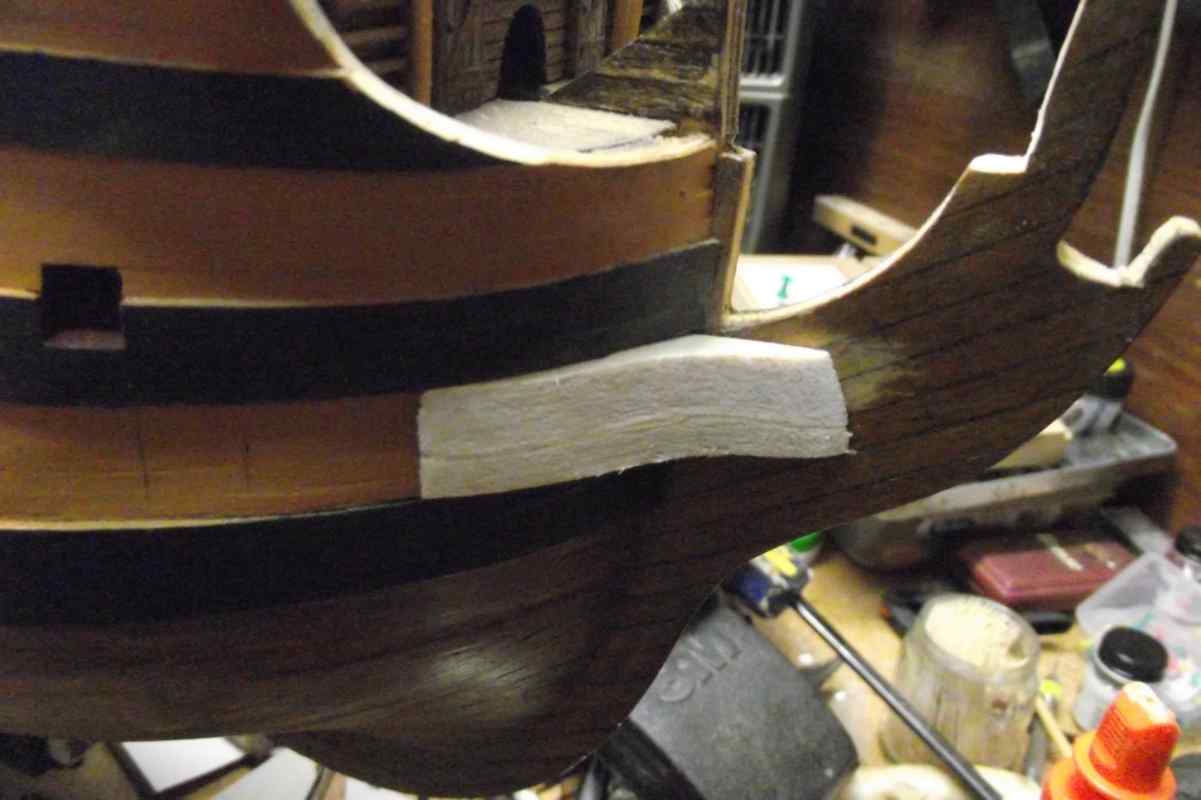
Making sure both sides of that part will be at the same height.
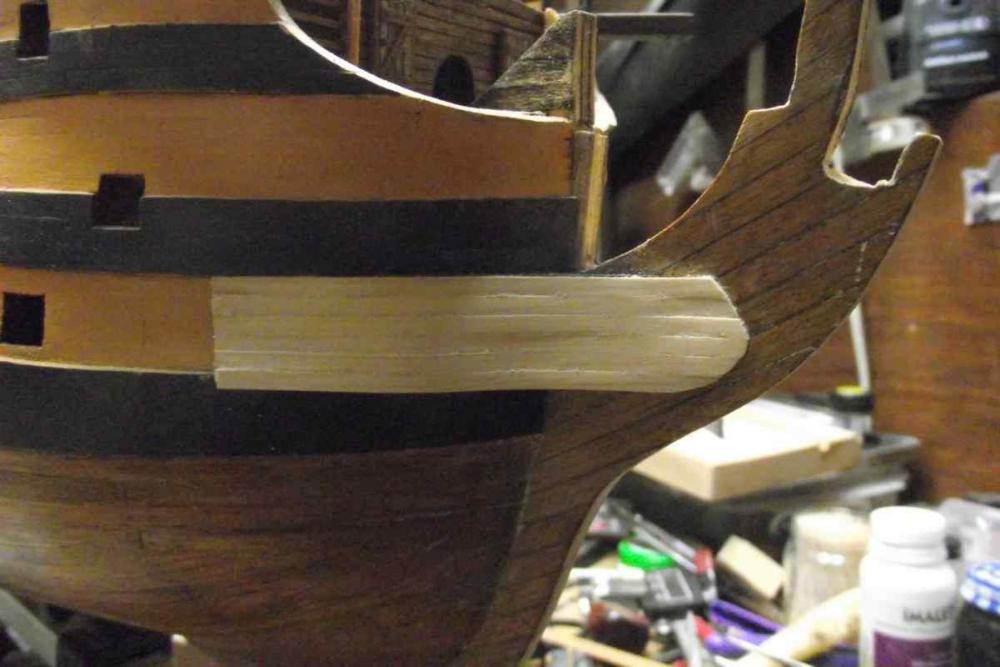
Both parts are finished and painted. Here is starboard

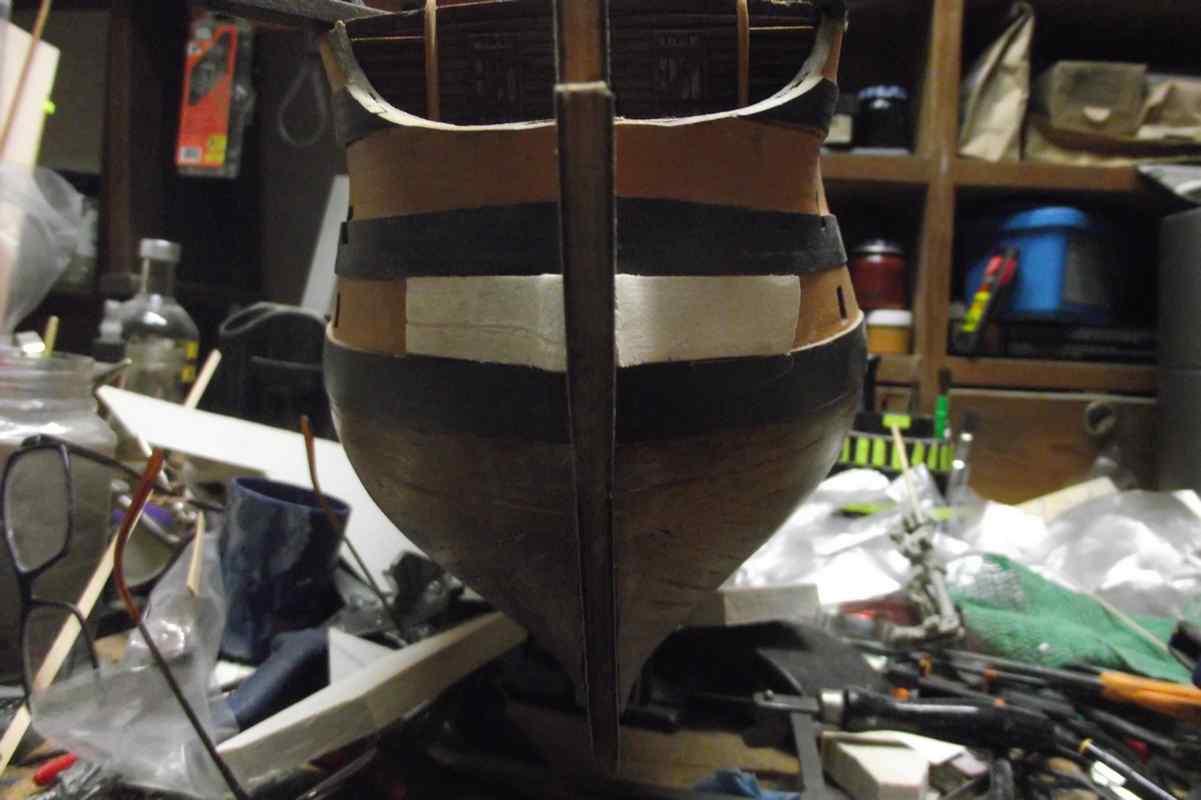
When finished, I noticed some spots that were a bit bouncy, meaning they were not very well glued. And I was undecided about what color to use here. I decided to give a coat of CA to the entire area and then paint it black, to match the color of the wales. Unfortunately, the paint I used to paint the wales became unusable so I used a different paint, and it shows when looking closely.
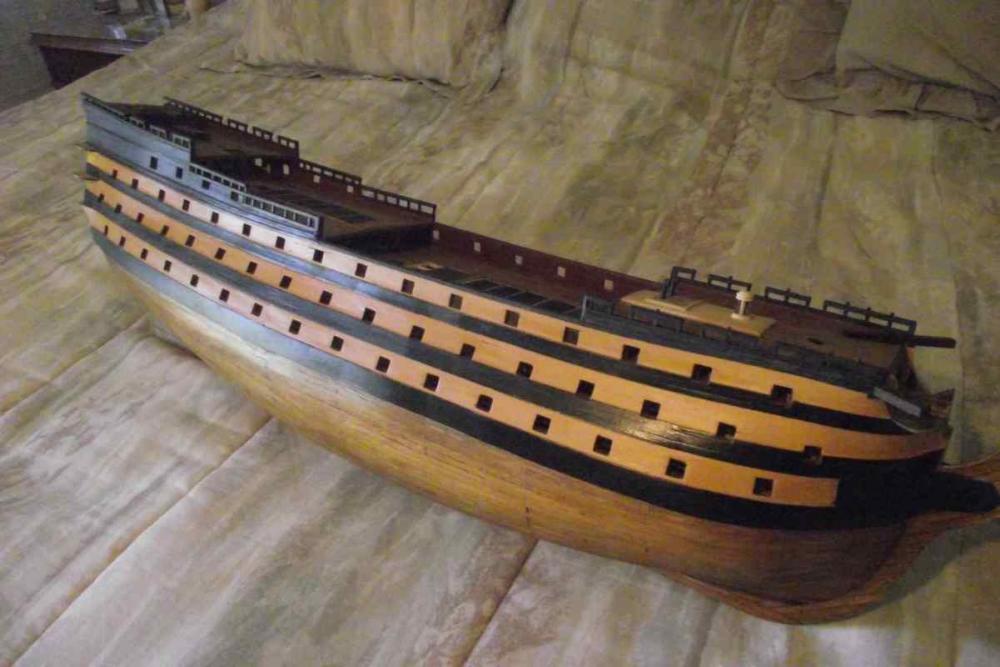
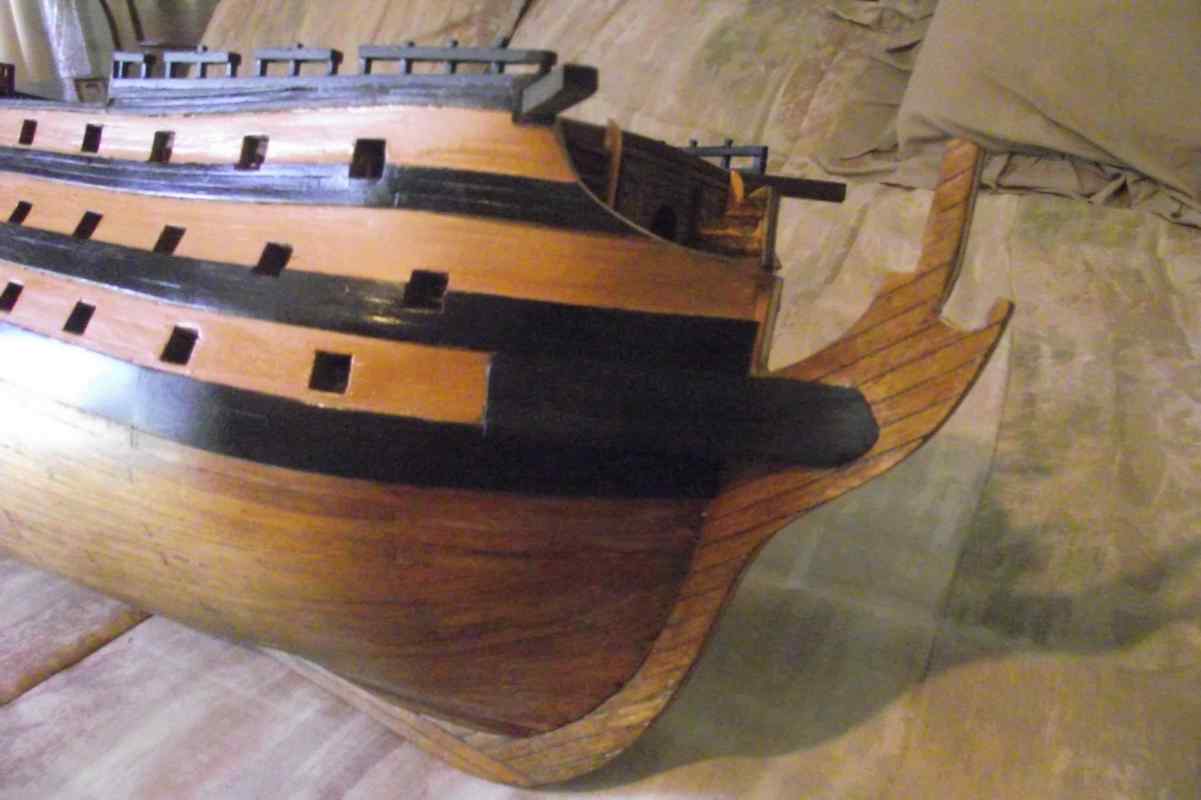
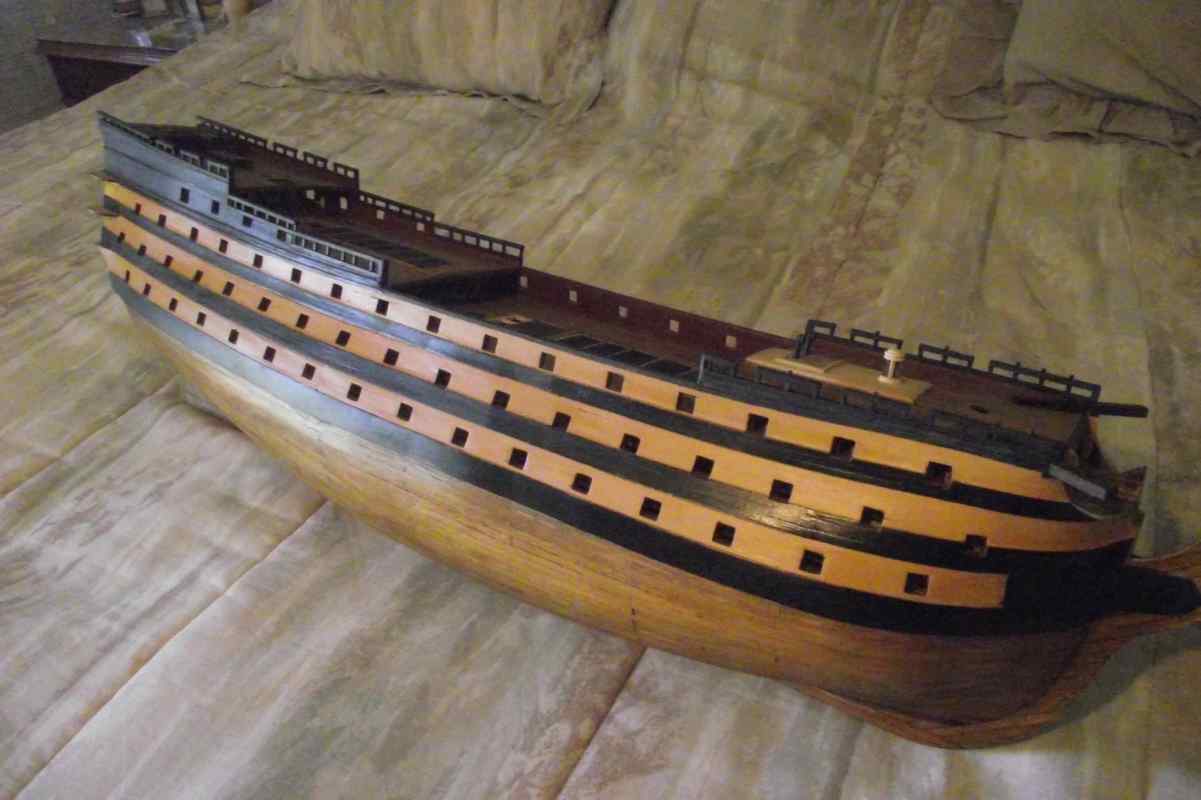
General view of the ship at this moment
Thanks for watching, mates.
All the best.
PD We celebrate mother's day today. Best wishes to all moms here, either members or members' mom.
Ulises
-
-
-
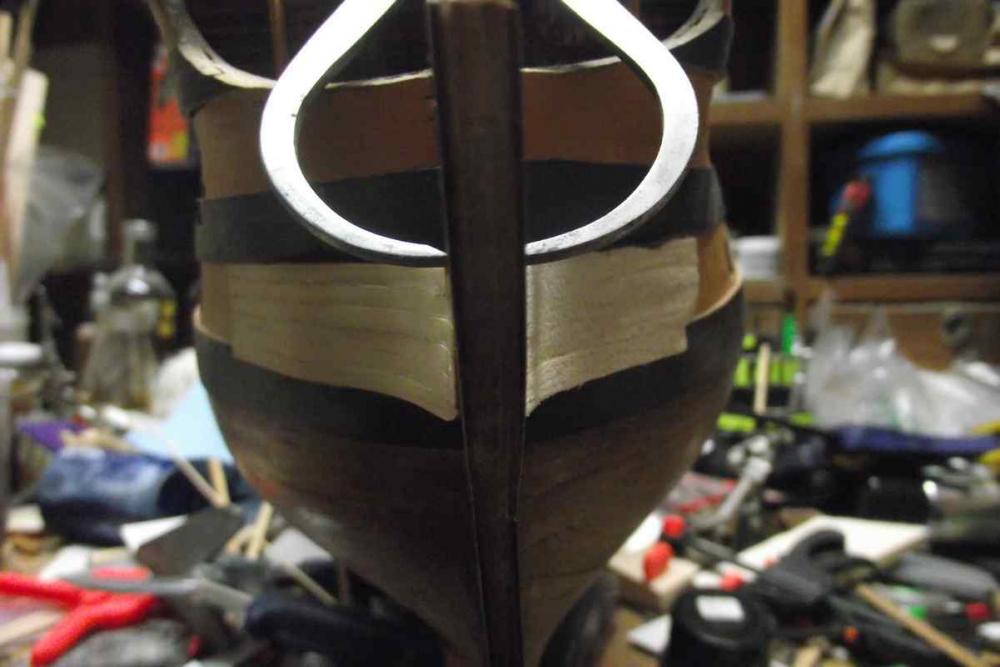
Now fit this here... yeah, right!
Coming along!
Part dry fitted in place.

Best regards!
- edmay, marktiedens, Sjors and 11 others
-
14
-
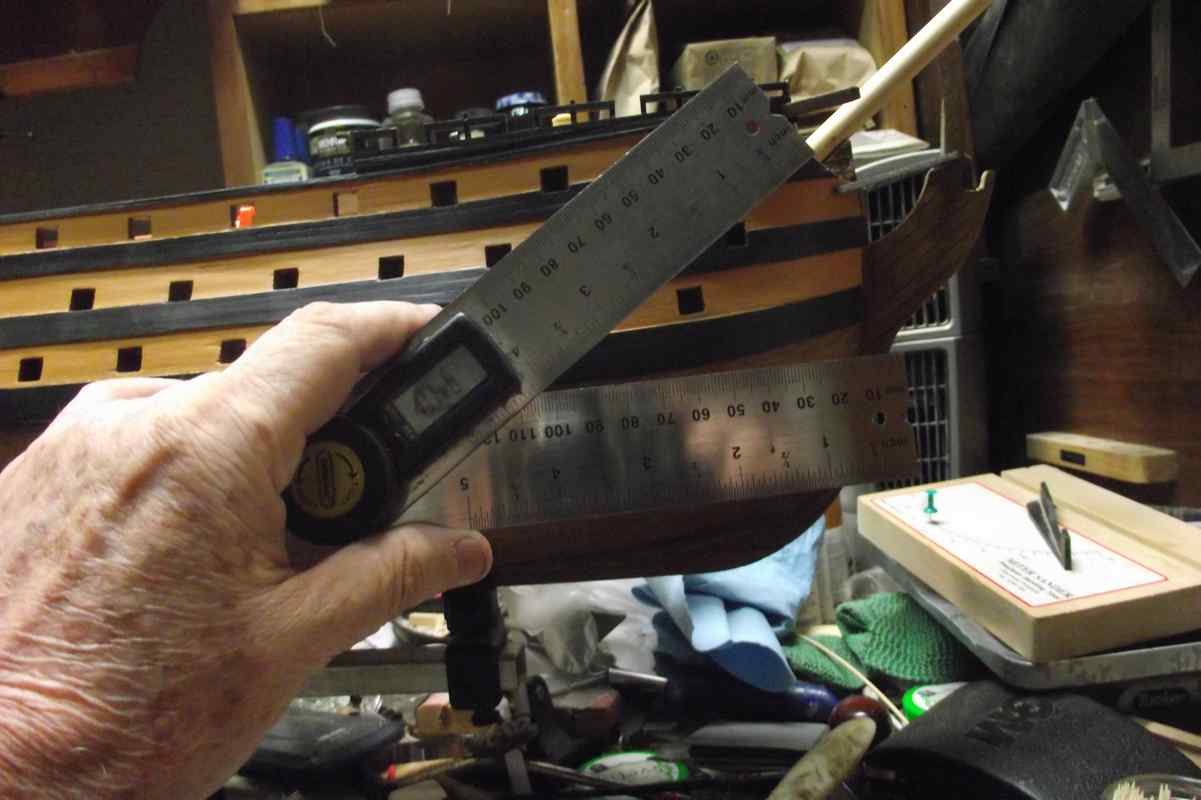
Thank you all for your comments!
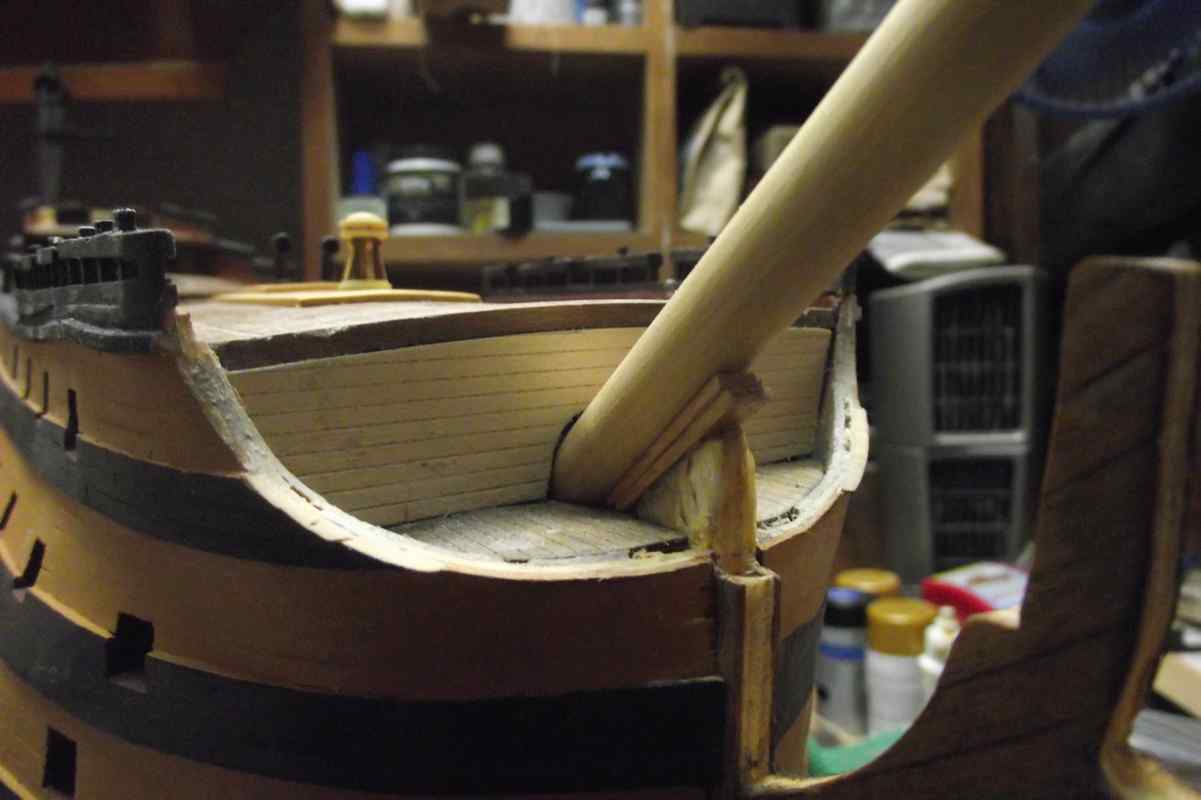
Pollex... I specially appreciate your comment. So I went to check things and this is what I did and found:
I measured the angle in the plans and it is 34º
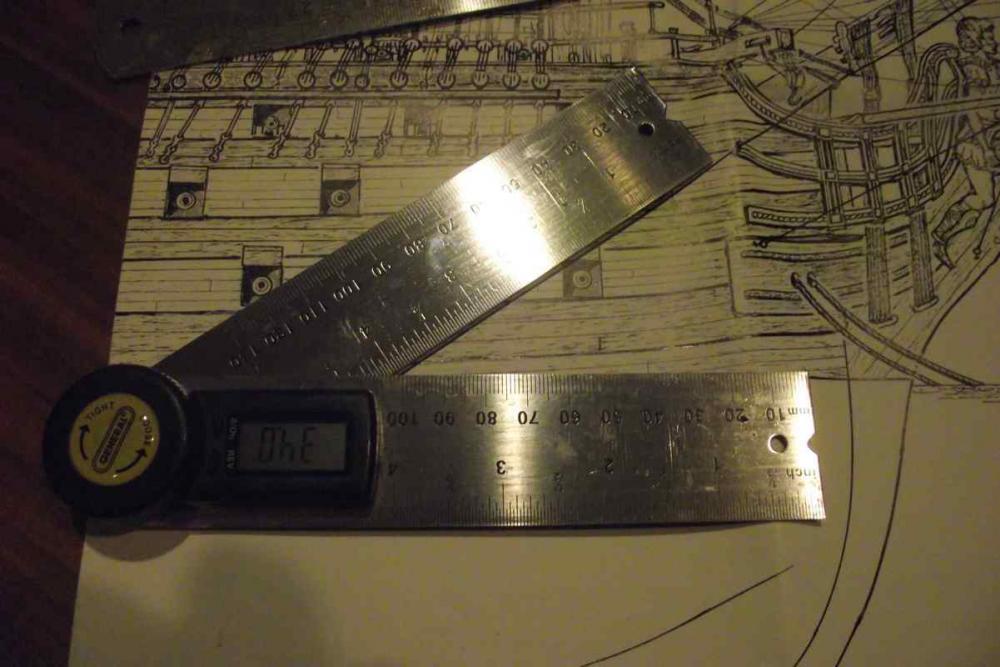
I don't know any method to actually measure the angle in the ship so this is what I came up with:
Placed a bubble thingy on the deck to check for correct level.
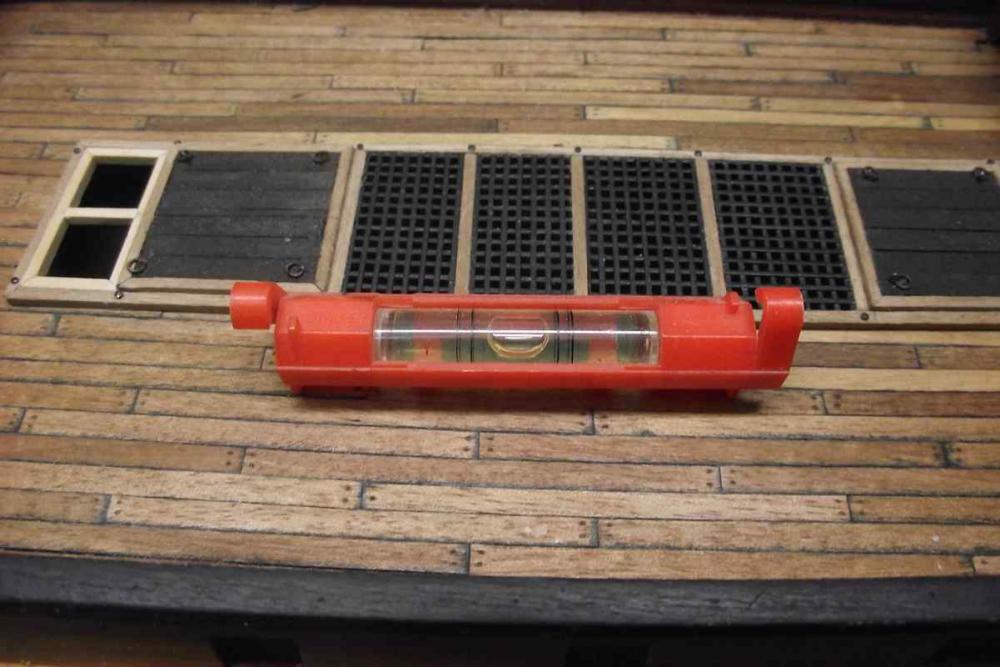
I then used the same 34º in my tool and checked by eye and hand how close the bowsprit angle was to 34º. against the waterline.
In my opinion, it is very close, but as I said, this may be a very crude method for checking that. Any suggestion will be greatly appreciated. (If the ship looks not aligned, its because the camera is tilted.

Thank you!
-
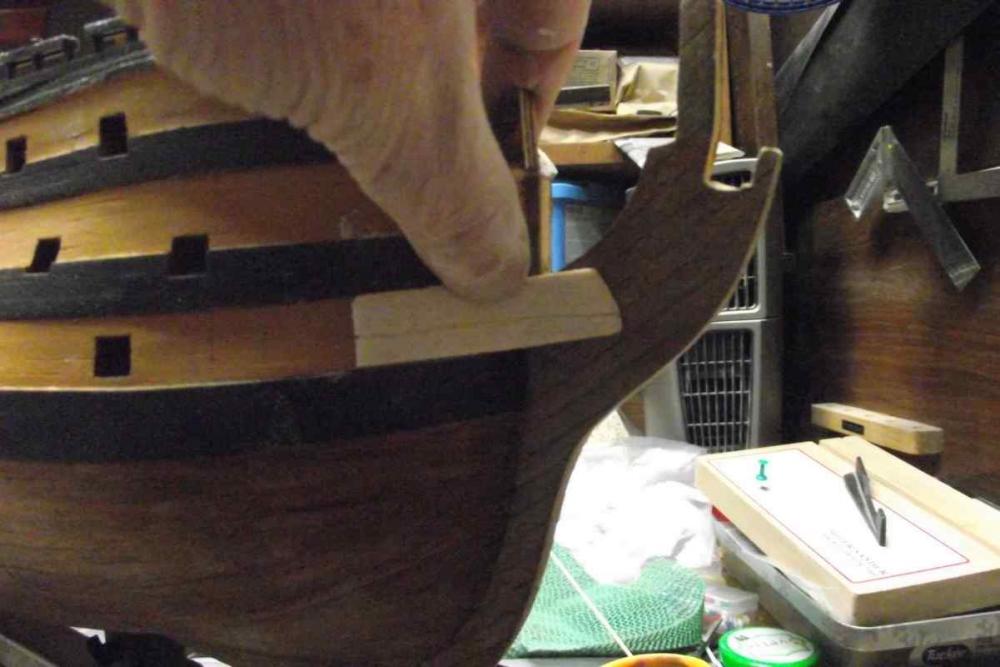
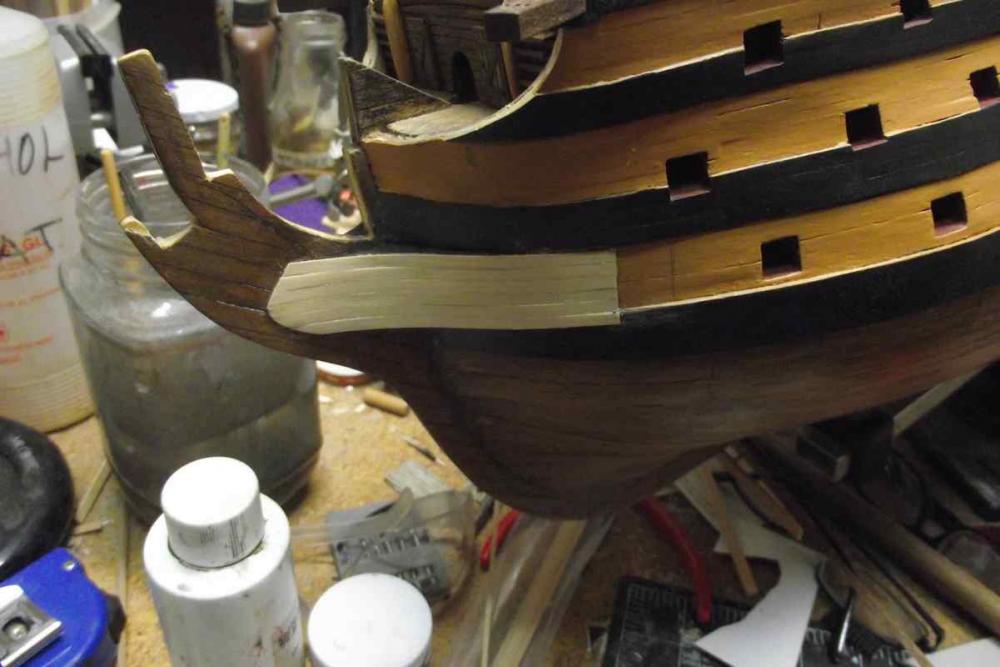
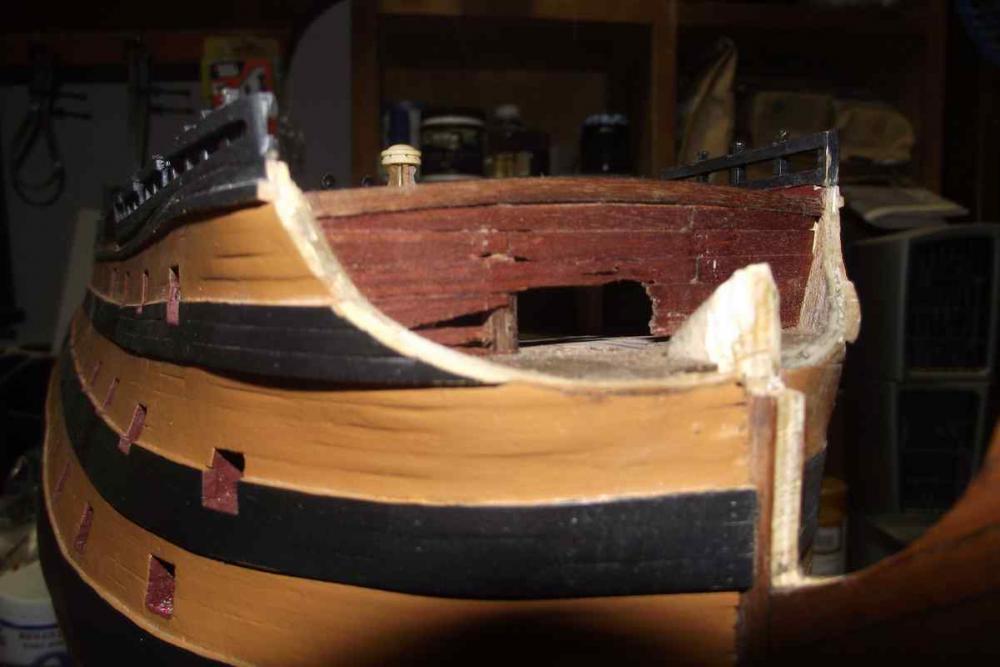
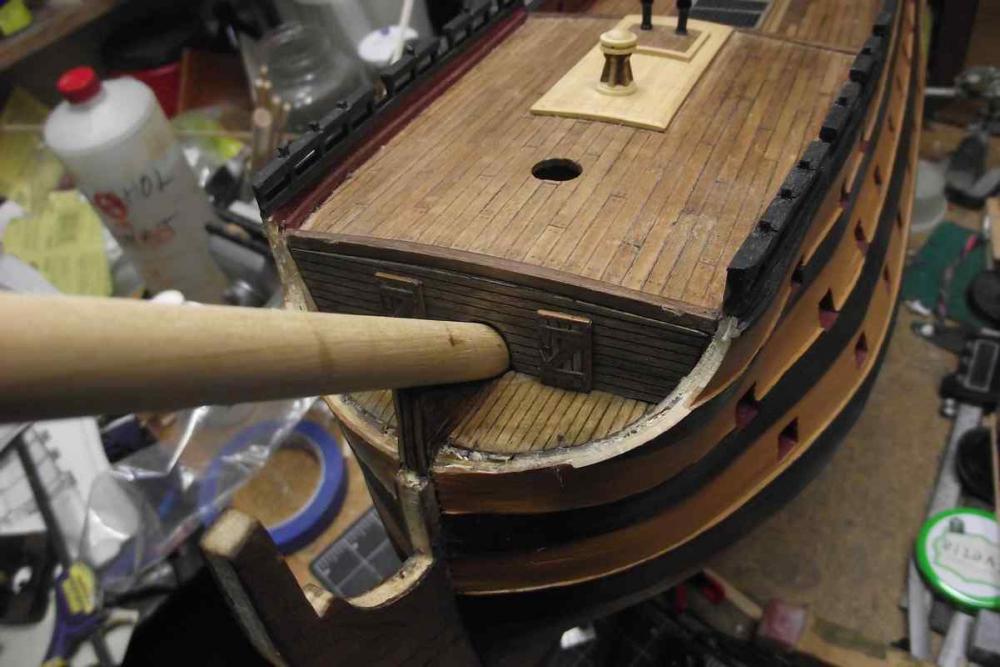
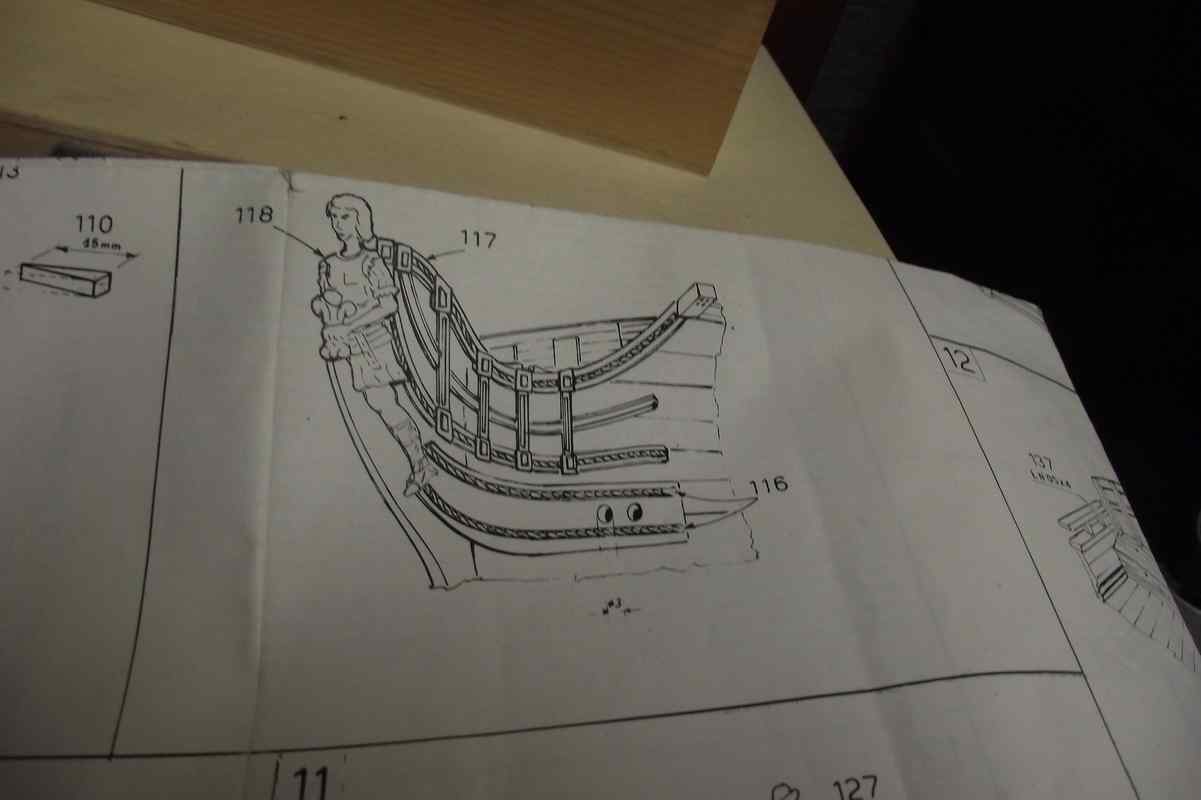
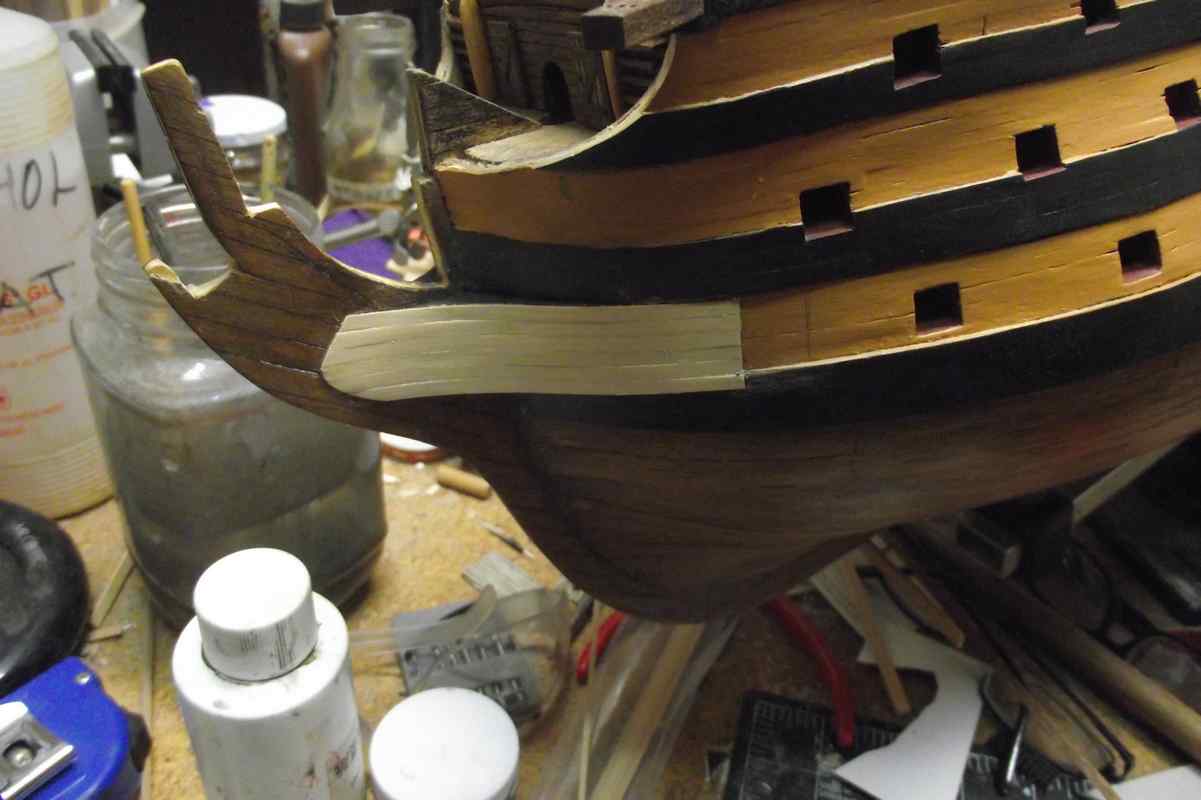
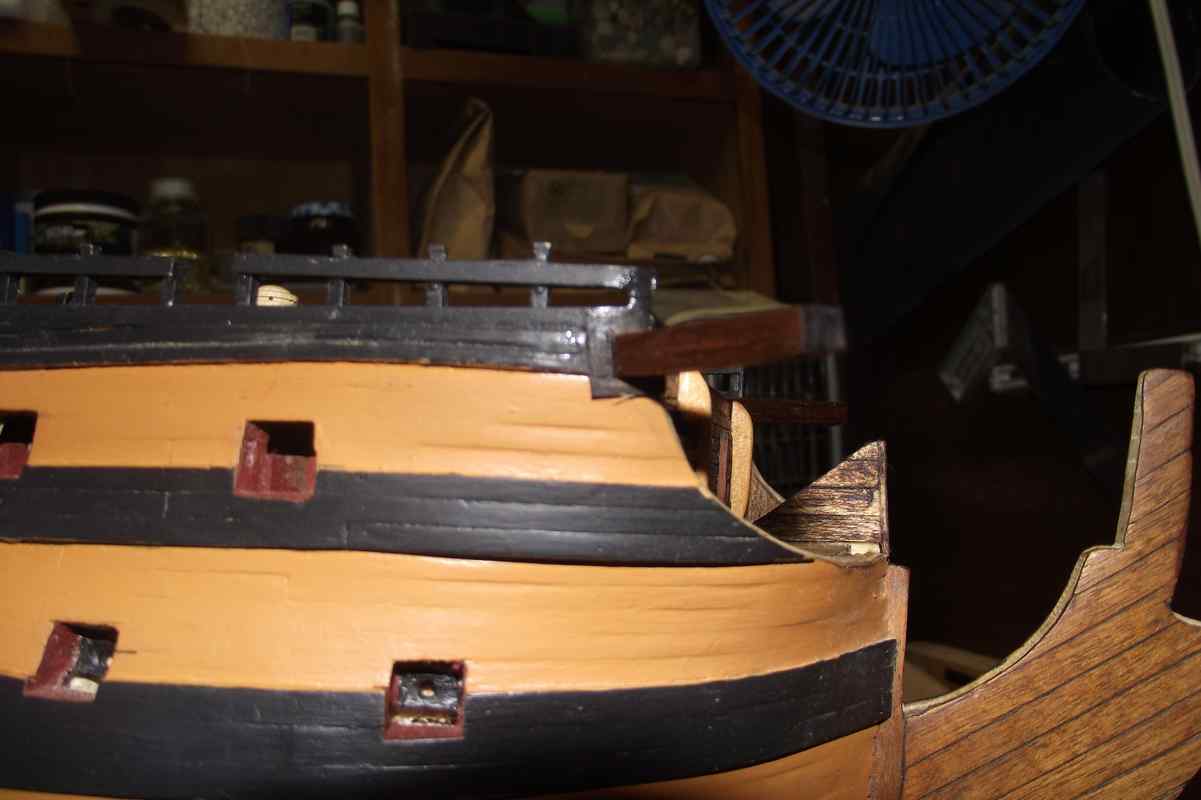
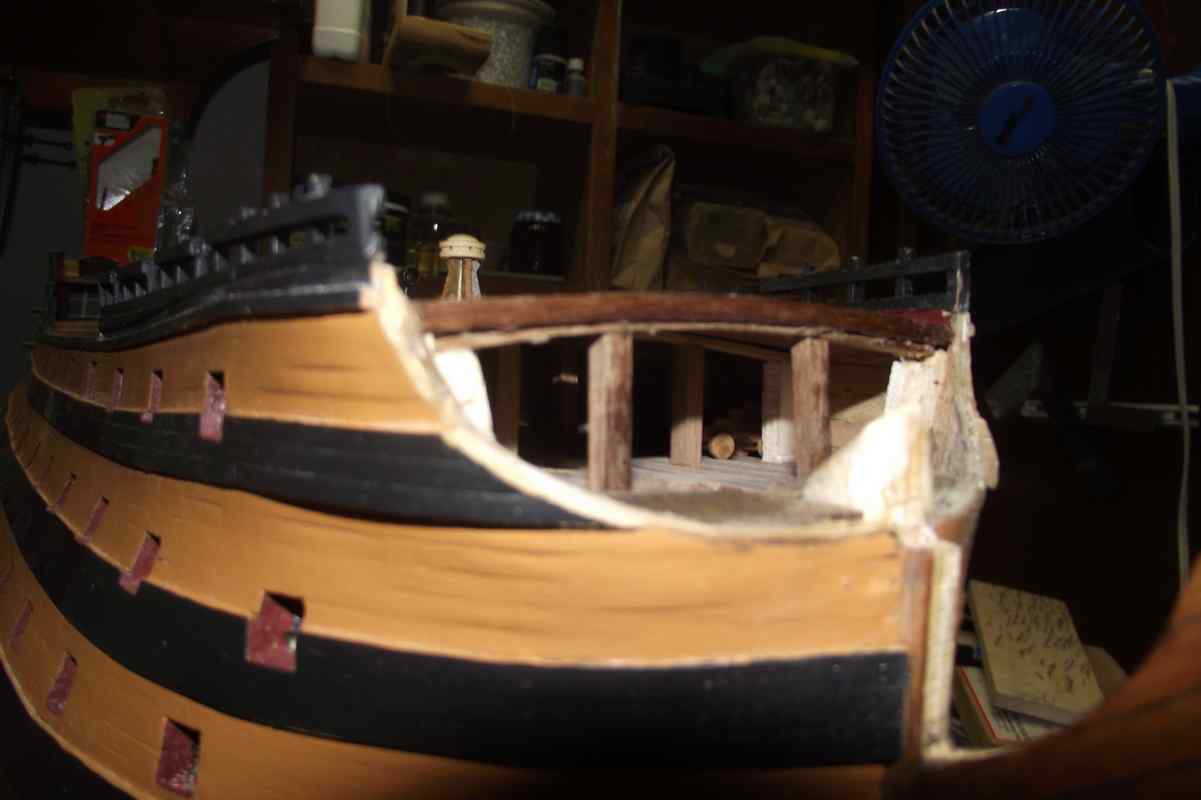
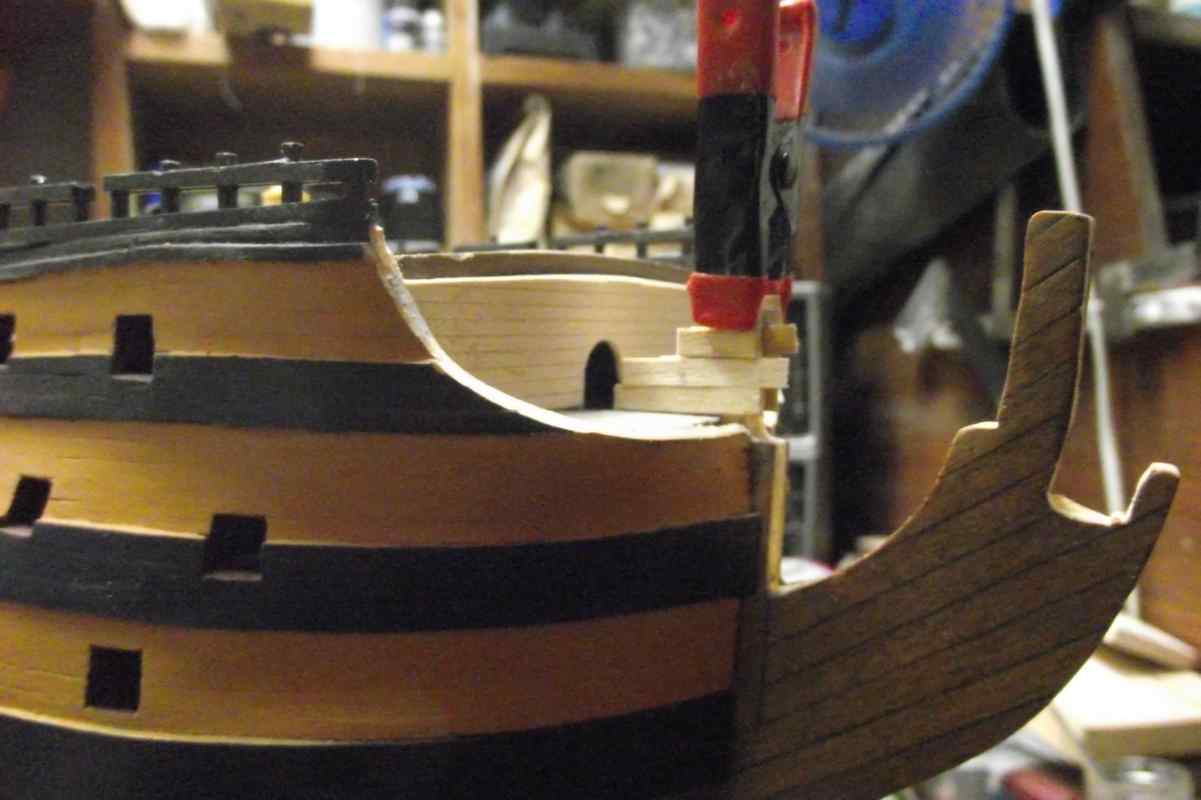
Hello there, mates!
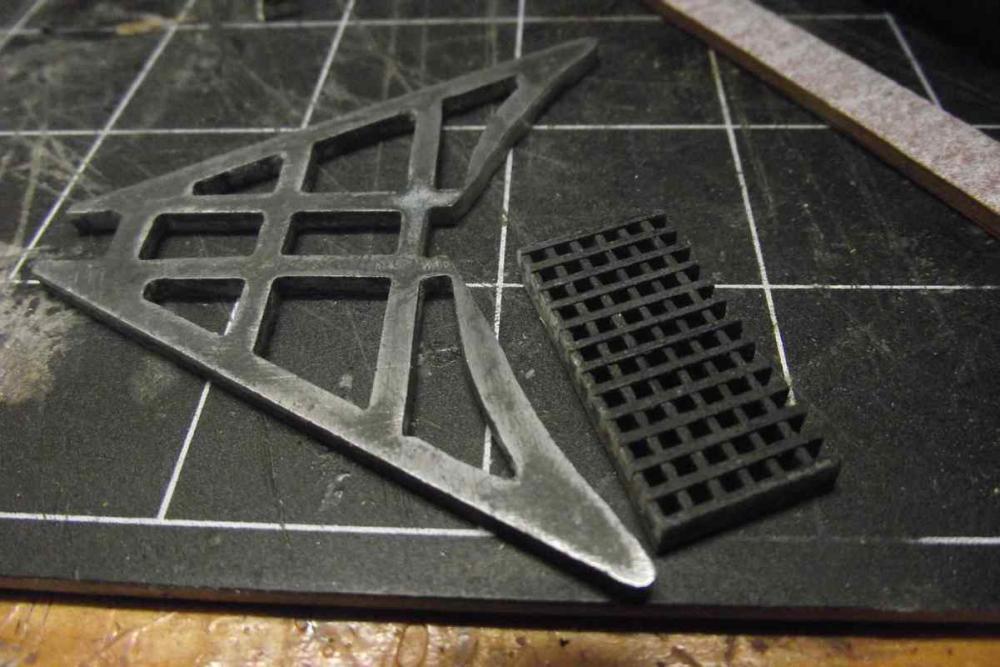
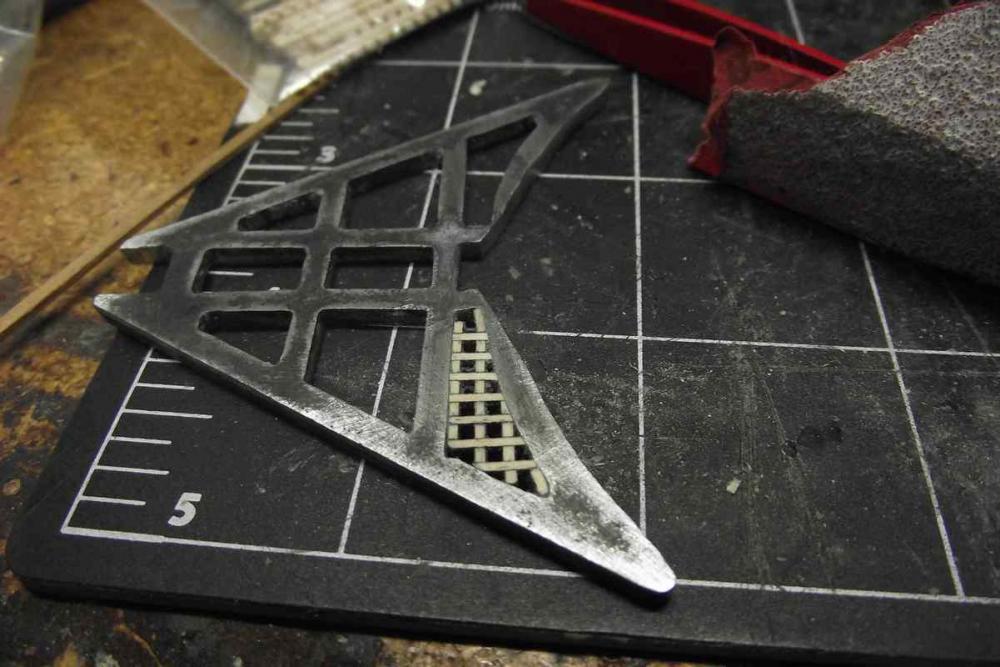
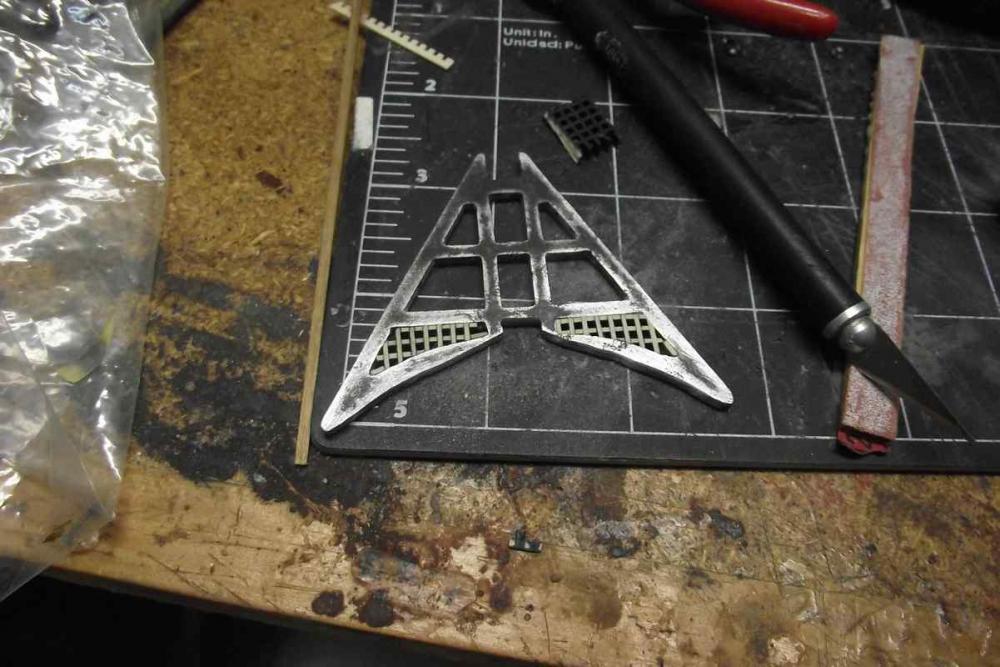
Another step I wasn't too excited about, was opening the sides of the bulwarks at the bow, so those large pieces of wood that support the anchors (English name, please?) could be fitted.
Here they are
These pieces taper a bit at the inner end.


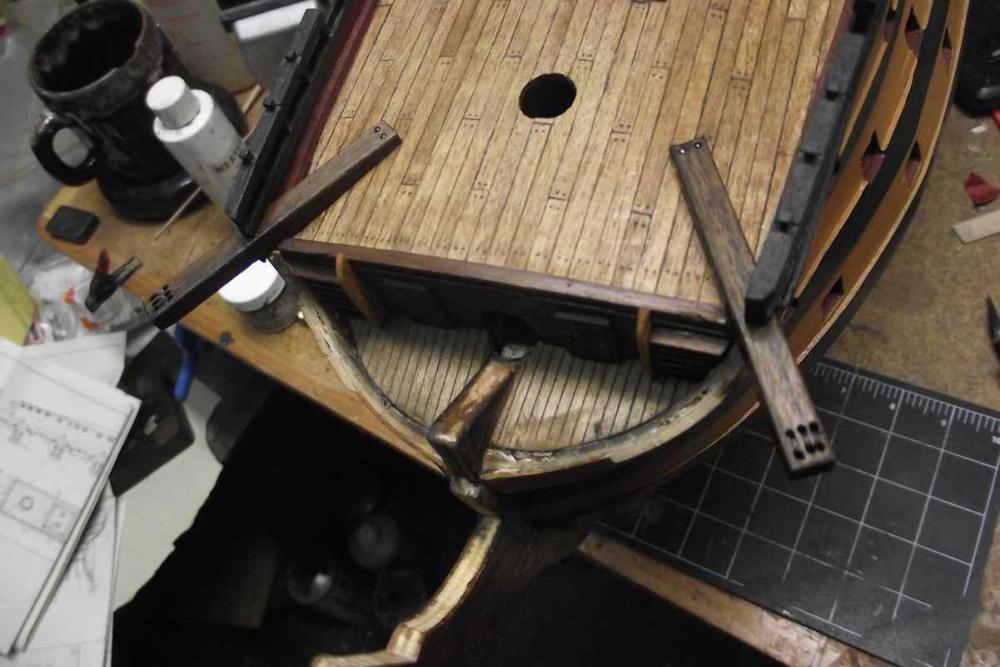

Thanks for visiting!
Ulises
- Elijah, CaptainSteve, Sjors and 1 other
-
4
-
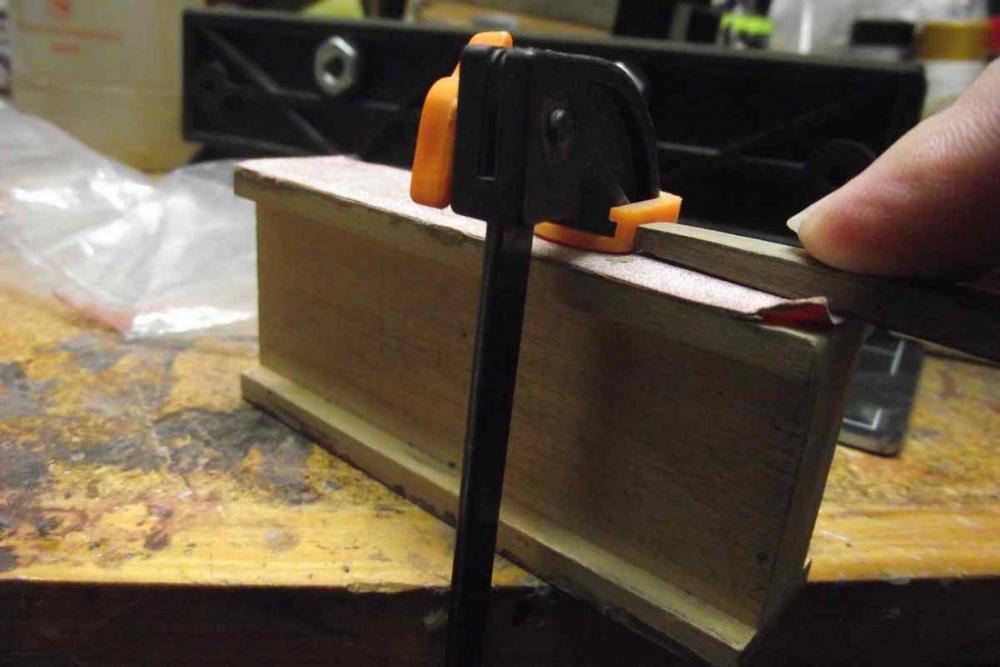
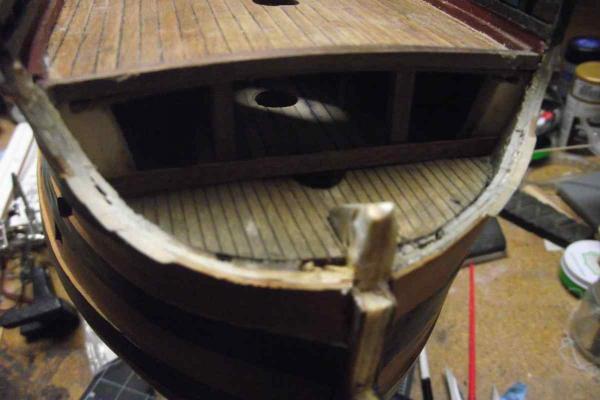
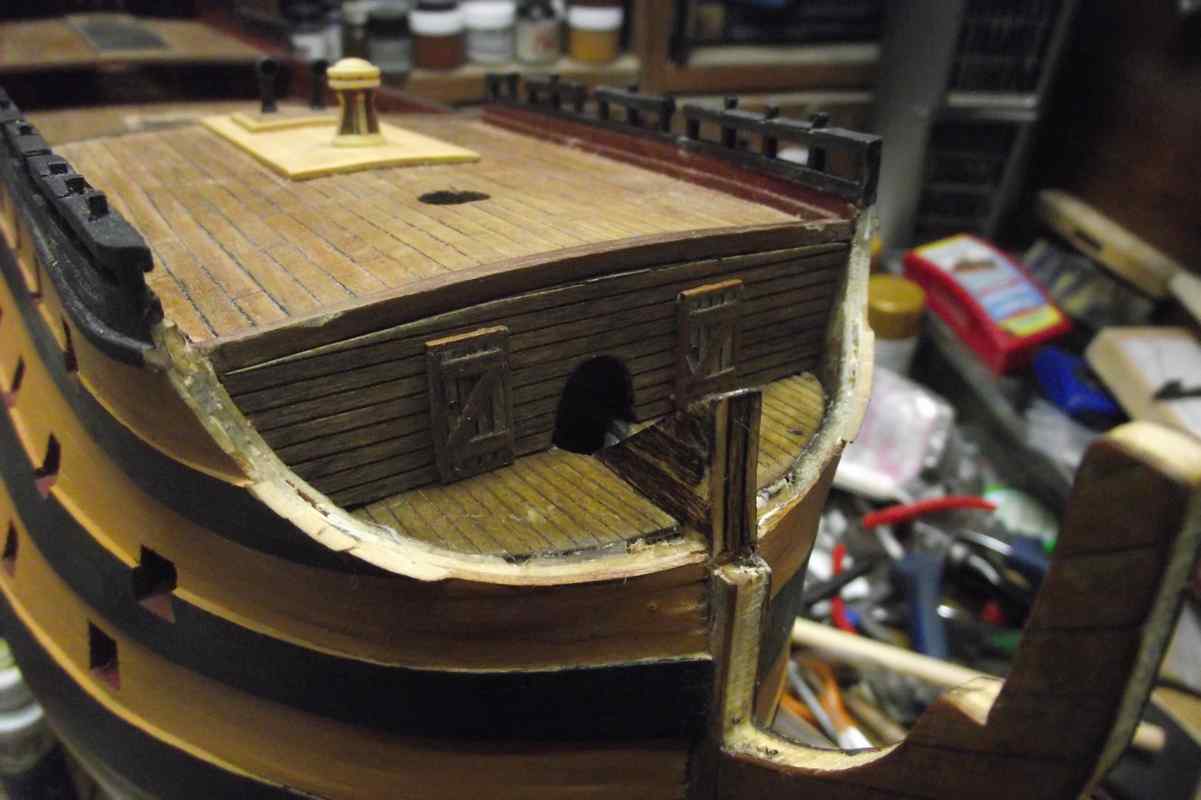
Addendum to previous post.
Completed the bow area with the steps. (I took some liberties here also. There was no way they could be fitted as per the drawings)


Thanks again!!!
- marktiedens, Altduck, CaptainSteve and 5 others
-
8
-
-
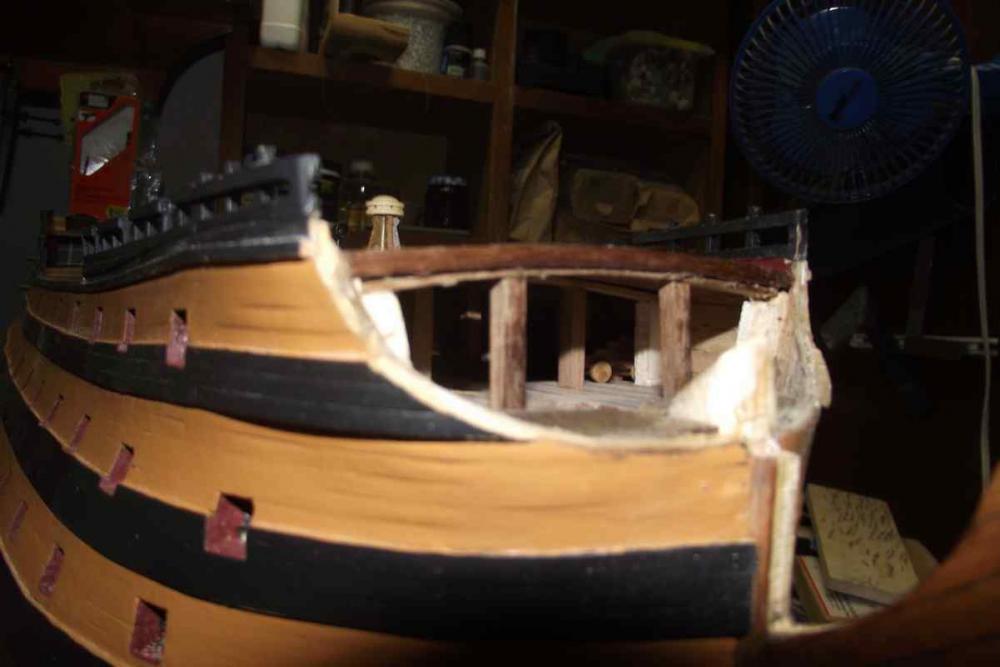
Thank you Keith!
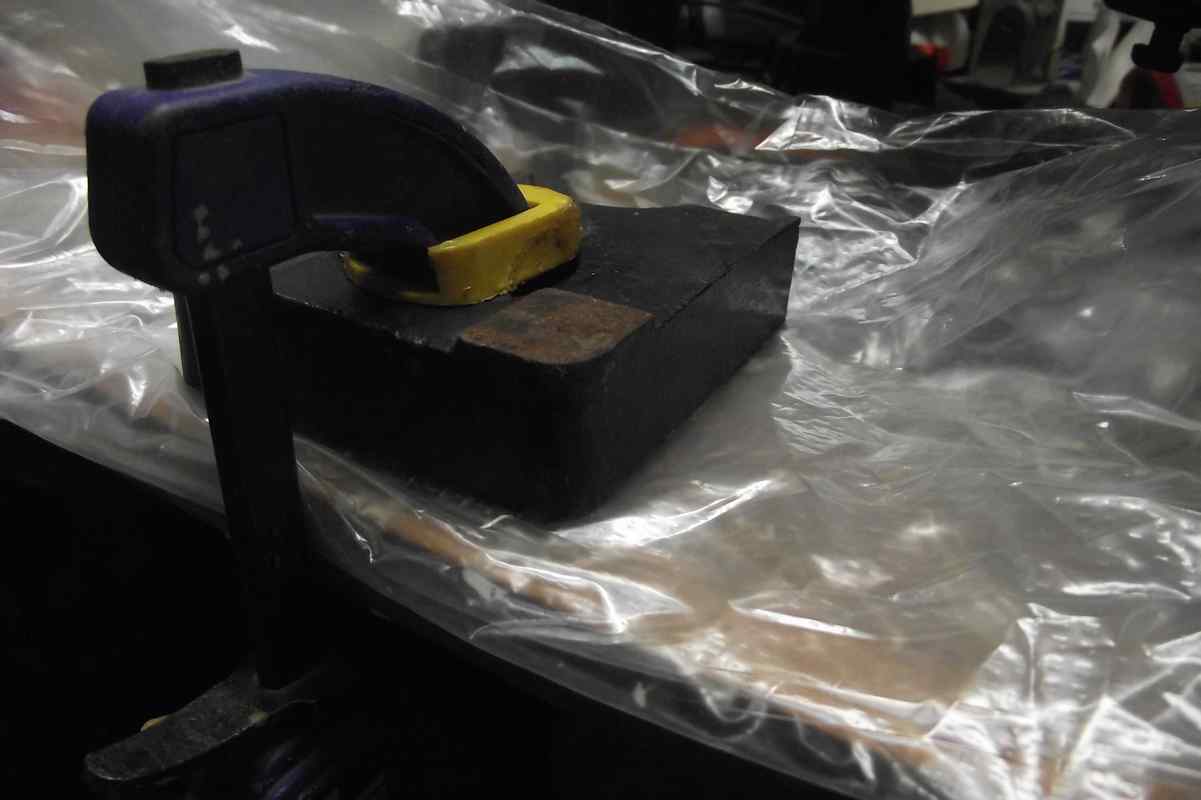
The problem here was the wood. I opened a small hole with a file and then used a small sanding drum to widen it. The wood started to fly in splinters. Part of the problem was that it had no back support. As you can see in the photos, there were only a couple of columns behind it.
Cheers!
-
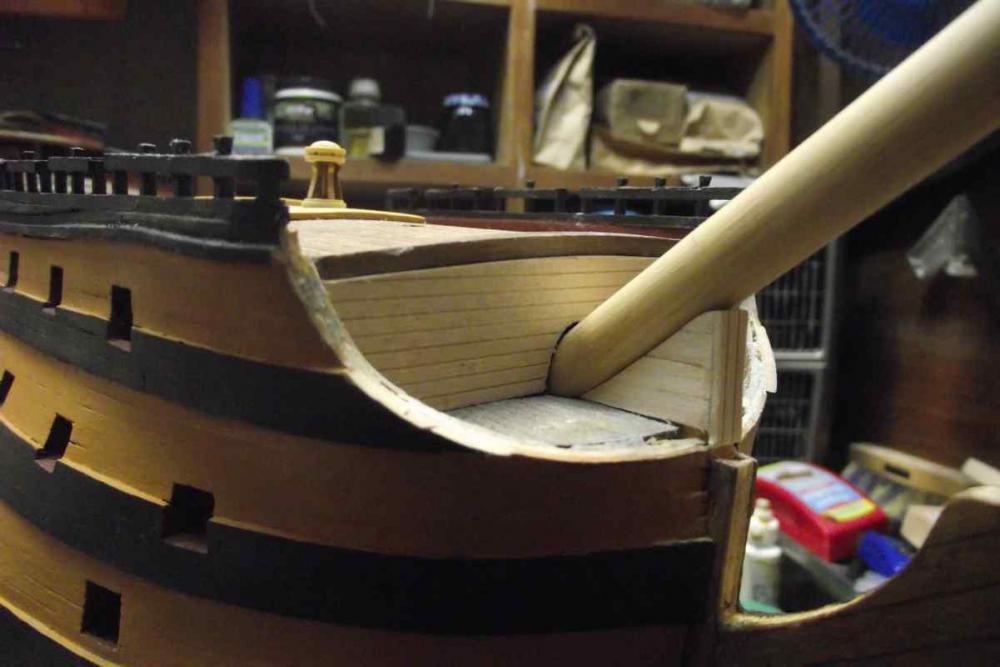
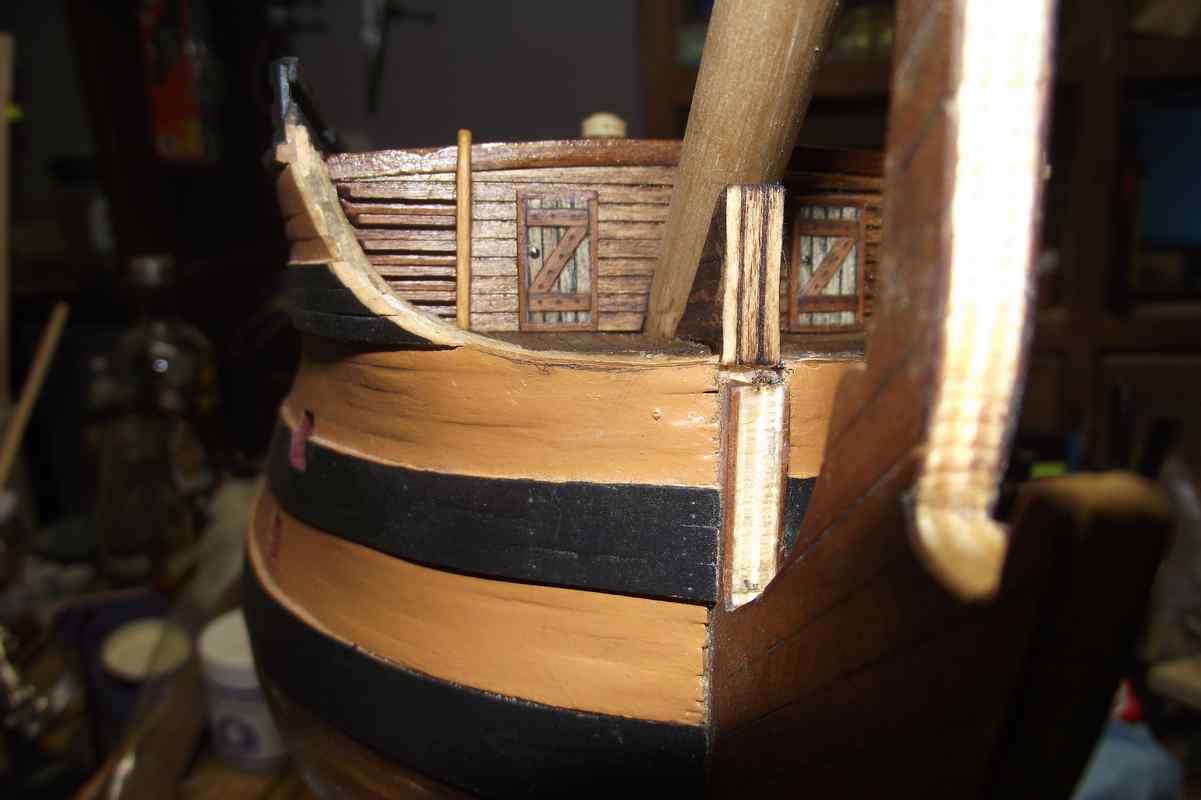
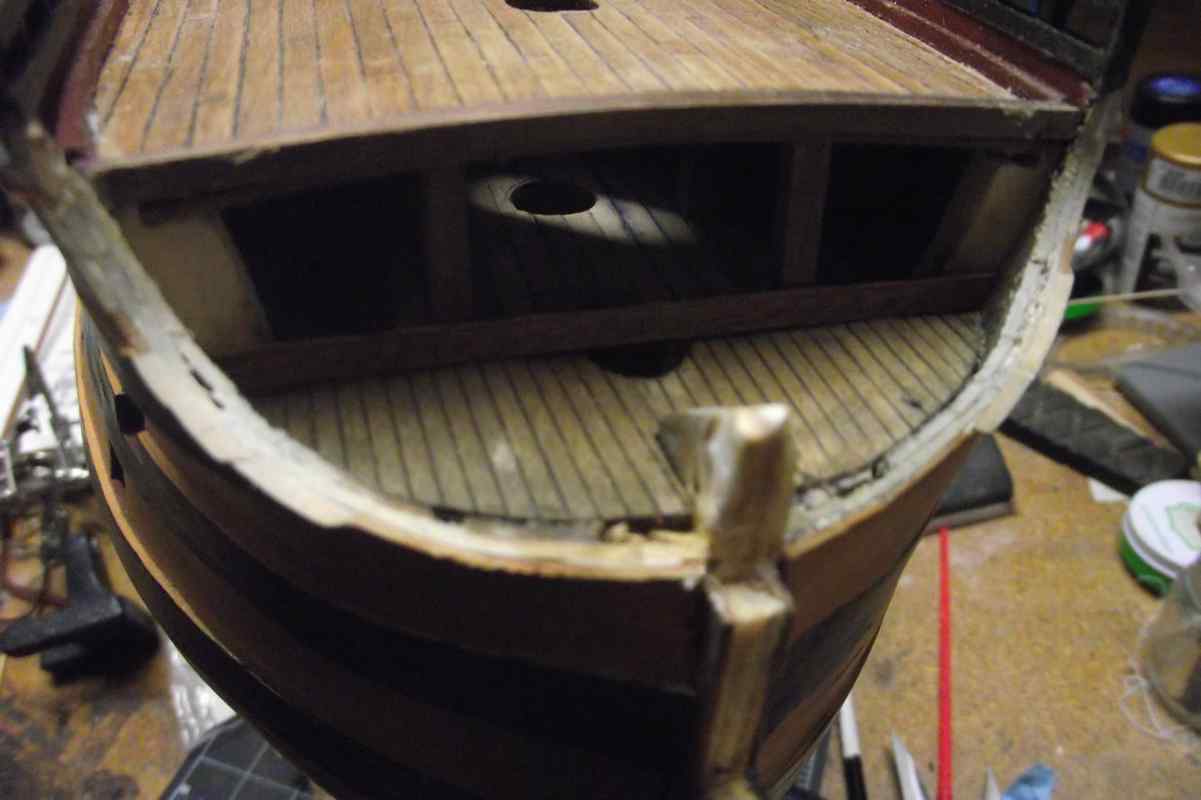
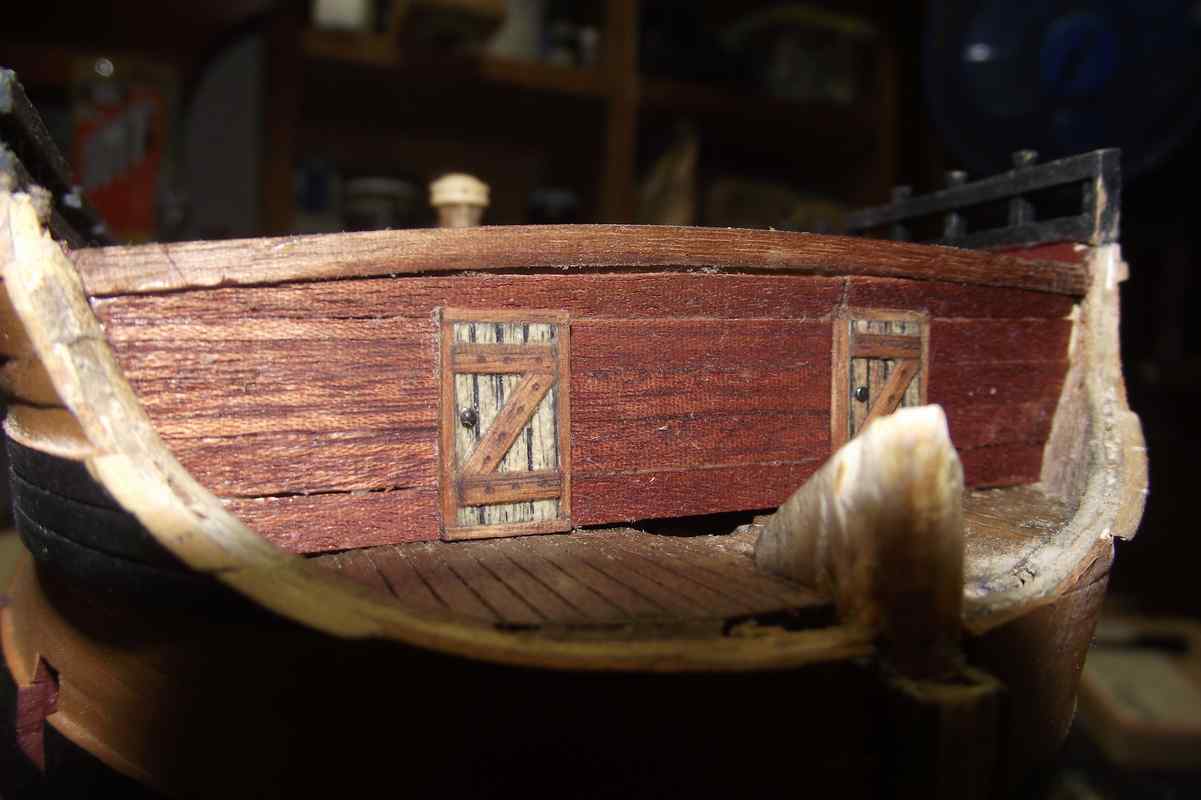
Hello again, mates!
More than an update this is a recount of something I had to do again.
After placing the doors in my last post, I tried to open the hole for the bowsprit to pass through.
This is what happened.
Ouch! It was a tough call, but it has to be re-done. Fortunately, I managed to save the doors.
So I removed the old planking and start over.
I am going to shamelessly confess that this time I am cheating. I will use again the pre-scribed balsa wood that I have in hand for this job.
I am here gluing some business cards in the back for added strength.

Actually, it was more work trying to fit exactly this part on all four sides plus the bowsprit opening.
Here I am placing a mock bowsprit. Had to add a couple of wood pieces so the bp could make full contact with its support.

Fixing that fix so that it looks good.

Things start to look better.
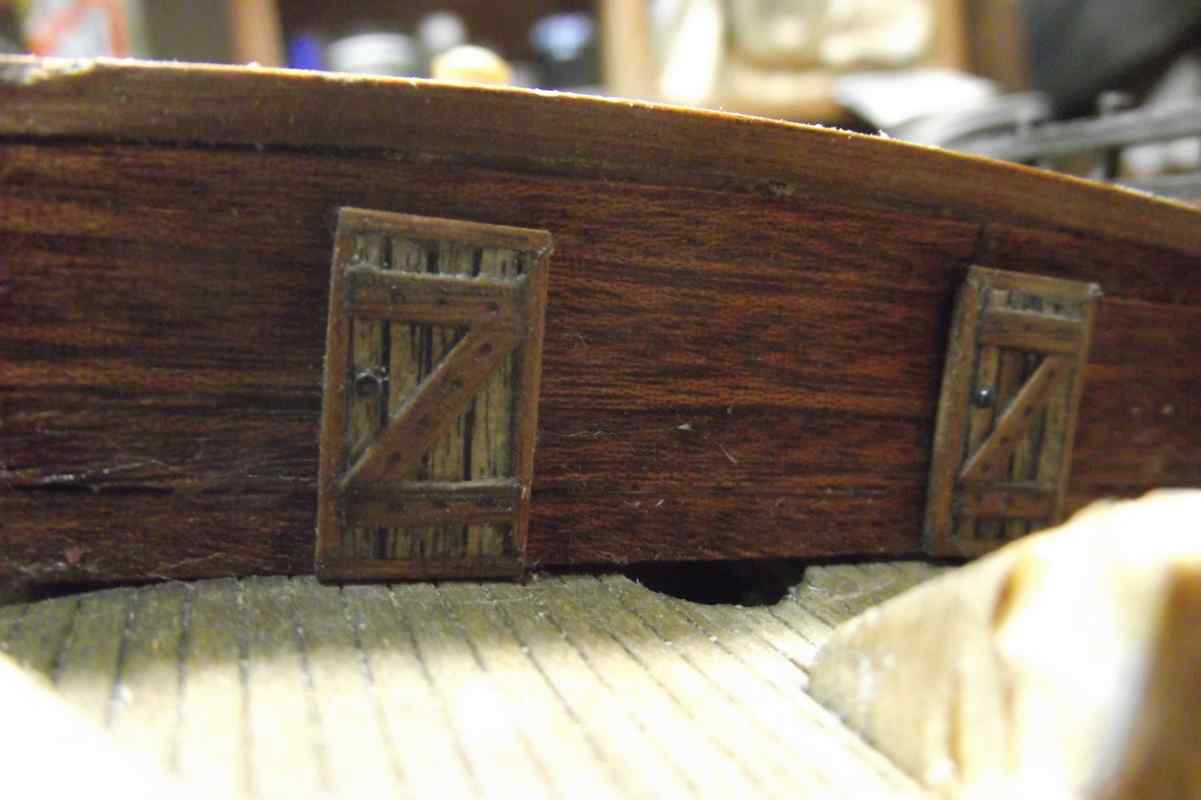
With doors attached. Which looks better....?
This...

... or this?

Thank you all for your continued support and encouragement. Badly needed!!!
Best regards
Ulises
-
-
Hello Don.
Thank you and all who replied, for your kind words.
Heller's Royal Louis in 1/200 if I remember correctly, was a pleasure to build. I gave that one to a very dear friend.
To glue dissimilar materials I always use epoxy. I try to avoid CA (superglue) as much as possible and use it only for emergencies or desperate situations.
Thanks for watching!
Ulises
-
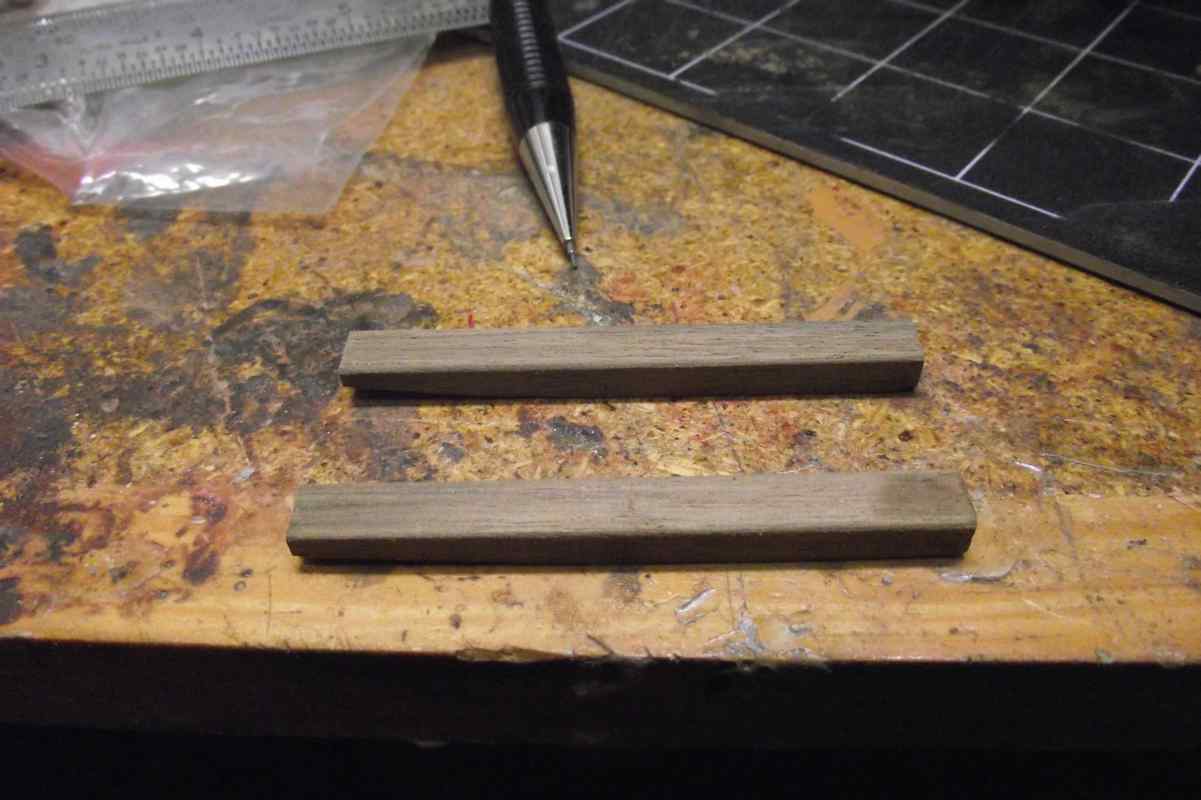
Update and a mini-practicum.
Hello all. A small update on working on the bow area of the ship.
Although I described it before in another thread, I will post again here my method of making doors. I hope someone will benefit from it.
Start of planking/closing this area.
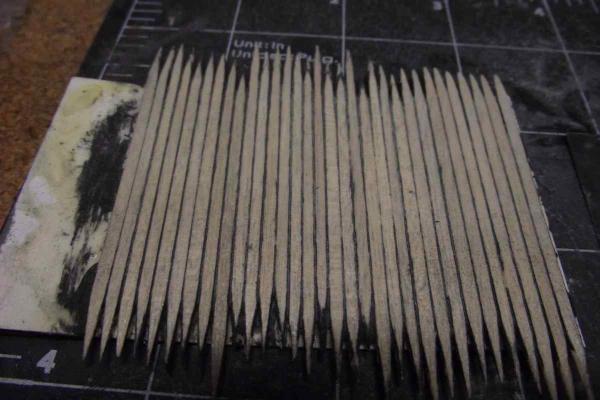
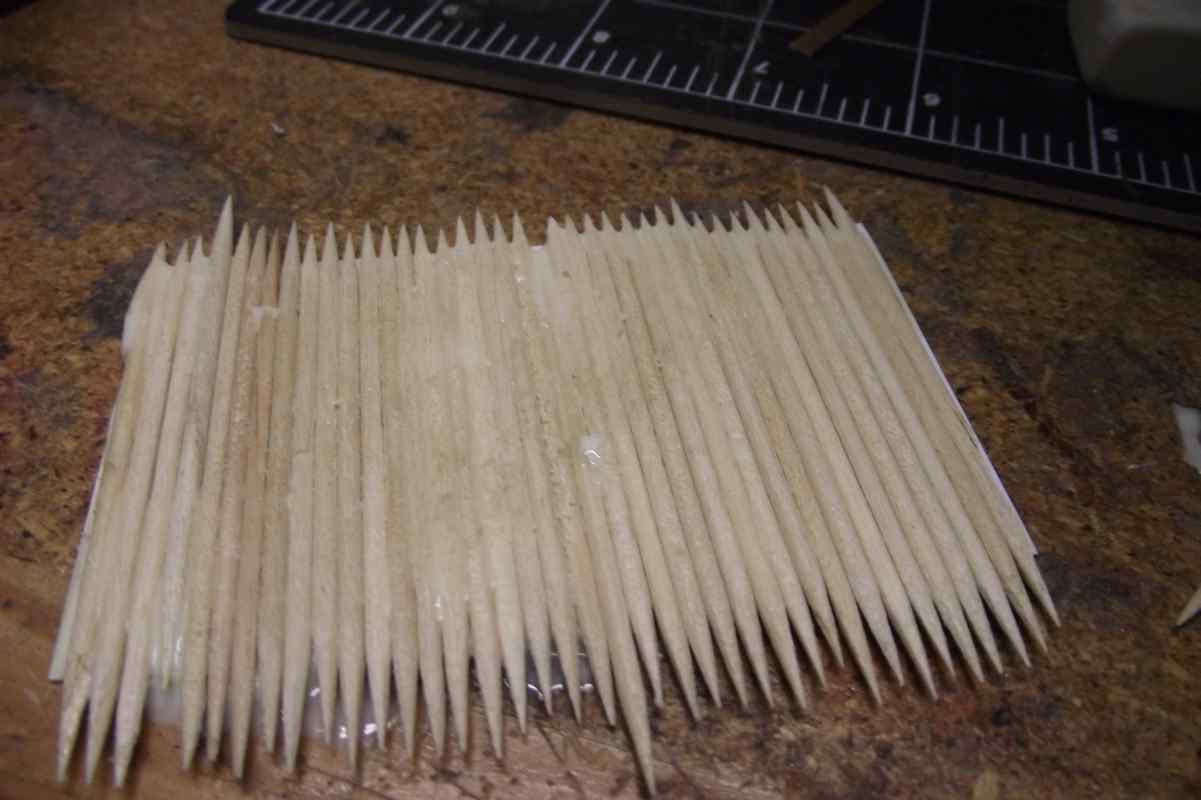
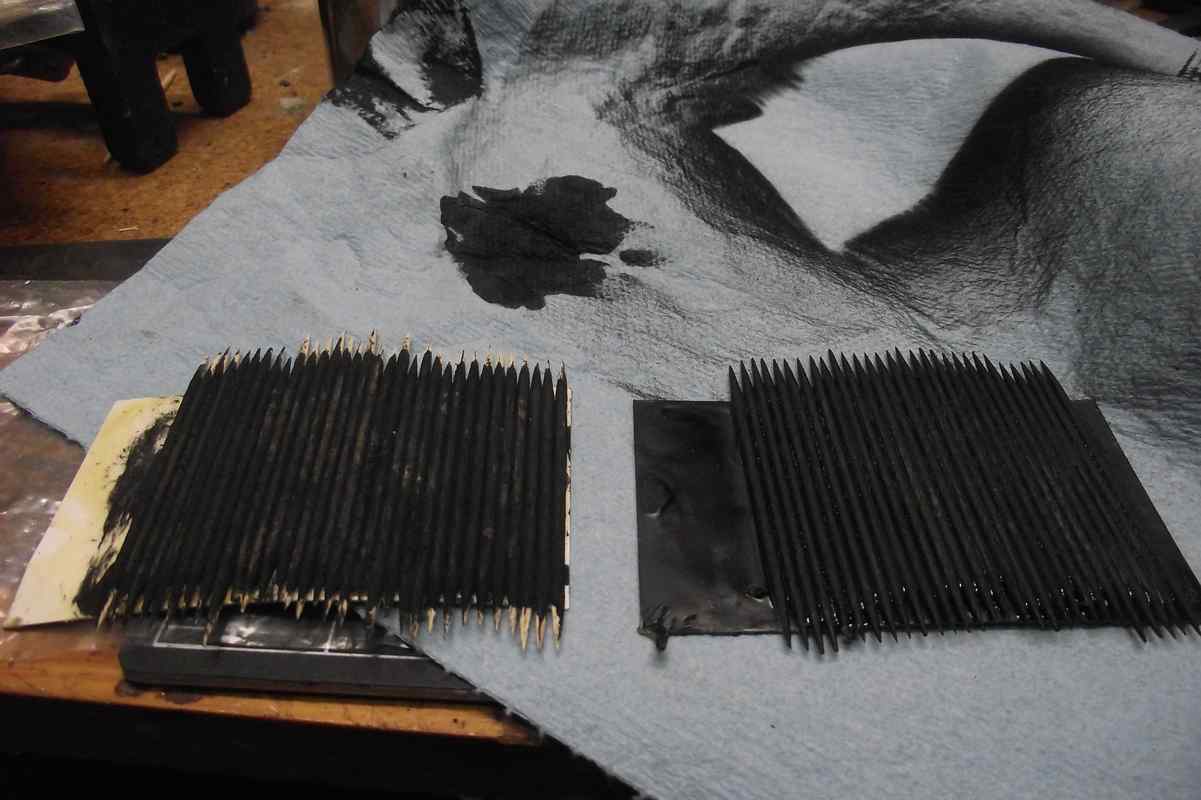
Here is how I make doors.
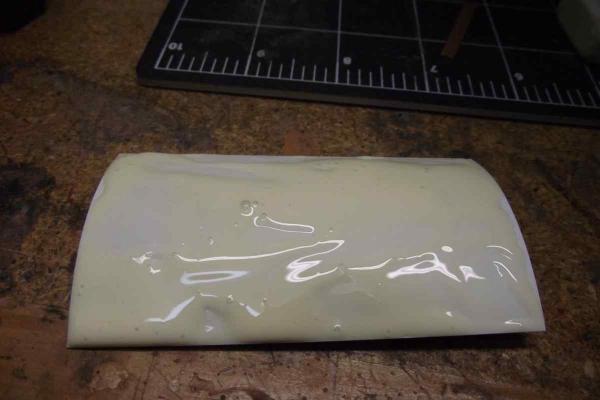
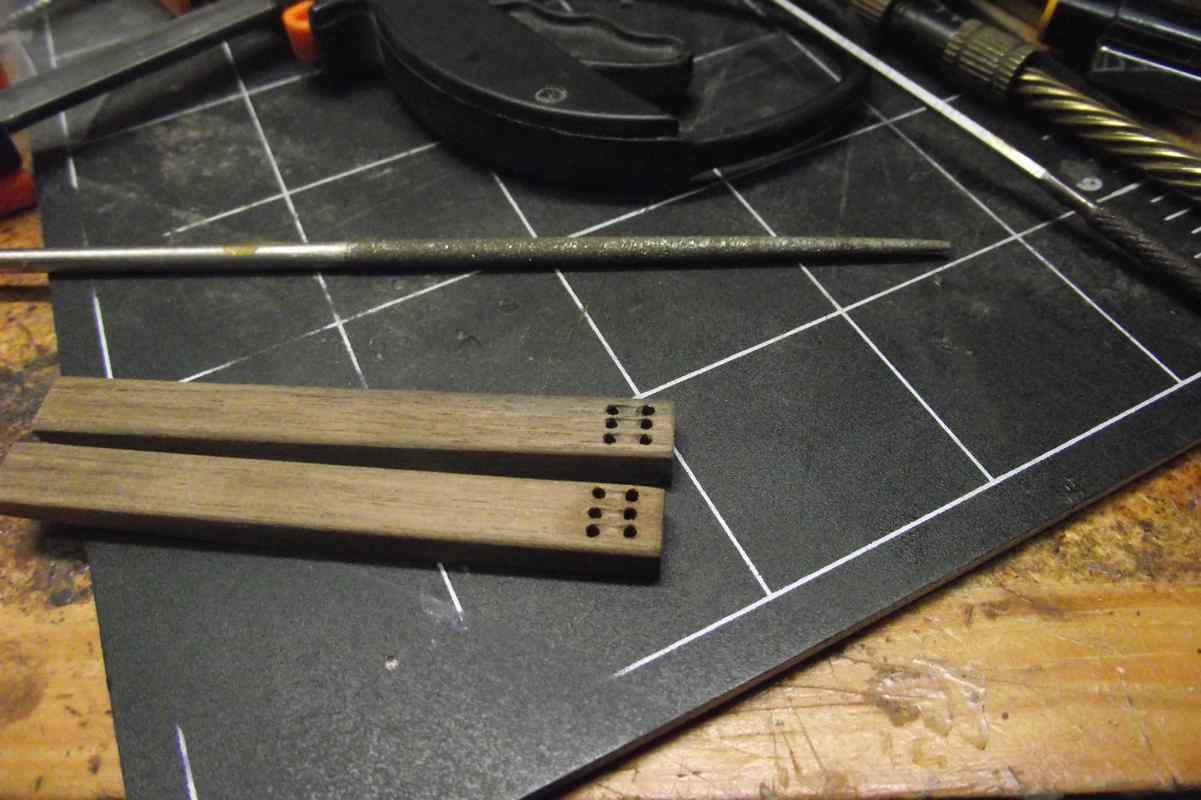
Start by spreading glue on an old business card. (Go to your desk. I'm sure you will find dozens of business cards of people you don't even know who they are. Put them to good use.
)
Now glue a line of ROUND toothpicks. Try to avoid the glue from squeezing through the sides of the toothpicks. The cleanliness of the area between them is critical. (NOTE: The photo here looks exactly the opposite to what I am trying to tell you to avoid. It is from a previous attempt.
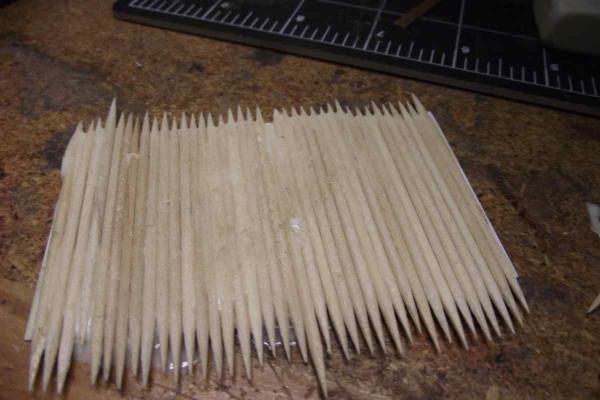
Clamp and let dry overnight. The wet card will try to bend like in the photo above. This will help to prevent that.

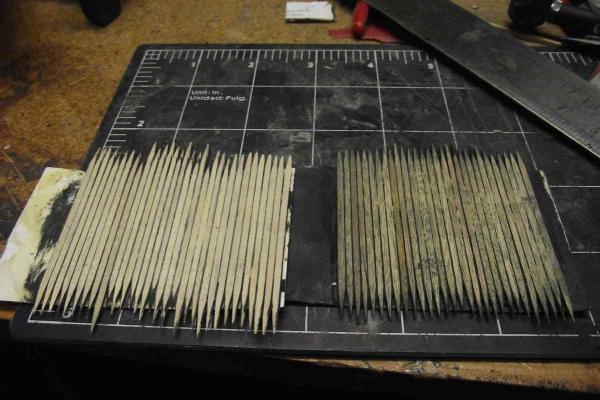
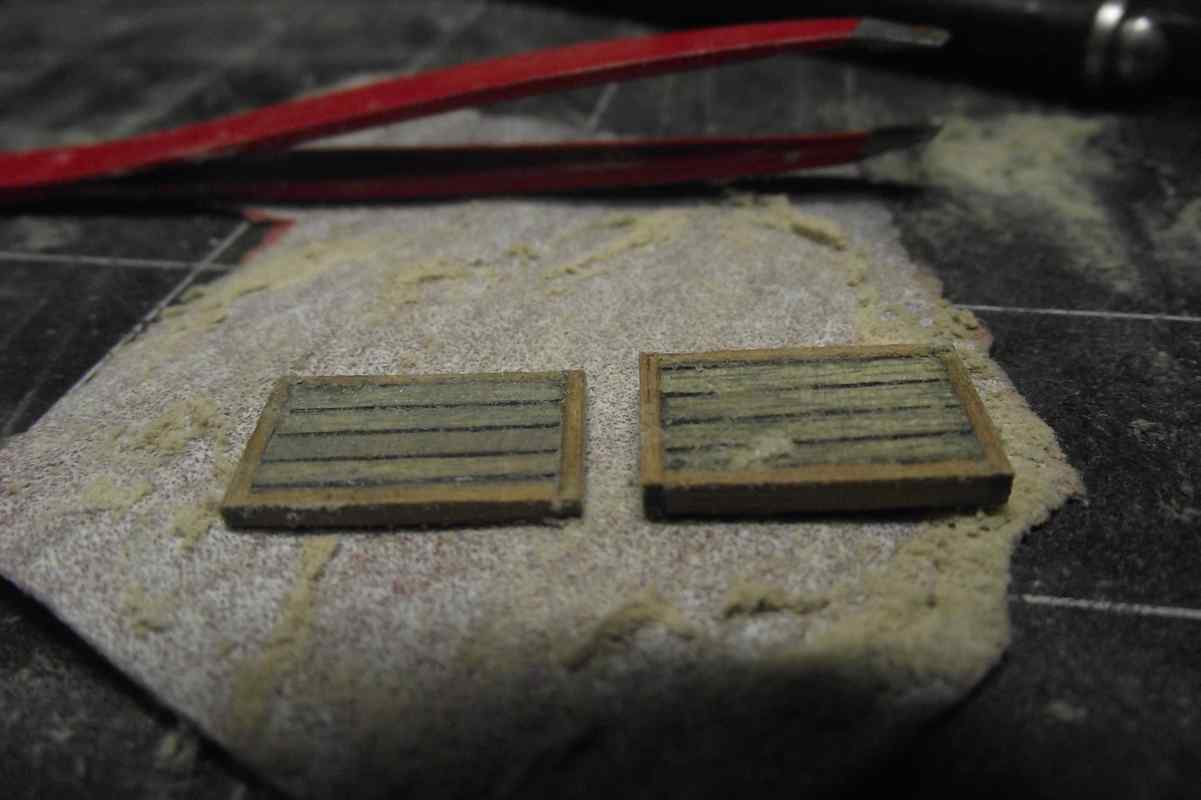
When dry, paint with flat black paint. Here I used on the left milk paint, and on the right spray paint. I did not notice any difference by using either. Important: make sure the paint goes all the way between the toothpicks.
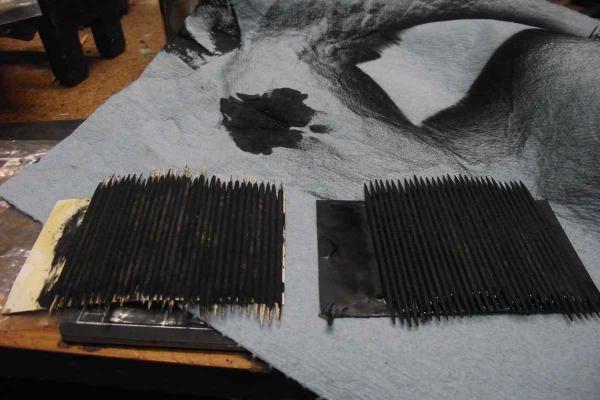
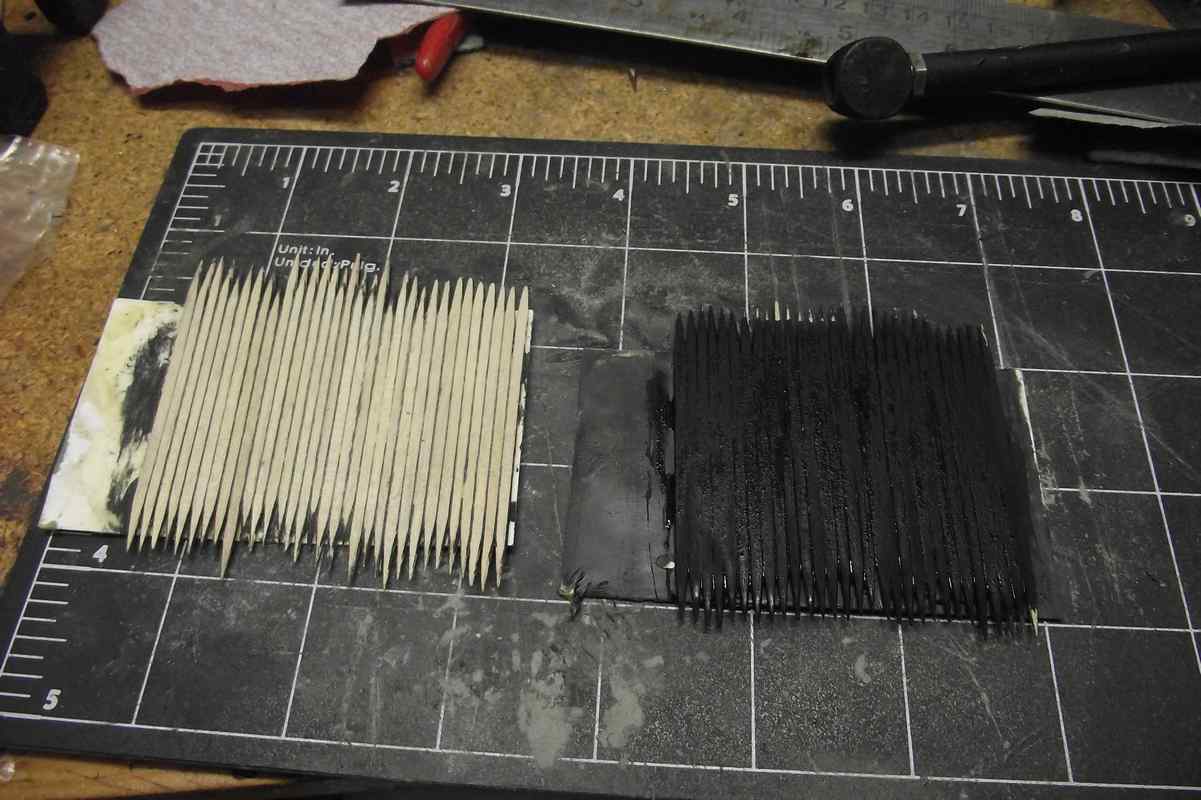
When dry, sand down to about half of the toothpicks. The roundness of them will allow you to make the black line between them wider or thinner, depending on what you want.
Here I made an experiment: after sanding both elements to about the same depth, I re-painted the one in the right to see if there was some difference after sanding it again.

Here is the result. The one in the right is the re-painted one, which I like better. To me it has more "personality"
Now cut to size

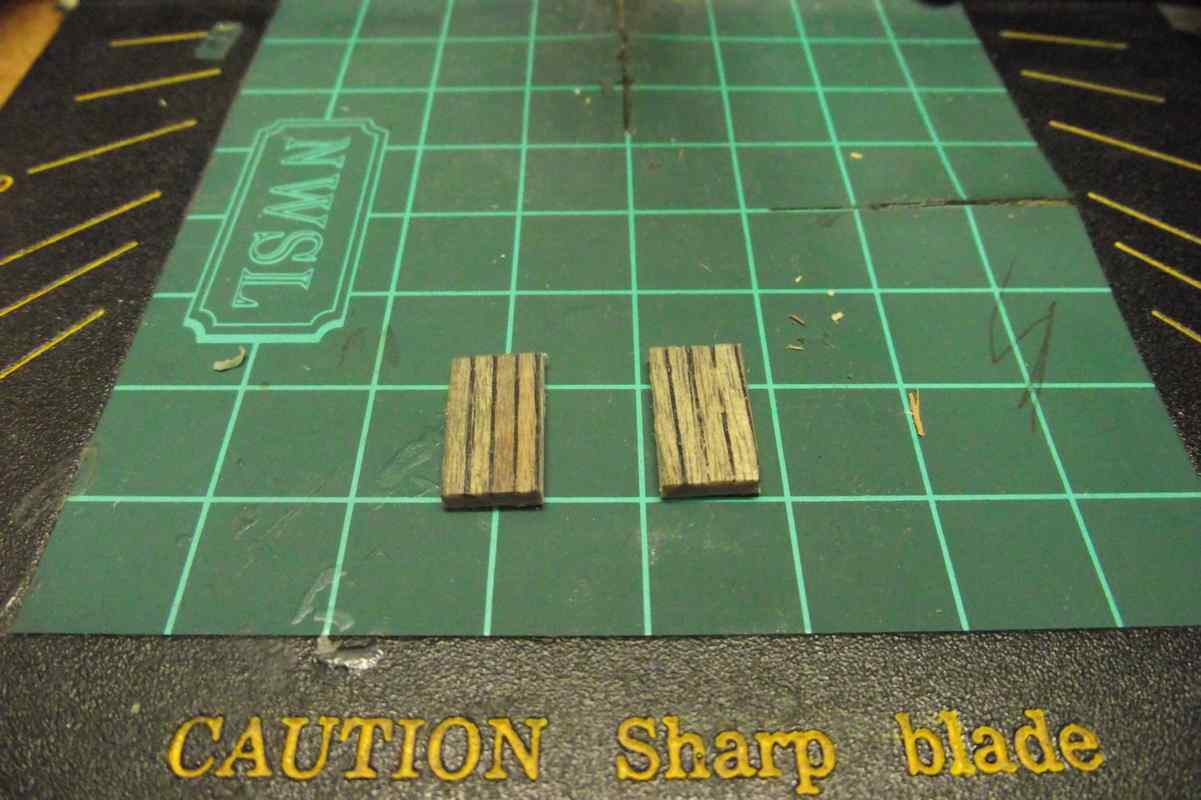
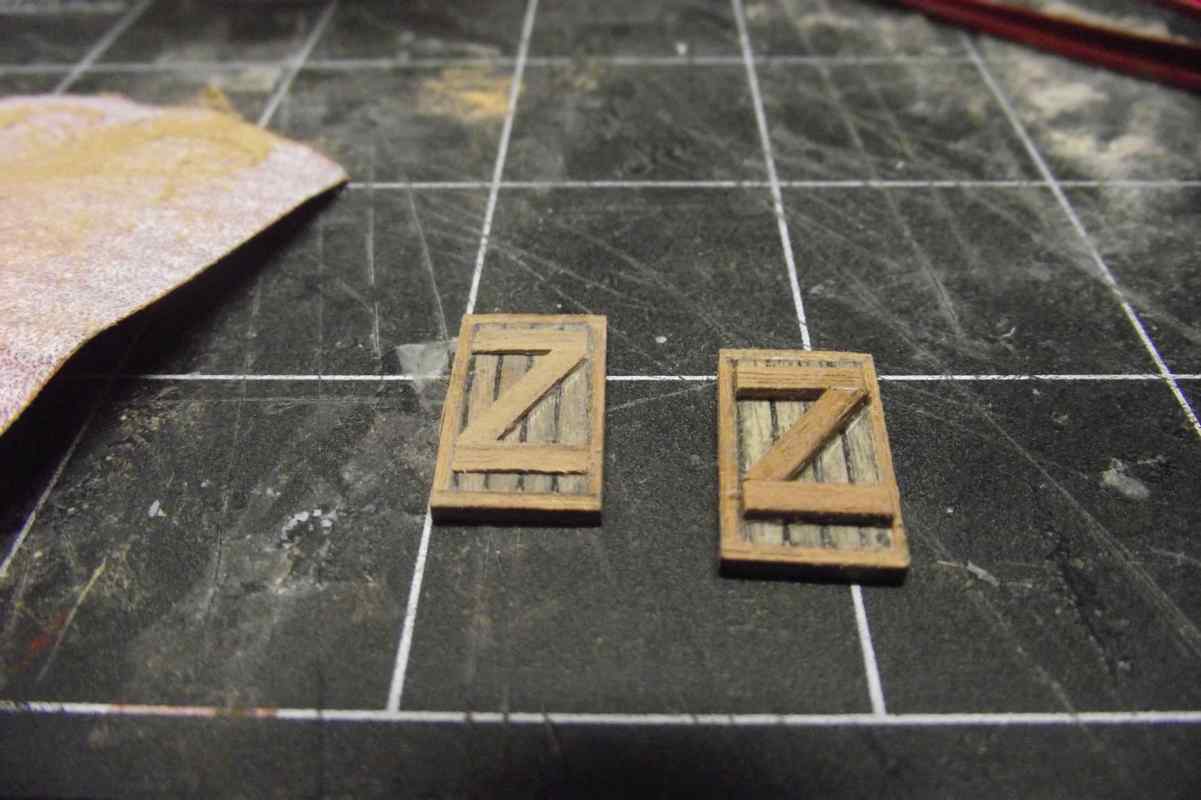
Here I added frames and sanded down a bit to reduce thickness.

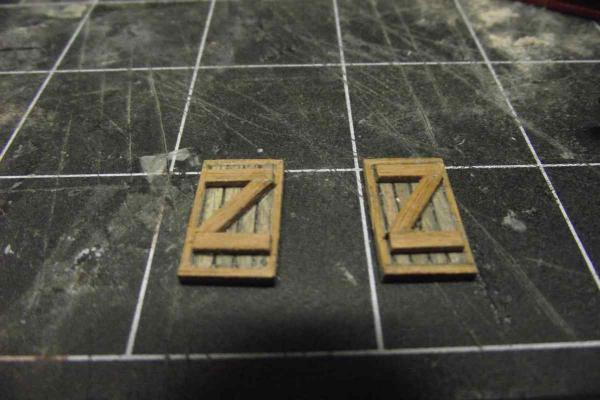
Here I am sanding down the "Zs" to reduce thickness.
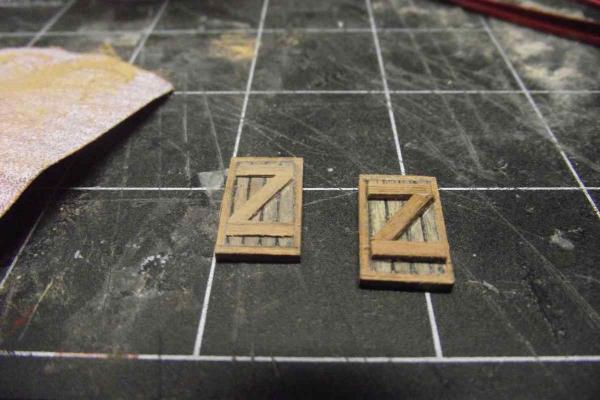
Drill small holes on the wood. I put a drop of Boiled Linseed Oil on a piece of fine sandpaper. The dust will mix with the BLO and fill the holes. This will make the effect of plugs. Great for deck planking.

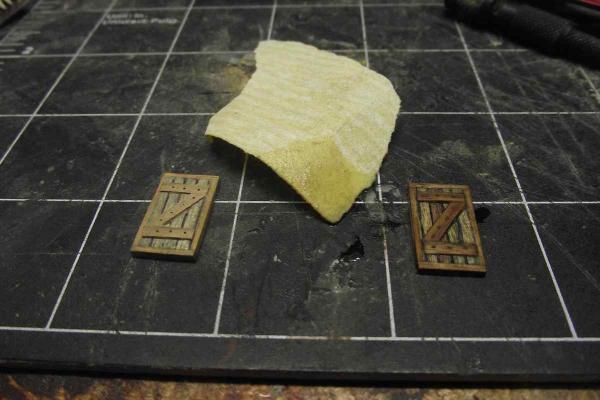
Doors ready and in place.
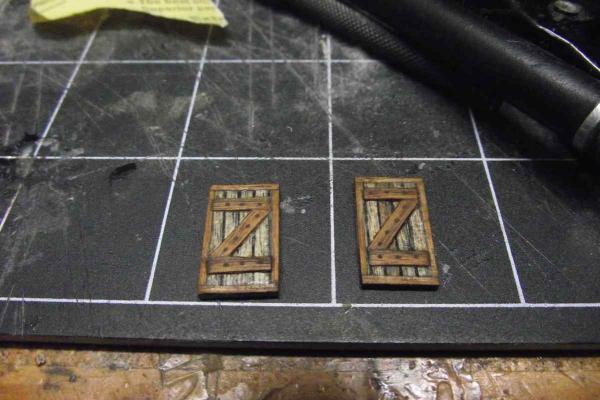


Thanks for visiting!!!
Best regards.
Ulises
- BANYAN, GLakie, CaptainSteve and 9 others
-
12


HMS Sovereign of the Seas by Sjors - DeAgostini - 1:84
in - Kit build logs for subjects built from 1501 - 1750
Posted
Sorry to be late! I went to the wine shop to get something to further enjoy this build.
SotS Is in my wish list, as you can see in my sig. Will follow your build closely as I'm sure it'll be a masterpiece!