All Activity
- Past hour
-
 GGibson reacted to a post in a topic:
Topsail Ties and Halliards on 16th/17th Century Galleons
GGibson reacted to a post in a topic:
Topsail Ties and Halliards on 16th/17th Century Galleons
-
GGibson reacted to a post in a topic:
Topsail Ties and Halliards on 16th/17th Century Galleons
-
kgstakes reacted to a post in a topic:
Pretty cool tool: drilling positioner
-
 Completed the install of the 4 planks at the bottom of the hull. The double bends in the planks, both fwd and aft were a little difficult but soaking them for a couple of hours helped. The other challenging thing was getting the right amount of taper and where a mid-ship to start the taper. You can see that when I was done, the port and starboard sides were not symmetrical. I can make up the difference as I finish planking.

-
paul ron reacted to a post in a topic:
Decals for draft markings
-
paul ron reacted to a post in a topic:
Gold solder for brass
-

Gold solder for brass
paul ron replied to Richard Braithwaite's topic in Metal Work, Soldering and Metal Fittings
a pen torch would be more than adaquate for such a small piece. but it seems by the conversation here, color is more important than heat. yes, silver solder would be fine, but some of the color matching sugestions are like killing mosquetos with a hammer. at the scale and size of the piece, the weld would appear insignificant. an eopxy fix would be more than sufficient but it's just too simple a solution. -
 Knocklouder reacted to a post in a topic:
Bluenose by Knocklouder - Scientific Models/Billing Boats - two-for-one build
Knocklouder reacted to a post in a topic:
Bluenose by Knocklouder - Scientific Models/Billing Boats - two-for-one build
-
Jared reacted to a post in a topic:
Flying Fish by Jared - Model Shipways - 1:96
-
Richard44 reacted to a post in a topic:
HMS Harpy 1796 by dunnock - Vanguard Models - 1:64
- Today
-
 It's already looking pretty busy in that engine room! John
 -
Such beautiful lines on that hull, mate! Can hardly wait for the next instalment. John
-
 More work on the helicopter. The rear section and pontoons and rotor blades are all Billing. The highly detailed Cockpit and engine are from an OH-13 Sioux (same scale) by Italeri. Quite happy with the look so far. Will only get better with more paint and decals. So not 100% accurate but darn close :0)


-
Phil, I think you're right in thinking that the control box would be in front of the winch rather than off to the side, especially if the side position interferes with the gypsy. John
-
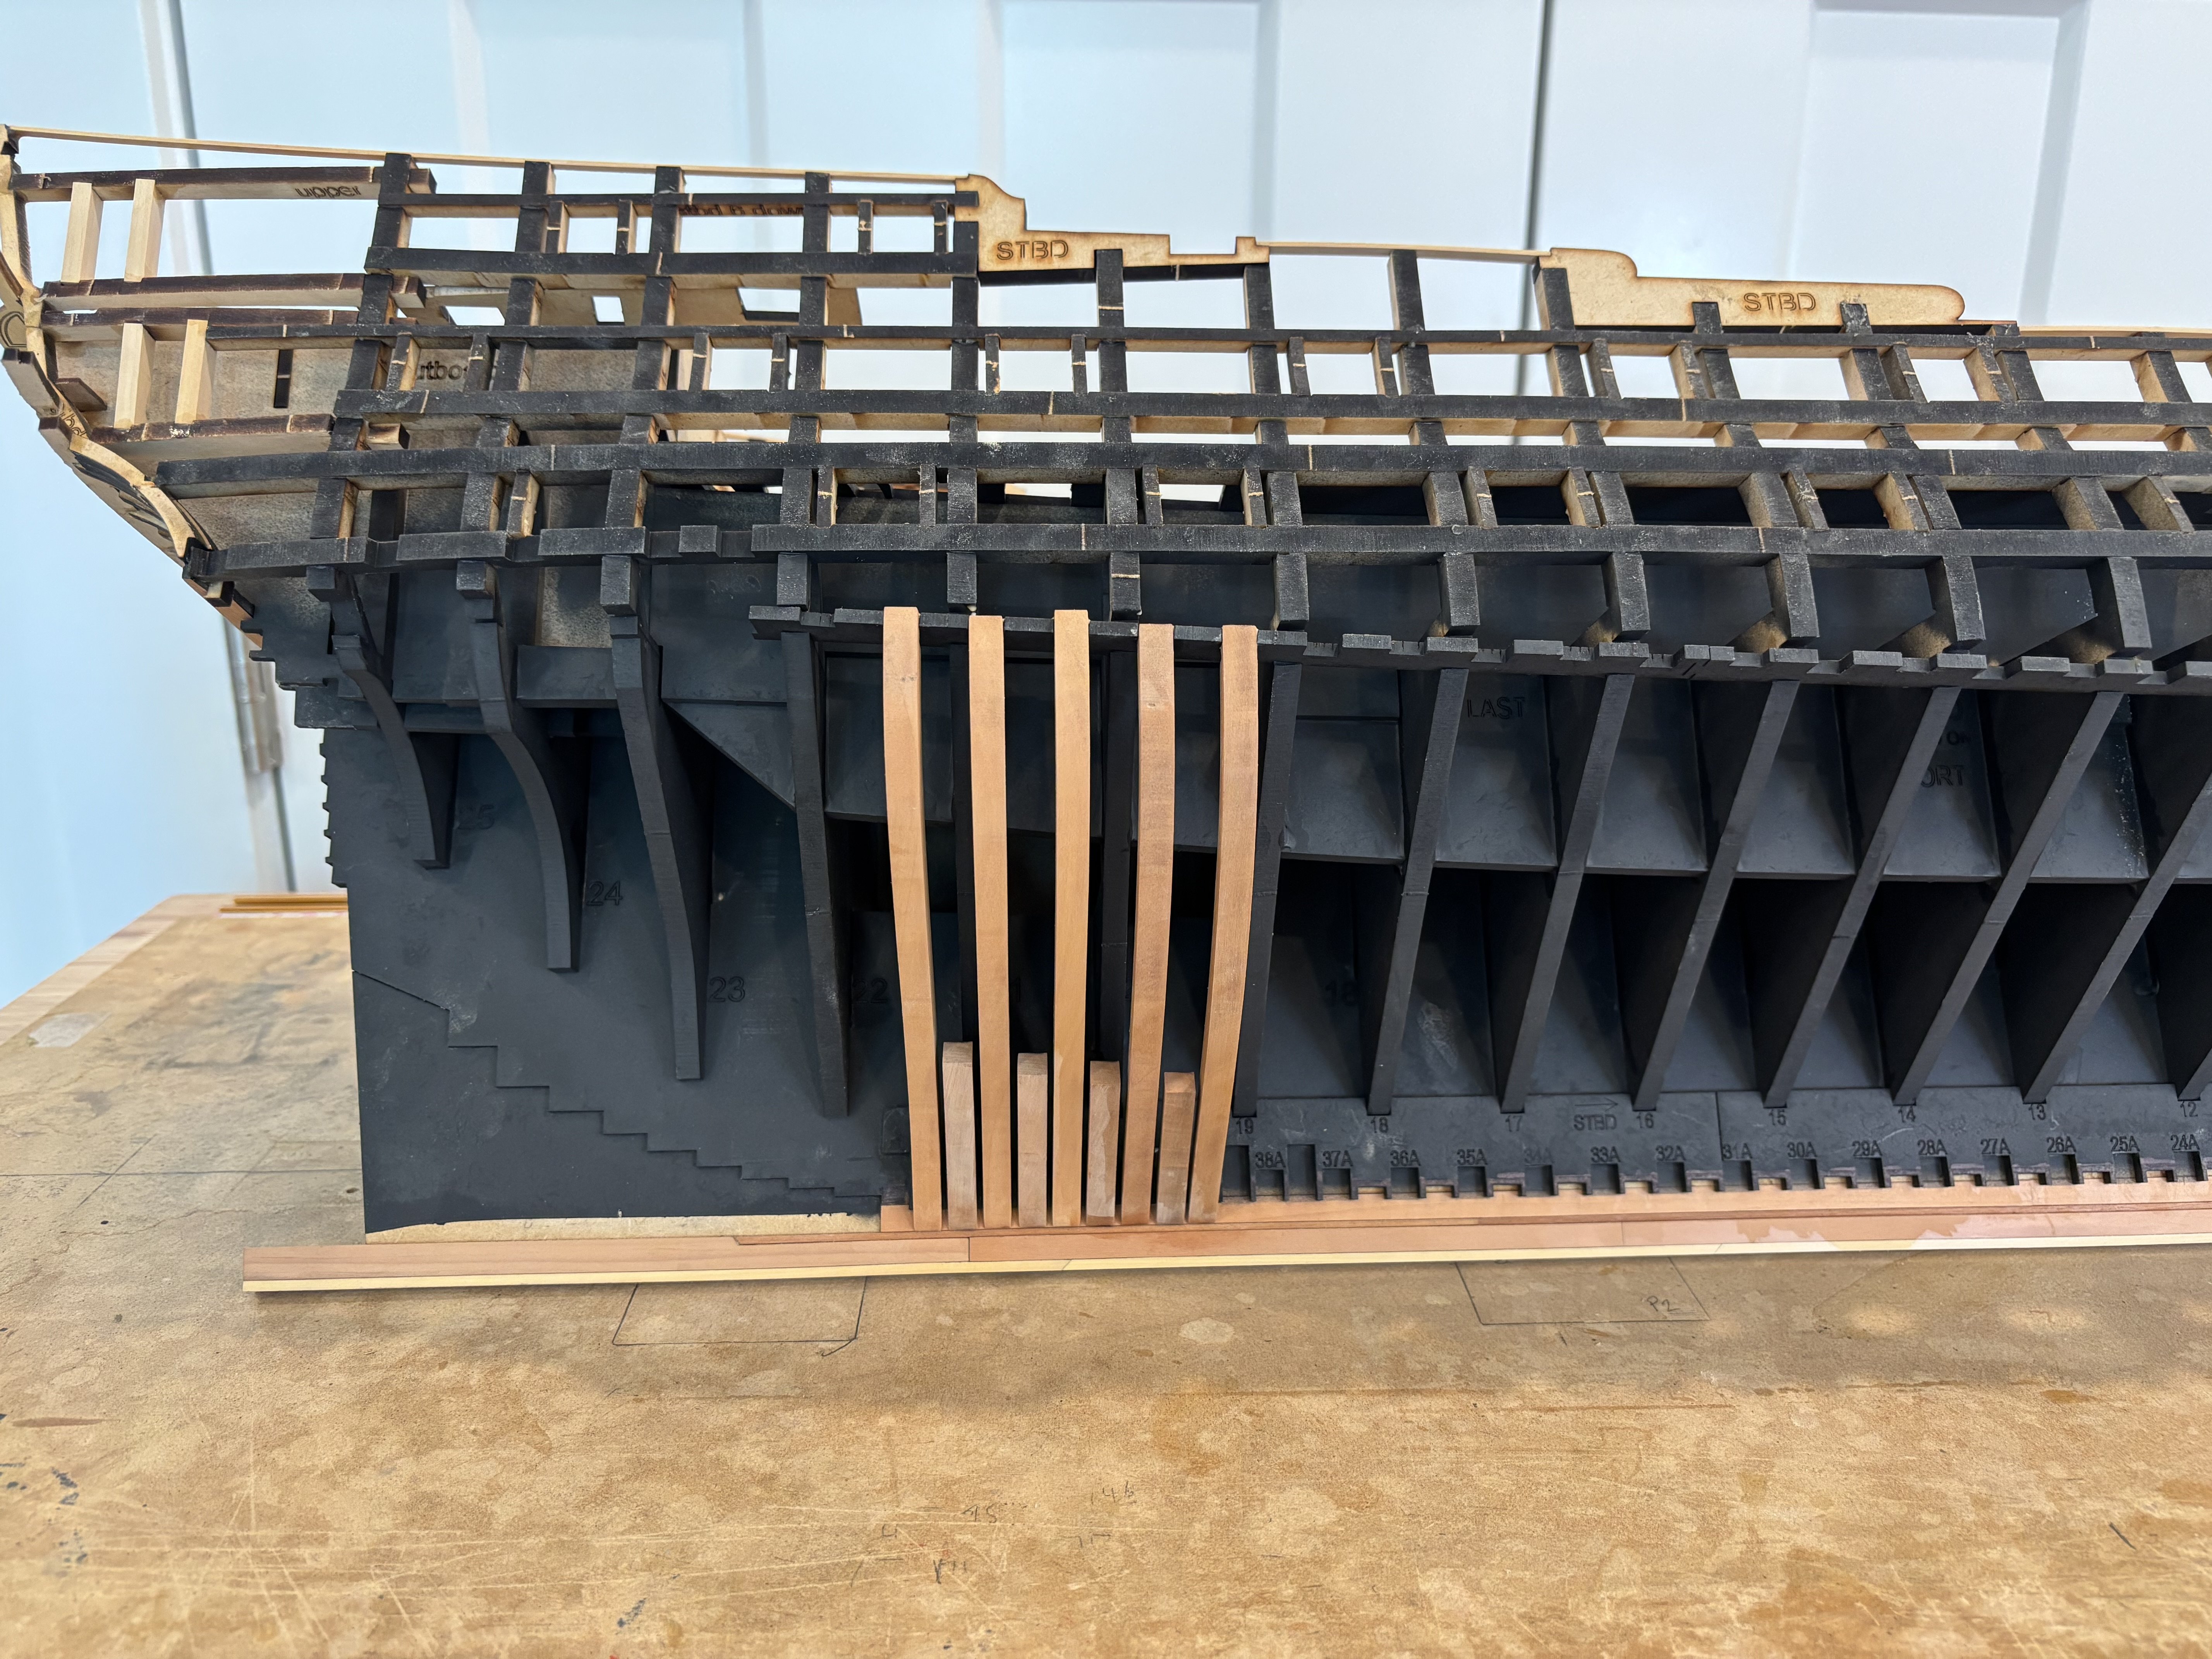
 Making some slow progress. I will finish everything but the small boats. More on that later
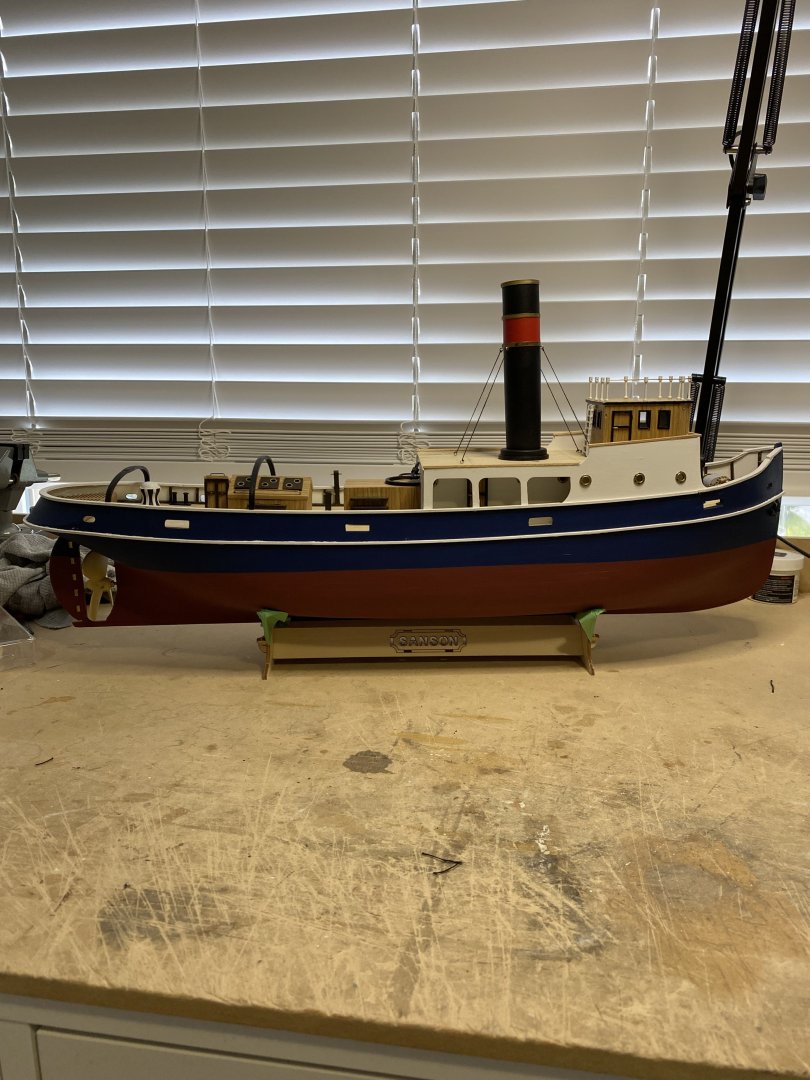
-
 Looks great! hamilton
 -
 Very impressive CAD drawings of the deck gear used on Cape during her Navy days. A lot of detail, going to be fun to see how the scaled equipment turns out. As for the location of the control box, my personal opinion is it looks less out of way of operations being in front the motor between those two large white wheels instead of the offset position. This is incredibly cool. Brian D
 -
.thumb.jpg.6fd4c1b78768bb3efd745ab810936005.jpg)
Gold solder for brass
vaddoc replied to Richard Braithwaite's topic in Metal Work, Soldering and Metal Fittings
These seem to melt at 900 C, whereas silver solder paste is between 600 - 700 C. To my experience, to reach such high temp a larger heat source is needed risking melting the actual piece. I actually had this happen a couple of times. -
 Very nice… I can see myself in that shiny coat. Cool 😎
- 16 replies
-
- 2
-
-
-
- Scientific
- Billings Boats
- (and 1 more)
-
Honestly Phil, your CAD drawings are pretty amazing. Regarding caulking, I ve used in the past Elmers colour changing filler mixed with black acrylic paint. Sanding it all off leaves gray caulking lines. A quick wipe with Tung oil (I suspect any other finish as well or Rennaisance wax which is invisible) makes the lines black again. Vaddoc
- 253 replies
-
- 1
-
-
- minesweeper
- Cape
- (and 1 more)
-
Dear all Thank you all for your comments and likes! I ve been working on the boat, walking a thin line between the Admiral's wrath and getting a few things actually done, so time for another update. Rob Ross used to say that there are no mistakes, only happy accidents. There sure have been many happy accidents so far with this boat! Usually my CAD drafts are pretty accurate but as I move on, I am scratching my head as 1+1 does not always make 2, I cannot figure out what I was actually drafting. But so far I managed to more or less fix things. So planking is finished! You will see that the sheer strake, or rather half of it, is missing. The reason is that Hercules has a tall bulwark and it would be difficult to securely fix it in place so I thought it made sense to merge the sheer strake with the bulwark. Now Hercules is 150 feet long and made of steel so the planks are completely unrealistic but they do make a nice hull! The card templates (there were even more than these) show how much work actually planking involves with spilling and everything - still I had only 2 half planks that I had to re do as they came out very wrong. One of the many happy accidents is in the following photos. I did not really want to buy new wood so I had just enough pear for the planking. I managed to snap the very last length I had left, with just a half plank left to do! I managed to fix this by making it in two parts, narrow escape! Then lots of Osmo filler and lots of sanding. Of course I did not read the instructions that state to thin the filler with 15% water and I struggled wasting a lot of the expensive filler. Prior to that, all the hundreds of screws were replaced by tree nails. Much more filling and sanding will be needed but a big chunk of the hull preparation has been done. Then I made the bulwarks but only after I managed to snap the little stem extension not once but twice. I had a sheet of maple and three sheets of mahogany left so I used maple - what a nice wood it is! It will all be primed and painted black. But something felt wrong. I went back to my CAD drafts and the plans and indeed, the bulwark/planks were a couple of centimeters short. The happy accidents are piling up! Now, Hercules has this little feature at the stern where there is a small flat vertical segment, this has to be made by laminating thin strips which gives the opportunity to correct the mistake above. So I used some thin beech strips I had. I dislike beech due to its huge movement in service but it is so nice to bend, just with water it can be tied in a knot. I just used PVA to laminate the strips, if I had used epoxy it would have been very messy. Then rough cut to shape and screwed in place. I know it looks rough, I had trouble with the stern drafting in CAD and did not really spend time on it, I hope I ll fix it with a bit of filler, bit of sanding, paint on top. I am enjoying this boat, it is very different from anything I have built so fat. On another note, the postman dropped a cardboard tube with some plans which are currently being processed. There will be a new log starting, this time for a far more complex boat that will take a long time to build, a boat that from the first time I saw it I new I just have to make! Take care all Vaddoc


-
 This one took a while to figure out, eventually I got a center post to support the frame rails and glued in place. Then I was able to sand them down and add the cap.

-

The Mossy Shipyard by Bryan Woods - 1:1
Bryan Woods replied to Bryan Woods's topic in Non-ship/categorised builds
Big improvement today:-) The refrigeration man showed up to cut and vacuum out the line set for the mini split. Forecast calls for cooler temperatures tomorrow:-)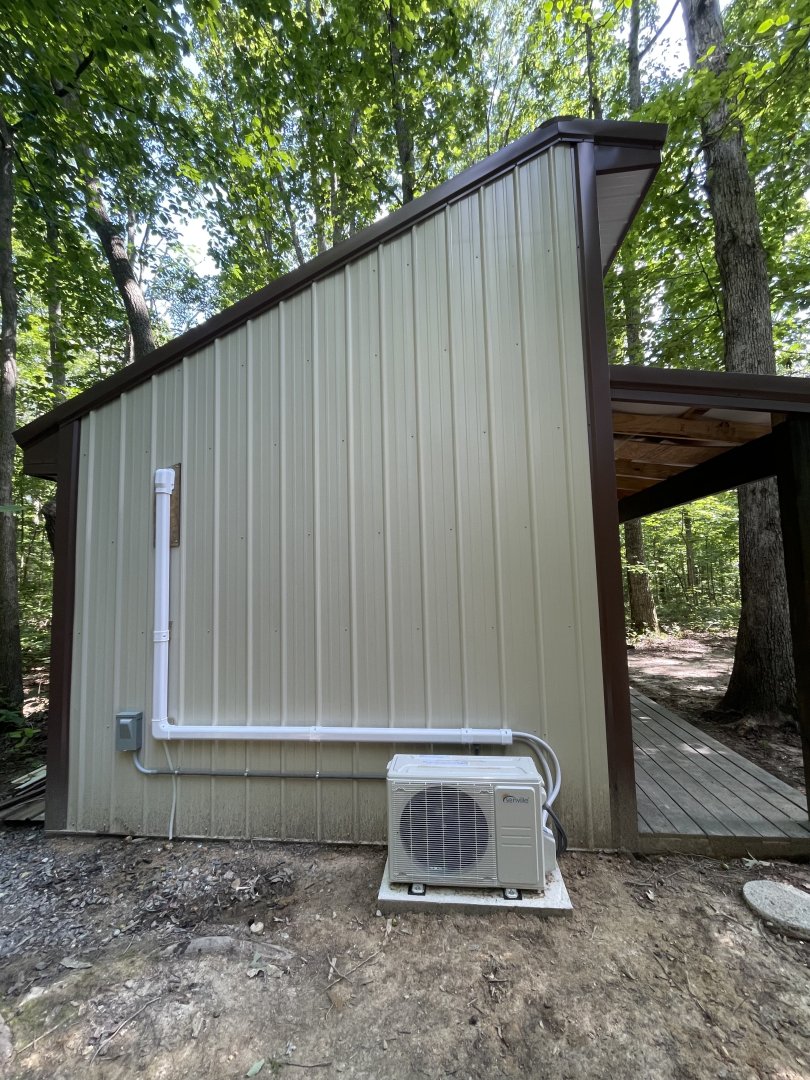
-

Decals for draft markings
CCClarke replied to g8rfan's topic in Painting, finishing and weathering products and techniques
I highly recommend this guy: Josh at BedlamCreations.com. He's my go-to guy for waterslide (white) draft marks. I told him what font I needed, and he scaled multiple sets for me. Easy to work with and reasonable pricing. CC -
 I recall that the only part of Victory that was at Trafalgar was the orlop deck. But still a magical ship. But it does raise questions as to accuracy. The original version of Trigger’s broom.
 -
.thumb.JPG.33e8fc9704bbb01f03cf31c187b62df9.JPG) Hi Etubino, Thanks very much for your nice post, do remember you where the first person who posted on my wip. Will finish this build one day Regards Richard
Hi Etubino, Thanks very much for your nice post, do remember you where the first person who posted on my wip. Will finish this build one day Regards Richard -
 Great work, Ben! I still have a lot of work to do, but I'm looking forward to starting the framing process on my model.
 -
 To be fair, Wyoming would have had a tough time getting in and out of the harbors at Arena Cove, Greenwood, Albion, Little River, Mendocino, Caspar, Noyo, Port Kenyon, etc. 😉
 -
 Damn...BlueJacket makes some wonderful kits. They are my go to for fittings I need on my scratch build projects - it's the closest type of fittings that I need, as nobody makes fittings for great lakes ships (modern ones).
 -
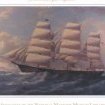
 Here are the first few Starboard side frames installed, we will begin to get a proper feel for what the model is going to look like now. The designer has left lots of “meat on the bones” for later fairing of the hull when framing is complete.
-
 Very impressive work!