
.JPG.ca33079f5815b861e67b9c2cccd37982.JPG)

Blue Ensign
-
Posts
4,284 -
Joined
-
Last visited
Content Type
Profiles
Forums
Gallery
Events
Posts posted by Blue Ensign
-
-
Thank you Nils.👍
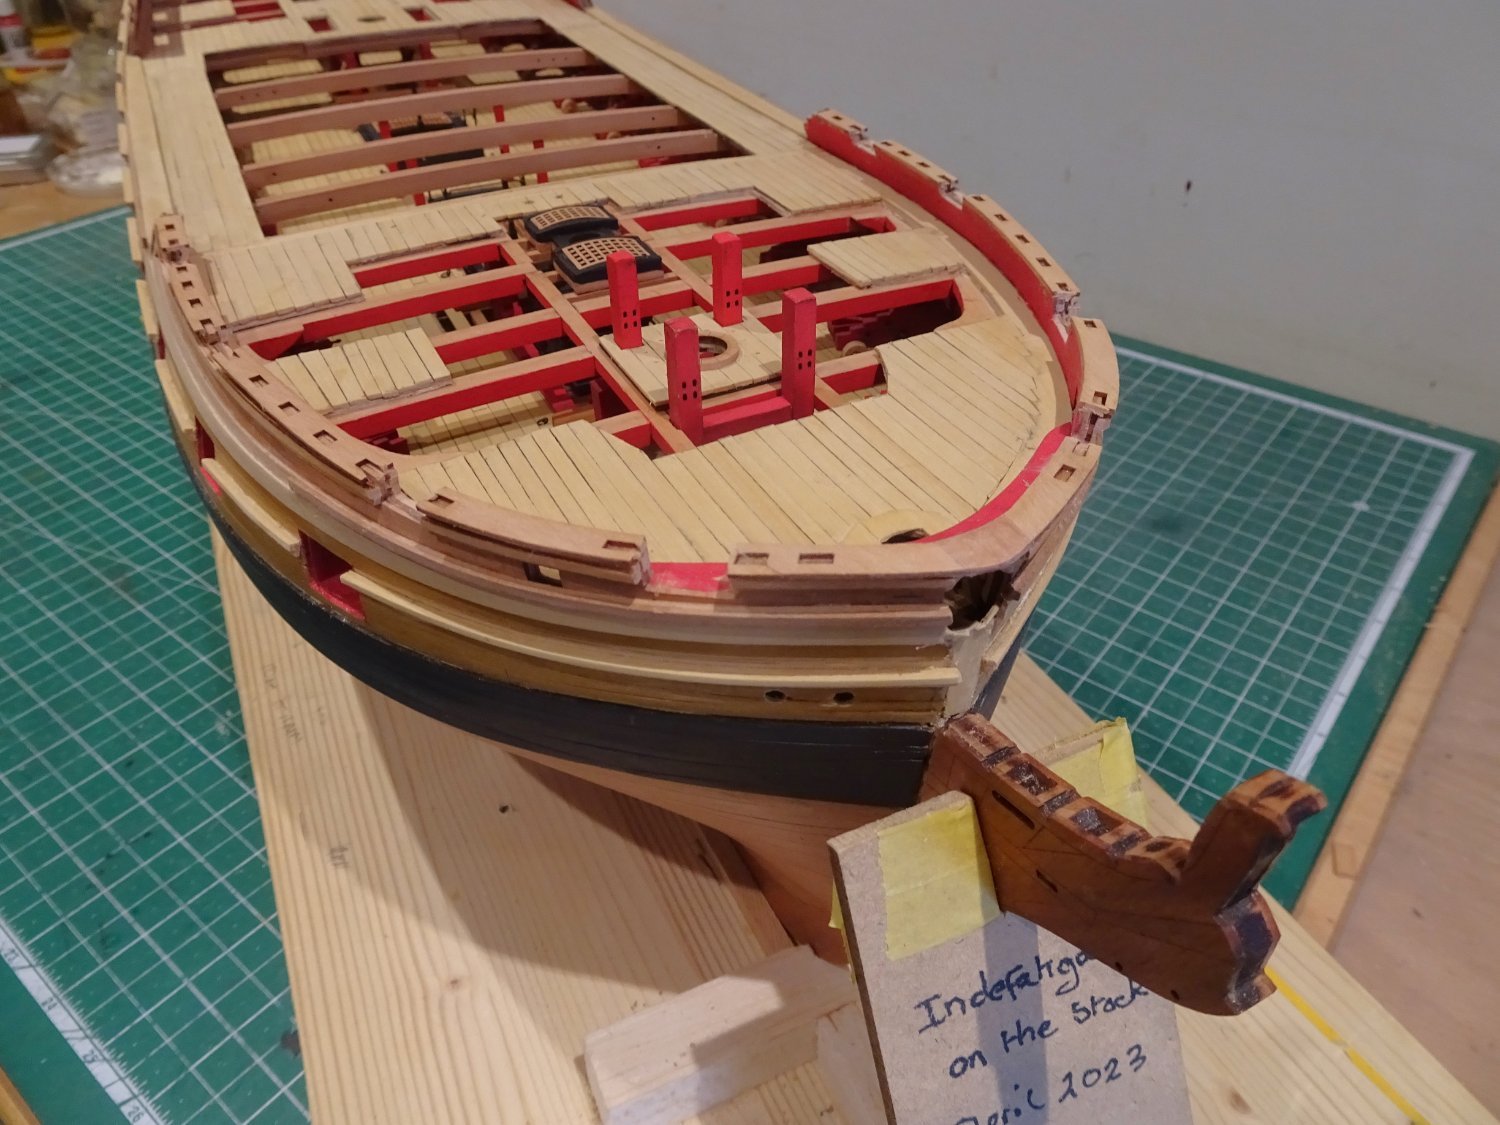
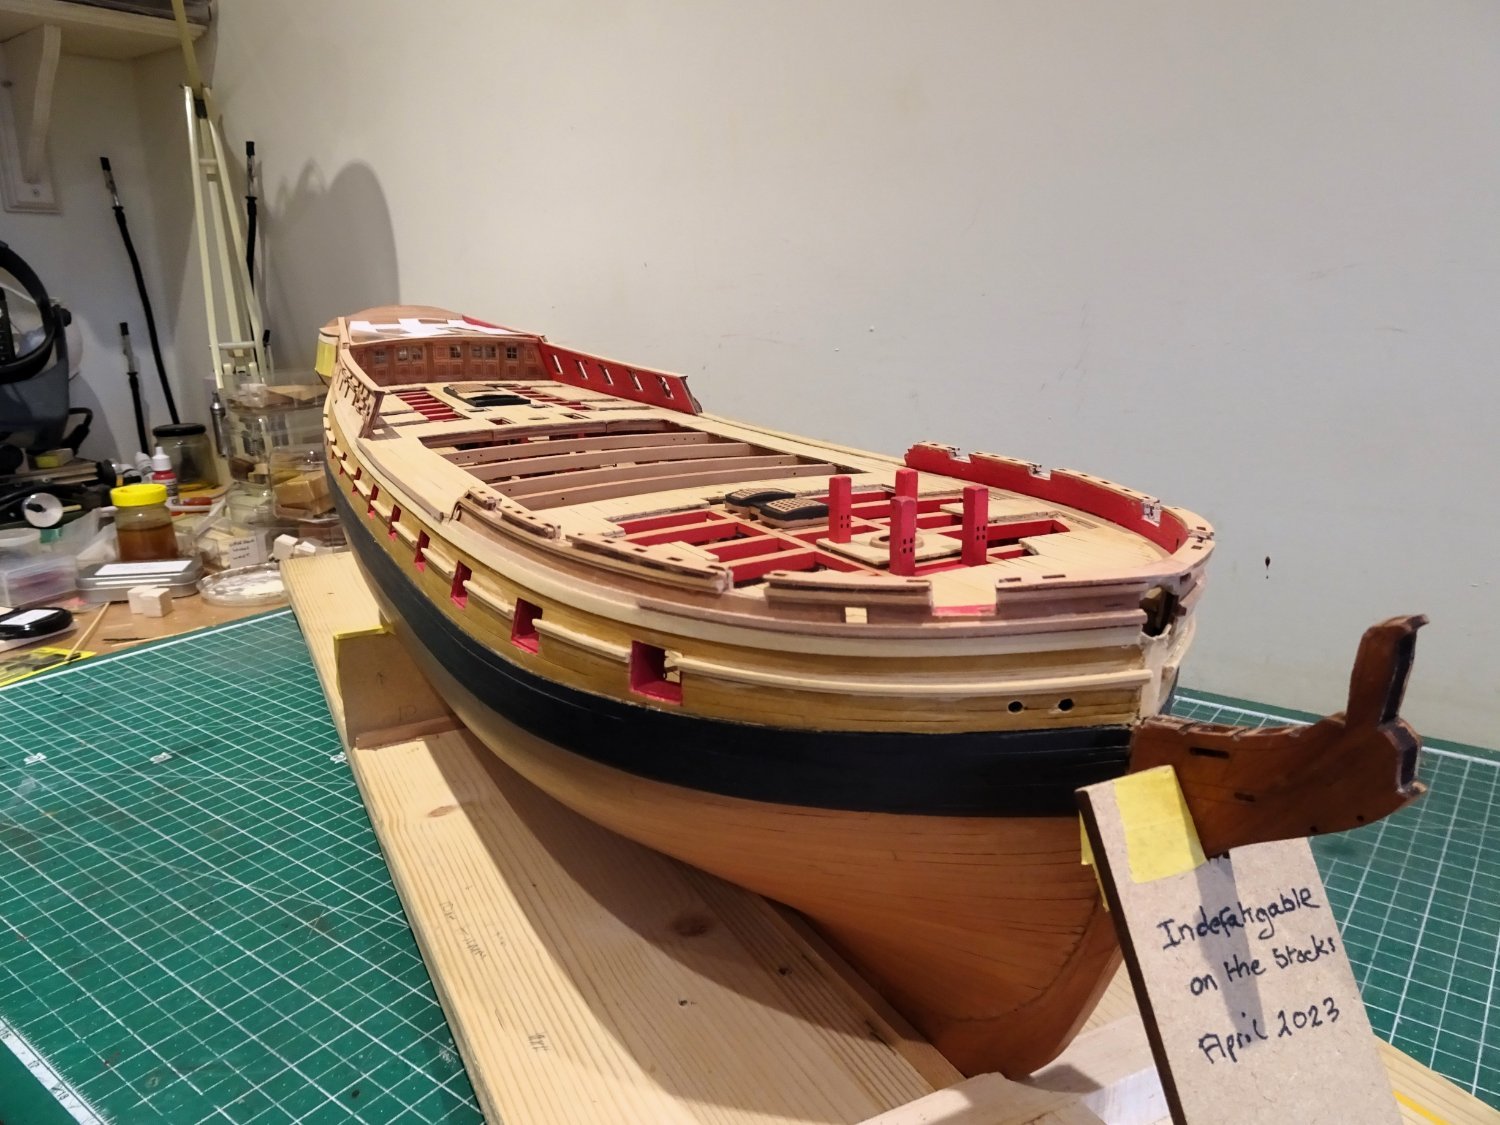
Post One Hundred and Nineteen.
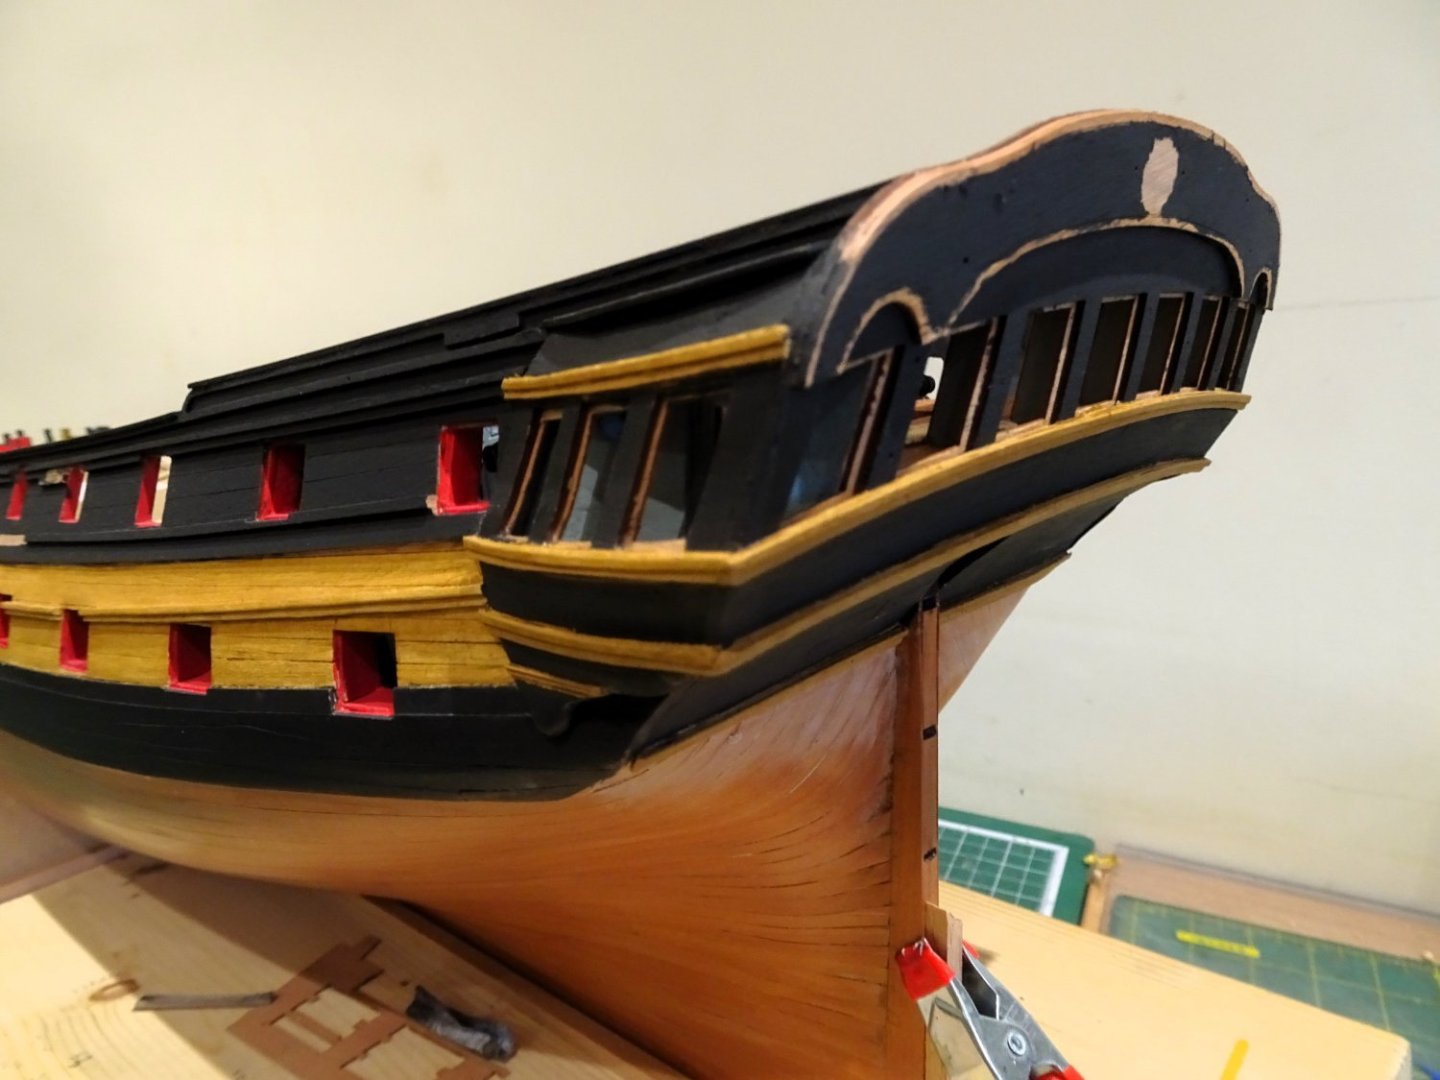
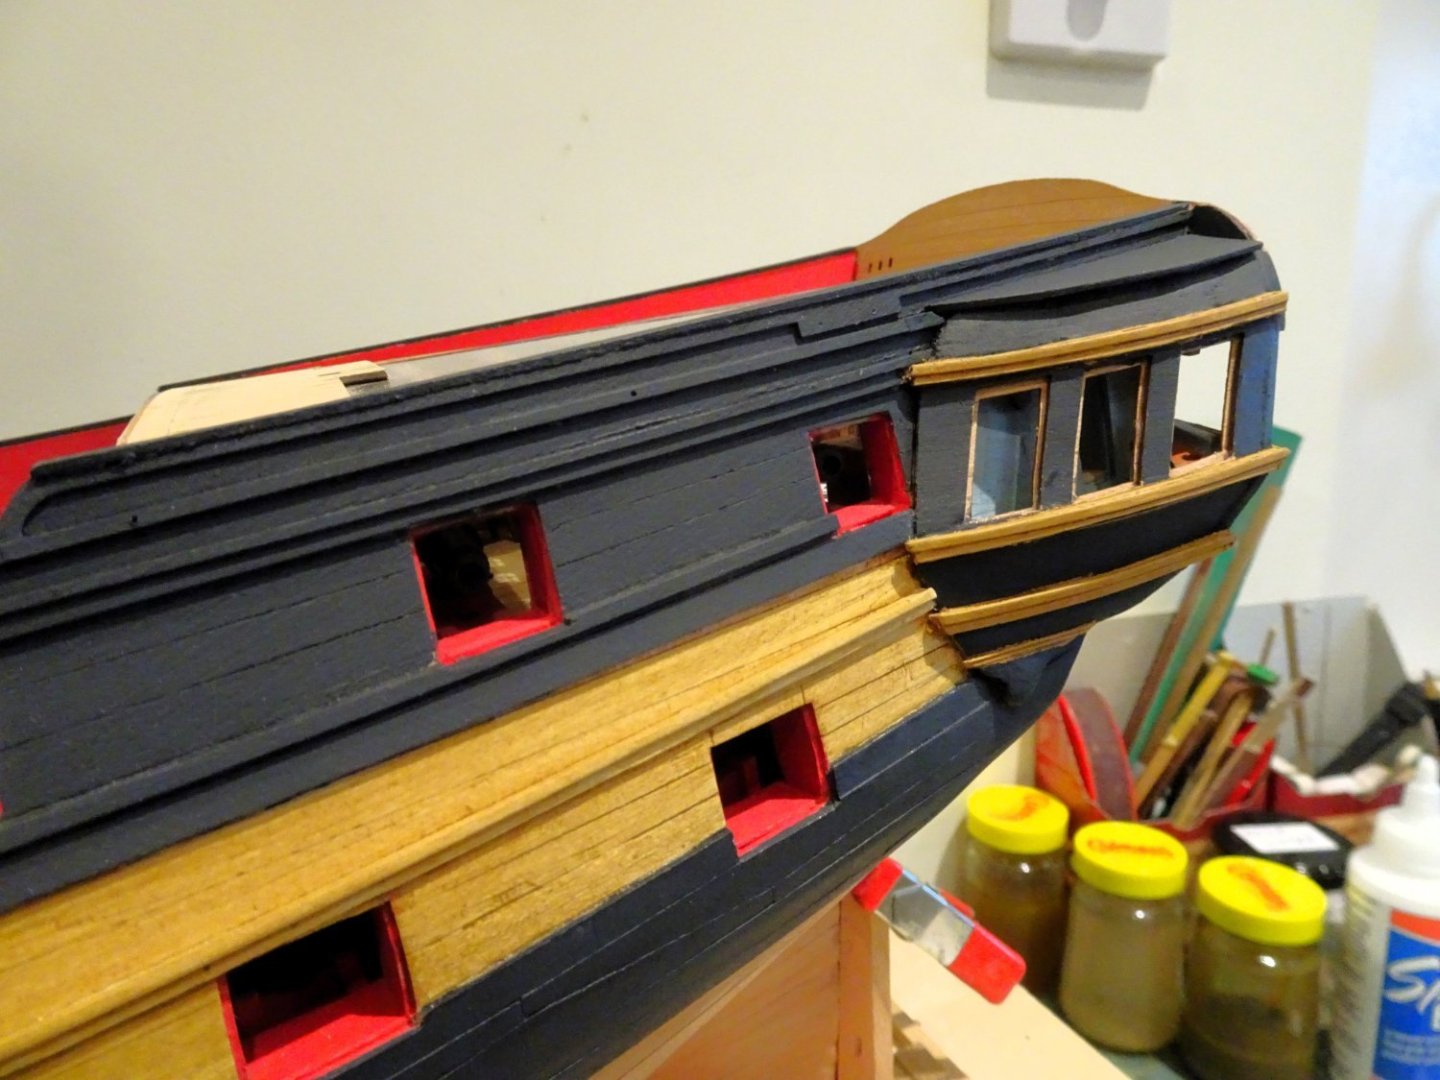
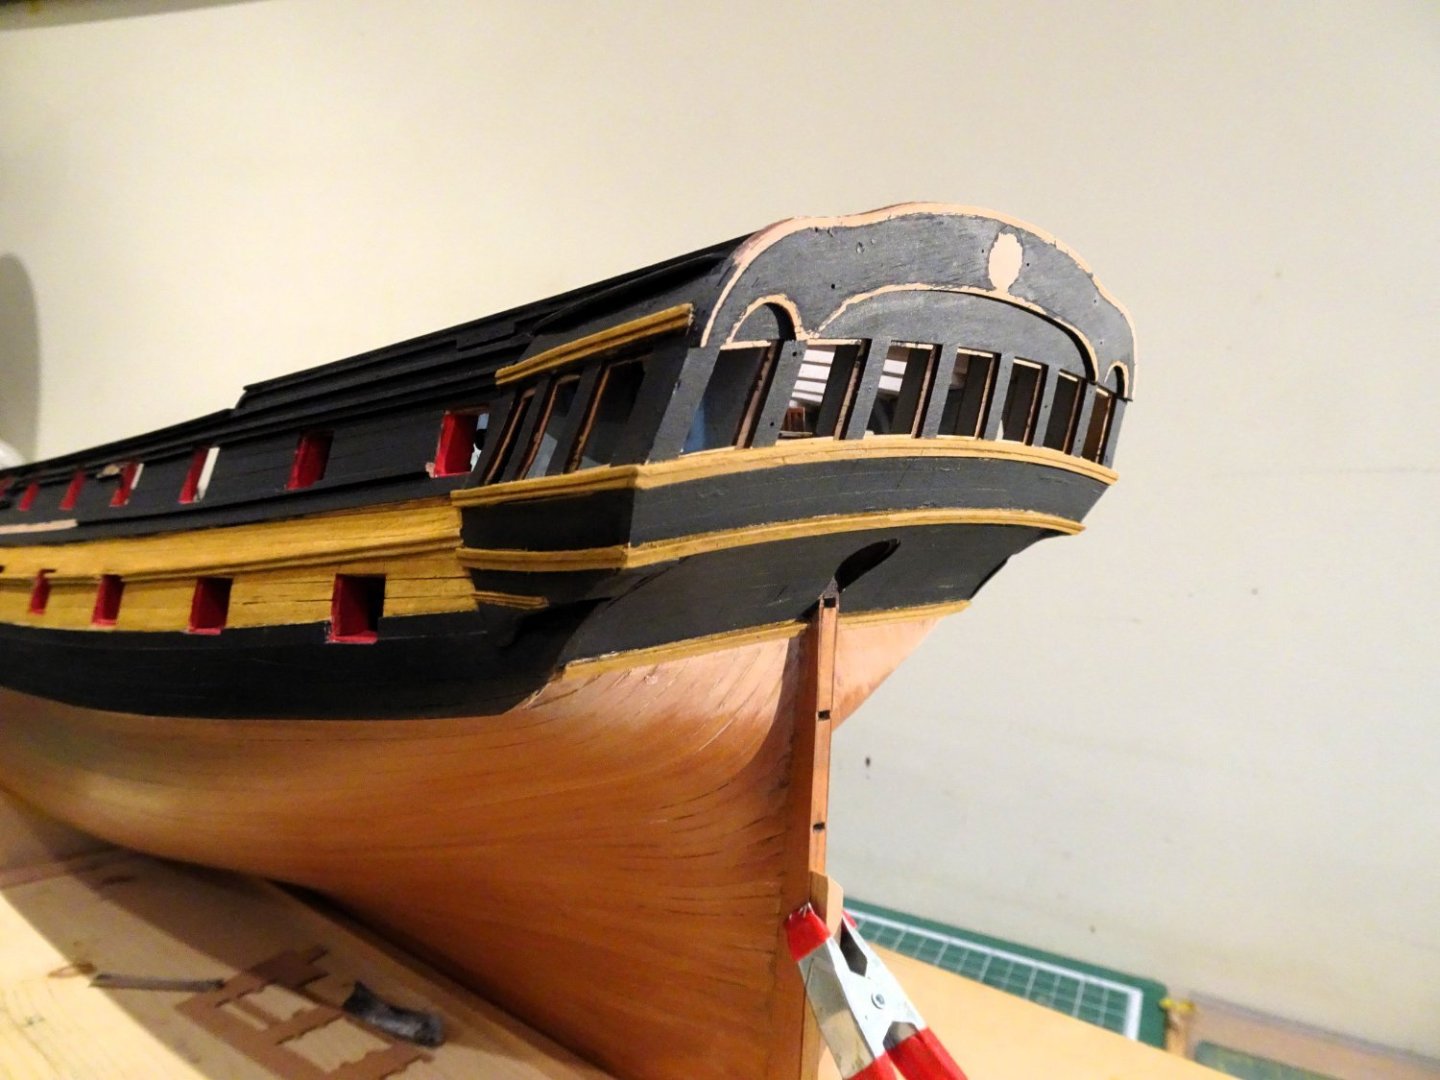
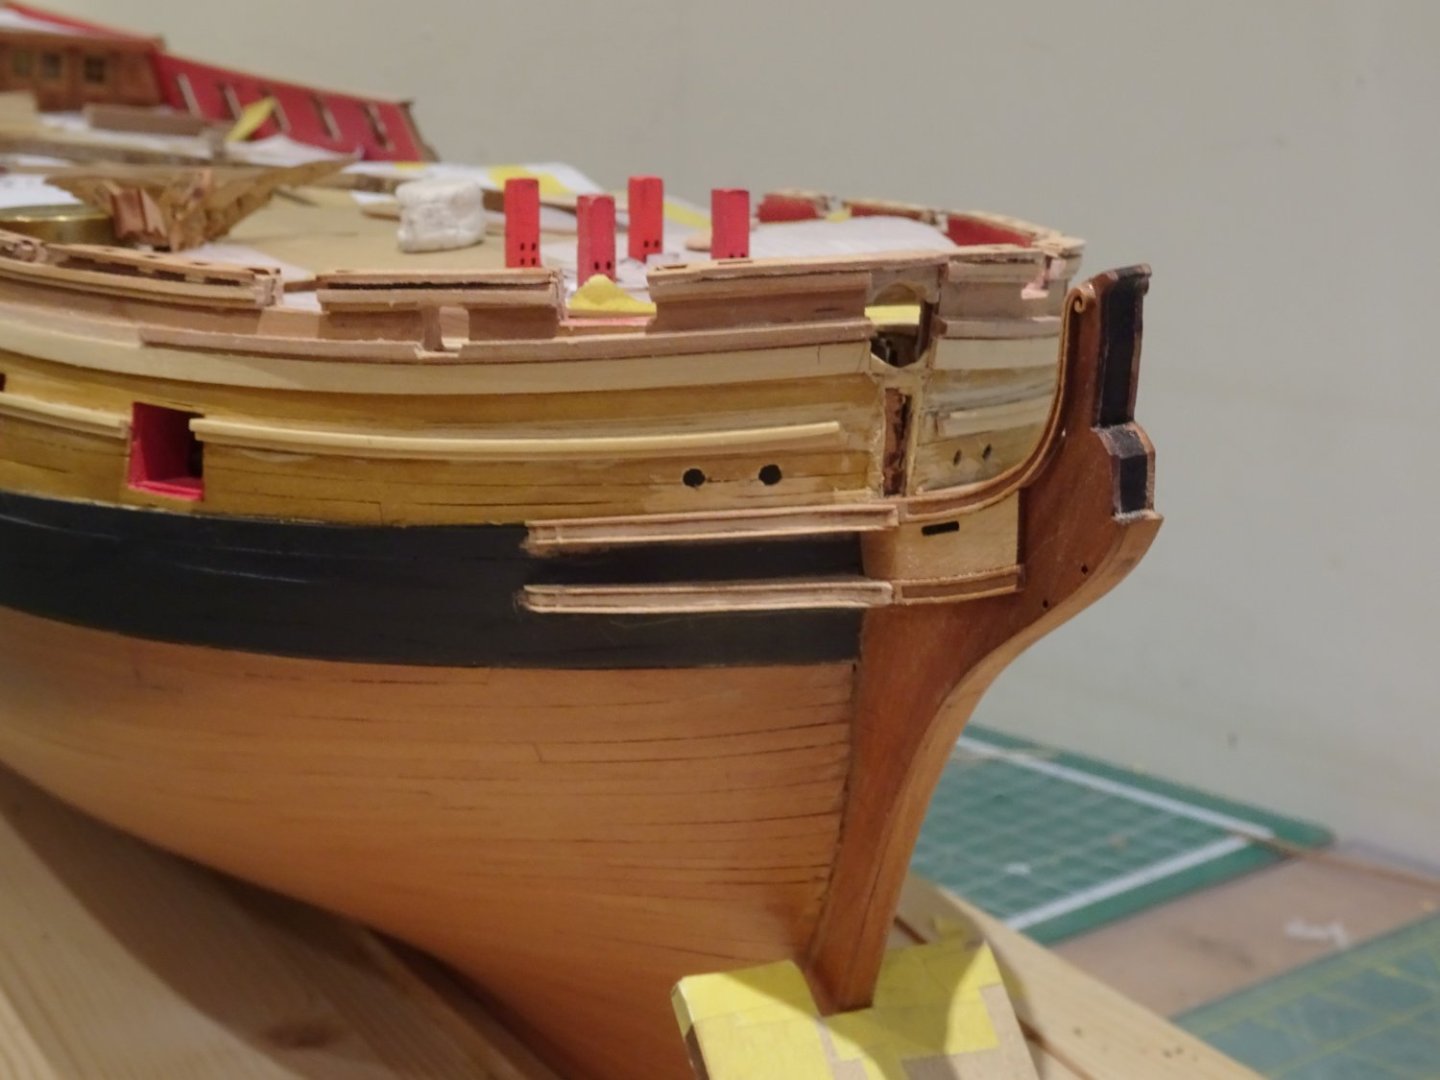
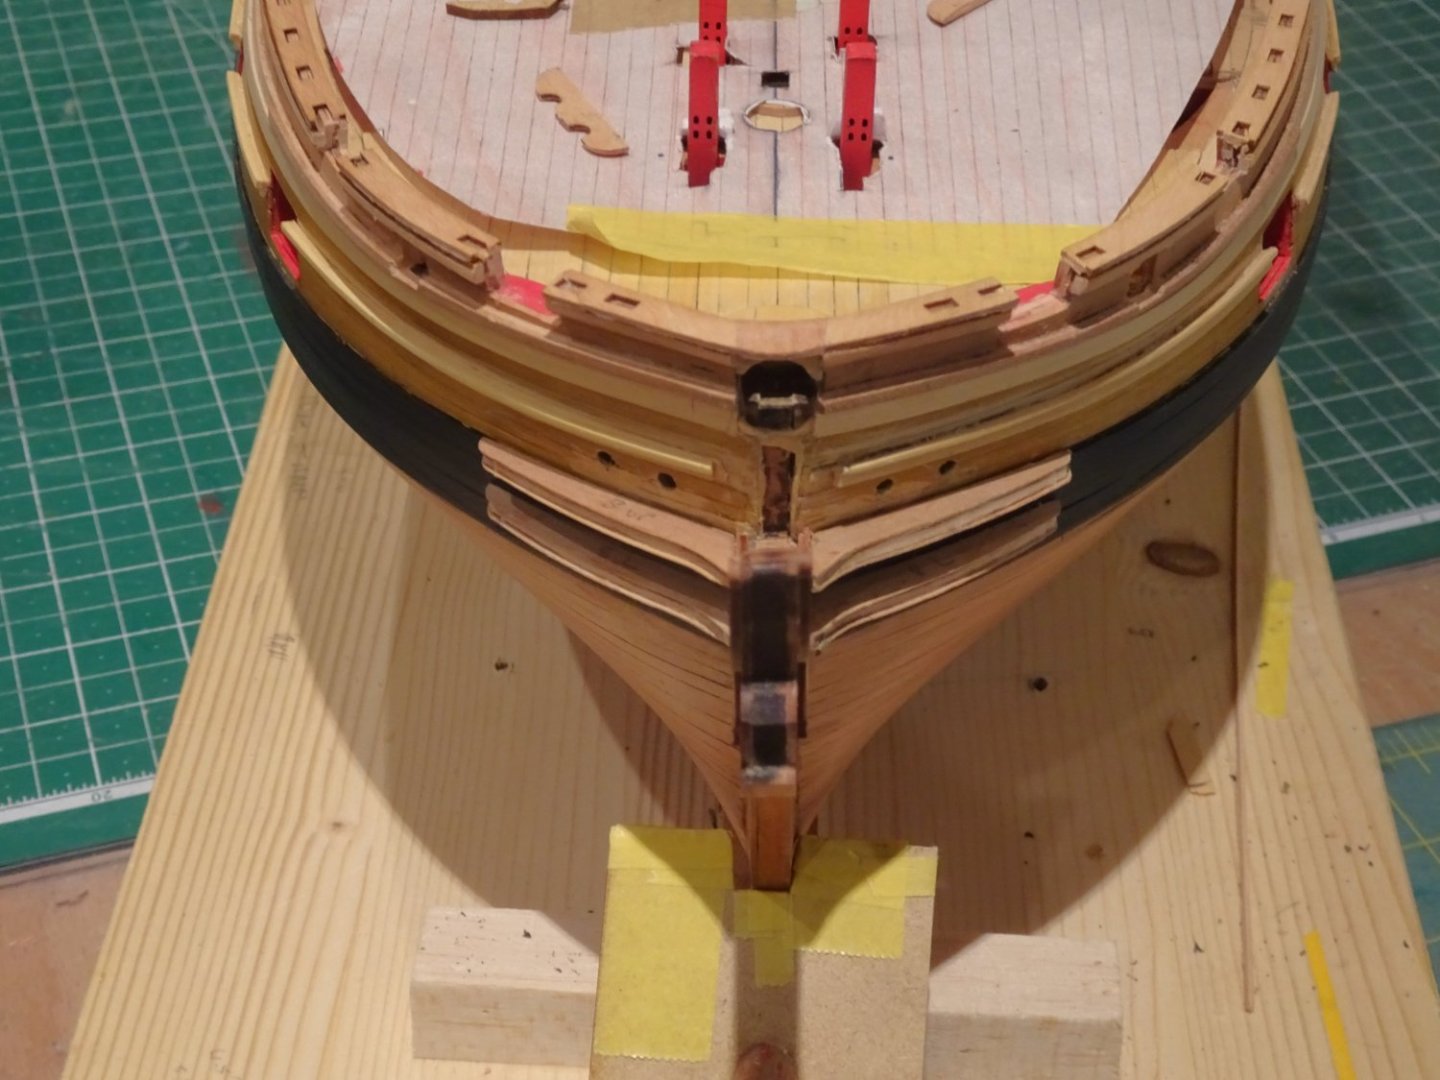
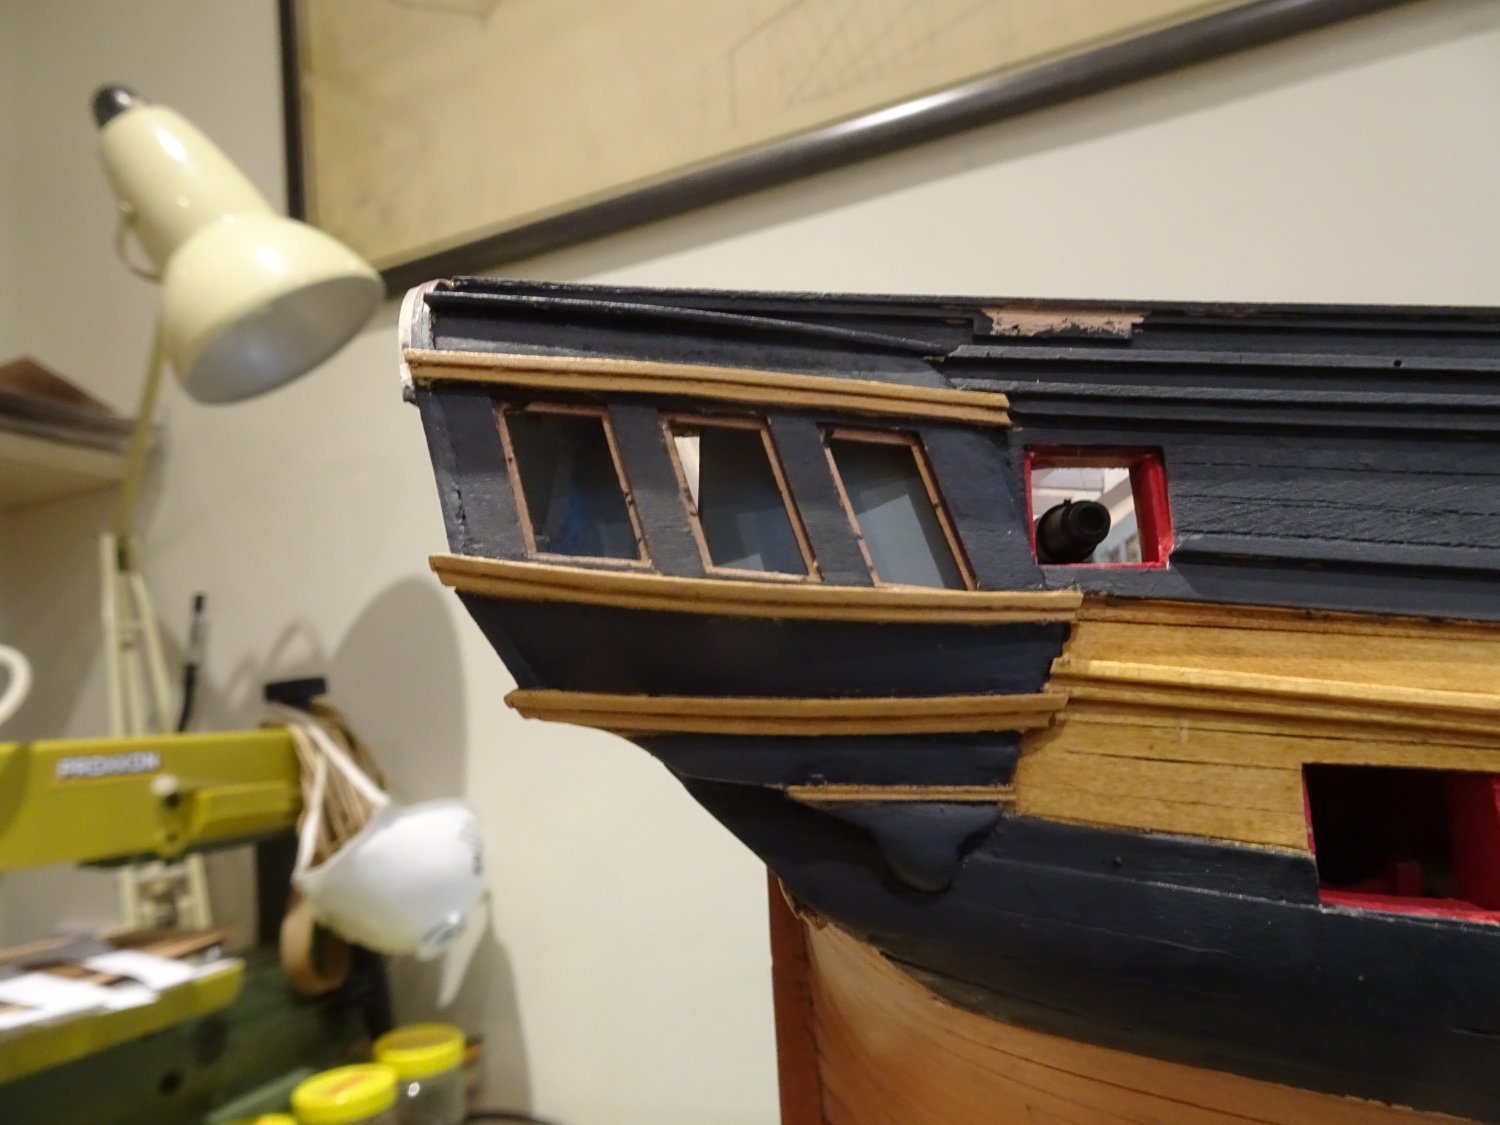
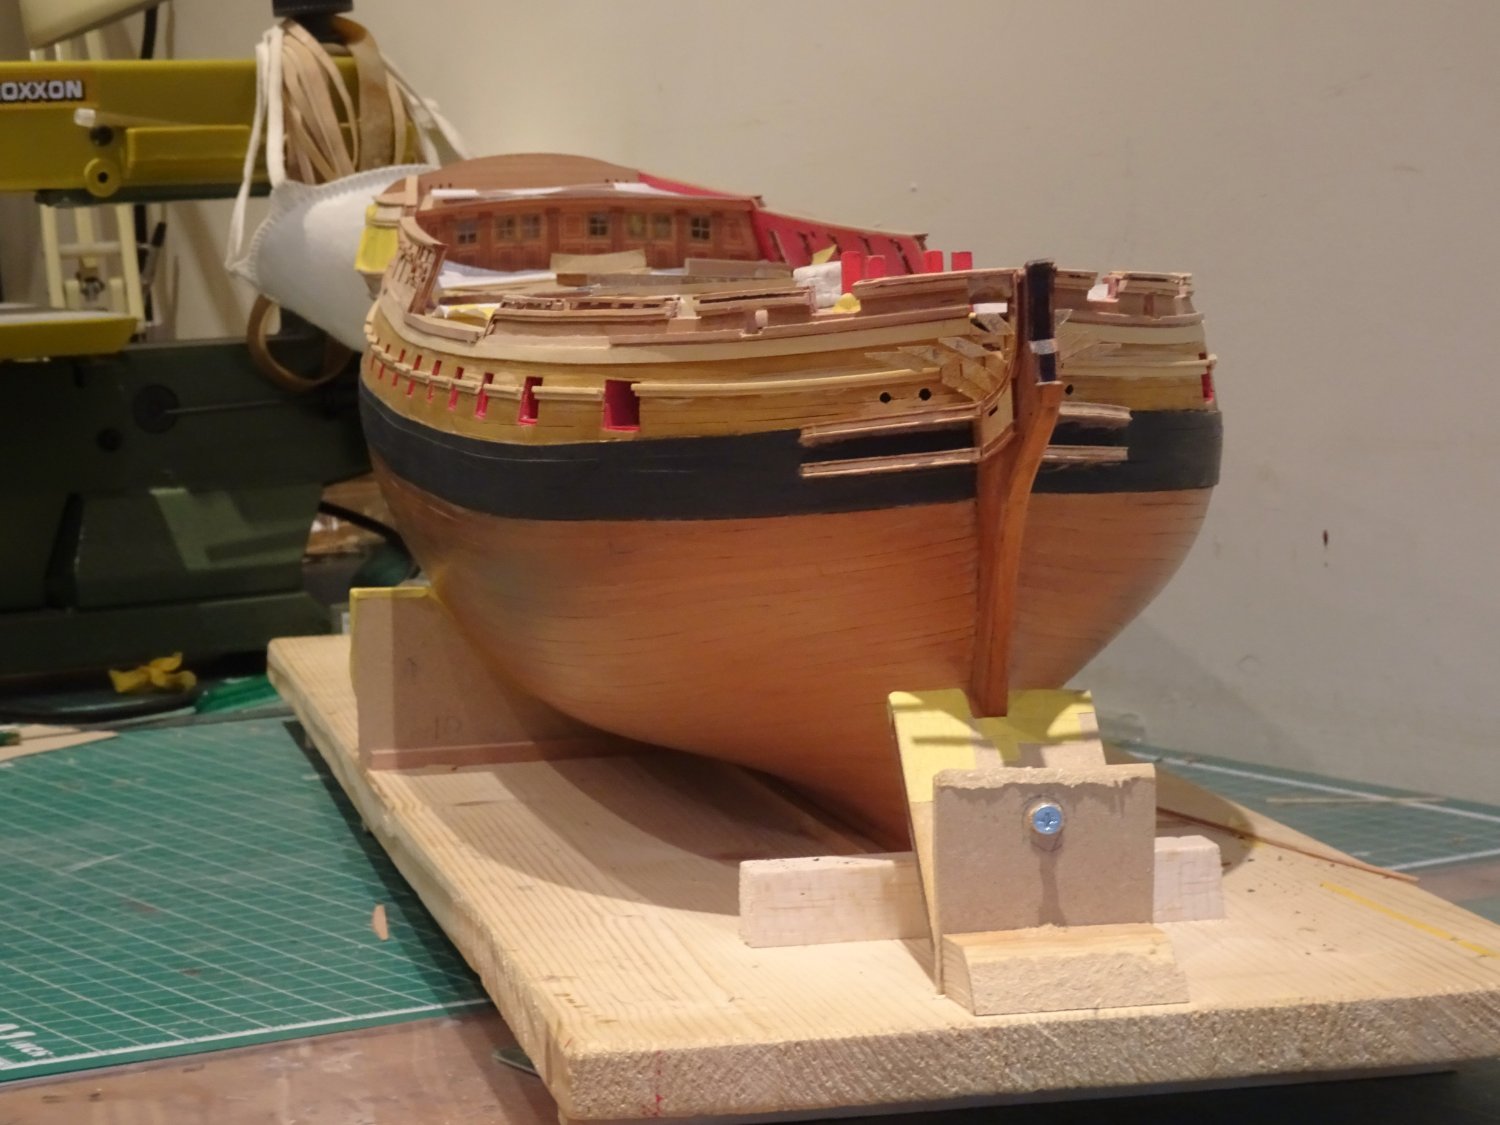
Back to the blunt end
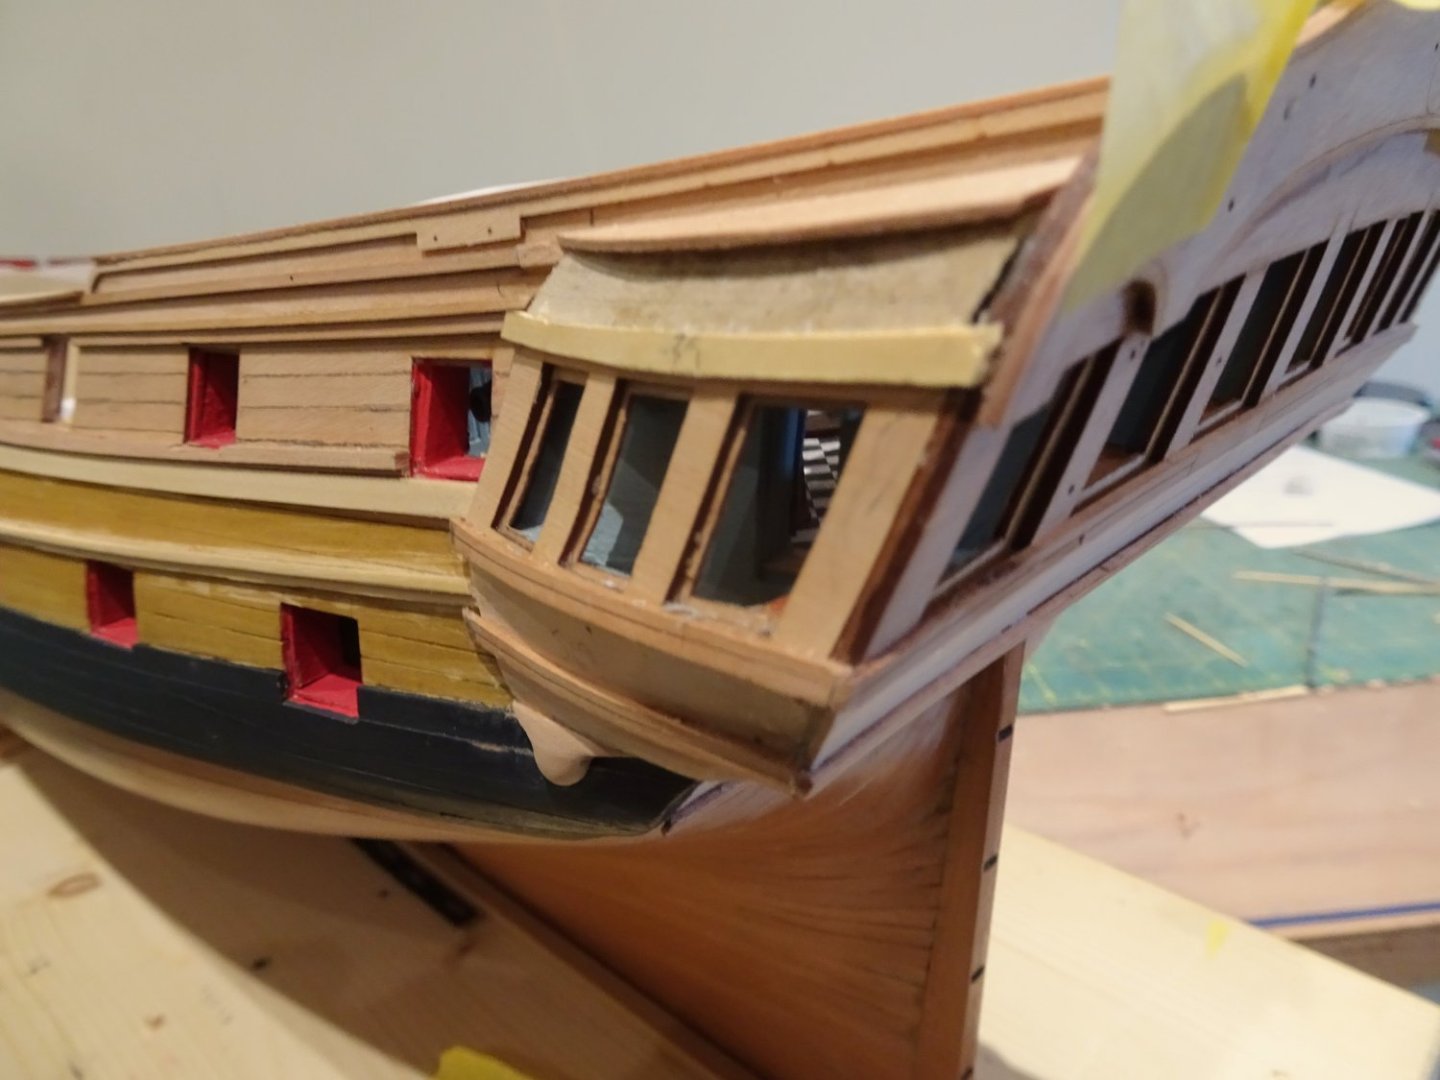
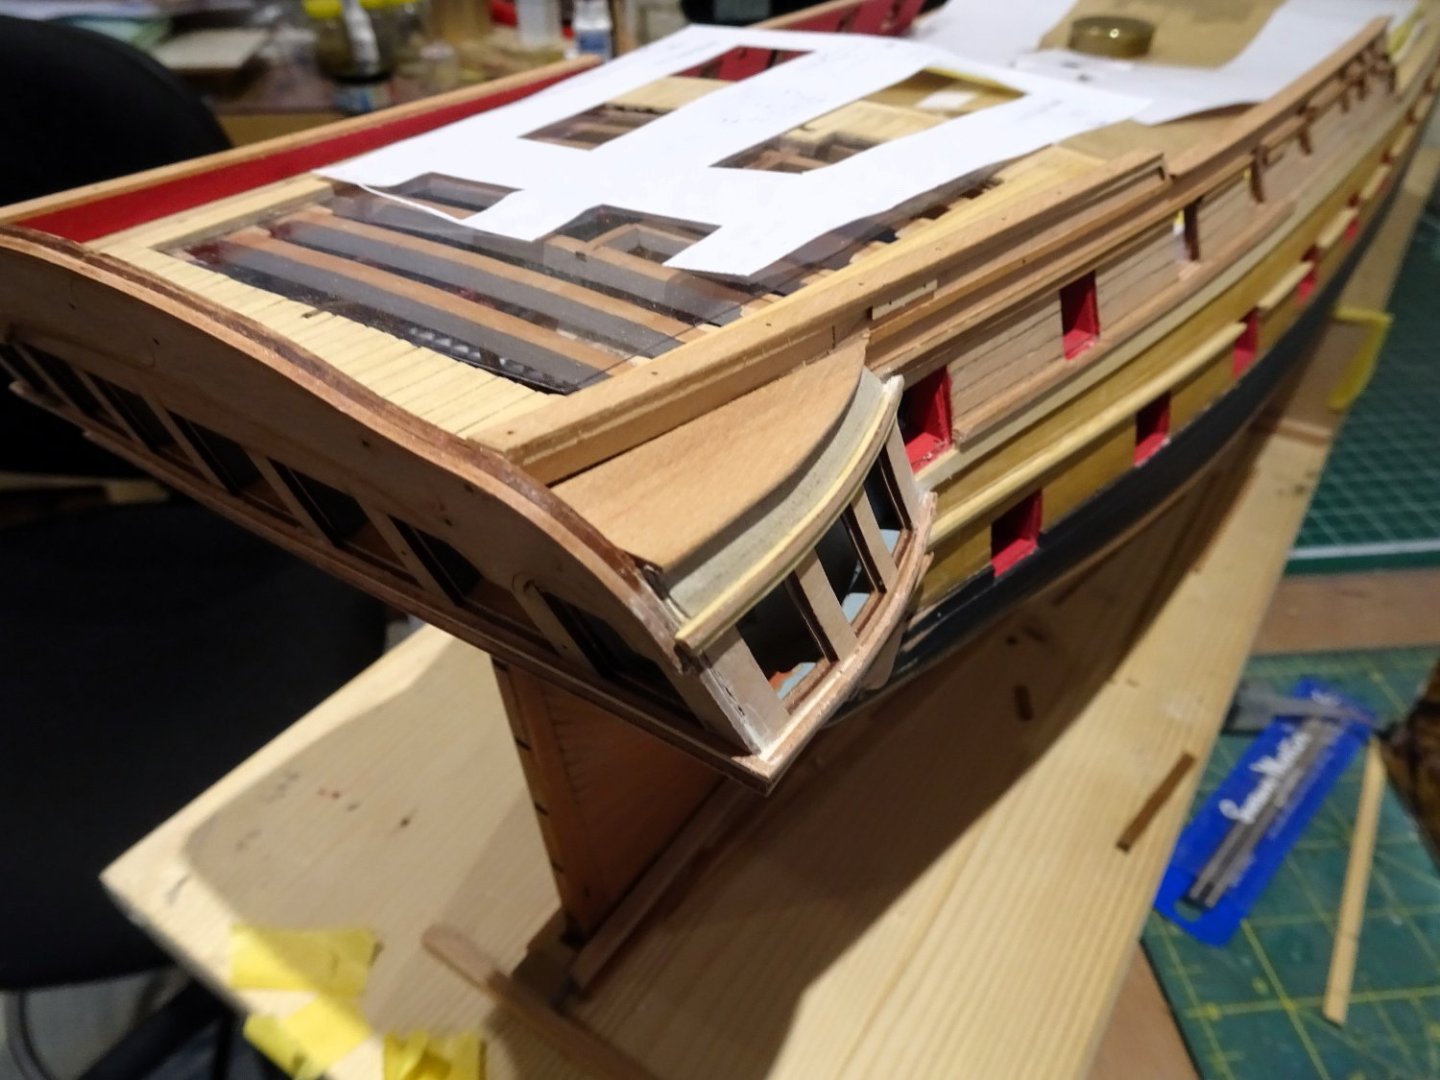
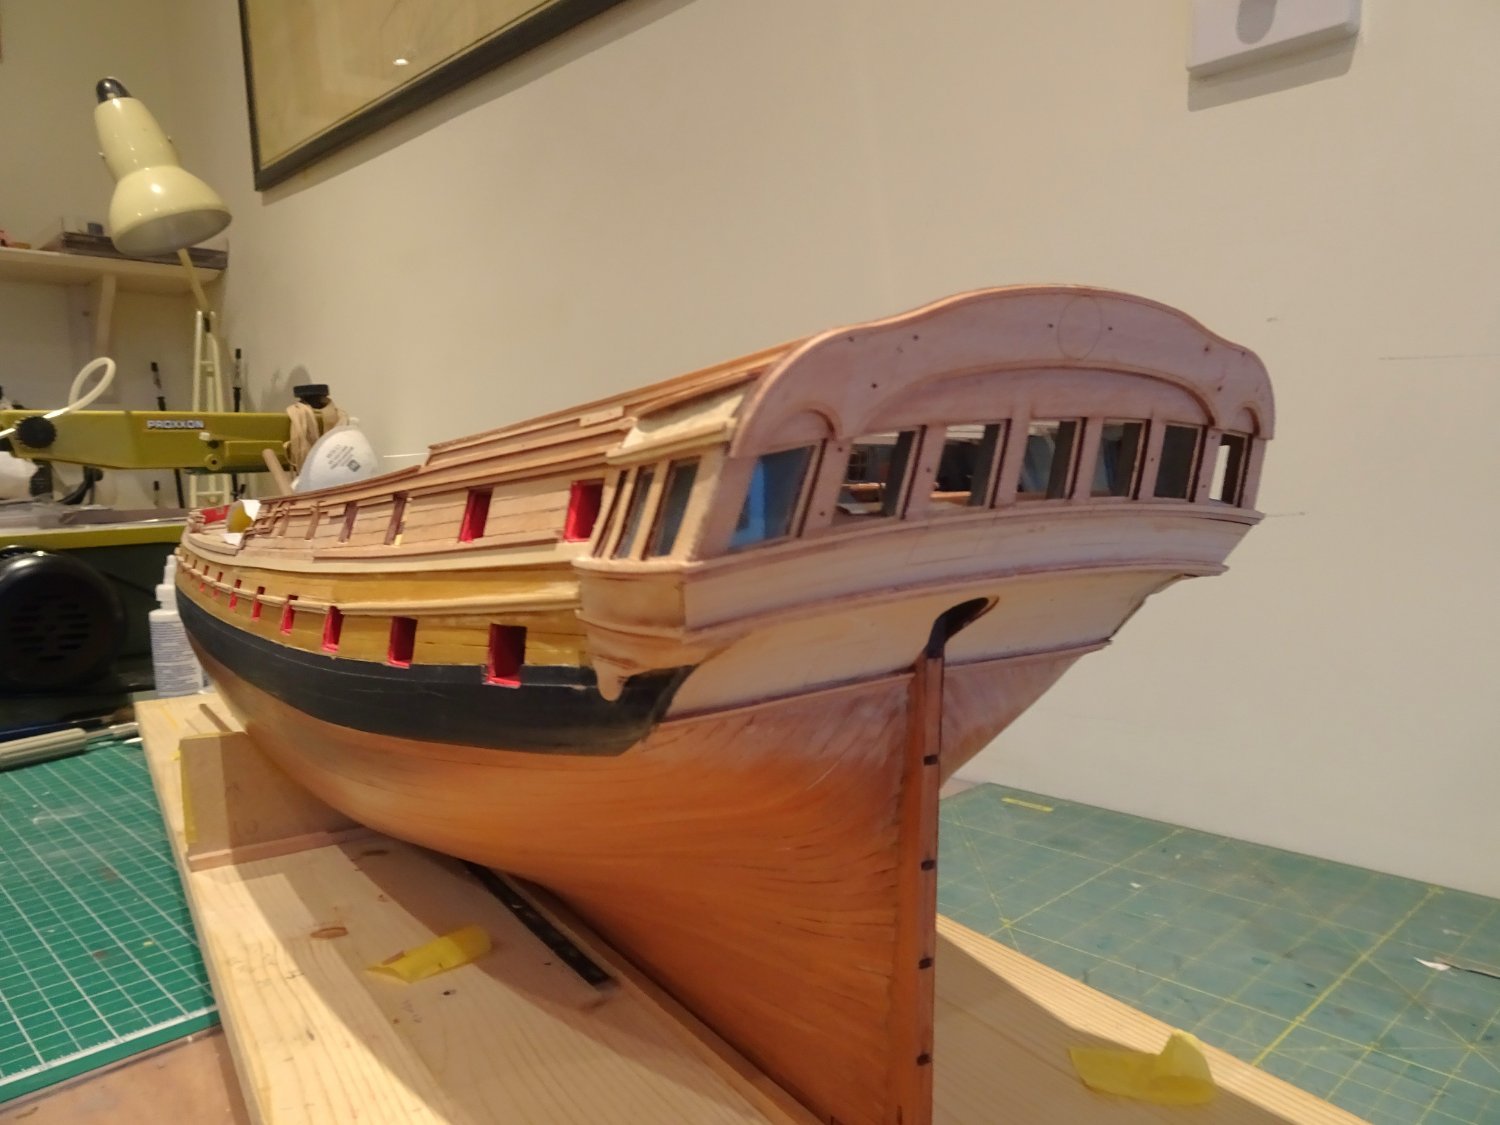
Time to attend to the unfinished stern.
I had figured out on the bow area how to finish the Pearwood mouldings and pilasters to be used on the stern.
3088
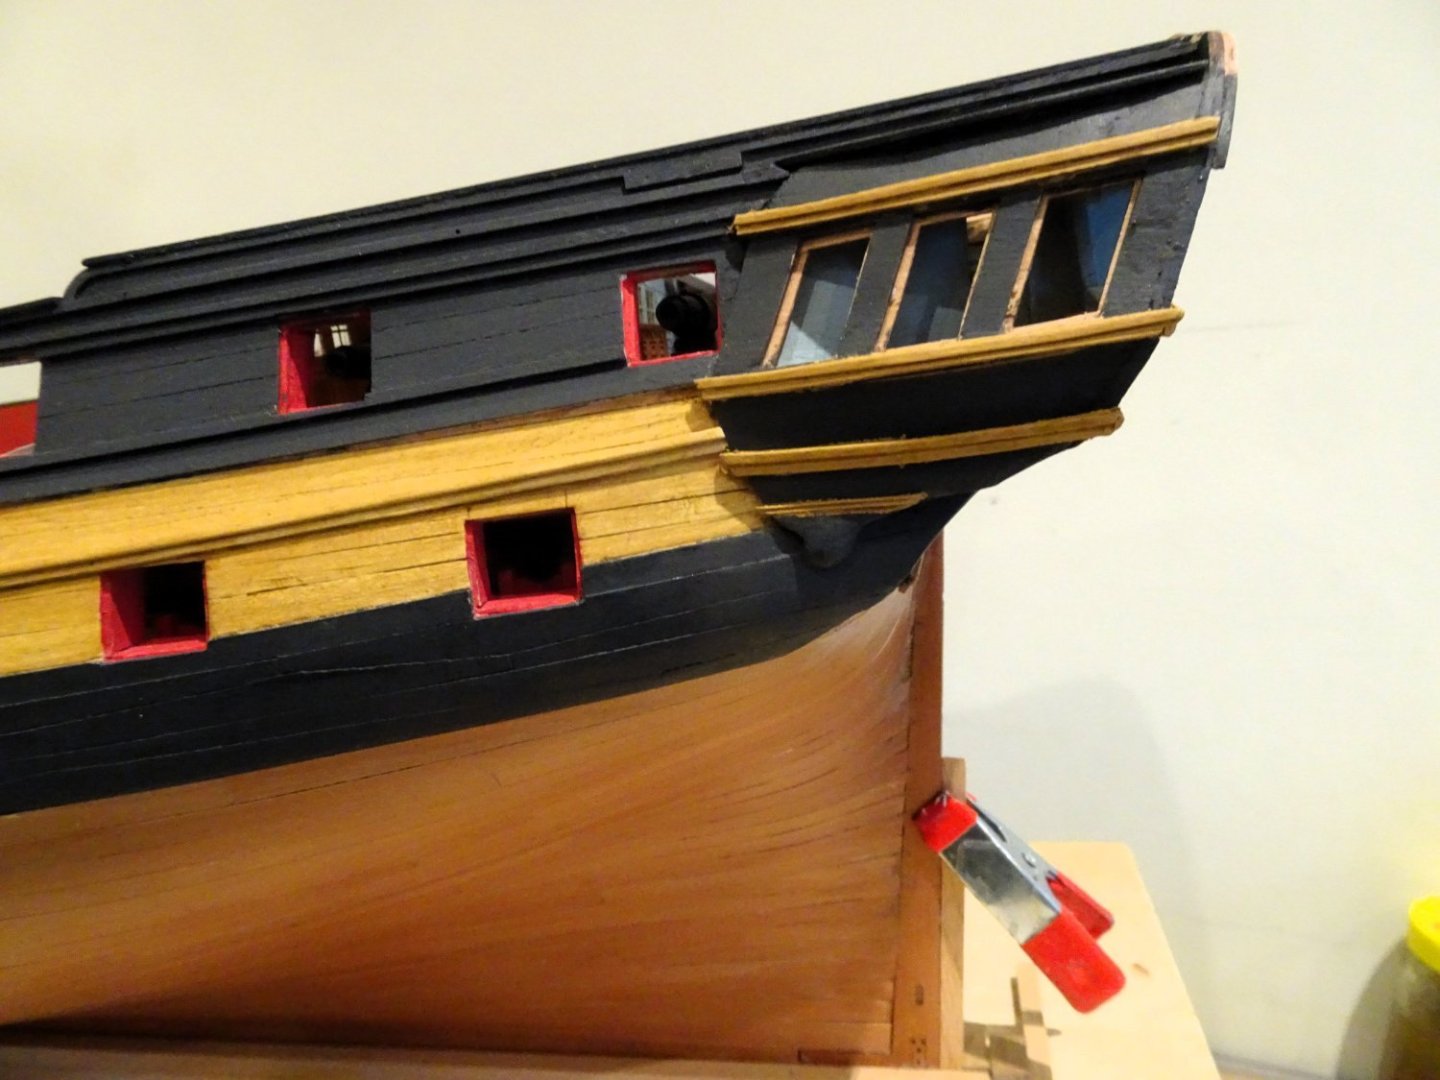
Vallejo Ochre Brown over the Pear followed by a coating of the water-based wood stain I used on the Boxwood hull timbers. This gives a fair match to the varnish hull finish.
3086
The stern is otherwise painted in Vallejo Black/grey.
3085
3084

3091

3093
3094
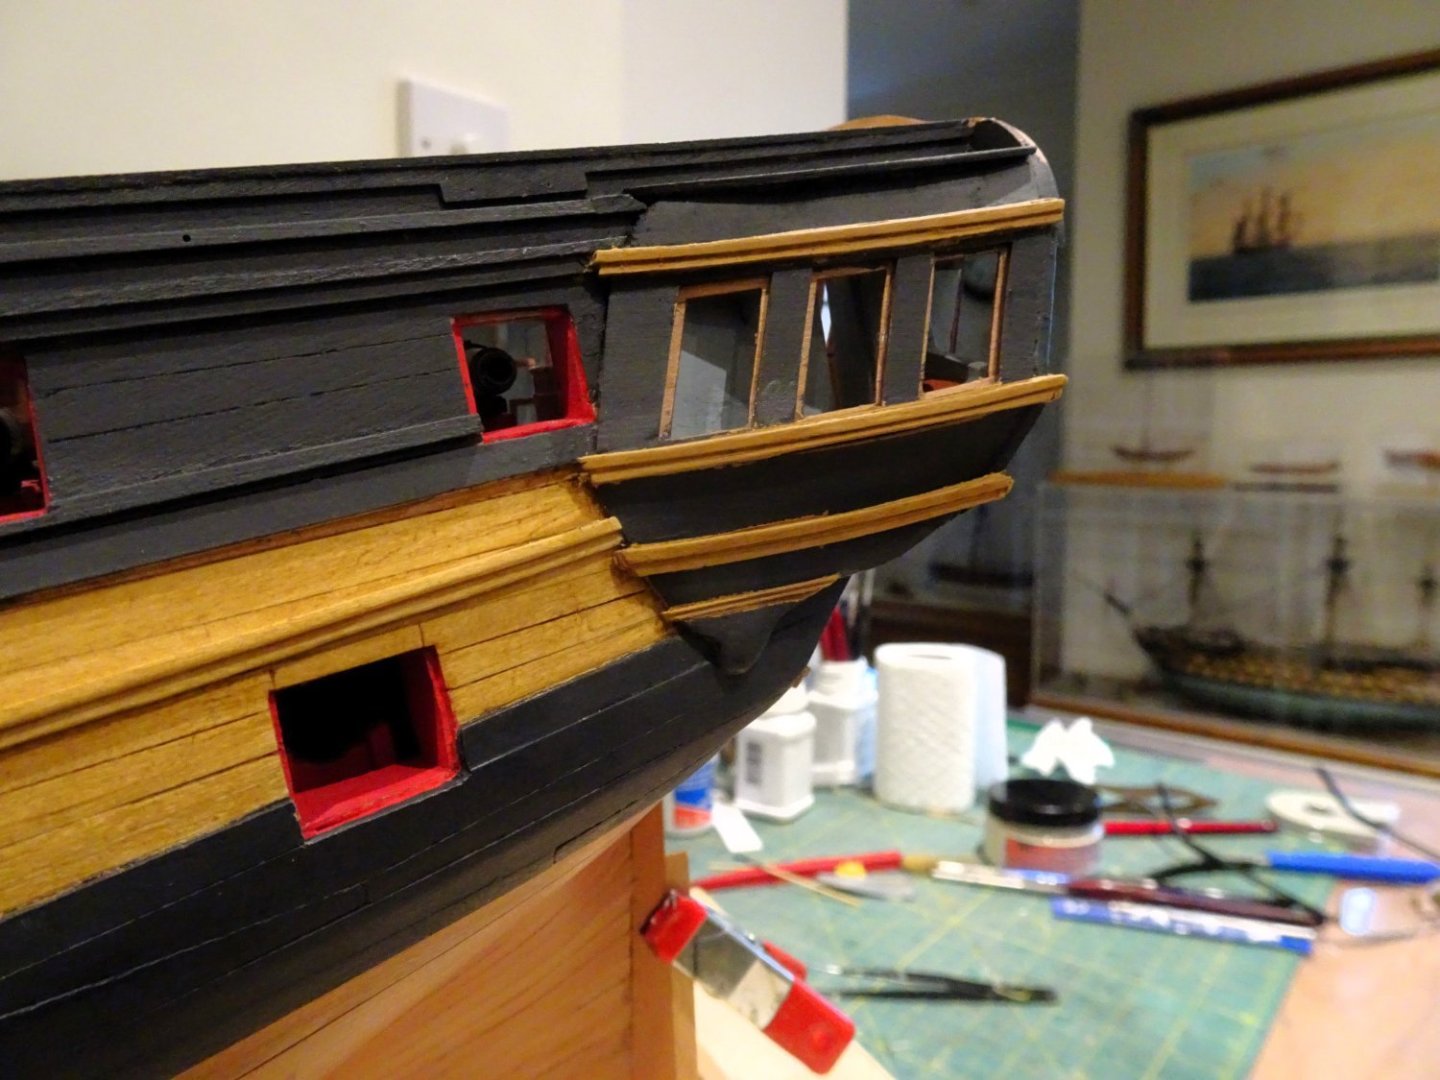
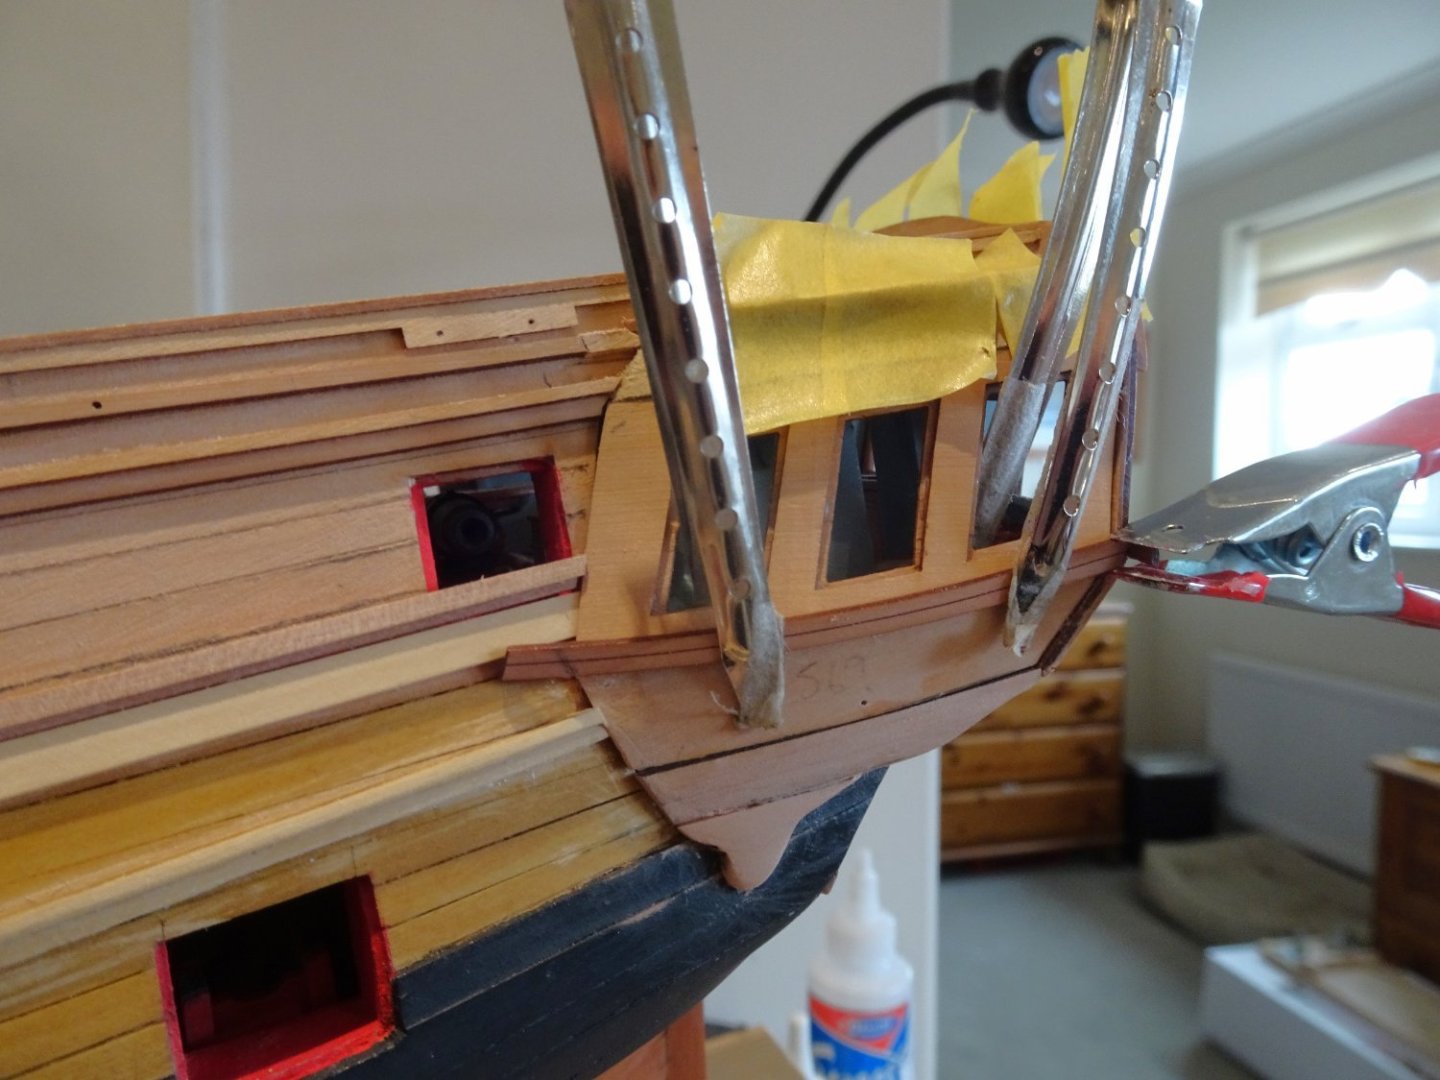
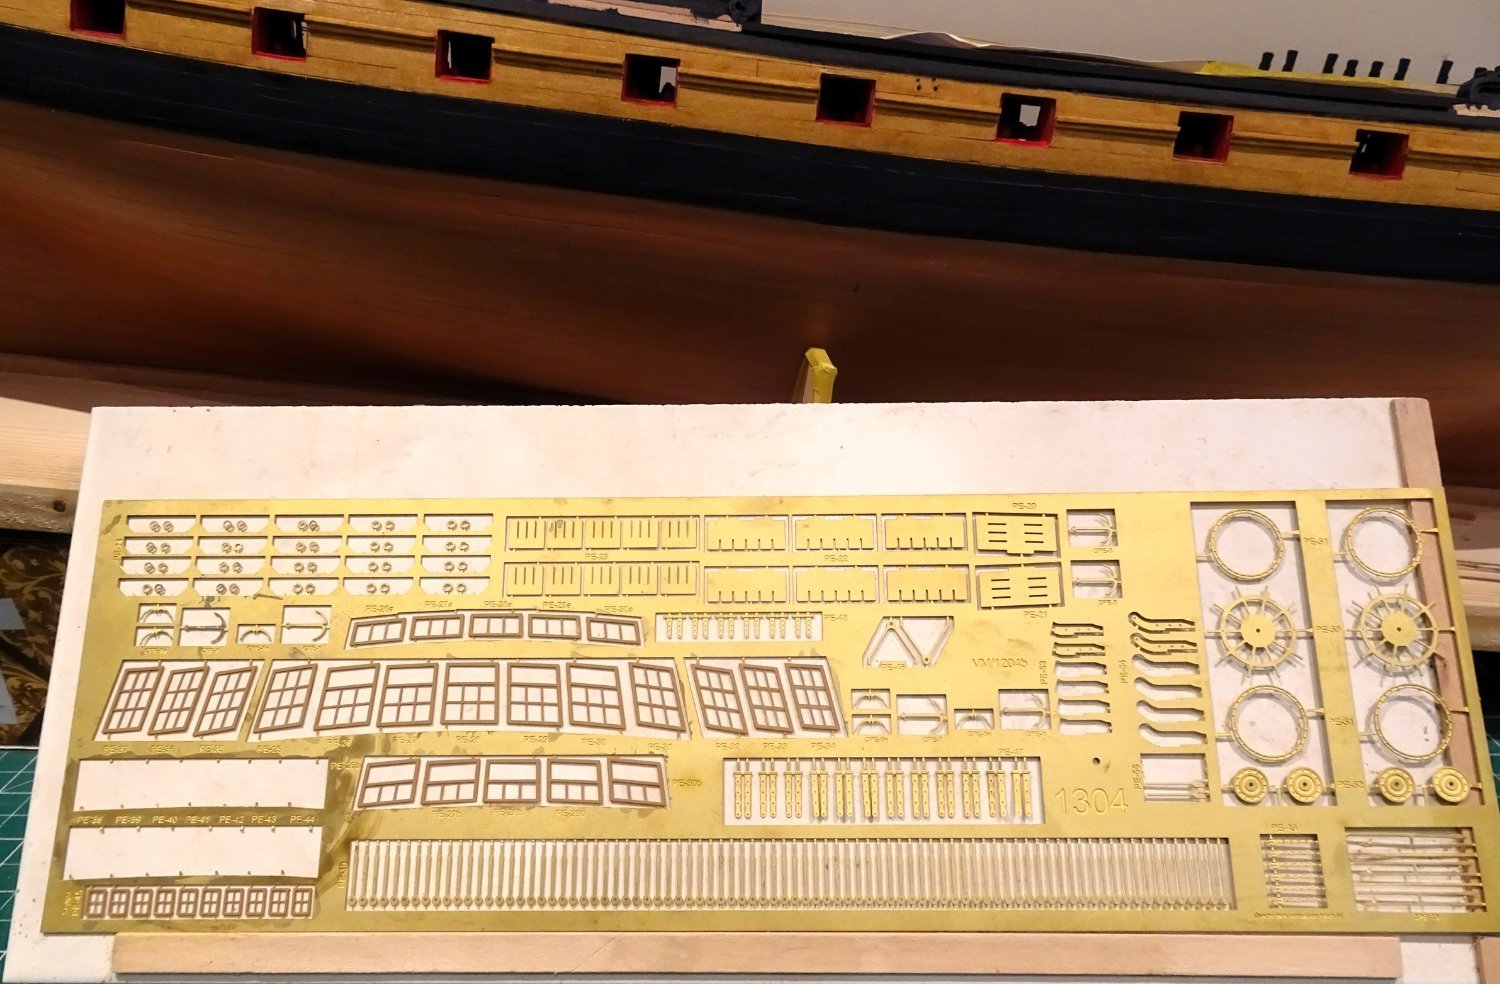
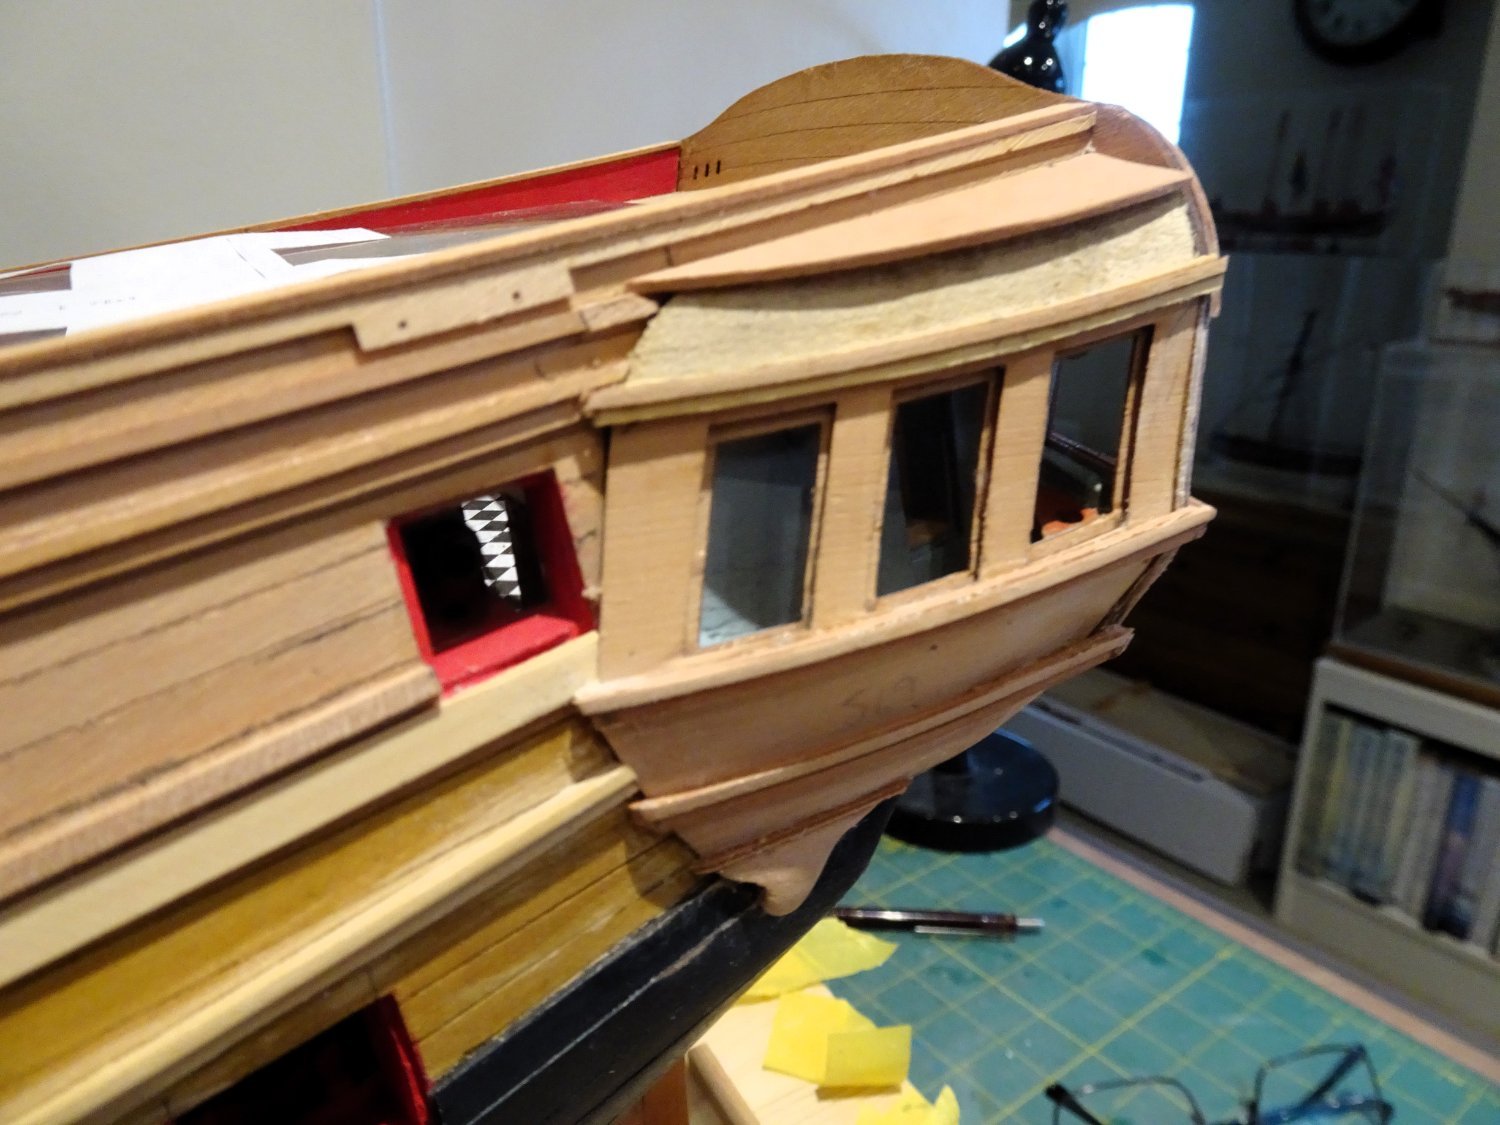
When it comes to the frames for the lights I have seen examples of white frames which look quite attractive. However, they would be the only white elements on the model so I am sticking with Ochre Brown.

3080
The frames are prepared on the fret, priming with Metal prep 4K, followed by two coats of Ochre brown.
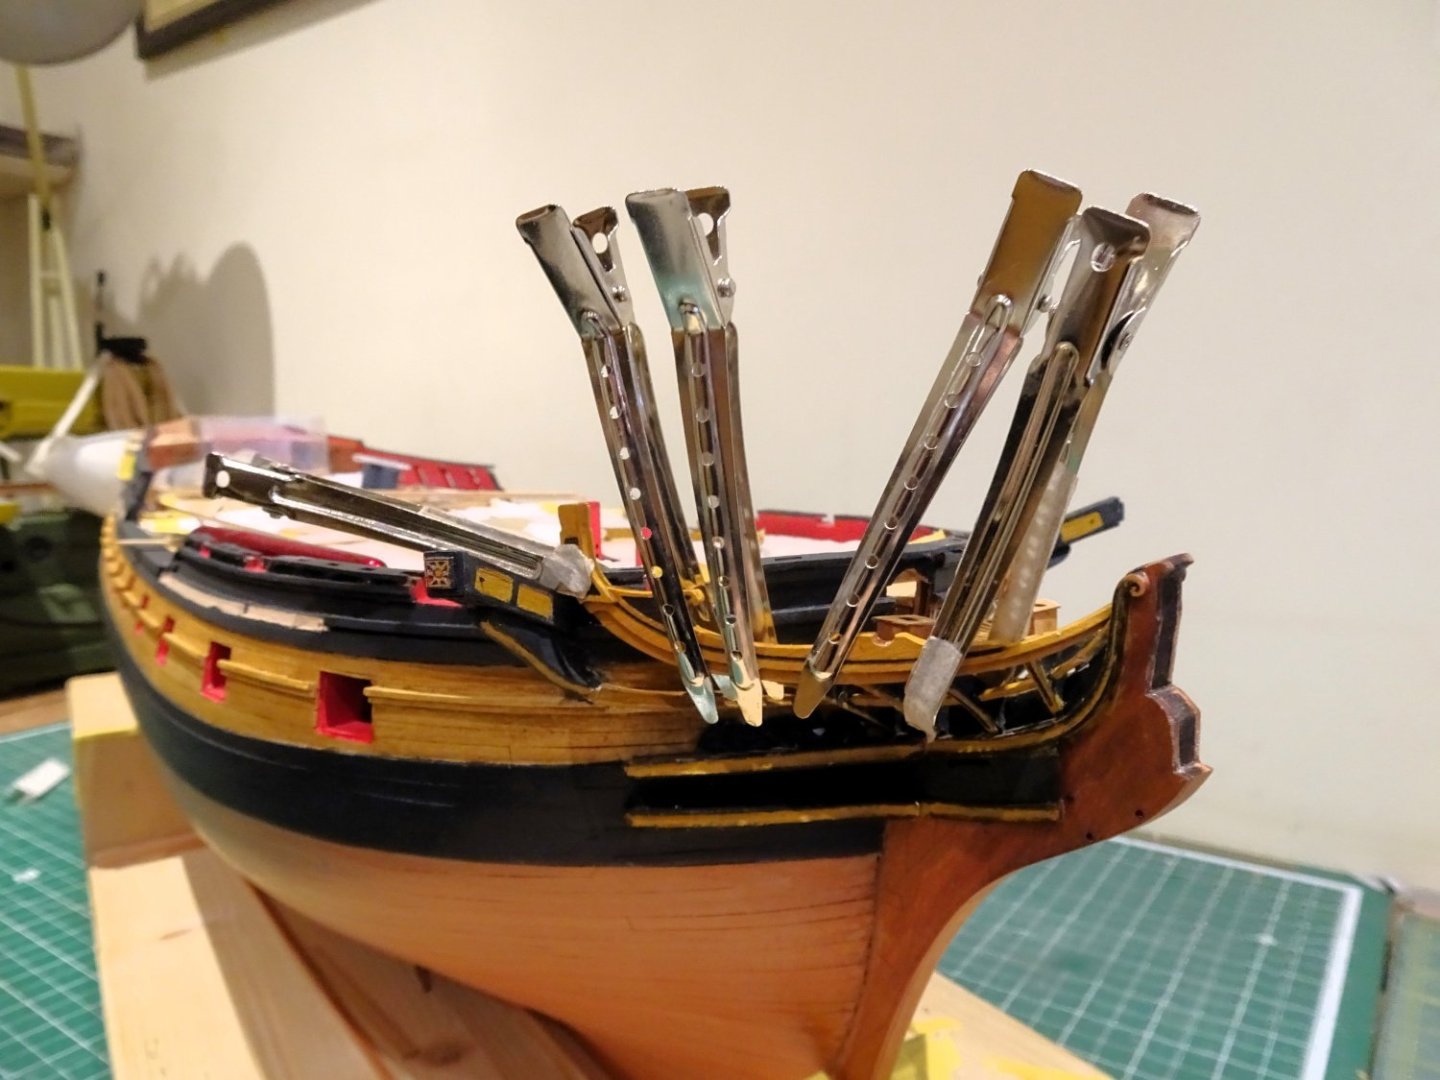
The trickiest part of this exercise will be fitting the frames without marring the ‘glass’ with glue smears.
Tomorrow’s interesting little exercise. 🫤
B.E.
18/12/2023
- Thukydides, Mirabell61, mugje and 24 others
-
 27
27
-
-
Cheers Guys, and thanks for the support with the 'likes'.
The figure is now back in the box for safety.
B.E.
- Ryland Craze, AJohnson, mtaylor and 1 other
-
4
-
Post One hundred and eighteen
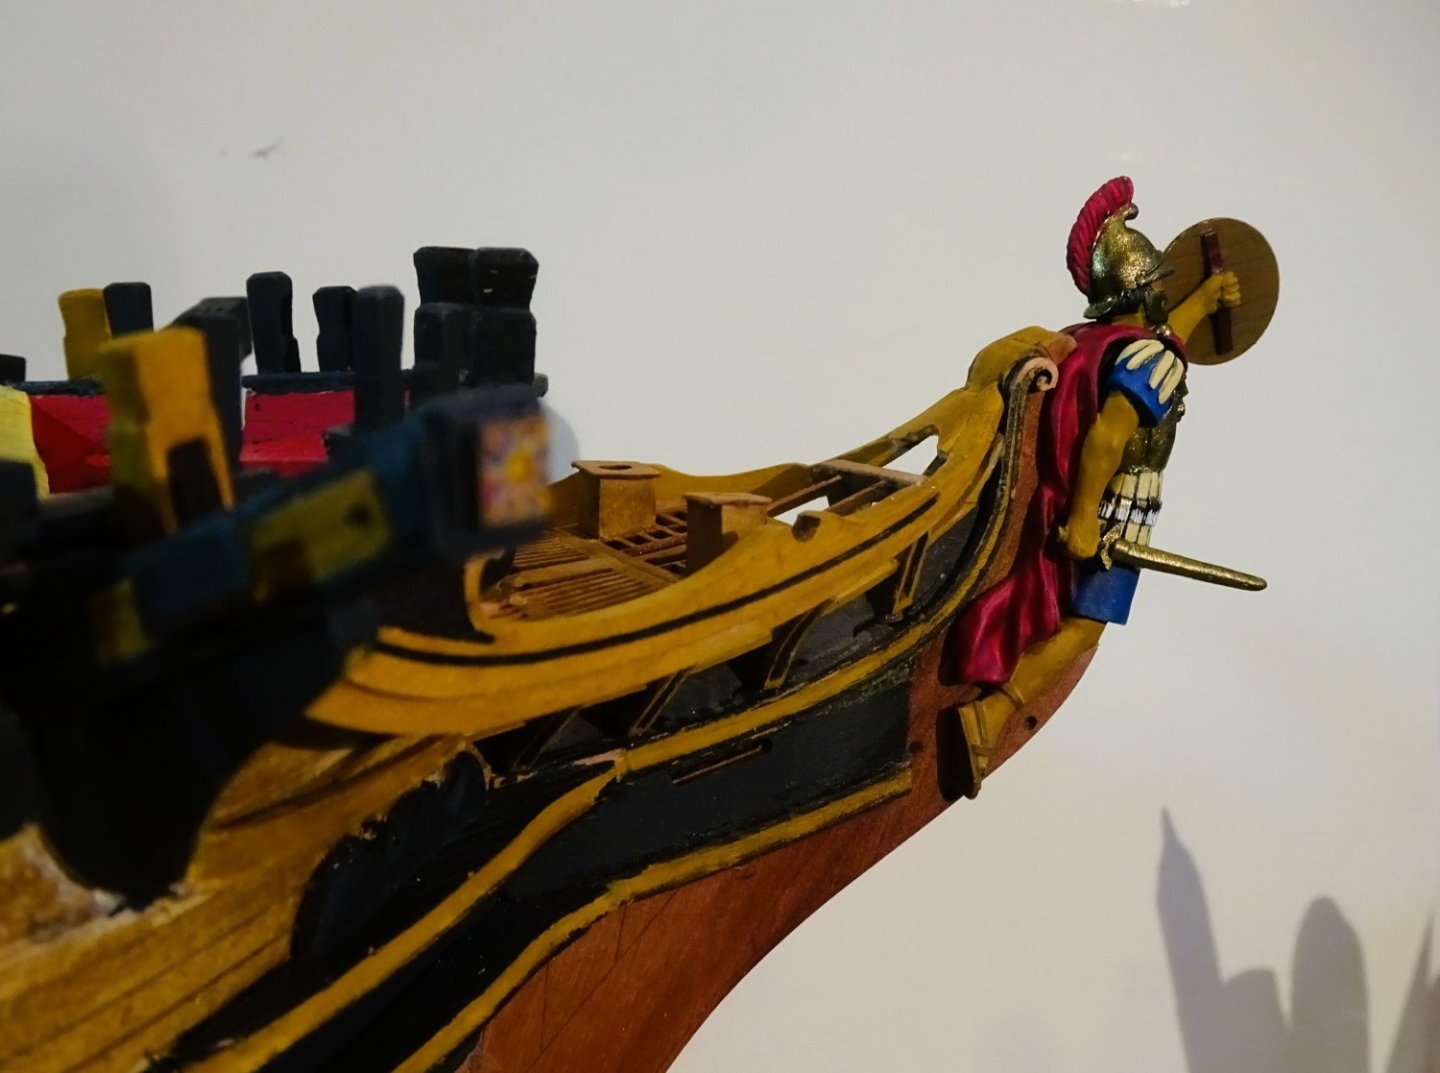
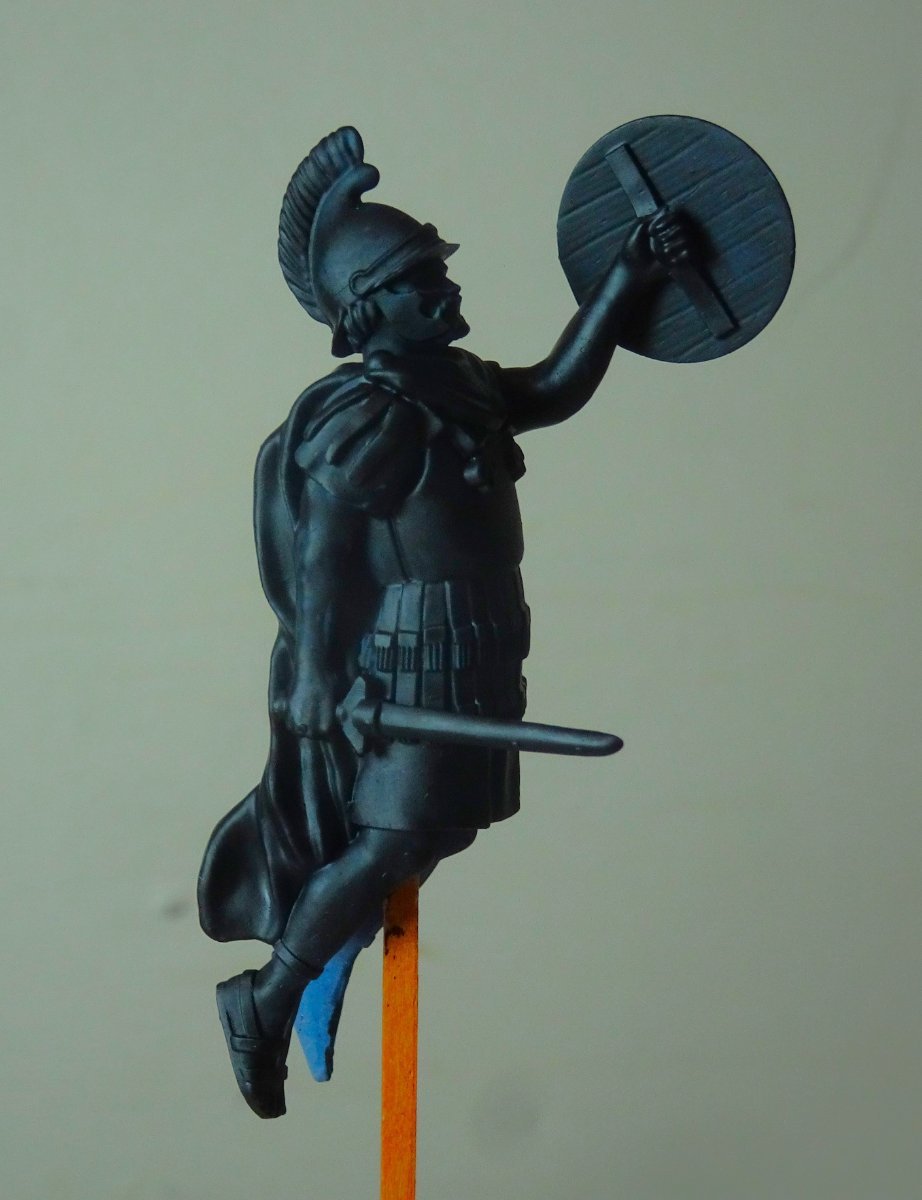
Thoughts about the Figure
This seems a good time to check out the Figure.
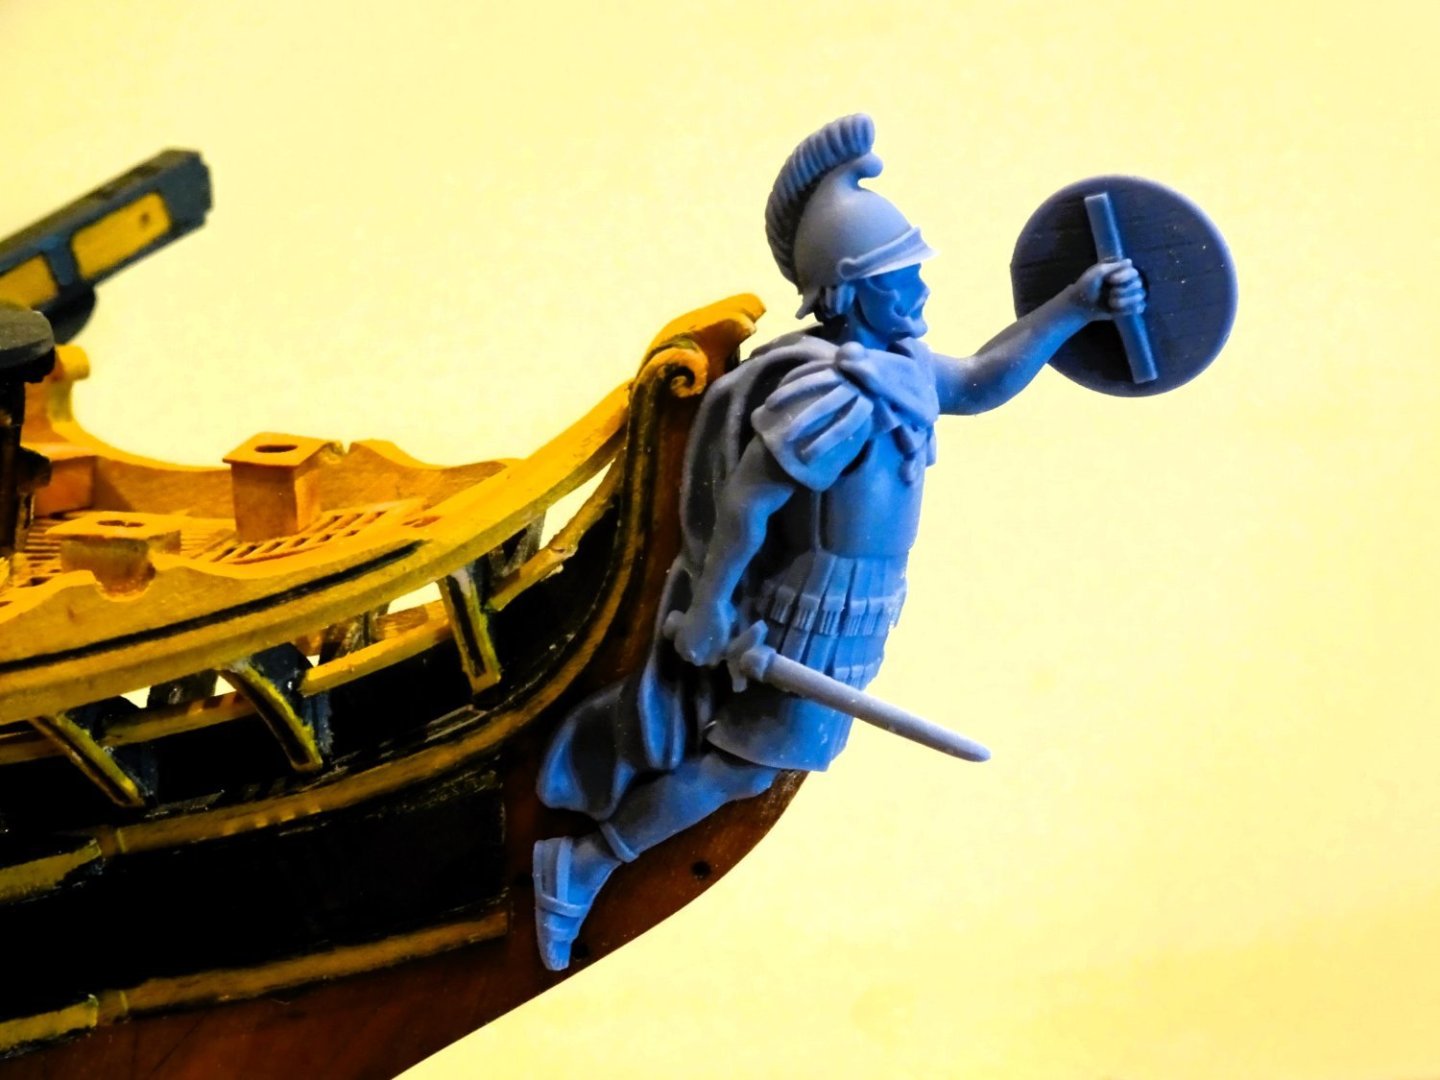
The resin warrior version provided by Chris is a mini work of art, beautifully detailed and styled.
2998
We don’t know what Figure ‘Indy’ actually had, but the choice of a Bronze age Greek Warrior fits perfectly.
During the late 18thc it was practice to paint Figures in natural colours, rather garish looking in some cases.
I have been pondering how to finish the figure, and I’ve concerns that too bright a finish may clash with the more muted tones of my build.
I have several books on the subject, but contemporary ship models of this period with ‘painted’ figures are hard to find.
A lot of Navy board models are without figures, and for those that have them they are usually either gilded or varnished.
For ‘Indy’ I want to use more muted tones with reduced contrast between the shades.
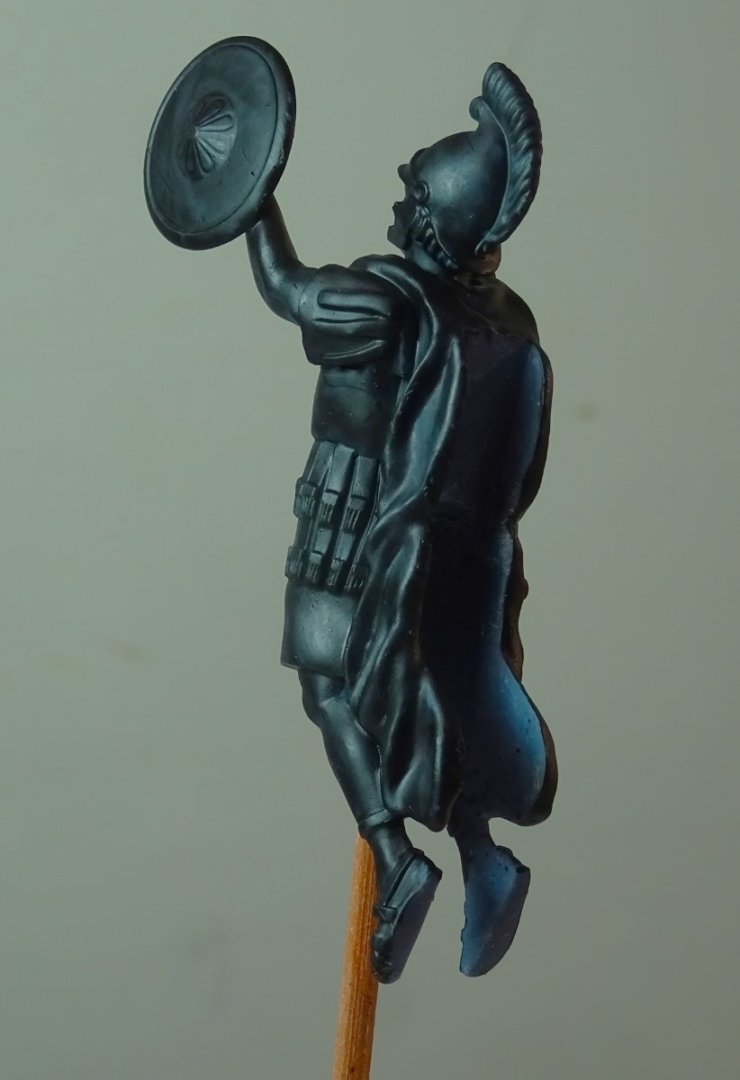
How that will turn out I’ve no idea at this point, but I first need to wash and prime the figure.
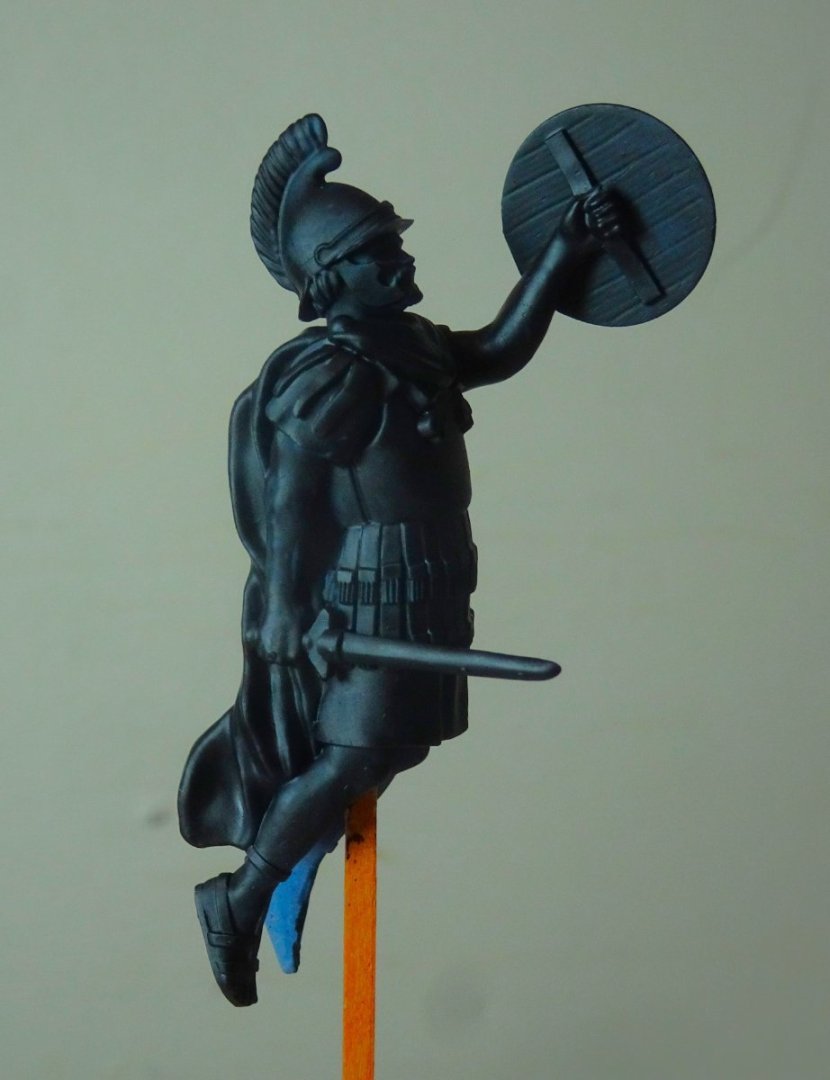
3002
3006
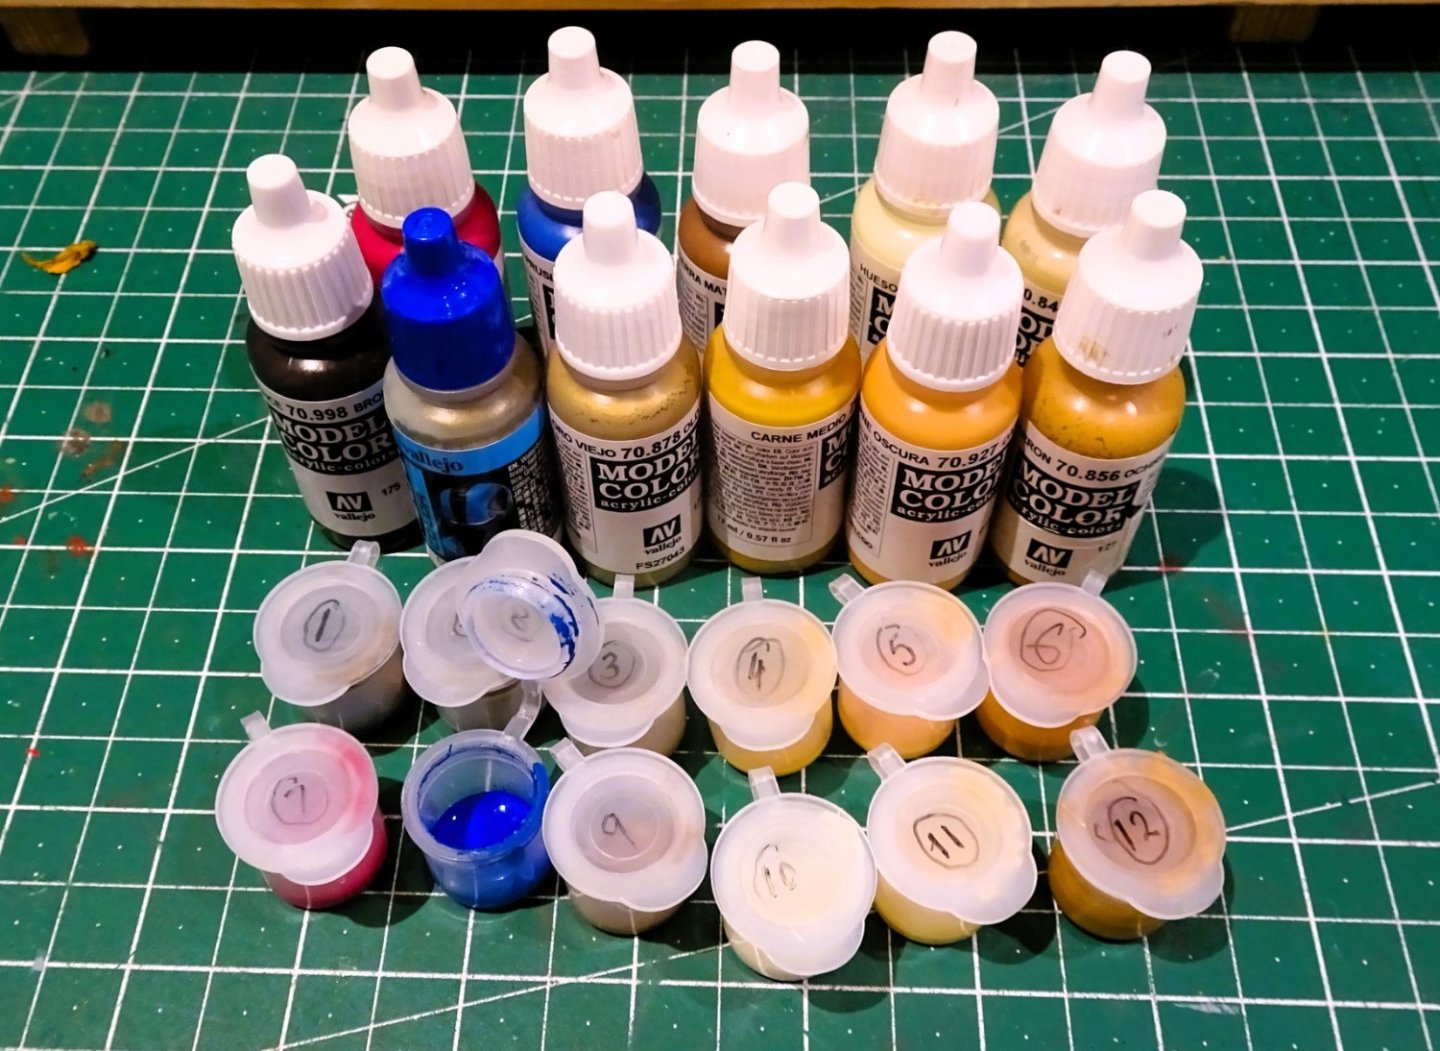
I use Vallejo Surface primer which shows up the detail beautifully.
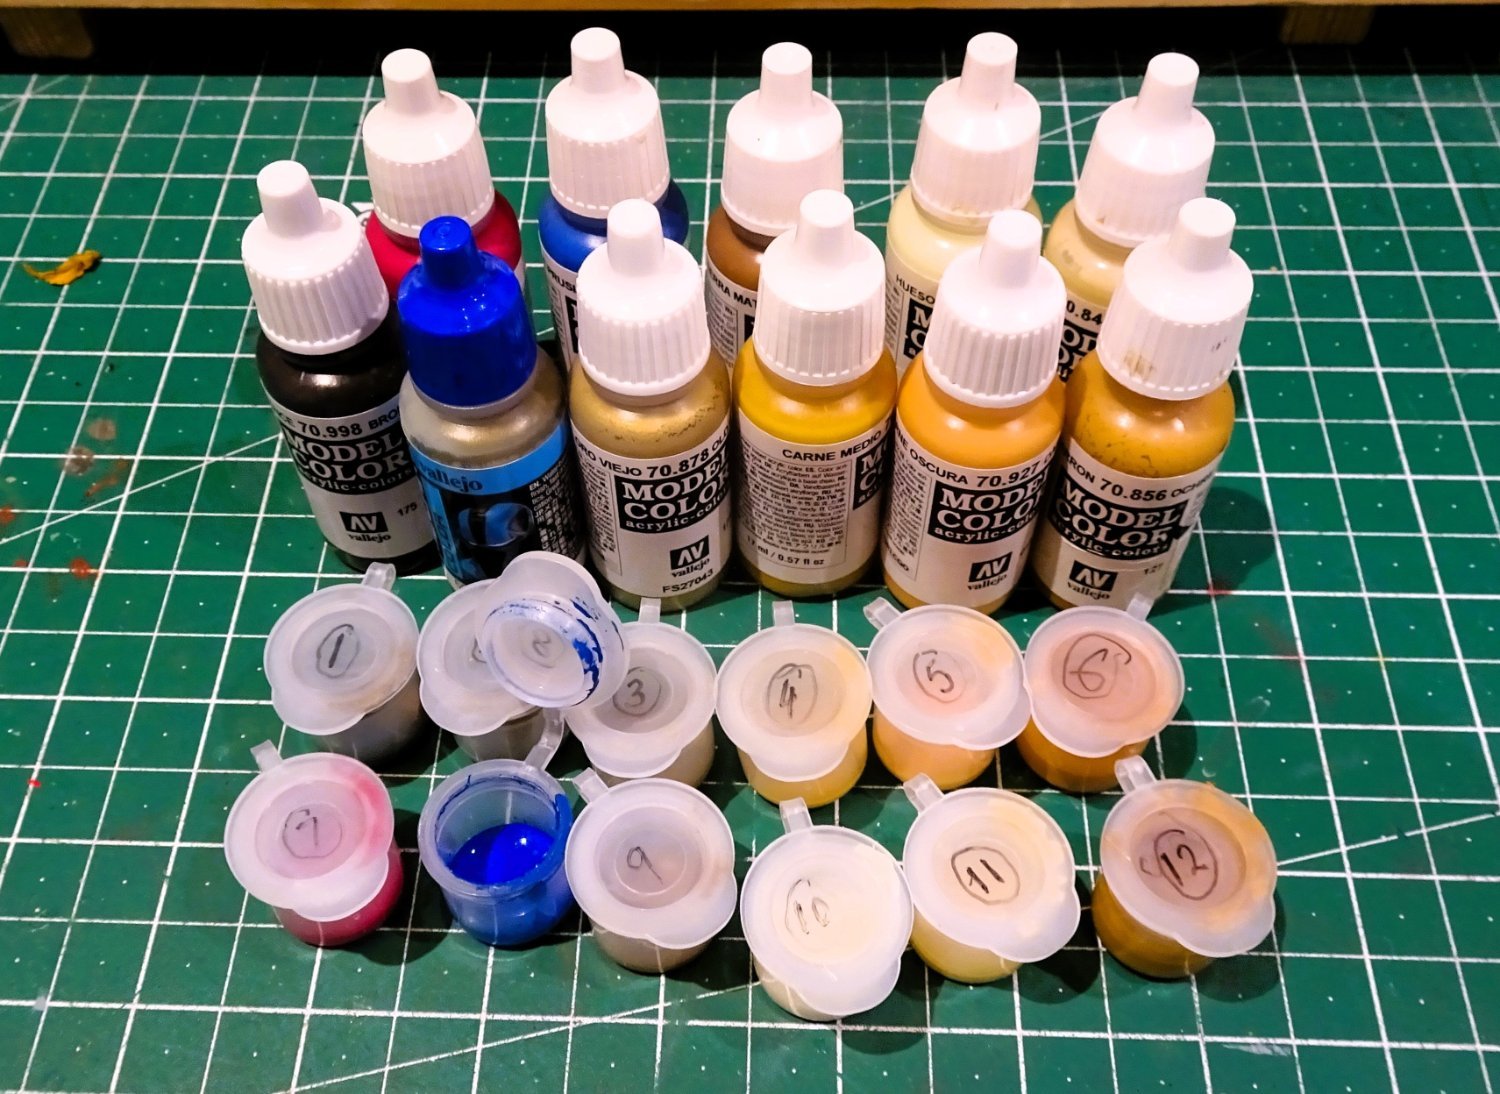
Before I start painting, I create a colour chart of the likely shades I will use.
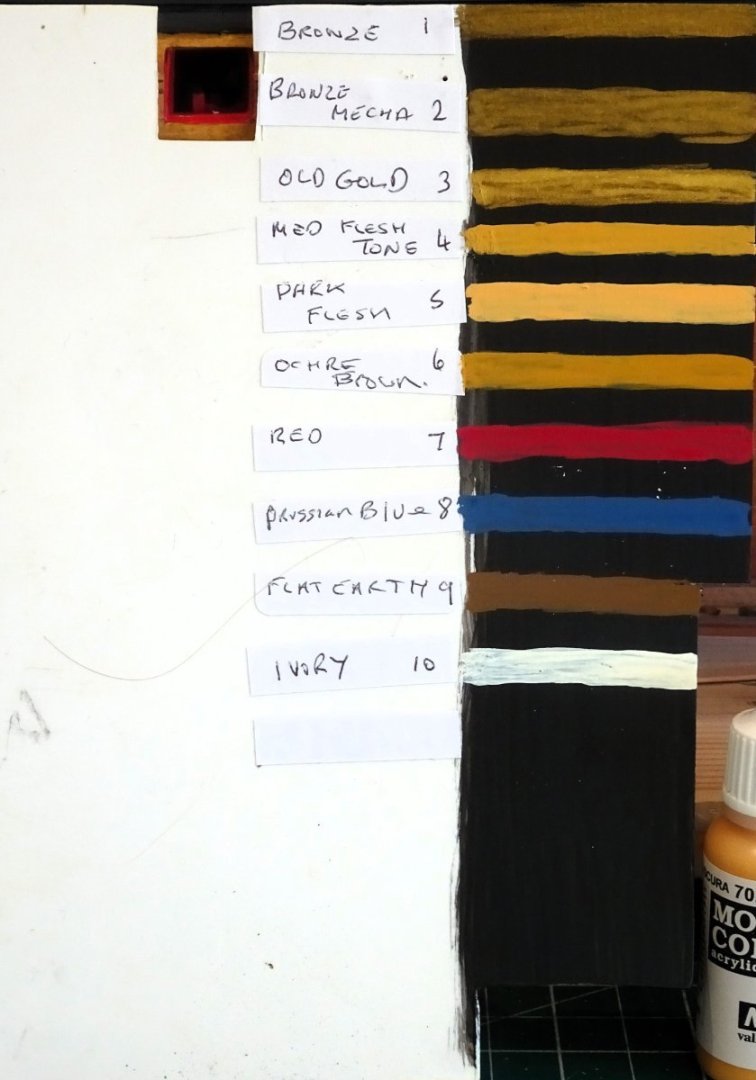
3032
These are painted over the primer coat so I can determine the coverage required.
3038
Incidentally, these little lidded 3.5ml pots obtained from Amazon are ideal for paint mixing small quantities and keep it fresh for a long time.
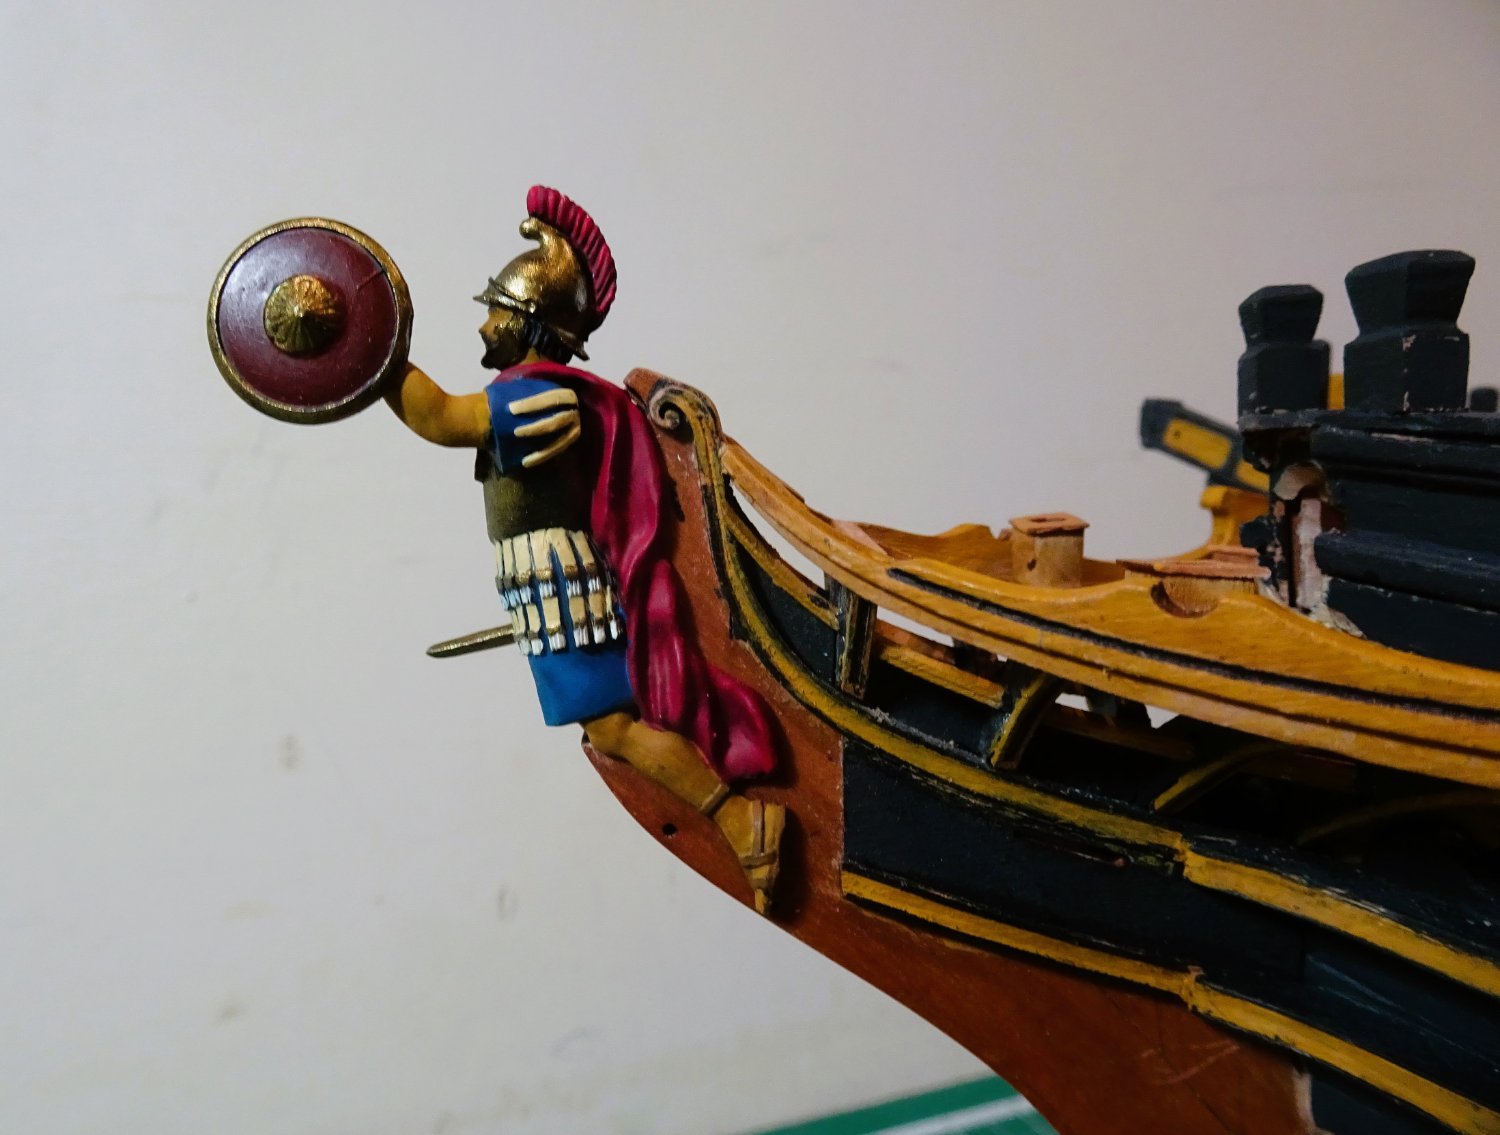
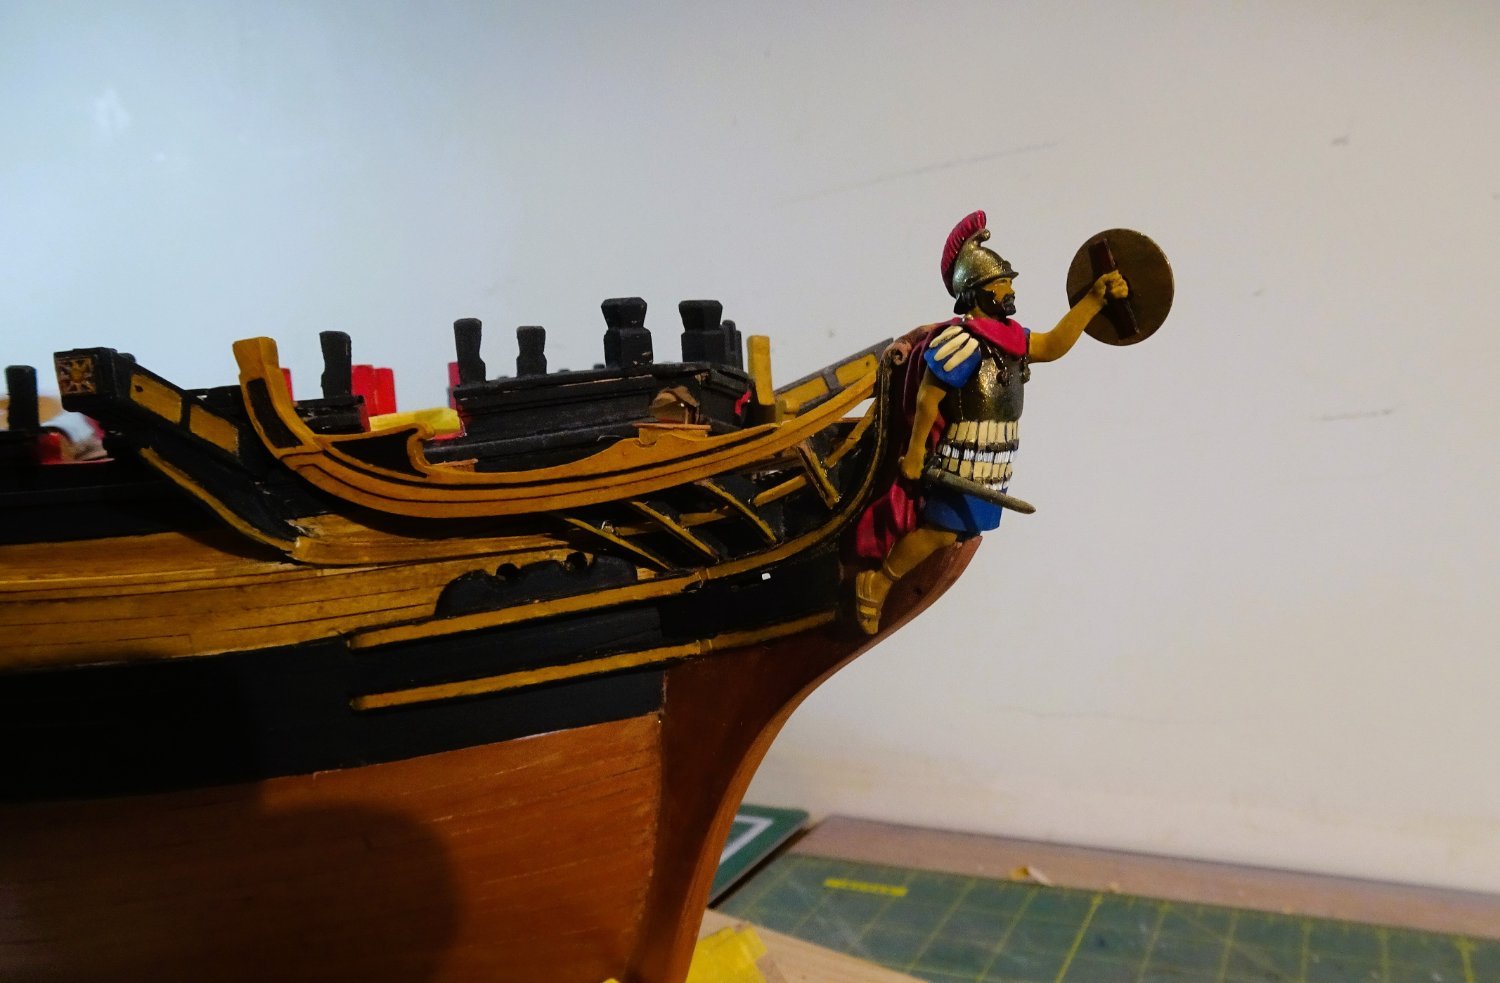
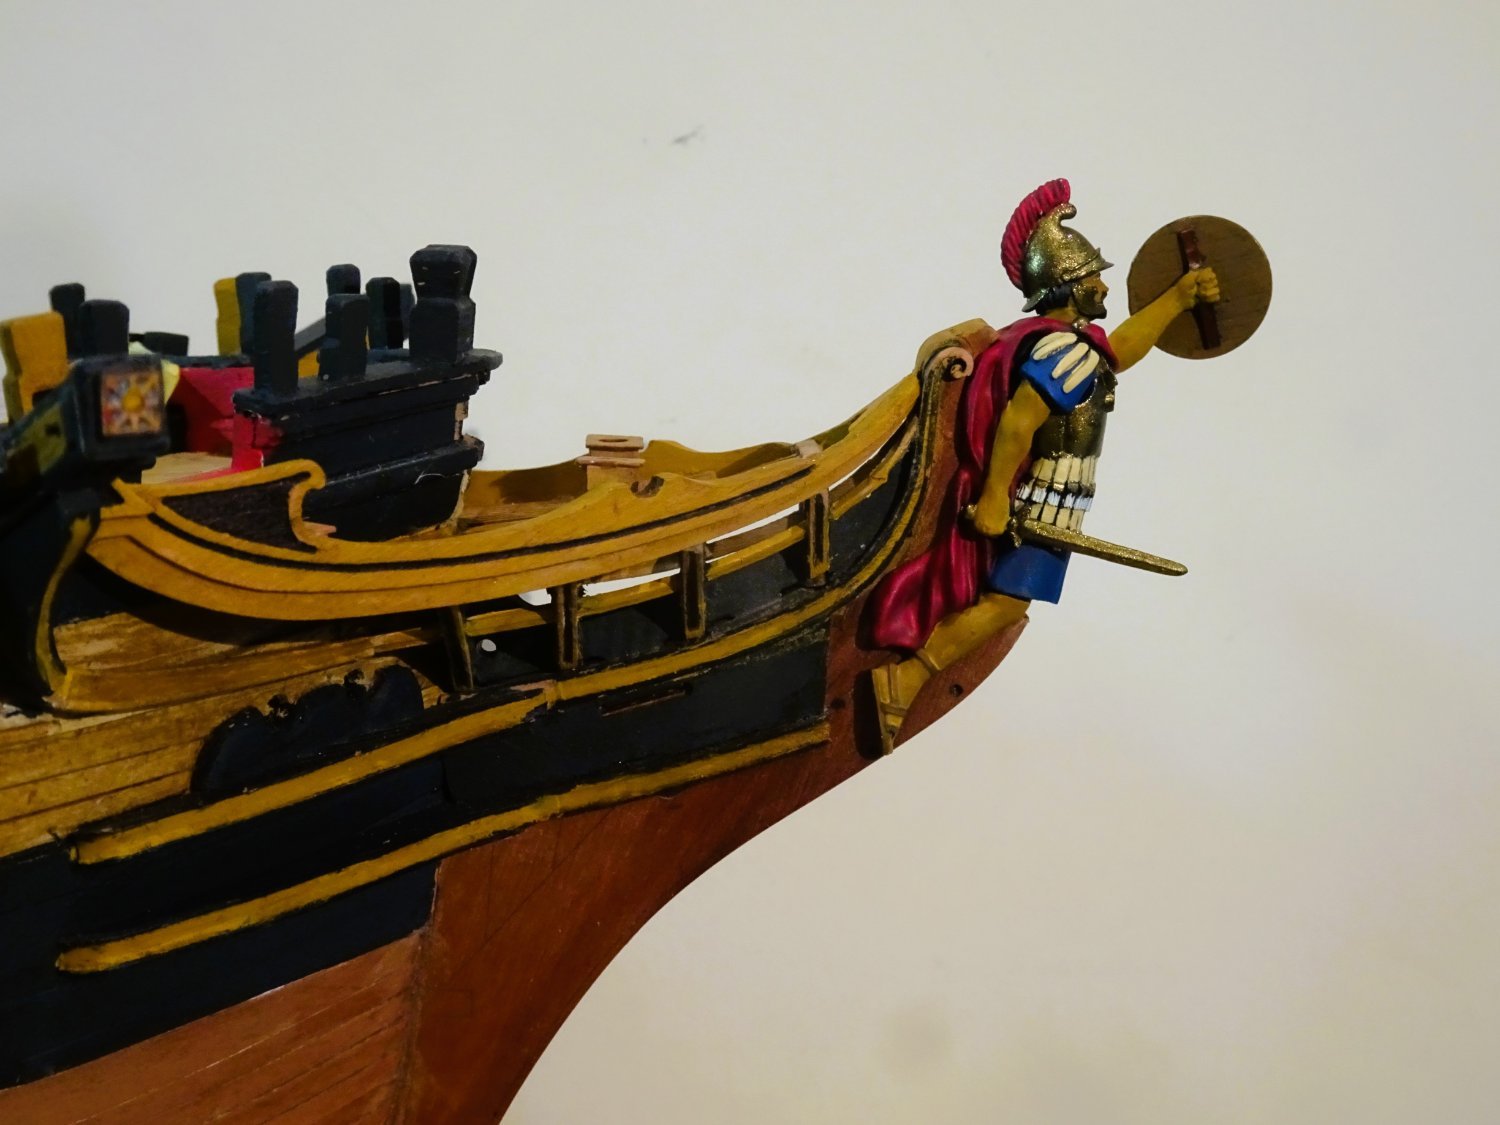
I painted the model in life colours but aimed for a soft tone. Vallejo paints were used throughout.
This is the result.
3068
3071
3073

3074

3078
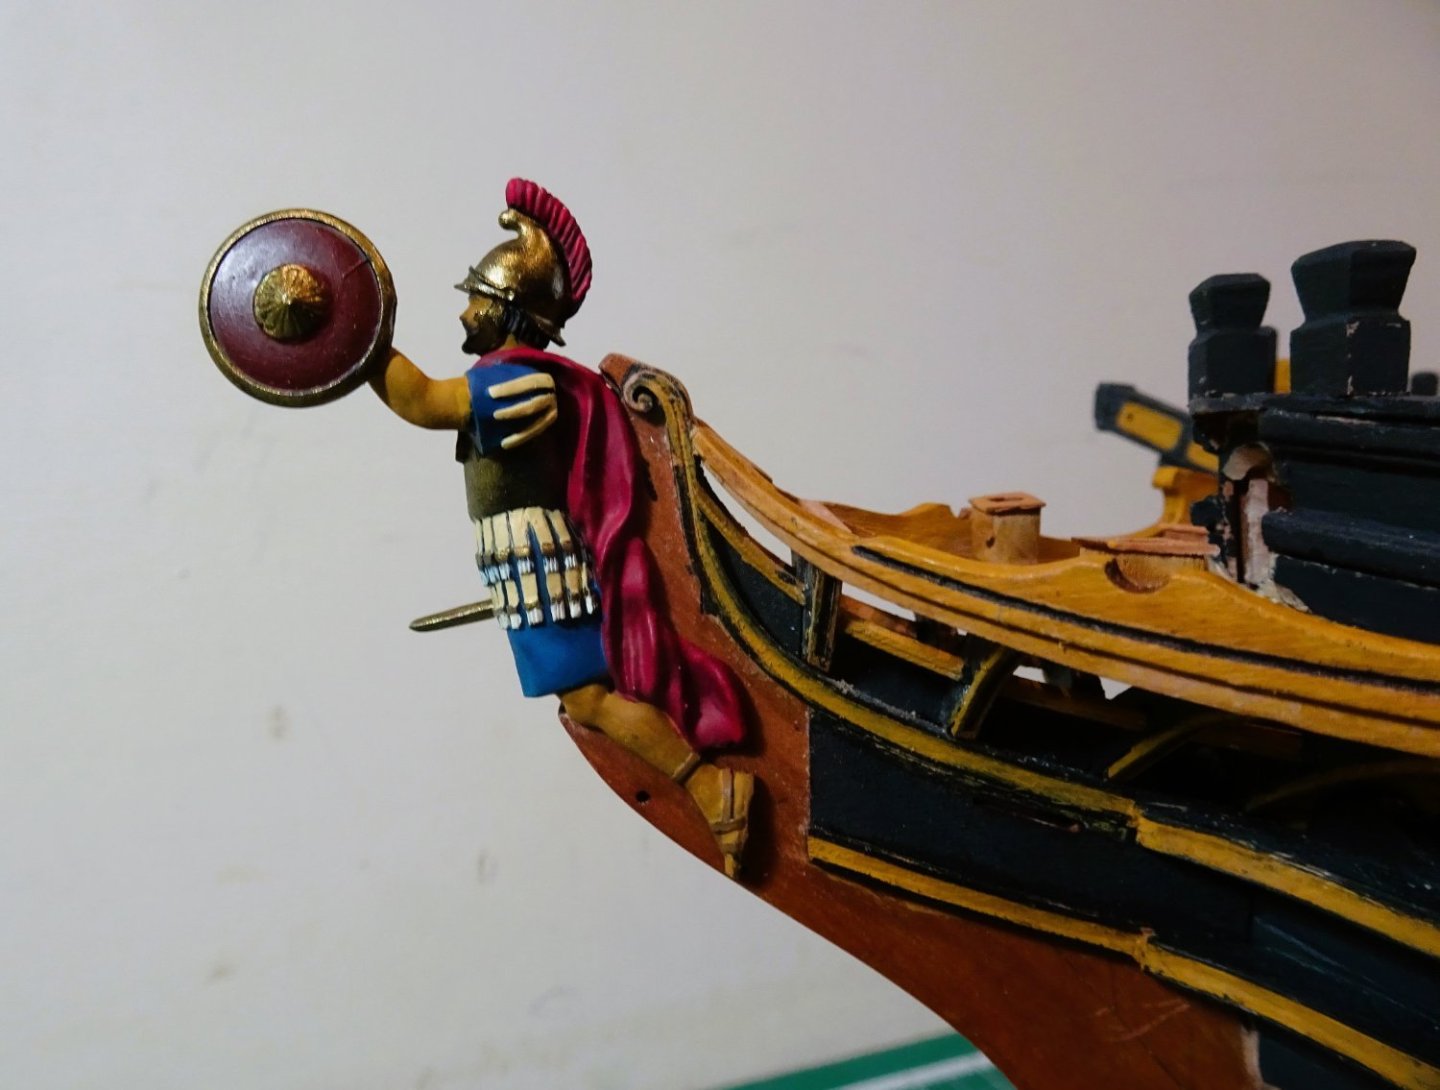
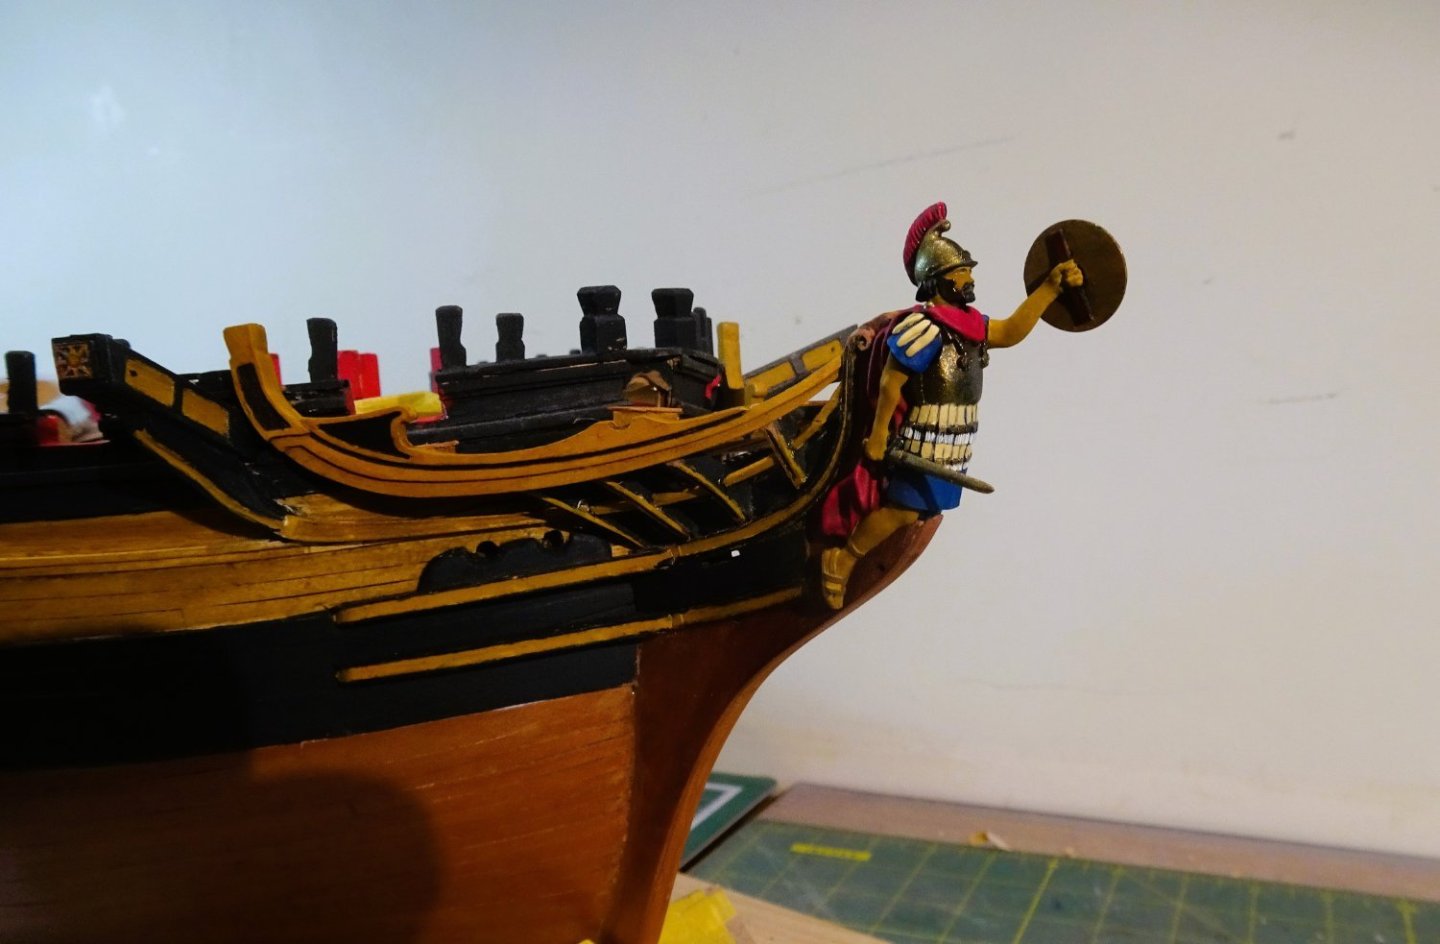
I think the colours tone in very well, and the figure sets off the model beautifully.
I am particularly pleased with the Bronze used on the metal work, and the Red for the cloak which has a dark wine colour.
The reinforced linen of the Pteruges (skirt) were painted with Dark sand, and the tassels in Ivory.
For skin tones I opted for Ochre brown with a spot of Burnt Umber added.
The shield is Hull Red with the embossed hub and rim in Bronze.
I had intended to apply washes and varnishes, but I’m now thinking I should quit while I’m ahead.
It is after all a figurehead on a ship not a real-life depiction as may be created for a specific model figure.
A pleasant diversion from recent activity, but back to the build now.
B.E.
15/12/2023
-
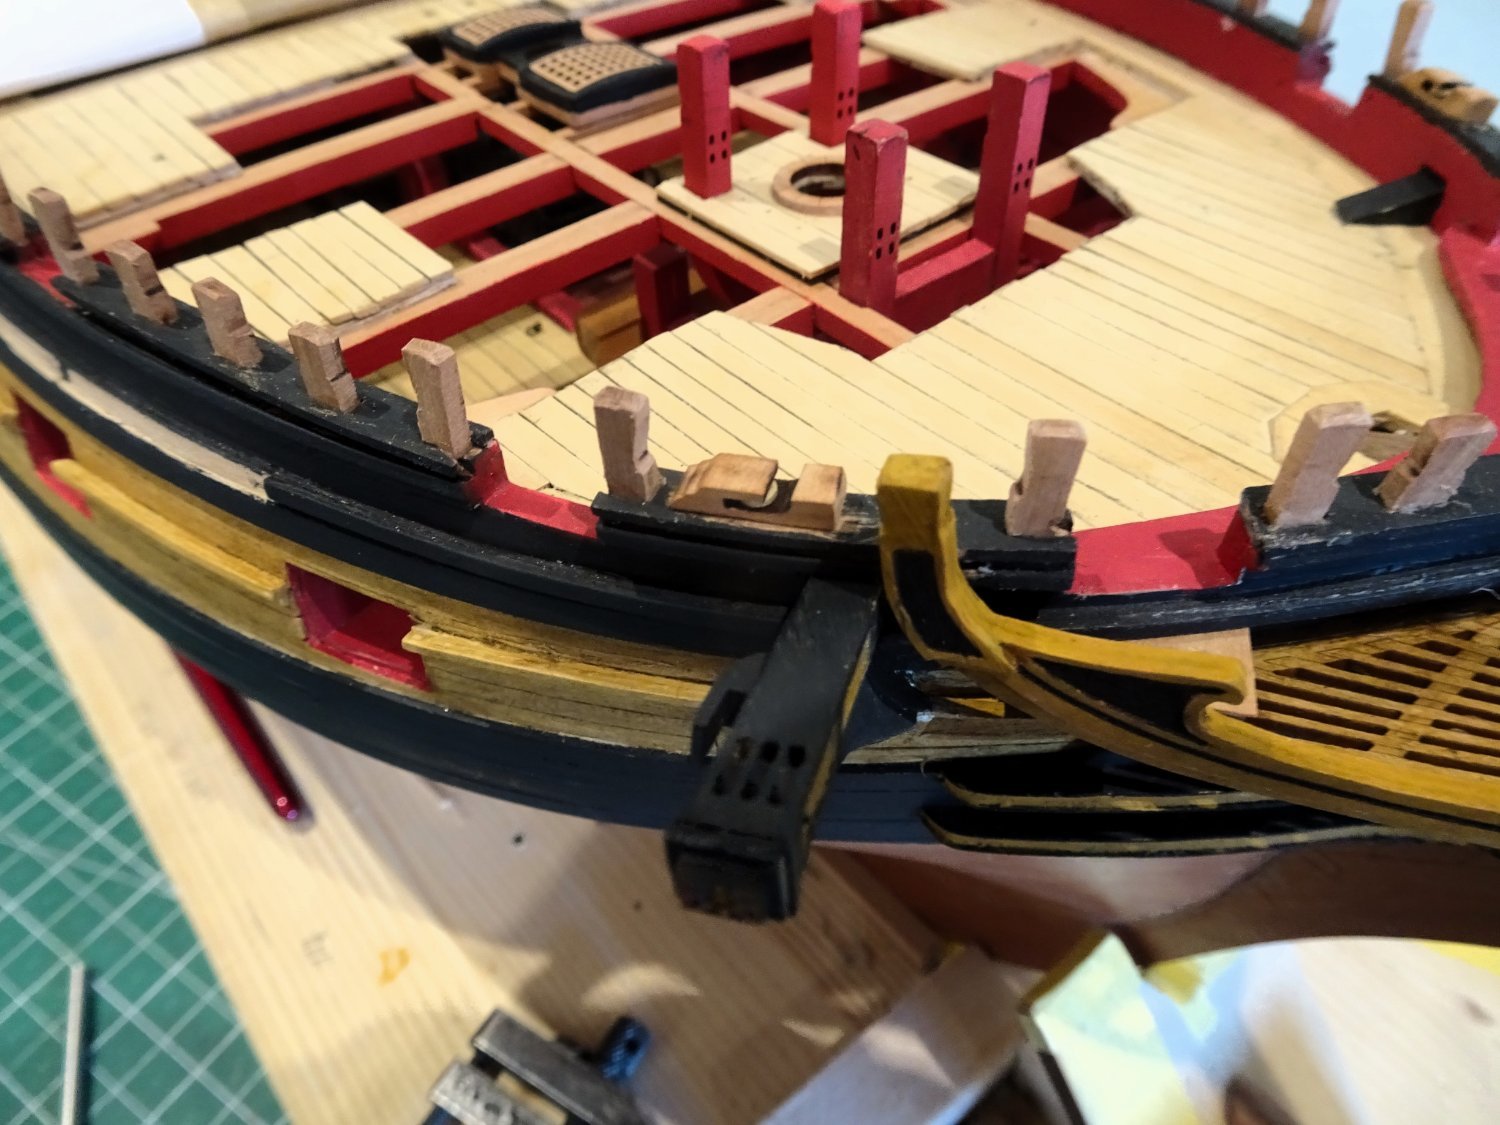
Post One hundred and seventeen
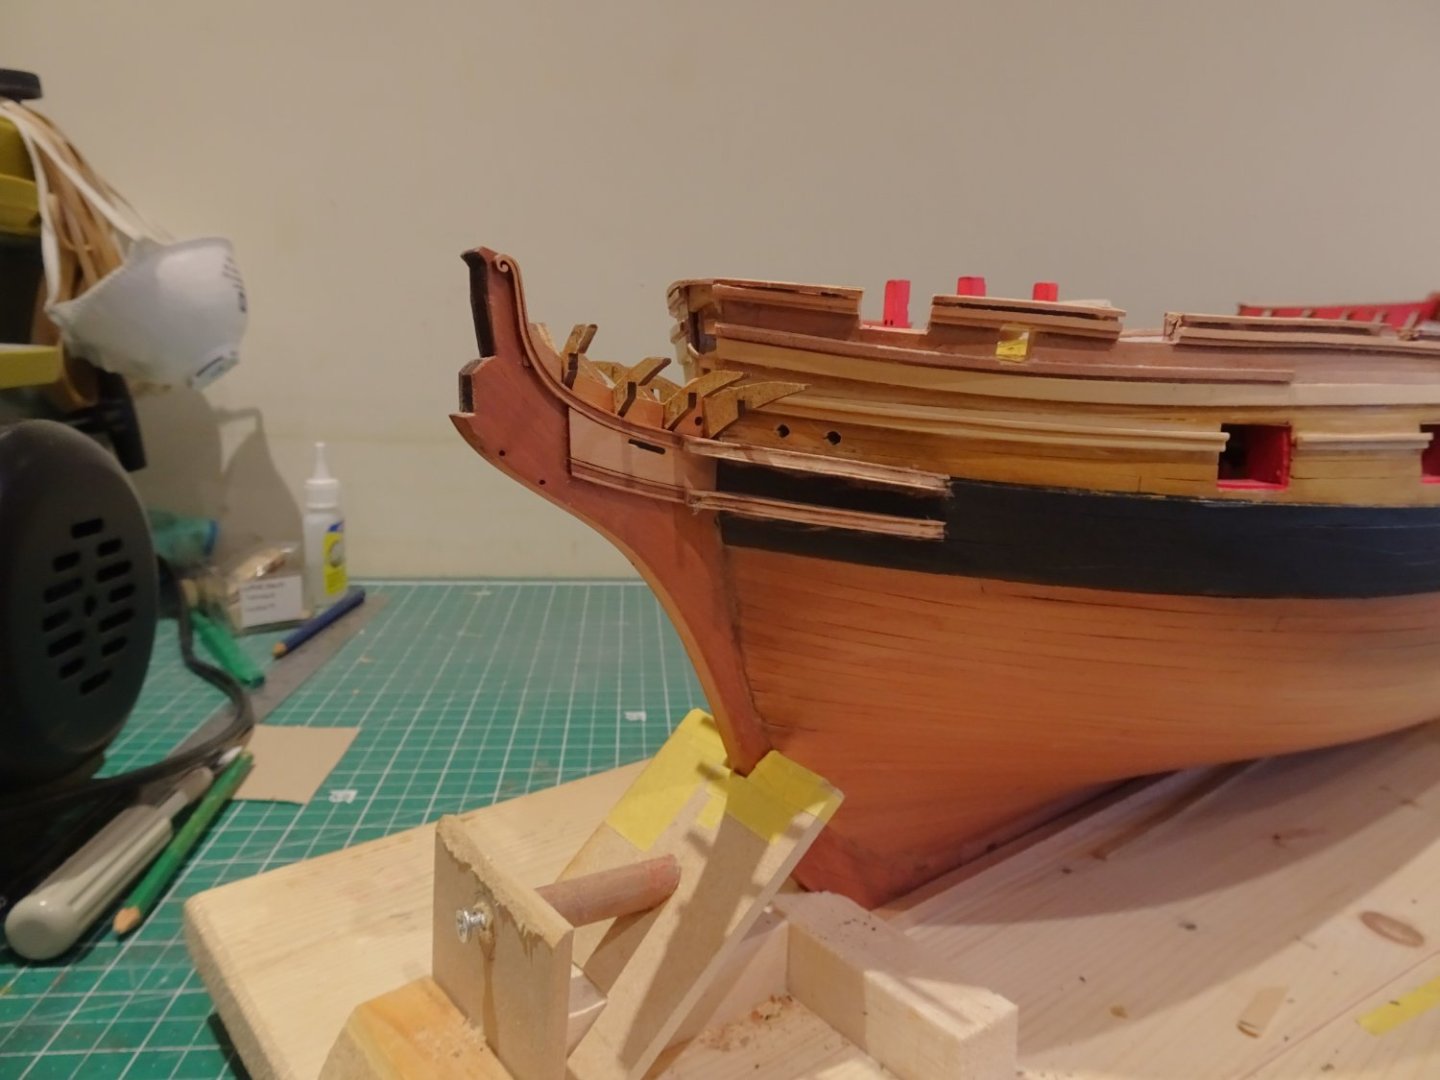
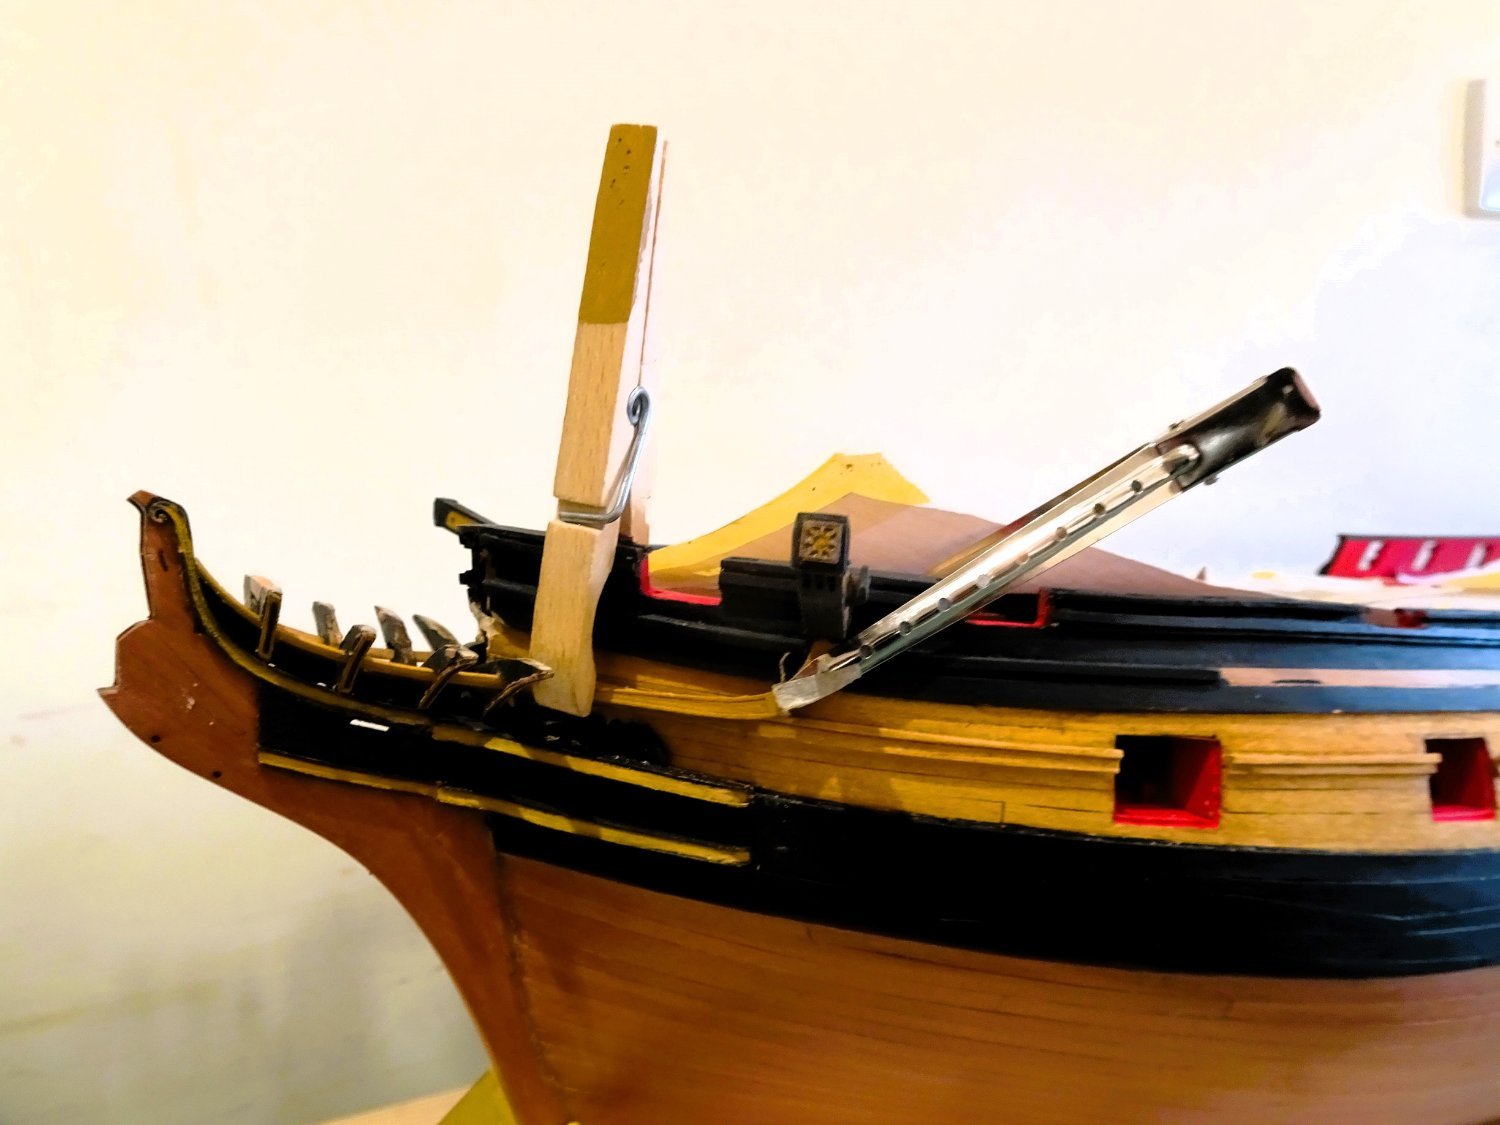
Timberheads
Not much to say about these, a little chamfering around the tops and ensuring that those flanking the gunports are vertical, and the others line-up.
3008
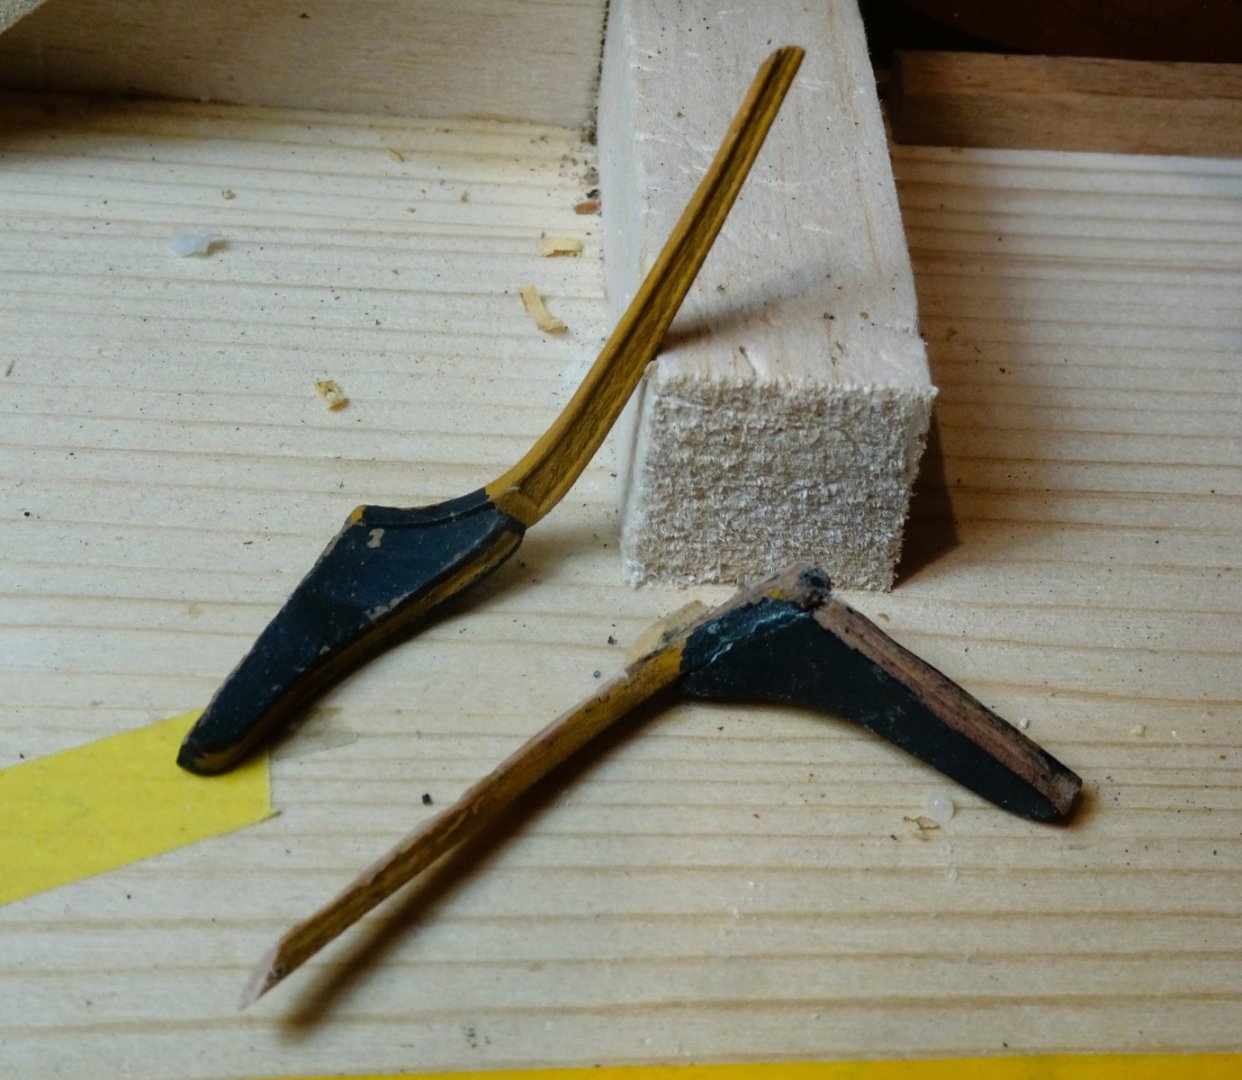
The much larger tops of the two knightheads or Bollards either side of the Bowsprit opening are the tricky ones.

3011
These need to be positioned accurately and appear vertical from all angles.

3009
The final addition are the snatch blocks for the Cat tackle. I added a sheave for these, cut from a slice of 3mm ø dowel.
3018
3027

3028
A little light sanding, a re-coat and they should be good to go.
B.E.
13/12/2023
- CiscoH, jpalmer1970, AJohnson and 22 others
-
25
-
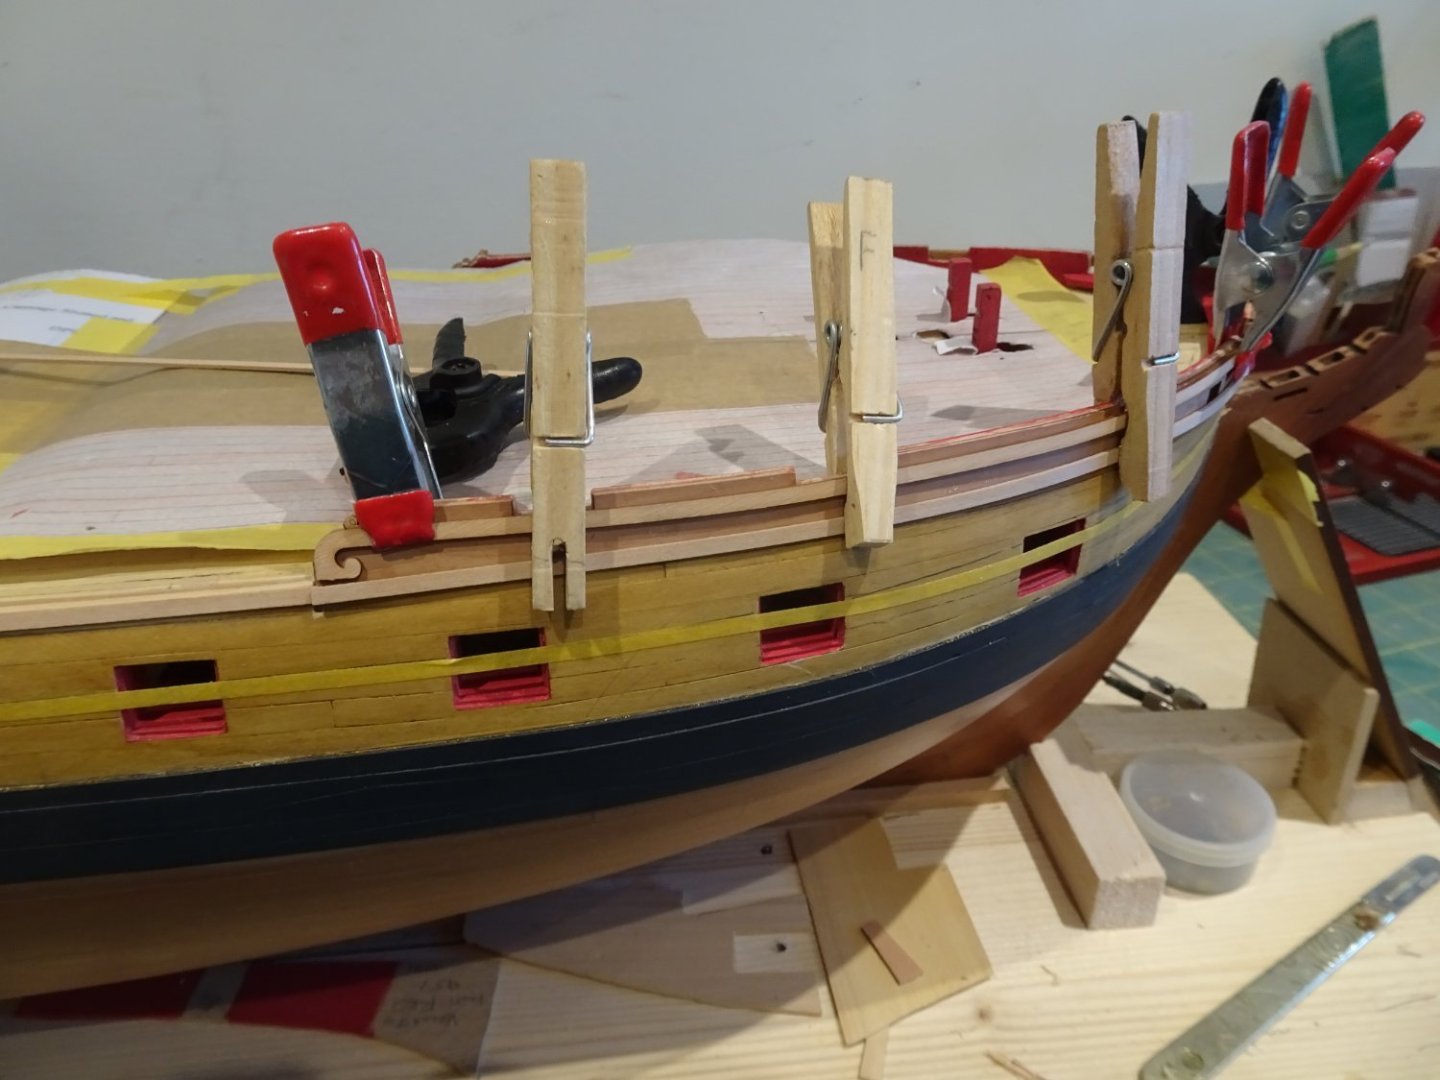
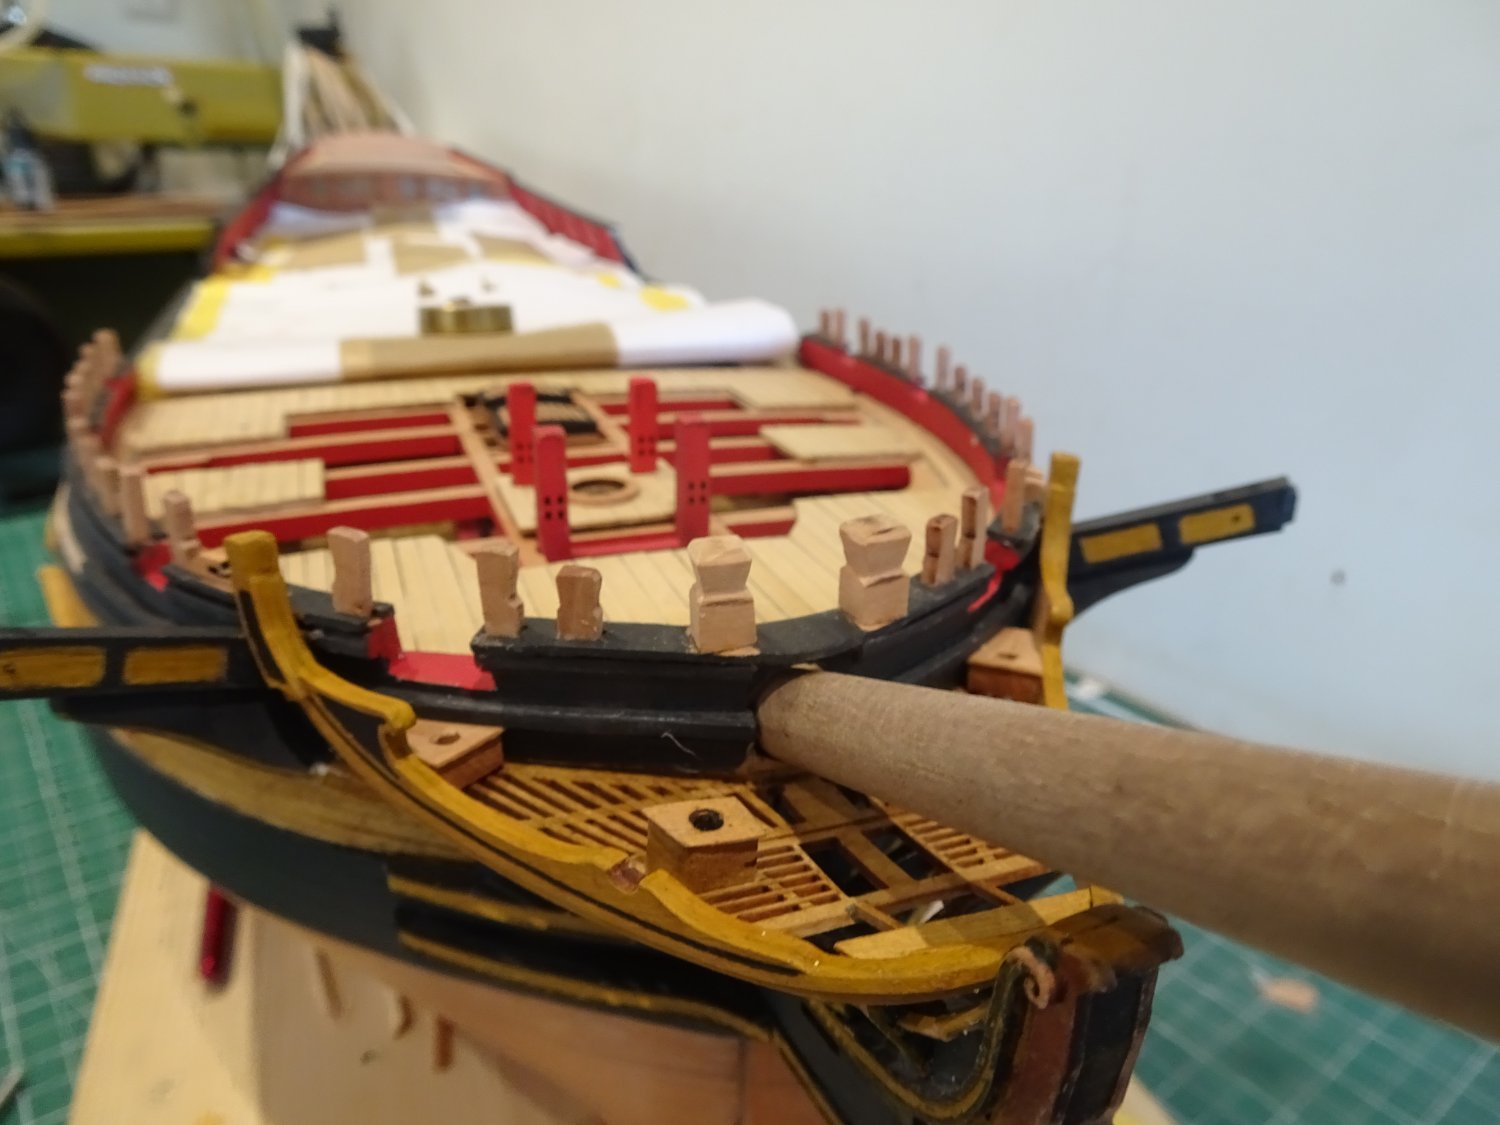
Post One Hundred and Sixteen
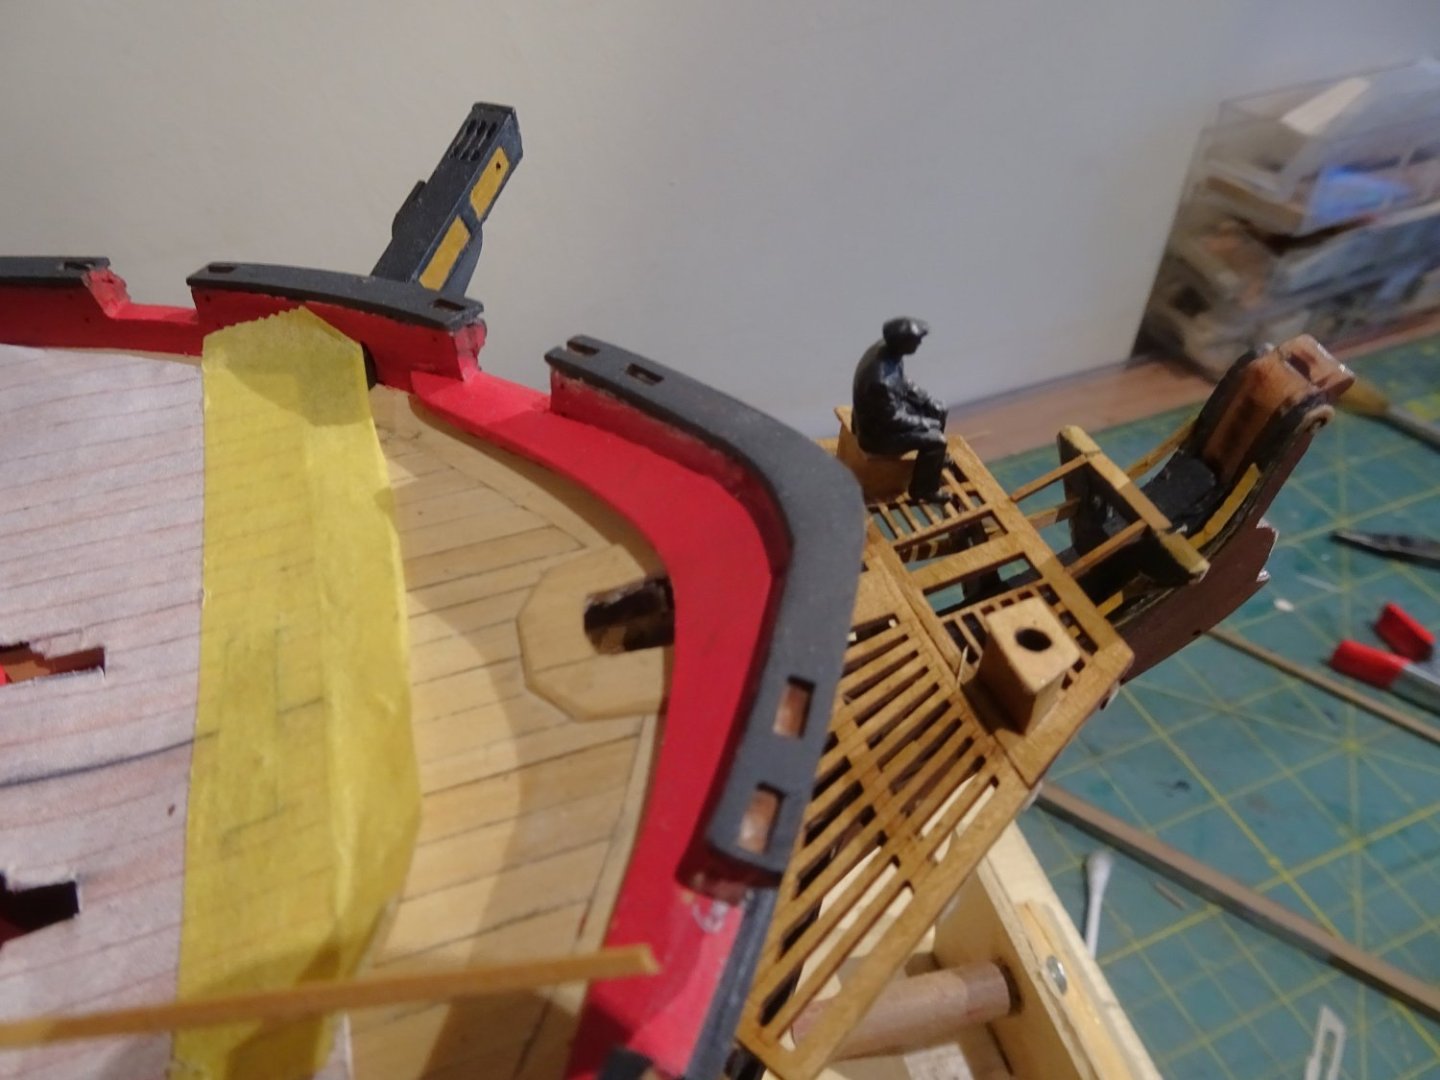
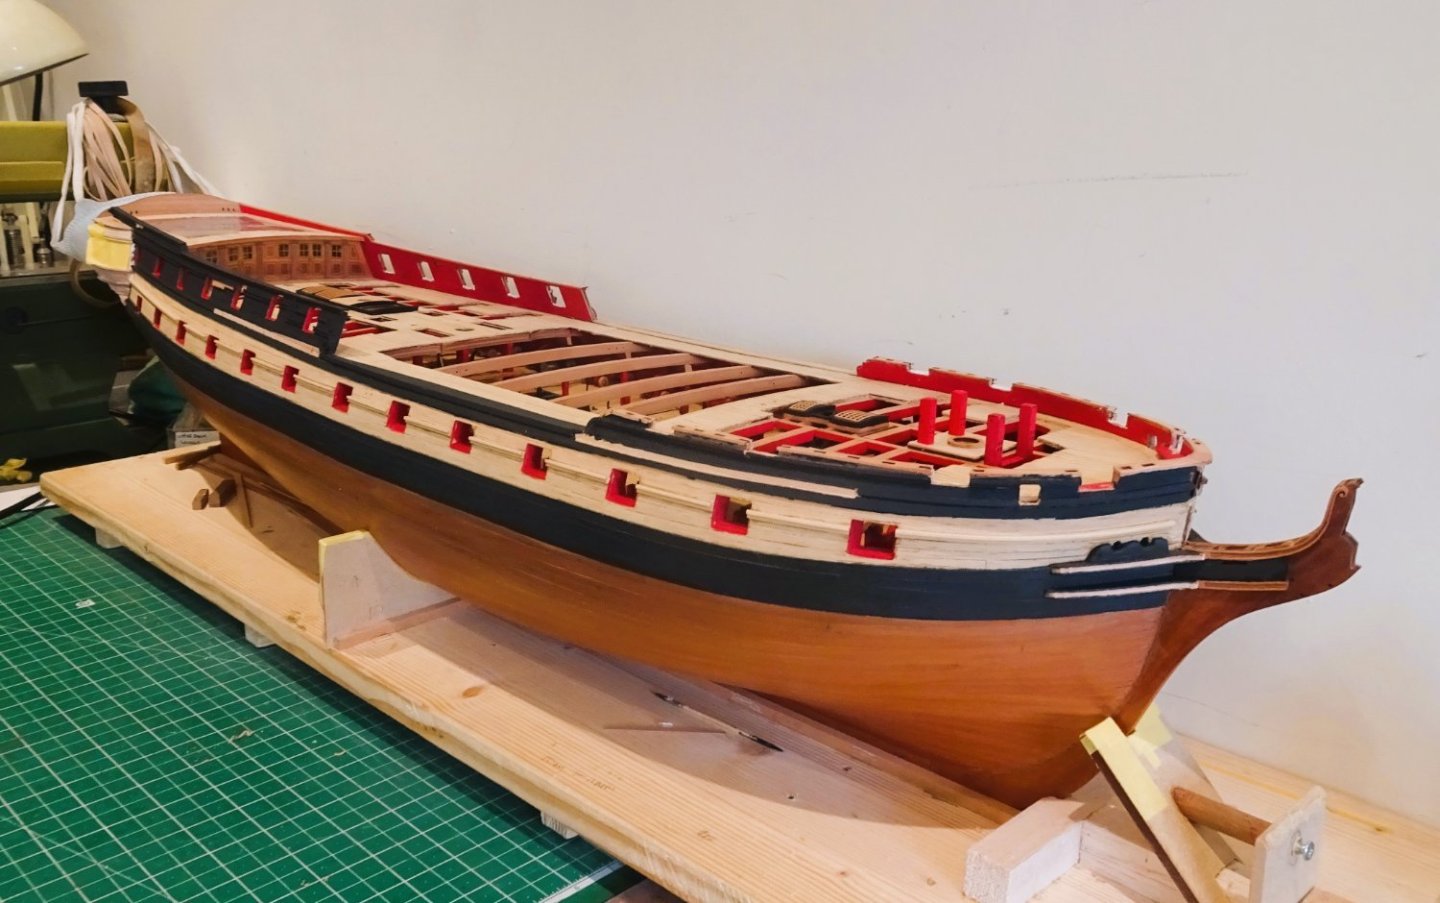
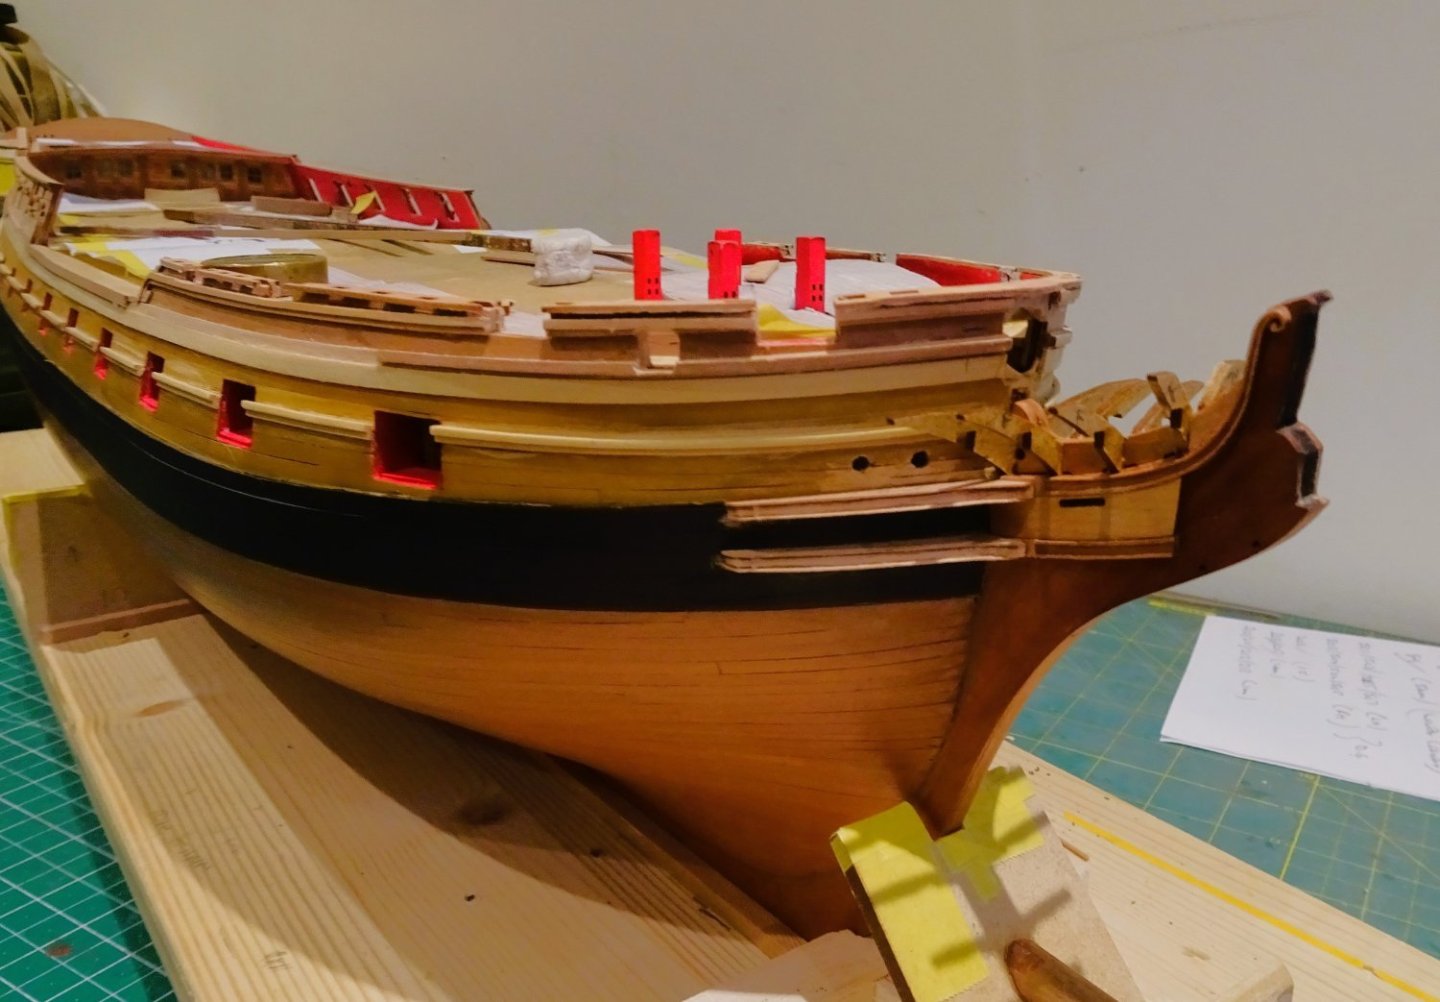
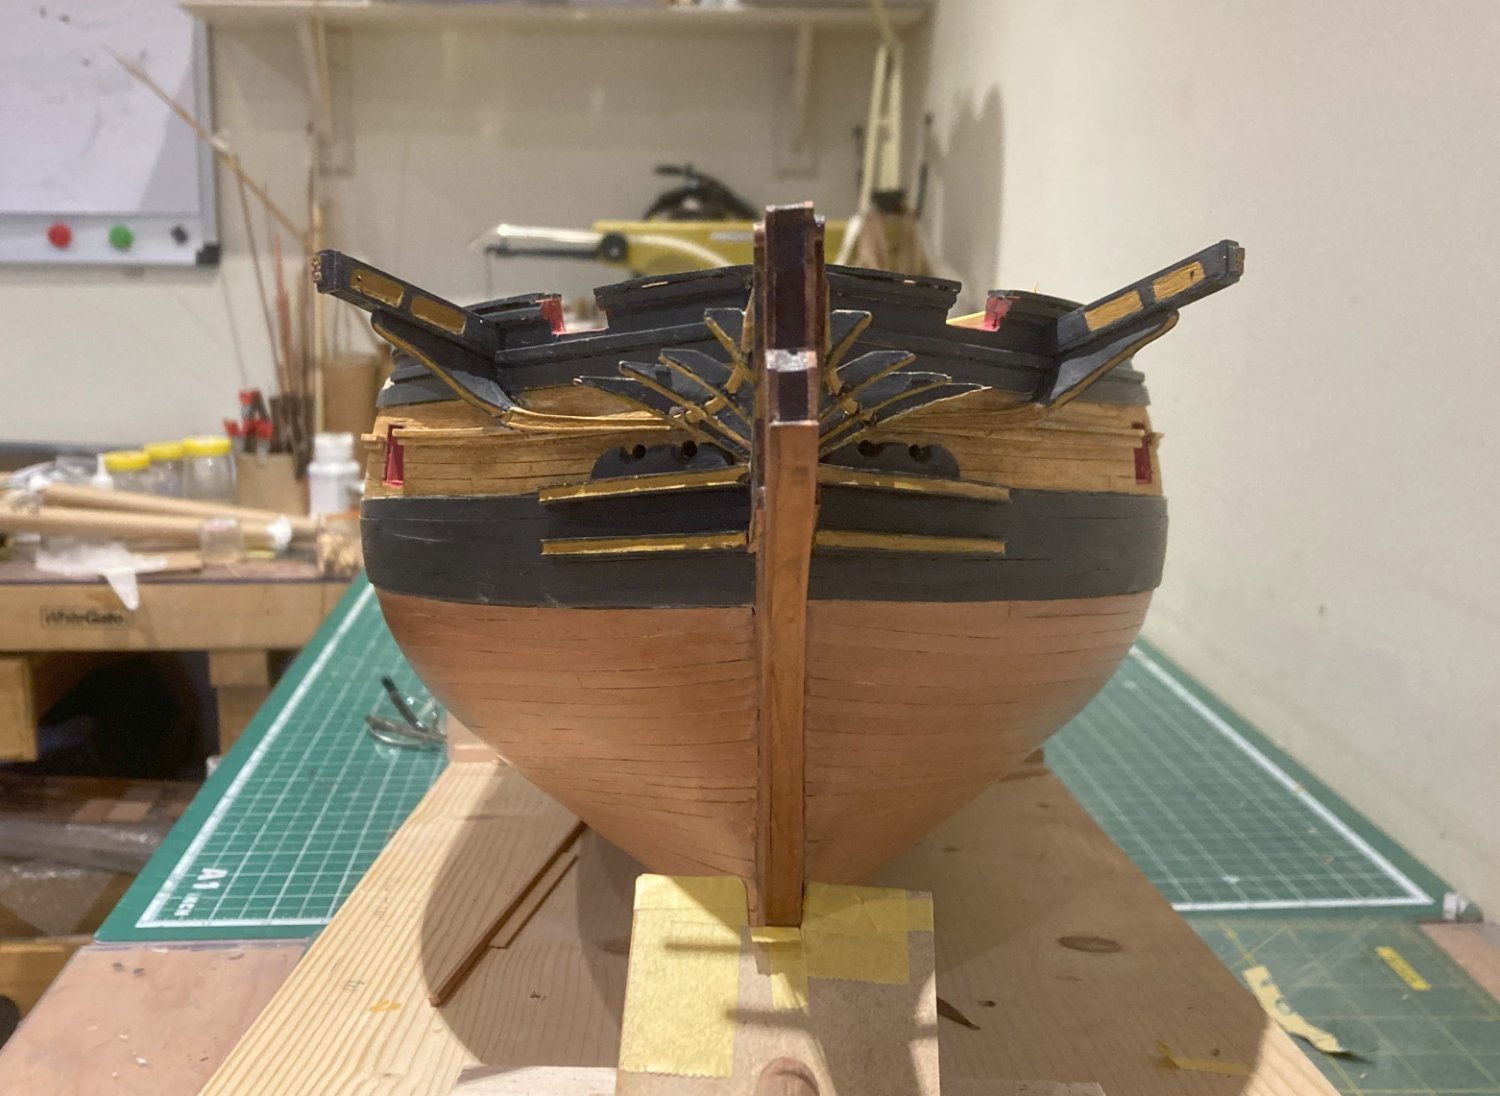
Completing the Headworks
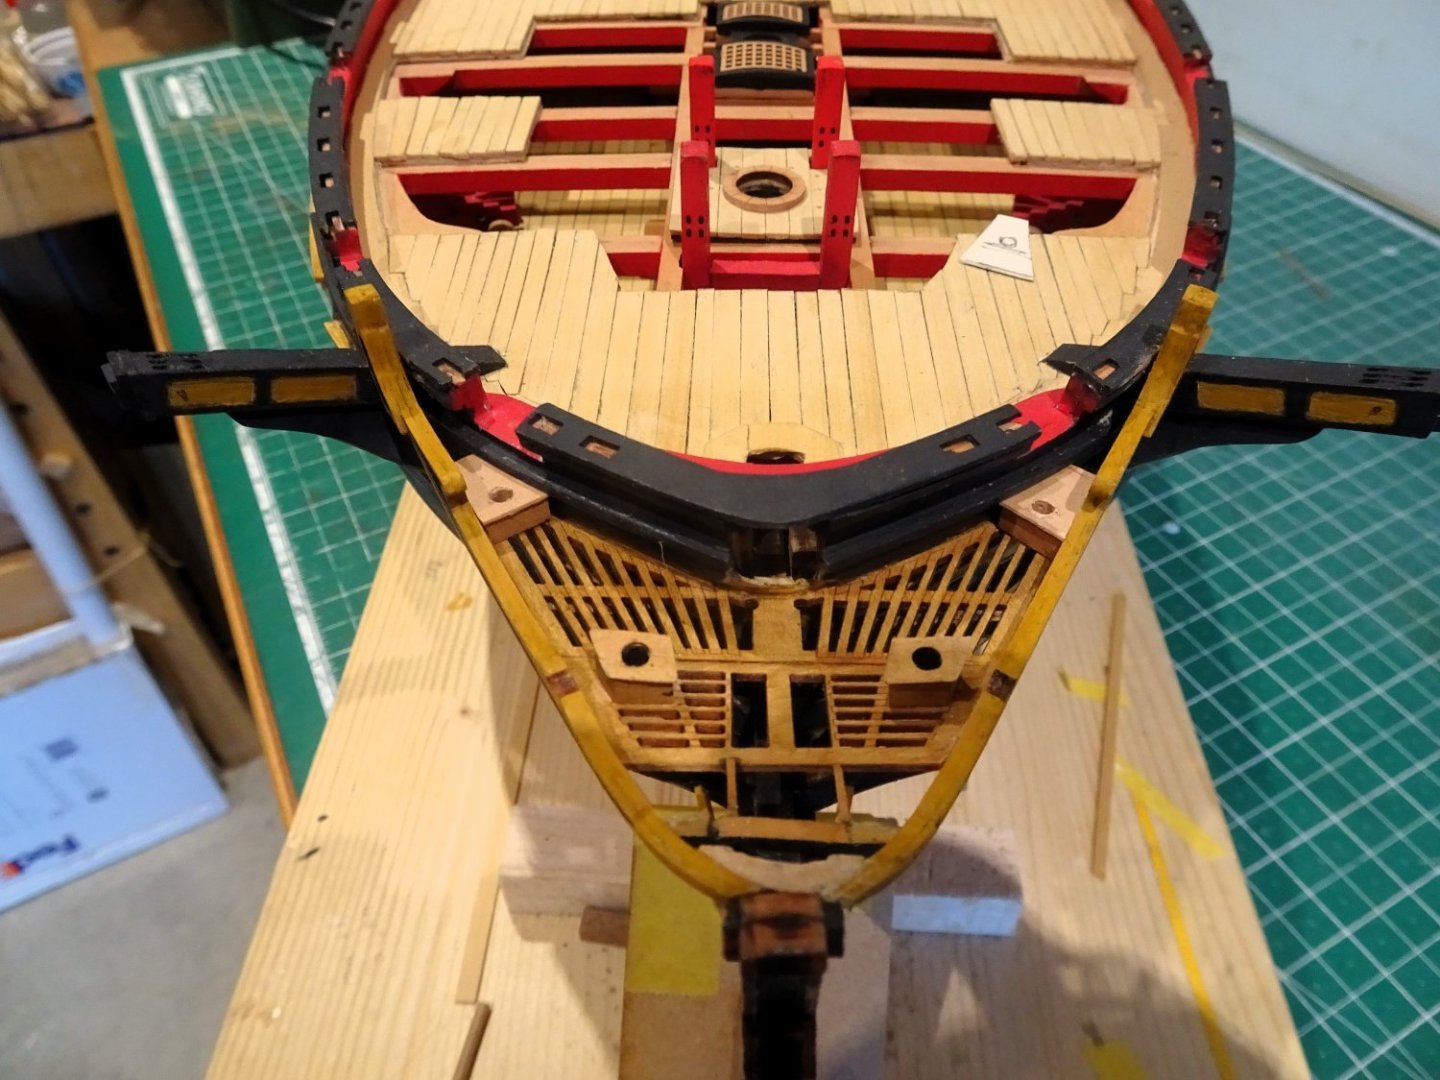
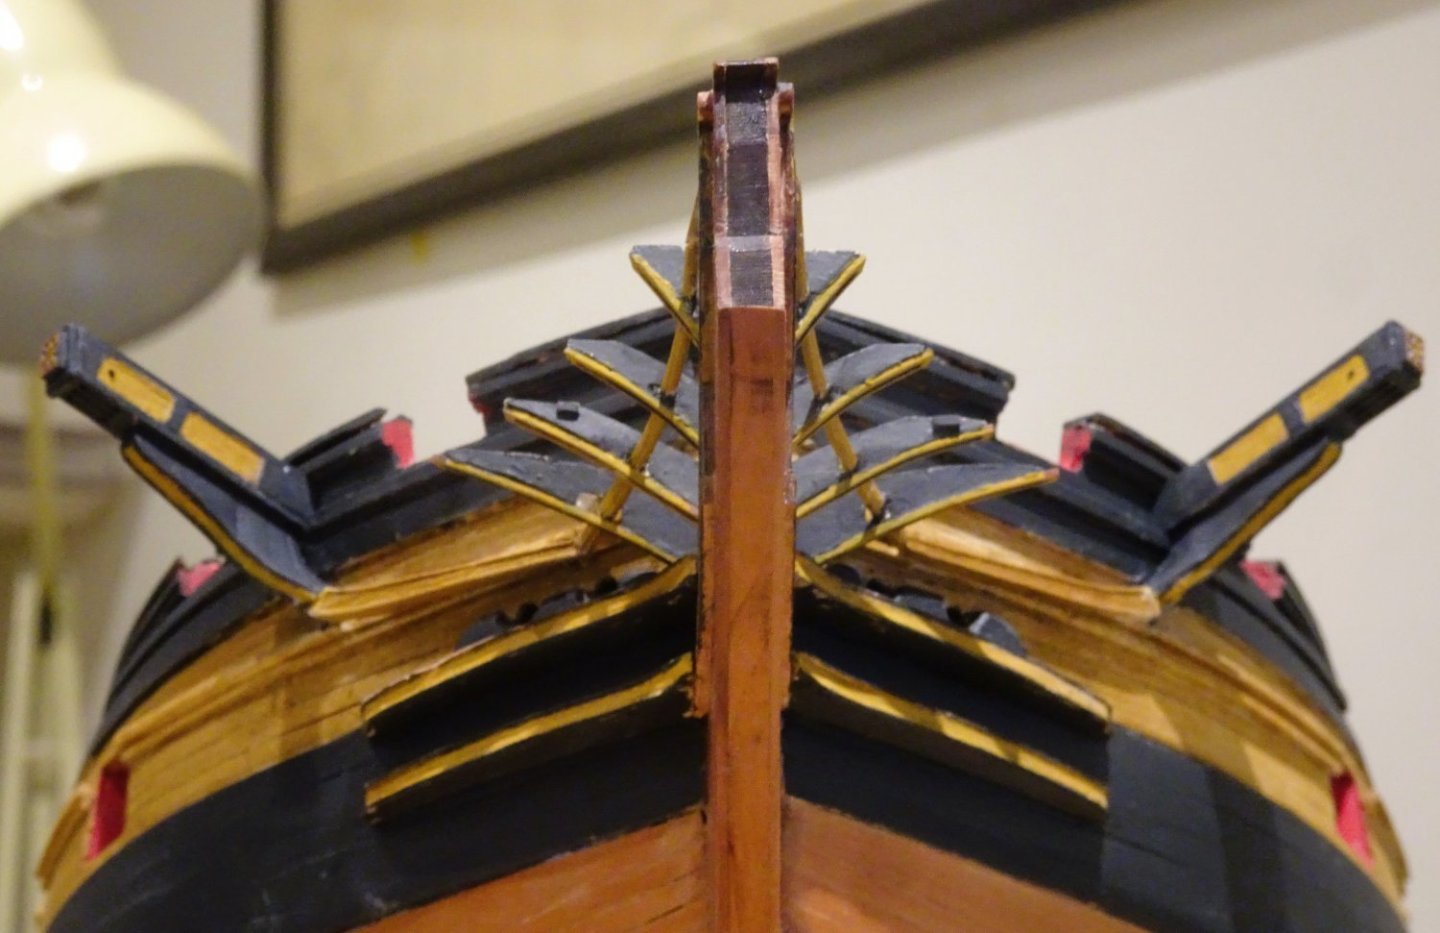
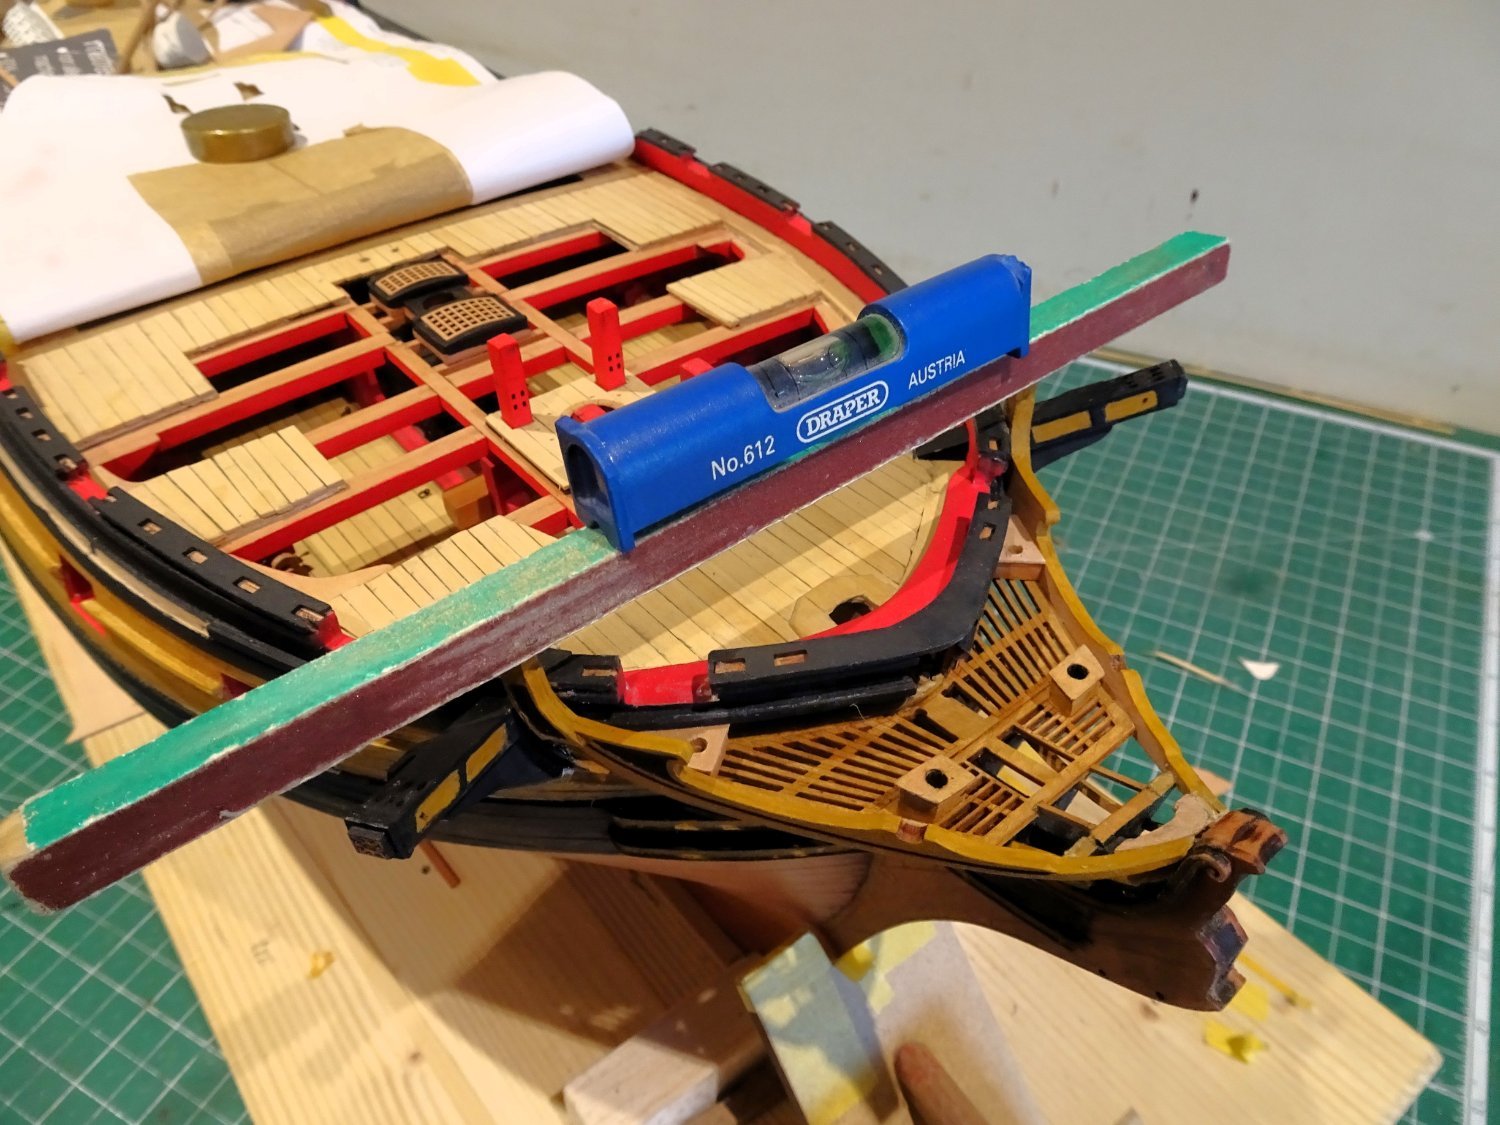
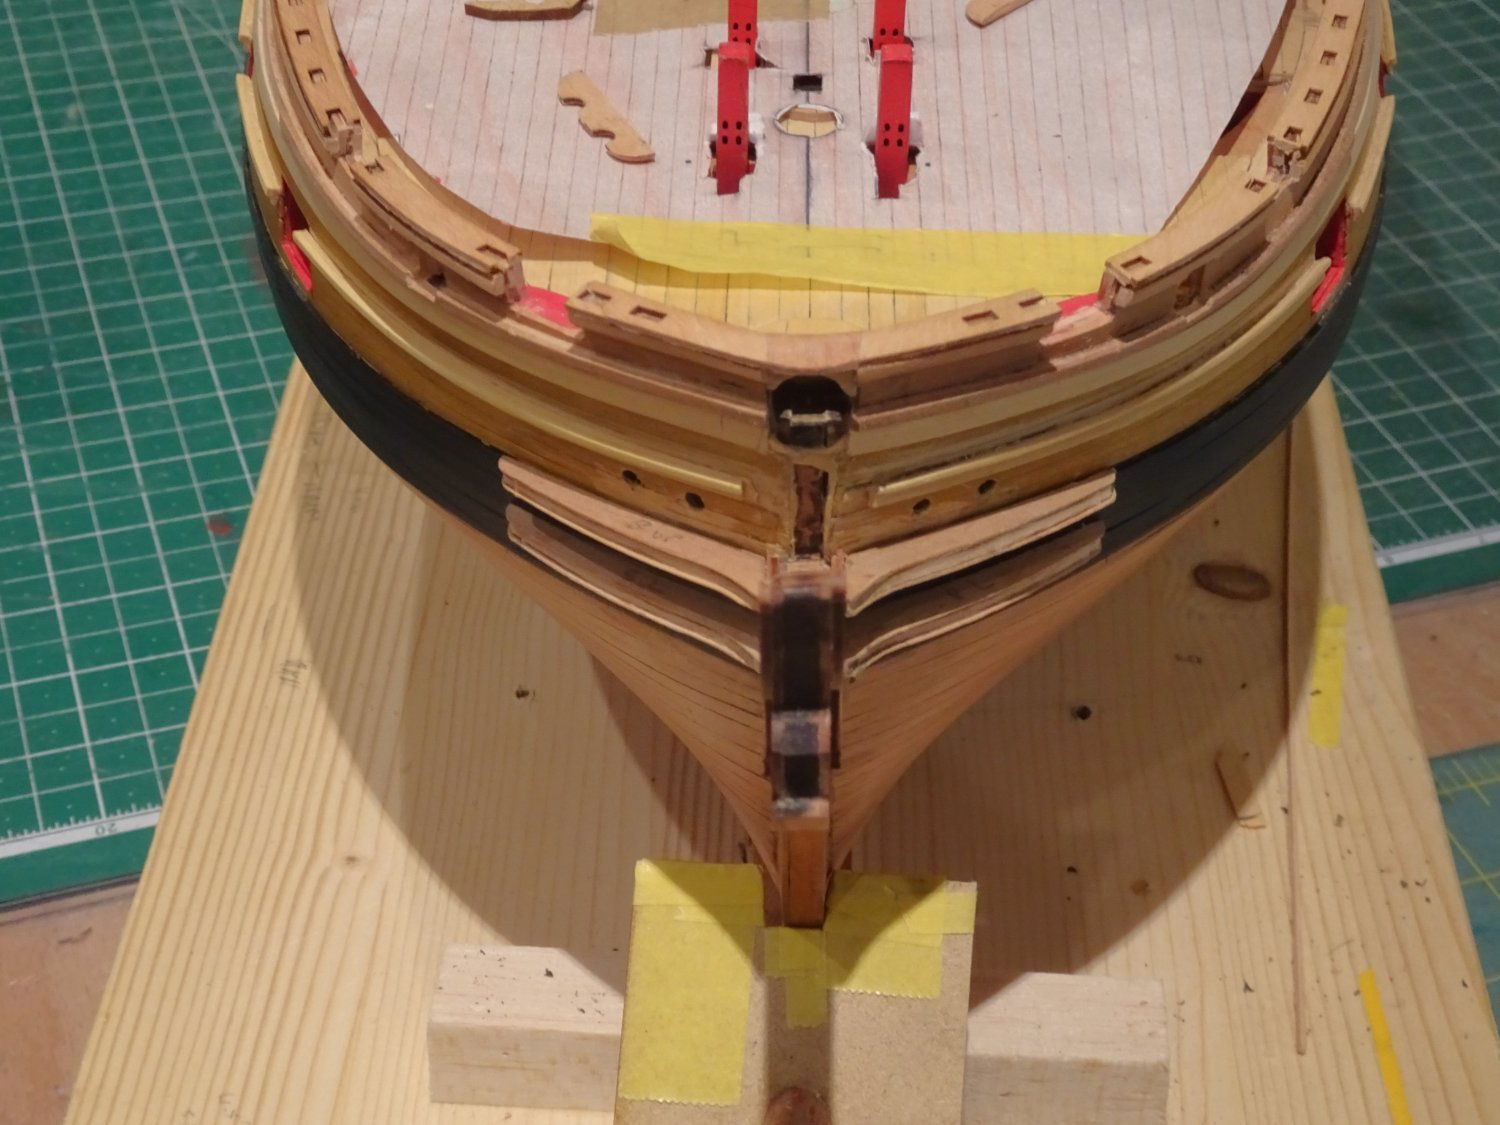
Gluing the Main rails in place is always a critical business.
2971
I fitted the Starboard side first which went on without issue, the pieces held using pva and sectioning clips.
2980
I took the precaution of marking the level above the capping rail on the Port side rail to assist fitting.

2978
2975
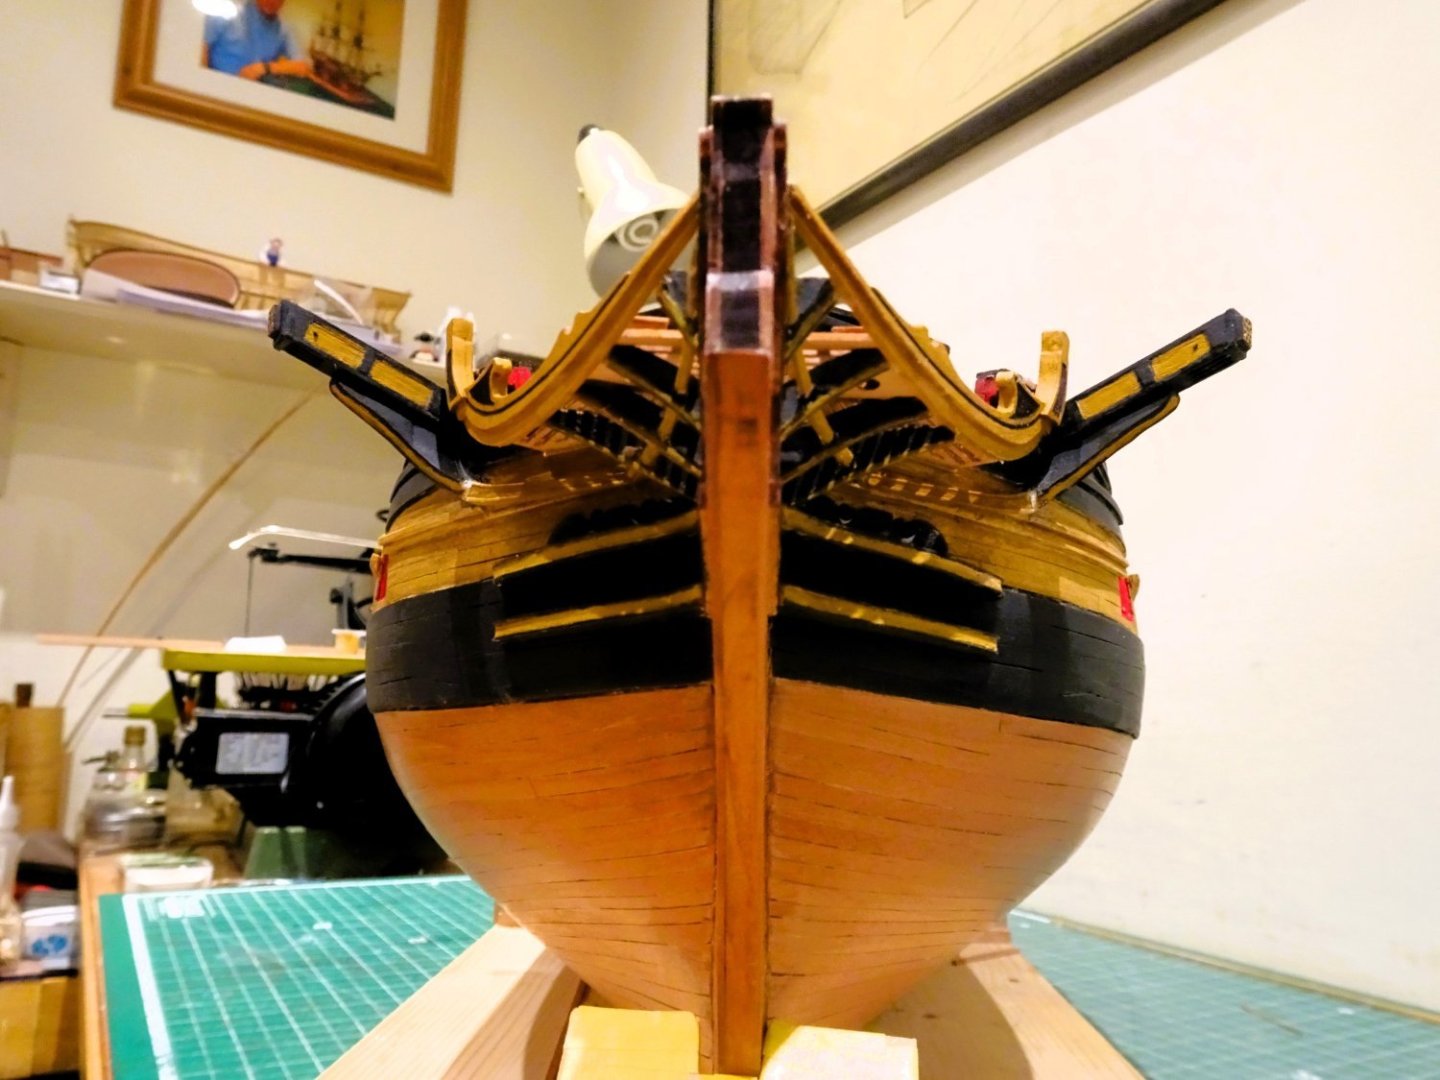
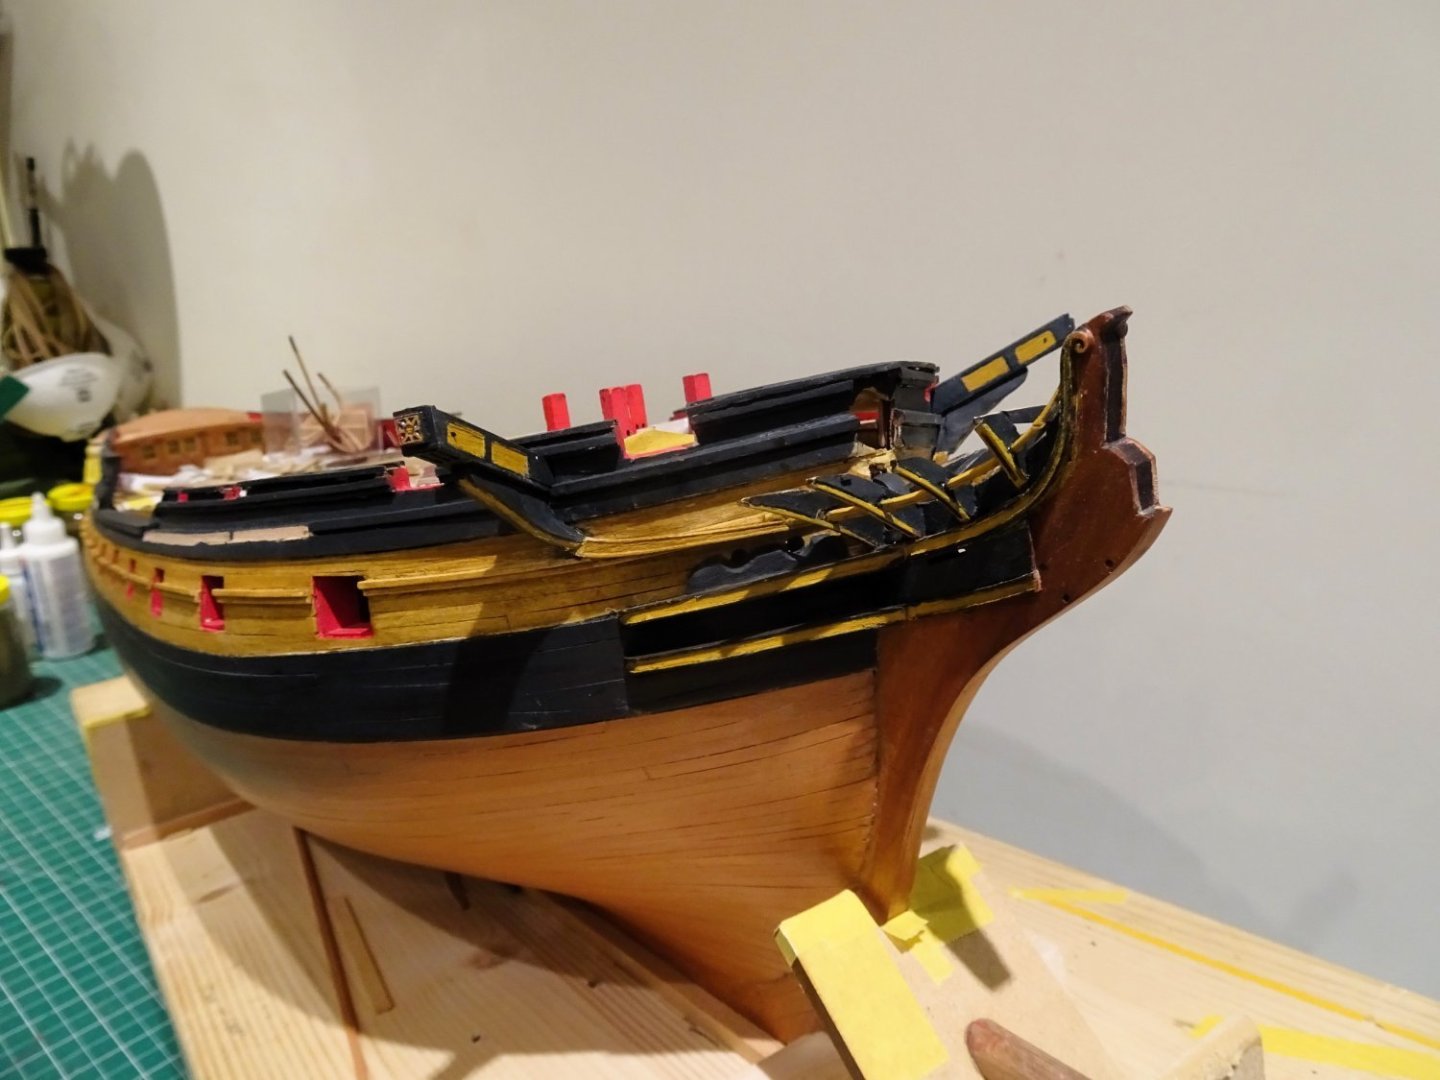
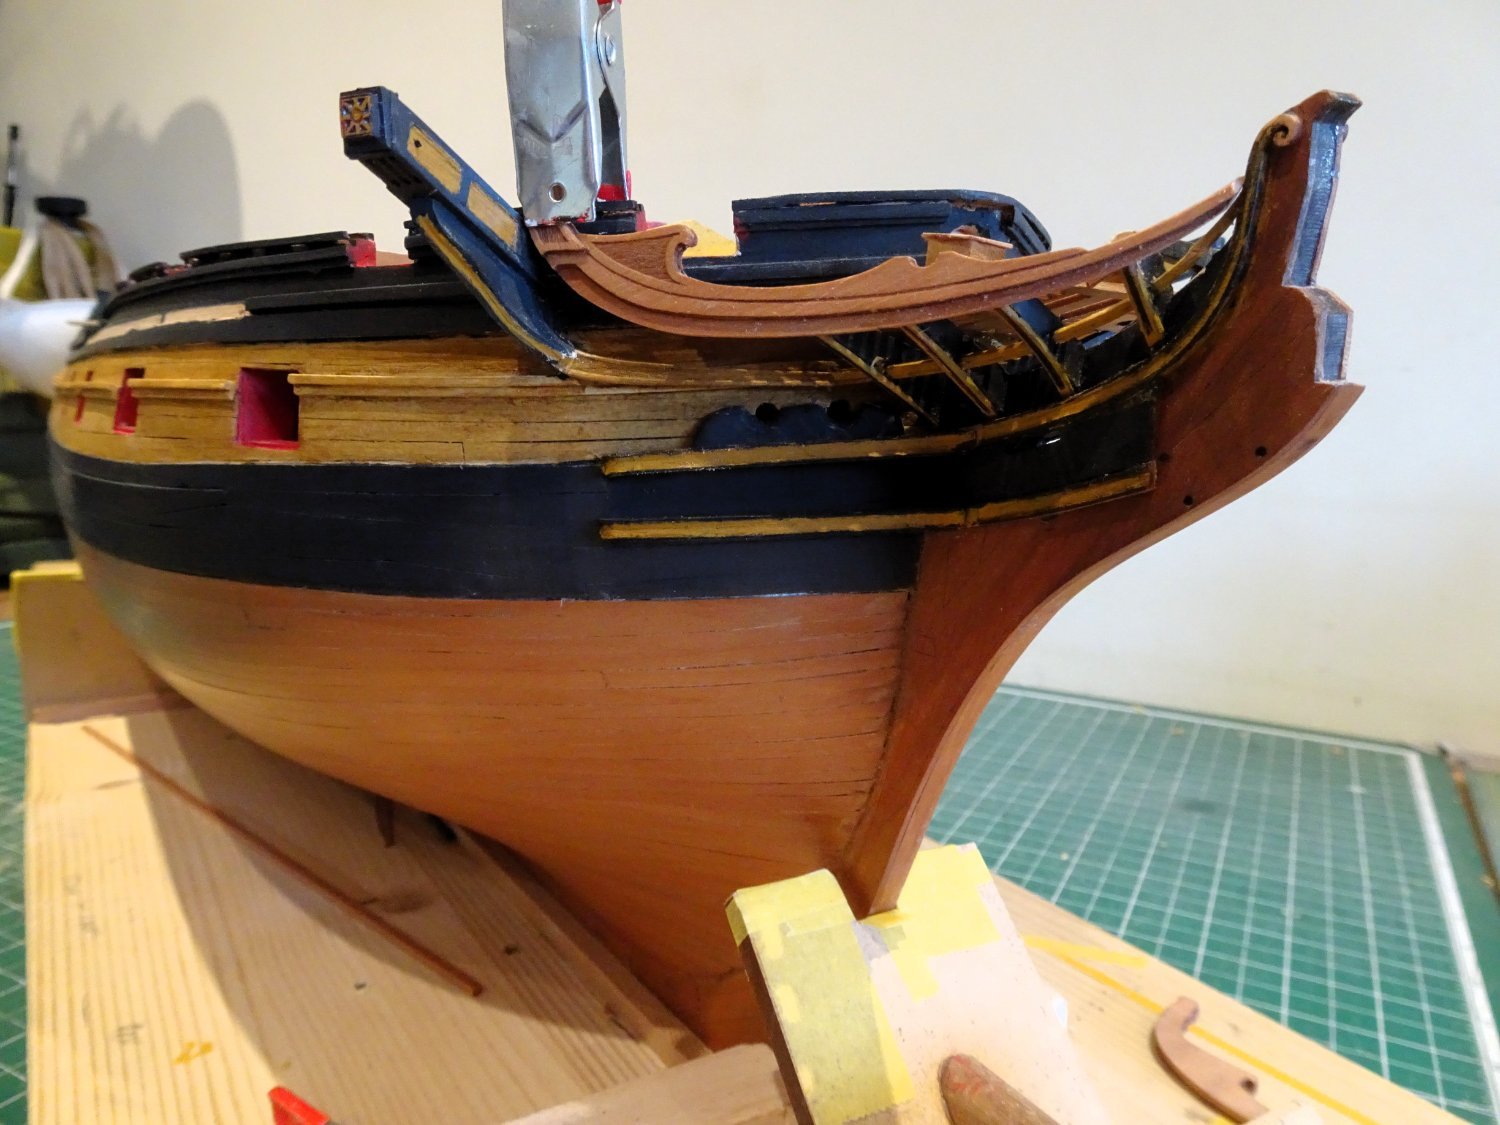
Always a relief once this part is completed.

2992
I am pleased to see that the level looks good athwartships.
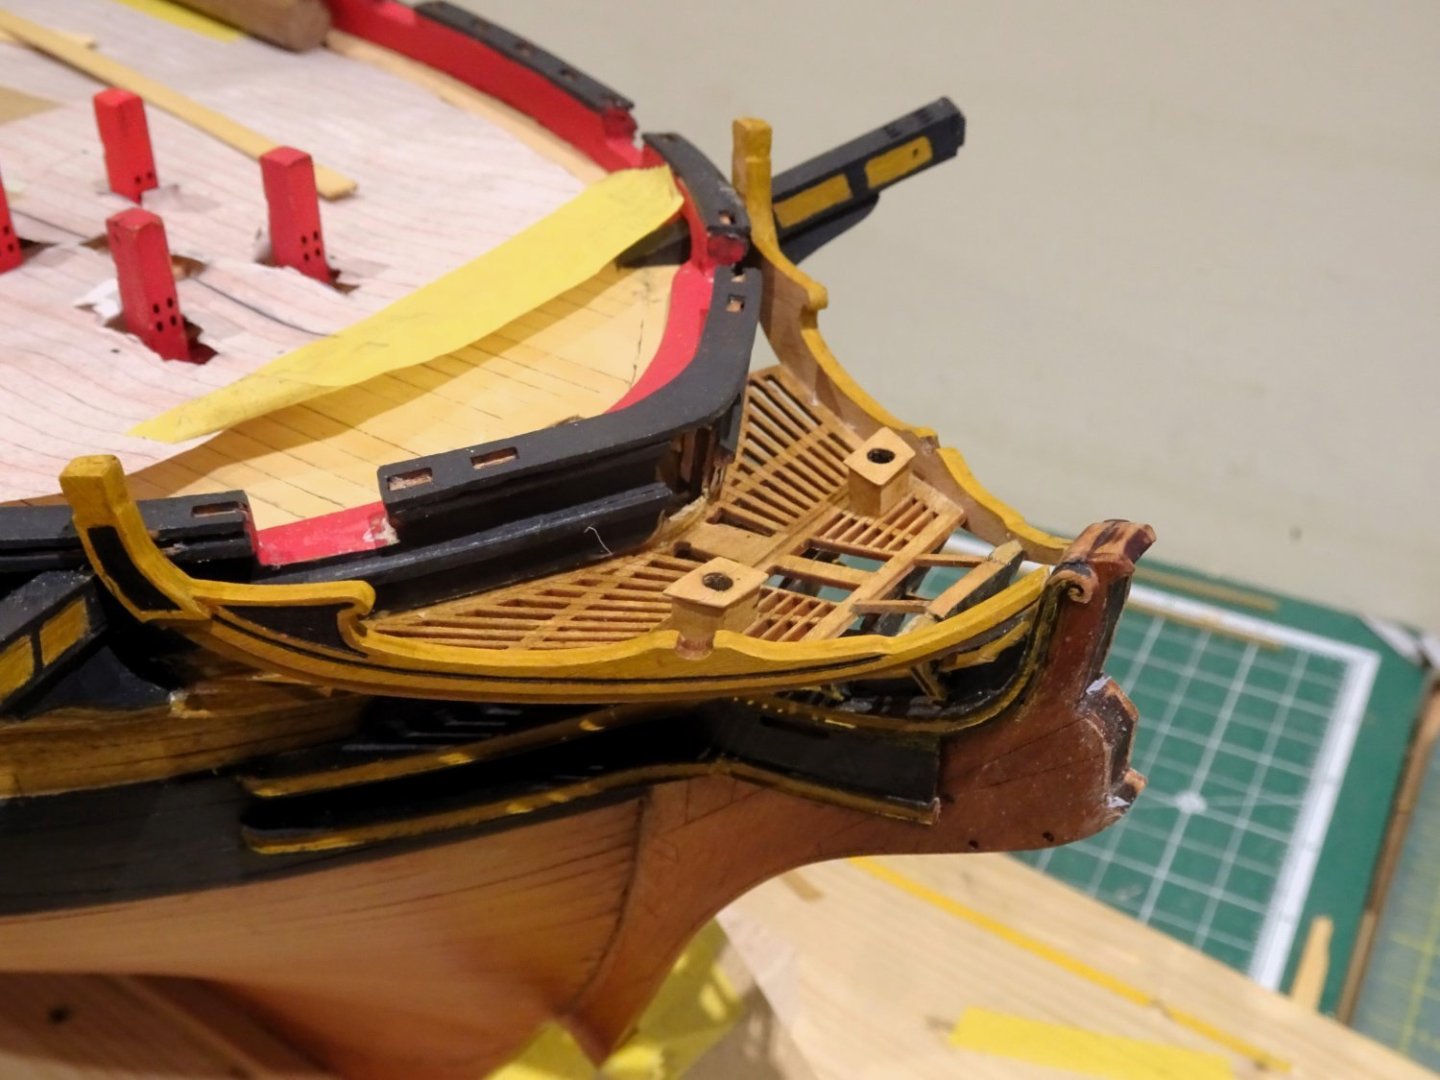
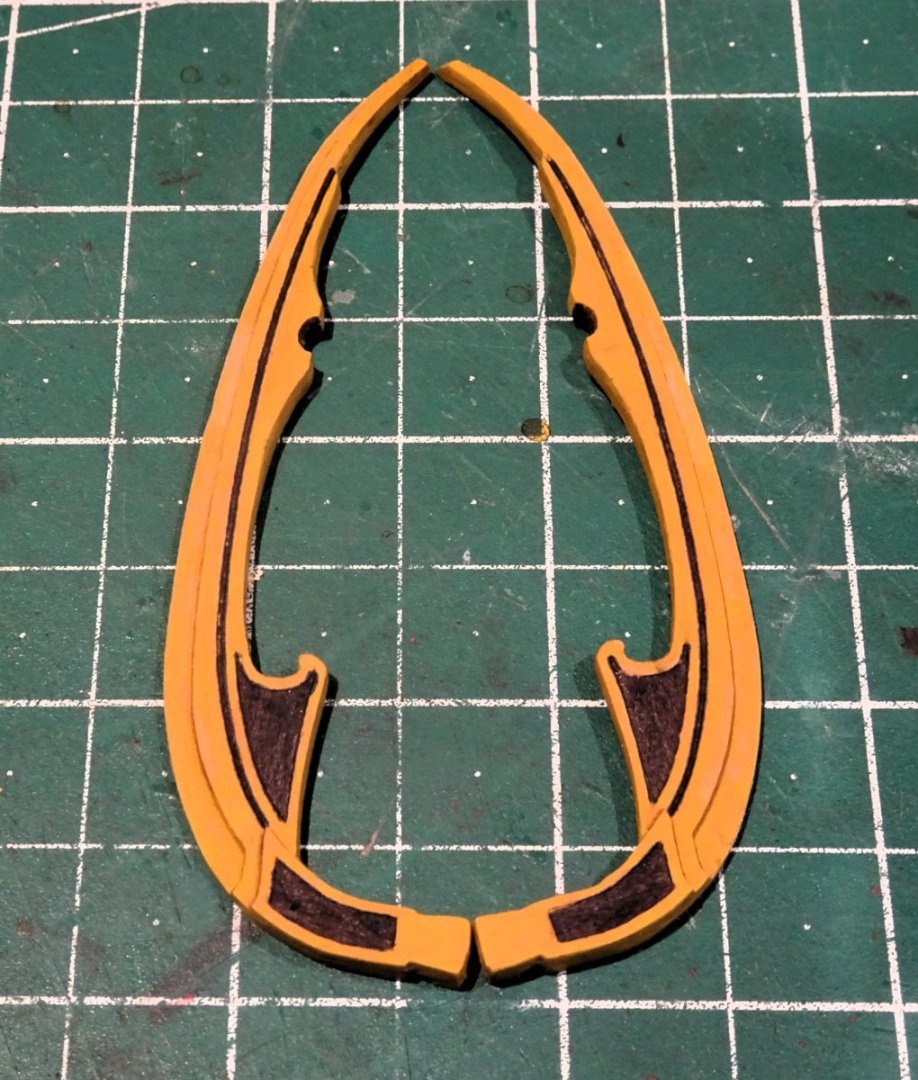
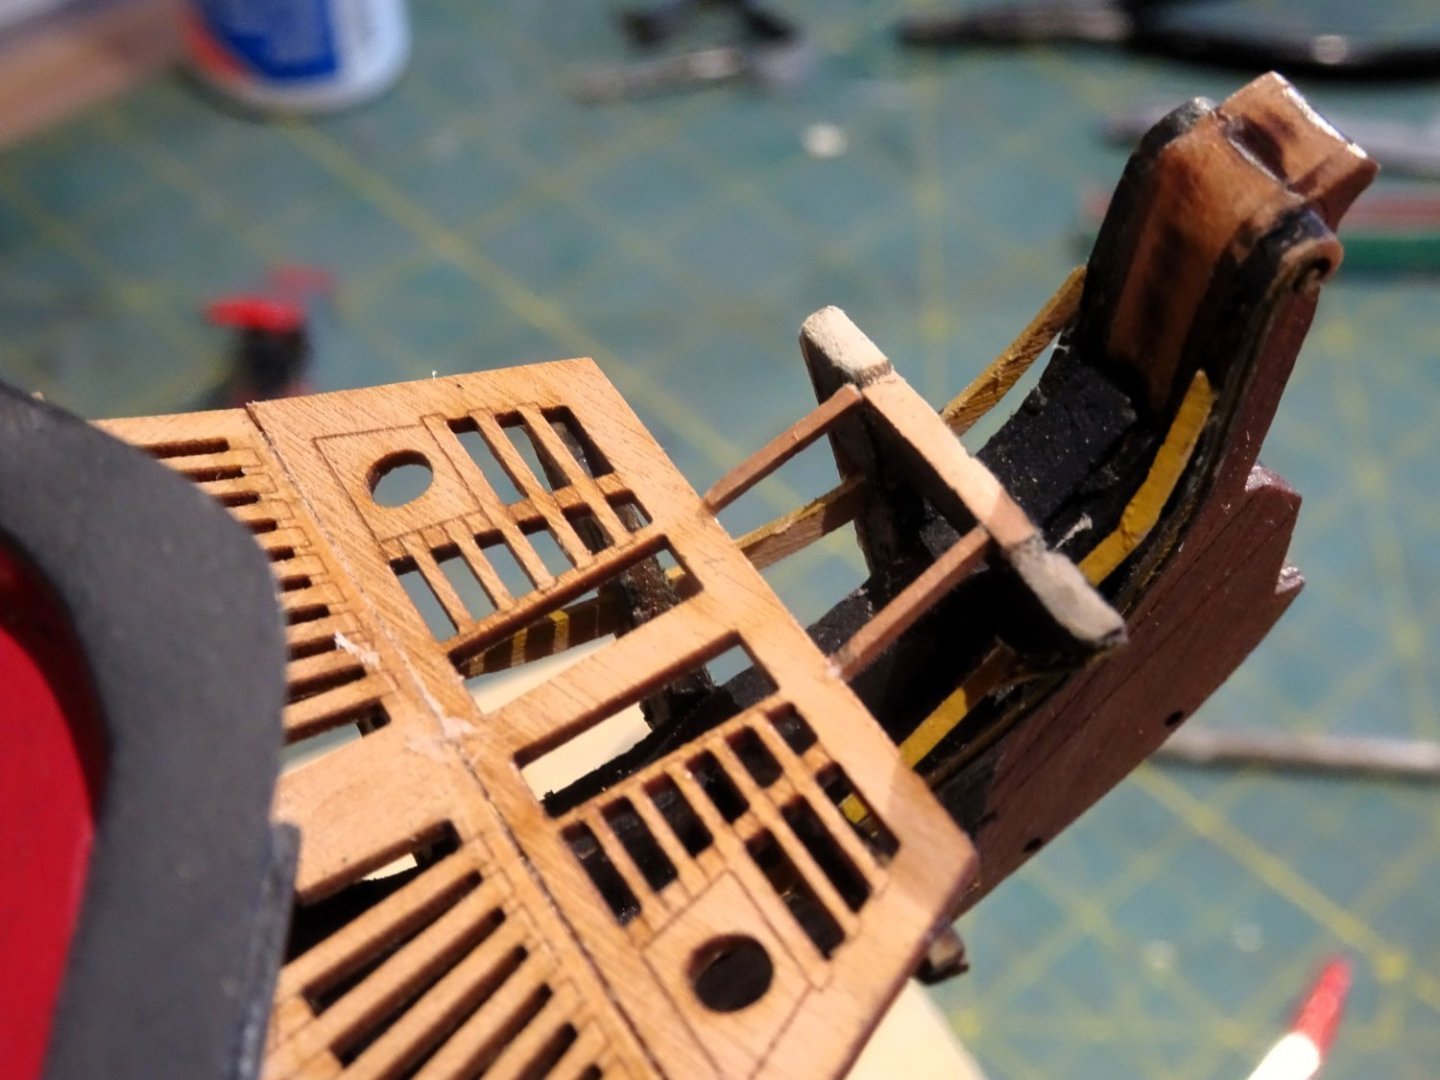
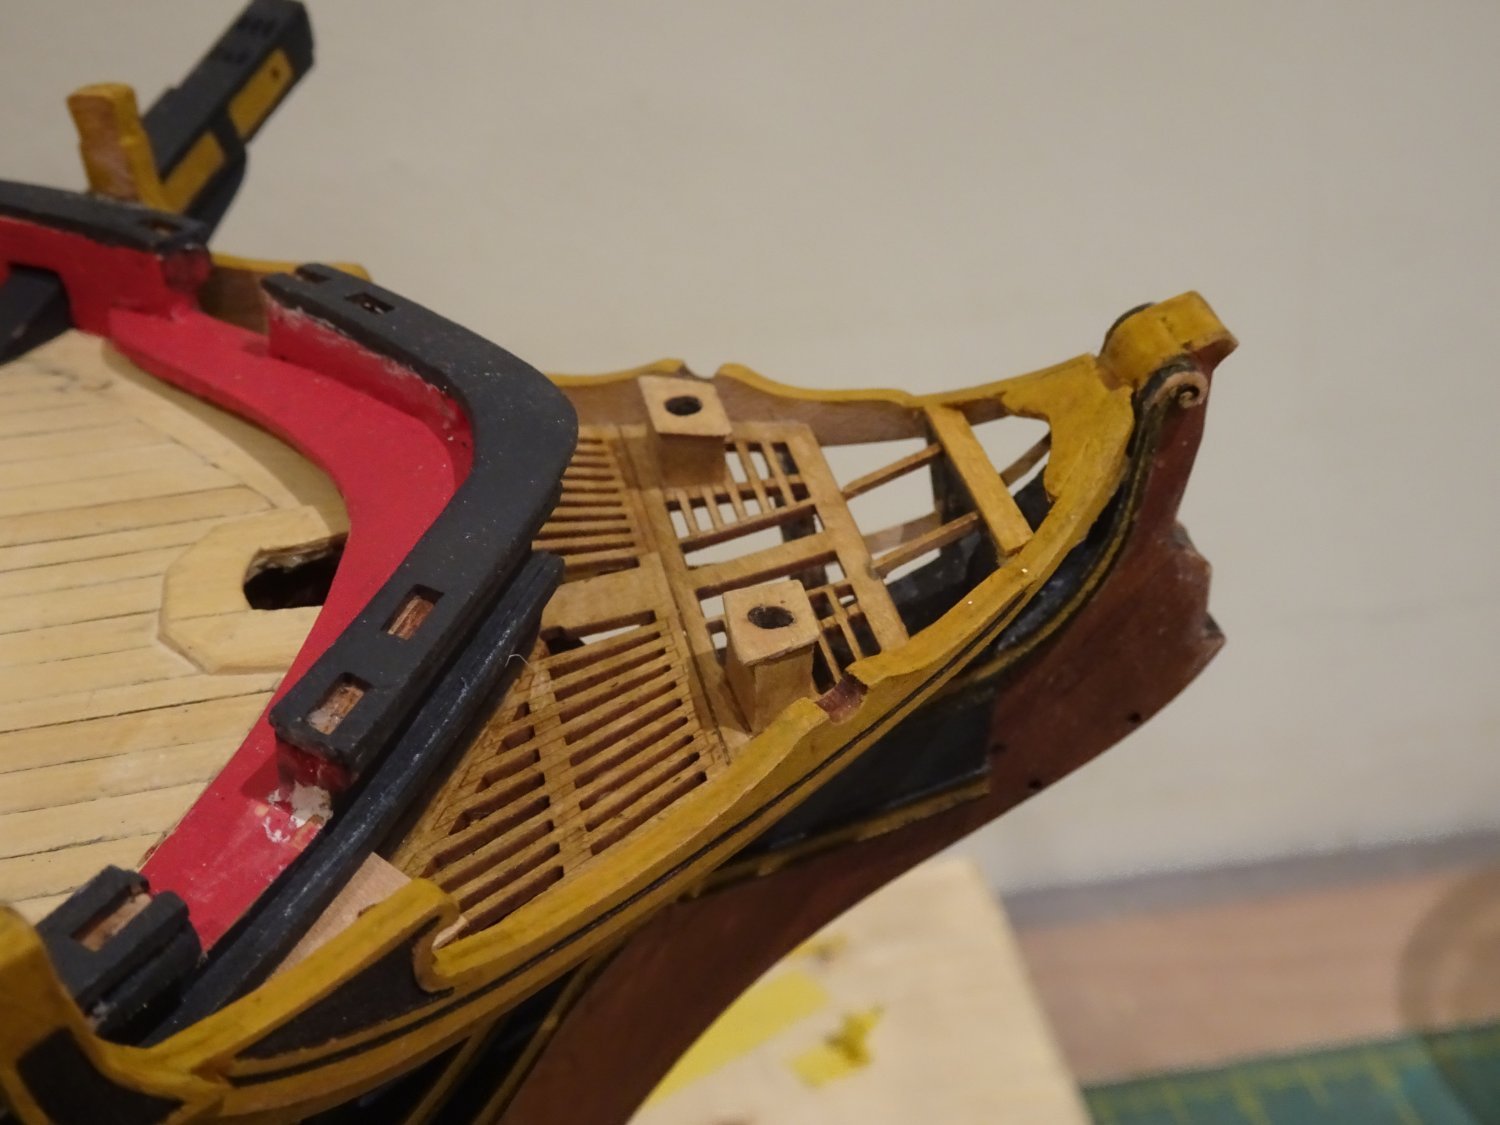
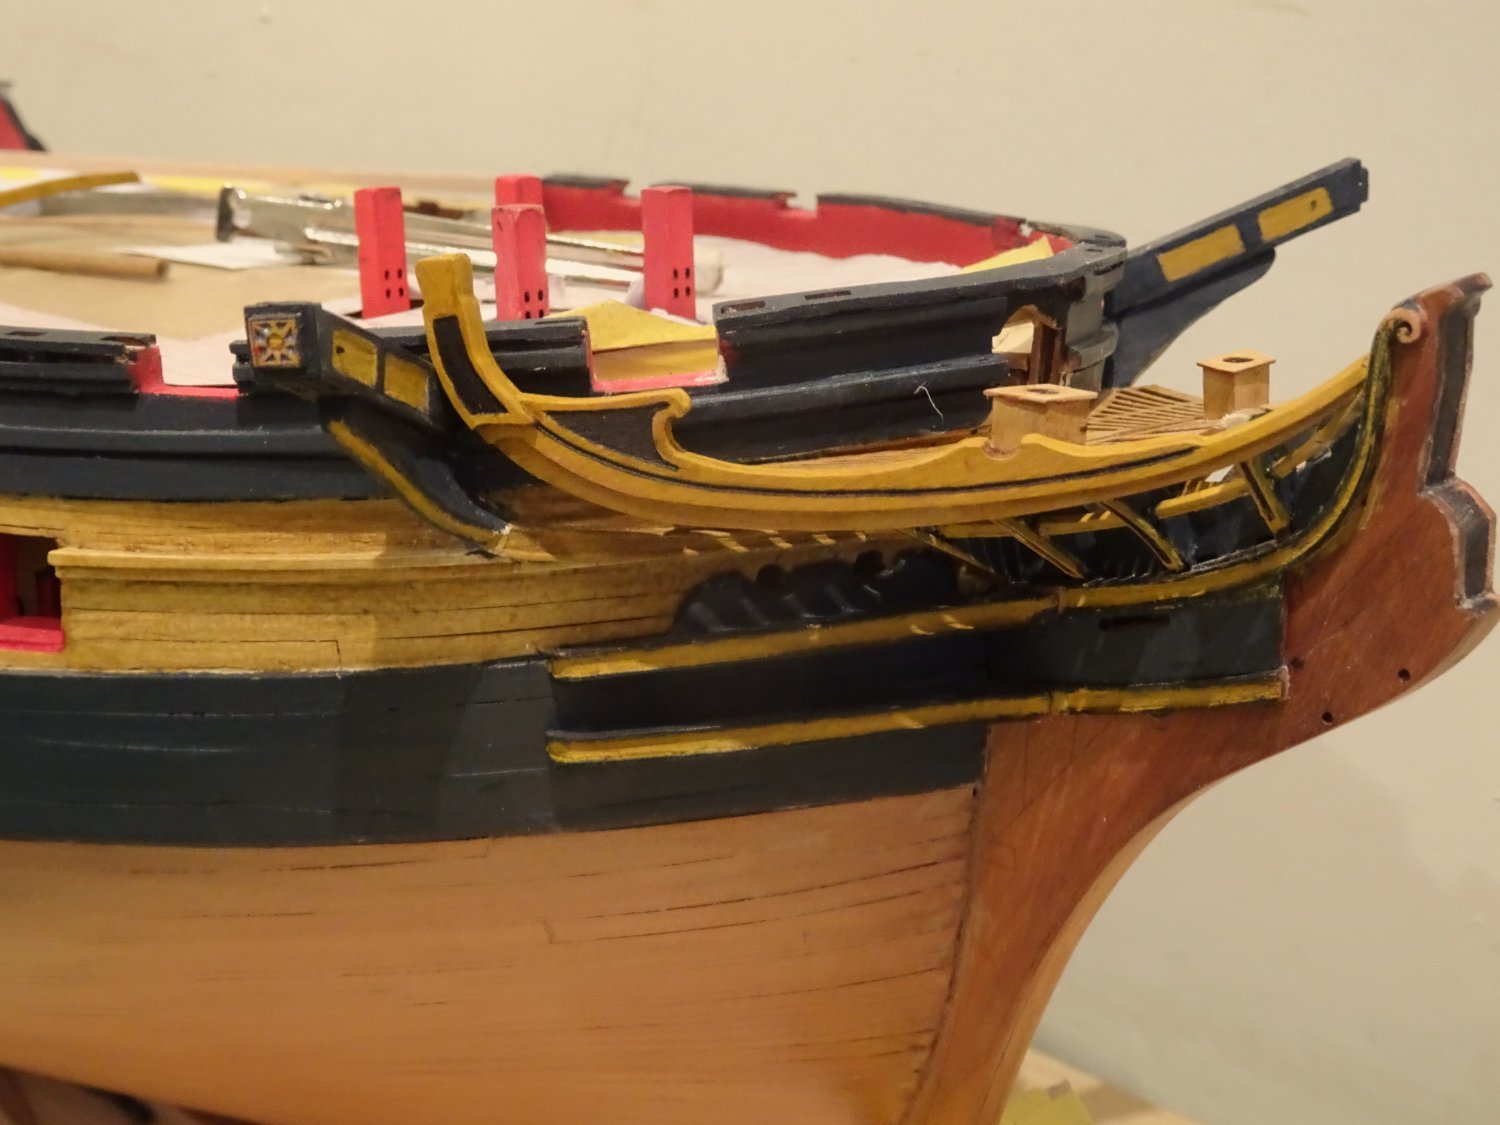
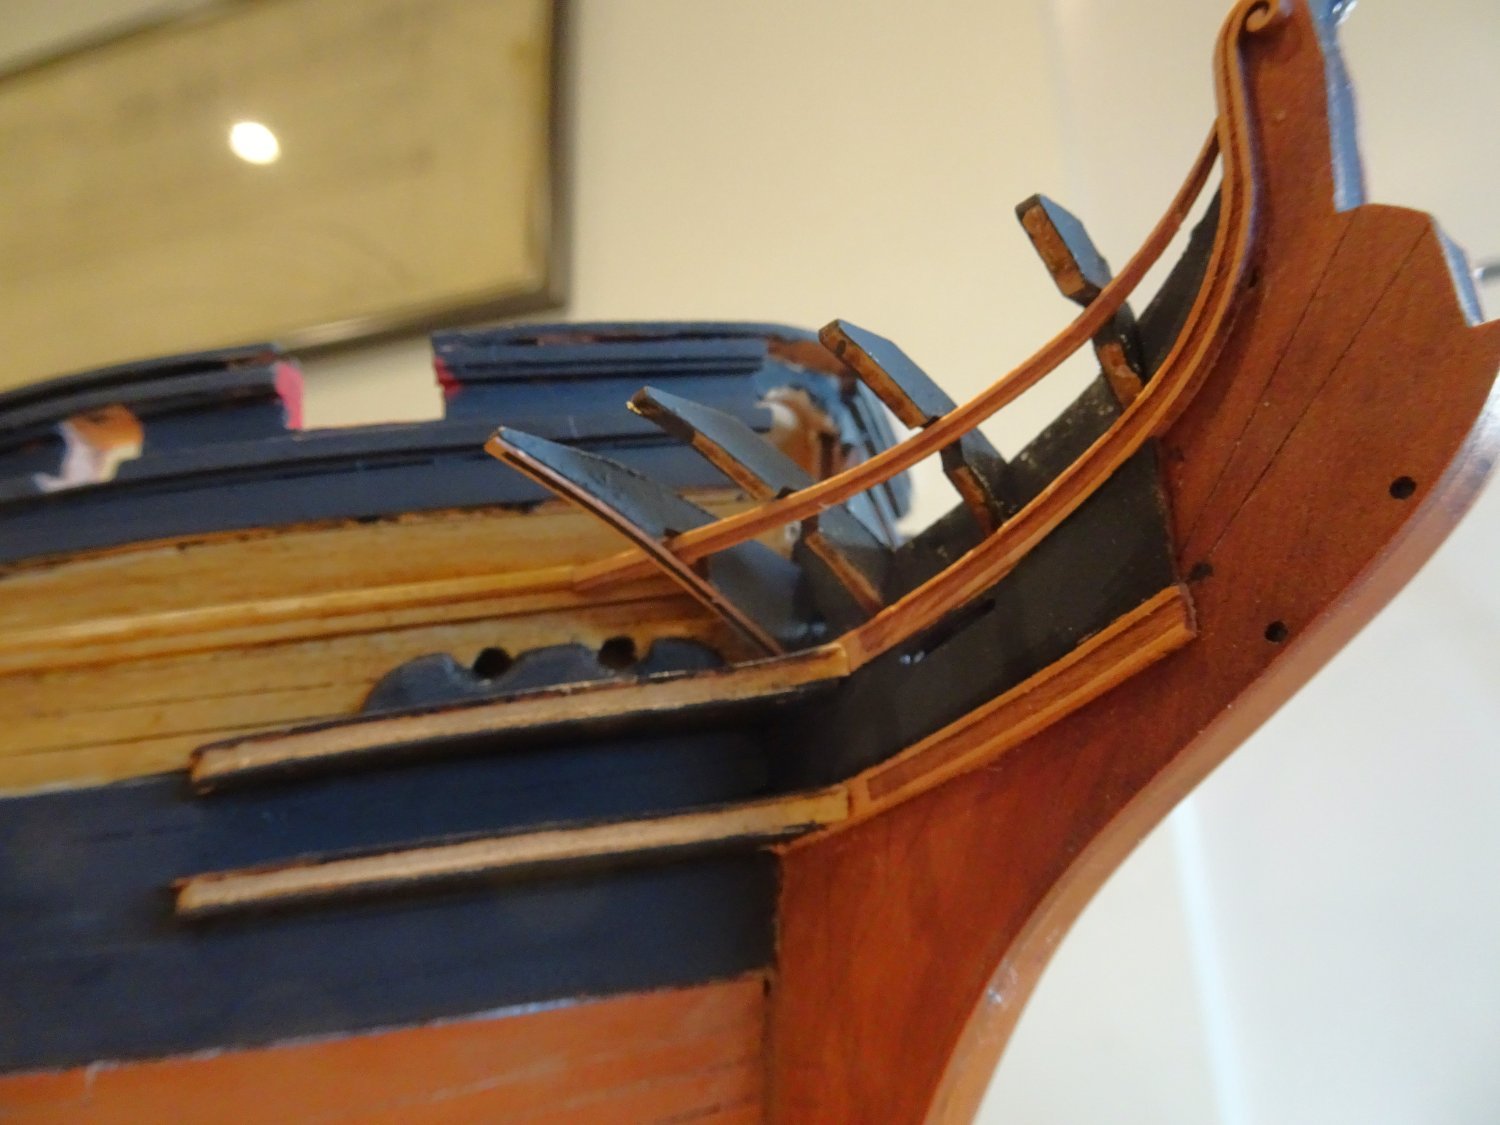
Not part of the kit is the Saddle.

2996
This is a section of timber triangular in shape, that spans the Main rails where they converge at the back of the head and effectively ties them together.
2982
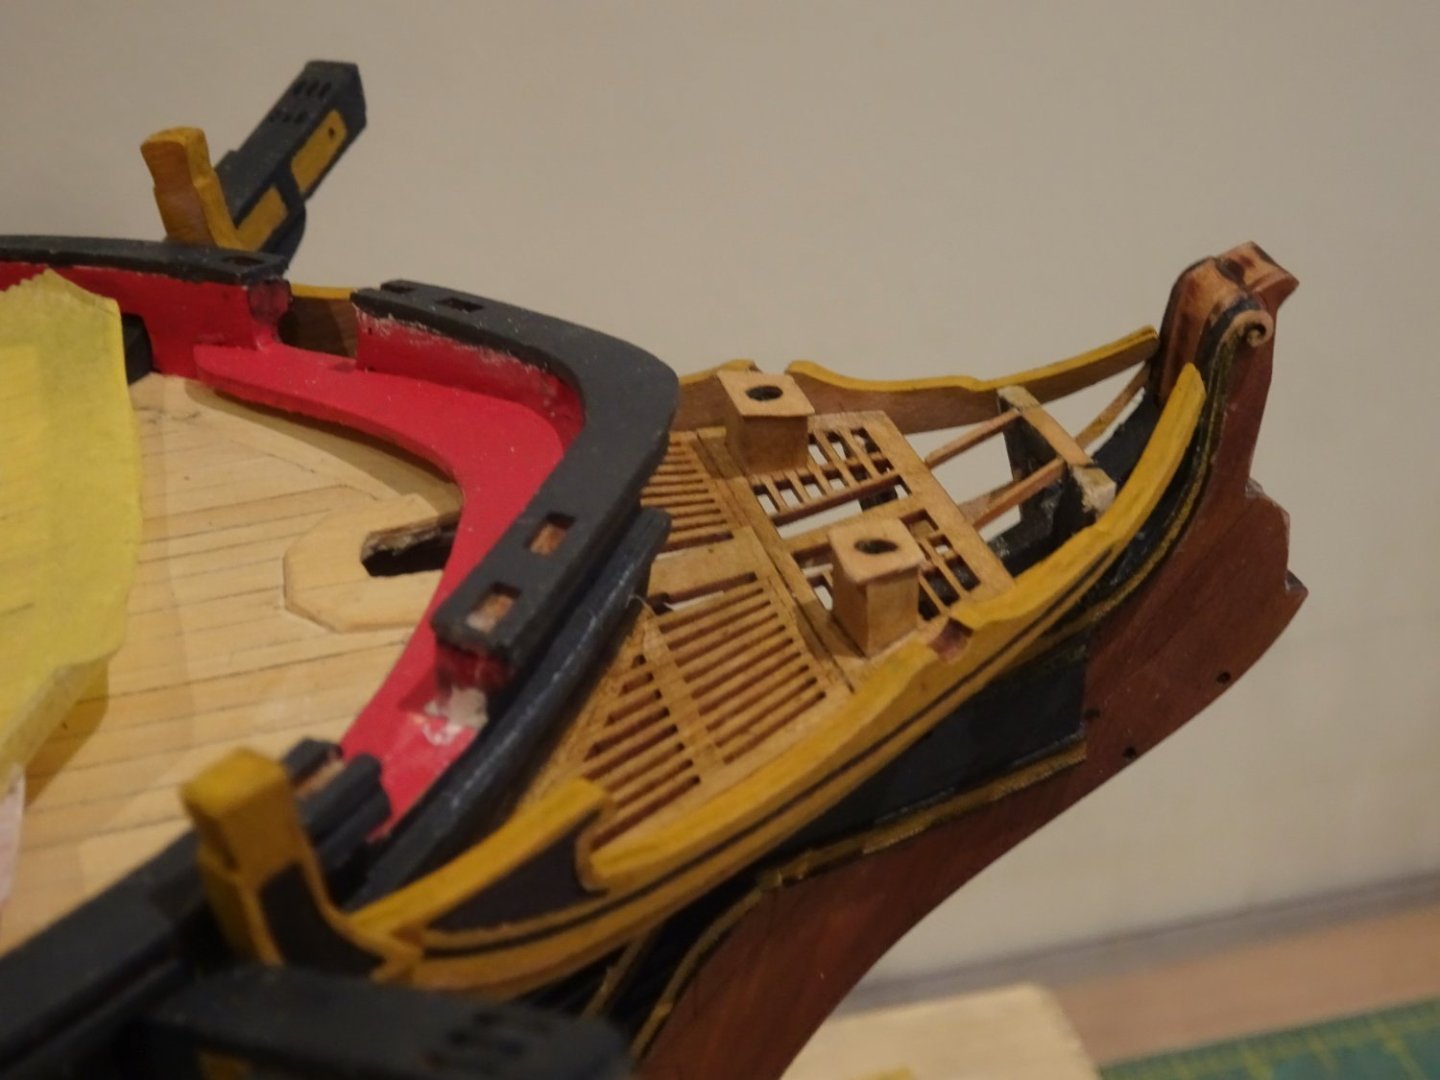
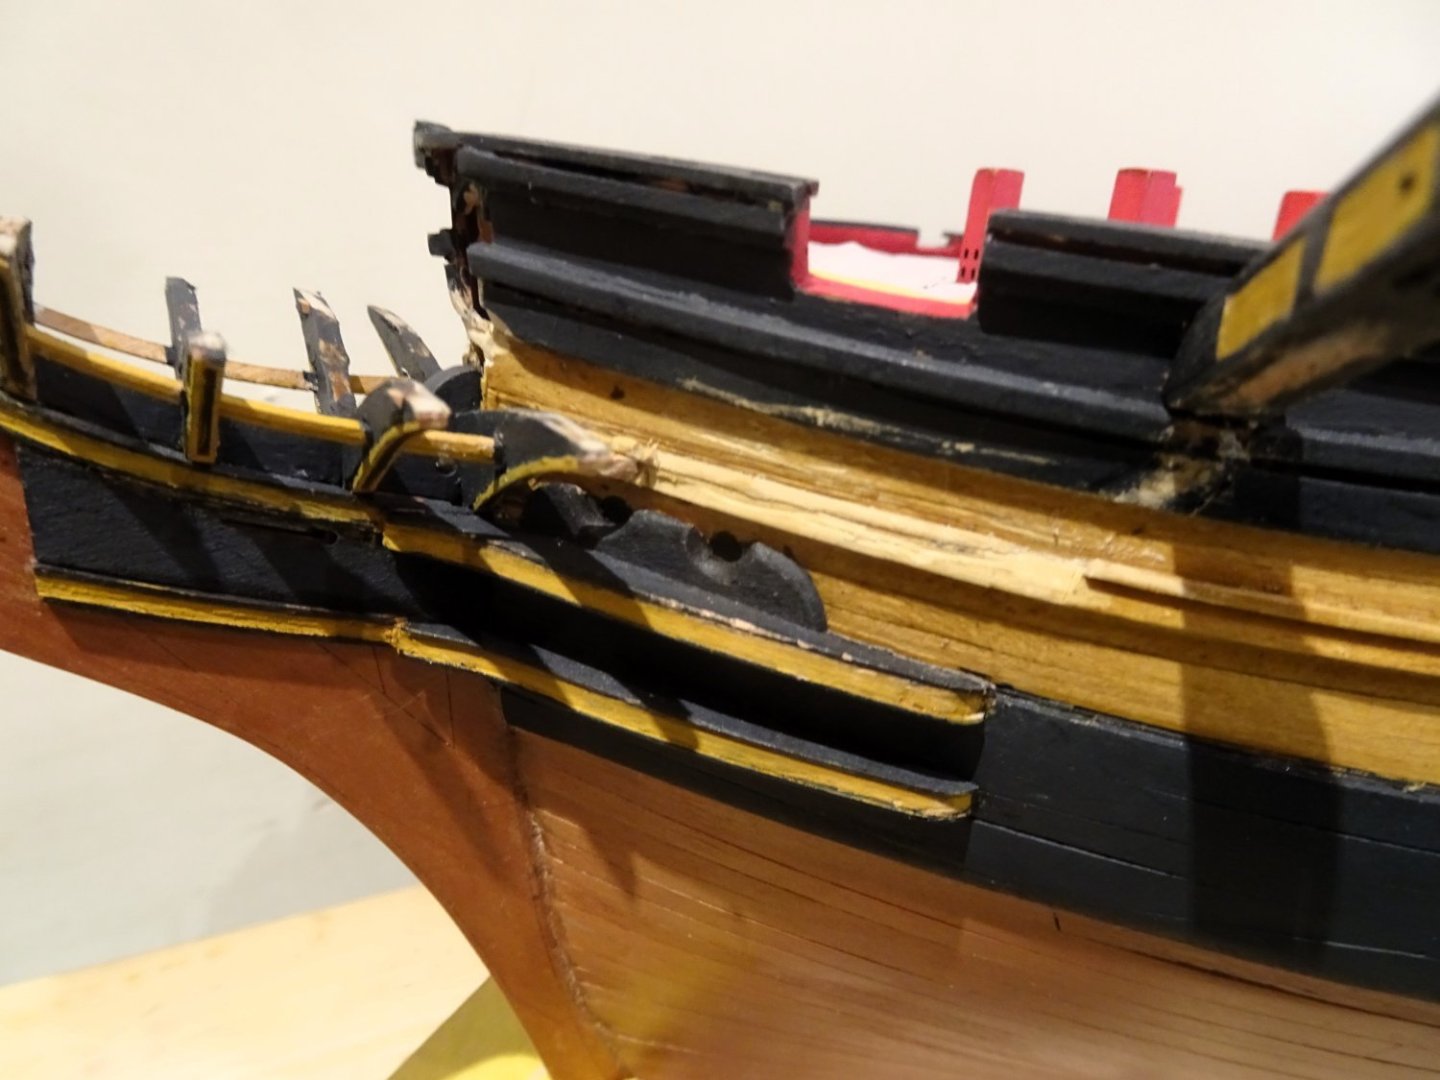
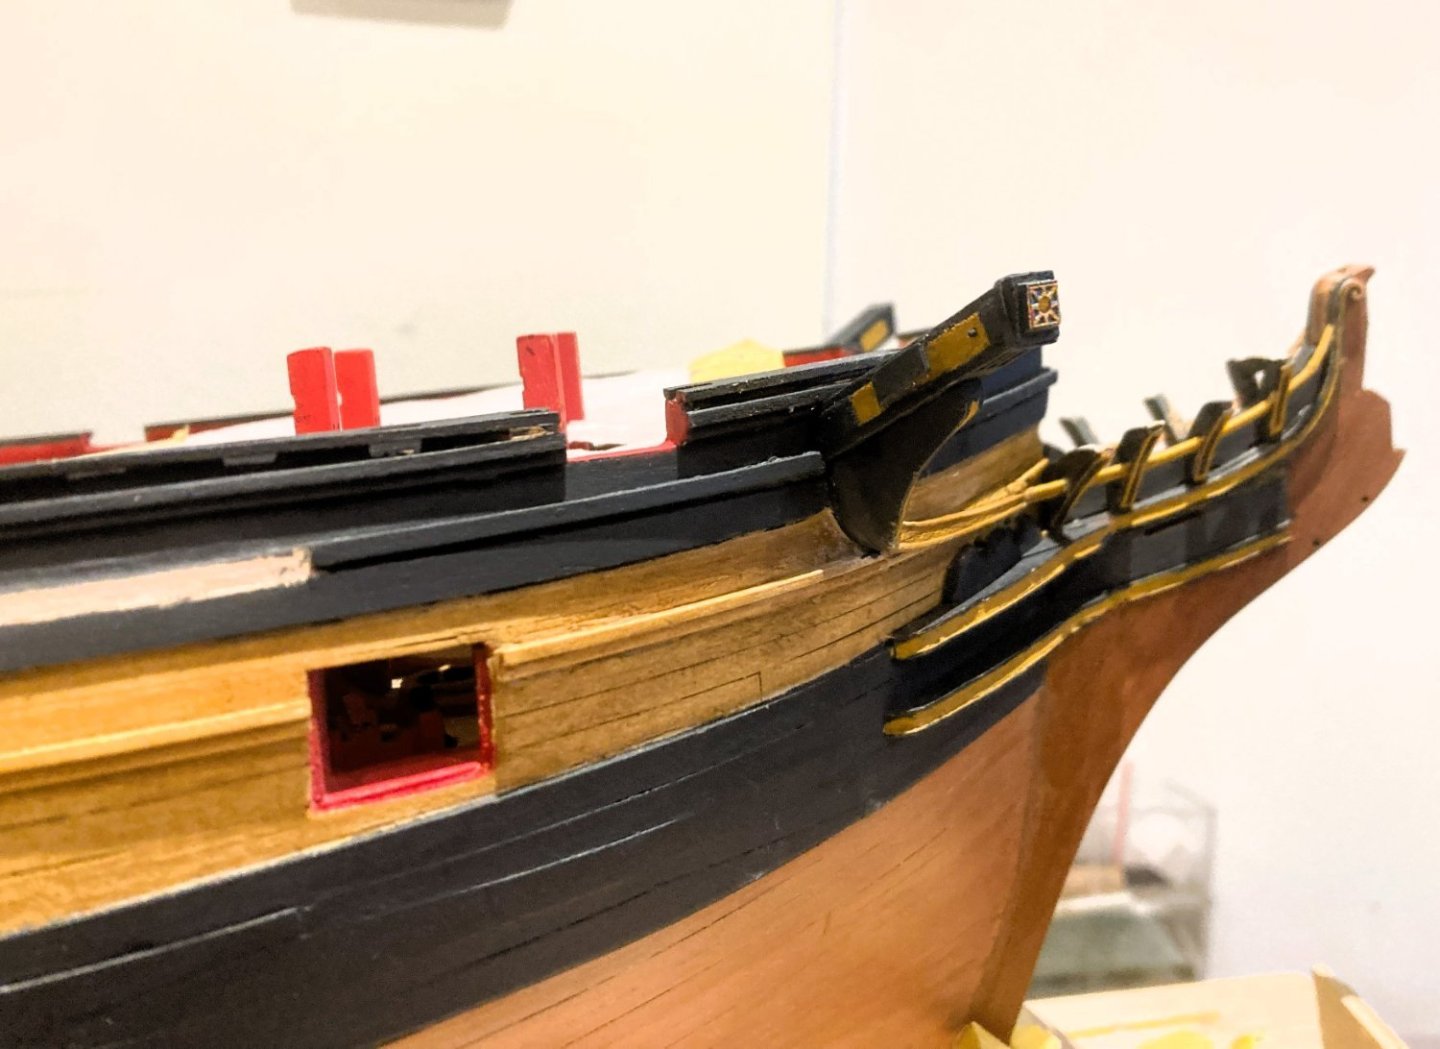
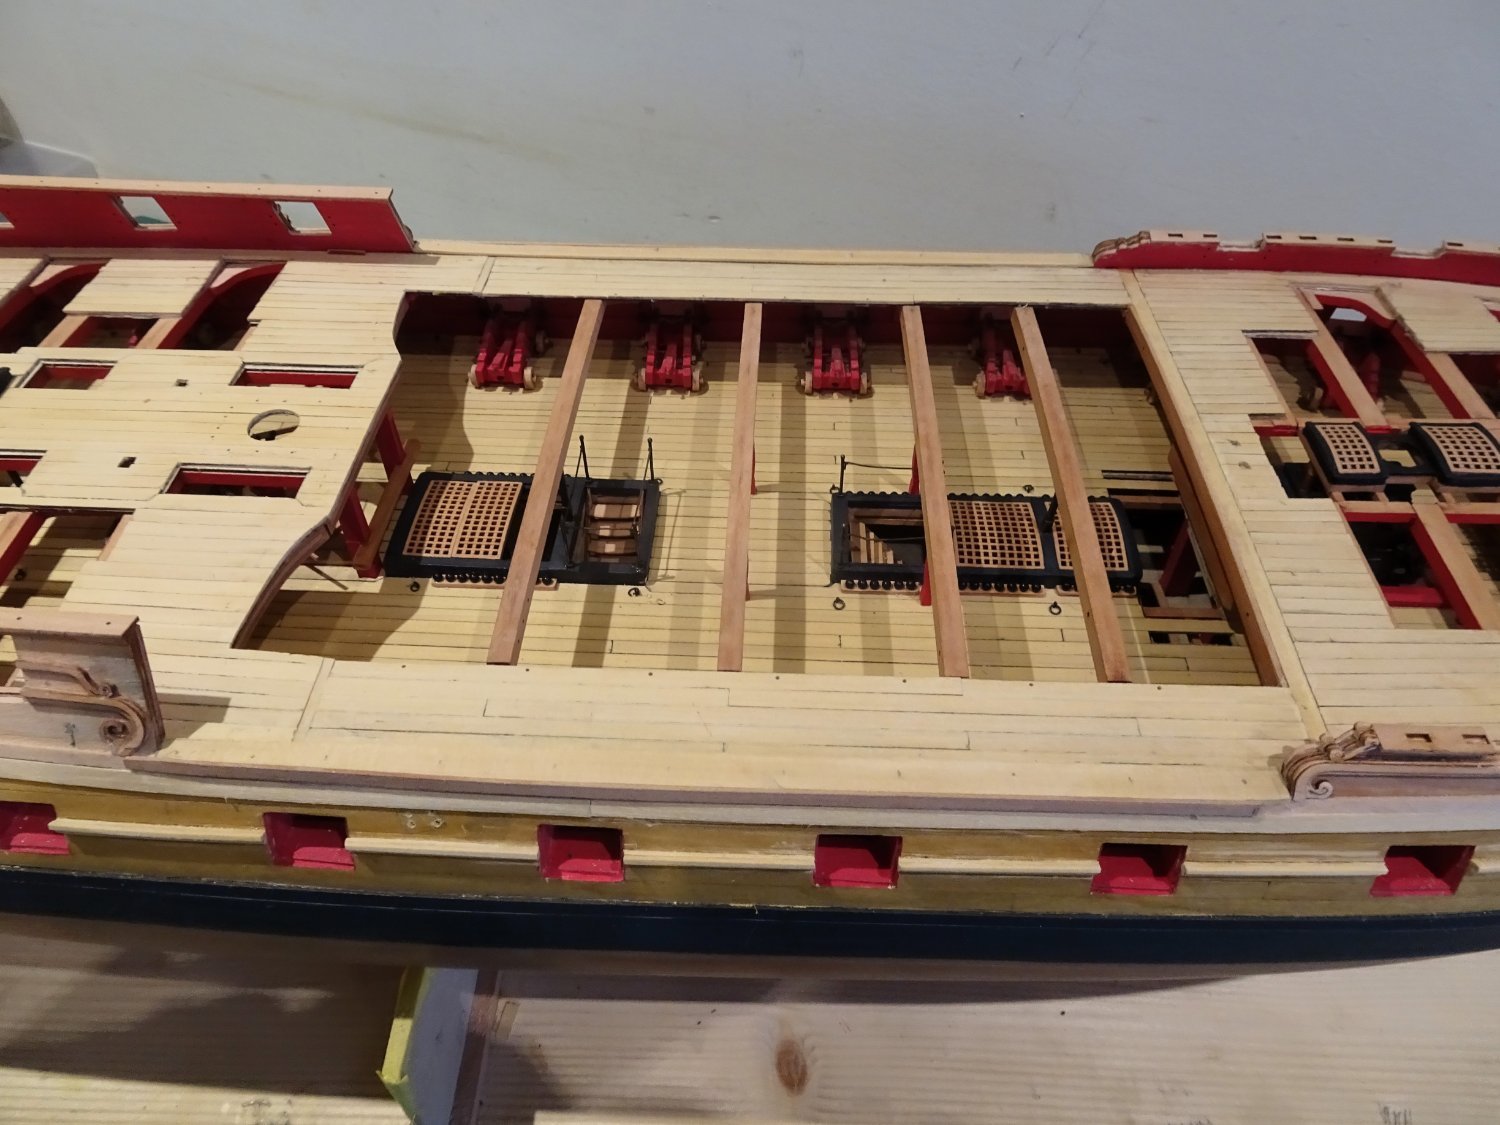
For the convenience of the crew I have added two additional seats of ease positioned at the aft end of the gratings adjacent to the False Rail.
In the Indy kit the False rail is an integral part of the Main Rail, and contains the Capsquare for the Boomkin.
The Headwork construction battle is now over, but I still need to do some tidying up and redo’s on the paintwork, but that I can do at my leisure.
B.E.
11/12/2023
- CiscoH, gjdale, BrochBoating and 21 others
-
24
-
-
-
-
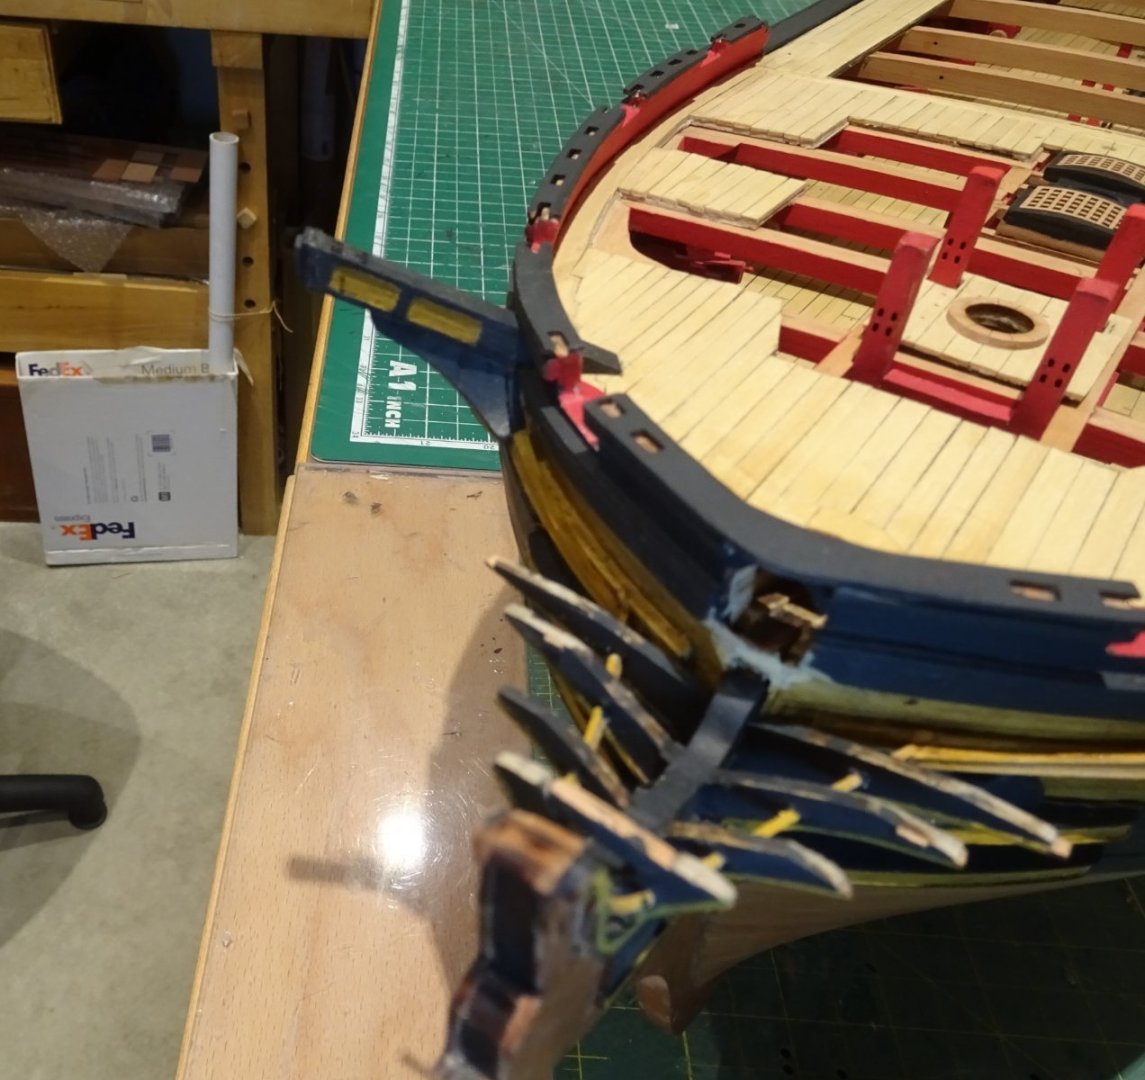
Post One Hundred and Fifteen
Main Rails
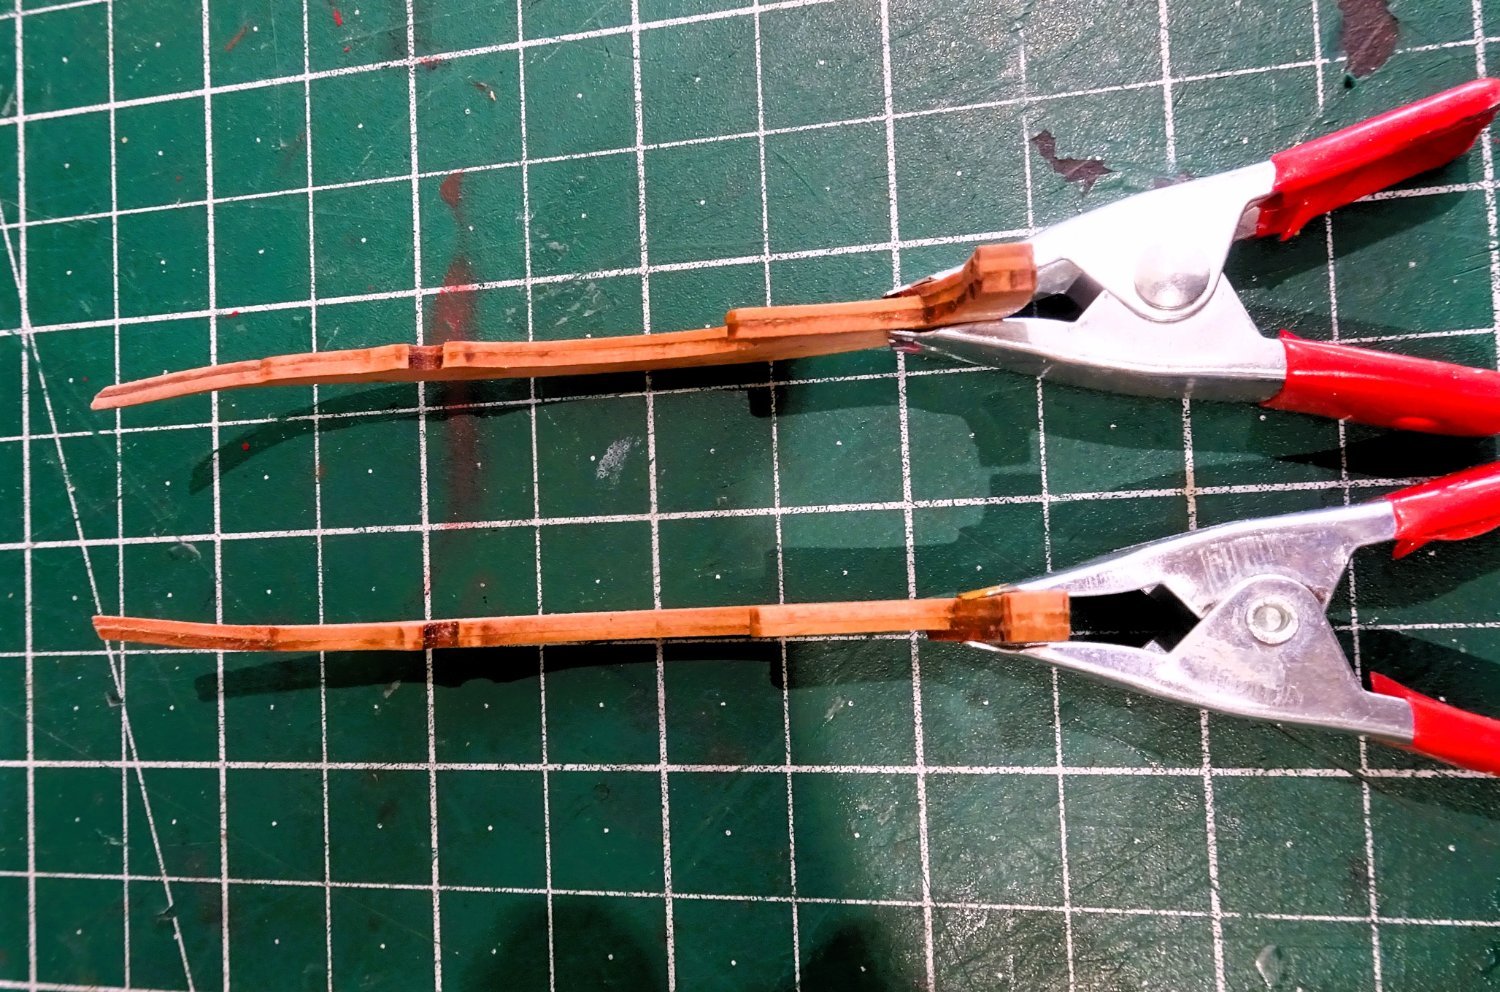
These are the most prominent rail of the Headworks and require careful positioning.
The laser cut parts are very nicely done and contain extra length. Accurate trimming is required for a good fit, I removed 11mm from the fore end.

2957
The Main rail should look elegant and I fined down the forward end where it meets the Hair bracket. I also tapered it on the inside as it runs towards the bow.
A gentle heat bend was applied to the forward end, forward of the Capsquare, to provide a less stressed fit to the hair Bracket.
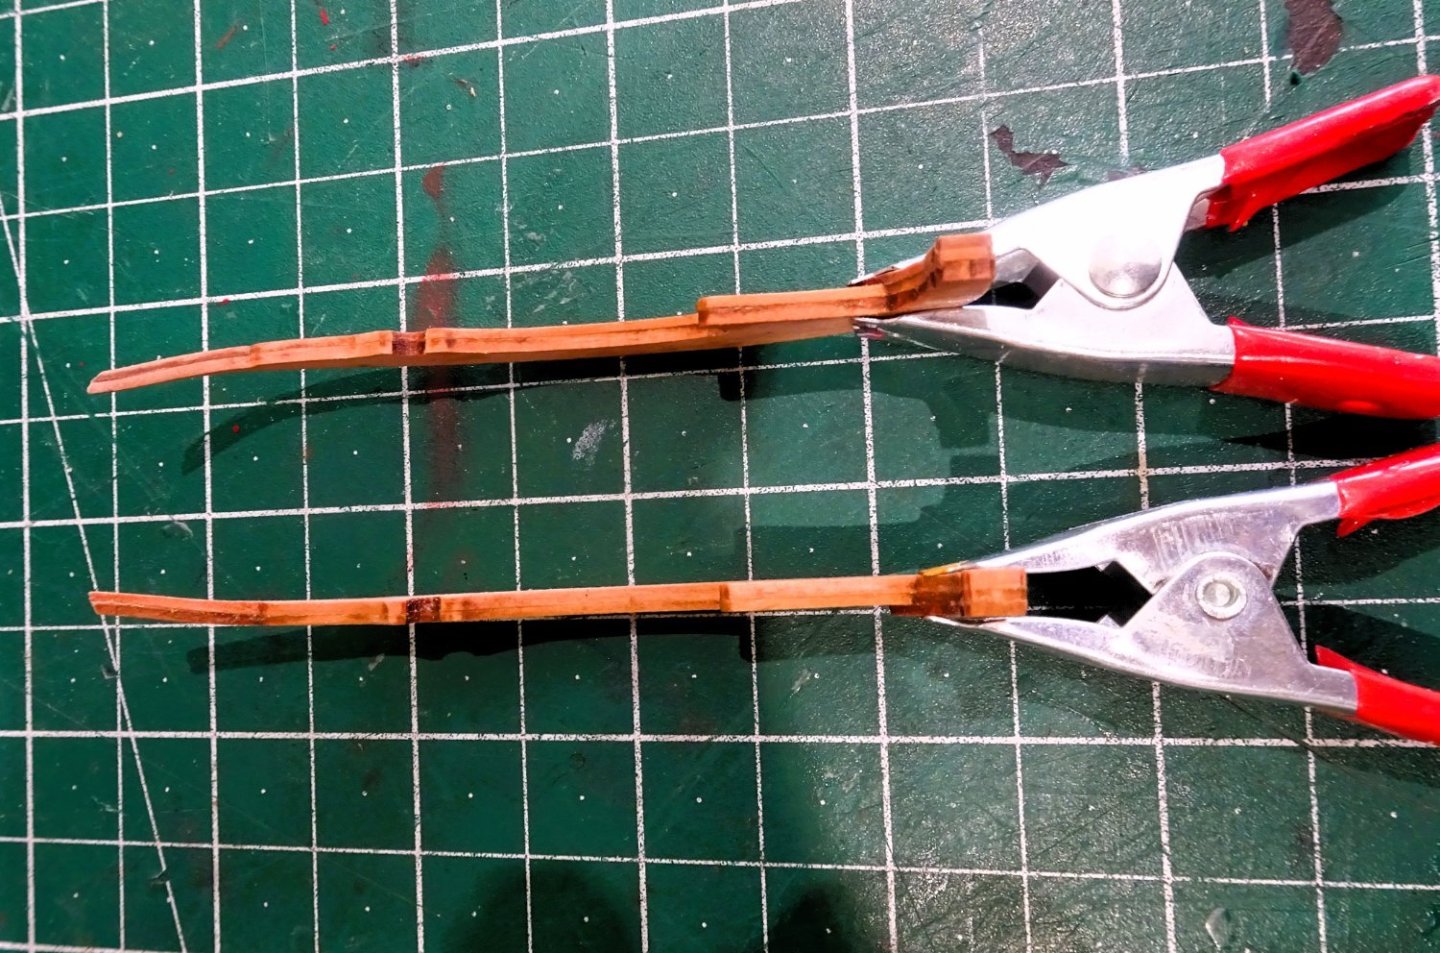
2959
A slightly risky business but the bend is very shallow, not much is required.
To finish these Pearwood parts, Vallejo Ochre Brown is used for the first coats, followed by my wood dye mix which produces a close match to the Boxwood varnish finish.
2965
The panel detail is black ink.

2966

2968
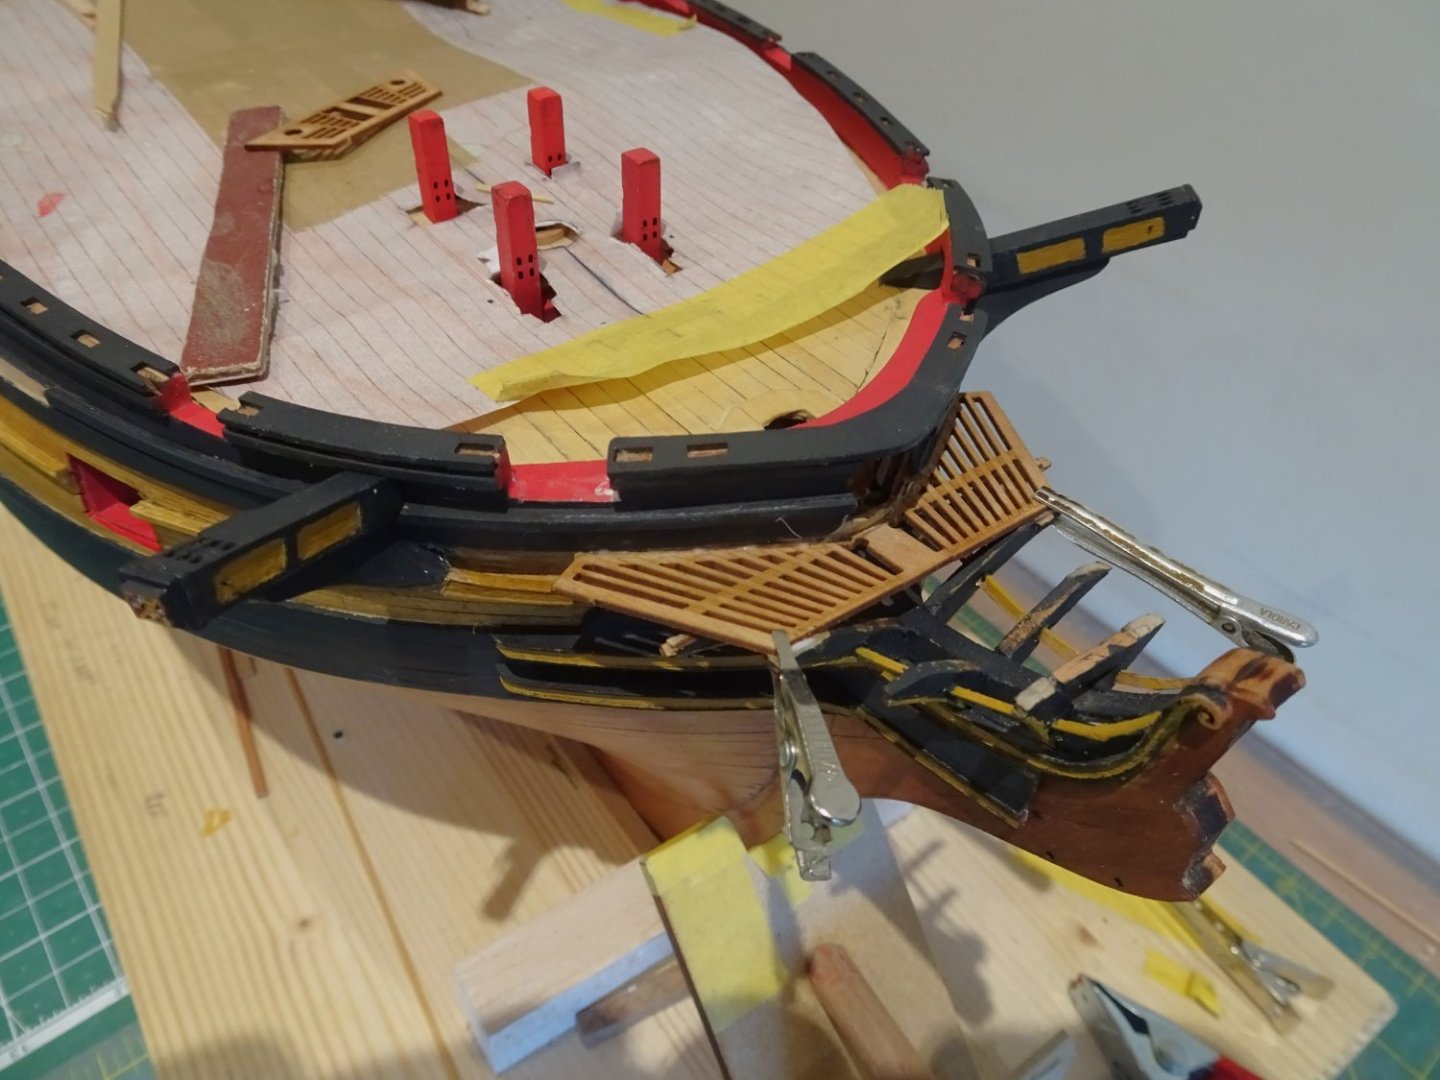
Dry fitting the rails.
As I played around with these rails I noticed that the Capsquare for the boomkins looked close by the seats of ease. This may cause issues with the Boomkin fitting.
2969
Plan sheet 9 shows the Capsquares sitting aft of the seats of ease which would allow a clear line of fitting.
All the build photos I’ve seen seem to show the position adjacent to the seats of ease, but no one has reached the stage of fitting Boomkins yet.
It will be interesting to see how the other members of the ‘Class of ’23 get on with this fitting.
I hope to get the rails fixed in position today but I suspect it may take a while.
B.E.
10/12/2023
- mtaylor, mugje, KARAVOKIRIS and 17 others
-
20
-
It doesn’t feel much like fun for me at present but we go thro’ the full gambit of emotions with model building.
The excitement of a new project, the boredom of doing repetitive routine elements, the frustration when things go wrong, the elation when things go right, the relief when a tricky element is successfully completed, and the pleasure of a project completed to satisfaction.
For me model building is a deeply absorbing activity, the research, the interaction with fellow builders on MSW, the striving for improvement, I couldn’t be without it in my life. ☺️
@ Darius – Thank you, - at present I don’t think I’m doing her justice! but that will pass.🤞
Regards,
B.E.
-
Post One Hundred and Fourteen
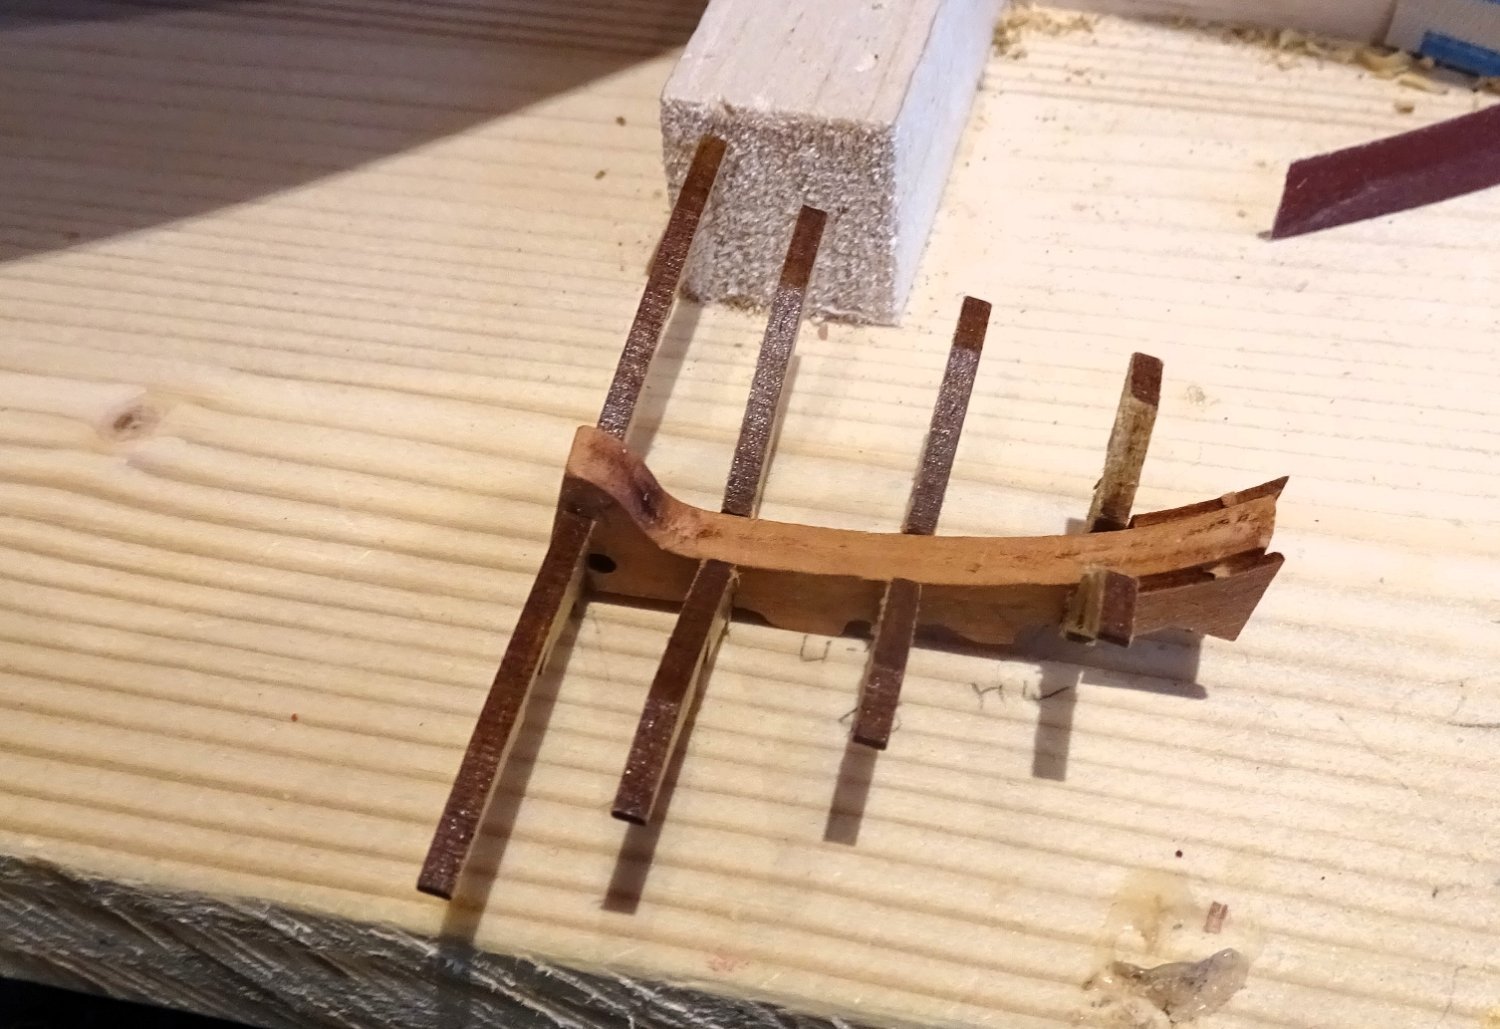
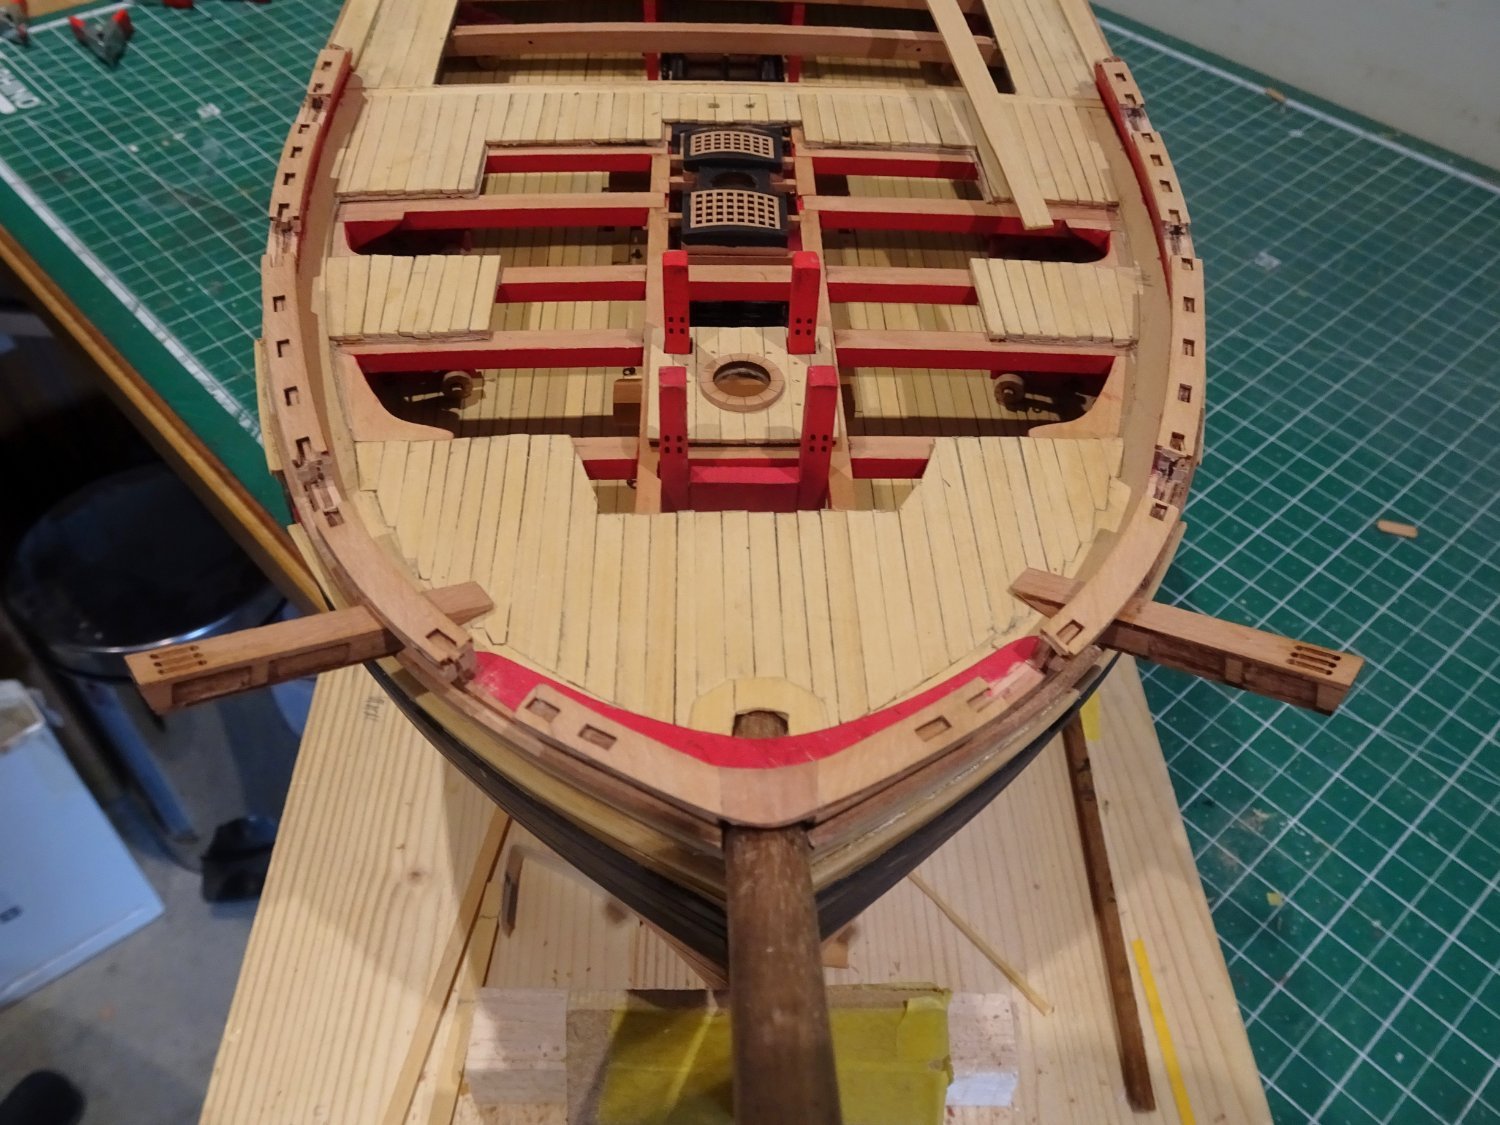
Headworks (Part Four)
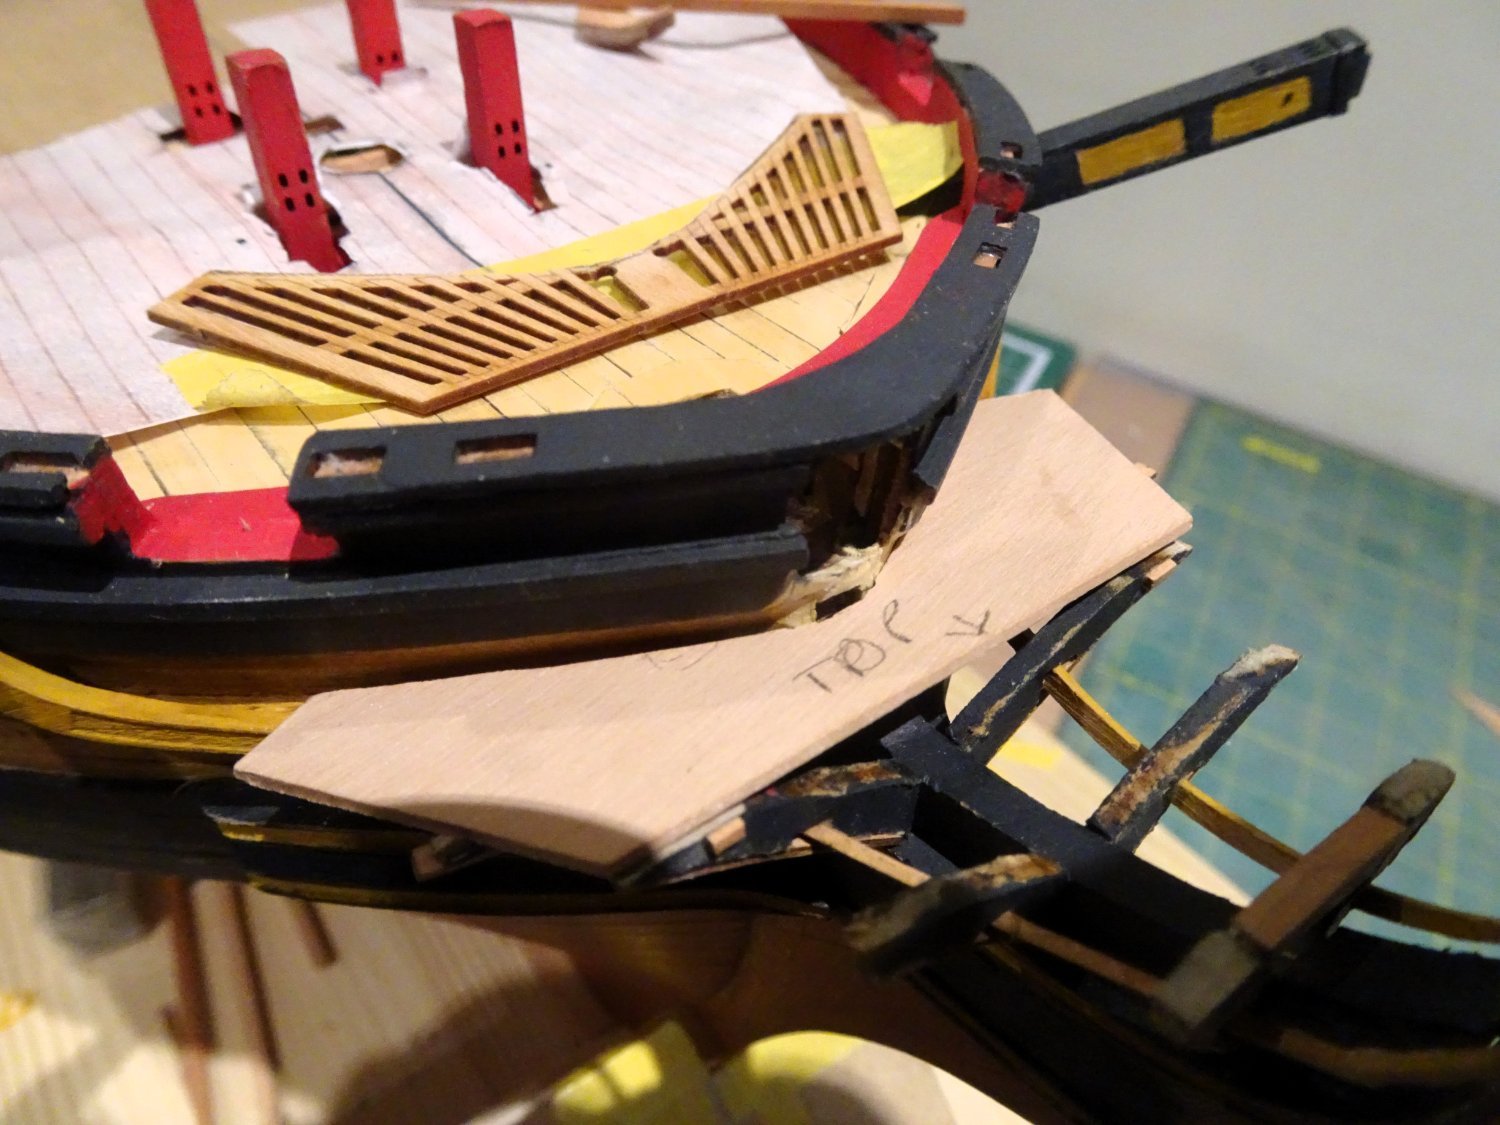
The next stage is fettling and dry fitting the gratings over the head timbers.
This piece is delicate and needs careful handling, I took the precaution of making a template to get the profile before applying it to the actual part.

2875
2941
….but I still managed to split it at the weak points during the necessary sanding to fit.

2945
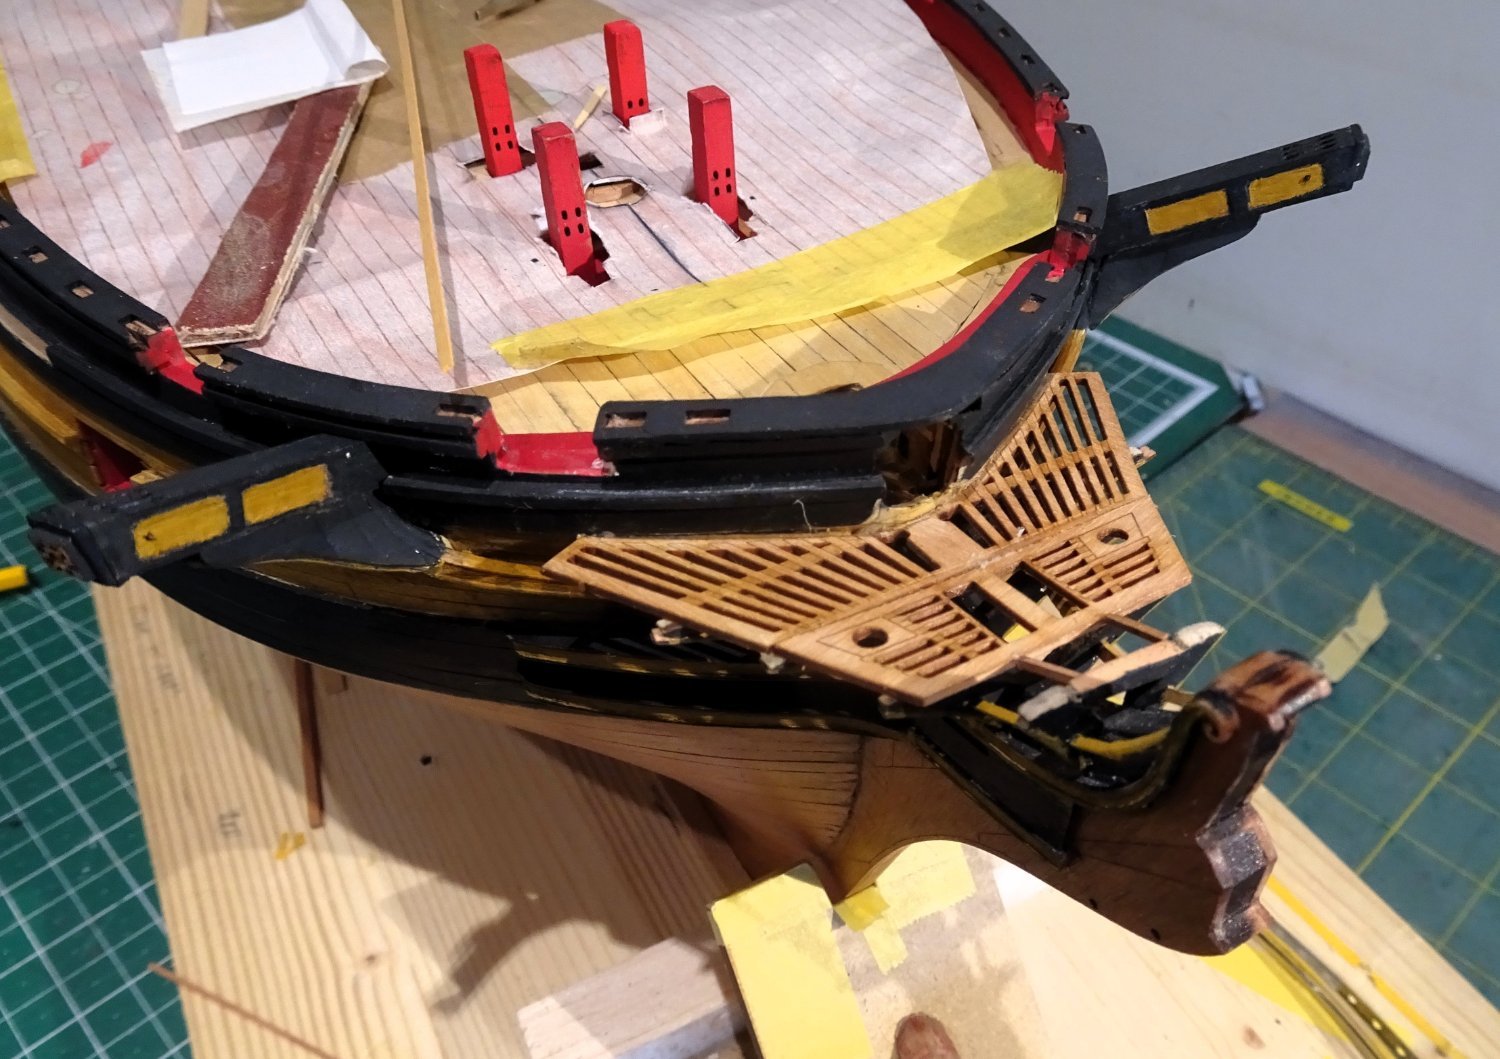
With the aft grating fixed the forward section is added.
2947
The fourth timberhead (nearest the bow) is left as is in the kit scheme but there would be a cross timber atop or aft of this known as the cross-piece of the head, very simple to add.
There is also an open space between the third and fourth timber heads which looks unfinished to my eye.
A check around indicates that there should be carlings running between the two, which are added using some 0.8mmx1mm pear strip.
These are also simply added.
The kit contains the makings for the seats of easement for which the hole looked a tad large to my eye, but on checking such details out, Chris has it spot on.

2952
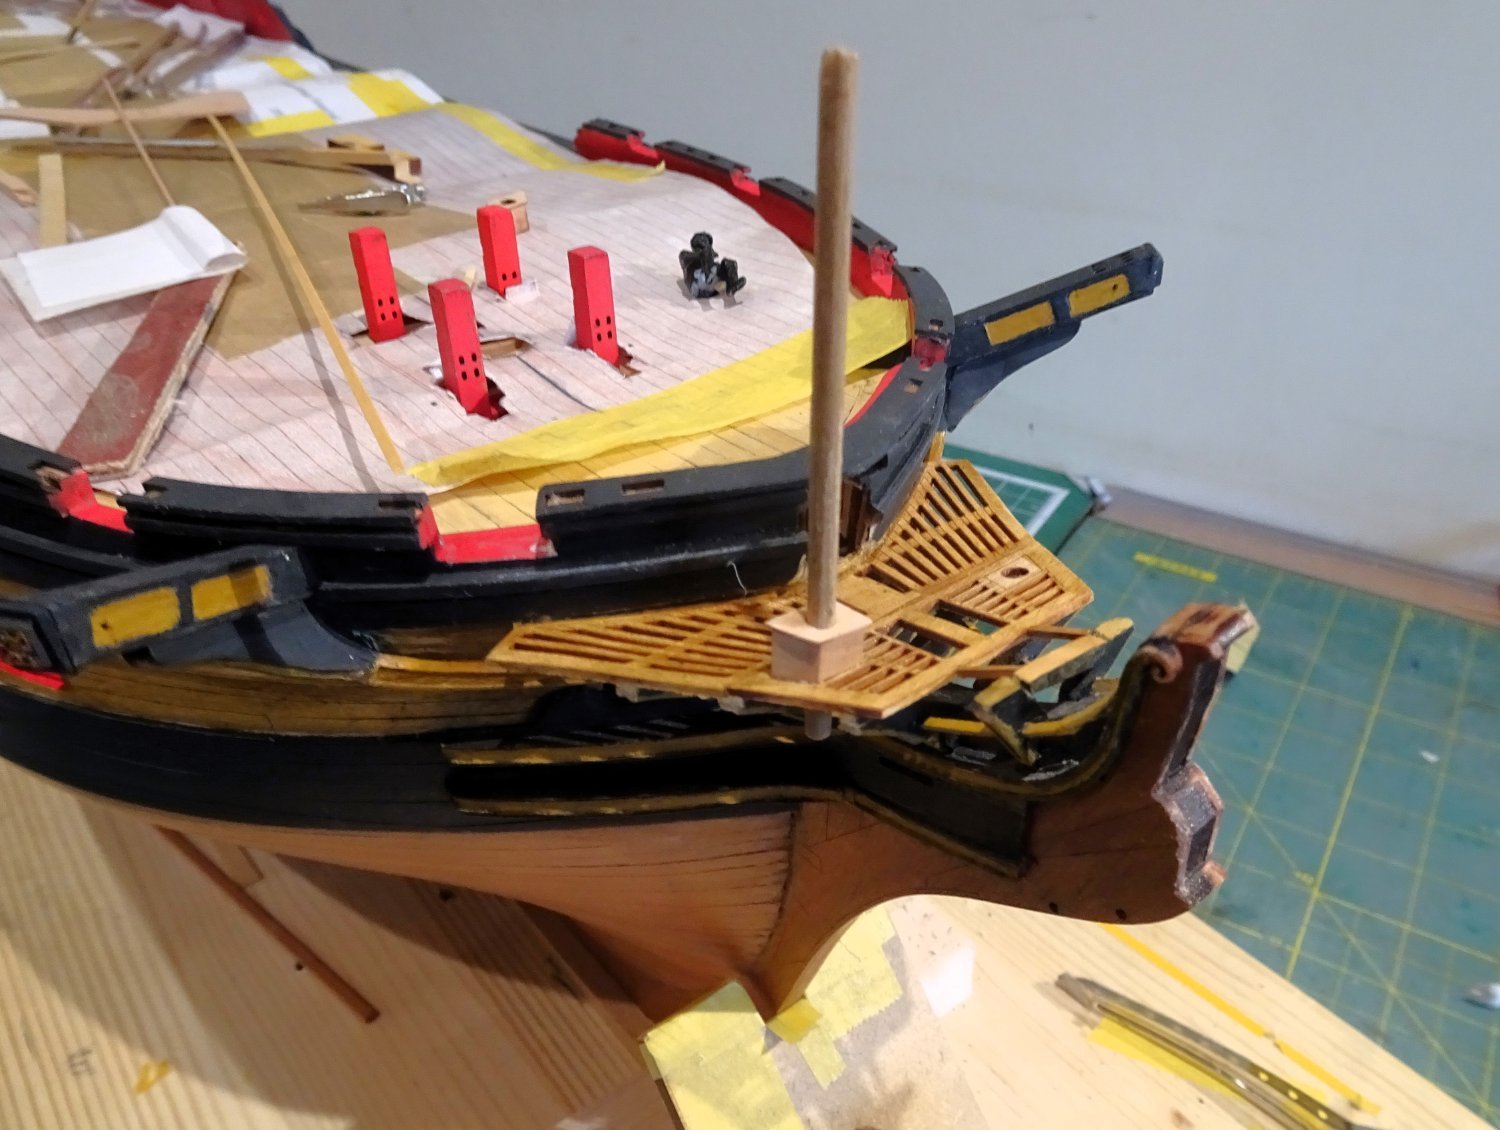
I considered that a ship the size of Indy would have had an extra set of seats fitted, which I intend to add. (I did the same on Sphinx)
2955

2956
I persuaded my Skipper from the Zulu Muirneag to try them our for size, it did cost me a dram.😉
Slàinte,
B.E.
08/12/2023
-
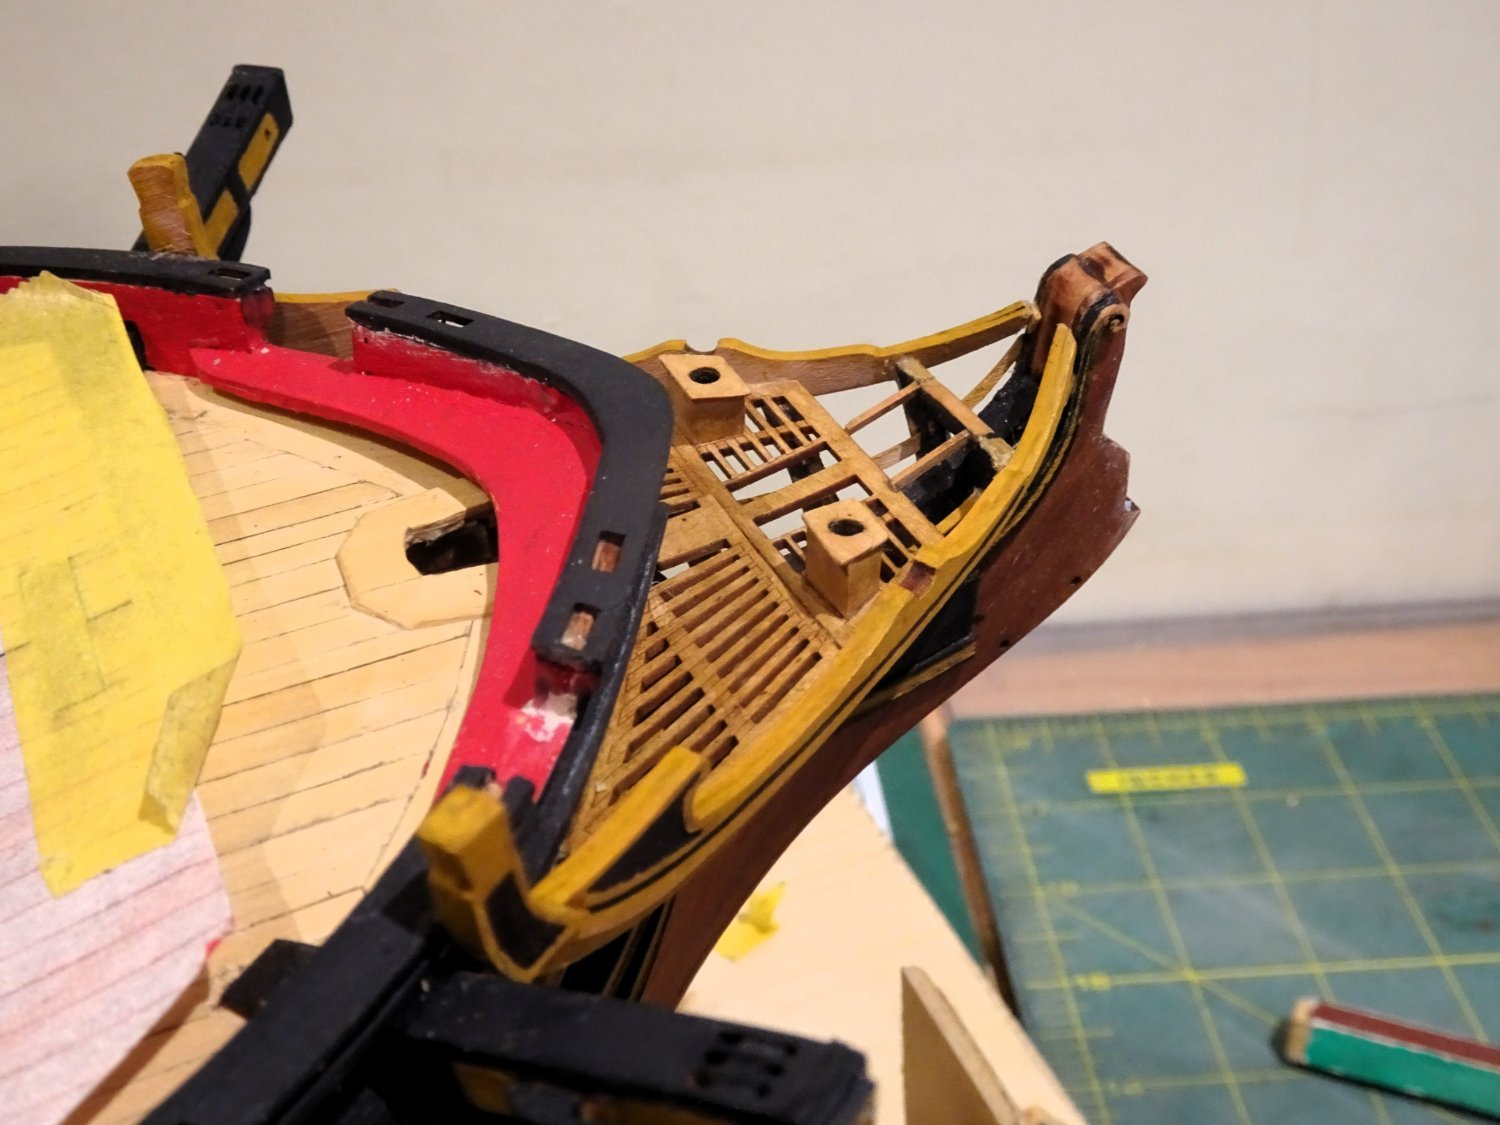
Post One Hundred and thirteen
Headworks (Part Three)
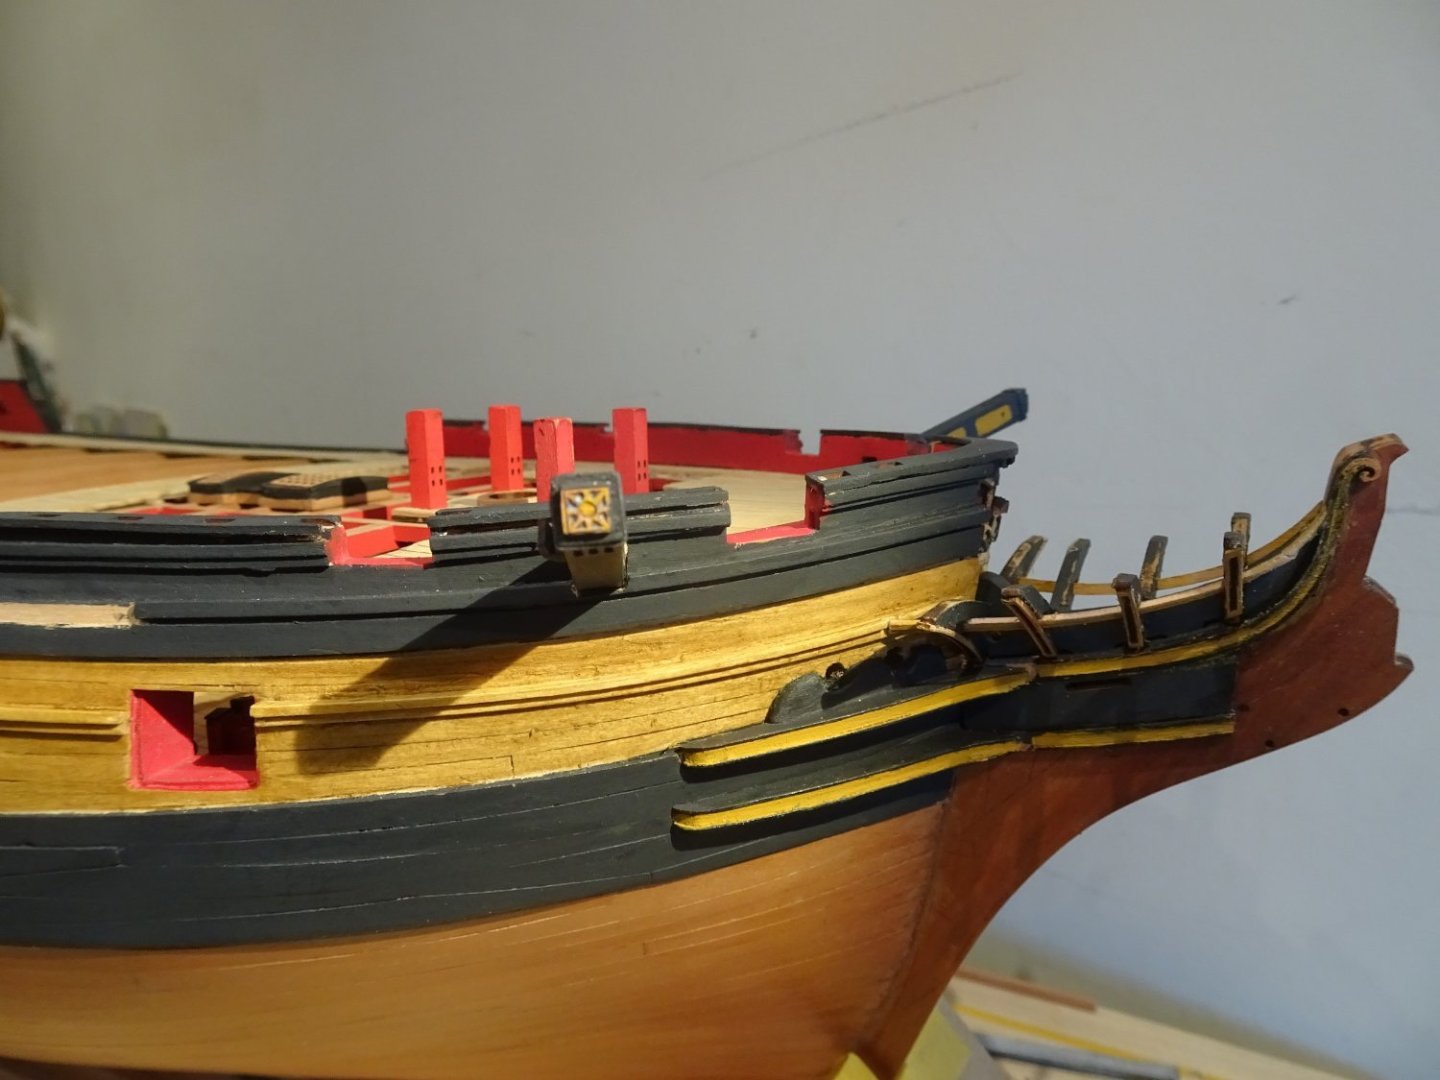
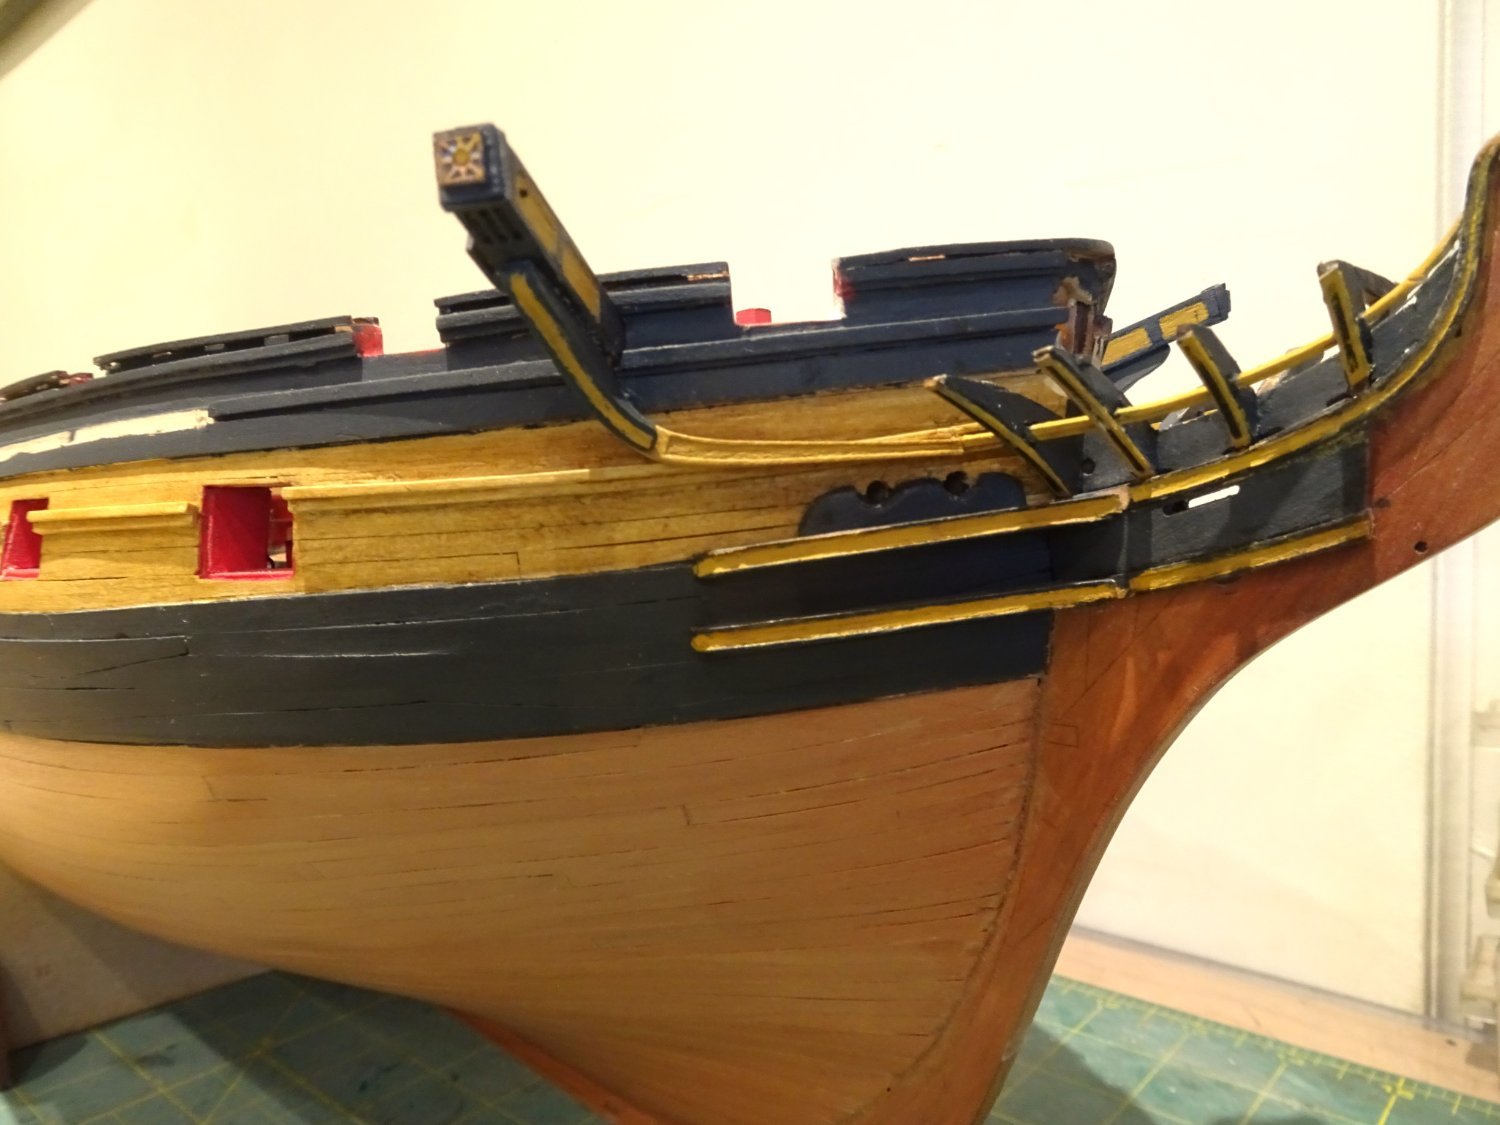
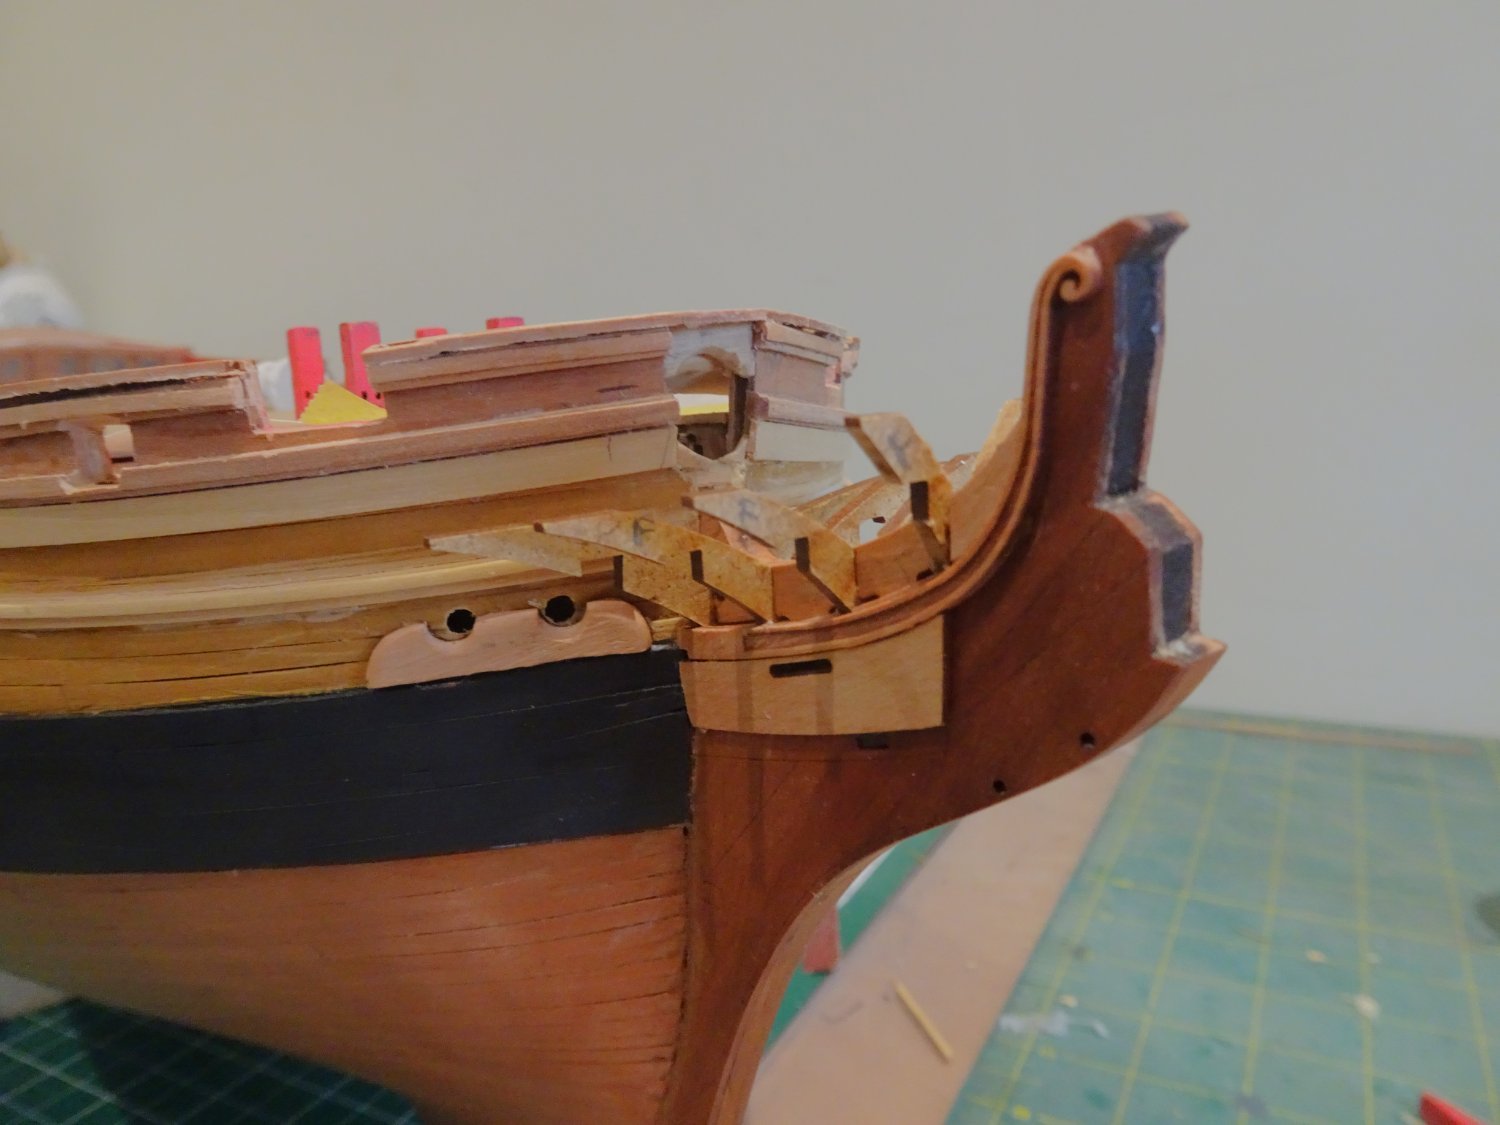
One of the trickiest parts to get right is the Cathead supporter and I did struggle to get the necessary curve to fay into the Ekeing rail even with Chris’s unique, as far as I know, jig which goes a long way towards resolving the problem of the complex curves involved.
Ideally the top of the supporter should be square and centred beneath the Cathead, and curve down to follow exactly the curve of the Ekeing rail.
My initial attempts resulted in a mismatch between the two. The problem could be addressed to some extent by bevelling the top of the supporter but there was still an obvious misalignment.
I scrapped my first attempts and I re-made the supports using a lamination of three pieces of 1mm stuff.
Even so it took a couple of re- shapings in the jig to get a result that just about passed muster.
2890
The Cathead supporter/ekeing rail arrangement on the kit is a simplification.
The Supporter in reality, was a separate piece to the ekeing rail and should be fastened close to the hull, with the ekeing fayed into its lower end.

2897
Once fitted, even tho’ superficially it may look ok, blind man on a galloping horse comes to mind, I was not happy with the result.
The main issue is that the supporter knee is glued to the Ekeing rather than the hull, resulting in a gap between hull and rail where the Ekeing passes over the upper wale and waist rails, which throw it away from the hull.
The manual only indicates removing a small section of rail directly beneath the cathead, and the result is that the supporter is then obviously attached to the rail rather than the hull and not attached to the hull at all at the lower extreme.
This made little sense and irritated my eye each time I looked at it.
2900
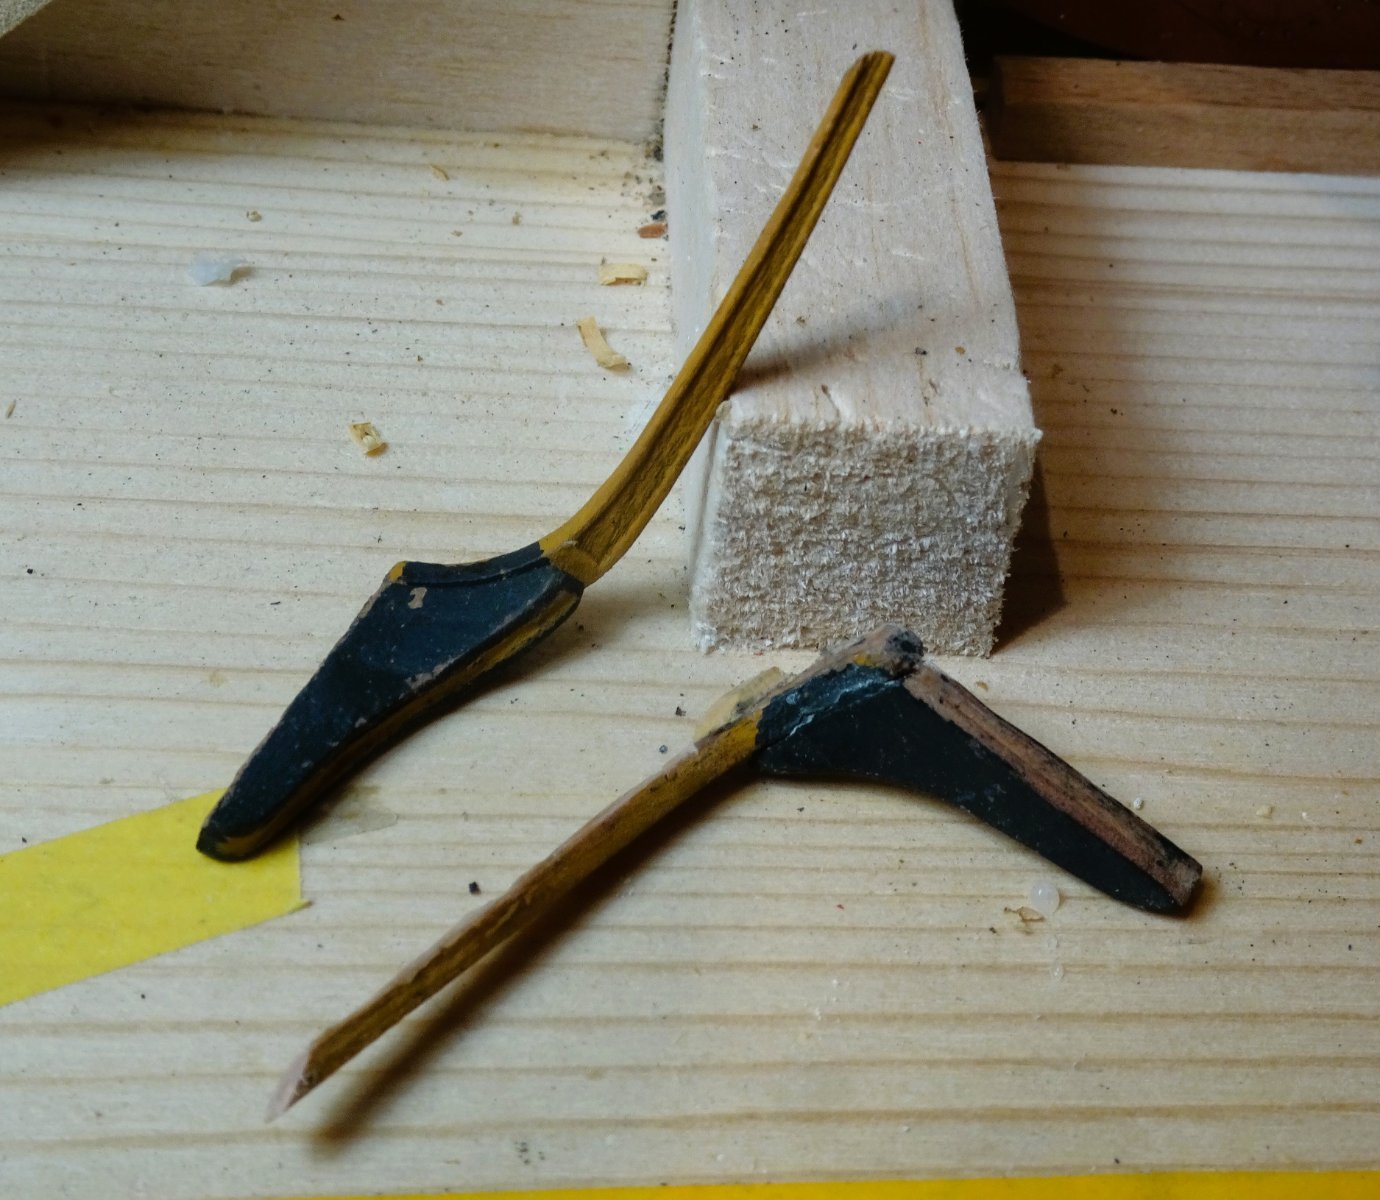
I needed a re-think, so all my work of the past few days was undone.
2902
Fortunately, the supporter and rail came away without breakage.
A contributing factor is that the Ekeing runs atop and almost parallel with the Waist rail rather than cutting it at a more acute angle to run below it as indicated on the plans (both kit and official)
My aim is to get the supporter to look as if it is fastened directly to the hull, and to achieve this it is necessary to fine down the waist rail to allow the supporter to sit flush with the hull. The aft side of the supporter is also built up to compensate for the gap between Upper rails and Waist rails.

1584a
This modification is still a bit of a fudge but I can now live with it.
2914
1588b
2918
There’s a lot of work left to do on the finish, and getting clean lines on the mouldings is also proving a challenge.
I need to wait for better light for detail painting, the light levels in the UK are very poor at present.
The Bow saga goes on…..
B.E.
07/12/2023
-
Thanks Dave, I’m not sure having fun is the right term – grim determination more likely.😬
@ Allan -
The approach is probably different on a scratch build, you need all the rails etc in order to determine the head timbers. With Indy this has already been determined, but even so it is a good idea not to commit to glue too soon in the process. 🤔
Cheers,
B.E.
-
Post One Hundred and Twelve
Headworks (Part Two)
With the Head timbers in place the Lower rail can be fitted. These are the ones that run along the slots in the Head timbers to join the Hair bracket at the fore end and the Ekeing rail aft.
The kit blurb indicates fitting the decorative cover panels to the head timbers and slotting the rail through them before fitting to the hull.

2851
I prefer to fit the rails on the model and then add the covers. I temporarily fitted the first cover to help hold the rail during positioning.
The provided slots do err on the generous side, presumably to allow trouble free access. Some remedial work will be required post fitting.
Looking at the manual photos the rail terminates on the Waist rail that runs between the gunports up to the bow. The plans show the rail meeting the ekeing rail which runs just below the termination of the Waist rail.
It is almost inevitable to get some variation in position due to the vagaries of individual builds, but with the head timbers in place (not glued) I can test the rail and see how it all pans out.
2866
Fitting the Lower rails is quite a tricky operation, these are delicate parts and I managed to break the tip off one, fortunately the repair held.
Cathead completion
This involves adding the caps and decorative motif and the cleat for the Cathead stopper.
The decorative motif on the cap is a star design neatly laser cut.
Ekeing rail
This runs from beneath the Cathead to meet the Lower rail just below the previously fitted Waist rail, or in my particular case at the lower edge of the waist rail.

2872
2874
It is a composite of two parts;
(inner214) and outer (212/213) I have confirmed with Chris that the inner (214) is a ‘spare’ but could be used to bulk out the Ekeing rail if desired.
I believe it did taper in thickness as it runs towards the Lower rail, so I opted to use it, looks better to my eye.

2870
As an aside, David Steel The elements and practice of Naval Artchitecture 1812) is rather scathing about the Ekeing rail.
The Ekeing rail at the low part of the supporter under the Cathead is only to continue the shape and fashion of that part, being of no other service.
We make this remark because if the supporter was stopd short without an Ekeing, it would be better, as it causes the side timbers to rot, and it commonly appears fair to the eye in but one direction.
Not many years later and by the time of the Leda class frigate Trincomalee the Ekeing seems to have been dispensed with.
Onto the delights of the Cathead supporter.
B.E.
05/12/2023
- bruce d, rybakov, chris watton and 15 others
-
18
-
-
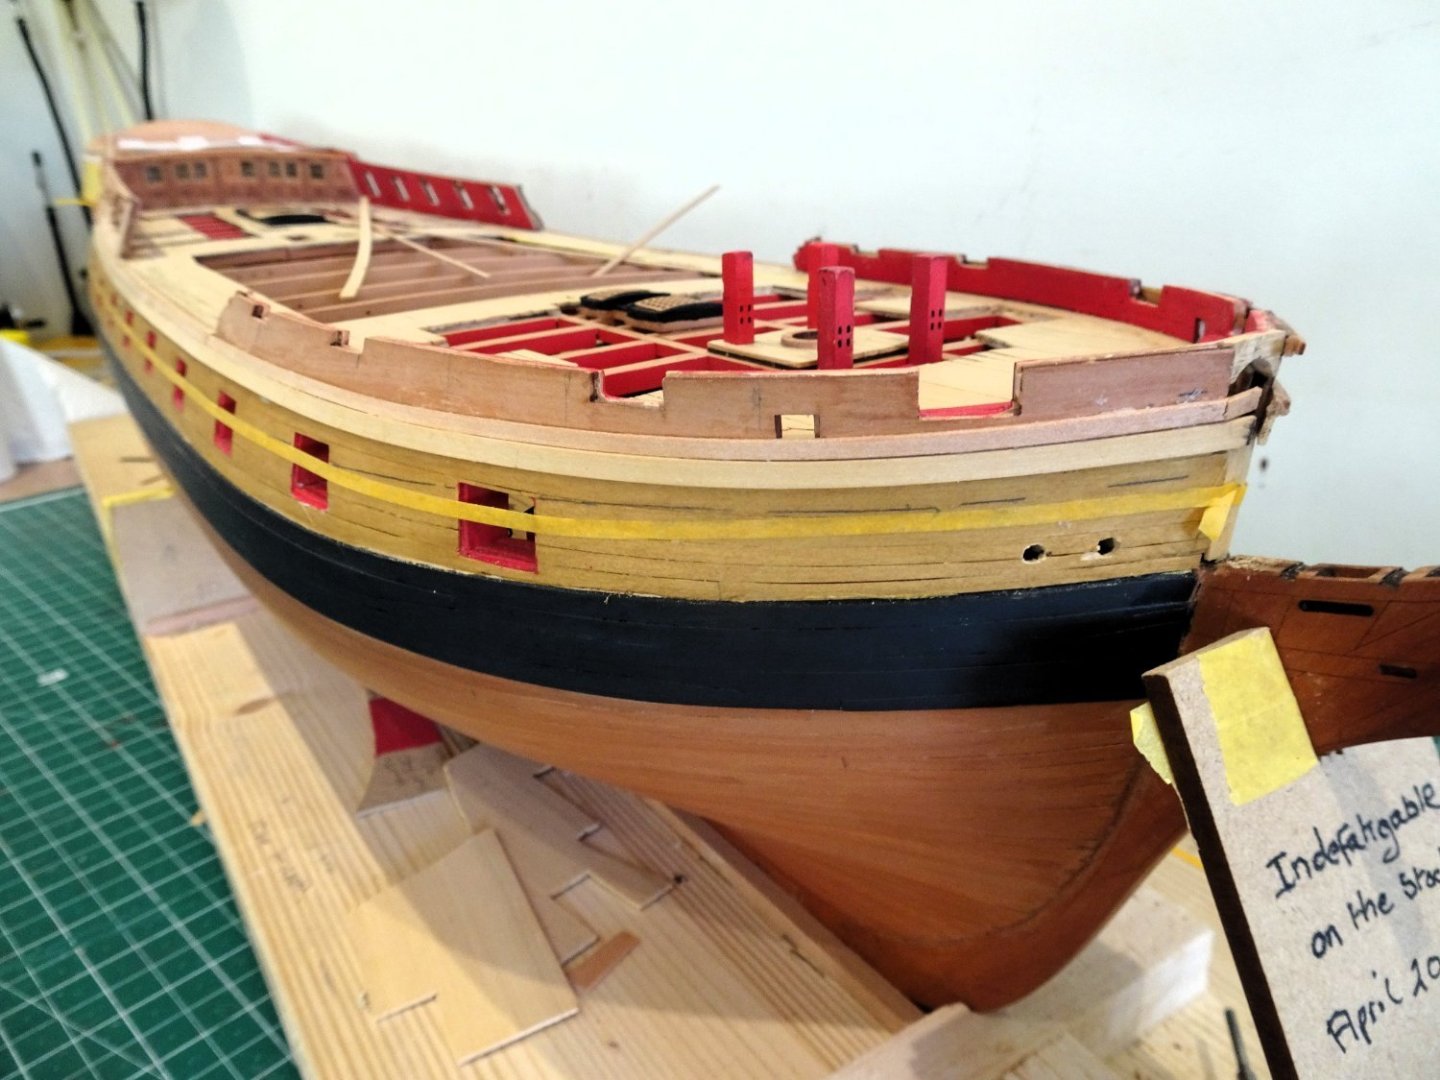
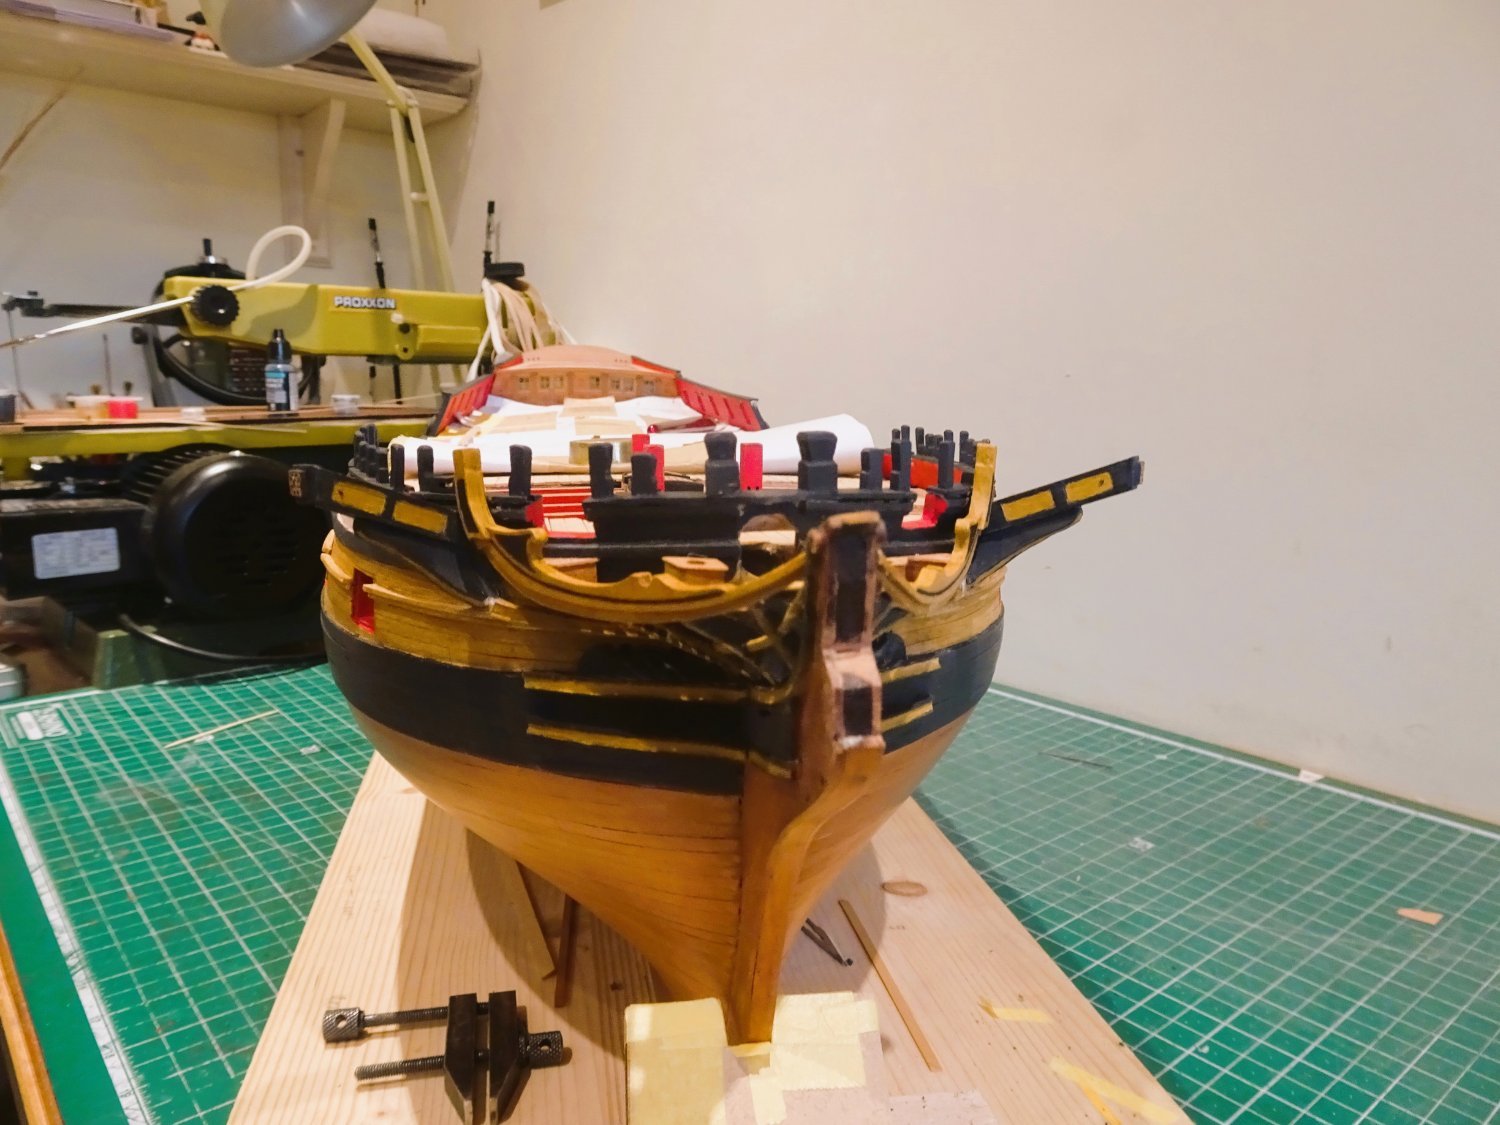
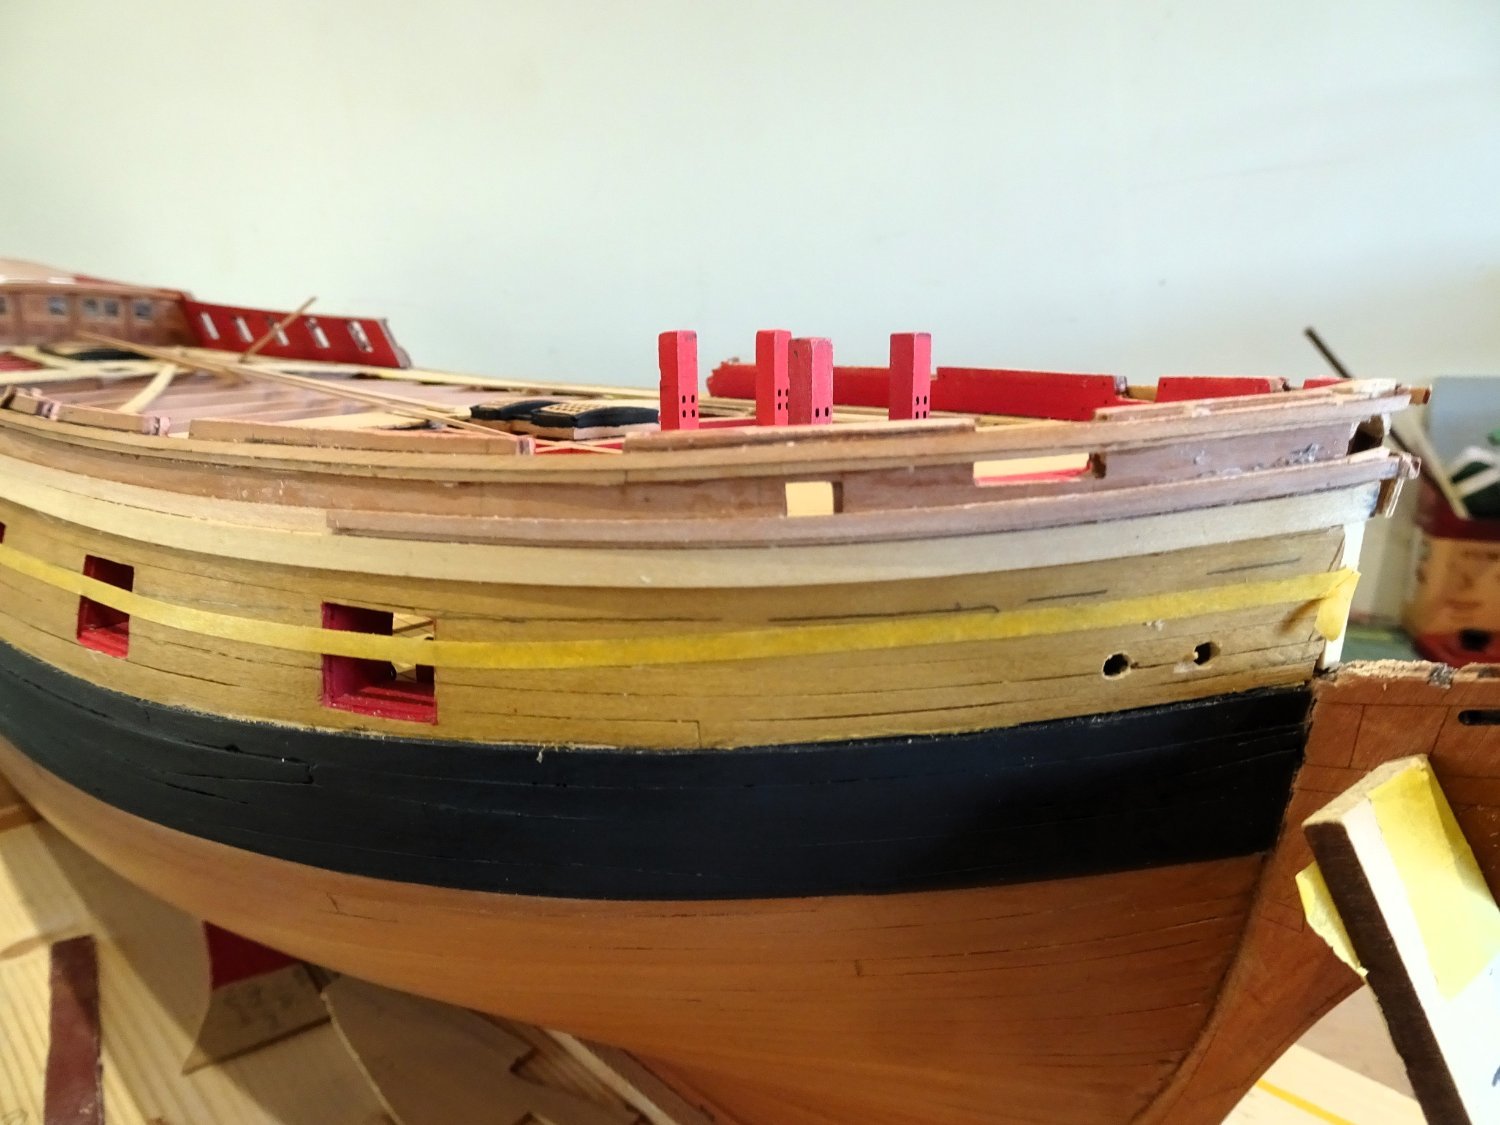
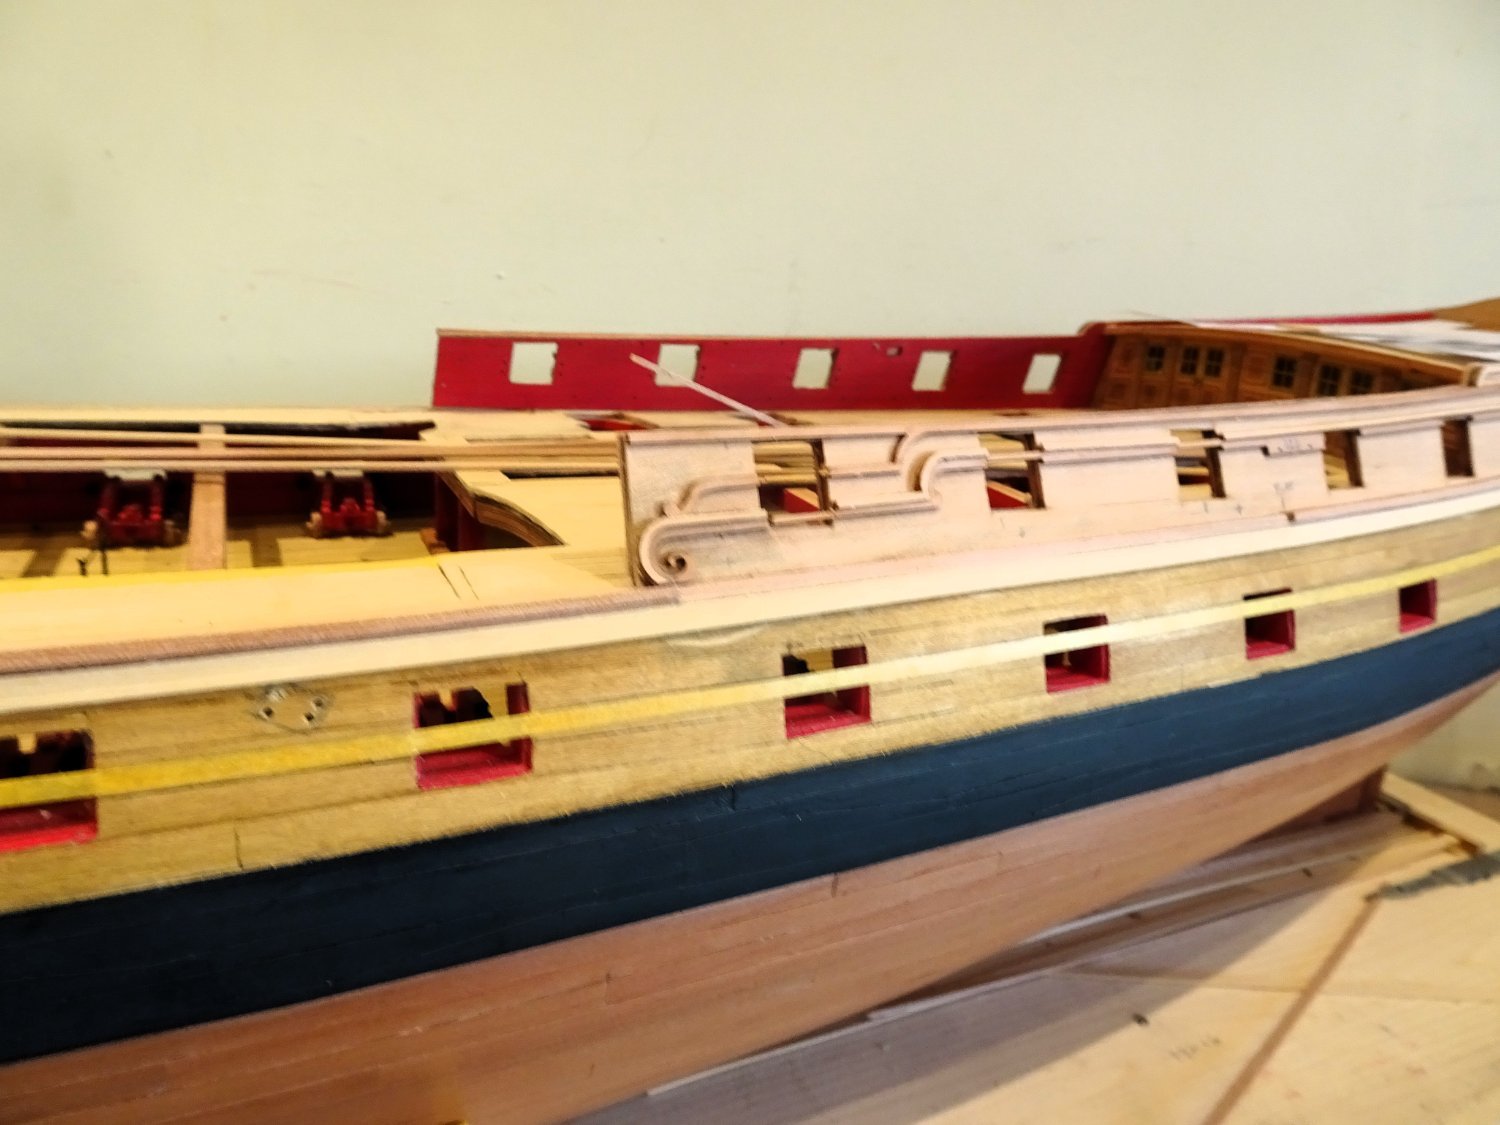
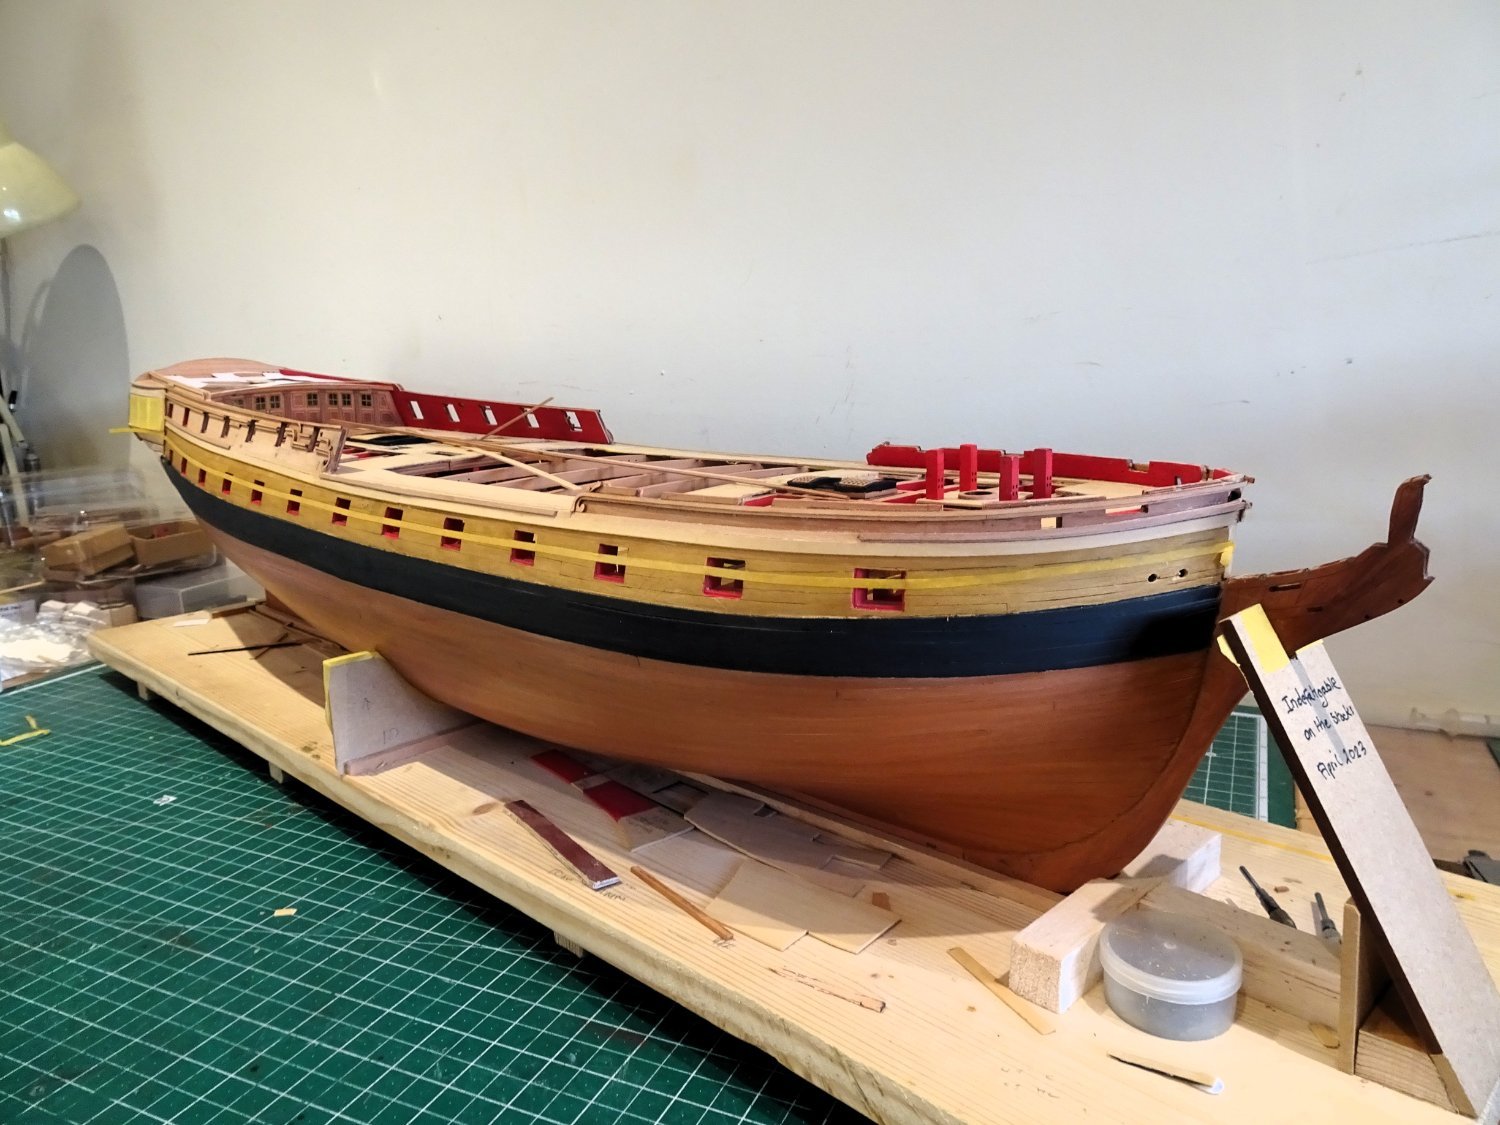
Post One Hundred and Eleven
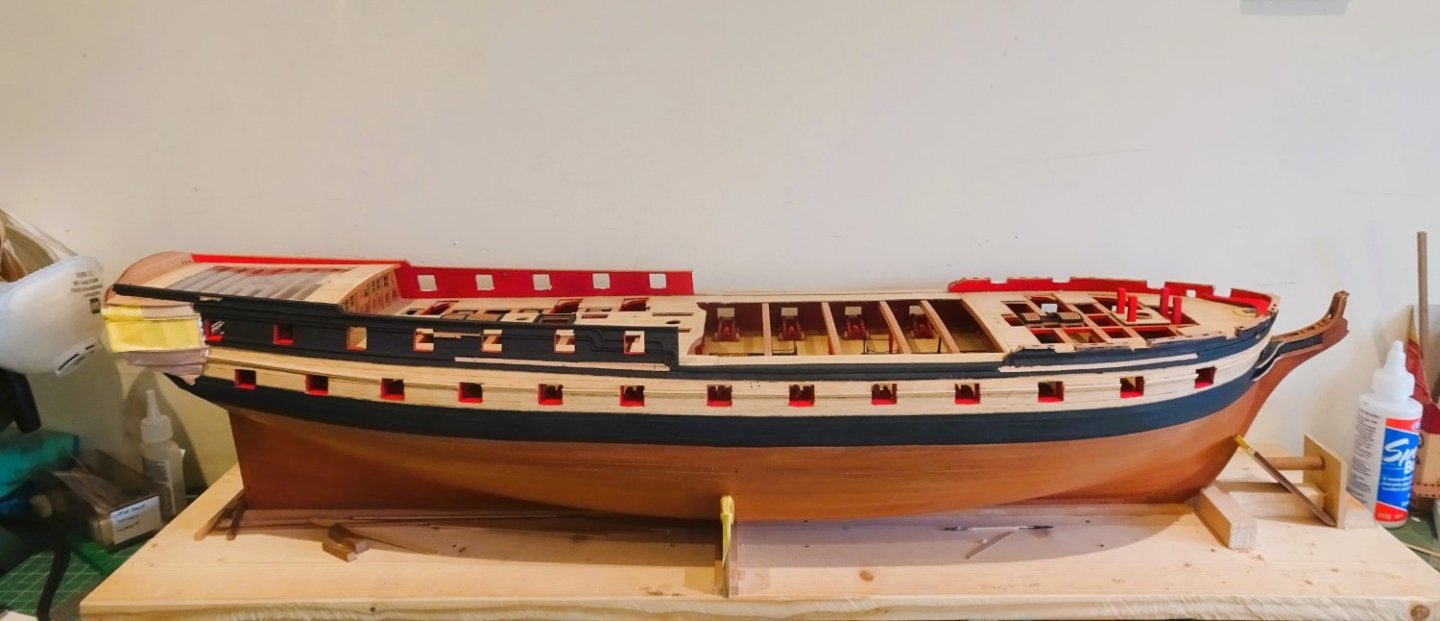
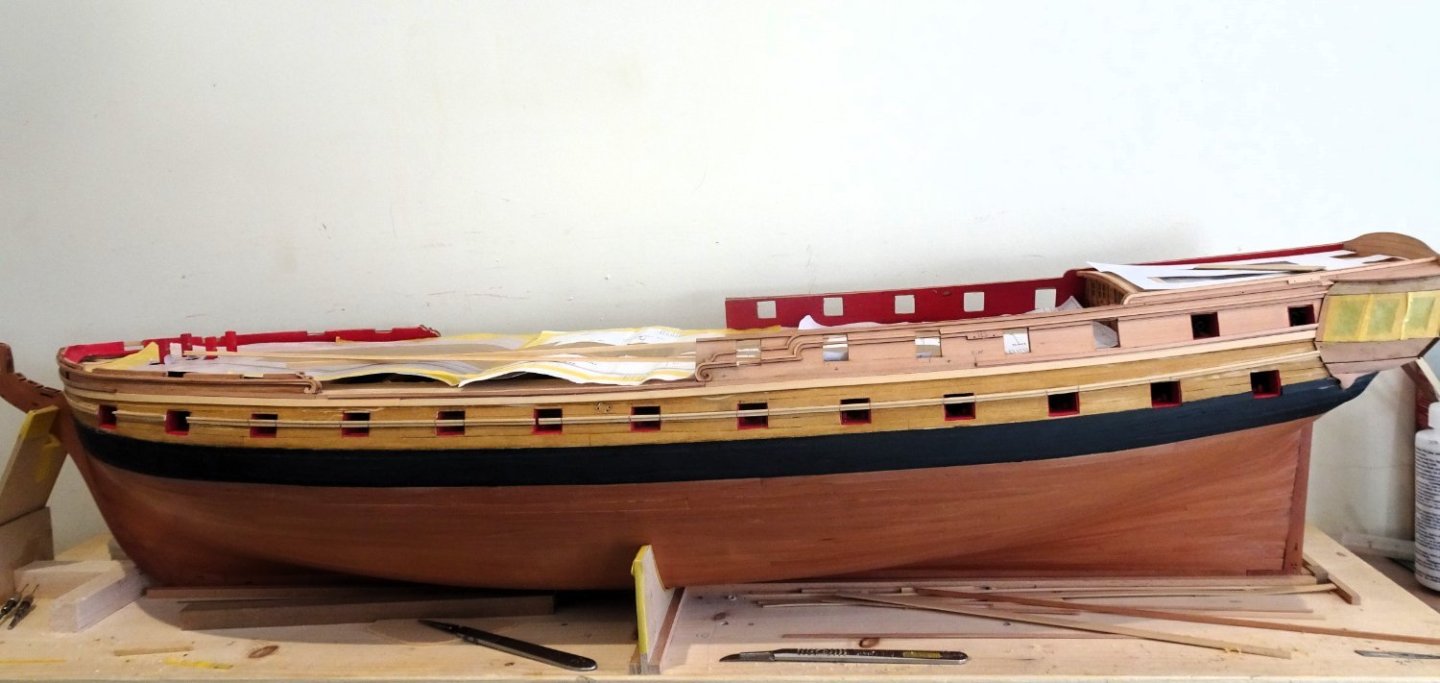
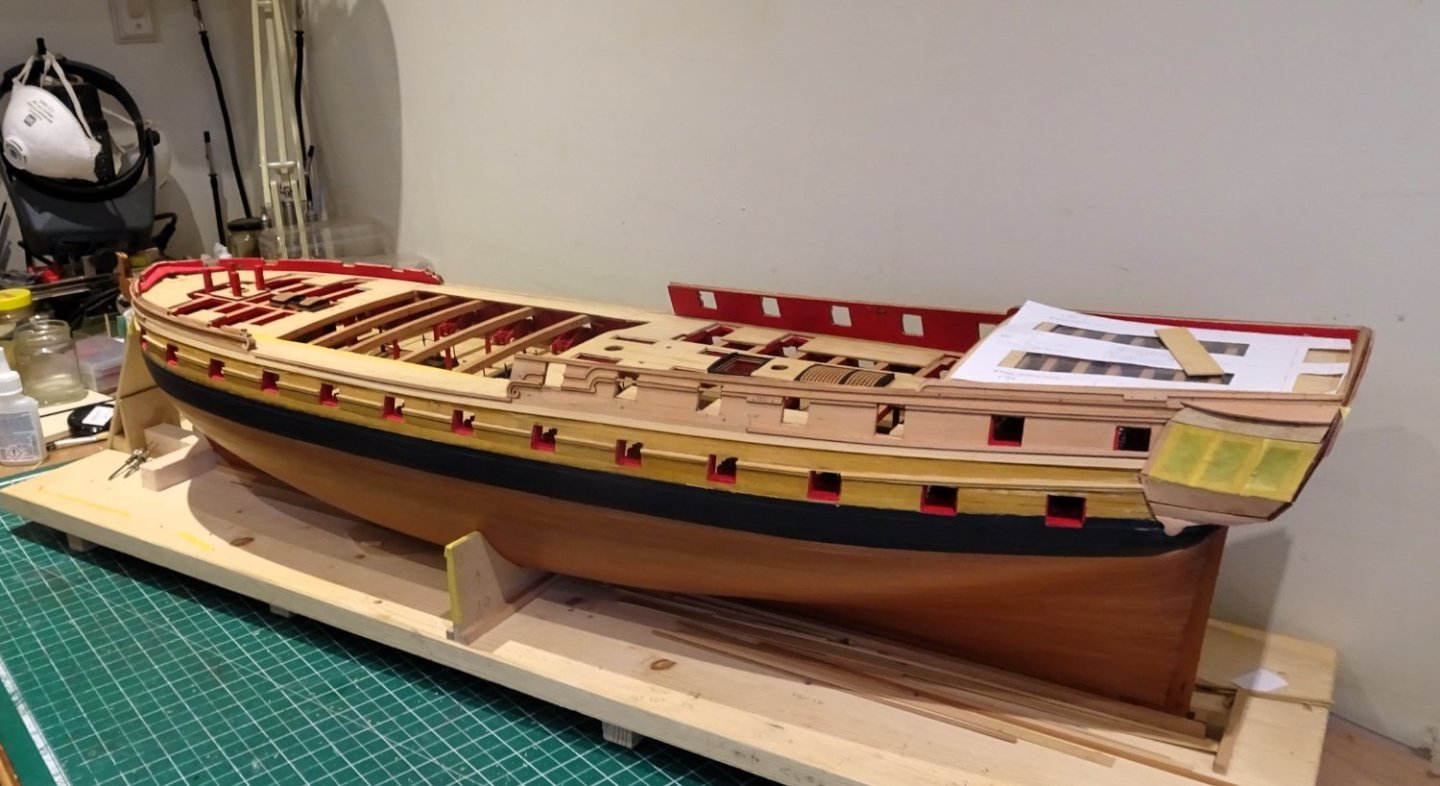
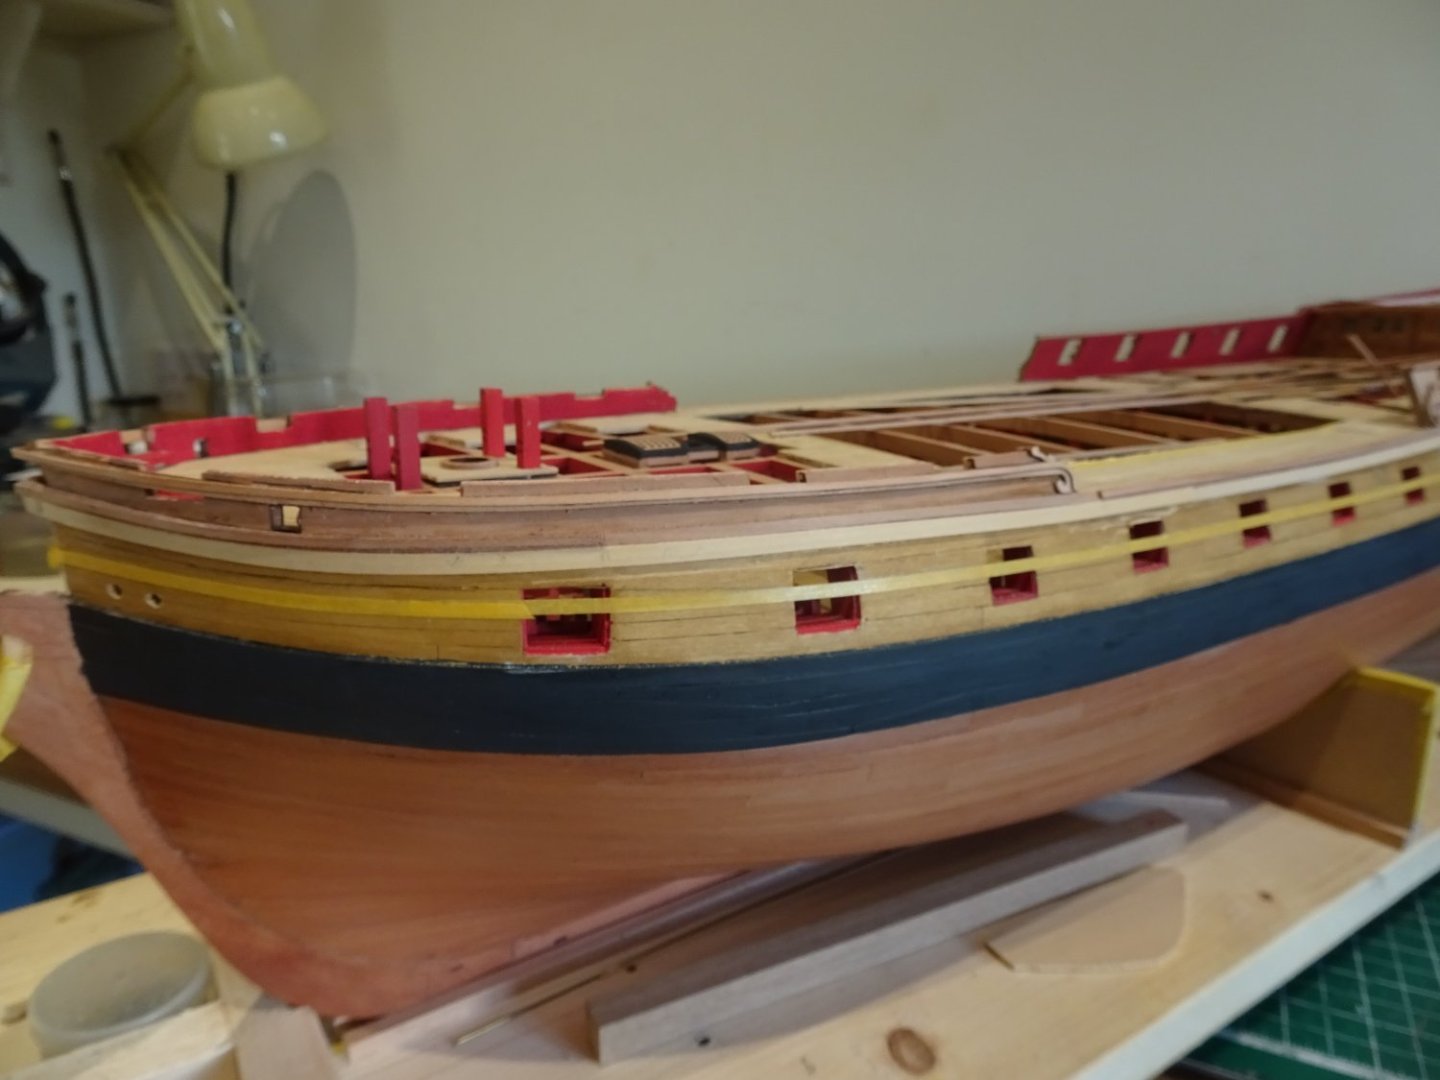
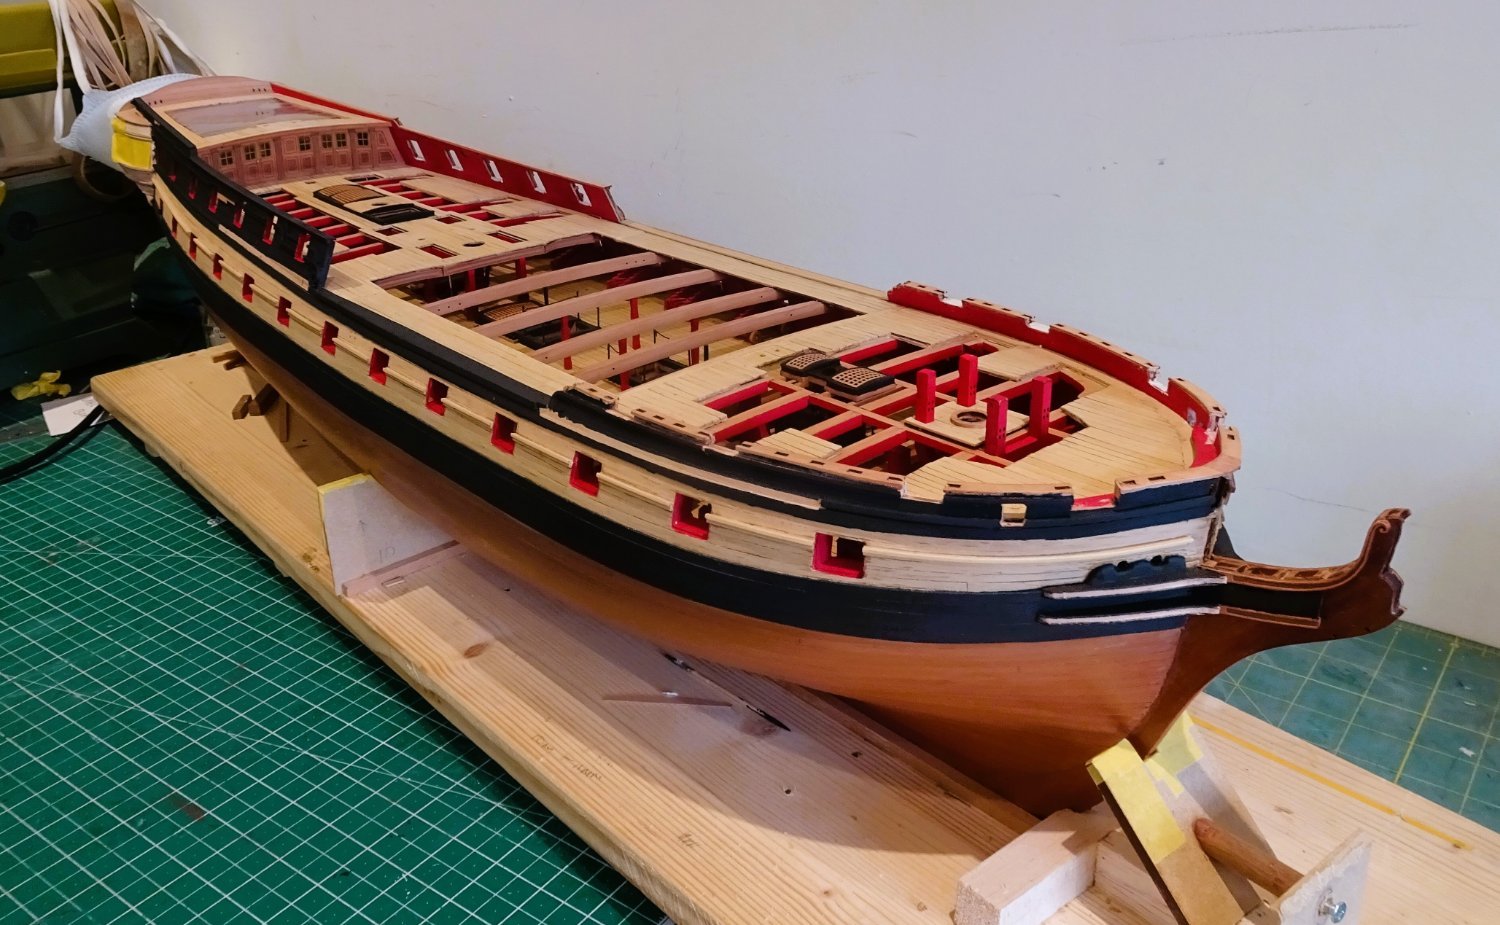
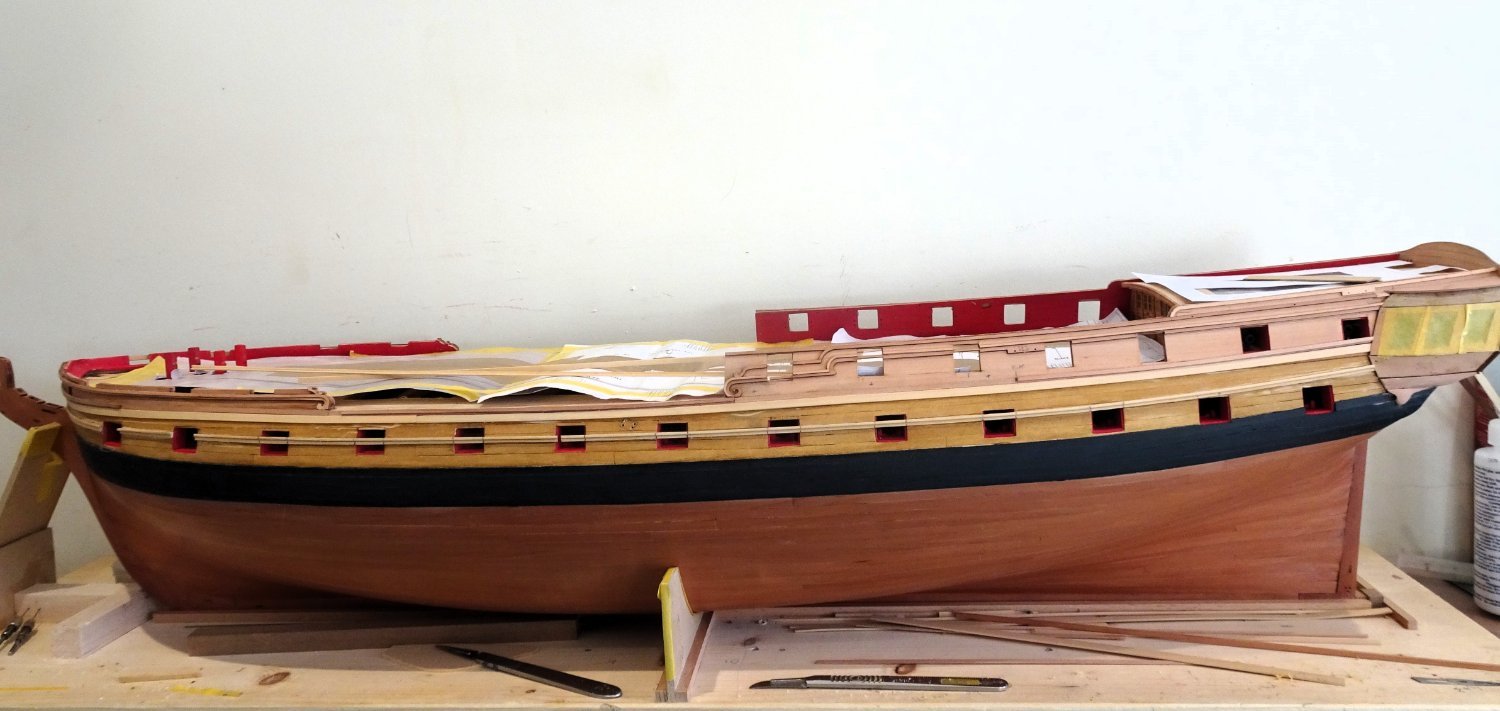
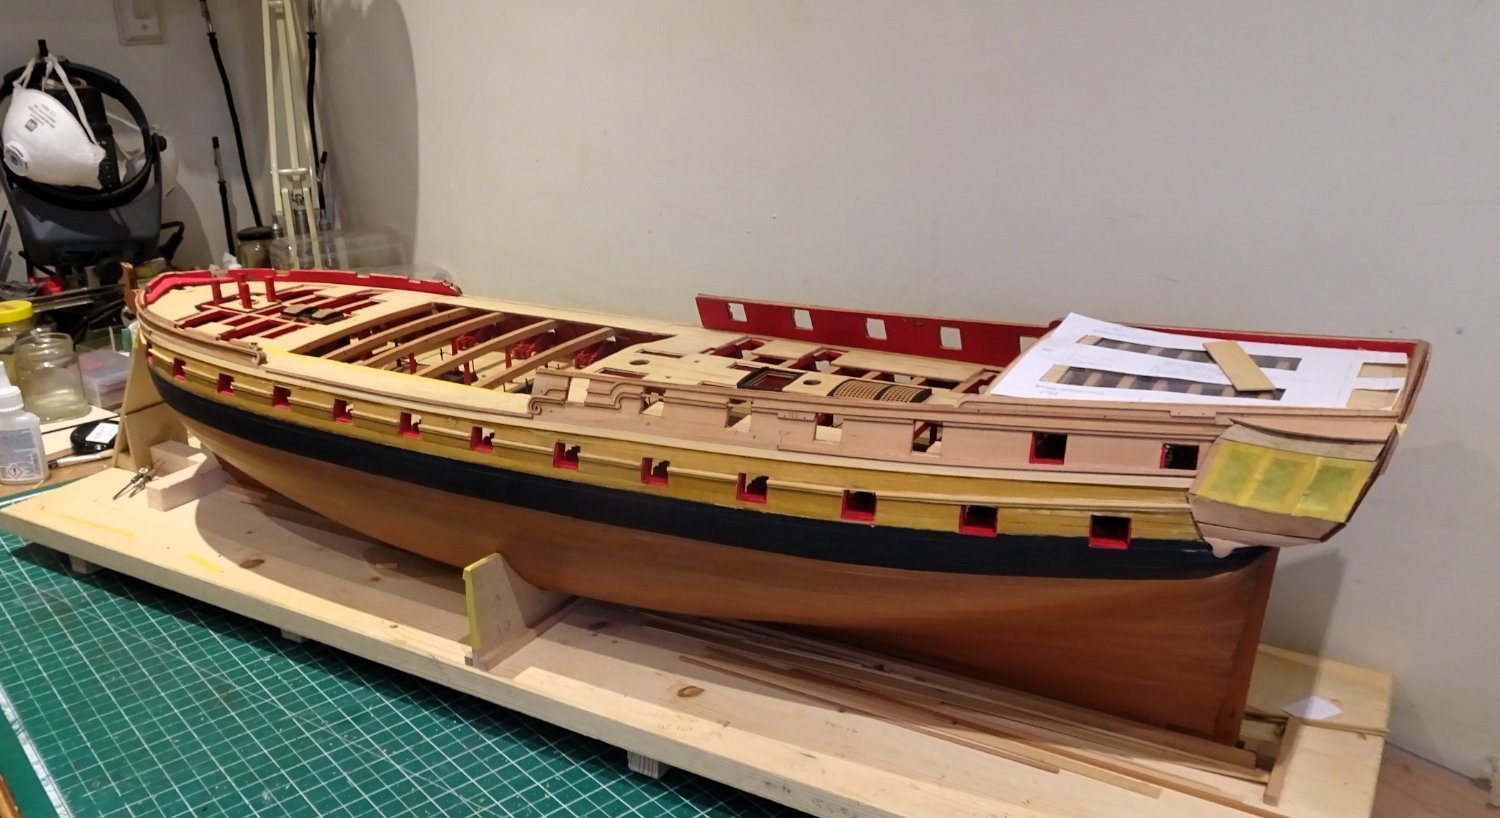
Painting the Topsides
The past couple of days amongst other stuff I have been applying some paint to the hull. I had been keen to get an idea of how my intended scheme was going to look.
I am not following the designated scheme with the colour bands following the deck line rather than the sheer, and as a Navy board style depiction, I don’t need to.
I have scraped the Boxwood section back to bare wood, the previously coloured w-o-p over English light Oak wood dye had suffered some deterioration over the past few months due to handling during construction.
A coat of Vallejo Black/grey has been applied to the topsides.
This is the result.
2839
 2837
2837
2838

2841
Getting there, but rub-downs and re-coats will be needed to get a finish I’m happy with.
The Boxwood will be re-coated using the w-o-p/wood dye combo.
B.E.
25/11/2023
-
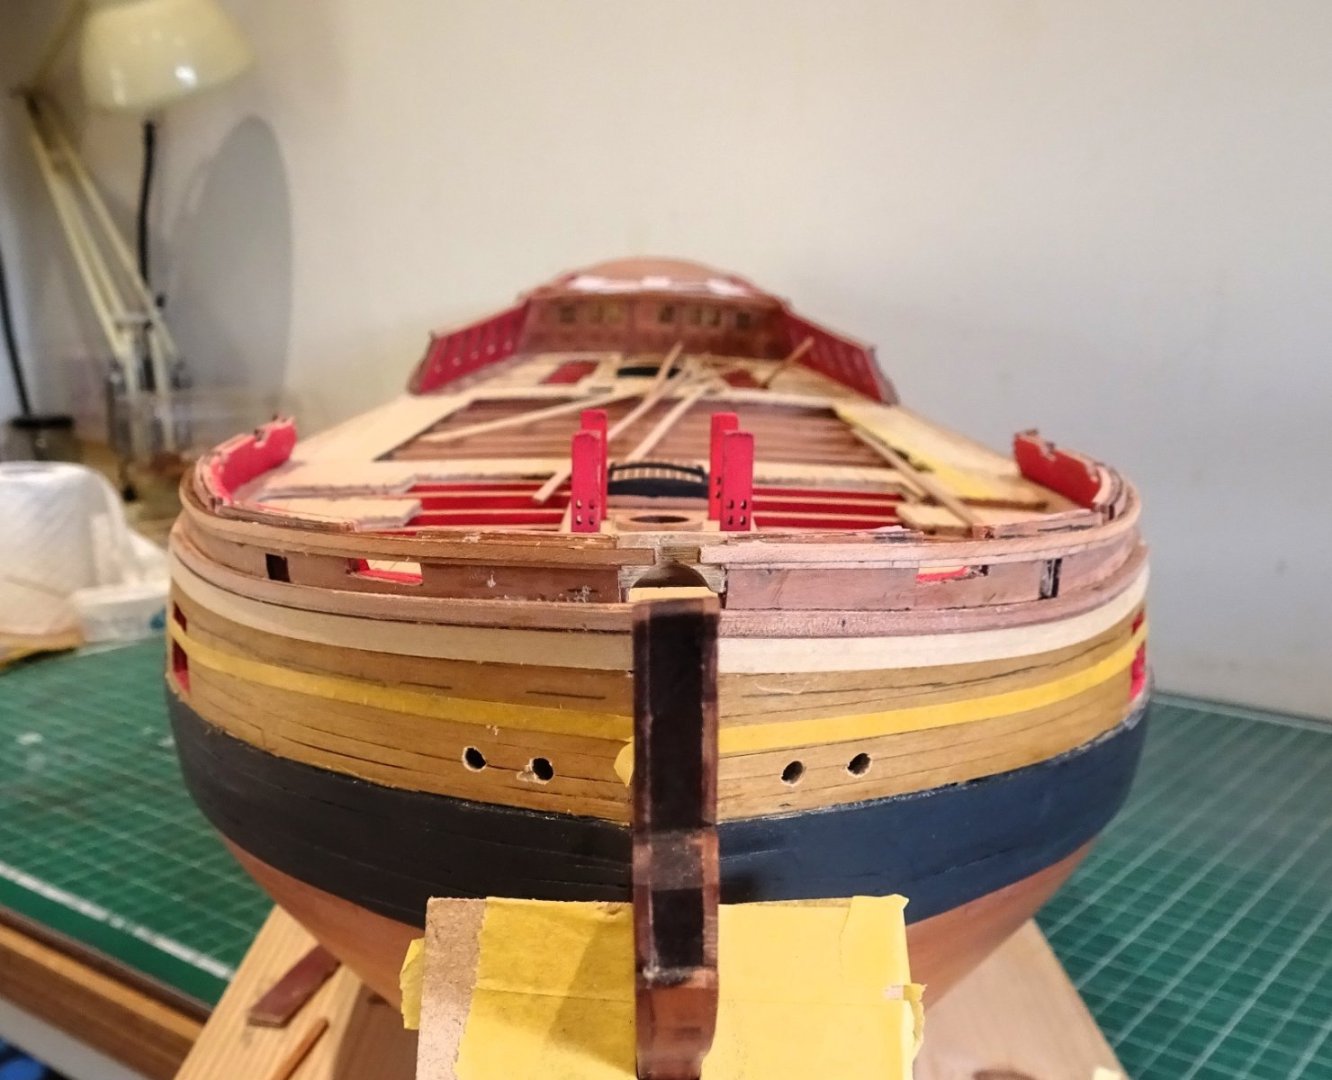
Post One Hundred and Ten
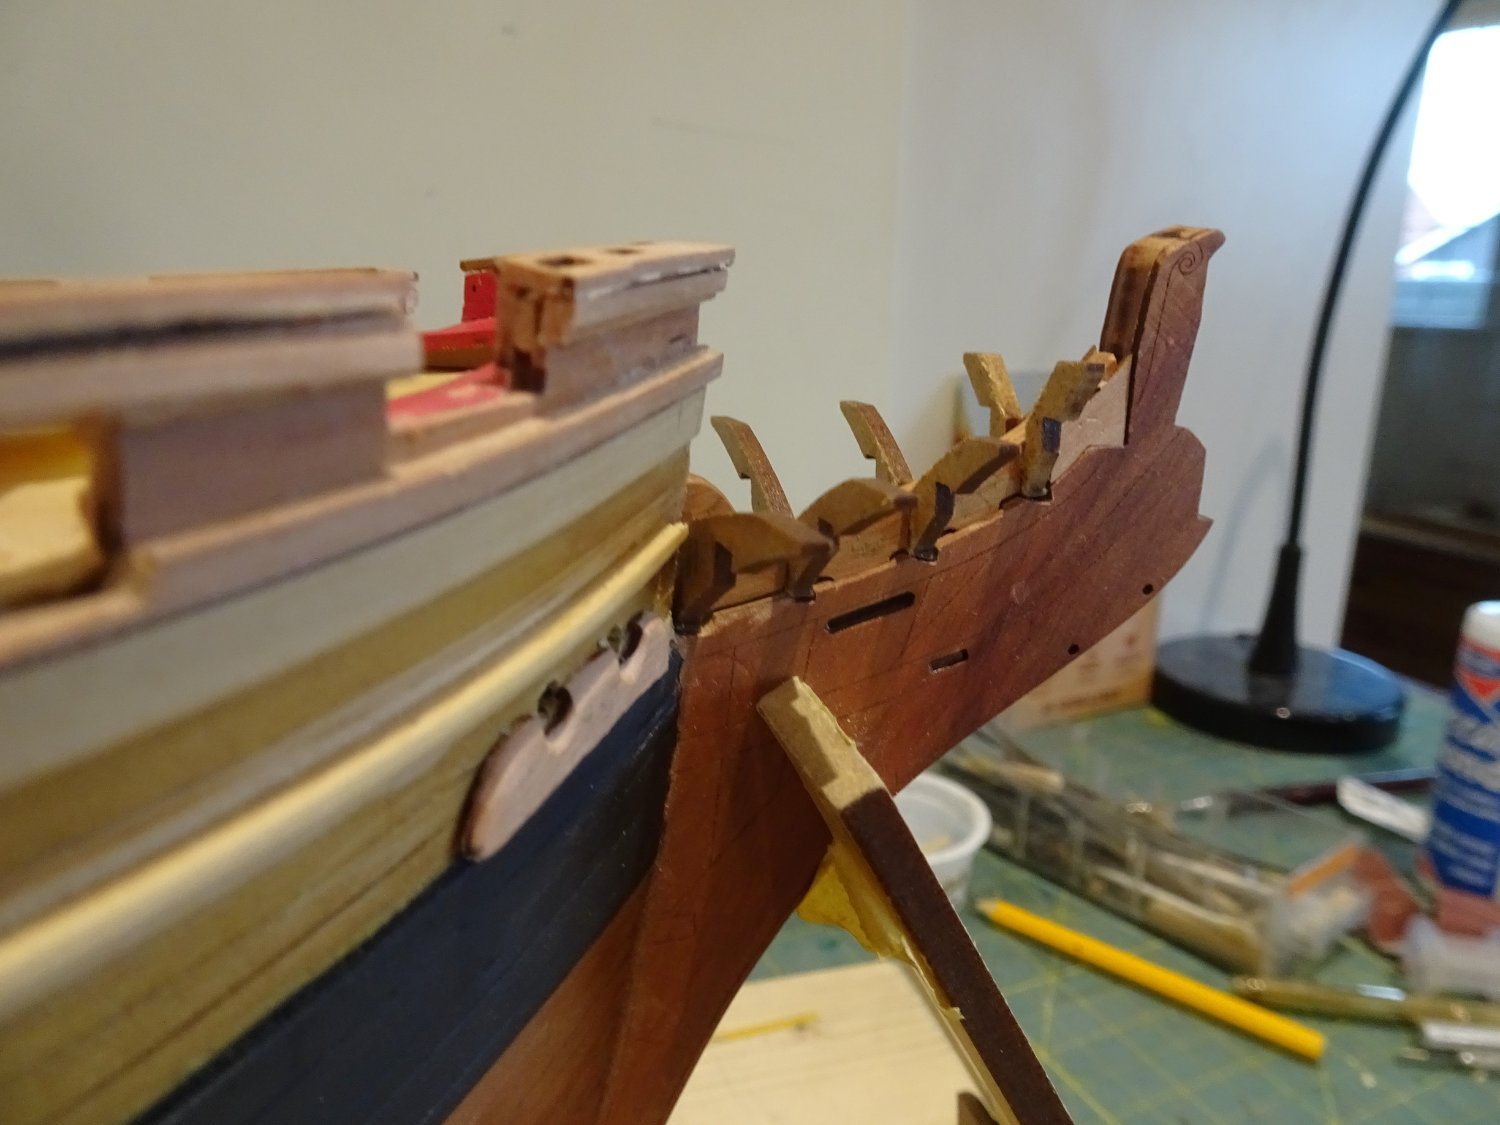
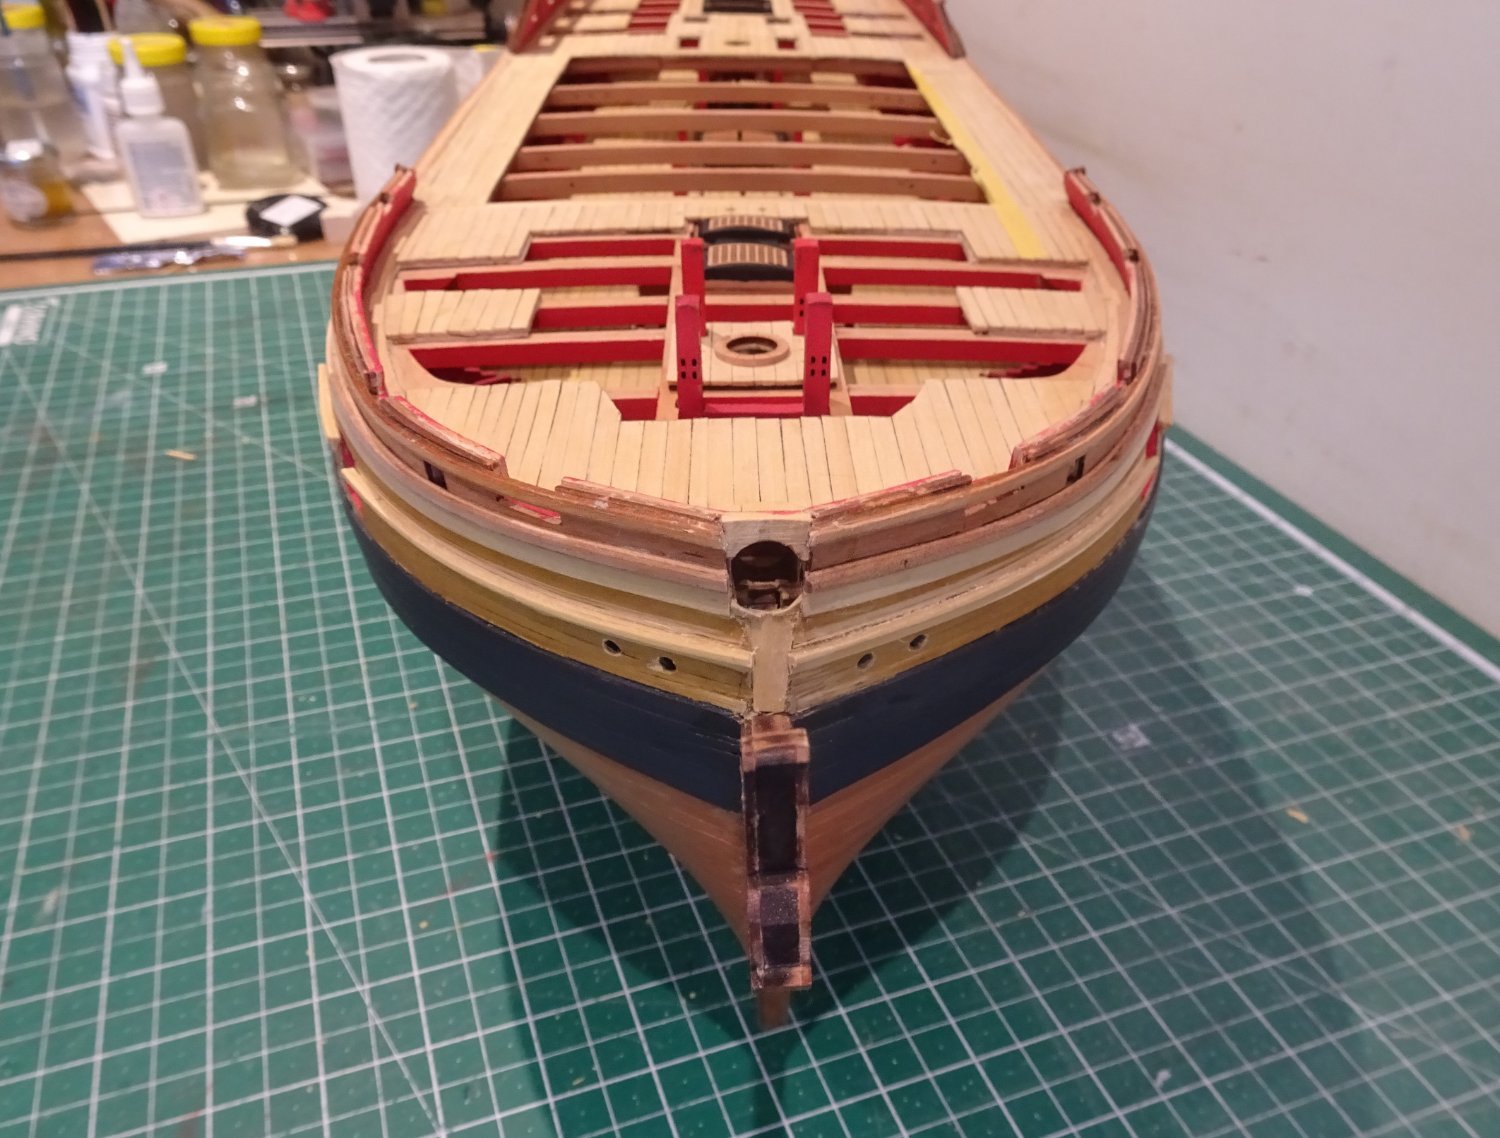
Headworks (Part One)
Along with the stern this is a critical area of a build, that can make or mar a model.
Chris has designed some of the best head work set-ups but great care is needed in assembly.
Assembly is covered over several separate sections in the blurb but I prefer to have all the parts to hand so I can check and dry fit before I commit to glue.
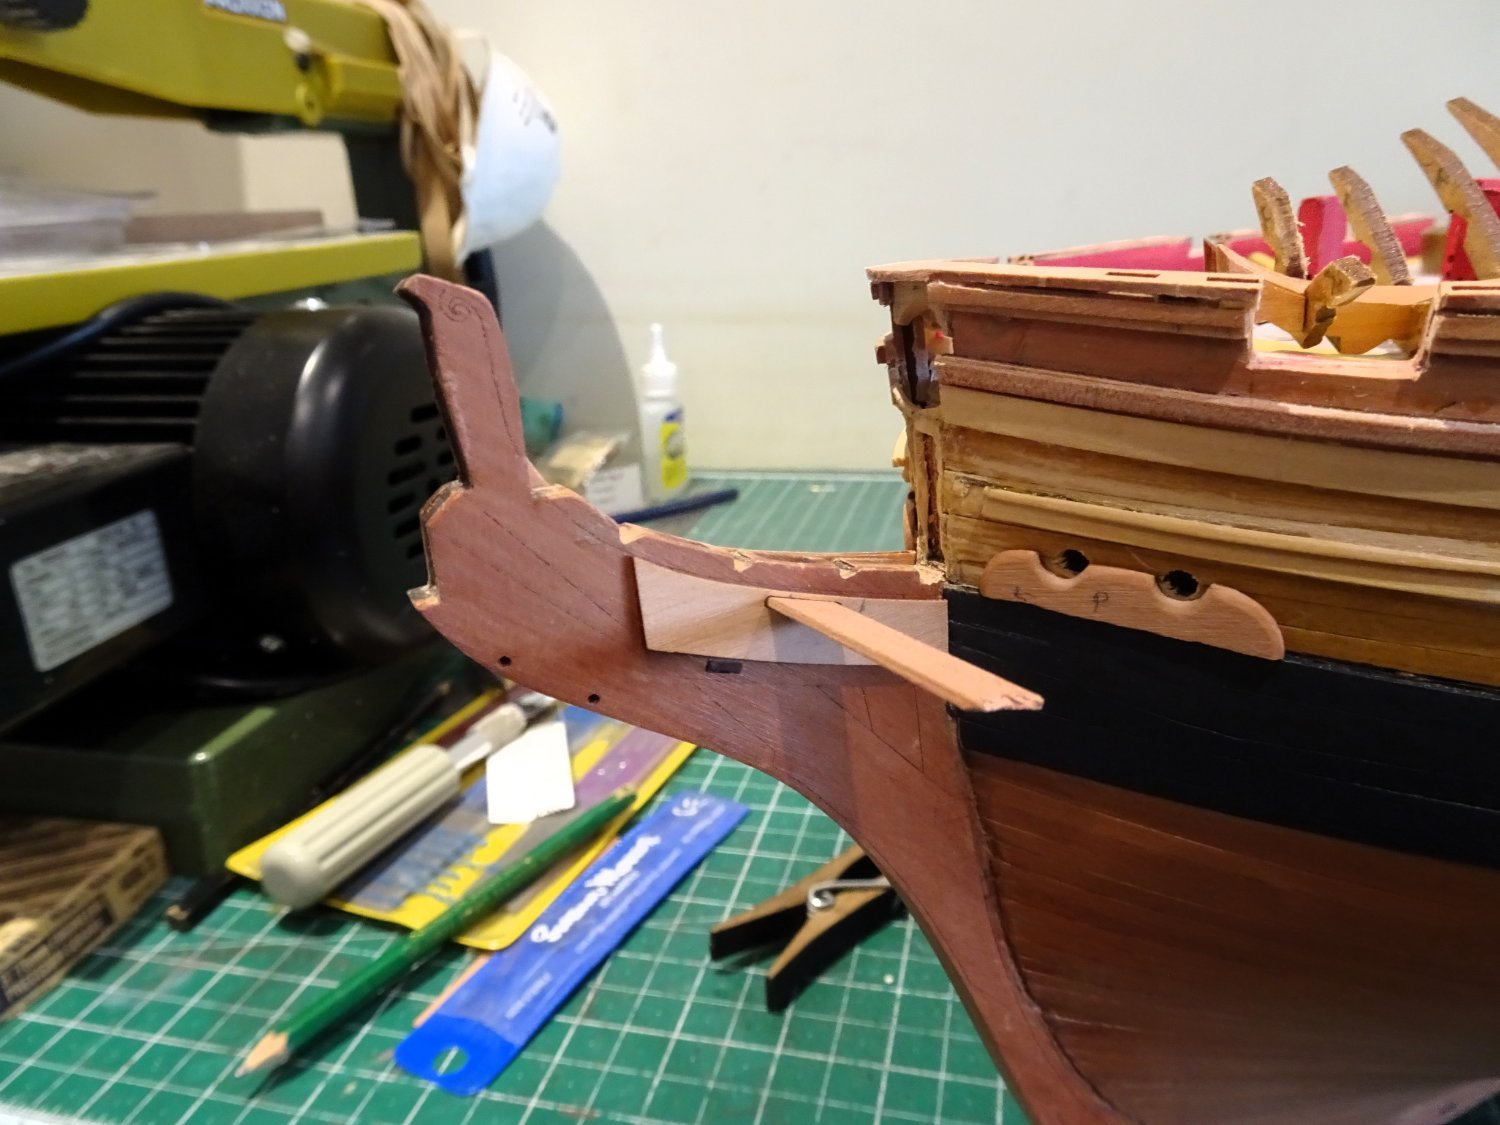
The business starts with attaching the Head timbers to the Gammoning knee which will ultimately fit atop the knee proper.

2808
The Head timbers are made of mdf and look as if they will snap in half should you give them so much as a harsh look; perhaps that is why two sets are provided in the kit.
An excellent idea; on my build the spaniel assistant had one part before it hit the ground, and another went floppy so I had to discard it.
To allow the Gammoning knee to sit down on the knee proper I found careful sanding and filing was necessary to the knee and base of the head timbers.

2807
I tested each of the four head timbers individually, and then as a set to confirm the fit is good.
The largest of the Head timbers (aft) gave me the most trouble as it was initially too close to the hull and decorative mouldings that round the bow. I had to indulge in a little light tweaking to resolve the issue.
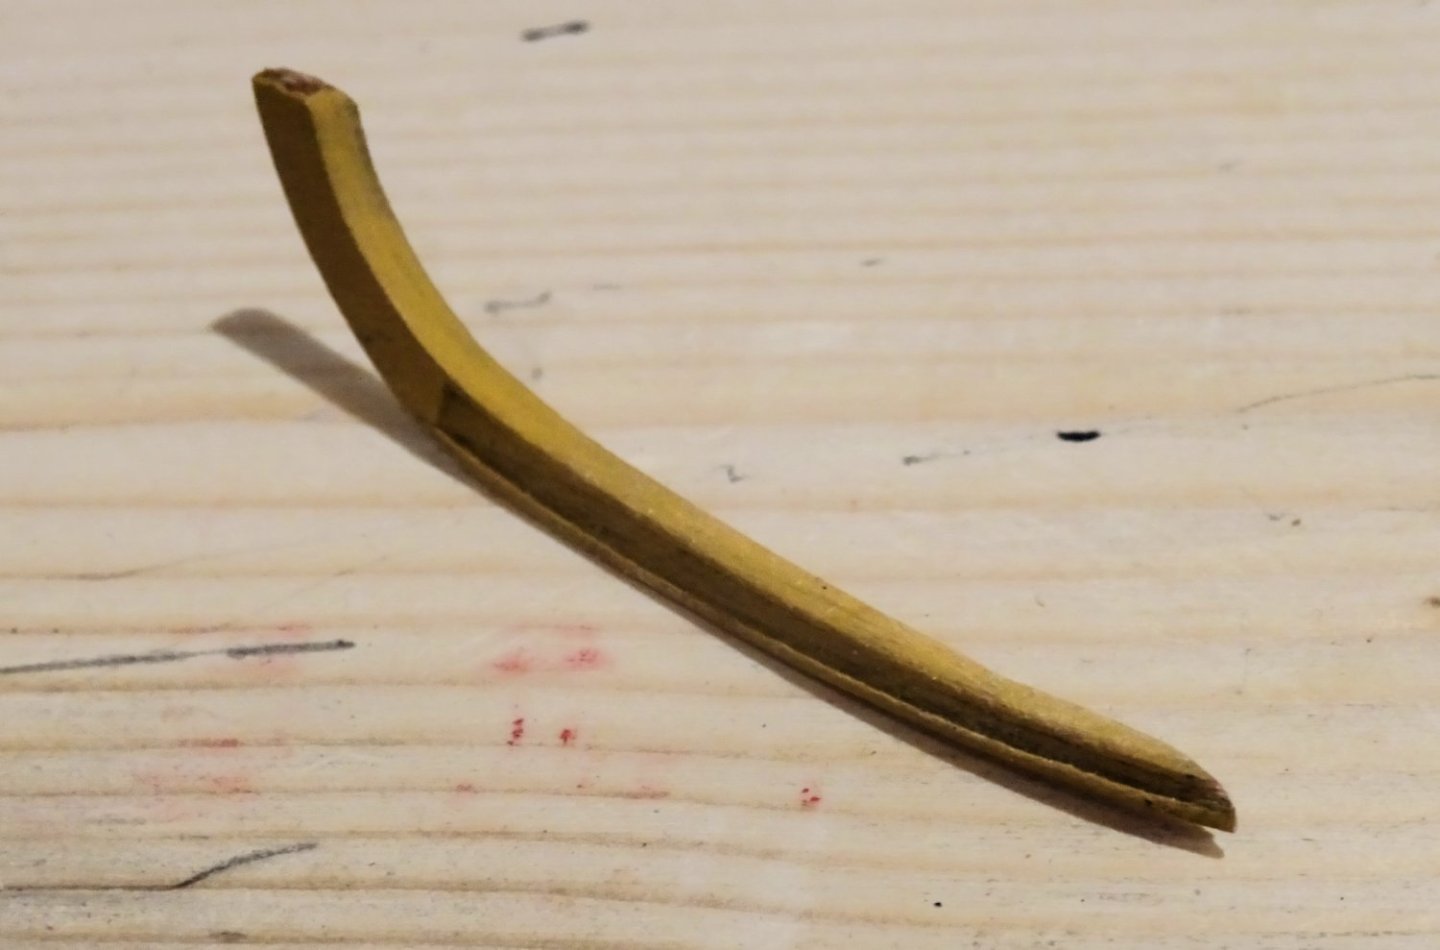
The Hair bracket comes next, a delicate shaped rail that runs from the Upper cheek to the head.

2813
Below this is the Trail board that contains the Gammoning slot.

2812
To assist location, it is useful to insert a piece of board thro’ the slot when fitting the hair bracket.
Finally in this section the Upper and lower cheeks are applied to the bow.
2814
On my build they took a bit of shaping on the aft side to conform to the hull.
2818
Fitting these is a tedious business, I fit the lower pair before the upper.

2819
Once glue is applied there is a frantic check before the glue dries to ensure that they look right from every angle.
There’s always that nagging doubt. 🤔
2822
2823
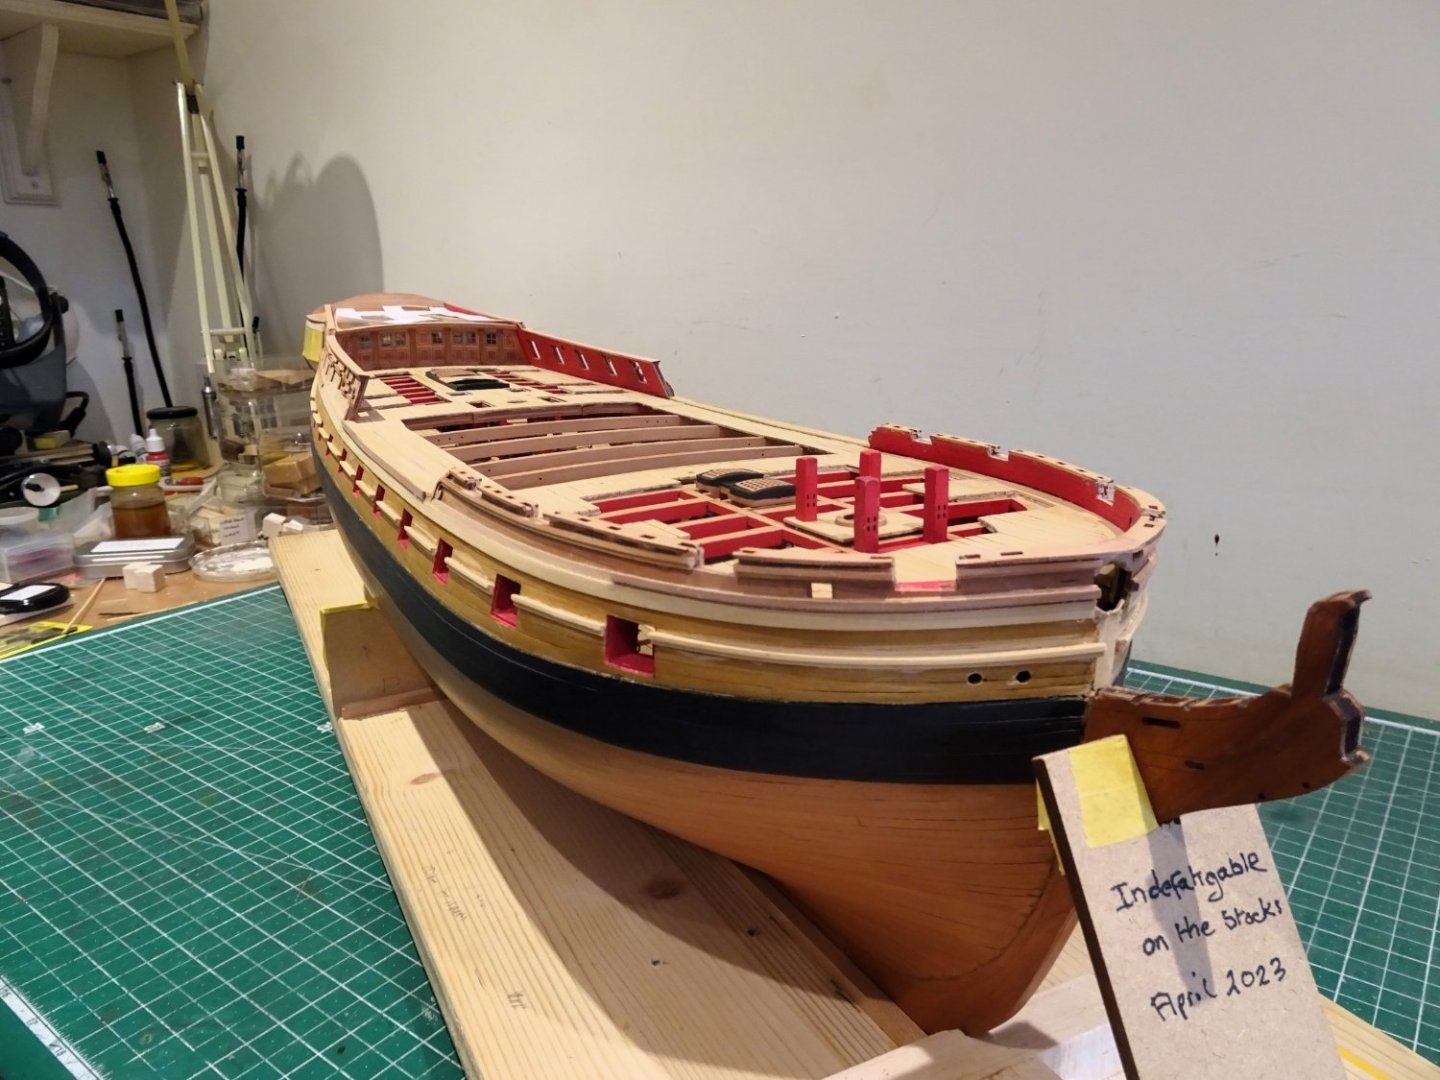
At this point I have modified the building board to allow better access to the Bow area.

2829
I will review my efforts in the cold light of tomorrow morning to see if my eye is still satisfied.
As with Sphinx I will not be fitting the wash cants.
Aesthetically these baulks of timber spoil the line of the cheeks and wale and they don’t seem to feature on Navy Board style models which is good enough for me.
They are in any case quite tricky things to shape without them looking lumpy, and I’m happy to have a ‘get out of Jail free’ card to play.
B.E.
22/11/2023
-
-
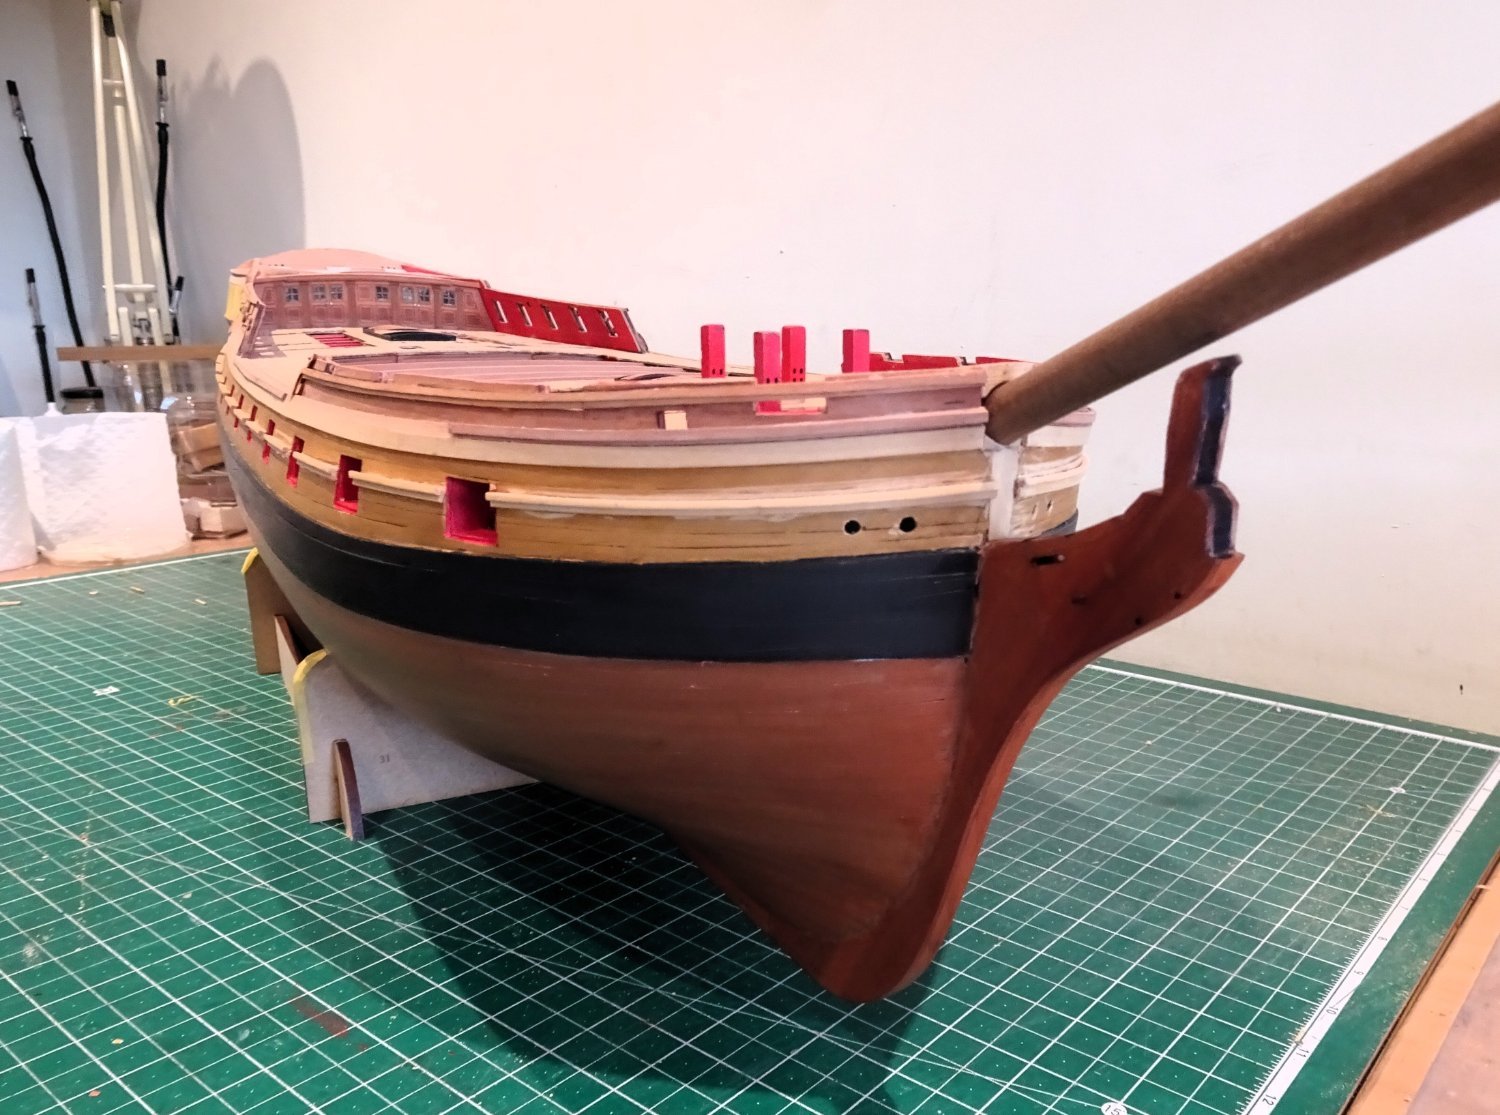
Post One hundred and nine
And more fettlin’
This seemed an opportune time to assemble the Catheads and open up the apertures.
Only the basic assembly at this stage, finishing will be done later.
2766
2769
The completed Catheads are 6mm square so a fair bit of filing is required to open up the bulwark location.
Flat and triangular needle files were used for the purpose.
The triple sheaves are patterned on the catheads and require drilling thro’ if they are to be rigged.
2788
The line of the sheave is offset to counter the stive of the Cathead, so that the tackle hangs vertically.
A slight round to the faux sheaves improves the look.
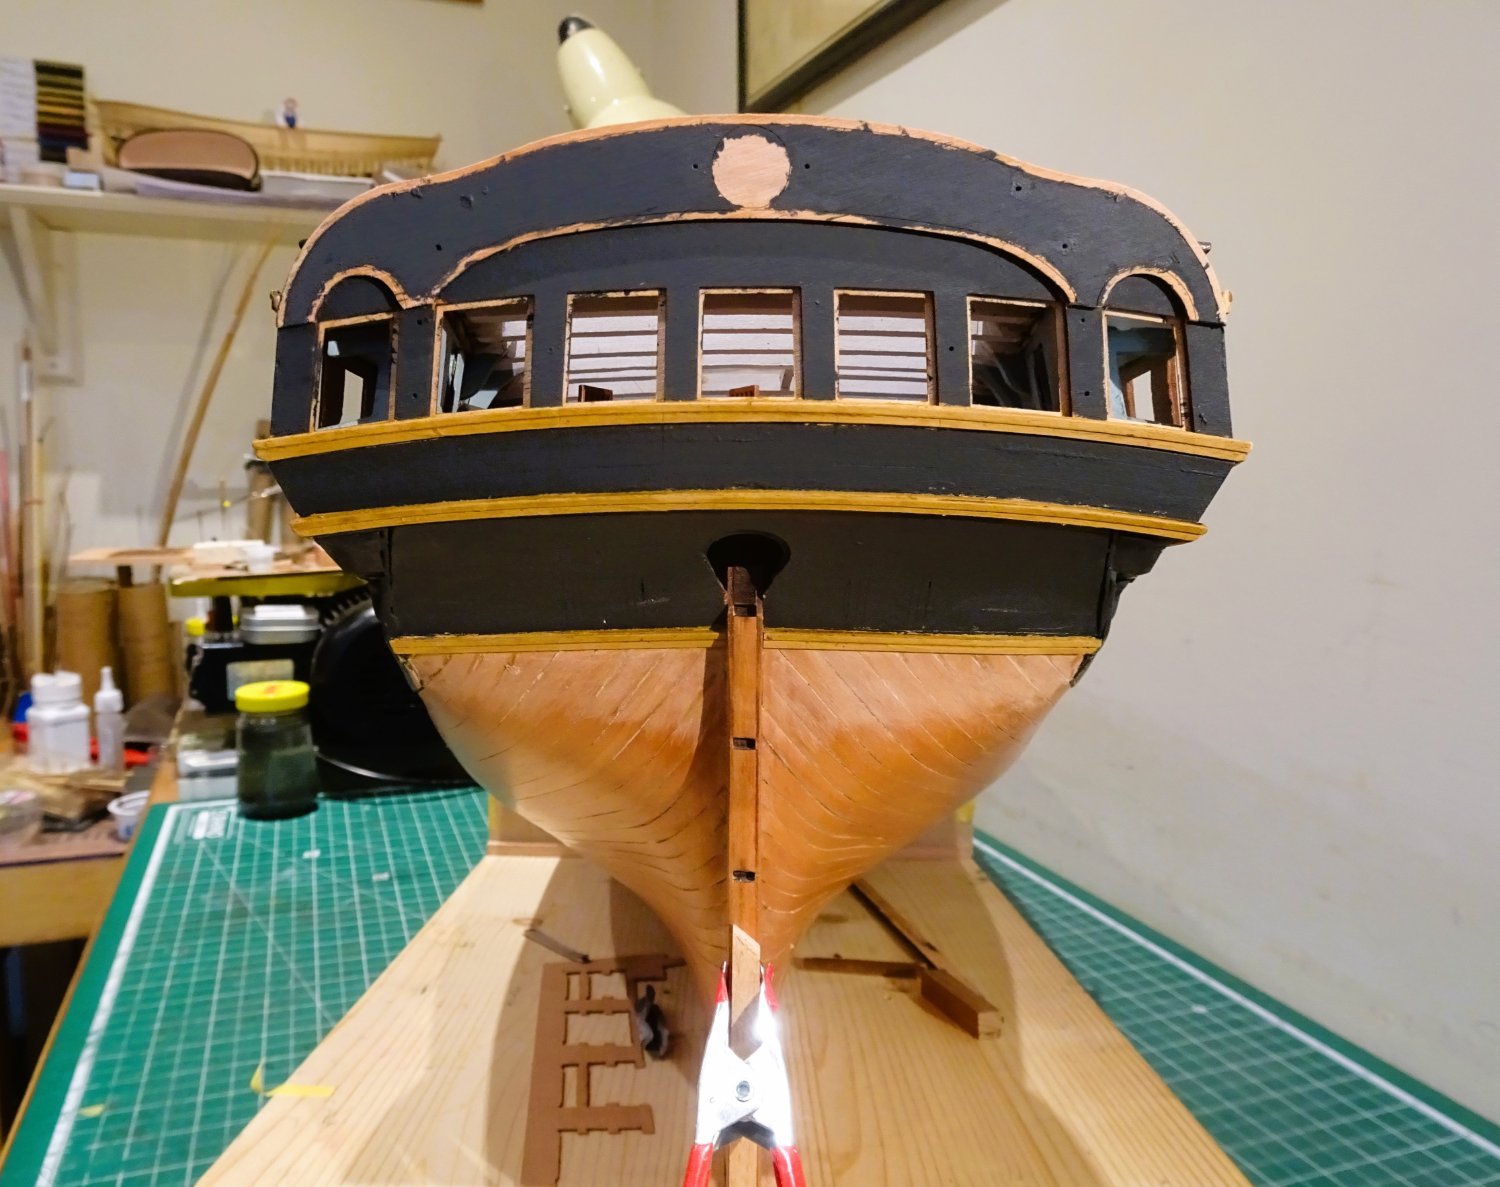
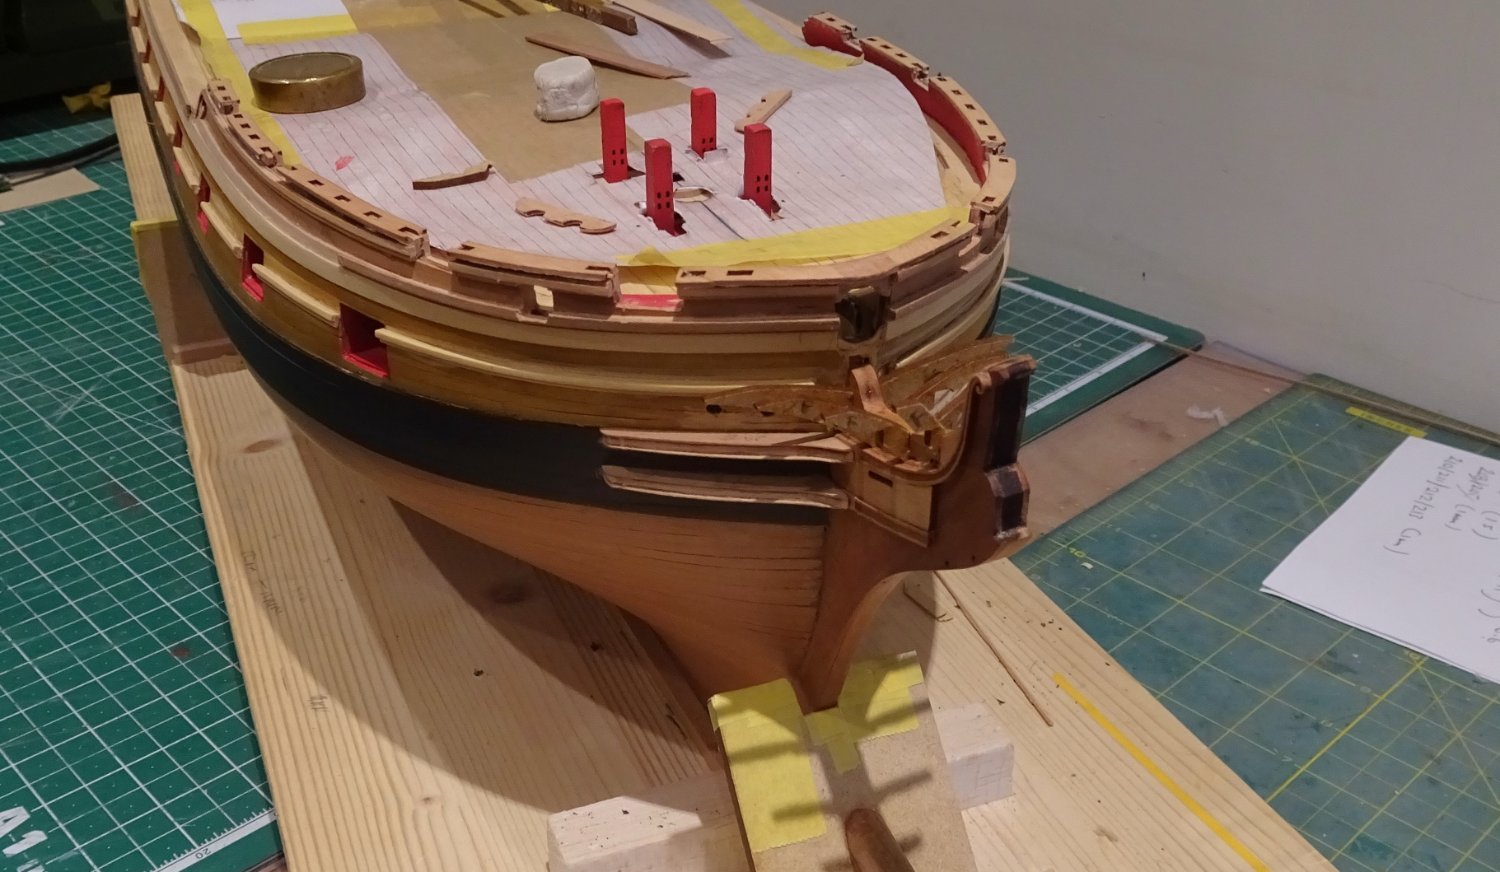
Back to the stern
The decorative mouldings are now fitted around the stern and Qtr galleries.
The trick here is to ensure that the upper counter mouldings match up with those of the Qtr galleries and have a neat finish at the corners.
Failure to achieve this will certainly catch the eye and detract from the overall look of the model.
In working this area position of the model is everything to get the right viewing angle to secure the mouldings.

2772
For me raising the hull at the stern gives me the best approach.
2780
I start with the upper counter rail, followed by the corresponding Qtr gallery rail.
2774
2778
I thought about applying a mitre joint to the corners but opted for a straight butt joint which worked out ok once carefully sanded.
Atop the rails a strip is added to create a simple profile.

2791
2793

2802
Fairly satisfied with the run of the rails, but for the present I’m moving onto the Headworks.
B.E.
19/11/2023
-
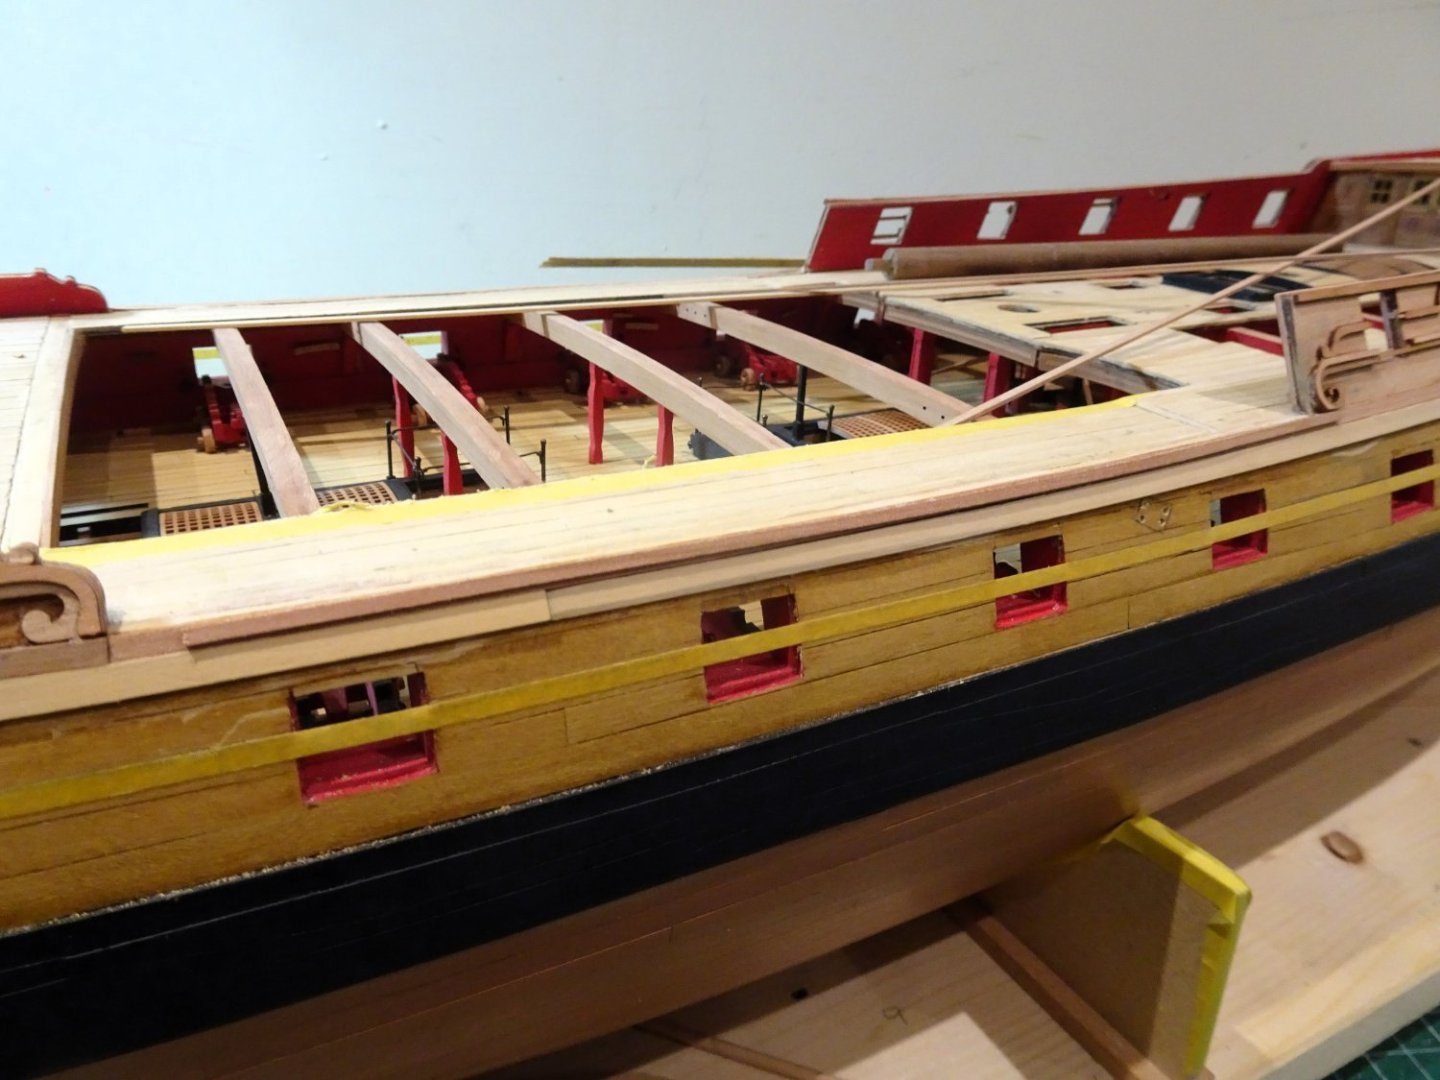
Post One Hundred and Eight
Capping rails.
A little more progress but exceedingly slow.
I have now added the Capping rails for the waist, along the gangways.

2761
The kit version which were a tad short were replaced with Boxwood versions.

2760
I lined up the inner edge with the Qtr deck and Foc’sle mouldings and shaved the outer edge back to the outer line.
2753
Poop rails were trimmed slightly at the aft end but otherwise fit without issue.

2754
The Qtr deck rails line up accurately, and are fitted as with all the cappings, with the inner edge flush to the bulwark.
The tricky ones are the Foc’sle cappings, but even so are not far off the Bow Bulwark shape.

2750
As part of my modifications the rail continues to enclose the bow.

2749

2756
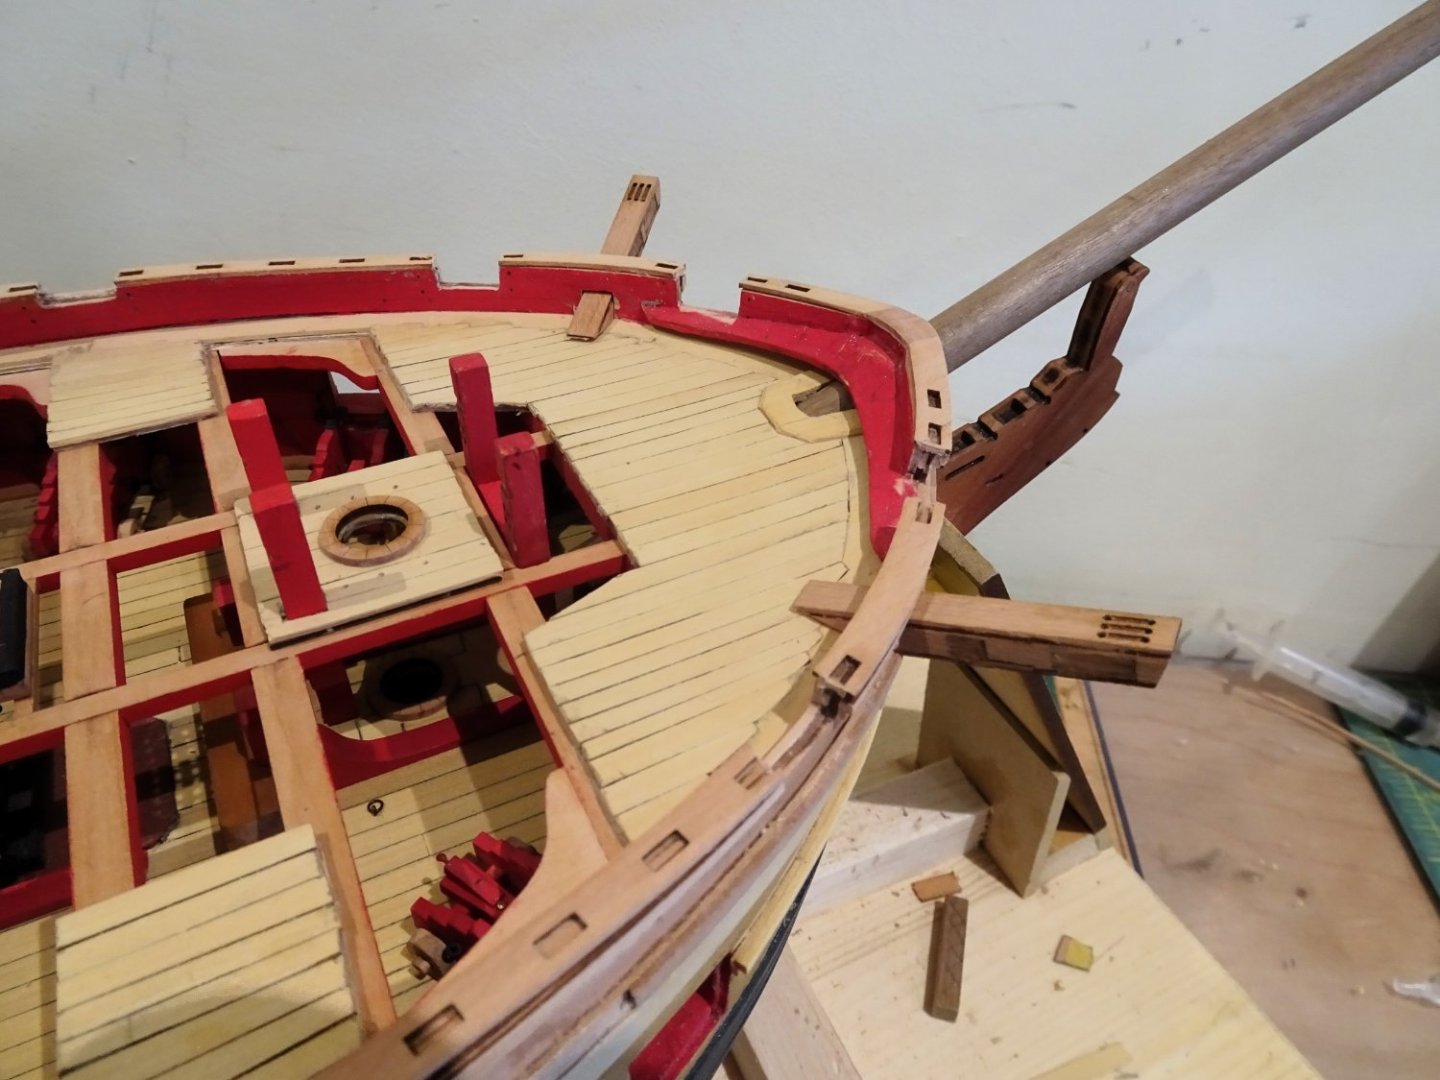
The Bowsprit slips below the rail and Bow Hook to tenon into the step on the deck below.

2751

2759
2758
The fettlin’ continues…..
B.E.
16/11/2023
-
-
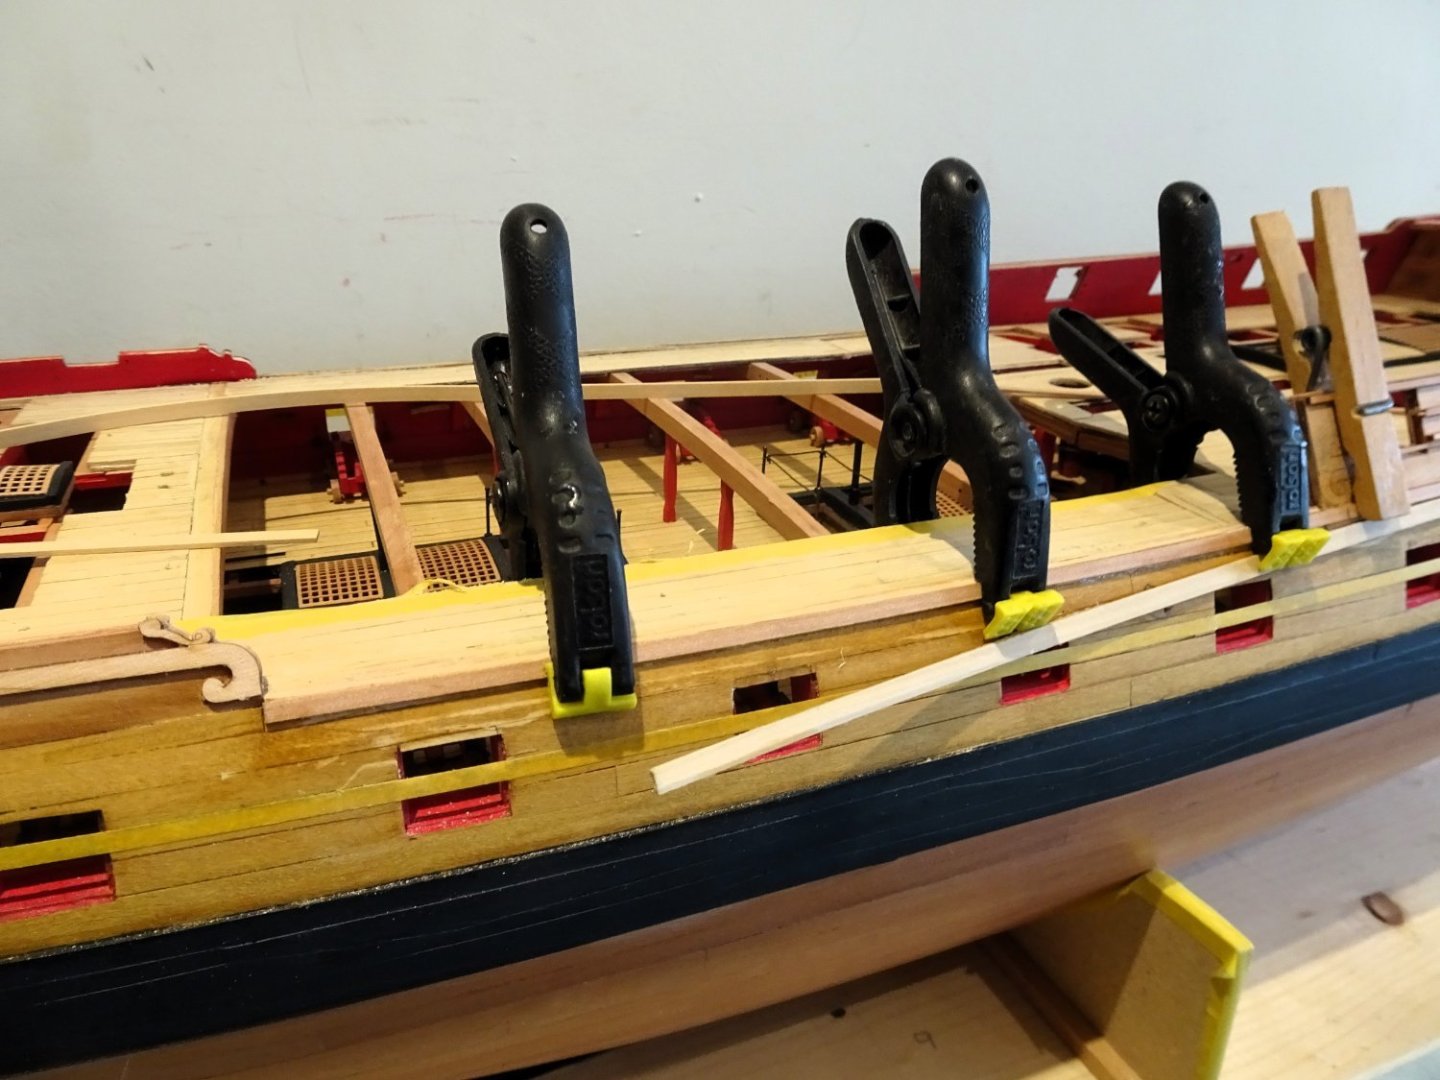
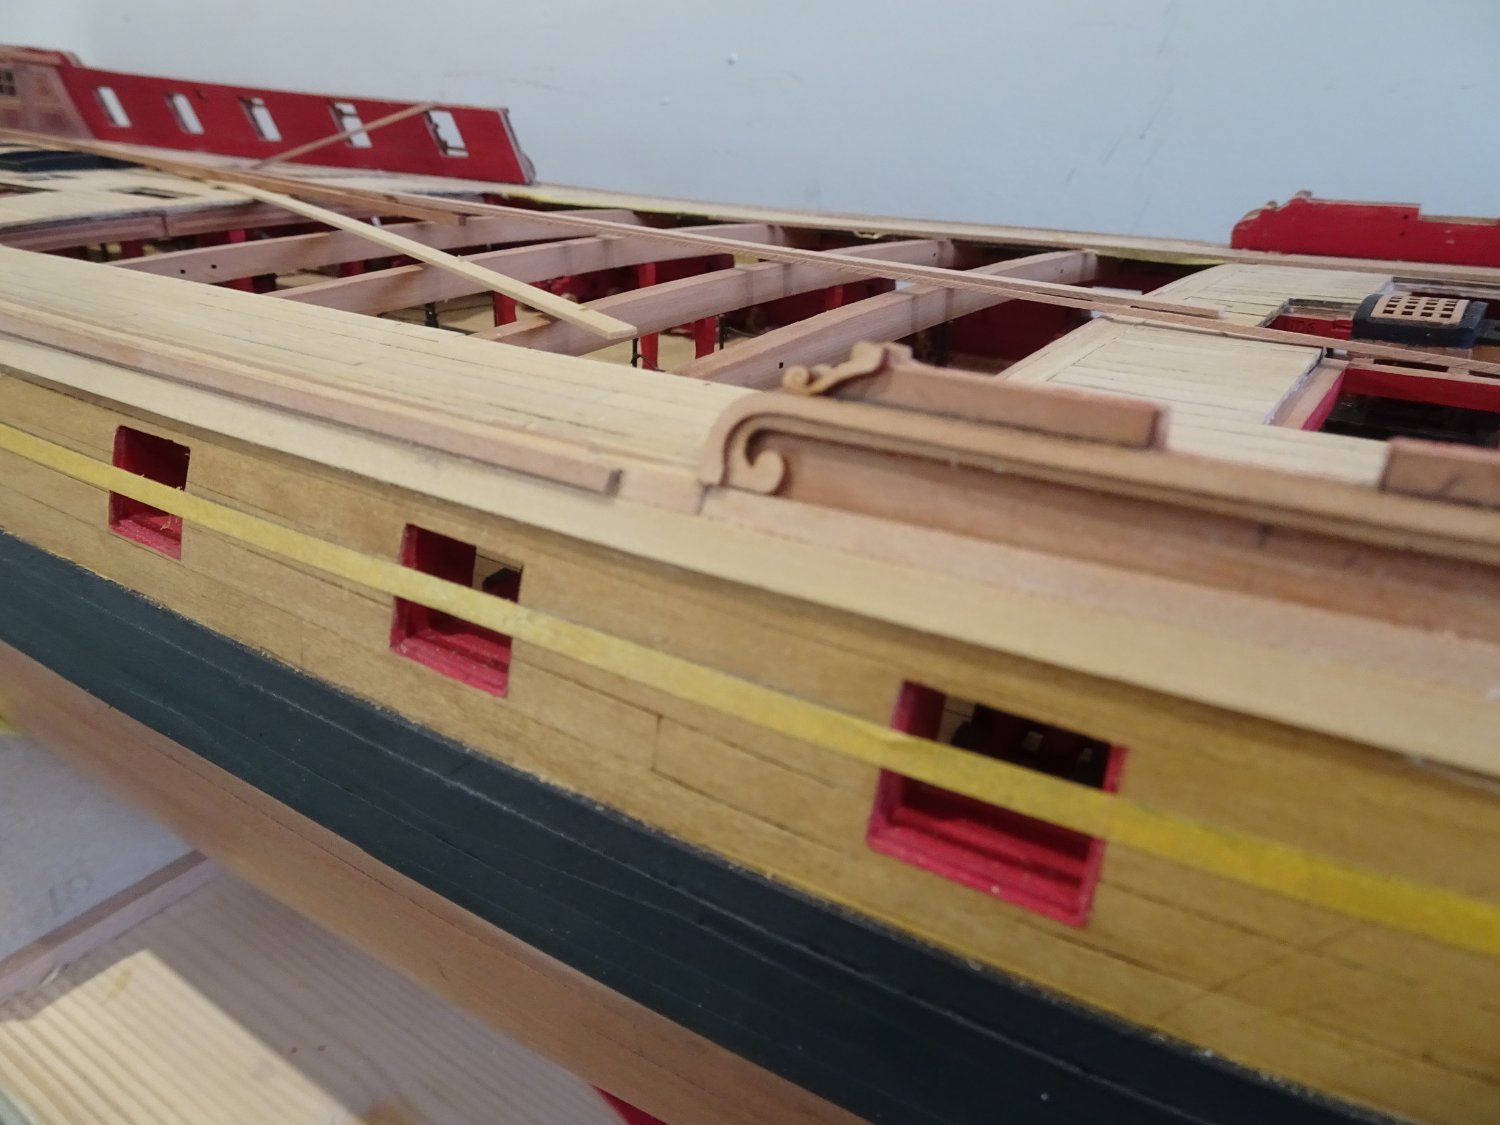
Post One Hundred and seven
Gunport mouldings
The kit provides 3mm and 1mm Pearwood strip to make up the profile.
A simple affair with the 1mm strip providing the relief profile.
I had considered scribing my own profile, but long lengths are involved, which could prove tricky, and I thought that the kit ‘simple’ arrangement would probably look ok with the edges softened to remove the ‘blocky’ look.
The prime objective is to get a smooth even curve from gallery to stem following the sheer.
On my build I have used Boxwood strip for the makings, to match the Boxwood planking.
2718
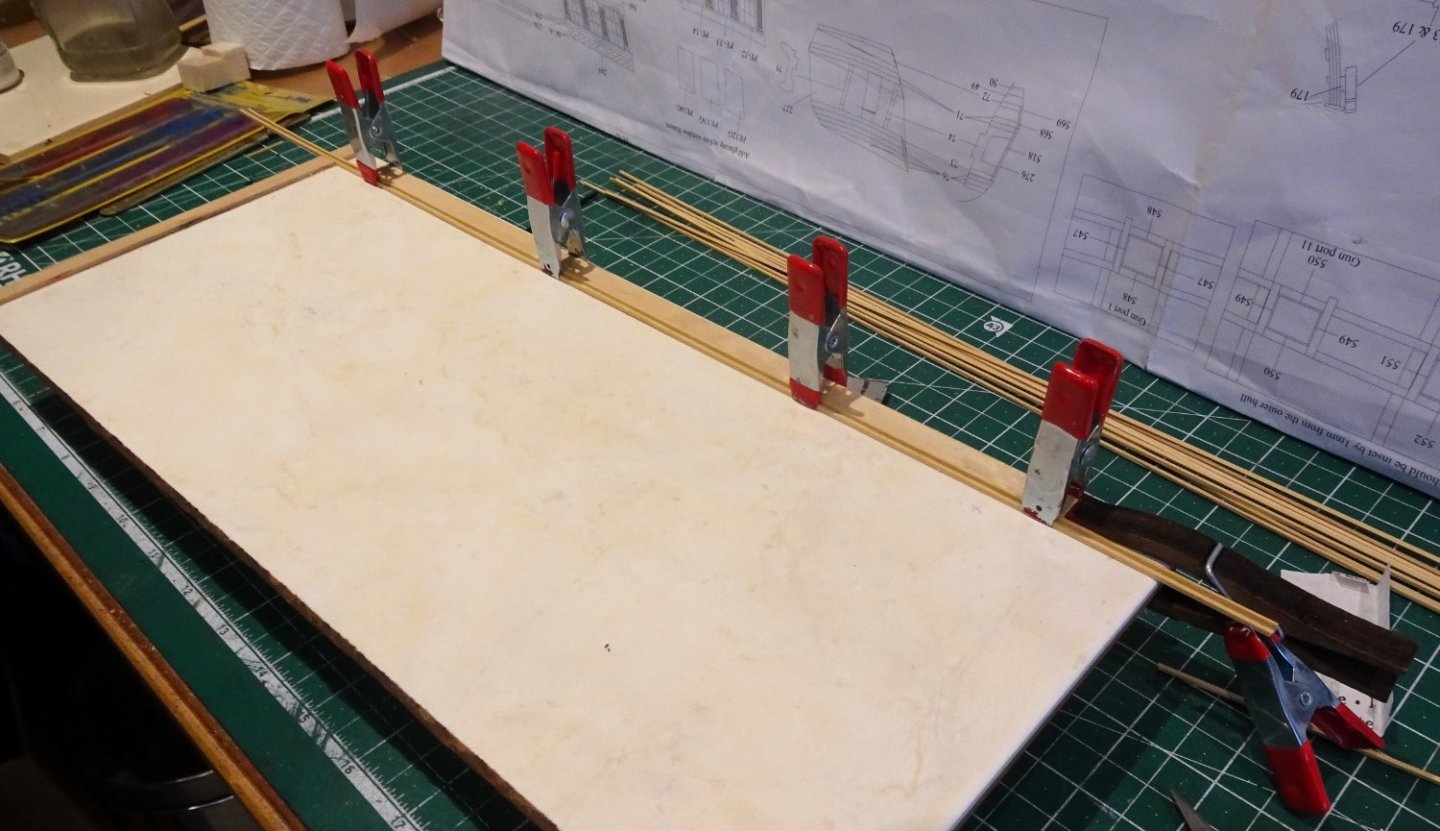
A simple jig is used to assemble the two parts before sanding and shaping.

2722
The mouldings are in two sections each side, running from stern to port eight, at which point the sheer has levelled out, and then onto the bow.
Between the upper rails and the Main wale I am now able to tweak the line particularly at the bow and stern, to satisfy the eye.
As it turned out there wasn’t much of a ‘tweak’ required.
The upper line was then taped and the moulding glued below.
It is better to fit long sections to achieve a smooth curve, rather than fit short sections between the ports.
2725
I did further divide the forward strip into two sections for ease of fitting around the bow.
Ca was used to fix the moulding.

2729

2732
2733

2734
2737

2741

2748
Trimming around port openings is a time-consuming business, three days work to reach this point with more time required to clean up the surfaces.
The process also mars the surrounding areas, which I expected and will be rectified later.
B.E.
14/11/2023
- realworkingsailor, mugje, Rustyj and 20 others
-
23
-
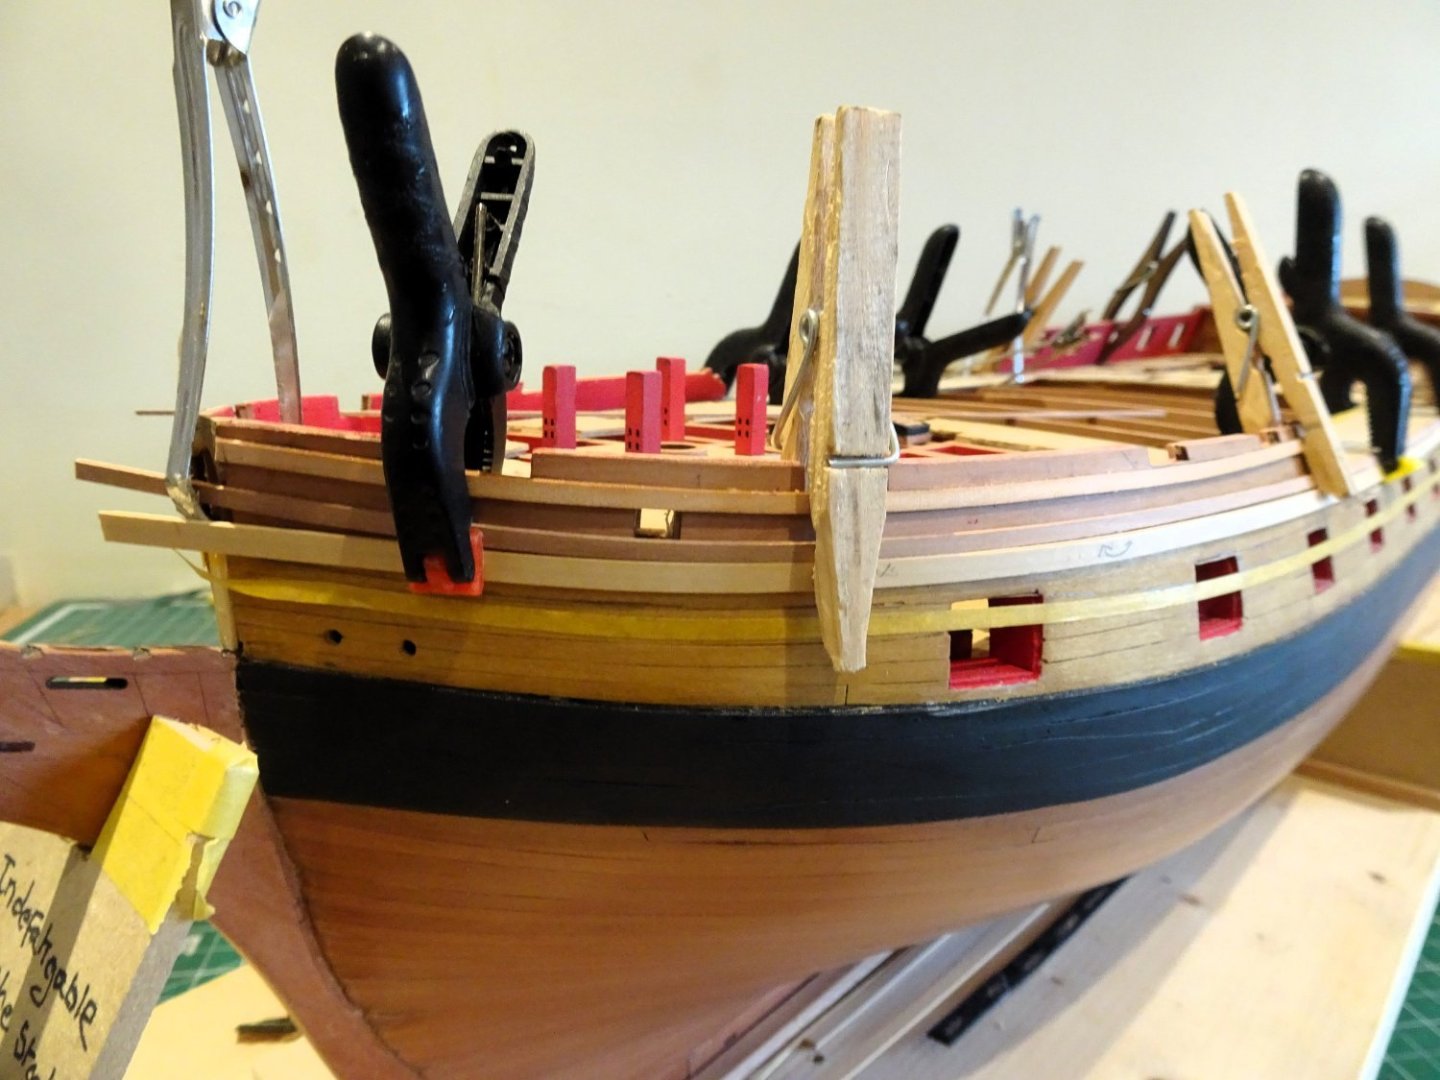
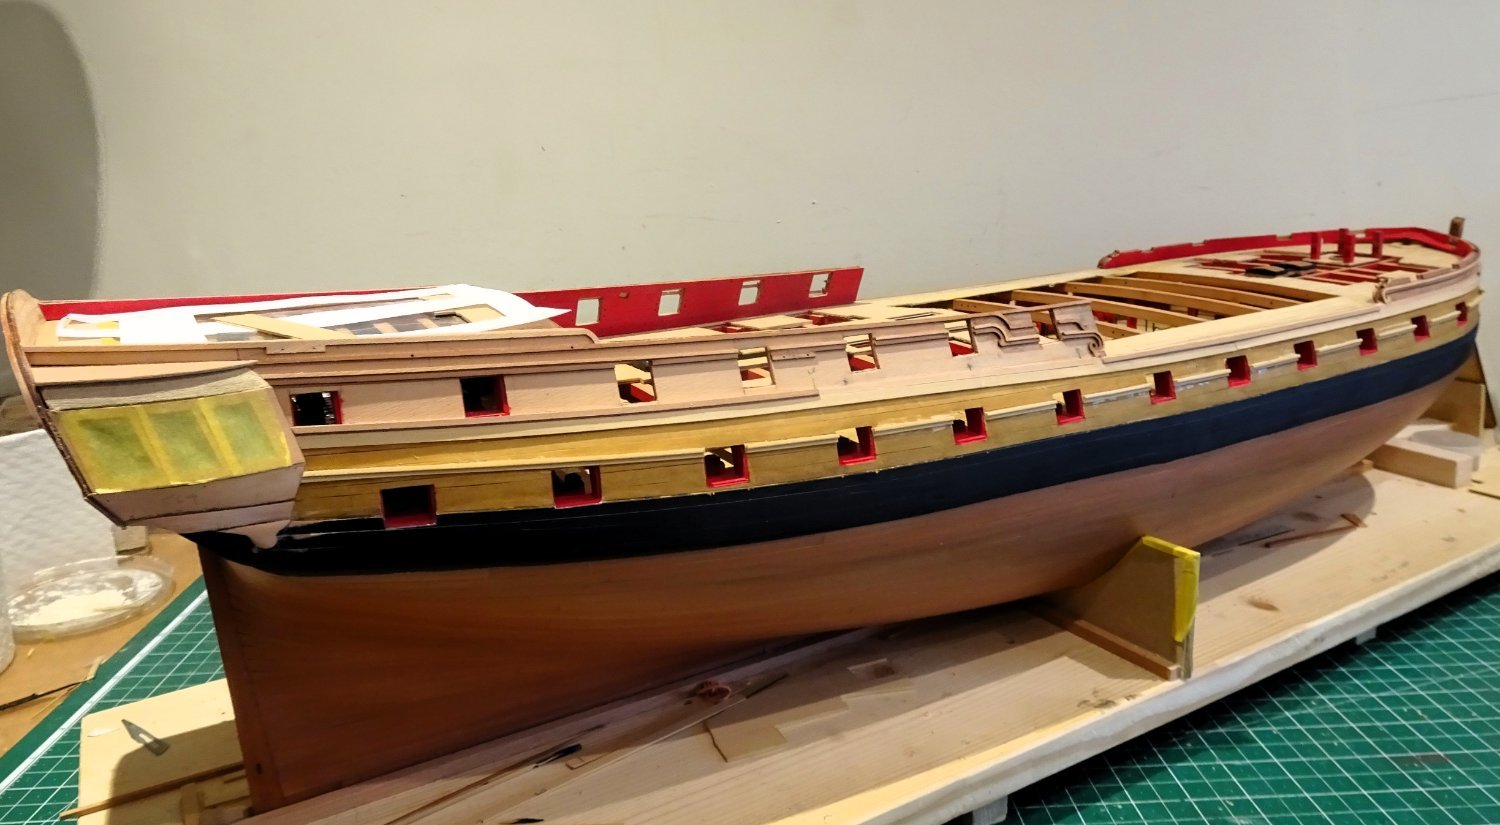
Post One Hundred and Six
I have now reached a part of the build where there is a lot of bits and pieces.
Bulwarks to sand level, gunports to clean up, and mouldings and cappings to fit.
There is also a lot more dust.
Getting the rails to run correctly and look acceptable to the eye has proven the most difficult part of the build for me thus far.
It took several constructions/de-constructions, to arrive at a sequence I found acceptable, without the urge to instantly rip it all off again.
This is what I found by trial and error worked best for me.
The most critical rail is that running between the gun-deck ports following the sheer of the hull.
I opted not to fix this first, as indicated, but I marked the line of the rail using Tape.
2714
Before I commit to glue I want to see how it will eventually relate to the rails above it.
Before adding the capping rail along the waist (section515) I think it is better to add the continuation of the 3mm strip to the forward end of the waist, following the sheer.
2688
I also added these before adding the topside decoration along the Qtr deck and Foc’sle.
Below this the 4mm strip can be added.( I am using Boxwood strip) I stop the strake short of the forward end of the waist. This strip is referred to as the ‘second wale’ left over from Indy’s time as a Sixty-four.
The forward sections of the 3mm and 4mm strips are then added to terminate at the bow stem.
2689
I am keeping an eye on the line of the main gundeck rail still marked by tape.
2700
Before fixing I use the upper rail with the scroll work to check how that will eventually relate to the intended fixing line.
2702
The lower 4mm (second wale) is then added.

2710
Once fitted the decorative rail is fitted above it, ensuring an even curve, and that the scroll work at the aft end meets the rail below it.

2712
2mm strips are then added to the 3mm rail, this completes the Wale for the Fore channels.

2715
The decorative scroll work at the break of the Qtr deck is now fitted ensuring the scroll meets the rail below it.
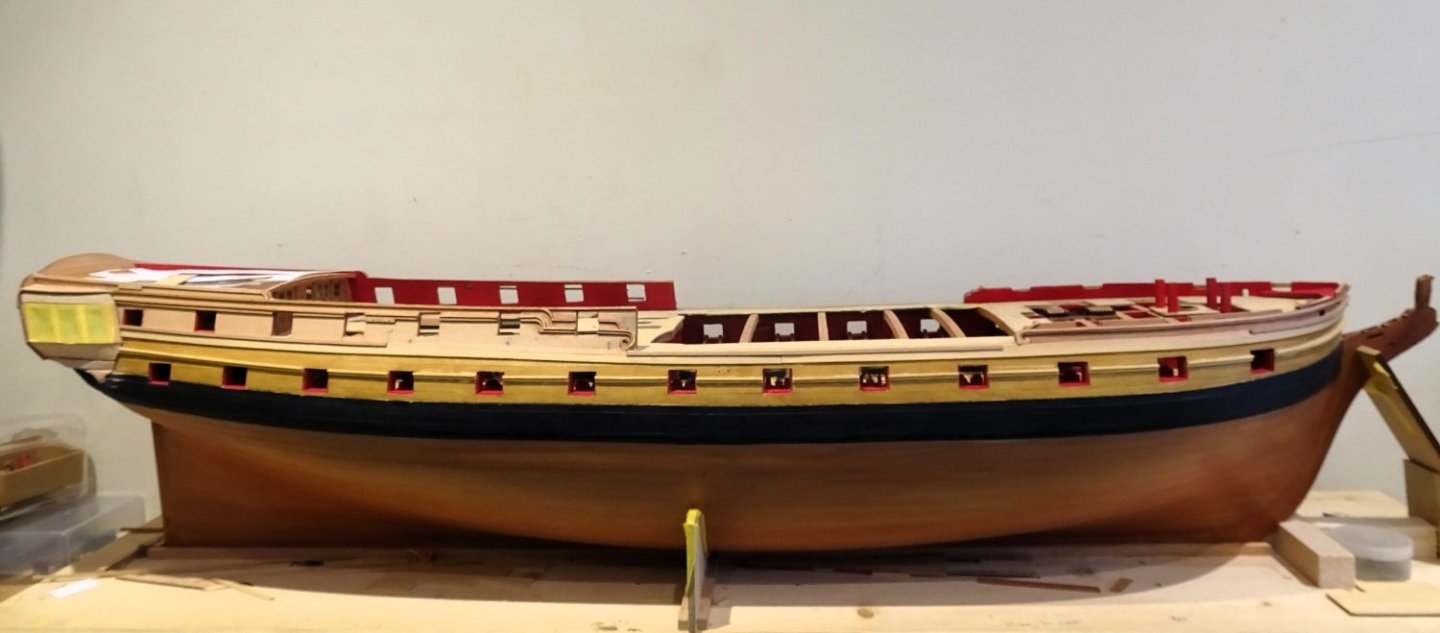
The Topsides are instantly improved by the addition of the mouldings.
2695
To complete the rails a 2mm strip which defines the Channel areas is applied atop the 3mm rail.
2711
The rails line up at the bow but need a fair bit of cleaning up at this point.

2716
This is not the end of the story, the gunport rails and waist capping rails are now to be added, and the decorative rails and
scroll work need some fettlin’ to address the rather ‘blocky’ look of them.
I am relieved that this part of the project has been completed without ending up with any mismatches or ugly rail angles at the bow. I found it quite a testy part of the build.
Onwards….
B.E.
11/11/2023


Grecian by DB789 - FINISHED - Vanguard Models - 1:64 - American Privateer Schooner
in - Kit build logs for subjects built from 1751 - 1800
Posted
Nice build, well done.👍
B.E.