
.JPG.ca33079f5815b861e67b9c2cccd37982.JPG)

Blue Ensign
-
Posts
4,286 -
Joined
-
Last visited
Content Type
Profiles
Forums
Gallery
Events
Posts posted by Blue Ensign
-
-
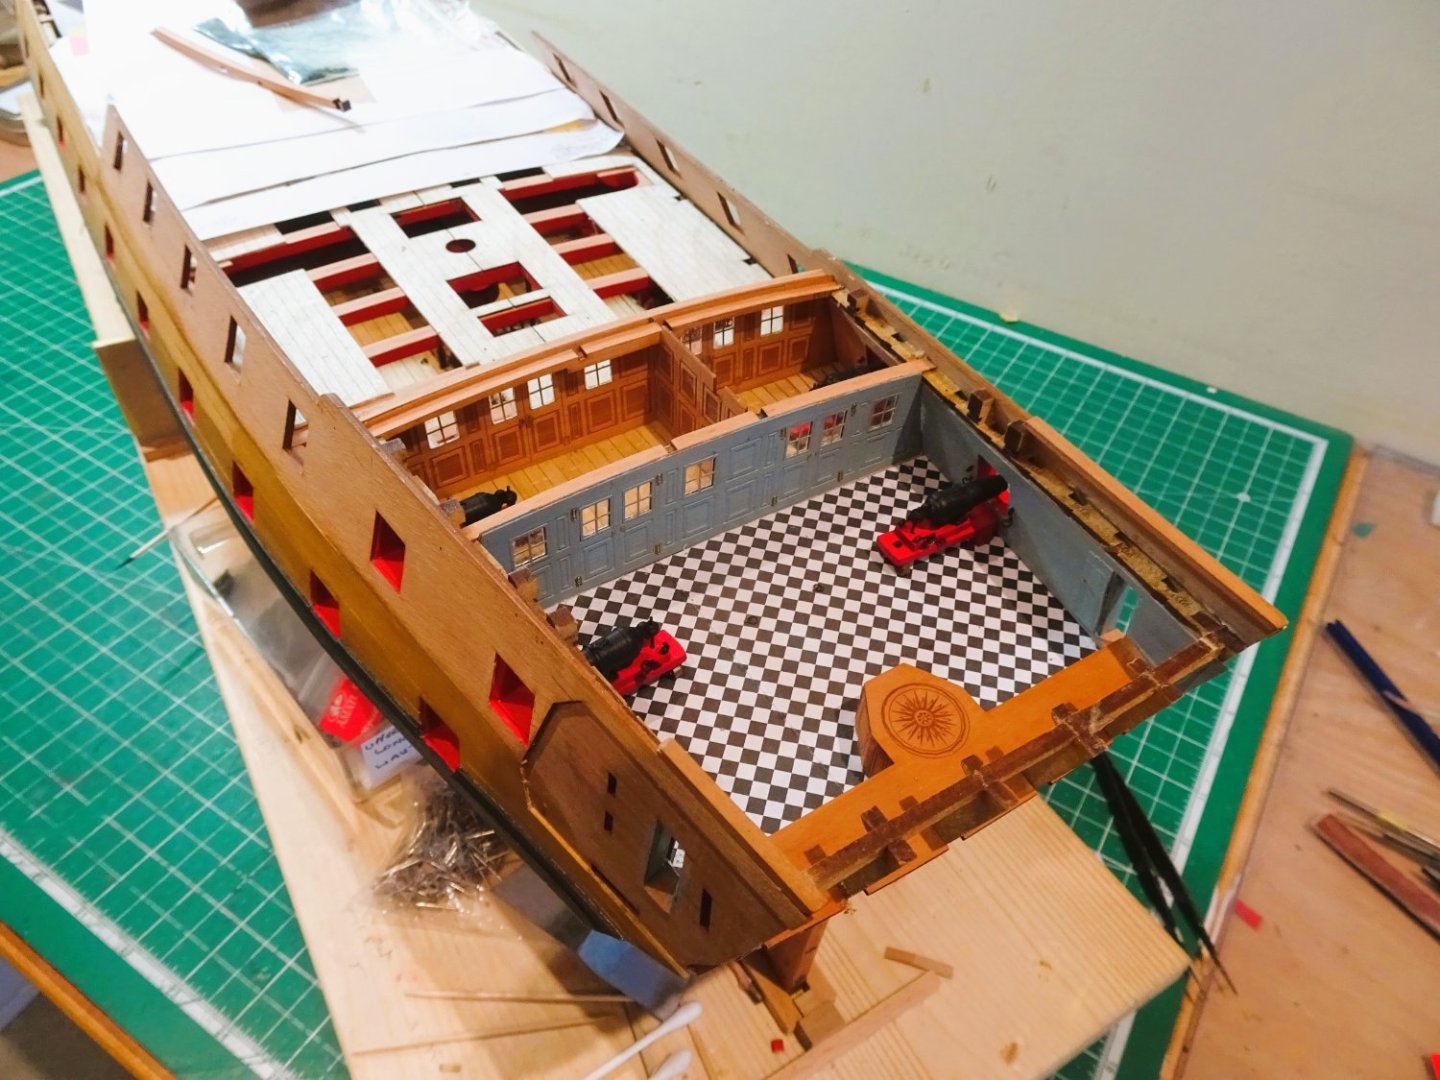
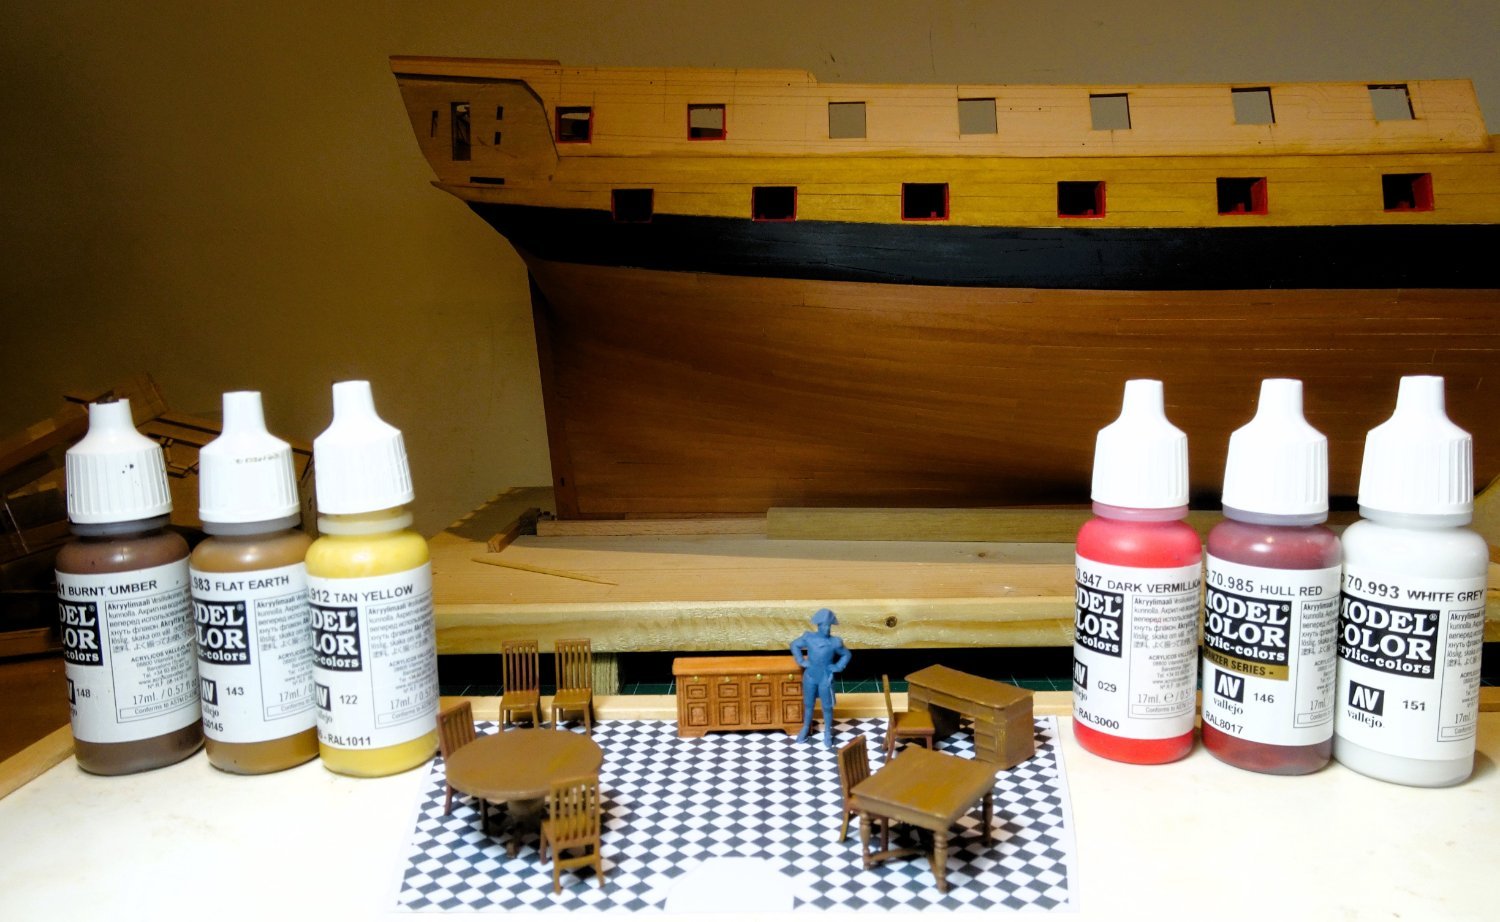
Post Ninety
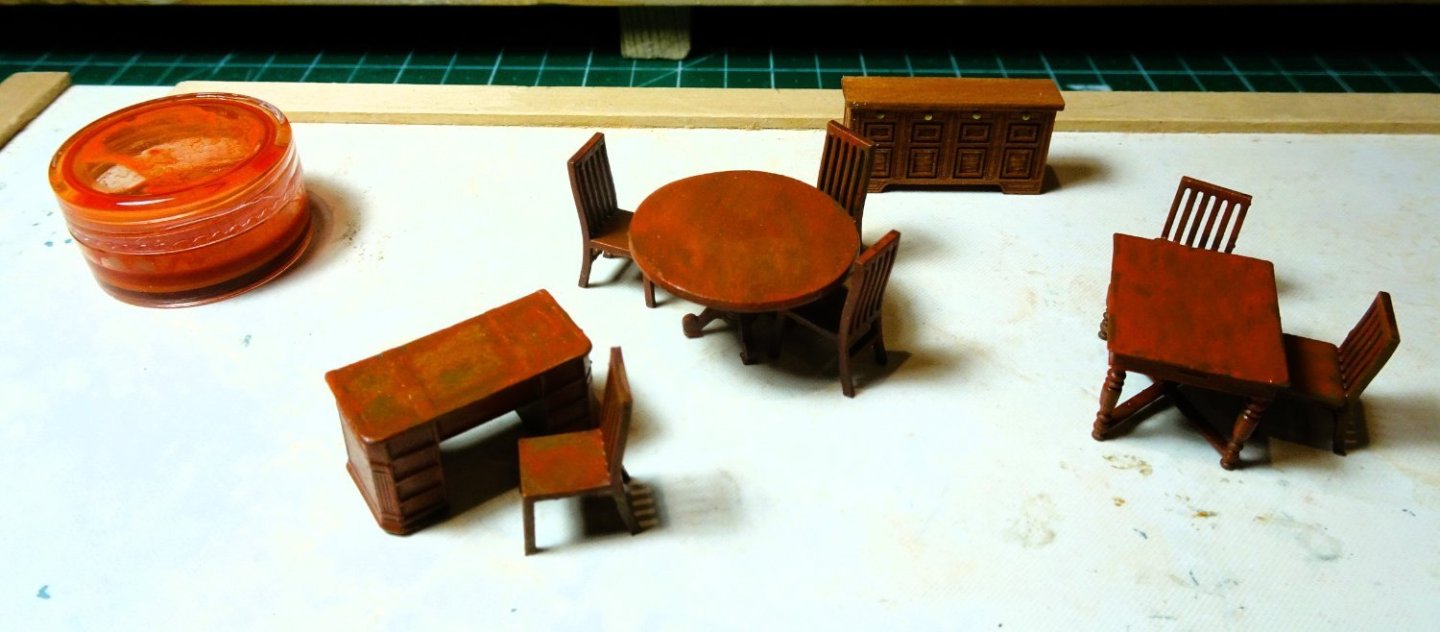
Back in the furniture shop
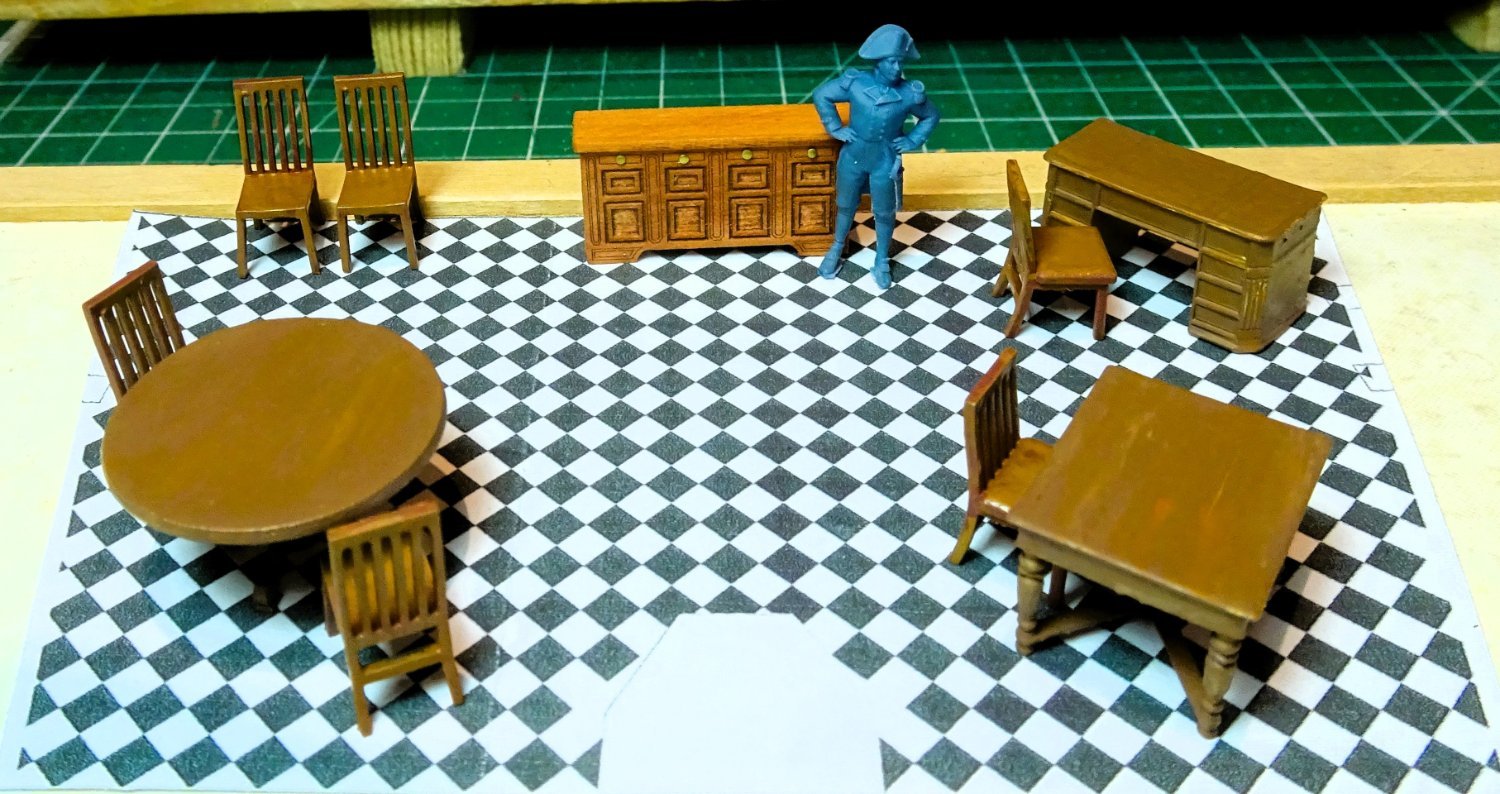
I have re-visited the finish of the furniture.
2302
I was looking for a tone that better matched the varnished Pear of the sideboard and the stern bench.

2305
This time I played around with enamel paints. To get the effect I used Revell Wood brown satin (382) with added drops of Humbrol Matt Scarlet (60) to both darken and redden the tone a tad.
I think this more has the look of Mahogany about it, more typical of the 18th century.
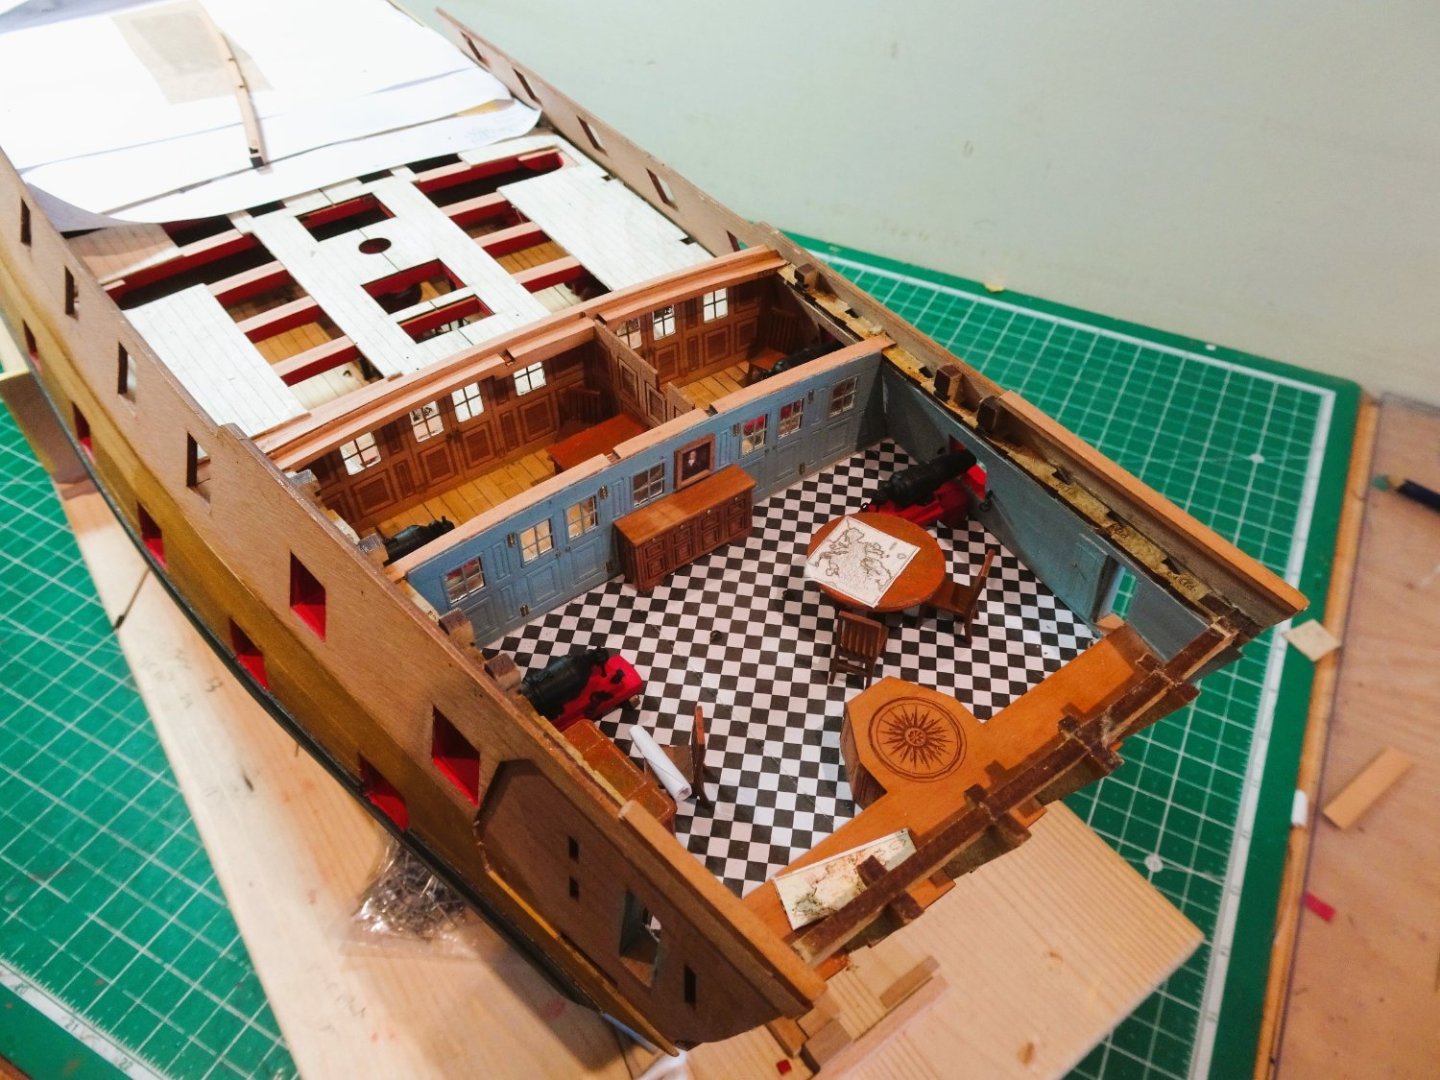
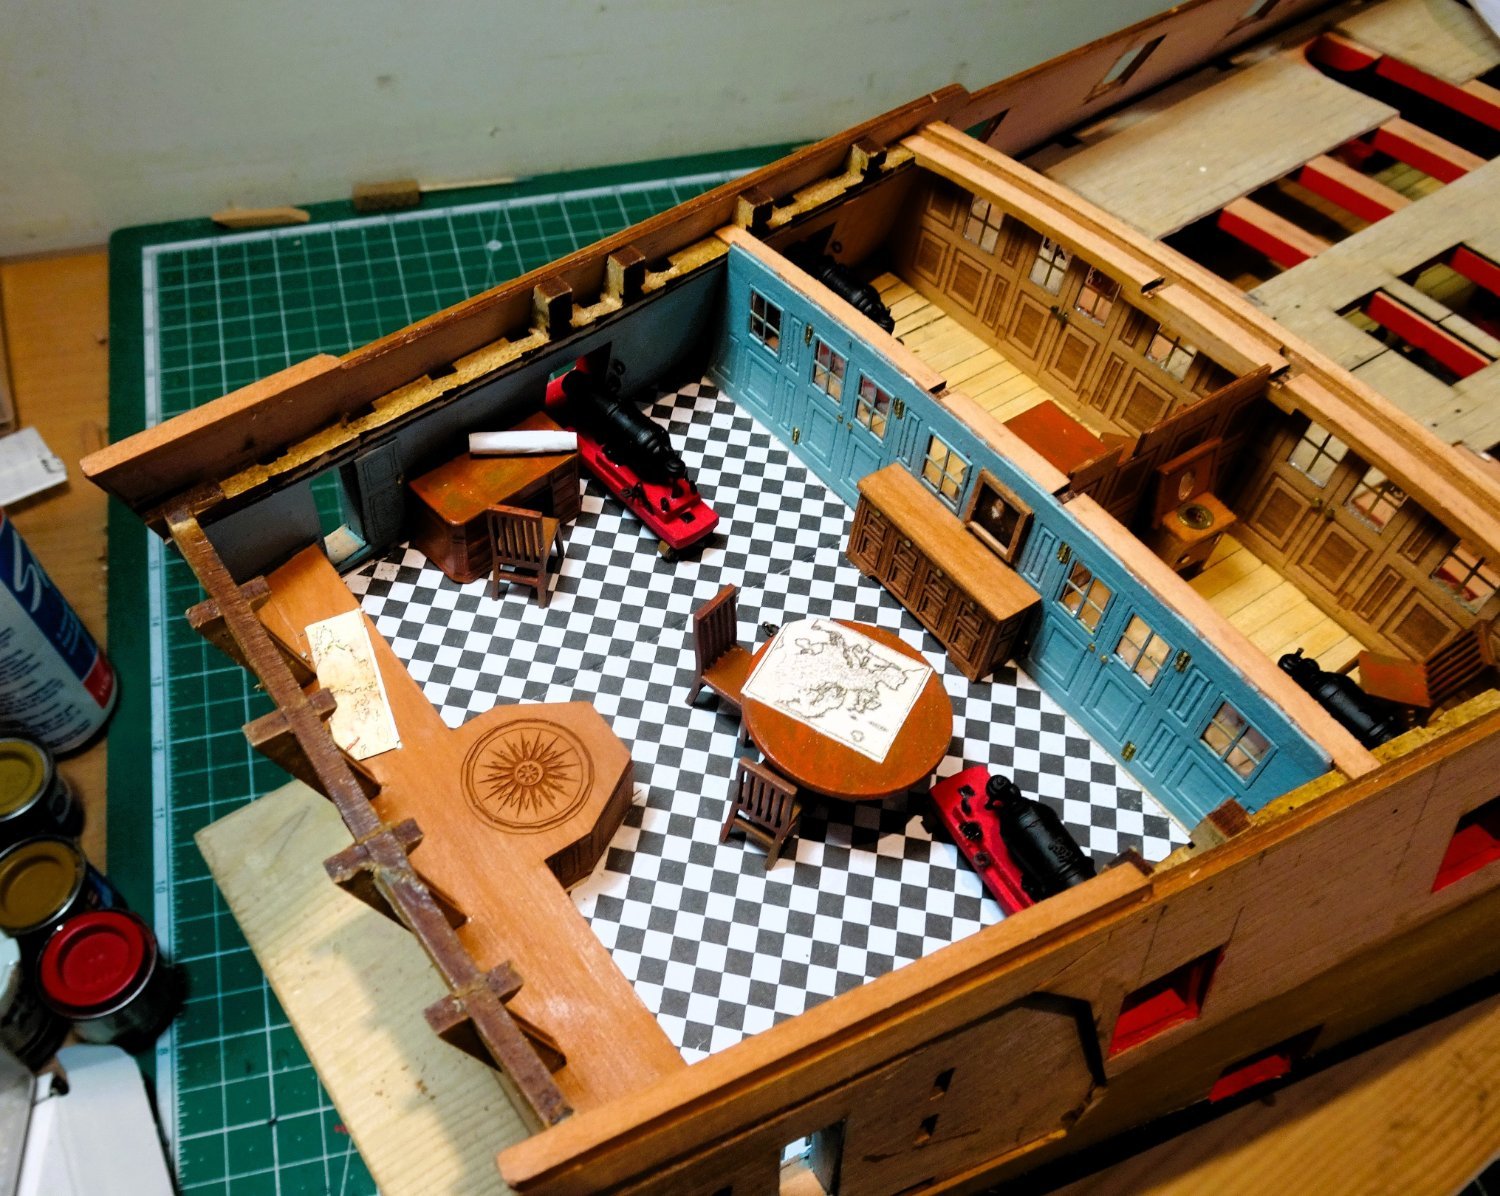
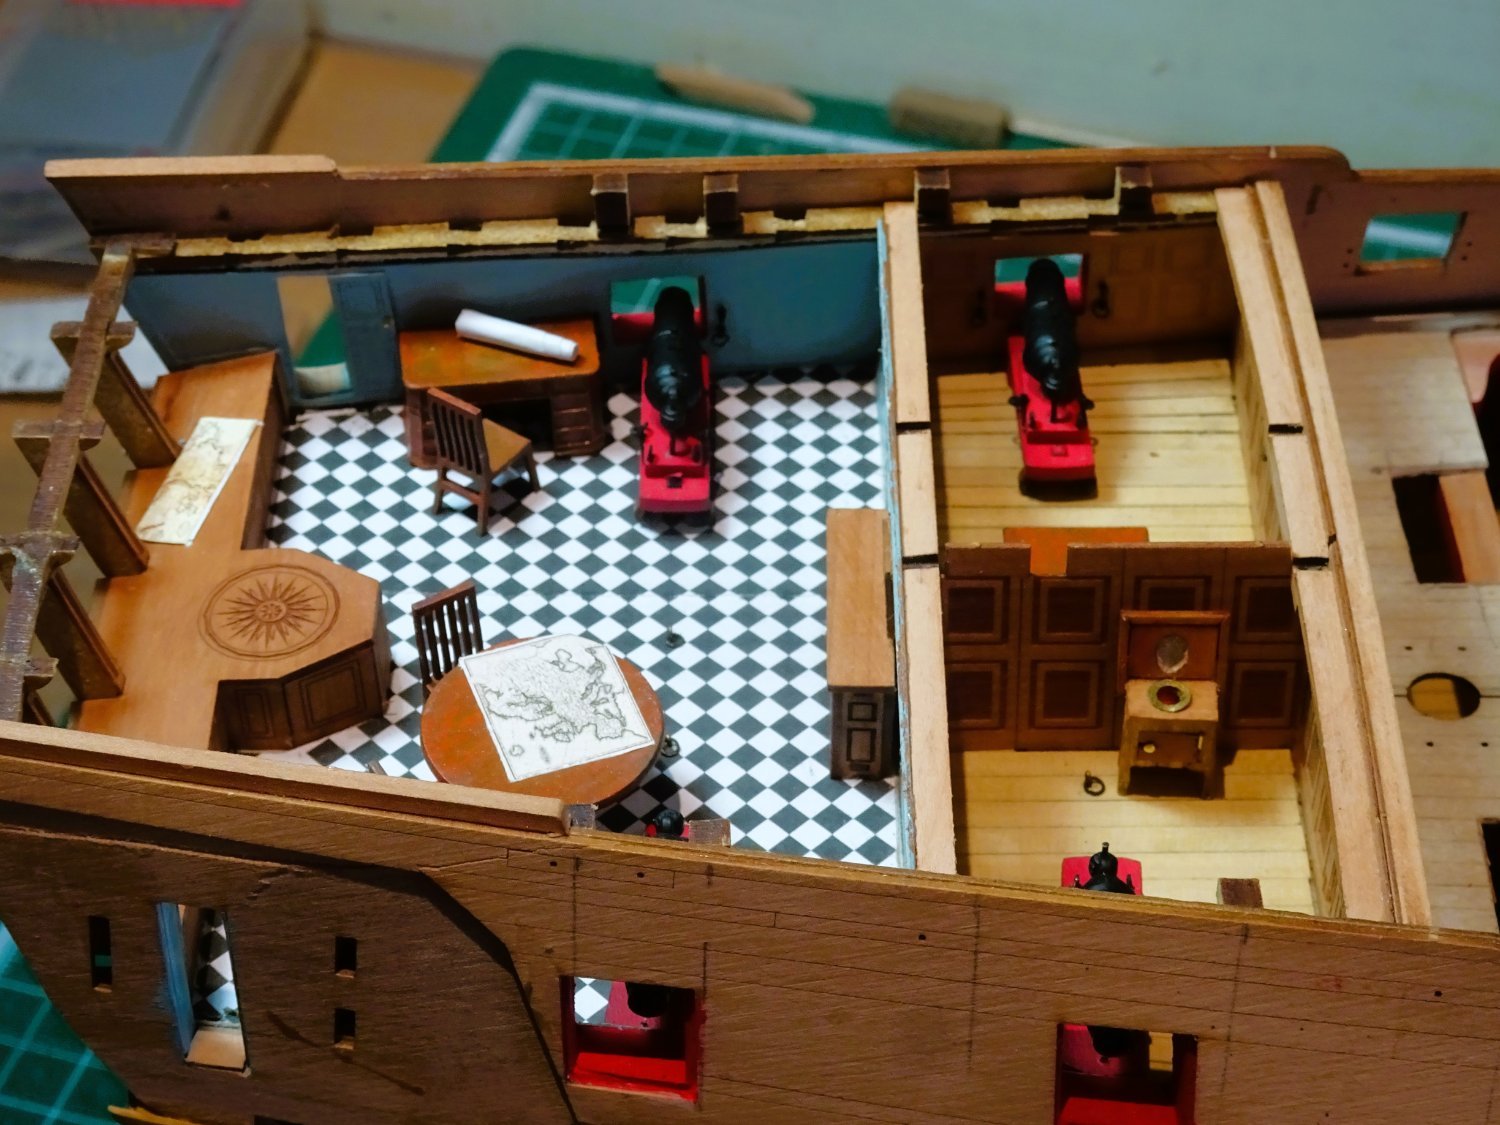
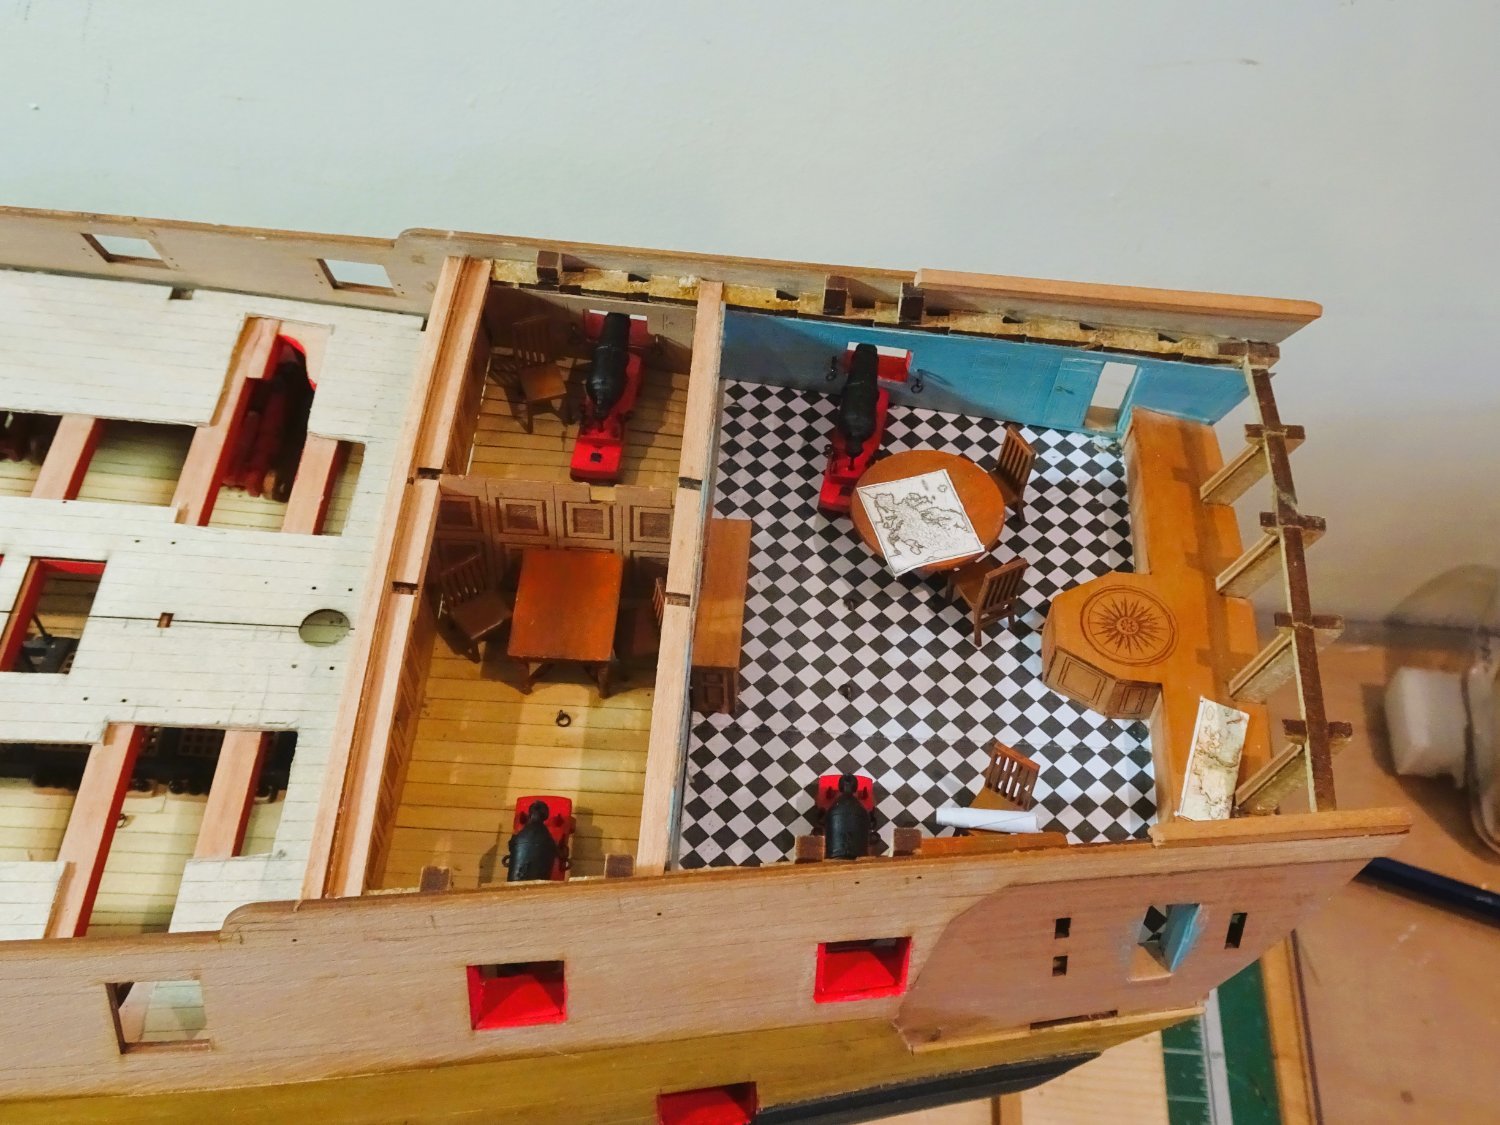
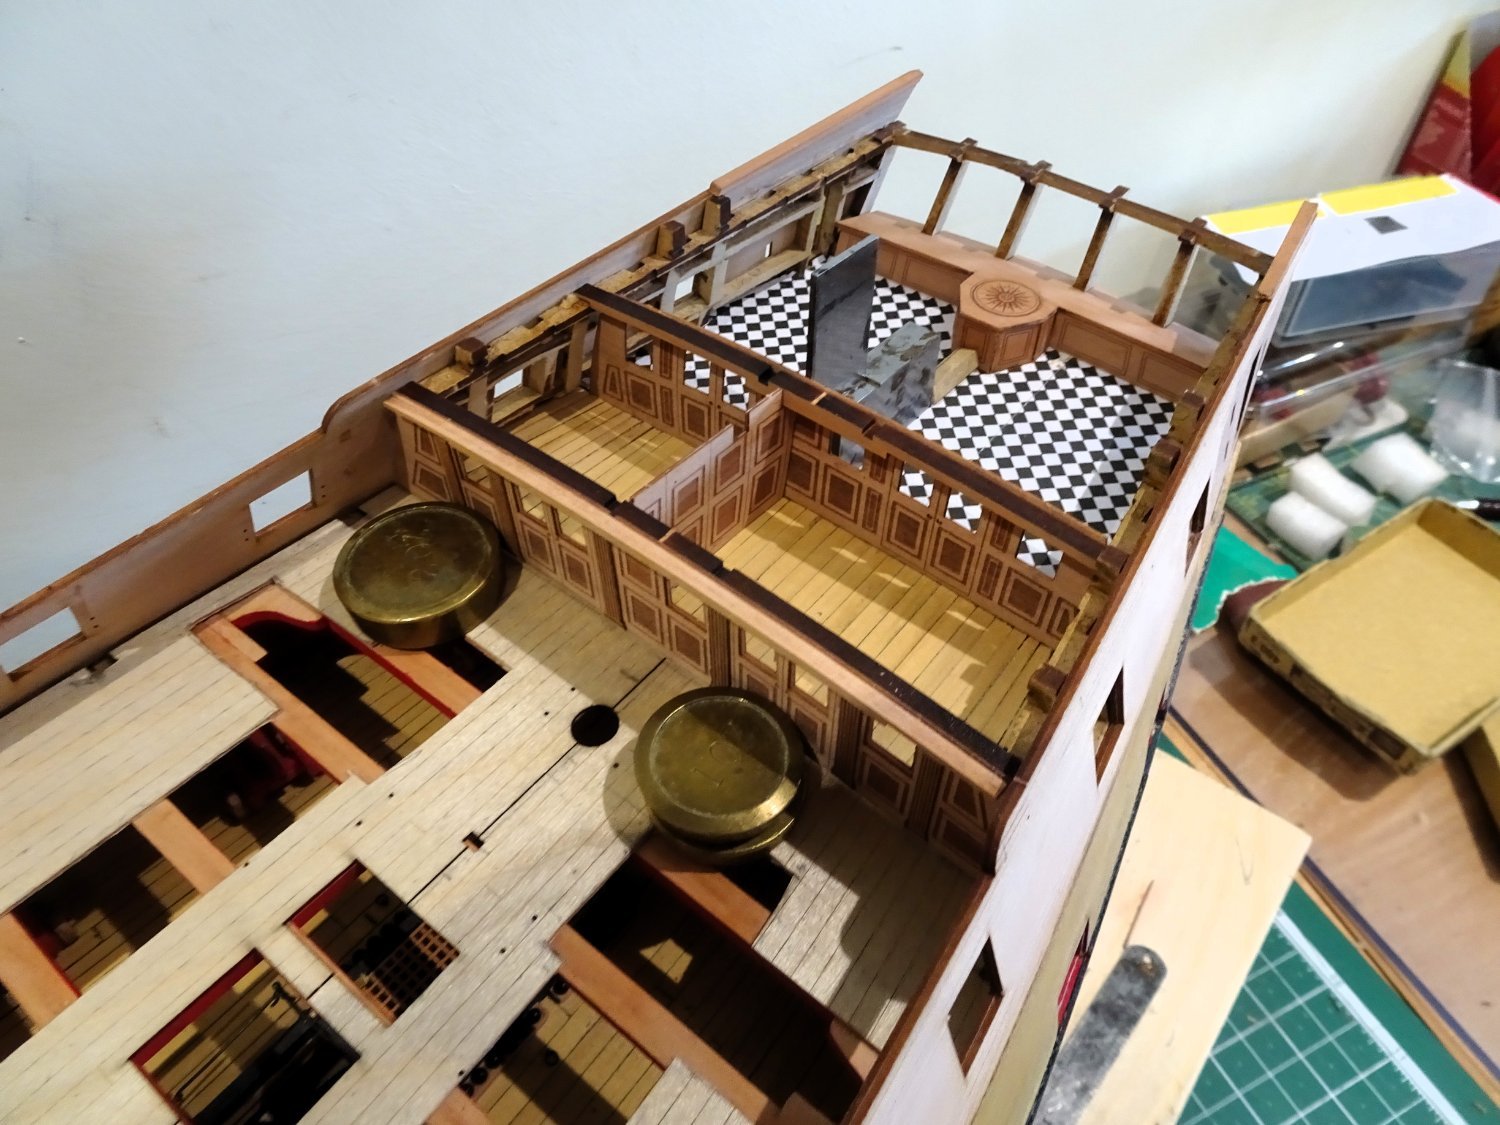
Musings about cabin space.
I toyed with the idea of including a Captain’s cot in the bedspace but couldn’t quite figure out how it would be arranged. The cabin has a mere 9’9” depth and that 42 pounder carronade sits in the middle.
I have seen arrangements where the cot/hammocks are hung above guns, but there is only 1’6” space between gun and deck beam above.
The most obvious arrangement would be slung from the beams inboard of the gun and taken down each morning. It would otherwise inhibit access thro’ the double doors.
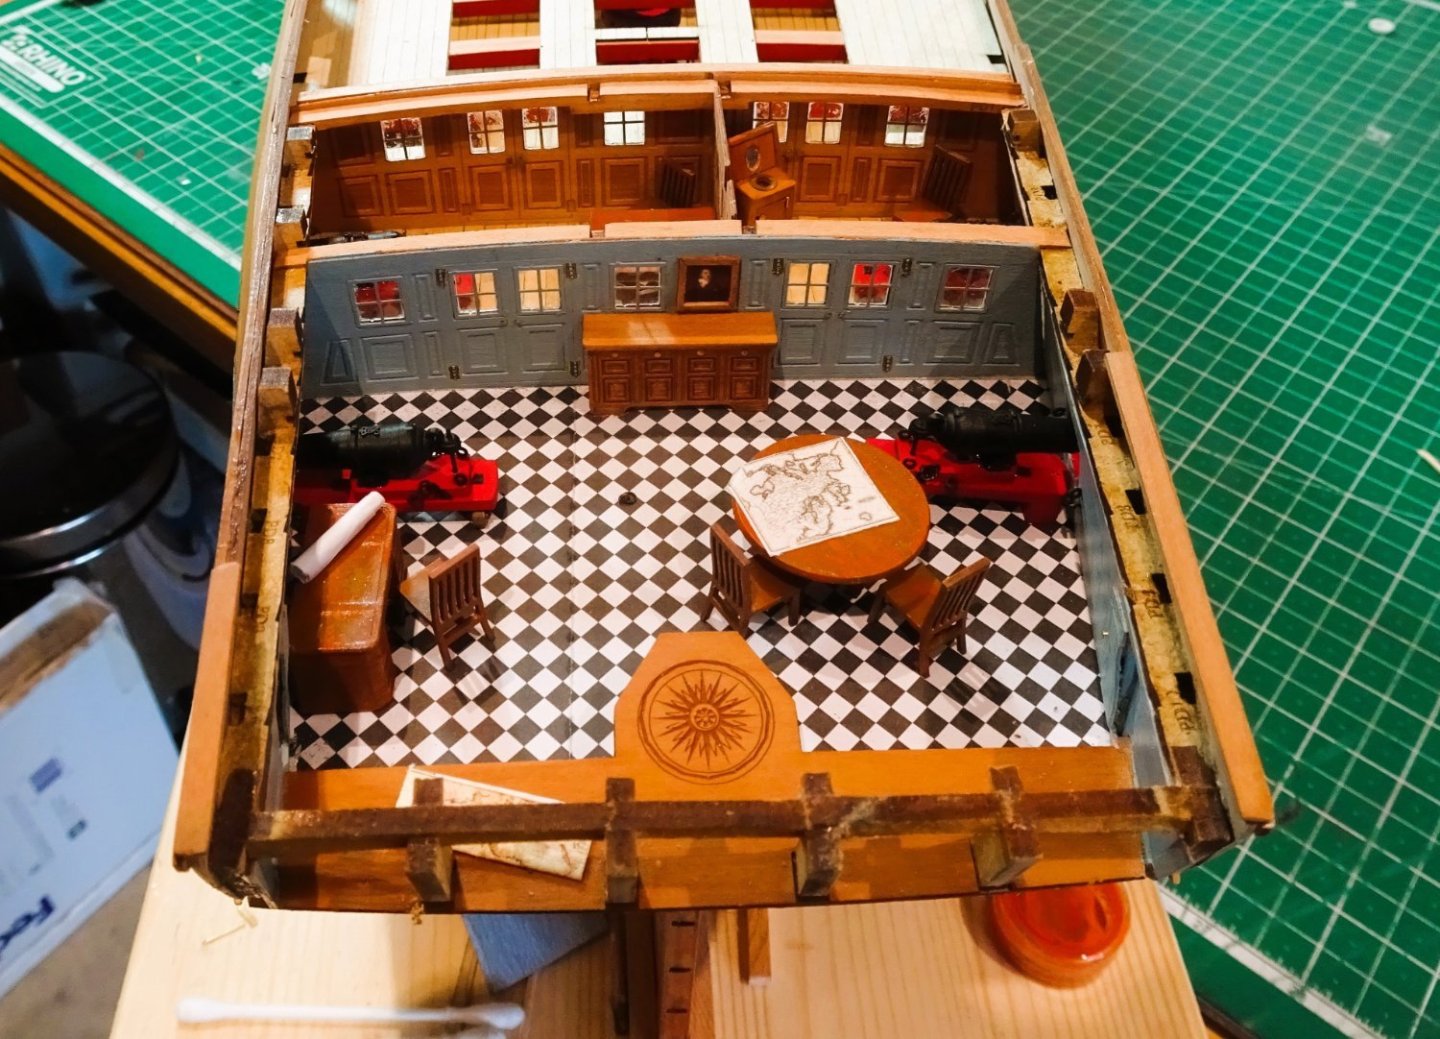
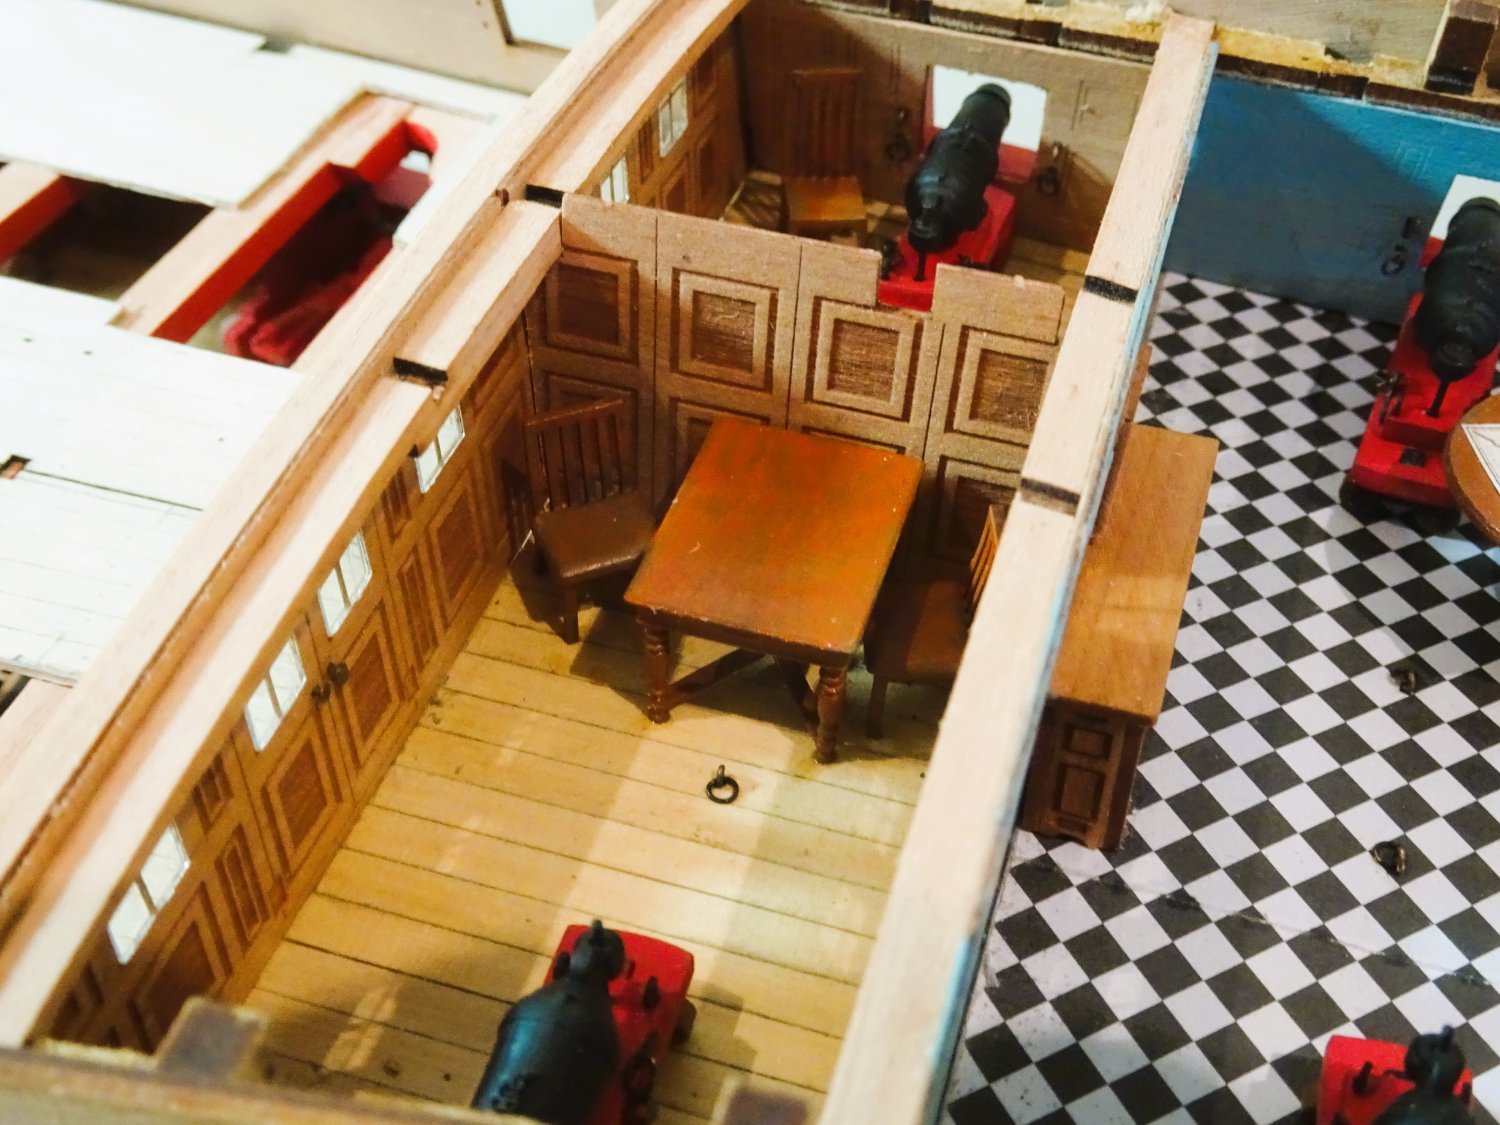
The Coach is less of a problem, where a table and chairs can be accommodated. Referred to as the Captain’s Dining room, I don’t see why anyone would want to dine in the confined space of the coach when the light and airy great cabin is available.
It would be more practically used as the secretary office / Captain’s larder/ storage.
Nelson’s expansive dining room as shown on Victory, this ain’t.
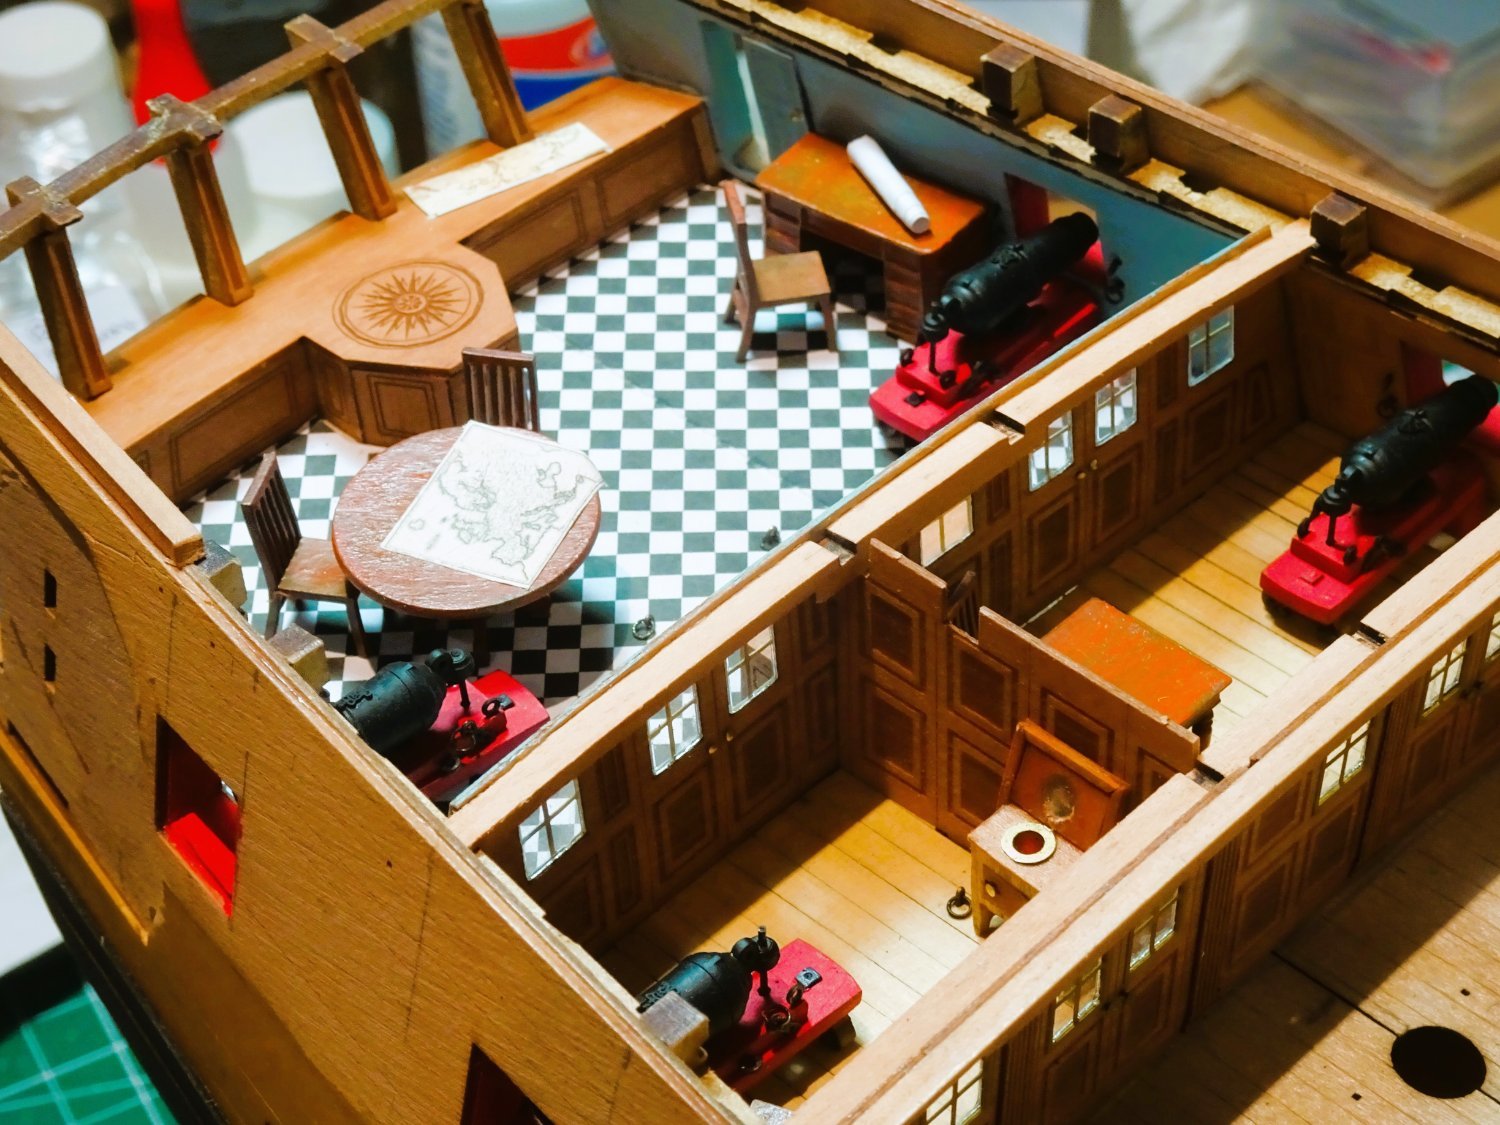
I have enjoyed myself today playing around with the furniture on my sea going dolls house.

2315
2316
2321

2322

2327
2323
2325

2326
Fairly happy with the outcome, moving onto deck beams.
B.E.
12/10/2023
-
-
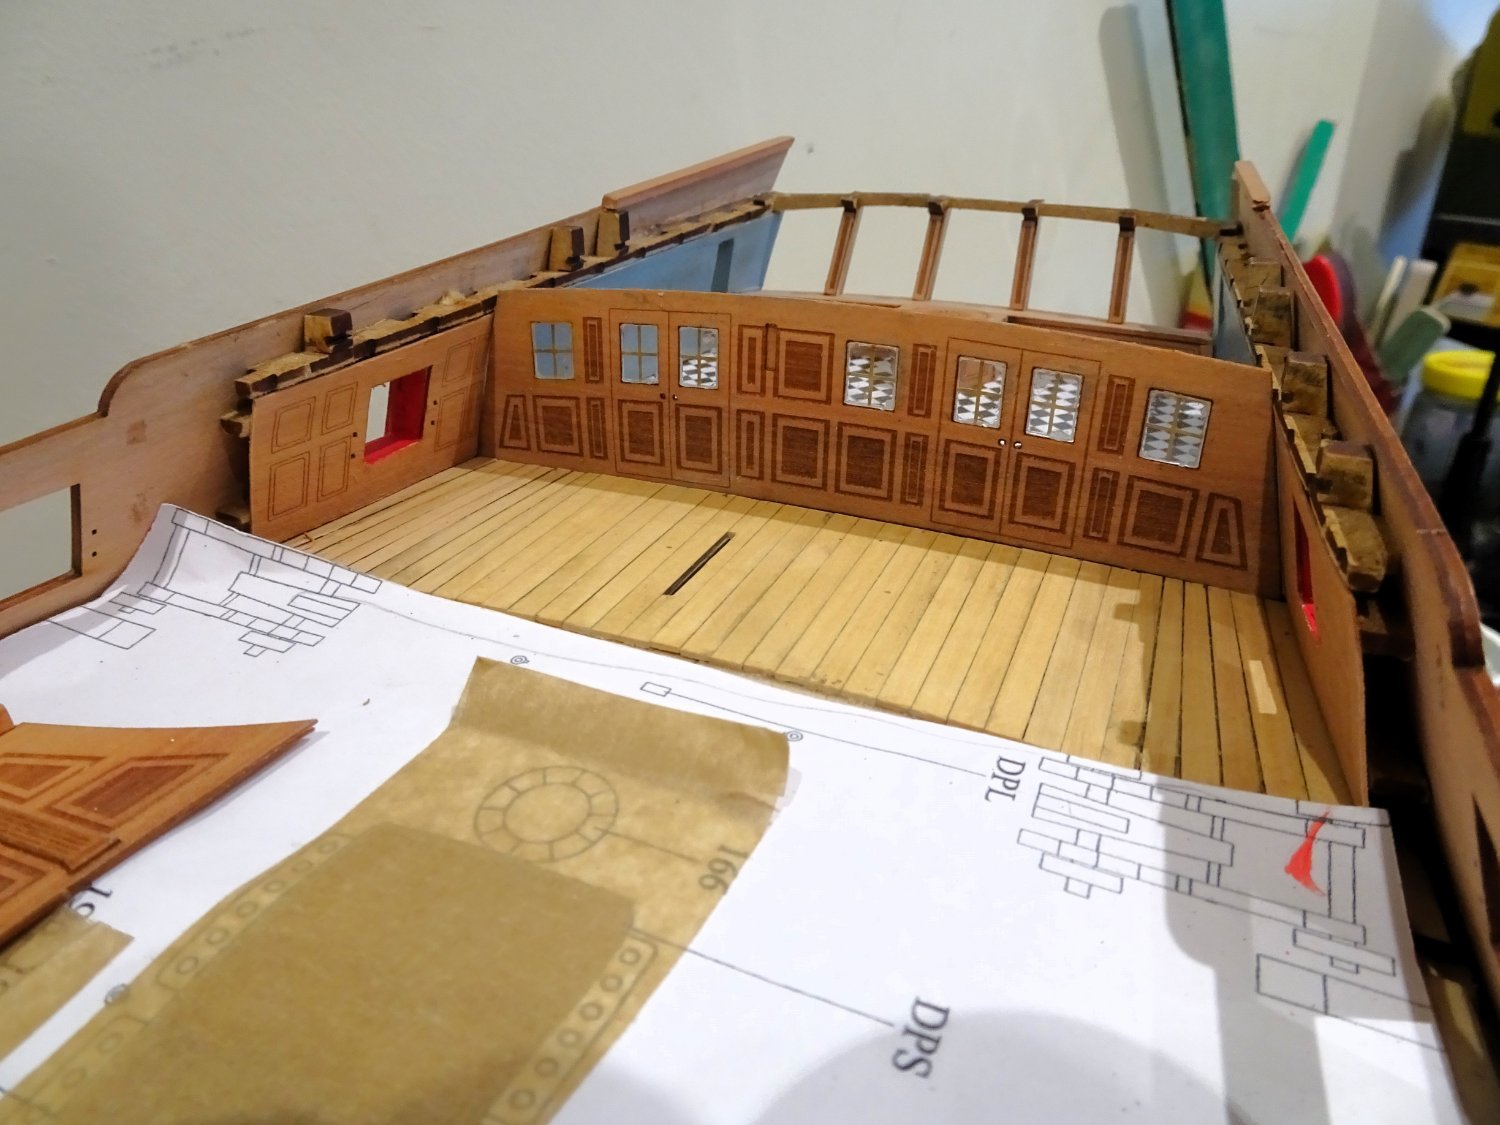
Post Eighty-nine
Cabin fitting (Part 3)
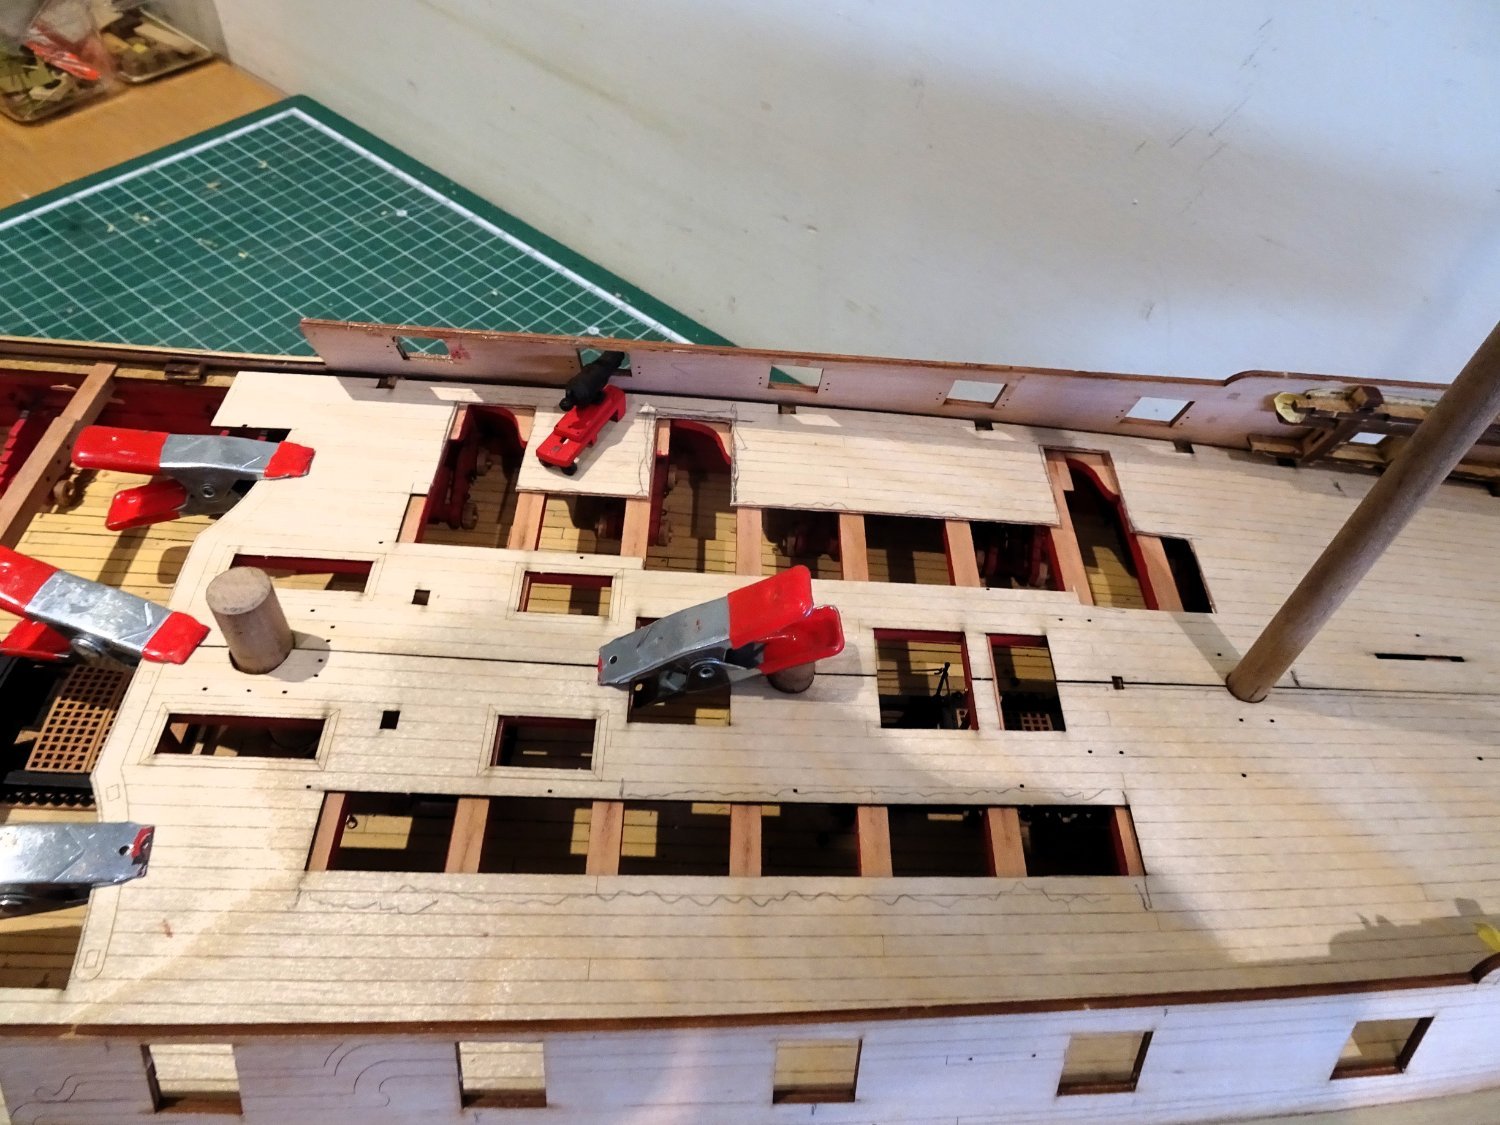
The ring bolts have been fitted to the bulwarks and deck.
Again I preferred Amati stuff to make up the bolts.

2273
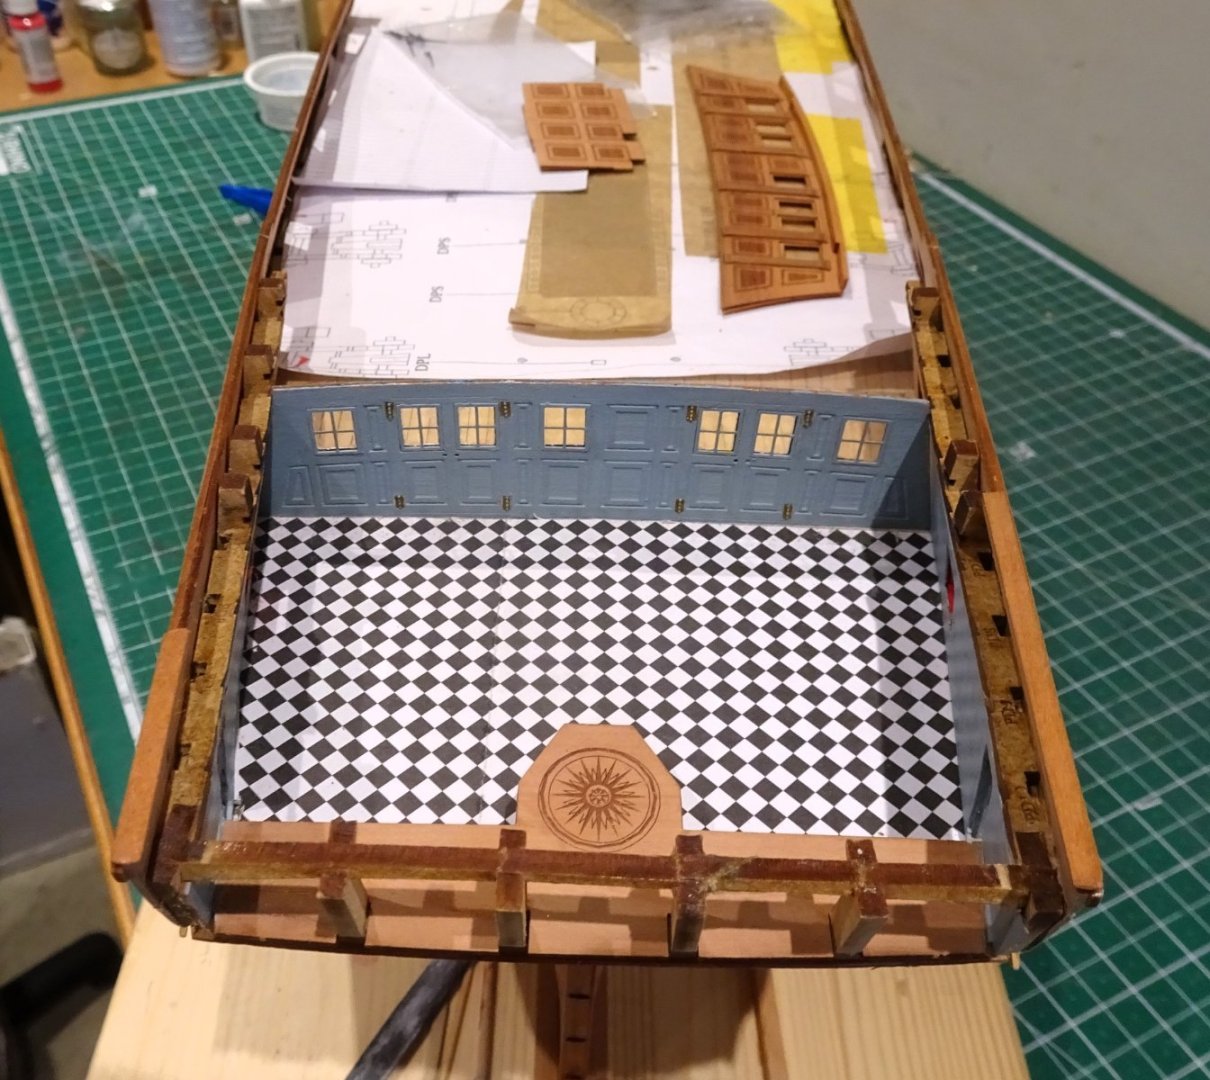
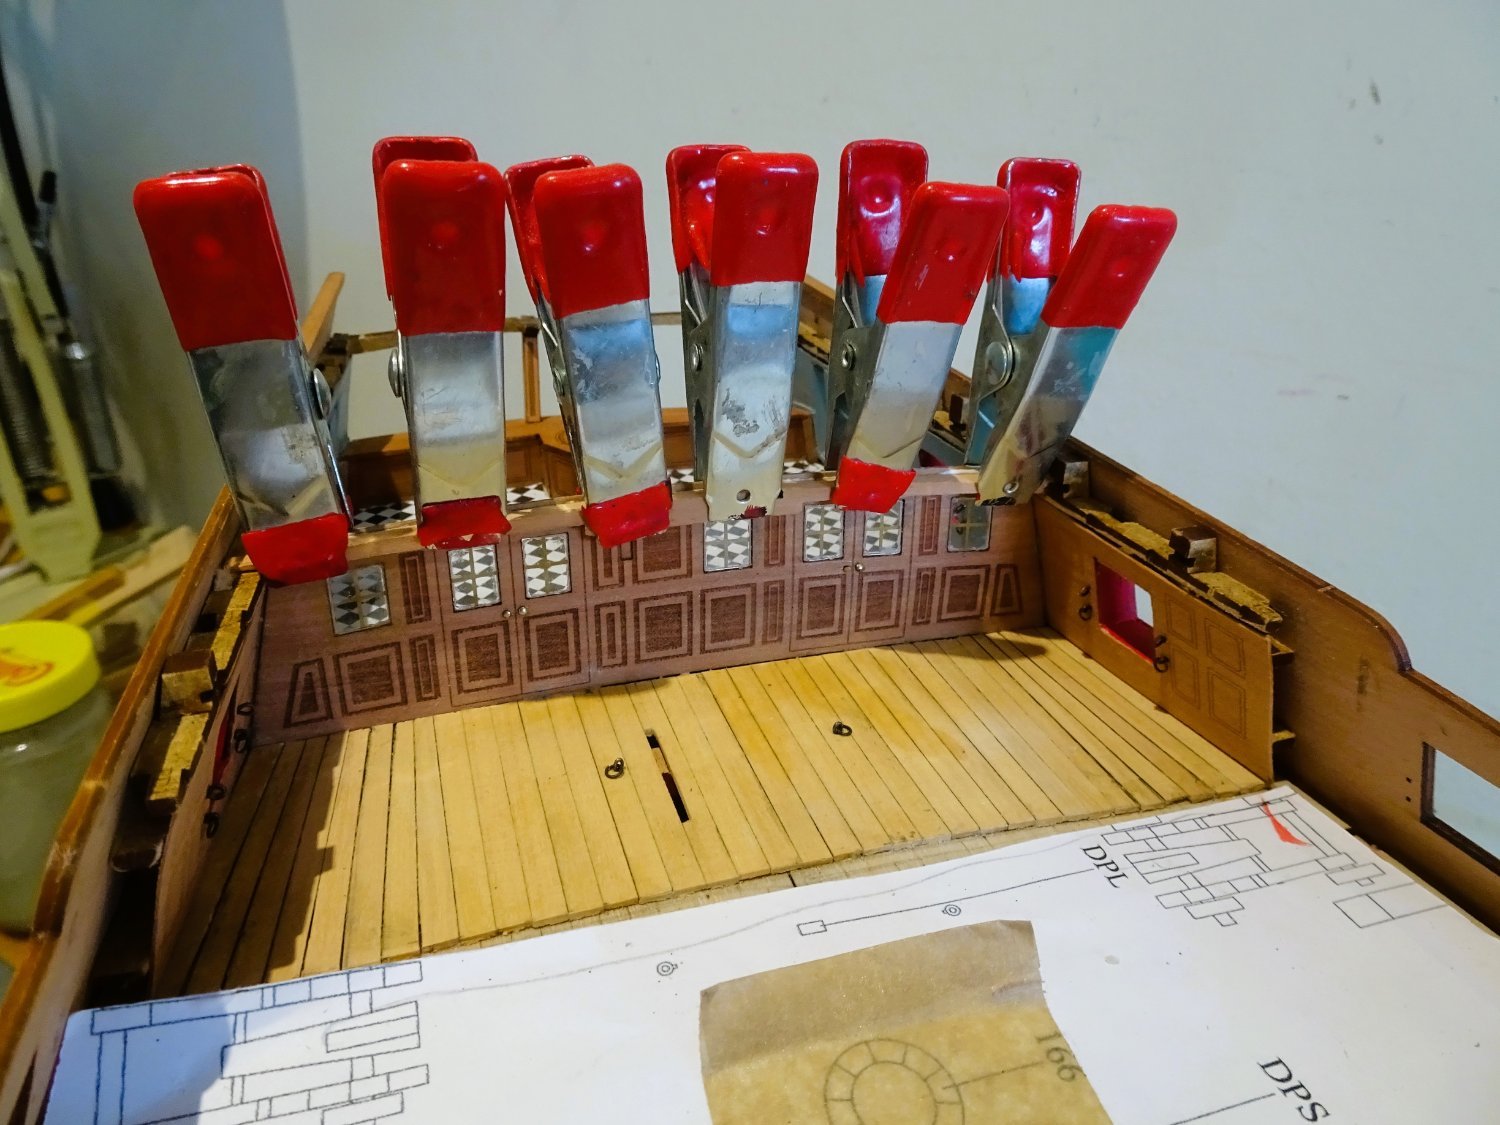
At last the rear screen is fixed into place.
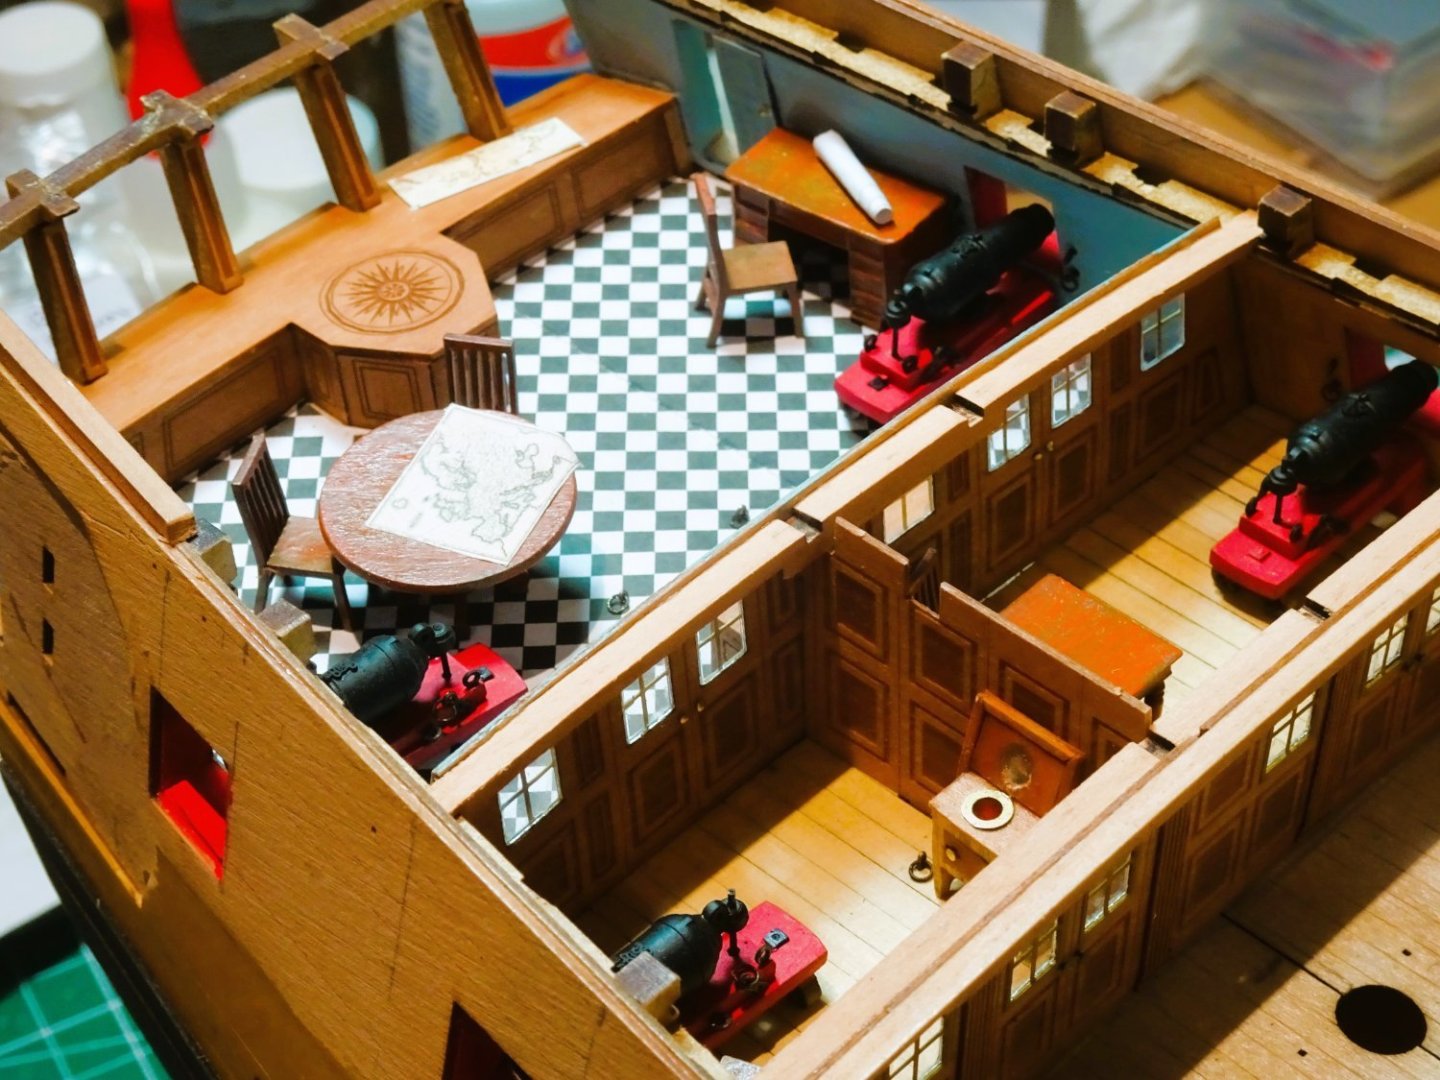
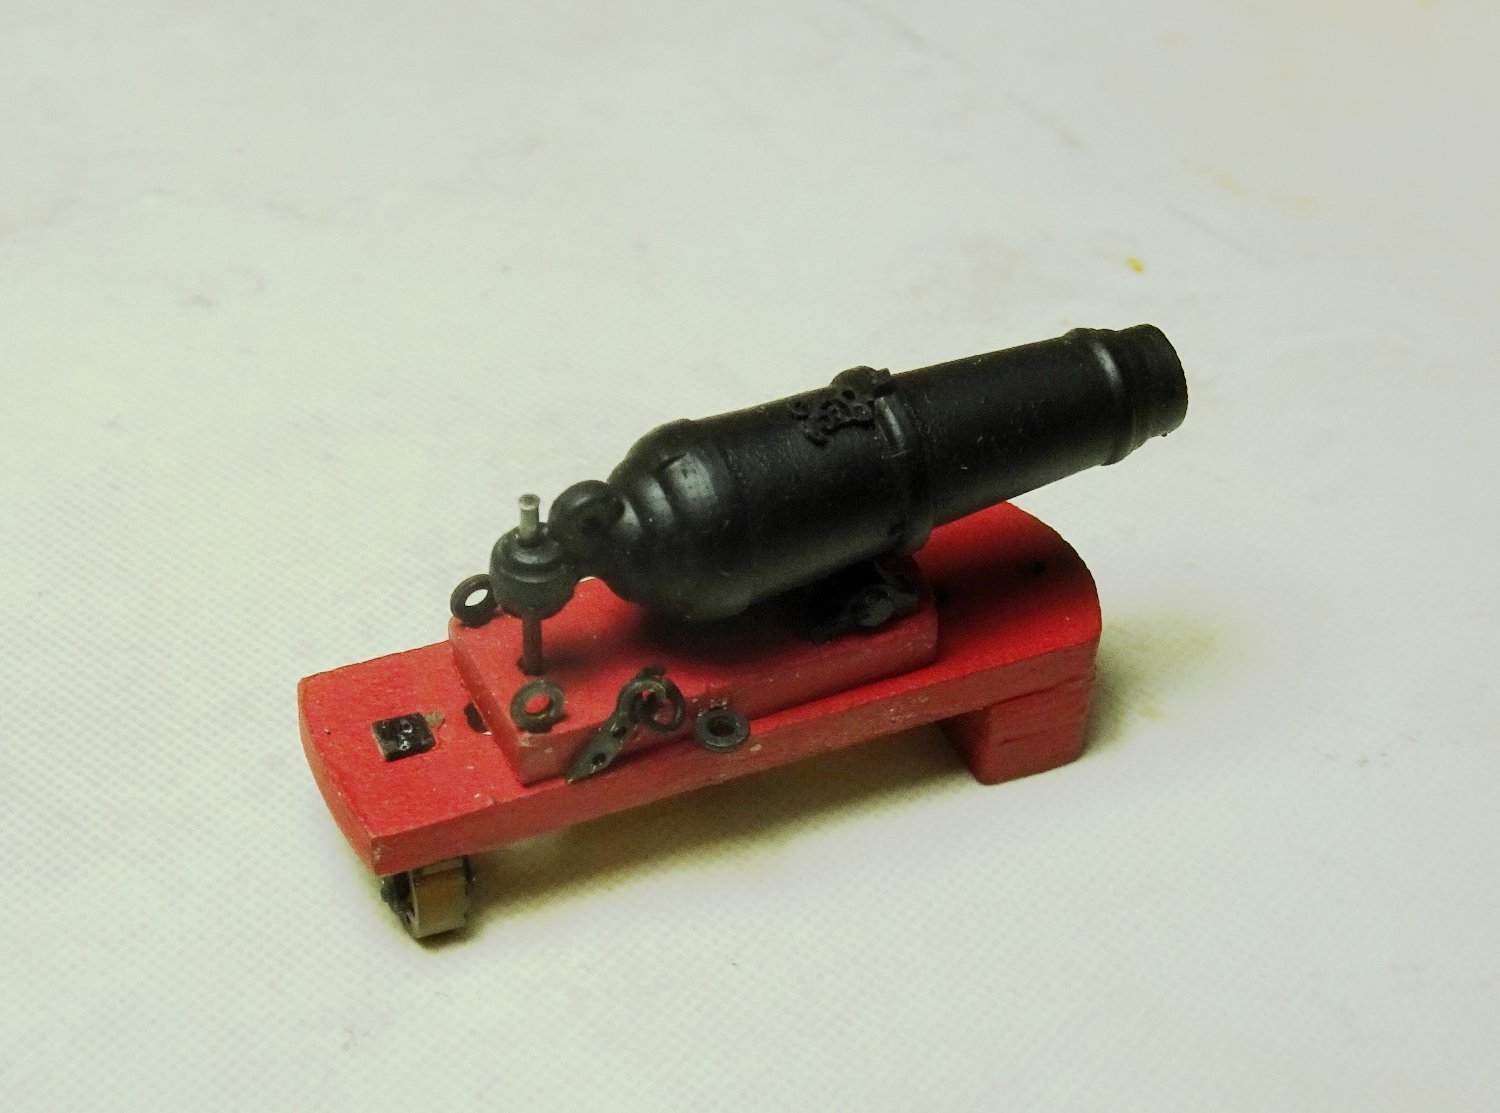
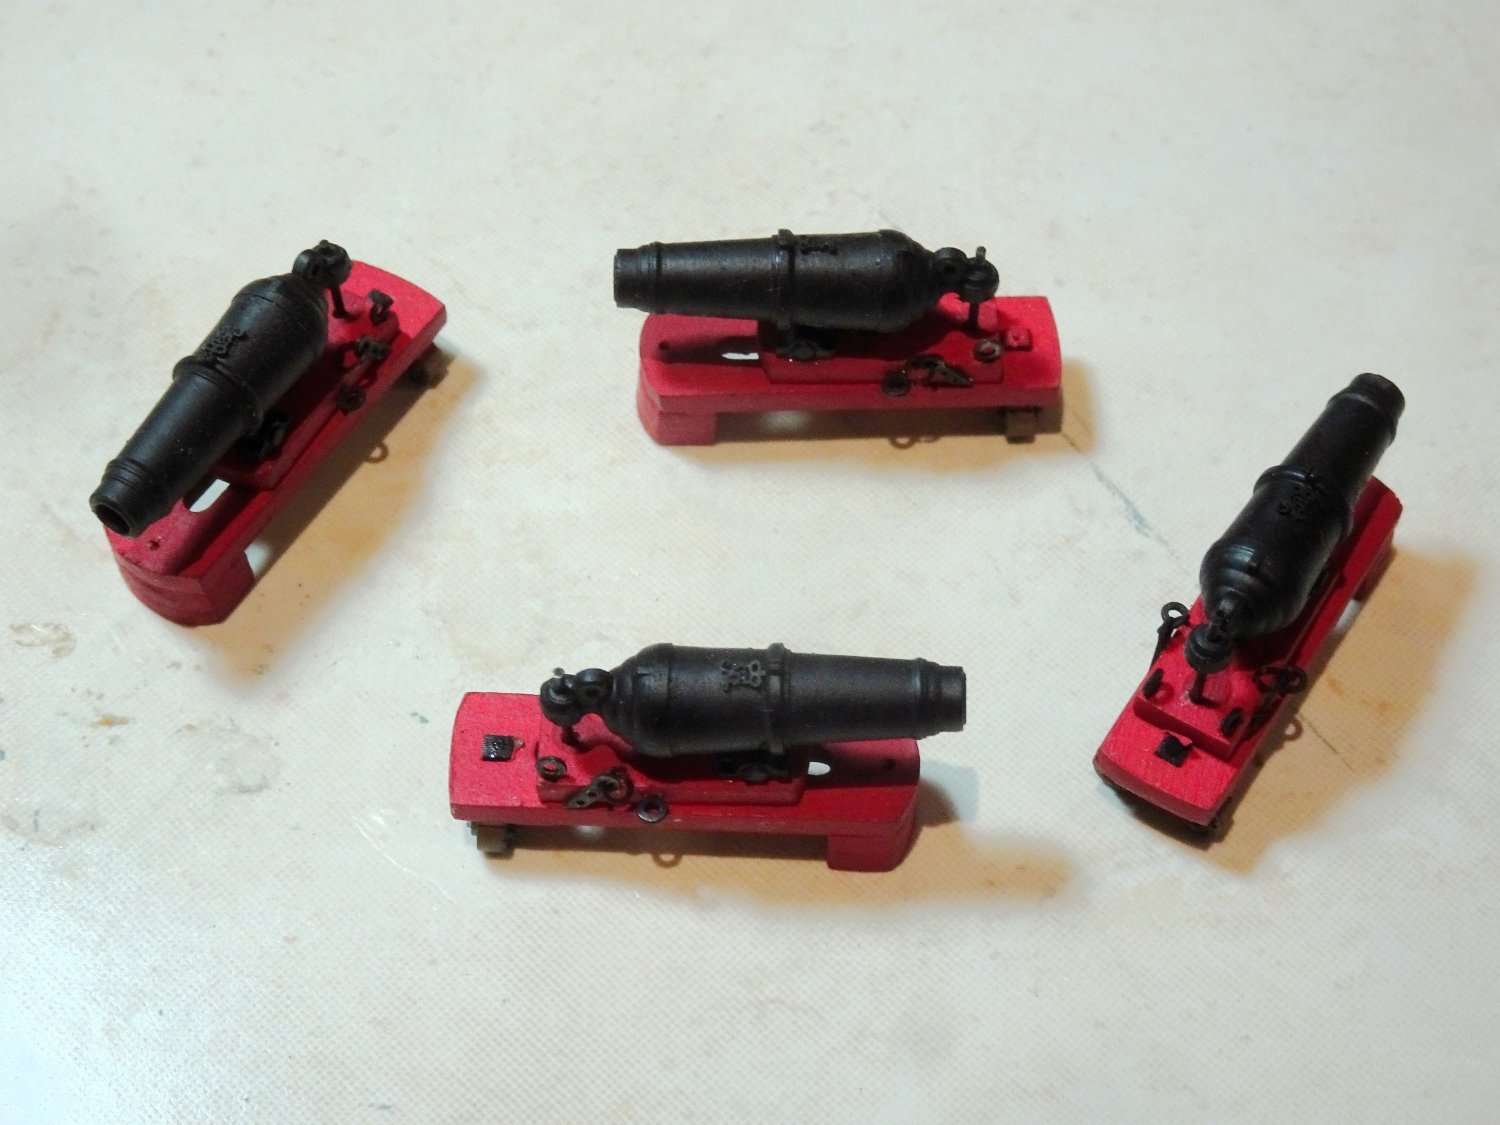
Cabin carronades.
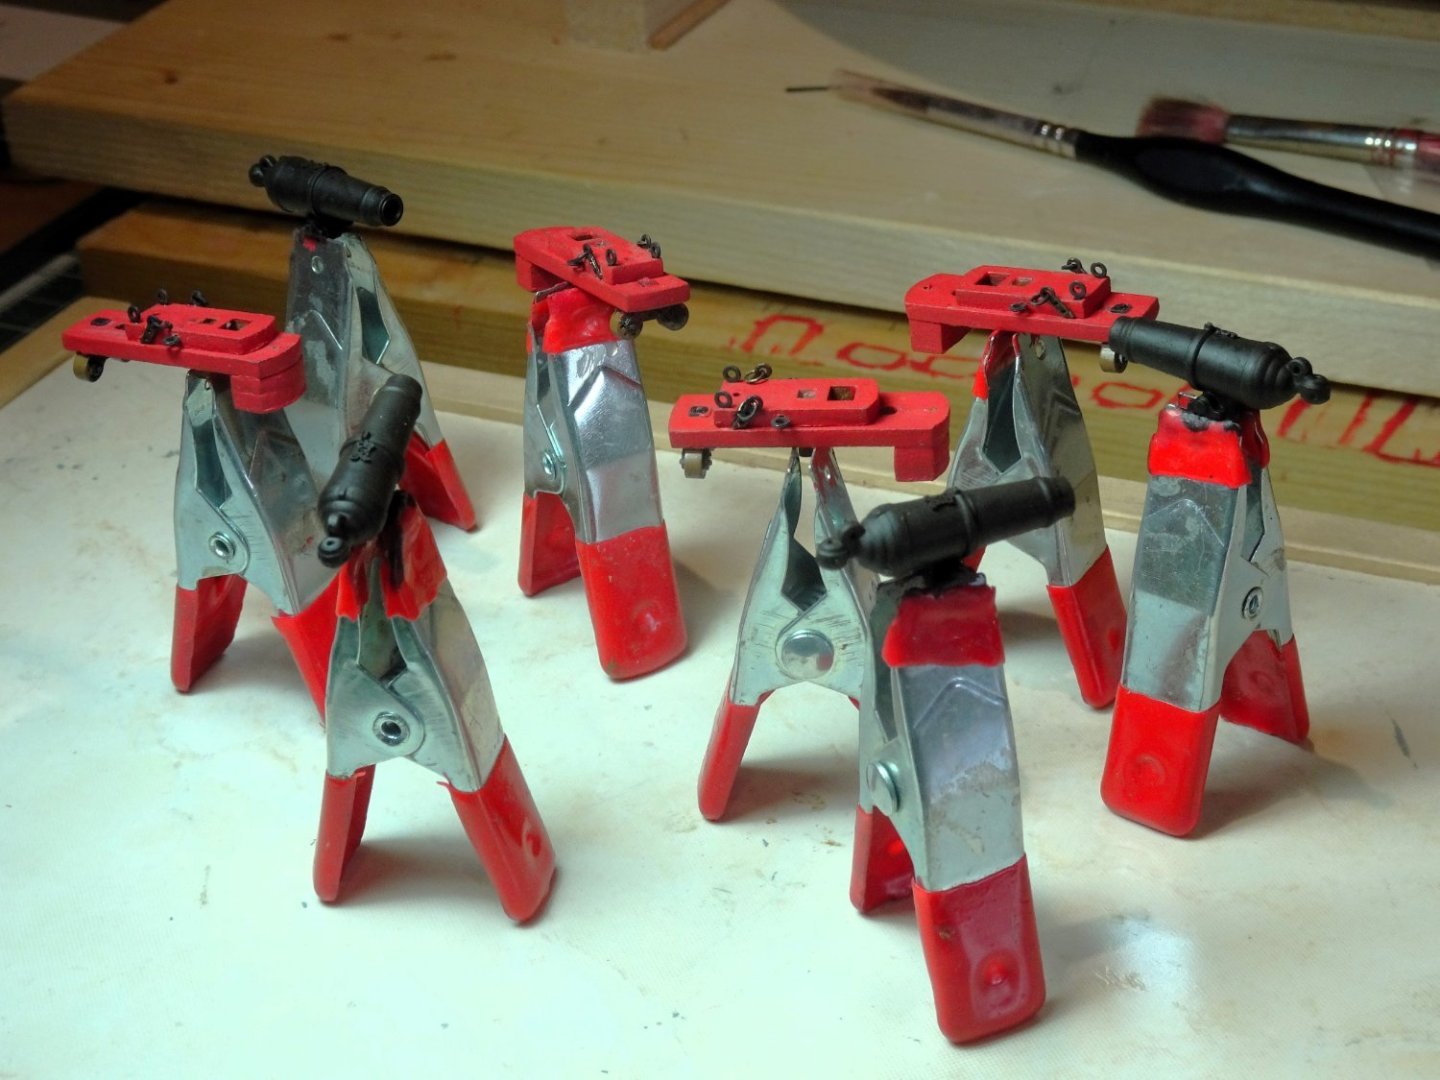
2277
I like the way Chris has designed these to slide in and out to facilitate finishing off the outside of the hull.
The carronades are fitted on the ‘inside’ principle whereby they sit on chocks fitted against the bulwark, but with rear transverse trucks to allow the gun to traverse a few degrees.
I don’t see why the carronades can’t be assembled to allow them to pivot on their bases; if desired, fit a pin long enough to travel thro’ the blocks and into the deck with the slide part left to swivel on the pin.
Lavery shows a system whereby separate pivots are fitted alongside the central one to allow the pivot bolt to be relocated to allow stowage of the carronade alongside bulwark to save space.

2284
I gave some thought to detailing the elevation screw with the addition of the turning bars, but at the scale involved the madness soon passed.🙄

2280
Just four of these seemed to take an age to assemble with the multiple stages. The iron work was chemically blackened, and the barrels treated with dark brown weathering powder after painting. I replaced the kit breeching ring with Amati 2mm rings and added the Royal Monogram to the barrel.

2292
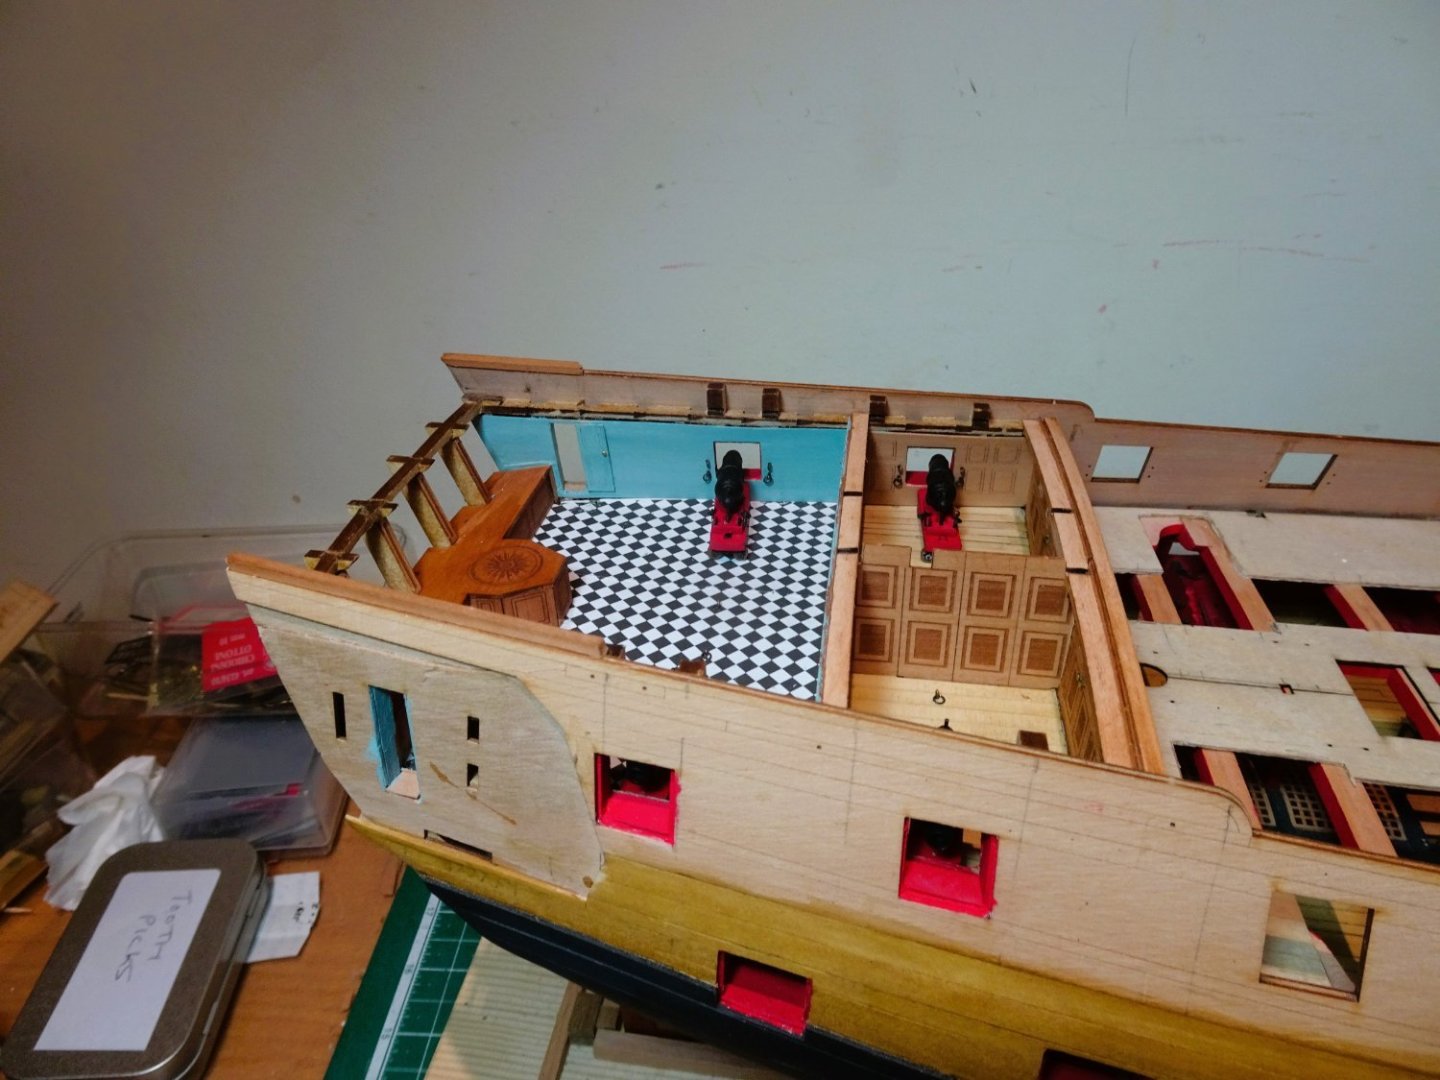
The Forward screen is now fixed and the carronades can be glued in place.
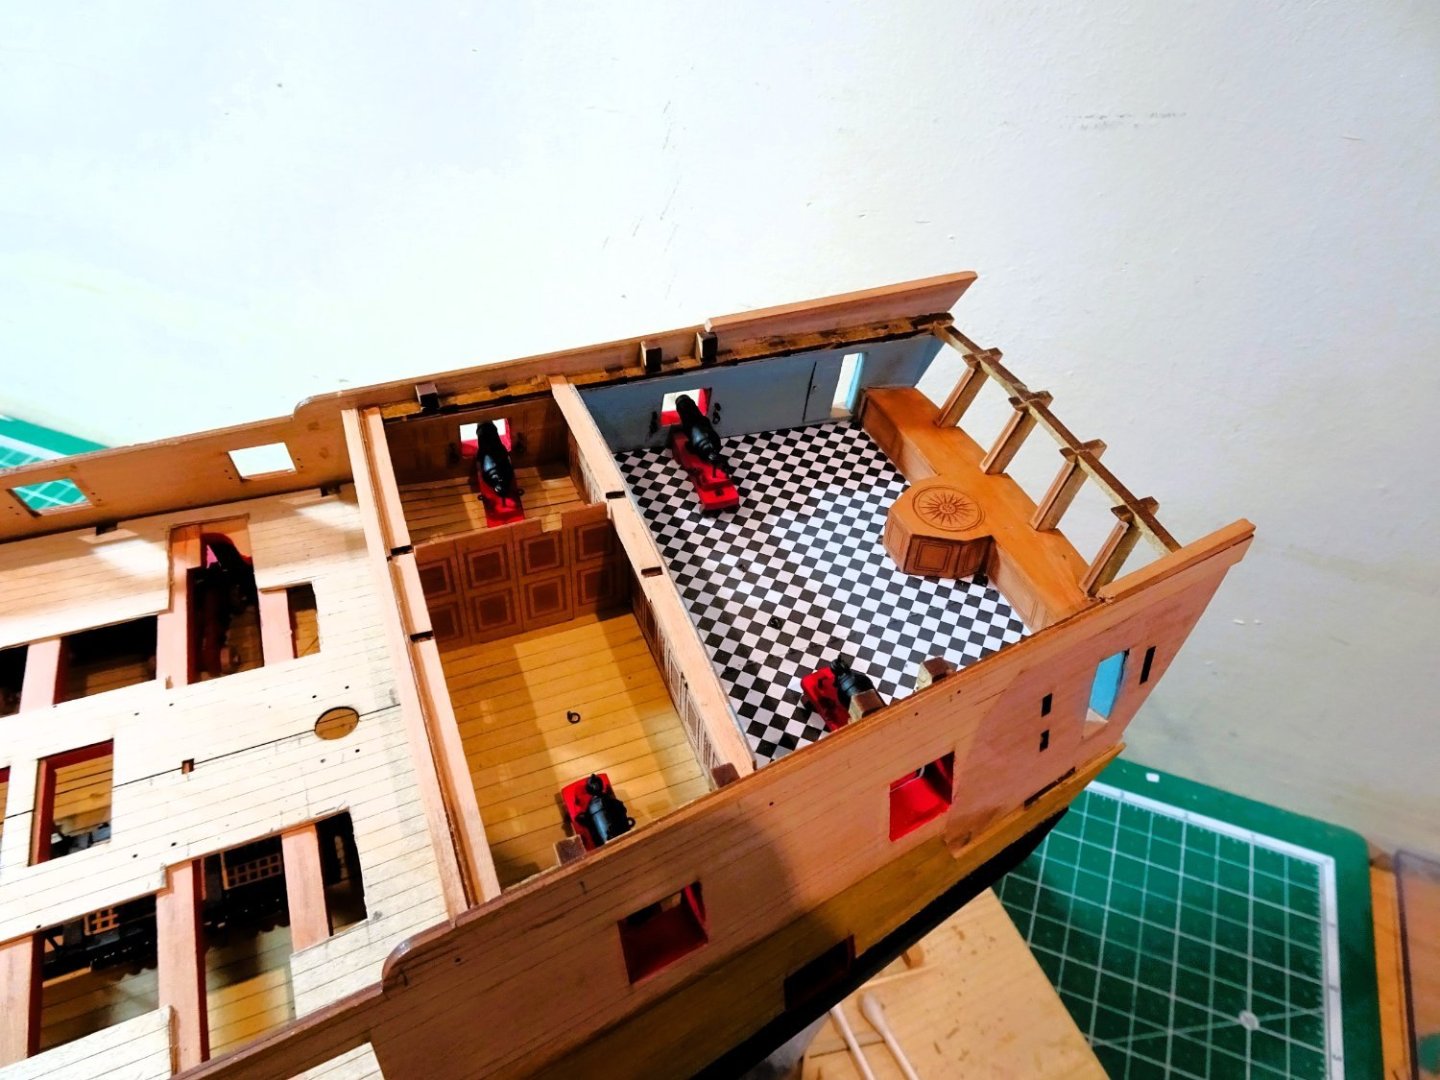
2293
2294
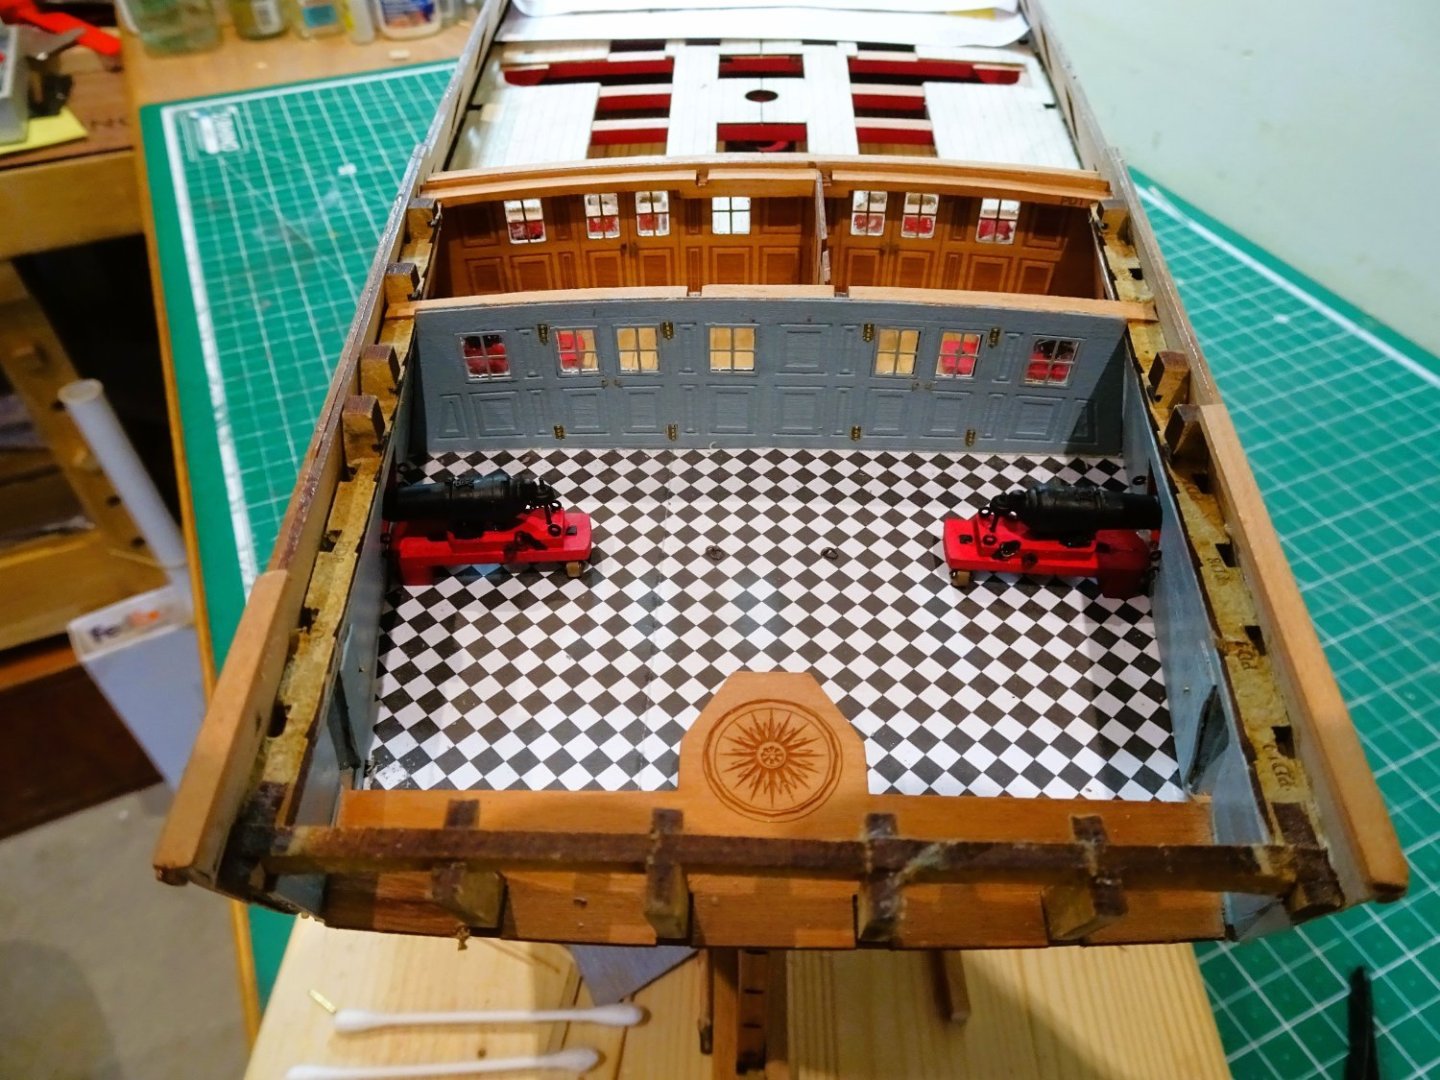
2297

2298
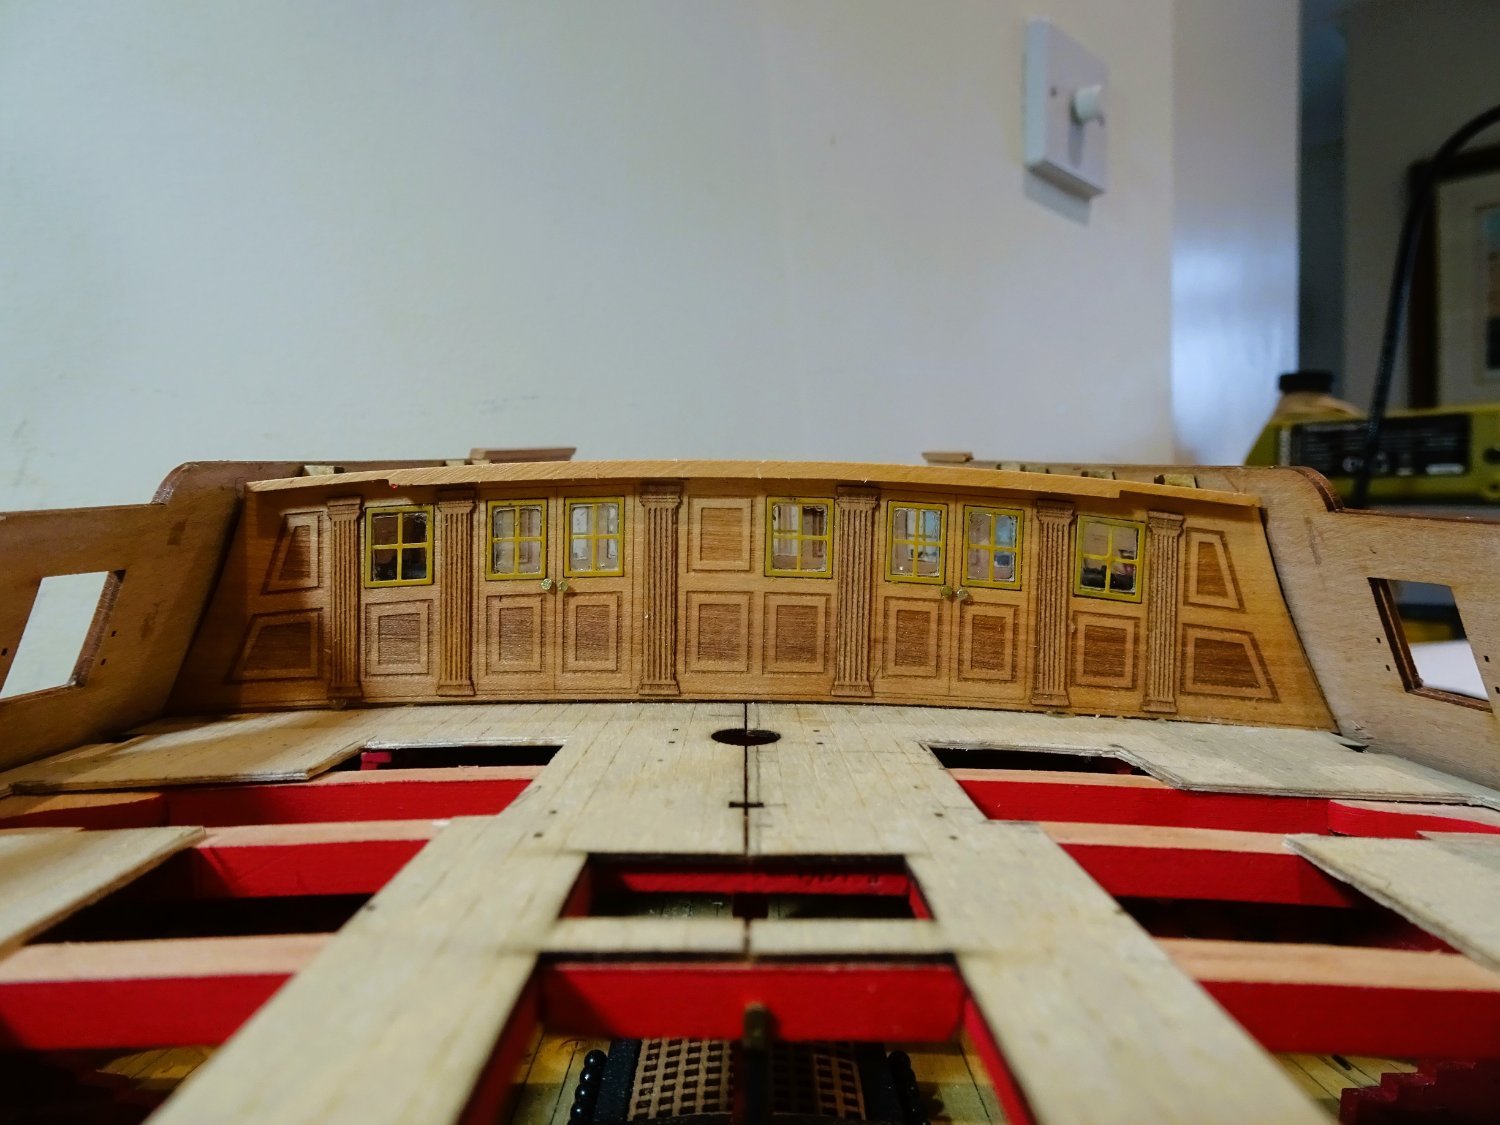
I reversed the QG doors to an open position, the light passing thro’ gives more depth to the QG lights.

2300
2301
Looking forward to furnishing the cabins.🙂
B.E.
11/10/2023
-
Good looking mouses 👍
B.E.
- dunnock, Thukydides and Glen McGuire
-
 2
2
-
 1
1
-
Thank you Nipper, we can live in hope.🤞
Post Eighty-eight
Fitting out (Part 2)
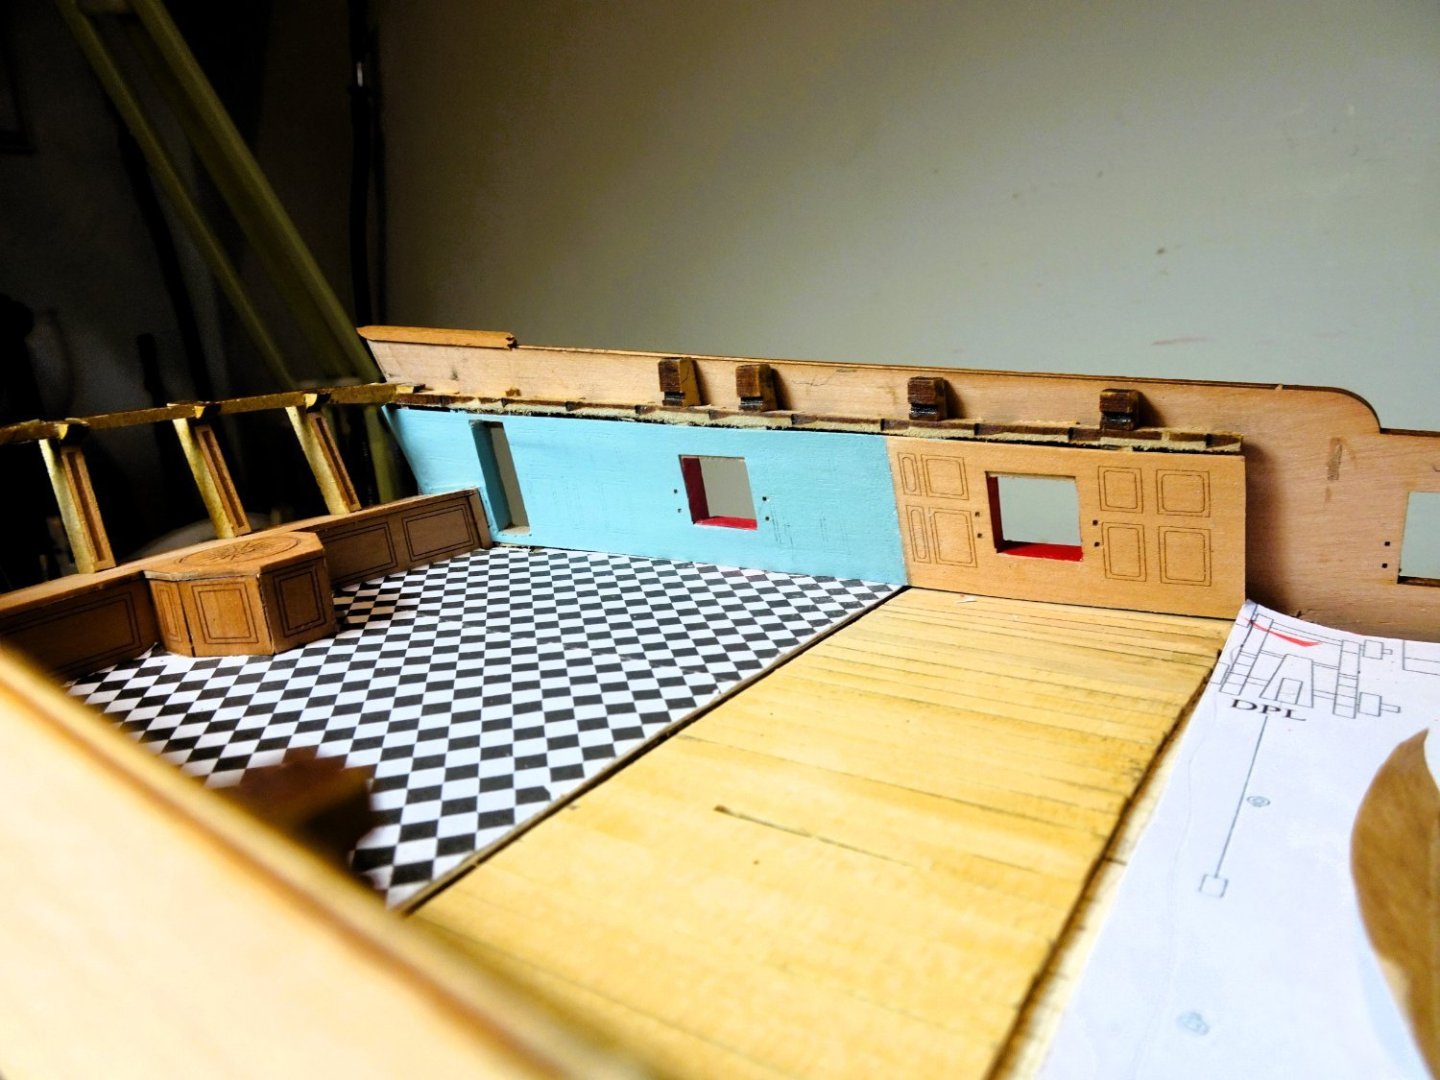
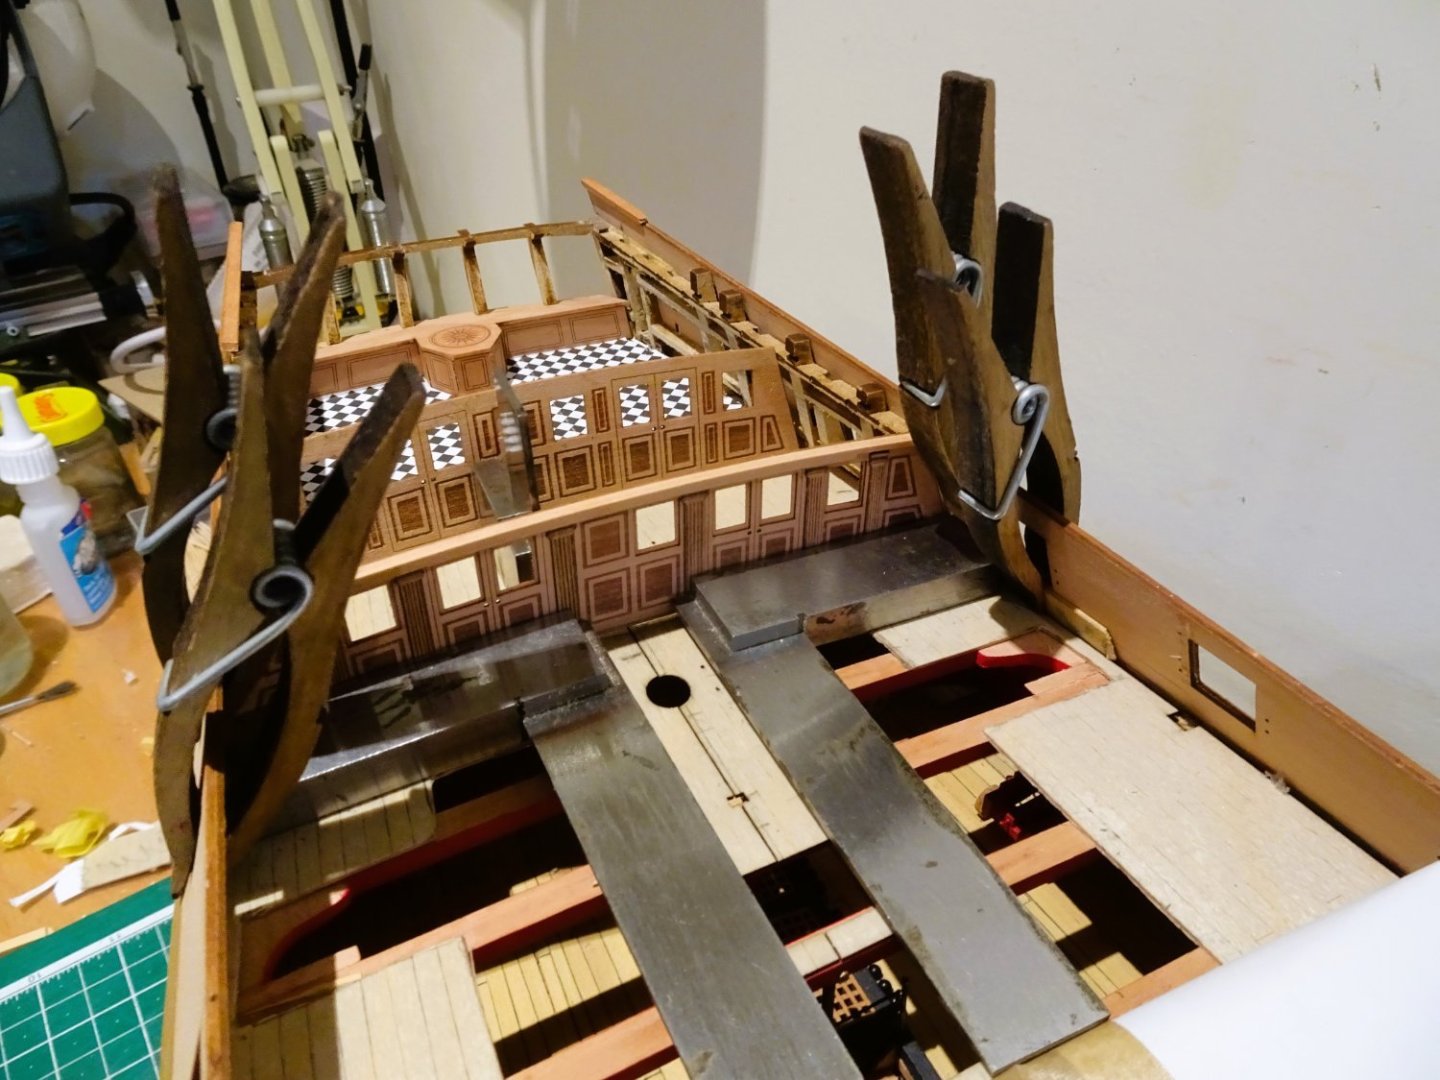
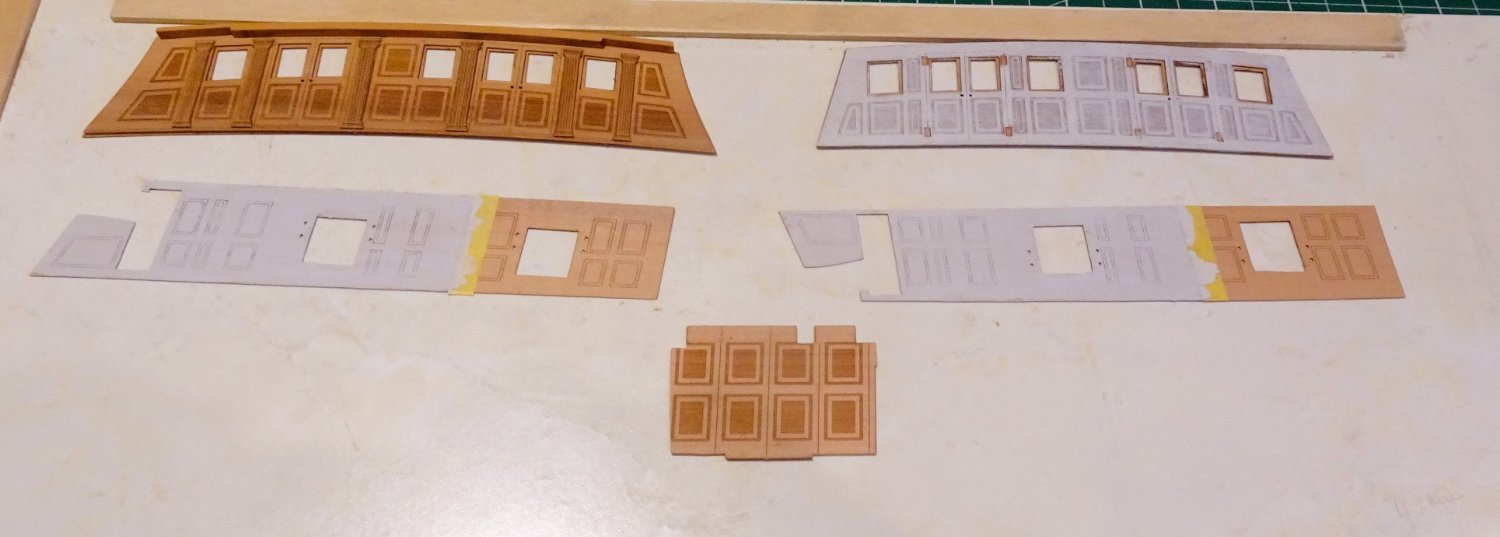
The internal panelling comprising delicate 0.6mm sheets proved tricky to fit; mine needed reducing in depth to fit beneath the deck clamps, and I suffered some breakage around the door area.
The alignment with the gunports is critical and I spent the best part of a day tidying up the gunports of the cabin area in conjunction with test fitting the internal panelling.
Once content with the fit and with the aft screen, they could be prepped for painting.

2247
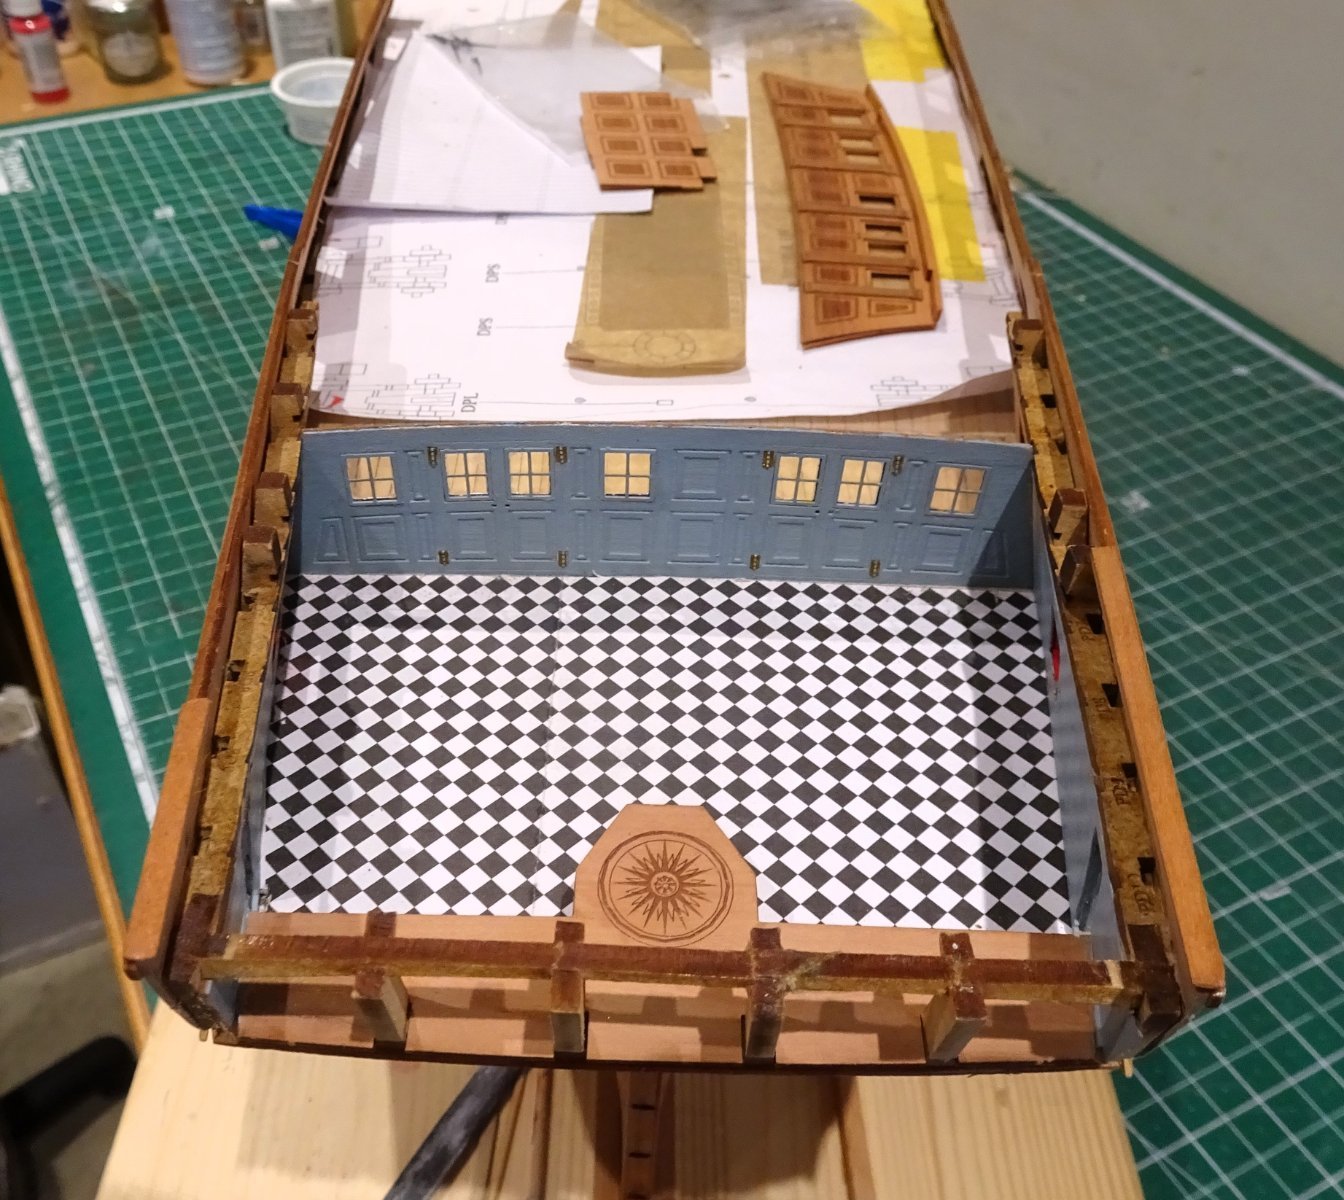
I primed the aft screen using Vallejo white/grey.
I made a colour palette up of my pastel/ blue grey range of paints for the internal decoration of the Great cabin.

2246
Humbrol (87) Steel Grey, and the kit recommended paint AK11817 are very similar, the Humbrol just a tad darker in tone, I would be happy with either.
Mrs W had the casting vote, and AK it was.
It is a good representation of a pastel shade so beloved of the Georgian age.
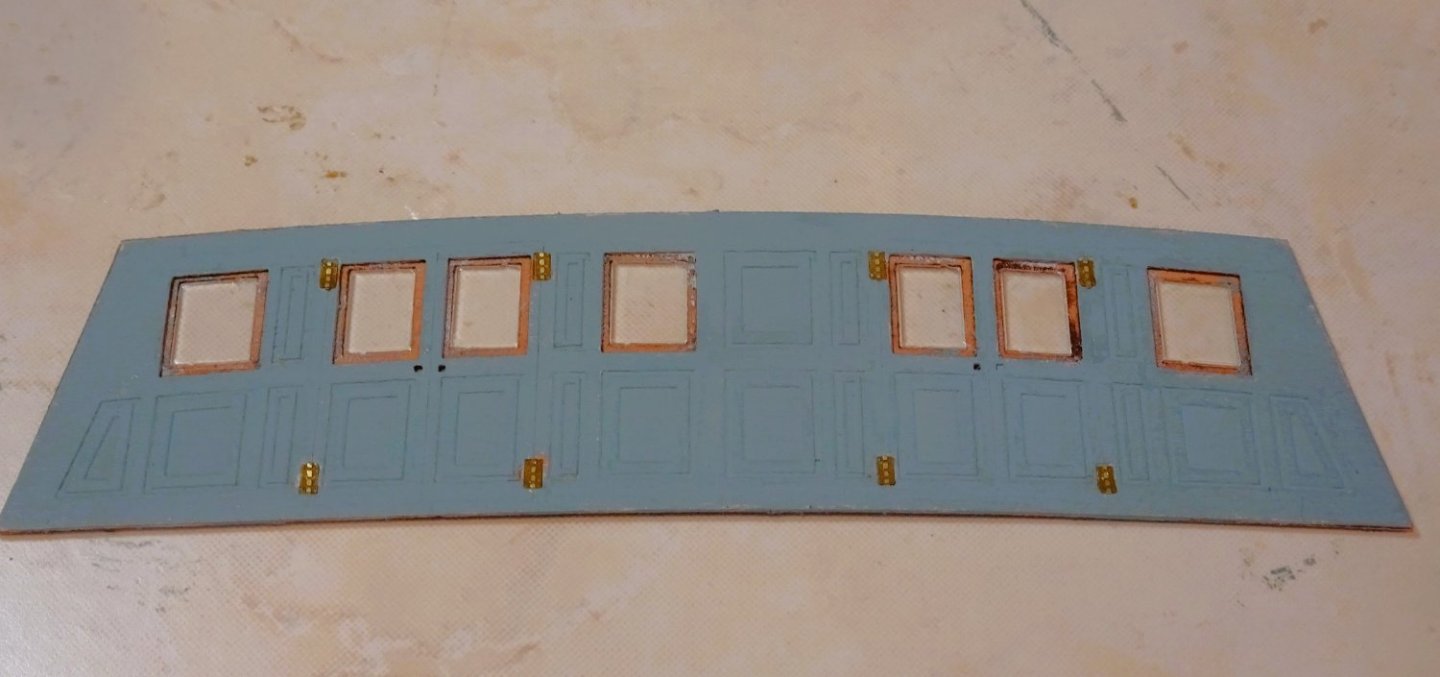
2250
The bulkhead panels were given a very light sanding with P1000 paper after painting.
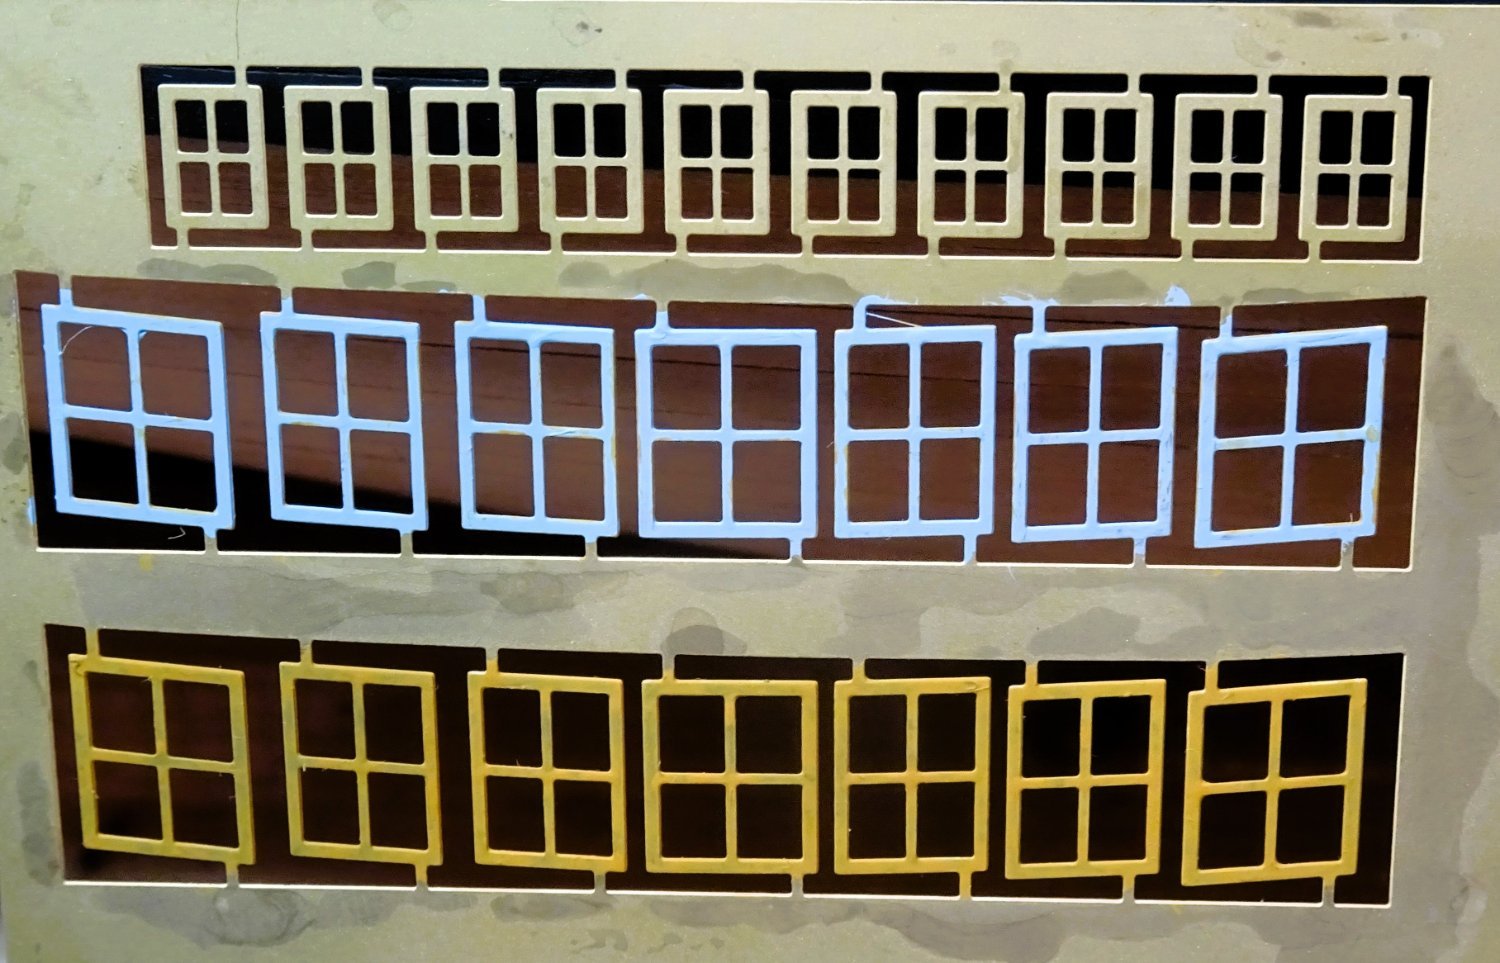
Windows
The clear windows are fiddly little beggars to fit without smearing. I used stuff called Glu’n’Glaze to run around the hairline gap between glaze and opening.
Frames
I leave these brass etched items on the fret for prepping. They are position specific.
Acid is used to clean the frames before priming with VMS Metal prep 4K.
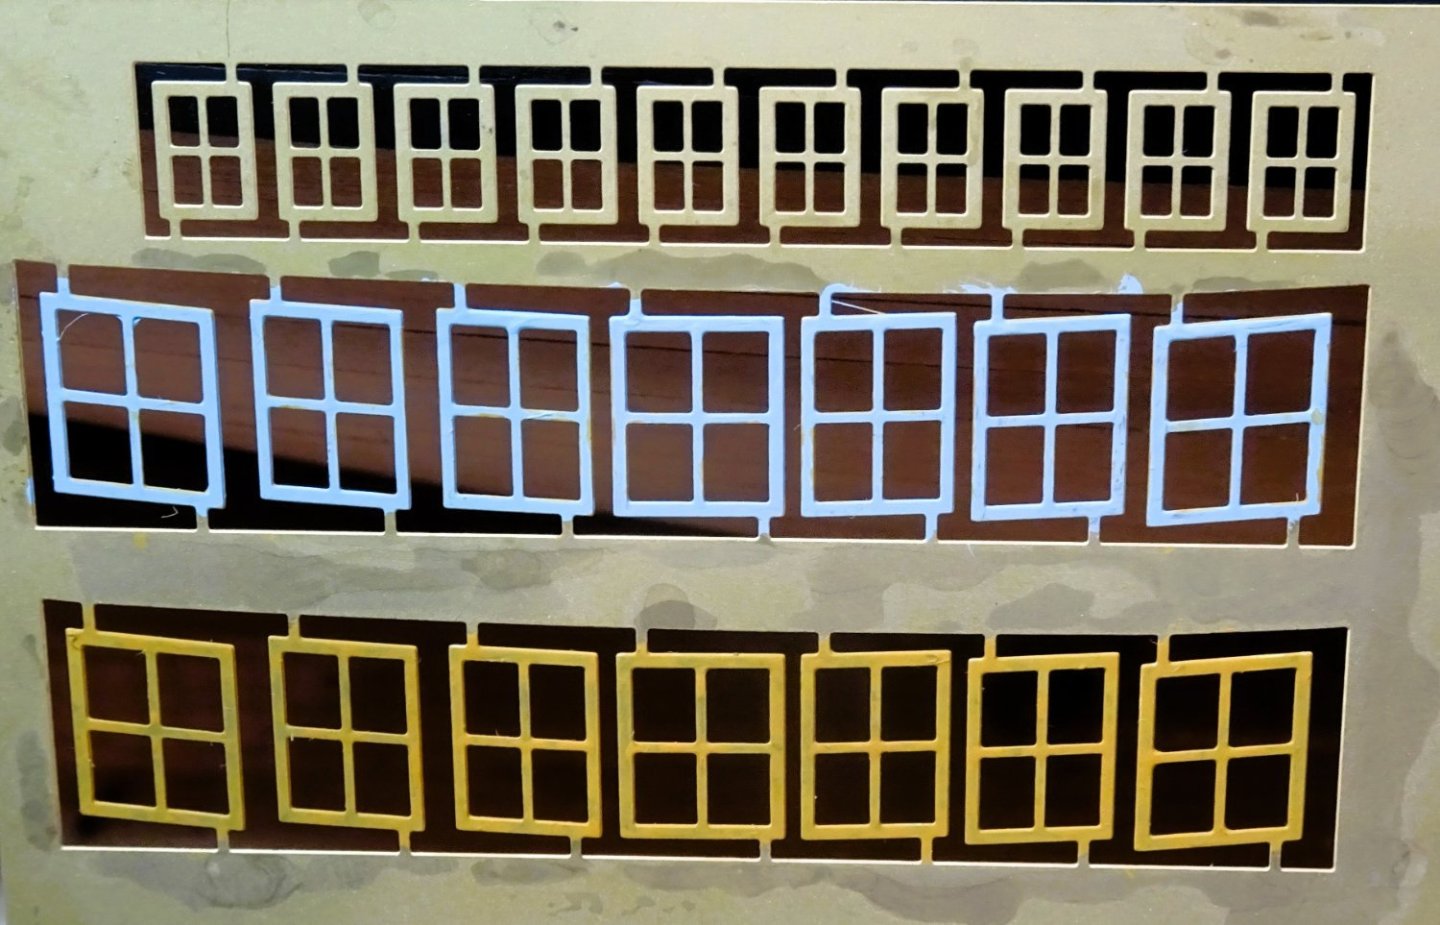
2252
For colour I’m using Vallejo Ochre brown for the varnished screens, and matching colour for the painted Great cabin screen.
2254

2256

2259
A final dry fit before gluing into place.
2255
2271
I had a fair bit of cleaning up around the area of the doors thro’ to the Quarter galleries. I will probably switch the doors around and position them open.
This part of a build I particularly enjoy, but it surely is time consuming, three days’ work on this area.
B.E.
08/10/2023
-
Thank you Nipper for your kind words, I sympathise with the confusions, I spent a lot time and head scratching to reach my conclusions on cutter rigging, there are a lot of inconsistencies in the Alert Book, and I certainly don’t put forward my efforts as the definitive arrangement.
For what it’s worth I detailed my approach to each aspect of the rigging in my log, and I don’t think I can add to that.
Whatever you decide Thuky, I doubt anyone will gainsay you, there was a lot of variation in cutter rigging.
B.E.
- jpalmer1970, Thukydides and mtbediz
-
3
-
-
Post Eighty-seven
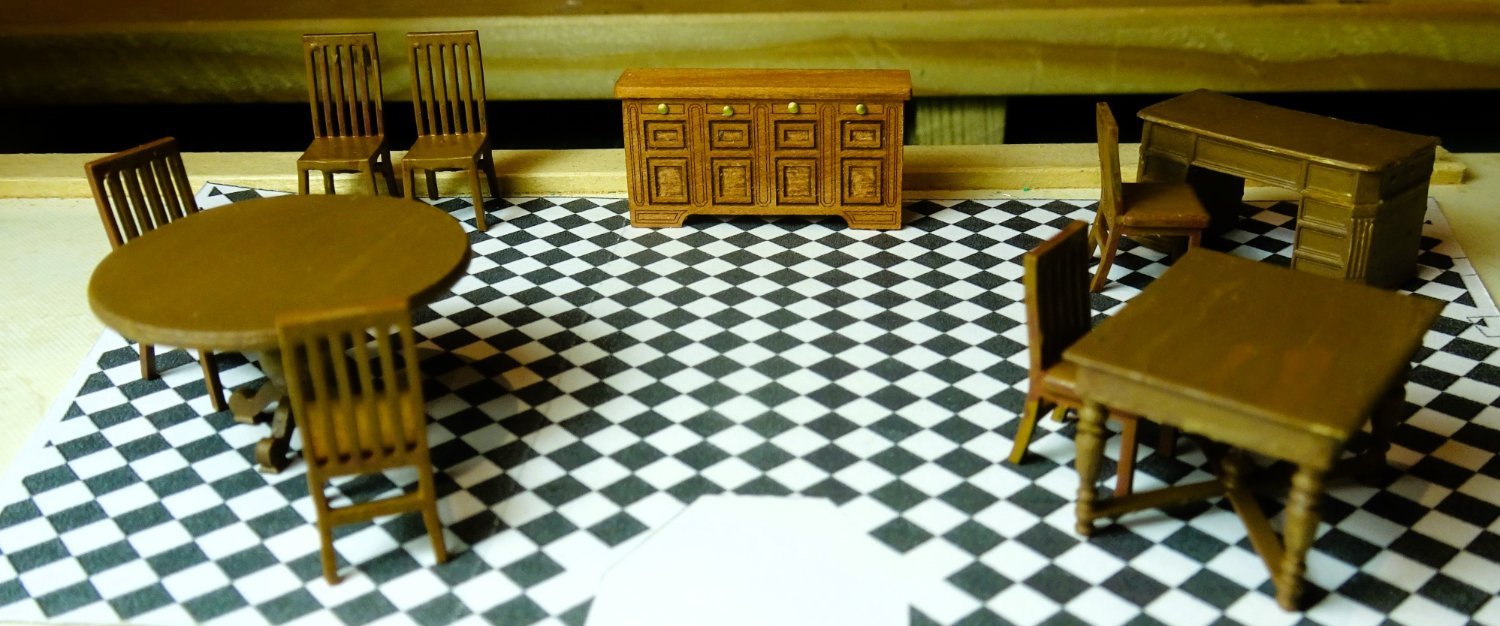
Cabin furniture
It was the prospect of having nicely made scale furniture to fit out the cabin that released my inner dolls house maker, and partly persuaded me to invest in ‘Indy’.
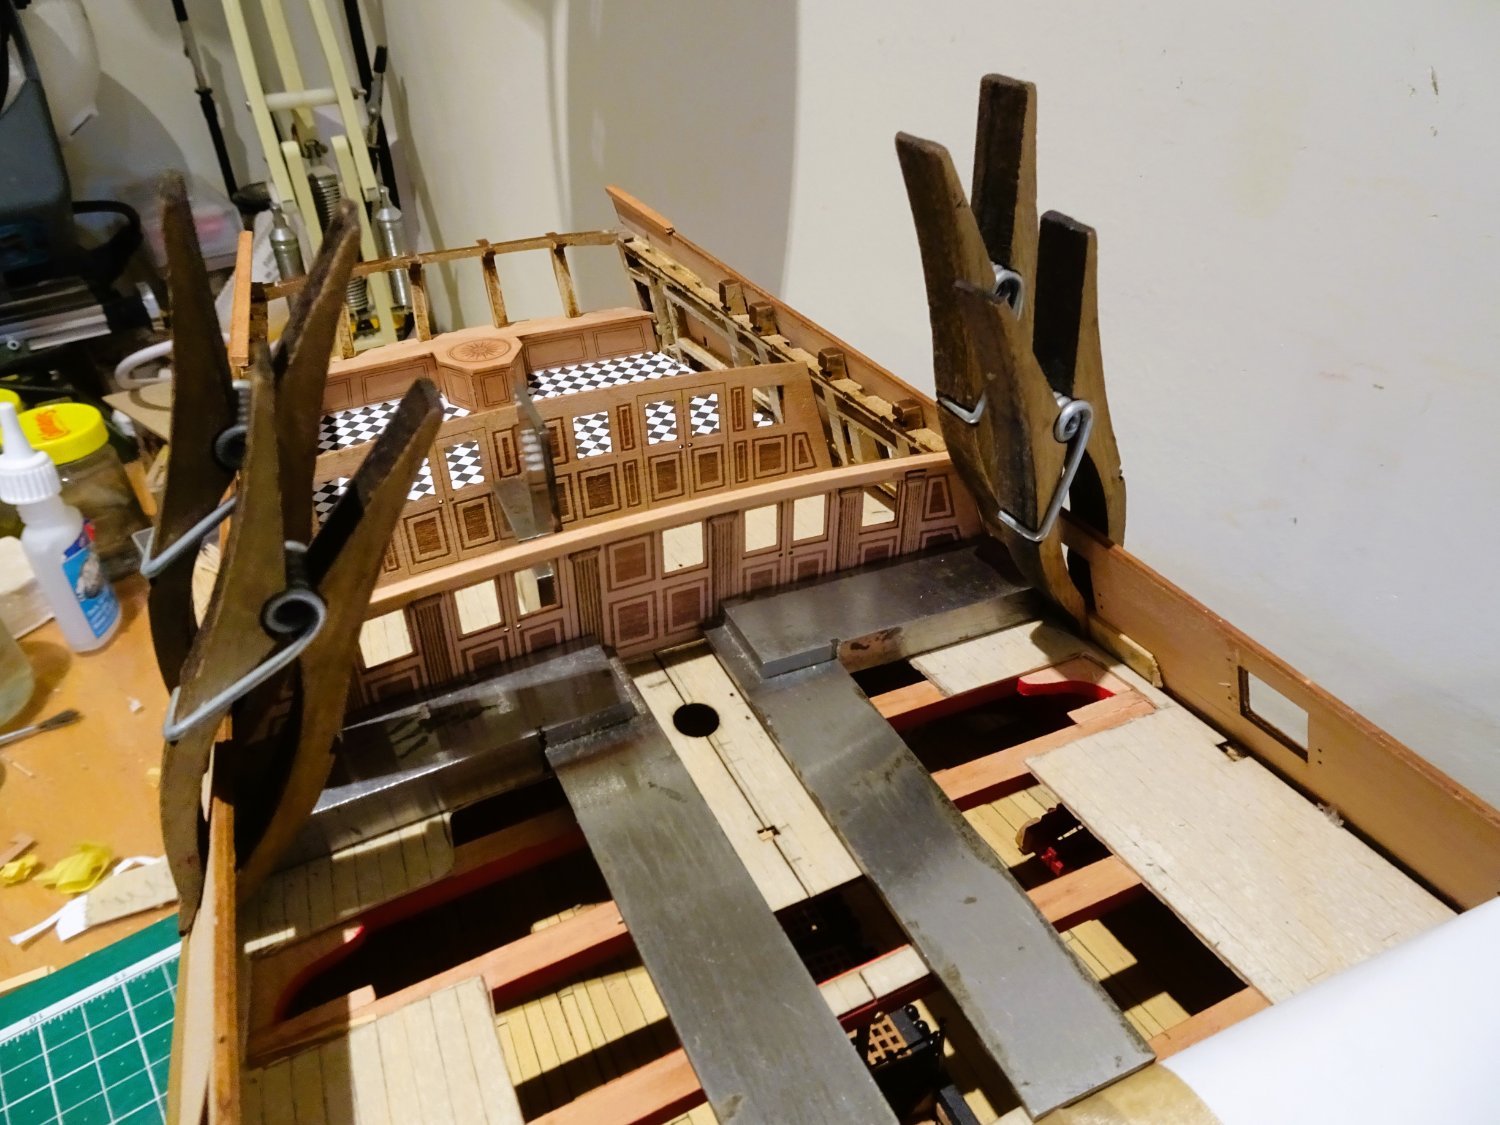
I liked the idea of having this stuff insitu, clearly visible thro’ the mostly unplanked Poop deck.
The trick is to make it look good as achieved by the painter of the prototype build, detailed in the manual, and Jim’s build.
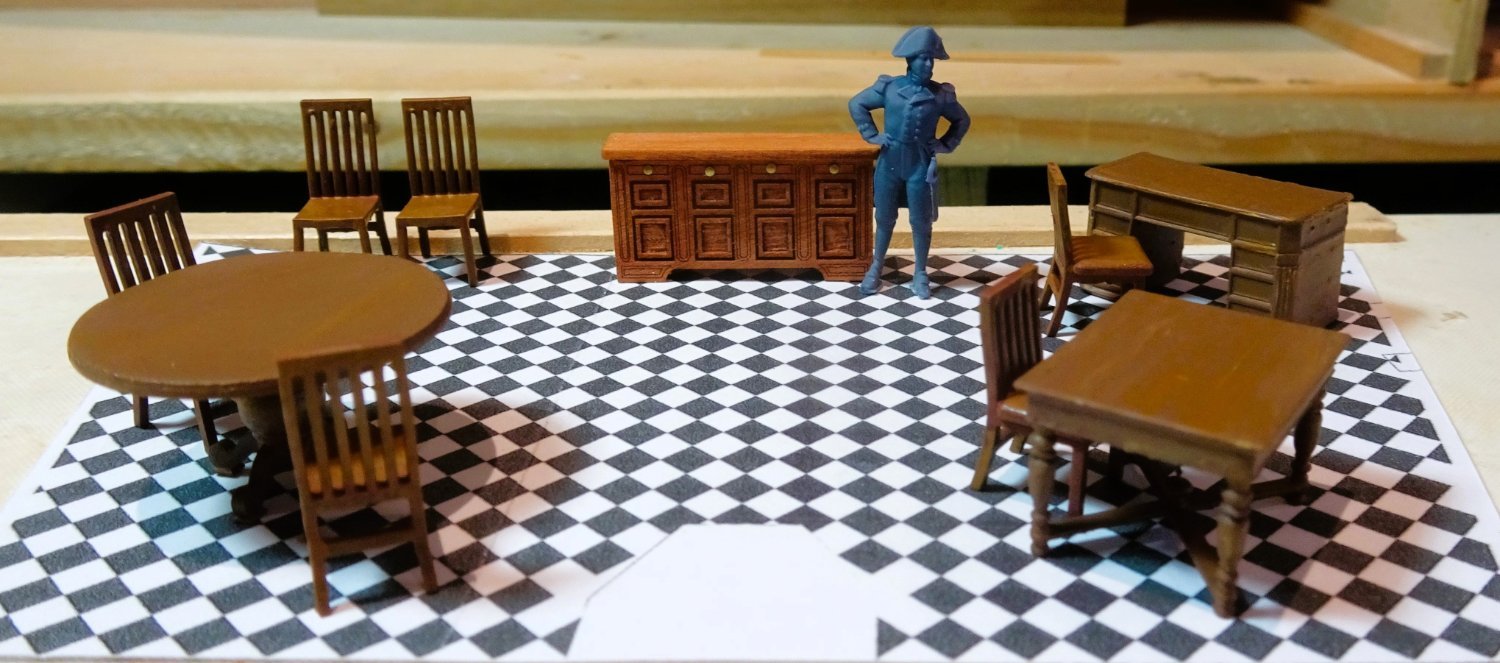
I would have dearly loved a sitting version of Pellew, at his desk or table, maps sprawled out before him, deep in thought.
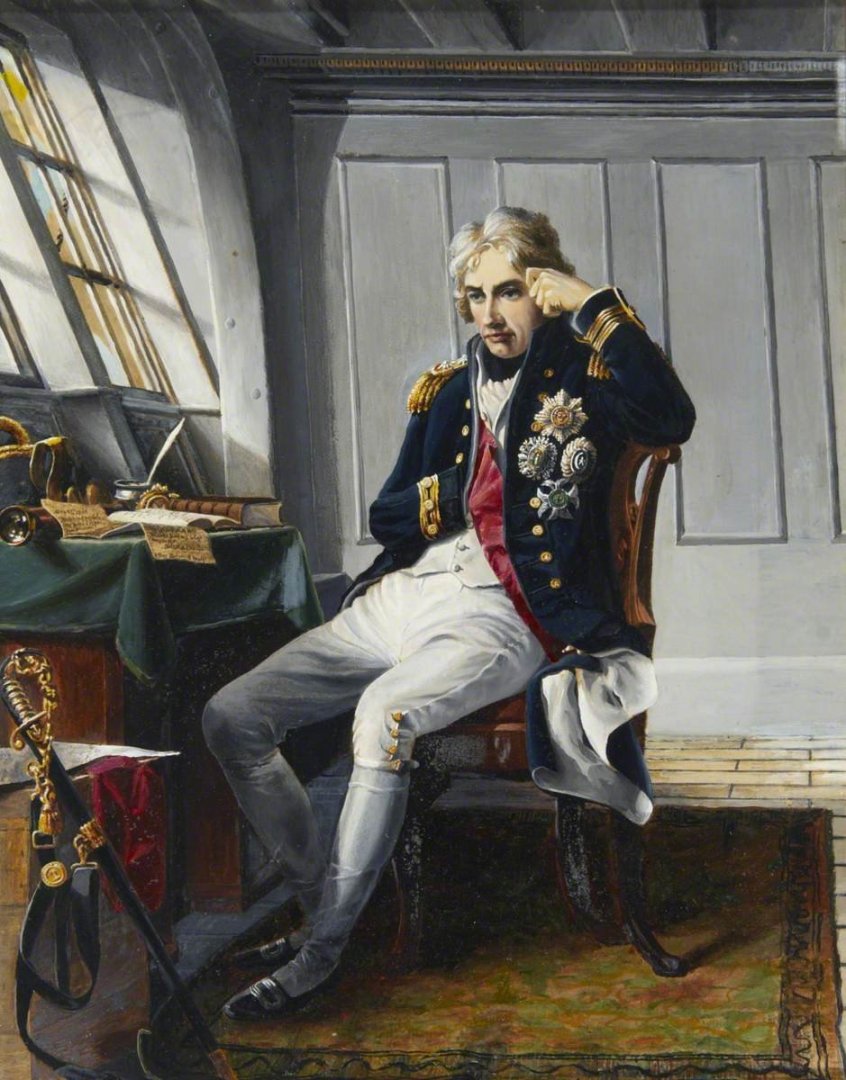
This famous painting of Nelson on the eve of Trafalgar, gives the sort of idea.
Come on Chris, how about it?
Awaiting receipt of some paint for the Great Cabin, I have spent a couple of days playing around with the furniture.
It is painted with Vallejo acrylics.

2241
This is the combination of colours I used.

2213
The items were washed is soapy water, and then primed. I use Vallejo Surface Primer (Black)
The base coat was made up using Burnt Umber lightened with Grey white and Sand Yellow, with added Hull Red and Dark vermillion.
Flat earth, Sand yellow and white grey were also used for dry brushing to highlight areas.
This is not formulaic; I just tweak the mix until it suits my eye.

2228
I did have some concerns about the obvious difference to the laser cut pearwood sideboard and thought about painting it to match, but the jury is still out on that.

2234
Not all this furniture will in the Great cabin.

2236
The wood tone changes depending on the lighting.
I probably won’t be able to resist fiddling with it further, perhaps some sheen to the tabletops.
Time to get back to the main event – I can see the Postie coming up the road.🤞
B.E.
05/10/2023
- Glenn-UK, Knocklouder, Ronald-V and 18 others
-
21
-
-
Thanks Theo and Ron,
Contemporary models of this era show a round-up to the head ledges, but difficult for kit manufacturers to do unless the coamings are made up separately. The laser cut approach taken by Vanguard provides a neat solution to these combined runs of hatchways and ladderways, but aesthetically I prefer the cambered style, and I think it helps reduce the 'kit' look, along with clearing all the laser burn.
Thanks Ron, I'll give it a go.👍
B.E.
- hollowneck, mtaylor, bruce d and 2 others
-
5
-
That looks good, but don't underestimate how much room the set will require above the retaining ring. the kit indication is nowhere near enough.
B.E.
-
Post Eighty-six
Fitting out the Cabin area. (Part 1)
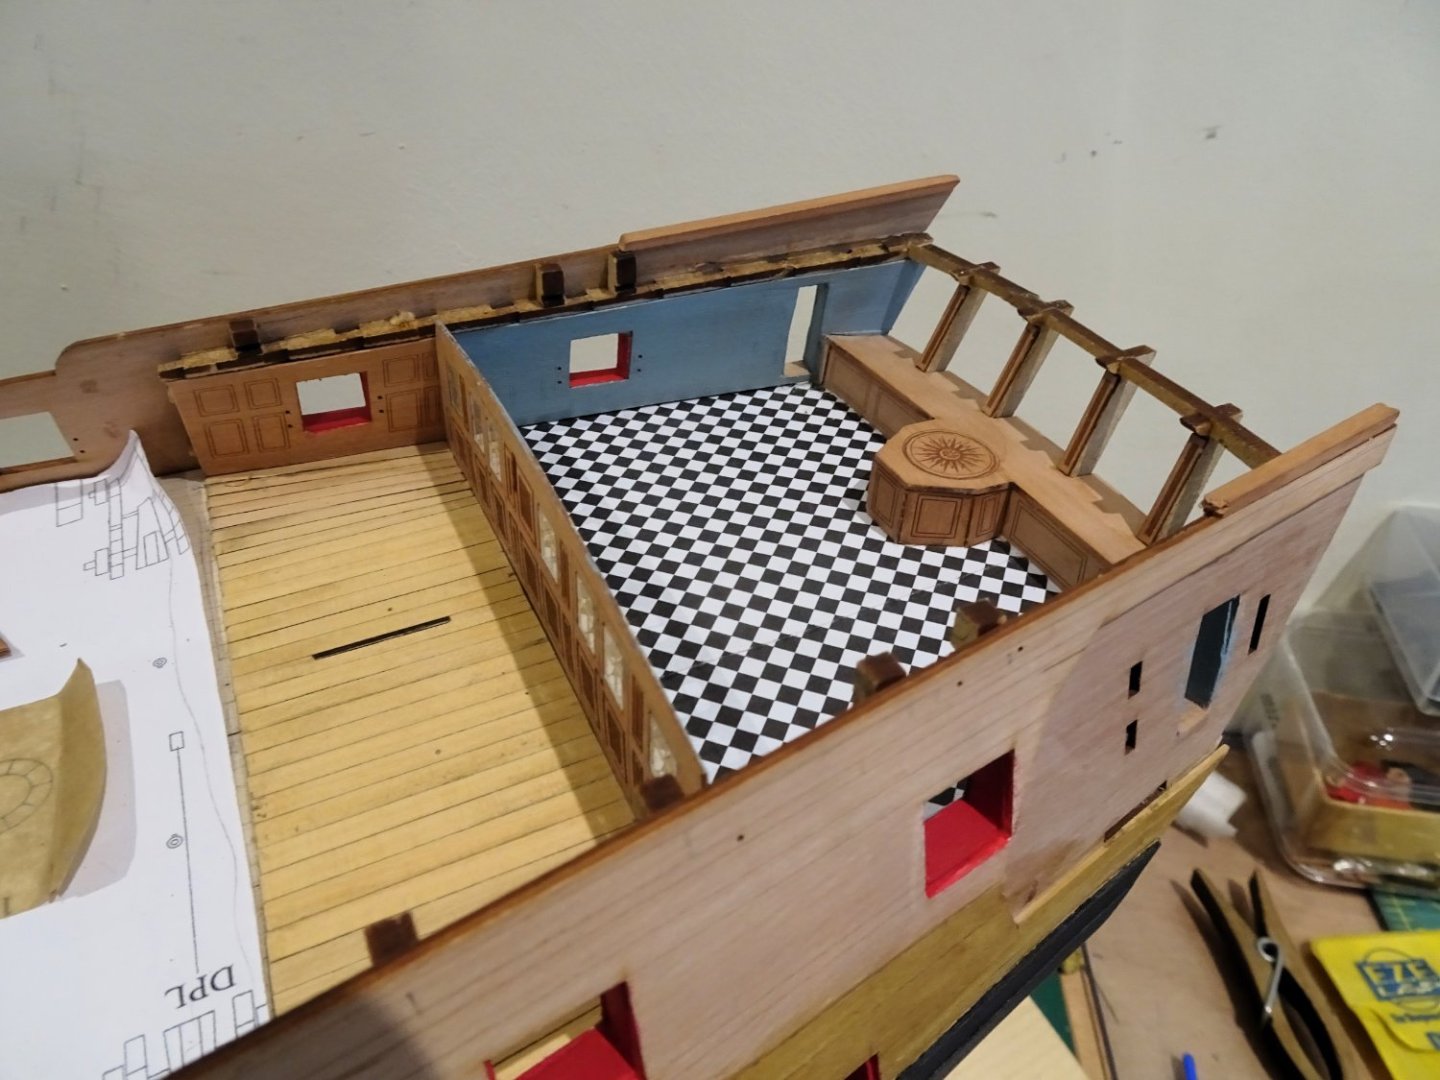
Firstly, the Rudder housing is glued into place.
I like this Rudder housing with its compass design, and its properly scaled bench, something I had to contrive for myself with Sphinx.

2194
I firstly fitted the two aft sections (233/234) which slot into the stern framework. These are given a slight bevel to meet the adjoining pieces (231/232). The central end panel (230) is then put into place.
At each stage the line-up with the top is checked.
2198
The top of the bench front, previously fitted, rises a little above the stern framework which gives the top a slight tilt aft to its fitting in the notched stern frames.
This seems to accord with the elevation drawing on plan 5.
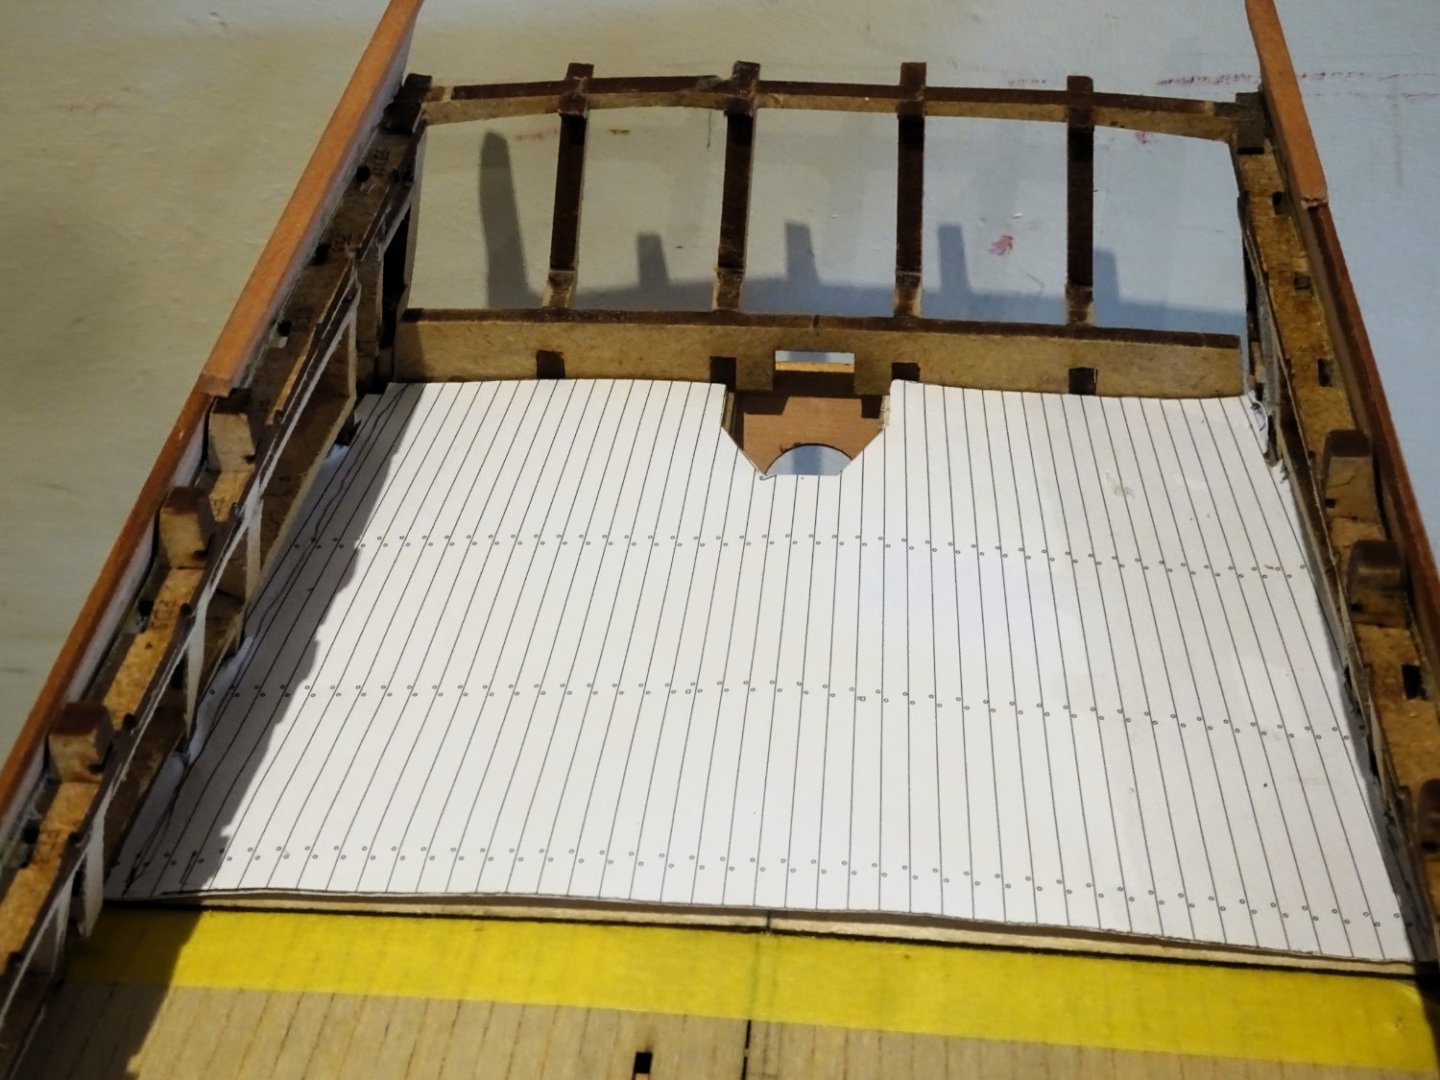
Cabin screens/partitions
These need to be assembled to use as a guide to mark the areas of the coach and bedspace for planking.
2195

2197
I used 4x1mm Box for planking which had to be placed to leave a 1mm spacing to allow the aft screen to sit down on the sub-deck. A 1mm strip was used for the purpose.
2201
Fitting the longitudinal screen between the bedspace and coach proved a little tricky. I found it necessary to trim the forward end to allow the front screen to fit and trim the bottom to allow the tab to sit lower in the deck screen slot.
I wonder if this is because the kit is designed for maple 0.8mm decking, and I’m using 1mm stuff.

2202
This is a critical area of the build and dry fitting and looking several steps ahead is essential in my opinion.
The parts can now be disassembled and made ready for painting and finishing.
B.E.
01/10/2023
-
-
Post Eighty-five
Looking at the Stern deck area.
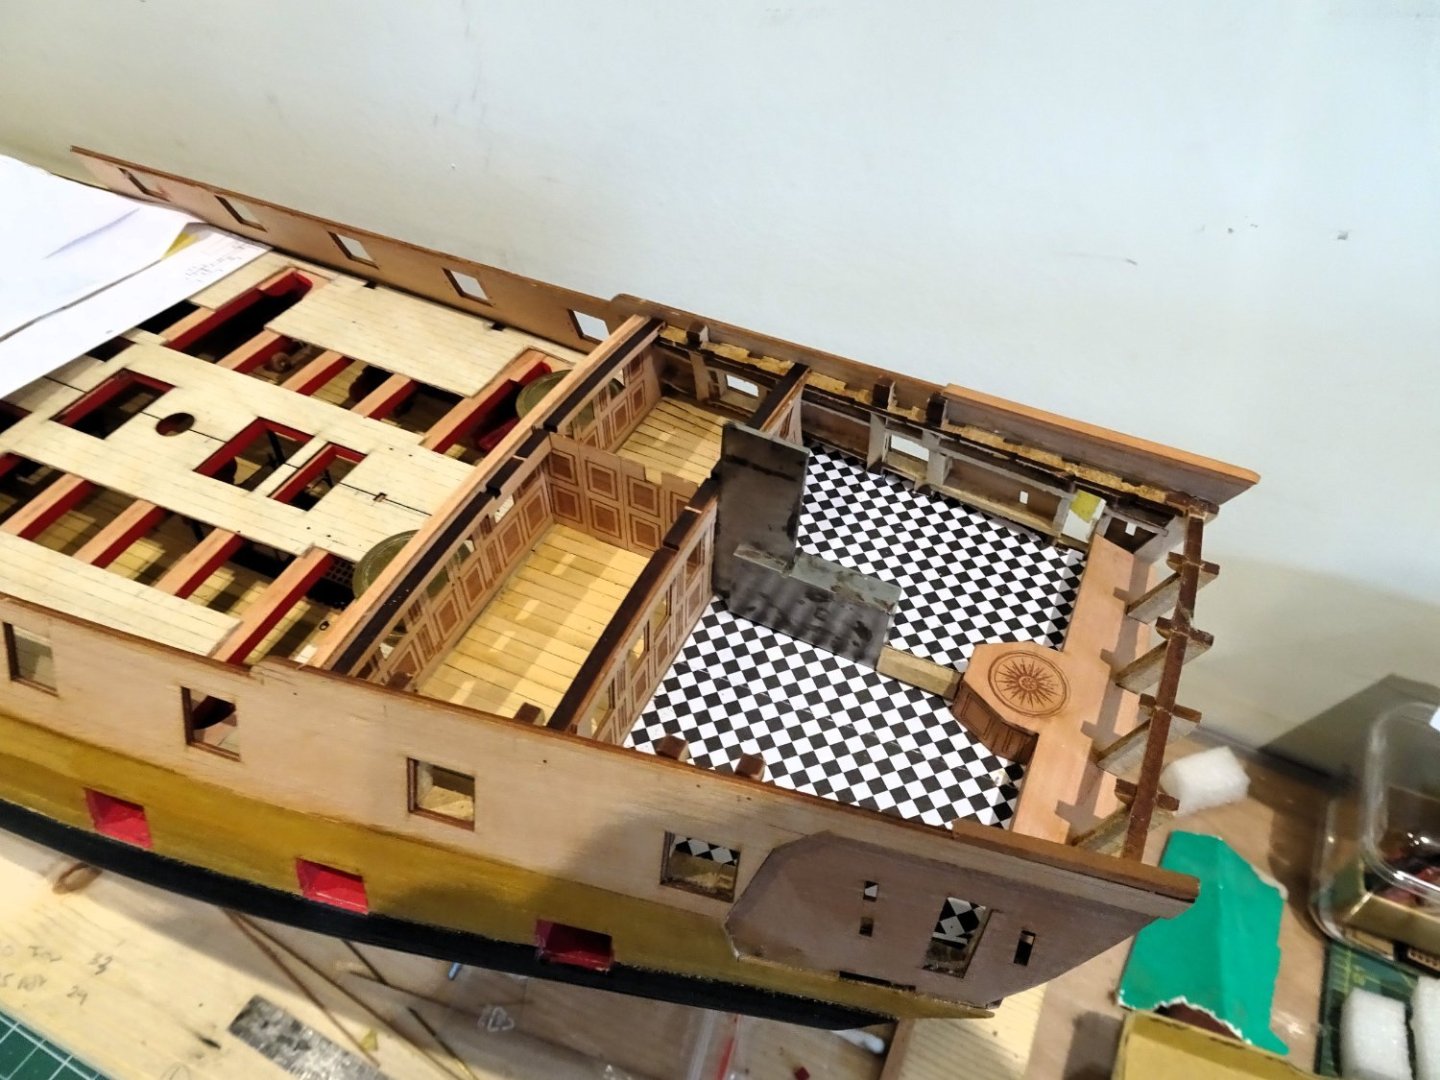
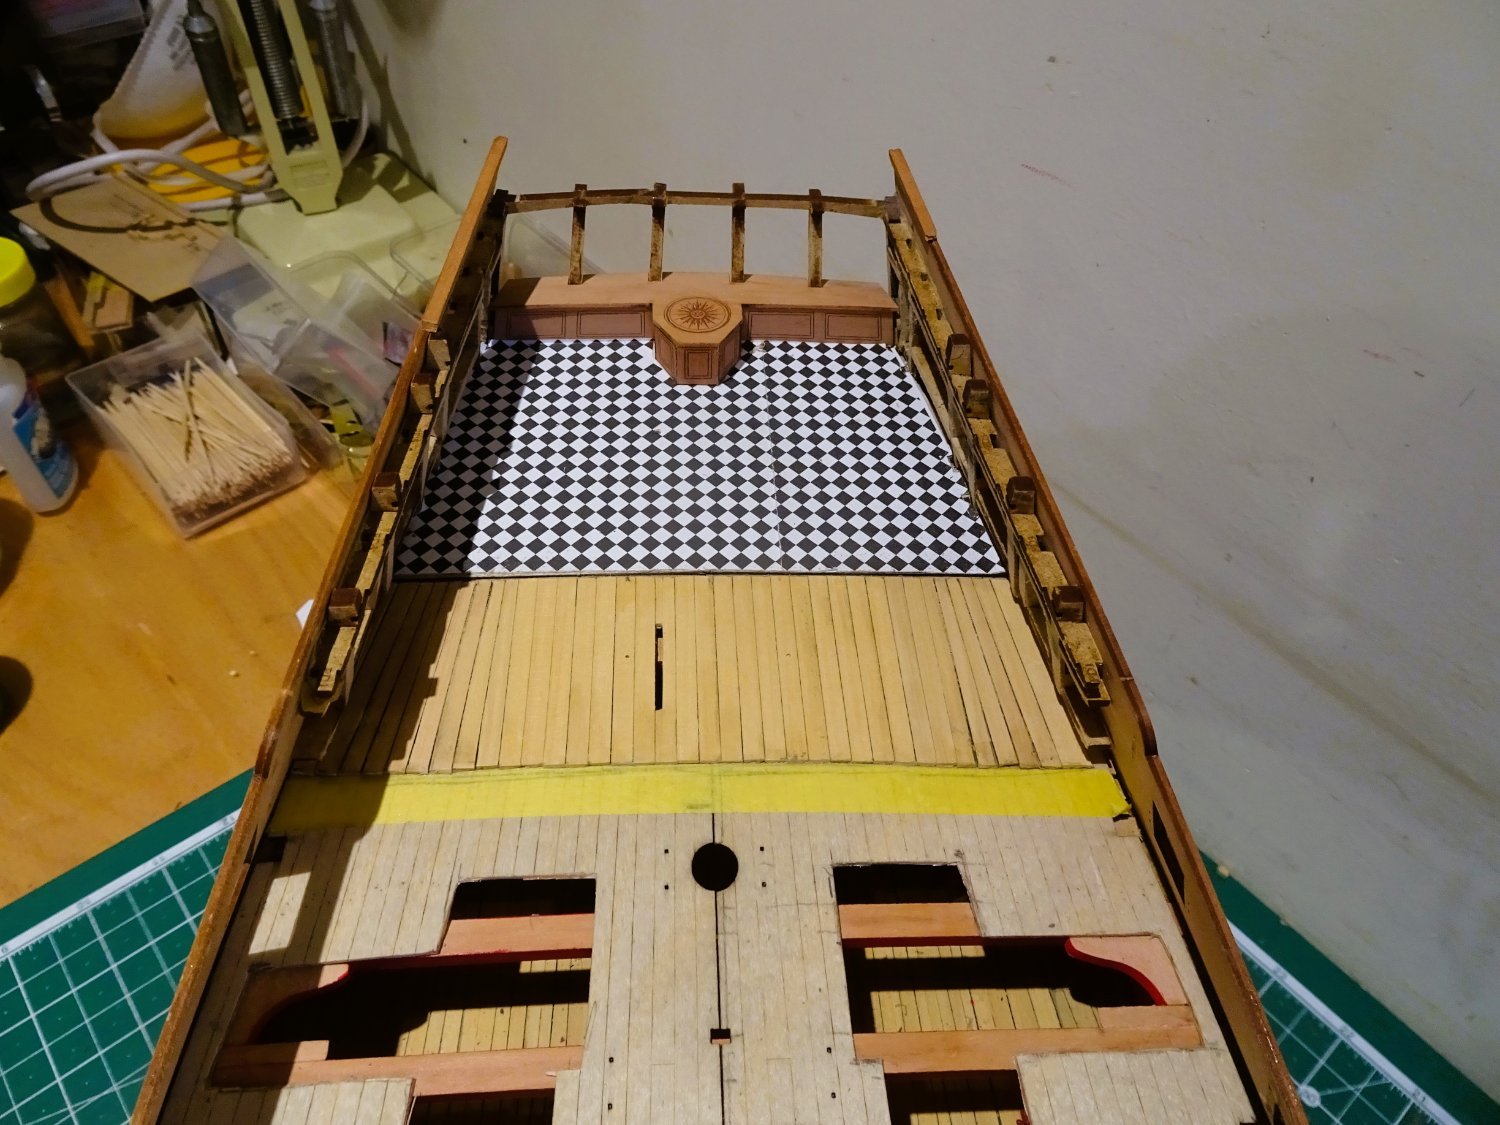
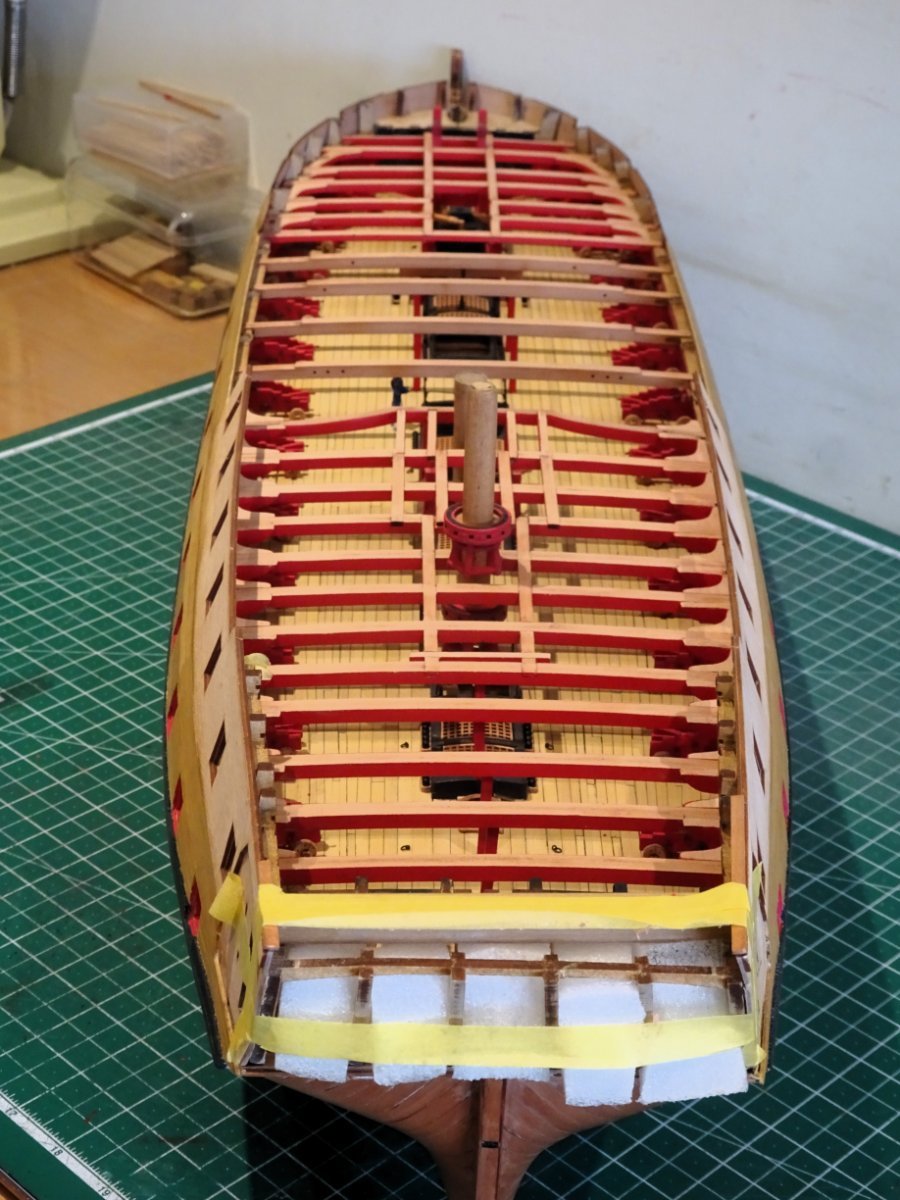
I deduce from the blurb that the sections of deck covering the stern cabin, coach, and bedspace are fitted separately as the partitions are designed to fit between them onto the sub-deck.
This means that the traditional method of planking the Qtr deck starting at the forward end cannot easily be applied in this instance without the need to cut narrow slots post planking.
In normal practice the planking of this area would be tapered as it runs towards the stern, and some 33 strips would be required to do the job.
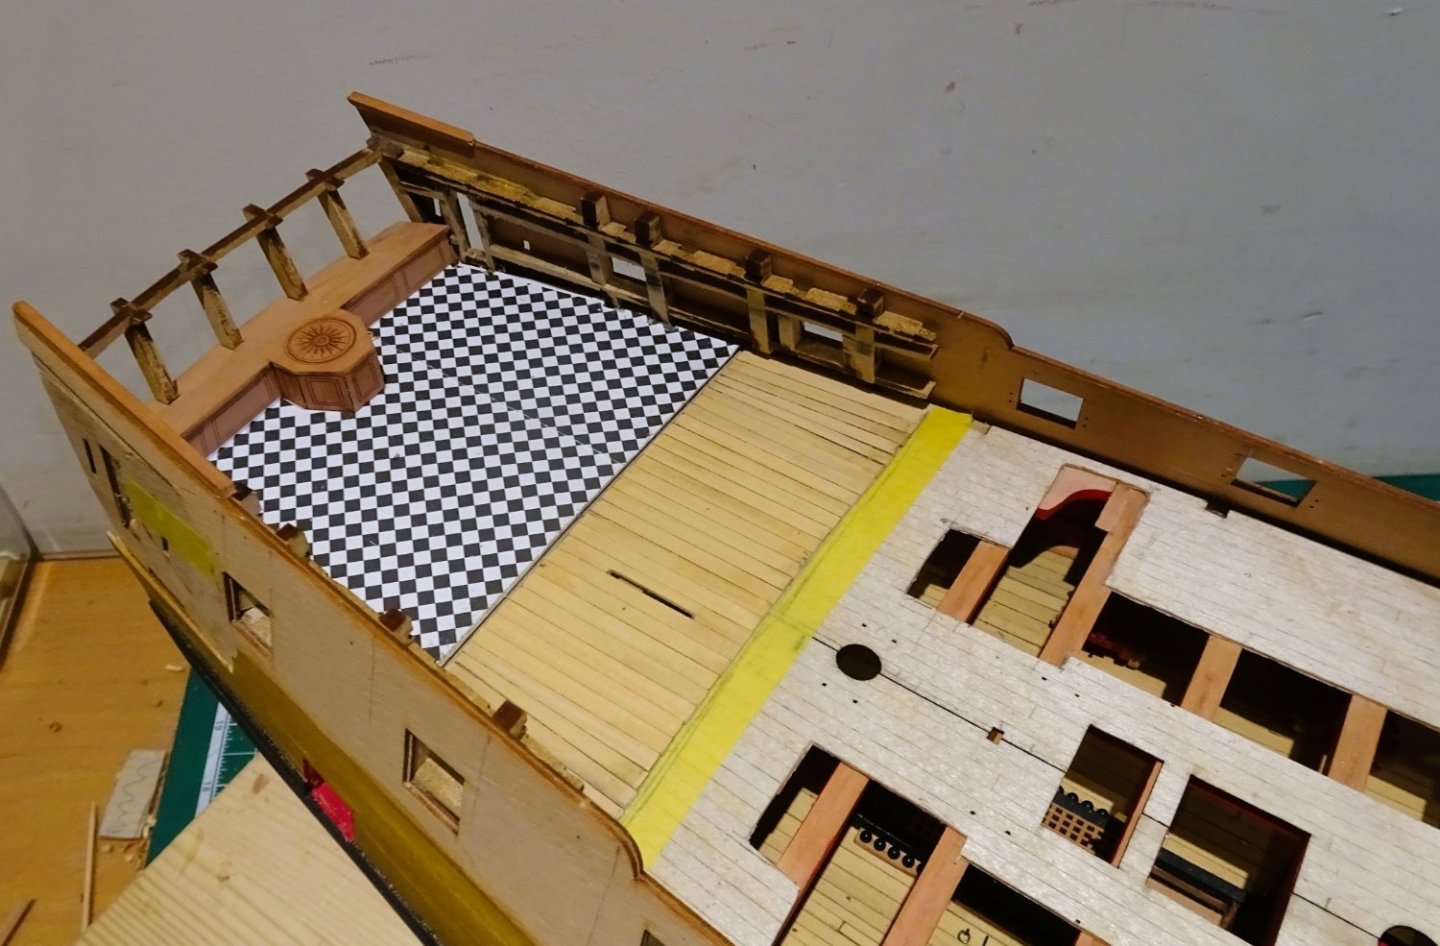
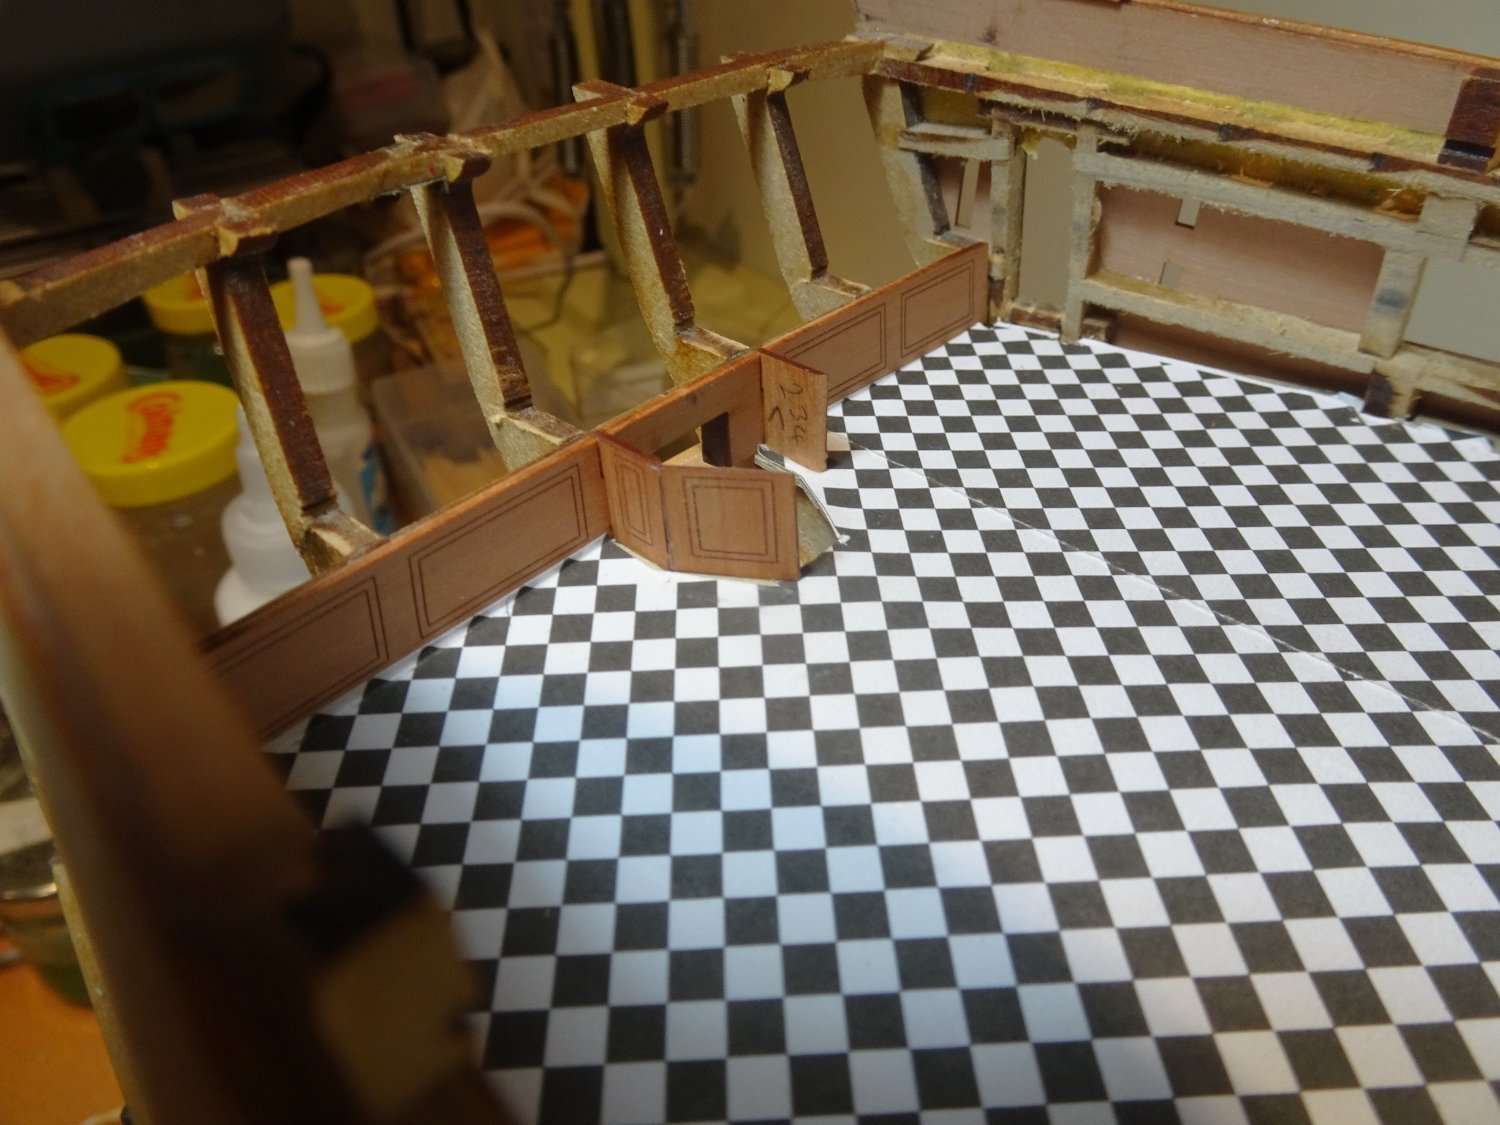
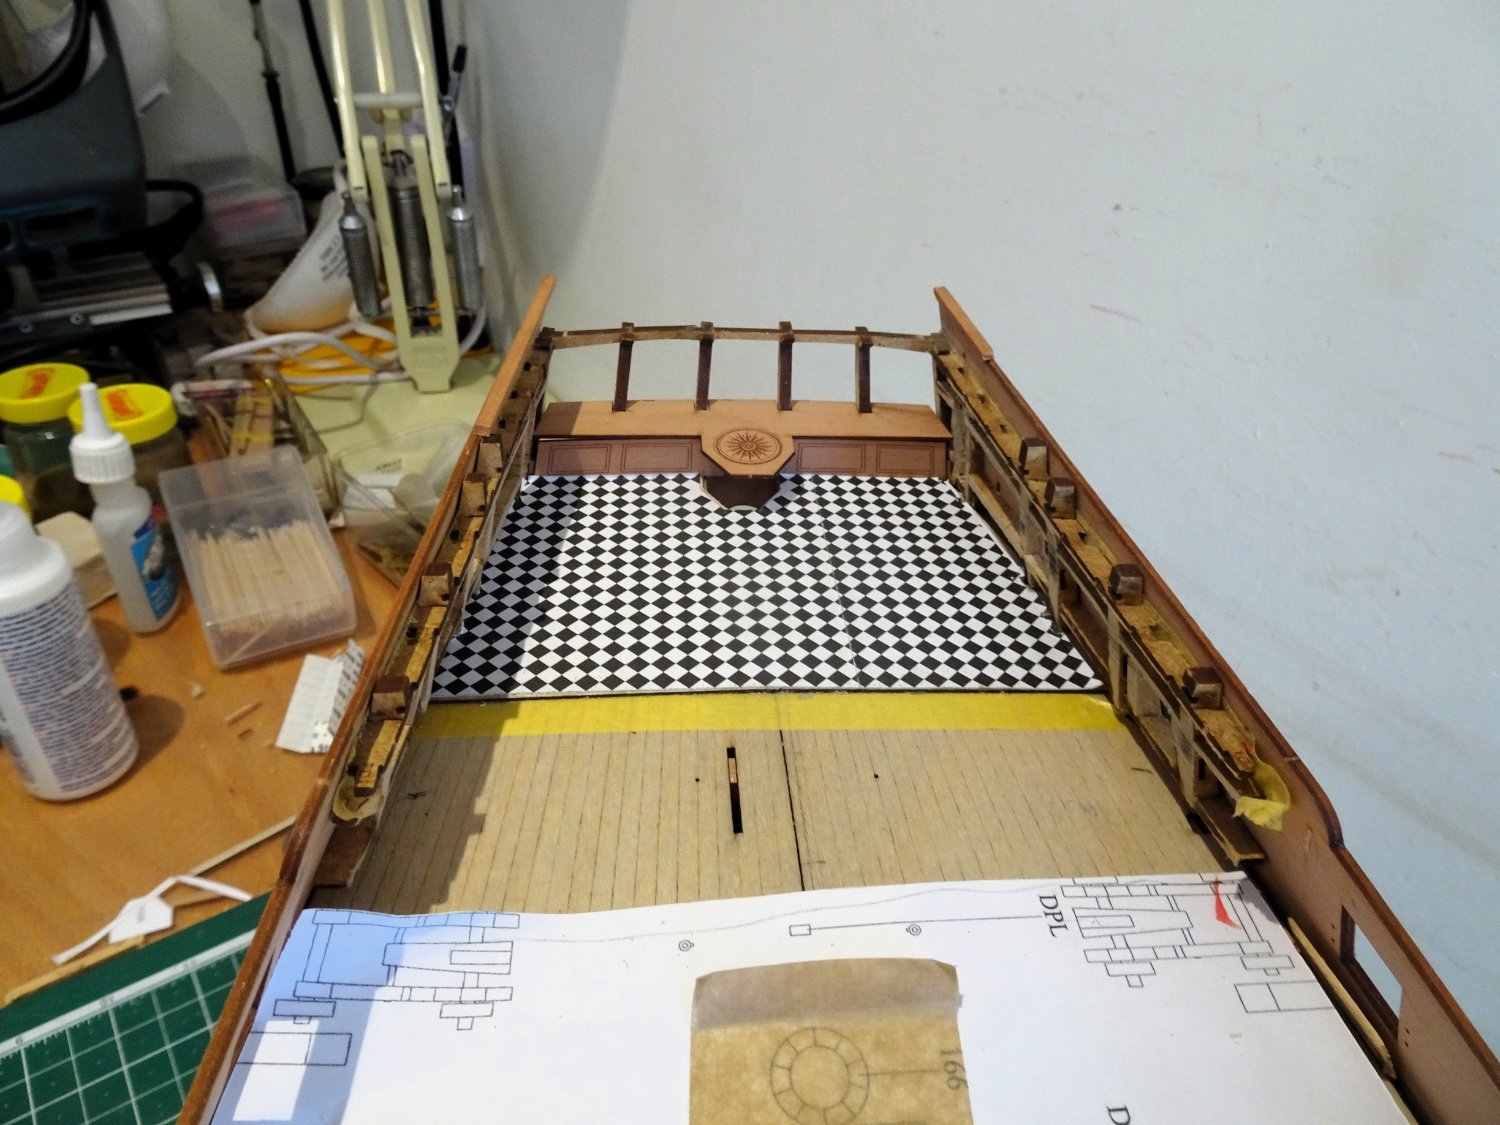
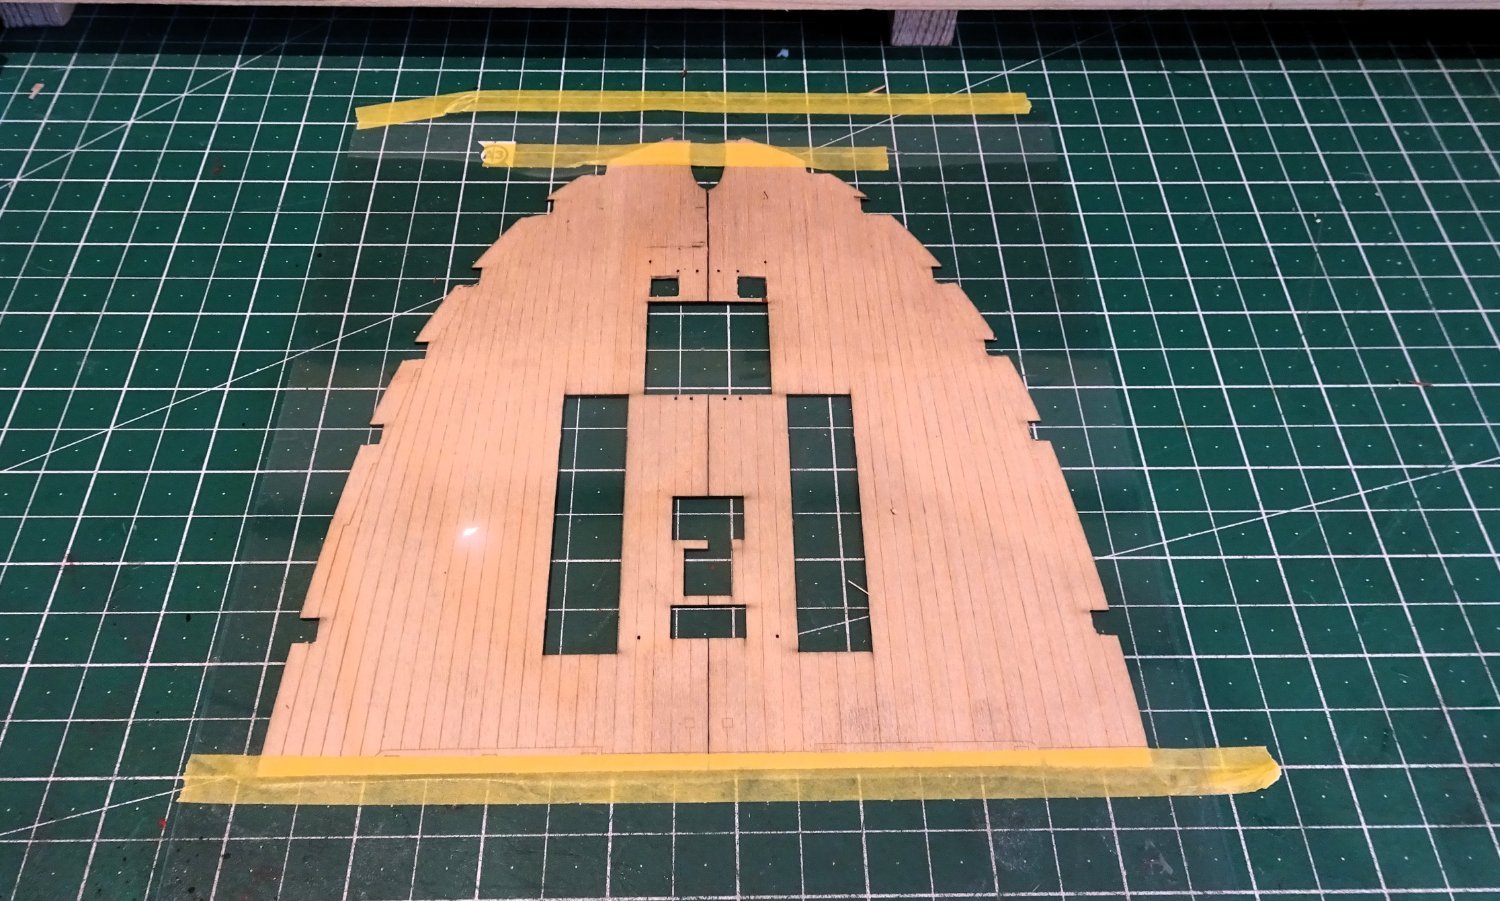
I concluded that there was little point in planking an area soon to be covered by the engraved faux wood block pattern, or for my preference the black and white sailcloth version.
2186
Starting aft I used the stern engraved maple pattern cut from the plans to give me the line of the aftermost partition which will mark the extent of the first planking.
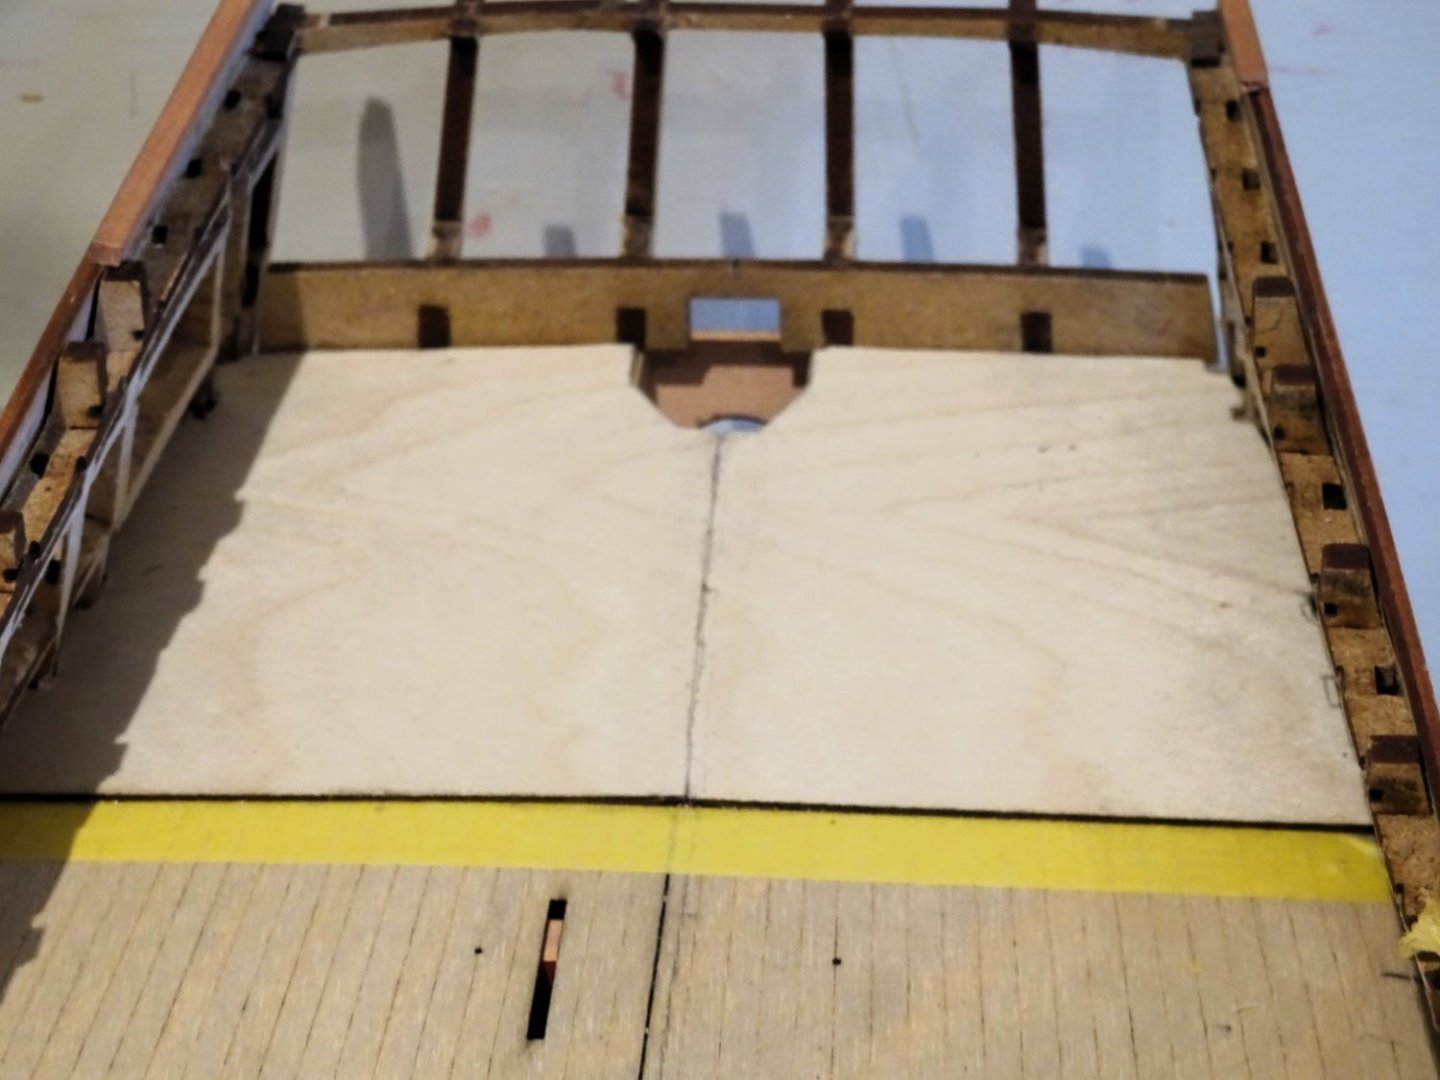
2187
I used some spare 1mm ply sheet to cover the area in lieu of planking.

2190
The b/w sailcloth pattern was applied using spray mount.
I did take the precaution of making copies of the pattern before use.
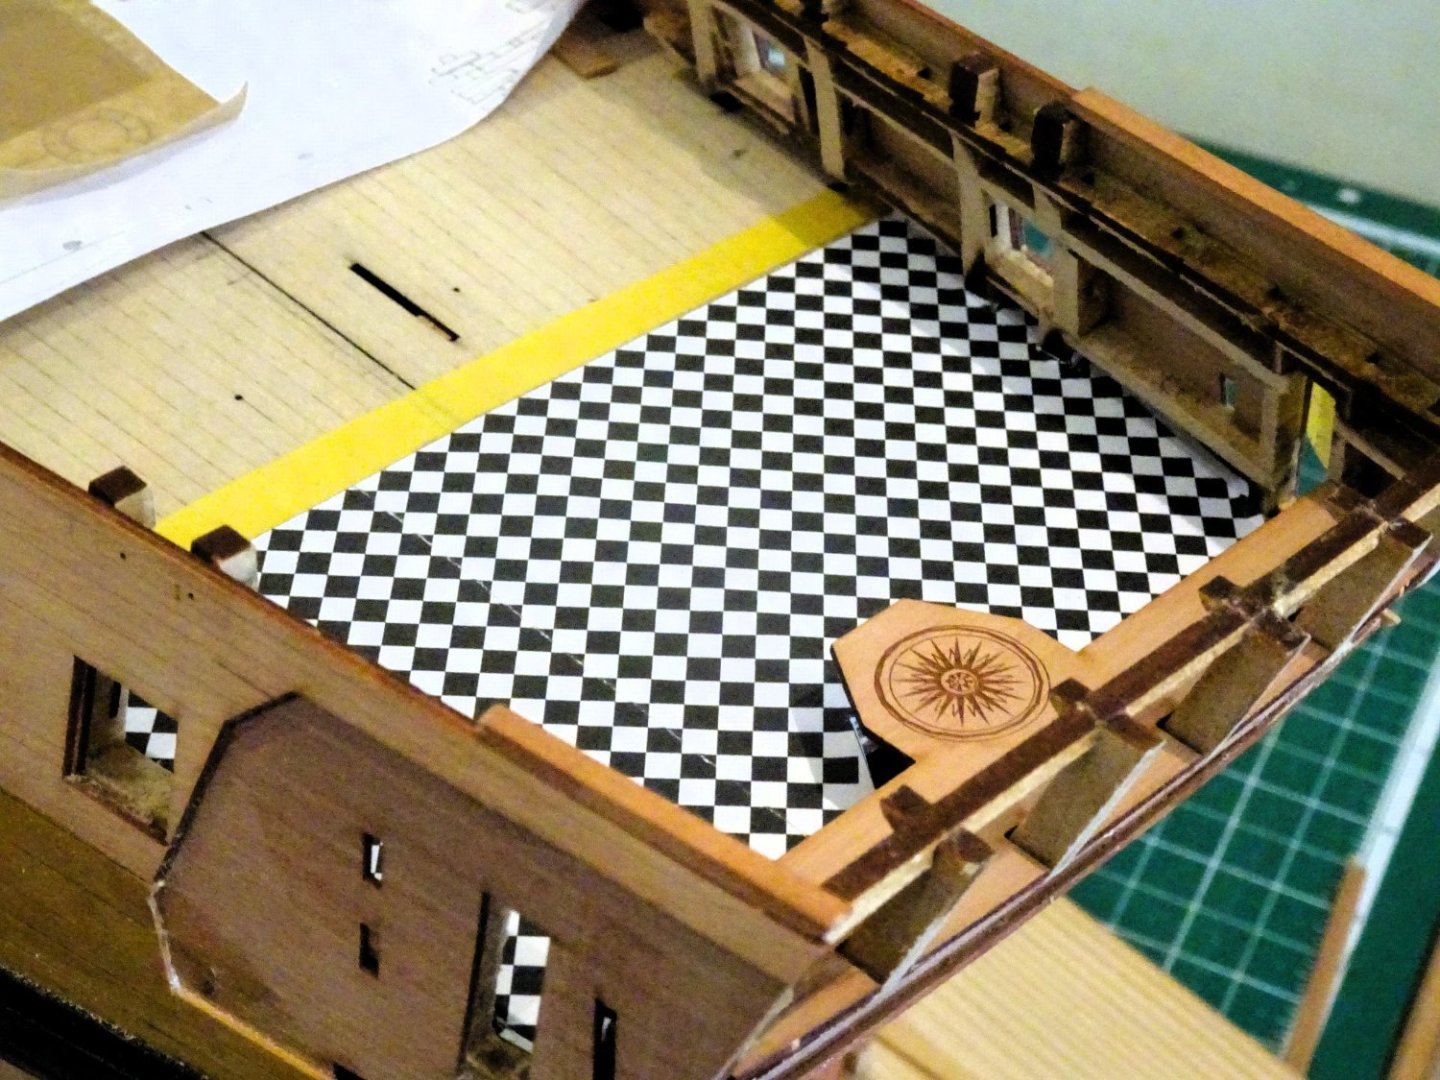
2193
It’s a shame that the pattern was placed on a fold of Plan sheet 2, the line can be discerned, but not so much from directly above.
There is a lot to do in this small section, and I will spend some time sorting and assembling all the relevant parts, before I move ahead.
The deck planking proper will be done as a separate exercise forward of the fore-most partition.
B.E.
29/07/2023
- CiscoH, realworkingsailor, CODY and 16 others
-
19
-
Thank you Glenn,
Once the decision has been made to build 'Navy Board' style it's just a question of how much deck to leave off. It is a pity to cover all that detail, but I would have done it even if I fully decked. I'll be barely covering the Poop deck so all the cabin detail will be on view.
Given the purity of your joinery I would be very tempted to reveal a little more on your 'Winnie'
Regards,
B.E.
- glbarlow, mtaylor, scrubbyj427 and 2 others
-
5
-
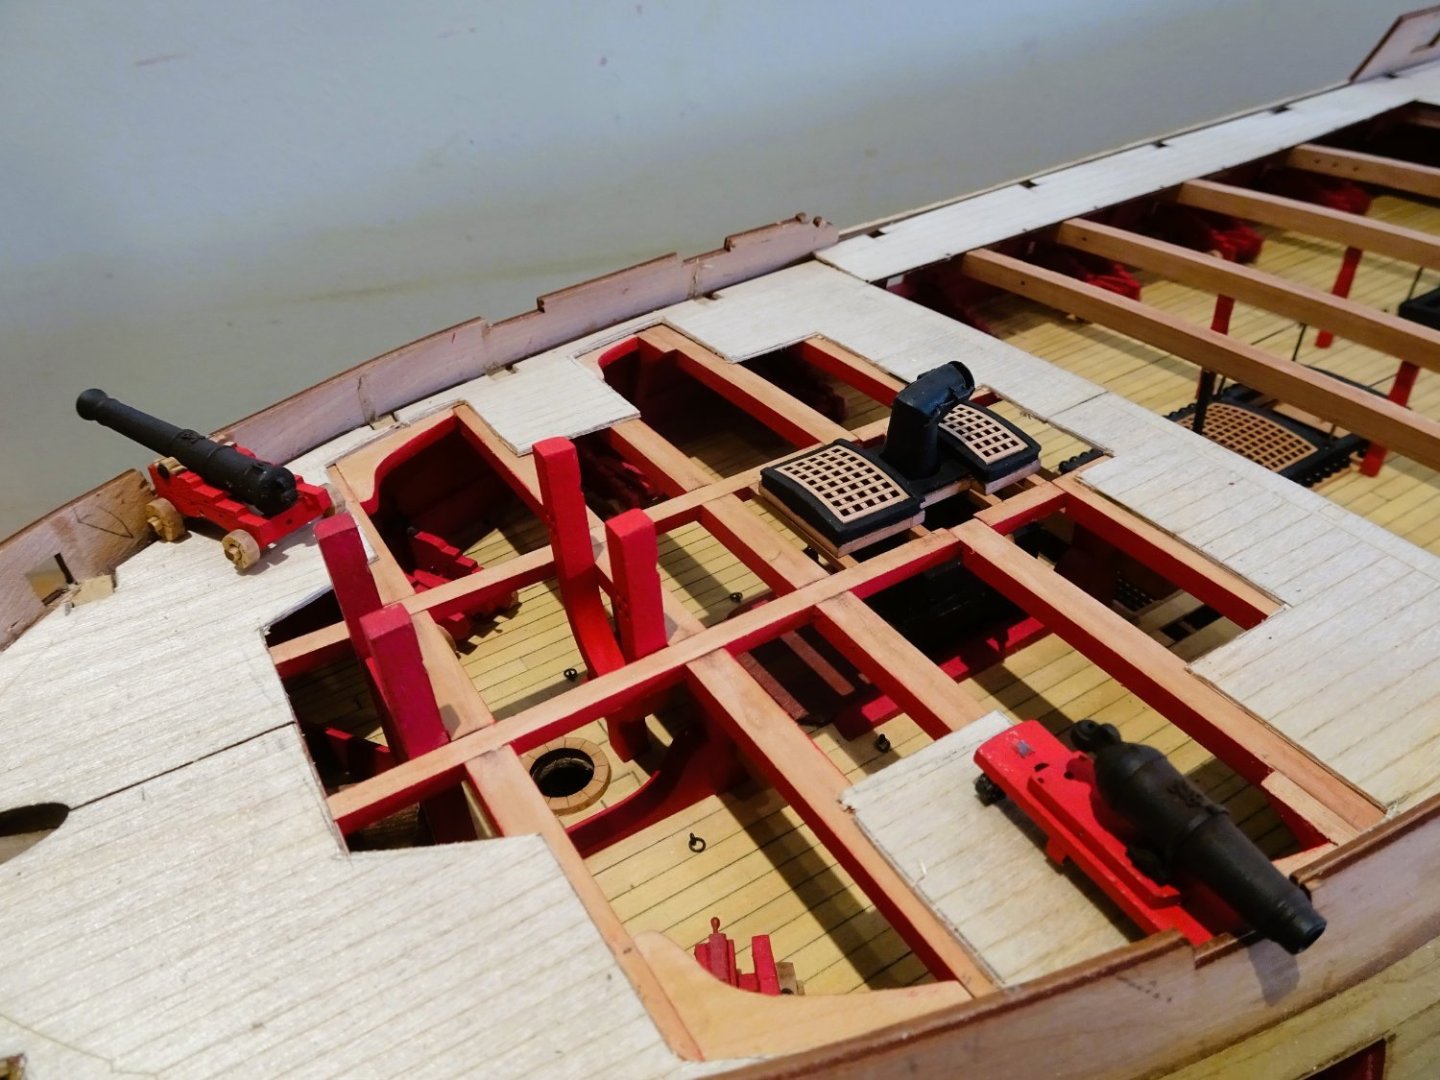
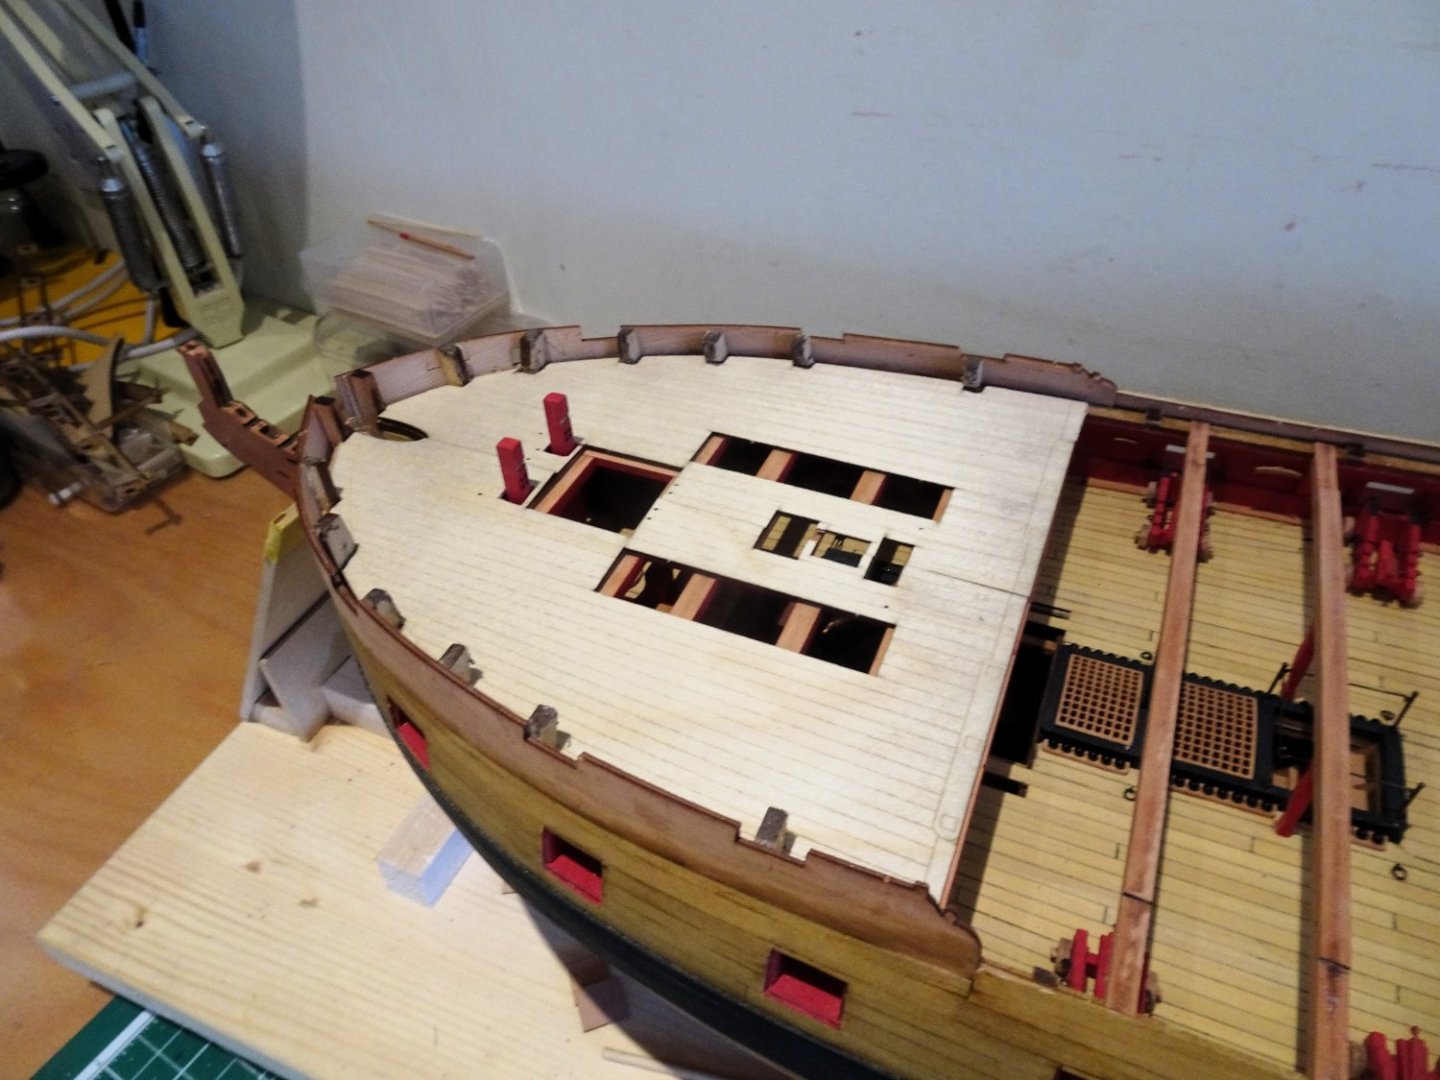
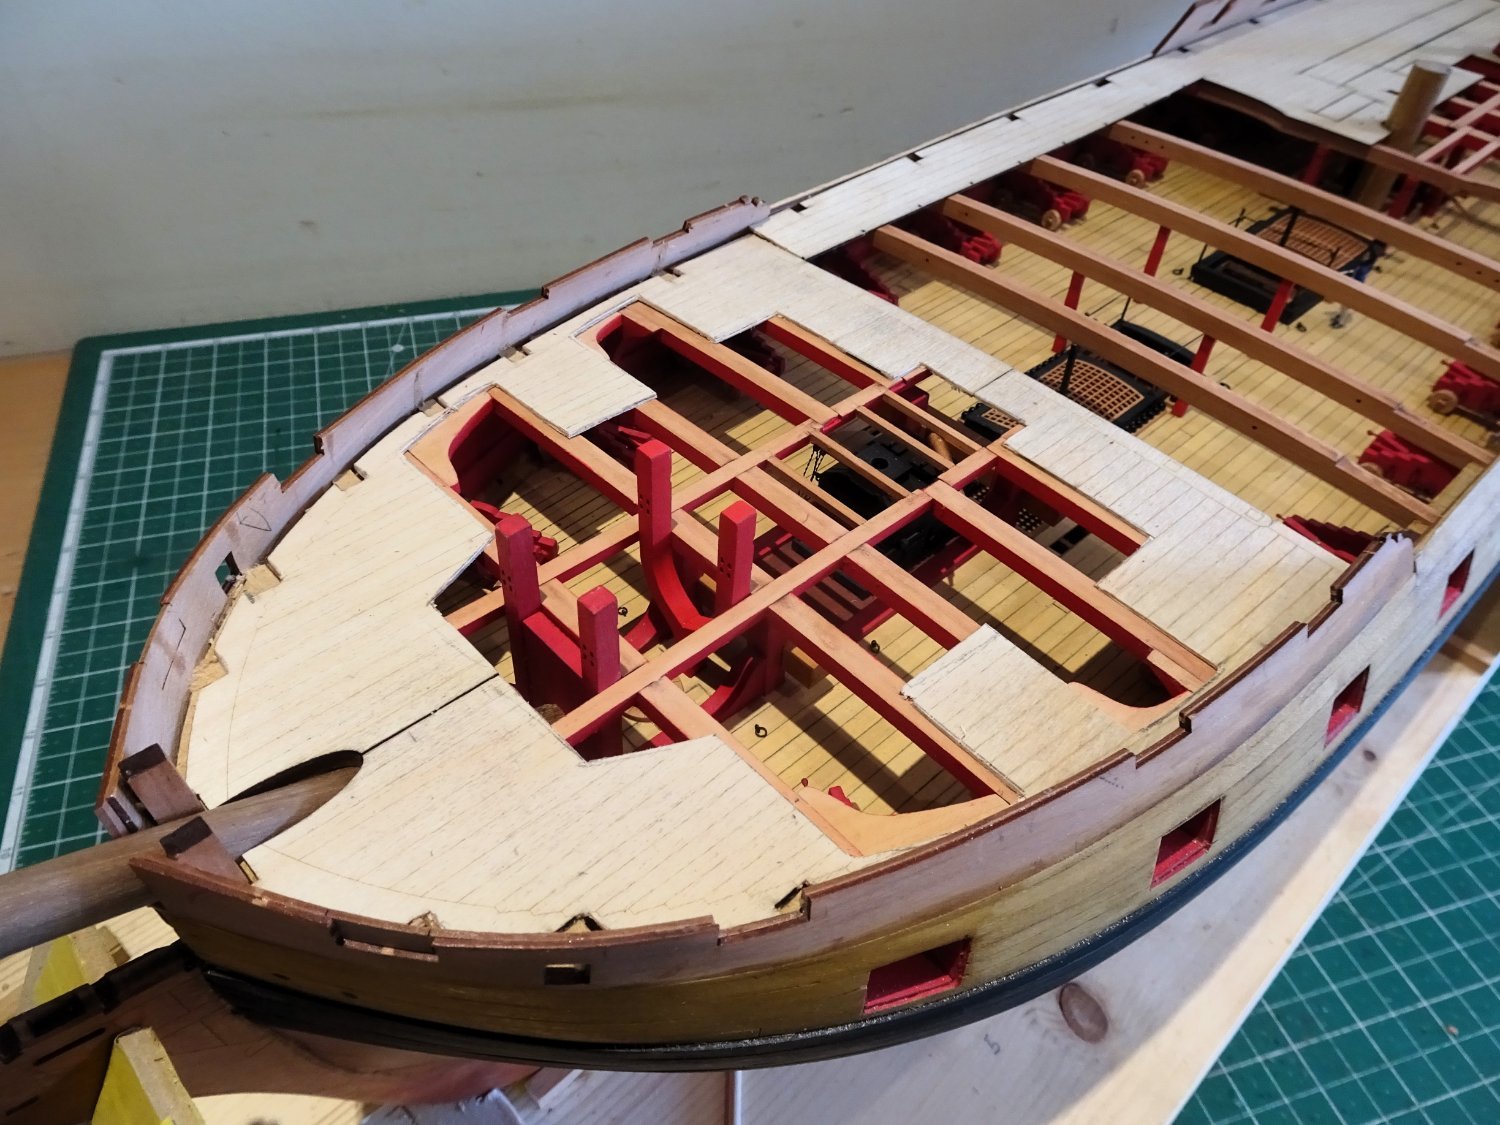
Post Eighty-four
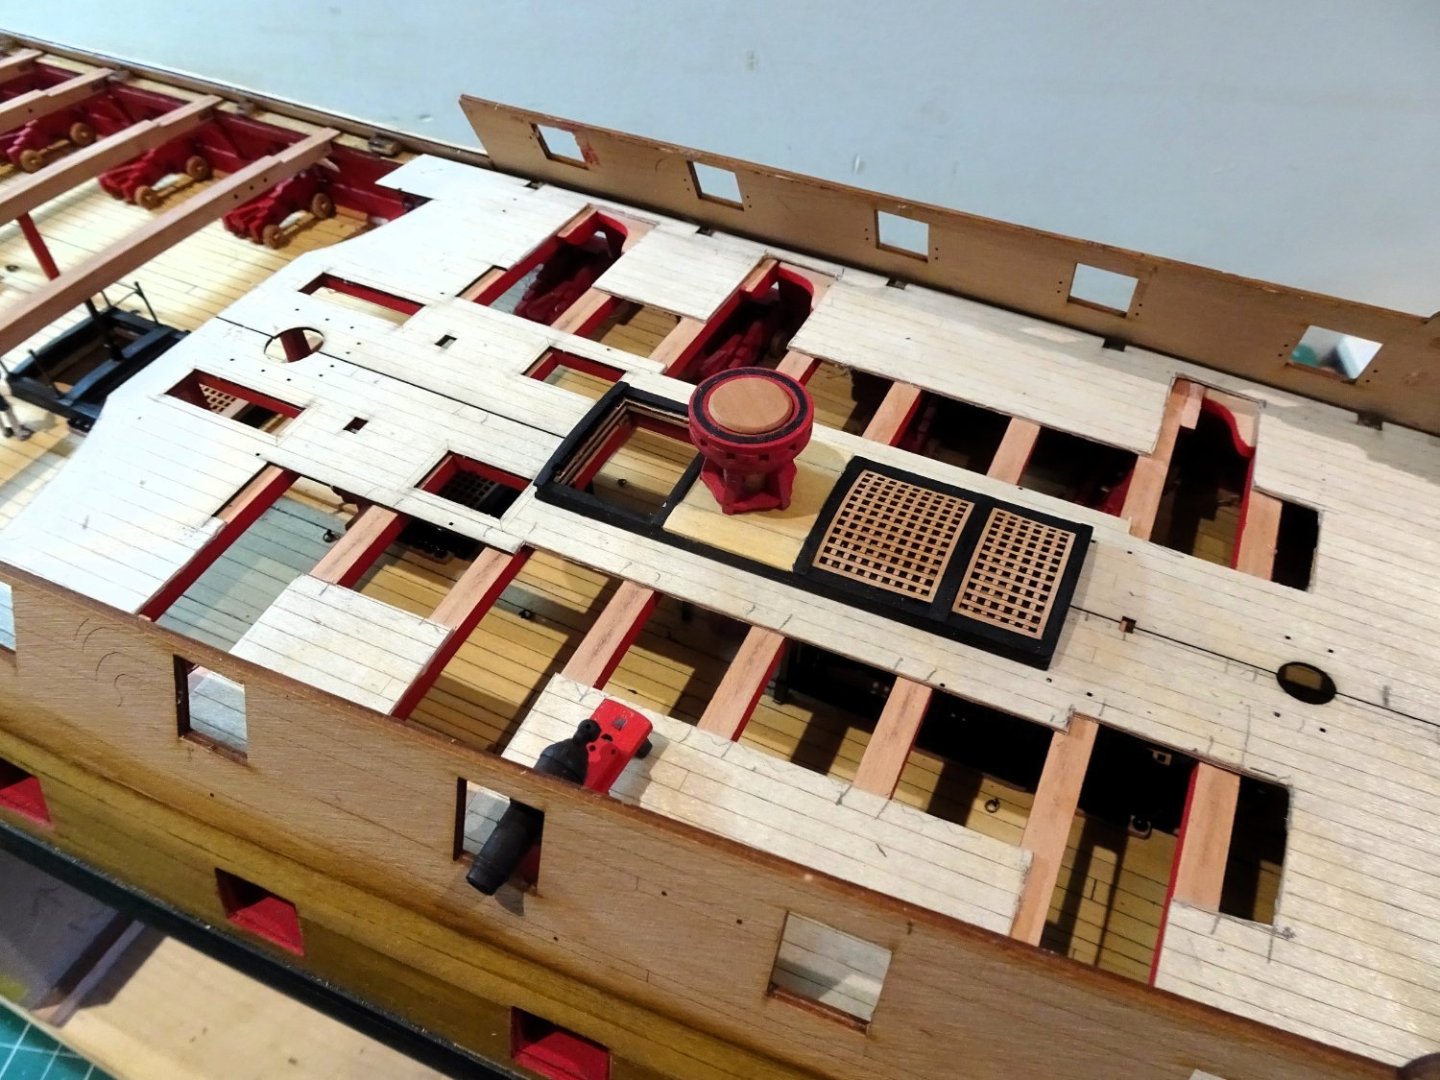
The Quarterdeck
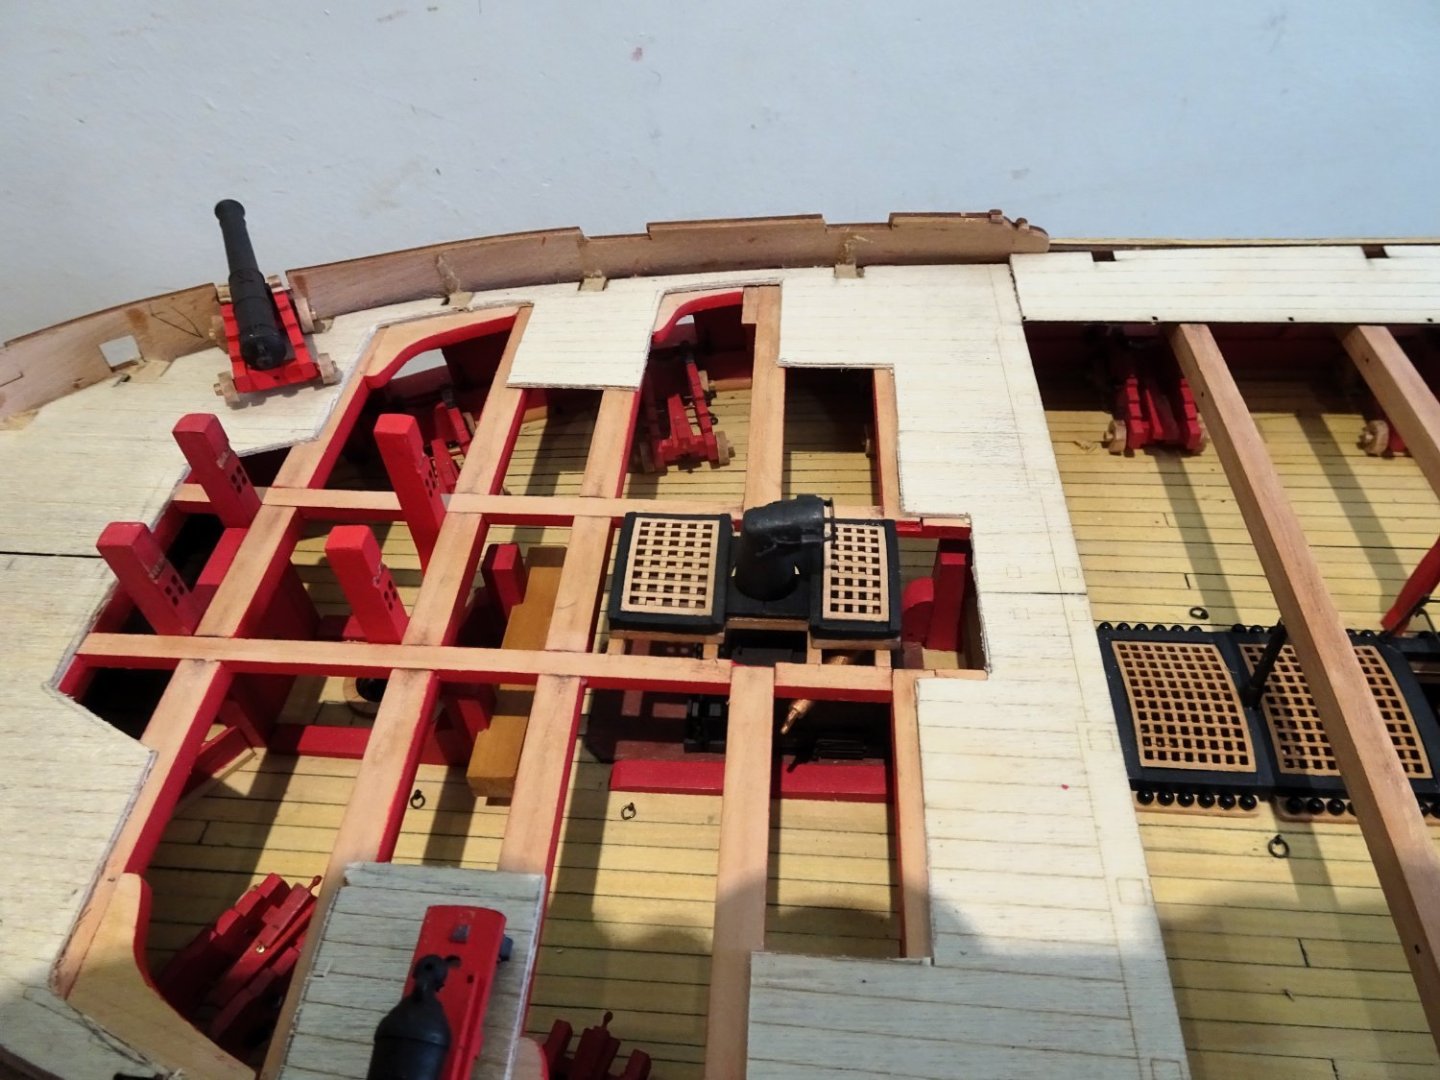
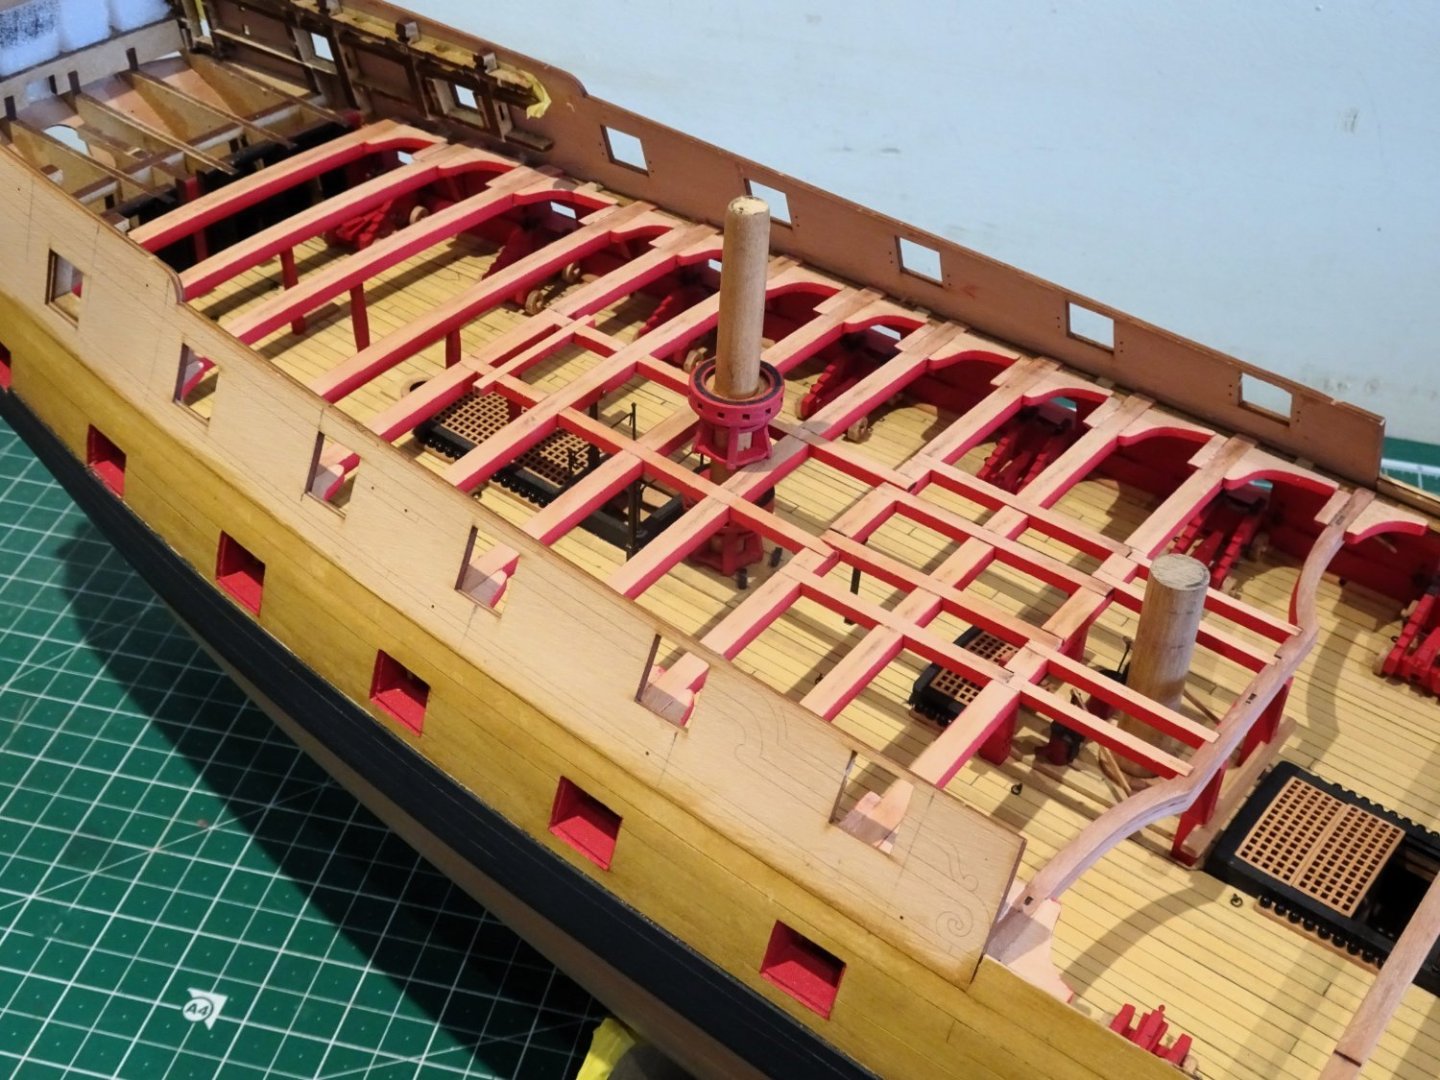
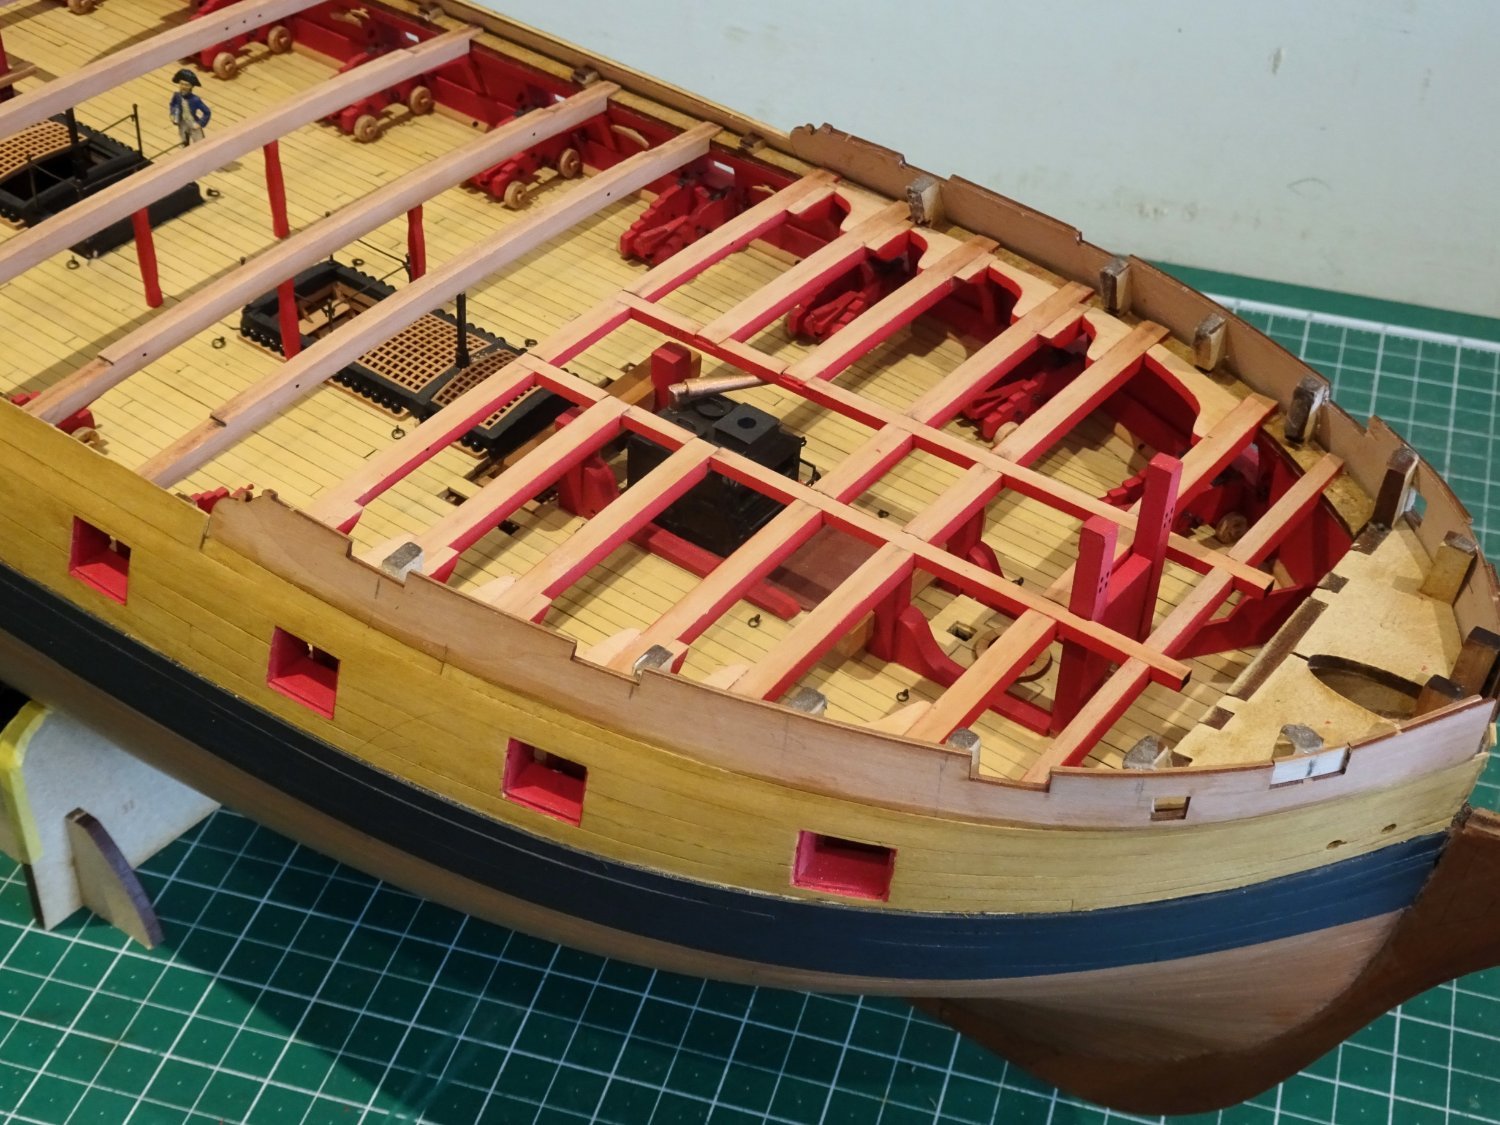
As with the Fo’csle I have tweaked the Quarterdeck to expose a greater area of the gun deck, whilst still allowing the full complement of carronades to be displayed.
2161
Checking the fit and working the pattern. The aft section which comprises the cabin areas will be fully planked.

2163
The design I settled on.
 2167
2167
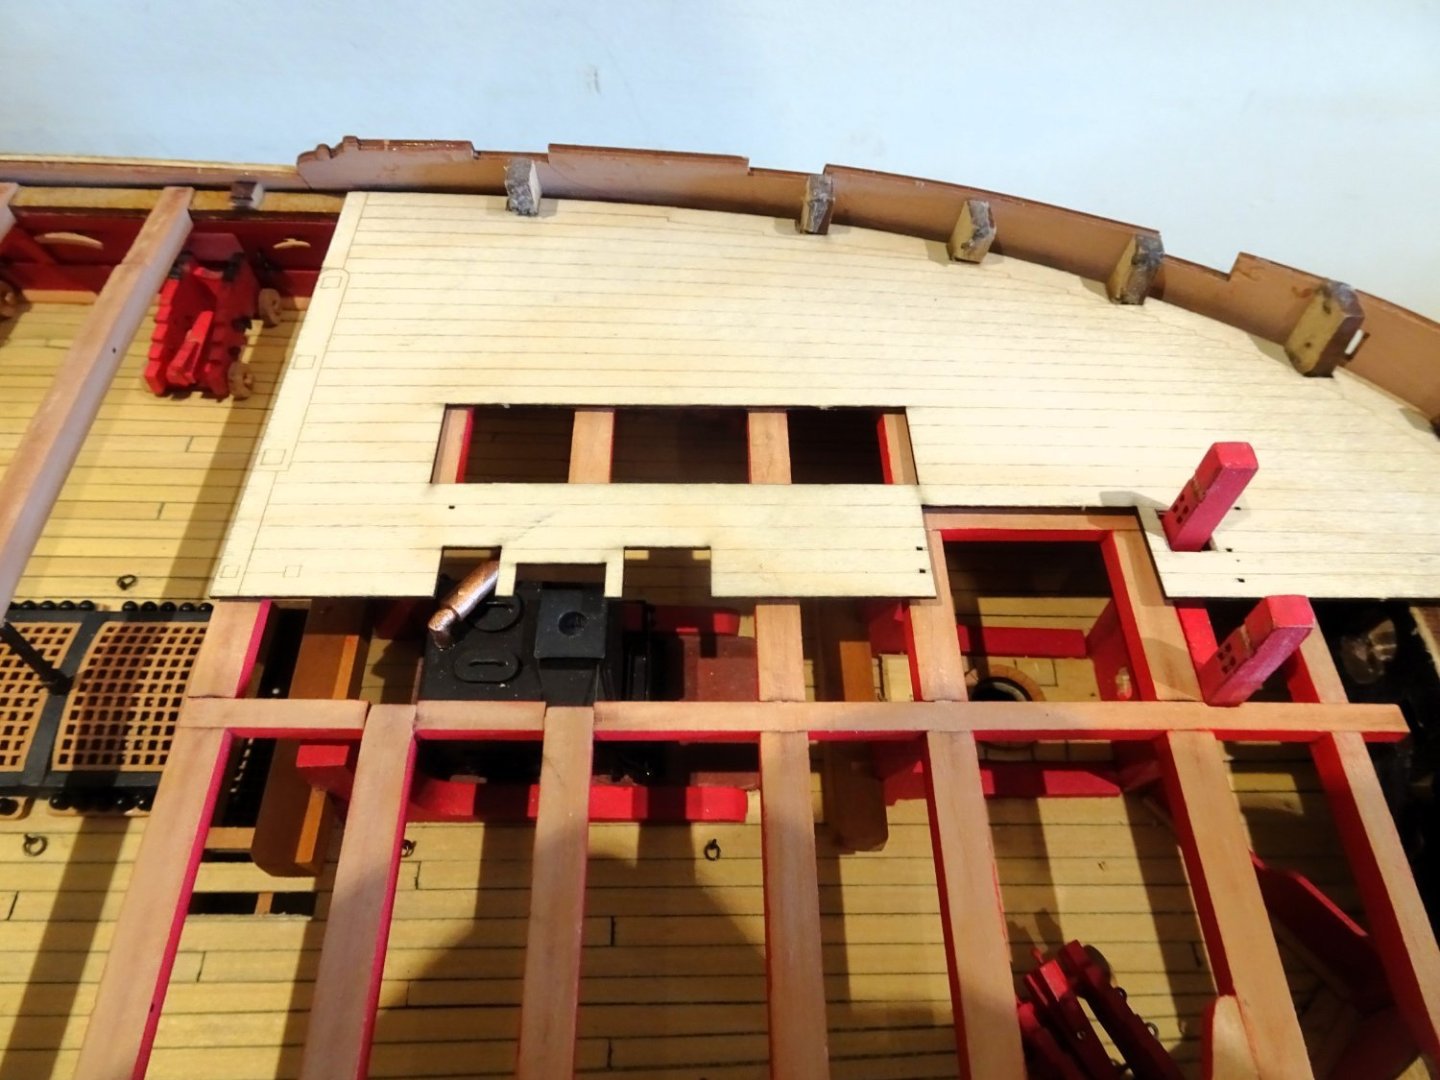
The ply underdeck fitted with only minimum adjustment, masts and capstan barrel were used to ensure an even fit.
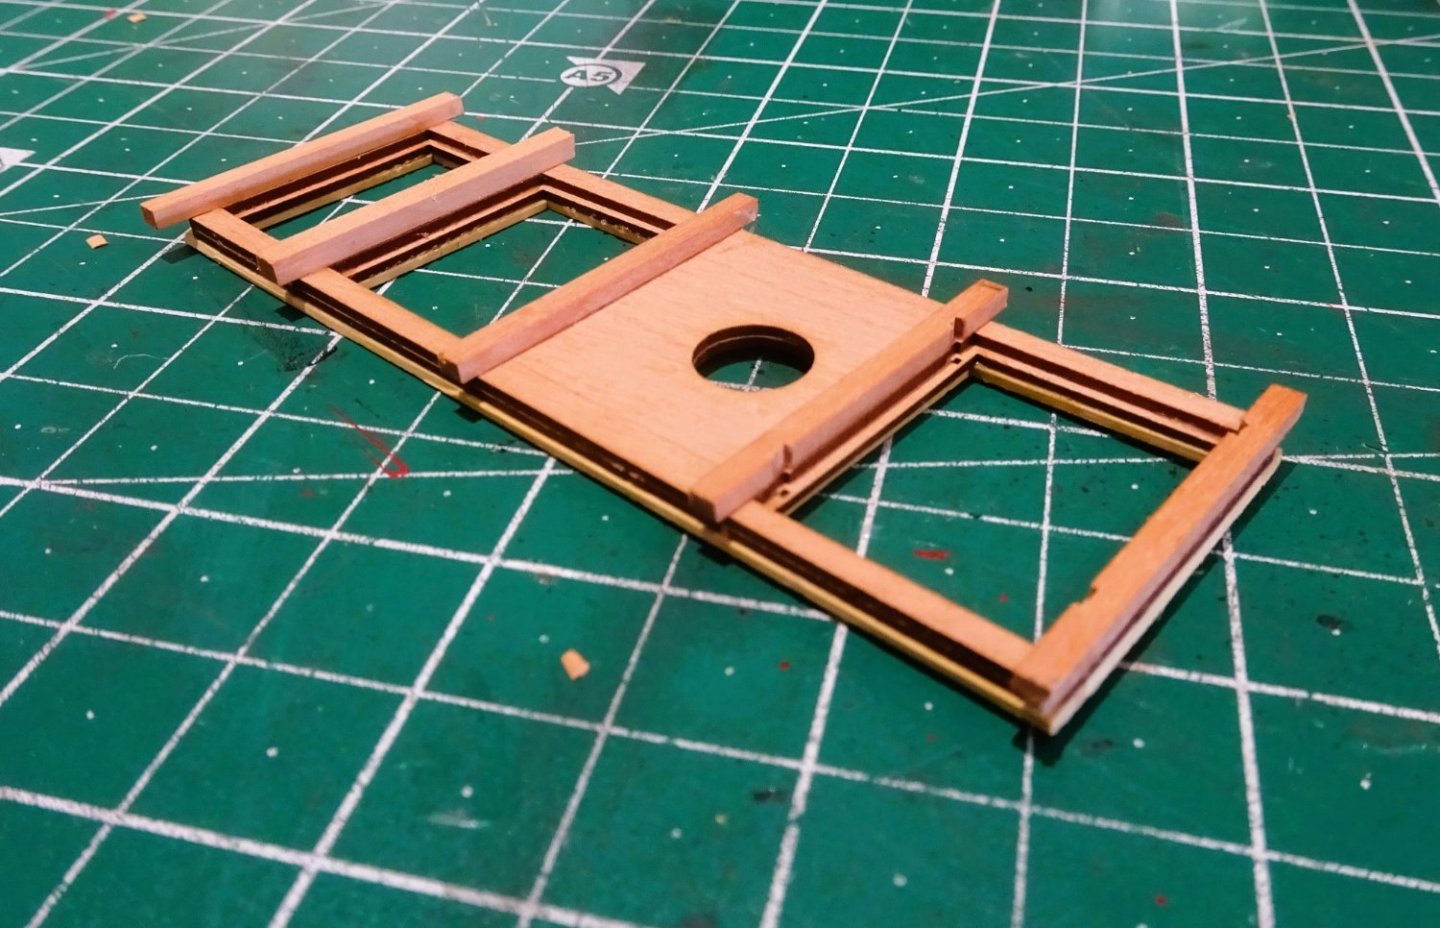
2169
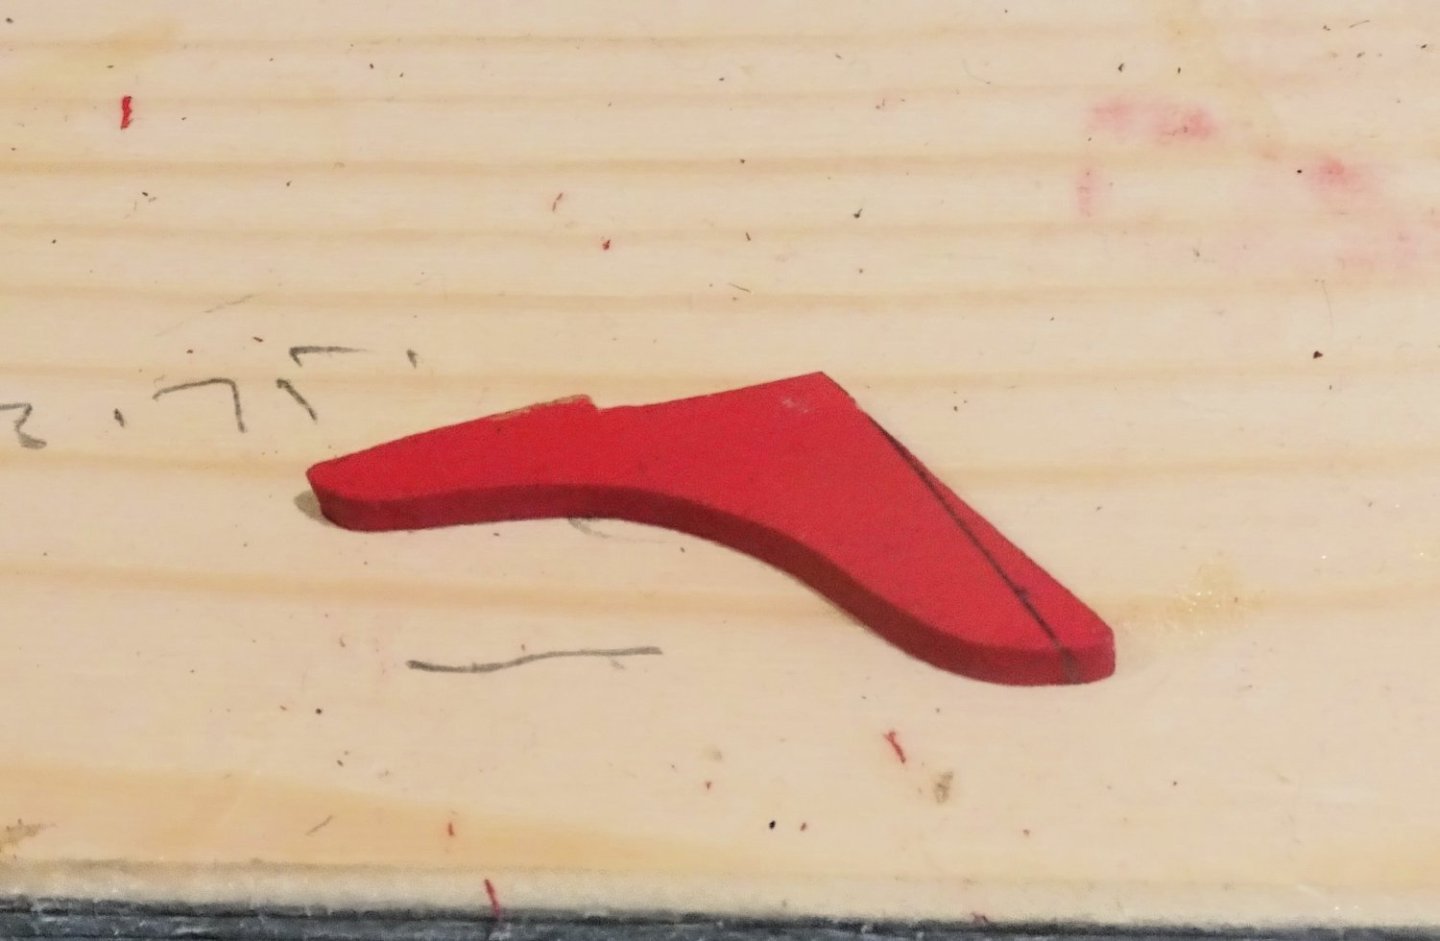
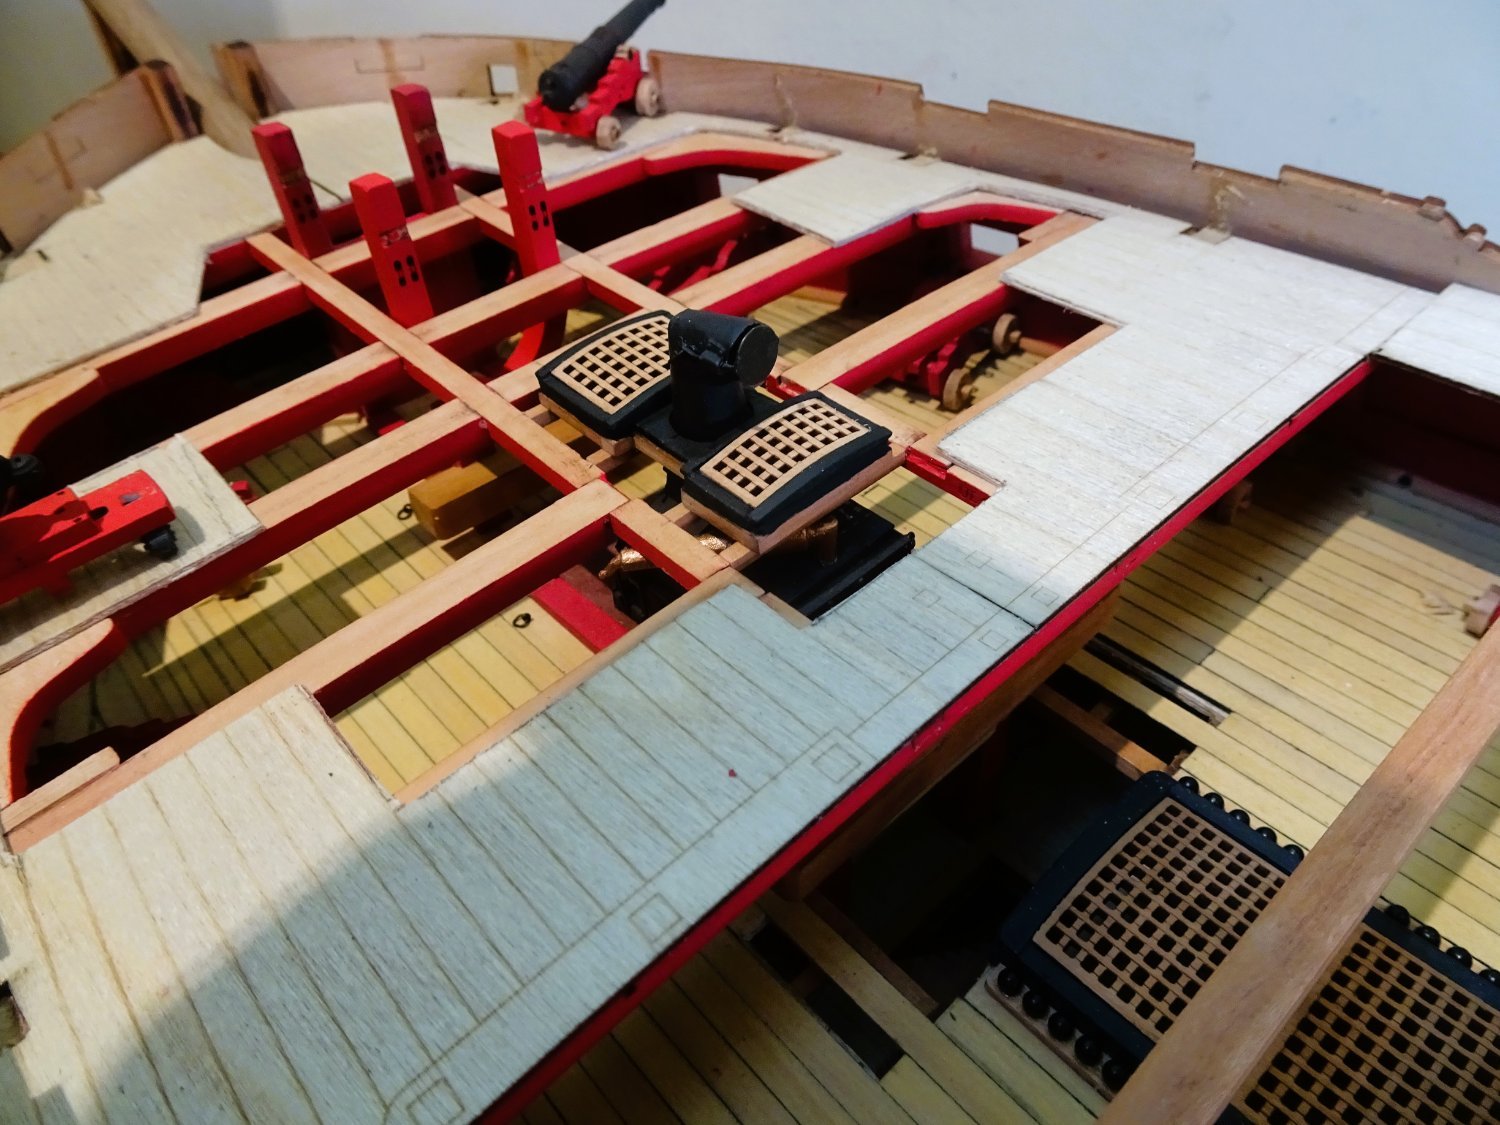
The centre line combination of capstan step, Ladderway, and gratings were raised by 1mm to allow for the planking, and the Head ledges were raised to form a slight camber.
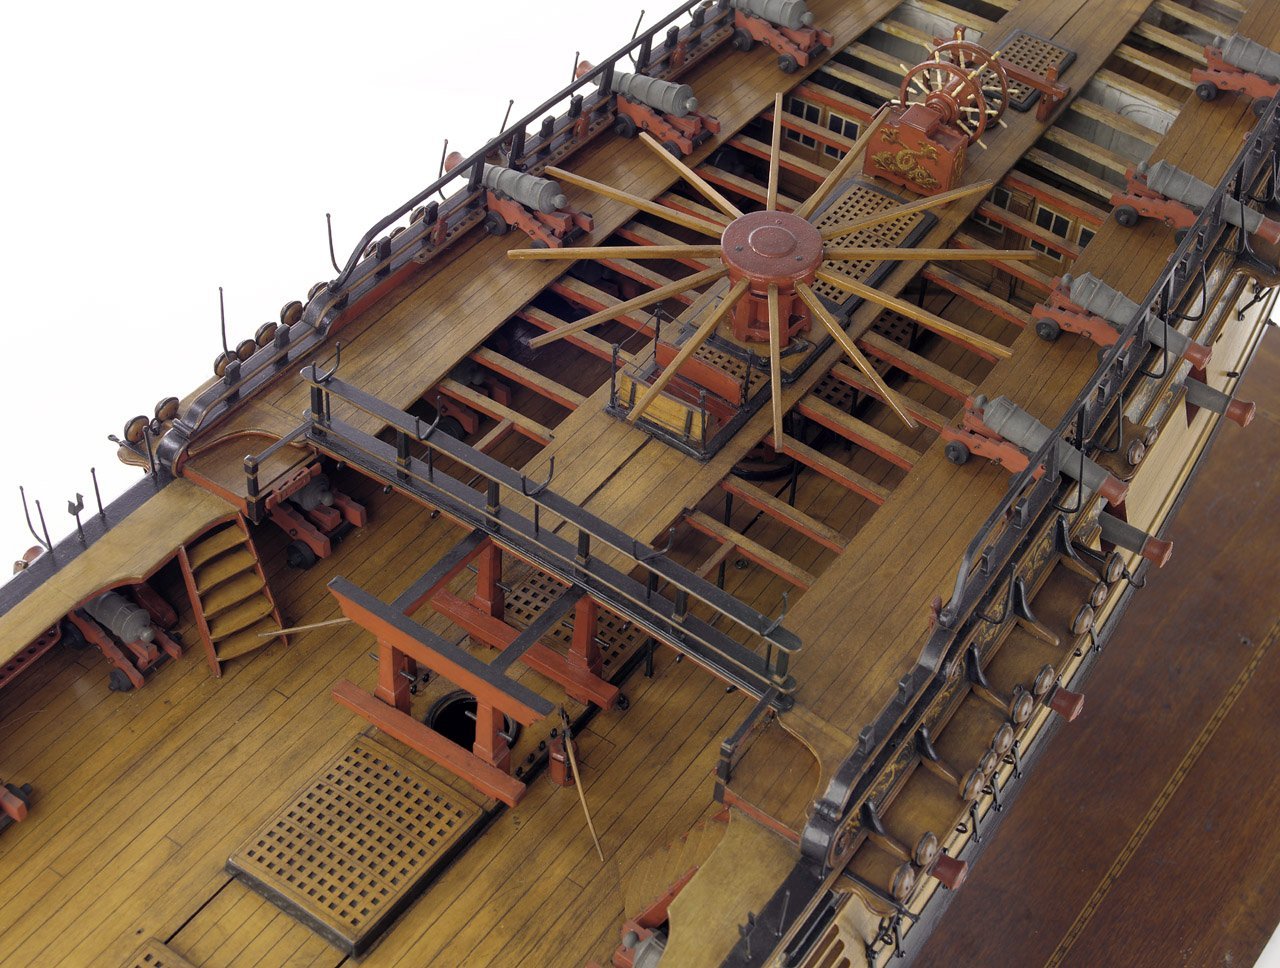
NMM Amazon model
The contemporary model of Amazon has a very similar set-up and the slight round-up to the ladderway ledges is clearly seen, as are the covers to the ladderway.
Ladderway covers have been included with the ‘Indy’ kit.

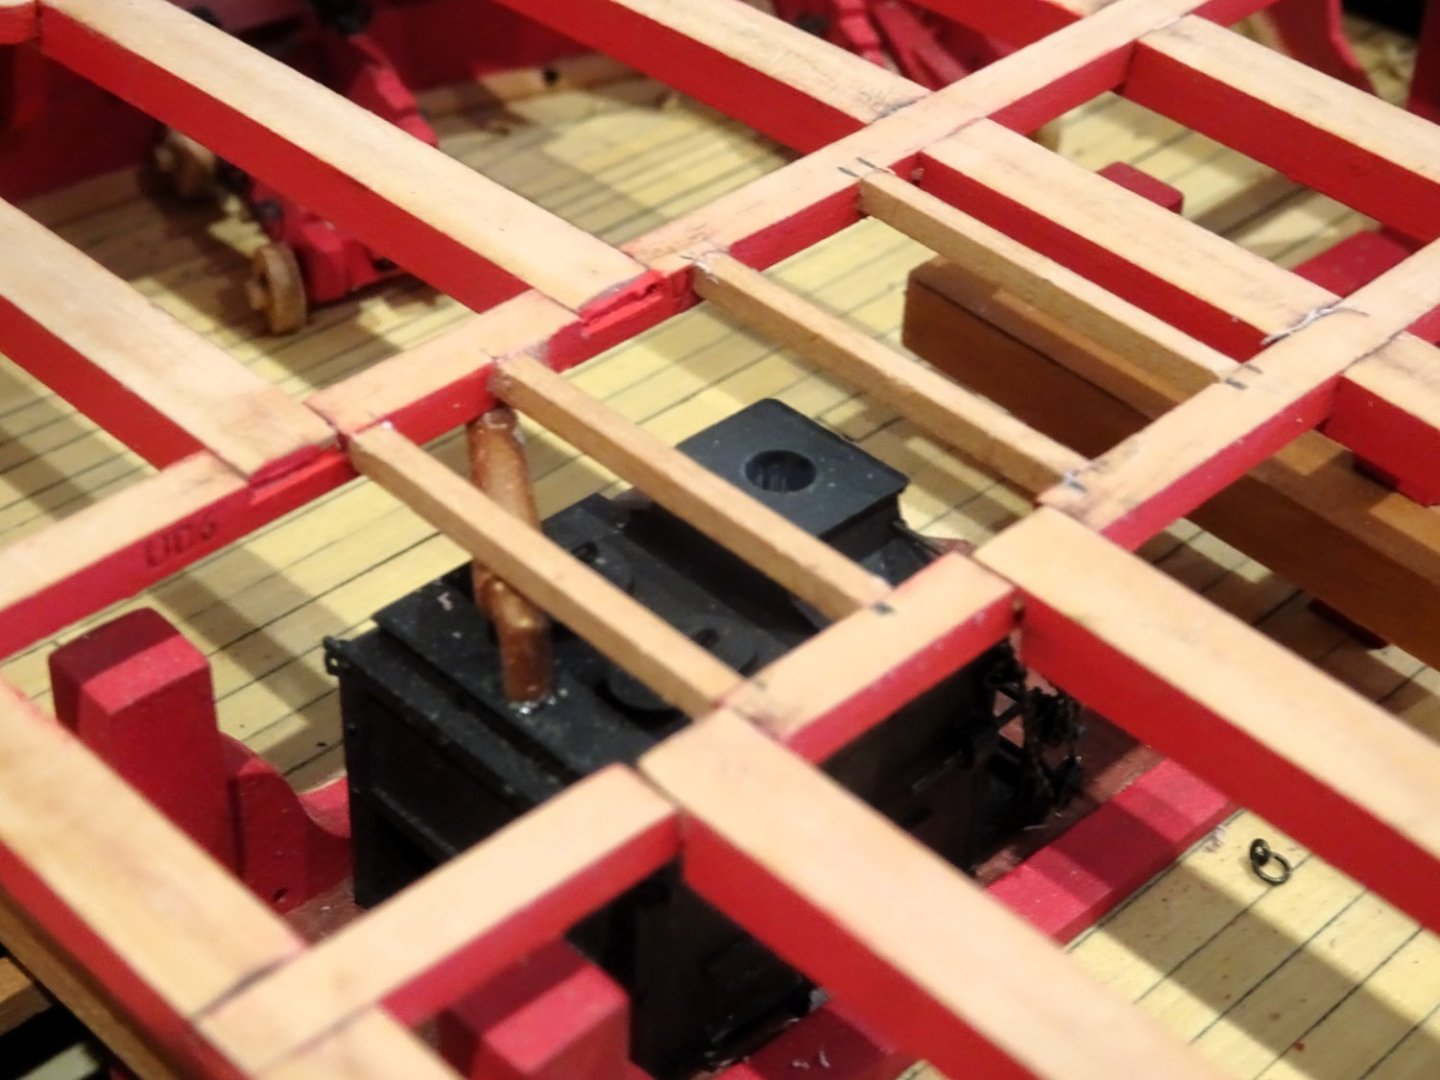
2170
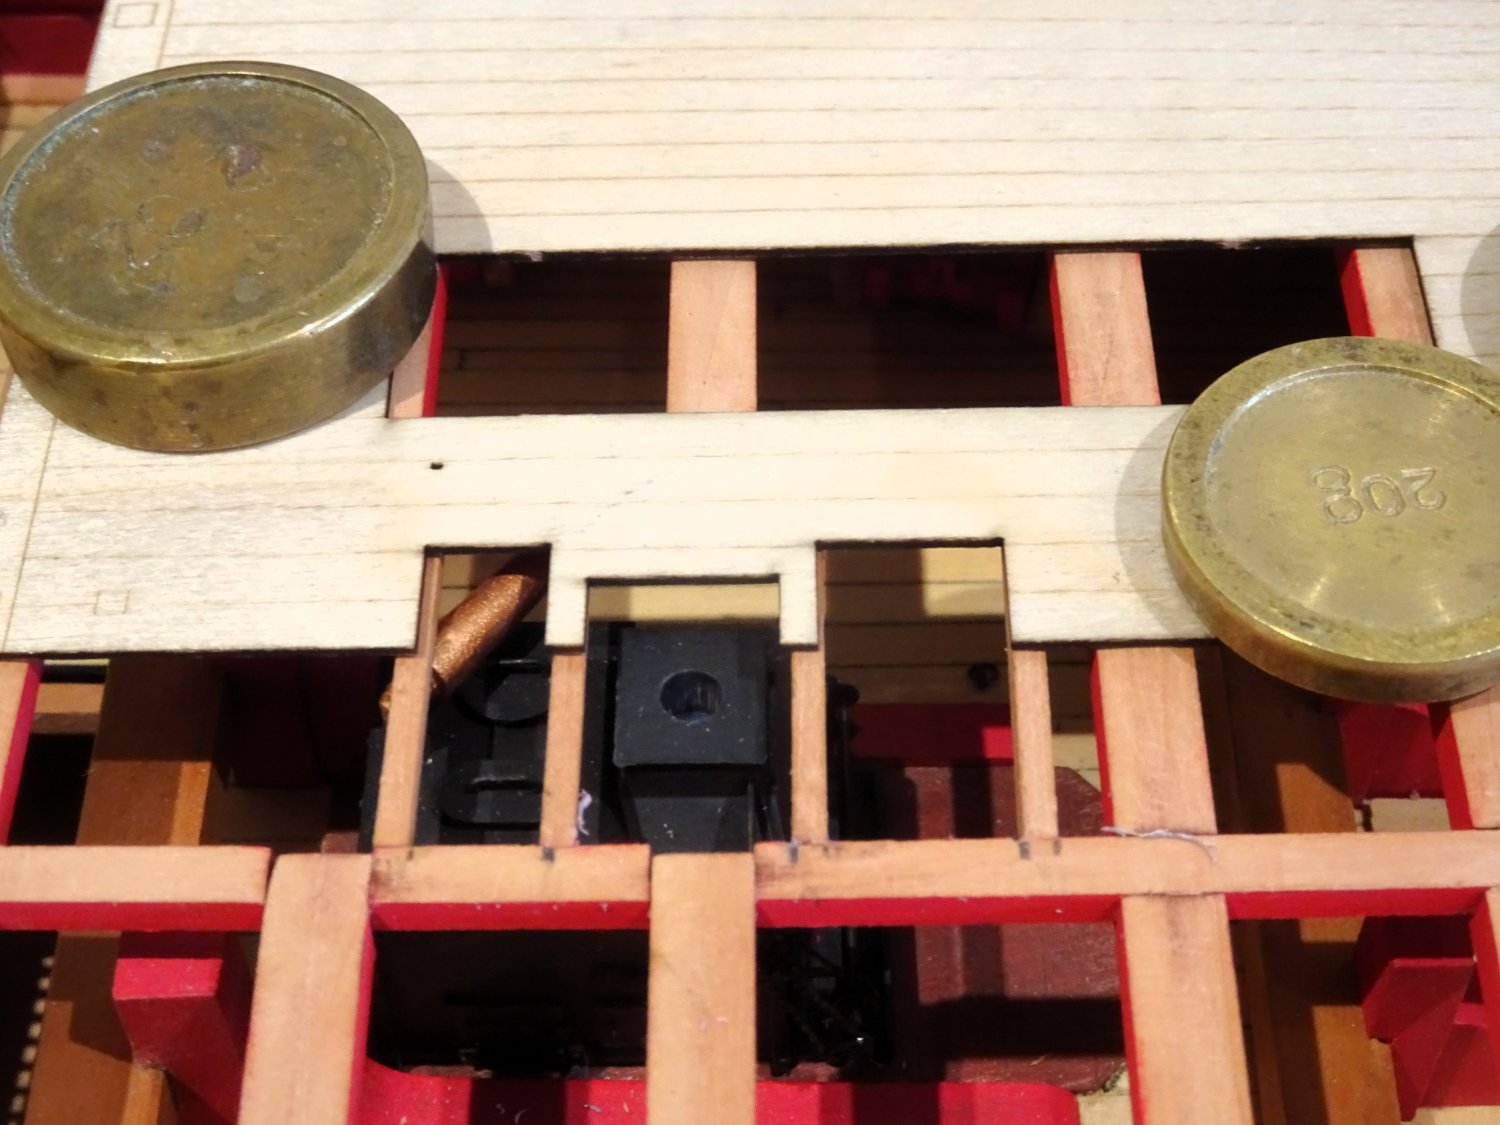
It is a sign of Chris’s dedication to authenticity that he has reflected the slight taper towards the stern of the grating set. This does mean that the gratings only fit one way, but the difference is subtle.

2173
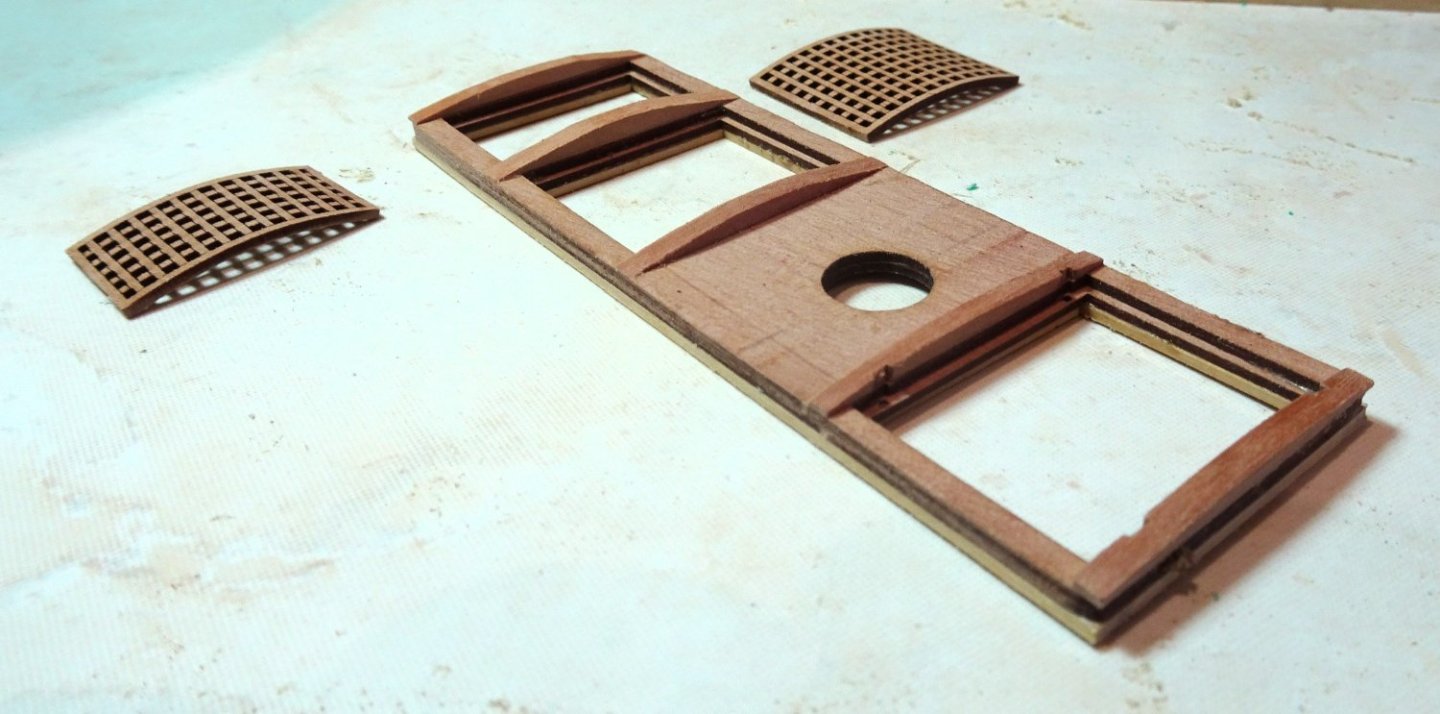
2174
With the camber formed on both ledges and gratings, the job is done.
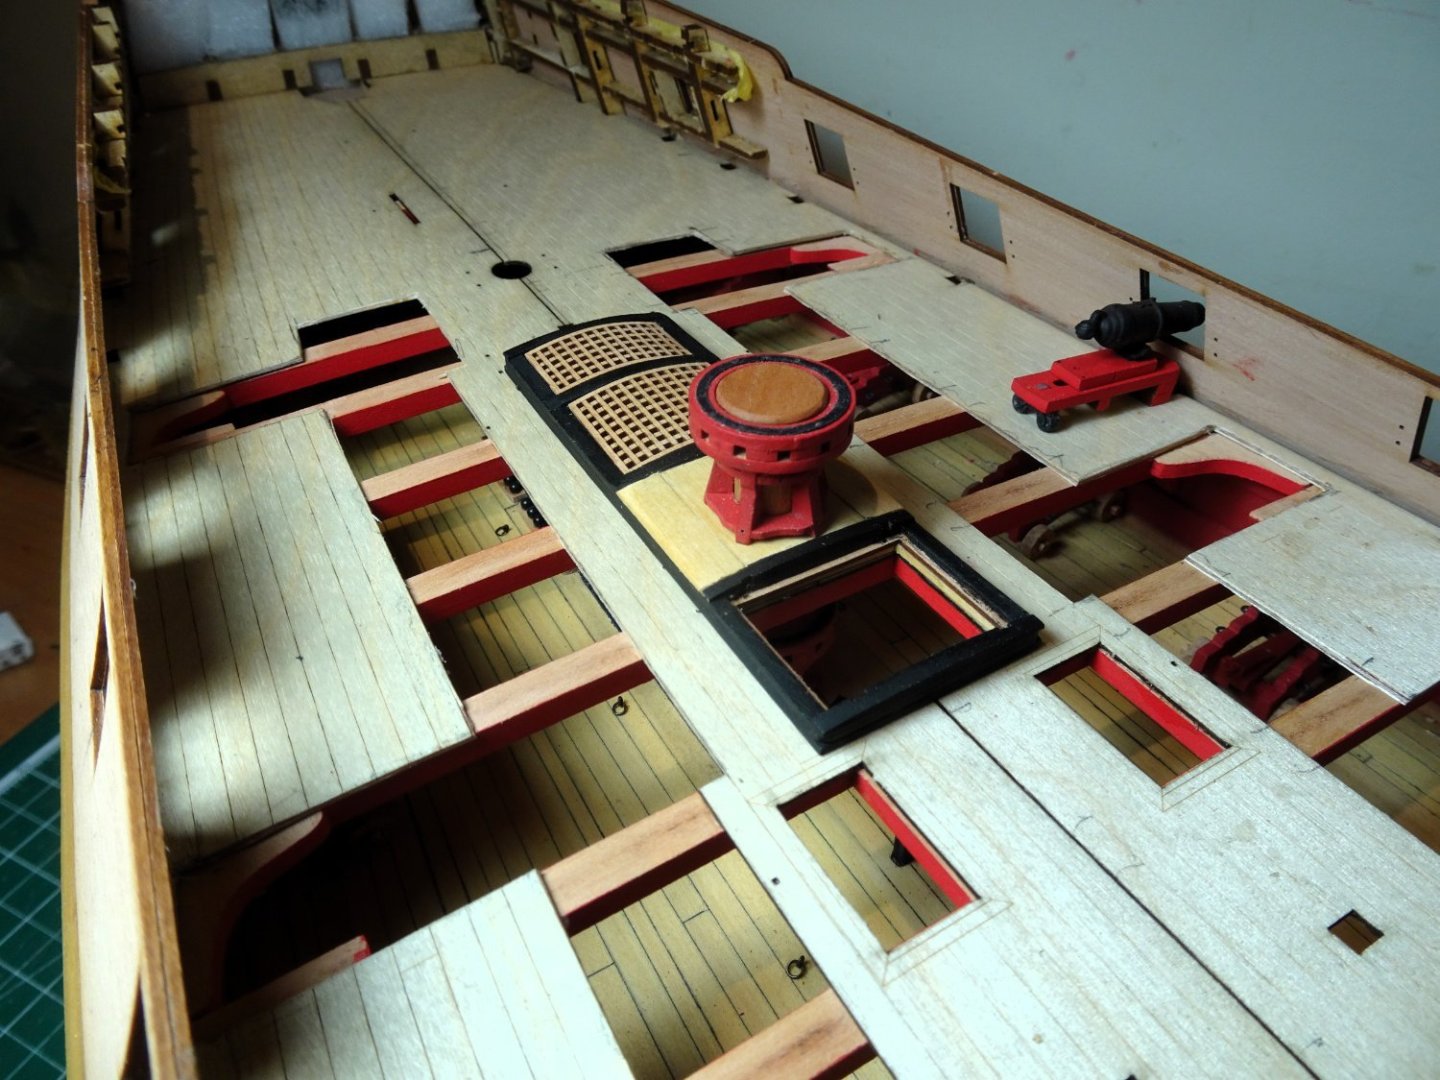
2182
2184

2180
The Upper Capstan has been completed, and I slightly modified the Capstan step.

2179
Moving forward to the deck planking.
B.E.
27/09/2023
- bruce d, hollowneck, scrubbyj427 and 18 others
-
21
-
Post Eighty- three
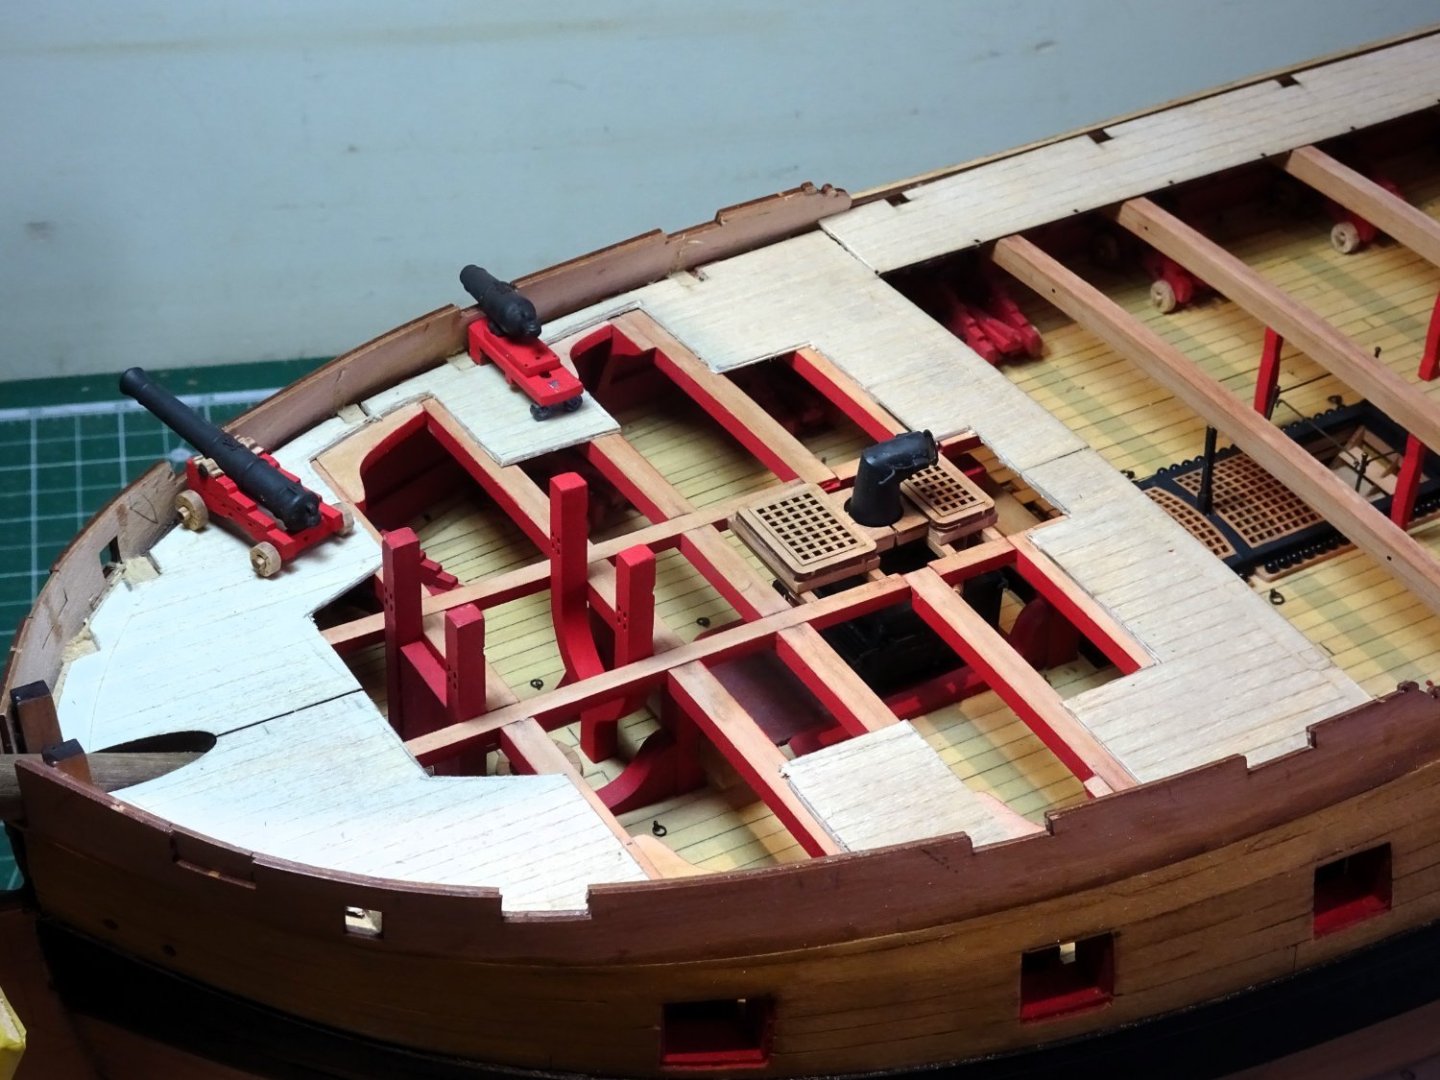
Fo’csle cont’d
The ply sub-deck has been fitted and the aftermost Fore jeer bitts (the ‘u’ shaped ones), put into place. On my build these did not require gluing into place.

2139
On the subject of the bitts note that the cross pieces both face aft. I’ve left mine off until the planking is completed.

2142
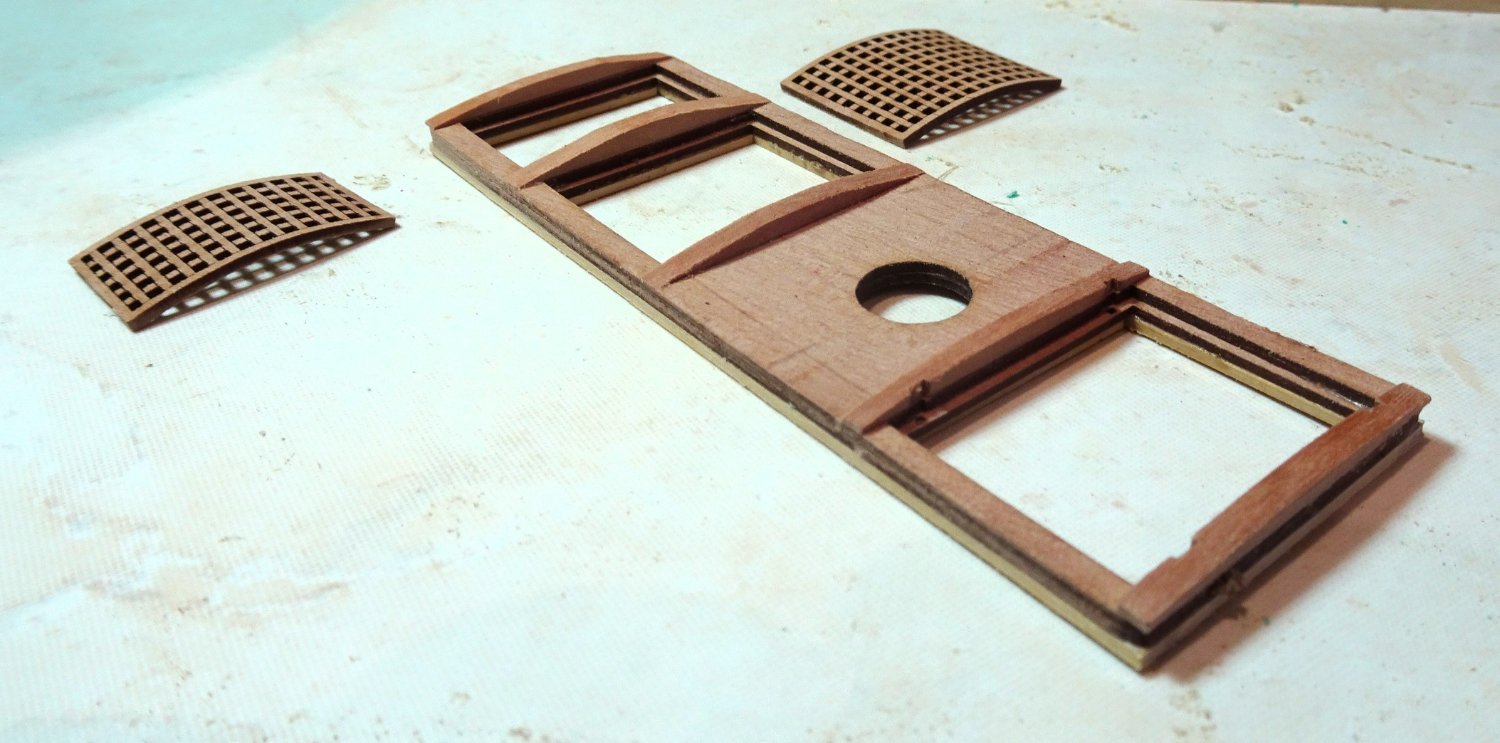
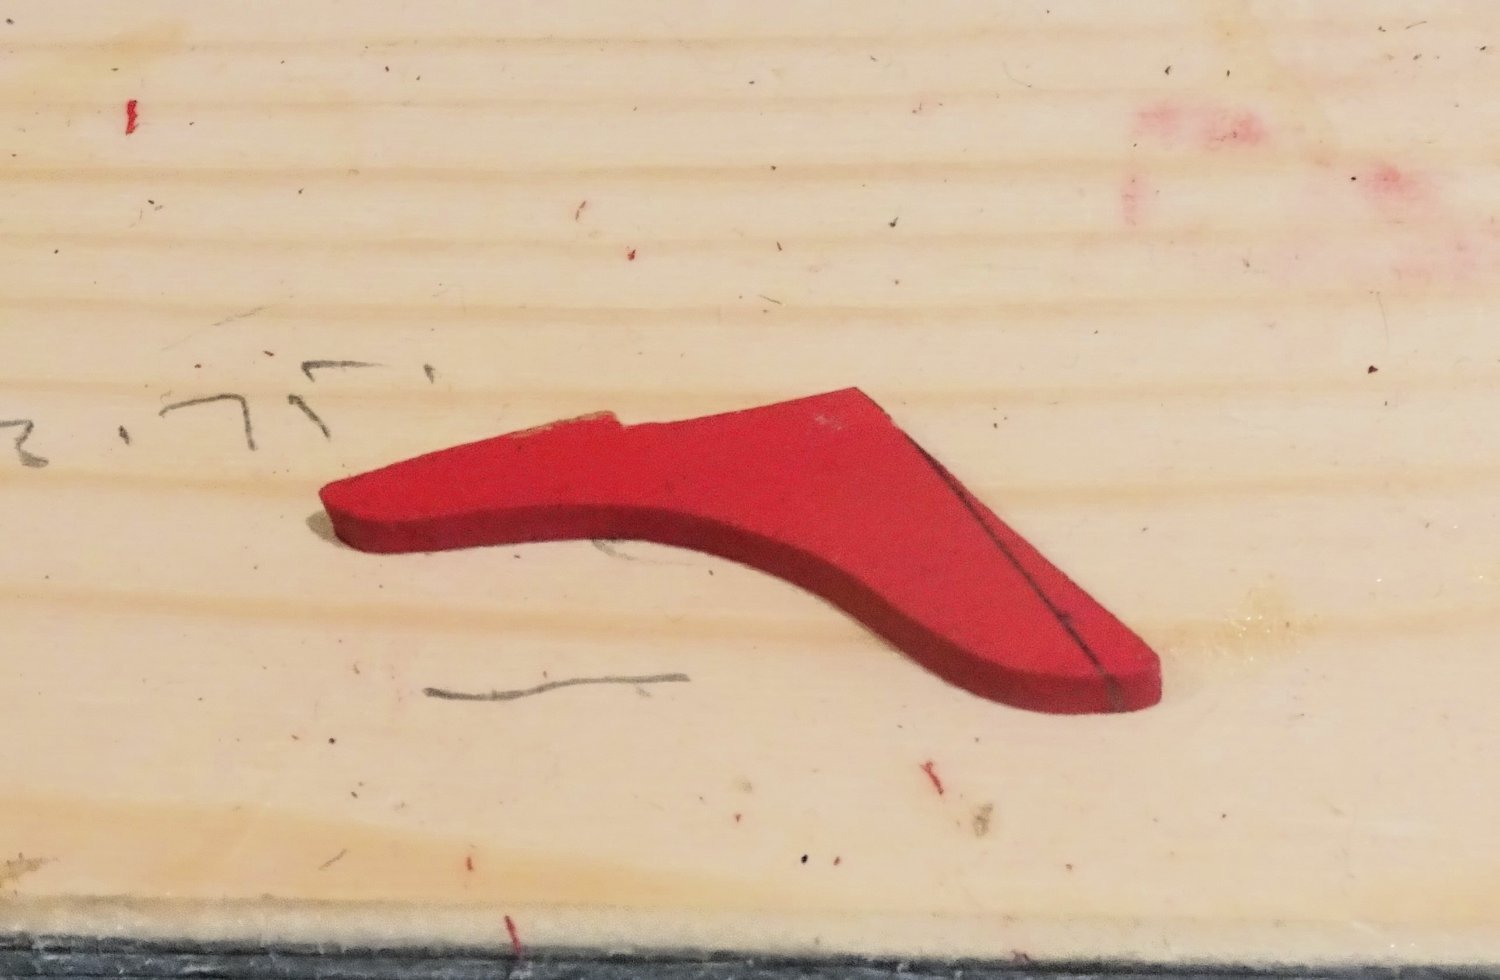
When it comes to the steam gratings a little bit of tweaking is required. These parts have been designed to sit atop the finished deck, so need building up by 2mm to match that level.
2145
They look ok but I do like to see a slight roundup to the head ledges.
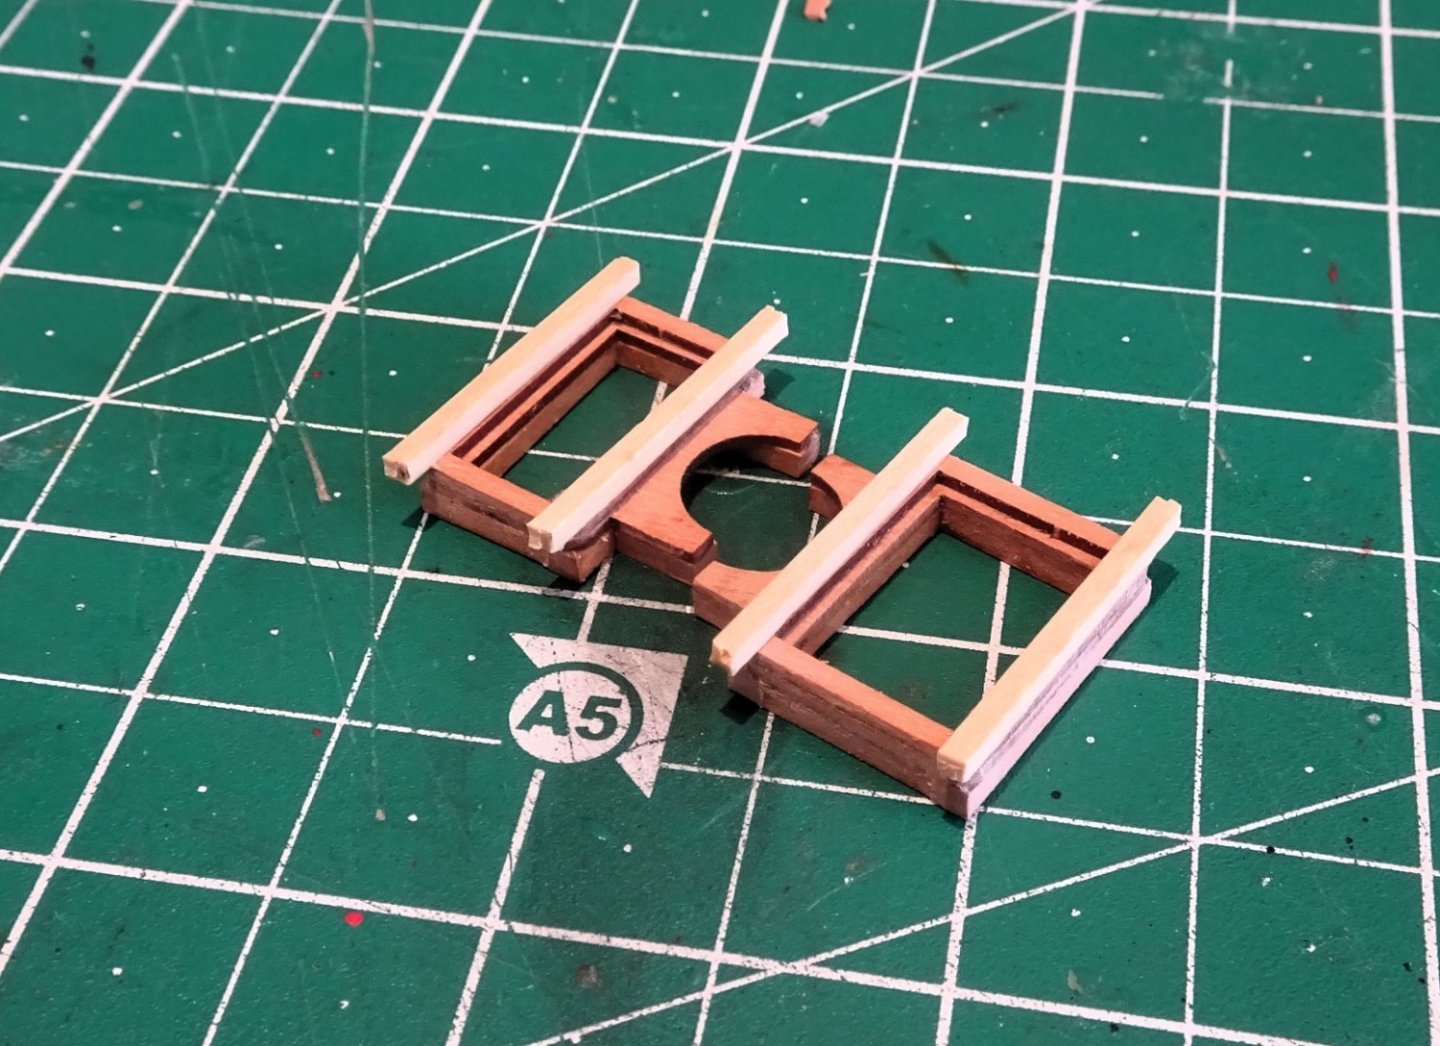
2147
This is simply achieved by adding strip to the top and shaping to suit.
2150
Still in a rough state but you get the idea.
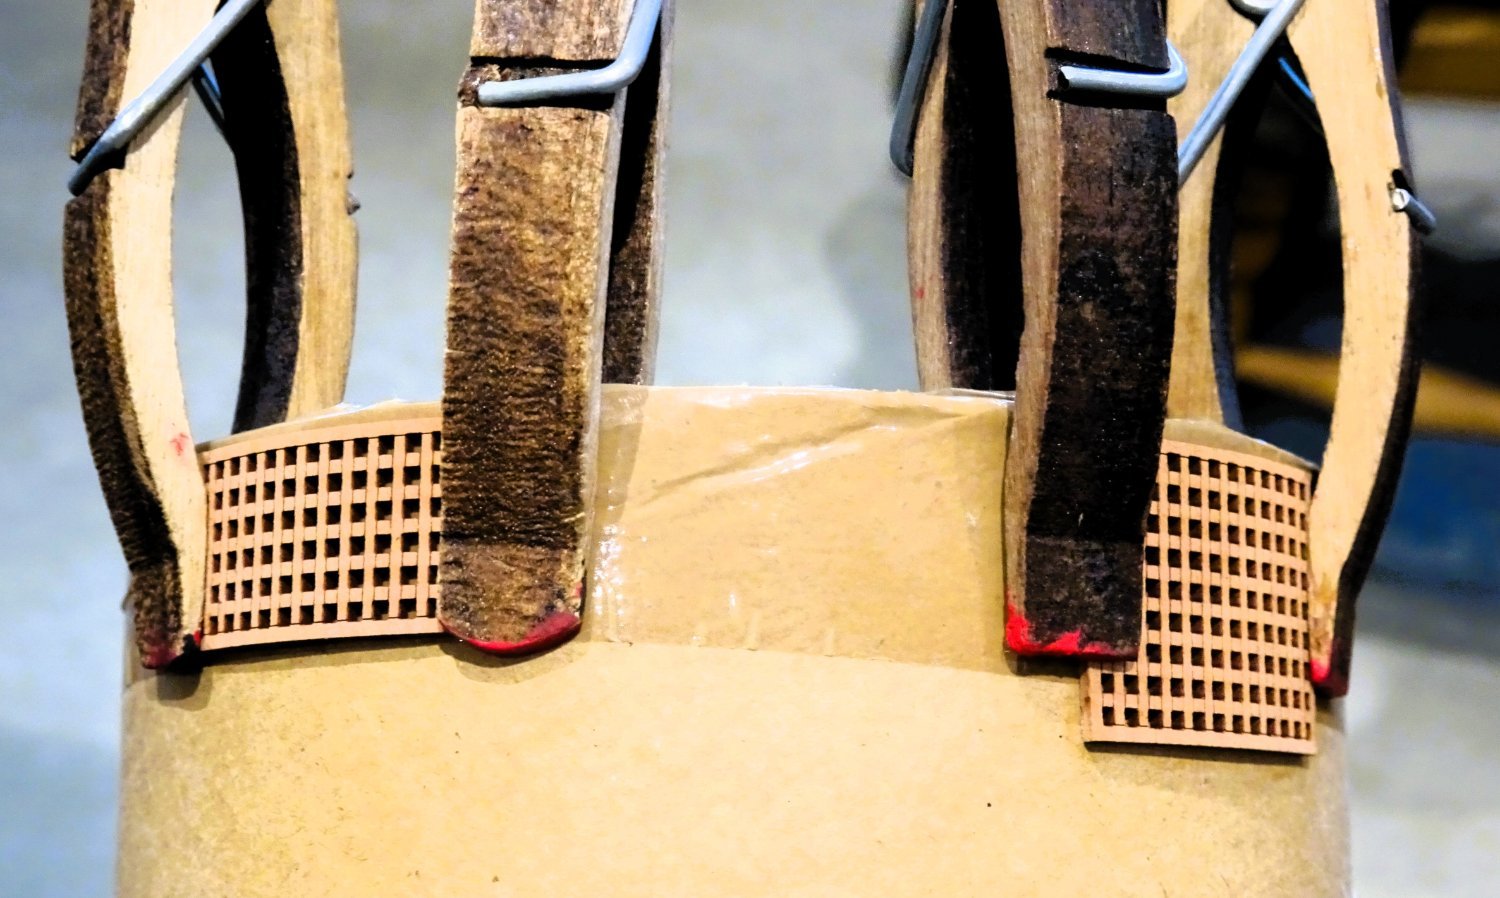
The final task is to impart a slight camber to the gratings. They are soaked and heat blasted around a large circumference tube of 11cm diameter.
2152
2154

2157
Happy with the result and onto the Qtr. Deck.
B.E.
25/09/2023
- mtaylor, fake johnbull, bruce d and 18 others
-
21
-
Excellent idea to re-visit those rails Glenn.👍
B.E.
- Glenn-UK, Thukydides and Theodosius
-
2
-
1
-
Nicely done Kevin, no hint of the shrouds going out of shape.👍
B.E.
- Old Collingwood and mtaylor
-
2
-
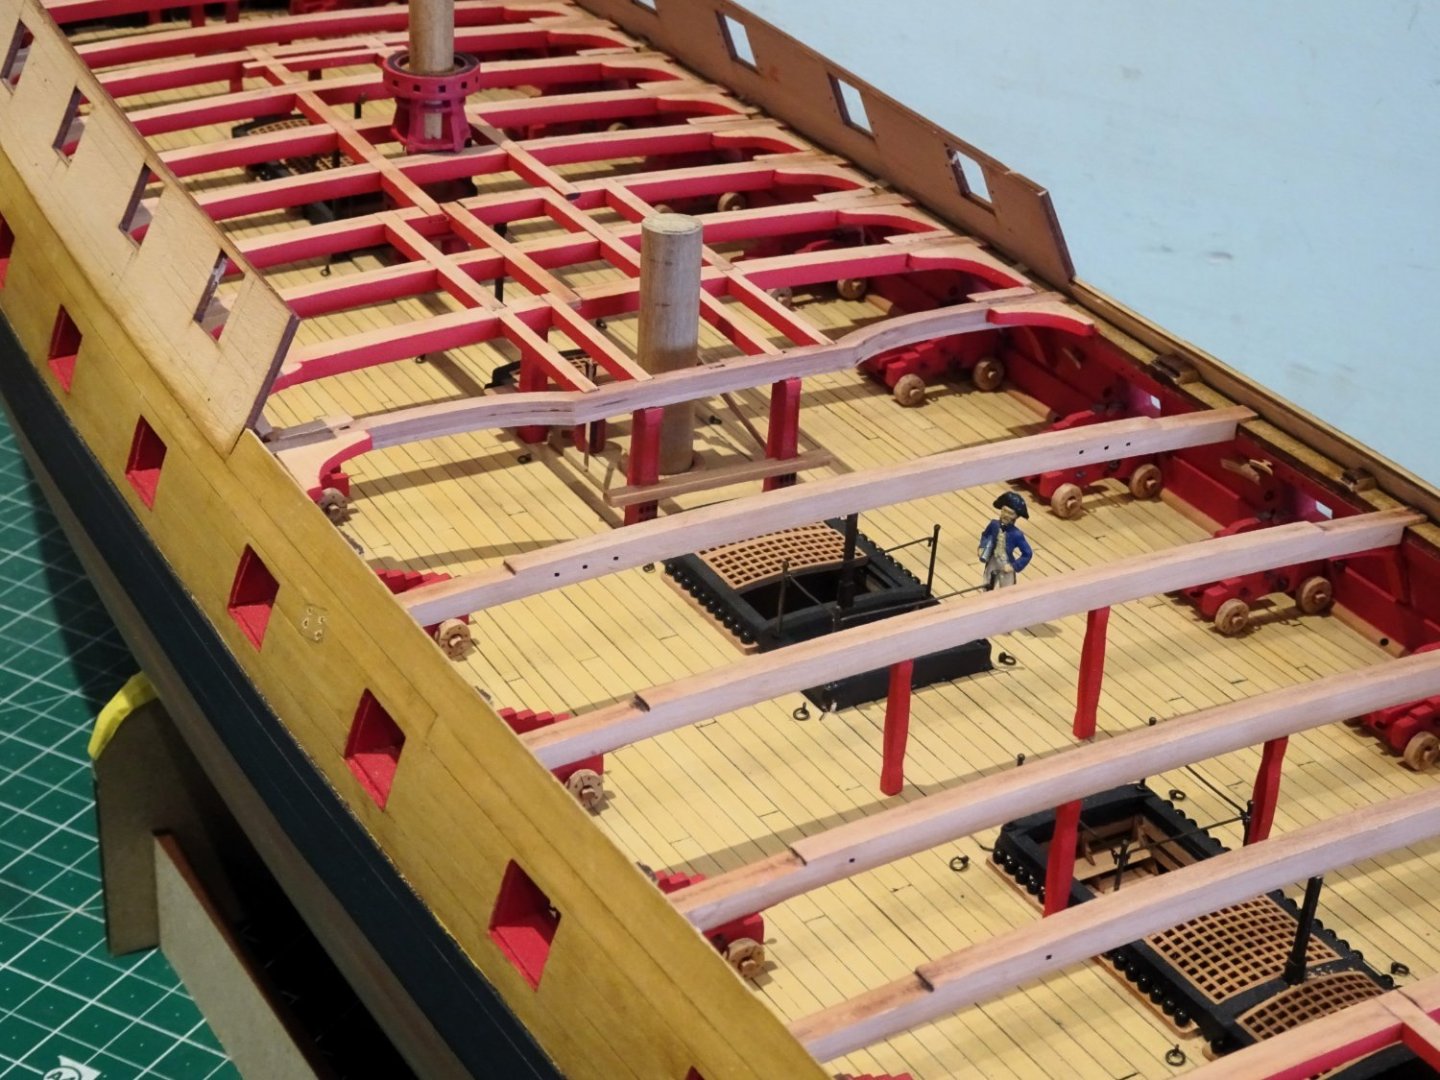
Hi Alistair, I have a fairly clear idea of where I'm going with this, in some ways the Qtr deck is easier to visualise than the Fo'csle. The cabin areas will be fully planked, but the centre line area between mainmast and Mizen will be modified to maximise viewing of the interesting detail below.
Regards,
B.E.
- mtaylor and jpalmer1970
-
2
-
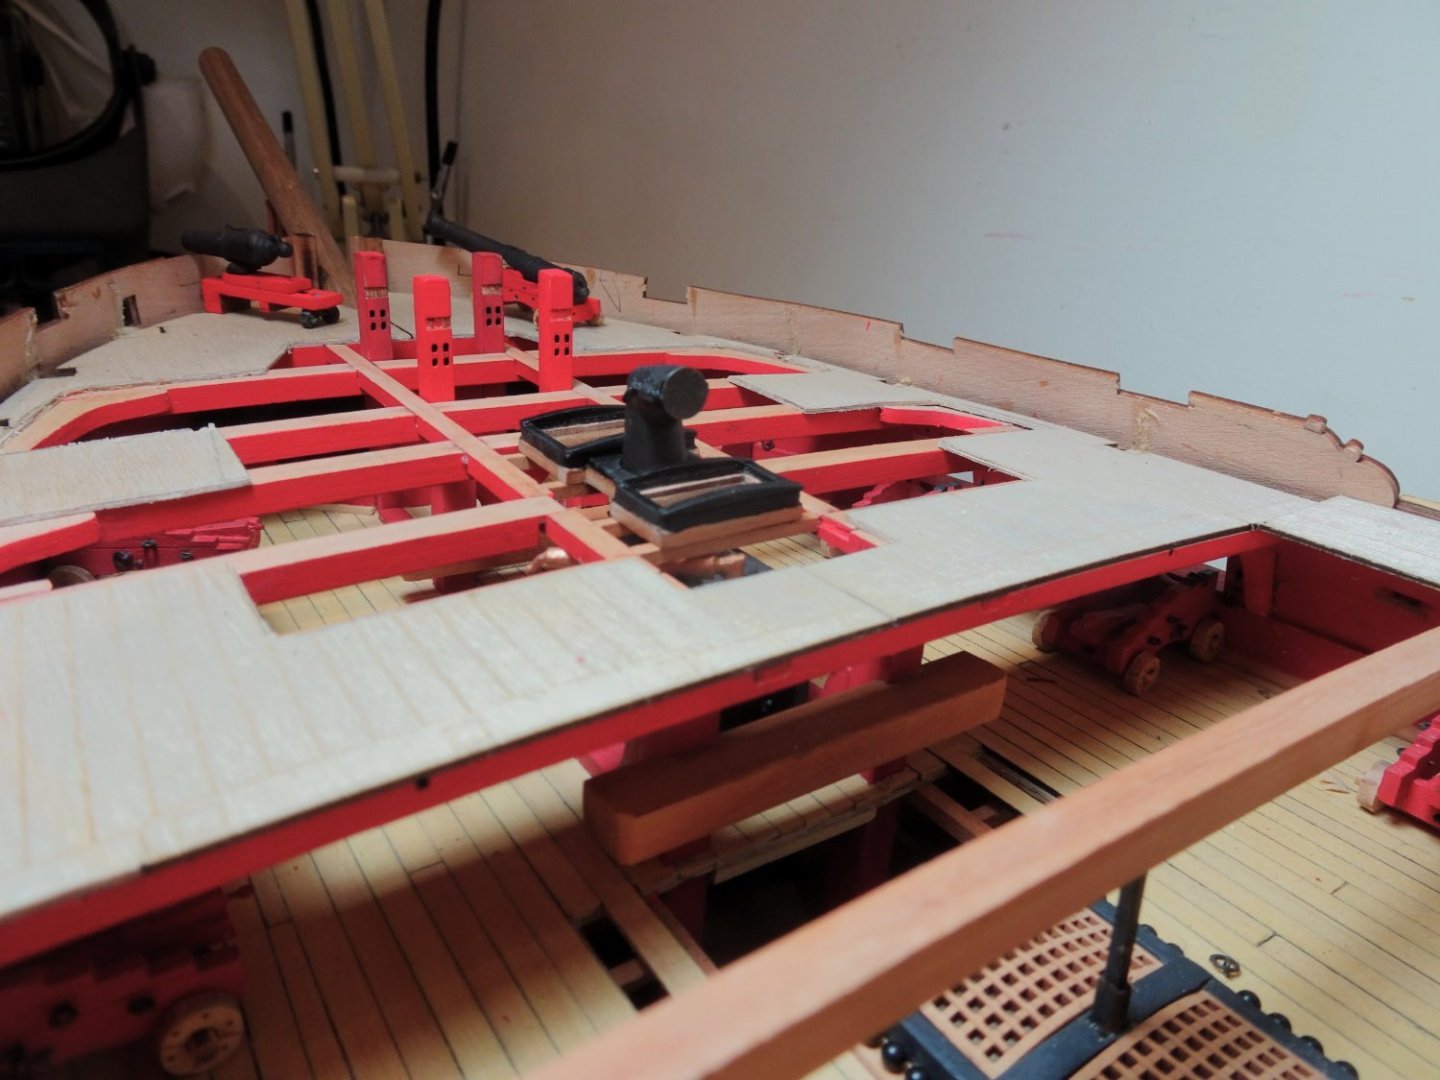
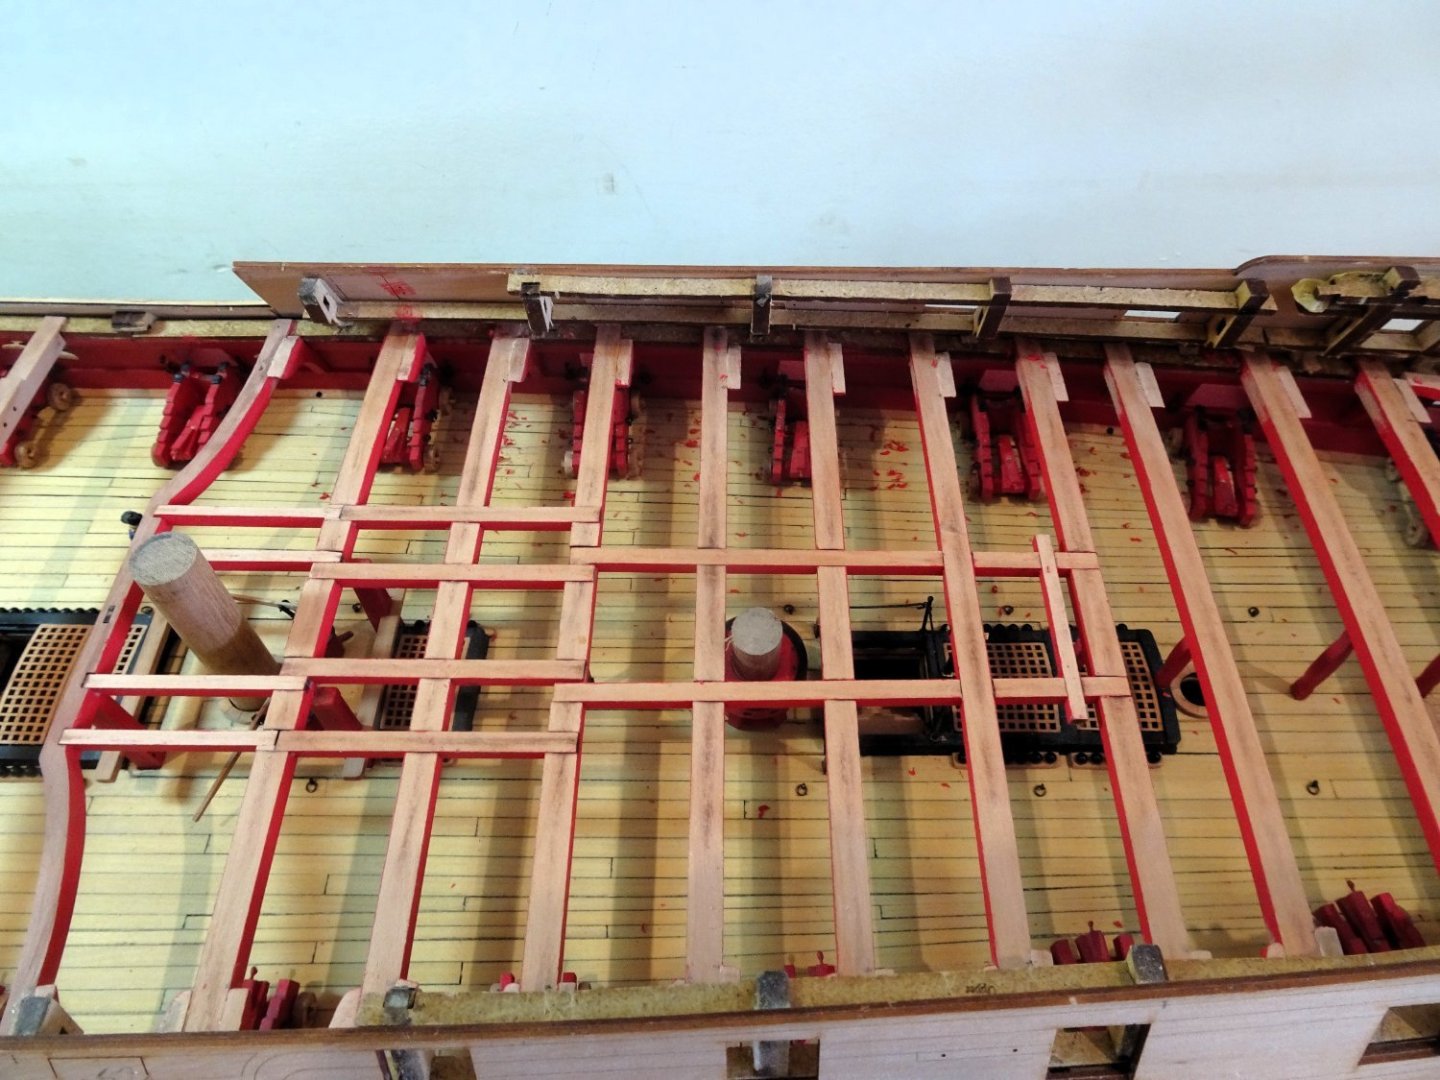
Post Eighty-two
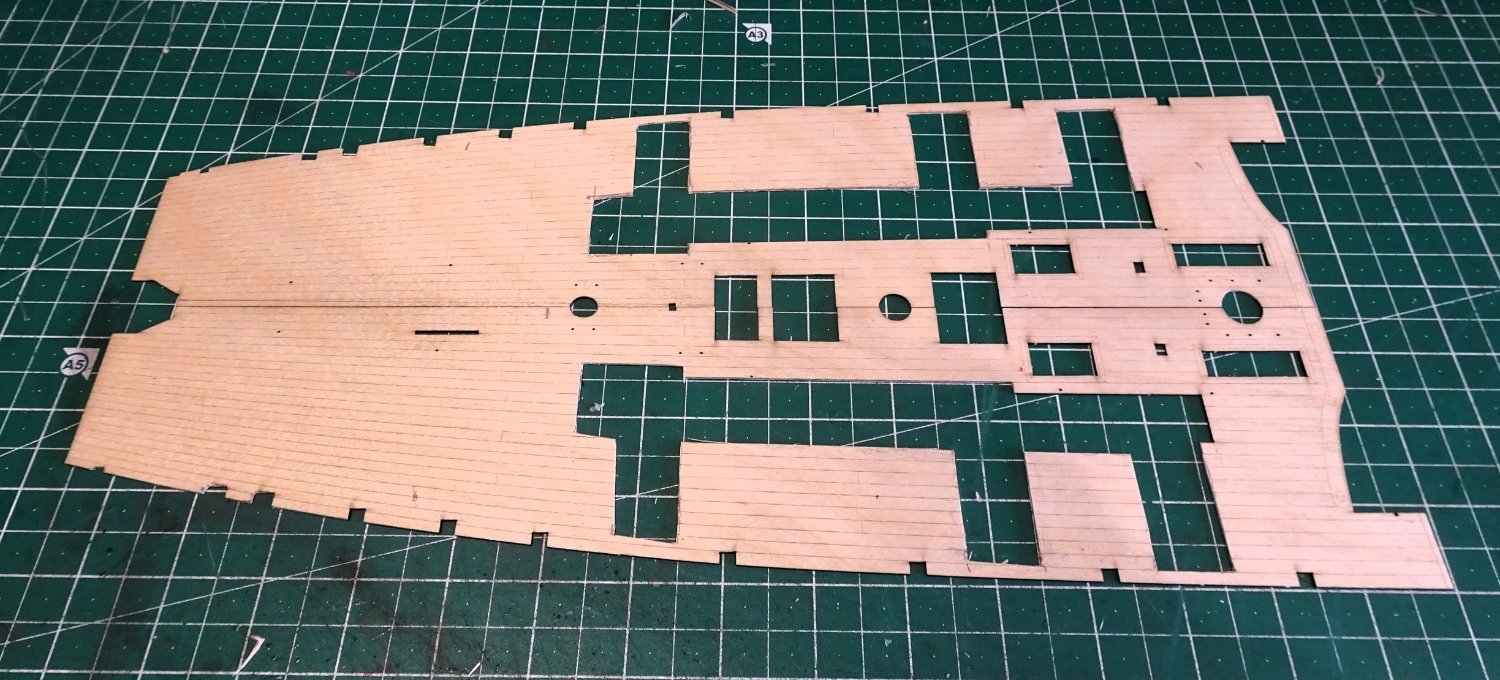
Setting the deck planking.
A ply sub-deck is supplied in two halves that run the full length of the deck area.
I am starting with the Foc’sle deck and my first step is to separate this section from the rest.
2120
With this fettled I notice a lack of support in the area of the steam gratings/chimney, and it seems I will need to add deck ledges.
2123
I used 2x2mm pear section for the ledges.

2121
2124
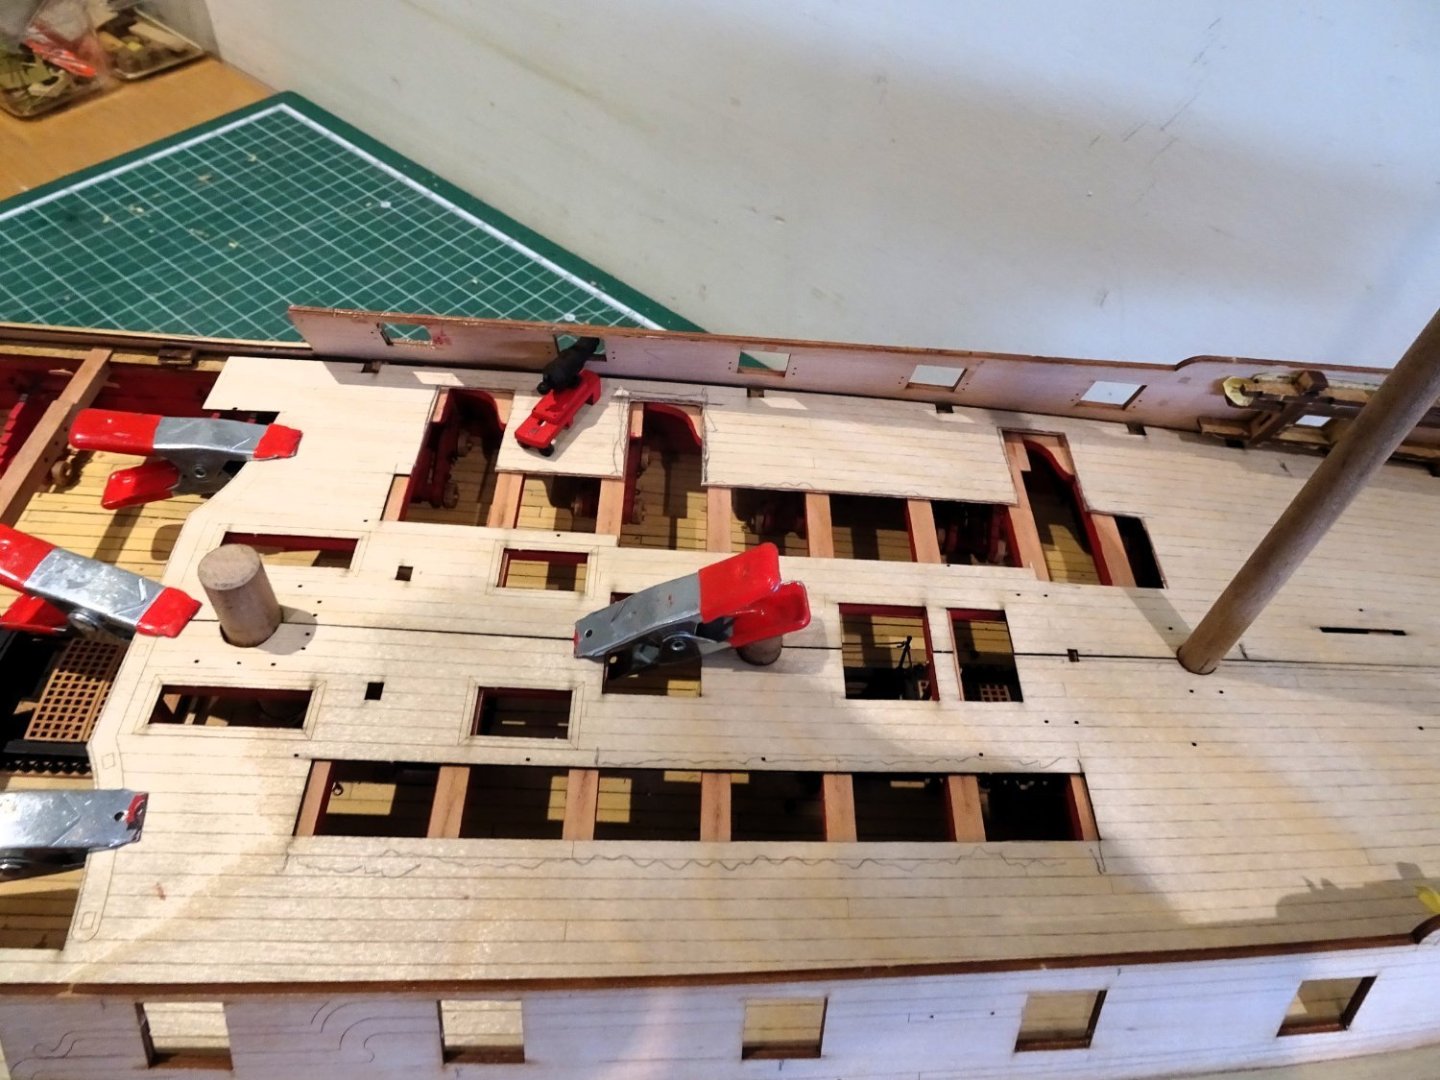
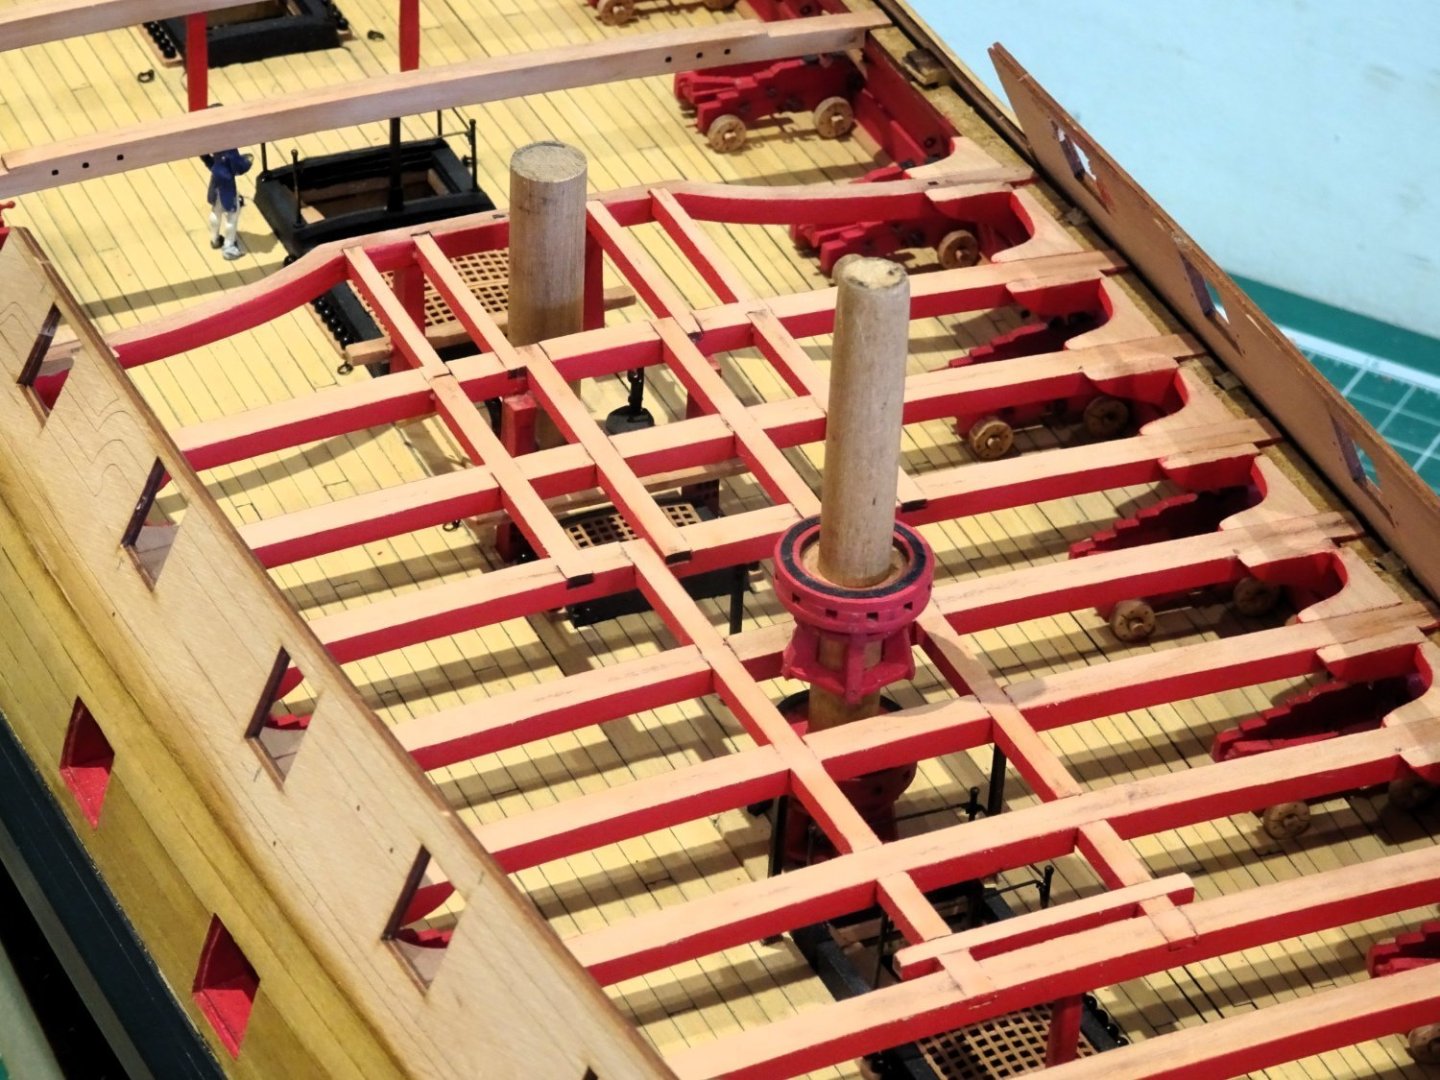
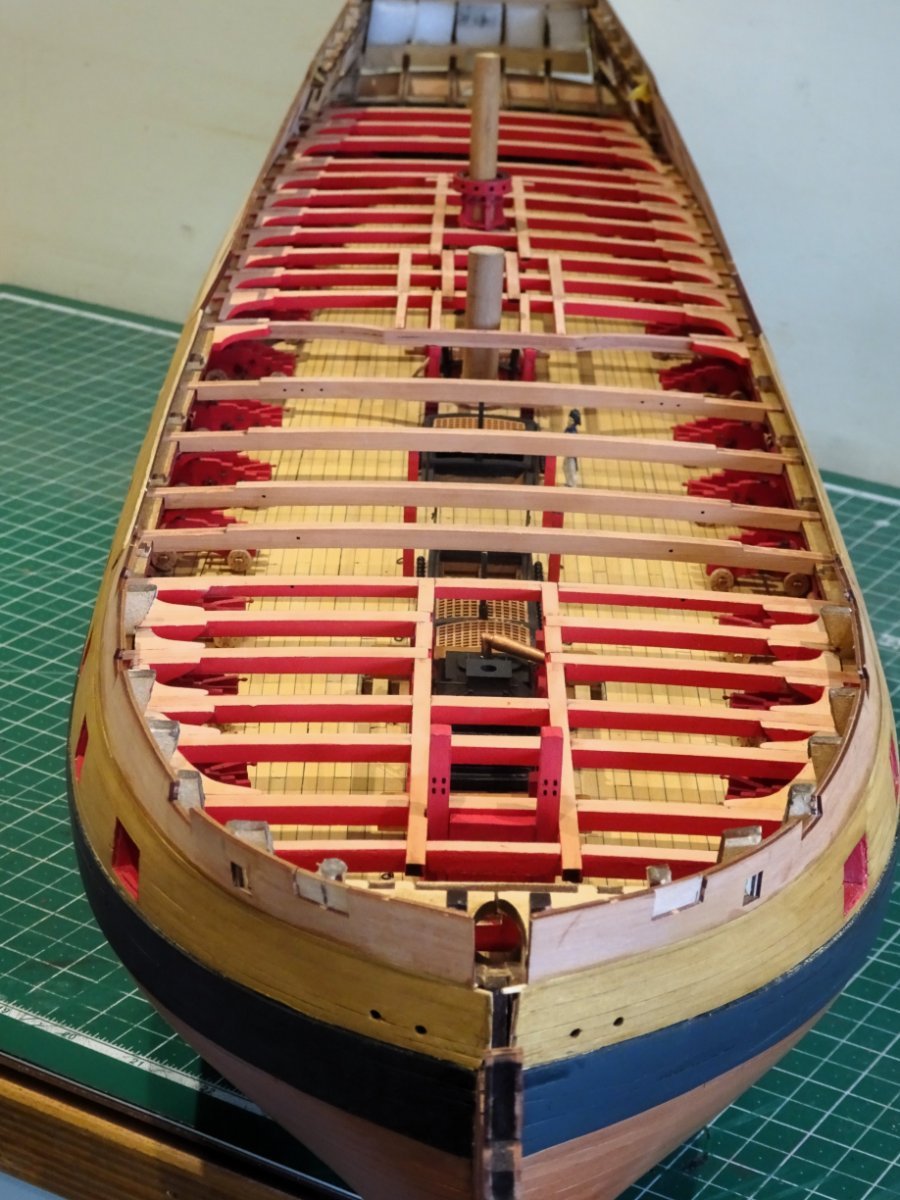
The sub deck will be used to maintain the correct deck height, but it will be modified to display more of the framing structure and give an enhanced view of the upper deck beneath the Foc’sle.

2125
I cut a clear template of the fo’csle deck to better see the beam layout below.
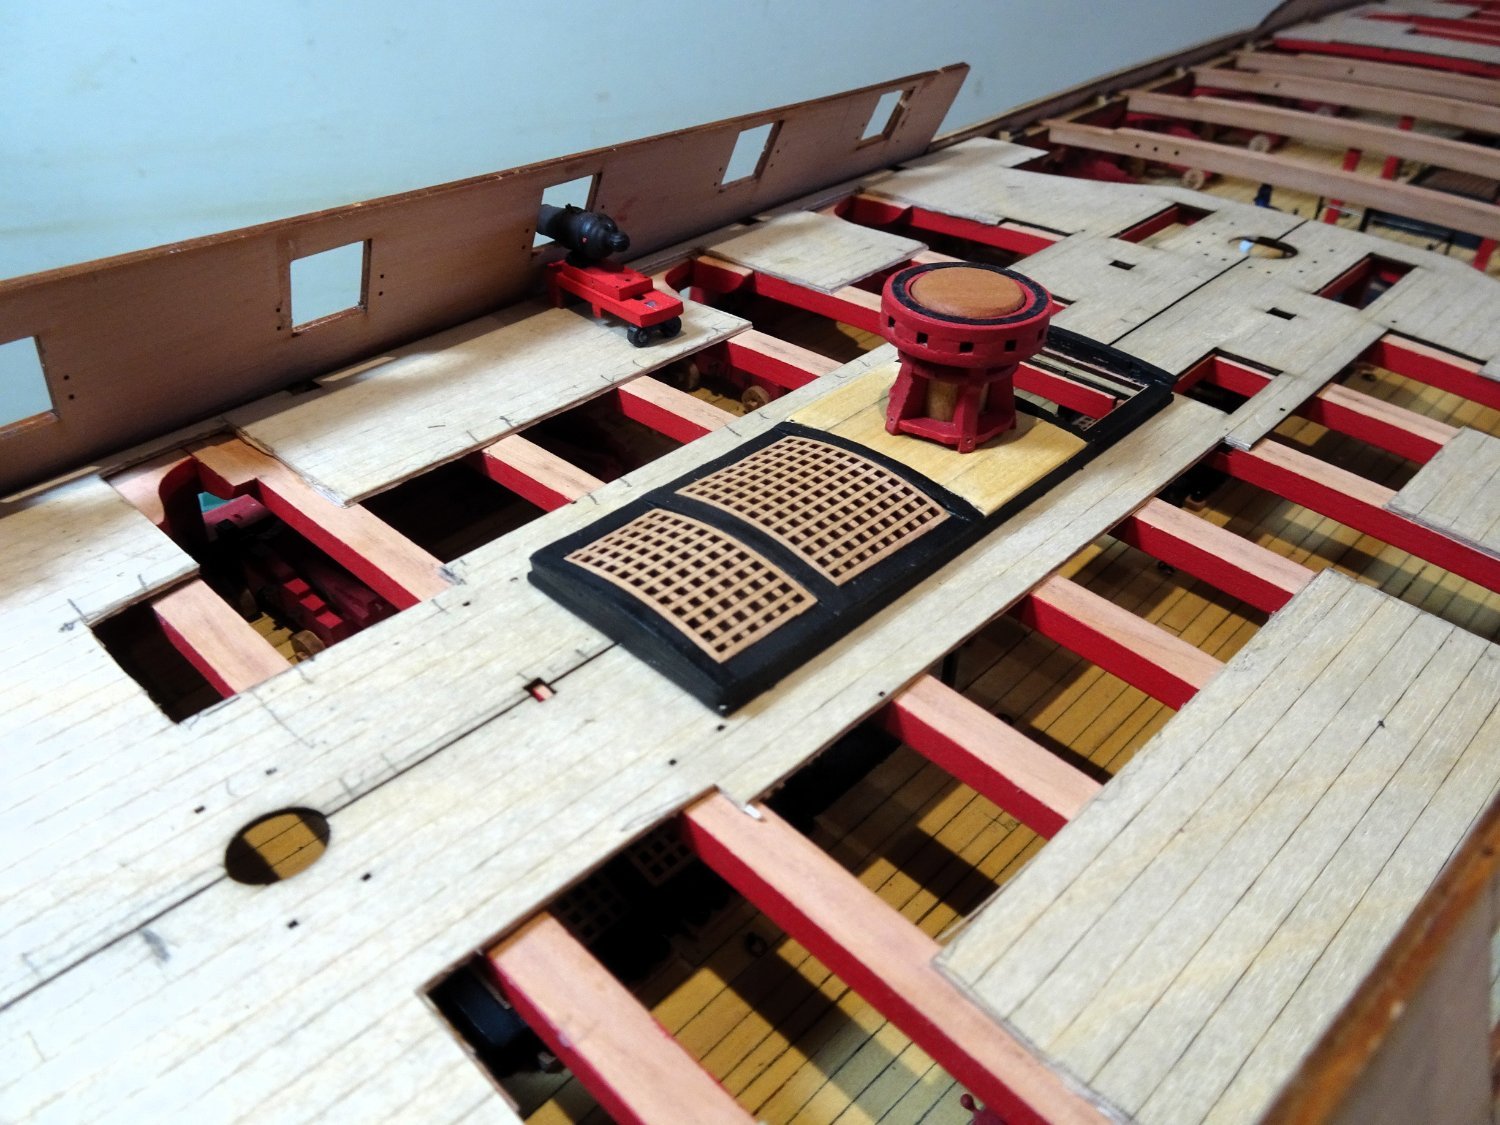
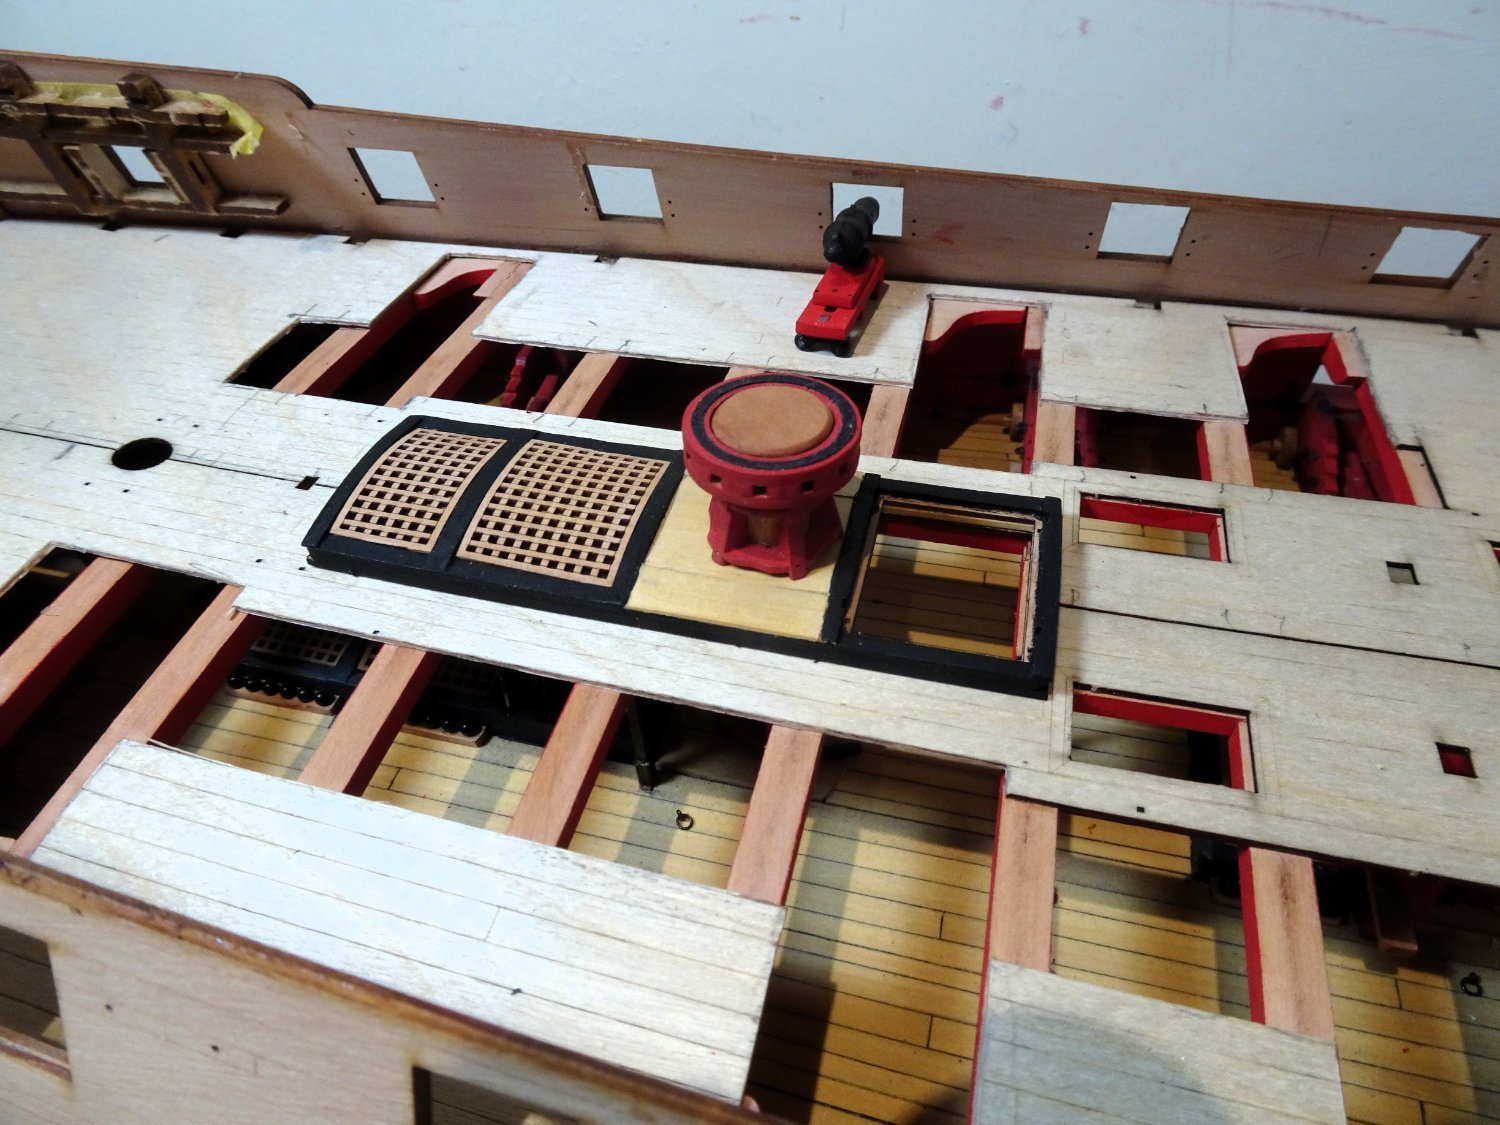
2134
This is the pattern I’m currently favouring.
It has symmetry and allows the fitting of the Fo’csle guns whilst exposing examples of the lodging knees.
The centre line fittings will be fixed atop the carlings and ledges and much of the detail of the Upper deck fittings will be visible.
It remains for the sub deck to be cut to match the pattern, ensuring uniformity before fitting.
B.E.
23/09/223
- CODY, fake johnbull, dunnock and 18 others
-
21
-
Is that a temporary line running from the the Fore T’gallant to the Main mast head.
I can’t place it.
B.E.
- mtaylor and Old Collingwood
-
2
-
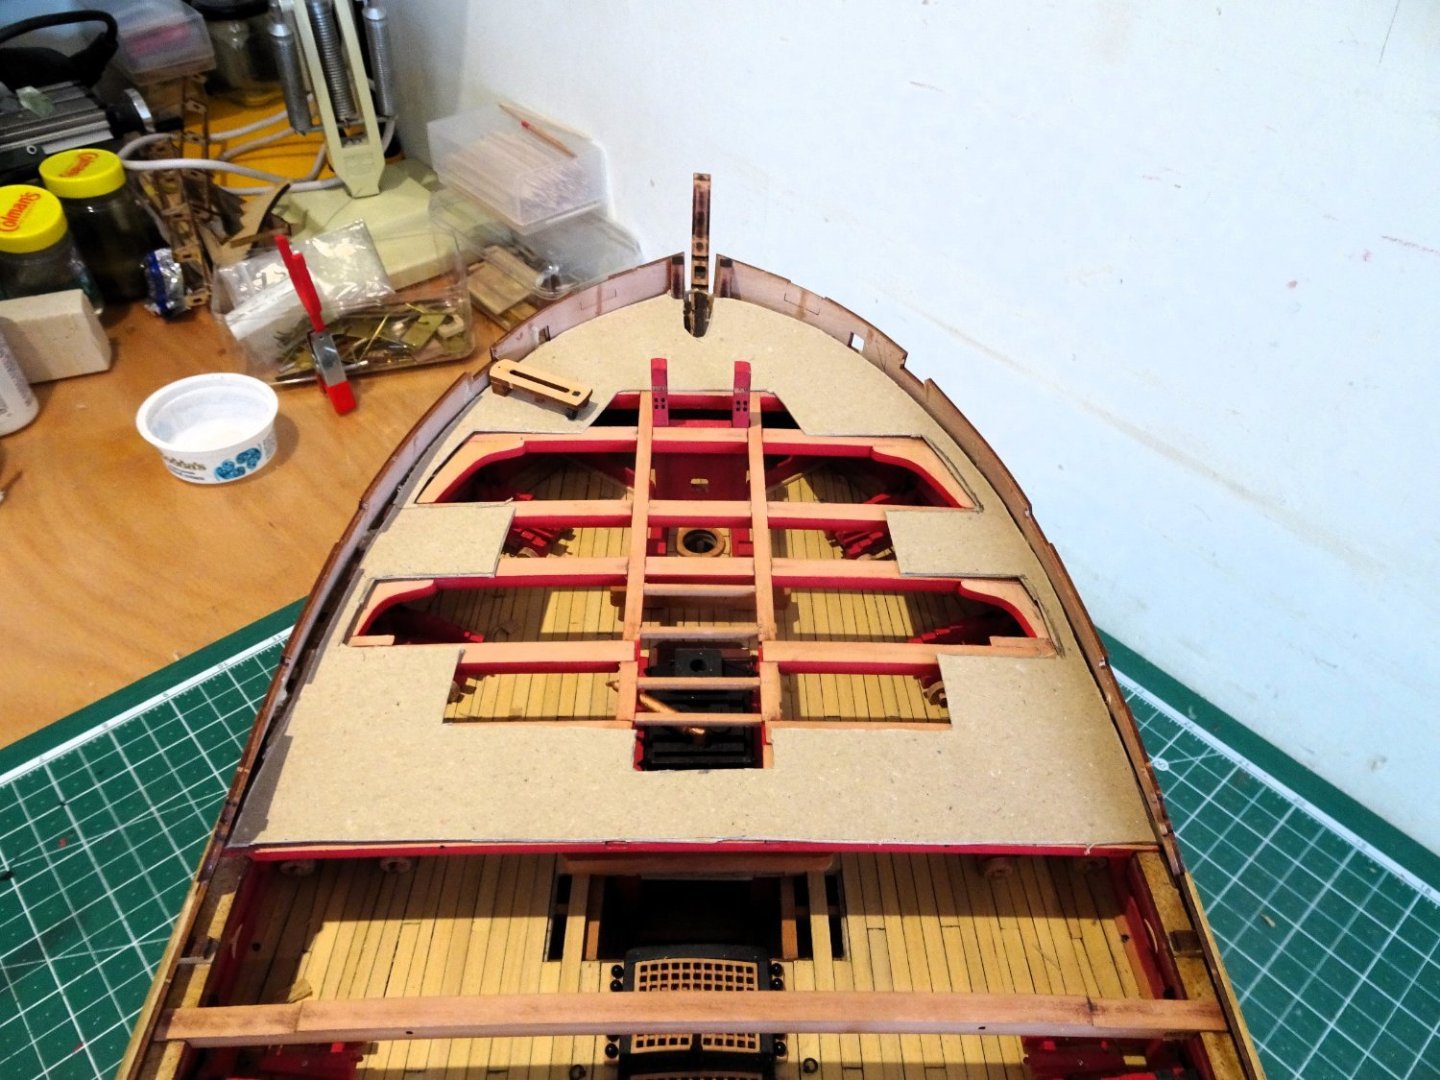
Post Eight-one
Quarterdeck knees
Prepping the knees didn’t take that long, but it helps to have a system.
2088
2098
Fitting these parts does mess up the painted bulwarks, fortunately there is plenty of room for cleaning up. Were I doing this job again I would have left the area of the beams covered by the knees unpainted before fitting, also the sides of the hanging knees where they attach to beam and Lodging knees.
Easier to touch in the paintwork rather than scrape away, and then have to clean up and re-touch anyway.
This time I fitted the full hanging knees first, followed by the short versions, and then the Lodging knees.
2092
This photo shows the trimming necessary to allow the knee to sit flush with the beam camber. The rebate on the back edge was lengthened a little to allow the knee to meet the beam camber at the deck clamps.

2099
I had imagined that fitting the Qtr deck Hanging knees would be trickier than those of the Foc’sle due to the tumblehome of the topsides.
Surprisingly I found the opposite, but perhaps my experience with the Foc’sle improved my dexterity.
2114
As with the Foc’sle the Lodging knees presented little issues.
2107
2118
I also added the hanging knees fitted below the Waist beams. Three should be fitted but the aftermost location is fouled by the large cleat to take the Fore sheets.🤔

2106
The Foc’sle beams were given a clean up.

2109

2115

2119
Onto the deck layout.
B.E.
22/09/2023
- mgatrost, Thukydides, Craigie65 and 16 others
-
19
-
I'm on the cusp now of working out the Foc'sle and Qtr deck planking patterns to best advantage, and I'm curious myself how that will turn out.
B.E.
- mtaylor, ECK, jpalmer1970 and 1 other
-
4


HMS Indefatigable 1794 by Blue Ensign - FINISHED - Vanguard Models - 1:64 scale
in - Kit build logs for subjects built from 1751 - 1800
Posted
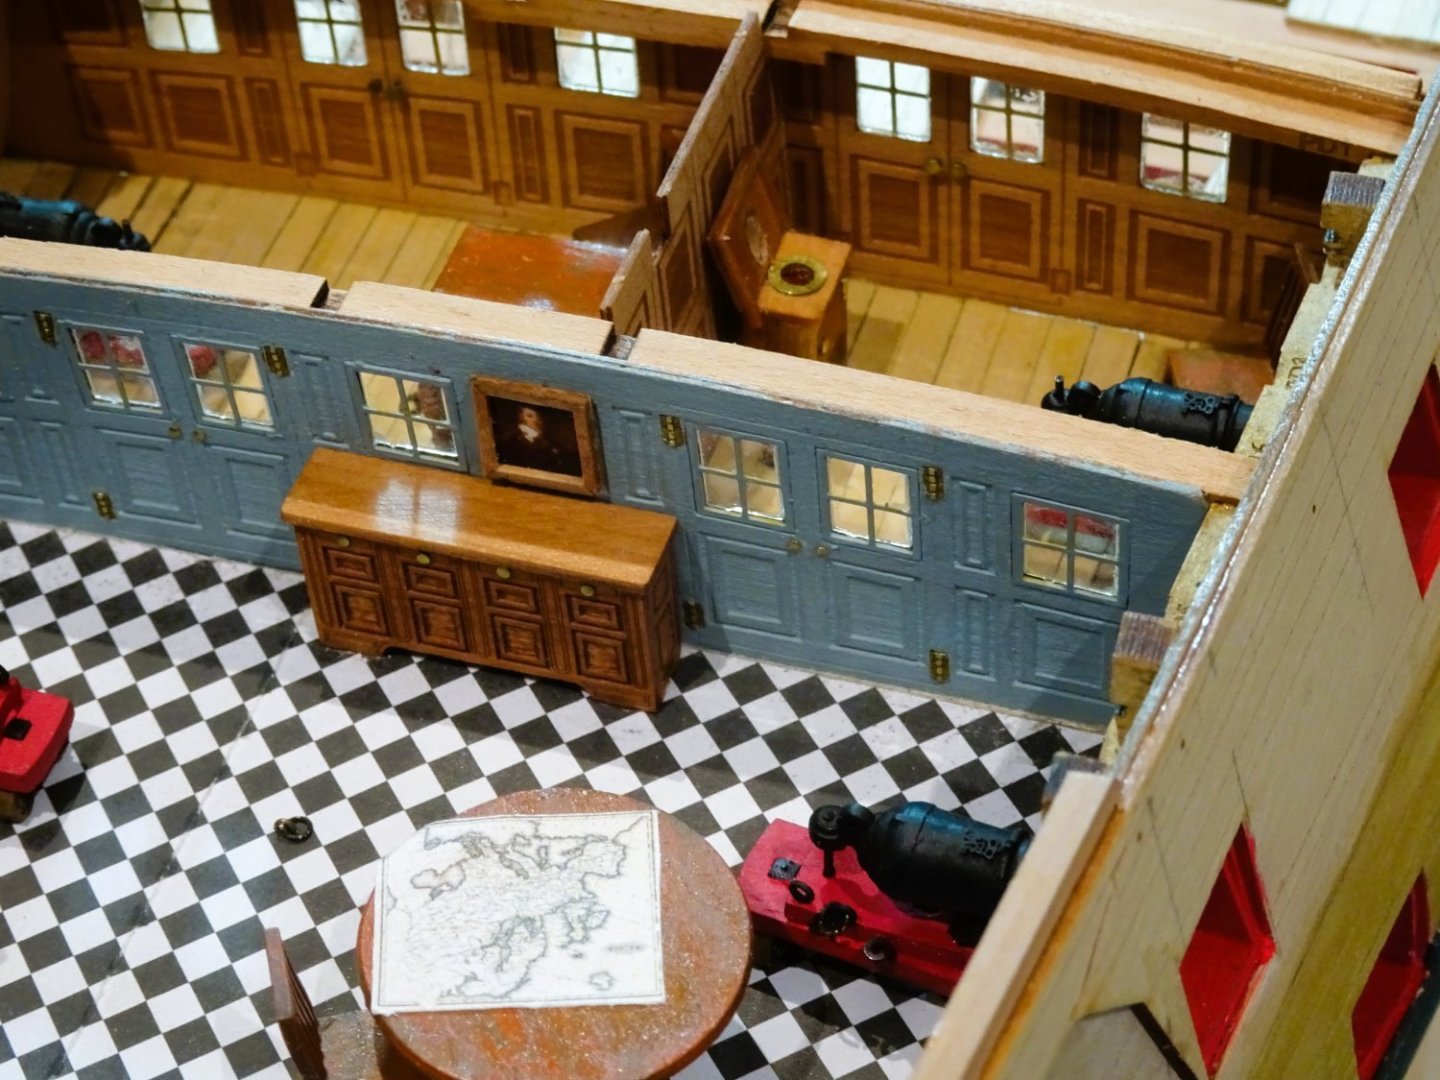
Thank you Thuky and Nipper.
It's my interpretation of an 18thc wash stand, but more Ikea than Sheraton.
The portrait is of Edward Pellew, painted in 1797 when he was Captain of the Indefatigable.
I thought it added a nice touch above the sideboard.
Now how do I model a 1:64 scale ships decanter to stand on the sideboard.🤔
B.E.