Landlubber Mike
-
Posts
4,543 -
Joined
-
Last visited
Content Type
Profiles
Forums
Gallery
Events
Everything posted by Landlubber Mike
-
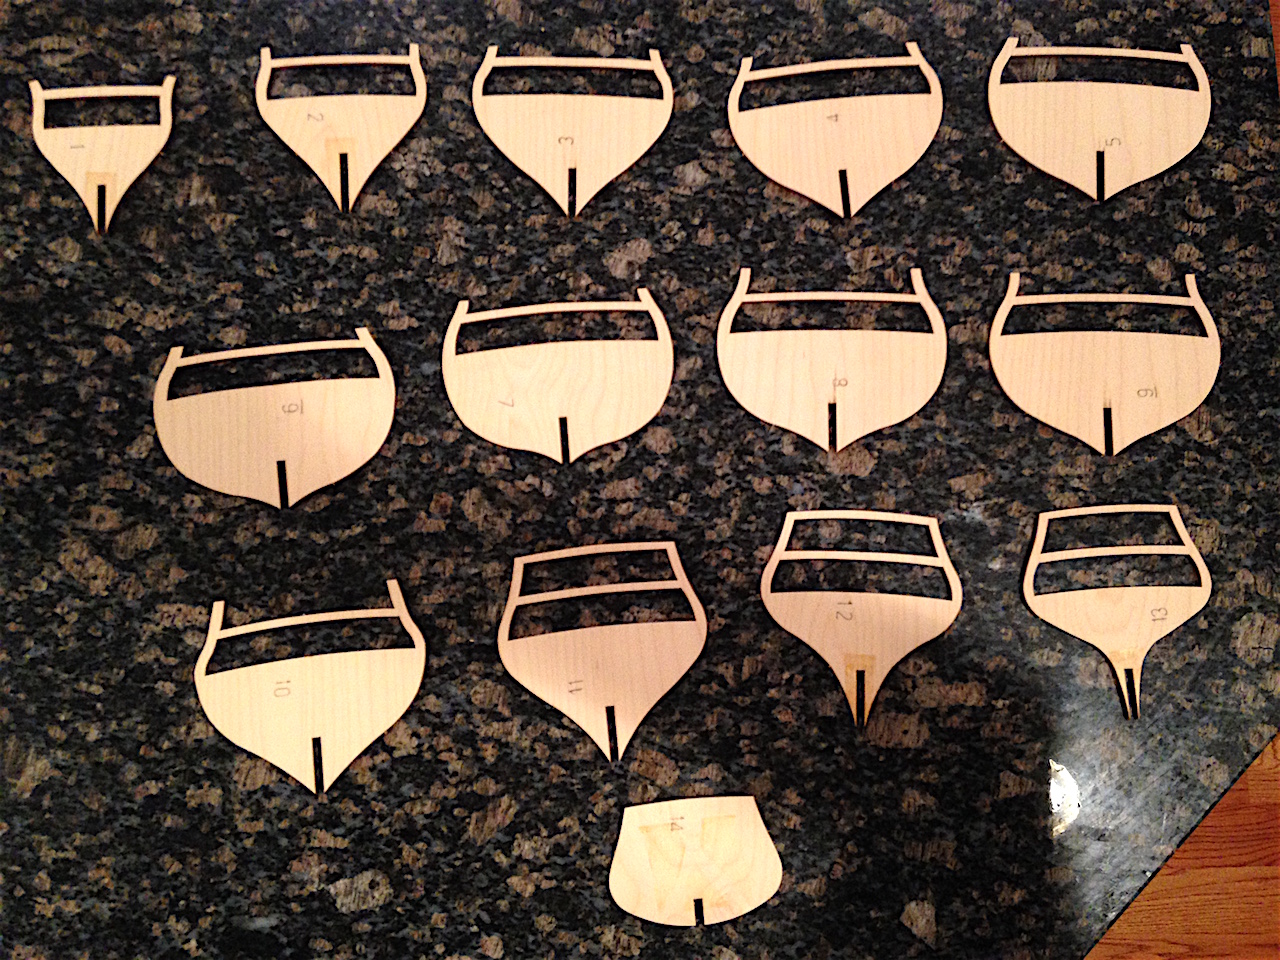
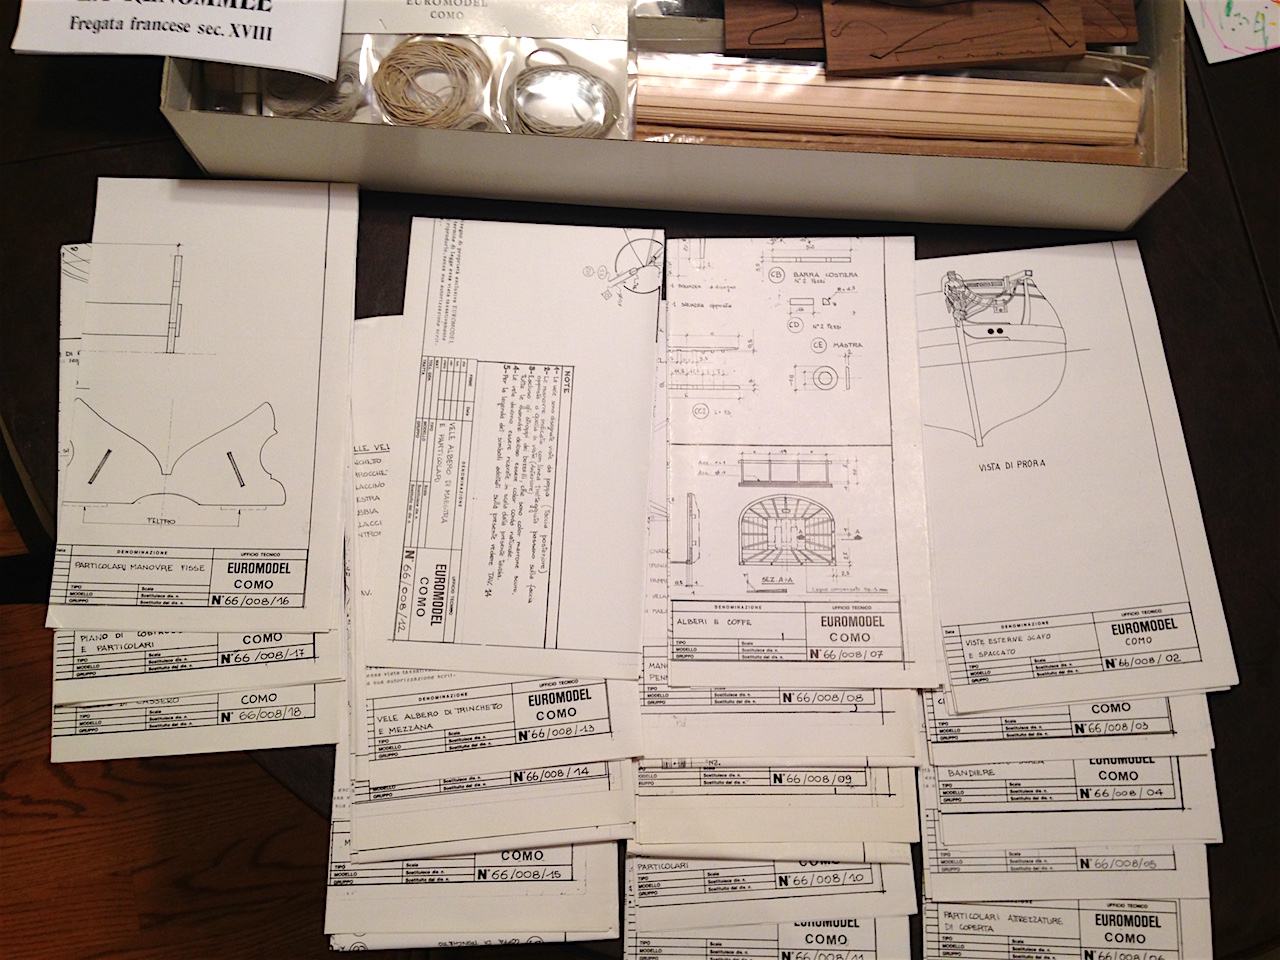
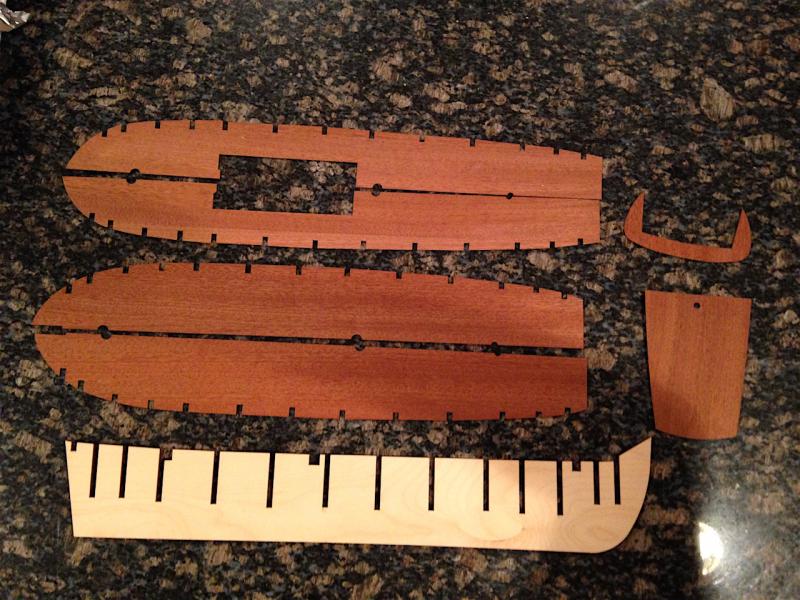
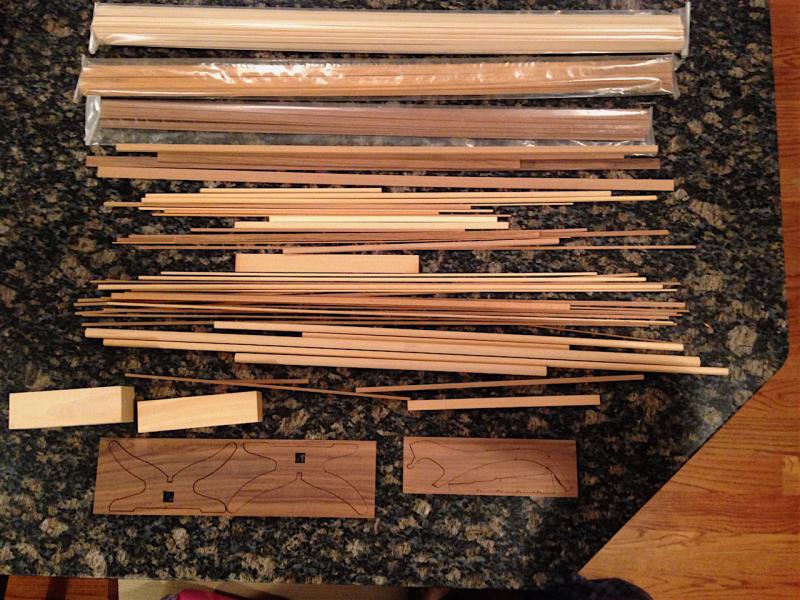
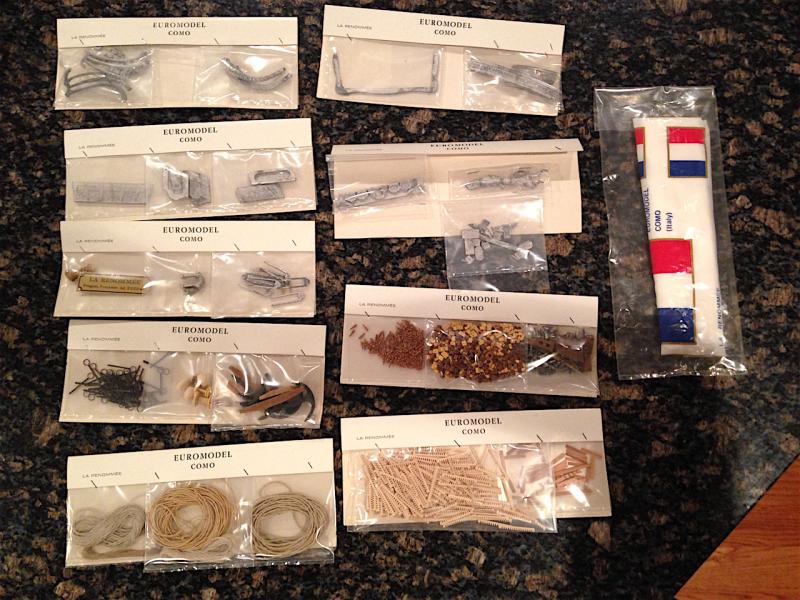
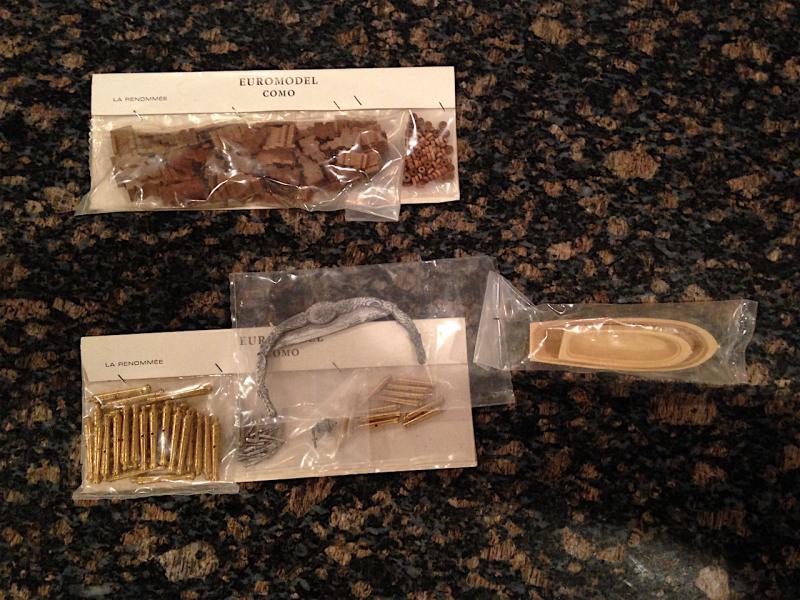
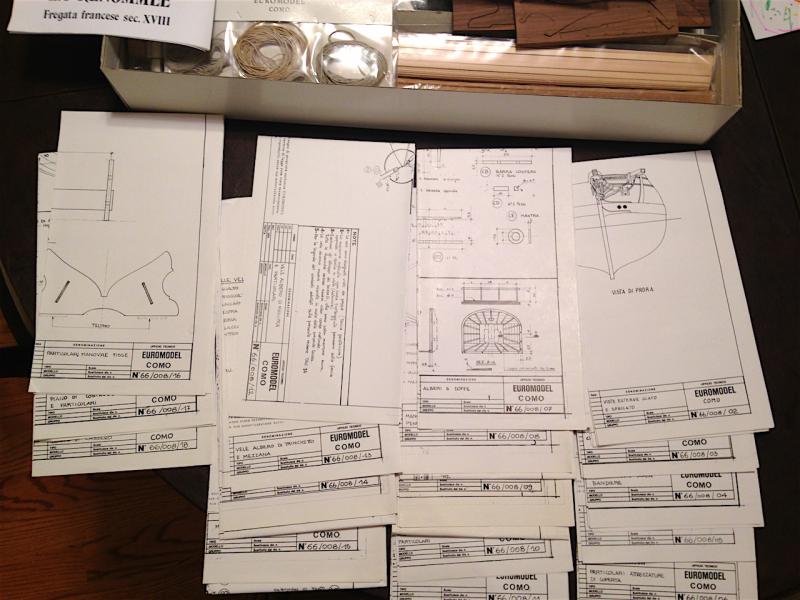
 There are a few Euromodel build logs on here, and one thing that really stands out with their kits is the quality. The plans are absolutely first rate. This kit has 18 plan sheets, which go into incredible detail on everything from deck items, to rigging, sails, etc. The order in which things are presented in the sheets is a bit of a head scratcher, but not an issue. The wood in the kit is also very good, and the fittings are especially nice. The cast pieces in particular are really well done - they really put the MS Charles Morgan cast pieces to shame. The box is quite heavy! Here are some pictures of what comes in the box:

-
Build Log Contents
-
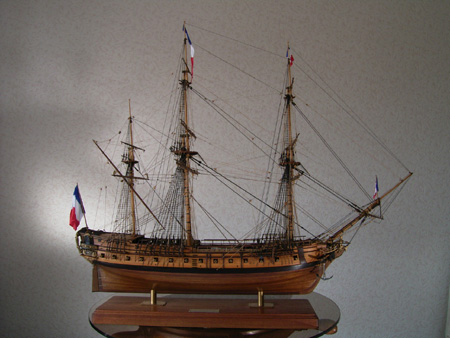
My next model is the La Renommee kit from Euromodel: This kit has been on my wishlist for quite a long time. I believe someone had a beautiful build log going pre-crash with MSW 1.0. That image stuck with me, as well as the Kenji Nakajima model pictured above. As far as I can tell, the only log going here is from J.P., who is doing a masterful job and setting the bar very high! I bought the kit on eBay a few months ago. I originally was going to build this after I finished the Pegasus and Charles Morgan, but given how much I have been bashing those two kits, I thought it would be a nice change of pace to build a kit from the box (even though Euromodel kits often encourage builders to take advantage of the incredible plans to enhance the kit). I also have the Euromodel Friedrich Wilhelm zu Pferde on my shelf -- a really amazing kit -- but I want to better my skills before tackling that kit to do it the justice it deserves. When my kit arrived, I realized not only was I missing Plan Sheet 1, but the keel was pretty warped (it had obviously been sitting somewhere for quite a while). I contacted Euromodel, and Massimo Mazza was incredibly courteous and helpful in replacing both for me. To show my gratitude for Euromodel's kindness, I decided that I would start this model alongside the others. I just hope to do the kit, Massimo and the other folks at Euromodel proud by my efforts! One thing I should mention is that this kit is in Italian and has limited instructions. However, Euromodel, together with MSW's own PiratePete007, have done a really nice job in providing translation and other materials. In particular, Pete has really done us model builders (and Euromodel) a great service in putting together very detailed guides on how one can go about putting together models from the Euromodel line-up. Those guides are really well done and very insightful, especially for me as I am on the beginner end of the spectrum, so a big thank you to Pete!
-
It's very good - I picked it up as well as earlier books as used books for not too much money. That particular book is in full color, which therefore was a lot more helpful than the earlier B&W books. He uses a lot of interesting techniques and materials at a smaller scale, but I think they can carry forward to larger scales that most of us mere mortals model at.
- 608 replies
-
- 4
-

-
- la couronne
- corel
- (and 1 more)
-
Hey E.J., I was just reading the Philip Reed book "Building a Miniature Navy Board Model," and his model of the Royal George had an entry balcony very similar to the one you added to your build. I instantly thought of your Couronne when I saw it. Very nice job by the way. It's coming along really nicely!
- 608 replies
-
- 3
-
-
- la couronne
- corel
- (and 1 more)
-
Thanks guys! Don - the kit has really nice looking plates. Much better than the copper foil tape that came with my MS Charles Morgan. I don't know if the plates are self adhesive, or you need to use glue for them. Judging by BE's response, it sounds like I will need to use glue to fix them BE - hmm, that gives me something to think about. Thanks for passing that along. Martin - no finish on the redheart just yet. From what I've been reading, any finish just delays the inevitable so no rush to do so I don't think.
-
Very nice Dave! Beautiful work, I love your use of different woods. A big inspiration as I try to take a similar approach on my builds. Looking forward to following your next projects.
- 306 replies
-
- 3
-
-
- armed virginia sloop
- Patrick Henry
- (and 2 more)
-
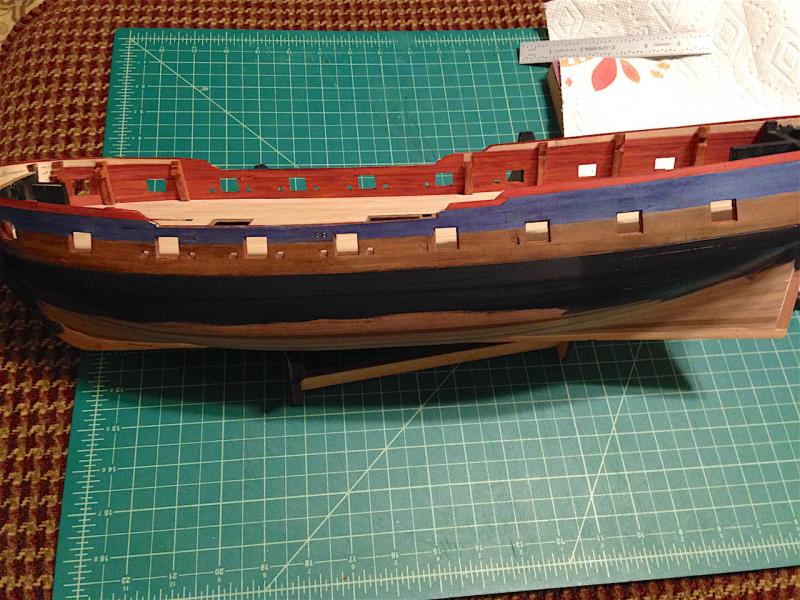
I finished the bulwark planking, though I left the very tops open for the thin strips of above the forecastle and quarterdeck. I think the redheart is a really nice touch. It won't stay this red, but over time will fade to a more orange-brown color which I think will be a nice effect against some of the other colors in the build. It's a nice wood to work with, though it can be a little crumbly and has a little of a burning rubber odor when working on it with tools (it doesn't bother me at all, but given that some people mention it, it must bother them). To tie everything together, in addition to the bulwark planking and red strip on the upper hull, I will likely use redheart for the bitts and possibly capstan. I'm also planning on integrating it into the stern as well as the quarterbadges as a bit of a decorative touch. I didn't bother with different thickness woods for the spirketting and waterway or with any focus on the widths of the planks for the non-waist areas, as those areas will be covered by the forecastle and quarterdeck. In case you could see a little of the bulwarks, through the gunport or otherwise, I figured I might as well use the redheart for consistency instead of stains or paints. Not sure what I want to tackle next. I'm mostly a lap modeler, so I'm thinking of doing the upper hull rails and certain other elements now, including possibly the stern and quarterbadges, and at some point I'll also need to treenail the deck. I want to delay adding the cannons as long as possible given my propensity for popping them off my Badger, but I'm also hoping to delay the coppering as long as I can as well. My guess is that I'll do most of the outer hull details, copper the hull, then switch back to the main deck to add the deck items and guns.
-
Turning out to be a real beauty Nick. Very nice job!
-
Looks great Joe, I'm in for the ride. Did you make a decision on your Morgan yet?
- 136 replies
-
- 1
-
-
- caldercraft
- Cruiser
- (and 2 more)
-
Beautiful work!
-
Hey Ron, your Morgan is coming out really nicely! Hope you don't mind that I've been following your log. It's given me a lot of inspiration as I think about how I will go about doing things on my Morgan. It's definitely a different type of build, isn't it? Dealing with the plank sheer and the various frames and supports and rails, it's a little more complicated than the typical kit that is out there. Everything is fine on my end, I've just been a little busy, and have been getting in some work on my Pegasus when I can find some time. Part of the delay on the Morgan was that I have been trying to figure out how to approach the color scheme. I was originally going to go with pear stained black for the black areas, boxwood for the ochre, and was hoping to do holly for the white areas. Then I thought about trying African blackwood for the black areas, and took the suggestion from Dave (DocBlake) to look at yellowheart. Well, I was thankfully able to source enough holly from Jeff's Hobbymill close-out, and to boot he had extra yellowheart left over so he milled me what I think I needed. The African blackwood was tough to source though, and after 2 months of emailing and calling various suppliers, I got very disappointed. Then MWB suggested a supplier of wood for inlays who works with ebony and was able to cut for me sheets and strips in the sizes I needed. Hooray! So after a lot of time, I've settled on ebony for the black areas, yellowheart for the ochre, and holly for the white areas. The deck will likely be maple stained with General Finishes Antique Oak to give it that grayish look, and the waterway will likely be pear stained a dark brown. If I can pull it off, it should be a pretty unique build. We'll see if I can pull it off though. I prefer the look of natural woods, or stained woods in lieu of using paints. I was fortunate enough to find a ship in the Morgan with three main colors that I can replicate directly with wood. There's a lot of planning that I'll need to go through, which I've started. For example, the plank sheer may end up being comprised of all three woods - yellowheart for the interior of the ship, ebony for the exterior, and a strip for holly on top of the ebony for the white stripe. A bit complicated, but should be fun. Now that I have the wood, I can get back to work. Thank for looking in! Good luck with your Morgan!
-
Really nice work Don, congratulations on a wonderful build! Those MariStella kits really work themselves into nice models. But your skills in bringing it to life, along with your added touches, really make for a nice model. Nice property too - must be really relaxing sitting on the mower in that beautiful part of the world. Do you get a lot of snow and cold and long winters? Perfect modeling weather
- 62 replies
-
- 3
-
-
- batelina
- marisstella
- (and 1 more)
-
Comparing Amati Swan Class Victory Models
Landlubber Mike replied to dchrismiller's topic in Wood ship model kits
Hey Chris, There is a good discussion on BE's build log on the cannons, as well as Martin's and Alistair's Fly logs. The guns are too large and out of scale. I went with the same barrels that BE used for his Pegasus that he describes here (I bought mine from Cornwallmodelboats): http://modelshipworld.com/index.php/topic/332-hms-pegasus-by-blue-ensign-victory-models-enhancing-the-kit-a-build-log-of-sorts/?p=4136 http://modelshipworld.com/index.php/topic/332-hms-pegasus-by-blue-ensign-victory-models-enhancing-the-kit-a-build-log-of-sorts/?p=354782- 12 replies
-
- 3
-
-
- Amati
- Amati Victory
- (and 6 more)
-
Comparing Amati Swan Class Victory Models
Landlubber Mike replied to dchrismiller's topic in Wood ship model kits
TFFM 4 is a great resource - I used it extensively for the rigging and sails on my Badger. The authors did lots of research using Steel and other resources which makes it very handy. It was recently expanded to include a chapter on how to make sails. For those that bought earlier editions, Seawatch Books offers a pamphlet covering that chapter.- 12 replies
-
- 3
-
-
- Amati
- Amati Victory
- (and 6 more)
-
Comparing Amati Swan Class Victory Models
Landlubber Mike replied to dchrismiller's topic in Wood ship model kits
I went through the same process when thinking about which to buy. Regarding the ships themselves, they are very similar, both have gorgeous, detailed plans from the NMM that are available for purchase, and since they are essentially the same ship, you can use the TFFM books to tweak your build. In terms of the kits themselves, I liked the fact that the Pegasus had all the upgrades in one box. The Fly upgrade kit was a bit hard to find when I was looking. I think the Fly base kit uses cast metal carriages, which was a turn-off to me, but I'd note that you might want to consider replacing the Pegasus guns anyway given that they are out of scale. As for the ply pieces, SpyGlass is right that they are pretty crumbly and not very good quality in the Pegasus kit (I haven't seen the Fly kit to compare). That didn't bother me as much as I'm replacing much of the visible wood anyway. In the end, I went with the Pegasus as I liked the figurehead and stern and quarter gallery decorations a little better. It's been a really fun project, not just to build, but also to build alongside my Swan class brothers and sisters As for the practicum, I have it and would strongly recommend staying away from it. I wish I had thought to ask for my money back. I bought it while working on my first kit, the Badger, and it did help me in certain places to see how various items fit together. Otherwise, it is terribly written, the work done is rushed and sloppy (half the pages have some acknowledgement of a mistake that was made, like reversing the PE decorations, etc.), and many of the pages show a different model than the Pegasus! Plus, no rigging or other instructions which would have been very helpful.- 12 replies
-
- 4
-
-
- Amati
- Amati Victory
- (and 6 more)
-
You sorta have to guess a bit where the wales end up at the stem - look at the head-on picture in the plans which might help. Using the temporary batten to mark the run of the wales works nicely. I wouldn't use it as a template to run the actual planking against. It didn't really work out all that well for me. Instead, I would think about running tape, etc., then marking the line of the wale. One thing I did was rather than do the full second planking and add a 1mm strip for the wale was to use a 2mm strip for the wale directly on top of the first planking. It made for a cleaner look I think rather than seeing partial planks above and below it. If you don't have 2mm strips, you could always laminate two 1mm strips together.
-
From the TFFM series, the wale sorta flattens out at the stem and doesn't continue the upward sweep. On my Pegasus, I found that this naturally happened given the curves at the stem so I didn't need any special bending or shaping. If I remember correctly, this started happening halfway between the first gunport and the stem. It's very slight though. Here is why my log starts with the wale in case you're interested: http://modelshipworld.com/index.php/topic/7267-hms-pegasus-by-landlubber-mike-amativictory-models-scale-164/?p=329358
-
Really nice work Frank. I like both colors, but would lean towards the fruit wood too. With the green, the ship might start looking too busy and have a kaleidoscope look.
-
I would highly recommend people giving Matt at Inlay Banding a look if you are looking for ebony, holly, or other woods: http://inlaybanding.com Matt was really great to work with, and did a custom order for me to exact specifications. He was even able to get ebony sheets down to as little as 0.7mm. Matt most does work for inlays and veneers, but I think he would make a great resource for ebony and other exotics (along with ebony, he does holly, maple, boxwood, satinwood, maple and others). Now that Jeff is retired, I would highly recommend Matt is you are looking for ebony or other woods.
-
After months of searching for a supplier of African Blackwood, I gave up and went with ebony. Thanks to MWB's recommendation, I was able to source ebony sheets and strips to ship model specifications from Matt at Inlay Banding: http://inlaybanding.com Matt was really great to work with, and did a custom order for me to exact specifications. He was even able to get ebony sheets down to as little as 0.7mm. Matt most does work for inlays and veneers, but I think he would make a great resource for ebony and other exotics (along with ebony, he does holly, maple, boxwood, satinwood, maple and others). Now that Jeff is retired, I would highly recommend Matt is you are looking for ebony or other woods.