


MEDDO
-
Posts
1,868 -
Joined
-
Last visited
Content Type
Profiles
Forums
Gallery
Events
Posts posted by MEDDO
-
-
9 hours ago, glbarlow said:
Hope to see you started on this soon. I’m eying the barge as a future project and will have your log marked as reference. I’m looking for another active log😀
It really is helpful to have others build logs to reference. The new tag system makes finding them much easier than before. I especially used the great log by @JpR62. Also the middle of @Chuck 45 page thread was very nice here
- patrickmil, BobG and Ryland Craze
-
 3
3
-
-
-
Those look really nice I can’t wait to see how they work out
- mtaylor and Retired guy
-
2
-
-
-
-
-
26 minutes ago, DelF said:
I've always left flags off models as I could never get them to look realistic enough. You've managed it beautifully, and I'll certainly have a go with your method in future.
And I'm strongly tempted to get the barge having seen your superb work (once I've finished several other items already in the dockyard!).
Derek
Thank you Derek. You certainly should pick up one of these “most excellent” kits. You will to regret it
- Ryland Craze, glbarlow, patrickmil and 1 other
-
4
-
9 hours ago, BobG said:
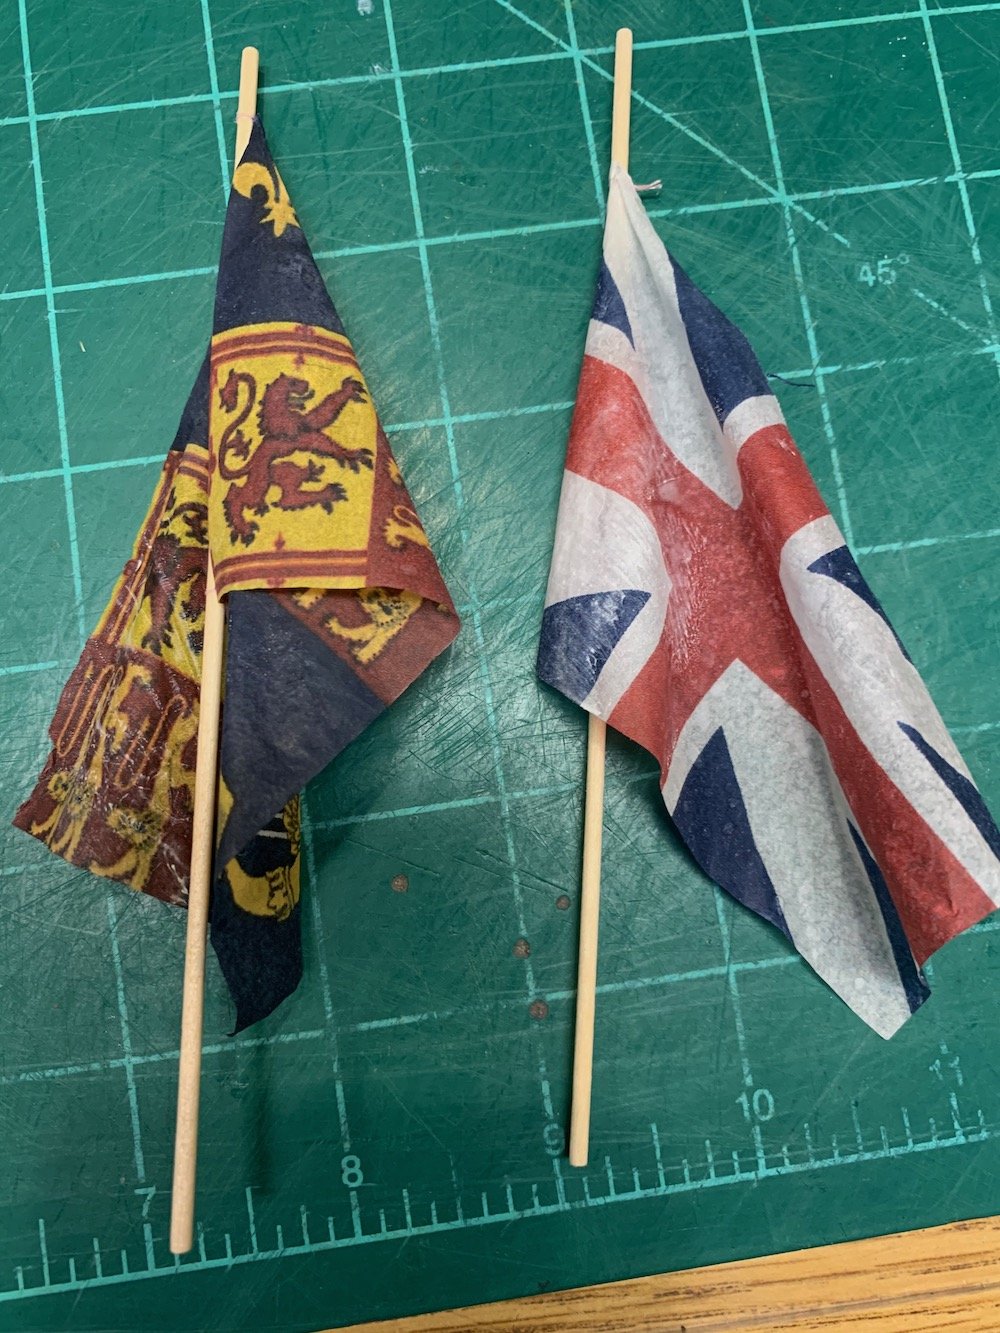
The only obstacle for me was that my fingers would get sticky from the artist fixative and that made it tedious trying not to ruin the shape when they would get stuck to the flag.
I also had this problem. One of my first attempts basically glued the flag to a paint brush handle and as I was trying to free it it ripped. With more experience I was able to shape them without it getting too sticky.
-
54 minutes ago, VTHokiEE said:
Your build looks awesome by the way!
Hope that helps and Thanks
-
31 minutes ago, VTHokiEE said:
Do you have any tips or suggestions for getting the flags to look nice and then stay there? I’m hoping to put an ensign on my build eventually and shaping them was something that I was curious about.
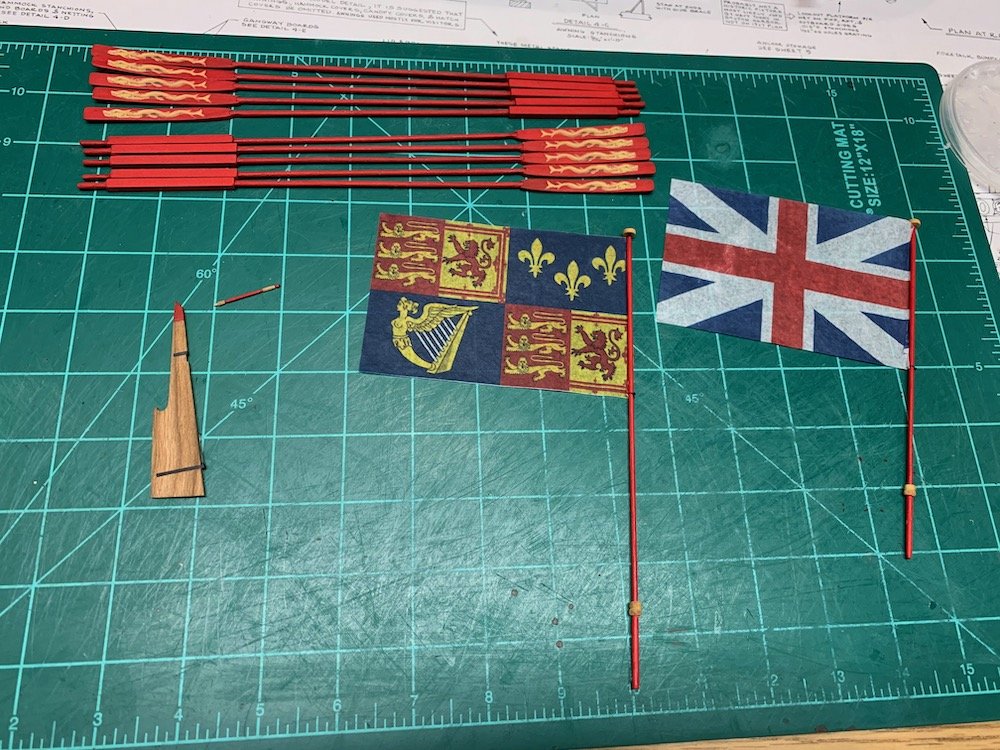
First thing I would do is to practice a few times with some tissue and some scrap poles. You don't even have to print the pattern for the practice runs. A few attempts and they really started to look better.
I used regular tissue paper that the wife had for wrapping presents. I cut a piece out and then just used scotch tape to tape all the edges to a piece of regular printer paper.
I then printed the design with a normal ink jet printer.
After cutting it out (11 blade scalpel) I used some thread to attach it to a pole.
I used Krylon matte fixative in the big spray can. My first few attempts ended up using too much and apparently was doing it in too high humidity. Too much spray resulted in a whitish frosting on the tissue when it dried. It also wetted it so much that it became very fragile and tore. I did do it in my office/workshop (very smelly not recommended) as it was in the 90's today with really high humidity.
After spraying both sides lightly I gently shaped it with my fingers as well as the roundish tips of a pair of hemostats and the end of a round paint brush. The spray has about 10-15 minute wet time so there was plenty of time to shape it. I was able to spray again if it did not dry in a nice enough shape.
After a few tries I then proceeded to make the final ones which I think came out pretty well.
Here is a picture of the white frosting on the practice runs
-
3 hours ago, JpR62 said:
Superb work on these flags Michael. She is going to be beautiful !
Thanks Jean-Paul
2 hours ago, BobG said:So now I'm thinking that I should just sell some of them.
My thoughts exactly
28 minutes ago, glbarlow said:I’ll get one after both of you start on your own Cheerful 😀
Maybe soon although the wife really likes the Echo cross section
- Ryland Craze and glbarlow
-
2
-
49 minutes ago, glbarlow said:
Your great work is tempting me to get myself one....
Do it!!! After this kit I am giving the big ol side eye to the other kits in my stash. They simply cannot compete
- BobG, Ryland Craze, glbarlow and 2 others
-
5
-
50 minutes ago, Chuck said:
If you alternate the blades of the sweeps on the left and right sides of each stack, it looks much better and more balanced.
Looks much better that way.
-
Getting there. Need to decide on final mounting. Still leaving the rudder off until finished with the carvings. Carvings are still being practiced. I do want to try one with a rotary tool as so far have only been using the 11 blade scalpel and carving knife.
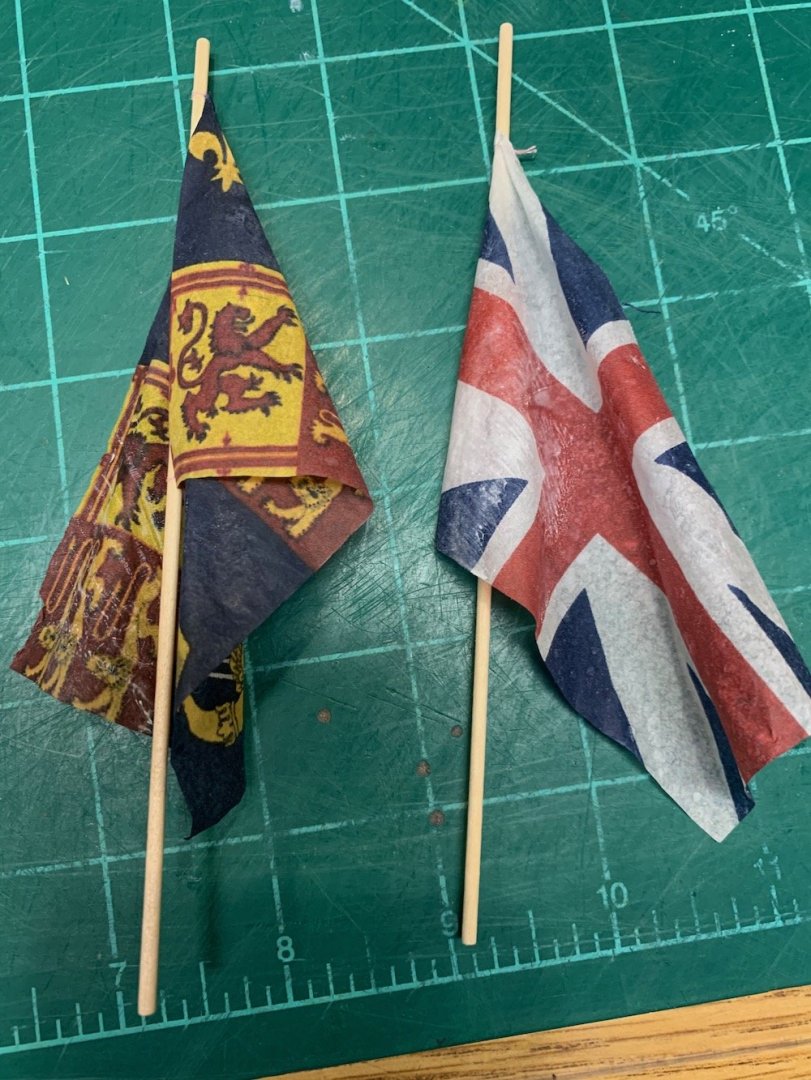
These are the first flags I attached to the poles. I had an epic fail when trying to shape them. Turns out you can use too much of a good thing (krylon fixative). So after printing out a few more on some tissue paper I was able to practice enough and get 2 to come out looking fairly decent.
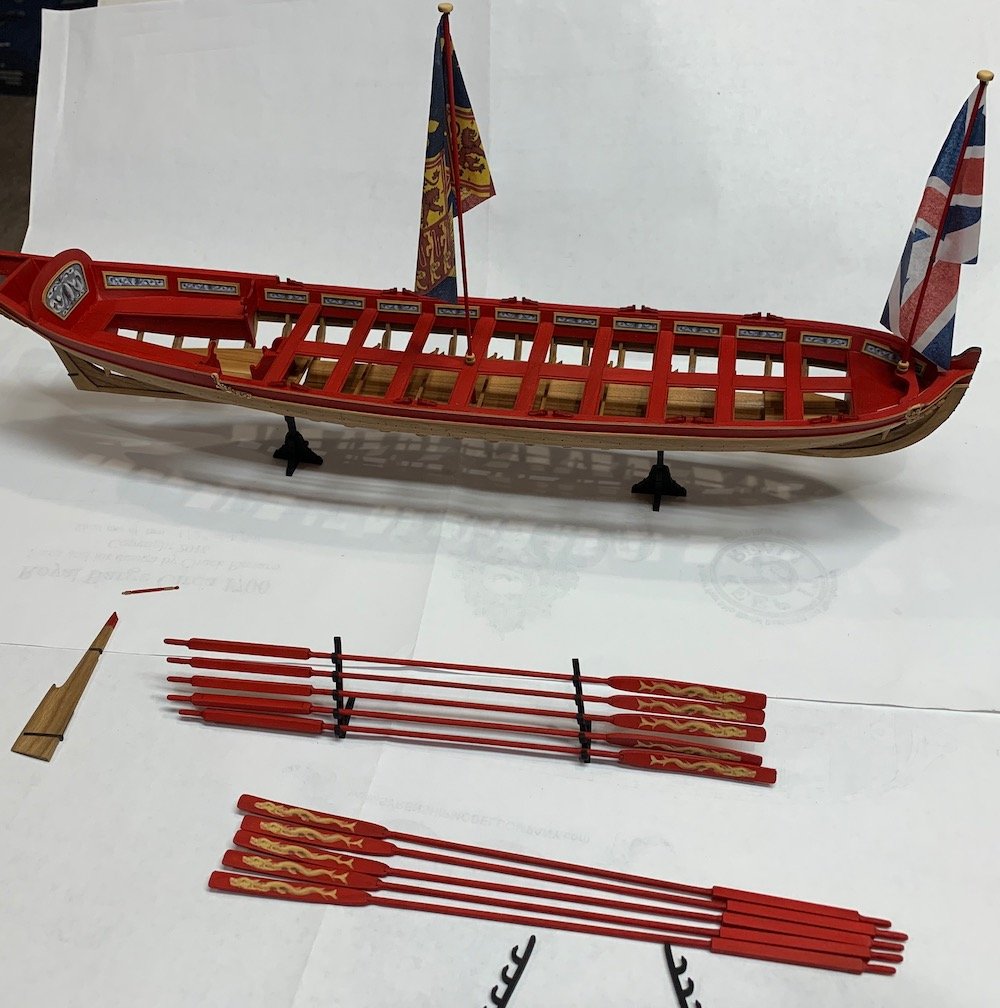
Now just on to the carvings...
Deo Volente
- Rustyj, Ryland Craze, davec and 8 others
-
11
-
Welcome Chris! Plenty of people here to help you out if you have any questions. A build log is a great way to show what your re working on and to connect to the community.
- ChrisSC, Ryland Craze and mtaylor
-
3
-
-
That is an excellent presentation for an unusual boat. The added details really make it come to life
- Keith Black and Boxbuilds
-
2
-
-
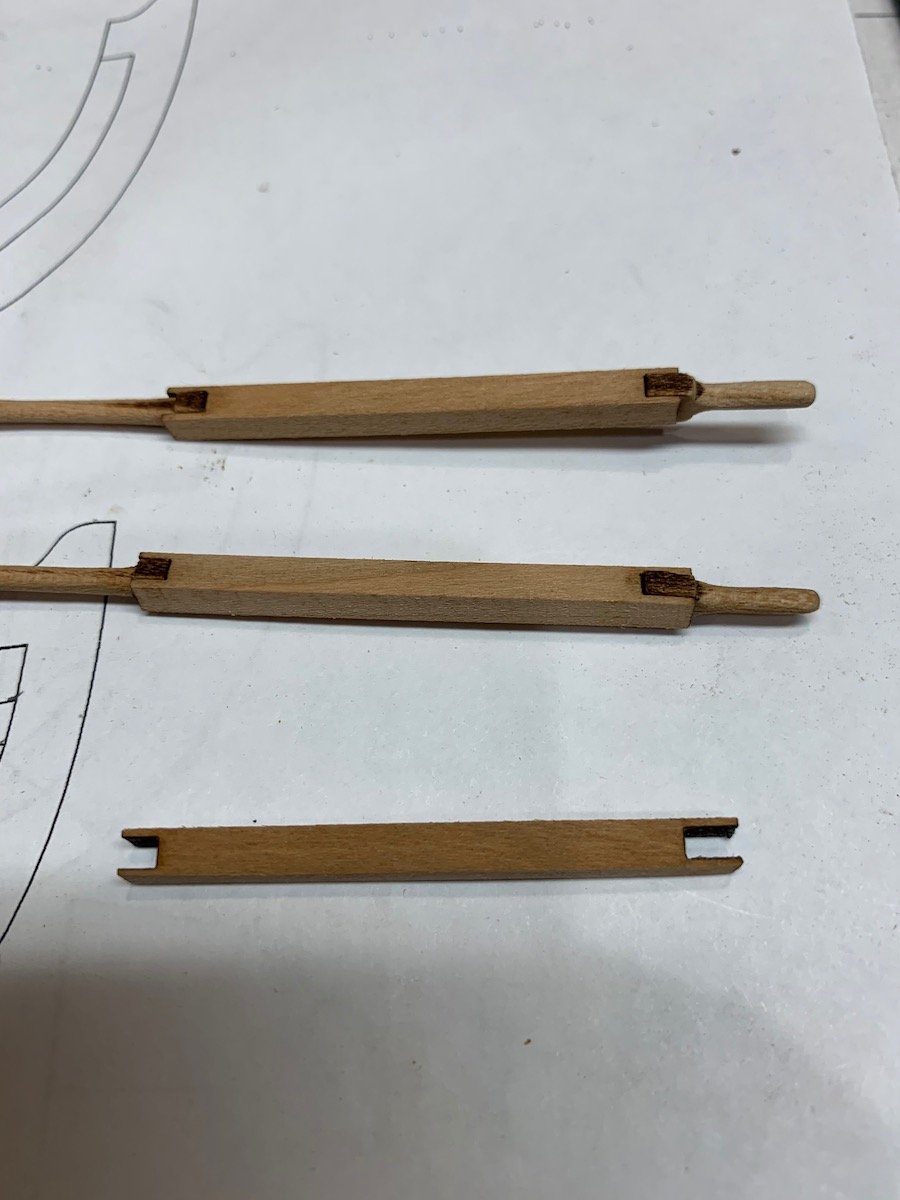
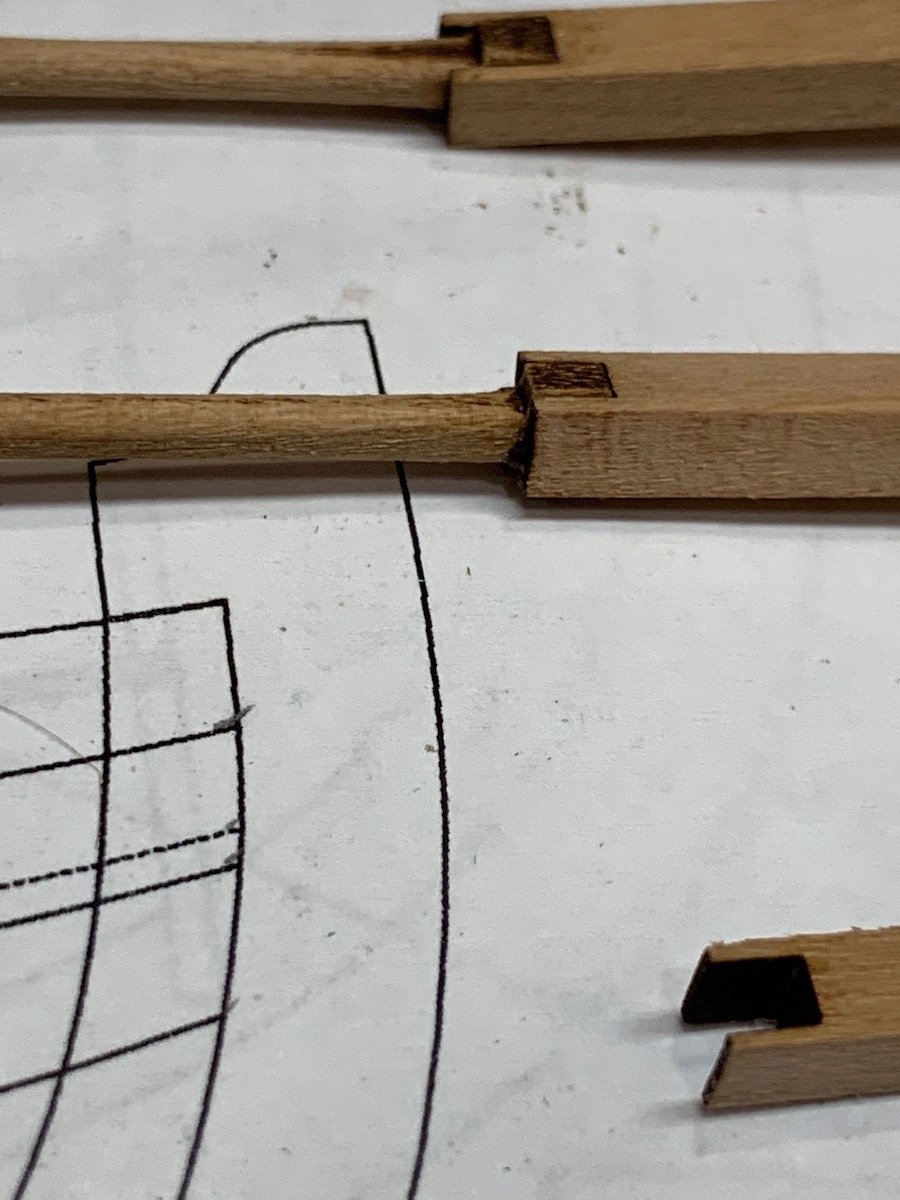
Another reason to not model while tired.
I put this post here so maybe will help someone else not be like me....
While putting the sweeps together I ran into this problem
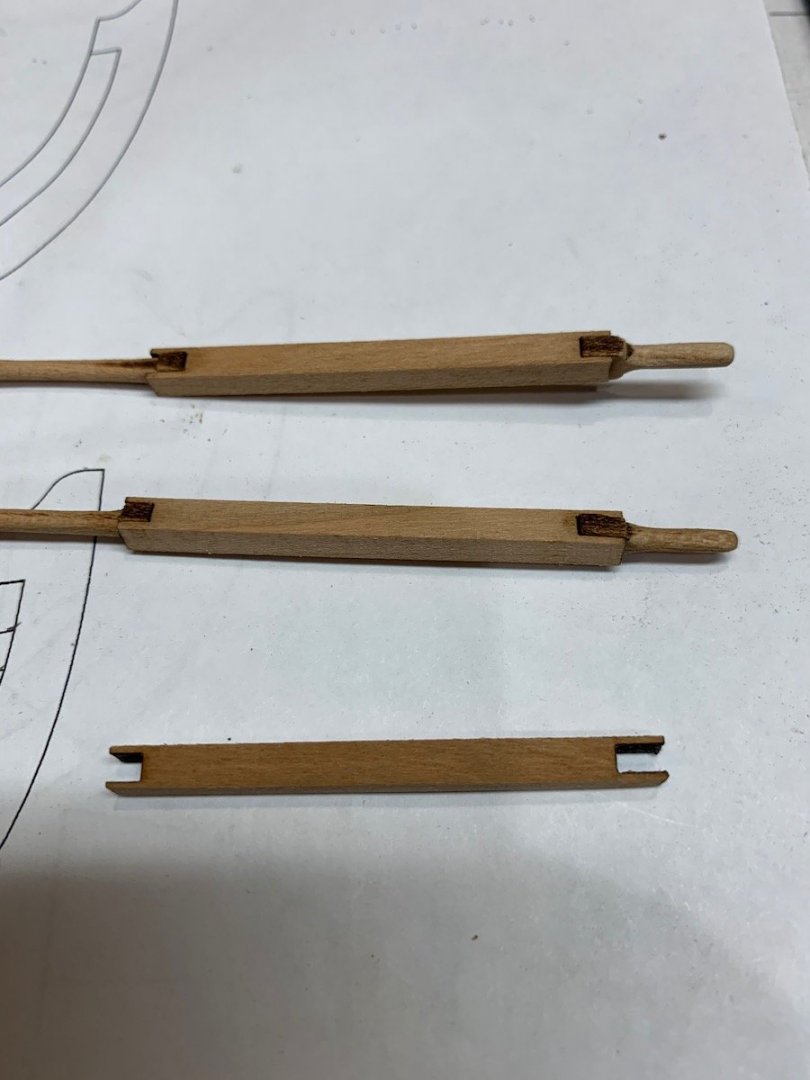
as you can see the square part has notches in the end for the handle and the shaft. I wasn't quite paying attention and when putting them together last night ended up with a few like the one pictured at the top. The one in the middle is correct. I didn't even realize this until I came down today and saw something funny on a couple of them. Obviously the plans have them right (another reason to always go back to the plans). The notches are not the same size. Here are a few more close ups
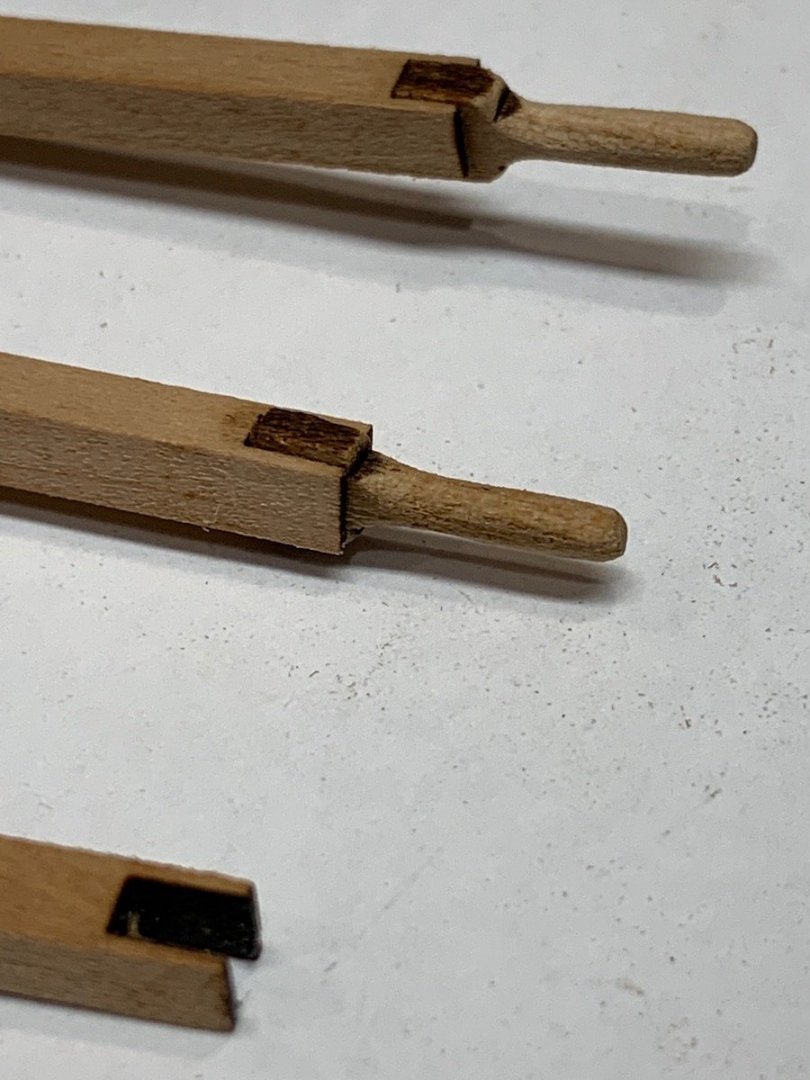
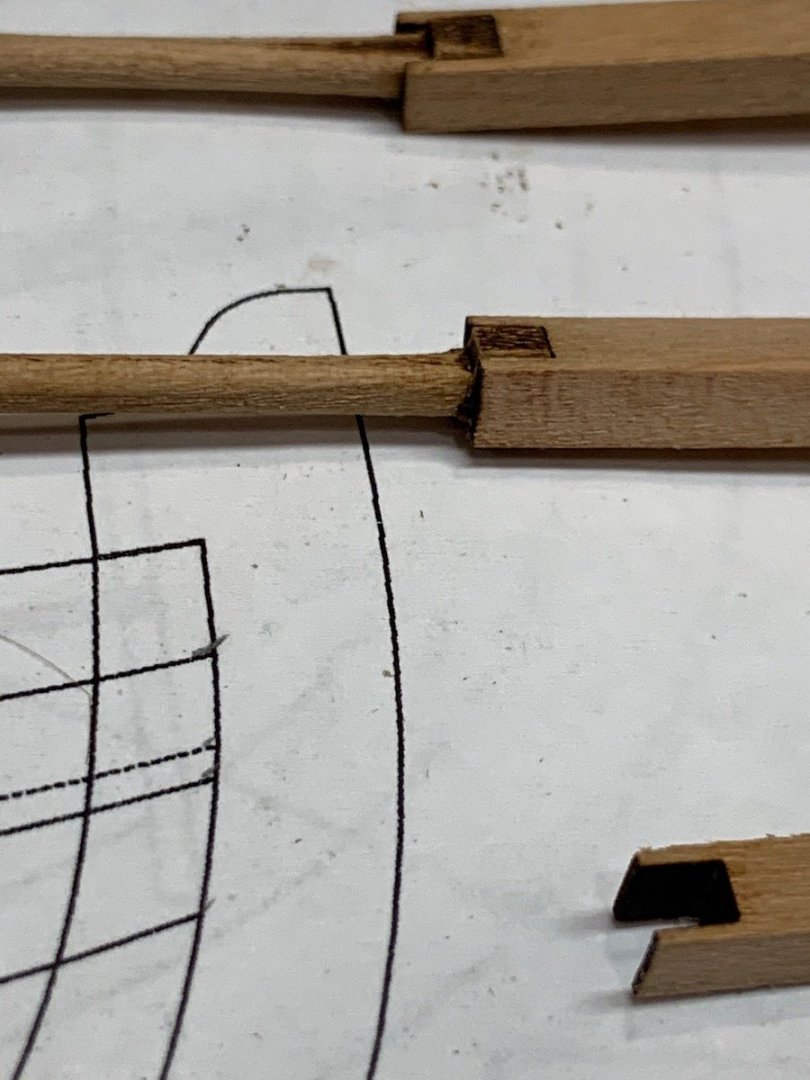
Haha had to take them apart and use some of my precious precious isopropyl. Them came apart easily and 'correctly' glued together.
Always learning...
-
-
The Malco saw Company provides blades of various sizes including the 0.03 kerf slitting blades.
Also available from Byrnes Model Machines. As to your Proxxon arbor size Mr Byrnes also has on the website the option for machining a blade adaptor 0.625" to 1"
- Ryland Craze and mtaylor
-
2
-
Congrats on another wonderful model. I do like the crew as it adds life to the model
- BobG, chris watton, VTHokiEE and 1 other
-
4


USS Constitution by Unegawahya - Model Shipways - scale 1:76
in - Kit build logs for subjects built from 1751 - 1800
Posted
This looks like a great start. The hull and coppering look very clean and gun deck is coming along nicely