HOLIDAY DONATION DRIVE - SUPPORT MSW - DO YOUR PART TO KEEP THIS GREAT FORUM GOING! (Only 72 donations so far out of 49,000 members - Can we at least get 100? C'mon guys!)
×


GuntherMT
-
Posts
2,213 -
Joined
-
Last visited
Content Type
Profiles
Forums
Gallery
Events
Everything posted by GuntherMT
-
These Master Korabel kits seem to build into really fantastic little boats. Thanks for posting these logs, they are great, and your boat is looking awesome.
- 13 replies
-
- 3
-

-
- 95mm boat
- master korabel
- (and 1 more)
-
Remind me to never say 'yes' to a request to restore some old wooden boat. Haha.. what a mess. I'm sure you'll end up with a masterpiece, but man, that looks like quite the chore.
- 59 replies
-
- 4
-
-
- norske lowe
- billing boats
- (and 1 more)
-
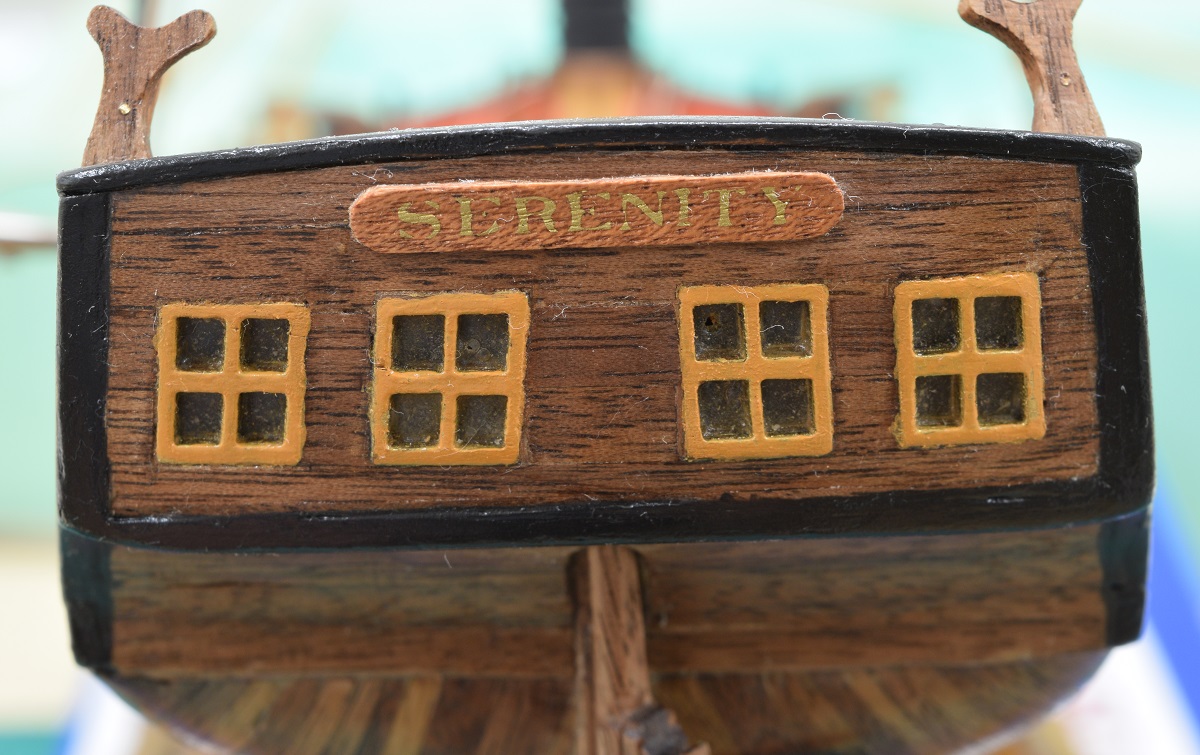
Nope. It's the name of the ship on the best sci-fi program ever created, that was sadly cancelled after only one partial season - Firefly. They did make a follow-on movie that was named "Serenity" after the ship.
- 831 replies
-
- 5
-
-
- Armed Virginia Sloop
- Model Shipways
- (and 1 more)
-
To knock the 'gloss' off of the wipe-on poly, just buff it with a very fine steel wool, and it will make it look like a flat finish.
-
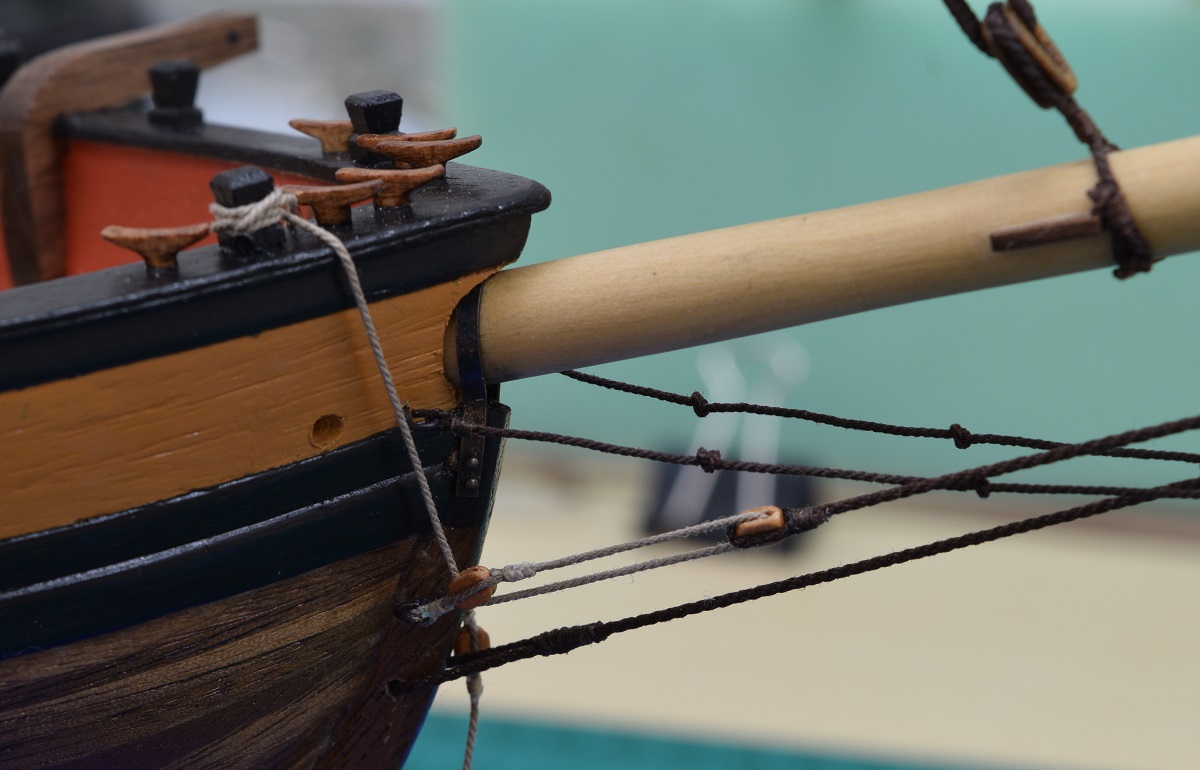
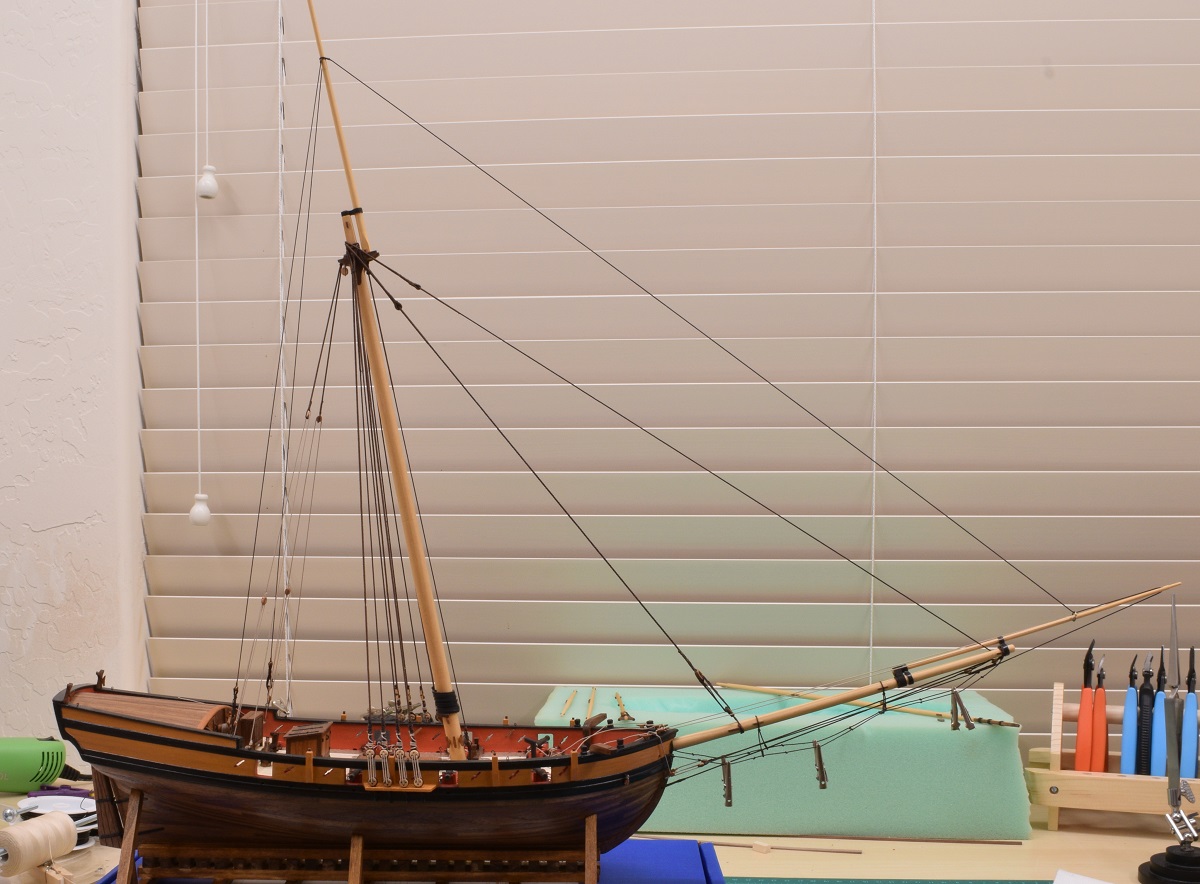
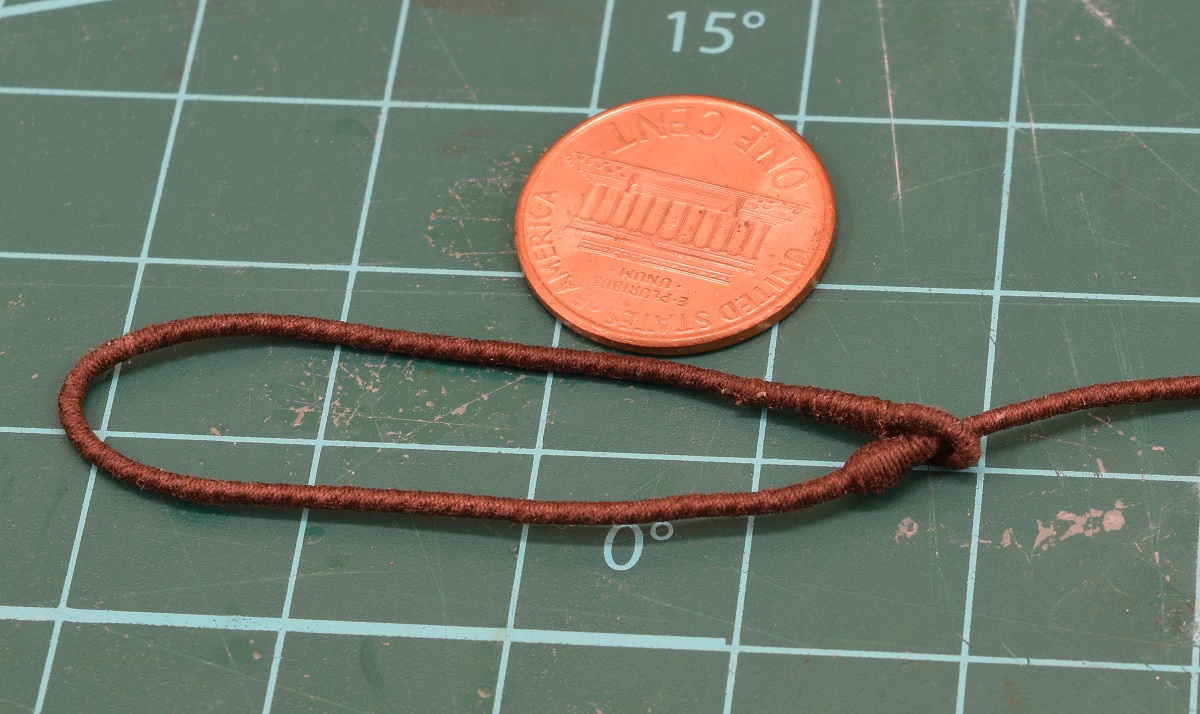
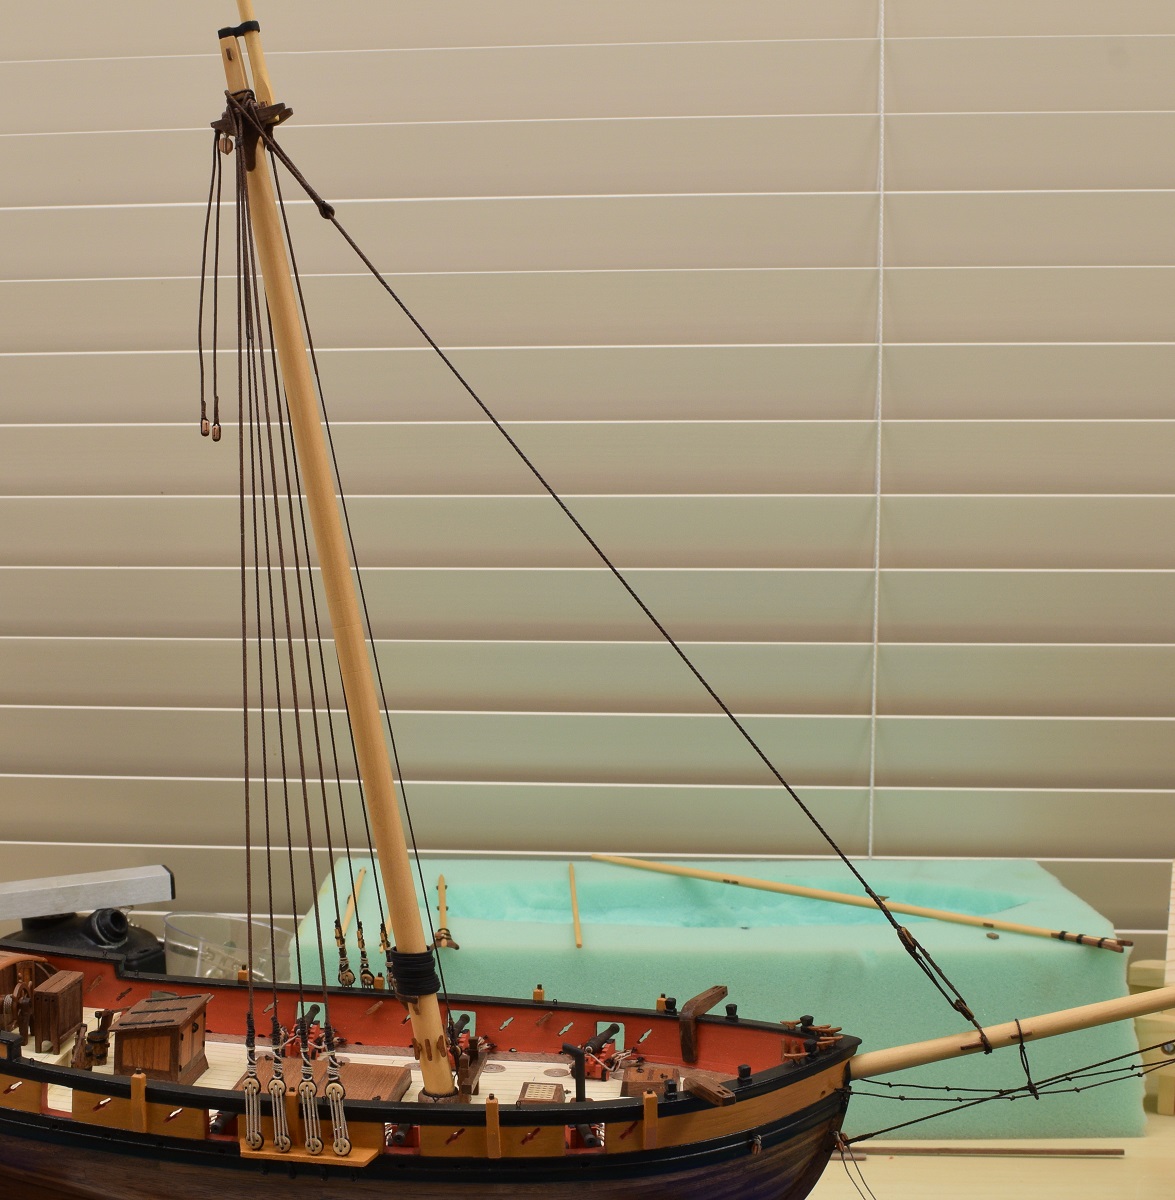
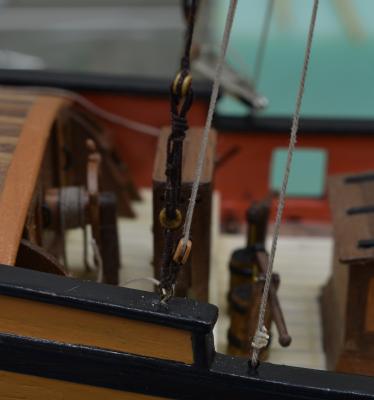
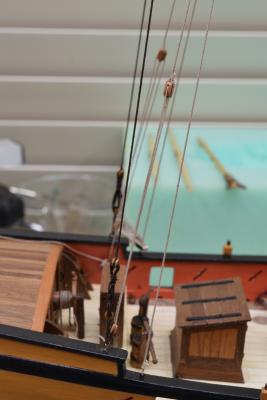
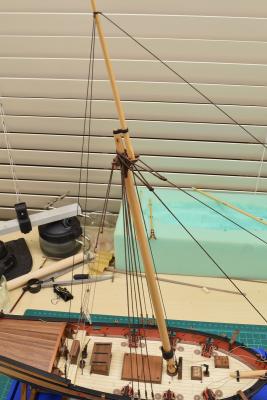
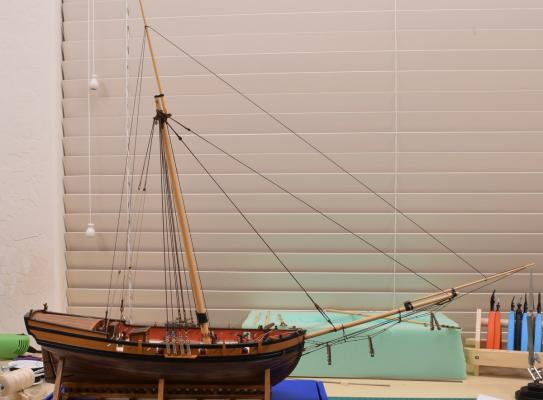
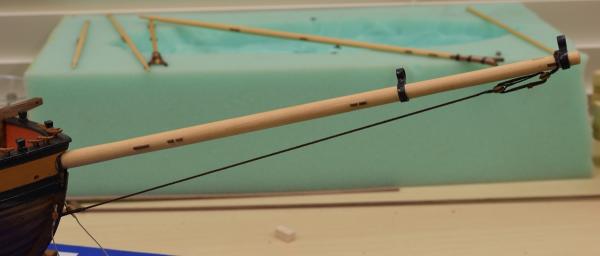
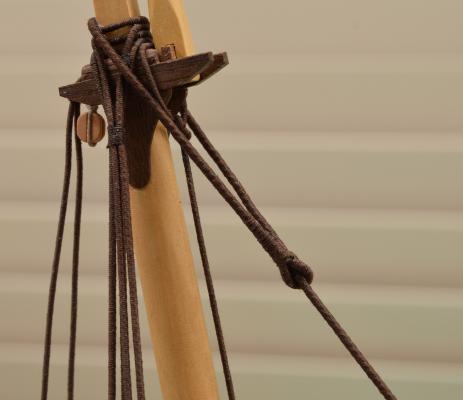
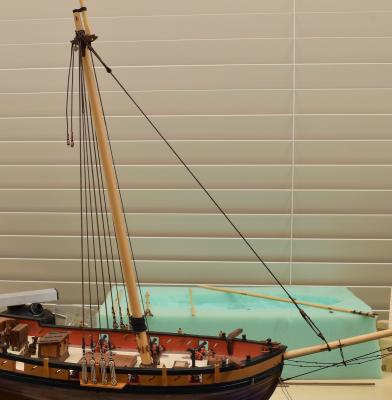
Ugh.. I had a huge post all typed up and when I tried to post it the forum timed out and then I couldn't get to it for 10 minutes or so. /sigh.. And... a second try failed too. Doesn't seem to be my night to make an update! Oh well, try again! Third time's a charm and all that, right? Thanks for the encouragement and likes everyone. I managed to spend a good part of today working on the standing rigging, and got a fair bit accomplished. Started out by making another mouse for the fore stay (smaller, since it's a smaller rope) and getting it all rigged up. Then moved to the back stays. The main back stays and top mast back stays attach to the same eye-bolt for some stupid reason, so I spent quite a while making the block and pendant arrangement on the eye-bolt before I was ok with it. Then I couldn't get the eye-bolt to go back into the hole that I'd just pulled it out of, and managed to apply too much force, and break both the eye-bolt, and the block. Grrr... Oh well, replaced the eye-bolt with a larger one, and proceeded on. Some of these pictures aren't coming out that great, sorry about that. Birds eye view! Added the top mast fore stay, and the jib boom is now permanently attached. Bow showing that some of the belay points are now being used. None of the belayed lines are permanently attached with glue, just attached with the ropes as shown. Not completely happy with the jib boom heel rope, but neither am I sure of any way to improve it, so this is likely how it will remain. The kit calls for a traveler ring, but doesn't include one, so I made one out of brass, after considering making a spiffy one like I've seen in other build logs with the hooks and other bits, but discarding that idea for the time being. Maybe in a future build. And, how it sits right now. Still need to add the bowsprit shrouds to complete the bowsprit standing rigging. Crossing my fingers, clicking the post button!
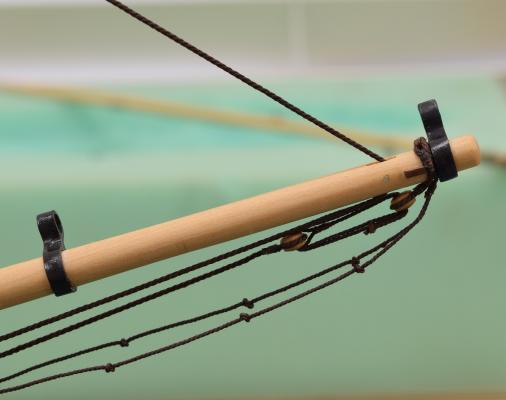


- 831 replies
-
- 28
-
-
- Armed Virginia Sloop
- Model Shipways
- (and 1 more)
-
Looks nice. I'm going to pretend that instead of using those contemporary models when making your decision to go with hook & scarf rather than nibbing, that you are just copying my build.
- 1,051 replies
-
- 5
-
-
- cheerful
- Syren Ship Model Company
- (and 1 more)
-
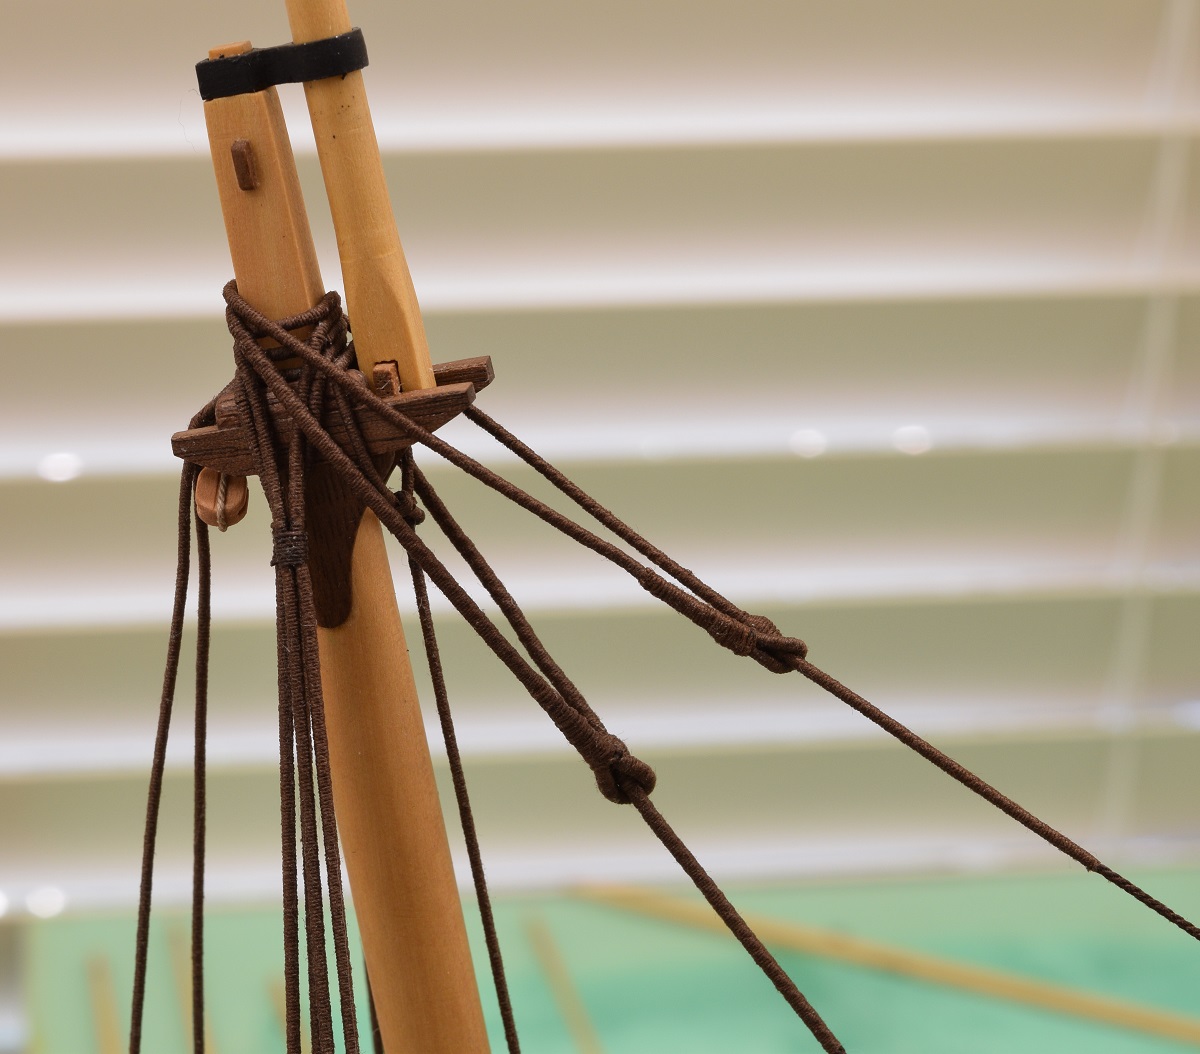
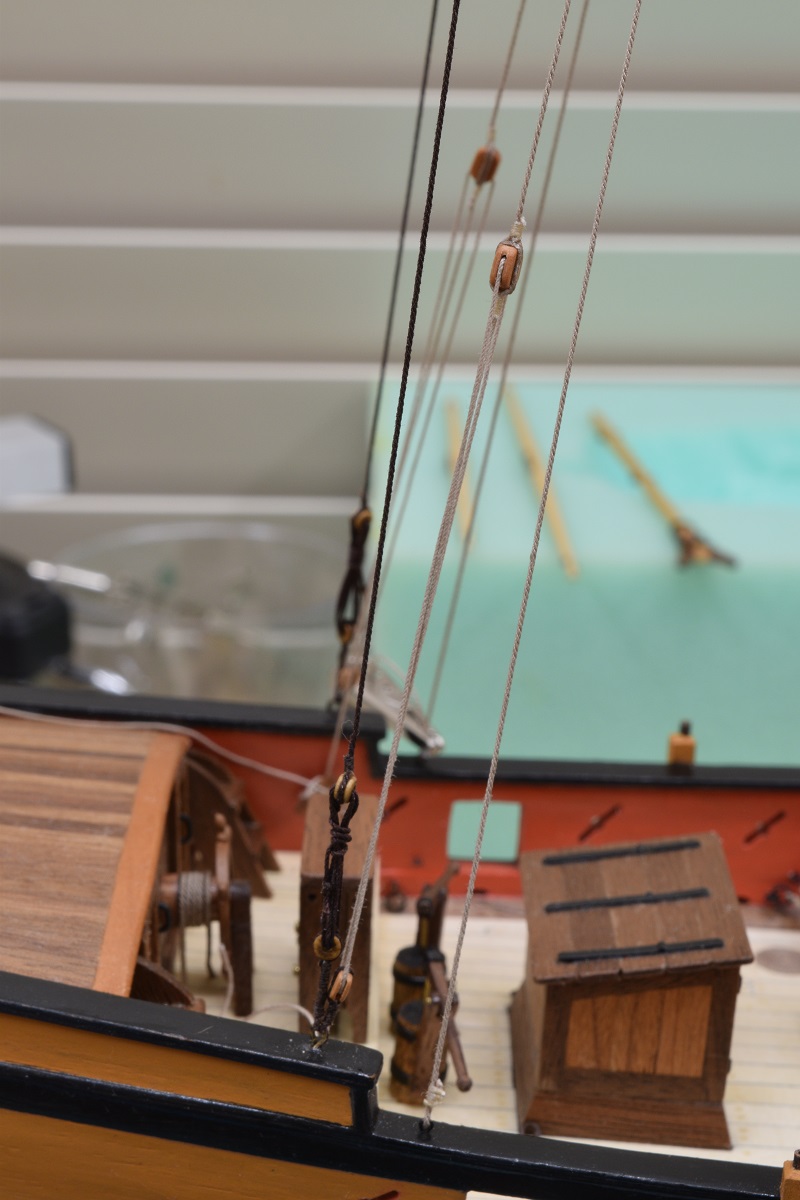
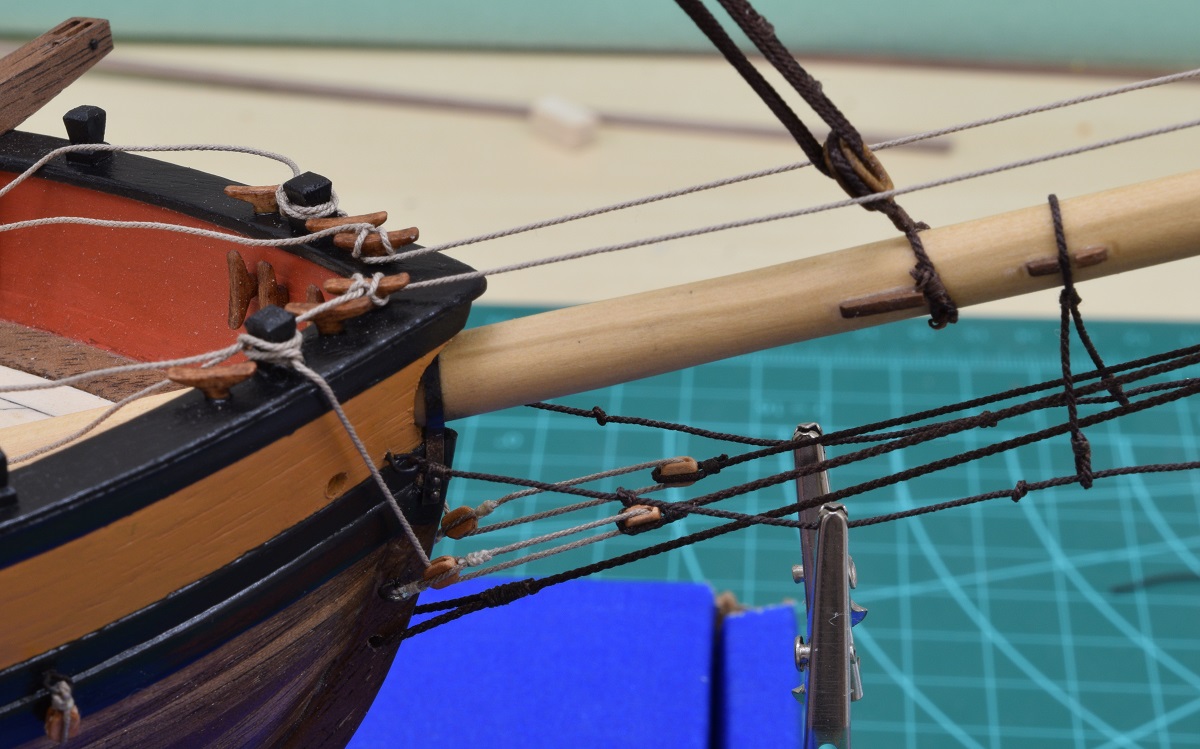
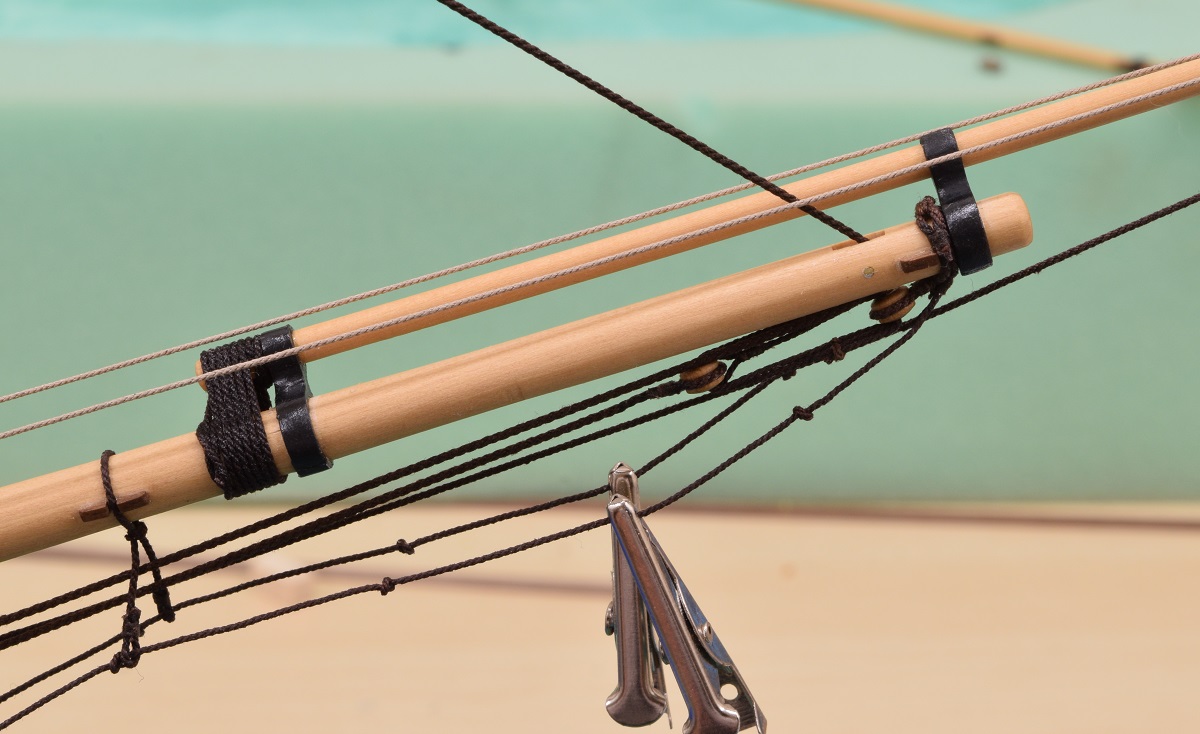
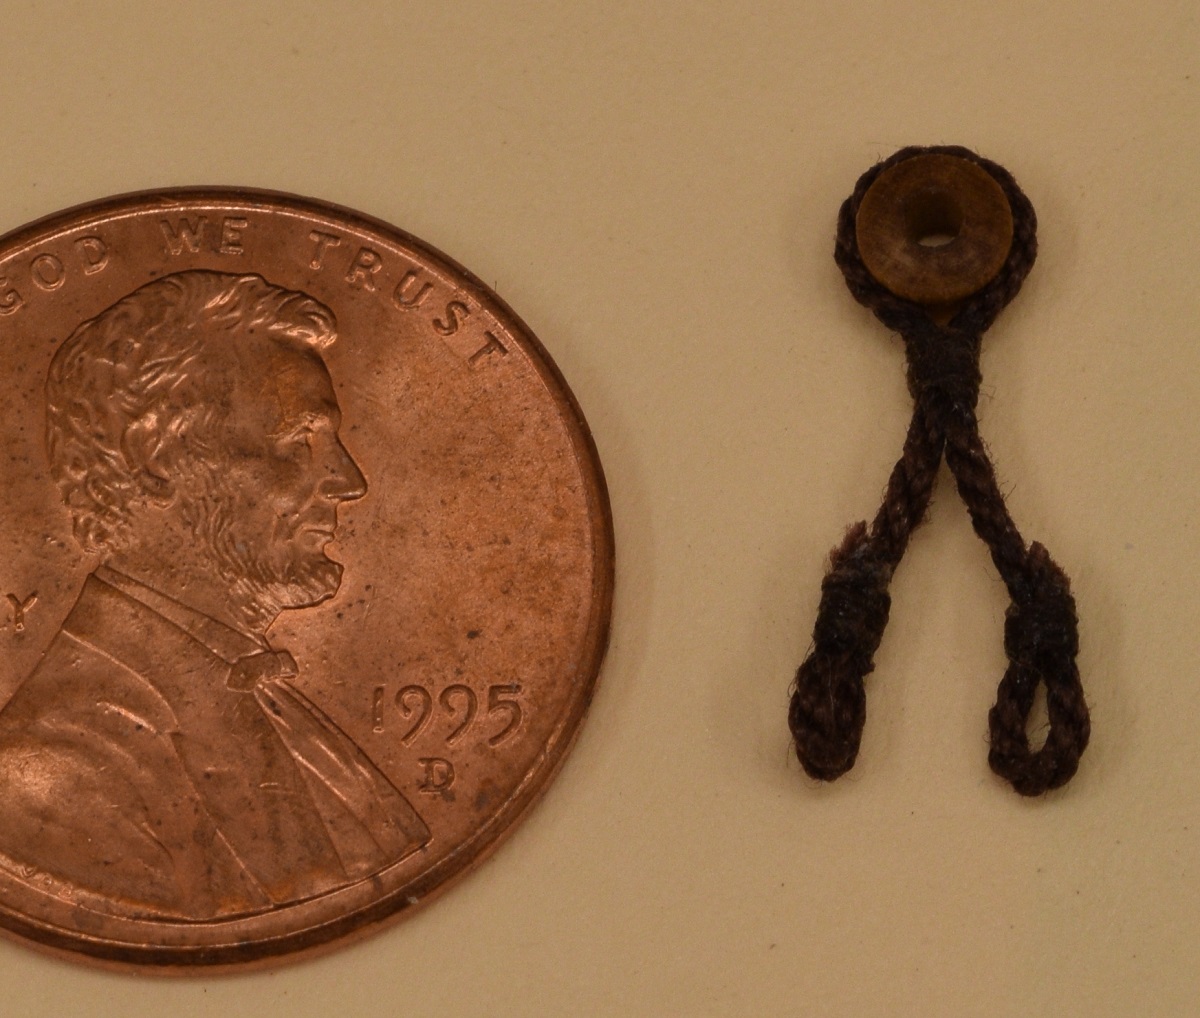
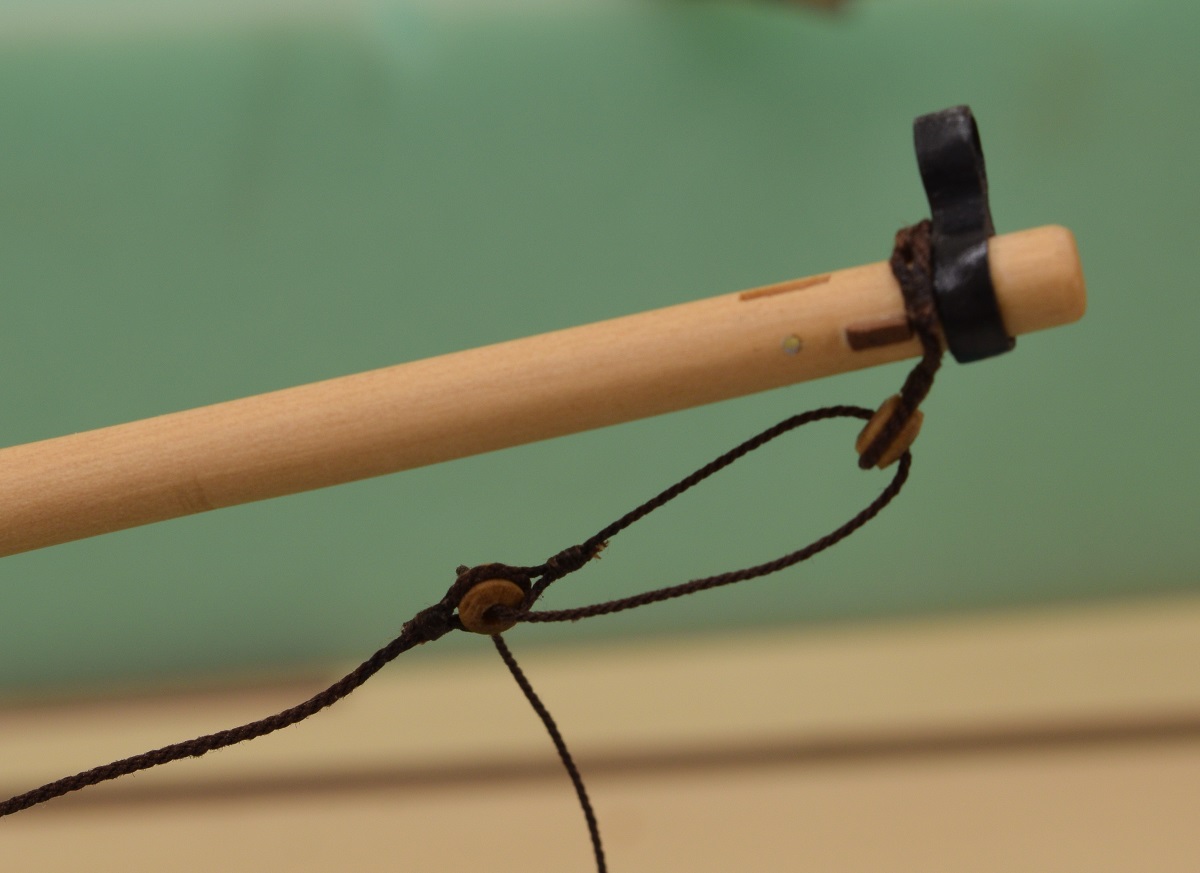
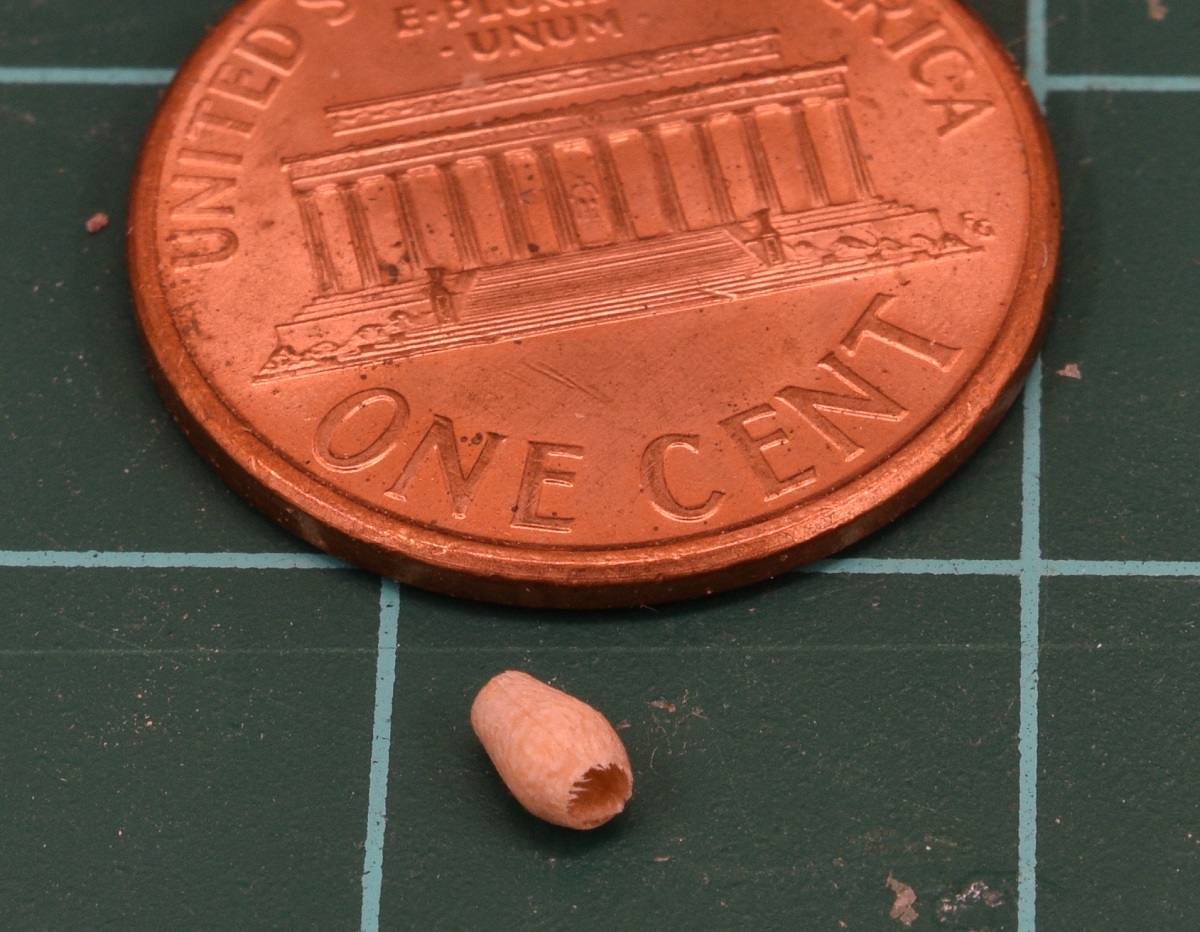
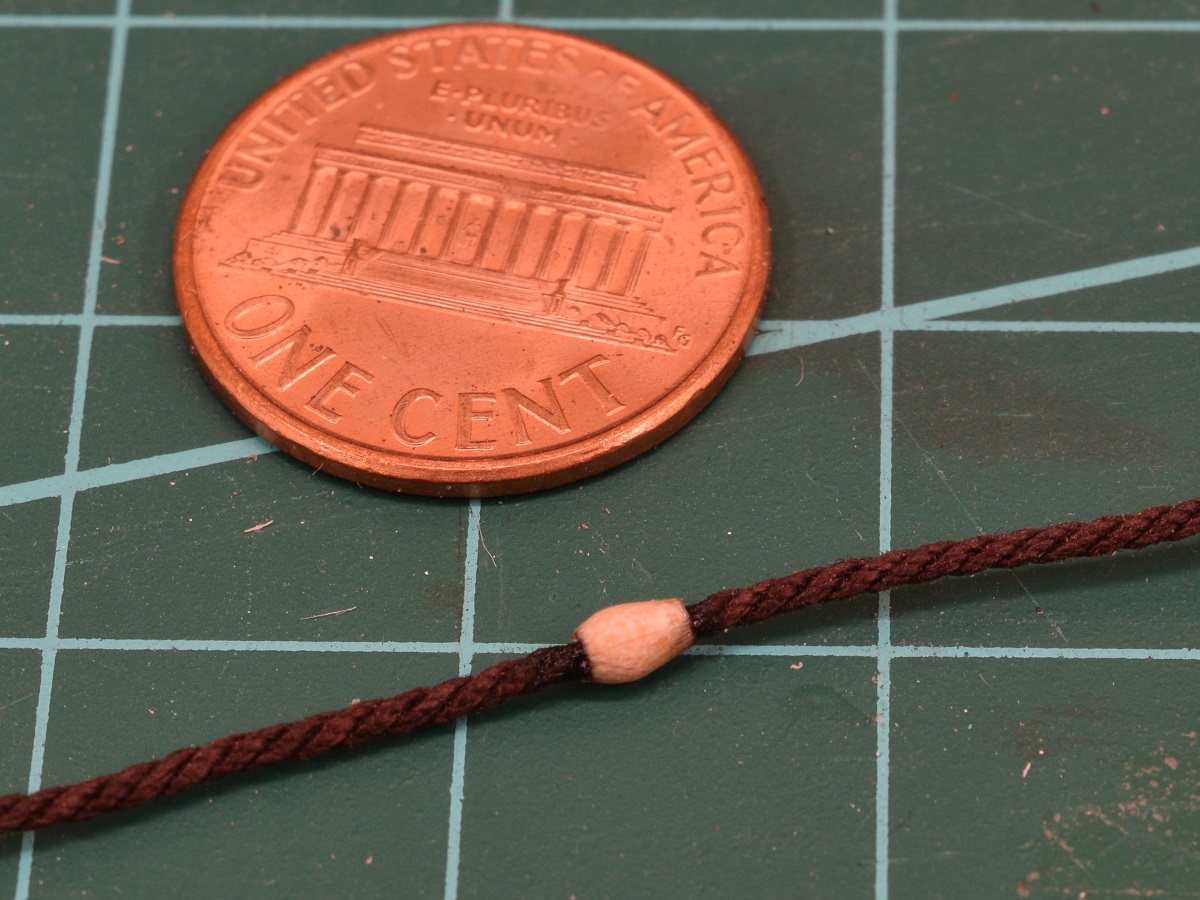
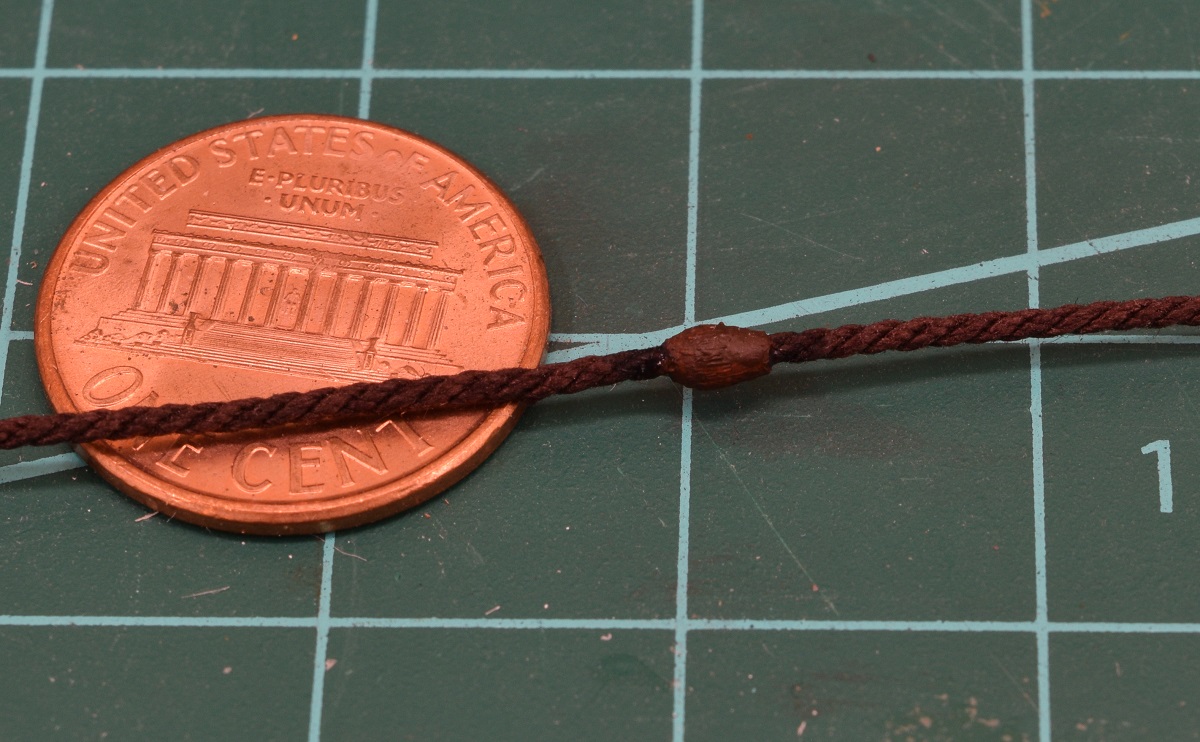
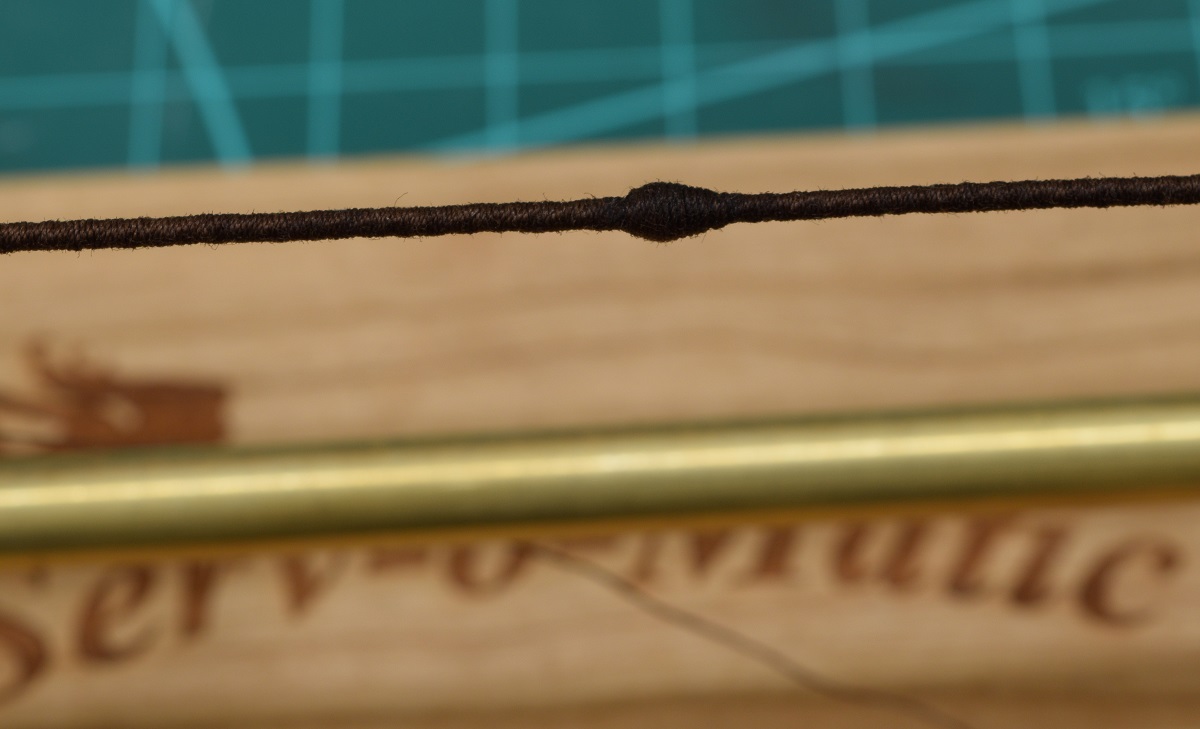
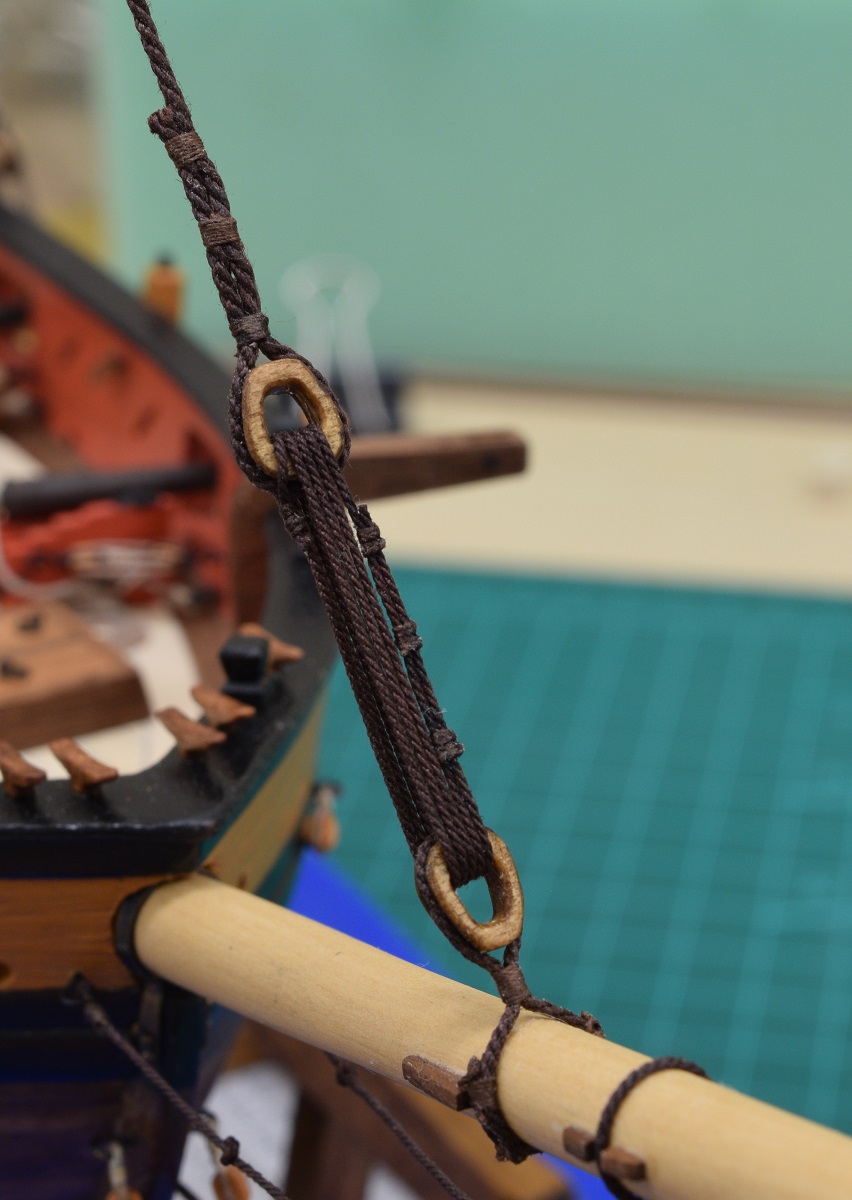
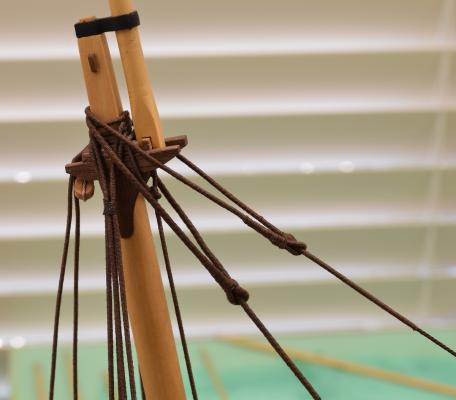
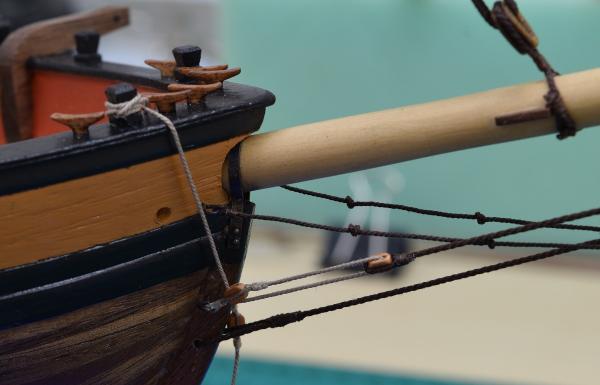
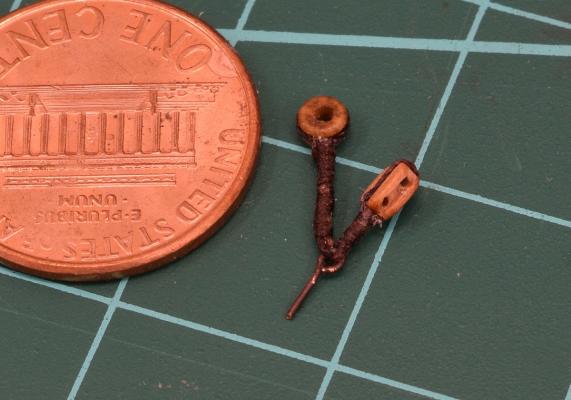
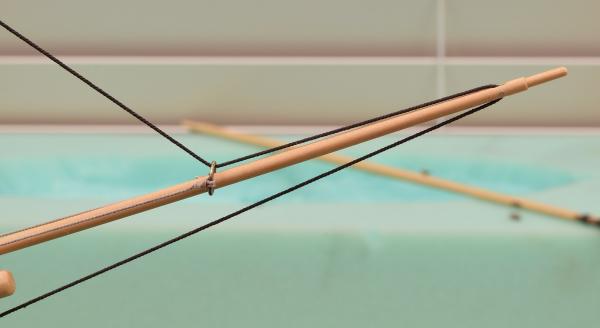
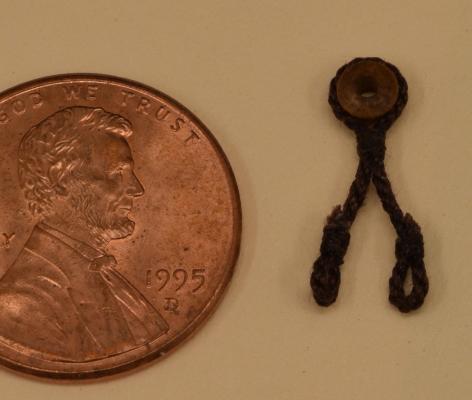
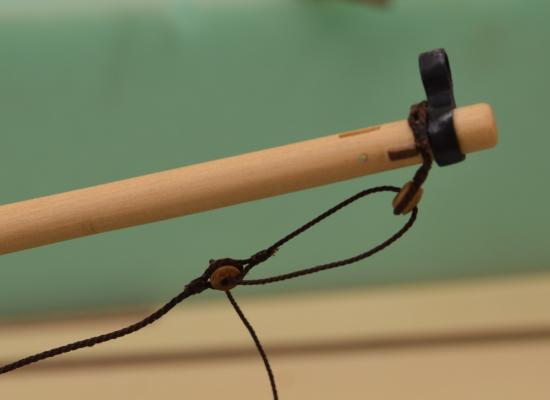
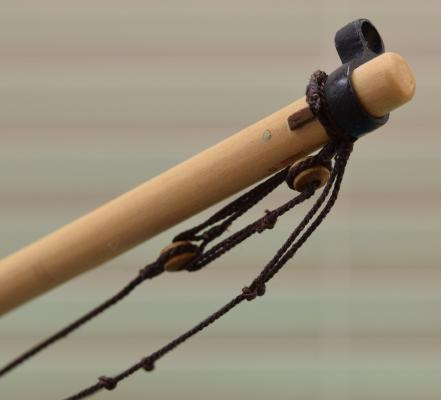
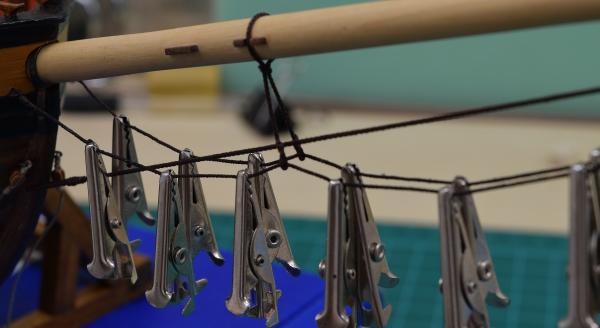
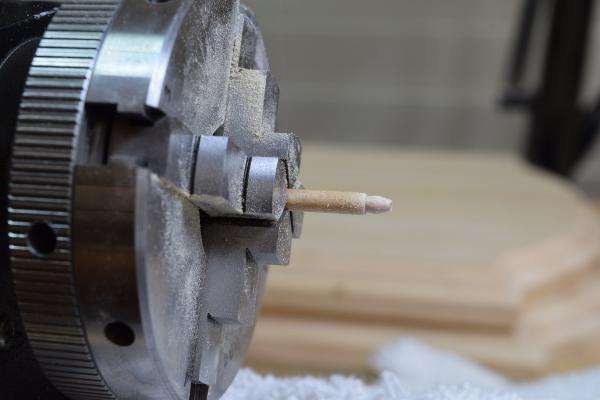
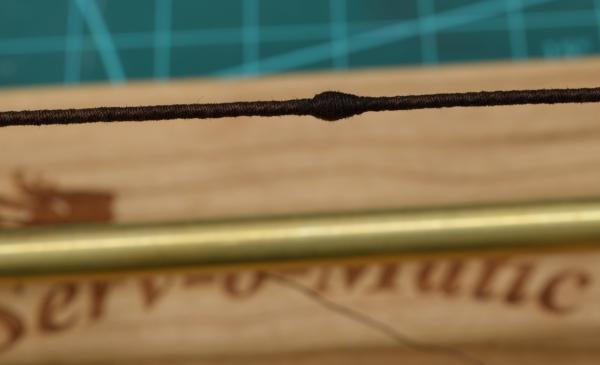
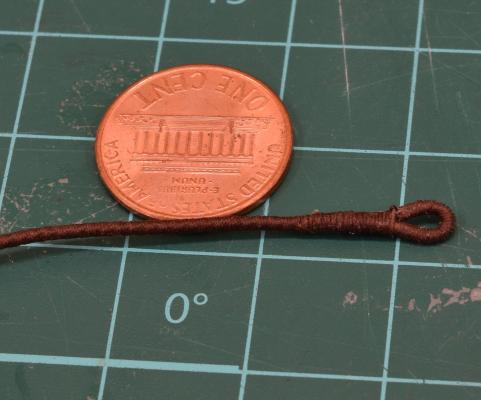
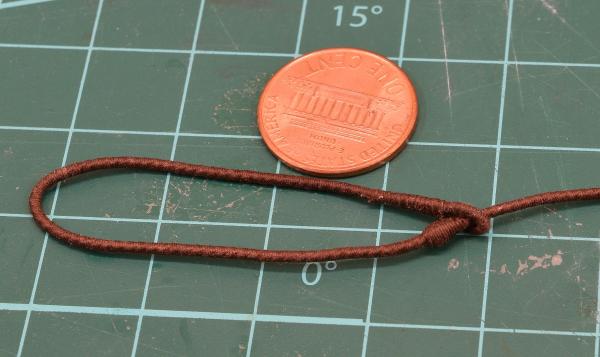
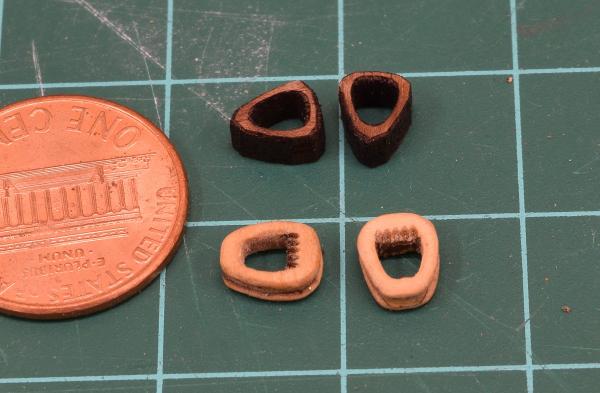
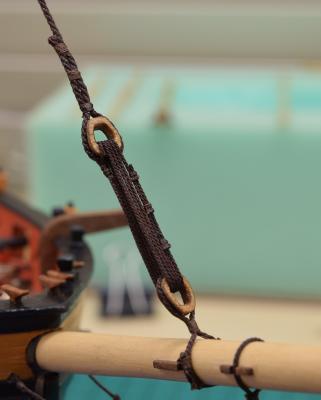
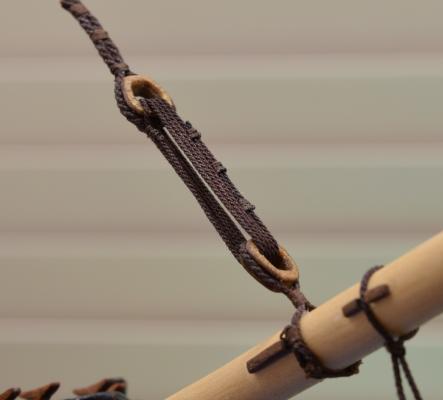
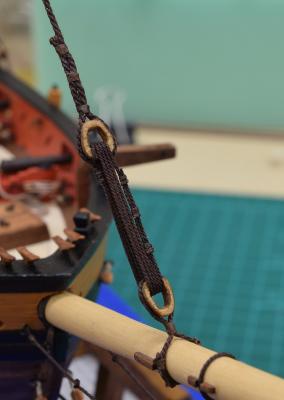
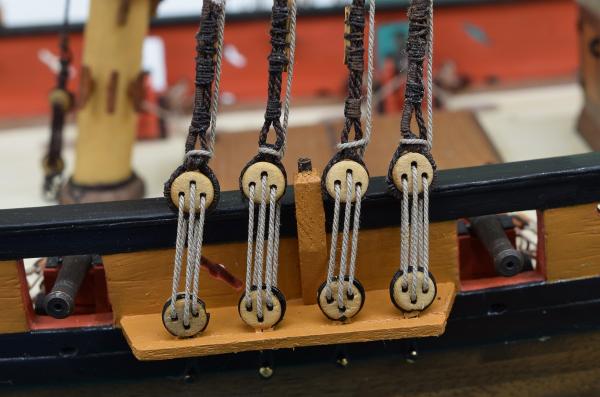
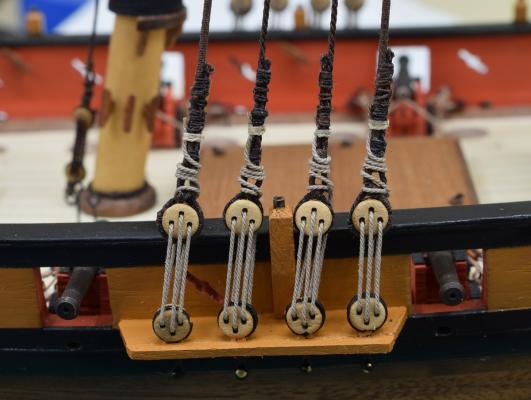
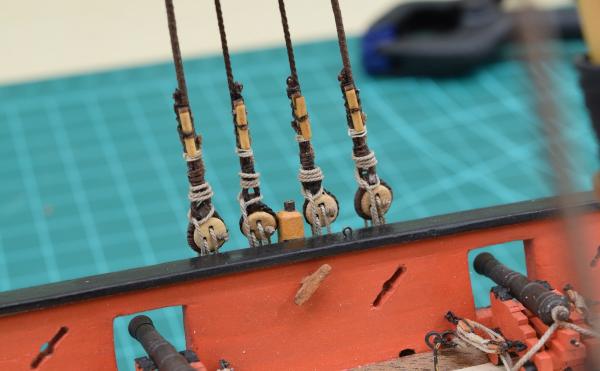
Catch up time! Several days since the last update, so a fair number of pictures for not a huge amount of progress. But hey, progress is progress! I'm getting to learn how to do new things on almost every line now. First up, The Bobstay. The end of the Bobstay is attached with a collar arrangement that is two eye-splices with a bullseye in the middle. The eye-splices wrap around the bowsprit, but don't meet up, they are lashed together around the bowsprit with rope. Another bullseye is on the end of the Bobstay and the two bullseyes are lashed together with a lanyard. The last picture shows a bit of the foot-ropes. I'm working on getting these to hang naturally by soaking the rope in 50/50 white glue & water mixture, then clipping little alligator clips to them for weight and letting it dry. It's sort of working but it's got a ways to go. The next piece of rigging is the thickest rope on the entire ship except for the anchor cables, the forestay. I made the mouse by sticking a small dowel in the lathe and drilling a hole through the dowel just large enough for the forestay to fit into, and then shaping the mouse with a file and cutting it off (saw this method in a post here on MSW!) I then glued the little wooden mouse to the rope, painted it brown so it wouldn't show the light wood through if I left any gaps, and then served the forestay right over the wooden mouse. It came out pretty good. The bottom end of the forestay is attached to the bowsprit by the means of two hearts. One heart is attached to the bowsprit with a lashed setup just like the end of the bobstay, and the other heart is wrapped by the forestay and seized. Then a rope goes back and forth between the hearts, gets tightened up, and seized to itself. The kit provided hearts are terrible, so I replaced them, just like so many other things on this build, with 7mm closed hearts from Syren. The eye-splice on the end of the forestay. The top of the forestay showing how the mouse and eye-splice work to fix the rope in place. The kit hearts are the ugly charred things on top. The new hearts are on the bottom. The top of the forestay wrapped around the top of the main mast. The bottom end showing the heart lashed to the bowsprit and the rope between with the three seizings where it's tied off to itself. Those seizings sucked. And the 'big picture'.


- 831 replies
-
- 26
-
-
- Armed Virginia Sloop
- Model Shipways
- (and 1 more)
-
Fantastic details. It's amazing to me how much rigging was still retained on ships of this era. Those old photo's show so much rigging it's crazy.
-
Erik, I agree with the others that the stain looks good, and I also like some color variation in the planks. Give it some 'life' or something.
- 222 replies
-
- 2
-
-
- 18th century longboat
- model shipways
- (and 2 more)
-
Brig Eagle by robnbill - 1:48
GuntherMT replied to robnbill's topic in - Build logs for subjects built 1801 - 1850
Those are some nice looking barrels Bill. -
ancre Le Fleuron 1729 by rekon54 - 1:24
GuntherMT replied to rekon54's topic in - Build logs for subjects built 1501 - 1750
Amazing and beautiful work. -
She's looking great Owend, the second planking came out really good, and I think the contrasting wood is lovely.
-
It looks like it's pointing to a sheave in the mast, so if it's like my model, they show the sheave, but then say to just drill a hole for it rather than actually putting a sheave in. Just guessing though.
- 389 replies
-
- 3
-
-
- scottish maid
- artesania latina
- (and 1 more)
-
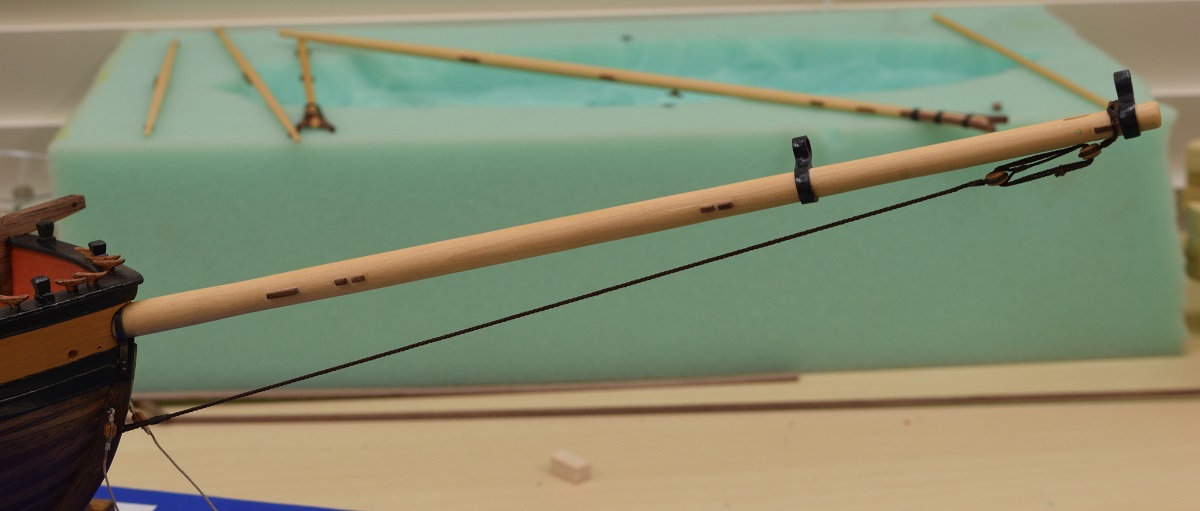
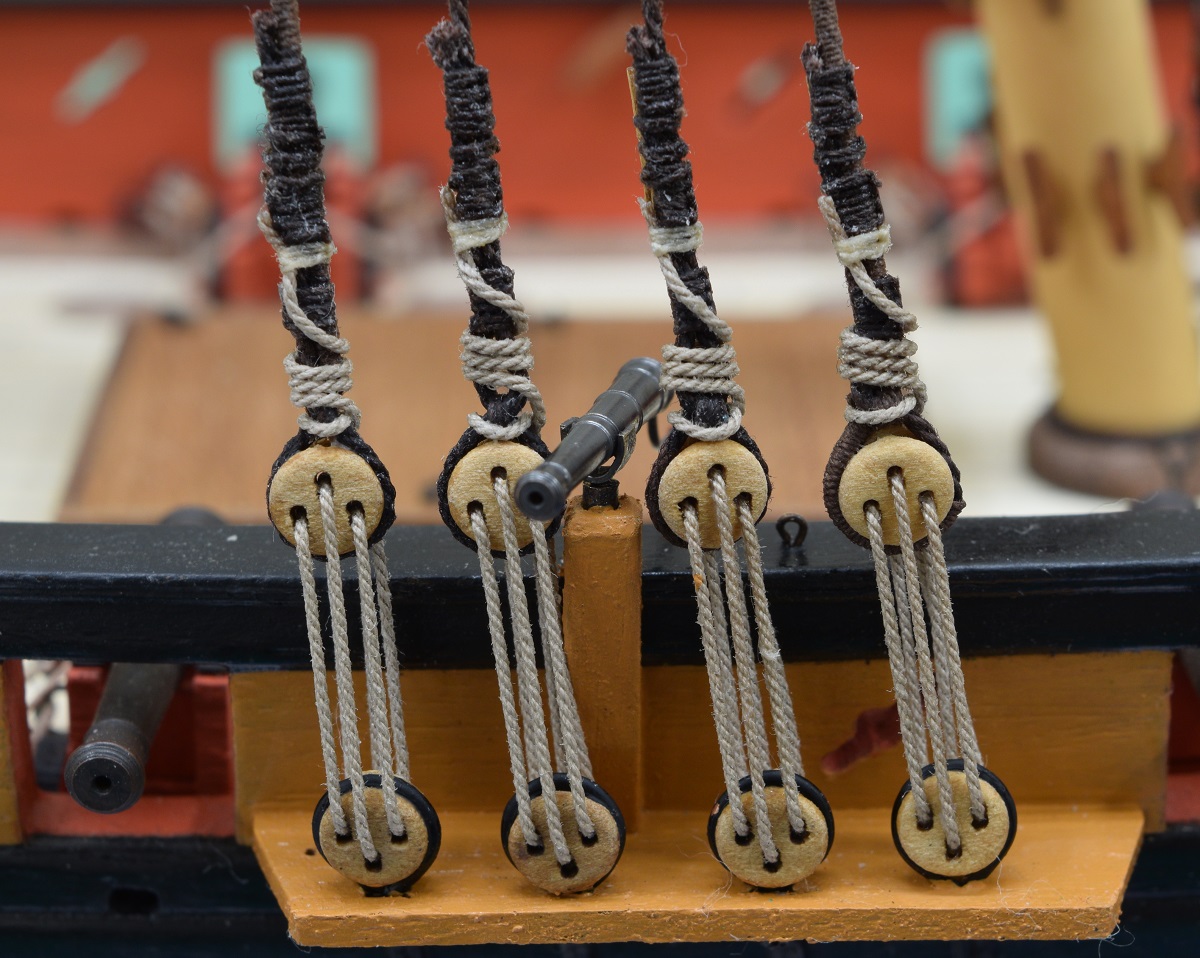
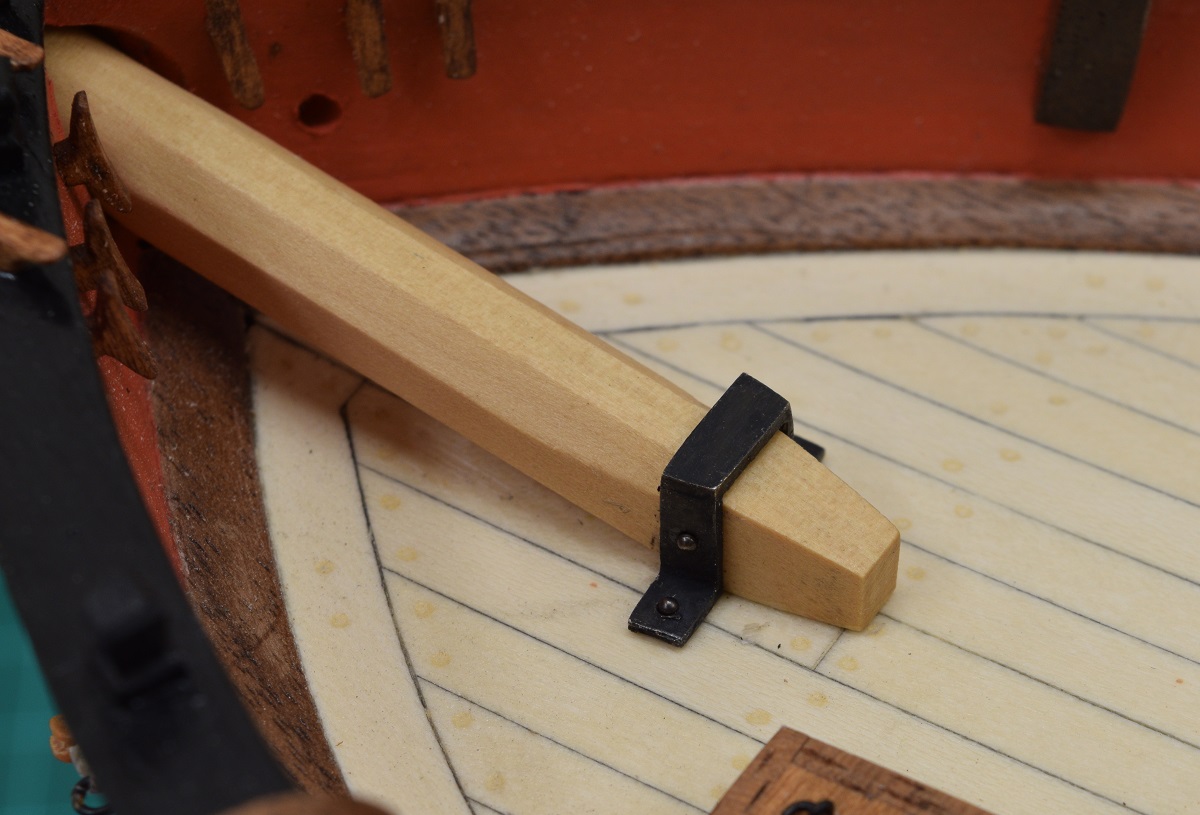
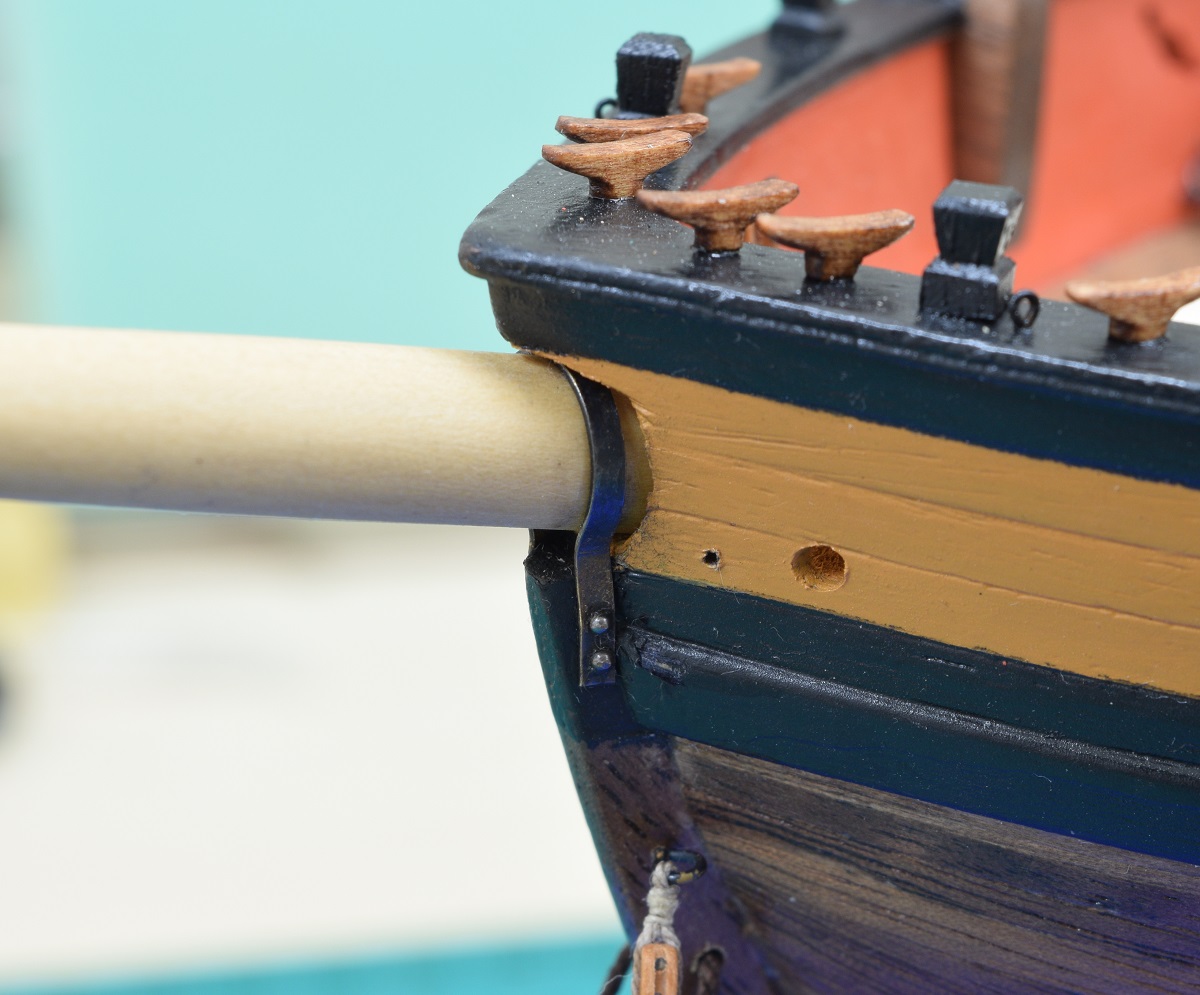
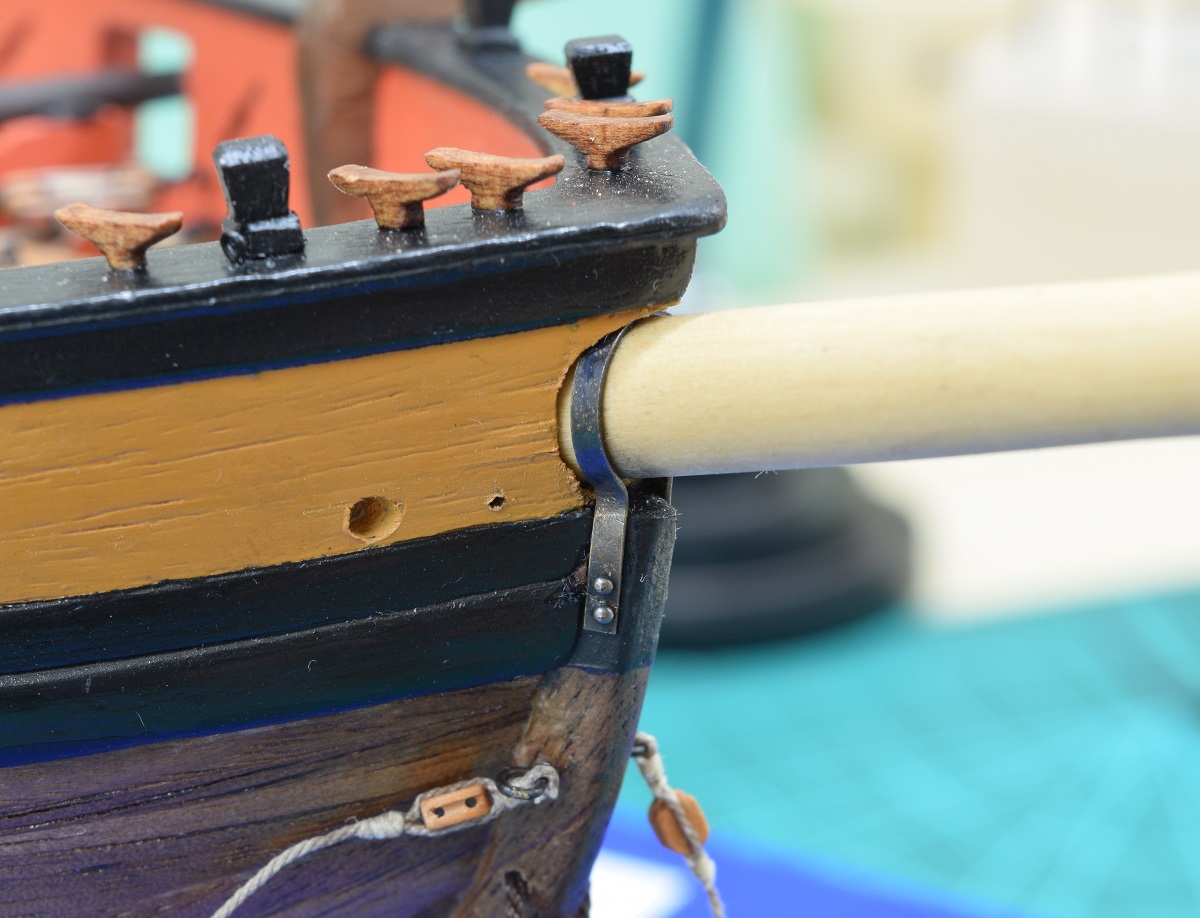
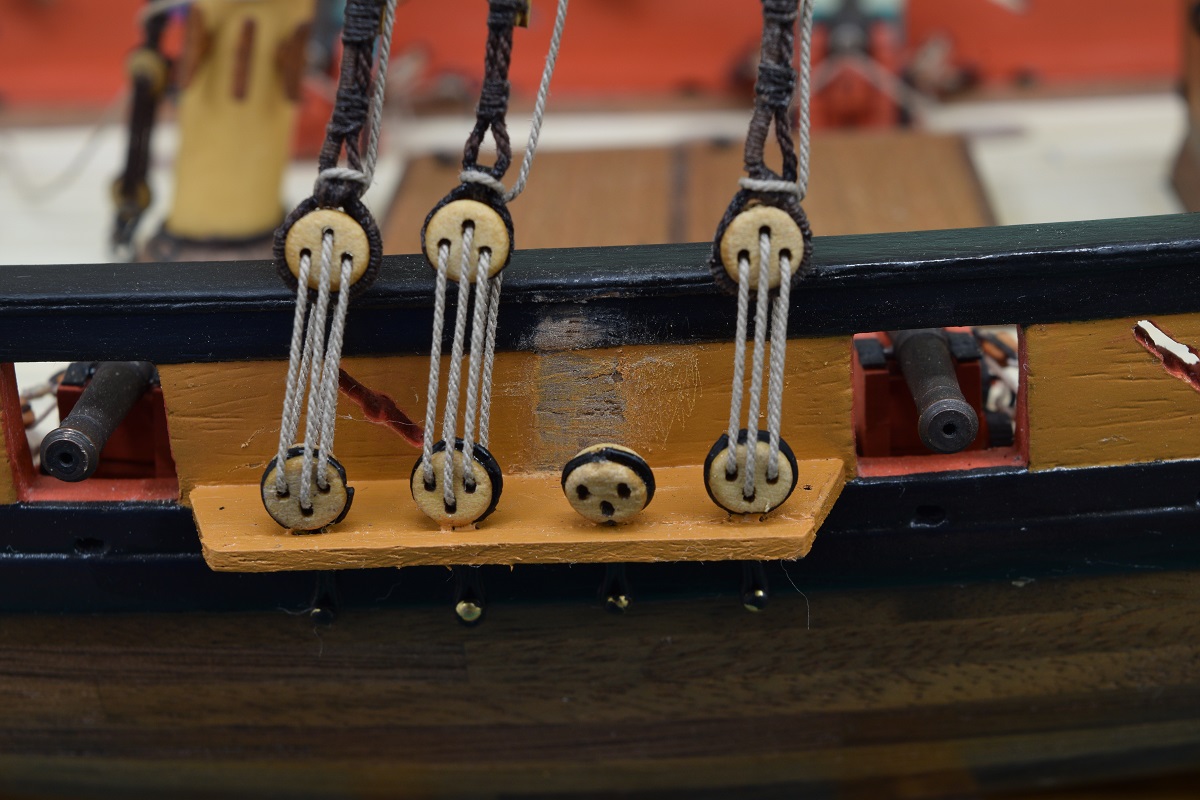
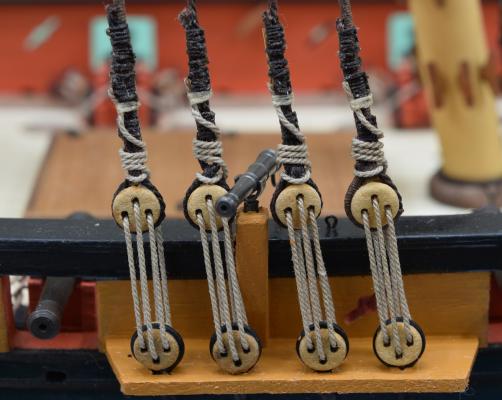
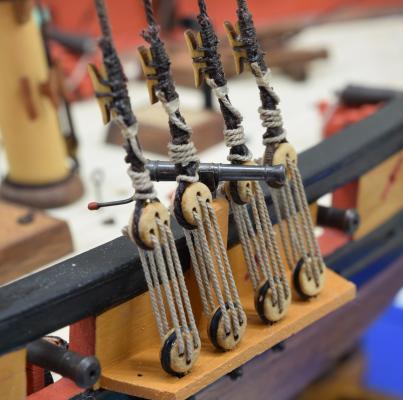
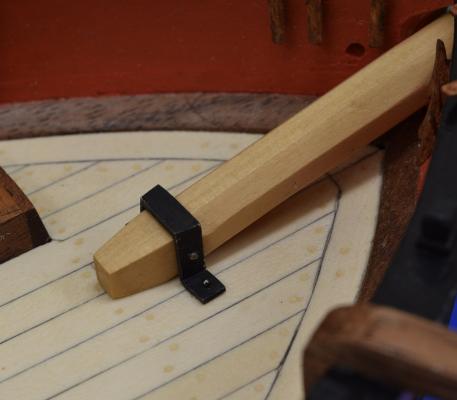
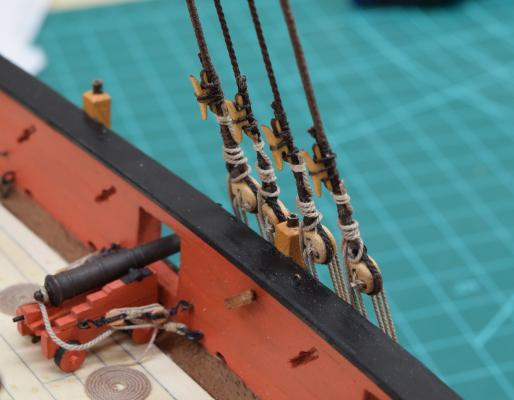
Tonight's update is for two different things. 1) Finished the starboard lanyards, and took some pictures. I included one of the now completed swivel guns, just because I like it! Shrouds are now complete (I think), with the obvious exception of the ratlines. 2) Part two of this update I blame completely on Dirk. The bowsprit is now attached to the ship (not the jib boom). The base (foot?) strap is made of 5 pieces of brass soldered together, and 4 tiny little brass rivets that actually do pin into the bowsprit and the deck. The cast gannon strap that came with the kit was somehow lost by me some time back, but instead of asking for a replacement from MS, I just made a new one out of brass, and attached it with 4 more tiny little rivets. Pretty happy with both of these items, and the rivets should make them quite secure, even if they aren't correct for the model (I have no idea if they used big bolts to secure this sort of things in the time-frame of this ship - 1768).


- 831 replies
-
- 20
-
-
- Armed Virginia Sloop
- Model Shipways
- (and 1 more)
-
Thanks! Yes, the number of deadeyes in your case will make it more difficult, but you could set up a jig to do a group at a time, depending on what's in the way and how the spacing is would determine what might work best for you. I stole the idea from another build log on here, it's what I really like about this place, I learn so much by looking at what other people do, so my building level is accelerating so much faster than if I was doing this in a vacuum that it's completely crazy. I doubt that my AVS would even be recognizable compared to what it is if it wasn't for MSW and what I've learned here.
-
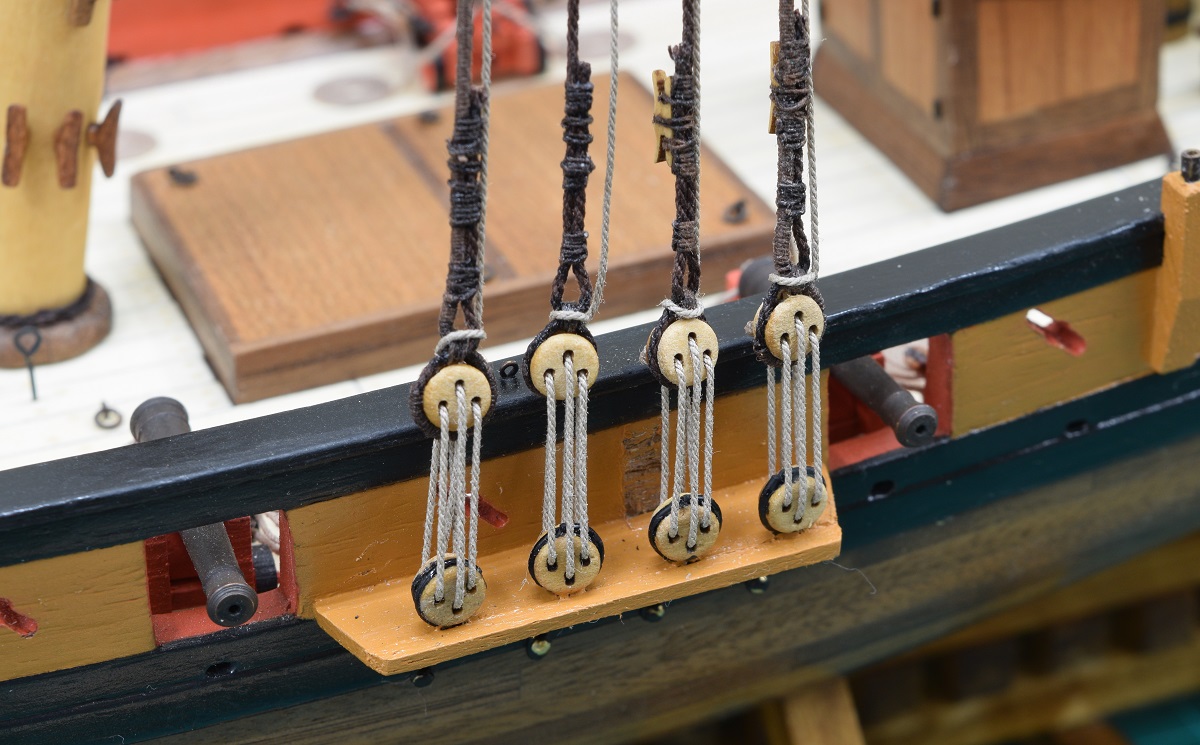
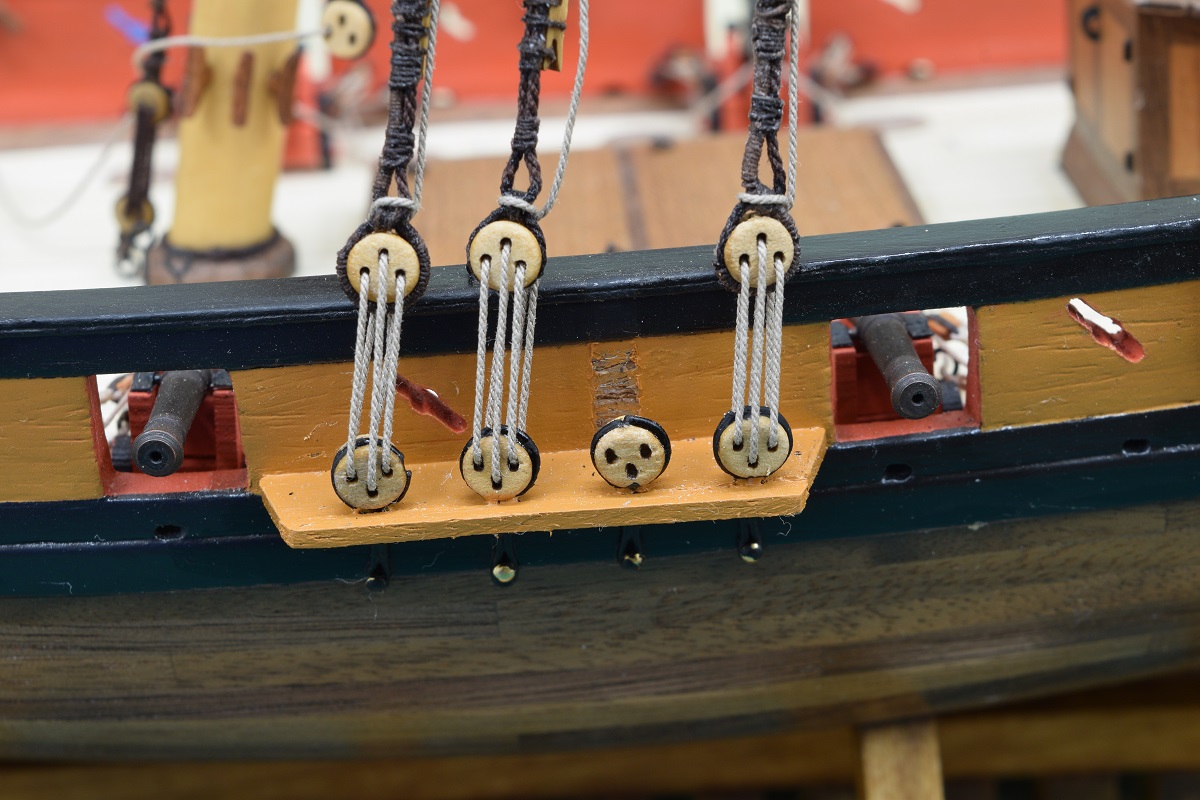
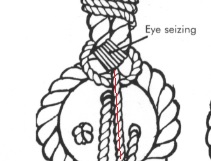
Thank you all! The lanyards are not done correctly, so be careful using them as a direct example! The proper way to do it is for the lanyard to go between the shroud and the deadeye as it comes up, then circle around from the front to the back where it goes under itself where it enters the gap between the shroud and deadeye, and then twist around the shroud and get seized at the end. I didn't leave enough gap between the shroud and deadeye on all of my shrouds, so rather than make some of them right, and some of them wrong, I did them all wrong for consistency. Here is what I mean - The red line is the lanyard coming up behind the deadeye from the bottom deadeye. As you can see it passes from back to front between the eye-seizing and the deadeye, and then loops back around under itself. That's what my goal was, but since I got the gap too small on some of the deadeyes, I couldn't do it that way, so mine loop under themselves next to the shroud instead.
- 831 replies
-
- 9
-
-
- Armed Virginia Sloop
- Model Shipways
- (and 1 more)
-
You cheated and added all those pictures and stuff after my post, indeed. Looks like your system should work fine. Seems like one of the more tedious/picky parts about the ships and rigging is getting the shrouds even, so you need to use some form of jig like you are using to do it, and I don't know of any way to do it except individually. Take a look at the last couple pages of my log and you'll see how I did it with a little jig that held all 4 dead-eyes in place, and allowed me to pull the shrouds to them. I could put both sides of a shroud pair on, and do whatever adjusting I needed before securing them to the dead-eyes.
-
Without seeing what you are doing, or at least some description of the difficulty that you are having, it's hard to say what is going wrong. The served line will certainly be stiffer, but I haven't really had much difficulty in getting them to go where I want - I 'painted' the entire served area with dilute (50/50) white glue to help secure the serving, so that makes it even stiffer, but it's still workable. Edit: Glad the alligator clips worked for you!
-
It's lighting the interior of the model to better show the detail. How is that a gimmick? And what it adds to the model is interior lighting, delivered from inside the model instead of a light of some sort shining into it. It's to illuminate the model, not 'do something for it'.
-
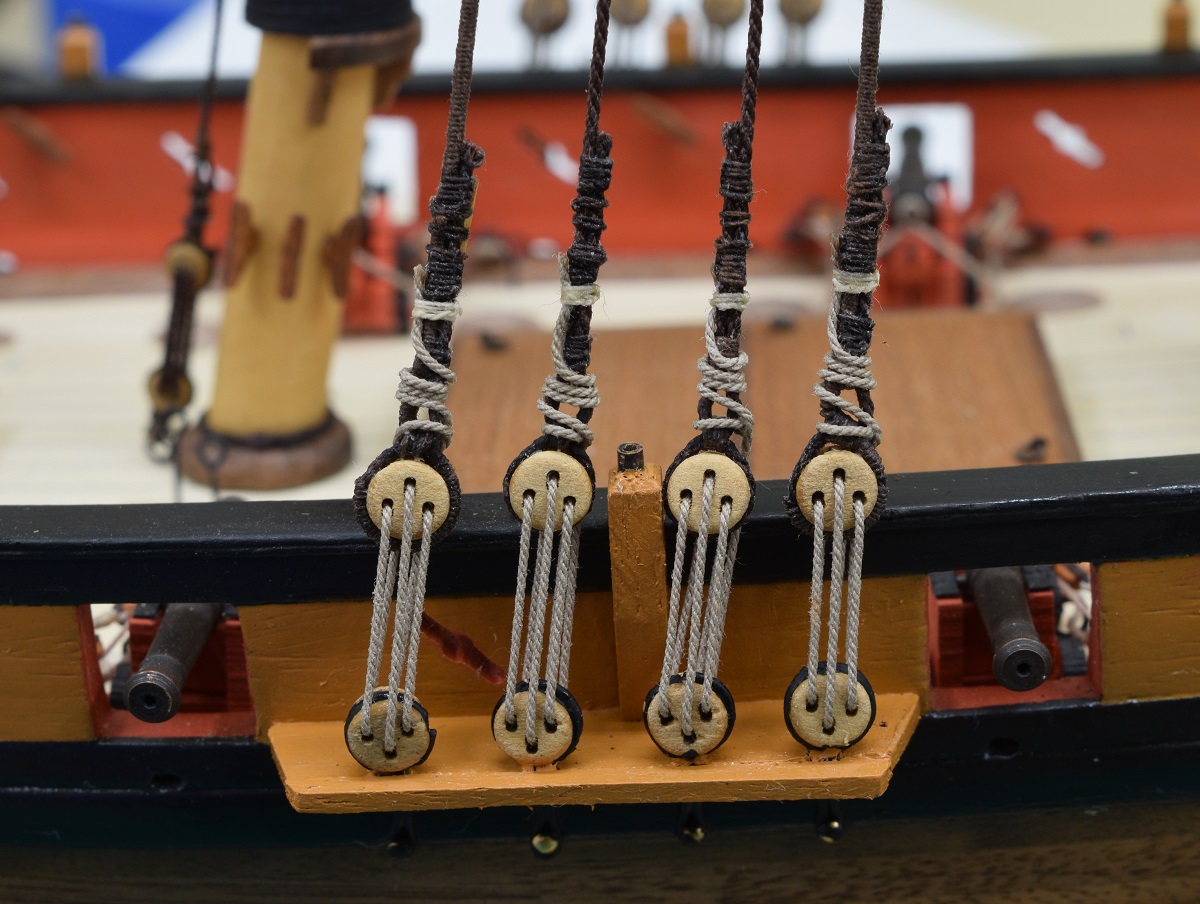
Repairs went far better than I could have expected. Lanyards on the port side are completed. Starboard side will be another day.


- 831 replies
-
- 23
-
-
- Armed Virginia Sloop
- Model Shipways
- (and 1 more)
-
It depends on the rake of your shrouds, remember that the top dead-eyes are not inline with the lower ones, they are at an angle. When I placed my mounts, I tried to accommodate this by measuring the angle to the top of my fake mast, and placing the mount where I thought it would be between the upper dead-eyes, but I obviously 'missed' on this side. The standing rigging on ships was served to protect them from chafing/wear in locations where they might rub against things. So if a line was protected from being chafed (like the inner shrouds are by the outer shrouds) then they were not served. The first and last shroud could be chafed by the sails, so they were served down to the dead-eye (and I should have served them all the way to the end, instead of stopping at the dead-eye and having the end of the seized shroud un-served, but I'm not going back and re-doing the shrouds to fix that). The inner two shrouds were only served a bit below the mast top, as all of them are served where they wrap the mast-head and a bit below that. I have no intention of removing the dead-eyes or chain-plates George. I plan to remove the lanyard from the interfering dead-eye (the lanyards are only secured with alligator clips right now) so that it's out of the way, and then remove the swivel gun pedestal. If it removes cleanly, then I can simply clean up the paint slightly further back to re-secure it, and then do some sanding and repaint the area, as that will be the simplest fix. If I destroy the pedestal, it can be re-made relatively easily. The big danger is damage to the cap-rail, planking, or channel in the process of removing the pedestal. Hopefully I can avoid that.
- 831 replies
-
- 10
-
-
- Armed Virginia Sloop
- Model Shipways
- (and 1 more)