


russ
-
Posts
3,086 -
Joined
-
Last visited
Content Type
Profiles
Forums
Gallery
Events
Posts posted by russ
-
-
Your model is coming along well. I recall those plastic sails from the Revell kits. They can be a bit brittle, especially after some time. I would have recommended that you attach the sails to the yards before you mount them on the masts. However, that ship has sailed so you will have to extra careful in attaching the sails.
Beware the cats near any rigging.

Russ
-
I found that making and apply decals was not too bad. For me there was a alight learning curve. I had two tries before I got what I wanted on my recent schooner model. I over sprayed it with dullcoat once it was on the model and it looked fine.
Your model looks really good. Wonderful work.
Russ
- Jack12477, CaptainSteve, cog and 5 others
-
 8
8
-
That looks very good. Problem solving is one of the things I enjoy about model building. Like you say, there is always something.
Russ
- thibaultron, Overworked724 and Elijah
-
3
-
-
The top looks great. I especially like the cross trees and cheeks.
Russ
-
Rob:
The masts look great. The model as whole looks wonderful as well. Nice work.
Russ
- Omega1234, mtaylor and FriedClams
-
3
-
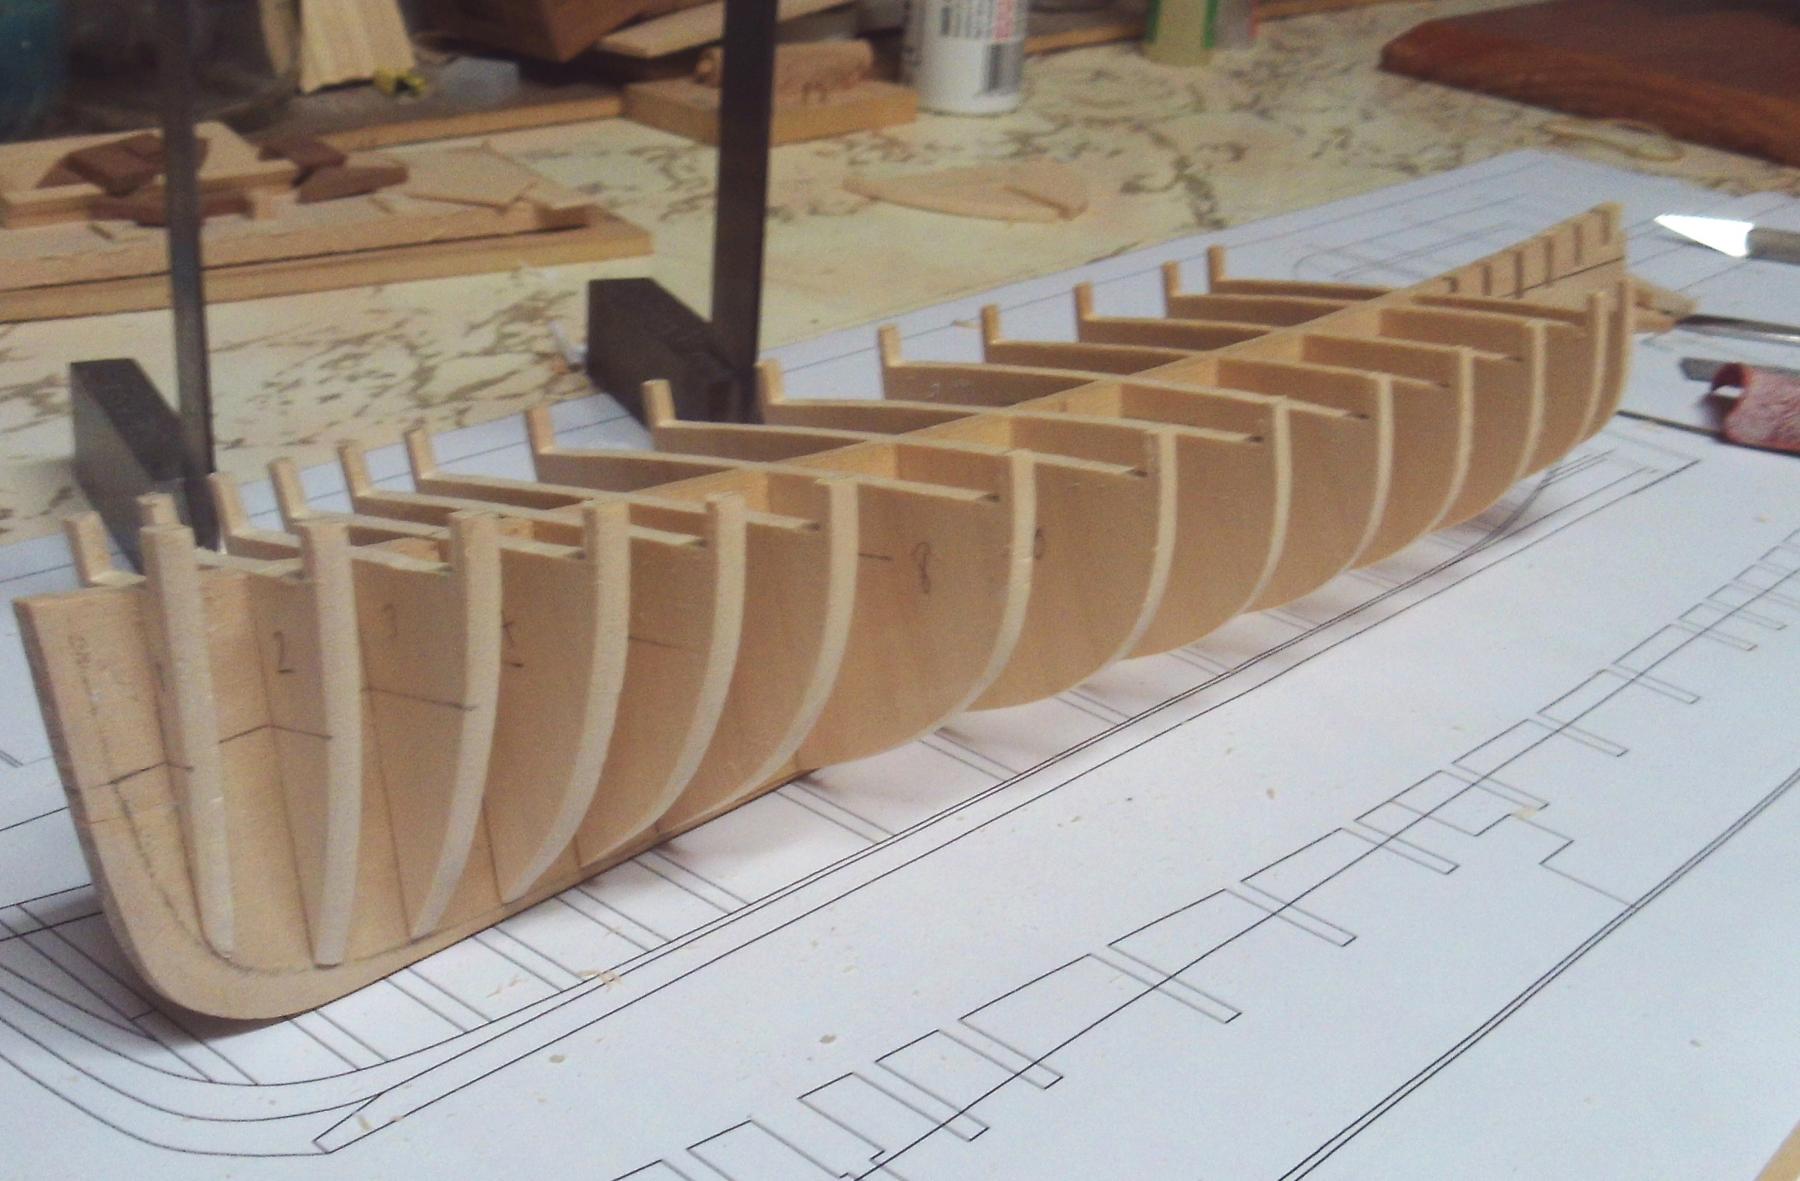
I still need to cut a slot in the middle of that bulkhead because the mast slot will go right in the middle of #4. The slot is cut into the profile former which is the gap you are seeing. There will be a slot cut into the top of the bulkhead as well. That will create a pocket for the butt end of the mast.
Russ
- FriedClams, cog, src and 4 others
-
7
-
The slightly off white color looks good.
Russ
-
-
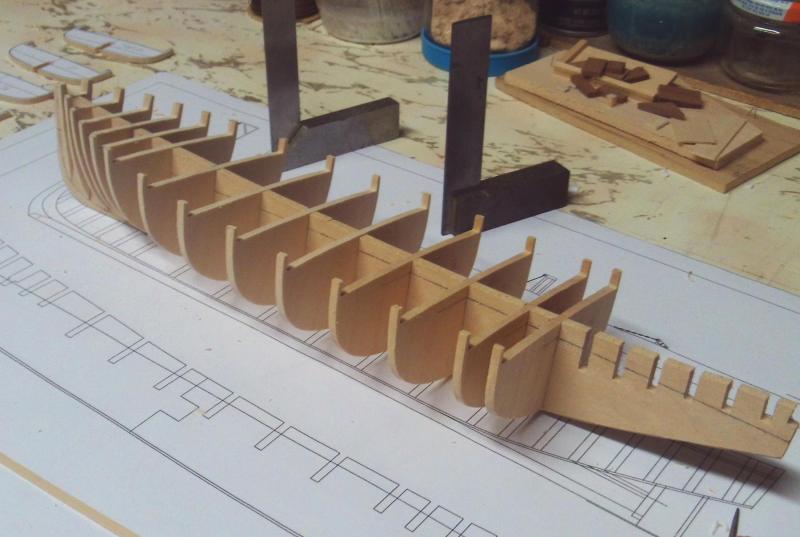
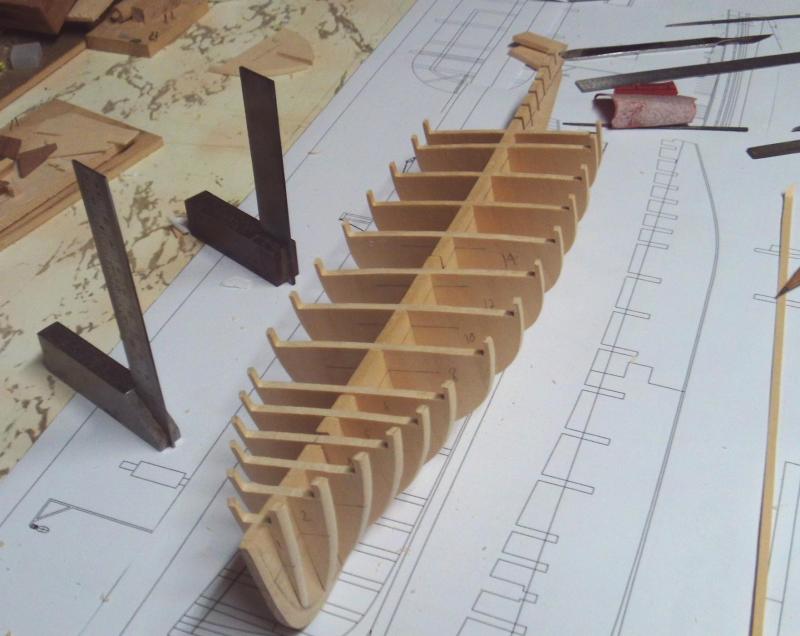
There is a little more progress, but this is mostly because I have a new camera (the old one died) and I wanted to test it out. Not bad so far.
Nothing is glued up yet. This is all dry fitting. I have 7 more bulkhead frames to fit before I can begin gluing the profile former together.
Russ

-
Gary:
Thanks for the kind words and good luck with your own build. I look forward to seeing it.
Russ
- FriedClams and mtaylor
-
2
-
-
This is something that we all go through at one time or another. Just keep plugging away.
Russ
- Elijah, husky1943, Overworked724 and 1 other
-
4
-
-
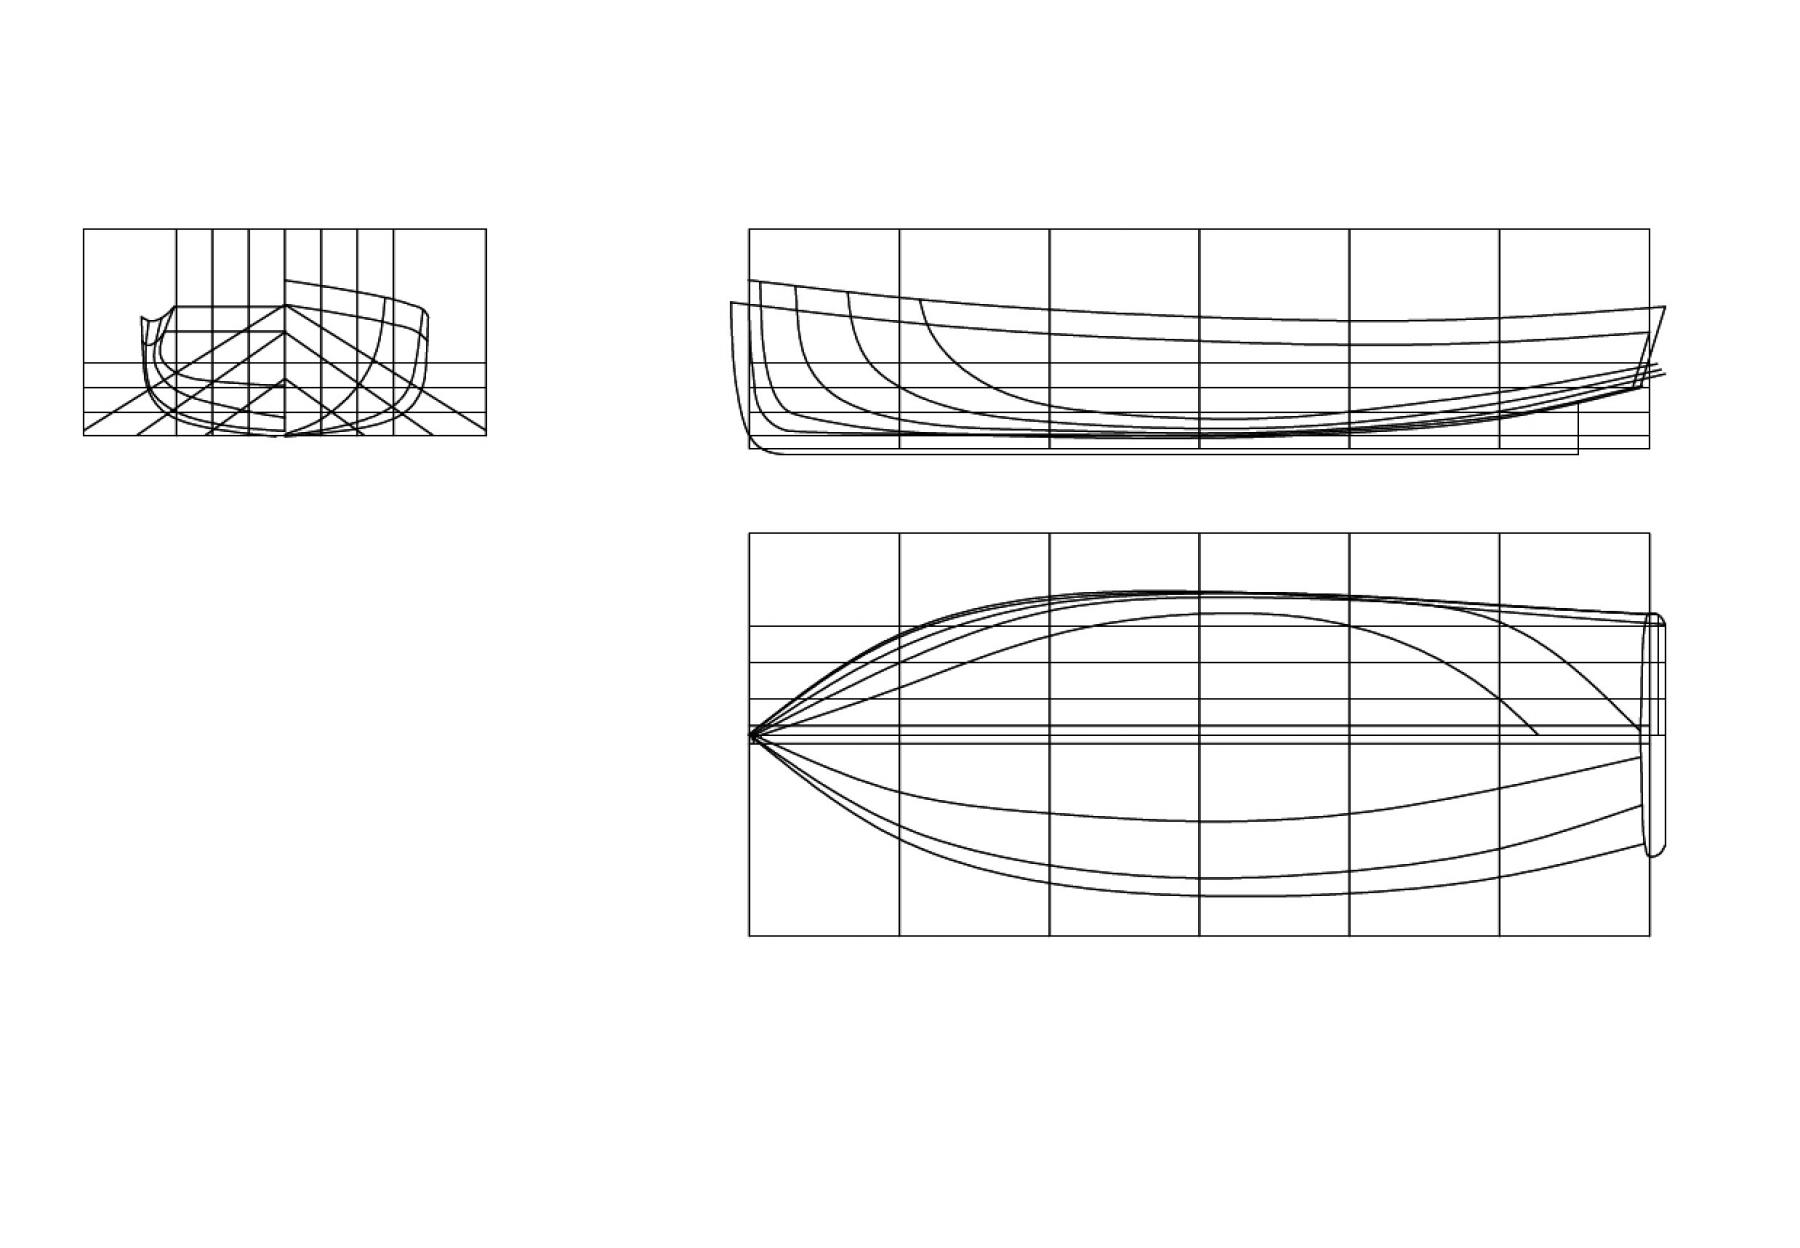
Here is an example of an unfinished three view lines drawing that has been roughly faired using waterlines, buttock lines, and diagonals. There are 5 waterlines including the deck and rail lines. There are three buttock lines; I have also included a bearding line that appears in the sheer profile drawing as a fourth buttock line, but ignore it for this discussion. There are three diagonals.
The half breadth has the waterlines on the top and the diagonal lines below. The sheer profile has the three buttock lines.
You measure down the length of the diagonal on the body section, taking a measurement at each body section it intersects. Transfer these measurements out along the corresponding straight station line on the half breadth. Do this with each diagonal at each station and then connect the dots.
Russ

-
Once you have produced a set of body sections drawn from your waterlines, you can extend diagonal lines across the body sections, from the centerline down at angles so that the diagonal lines intersect the body sections at as close to right angles as possible.
Then, measuring down each line to each body section, plot those distances on your half breadth plan at each station line, opposite the waterlines and connect the dots much like you did on the waterlines. The diagonal lines on the half breadth will not have any concave curves in them because they cross the body sections at, or nearly at, right angles. There may be areas that approach a straight line, but other than that, the lines will have some convexity. It is the result of the diagonal lines in the body sections crossing at nearly right angles to the body sections.
These diagonal lines in the half breadth will show you where you have unexpected humps or dips in the body sections, and thus in the waterlines. I would also include three buttock lines as well. Thus, using the waterlines, buttocks, and diagonals, you can correct each, checking back and forth for each body section, until you have faired the drawing. It is a time consuming and painstaking process, but it is the best way to produce a plan from which you can build.
Russ
- GemmaJF, druxey, Roger Pellett and 2 others
-
5
-
-
So far the rigging looks good. It takes time so do not worry if it seems to drag on a bit.
Russ
-
-
-
-
-
John:
That is correct. I have seen several over the years here in Mississippi. There are a lot of photos of luggers in local archives. This model will be set up for shrimping.
Russ
- John Allen and mtaylor
-
2
-
Popeye:
Thanks. I appreciate the kind words. I am pleased with the build so far. Time and patience will tell the tale.
Russ


Sultana by Overworked724 (Patrick) – FINISHED - Model Shipways – Scale 1:64 – Solid Hull – First Wooden Model Ship
in - Kit build logs for subjects built from 1751 - 1800
Posted
I use a number 11 scalpel to cut pieces out of thin wood sheets.
With an exacto blade, if its sharp, you should be able to get through making repeated cuts along the same line. Make sure you have a sharp blade. Go slowly and watch the point of the blade to keep it on course as it works its way along and through the wood grain. Better to cut the piece a little large and then you can sand it off. It takes patience and some practice. Mind your fingers so you do not cut yourself.
Russ