


amateur
-
Posts
3,506 -
Joined
-
Last visited
Content Type
Profiles
Forums
Gallery
Events
Everything posted by amateur
-
Photos
amateur replied to derekuk's topic in Using the MSW forum - **NO MODELING CONTENT IN THIS SUB-FORUM**
Nope, just curious when you mentioned the problem. Jan -
Photos
amateur replied to derekuk's topic in Using the MSW forum - **NO MODELING CONTENT IN THIS SUB-FORUM**
Sorry, I thought they were hosted here, as the link-address that pops up hovering over those question marks is something like this: https://modelshipworld.com/uploads/monthly_09_2014/post-96-0-67177900-1412022422.jpg That refers to a non-existent file, but with msw in the address.... That made me think 'should be visible, but is not....' Jan -
Photos
amateur replied to derekuk's topic in Using the MSW forum - **NO MODELING CONTENT IN THIS SUB-FORUM**
The funny thing is: those are jpg’s hosted at MSW. (The two main reaons for problems) They should be visible, I think..... Jan -
At 1:64 definitely too big for both my bench and my house. (probably also too big for my bankaccount ) But a wonderfull model it will make... I'm still hoping for someone going into the McNarry/Philip Reed sized kits . I'm not a good enough builder (and have far too litte machinery) to go into that direction by myself, but that size would fit both bench and house.... (not sure about the bankaccount, though: Chris already explained to me a long time ago that smaller models do not come at a substantially lower price) Jan
-
build logs order
amateur replied to Papa's topic in Using the MSW forum - **NO MODELING CONTENT IN THIS SUB-FORUM**
I don't think I understand you question. when opening a thread, the software places you at the first unread post. That sounds reasonable to me. I would not like to go back and search for the last post I read. When a log has more pages, you can skip to the last one by using the pages-numbers and arrows next to it (single arrow:next page, double arrow:last page) Or do I miss your point completely? Jan -
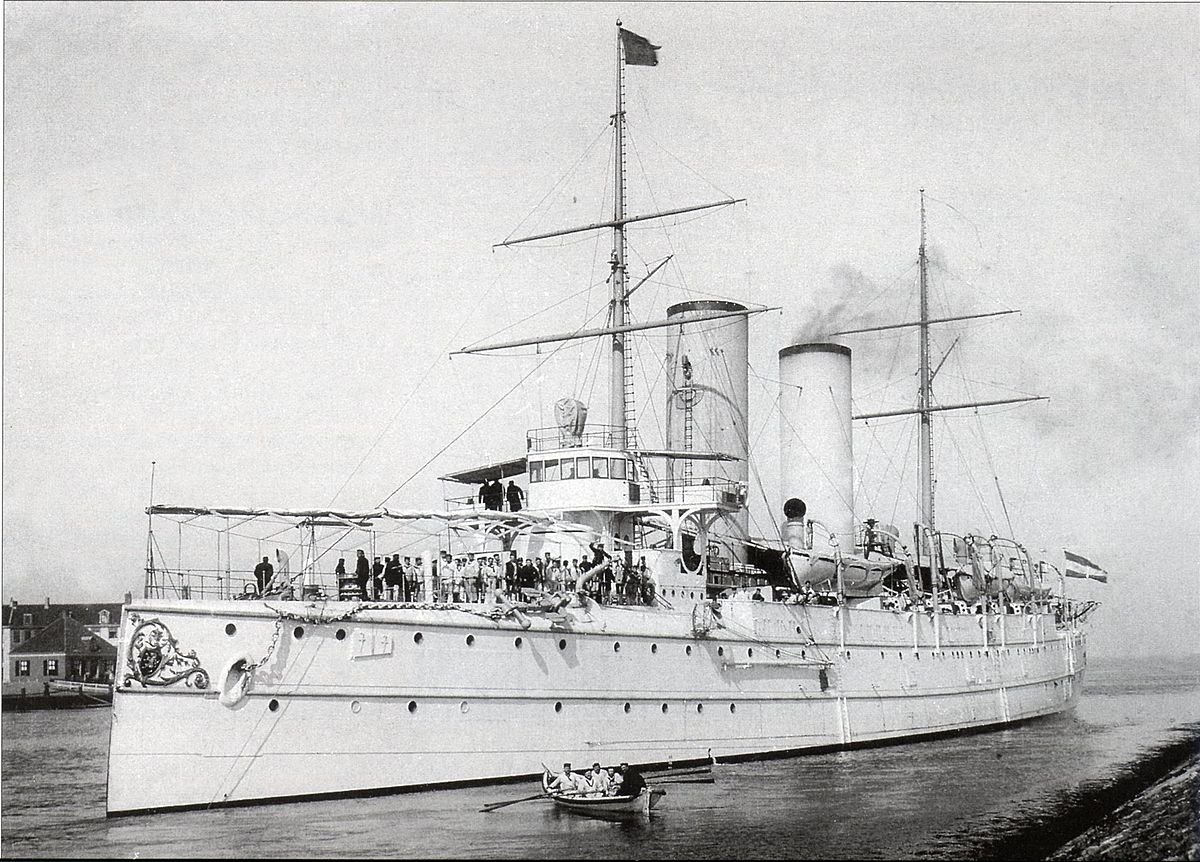
In the dutch navy we had protected and armoured cruisers. Protected cruisers had an armoured deck (pantserdek kruisers in Dutch) armoured cruisers had an armoured belt at the waterline. (Pantserkruiser in Dutch) My favourit dutch protected cruiser is the Gelderland-class. No model available Slighty later than the german cruiser described above. There is a very nice cardmodel of beowulf (by hmv, scale 1:250). Is on my wishlist. I guess you are aware of the german forum dedicated to the Kaiserliche Marine? (Edit: I checked: unless your name is used by someone else you are ) Jan
-
I had decided that my house became too small for another dull size wooden model, but now I am seriously, very seriously tempted indeed..... How many months do I have to turn the missus around? Jan
-
Have you seen the new Amati prototype 1:64? Now that would really give you the possibility to add small details. Jan
-
would you please stop mixing pics of the real bike in between pics of your your model? honestly: for some parts it is only for the background that we can see that it is a model great work Jan
-
Is this a cutter build on aplug? Looks a very convincing cutter. I'm very curious what the next one will be. pics till now looked promising. Little space left in my cupboard, butI might be tempted.... Jan
-
Hi Matt, as Dan passed away some weeks ago, you will not get a reply from him on your question. Jan
-
Porsche 934 by kpnuts - FINISHED - Tamiya - 1/12 - PLASTIC
amateur replied to kpnuts's topic in Non-ship/categorised builds
Ah, closed I like the way you display the model.! Jan -
Hi Chris, doing the guns of my De Ruyter, I actually deviated from the rule you gave: the paint had a very high tendency to break at the scoring. Someone suggested to di the scoring on the other side. It made a difference wrt the cracking (although: small). The quality of the print is the weak point of JSC: not completely waterproof, and rather easily cracking at bends.... (based on two models: axeldijk and De Ruyter) Jan
-
Question: are you scribing the folding lines with a blunt needle or something? Doing that helps getting a crisp fold, and at the place you want it to be. the real pro's are even fussing about on which side you need to do your scribing, but actually, I never see the difference in my results. (perhaps my fault, or eyesight) Jan
-
New to MSW, Tom from The Netherlands
amateur replied to Articcie's topic in New member Introductions
Hallo Tom, welkom bij MSW. the victory kit by Amati will be great, (and very large ). will give you some frustrations (all builds do), and lots of fun (most build do ) compared to your other builds, the building time will be slightly longer Jan -
And if the tail does not belong to the pixie holding the crown, what is the use of the tail (or: were is the head that goes with it?.) Jan
- 2,679 replies
-
- 1
-

-
- heller
- soleil royal
- (and 9 more)
-
Yes, I know that that is what you were thinking of. Therefore I mentioned the generic sets made by hmv and draf (There are also firms doing PE-style metal detail sets) Jan
-
But hmv (and some other companies) sell aftermarketparts (such as railings, ladders, handwheels and anchorchains) fentens, drafmodel are two companies worth checking. Card modelling is serious business in countries east of here. Jan
-
Porsche 934 by kpnuts - FINISHED - Tamiya - 1/12 - PLASTIC
amateur replied to kpnuts's topic in Non-ship/categorised builds
Oops..... can you salvage it, or do you need to do a total repaint? Jan -
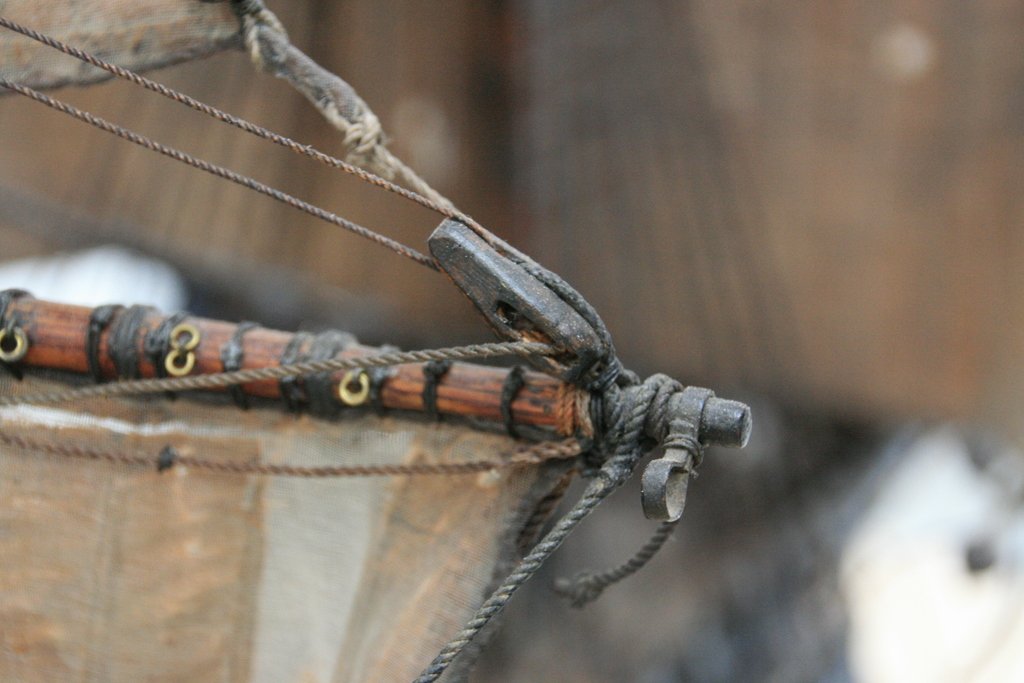
I never saw a clue-line on the front of the sail.: they run from the yard to the clue block, back to the block at the yard. Jan
-
question just for reference: is it a inch-grid onyour cuttin gmat, or a centimeter-grid? (or the same question stated differently: how long is the model?) Jan
-
Prins Willem 1650 by mhkash
amateur replied to mhkash's topic in - Build logs for subjects built 1501 - 1750
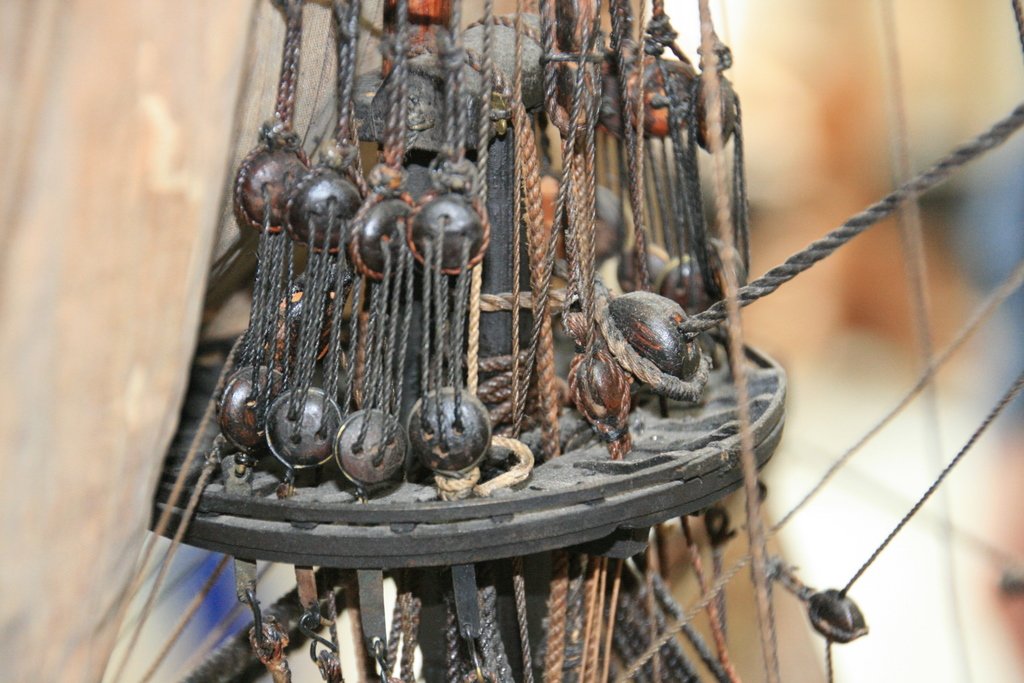
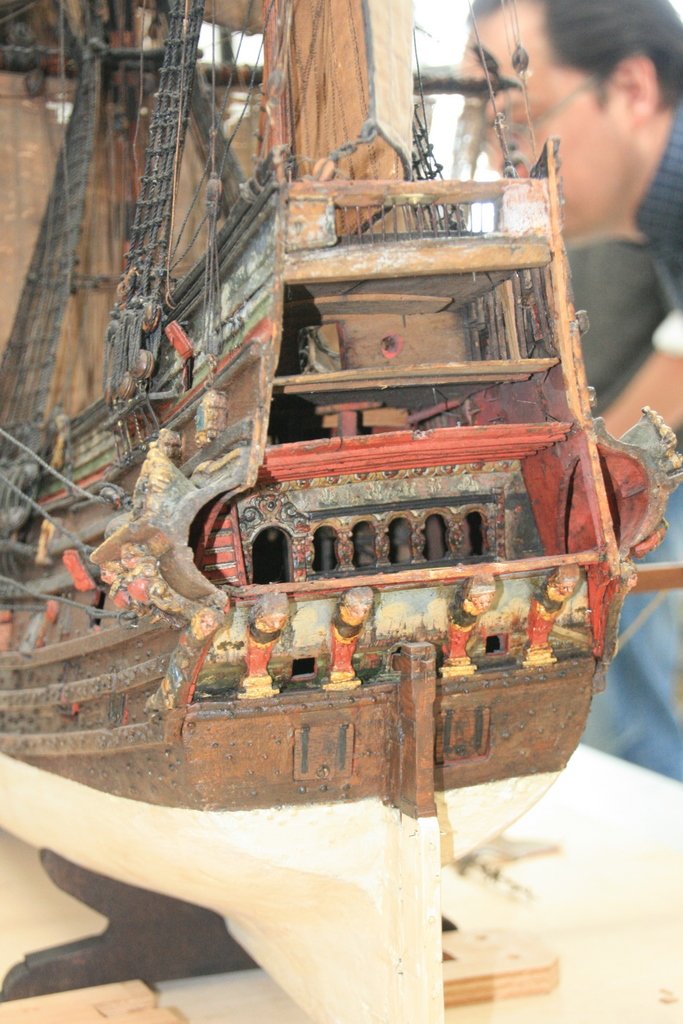
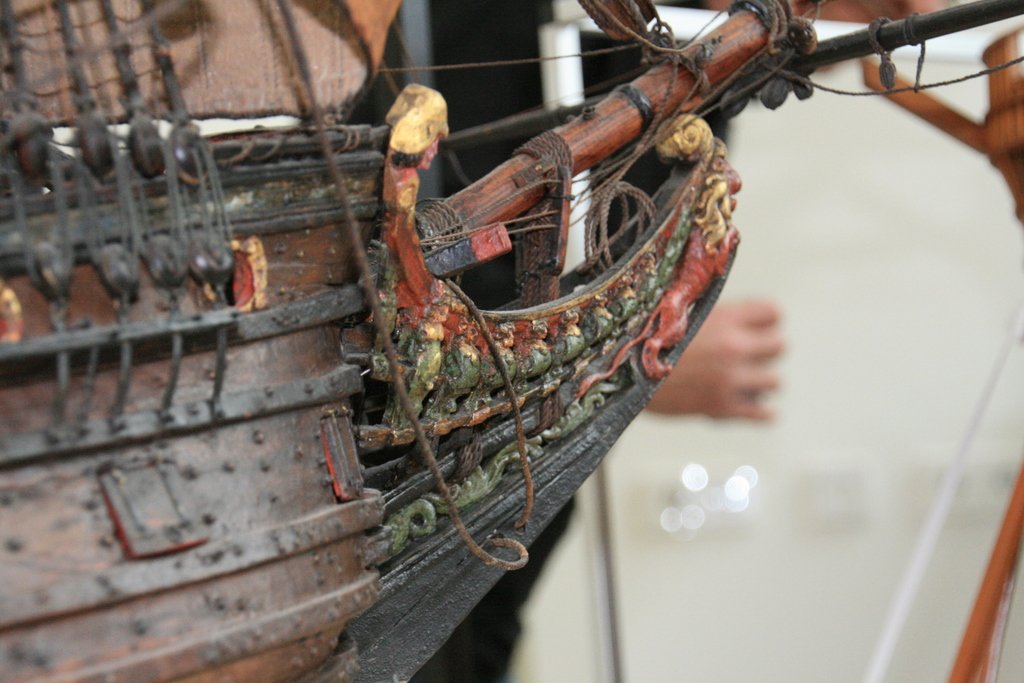
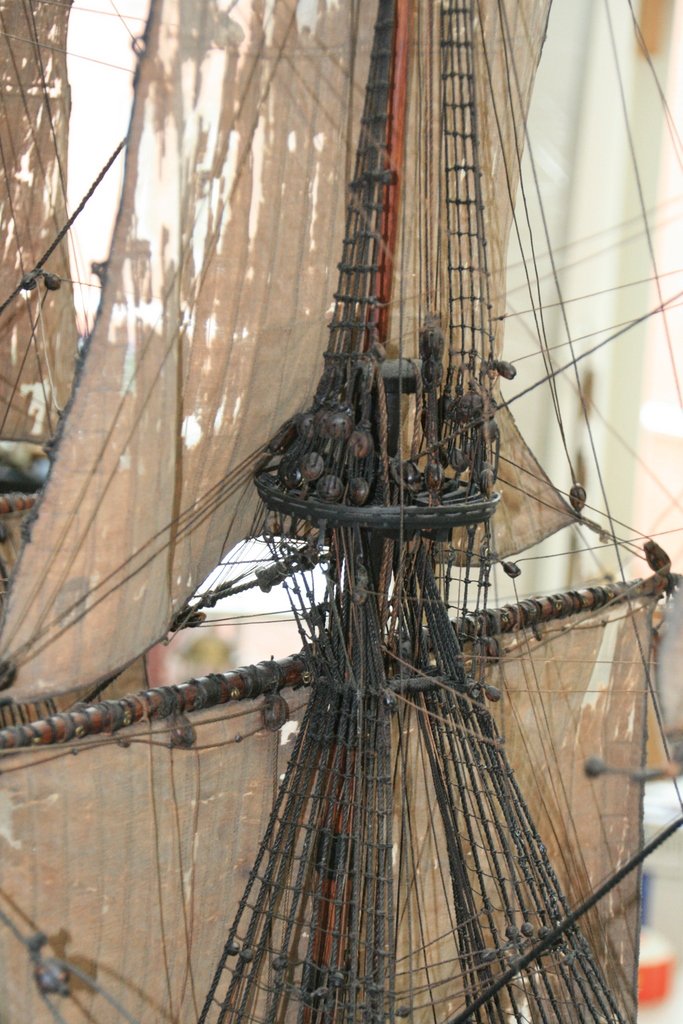
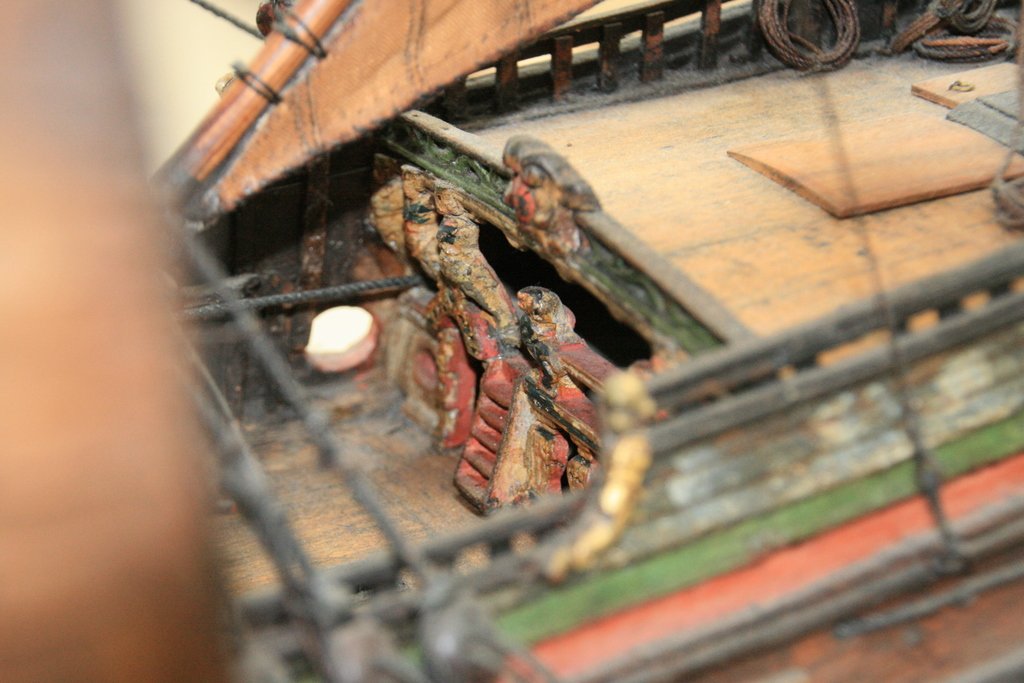
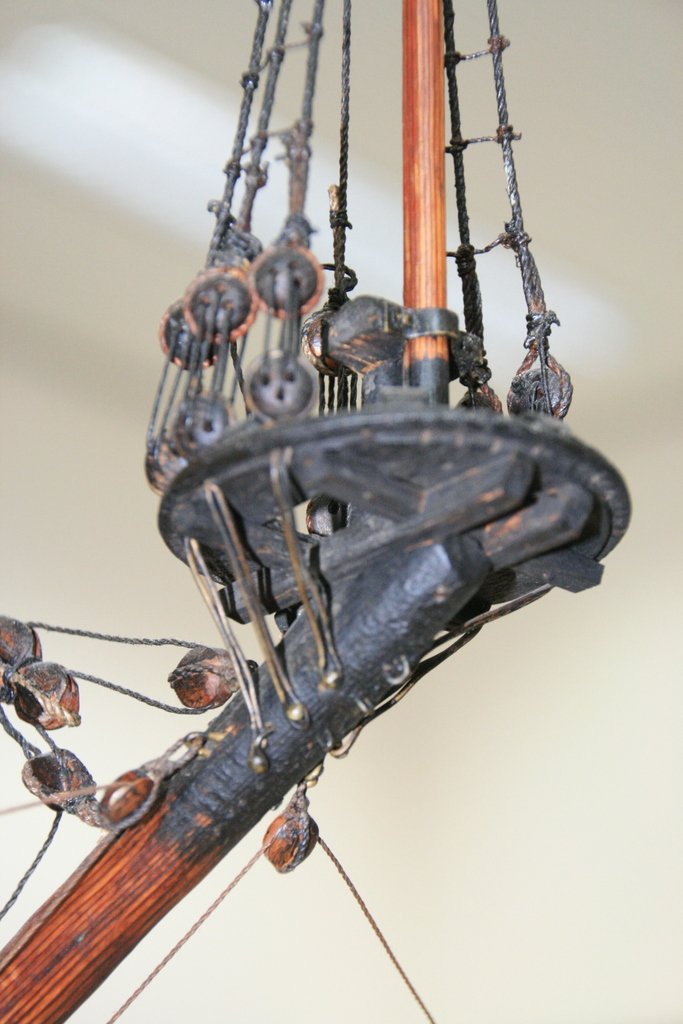
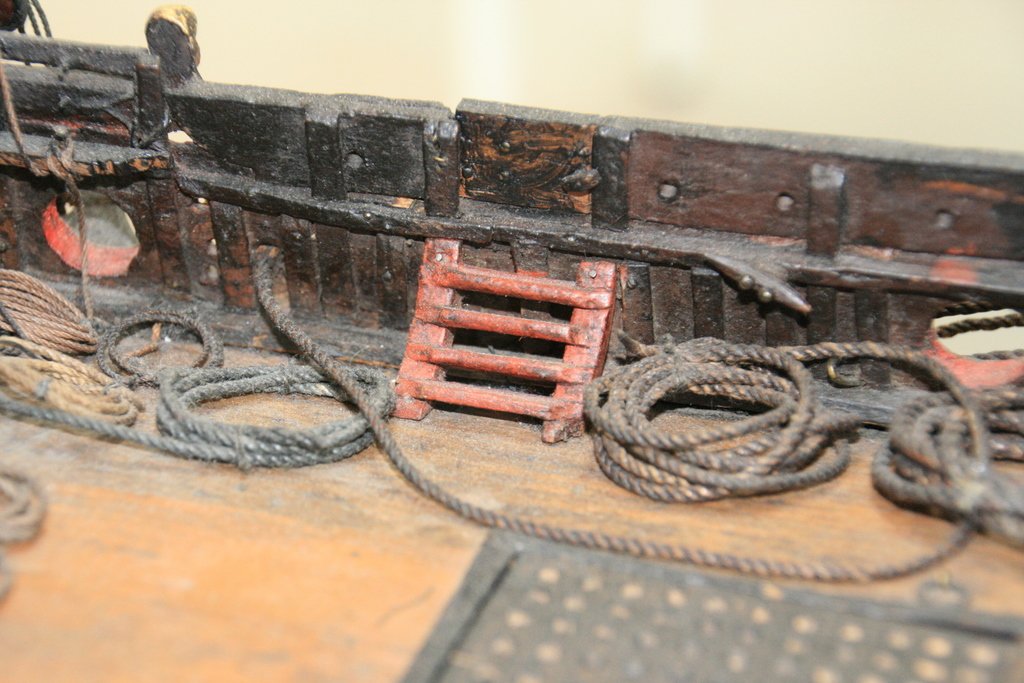
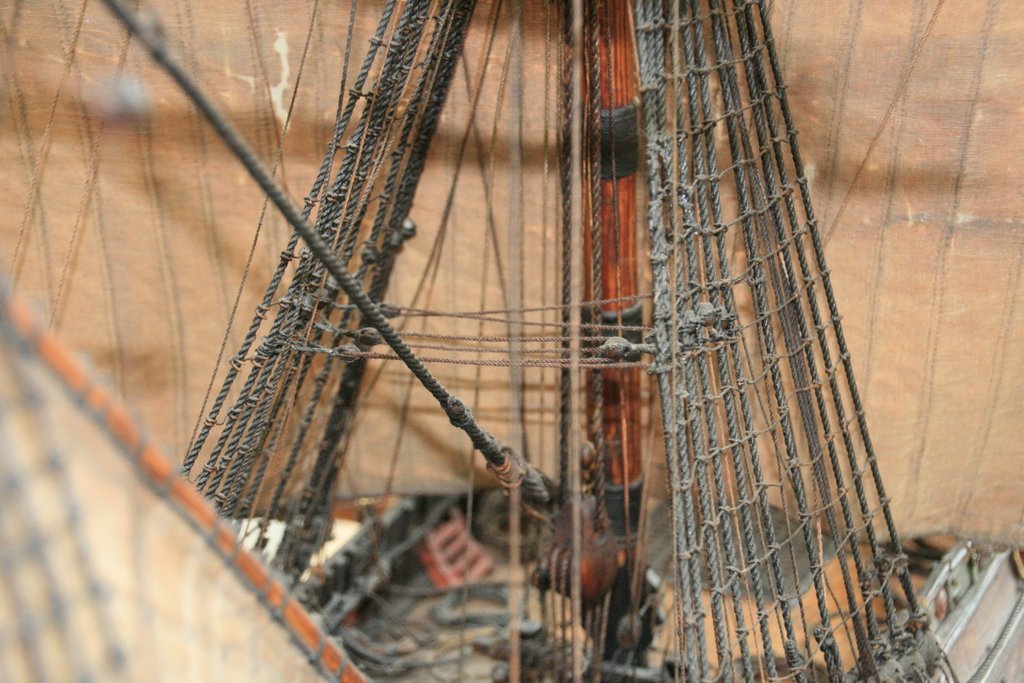
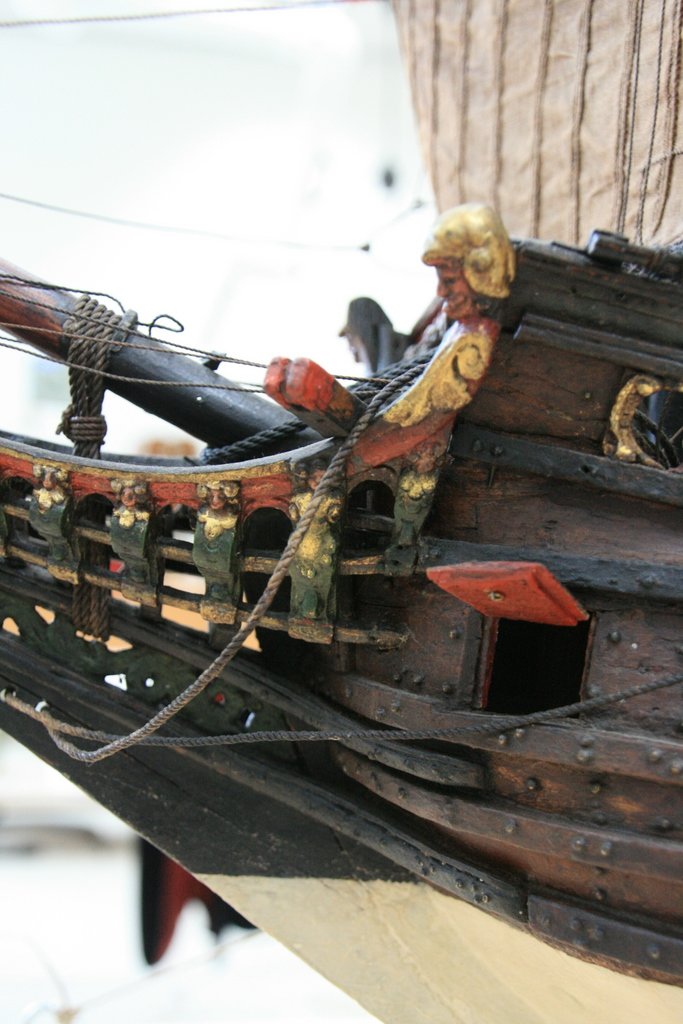
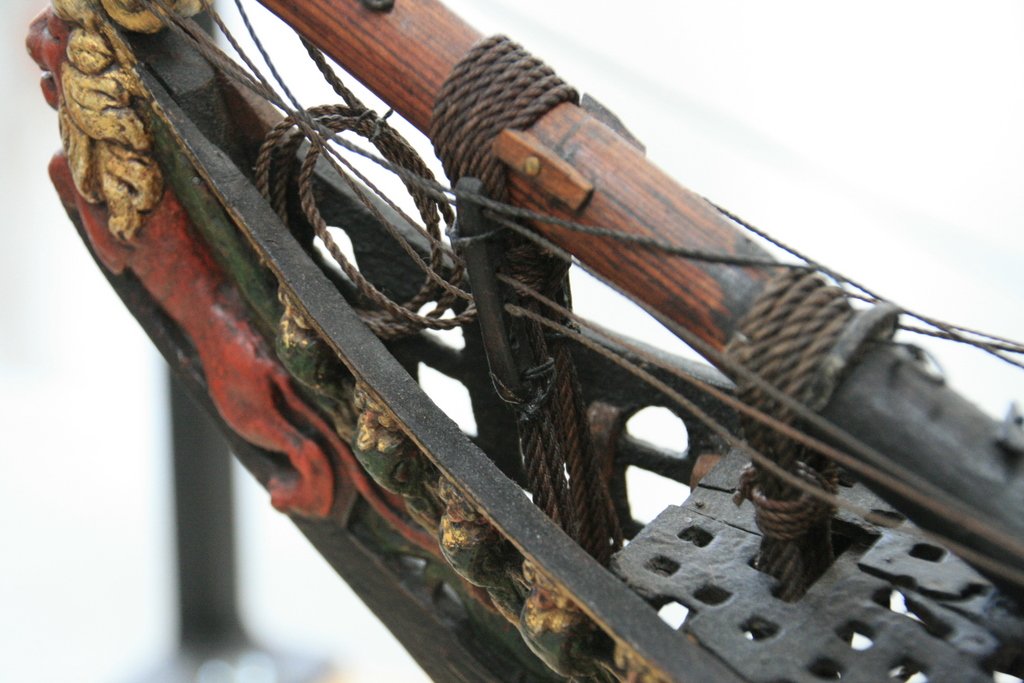
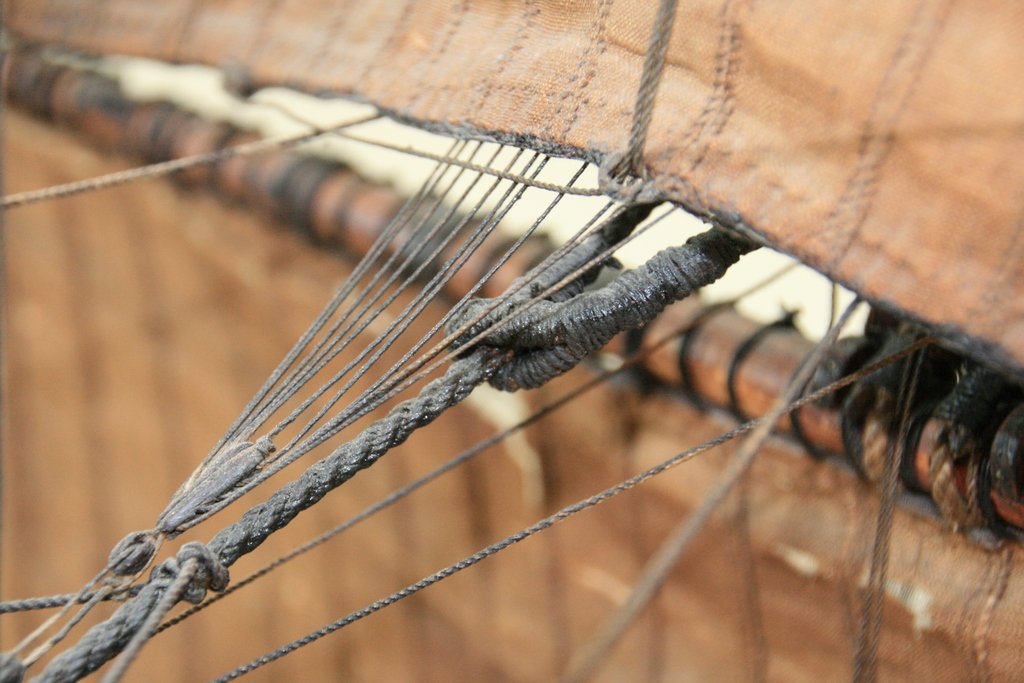
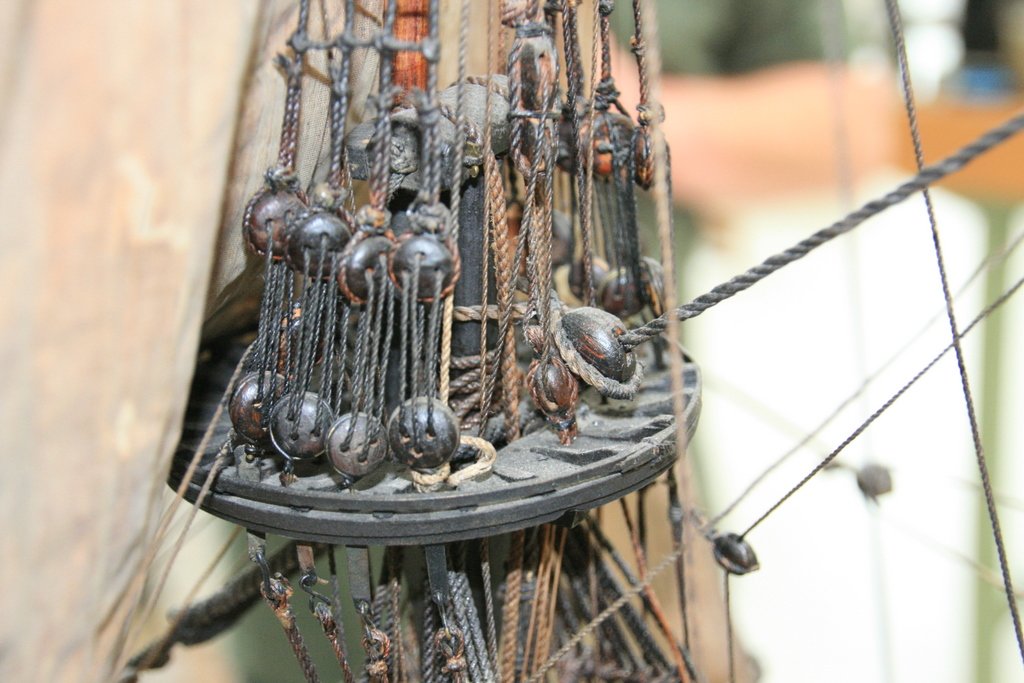
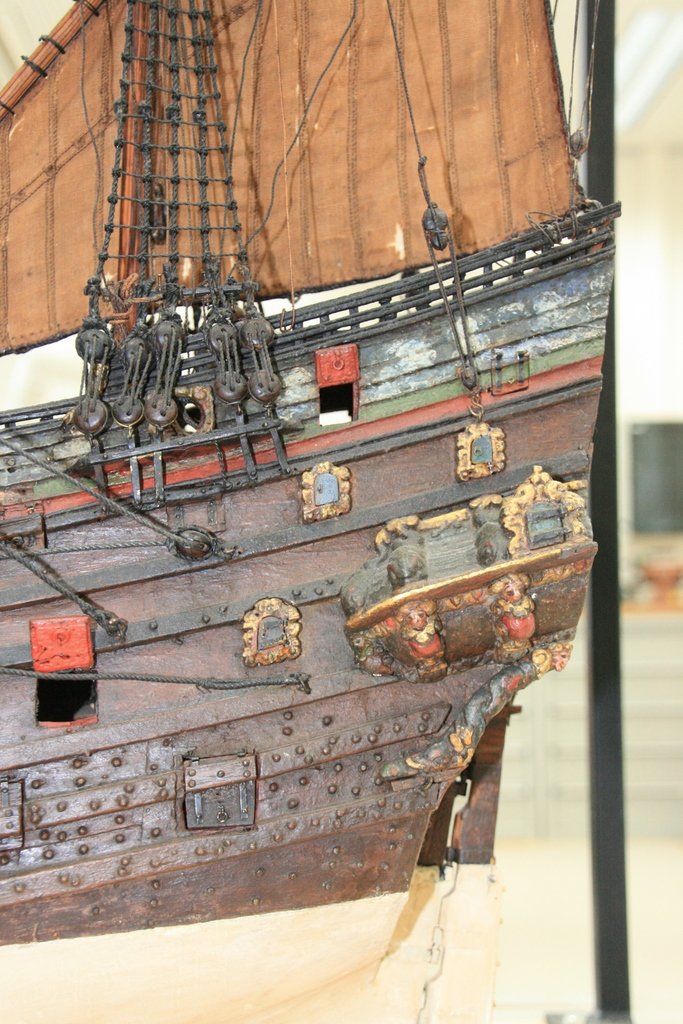
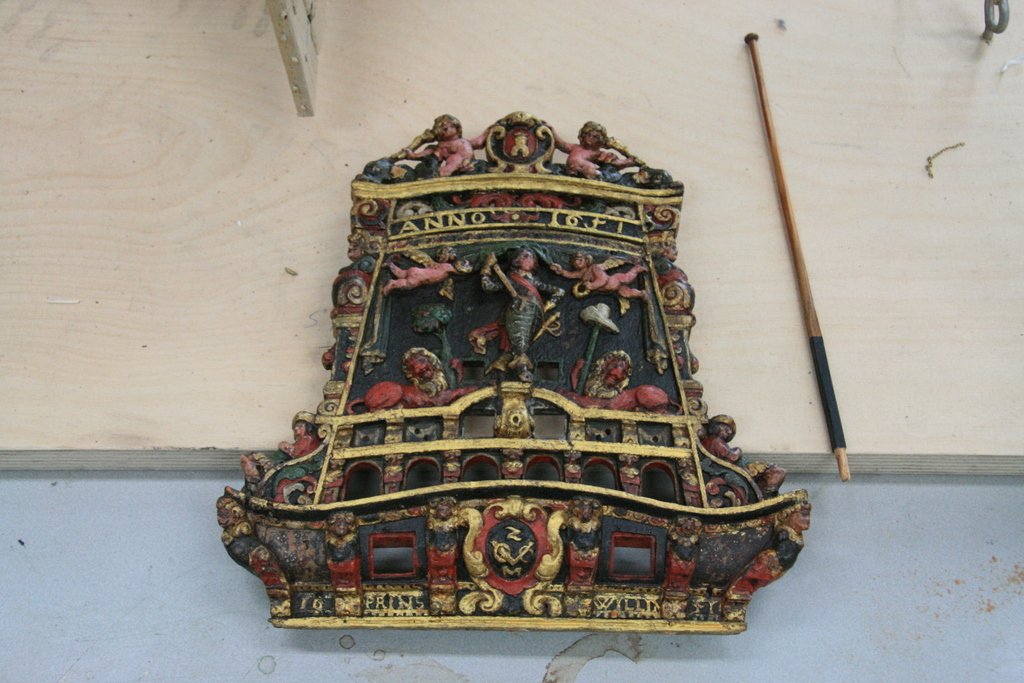
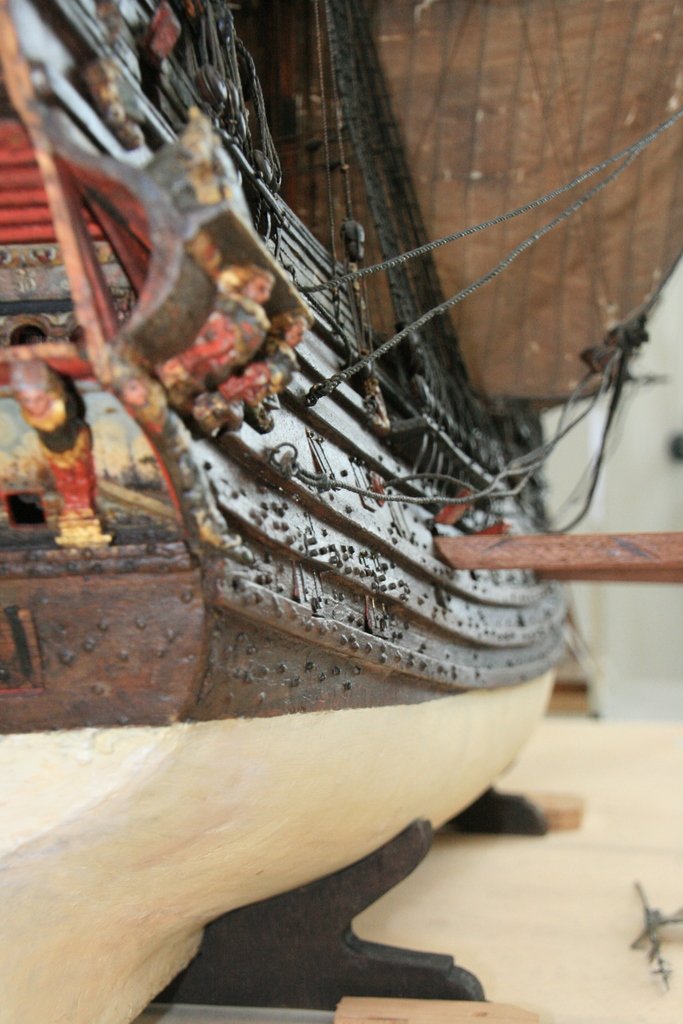
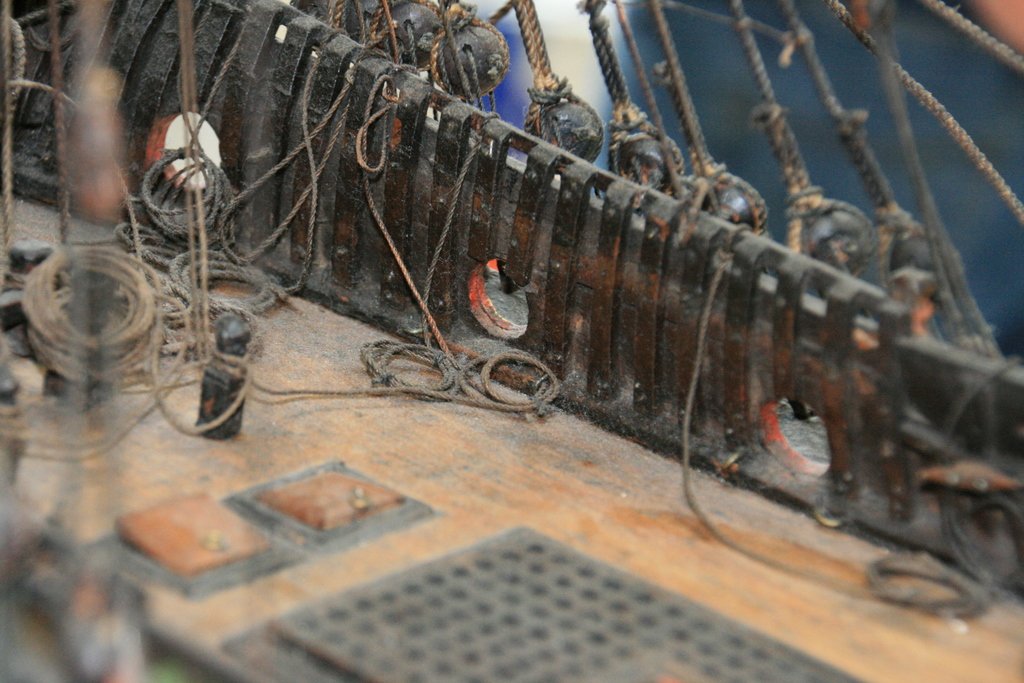
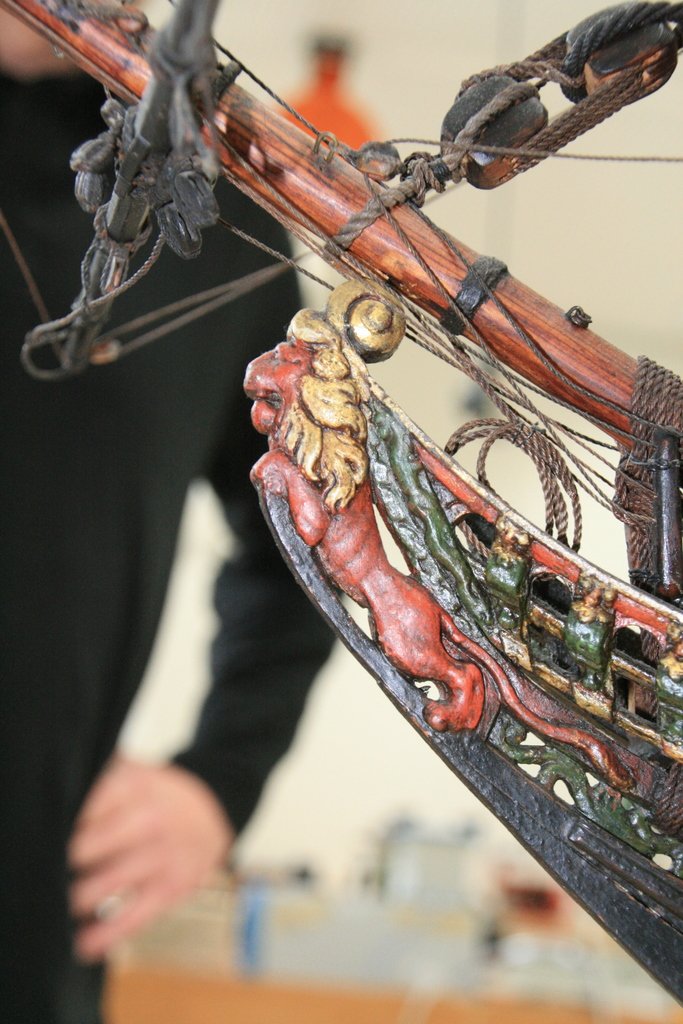
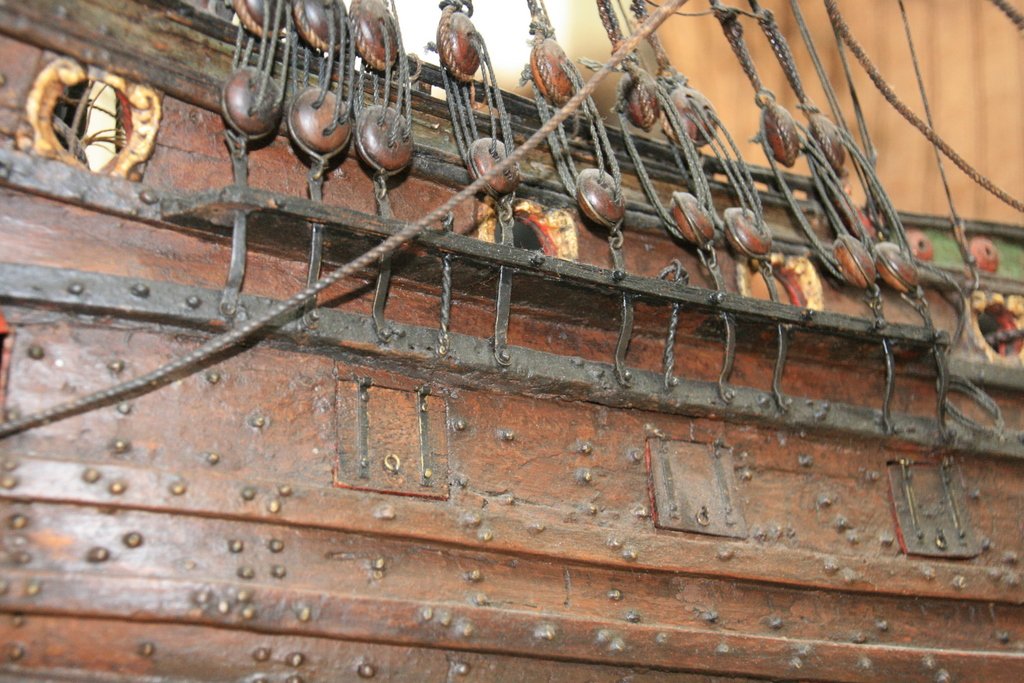
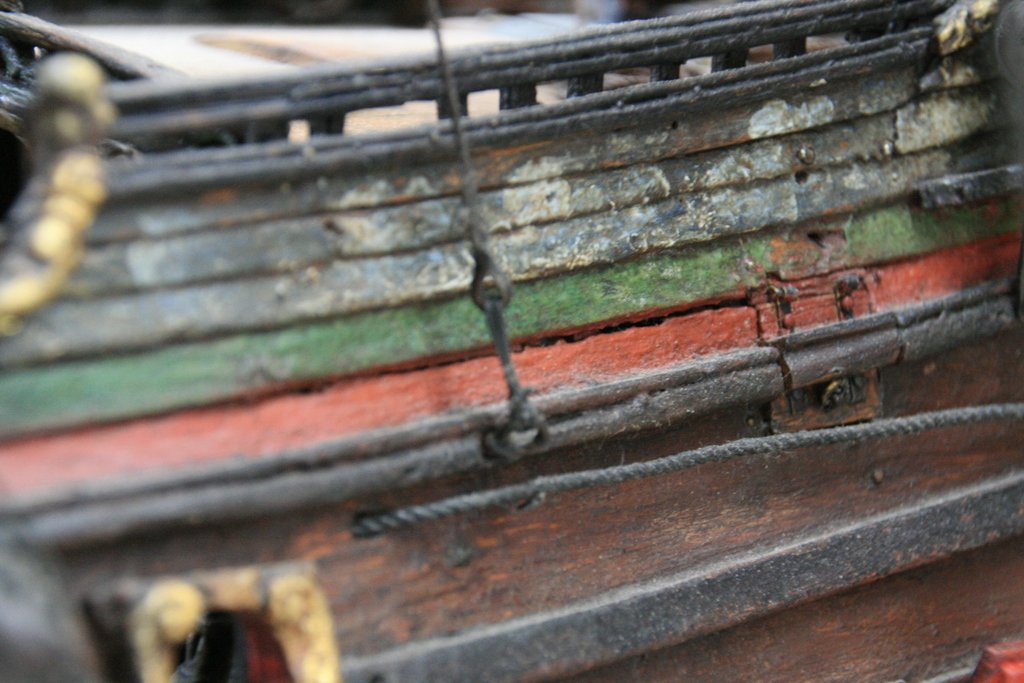
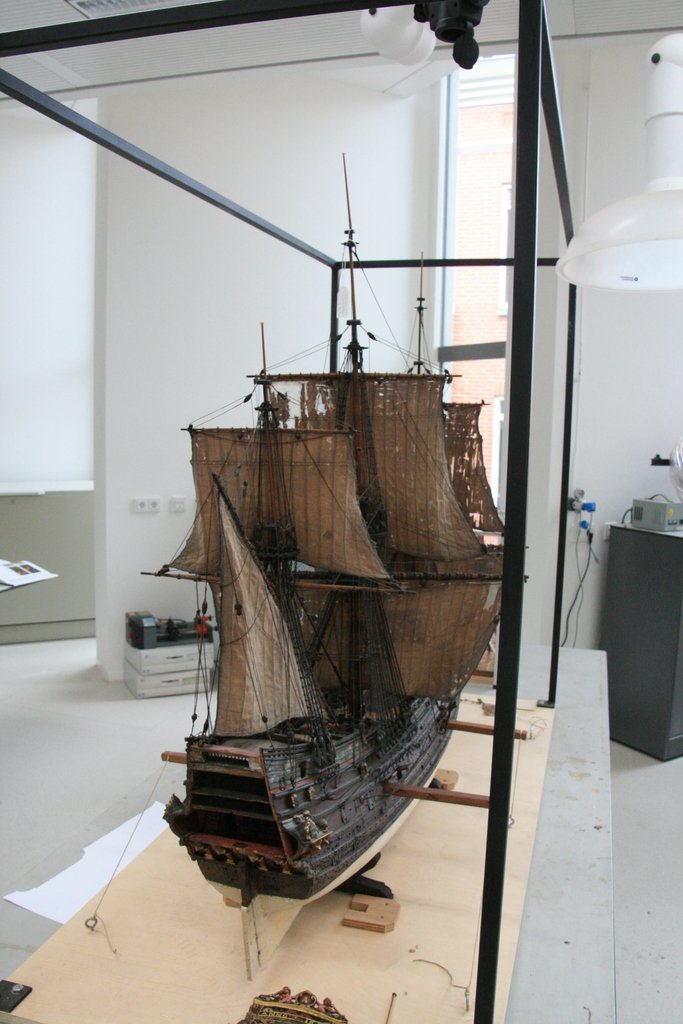
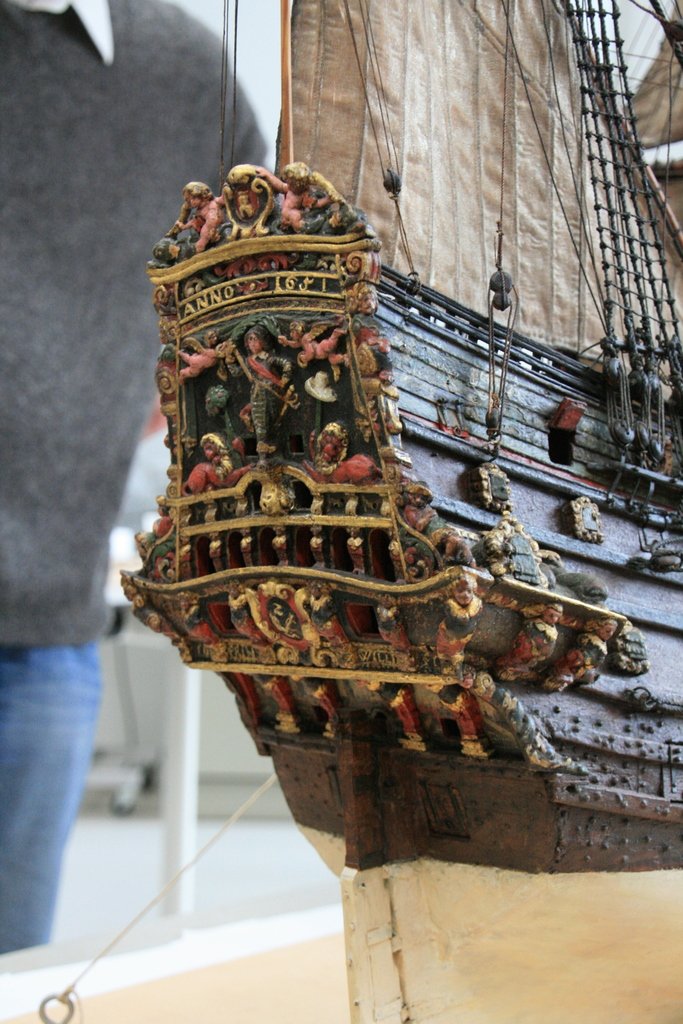
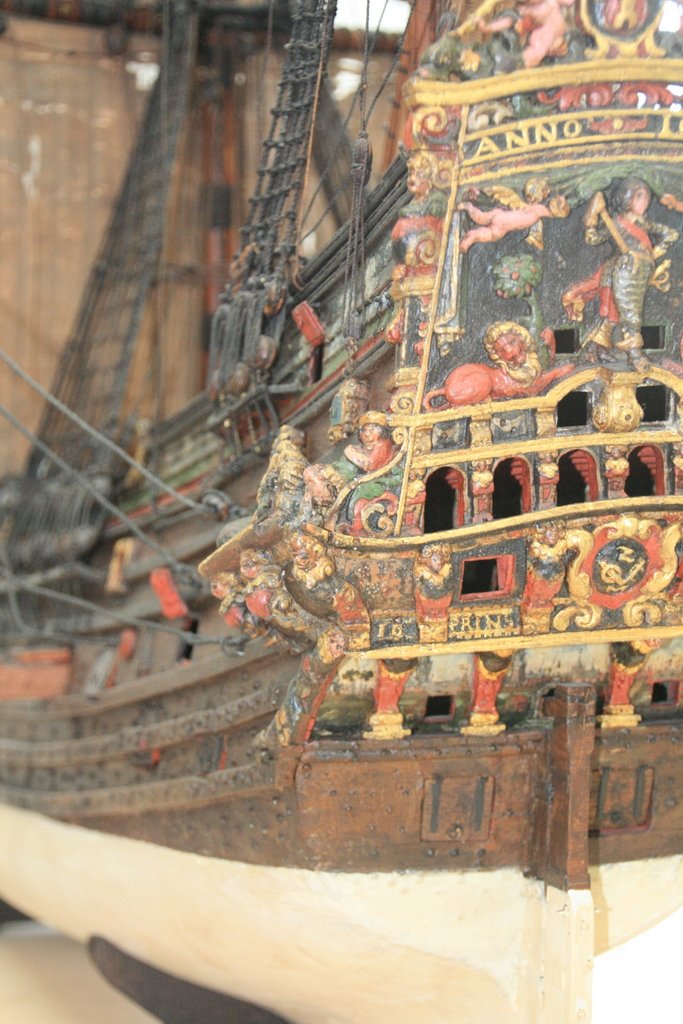
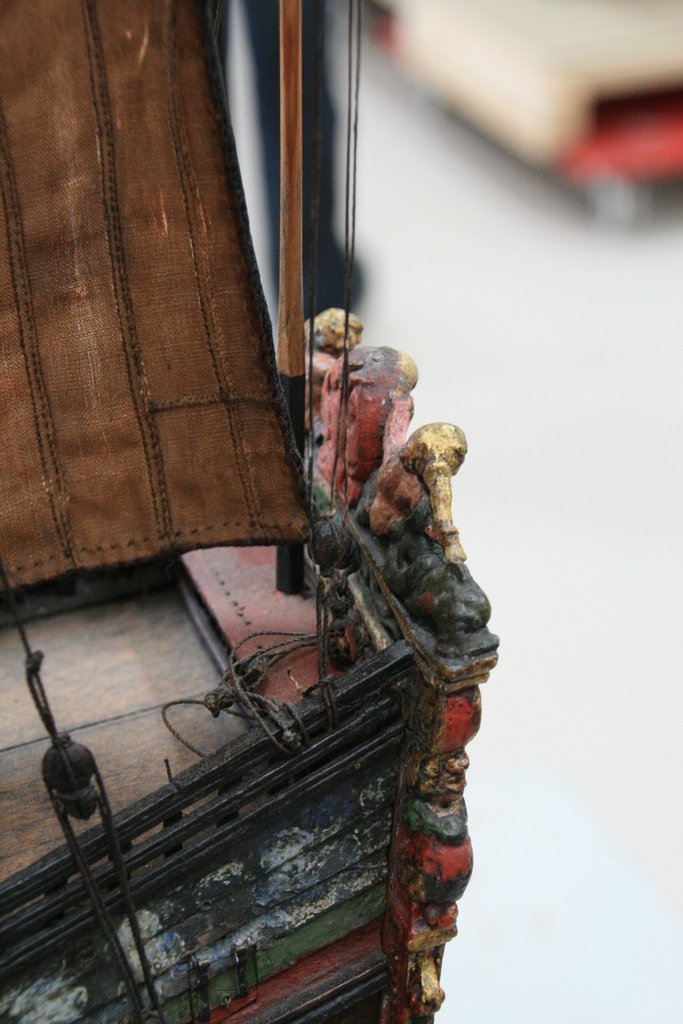
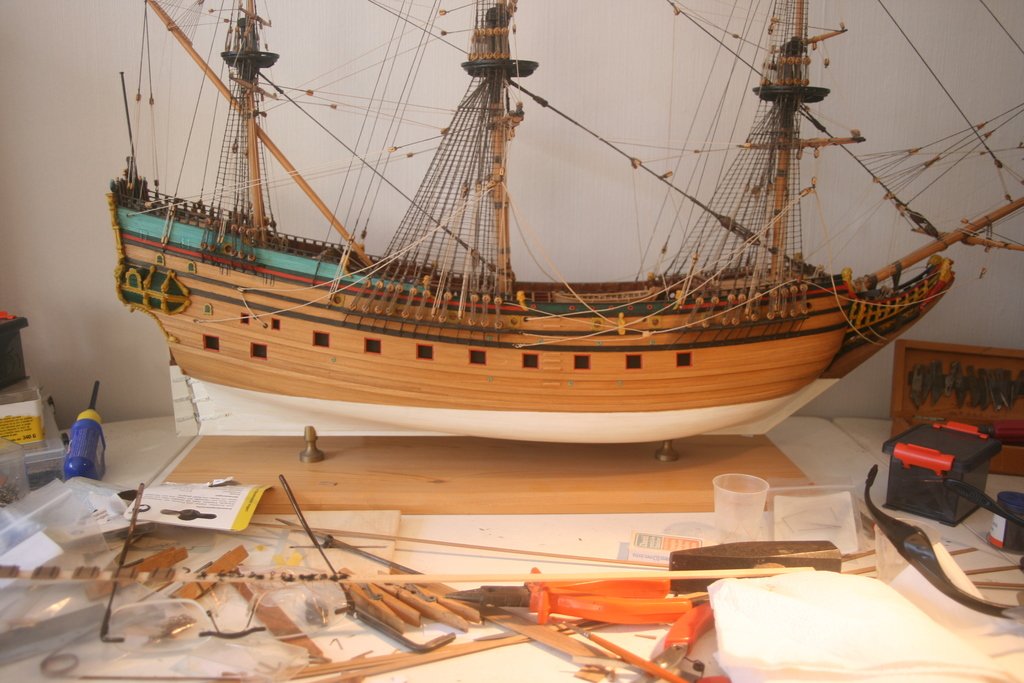
There is also a book (in Dutch, by Herman Ketting) giving quite a number of helpfull illustrations. He also gives drawings of the model, but the as Corel took some liberties, the drawings of the original model do not match the Corel drawings 100% The mdoel can be found here: https://www.rijksmuseum.nl/en/collection/NG-NM-11911 And some detail pics of the model (it was in depot when the pics were taken, hence the somewhat dusty appearance....). I was workin gon the rigging when I visited the model, so the pics mainly show riggin gdetails, and not hull details. But perhaps you can use them anyway for inspiration. ON the pics you will see one of the main differences between the original model, and the Corel version: it's the fore-deck: Corel put one in (following a suggestion of Ketting), but the model has none, and presumably, the original did not have one: quite a number of this size of Dutch ships did not have the fore-deck (although the outside apearance is that the have one). And in case you wonder why my avatar is the Prins Willem, and I have this many pics. Somewere in 2000 my wife gave me the Corel-kit as a birthday present, and I'm still not finised (not very hard at work either ) Jan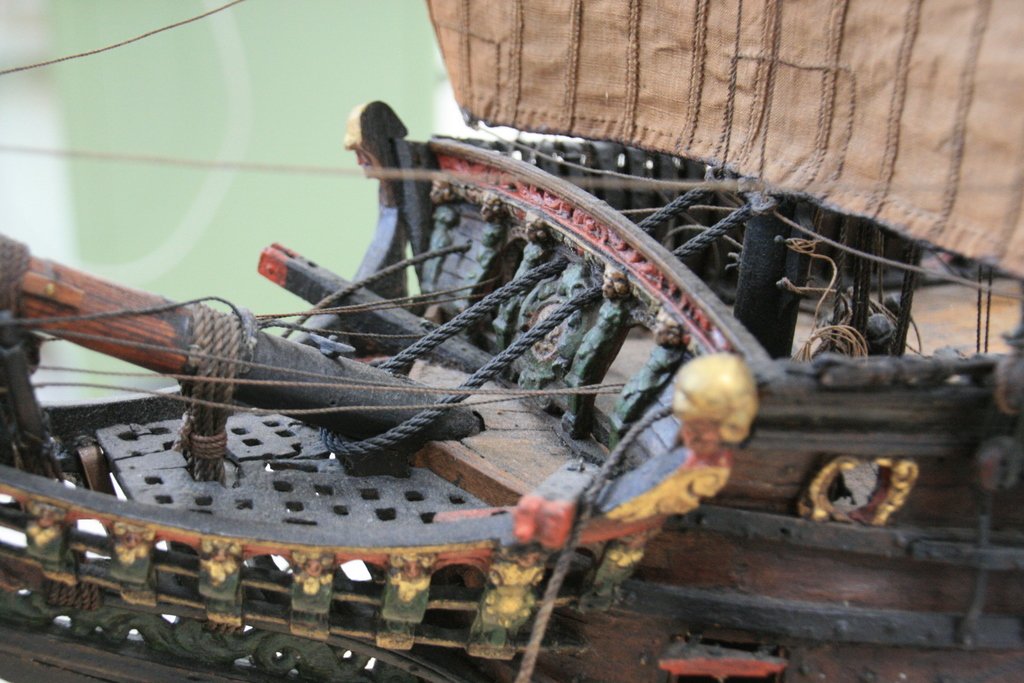


-
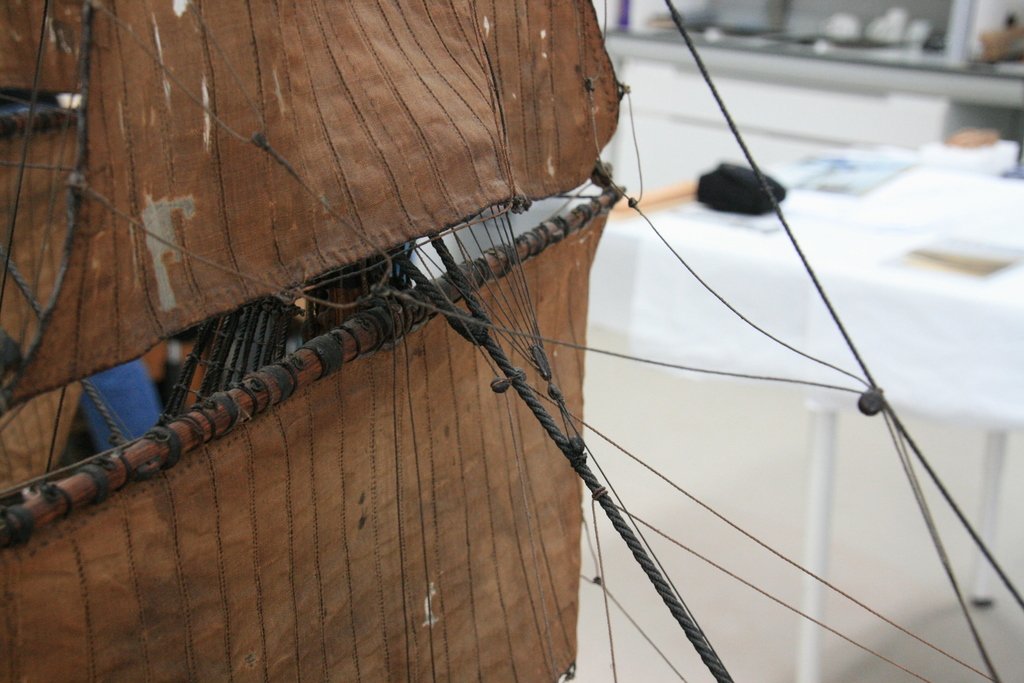
Thanks for correcting me. Yes, I mean those blue thingies with the black mast in between. Jan
-
Prins Willem 1650 by mhkash
amateur replied to mhkash's topic in - Build logs for subjects built 1501 - 1750
OK. In that case there is no need to tell you the errors in the kit :). Wish you with your build. Guess you know that this drawing is based on a model that is in the amsterdam Rijksmuseum? Jan -
Prins Willem 1650 by mhkash
amateur replied to mhkash's topic in - Build logs for subjects built 1501 - 1750
Do you work from drawing, or from the Corelkit? PW makes a nice model. Jan
