michael mott
-
Posts
5,200 -
Joined
-
Last visited
Content Type
Profiles
Forums
Gallery
Events
Everything posted by michael mott
-
Beautiful yacht, I wouldn't call it HUGE, that might not be a term to use around your wife... perhaps you could use one of us as a scapegoat and mention the madmen on this site that are building hulls that are 5 or 6 feet long, that the canoe is tiny, that this would be a normal size, its only 30 odd inches long Perhaps you wife needs a new dress or some other accoutrements, as a bribe? Good luck Michael
-
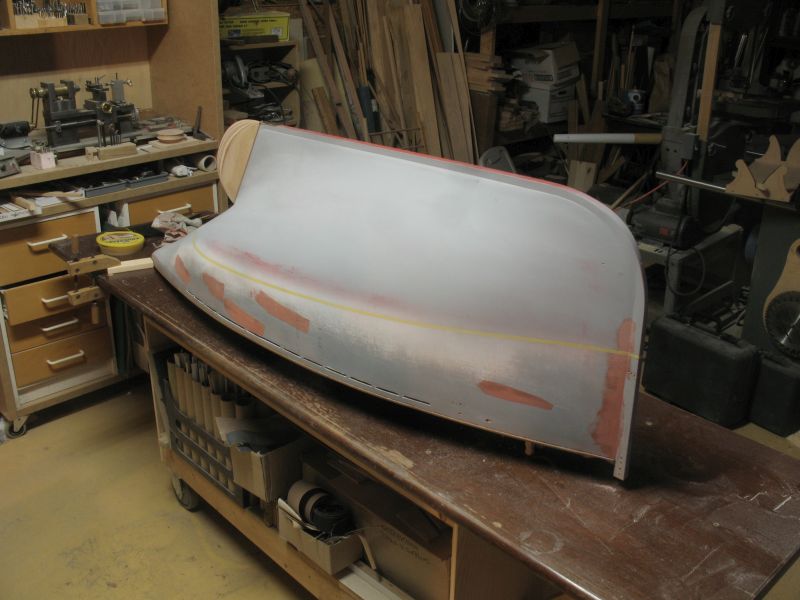
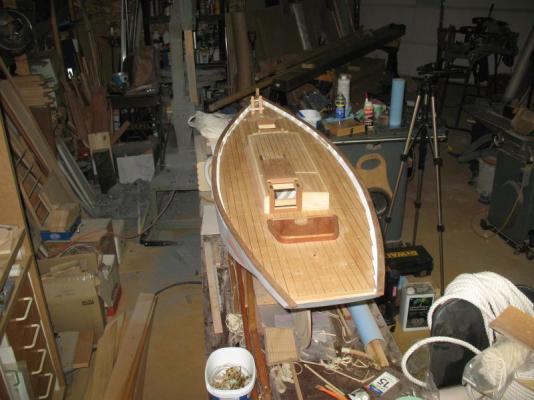
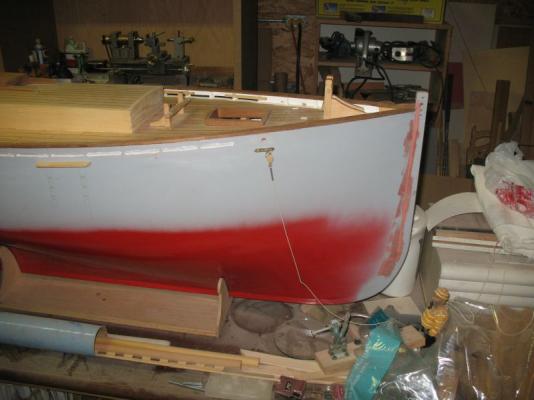
 Thank you all for your considered comments regarding the colour and for all the likes. Preparations are underway for the final painting, I purchased some masking tape for delicate and fresh paint surfaces. I set the roll up on the lathe and created a 1/4 inch and 1/2 inch division in order to deal with the soft curve. The water line was set with the laser light beam then cross checked with a pencil attached to a scribing block. The tape went on well and tomorrow I will finish the light sanding and if there is no wind I will start the painting. Michael
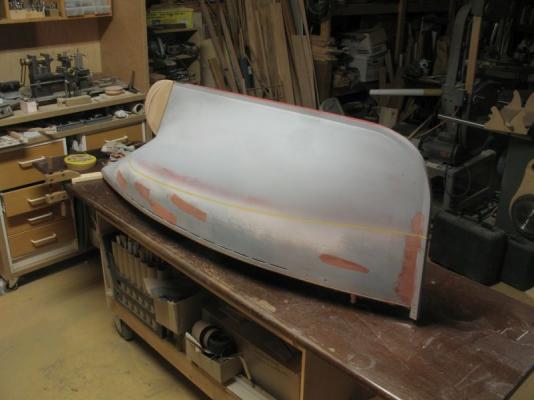

-
Pete the photographs of her in the water are wonderful, you must be very happy with the final trials. A wonderful model all round and it was a pleasure watching it come together. Michael
- 296 replies
-
- 1
-

-
- herreshoff
- buzzards bay
- (and 1 more)
-
Harriet McGregor by Boccherini
michael mott replied to Boccherini's topic in - Build logs for subjects built 1851 - 1900
Great clean soldering there Grant. Michael -
I have used a spokeshave for a lot of curved work, I would suggest that a small block plane would be an easier tool for the shaping of the spars for the general rounding or for creating an octagonal cross section, with the exception of creating an octagonal or flat that is scalloped from the round section of the spar, in which case I would use the round spokeshave not the flat one. Michael
-
David i don't think I would have the patience to work with the card details the way you have. Cutting that curved chain looks like it took a while, well done. Michael
-
Dave the ship looks great, the jury rigged eyeglasses are brilliant. I will have to try that myself. Michael
-
Vivian, might i suggest a simple jewelers saw, you can cut through a lot of different materials with them. they accept different thicknesses of blades with all sorts of different teeth spacings. Use this instead of the scalpel for the hard to cut items and you will save time and blades and be more satified with the results i am sure. Michael
-
Good morning all. Thanks for the information regarding the tar John which would account for the dark look in the historic photographs. Bedford, and David, your opposite preferences regarding the colour echo my own conflict, it is one of those decisions that I have been putting off for a long time for this very reason. There are two particular cutters that I really like the look of and they are opposite colours this one and this one When one looks at the images for pilot cutters in Google I notice that the contrast between the dark hulls and the sails is much more apparent that the white hulls which is natural I suppose. This leads to the issue of final display, and this of course is a whole different ball game, I don't think that Judy will want this model filling up half the living room with a full suit of sails raised. The shop will be out of the question. due to more modelwork needing the space. Hmmm Michael
-
Nils I am amazed by how fast you get these parts made and it always looks so clean and tidy. Michael
-
Pete I am also looking forward to seeing her under sail. Michael
- 296 replies
-
- 1
-
-
- herreshoff
- buzzards bay
- (and 1 more)
-
Good morning Ed, Mark, I have used wedges a lot over the years and yes as you say Ed using them in opposition with equal angles works well and even with different angles it will work equally as well to fill an angled space. these wedges were made on the fly as well and are 1/4 inch square maple with the angle simply brute sanded on the disk sander. Michael
- 3,618 replies
-
- 2
-
-
- young america
- clipper
- (and 1 more)
-
Very nice Tim, looking forward to the final finish. Michael
-
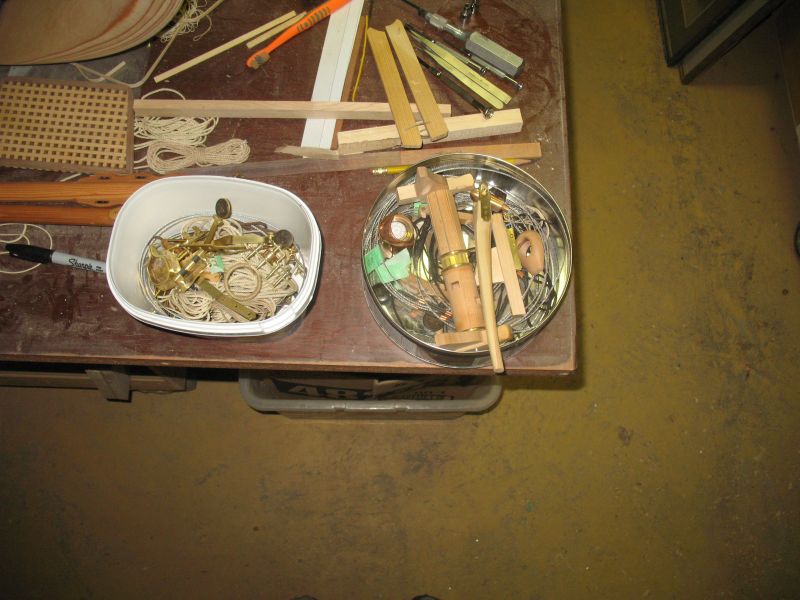
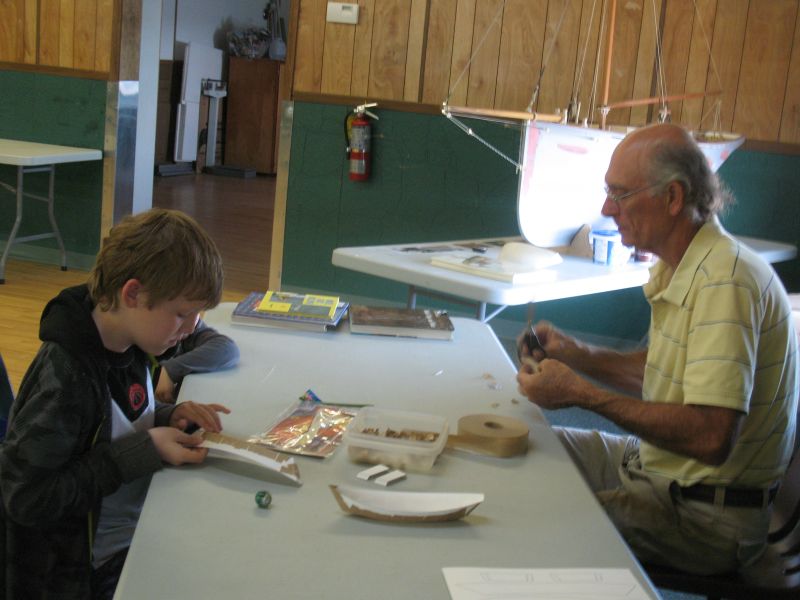
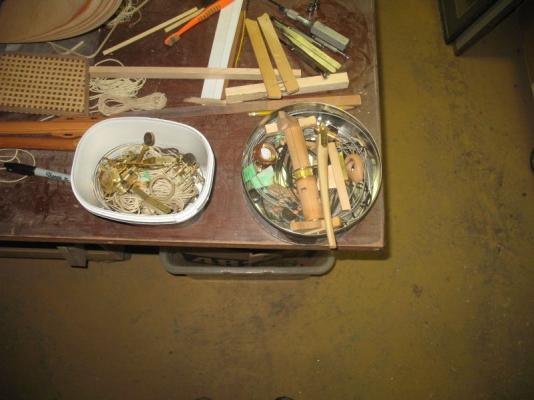
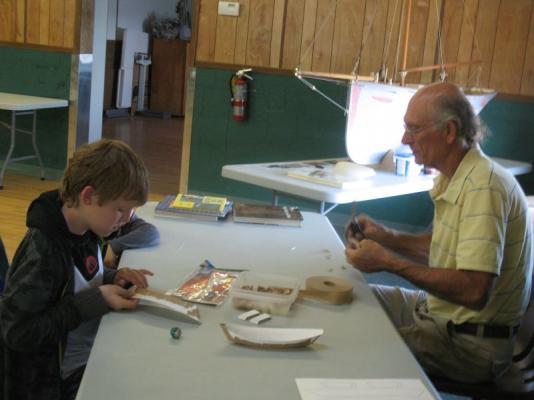
Thank you all for you kind remarks and likes. "To see her on the shore looks so authentic. The primer and paint patches only adds to that! Almost a shame to paint her!" Sven, Don't think I didn't think about it. "what a wonderful way to get kids away from the computer and into model building. Also, I'm with Sven. It's almost as if all you need is to paint a weathered waterline and then the ship would be complete;" Omega, getting the kids to work on the boats was easy they seemed to understand the need to use their hands in a creative way. I had a bit of spare time this evening after a nap, so decided to give Walter a hand preparing for the final painting of the hull. I was quite surprised by how long it took to remove everything, it was over an hour and a half, and i had to put my thinking cap back on to remember the sequences of a couple of items especially at the stem. here are a couple of containers of parts. Almost ready for some light sanding, then to paint. I an definitly leaning toward a dark hull like these here is a link to Classic Sailing Michael
-
Mark your tools and workmanship show what a fine craftsman you are. Beautiful work. michael
-
Amazing!!! And 20 tries on the printing the sails, now that is dedication to the cause. Michael
-
Good morning Omega, the interior work is simply amazing! actually so is the rest of this model. I am still having trouble getting my head around the scale that you are making this at. michael
-
Dremel collets/chucks
michael mott replied to Timmo's topic in Modeling tools and Workshop Equipment
Joe I hear you, the drills with the 1/8th inch shaft are much better for us. I must say though that over 1/16th I sharpen them myself. Sometimes it is a little frustrating, must be the weather on those days. I was drilling through some drill stem on the boat trailer and had to resharpen the 5/16 bit 4 or 5 times and sometimes resharpen because I had not got it right. even after 50 years of practice it still takes a gentle touch, and doesn't always work. Michael -
Richard, thanks for the answer, it makes sense, The Xuron 2193 looks like they will work to cut the needles, the only thought have is that they look like they work similarly to a shear or a pair of scissors. I would think that something that can cut like a flush cutter would be better for your purposes though. Michael
-
My first question is why hard wire?, What is the function of the wire? The people who repair Pianos would be the best folk to talk to regarding cutter for the hard wire (music wire) Michael
-
Excellent modelwork and excellent toolmaking as well. Michael
- 56 replies
-
- 2
-
-
- bonhomme richard
- finished
- (and 1 more)
-
Tim what a fantastic job of carving, the lines look super, I look forward to seeing the paint on her. Glad you are OK re the weather. Michael
-
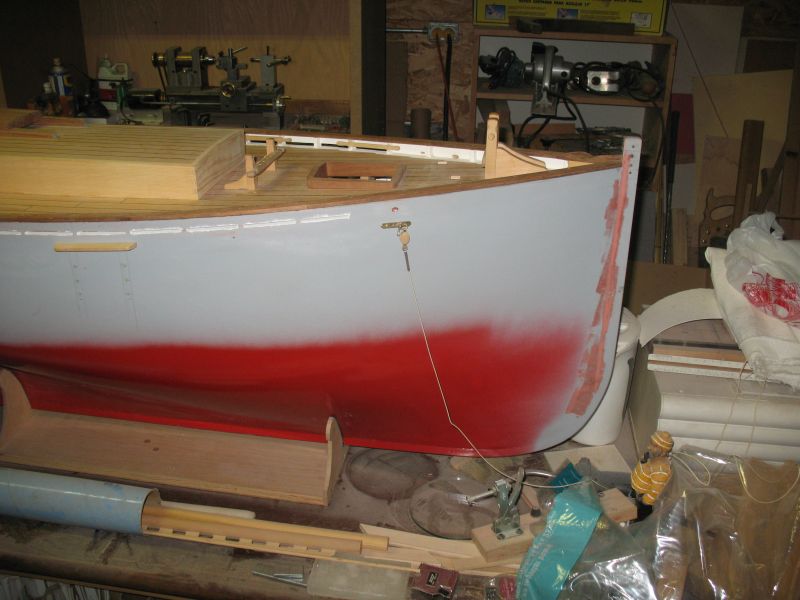
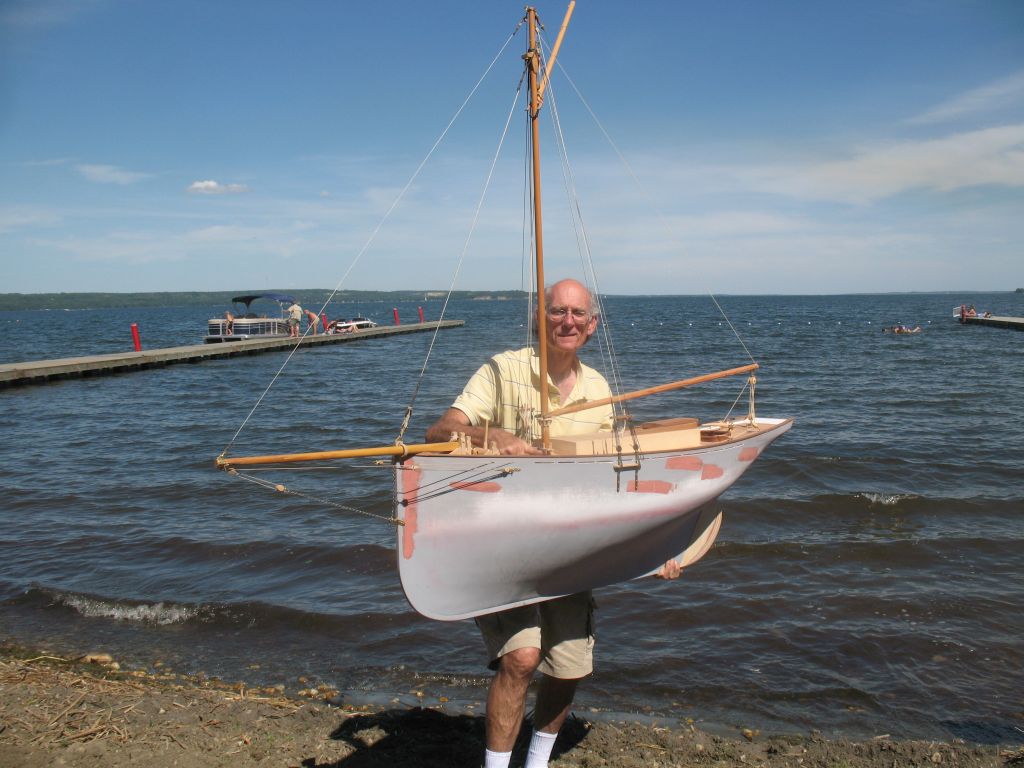
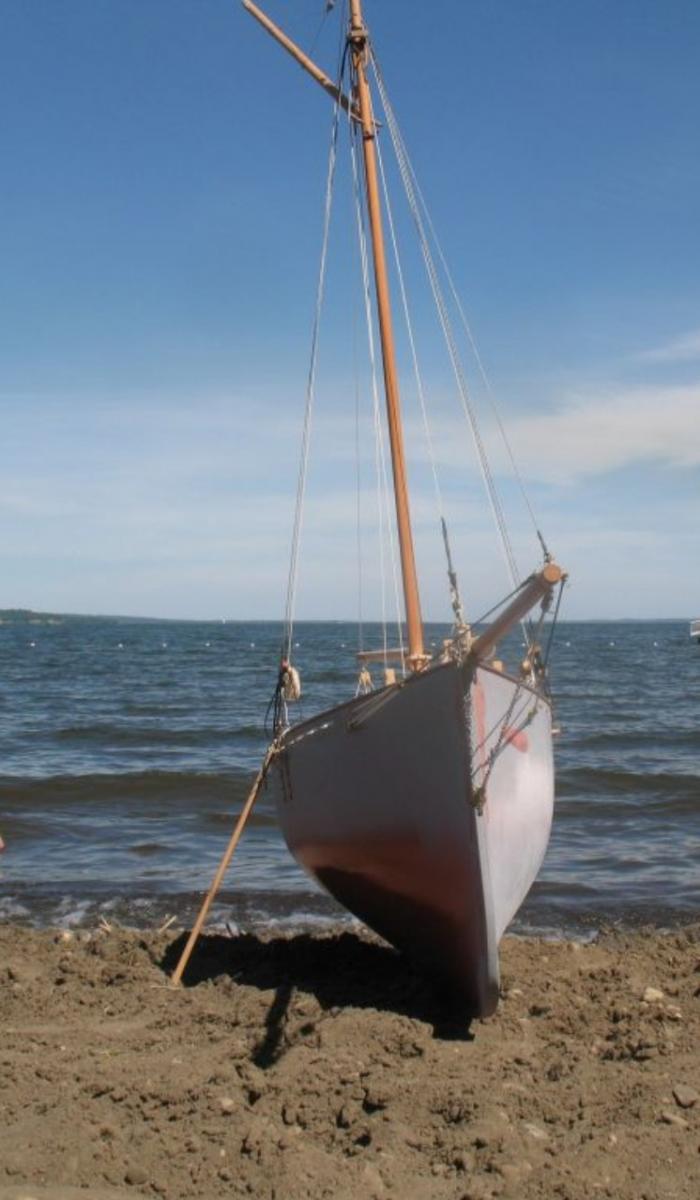
Thank you Greg, Jay, Mark, Bedford, Nils, Grant, John E, Bob, Druxey, Remco, and Mark Taylor for all your positive remarks. "Two things I take from that are that you have a MUCH easier rig to unship than I do" Bedford 5 minutes to de-rig, and 20 to re-rig I found out today at the pavillion. "I asume rigged mast and topsail shall nearly be scratching the room cealing." Nils the ceiling in the living room is 10 foot 3 inches so it will be about 3 feet shy All in all the event was very successful, I had a table set up for children to make paper dorys, most of the visitors were young girls and they built 13 dorys during the afternoon, at the end of the day there was a young boy who came, The photographer came around late in the day, so missed the girls in action building their boats. There was a lot of positive feedback regarding the pilot cutter. After the event I went outside because there was a bit of commotion on the beach, seems that a boat had been stranded. Close but still dry. Now to remove the deck hardware and rigging completely so that I can finish painting the hull. and the rest of the seizings and other rigging details. Michael


-
what is the ideal modelling table?
michael mott replied to AON's topic in Modeling tools and Workshop Equipment
Lovely worktable Alan. Michael