michael mott
-
Posts
5,200 -
Joined
-
Last visited
Content Type
Profiles
Forums
Gallery
Events
Everything posted by michael mott
-
 Well this is great news looking forward to the rest of the build. Michael
- 296 replies
-
- 1
-

-
- herreshoff
- buzzards bay
- (and 1 more)
-
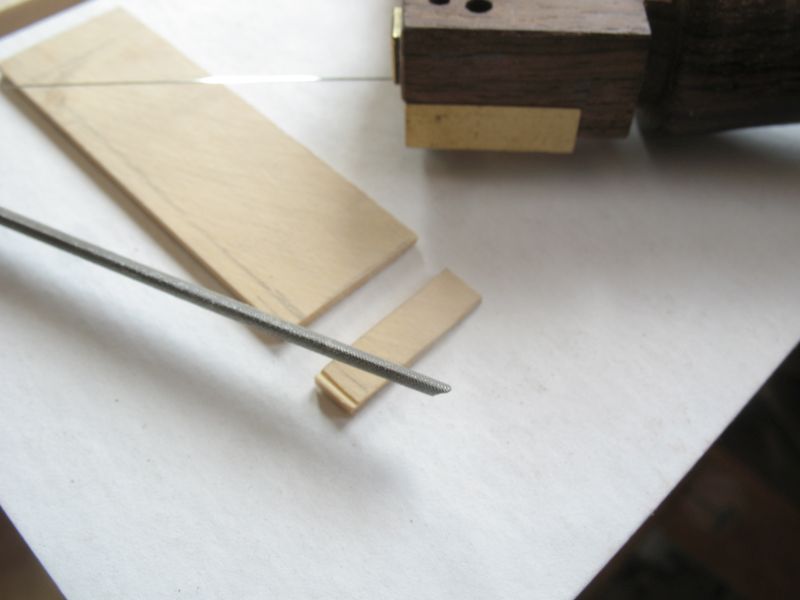
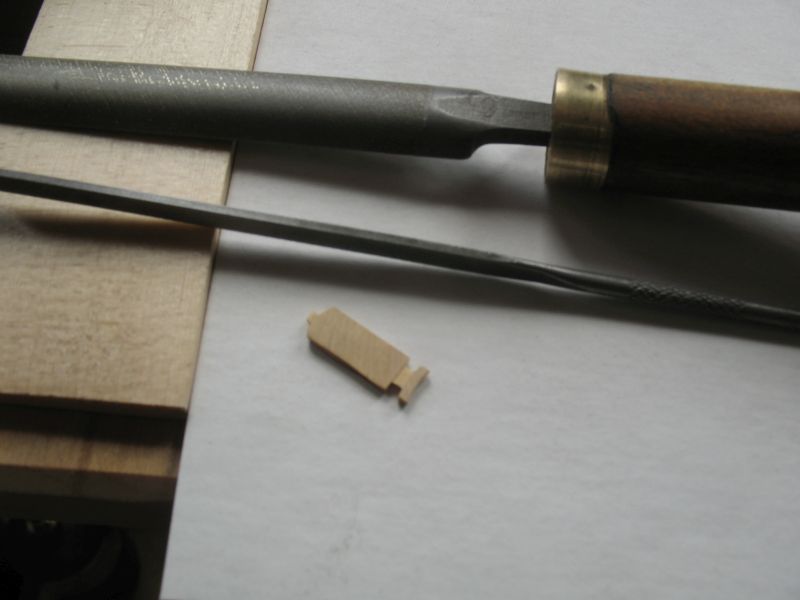
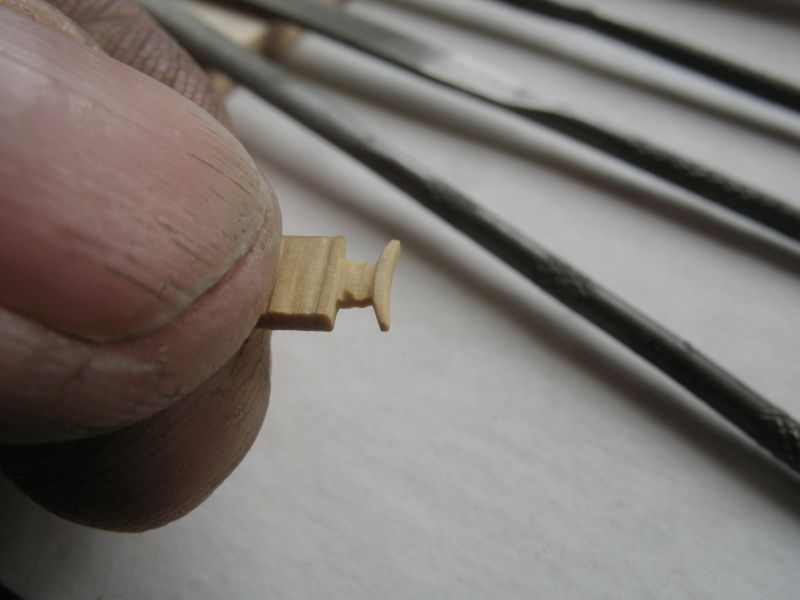
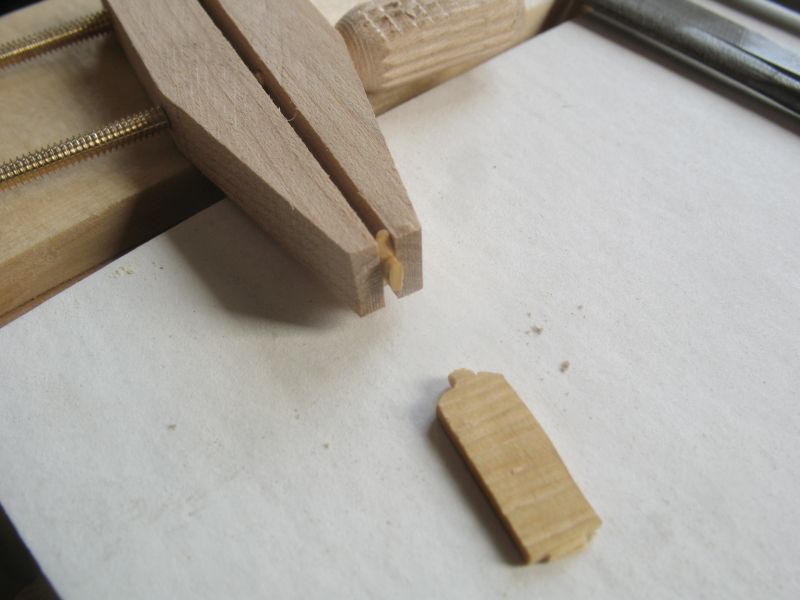
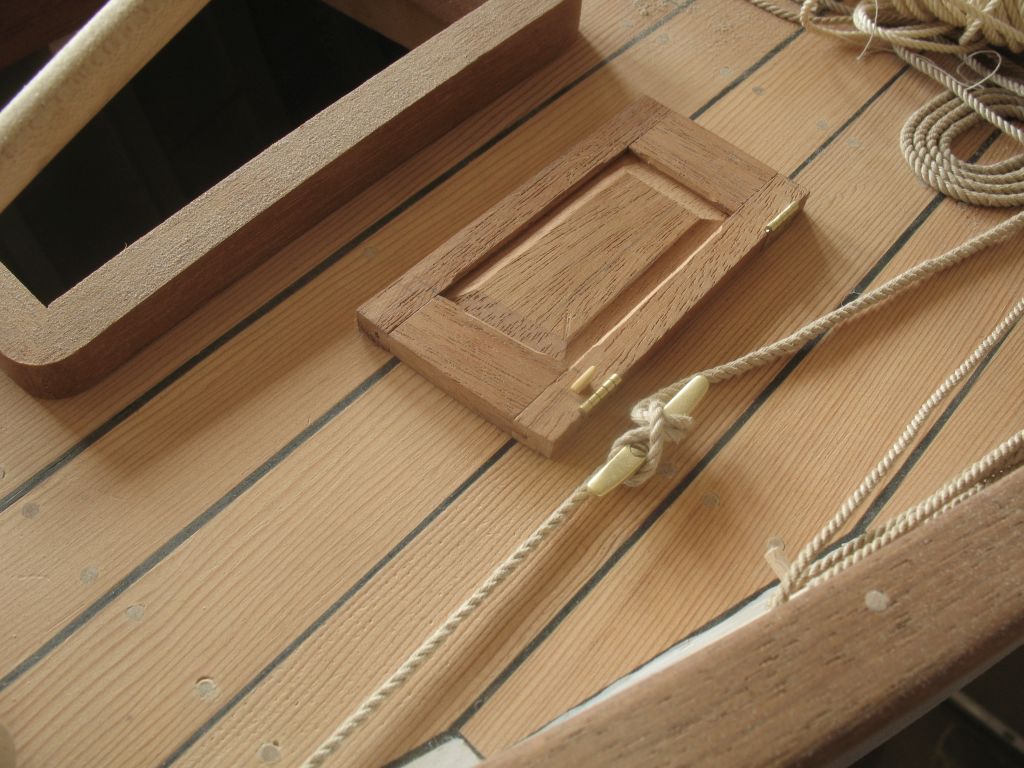
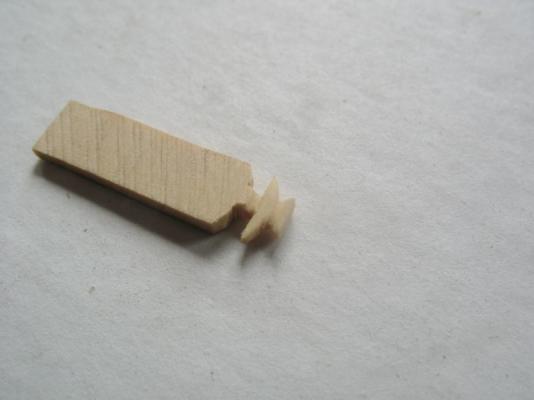
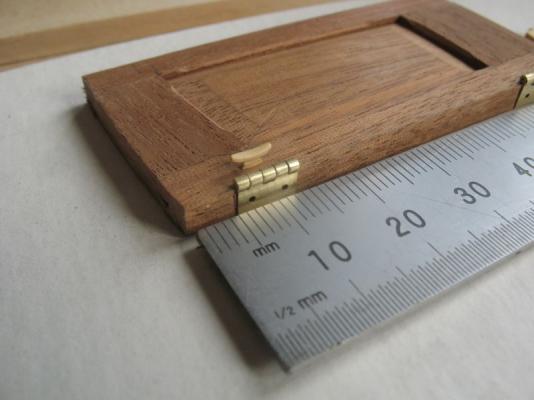
A set of tiny cleats on Kieth's build log intrigued me regarding how difficult would it be to make a couple for the pilot cutter. The first task is choosing the right approach, I prefer to have a large enough piece of material that I can hold it in my hand while using files because I can feel the work being done. I started by cutting a 5mm strip off the end of a strip of boxwood that was extra from the block making The first cleat vanished as the saw completed the cut through the wood and I knew that it would be faster to make another than the futile endeavor to look for the one that took off. This first one was made by working the bottom sides first, then partially shaping the topside before cutting it off the bulk On to version 2, this one I began in the more conventional way of shaping the top first using a rectangular needle file with a squared safe edge, the safe edge is very useful and I put it on the one side with a sharpening stone. I clamped a small wooden clamp on the end so that when the saw cut off the cleat from the main block it was captive for the next operation. Here the small cleat is next to the hinge on the companionway door for size comparison in scale this cleat would be 1.5 inches long by 3/8ths wide and next to the 10 inch brass cleat on the deck. Michael


-
Ollie My thought are regarding the access to the belaying pins on the starboard side where the boat is stored, it feel just a little cramped. Michael
- 803 replies
-
- 2
-
-
- colonial cutter
- modellers shipyard
- (and 1 more)
-
Very nice Dan. Michael
-
The stove looks pretty rugged, and the distiller is a neat idea, I suppose they thought about Rum too? Michael
-
Hi Ollie, I just finished going through you entire log, what a wonderful job you are doing. Your planking certainly deserves to be shown. really clean joinery on the deck furniture as well. Michael
- 803 replies
-
- 2
-
-
- colonial cutter
- modellers shipyard
- (and 1 more)
-
What an interesting thread, I have a few books but it is a small collection of Nautical and ship model ones, plus others on Art, the Railways, Aircraft, Architecture, Model engineering, Egyptian Archeology, Trees and Wood, Astronomy, Geography, Clocks and Watches Carriage Making and Wheelwrights, and the Environment, probably close to a thousand books or more. I had not thought about cataloging them, and my wife is a librarian My books are mostly reference my wife has mostly fiction. Michael
-
SS Vinal Haven by TBlack - FINISHED
michael mott replied to TBlack's topic in - Build logs for subjects built 1851 - 1900
Made me laugh. Tom The light s turned out well, you did a great job. Michael -
But Piet after I read this that you said I then proceeded to follow the bend this way and that, and yes you do make it look easy, because this is exactly what you did. Michael
-
Well Dimitris you certainly don't hang about do you, very nice work and fast. Your model looks very good. Michael
- 57 replies
-
- 1
-
-
- bluenose ii
- artesania latina
- (and 2 more)
-
20 gauge shackles
michael mott replied to michael mott's topic in Metal Work, Soldering and Metal Fittings
Jud yes if I were using steel I would in fact use the upsetting method. Michael -
SS Vinal Haven by TBlack - FINISHED
michael mott replied to TBlack's topic in - Build logs for subjects built 1851 - 1900
Tom you have done a superb job in matching the original. Michael- 326 replies
-
- 1
-
-
- vinal haven
- steam ship
- (and 1 more)
-
Very nice fabrication of the rim Elia. Michael
-
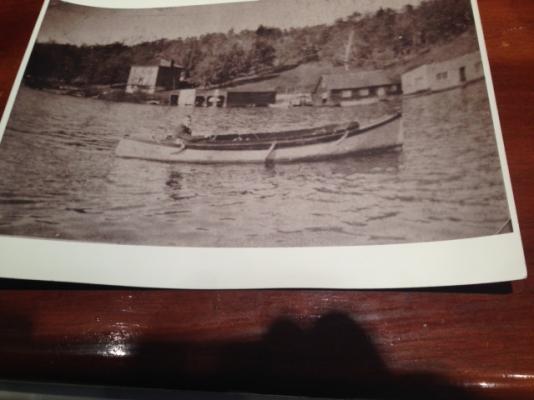
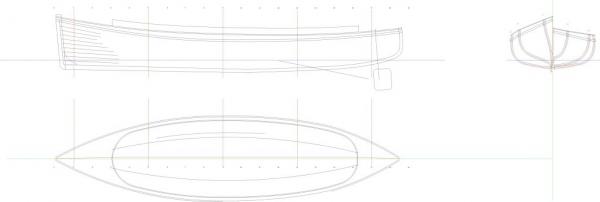
A small update Skipjack/Floss part 7 I have received some updated information from Roger this past month I got new dimensions of some critical areas and have been refining the plans which are getting much closer. Roger also sent some great pictures of details and information regarding the sizes of ribs and floor timbers and the way the stem and stern are built. The stem was originally cast aluminum and was more upright than it is currently. The stem was modified after 1912 and a wooden one replaced the original and at a softer angle to the water. This pre 1912 photo shows the original stem This next picture shows some restoration work that was done in 1987 showing some of the new floor timbers. and the ceiling boards. this is the current itteration of the plans given the new data. Michael

-
Dave they are different organizations, there are most likely some members in both. Michael
-
I have to admit i had exactly the same reaction when seeing the model between your fingers. Wow! very clean build. Michael
-
Cutty Sark by NenadM
michael mott replied to NenadM's topic in - Build logs for subjects built 1851 - 1900
Nenad that look like a very effective way to get a weathered look to the decking. Michael -
Mark the lines of your framing look superb by placing the hull upside-down one really gets to appreciate the graceful lines of your work. Michael
-
20 gauge shackles
michael mott replied to michael mott's topic in Metal Work, Soldering and Metal Fittings
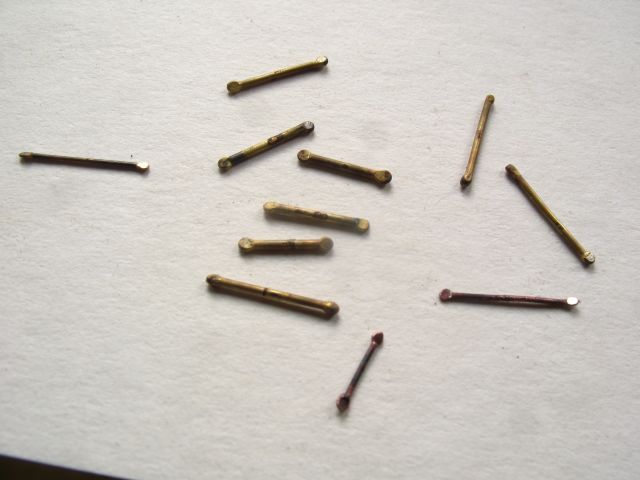
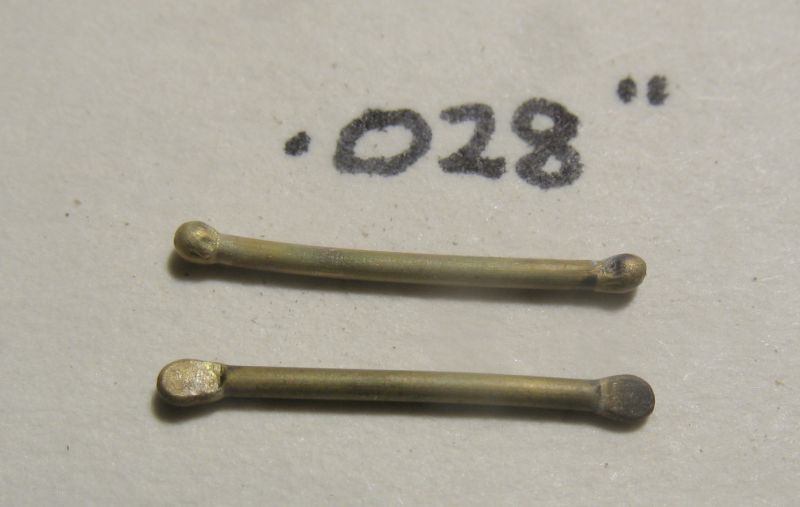
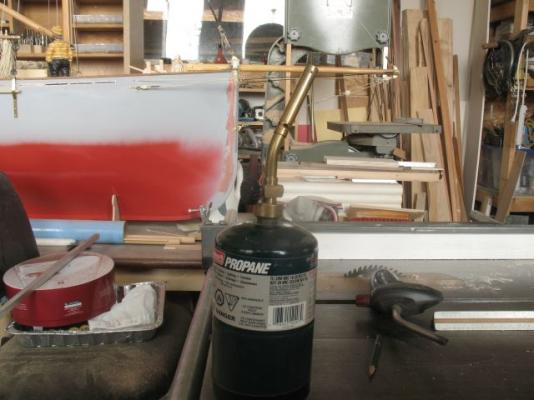
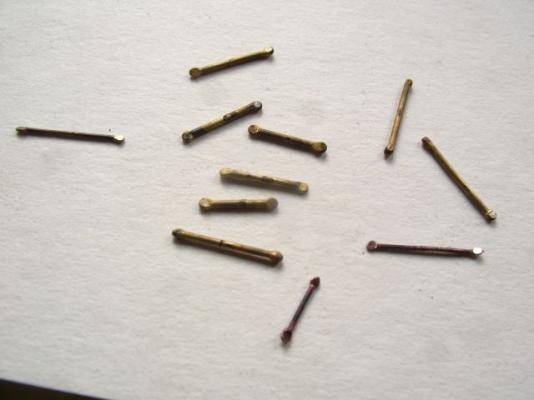
Jud I understand the principles of forging techniques with iron and steel. I am not using steel for these very small shackles but Brass. The process you outline works very well on larger scale pieces of metal but is very difficult to achieve with 20 gauge brass wire, in fact the grip needed to hold the brass and either tap on the "cold" is enough to deform the brass in the first tap and also begins to work harden it at the same time, whereas by holding the brass wire in a vertical position which I did this morning the results are a consistent capillary type balling of the end using a simple soldering torch with propane or butane, all in one operation in seconds. I also found it works best if the metal is cold so after each end is balled then I quench it in cold water before rotating it to ball the opposite end. the first pic shows .028 diameter brass balled at both ends in the spring tweezers This is the torch I used for this mornings test it is a pencil flame I used the only bottle I had around the shop. the results for the balling were quite consistent and with a little practice this would become quite a fast way to accomplist this task The fine copper was more difficult to do than the brass, in all likelyhood because the alloy of copper zinc and tin melts at a lower temp than the pure copper but it is only a guess on my part based on empirical results. Michael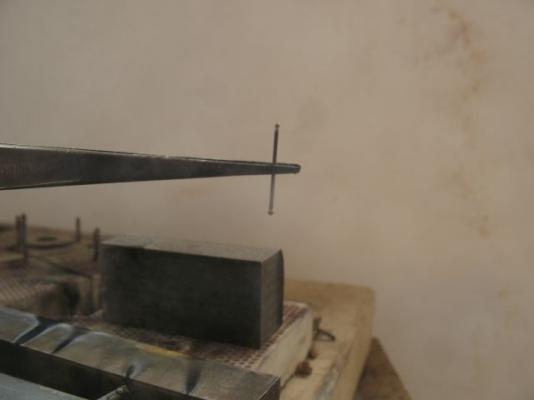
-
Excellent work on the brackets and catheads Sherry. Michael
-
20 gauge shackles
michael mott replied to michael mott's topic in Metal Work, Soldering and Metal Fittings
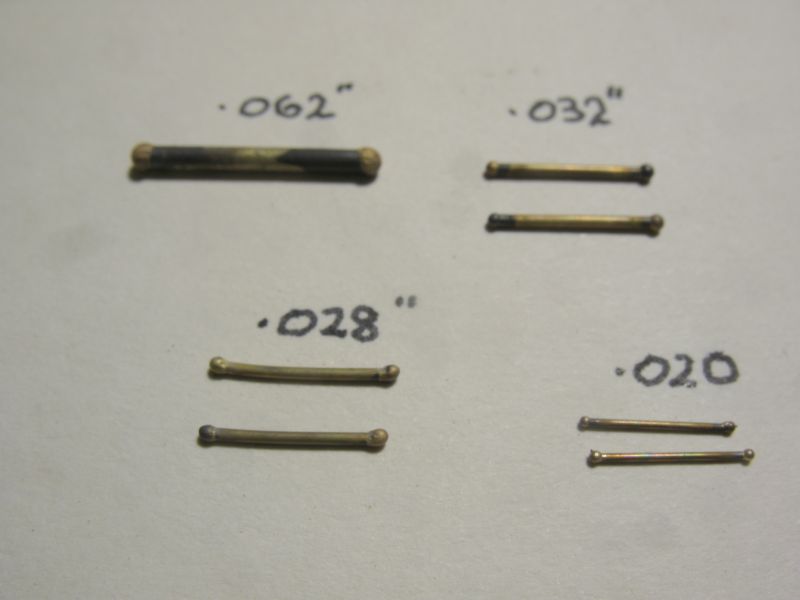
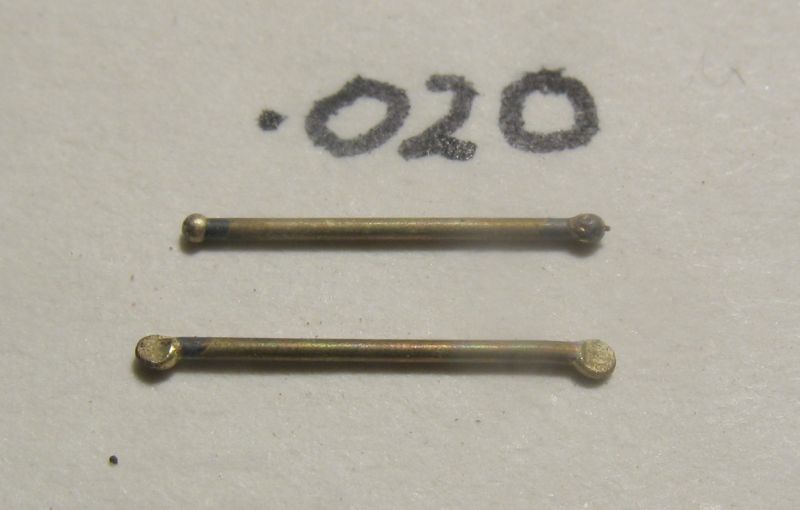
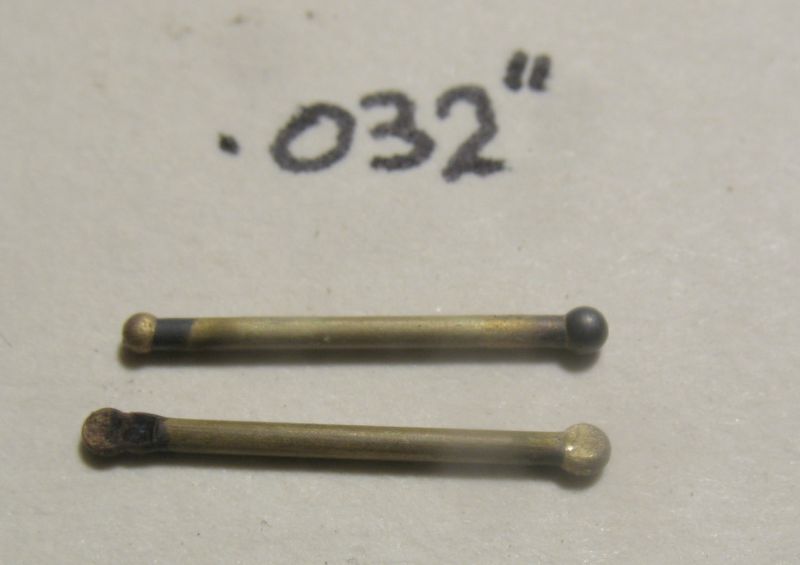
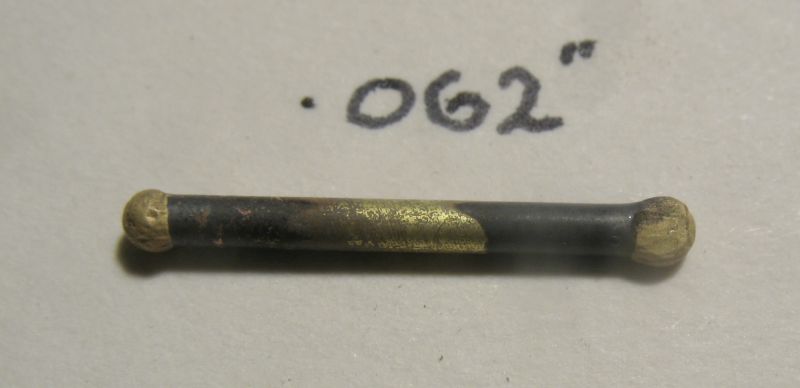
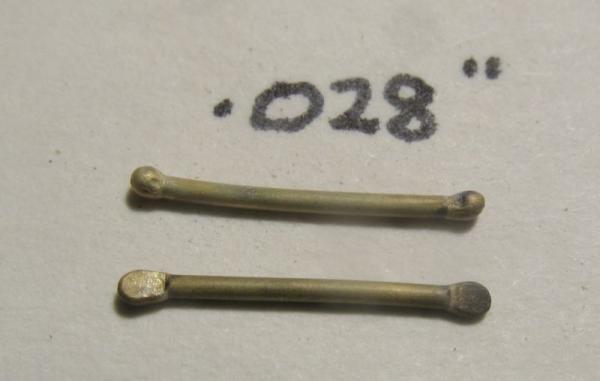
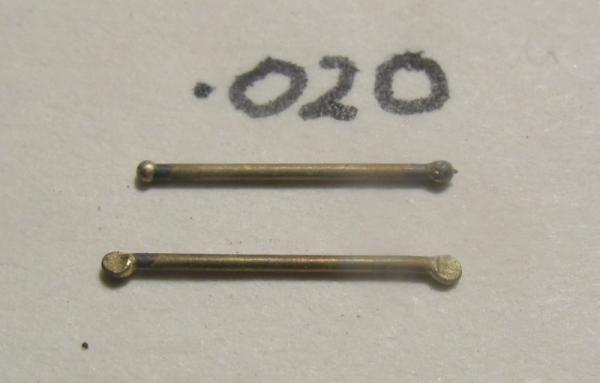
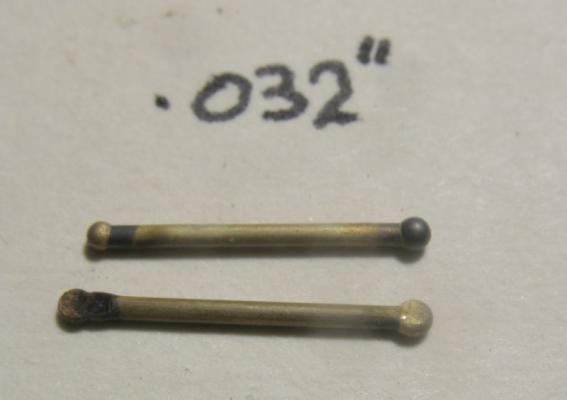
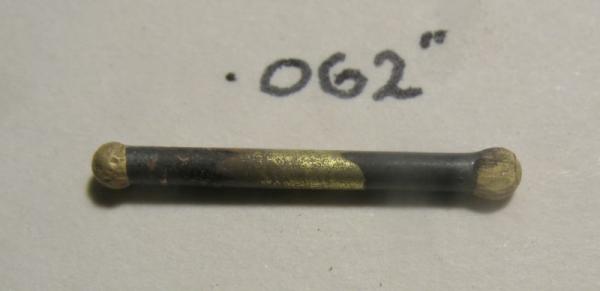
Thanks for the likes Bob Thanks it has taken a while to learn to be gentle with the torch This is the torch set up that I have, it just uses acetylene and air is entrained through the handle, the only adjustment needed is the gas. John thanks and yes do give it a try I am interested in how well it works with different torches I did an experiment this evening to see what the best tip is for different diameter wire. I set them all up on the 1/4 inch steel bar to act as a heat sink, I had to be very careful not to blow them off with the torch. Originally I had set a second bar on top but it worked far to well as a heat sink, and I did not want it to work in reverse by getting too hot. I used the #1 tip in the torch for the .020" the .028" and the .032" I used the #3 tip for the .062" rod the .020" showing the flattening on one of the set I used the same blue pliers as before to squeeze the end flat. As you can see it will take a little practice to get the flattening sorted to be consistent, I will likely use the small vise and use a mark on the rod. I was not up to drilling the holes tonight so will tackle them in the morning. Michael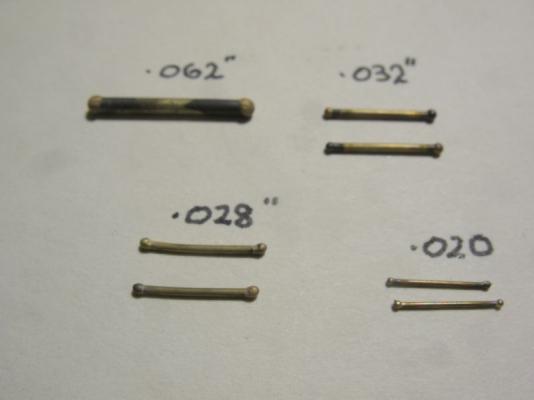
-
Captain Al ,perhaps a small razor saw would be a better tool for cutting across the wood it would give a square cut and actually remove the material in the same way that a chisel cuts . if you think about how a saw blade is designed it is a row of micro chisels. An eXaco blade works more like an axe it is a wedge albeit a sharp wedge. Michael
-
How to sand longer stock?
michael mott replied to Landlubber Mike's topic in Modeling tools and Workshop Equipment
I agree with Nigel use some double sided tape and make yourself some long sanding sticks if you use the edge of a wider board it will remain rigid and be easier to hold. Michael -
20 gauge shackles
michael mott replied to michael mott's topic in Metal Work, Soldering and Metal Fittings
Jud thanks for the extra information regarding the forging of the metal for different shackle arrangements. Michael