
HOLIDAY DONATION DRIVE - SUPPORT MSW - DO YOUR PART TO KEEP THIS GREAT FORUM GOING! (Only 20 donations so far - C'mon guys!)
×


michael mott
-
Posts
5,197 -
Joined
-
Last visited
Content Type
Profiles
Forums
Gallery
Events
Everything posted by michael mott
-

More tools - Luthier, jeweler, fly-tying
michael mott replied to vossiewulf's topic in Modeling tools and Workshop Equipment
Thanks for the link about the scraper, very interesting video, I have some 1/8th x 2" tool steel plate so might give something like this a try. the steel he is using looks to be about 3/16th thick. The card type (as he calls them) do get quite warm on the finger tips and he is correct when he states that it takes a while to learn how to sharpen them properly. Michael -
Couple questions of Sherline Mill purchase
michael mott replied to sfotinos's topic in Modeling tools and Workshop Equipment
I have not used a Sherline but this chap is doing some amazing work in metal on one, and has some interesting comments about the handles. http://www.modelenginemaker.com/index.php/topic,6515.60.html the page is talking about machining stainless plates for a steam hauler, if you scroll down there are some pictures of his model ship building, which is very nice too. Overall it looks like a very nice machine. if I were looking for a lathe and mill combination I would seriously consider this machine, Bob's comment about the cutters is useful, remember that you can purchase metric cutters as well. Michael -
Johann made me smile seeing the way you used a second Unimat bed and put the tailstock there to extend the length, a brilliant out of the box way of thinking. Michael
-
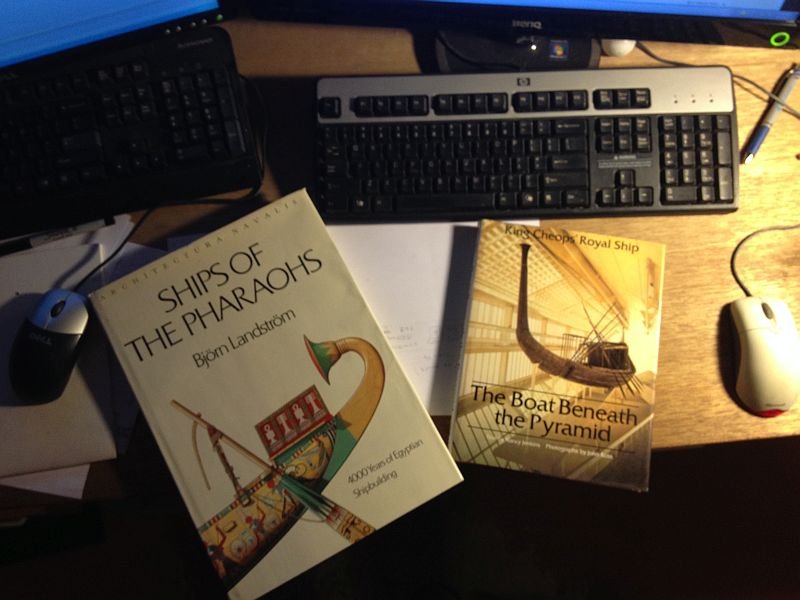
Welcome back to the world of model ship blogs, I am particularly fond of the Egyptian boats. The beautifully illustrated book "ships of the Egyptian Pharaohs" by Bjorn Landstrom is one of my favourites. I also have the "boat beneath the Pyramid", Text by Nancy Jenkins Photographs by John Ross A name would be good far traveler Regards Michael
-
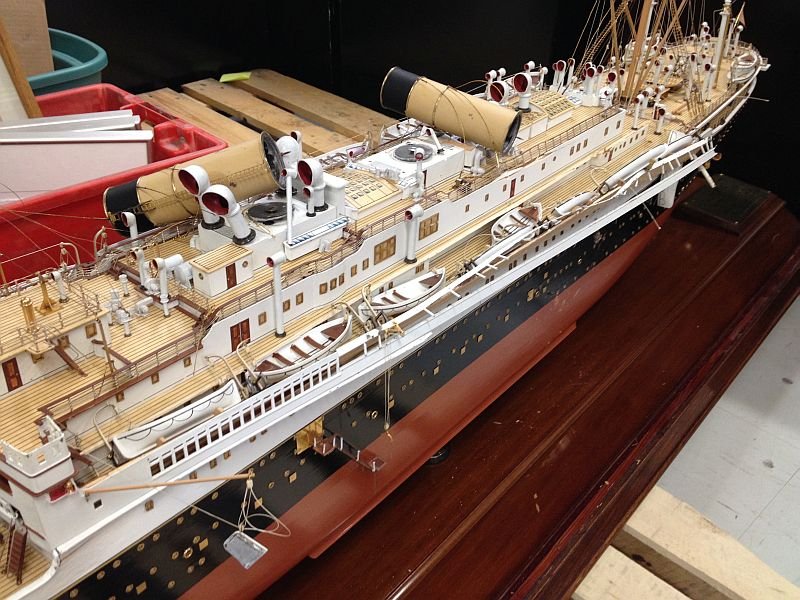
In my proposal to the client I suggested that when the model goes back on display in its new public space that a completely new and more stable display environment be considered. I gave them a number of alternate designs that would be appropriate. As the new space is being completely renovated over the next year I also recommended that the interior designers be involved in integrating the new display in the new public space. The original base is not going to be reused, and a completely new glass or plexiglass cover will be incorporated. my recommendation is for glass as it will be better for long term maintenance and static control. I do not have control over the actual display method so can only make recommendations. Michael
- 749 replies
-
- 8
-

-
- albertic
- ocean liner
- (and 2 more)
-
Congratulations on finishing your fine model John. I look forward to your next build the paintings look good. Michael
- 745 replies
-
- 3
-
-
- francis pritt
- mission ship
- (and 1 more)
-
Great start Bob, I will be following along, By making the waterline level it would also help with painting the hull before removing from the build board I would emagine. Michael
-
Simple answer it was knocked over, the base was tall with a very narrow longitudinal footprint. Michael
- 749 replies
-
- 5
-
-
- albertic
- ocean liner
- (and 2 more)
-
Hi Druxey and John, yes I will be doing that with a little clear just to maintain the idiosyncratic method of the originals. That will keep future conservers thinking. Michael
- 749 replies
-
- 6
-
-
- albertic
- ocean liner
- (and 2 more)
-
Thanks for this Step by Step Ed, I have to keep reminding myself how tiny all this work is 1.5mm in not very big for the thimbles. lovely work on the mast fittings. Michael
- 3,618 replies
-
- 7
-
-
- young america
- clipper
- (and 1 more)
-
Very sharp looking boat Marcus you did a great job. Your sister will no doubt be a very pleased. Michael
- 165 replies
-
- 5
-
-
- cape cod catboat
- Finished
- (and 1 more)
-
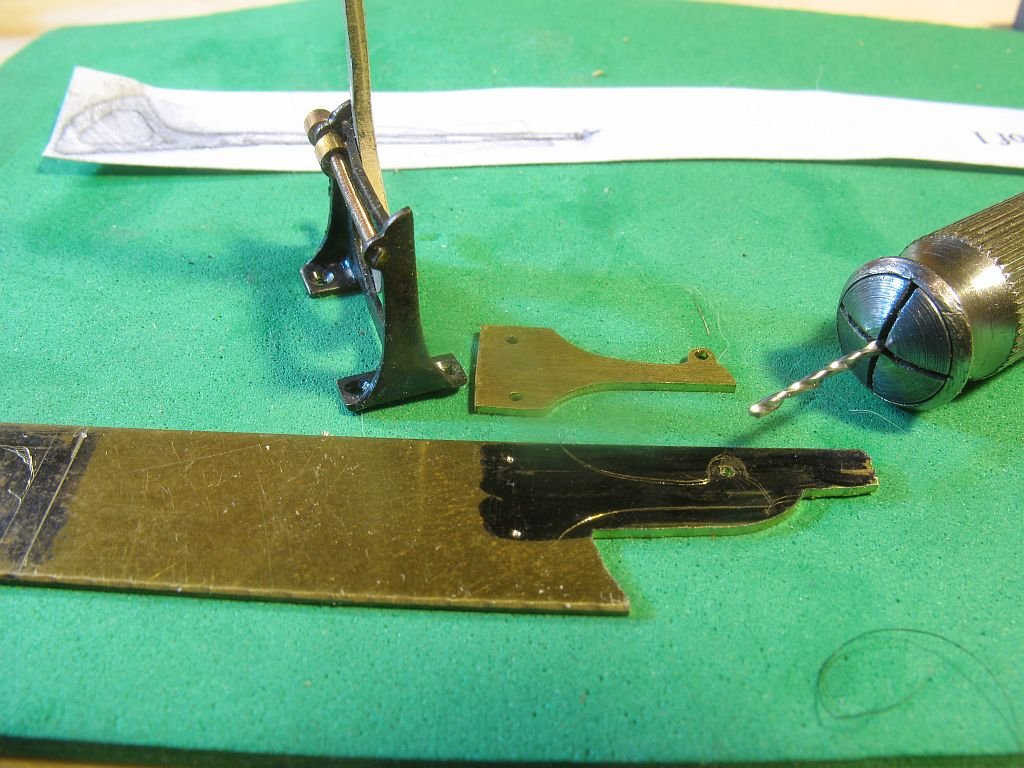
Happy to have you following along Pat Nils, at least I didn't have to make them just fix a few up. I have begun working on the missing davit replacement the first thing was to sort of measure it up I did this with a pair of vernier calipers and a pencil tracing. I could have used the mill drill out in the shop but it was snowing and getting late so just opted for a drill in a pin chuck with a #68 drill bit to spot the holes through the .020" brass for the side plates. After the holes were drilled I used the jewelers saw to fret out the sides these will be annealed before I bend the bottom section prior to soldering the three main body parts together. I used some brown Testors paint brushed onto some different textures of card and the Stash tea box was the best to give the right amount of absorption of the gloss paint to leave it as a semi gloss. the three following images were taken with different lighting the first Tungsten the second Fluorescent last one being Daylight I am happy enough with the results and as long as I am careful with the placement I think they will be passable. Michael

- 749 replies
-
- 16
-
-
- albertic
- ocean liner
- (and 2 more)
-
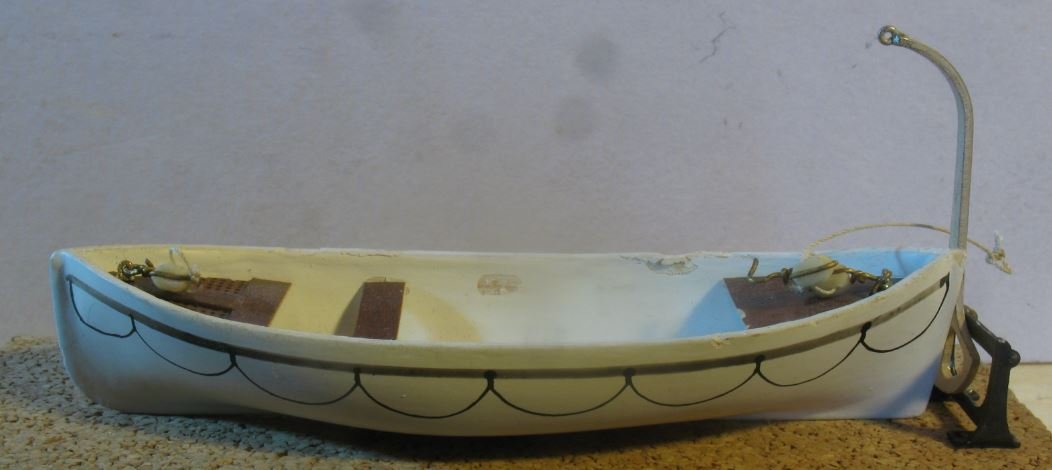
Druxey,Yes a good Idea I shall certainly give this some attention. three of the boats had no thwarts in them (no doubt swept up in the debris of the event) a couple of the boats on the starboard side have one or two thwarts missing with most showing some level of random curvature. only one of the port side boats had all the thwarts intact. Michael
- 749 replies
-
- 13
-
-
- albertic
- ocean liner
- (and 2 more)
-
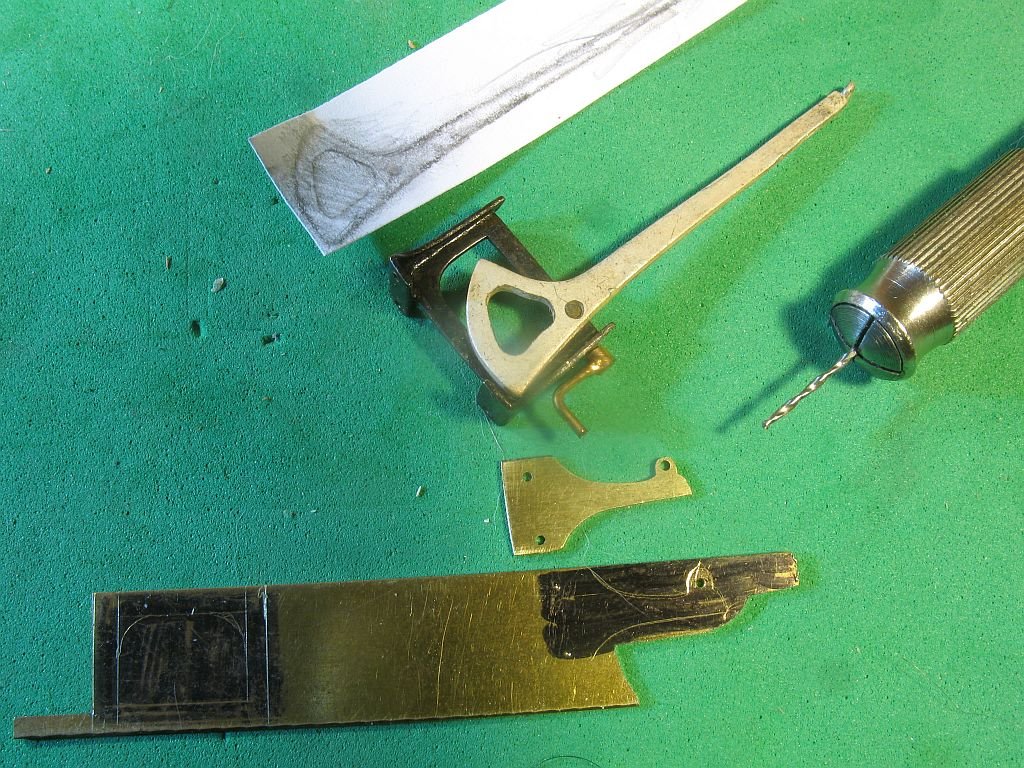
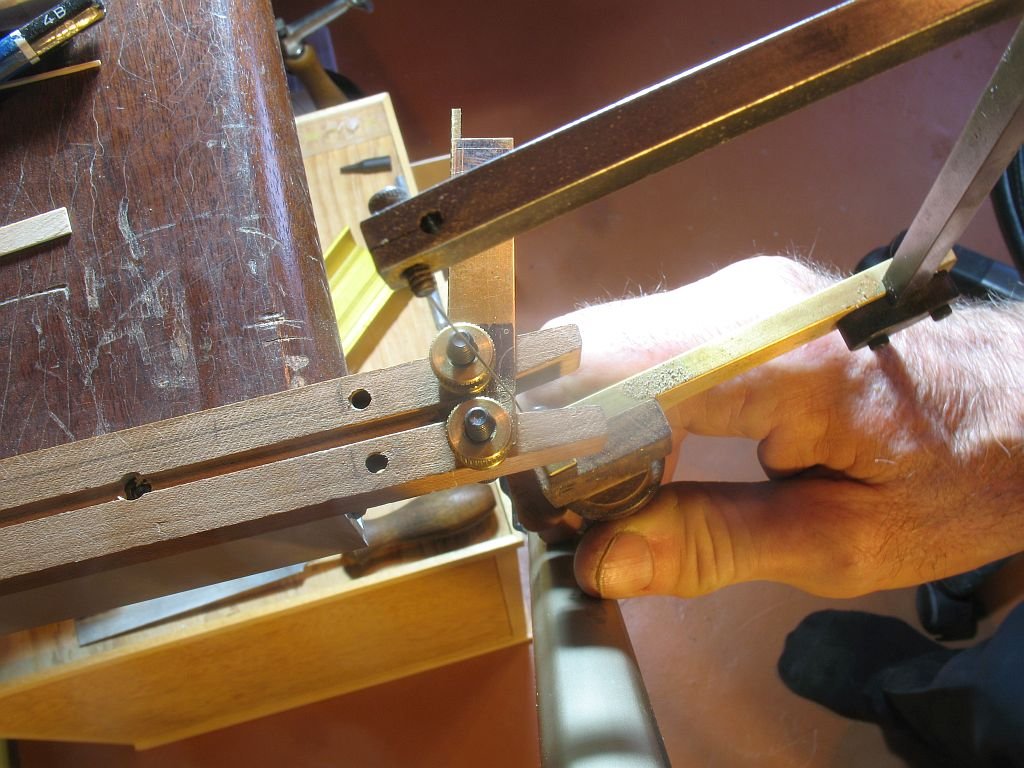
I'm looking John, I'm looking. well I made an interesting discovery and I am not quite sure how I missed it but this one will be tricky. So easy to spot now but was more difficult earlier The davits that sustained the most damage were in line with the aft funnel and got pretty twisted up. I noticed that the arms were stamped out of sheet so Bassett Lowke must have either jobbed out the stamping or made enough of these to have their own small punch press or fly press. I am going to be using one of the good davits as a pattern and will fabricate one out of some brass and paint it to look like the rest. Michael

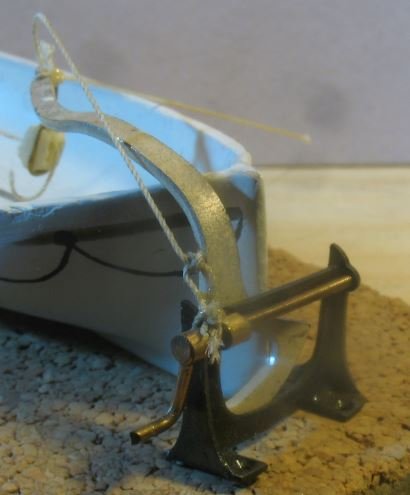
- 749 replies
-
- 15
-
-
- albertic
- ocean liner
- (and 2 more)
-
Hi Igor Like Patrick I just sit here and shake my head. It is amazing to watch how you build and assemble such intricate parts into a bottle. The underwater profile is very nice. Michael
-
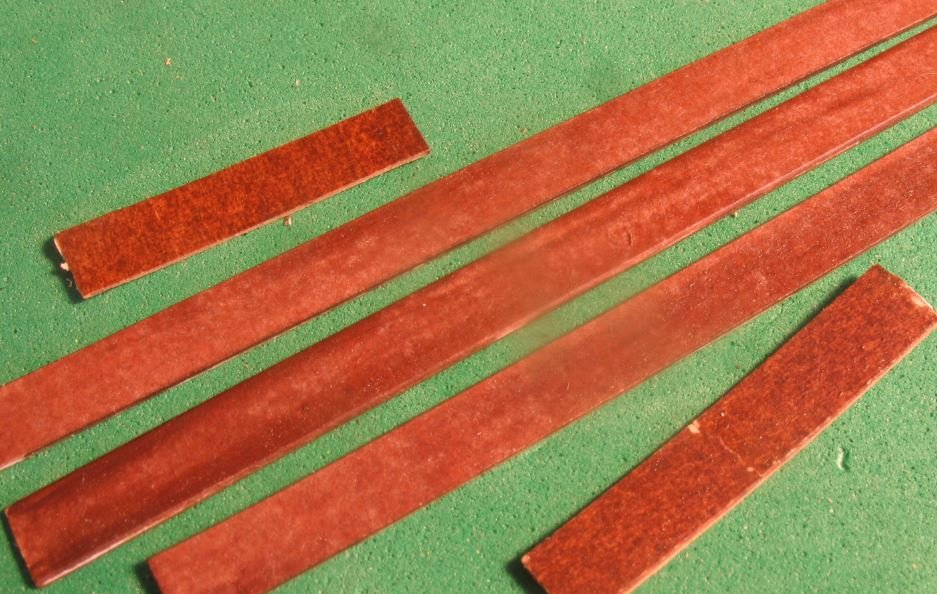
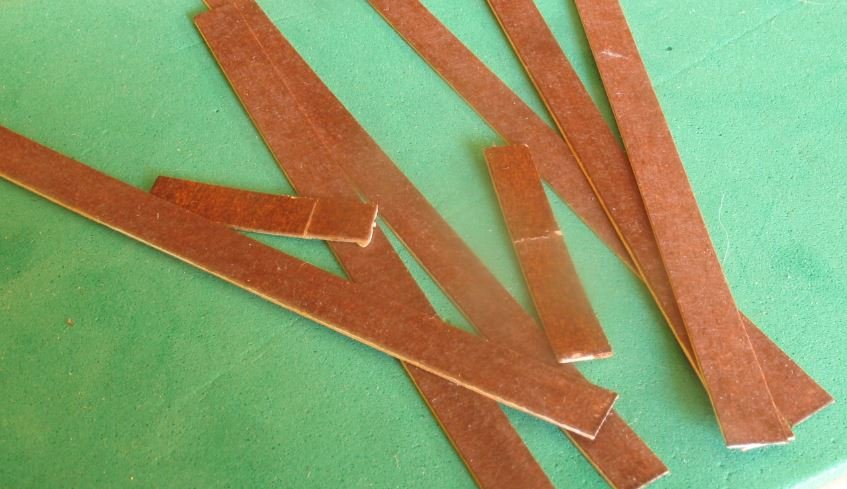
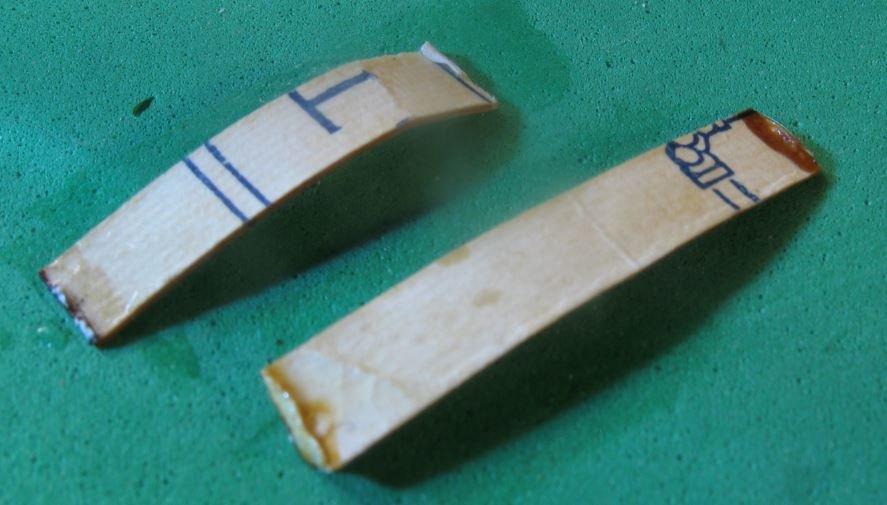
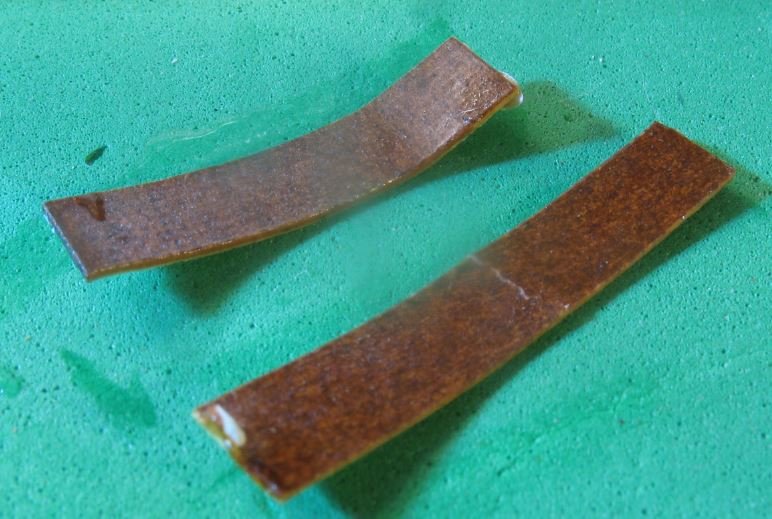
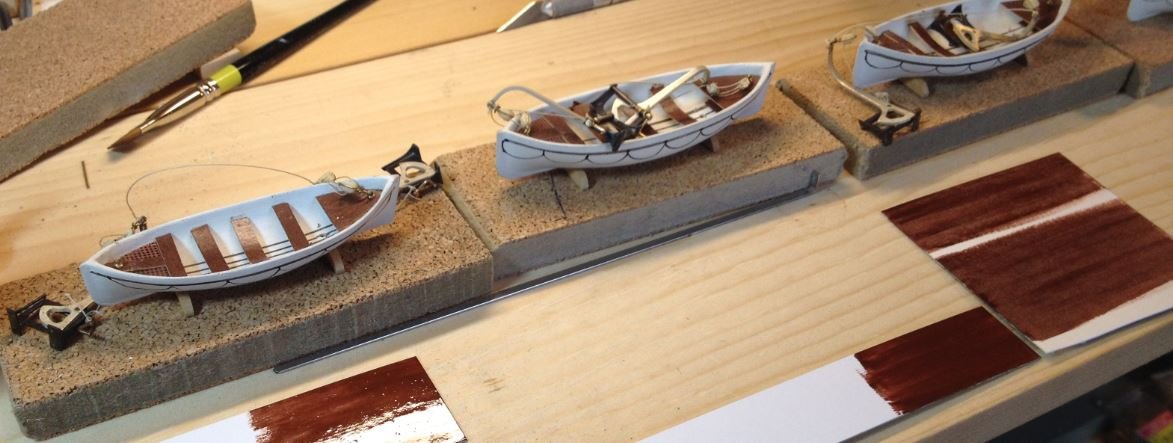
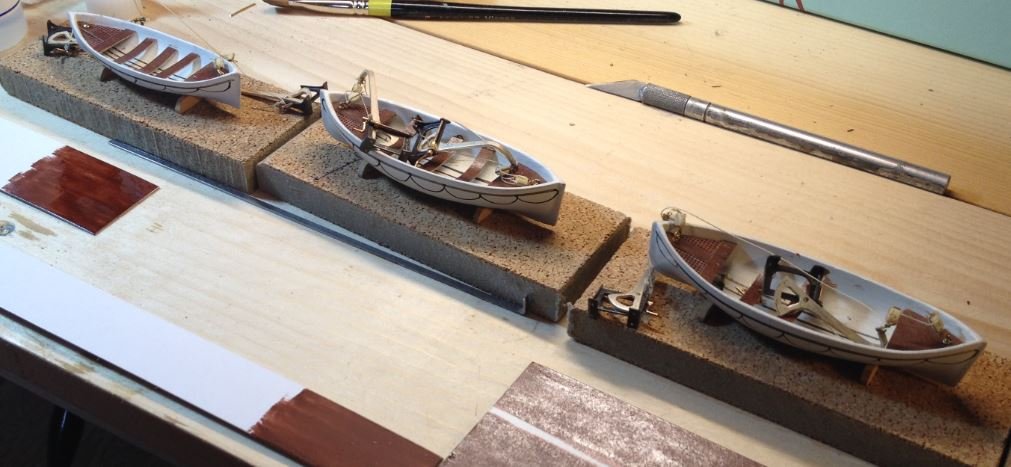
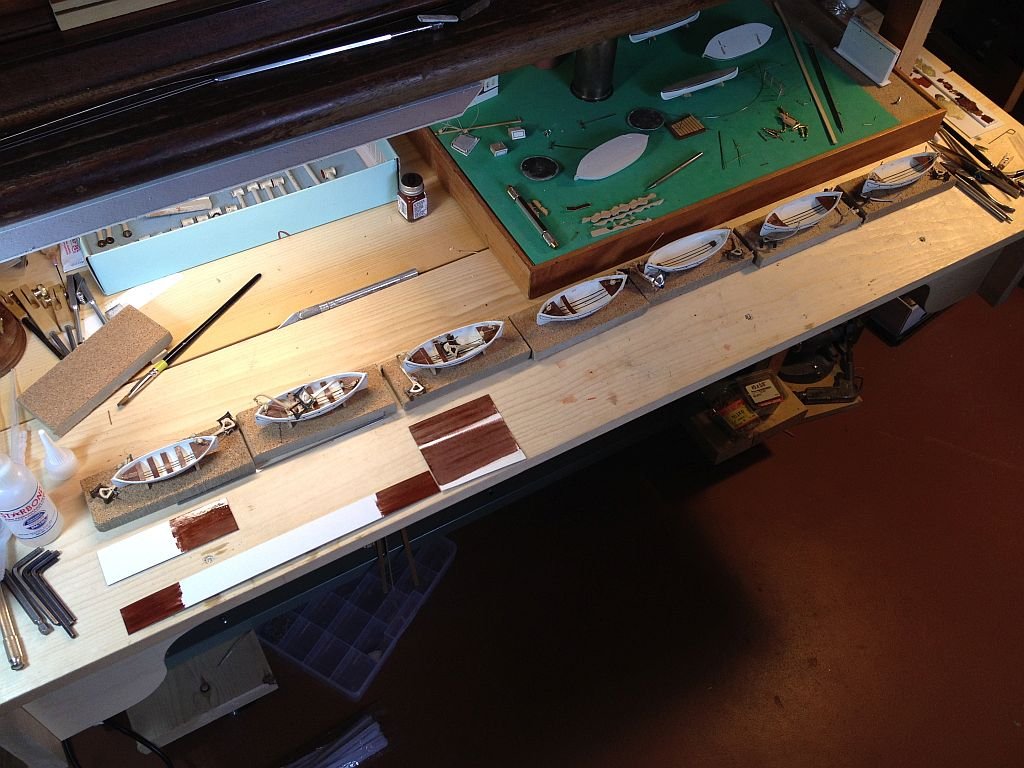
Thanks for all the positive comments. I am beginning to sort out the lifeboats now that a few distractions are completed and mailed. I decided to set them up in some small rectangles of homasote so that each will be able to be handled as an independent model so that I can fix the davits and lines while off the ship model. The small bits of card are some test pieces of card painted for replacing the missing seats in some of the lifeboats. I had thought of using some strips of Evergreen initially but they would not be as the original which are card. The interesting thing is some of the loose pieces when flipped over one can see that the model makers back in the day that this model was made must have simply cut up some packaging. Quite a few of the lifeboat seats have sagged into a curve some quite a lot, the painted card in also quite brittle, when i attempted to flatten one of the loose seats the paint fractured. Hmmm now the dilemma is do I replace all the curved seats. some of the davits are seriously bent, and will need some delicate straightening. Something I noticed while writing this post was a pleasant surprise, Judy had called me from the library and asked me about the weather it is snowing so I clicked on the weather tab without changing tabs and lost the post which was almost ready to submit. I was annoyed at myself and used the back button to see if it was still there and it appeared to be gone, I told myself off. I went to rewrite the post and it all came back with a comment that it was restored! So thank you for that Admin, I have lost a few in the past, this is a nice feature. Michael
- 749 replies
-
- 19
-
-
- albertic
- ocean liner
- (and 2 more)
-
Mike you really are doing an outstanding job on this model, definitely an inspiration for us all. your photographs are also very clear and uncluttered. Michael
- 452 replies
-
- 3
-
-
- cheerful
- Syren Ship Model Company
- (and 1 more)
-
Wow that is a lot of canvas up high, model looks great.
- 70 replies
-
- 2
-
-
- pen duick
- artesania latina
- (and 1 more)
-
Denis you can change the color by heating them up they will turn just like the tempering chart straw to amber to dark purple to blue. Michael
-
Bob this looks like a must follow build log. She does look very elegant. Michael
-
Hi Alex, the level of work in the preparation for the lost wax is very nice. Your computer rendering skills leave me in awe. When I look at the machine work that goes into the wood panels I cannot help but think of the watchmakers who build amazing watches. The level of work in the finishing of the wood with small rotary cutters speaks volumes about the quality of your tooling and your mastery of them. I am enjoying watching your ship evolve. Michael
-
Very nice workmanship Peter. Michael
-
Hi Patrick, the shots of the various decks laid out really give me a sense of how much detail in such a small space you have accomplished. It all look amazing. Michael
-
Any chance of a picture or two showing the differences Frank? Michael
- 3,618 replies
-
- 4
-
-
- young america
- clipper
- (and 1 more)
-
My goodness you work fast Nils, do you ever sleep? Michael
- 2,625 replies
-
- 8
-
-
- kaiser wilhelm der grosse
- passenger steamer
- (and 1 more)