HOLIDAY DONATION DRIVE - SUPPORT MSW - DO YOUR PART TO KEEP THIS GREAT FORUM GOING! (89 donations so far out of 49,000 members - C'mon guys!)
×


gjdale
-
Posts
4,891 -
Joined
-
Last visited
Content Type
Profiles
Forums
Gallery
Events
Everything posted by gjdale
-
 Looks like you've got it cracked Aldo - well done!
 -
That really is a great improvement Robbyn - well done! The Morope looks very nice, as does your serving. You can be well pleased with that.
-
Nice work on the painting John, and glad to hear you found your stars.
-
Welcome home Robbyn! Hope you enjoyed your break by the lake, even if you did have to follow it up with house repairs/rennos. There is an attachment for the Dremel that replaces the collets with a micro-chuck that should solve the problem. Alternatively, you can buy drill bits that have a thicker shaft to mount in your existing collets.
- 773 replies
-
- 1
-

-
- san francisco ii
- artesania latina
- (and 1 more)
-
Looks idyllic Sherry. I just showed the Admiral your scenic photo and she wants to know if you'd like some house guests!
-
Nice work Aldo. Good to see an update from you. Looks like you've put a lot of work into getting this "right" - although that is always a relative term! So when does sawdust start to make an appearance?
-
Thanks Aldo - nice to hear from you again my friend. I hope your are managing to get some time in the shipyard these days. That work thing is totally over-rated!
-
Hearty congratulations on your promotion Commodore Augie! For your special reward, you get to sit at the Commodore's table with Sjors. Yep, just the two of you..........
- 1,668 replies
-
- 2
-
-
- syren
- model shipways
- (and 1 more)
-
Nice work Patrick, and great to read your "observations". I particularly liked: 6. Doing this tedious and repetitive task is a good time for reflection...usually along the lines of "What the hell was I thinking!"
-
The peanuts are agreed - Deck looks great John. Re your stars, if they are missing from the kit, why not contact Model Expo and ask for some replacements?
-
Hi Mobbsie, Looks great mate! I'm also of the "you're the Captain" school, though advice regarding input from the admiral is wise! I also agree that this is an opportunity for you to differentiate your model from others, in much the same way as you have done with the cannons. Just don't forget the rope mate!!! :P ;)
- 1,279 replies
-
- 1
-
-
- agamemnon
- caldercraft
- (and 1 more)
-
Thanks Kevin and John. John: I will be making more, just haven't yet decided on how many I will do. They will be made in a similar fashioni, although there are some other techniques I want to try in the process.
-
Rudder looks great Kevin. Your hard work pays off again.
-
Thanks David, Augie (again) and Bob. Augie: Not a chance in hell my friend!!!! I wouldn't want to deprive those good folks of the pleasures involved. Bob: Thanks for the compliment, and standby for further rigging. Don't expect too many progress shots though - it's one of those things that doesn't seem to change much at the time, and then suddenly it's done. I'll try to keep enough pics coming to keep you know who off my back!
-
Fast work there Mick. The deck looks good with the beeswax finish. Your little boat also looks great - just remember that the Macro lens is not always our friend!!!
-
Thanks again Augie, Sjors, Mick, Mark and Andy. Andy: Still considering the answer to that question. I COULD do five more: 32' Barge, 28' Pinnace, 18' Cutter, and two 26' Sea Cutters. Not sure yet whether I will do them all, but will probably do at least the Pinnace. I have another technique I want to try, so will experiment with that in a little while - after I get some more rigging done! At least now I have some general techniques under my belt, so the others SHOULD come together a little more quickly (famous last words )
-
Hi Mick, Deck looks good. As to your question, my only advice would be to avoid a finish that looks too shiny. With your deck planks, you might want to consider staggering the plank endings a bit more. This "shift of the butts" is usually 3 or 4 planks (ie 3 or 4 planks between plank ends ("butts") falling on the same beam, while yours appear to be at every other plank. I know you said this deck won't be seen much, so maybe something to consider for the upper decks. And half your luck - being able to spend 8 hrs/day in the shipyard!
-
Thanks for the compliments Mobbsie, Slog, and racouch444. Mobbsie: of course I don't mind you mentioning something you think would be an improvement - that's exactly what this forum is for my friend. . I'll sleep on it, but at this stage I'm thinking "less is more", so probably no rope (for now at least). Mind you, if I can get Remco to send me one of his little wicker baskets to stow it in, I might reconsider Slog: thanks for the offer, but I've enough boats of my own to make! When are we going to see some more of your card Bismarck by the way? I was enjoying watching your initiation by fire!!! racouch444: welcome to my build log and thanks for the kind words. The stern re-build was a bit of a "leap of faith", but as you said, well worth it in the end. I'm not sure I understand your question about the inside contour of the launch. If you'd like to expand, I'll do my best to answer. And the template for the rigging certainly wasn't an original idea, so feel free to "steal" it. Good luck with your Syren build - that's a really lovely model.
-
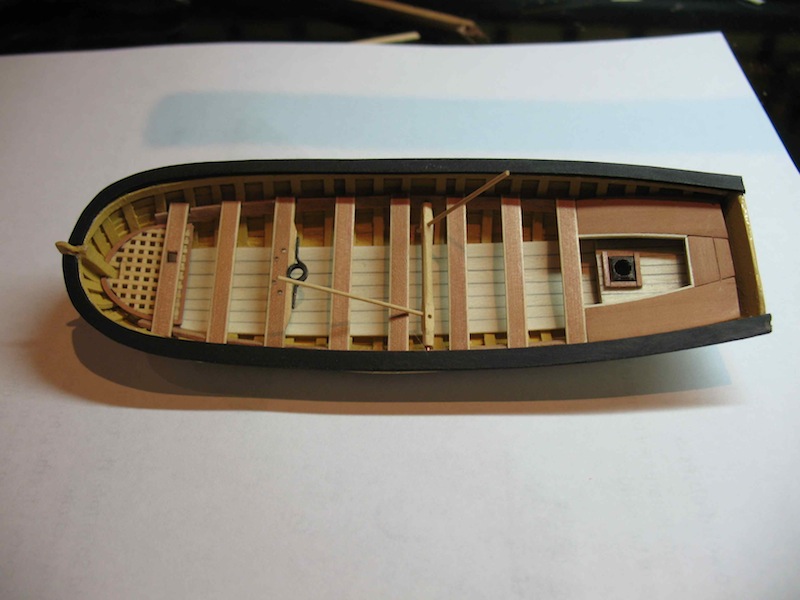
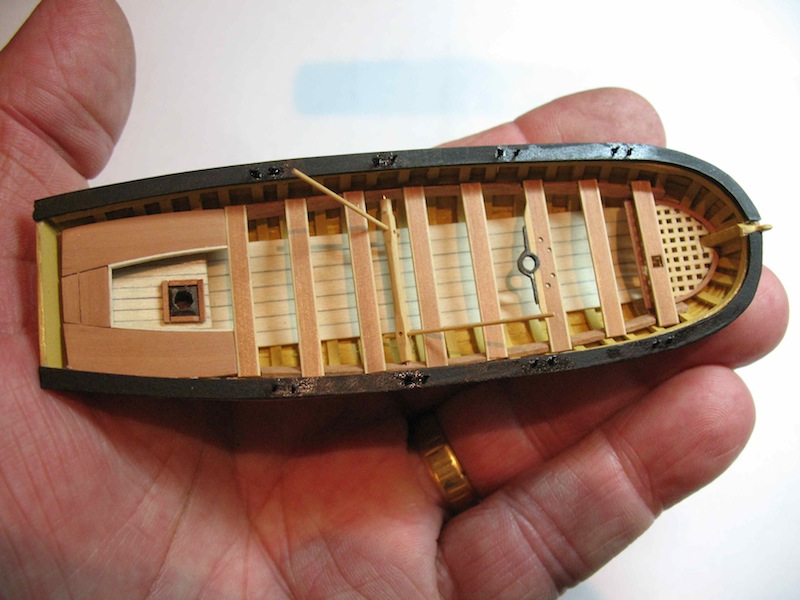
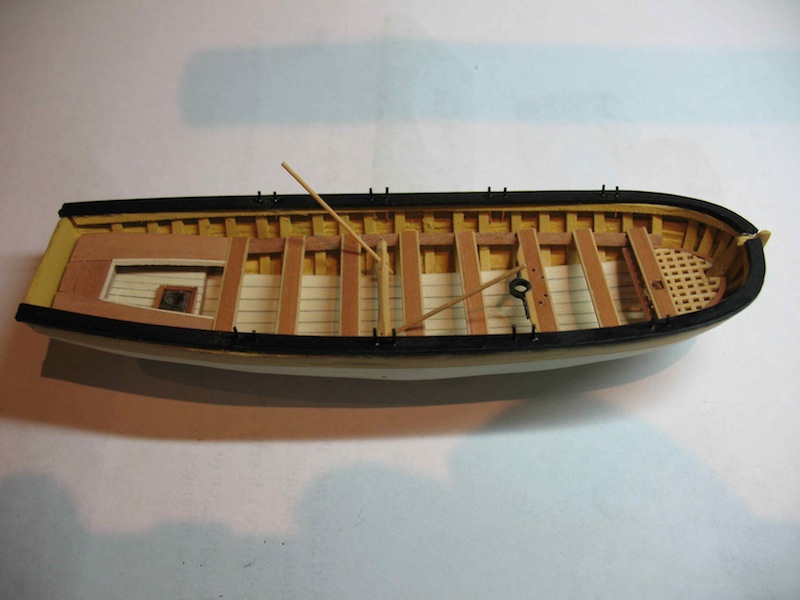
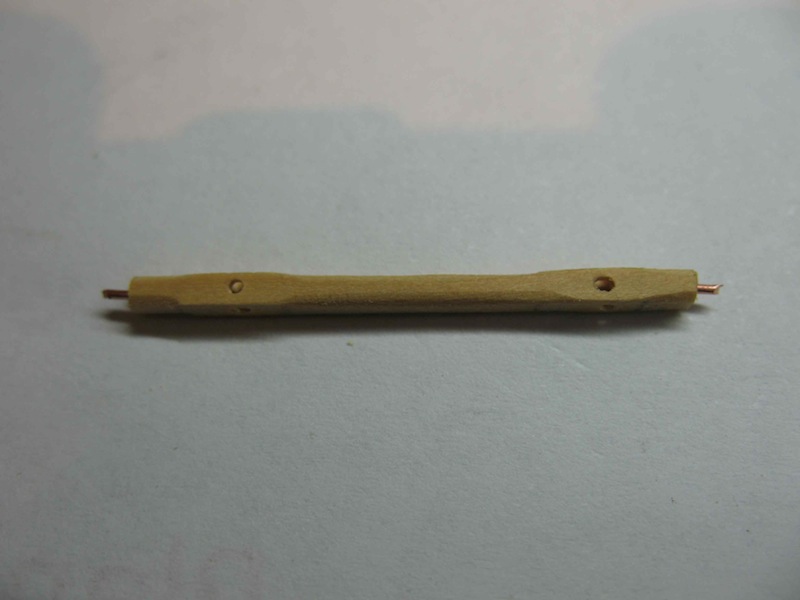
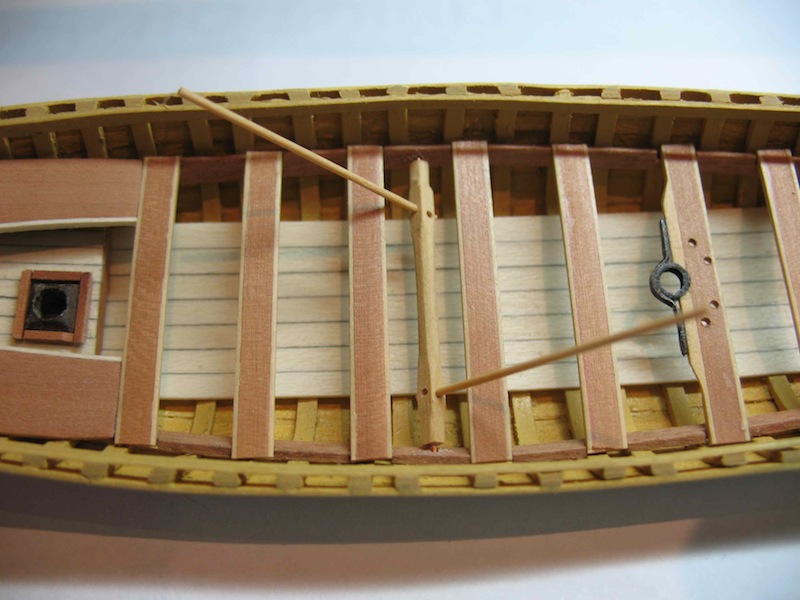
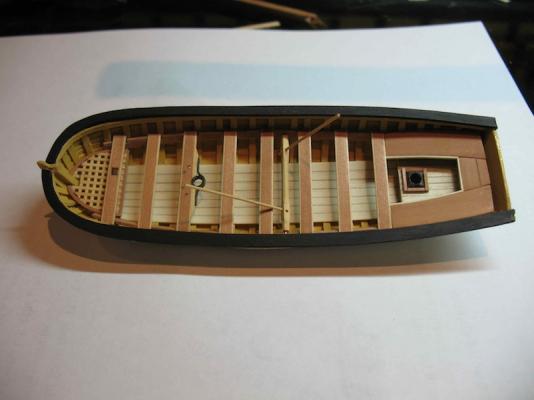
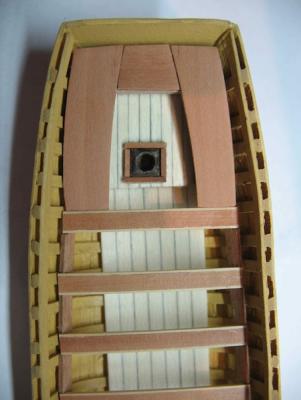
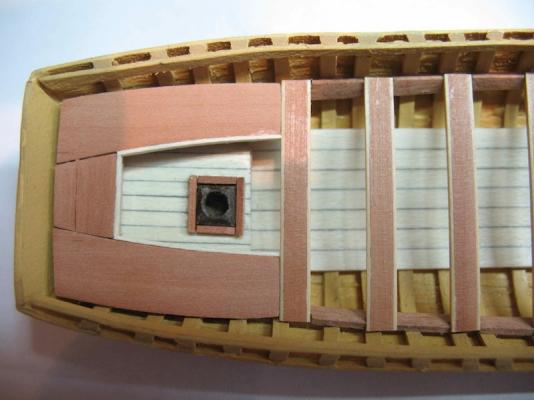
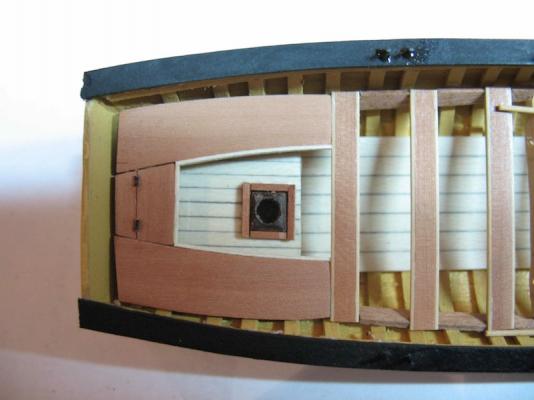
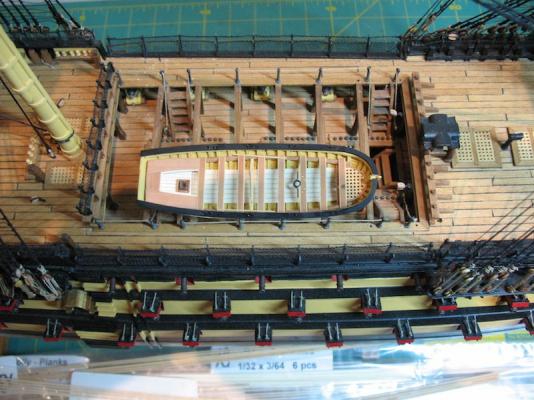
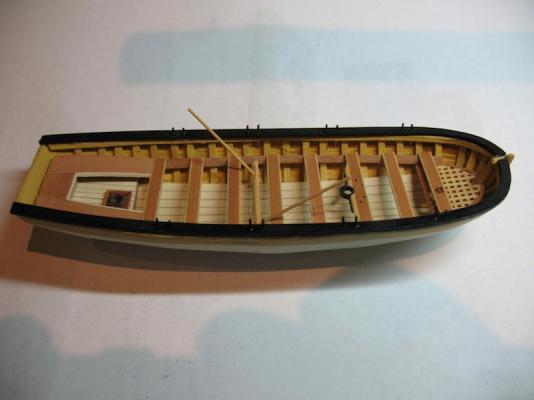
Hi all, We decided to keep our trip to Sydney to a day trip, so although that made for a long day (nine hours of driving all up), it did allow me to spend most of the day today in the man-cave (er, I mean shipyard ) First job was to install some framework for the Sternsheets in my little Launch: Then the Sternsheets themselves, which were cut to size from some Pear sheet stock: I trimmed the sternsheets with Holly, in the same way as the Thwarts, and then scored a line across the athwartships seat, to give the suggestion of an opening lid, but diidn't think to add some "hinges" until later in the day: Next up, the windlass. This was made from some 1/16" sq boxwood that was shaped to octagonal form with the exception of the part for the handles. Copper wire pins were inserted in the ends for mounting in the launch. The handles for the windlass were made from some scrap 1/32" sq box that was drawn through the Byrnes Drawplate to a No. 29 hole. Here is the assembled windlass in the Launch, and yes, it does actually work! The cap rails were next: And then the Thole pins, which were also made from copper wire, blackened with Liver of Sulphur. Another reminder of the scale of this thing. It fits in my hand between the base of my thumb and the end of my middle finger: And here it is stowed on the skid beams: And finally, a last minute idea. I made some "hinges" by attaching some tiny pieces of 28 gauge black annealed wire. That pretty much completes the launch as far as I want to take it. As the boats would be stowed without their rudders, I'm inclined to not make one. I'm also in two minds as to whether or not to make a bunch of oars - I think probably not, but I may change my mind a bit further down the track. I also have not made the stern davit for the launch, nor the bowsprit step post. Again, some details I might decide to add later. For now, I think I'm satisfied with where it's at and I'm ready to return to the Running Rigging next week. Oh goodie - a "block party"!


-
Gary, Those look fantastic and I'll bet they were a real bear to make - something you modestly neglected to mention! Well played Sir!
-
Welcome home Mobbsie. Looking forward to seeing your next update.
- 1,279 replies
-
- 1
-
-
- agamemnon
- caldercraft
- (and 1 more)
-
Nice catch John.
-
Interesting "experiment " with the threads Mick. I hope you find one that you're happy with. It does look to give a nice effect.
-
Now that's just brilliant Danny! I don't know how you come up with these ideas, but I'm sure glad you do!