HOLIDAY DONATION DRIVE - SUPPORT MSW - DO YOUR PART TO KEEP THIS GREAT FORUM GOING! (Only 72 donations so far out of 49,000 members - Can we at least get 100? C'mon guys!)
×


gjdale
-
Posts
4,891 -
Joined
-
Last visited
Content Type
Profiles
Forums
Gallery
Events
Everything posted by gjdale
-
 Now that's just brilliant Danny! I don't know how you come up with these ideas, but I'm sure glad you do!
 -
Looking good Sjors!
-
Intro to Card Models Pt. V: Building V108 - The Hull
gjdale replied to ccoyle's topic in Card and Paper Models
This really is a great tutorial Chris. The "warts and all" approach makes it seem that much more accessible to first timers.- 25 replies
-
- 1
-

-
- card models
- paper models
- (and 1 more)
-
Great work Augie. Enjoy your fishing trip and we'll look forward to hearing your lies (er, I mean tales) when you return.
- 1,668 replies
-
- 2
-
-
- syren
- model shipways
- (and 1 more)
-
Lovely, Sherry. I really like your lighting. Enjoy your holiday and I hope you get plenty of that "rest" thing! Please do let me know what that's like.
-
Fabulous work Dan, and really interesting to read your description of how you achieved the end result. Really well done!
-
Very nice Rusty. Good tip with the ruler - thanks for that. And a lucky escape too..........
-
Thank you Ben, Mark, Sherry, Lawrence, Patrick and Kevin for adding to the chorus of support. Your kind comments are greatly appreciated. There may be a slight pause in progress as work is very busy at the moment (when is it not?) and the Admiral and I are going away this weekend to visit her family in Sydney. Hopefully more progress to report in a week or so.
-
Nice start Mick. Glad to see that you managed to work out the photo thing.
-
Hi Mick, Looks like I'll have to join Sjors in the second row. I'll get the beers and he can share the popcorn - that might keep him quiet for a while, but I doubt it. I hope you can manage to work out the photo system here, as I have to agree that while the photo bucket does work, it's a little inconvenient. Good luck with the build and I look forward to following along.
-
Come on Robbyn! What could possibly go wrong? :P
-
Just wonderful Gary.
-
Beautiful, as always Alexandru!
-
Congratulations Ed - what a masterpiece. And thank you so much for taking us all on the journey with you. Your log has been a wellspring of information and inspiration. I look forward to adding Vol 2 to my collection of seminal works.
-
Congratulations Augie! It's all been said already, but I'll say it again - a real masterpiece! Now, go enjoy your shore leave.
- 1,668 replies
-
- 1
-
-
- syren
- model shipways
- (and 1 more)
-
Thank you one and all for the very kind comments. Your support and encouragement help to inspire me to always try harder.
-
Nicely done Sjors. Using shims to get the cannon to the right height has worked very well for you.
-
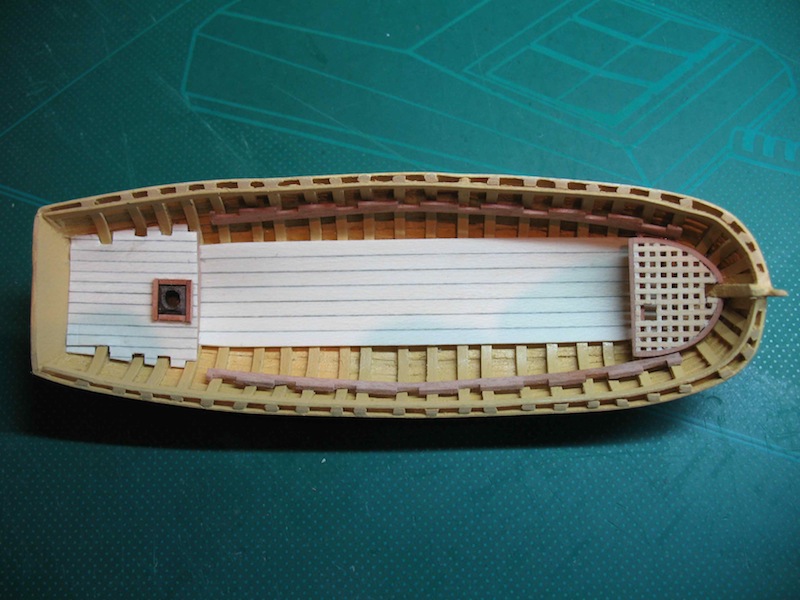
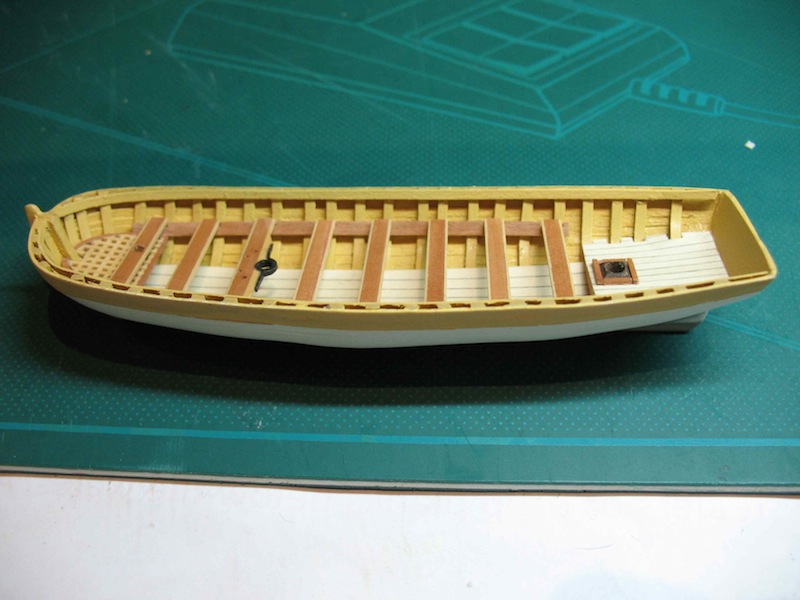
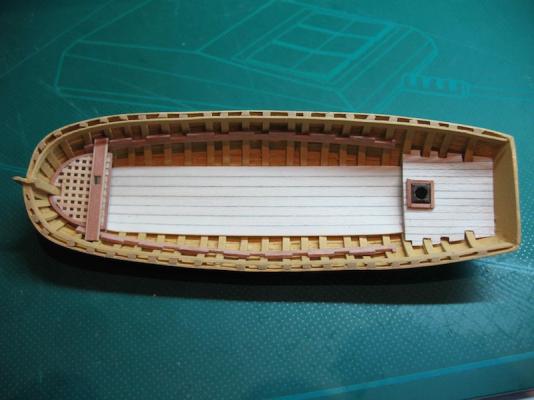
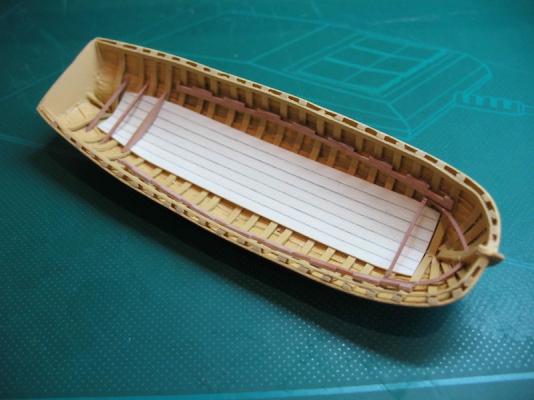
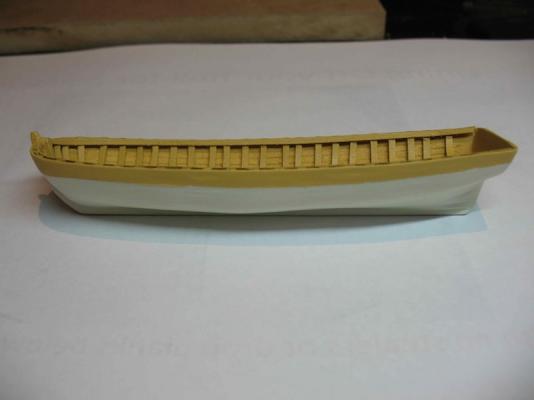
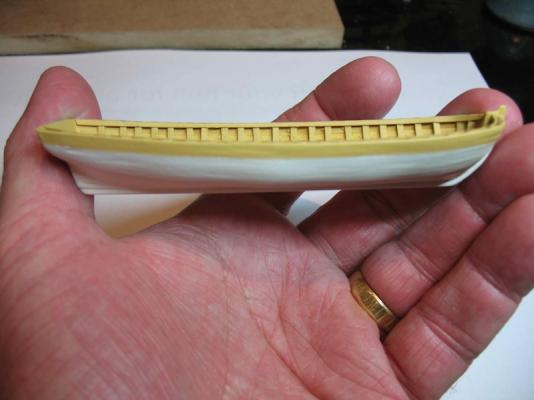
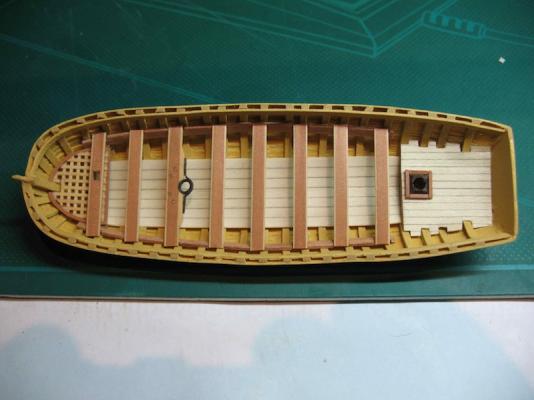
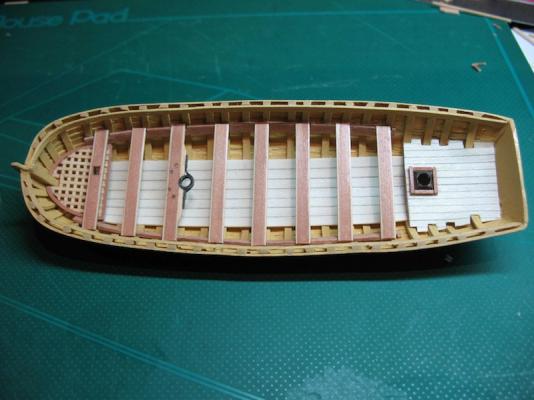
Hi all, A bit of progress to report at last. First up, the re-do on the paint job. As you can see from these first few photos, I've managed to get it back to where it was, but this time with successfully applied DullCote finish (four coats). Then at last it was time to install the previously made footwalling, along with the risers and some framework to support the grating in the bow and the stern platform: I then made up some grating using some Boxwood pre-milled for me by Jeff at HobbyMill. I gave the grating a contrasting border in Swiss Pear. Note the larger square hole in the grating - this is to take the bowsprit step and will have a matching hole in the thwart above it. In the stern, you will see the step for the davit. This was made from walnut, with a Pear frame around it. Here you can see the first thwart installed, with the square hole cut into it for the bowsprit step: And finally, the addition of the rest of the thwarts. Note the third thwart from the bow with the mast support and four holes for belaying pins. All of the internals have been given a coat of sanding sealer. That brings me up to date - with enough photos to keep you know who happy for at least a week! Next job will be fit the stern sheets, knees (maybe!), windlass, and then the cap rail. I made a windlass today, but I guess it says something about the size of this little beast that I now can't find it!!!!!


-
Hi John, You're certainly moving along quickly. I understand the urge to get to a certain point before your trip but I recommend resisting the urge to rush - you'll only end up regretting it later on. Take your time - it will still be there when you get back. What Sjors is referring to is known as "the shift of the butts" - this refers to the pattern formed by the plank ends (ie how many planks before a plank end falls on the same beam), and should be consistent. Depending on the ship, either a three or four plank shift is normal. Yours seem to be somewhat inconsistent at the moment. I hope this makes sense to you.
-
Looking good Augie - almost there! But we all know you're slowing down in order to keep the log alive for more tall tales and true from the Wild Kingdom and even Wilder West!
- 1,668 replies
-
- 2
-
-
- syren
- model shipways
- (and 1 more)
-
Looking great Clare.
-
Very nice Rusty. Thanks for the tip.