gjdale
-
Posts
4,894 -
Joined
-
Last visited
Content Type
Profiles
Forums
Gallery
Events
Everything posted by gjdale
-
 Tough break Hamilton. For what it's worth, I'd go with the harder option of re-doing the keel. If you don't, it's going to bug you forever. A little extra cost, and a little extra time now, vs regret at leisure for a very long time. Good luck with whichever option you choose.
 -
Looking great Aydin! Nice to see you back - hope you had a good trip.
- 414 replies
-
- 4
-

-
- riva aquarama
- amati
- (and 2 more)
-
Hey Bill, This is why spreadsheets were invented my friend! Once you know the conversion factor (1.333 in this case), let the spreadsheet do the heavy lifting and give your brain a rest. Then you can concentrate on what you are bettter at than the computer - making sawdust!
-
Lovely work, as always, Bob. Your extra details and replacement parts make all the difference!
-
Just wonderful Nils. Such a joy to see your updates.
- 2,625 replies
-
- 5
-
-
- kaiser wilhelm der grosse
- passenger steamer
- (and 1 more)
-
Thanks Sam. I used thick CA to bond the planking to the Sinatra. It required a LOT of kicker! That's just one more reason to coat the whole thing in a fibreglass jacket - I don't really trust the CA bond strength over time. If I were to do this build again, I would replace all the Sinatra subplanking with timber - either light plywood sheeting or balsa strips. The Sinatra is supposed to be a weight saving, but I think it introduces more problems than it solves.
- 339 replies
-
- 7
-
-
- dumas
- Chris-Craft
- (and 3 more)
-
Thanks Slog and Carl. Slog - it was watching the Paul Budzik videos that sent me down this path in the first place. I can thoroughly recommend the Airbrush Megastore - check out their website. Great friendly service, reasonable prices, prompt delivery, and good advice. Go on, you know you want to............. Carl - that gun has a 1.0mm needle as standard but also comes with a 1.2mm in the package. With the recommended spraying pressure of 40psi, you can cover a large area very quickly indeed. To answer your question, I made up a batch of about 50ml and used only a fraction of it. I was able to decant the leftover back into a glass container afterwards. Not sure how well it will keep, but we'll see.
- 339 replies
-
- 6
-
-
- dumas
- Chris-Craft
- (and 3 more)
-
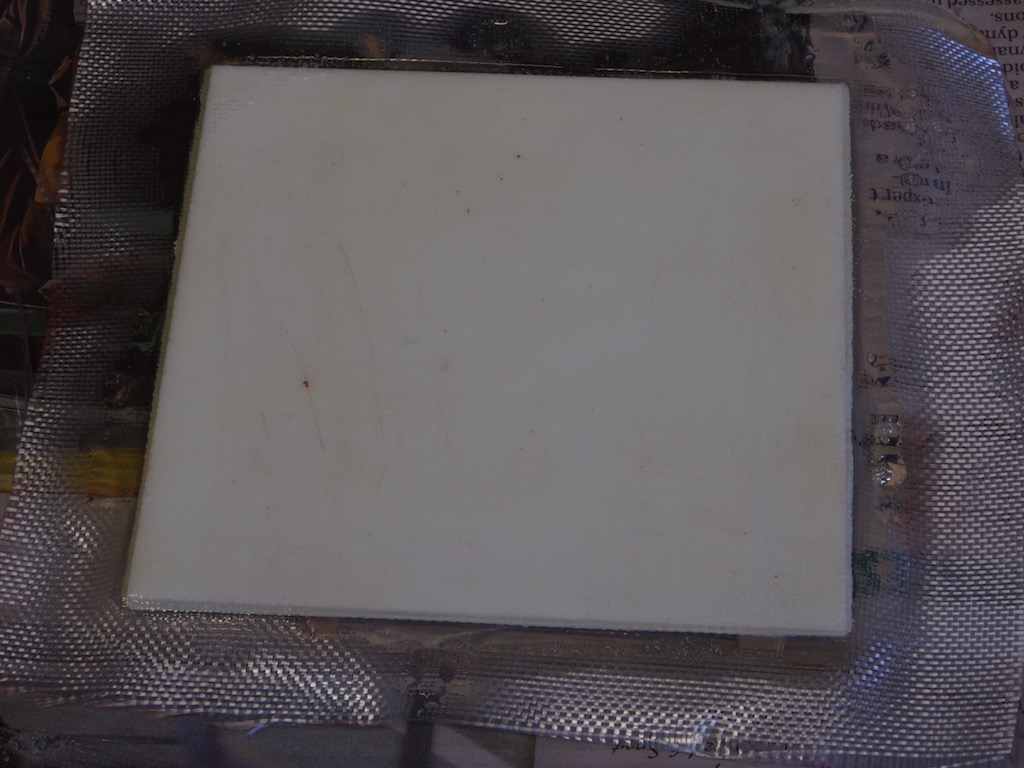
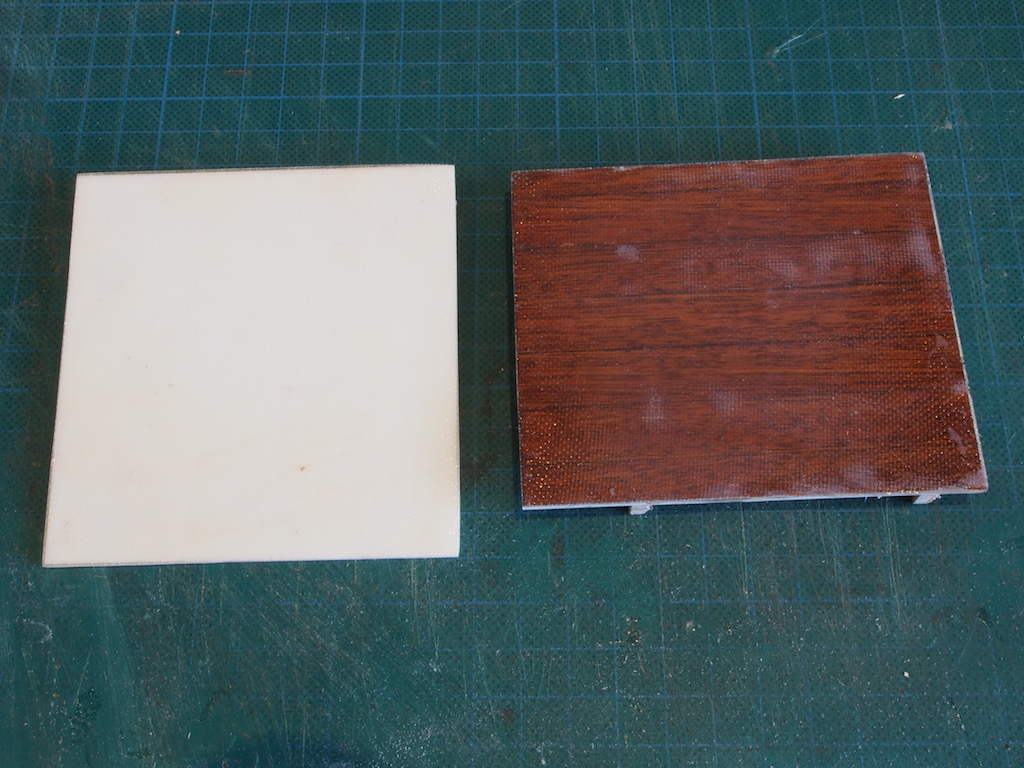
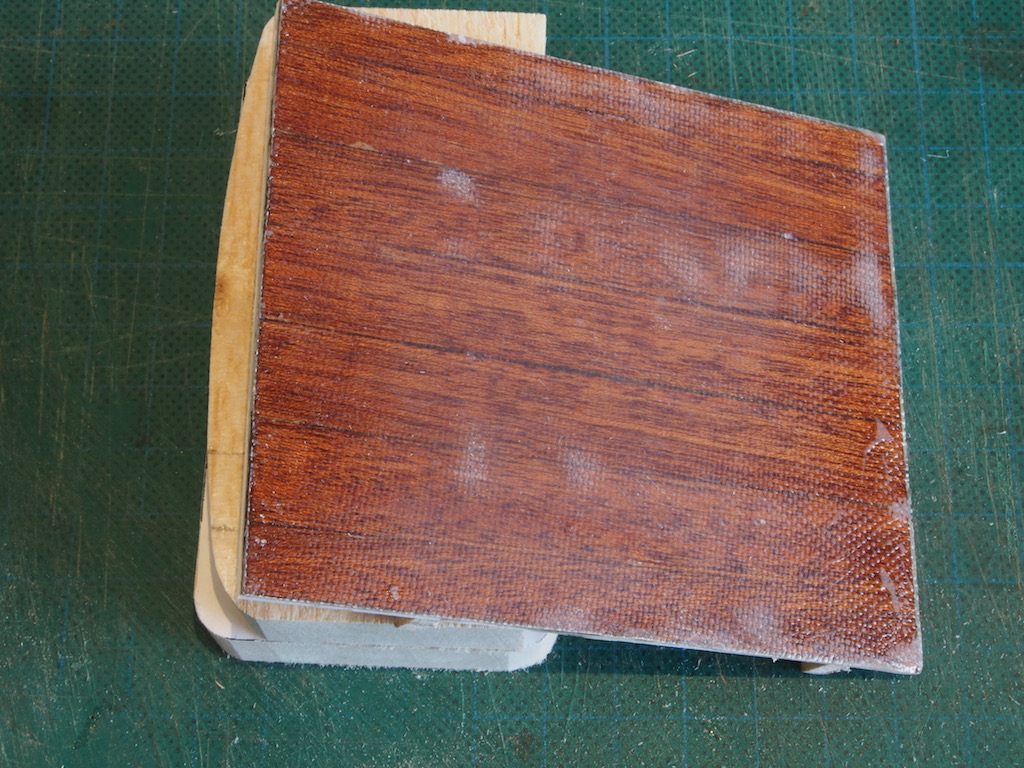
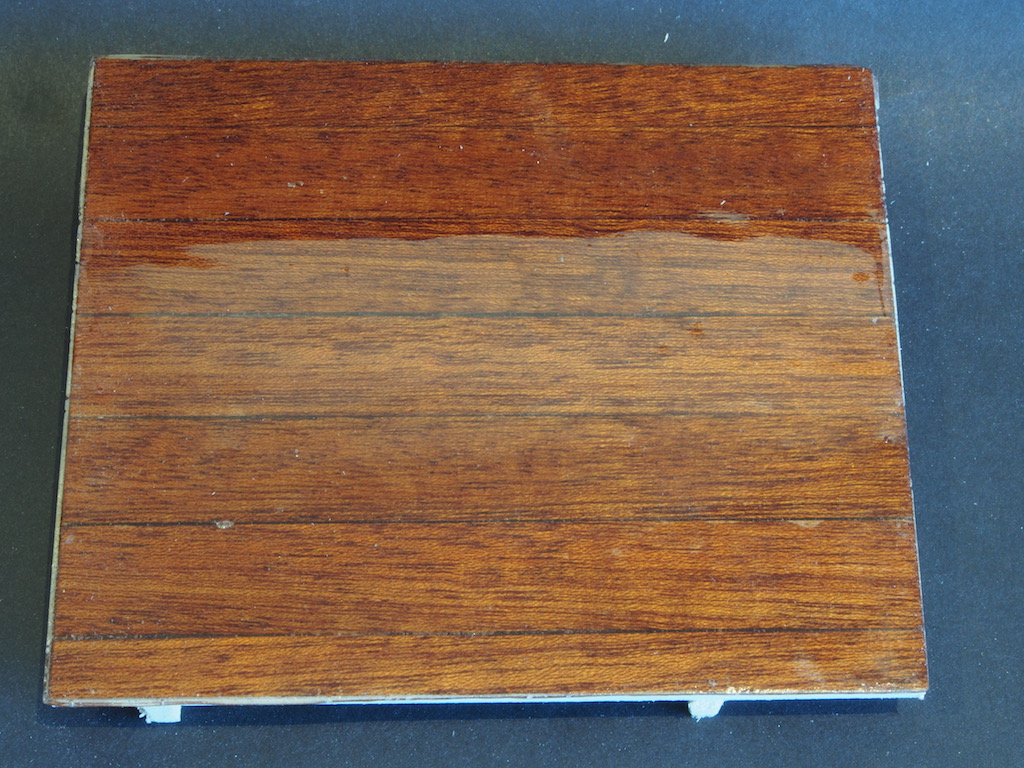
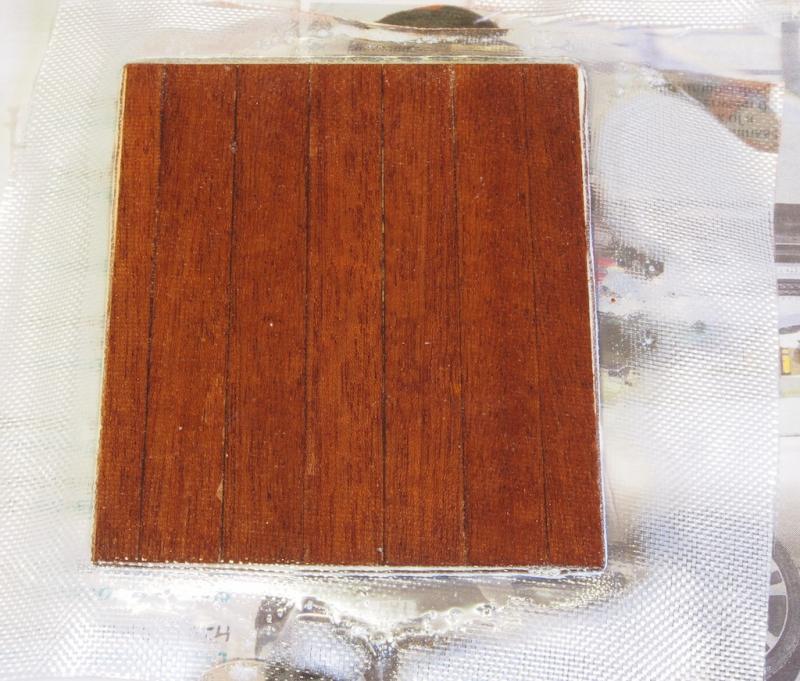
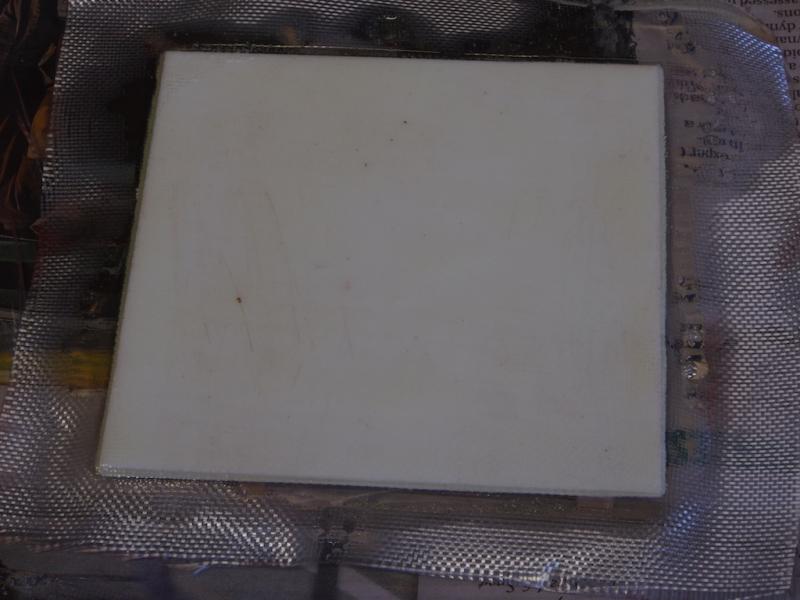
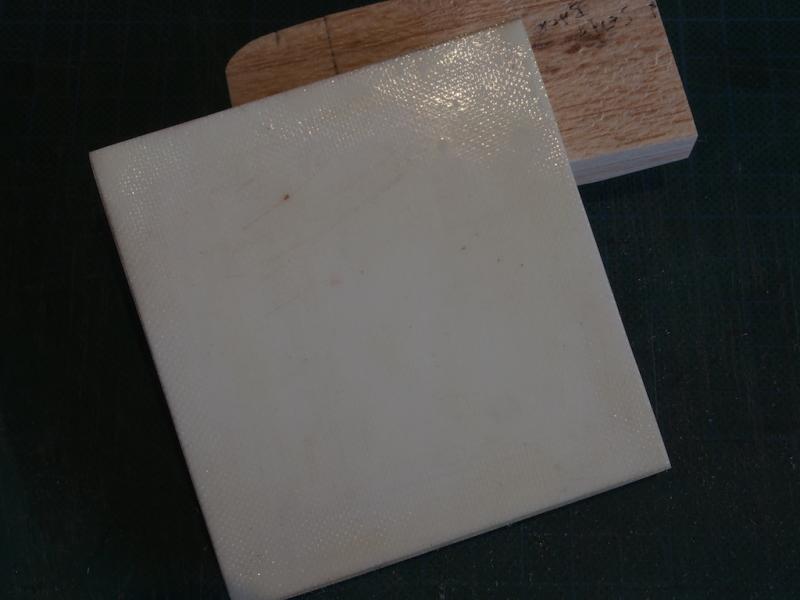
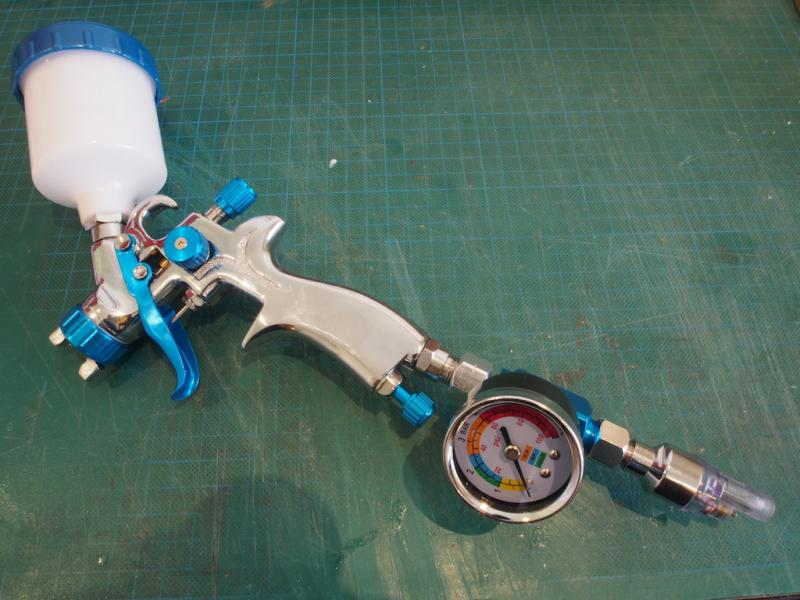
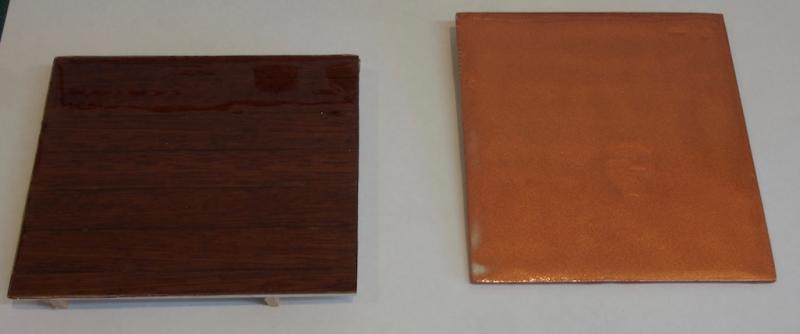
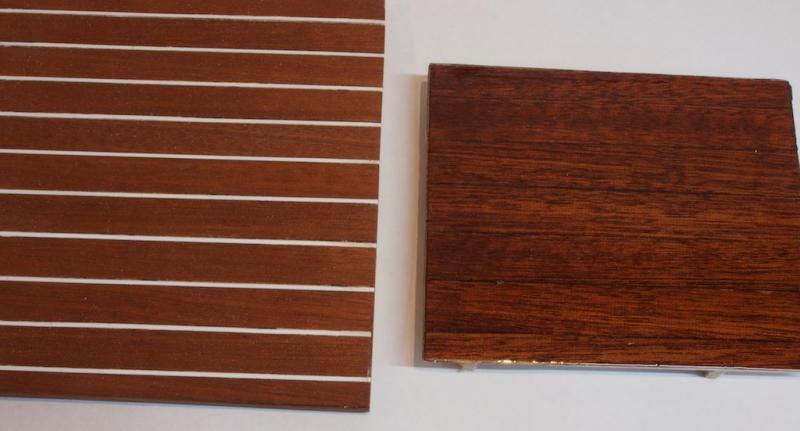
The Fibreglass Trials As I have never attempted fibreglassing of anything, ever before, I decided it would be prudent to do some trials before “going live”. I read a number of “how-to” guides, and found that the one by Pat Tritle on RC Groups Forum was probably the simplest to follow. For anyone that has never done this before, my advice up front is “trust the process!” It is really quite a simple process, but if you don’t know what to expect along the way, it is easy to think that something has gone wrong. It hasn’t (probably…..) Materials used for the test were exactly what is planned for the actual job, and comprise some 2oz. fibreglass cloth, West Systems Epoxy Resin (No 105), West Systems Hardener (No. 207, which is supposedly designed for use with a clear finish), Feast Watson Spar Marine Varnish, and Krylon Premium “Copper Brilliance” (rattle can spray paint – for the below the waterline colour). I made up two test pieces of roughly three inches by four inches Sintra (the plastic sheeting that also forms the sub-planking). One of these was planked with Mahogany strips just the same as the sides of the hull, and the other was left ‘au-naturale’, the same as the bottom of the boat. The first step was to cut some cloth a little over-size and drape over the test pieces. The Epoxy was mixed according to the West Systems directions (a three to one ratio by volume in this case). A lot of folk say to thin this mix by adding up to about 20% denatured alcohol (methylated spirits here in Australia). The reason given for this is that it supposedly helps the epoxy penetrate the timber substrate and also reduces the chance of bubbles in the mix. The West Systems website advises against thinning and states that strength is significantly reduced by thinning. I decided to stick with the West Systems advice and did not thin. I applied the epoxy by pouring a small amount onto the centre of the test piece and then using a hotel room keycard (same size and shape as a credit card) as a squeegee to spread the epoxy and press it into the weave of the cloth. The important part of the process here is to ensure that the epoxy gets into the weave all over, and right up to the edges (though excessive over spill along the edges is to be avoided). Here’s what the test pieces looked like after this step: Once the epoxy had cured, the excess cloth was roughly trimmed back with a single edge razor blade, and then block sanded with 80-grit sandpaper to the edge of the test piece. The surface was then lightly sanded with 120 grit to remove any high spots. Care needs to be taken here not to sand through the glass itself. Note that the weave of the cloth is still visible here. Don’t panic! Here’s another couple of shots to show clearly how much of the weave is still visible. A second coat of epoxy was then applied, this time with a stiff brush. The aim of this coat is to fill the weave of the cloth. This is what makes the cloth seem to totally disappear. Once that coat had cured, it was again lightly sanded and a third coat applied. The aim here is to get a smooth surface with the weave of the cloth completely filled. If it isn’t to your satisfaction you can keep adding more layers until it is, but I stopped at three coats for the purpose of this trial. Here is what it looked like after the third coat and wet-sanding with 240 grit. Not sure if the variation in “shiny-ness” is due to light reflections (which is what I think it is), or whether that section was still wet from sanding. Again, the aim here is a flat smooth surface – don’t worry about “shine” at this stage (remember, trust the process!). At this stage, it is time to start adding the clear coat (or colour in the case of the bottom) I brushed on one coat of Spar Marine Varnish on the planked test piece, and then lightly wet-sanded with 1200 grit. On the unplanked piece, I sprayed one coat of Copper from the can, followed again by lightly wet-sanding with 1200 grit. My observation at this point is that the Copper paint probably needs at least two coats, and probably no sanding on the final coat. For the remaining clear coats, I wanted to spray the varnish. I thought that a standard airbrush with a 0.35mm needle might not be the best approach, so after seeking some advice from the Airbrush Megastore (based in Adelaide), settled on this as my weapon of choice: The directions for the Spar Marine Varnish say to thin by 10% with Mineral Turpentine for spraying, so that is exactly what I did. Oh boy, what a piece of kit! Took no time at all to lay down a good coat of varnish and I can see that when I’m painting the whole boat, I will be praising my good sense in purchasing this! As the varnish is thinned just that little bit, it also levels very well. Here is a picture of both test pieces having had one coat of varnish sprayed on. It's really difficult to capture the gloss shine on these pieces in a photograph. You'll just have to trust me on this. The copper painted piece shows both some variation introduced by sanding, and also a blemish where the initial epoxy coats did not quite level. Lessons for the “real thing”. And finally, here is a shot of the planked test piece next to the un-treated hatch cover. Notice how the grain is much more apparent after glassing and varnishing, as well as being a slightly richer colour. At this stage, a few extra coats of varnish would be followed by further shine imparted by very fine sanding and polishing. I'm not going to bother with that on the test pieces as the purpose of the test was purely to get comfortable the fibreglassing process. Okay, on that basis I think I’m ready to declare a win and proceed with glassing the whole boat. I’ll be back once that is well and truly underway.


- 339 replies
-
- 14
-
-
- dumas
- Chris-Craft
- (and 3 more)
-
Another interesting update Slog. Safe travels and we'll look forward to resumption of play in due course.
- 244 replies
-
- 4
-
-
- borodino
- dom bumagi
- (and 1 more)
-
I'm reserving a front row seat for this build once you start it Mike. On the question of fittings, I have read where some guys have done there own copy chrome plating. The DIY plating kits are relatively inexpensive - look for Caswell plating kits.
- 146 replies
-
- 6
-
-
- dumas
- Chris-Craft Commander Express
- (and 2 more)
-
Okay then! I've shifted my chair, now in the front row for a close up view. Can't wait to see what you do with this Bill.
-
Think I'll pull up a chair and follow your progress here Dave.
-
Great to see you back Bill. Looking forward to resumption of play!
-
Congratulations Mike - I'm sure you will enjoy this adventure. I look forward to following your build log in due course.
- 339 replies
-
- 3
-
-
- dumas
- Chris-Craft
- (and 3 more)
-
Great work Slog! Really enjoying watching this come together.
- 244 replies
-
- 6
-
-
- borodino
- dom bumagi
- (and 1 more)
-
Elijah, JesseLee just posted on his Syren log about a jig he made for drilling the mast holes at the correct angle. Have a look here: http://modelshipworld.com/index.php/topic/10420-syren-by-jesselee-model-shipways-scale-164/page-33#entry442086
- 701 replies
-
- 7
-
-
- phantom
- model shipways
- (and 1 more)
-
Mike, Would a marking knife give you better result than a pencil? I know that EdT swears by this method of marking. Your ship is looking great, by the way!
- 969 replies
-
- 4
-
-
- hahn
- oliver cromwell
- (and 1 more)
-
Can i live without a BYRNES TABLE SAW
gjdale replied to shihawk's topic in Modeling tools and Workshop Equipment
Julie Mo, The binding problem is being caused by exactly the reason you have described. To avoid this, you can either add a degree of back taper to your fence (ie move the back of the fence slightly away from the blade), or add a "half fence" to the leading side (a fence that finishes just before the middle of the saw blade). This will give the cut portion of the strip space without binding against the blade. -
Wow, Thanks so much for all the input guys - really appreciated! Sam - some great tips, especially the safety reminders! And yes, some test pieces are called for. Daddyrabbit - you're quite right that lighter glass is available, and used extensively by the aircraft folks where weight is a real consideration. I'm basing mine on advice from guys who've built a number of these boats before, over on the RC Groups forum. Sam - Wefalck is spot on the money. The fibreglass not only adds strength and waterproofing, it also prevents the wood from shifting and cracking open seams later on - a problem I've certainly read about. Mike - me too!
- 339 replies
-
- 2
-
-
- dumas
- Chris-Craft
- (and 3 more)
-
Thanks so much Ken, Rusty, Sam and Mike, and all the "likes". Sam, to answer your questions: Yes, fibreglass will go over the hull. Cloth weight is 2 ounces (very light) Epoxy will be West Systems and using their 207 Hardener, which is specifically designed for clear finishes (as I understand it anyway). No to the vacuum bagging. Please bear in mind that I have never fibre glassed ANYTHING before, so I'll be learning as I go! What could possibly go wrong?
- 339 replies
-
- 6
-
-
- dumas
- Chris-Craft
- (and 3 more)