


gjdale
-
Posts
4,894 -
Joined
-
Last visited
Content Type
Profiles
Forums
Gallery
Events
Everything posted by gjdale
-
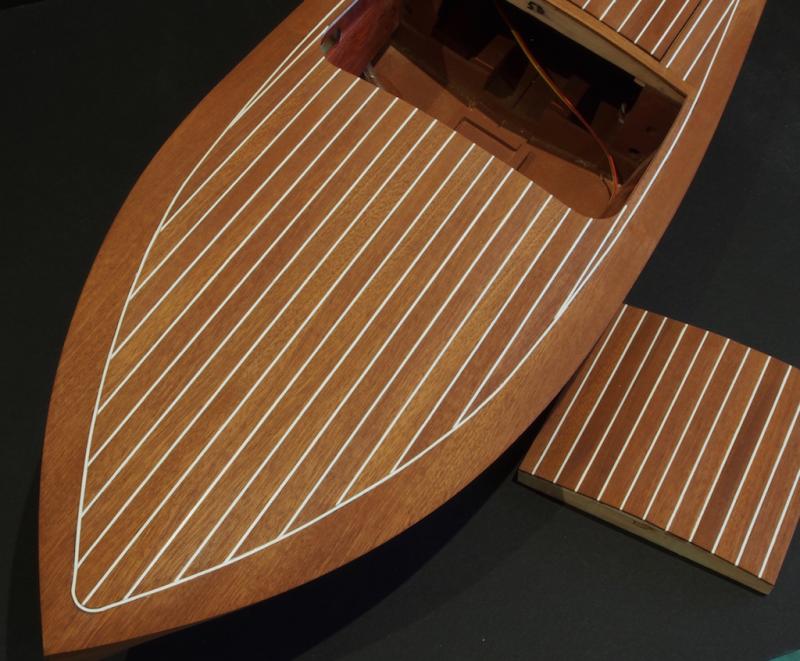
 Thanks Don and Bob, and also to all of the "likes". Just a little more progress this week. The hull has finally been prepared for fibre-glassing. Rather than continue with progressive grits of sandpaper, and the all of the dust that that entails, after the initial rough sanding, I used some cabinet scrapers to smooth the deck and remove any residual glue stains. I had been apprehensive about using the scrapers but after watching a couple of YouTube videos on how to prepare and sharpen (burnish) a scraper properly, I felt confident to give it a try. I have to say, it is a lot easier than I’d anticipated. It is also a lot quicker than sanding, and the major bonus is that there is not a lot of dust – just some very fine shavings. It also ensures that the plastic “caulking” strips have a smooth finish. Once the scraping had been completed, I brushed on the mahogany stain provided in the kit, as per the kit directions. It is a water-based stain and was very easy to apply. The caulking strips were simply wiped over with a piece of paper towel to remove the stain from them and prevent any discolouring. Here is where she is at today: And a close up of the fore-deck: I intend to delay fibre-glassing for a couple of weeks for two reasons. Firstly, we are going away for a few days next weekend, and secondly, I’d like to wait for the weather to warm up a little before tackling this as from what I’ve read the process is somewhat easier to get right with a little heat in the air.
- 339 replies
-
- 21
-

-
- dumas
- Chris-Craft
- (and 3 more)
-
Hi Slog, I'd never heard of a Japanese Screw punch before, but a quick consult with Prof. Google brought up this Australian supplier: http://www.cxdaustralia.com.au/product/6168-a-the-original-japanese-screw-punch Looks to be the genuine article. Hope this helps.
- 244 replies
-
- 4
-
-
- borodino
- dom bumagi
- (and 1 more)
-
Best wishes for your Chemo results Danny. I look forward to seeing you back at the bench soon.
-
Thanks Don, Yes, definitely a gloss finish - fibreglass/resin, two more coats of resin, then several clear coats of high gloss varnish, and then polished as shiny as I can make her! The bottom will be a gloss copper paint.
- 339 replies
-
- 3
-
-
- dumas
- Chris-Craft
- (and 3 more)
-
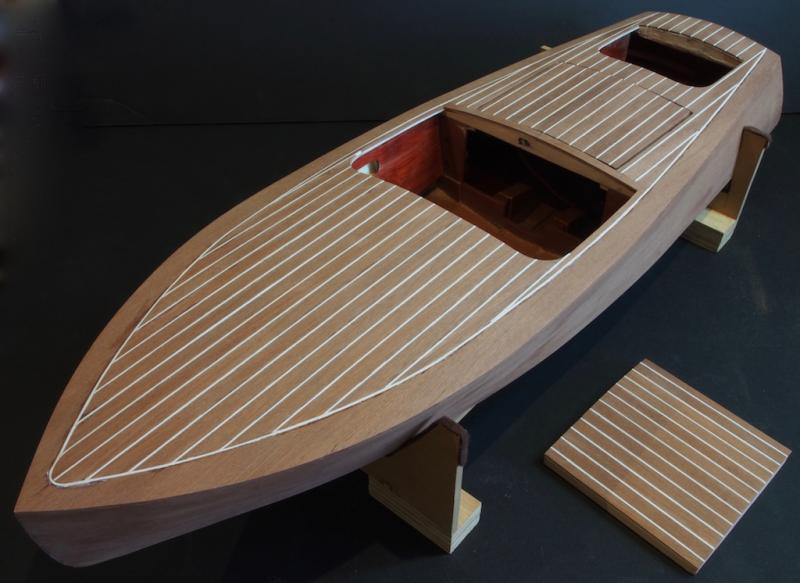
Thanks again for the kind remarks and all the "likes". After a few weeks of absence from the shipyard due to work and other commitments, planking is at last complete! The remainder of the deck was completed in much the same way as the fore deck, with the hatch being left in place and planked together with the rear deck. The hatch was cut free on completion, the hatch openings and rear cockpit opening cleaned up, and the transom was then planked in much the same way as the sides of the hull. The transom was trimmed flush with the deck, sides and bottom of the boat, and then the decks were given an initial sanding with 80 grit sandpaper. The aim of the initial sanding is to bring the white caulking strips down level with the deck planks. While it was not difficult to do, it did require a little more elbow grease than I’d anticipated. Anyway, here she is as she sits today. The “spare” hatch is in the foreground (in case my two-part hatch doesn’t work out). There’s still quite a bit more sanding to be done before she will be ready for staining and fibre-glassing.
- 339 replies
-
- 17
-
-
- dumas
- Chris-Craft
- (and 3 more)
-
I'll second Slog's vote of confidence in the Airbrush Megastore, Greg. Excellent service, great advice, good prices, and very quick turnaround. There's also a series of videos on their website. Paul Budzik's videos on YouTube are also excellent and well worth taking a look at.
- 342 replies
-
- 6
-
-
- dreadnought
- zvezda
- (and 2 more)
-
Paint job looks great Slog. The extra effort was well worthwhile.
- 244 replies
-
- 5
-
-
- borodino
- dom bumagi
- (and 1 more)
-
Rob, When I built my Bomb Vessel cross section I used a technique called "painting with wood", where I used different spieces of wood instead of paint to achieve the same effect. Link to my build log in the signature block below if you're interested. I've described where I've used each timber spieces within the log.
-
Congratulations Druxey, on what will almost certainly be a best seller. I've given the Admiral a big hint (link to the SeaWatch page ) as I have a birthday coming up in a few months time.
- 641 replies
-
- 1
-
-
- greenwich hospital
- barge
- (and 1 more)
-
Well done Kevin, and I see from the photos that you have the domestic testing facility ready for sea trials too!
- 1,319 replies
-
- 5
-
-
- caldercraft
- Victory
- (and 1 more)
-
Great to see you back Sarah. I'll look forward to following along with this one.
-
Paint job looks great Jerry.
-
Congratulations on reaching such a significant milestone Gary. She looks superb!
-
Thanks Tom, I've been avidly reading through a bunch of logs and "how-to"s over on the RC Groups site. Plenty of good advice there, as well as some great examples. Even though I've never done it before, I'm pretty confident that I'll be able to make a reasonable job of it. Worst case - sand it all back to bare wood again and go the epoxy resin route instead.
- 339 replies
-
- 4
-
-
- dumas
- Chris-Craft
- (and 3 more)
-
So if we see a sharp rise in the cost of all things Syren, we'll know why!
- 1,051 replies
-
- 9
-
-
- cheerful
- Syren Ship Model Company
- (and 1 more)
-
It may be slow Mike, but it sure is beautiful! Great work.
- 969 replies
-
- 4
-
-
- hahn
- oliver cromwell
- (and 1 more)
-
Thanks Bob and Tom. Tom - yes, the hull will be fibre glassed. This will be a first for me, so stay tuned!
- 339 replies
-
- 3
-
-
- dumas
- Chris-Craft
- (and 3 more)
-
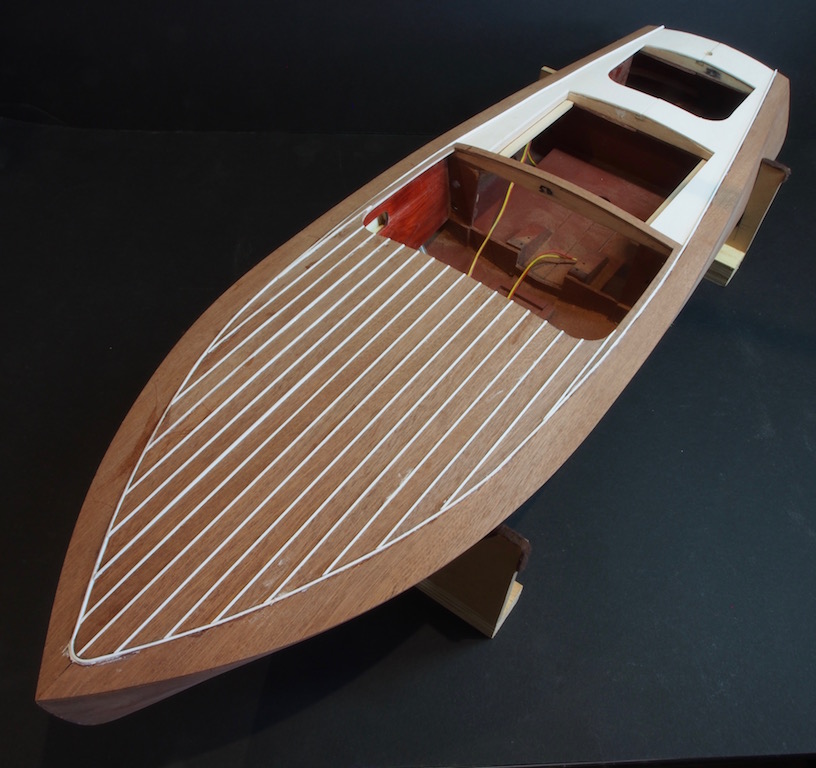
Thanks very much Bug, Popeye, Lawrence, Rusty and all the "Likes". A minor update this week.... Deck Planking Planking the deck has presented no particular problem thus far. The instructions direct you to alternate a caulking strip with a plank, but I found it easier to laminate one of each together and then shape and fit as a single unit. The only tricky part of shaping was the last plank on either side around the side of the cockpit, which just took a little time and patience to ensure a good fit. The ends of the planks were trimmed close to the forward end of the cockpit and then taken closer still with a sanding drum in the rotary tool, before finishing by hand. Once all the planking is complete, the surface will be sanded level such that all caulking strips will be level with the planks (at the moment they stand just a little proud). Not bad for a day’s work! There will be a brief hiatus for a couple of weeks as I’ll be travelling with work.
- 339 replies
-
- 18
-
-
- dumas
- Chris-Craft
- (and 3 more)
-
Neat idea for the oars support Jack. Looking forward to seeing the final photos.
- 170 replies
-
- 2
-
-
- gokstad
- dusek ship kits
- (and 1 more)
-
Looking great Aydin. Can't wait to see her with her finish coat on!
- 414 replies
-
- 2
-
-
- riva aquarama
- amati
- (and 2 more)
-
Good decision John - you won't regret that additional effort and time.
-
Nice work Bug. Tedious, but the end result is worth the effort!
- 2,191 replies
-
- 6
-
-
- confederacy
- Model Shipways
- (and 1 more)
-
I like the faux leather Aydin - can't wait to see it on the seats.
- 414 replies
-
- 4
-
-
- riva aquarama
- amati
- (and 2 more)


