gjdale
-
Posts
4,894 -
Joined
-
Last visited
Content Type
Profiles
Forums
Gallery
Events
Everything posted by gjdale
-

Can i live without a BYRNES TABLE SAW
gjdale replied to shihawk's topic in Modeling tools and Workshop Equipment
That's great news Jim. At least now Donna want need to put you on half-pay to cover the costs! -
Mill Column for Sherline Lathe
gjdale replied to mikiek's topic in Modeling tools and Workshop Equipment
Mike, It might be a good solution if budget is your driving concern. However, don't overlook the (in)convenience factor. Mr Murphy stipulates that when you want to use the Mill, it will be configured for lathe work, and when you want to use the lathe it will be configured for mill work. And then there are those occasions when you will want to go straight from lathe to mill. If you can live with this, then go for it. Otherwise, splash the extra cash and buy the separate mill. I have both and don't regret a cent spent on either. Go on, you know you want to......... -
Congratulations Dan, and thoroughly well deserved too!
- 175 replies
-
- 2
-

-
- 18th century longboat
- model shipways
- (and 1 more)
-
Well done on the repairs John. I think the cat may have been suggesting a need for a re-do..............? Whatever the cause, the latest work looks great. So, I guess the cat is down to eight lives?
-
Nice job on the seat coverings Aydin - it's looking great. I absolutely agree with you about propellers. I got a nice brass one from Dumas as an after-market addition. I know that MACK products also offer a range of nice brass props. I think that the ones offered by Dumas are actually made by Raboesch.
- 414 replies
-
- 4
-
-
- riva aquarama
- amati
- (and 2 more)
-
Great to hear the good news on the work front Andy, but timing really sucks! We'll still be here when you get back, though I can't promise the same for those beer cartons..................
-
Yep, spouse approval factor is very important! My Chris Craft build is already designated as my wife's boat - it will even carry her name!
- 414 replies
-
- 4
-
-
- riva aquarama
- amati
- (and 2 more)
-
Beautiful looking deck Rusty. Good luck with the move and I look forward to your return to the work bench.
- 310 replies
-
- 3
-
-
- cheerful
- Syren Ship Model Company
- (and 1 more)
-
Great progress Aydin, she's going to be a real beauty! Have you given any thought to placement of electronics/RC gear? I've no idea what the Amati instructions say about this, but it's worth giving some thought to before closing up the hull. I'm building a few support shelves/racks for mine using scrap material.
- 414 replies
-
- 3
-
-
- riva aquarama
- amati
- (and 2 more)
-
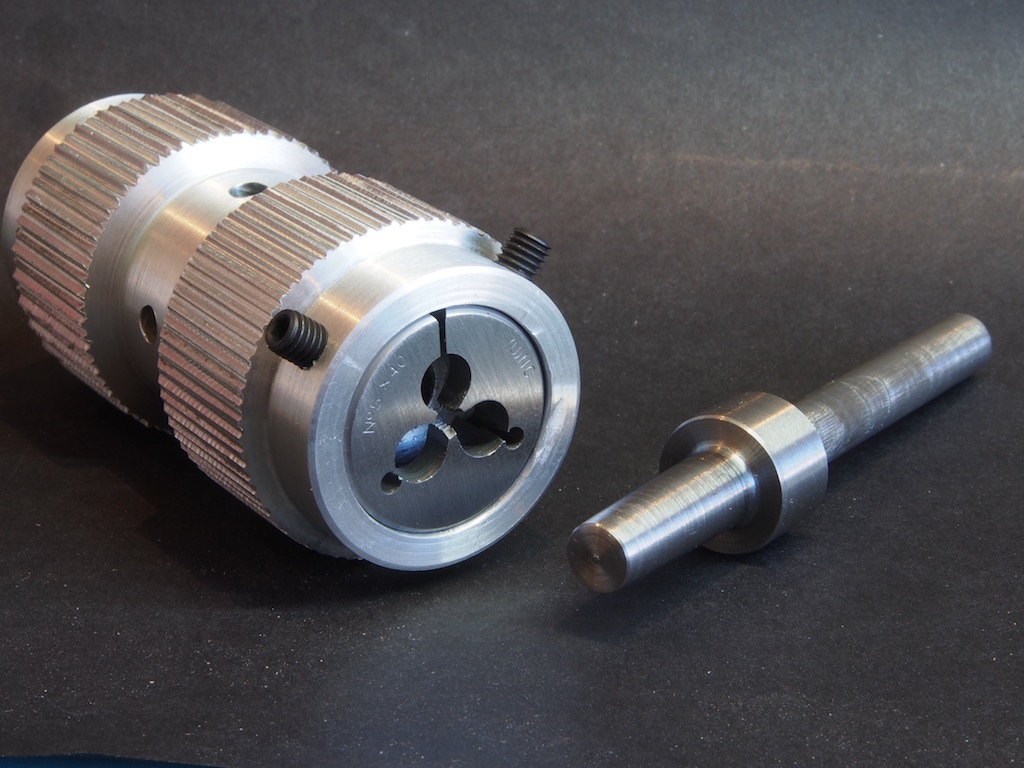
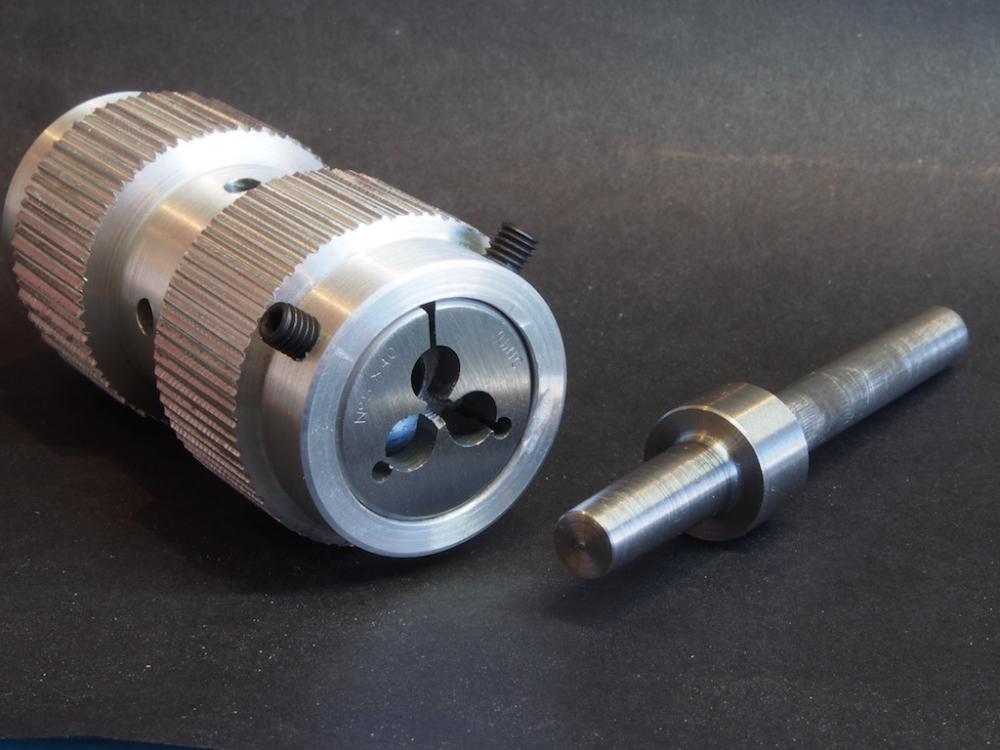
Thanks Mobbsie and Mark, Mobbsie - the mounting plate does allow for some adjustment. As for the Die Holder - I wasn't confident of being able to cut the thread accurately/square, hence was looking for a way to achieve that. Mark - the lathe doesn't spin at all for this operation, it's all done without power - just using the capability of the lathe to align things properly. The head stock (with a collet holder) will hold the stock piece, and the Tailstock Die Holder will present the Die centred and square to the stock. The Die Stock is then rotated by hand, or with the assistance of some tommy bars (you can see the holes for the in the centre section of the holder). Because the Die Stock is mounted on a central shaft, it is able to advance itself as the thread begins to cut.
- 339 replies
-
- 6
-
-
- dumas
- Chris-Craft
- (and 3 more)
-
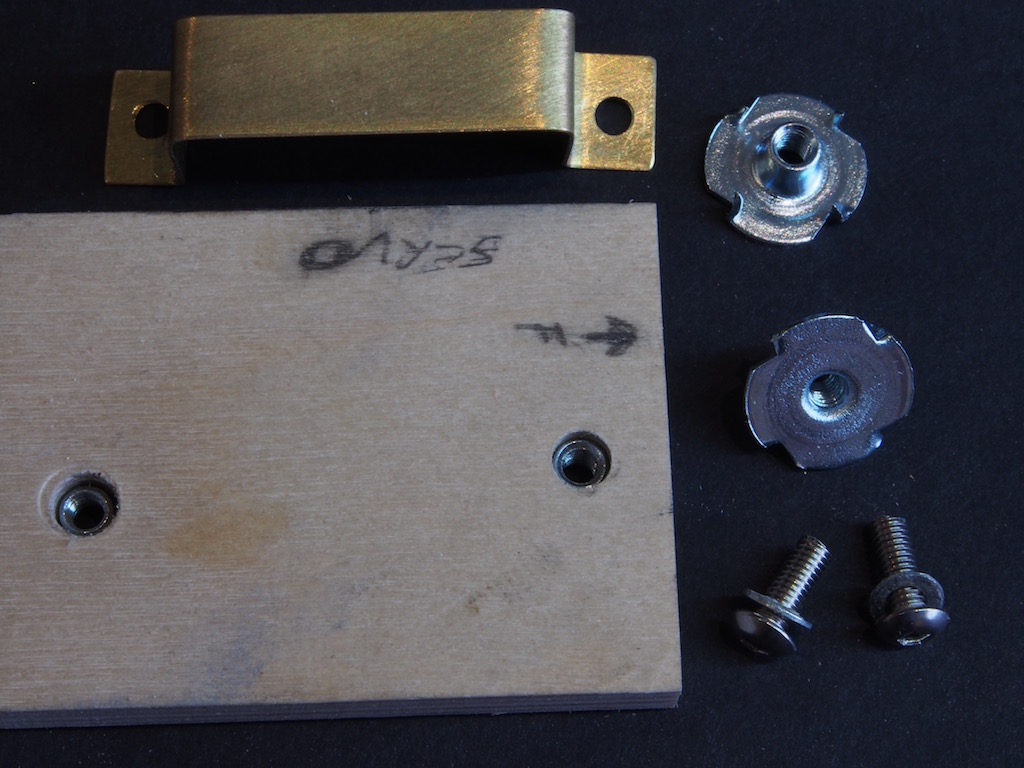
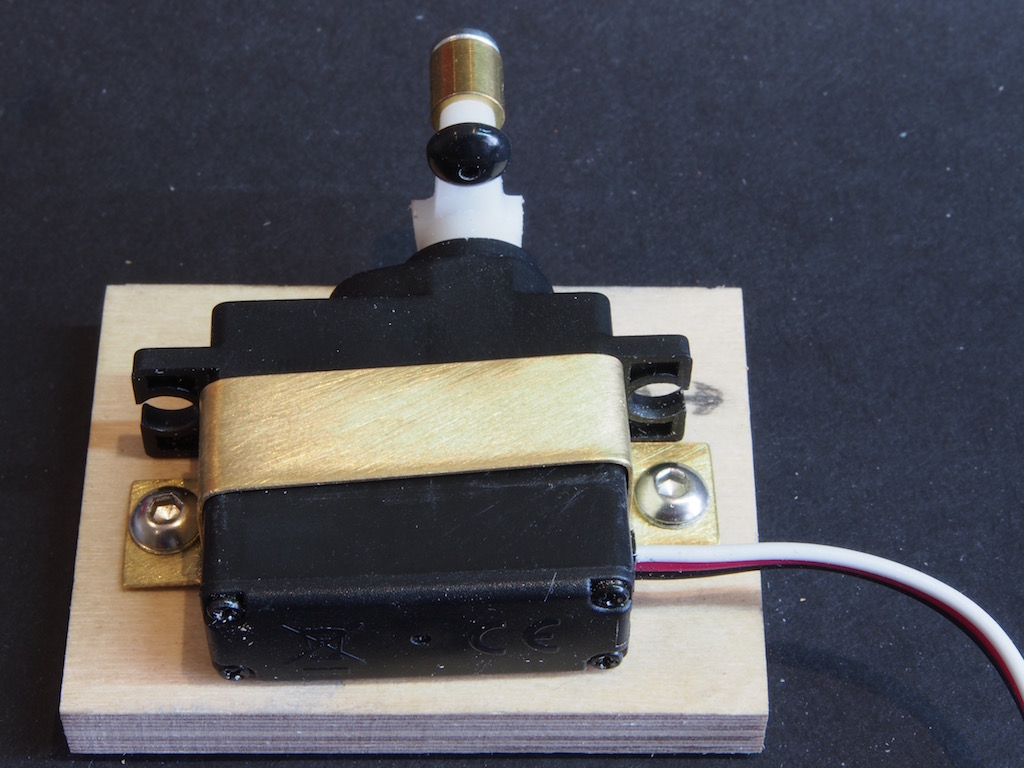
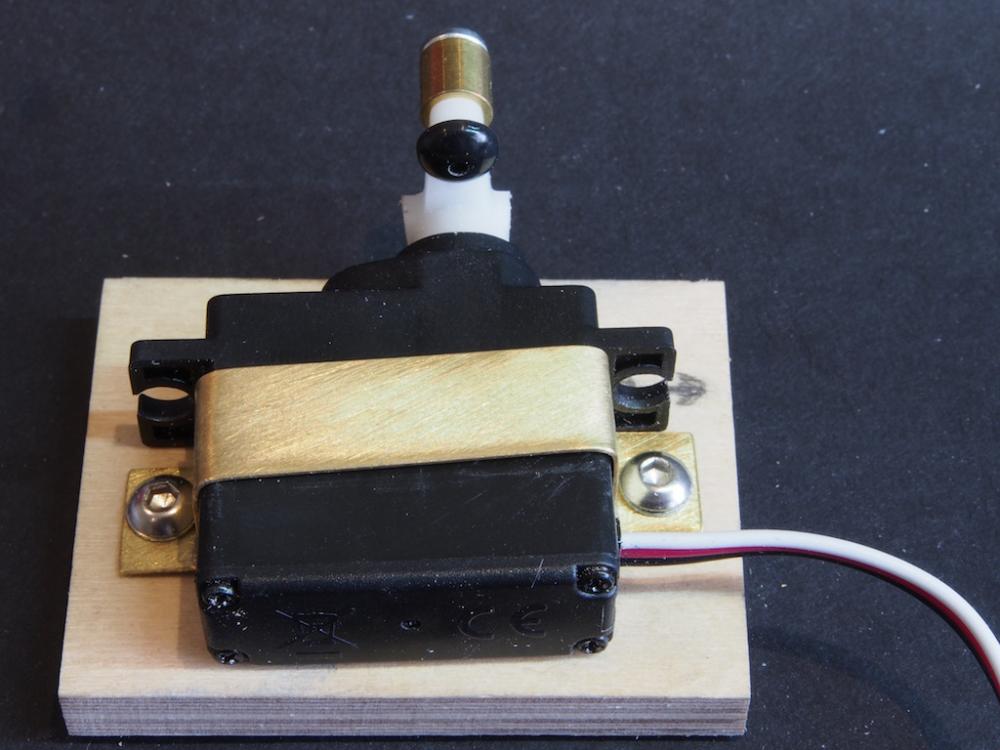
Time has been at a premium lately, but some progress has still been made. I started making shelves and racks to house the electronics but soon concluded that I would need to install the drive line before I’d be able to complete that task. I made a mount for the rudder servo, following the lead of some other builders and making a more secure arrangement than a simple Velcro attachment. I fashioned a hold-down strap from some brass sheet, and used some captive nuts to make it easier to insert/remove multiple times. I have decided to replace the drive shaft and stuffing box. The drive shaft supplied was slightly bent, and as I’m using an “after-market” propeller, it made sense to just replace it. Also, based on advice from Pat Matthews in his book “Mahogany in Scale”, I decided to replace the stuffing box with a larger diameter brass tube and some sintered bronze bearings. All this meant that I would need to cut a new thread on the new drive shaft. Thinking about how to go about this, I came across an excellent video on YouTube (https://www.youtube.com/watch?v=MmGzzZEFSJU) on machining a Tailstock Die Holder for the Sherline Lathe. It seemed to me to be the ideal solution to my problem, so work on the model came to a temporary halt while I spent a couple of weekends manufacturing my Die Holder. The video is excellent and there is a link to purchase the drawings (for not very much at all). I have to say though, I did not find it quite as easy as the video suggested – the presenter is obviously an experienced and skilled machinist (unlike me). Anyway, here is my completed Tailstock Die Holder. I’m very pleased with the end result. The body of the Holder is machined from Aluminium and will take a 1” Die in one end, and a 13/16” Die in the other. The short end of the steel central shaft has a No. 0 Morse Taper to fit the Tailstock of the Sherline Lathe. Okay, now I’m ready to start work on the model again!

- 339 replies
-
- 14
-
-
- dumas
- Chris-Craft
- (and 3 more)
-
Nice start Aydin, think I'll follow along too. I'm building a similar boat myself - the 1949 Chris Craft 19' Racing Runabout by Dumas models. Like you, this build holds many firsts for me. I'll be interested to watch your progress.
- 414 replies
-
- 2
-
-
- riva aquarama
- amati
- (and 2 more)
-
Welcome back Andy. Nice to see you posting again. I'll look forward to following along with this one.
-
Congratulations Mike. That's a really significant milestone to reach and she looks fabulous. Well done!
- 969 replies
-
- 8
-
-
- hahn
- oliver cromwell
- (and 1 more)
-
Brilliant work Ken!
-
Your gonna be delighted Bill. The Sherline machines are a real joy to use. And buying accessories for them is an endless hobby in itself - one that's bound to keep you broke. Don't ask me how I know..................
-
Beautiful work, as always Nils. What a pleasure it is to read your updates!
- 2,625 replies
-
- 4
-
-
- kaiser wilhelm der grosse
- passenger steamer
- (and 1 more)
-
Jon, If its flexibility you want in wood, then try using Holly. After a short soak you can tie into a pretzel!
-
PROXXON DSH 2 SPEED SCROLL SAW – REVIEW.
gjdale replied to Blue Ensign's topic in Modeling tools and Workshop Equipment
Derek, B.E. mentioned this in the original post: http://www.tbs-aachen.de/Proxxon/table_top_tools/scroll_saws/Proxxon_28092_2-speed_scroll_saw_DSH_i2477_42308.htm A lot of UK members have commented that buying from this site provides significant savings over UK distributors, and with excellent service and delivery times.