Baker
-
Posts
4,296 -
Joined
-
Last visited
Content Type
Profiles
Forums
Gallery
Events
Everything posted by Baker
-
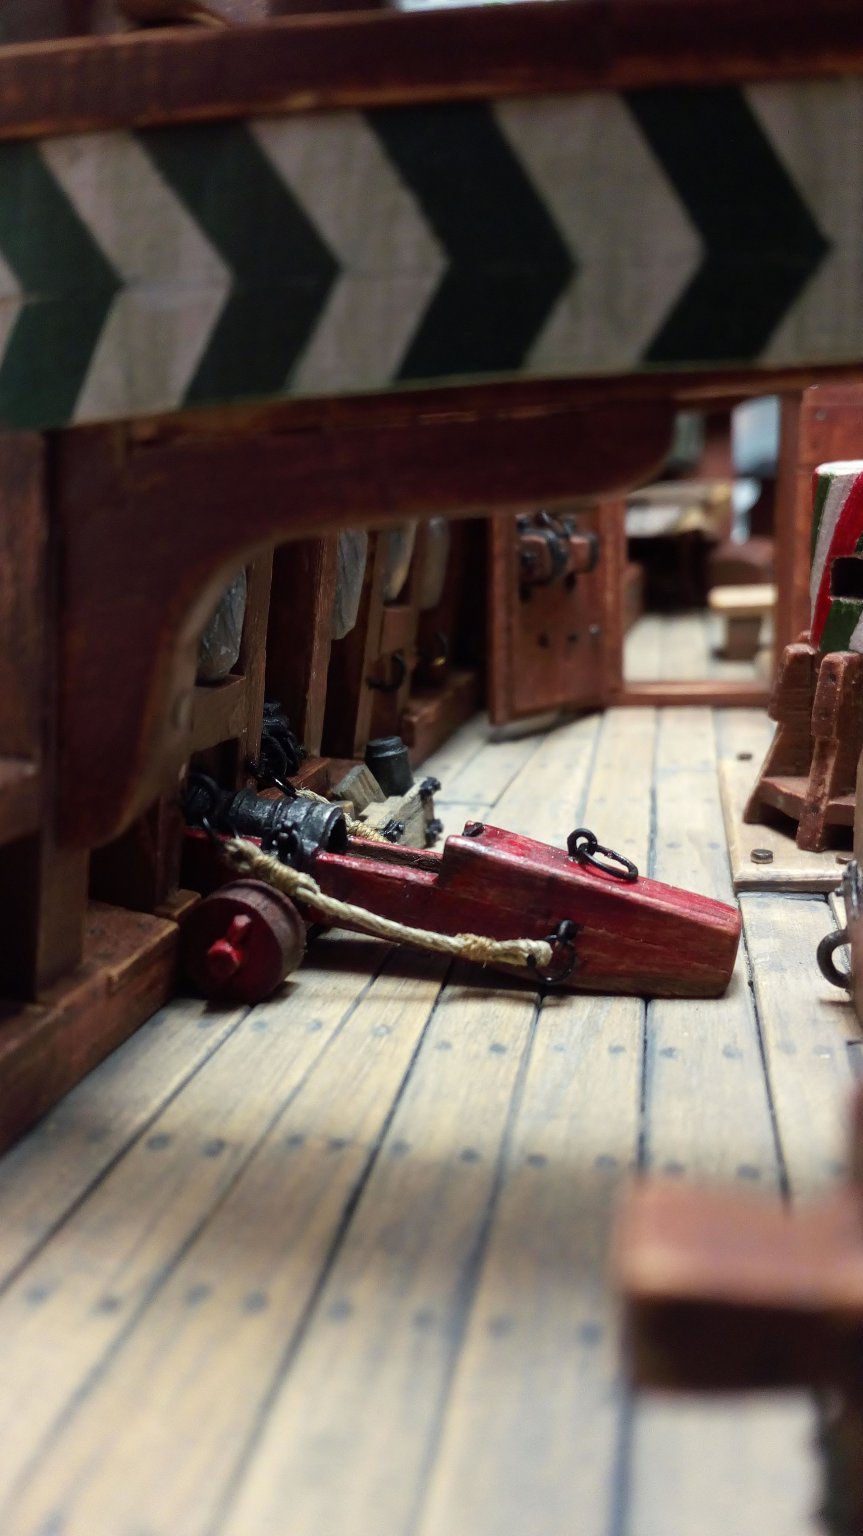
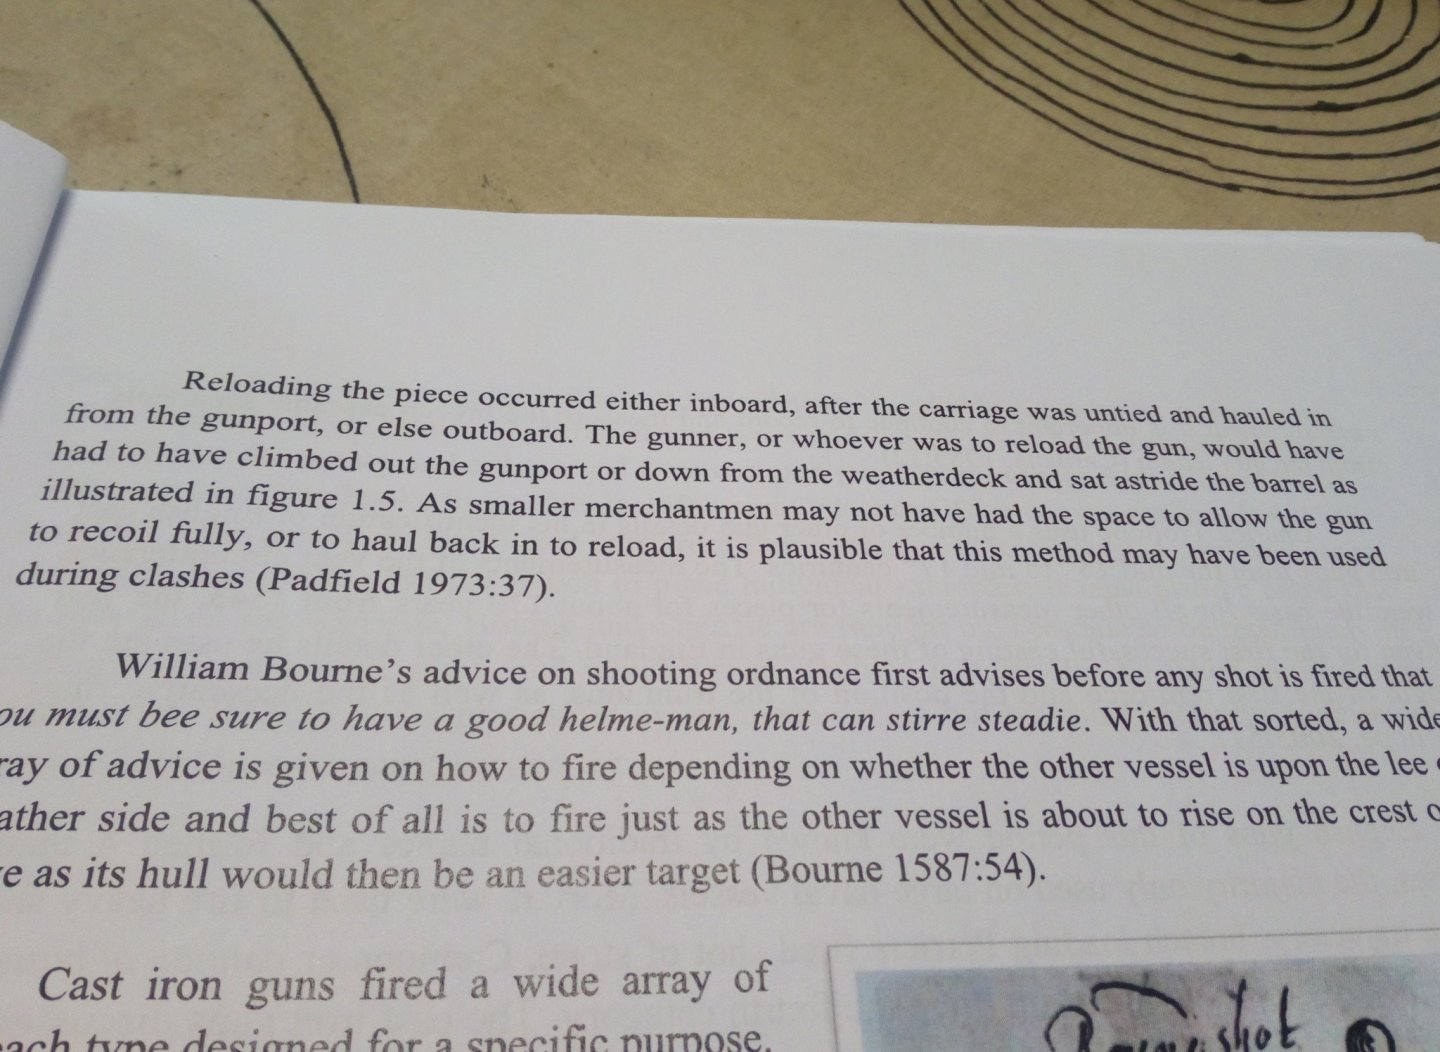
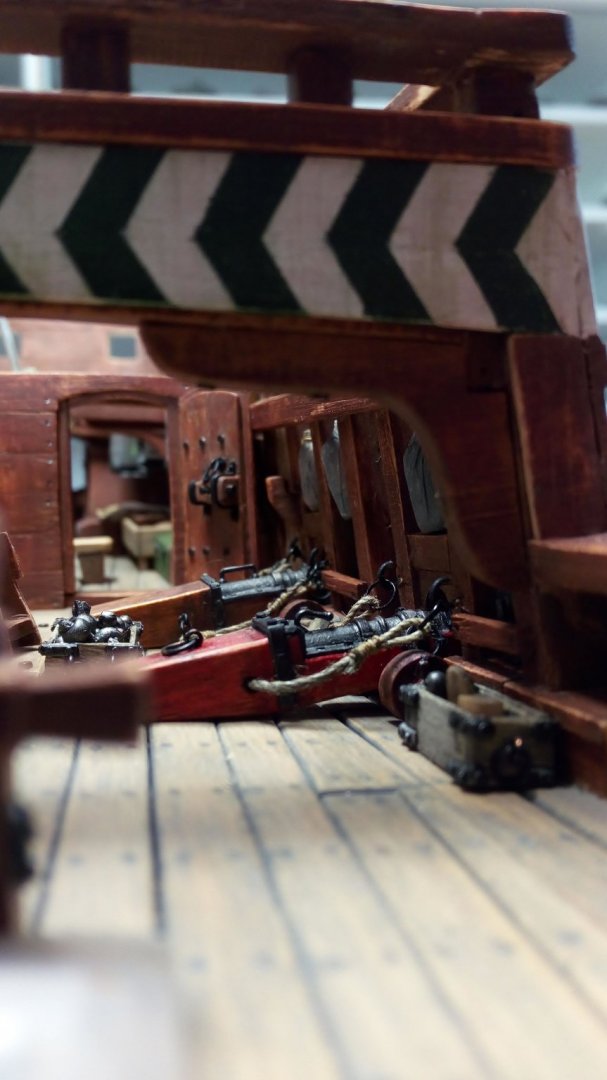
 The cannons could be loaded from the outside. Source : https://www.academia.edu/20120786/The_Arming_of_Late_16th_century_Merchantmen._A_Masters_Thesis_from_the_Maritime_Archaeology_Programme_University_of_Southern_Denmark A replica, but interesting about the cannons (rigging) https://www.modelships.de/Museums_and_replicas/Batavia/Photos_Batavia.htm The title of this topic is confusing The mary rose is from about 1540. But information is requested about cannons from 1640 ? After much research I did my 16th century cannons like this : Greetings, patrick
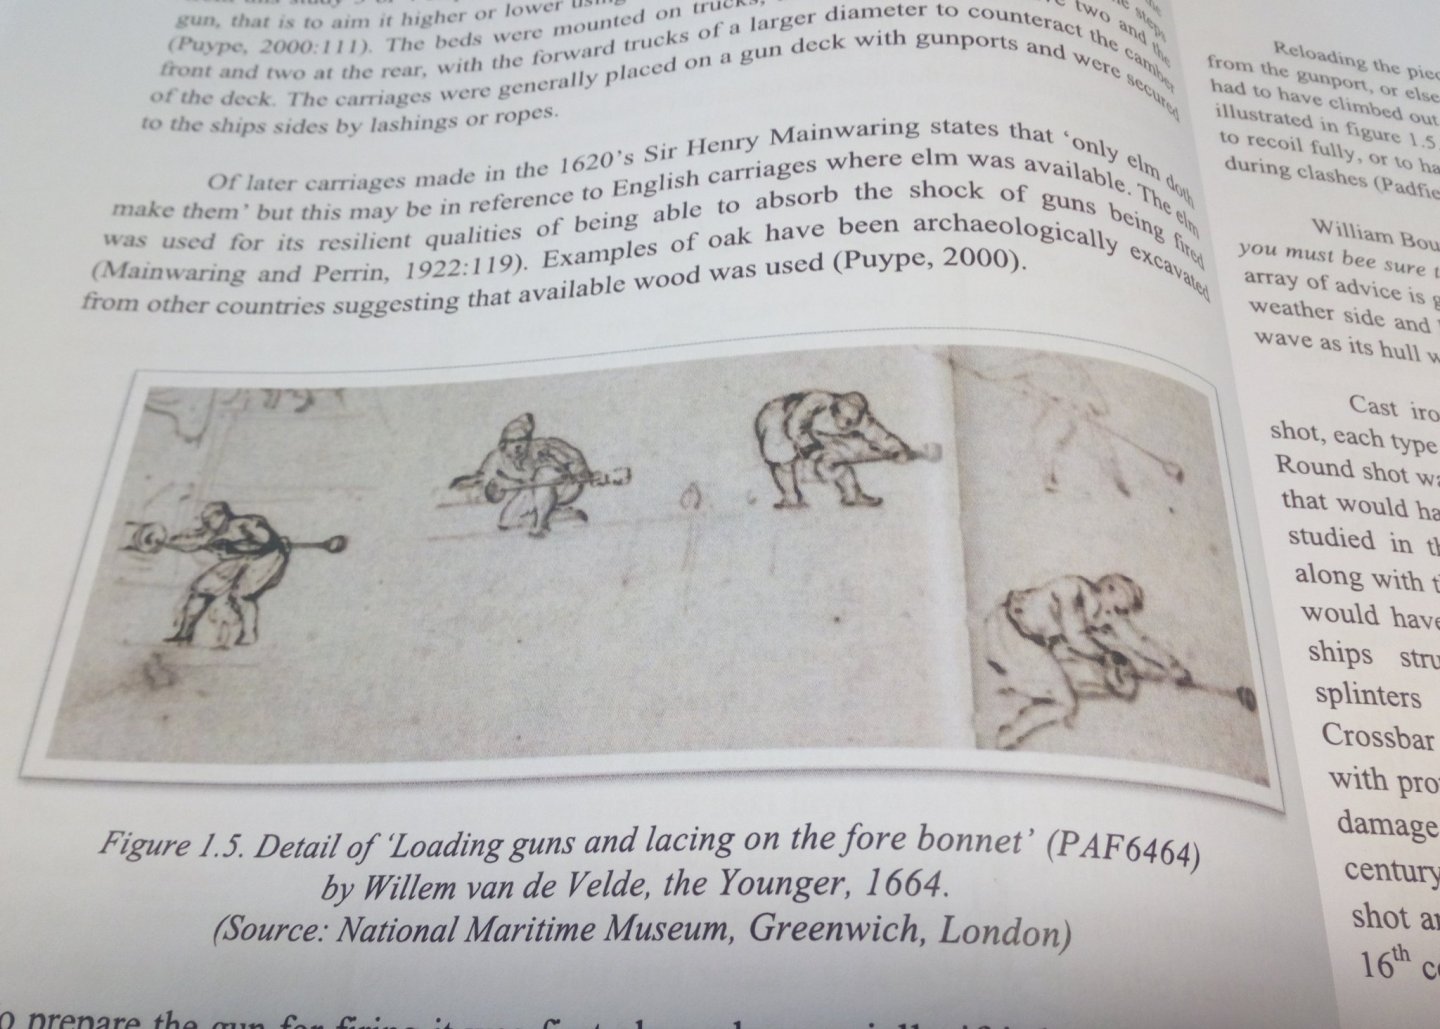

-
Great work, Succes on the ratlines. On this small scale, you are a brave man. But, this will work out well 👍
-
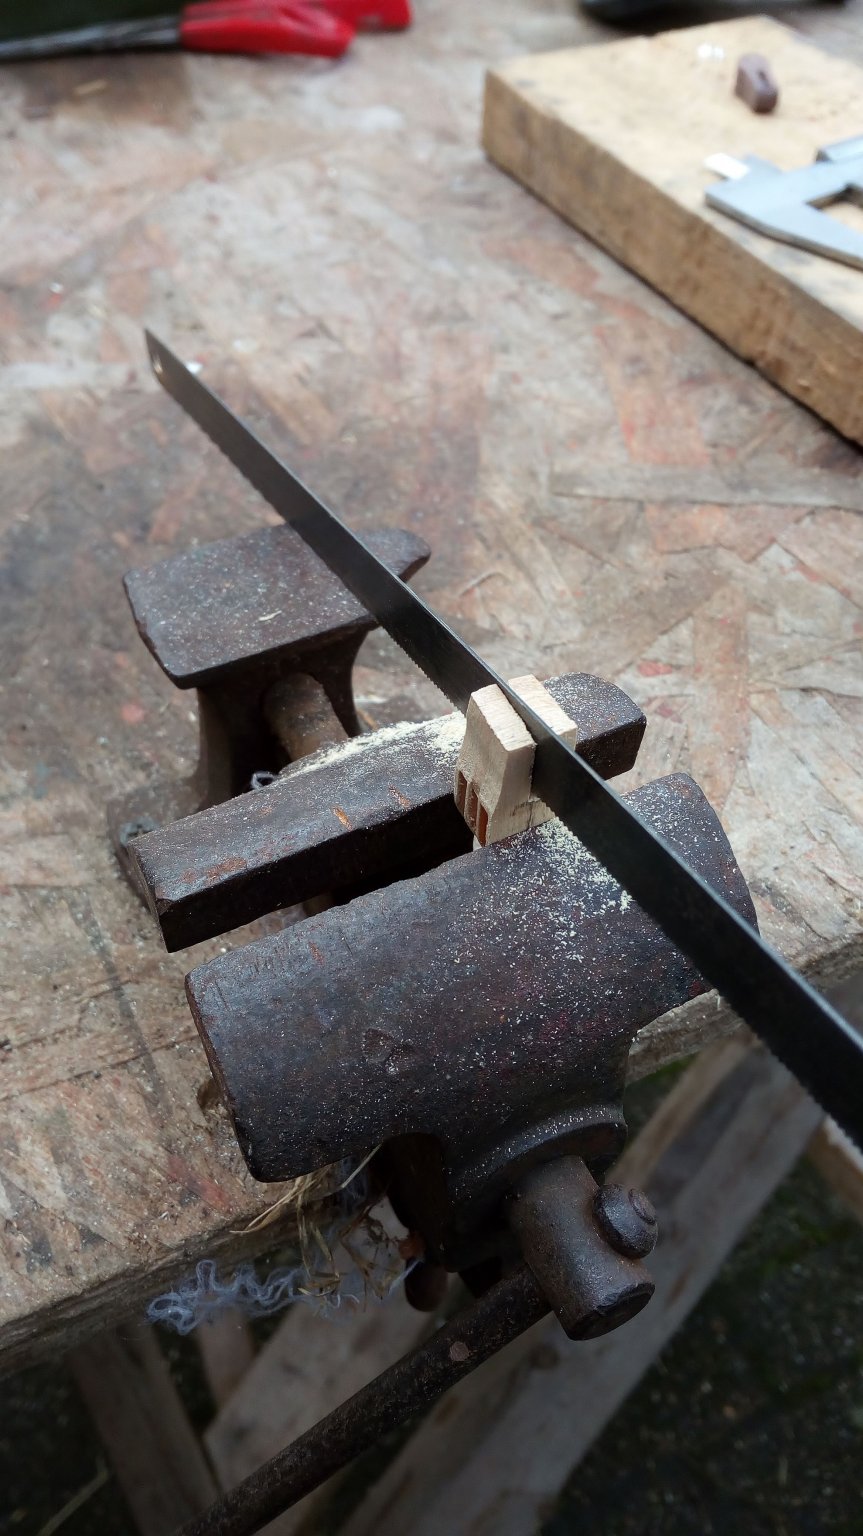
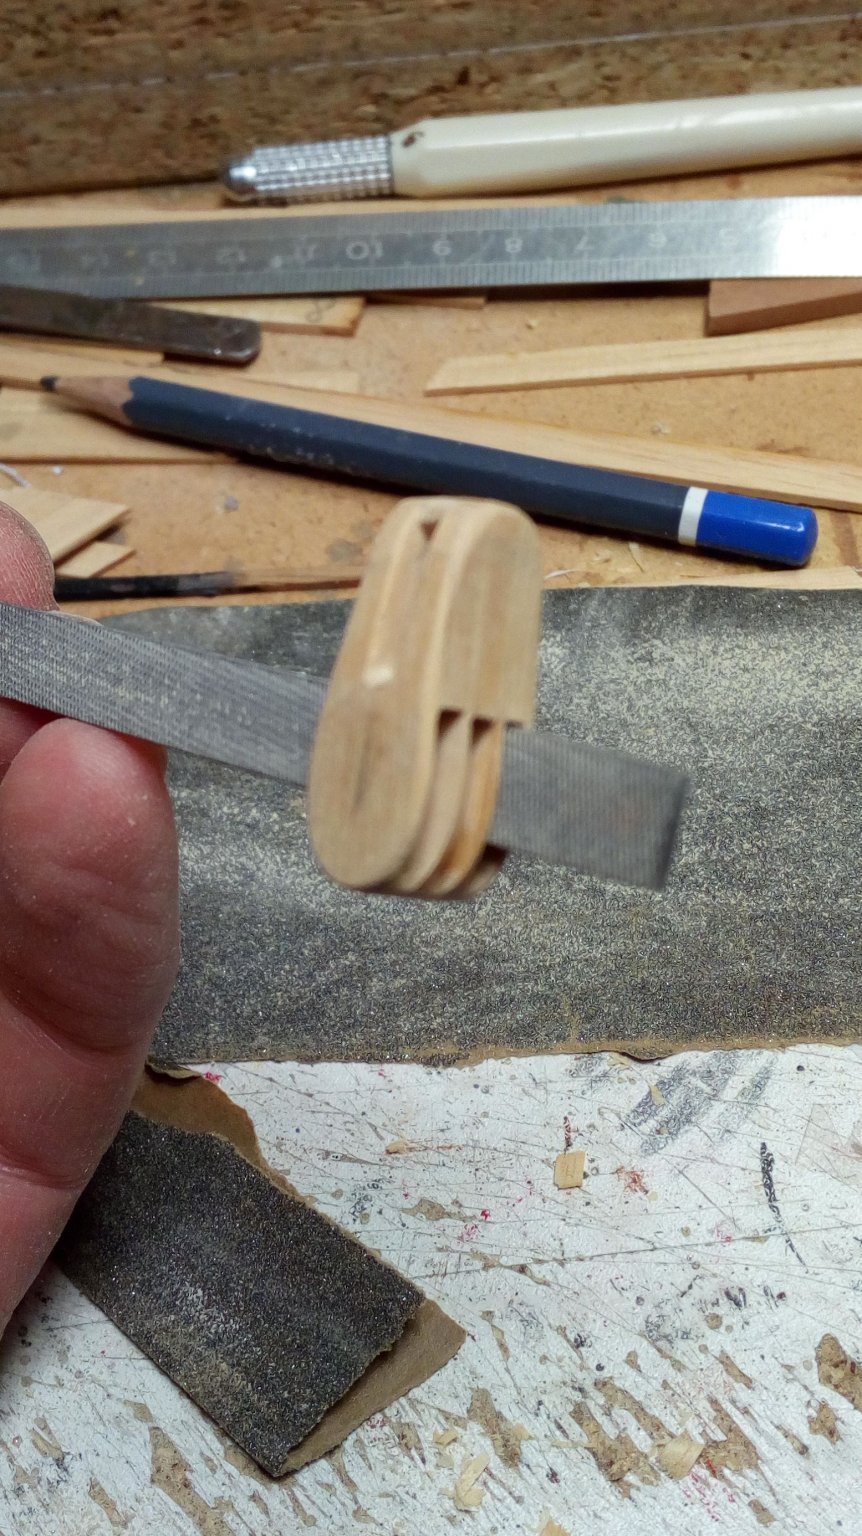
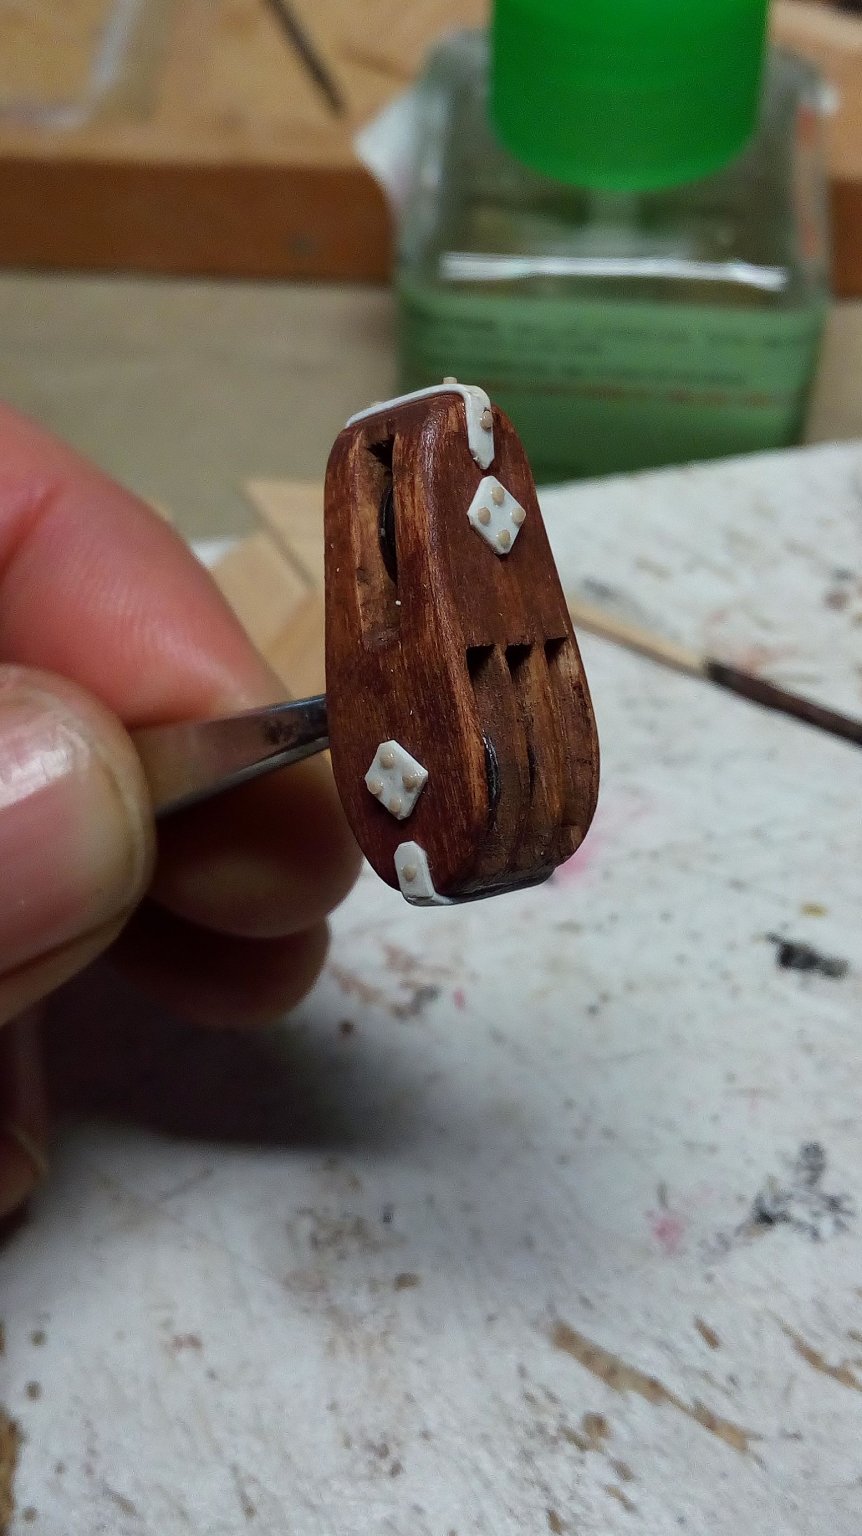
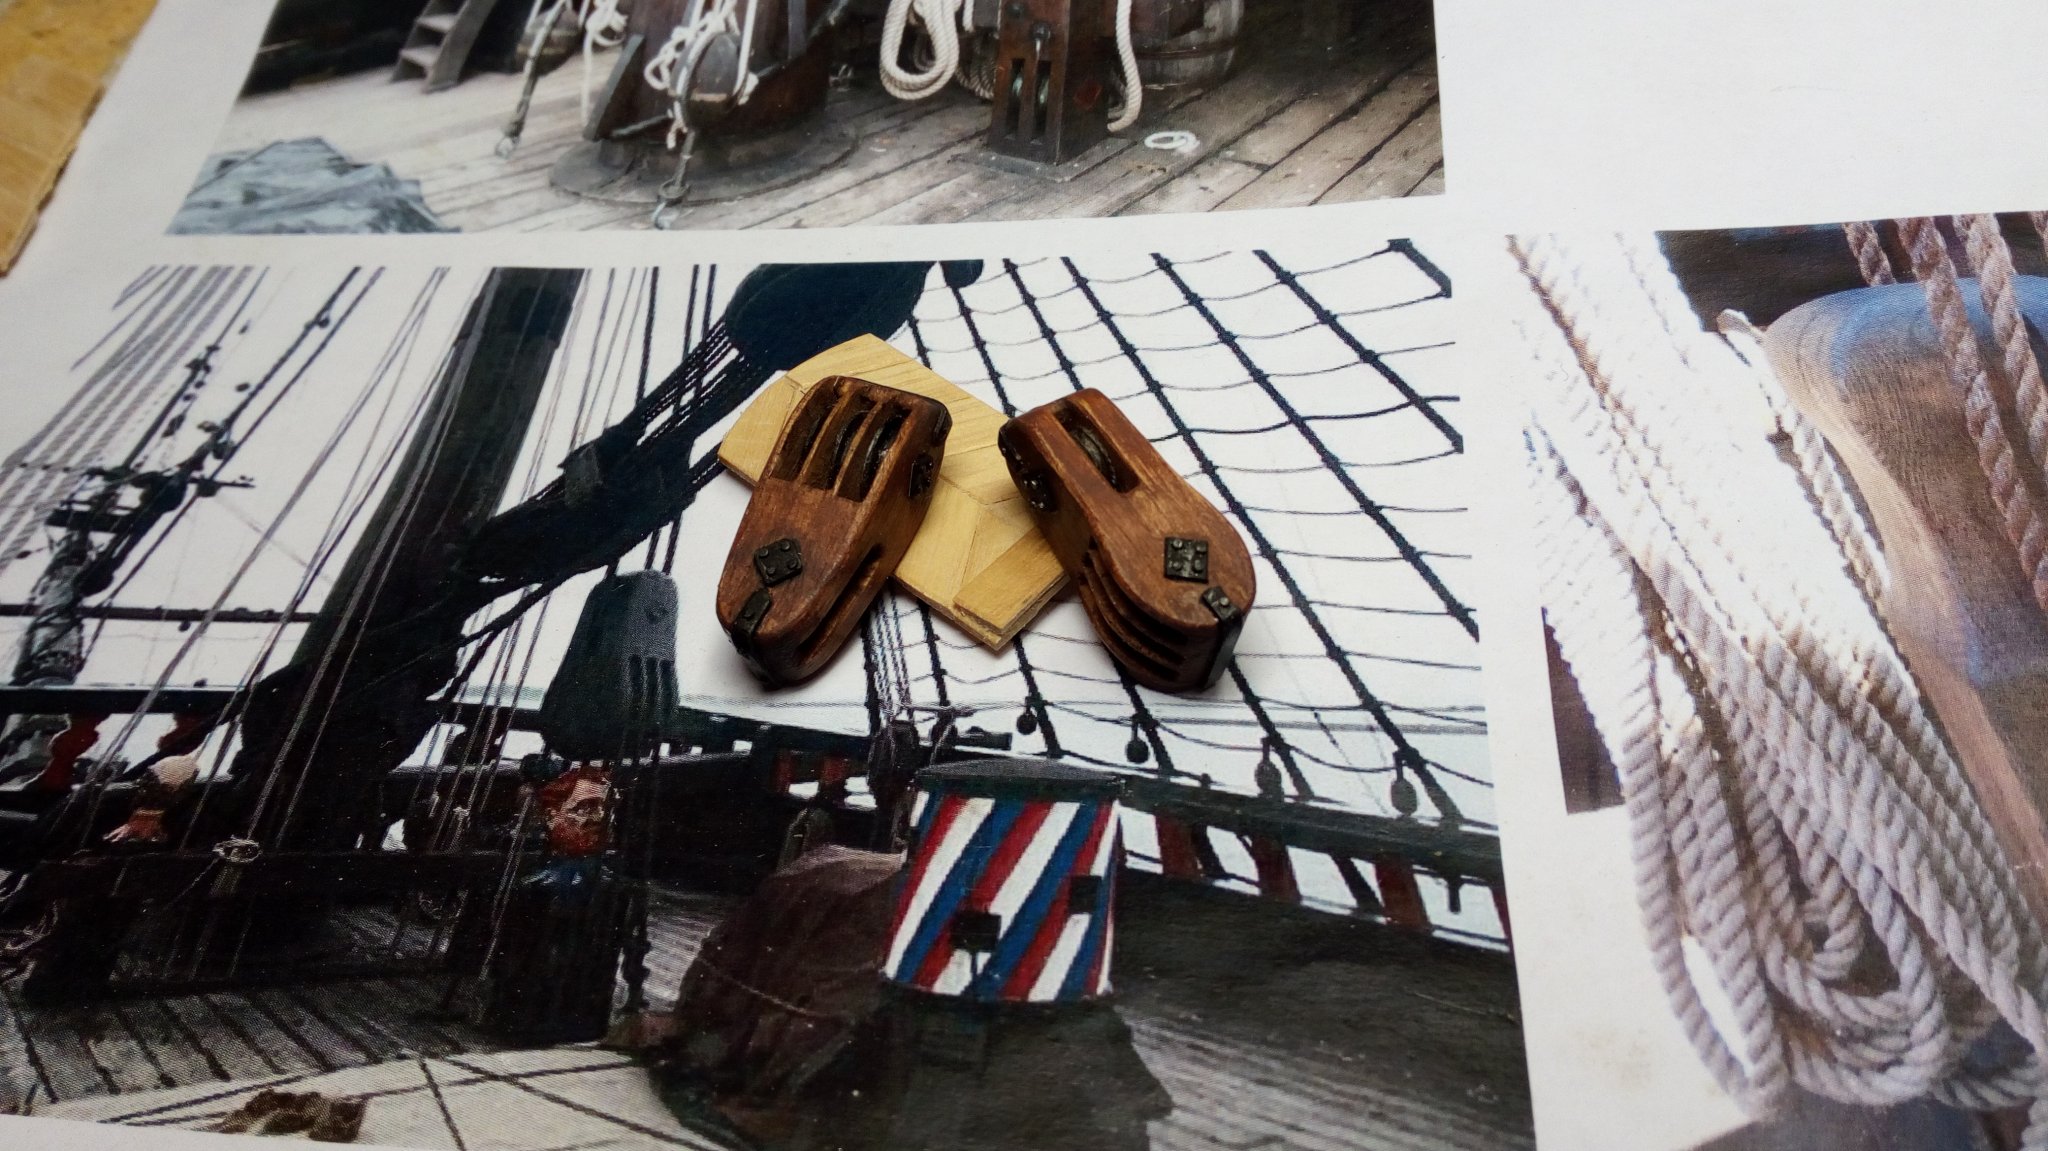
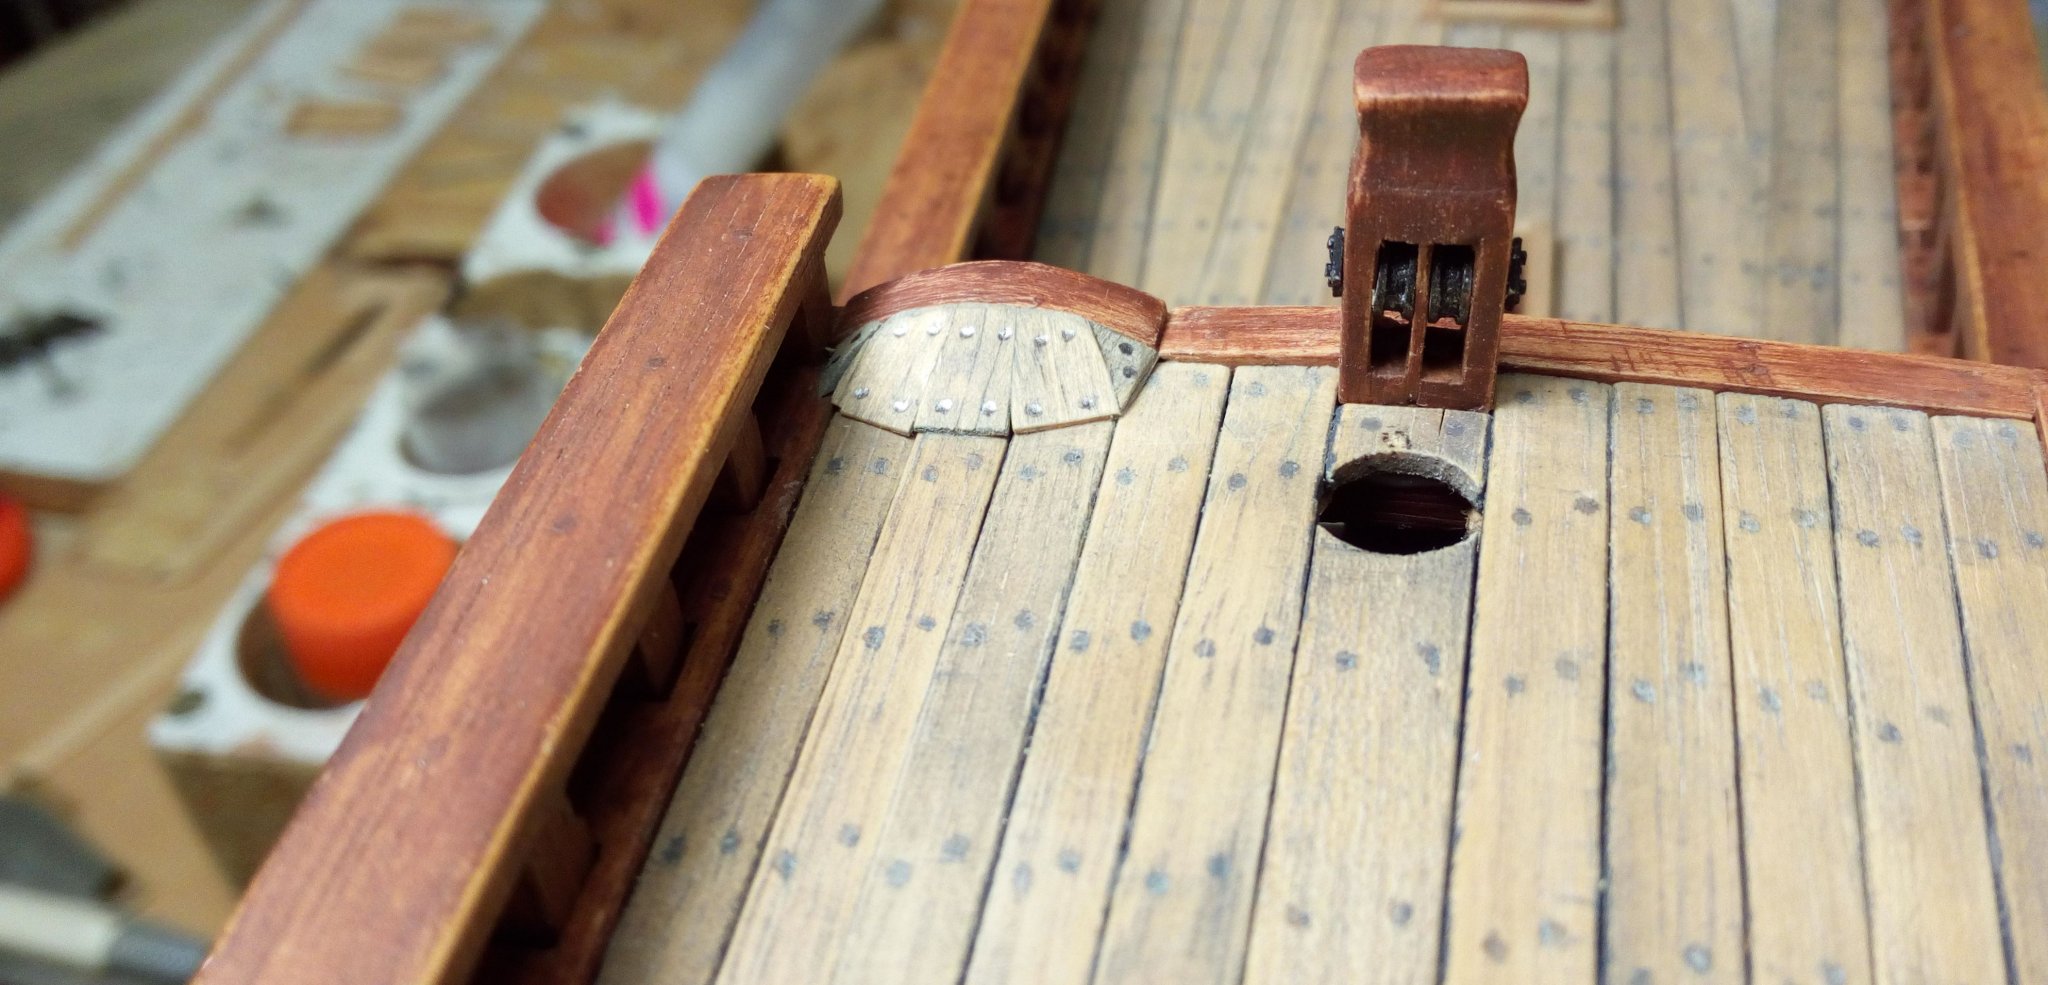
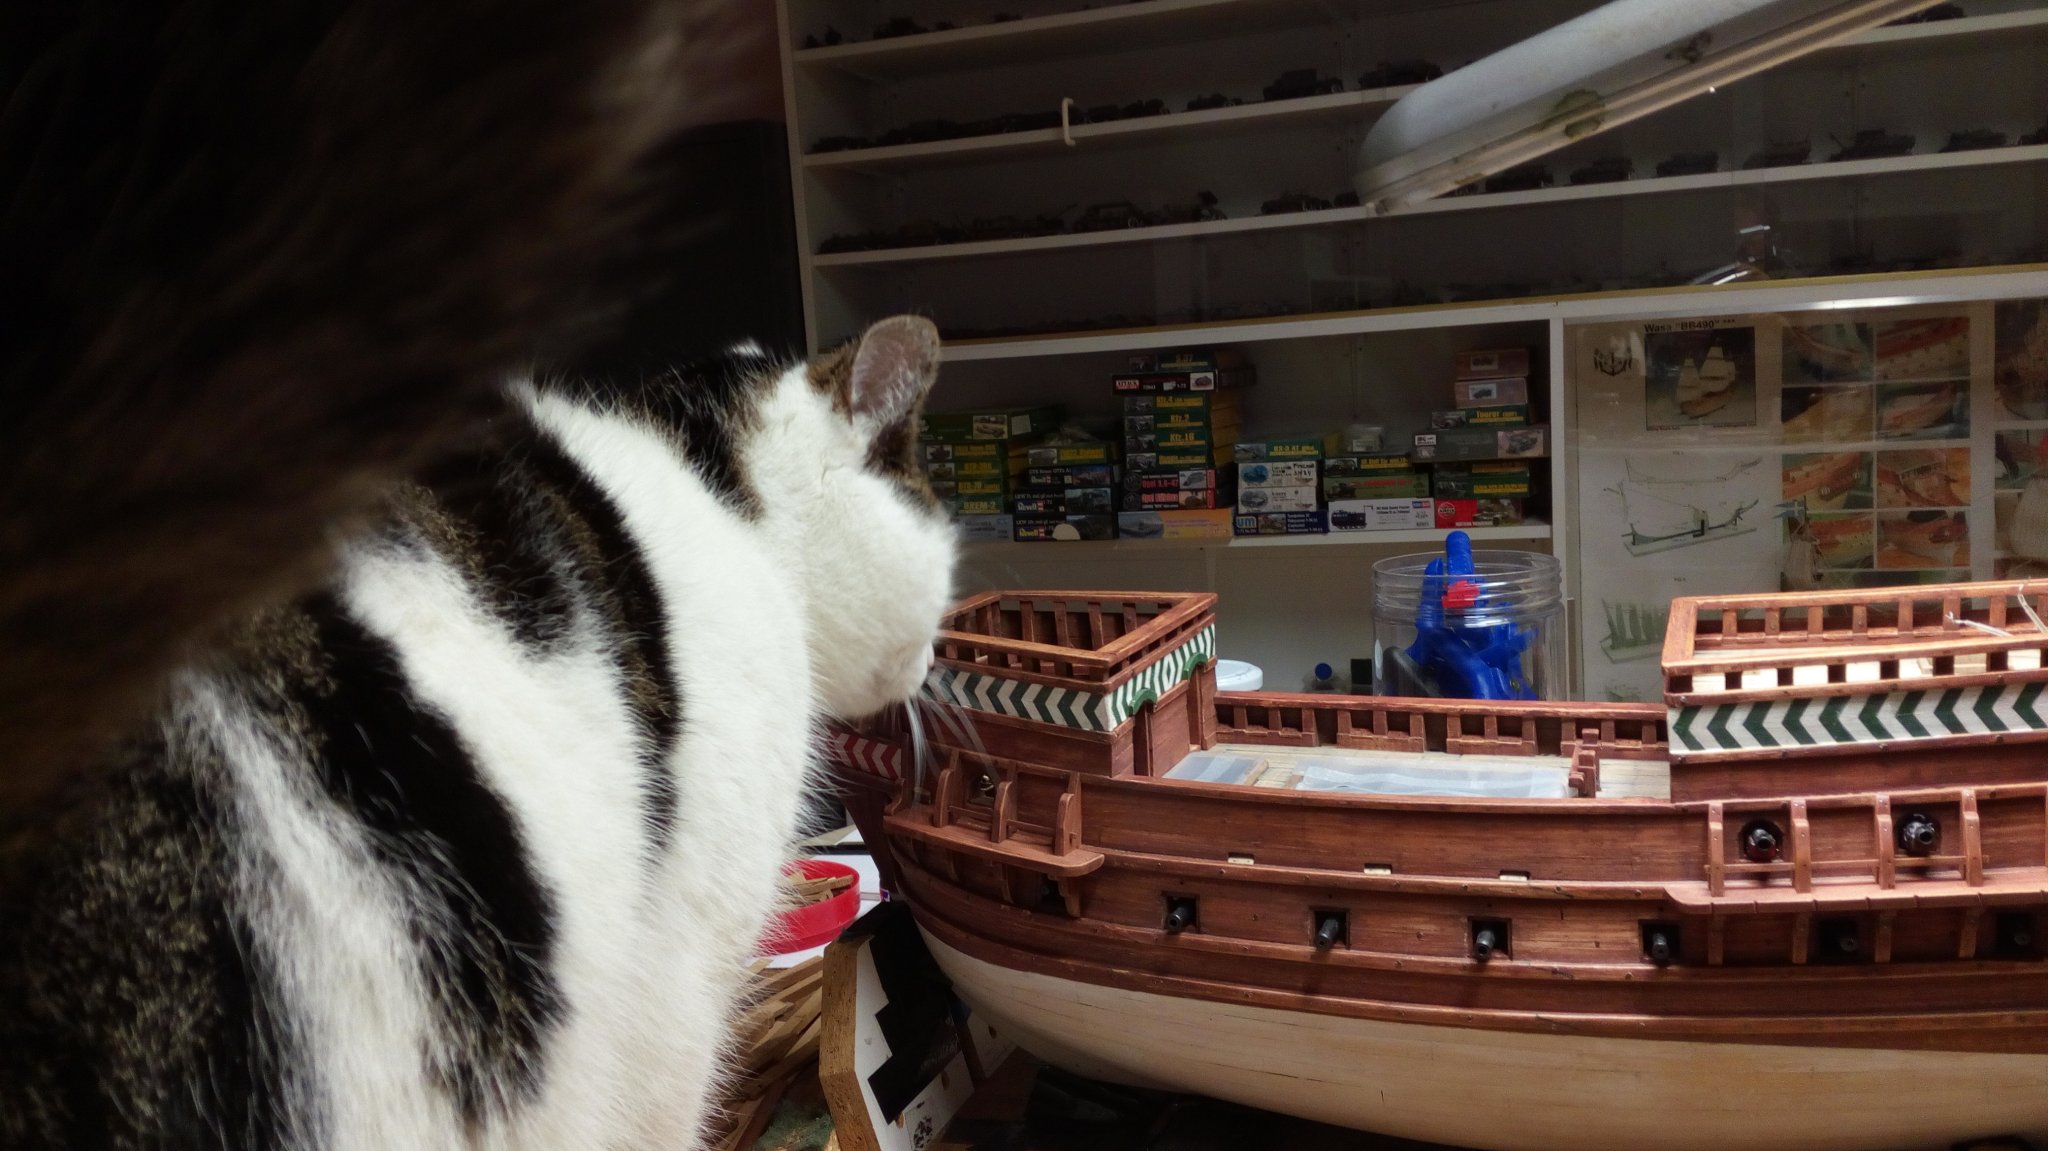
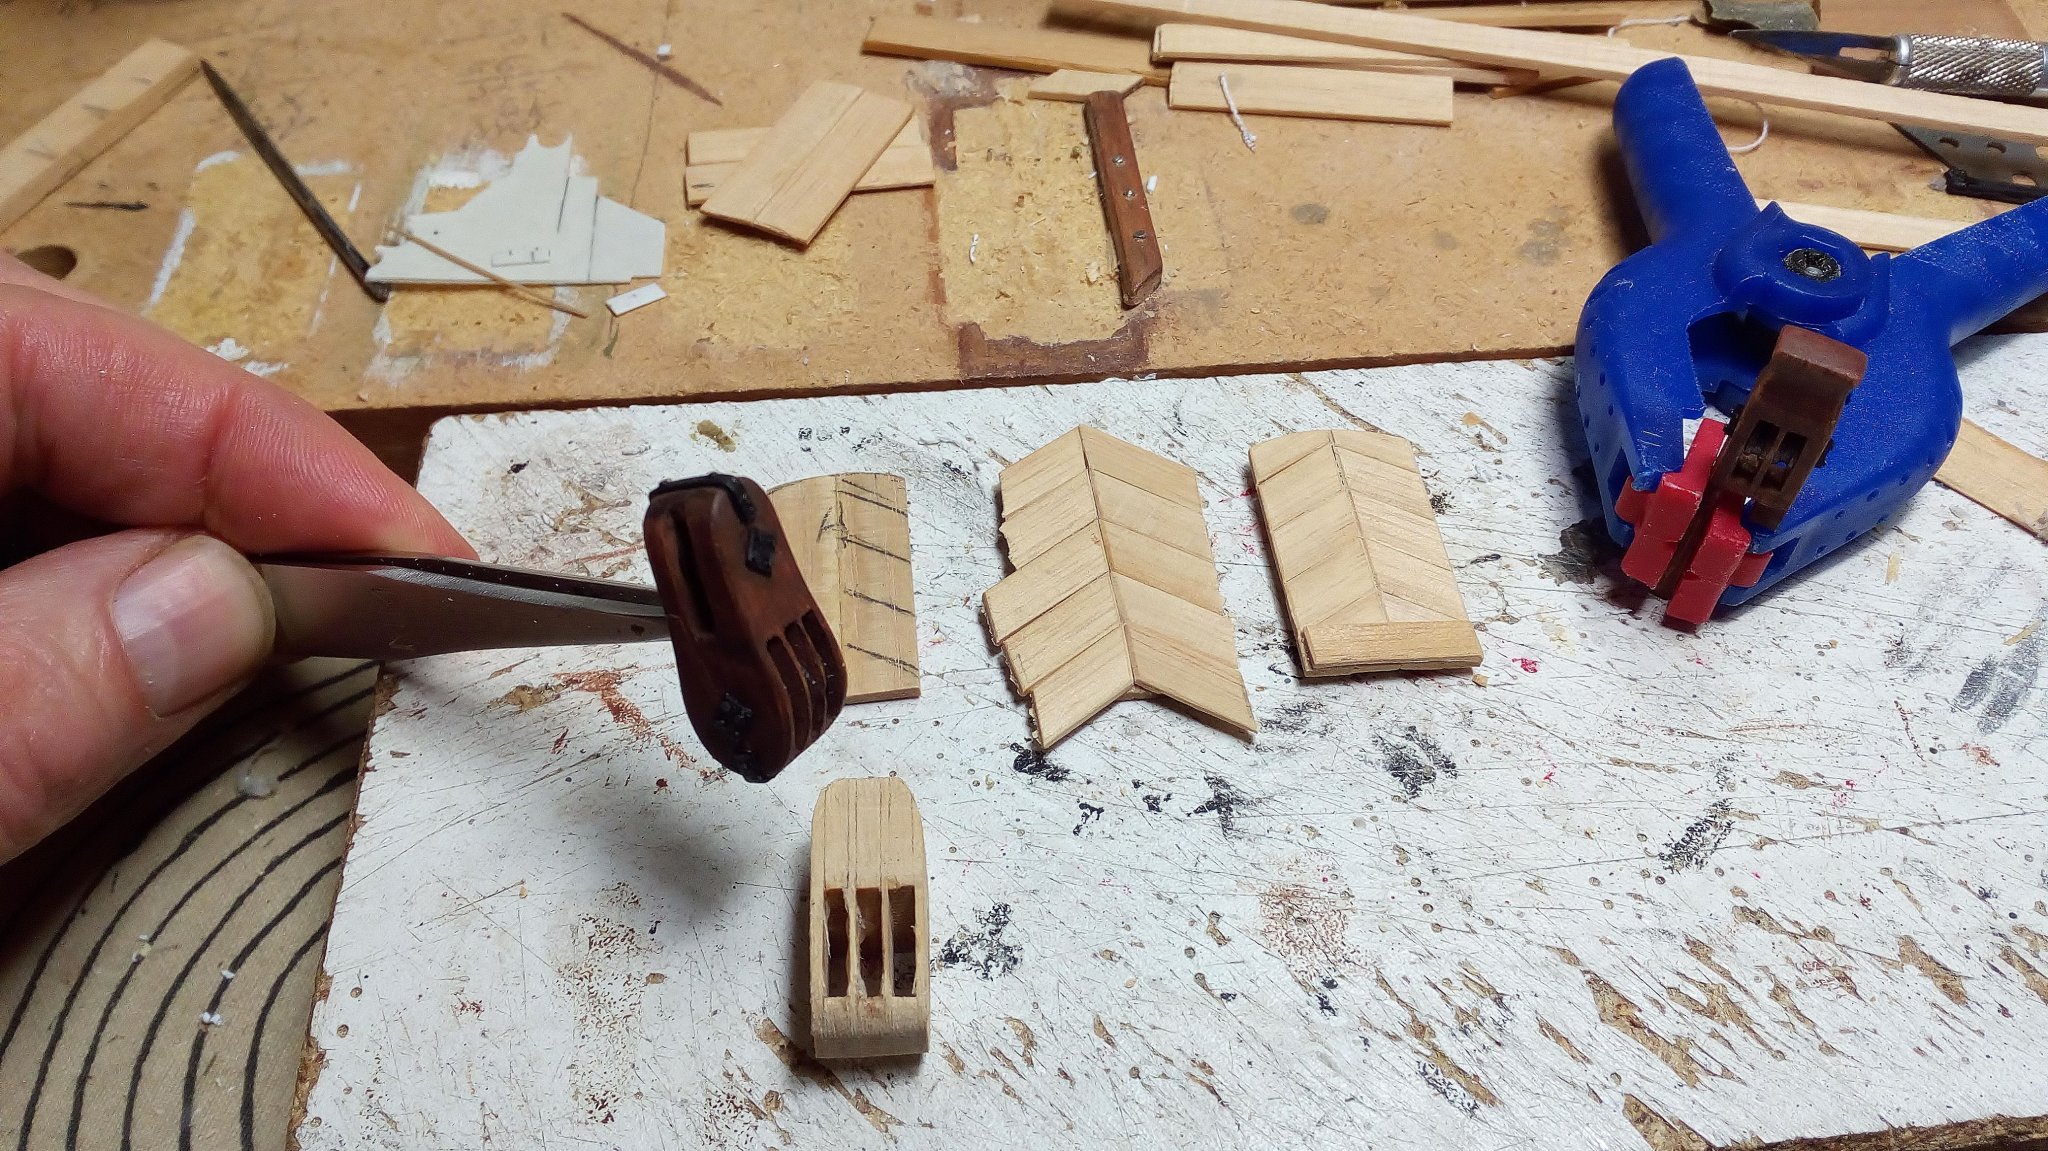
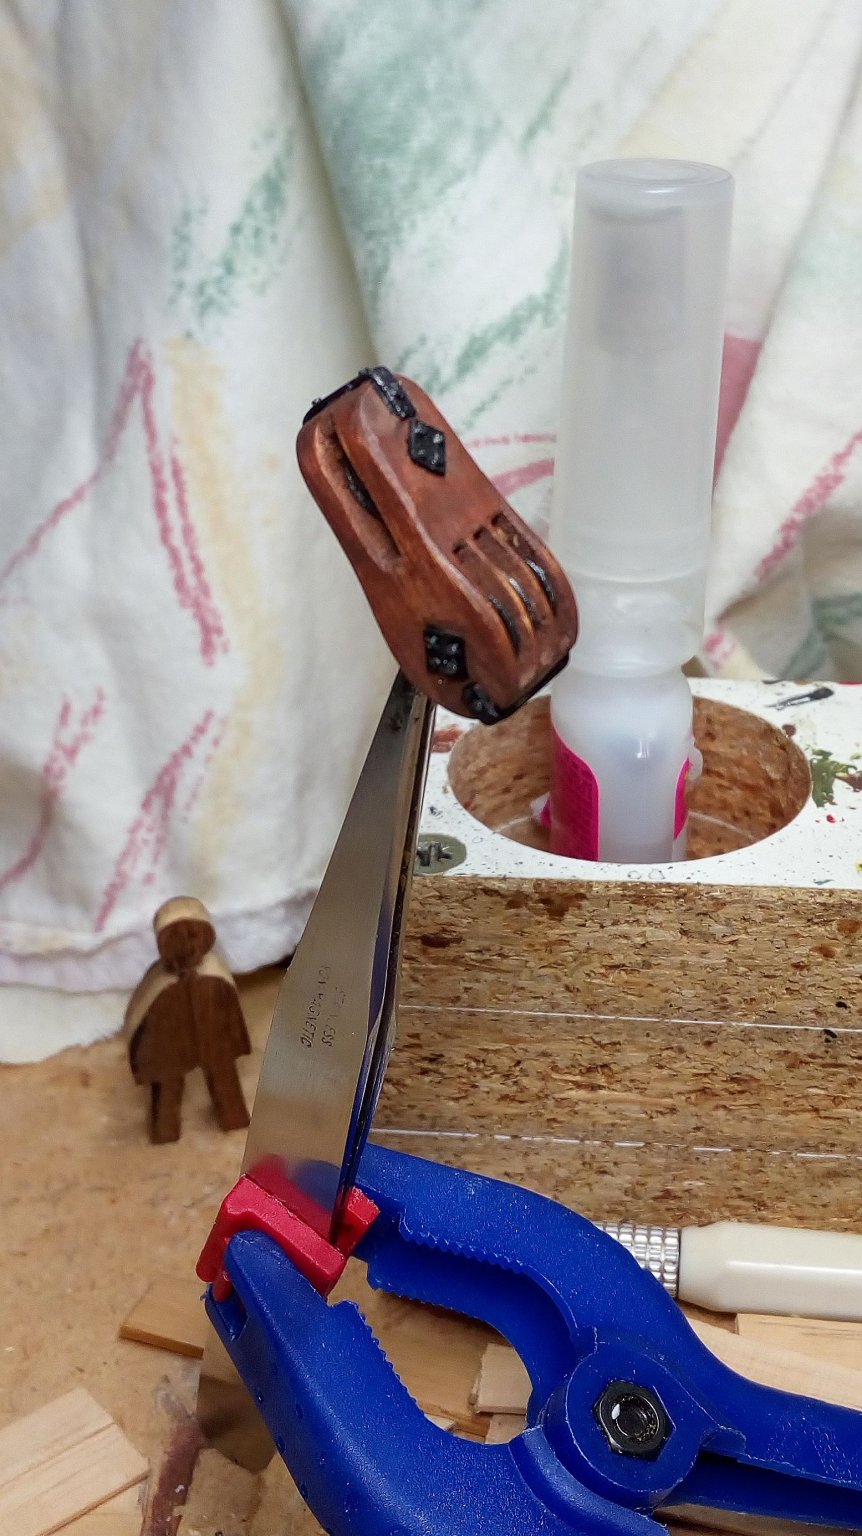
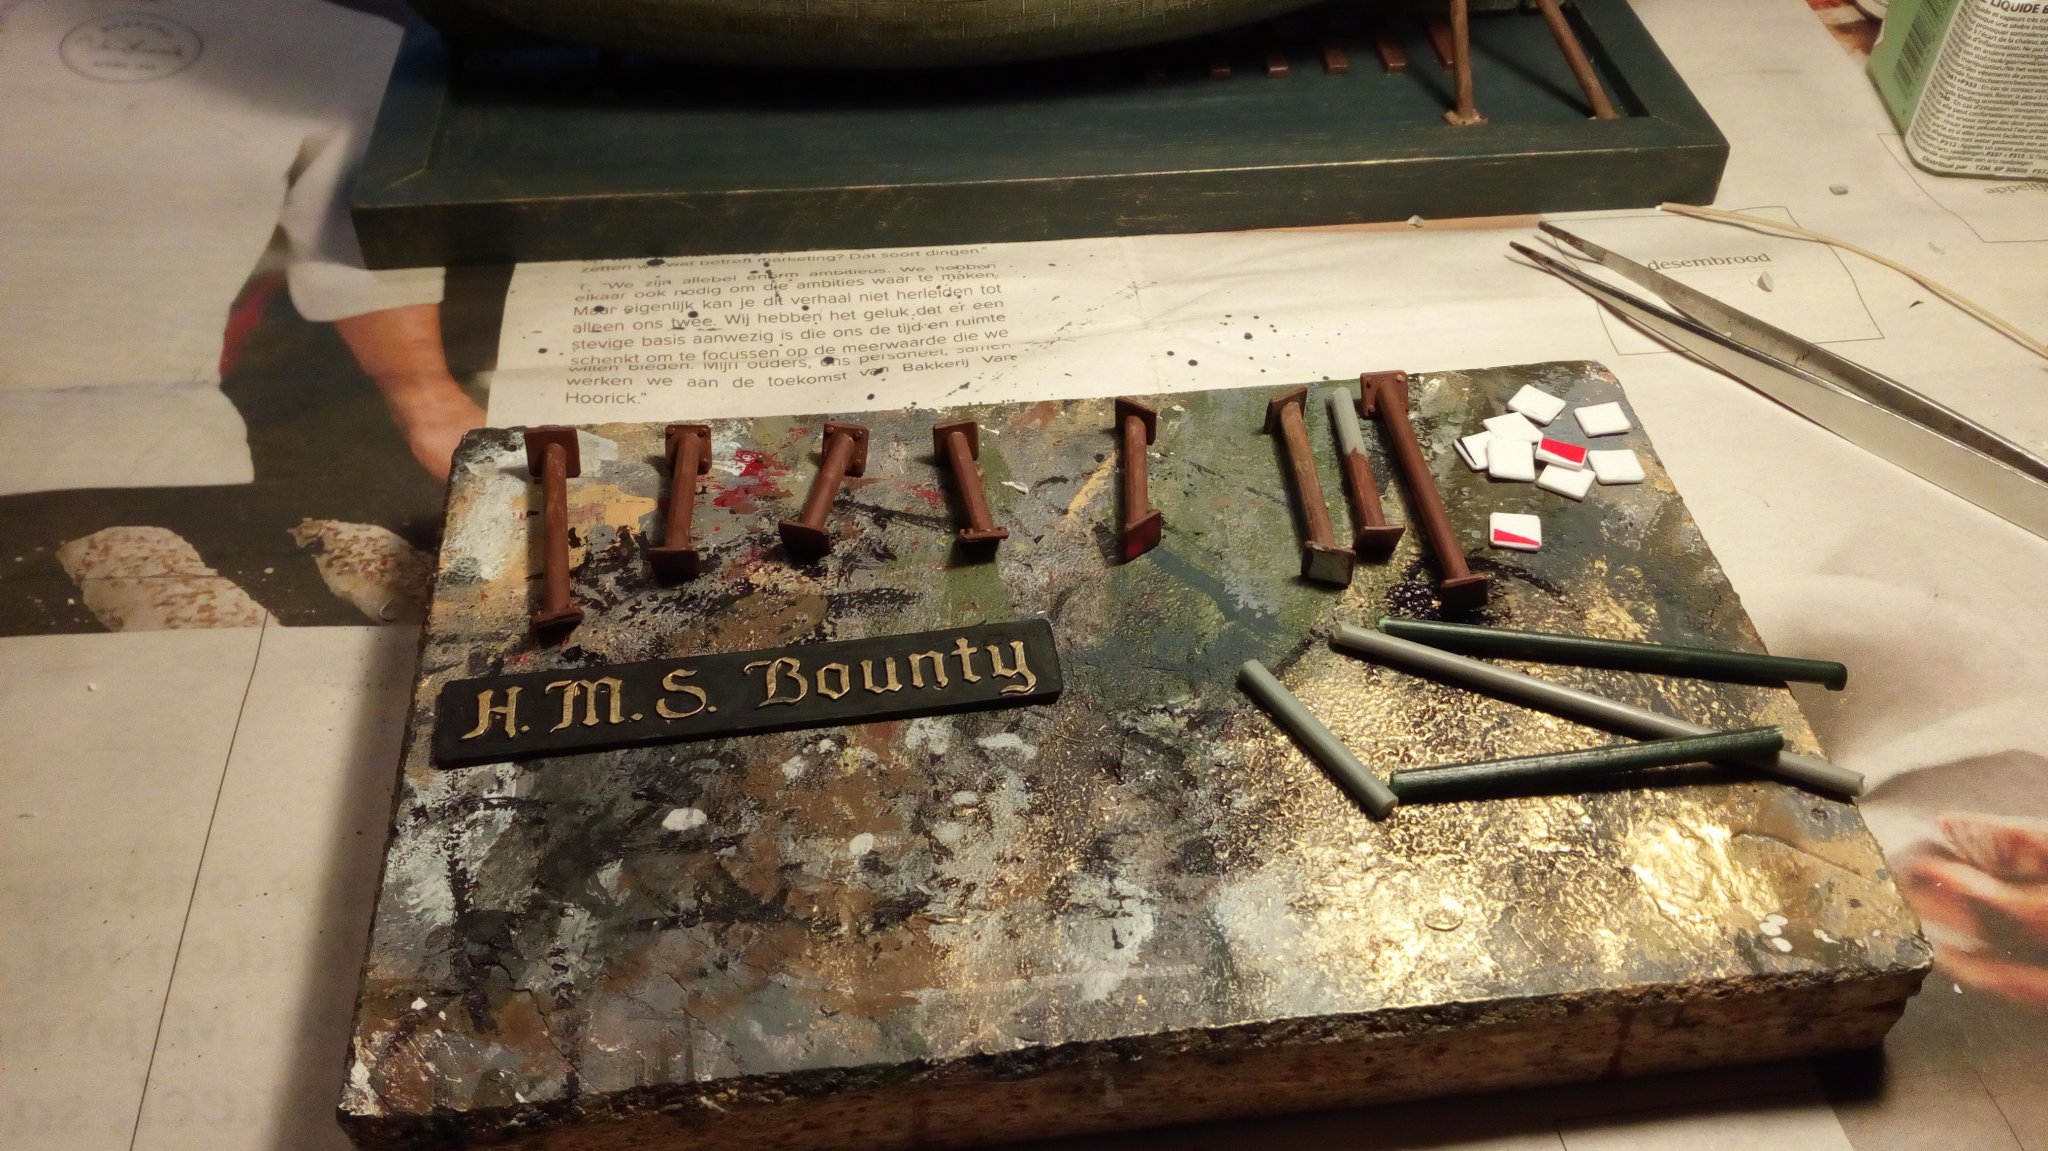
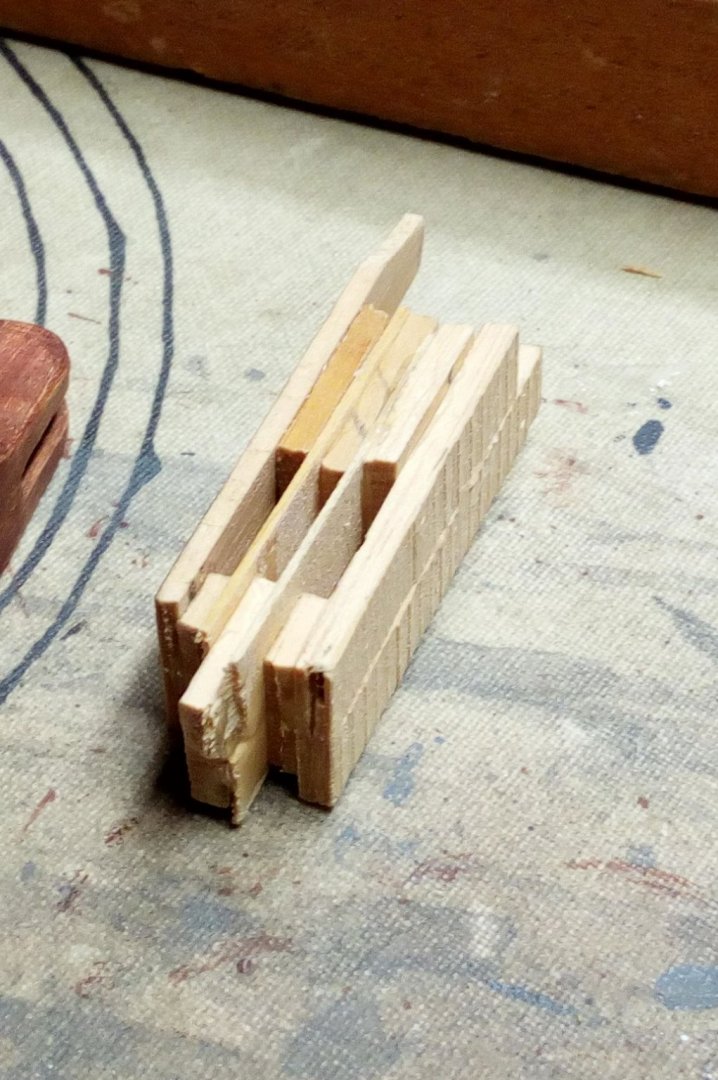
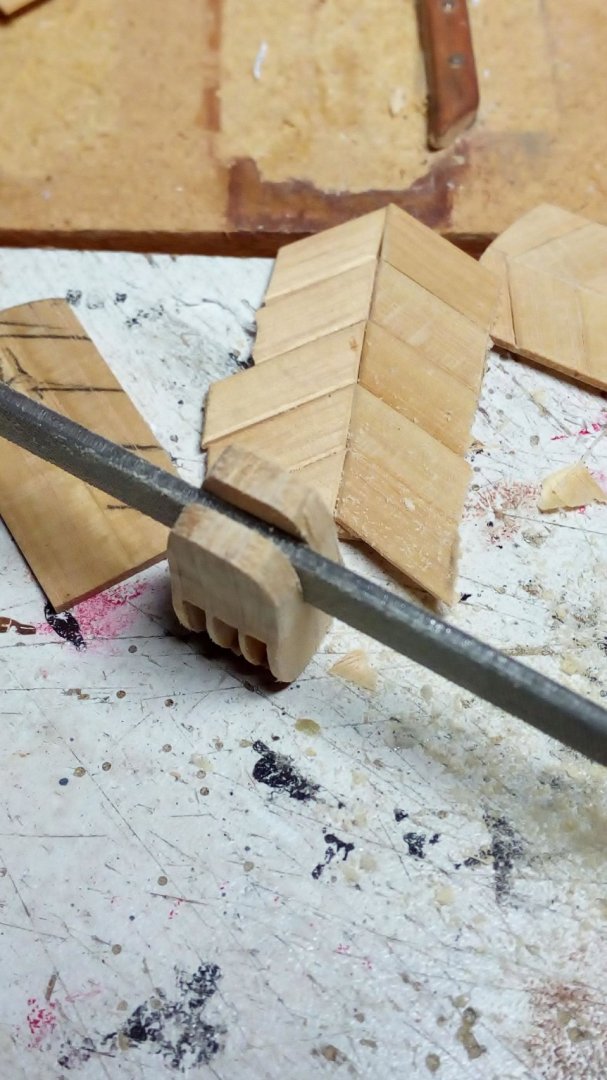
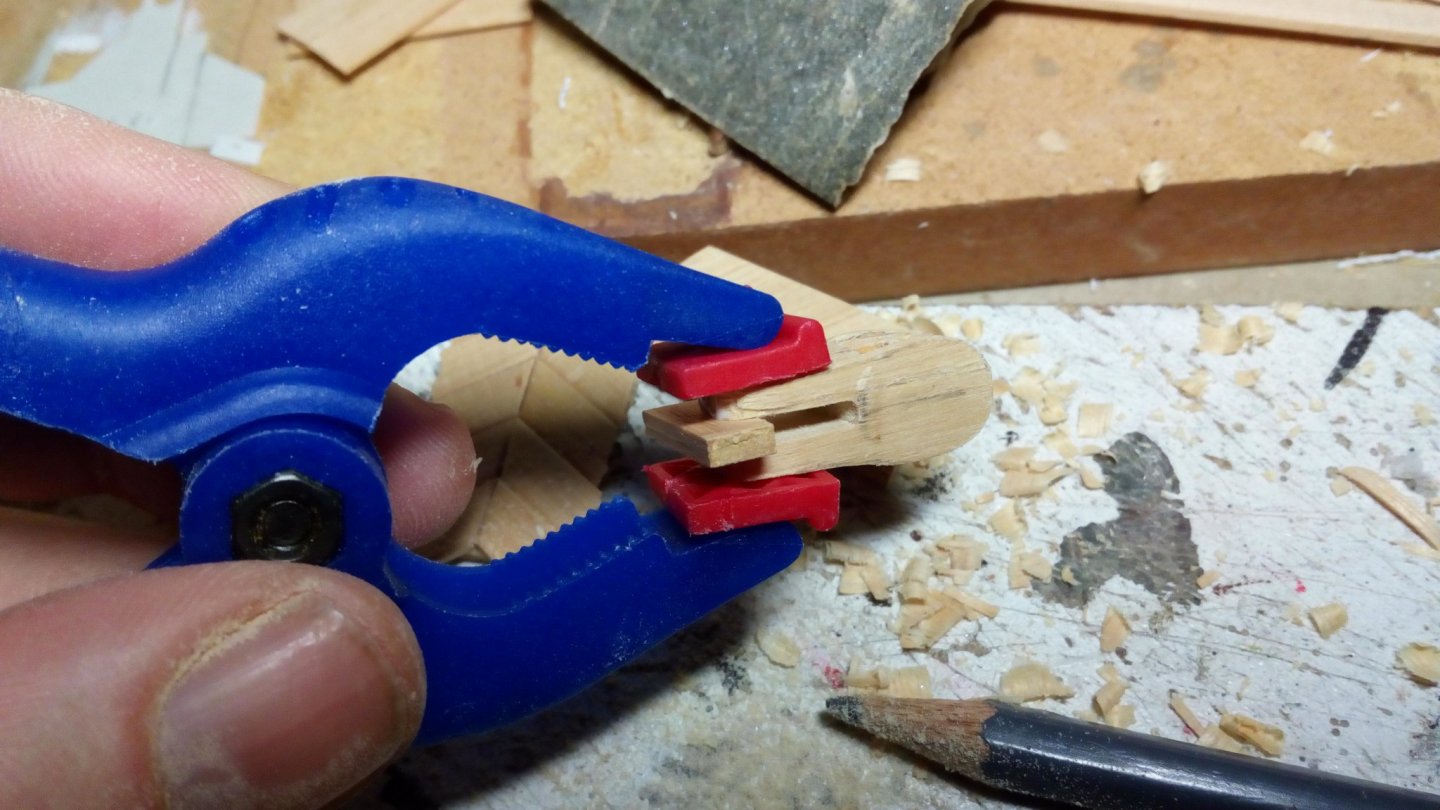
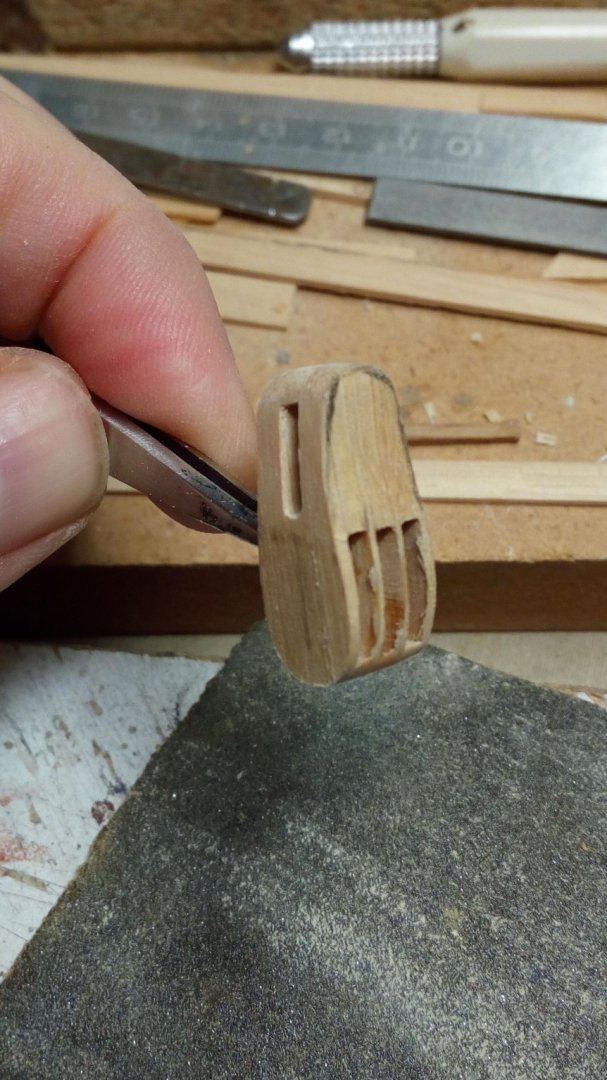
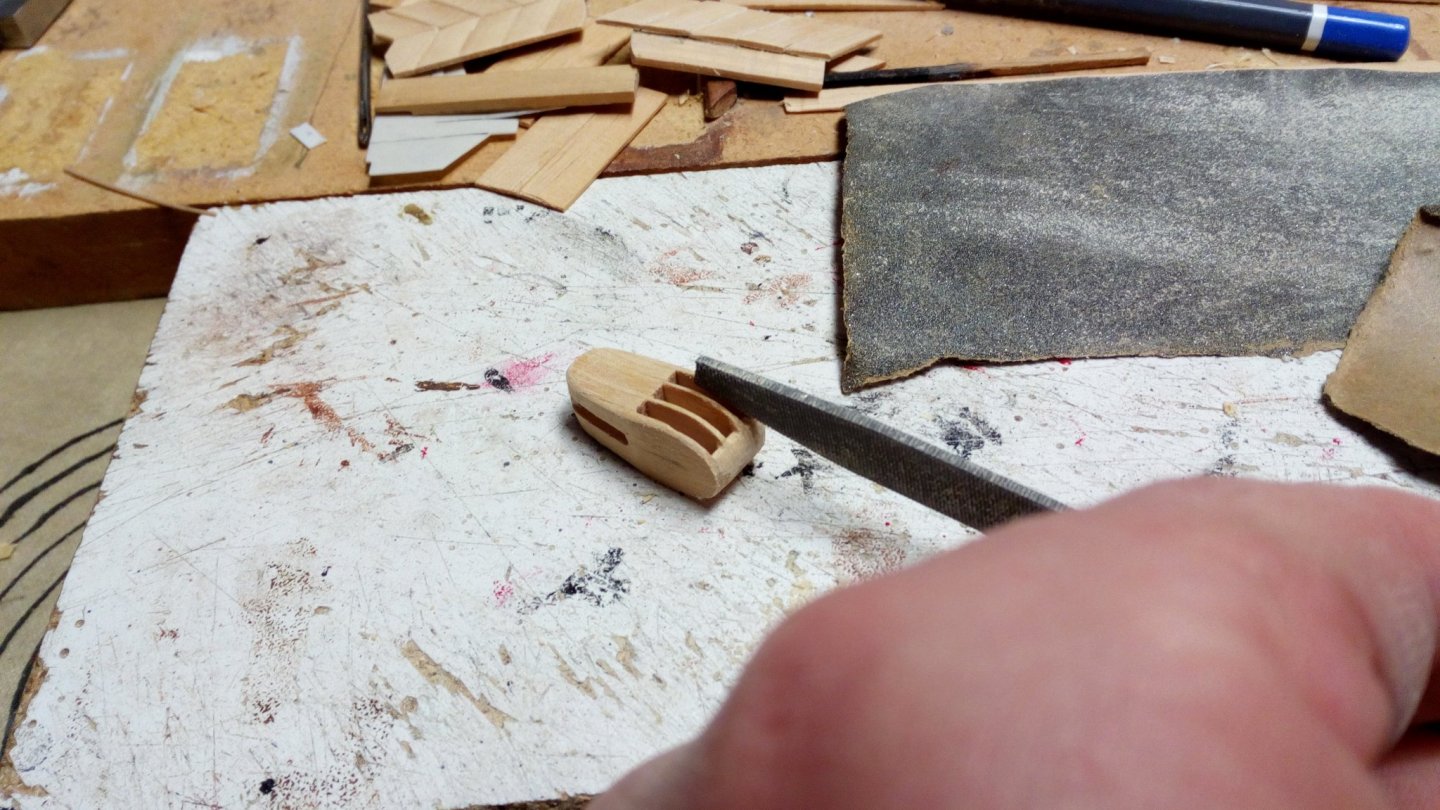
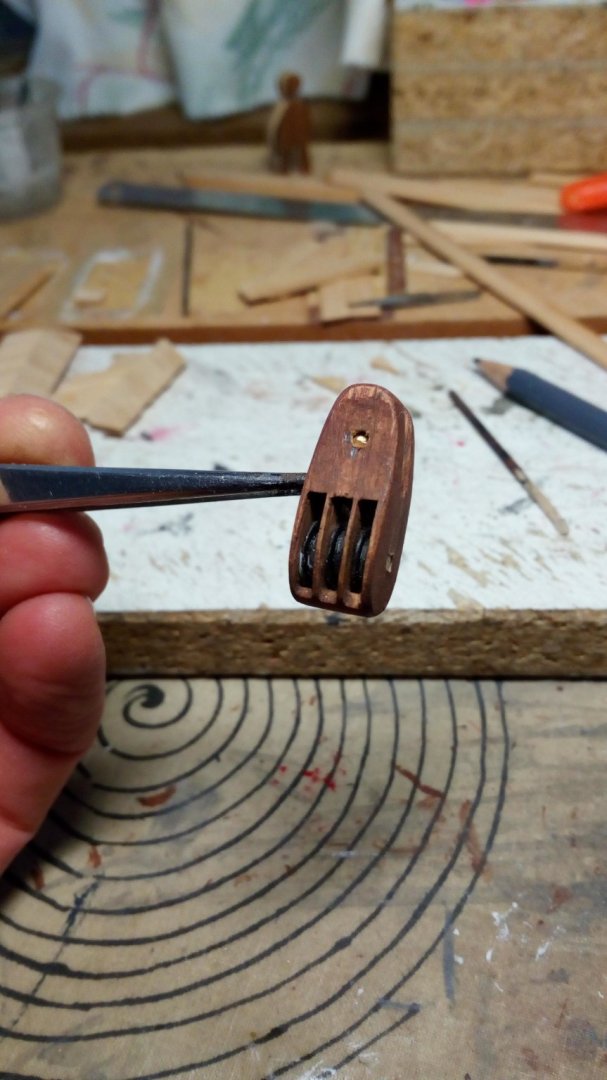
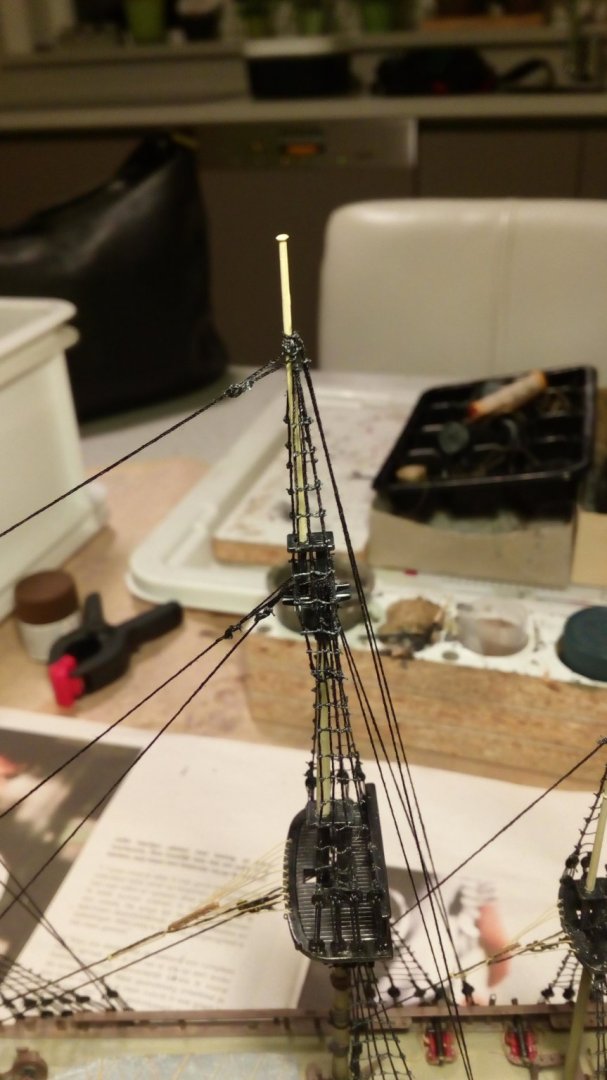
Thanks Michael, Here we go: Make a rough block ( only the 3 holes for the discs are currently the correct size). Sand in the correct shape and saw and file a groove across the 3 other grooves Glue a wooden piece in the groove. Sand and file completely to size sanded, painted and discs in place details added (plastic) ready Mine too. Want to know something about galleons, ask Felix... The poop deck is also finnished Thanks for following and likes


- 756 replies
-
- 13
-

-
- galleon
- golden hind
- (and 2 more)
-
Great news!! And, welcome back.
-
And another from the Great Pacific Northwest
Baker replied to Egilman's topic in New member Introductions
Hello, and -
Good news. At the request of my supervisor, Felix, this shipyard has been restarted. He was not happy with the slow progress... Not much progress yet. I started with 3 doors, and few halyard blocks. Detailed explanation of how everything is built will follow. Greetings, Patrick


- 756 replies
-
- 13
-
-
- galleon
- golden hind
- (and 2 more)
-
Due to the restart of my Golden Hind shipyard, this build has been temporarily put on hold. Thank you for following this build and the positive comments. Reopening of this shipyard is planned for October – November 2020 I hope to see you all back again.
-
Beautifully done 👍
-
Revenge 1577 by Asat - Amati - 1/64
Baker replied to ASAT's topic in - Kit build logs for subjects built from 1501 - 1750
Great work, I take a seat and follow -
In this part of the world (Belgium) it is normal to eat horse meat and cow tongues (no donkeys ) I think that this has something to do with the past 2 world wars that we have experienced (and all the other wars before these 2 ) Then you eat what is available, or you eat nothing. Flemish saying: "Honger maakt rauwe bonen zoet." Hunger makes even raw beans taste sweet
-
Nice model, One of my colleagues at work served in the Serbian army at the artillery (Yugoslavian Civil War) (Ordinary people such as him had the choice: 2 years of military service or 2 years of prison as compensation because you refuse to join the army). Once the supply of food to their unit had failed. And a donkey passes by, within reach of their cannon ... Bang, and there was a big hole in the donkey's body. And the cannon crew had "fresh meat". Whether donkey was nice to eat, he never told me 🤣.
-
Thanks everyone. These plastic spars are really not suitable for the use in this way. Cleaning up one spar took about as long as making a new one in wood. For someone who builds a plastic ship for the first time and chooses this model. Follow the kit's instructions for masts, spars and rigging. At first sight nothing can go wrong. And, winter is coming to an end (actually we have not had a winter this year). It is almost time for me to switch back to the shipyard of my wooden shipmodel. I'm starting to miss the dust and smell of sanded wood
-
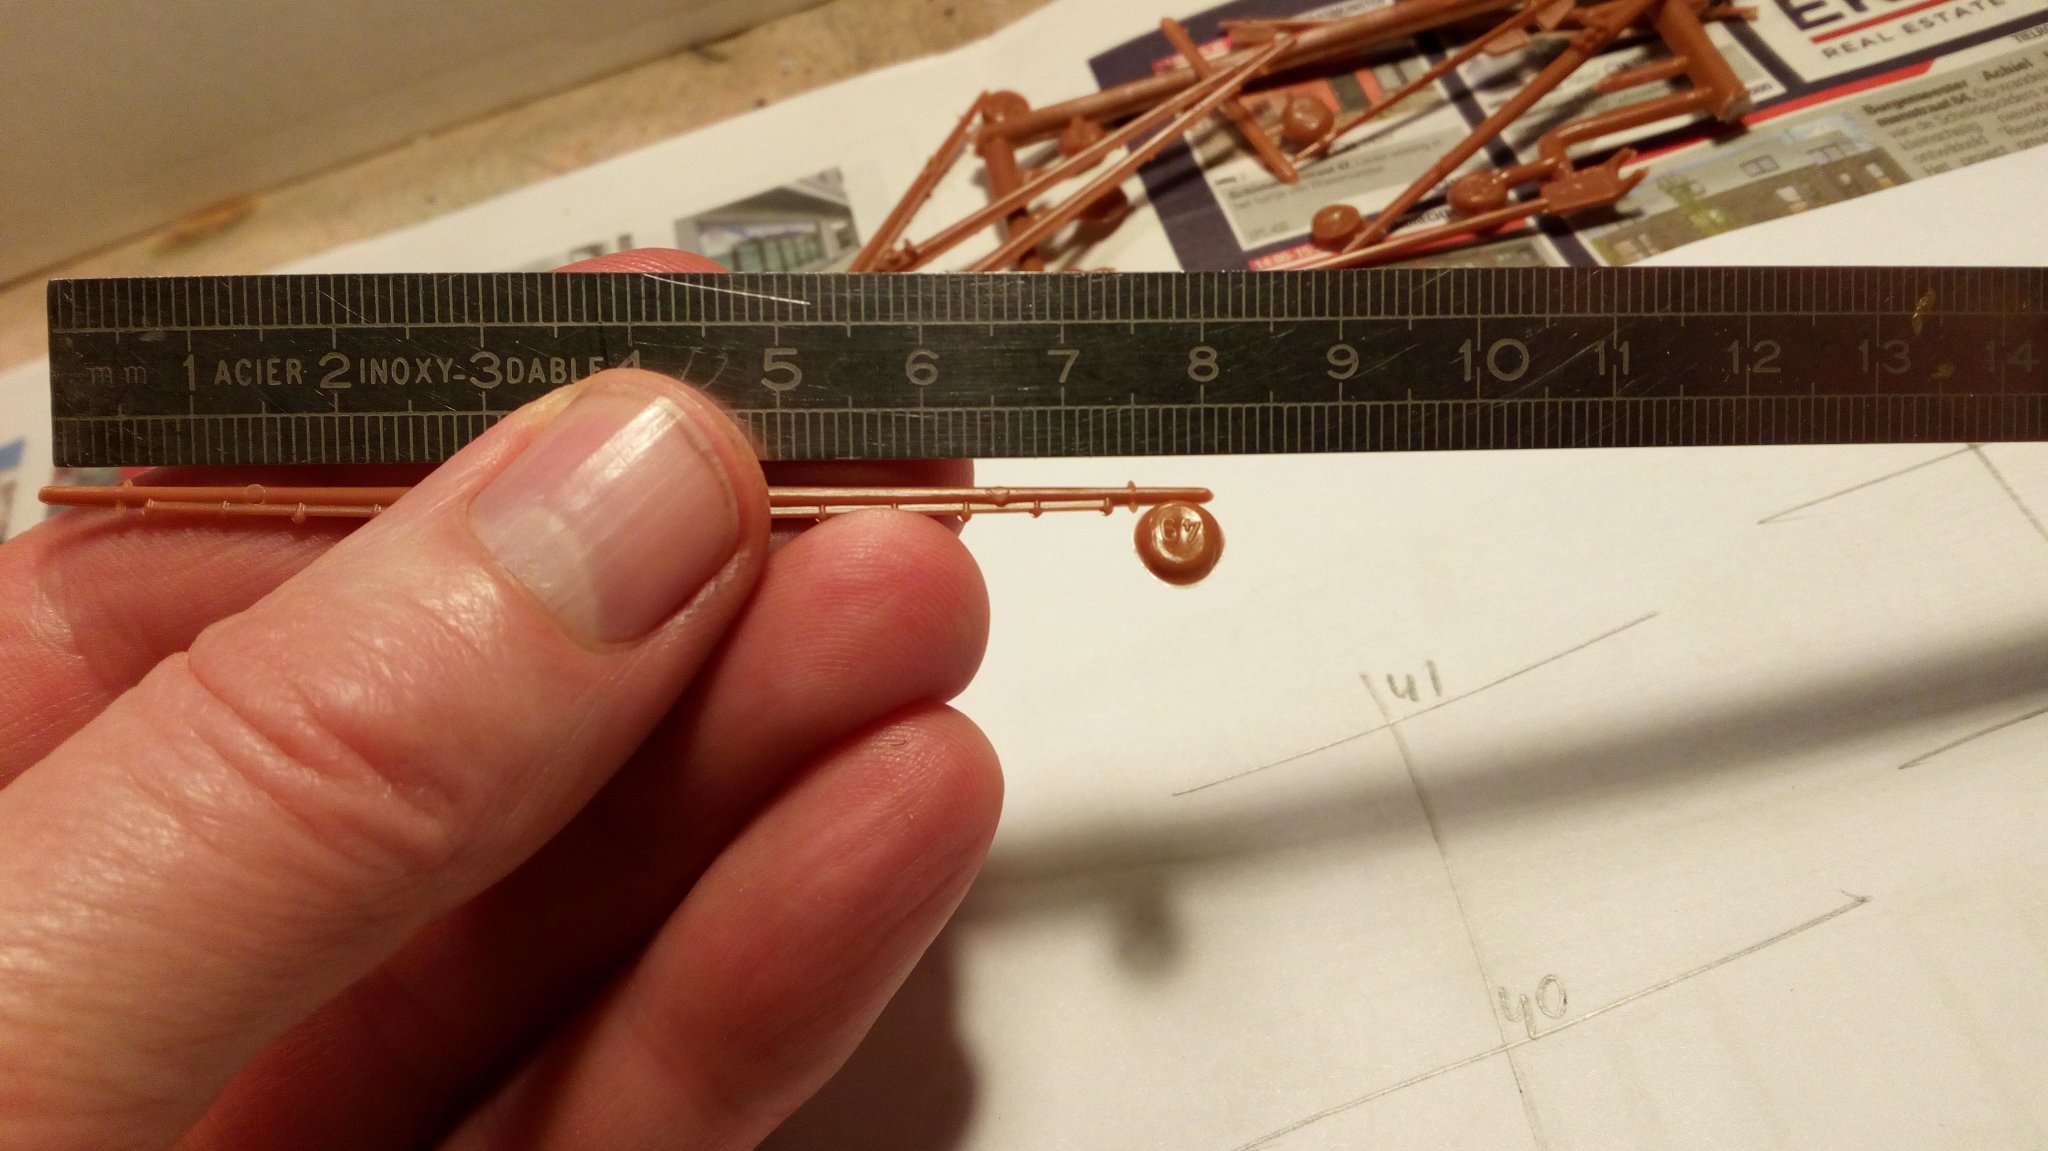
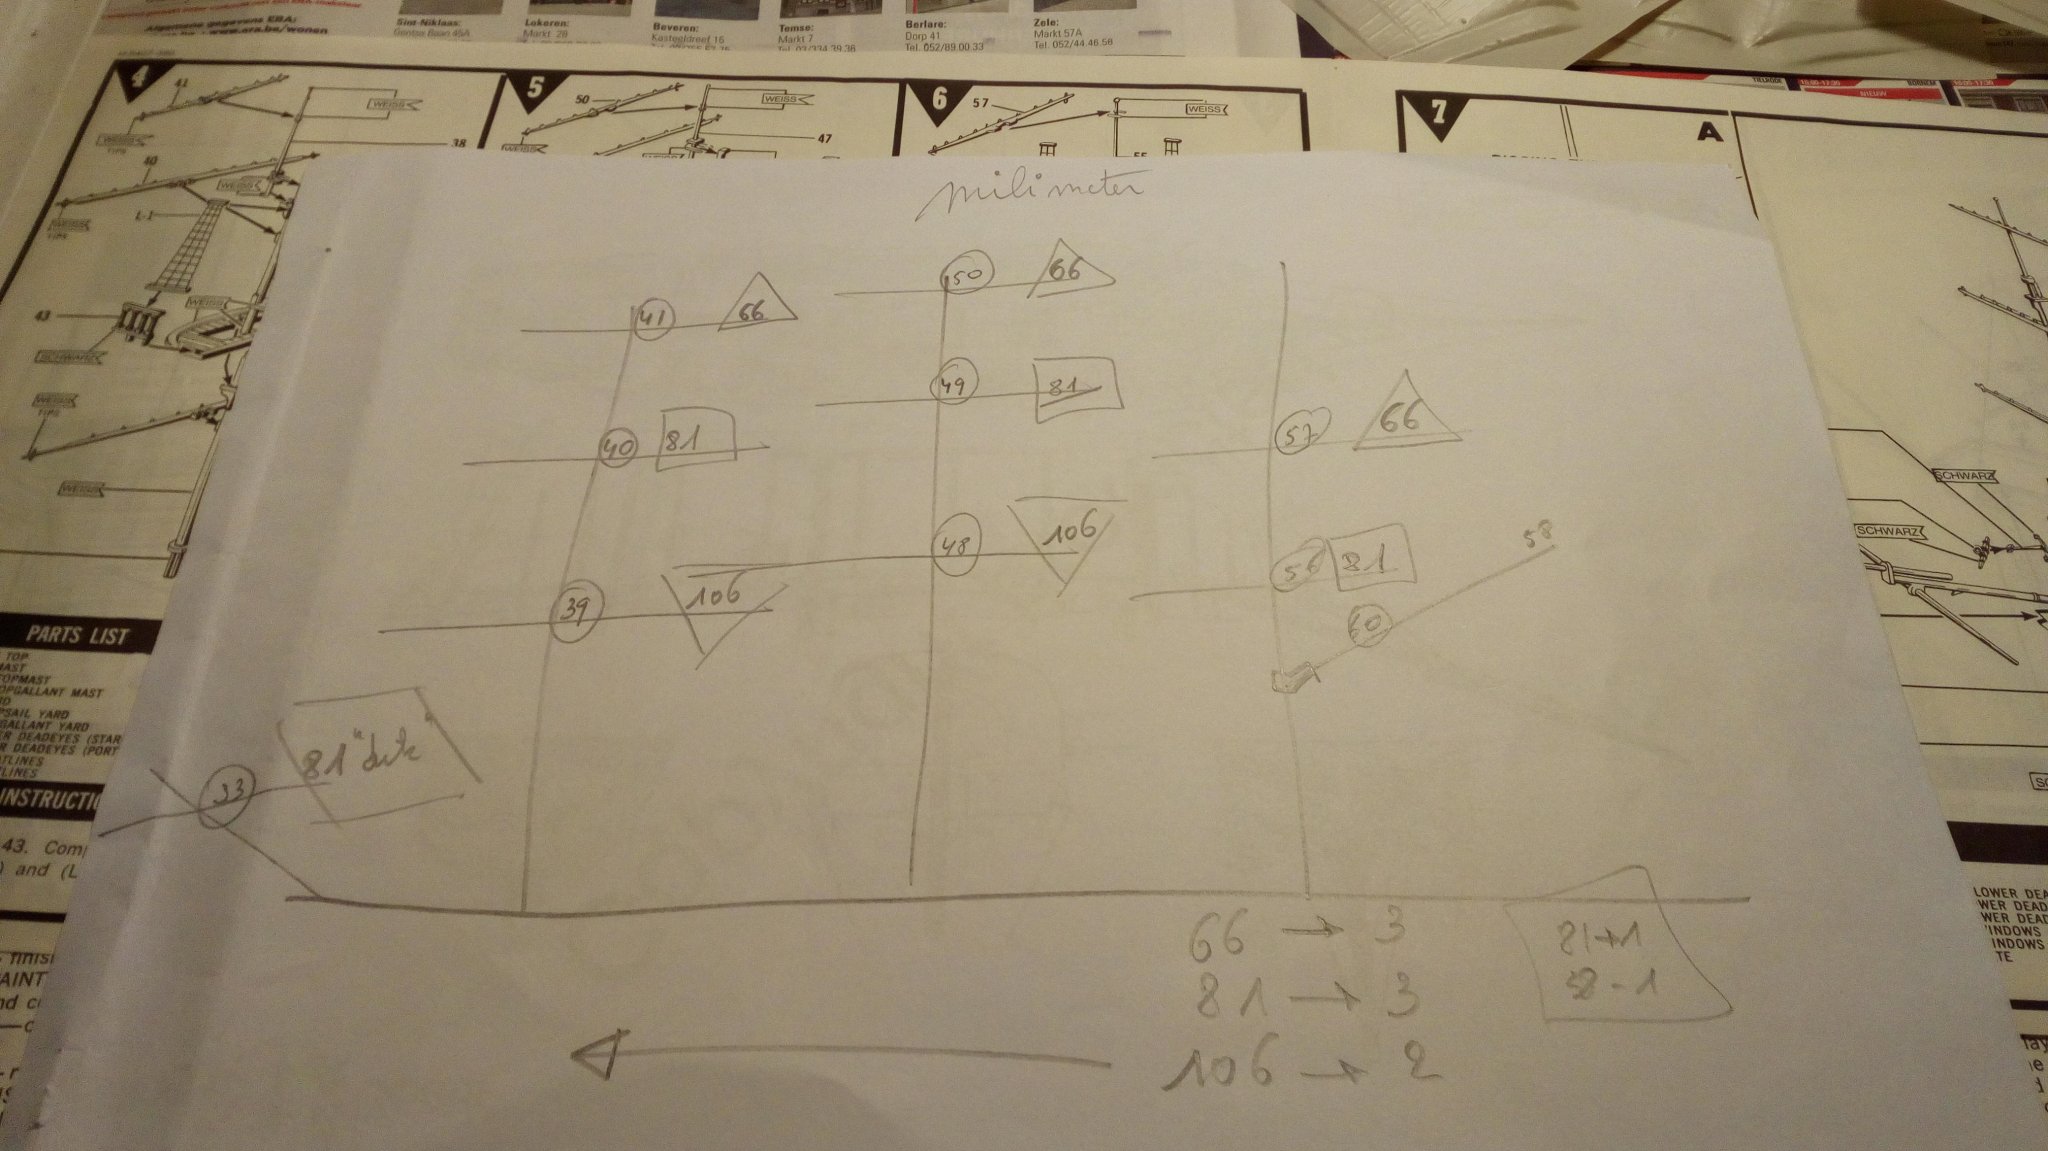
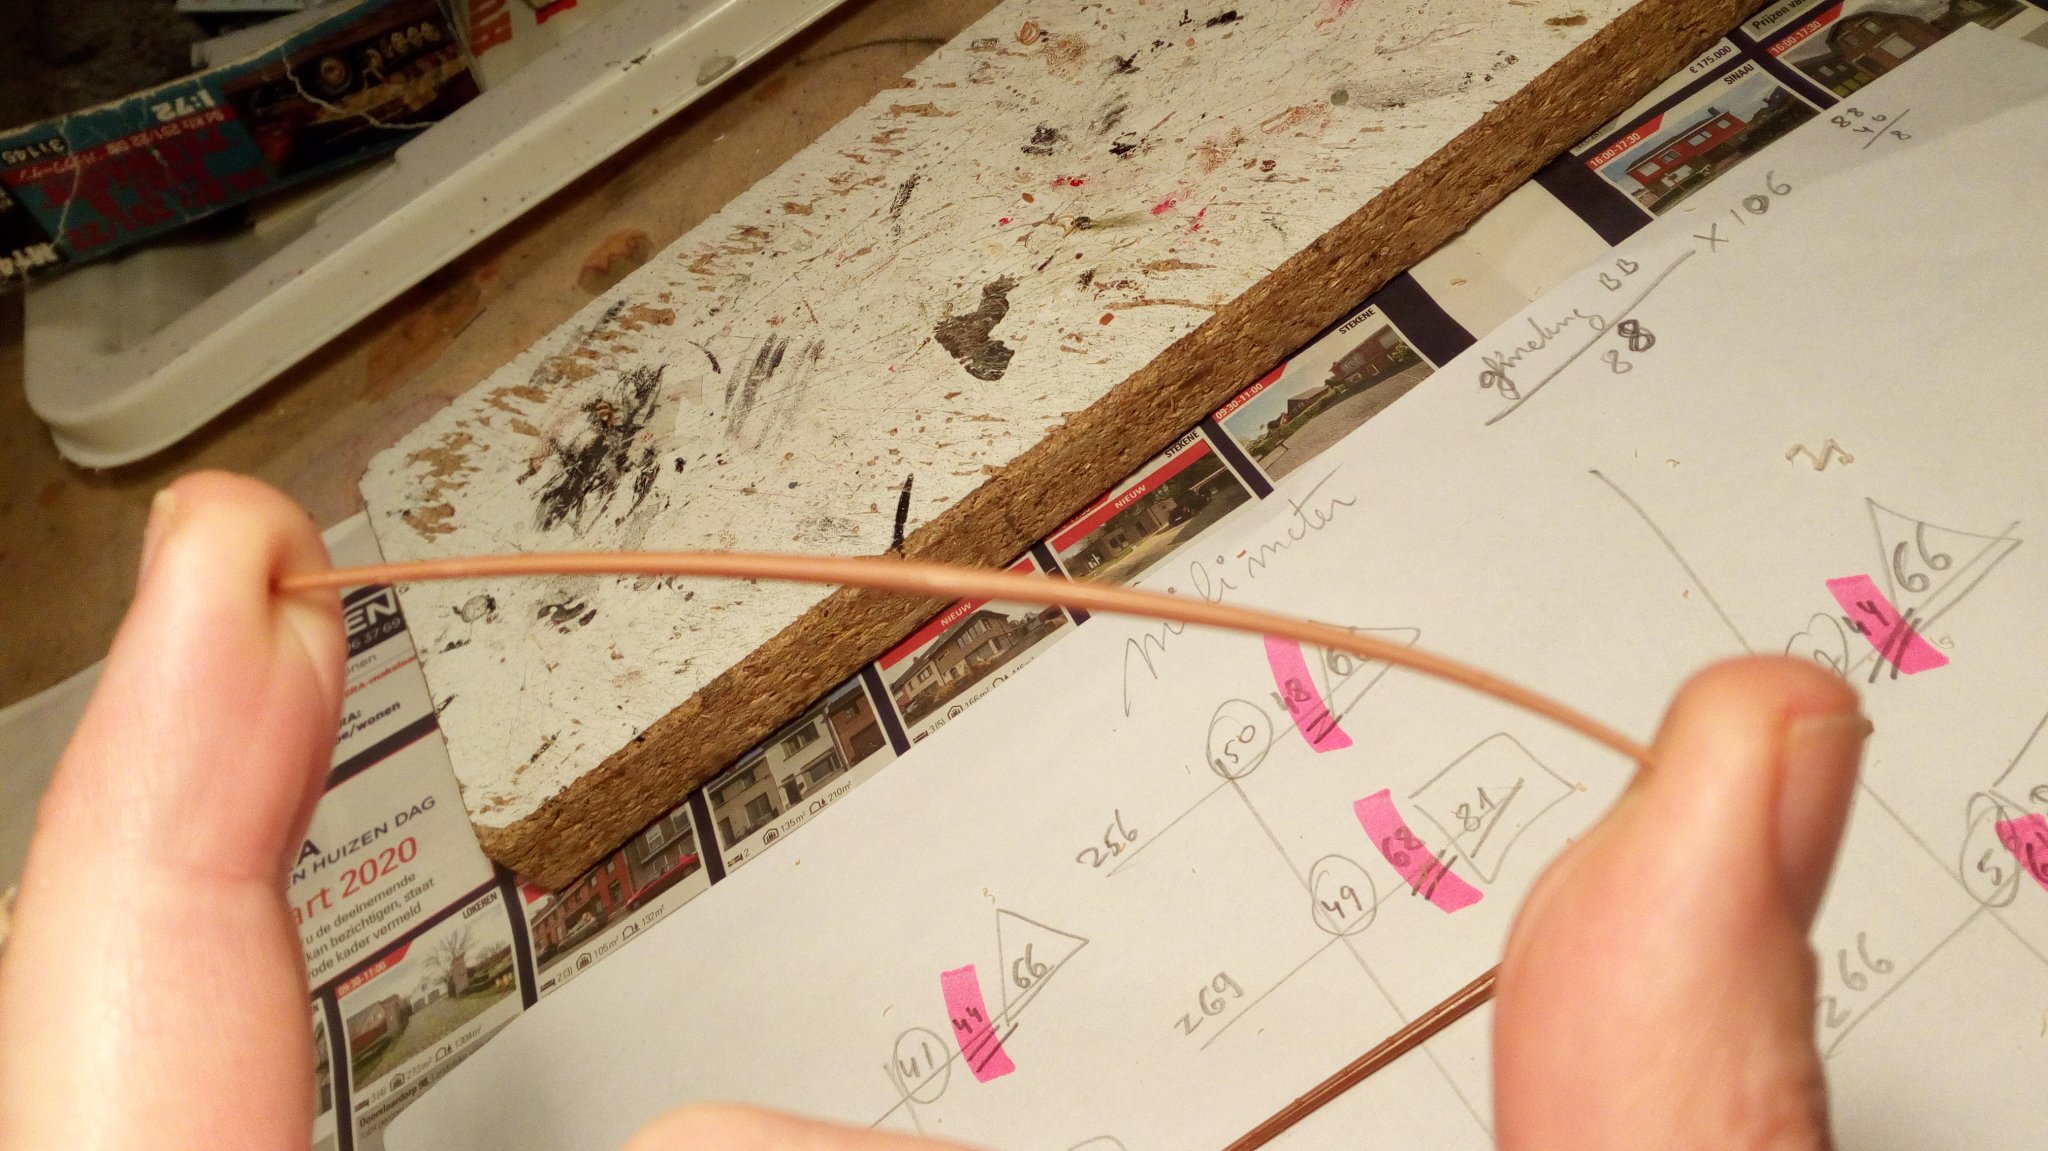
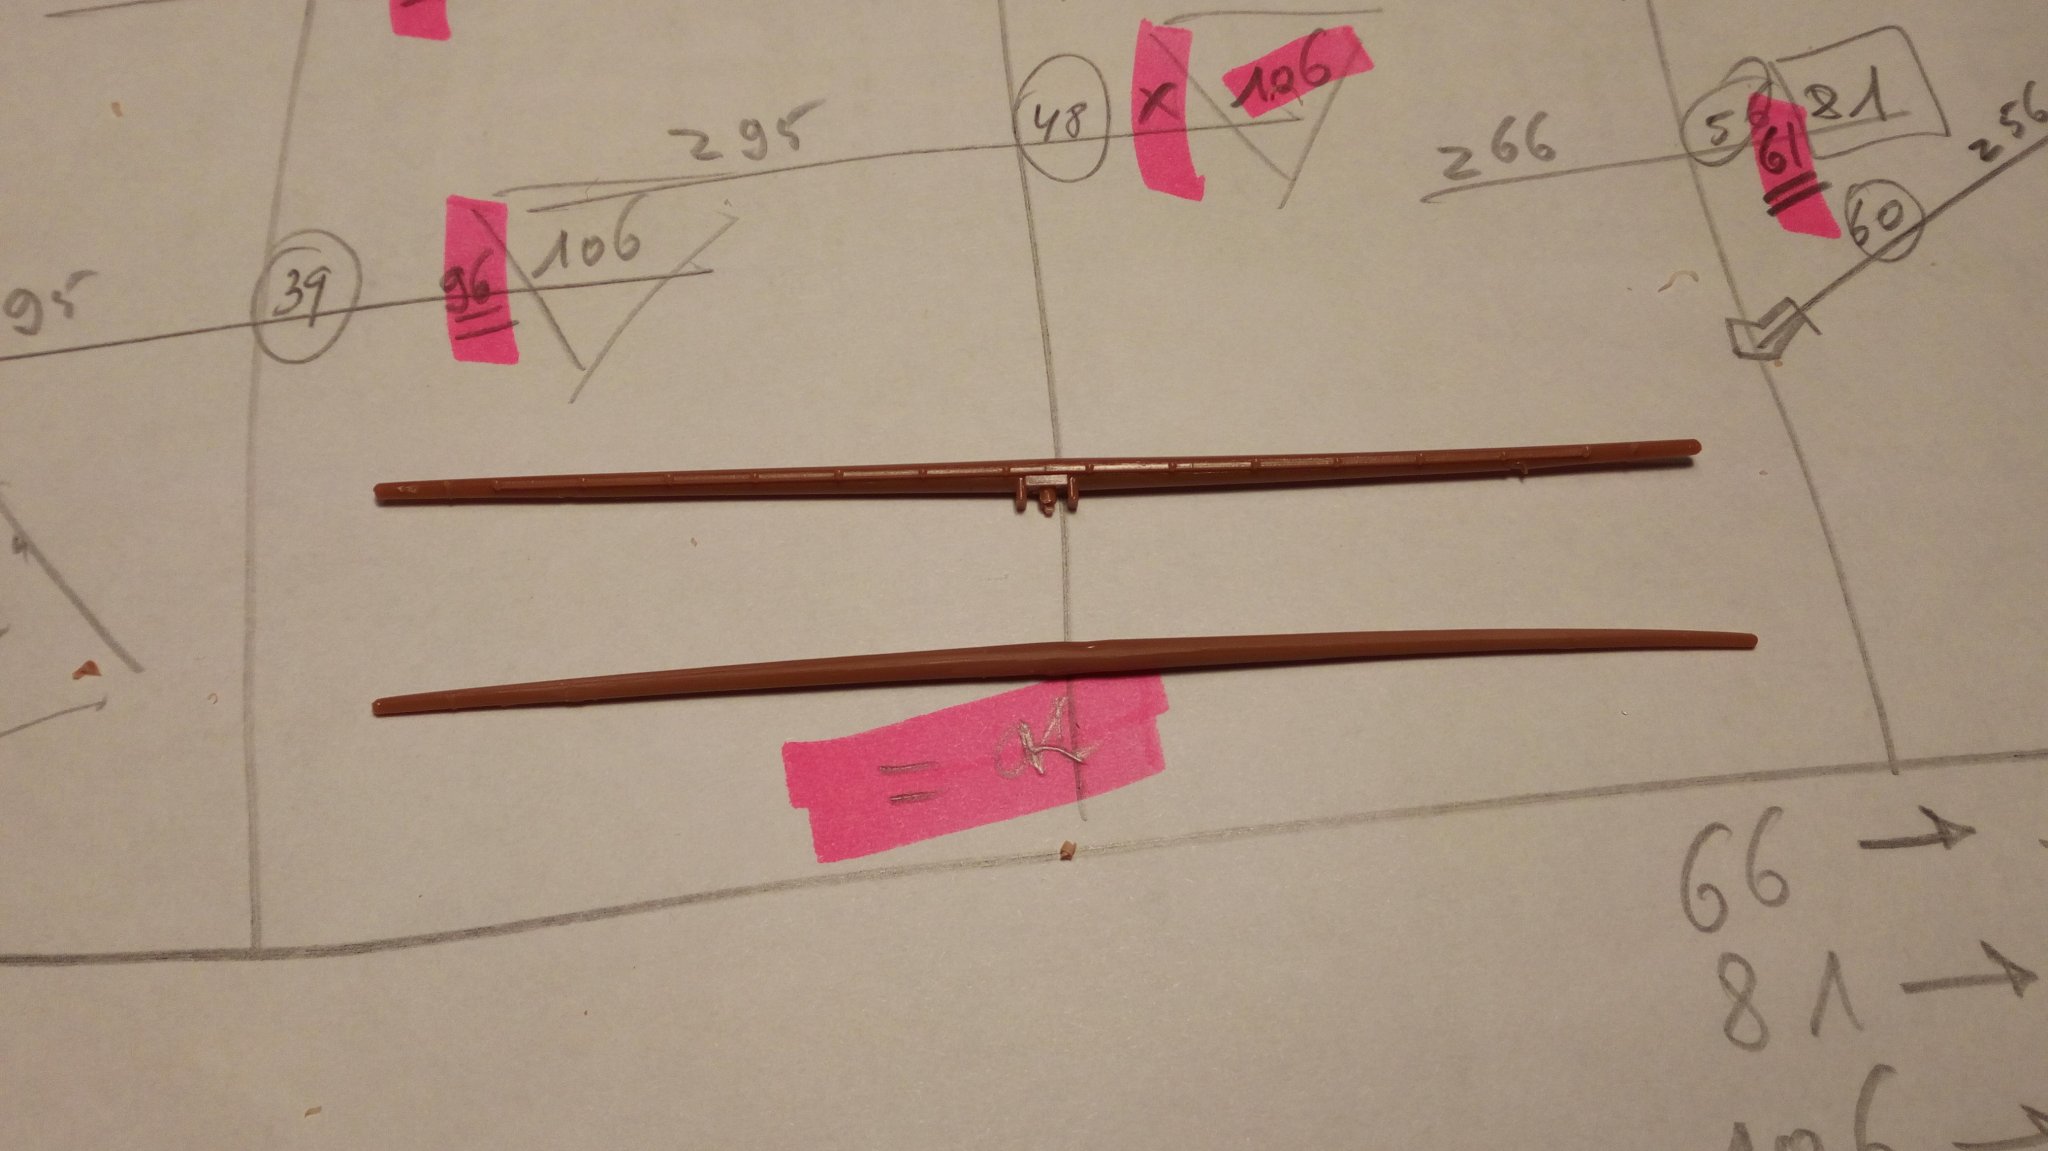
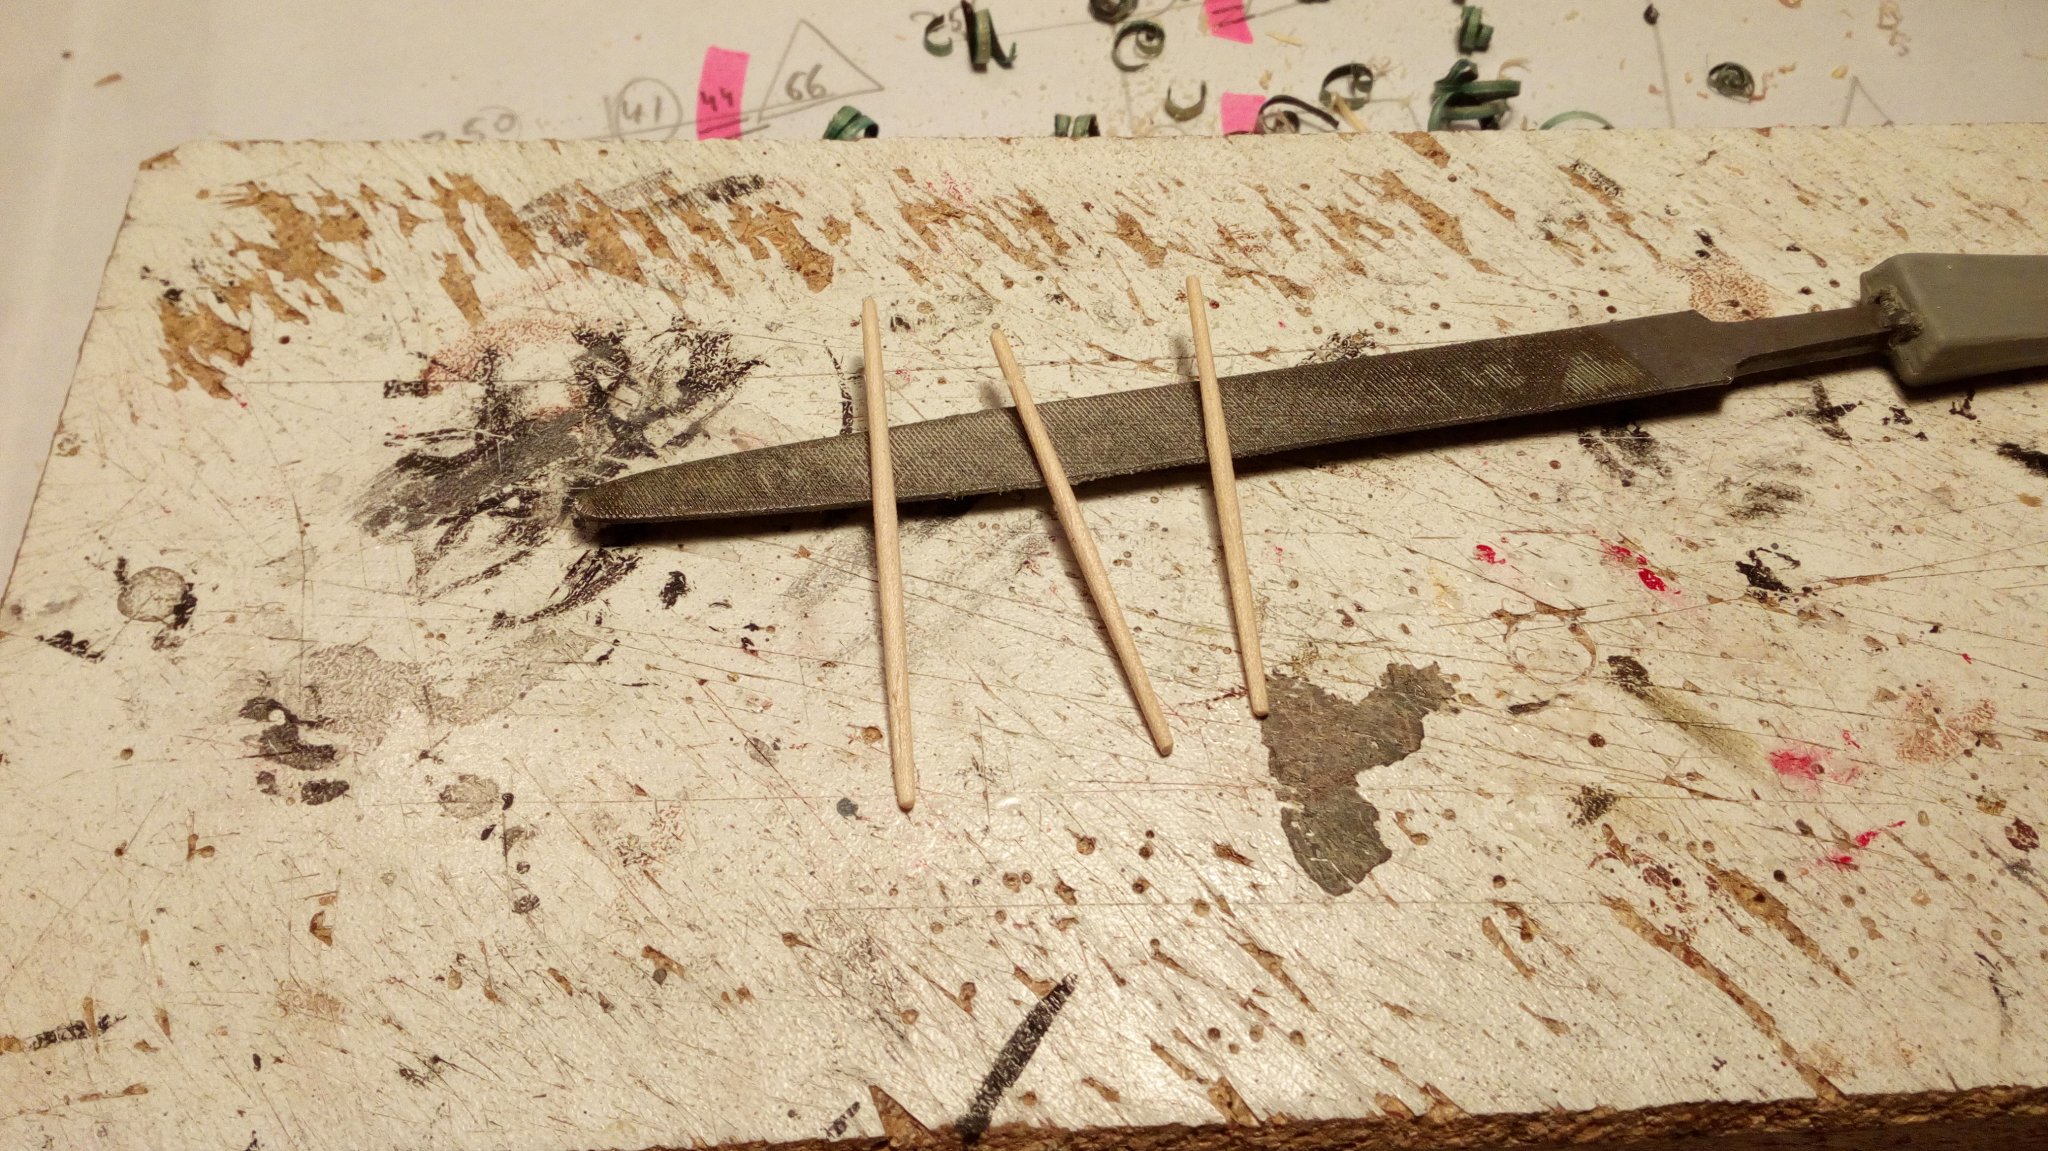
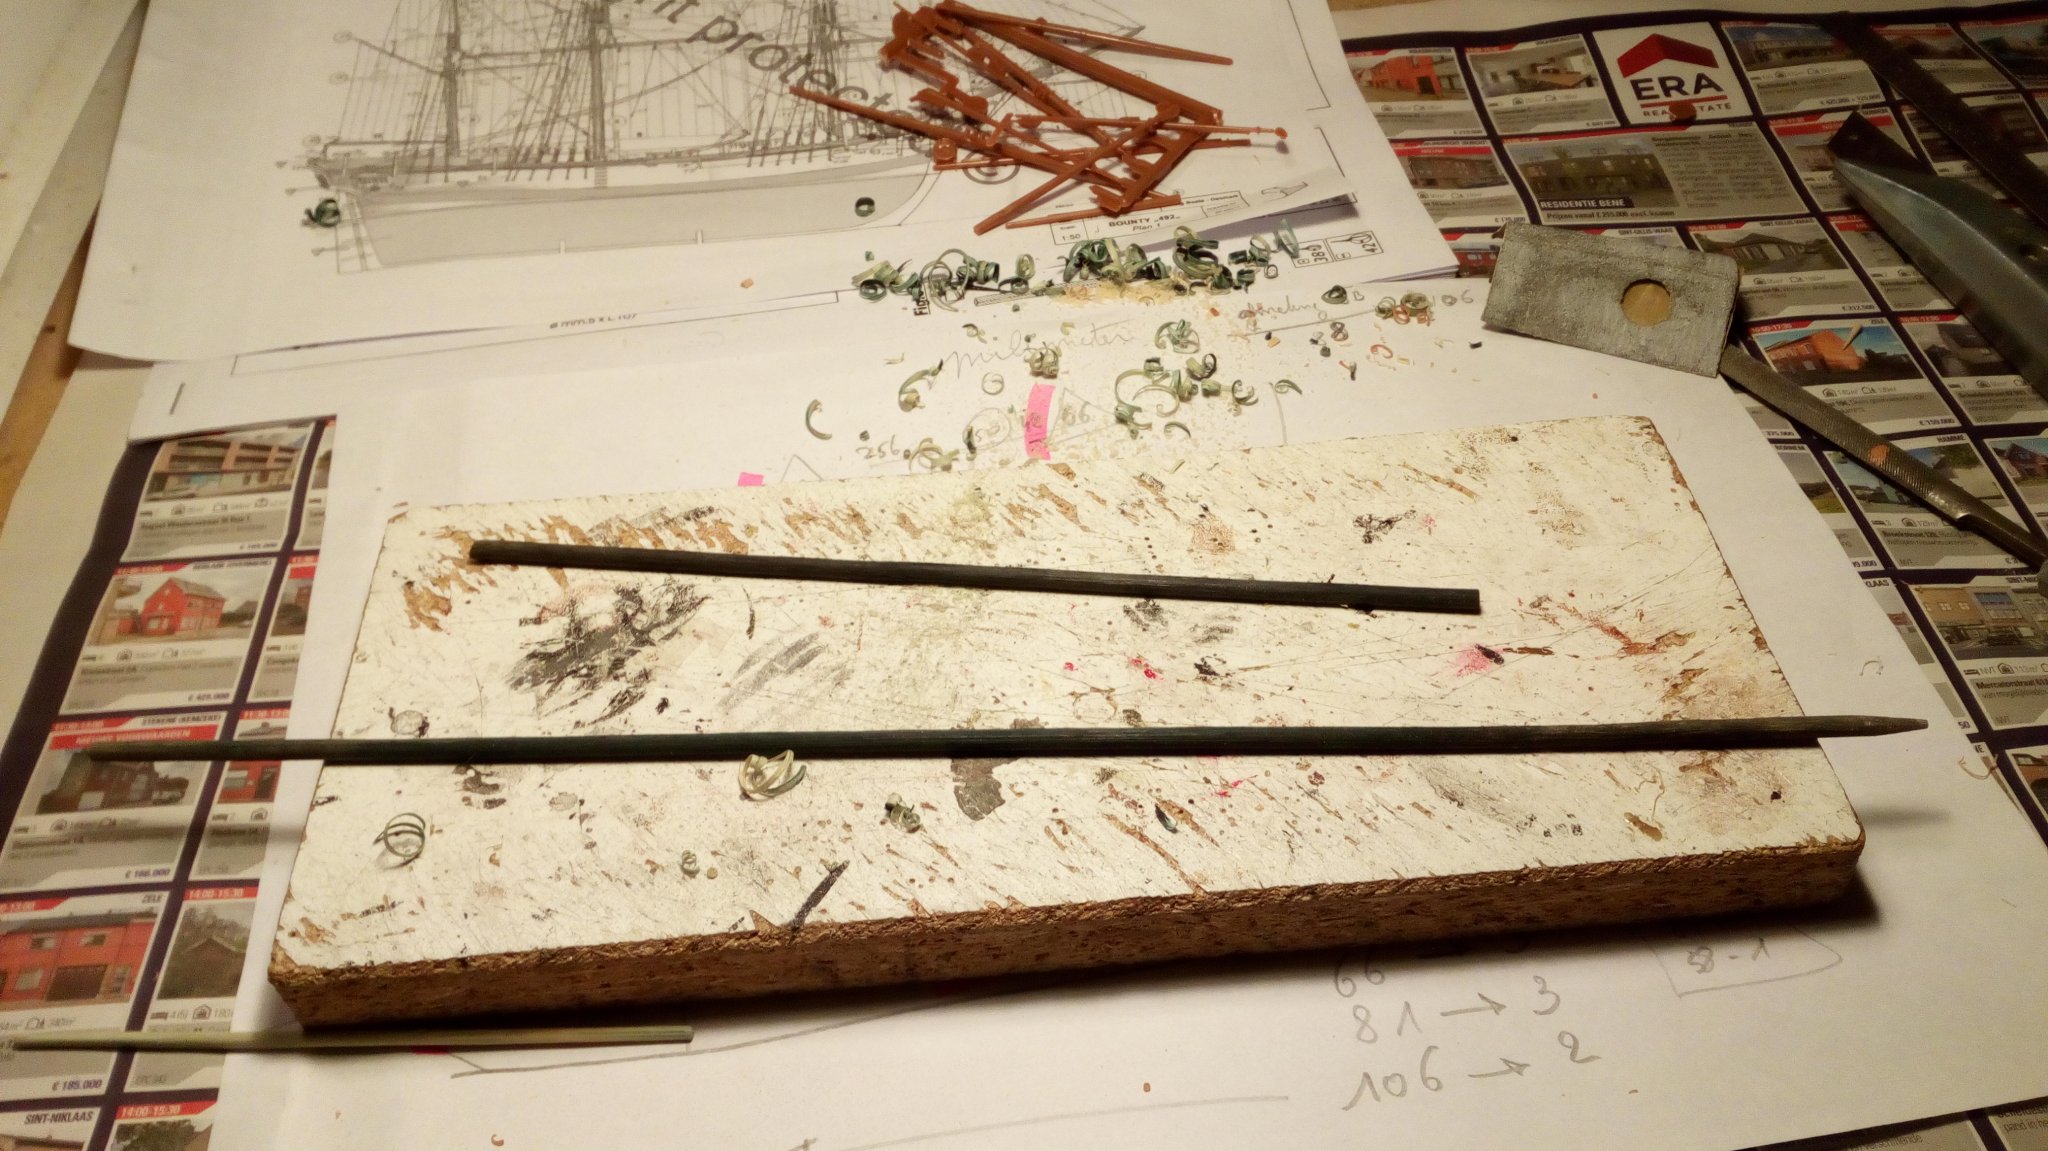
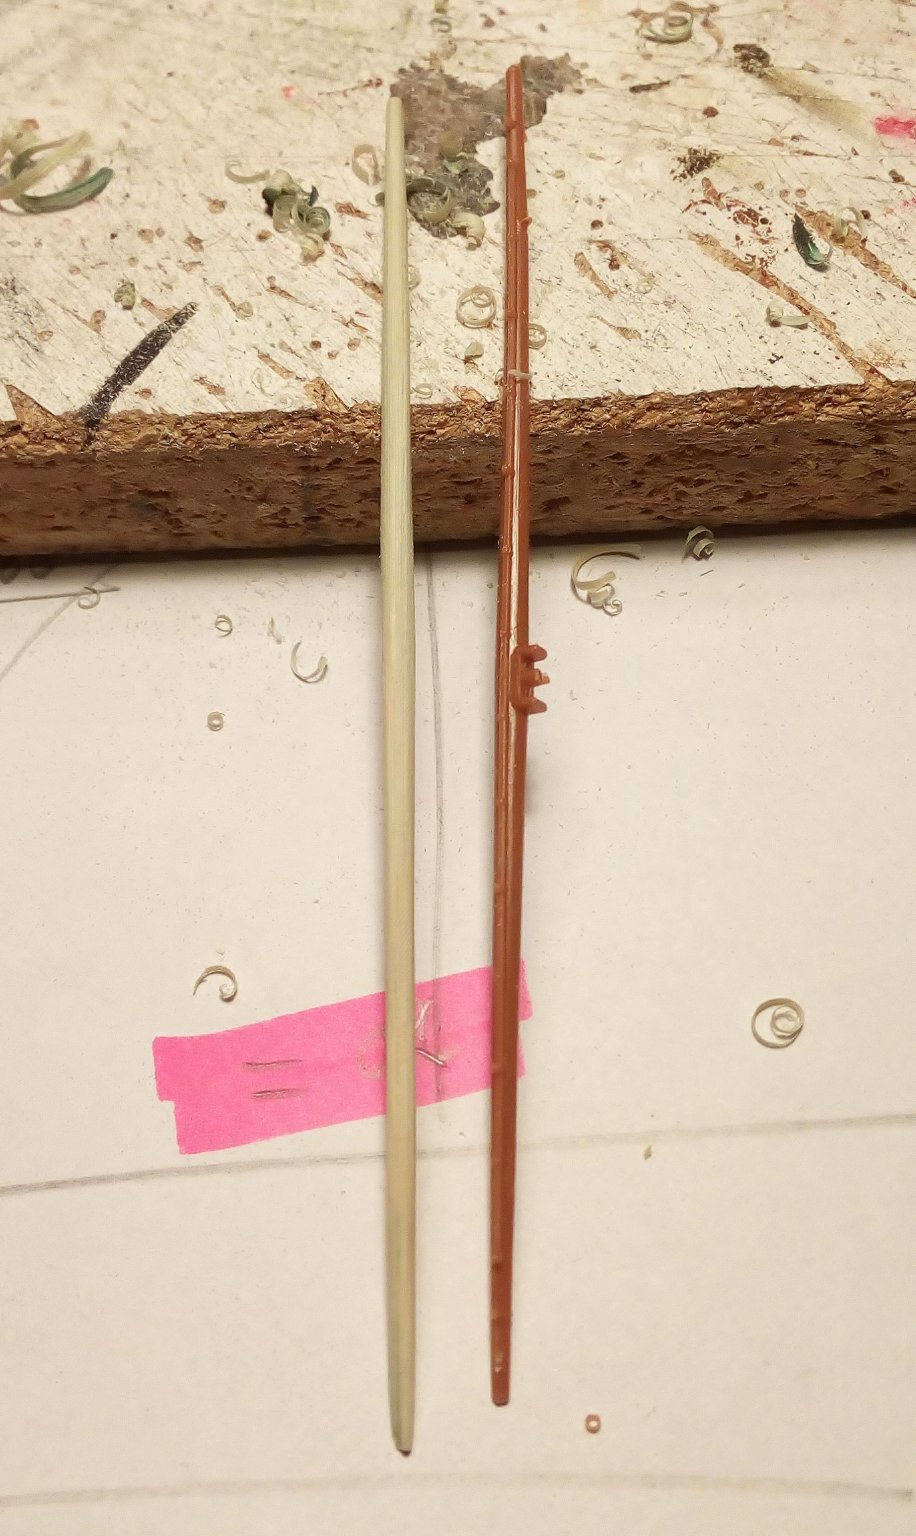
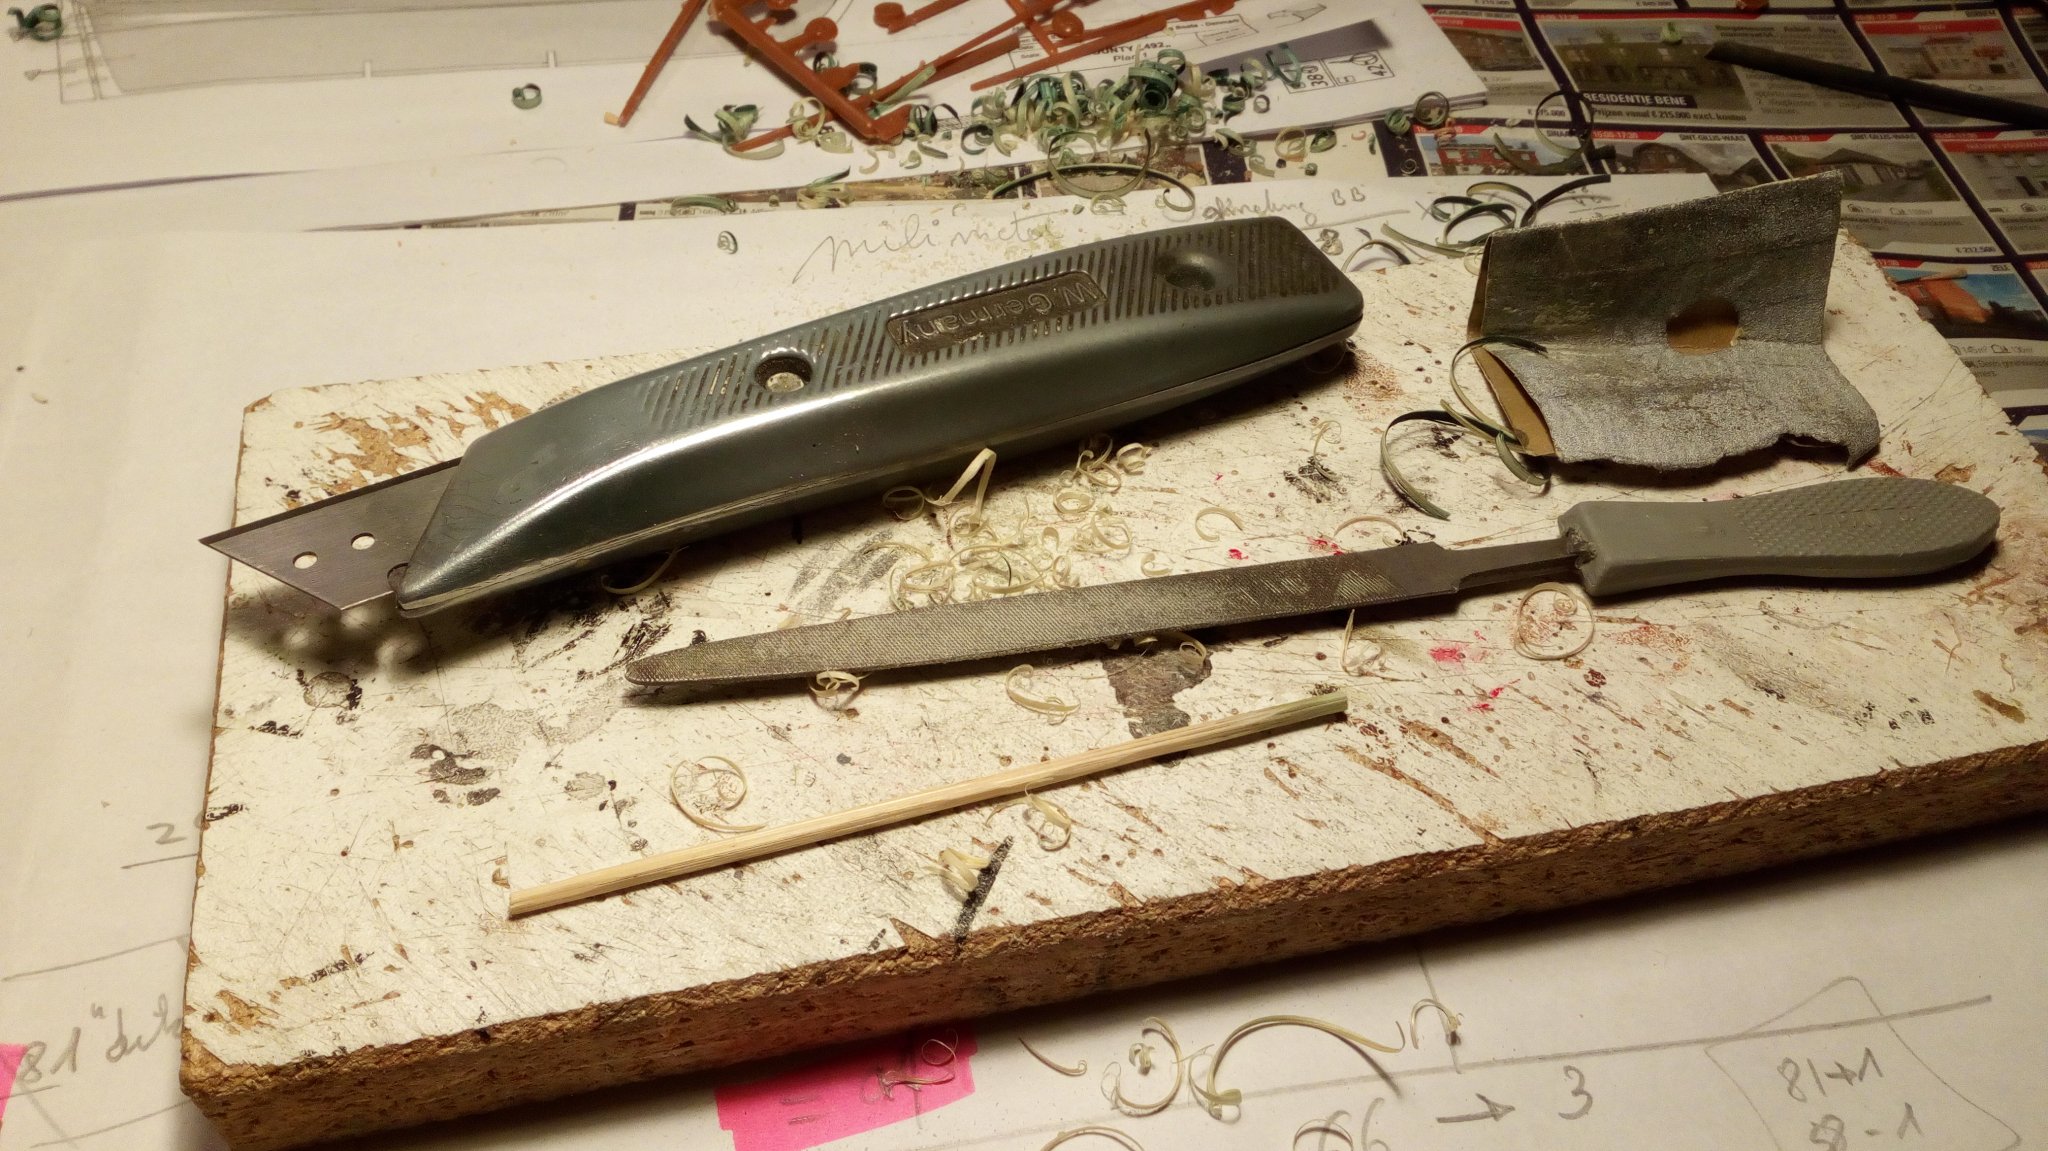
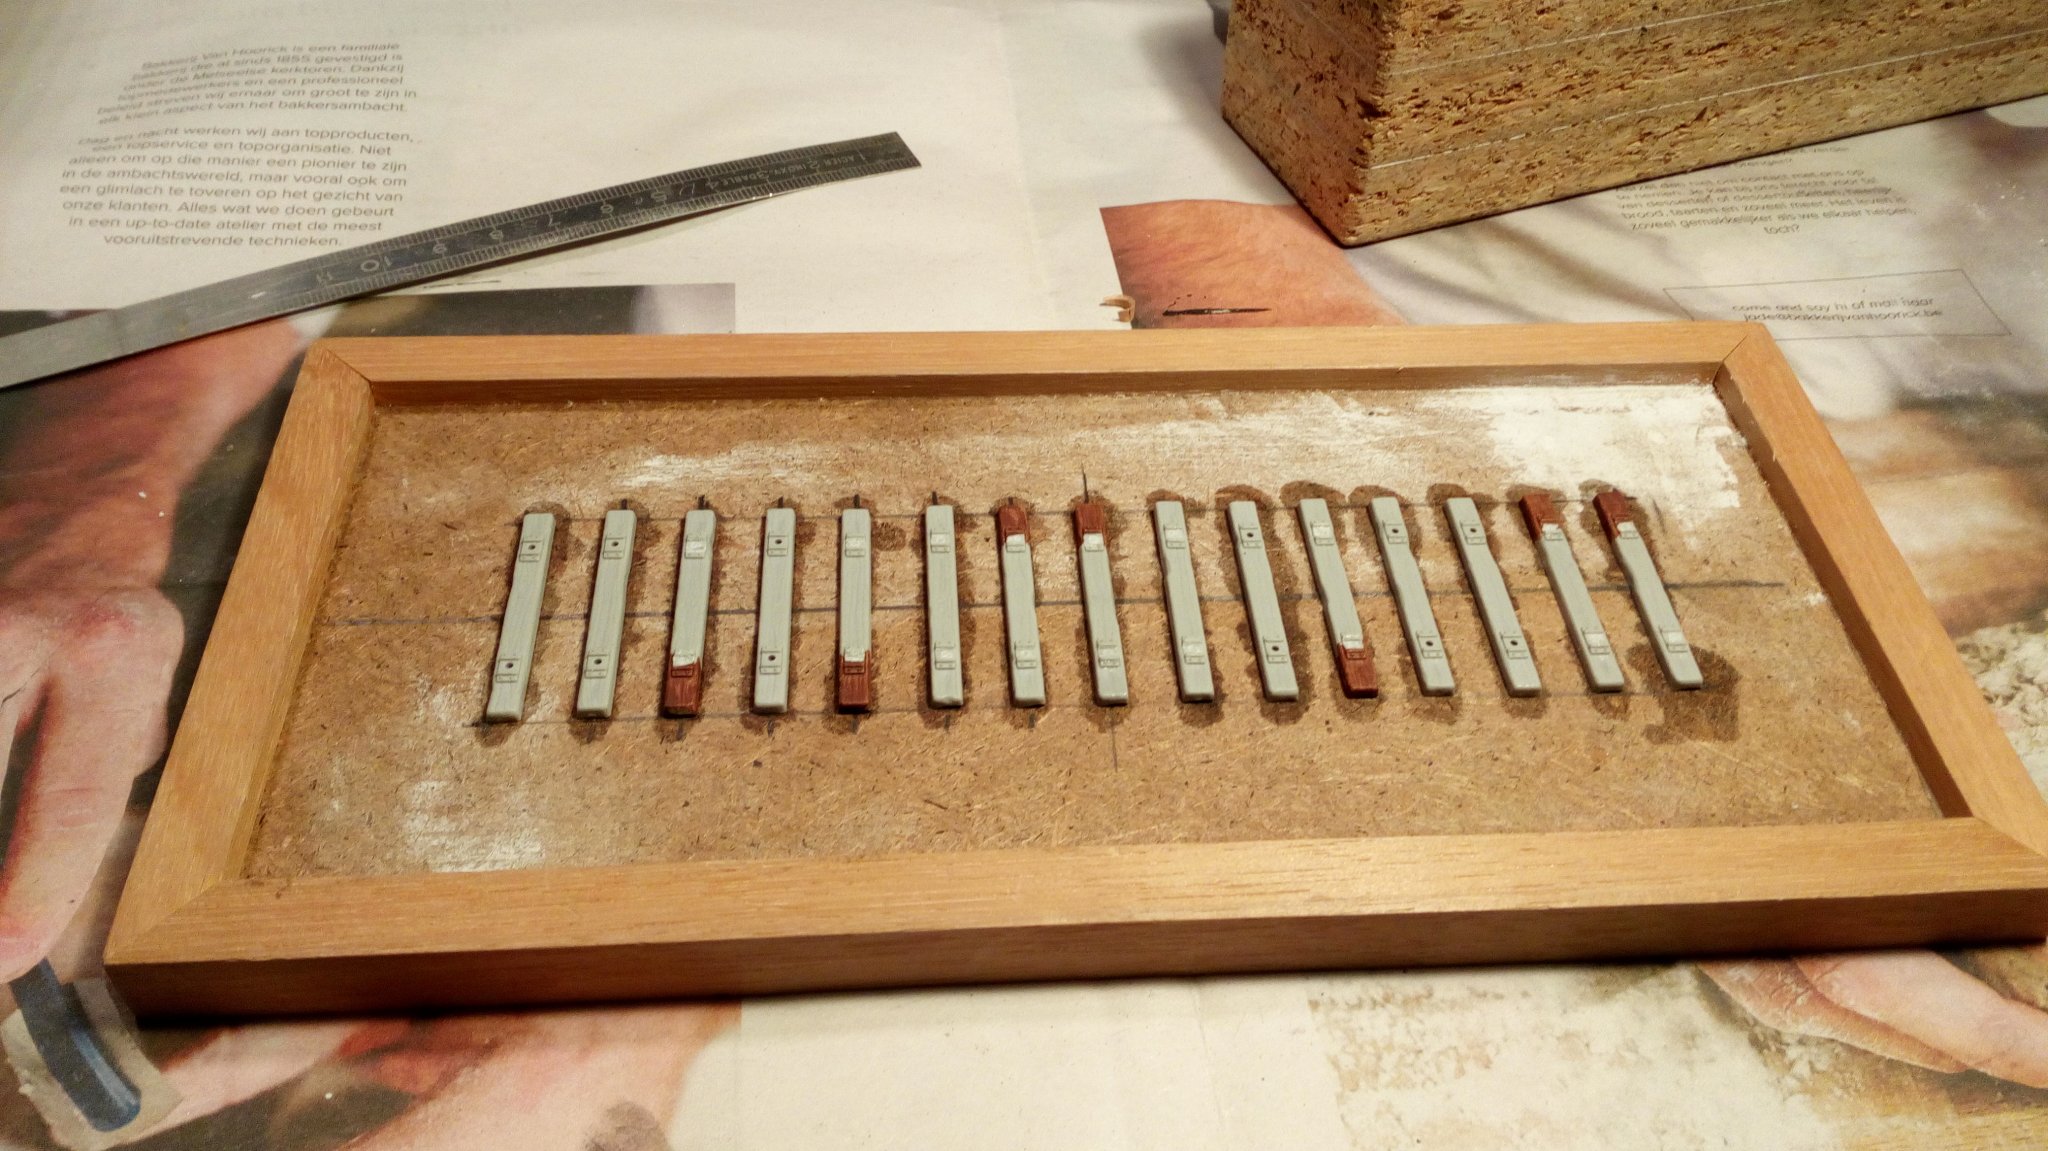
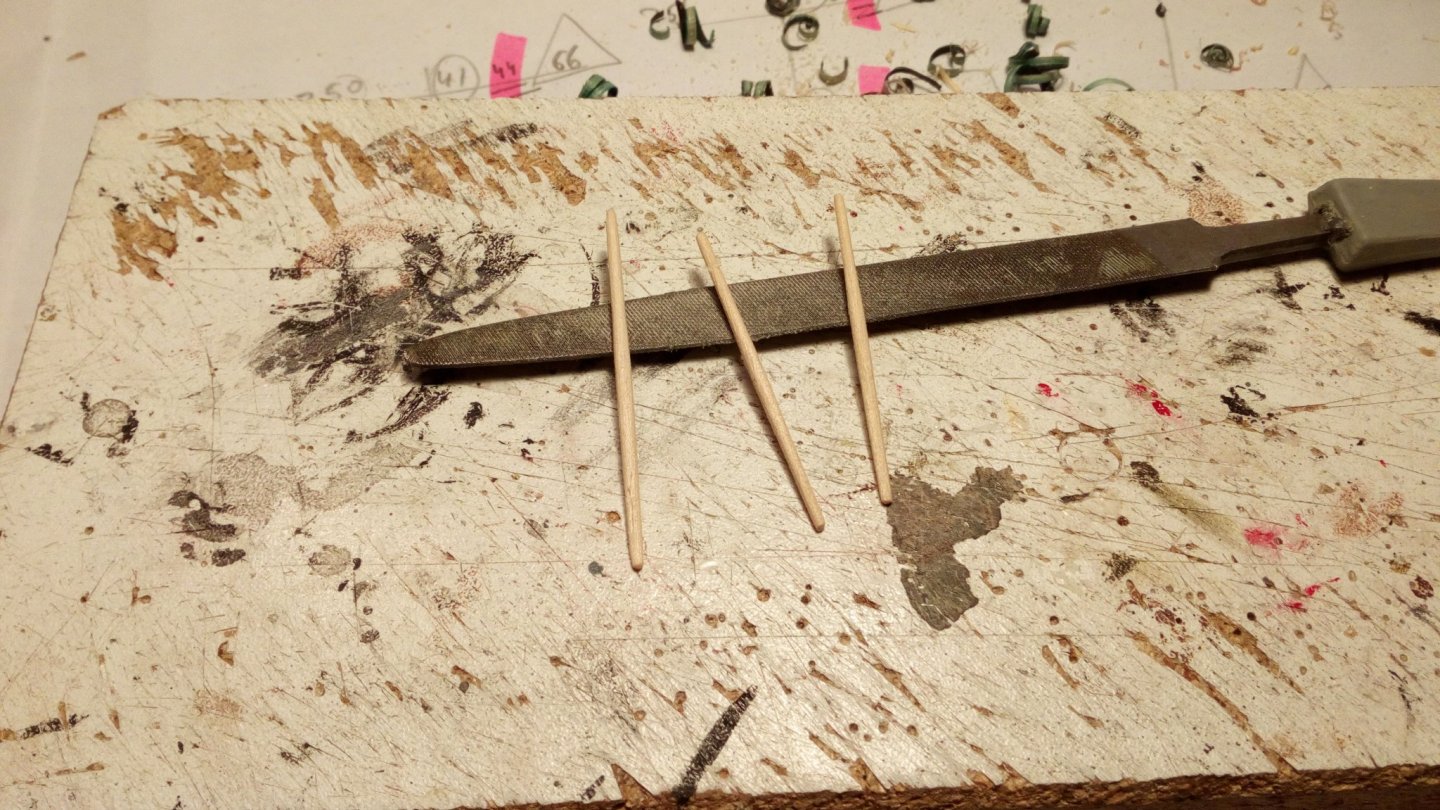
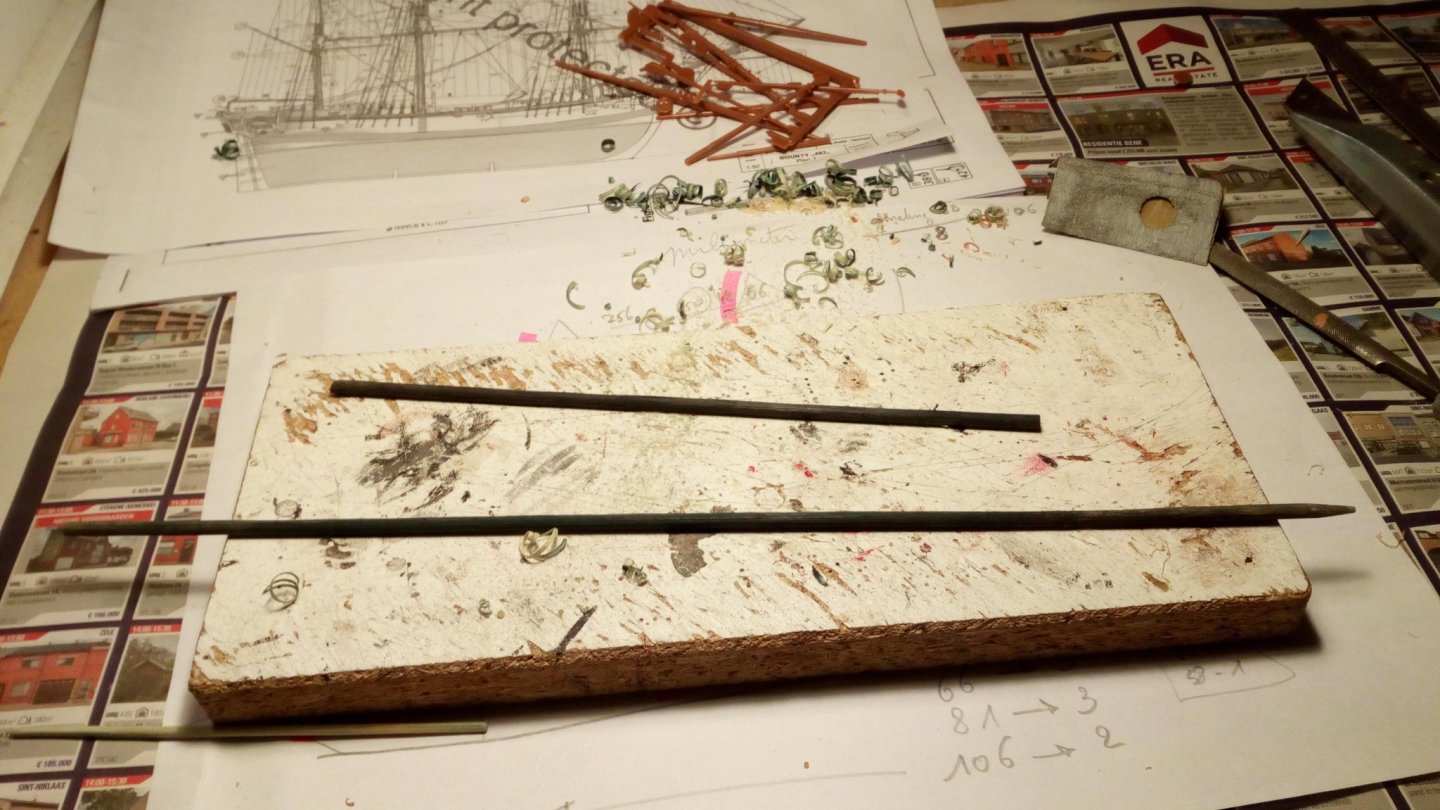
Thank you everyone for the nice comments and likes. This old kit has become a real challenge. And so far also my cheapest plastic model kit. A kit for free, some plastic sheet, glue, some paint, and some leftovers from the spareparts box. Meanwhile : Started making spars. The designers of this kit made it easy for themselves when making the mold. Some spars are simply identical to each other (see sketch) "Cleaning" the spars Oops, Very flexible. Later it also appeared that they broke quickly ... The plastic spars are all in waste bin. New ones are made from toothpicks And from small bamboo sticks. They are used in plant pots. The processing of this bamboo was fairly easy Tools used Wooden spars (Some are still a bit too thick in diameter) Thanks for following


-
Neatly planked. Congrats.
-
-
I agree with Druxey. Everything neatly in line is of course a challenge. But this is much more realistic. If anyone has a comment. You can always say that some rowers have just been recruited, and still have to practice
-
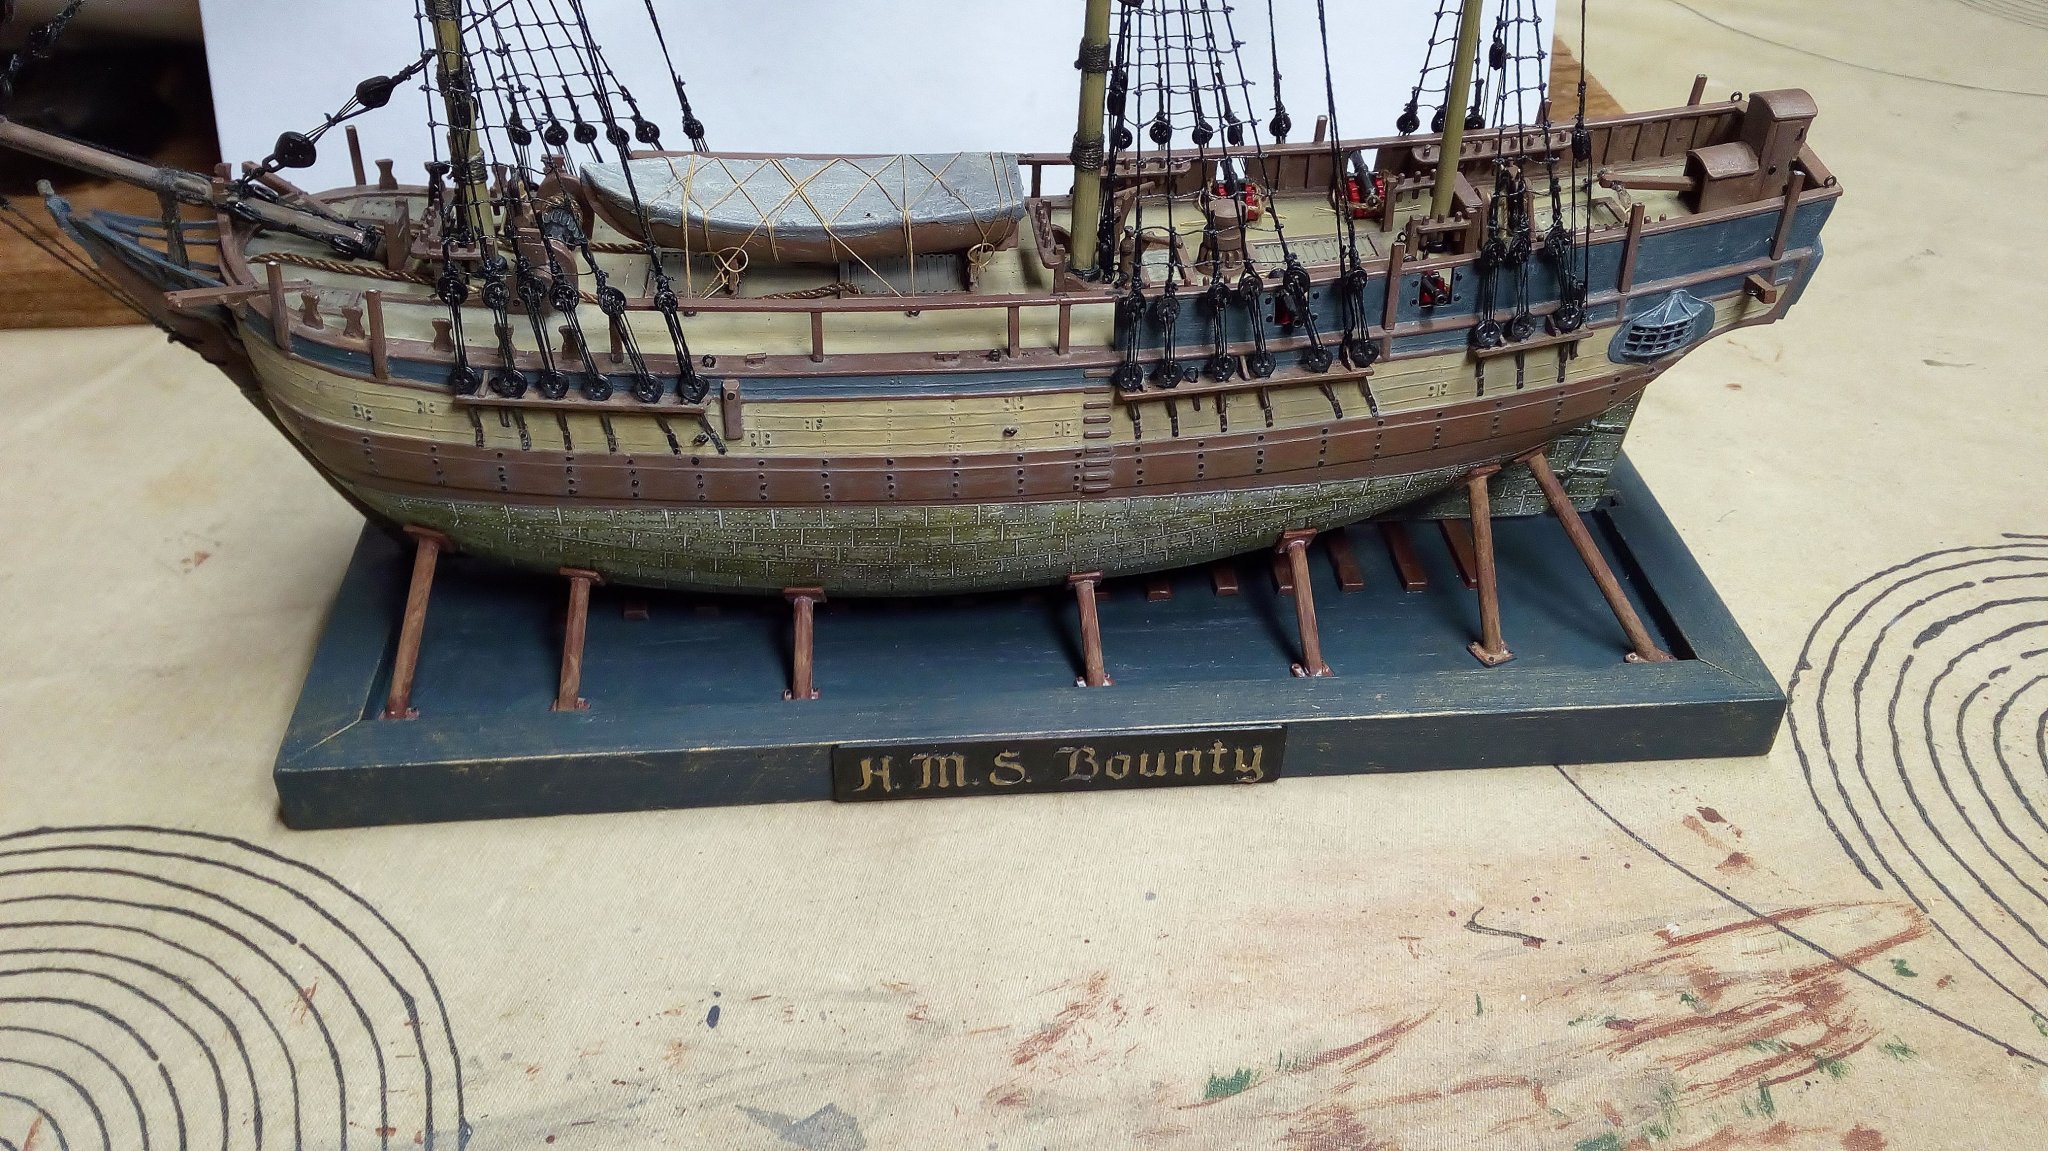
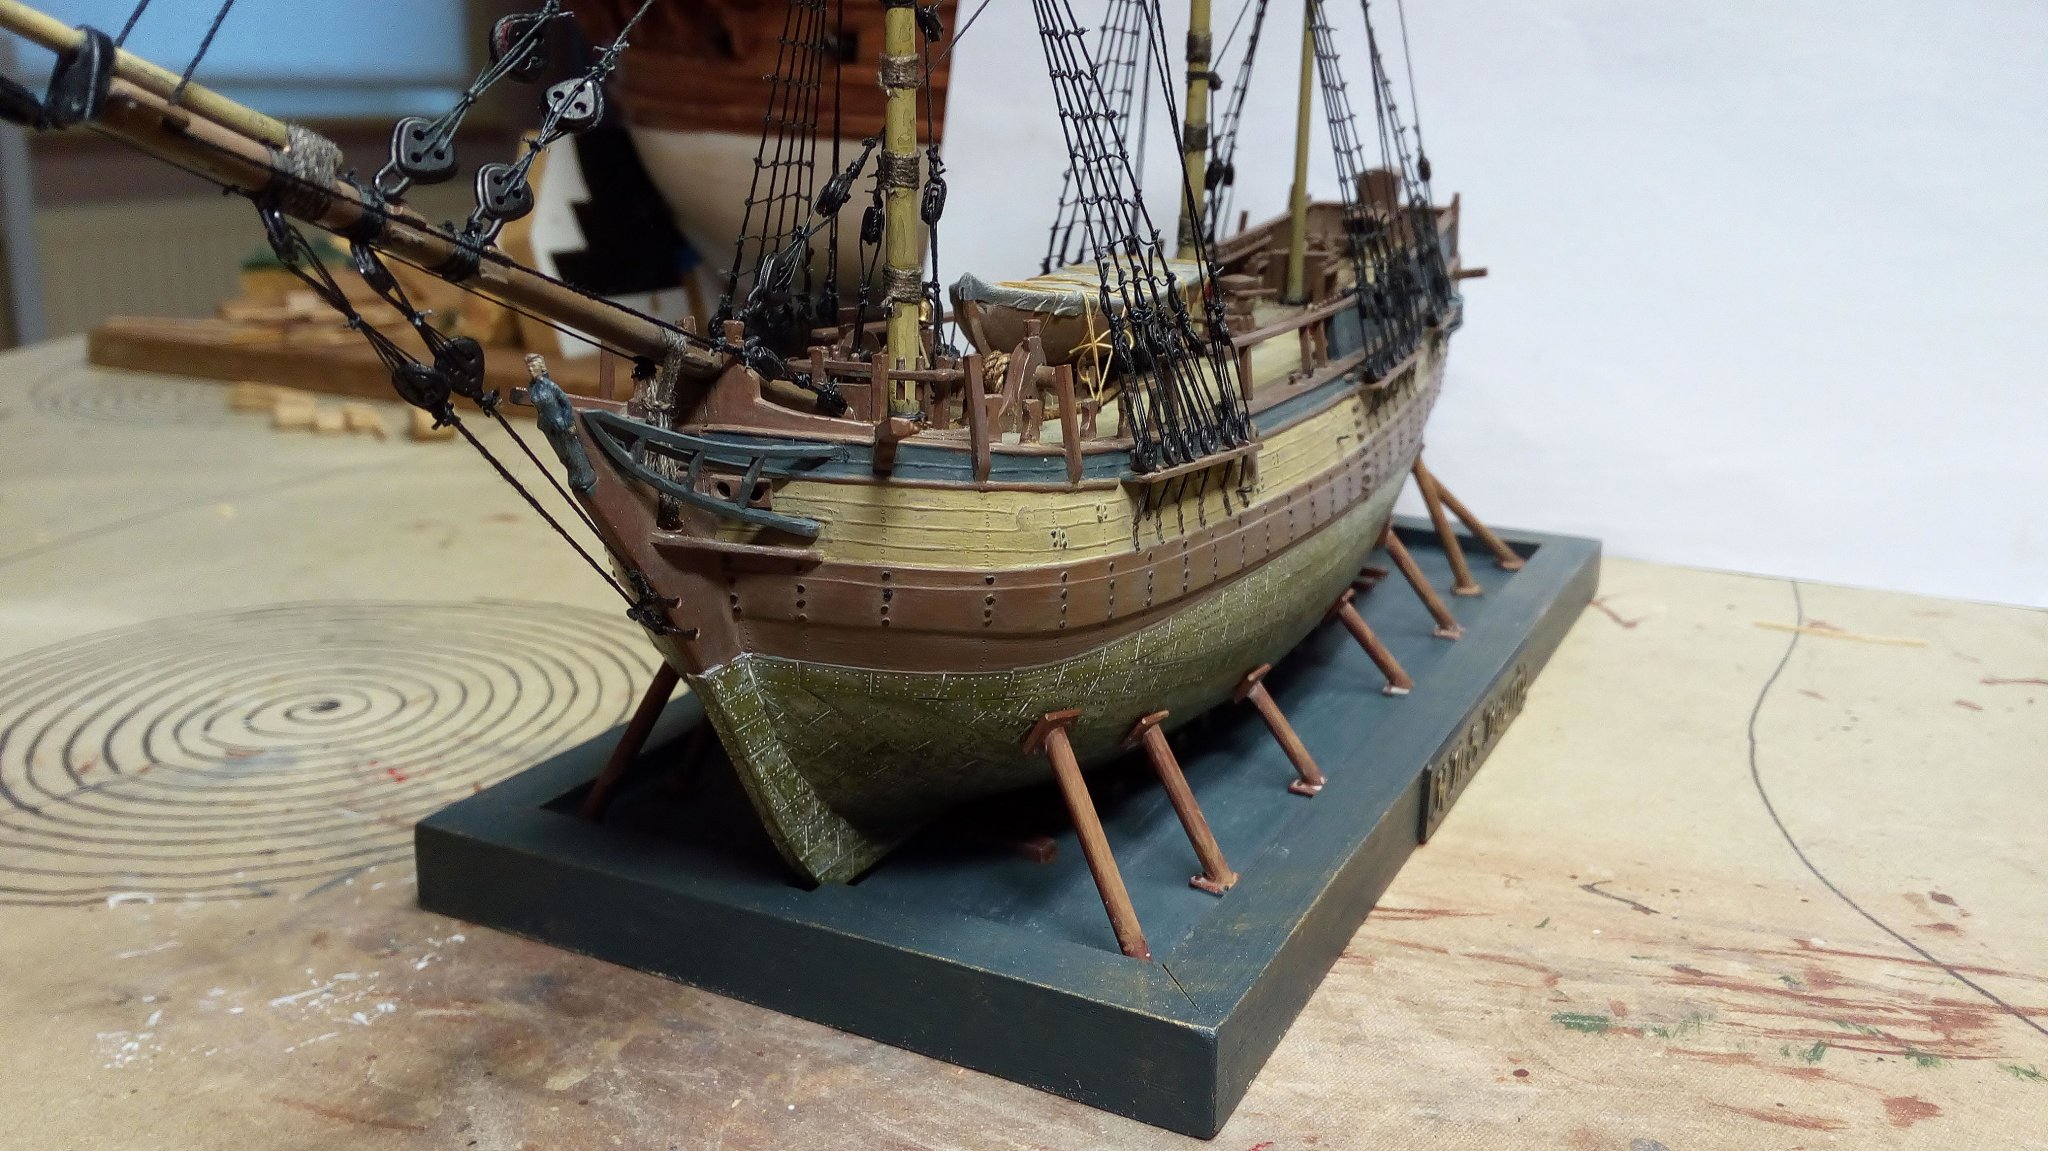
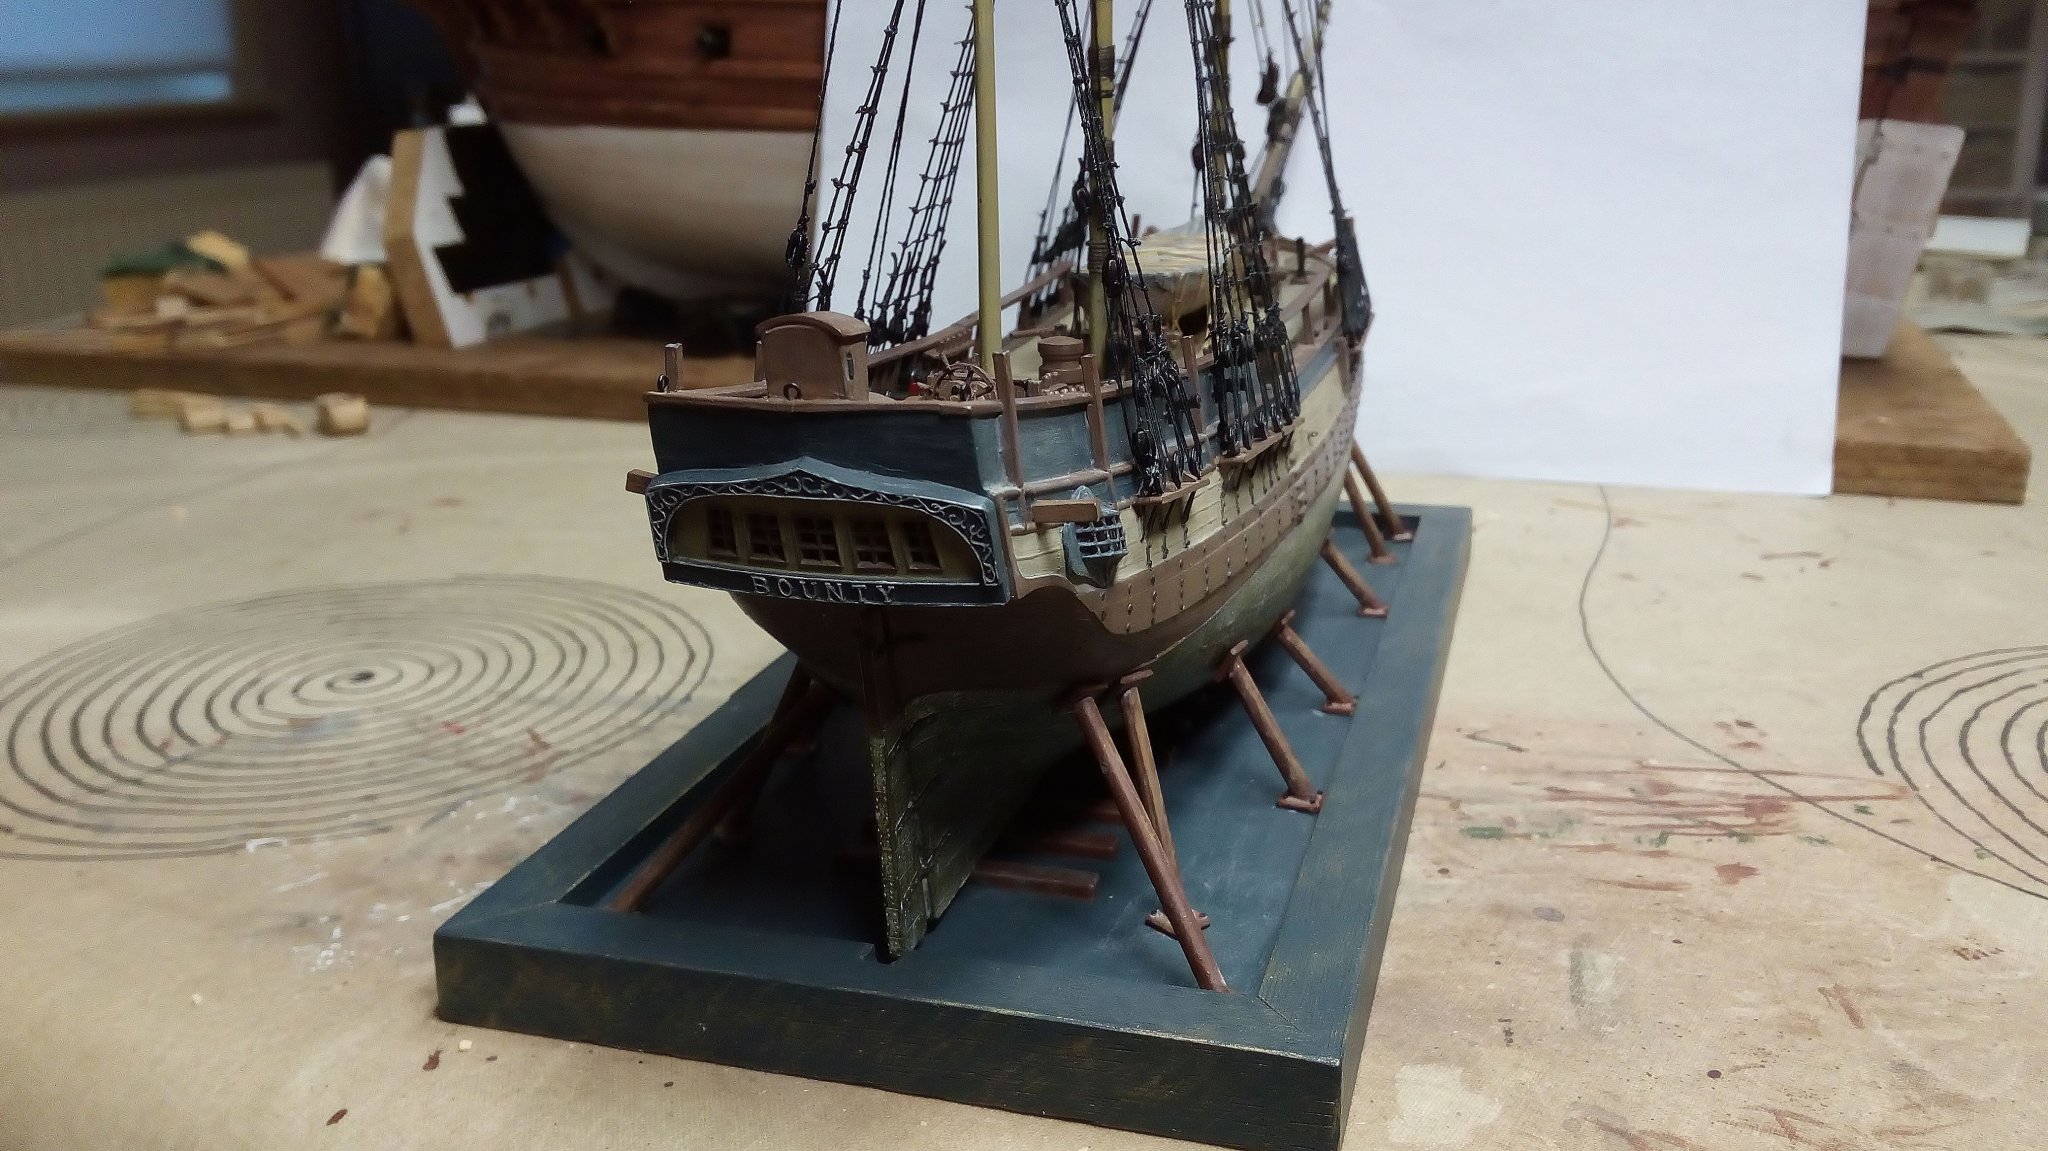
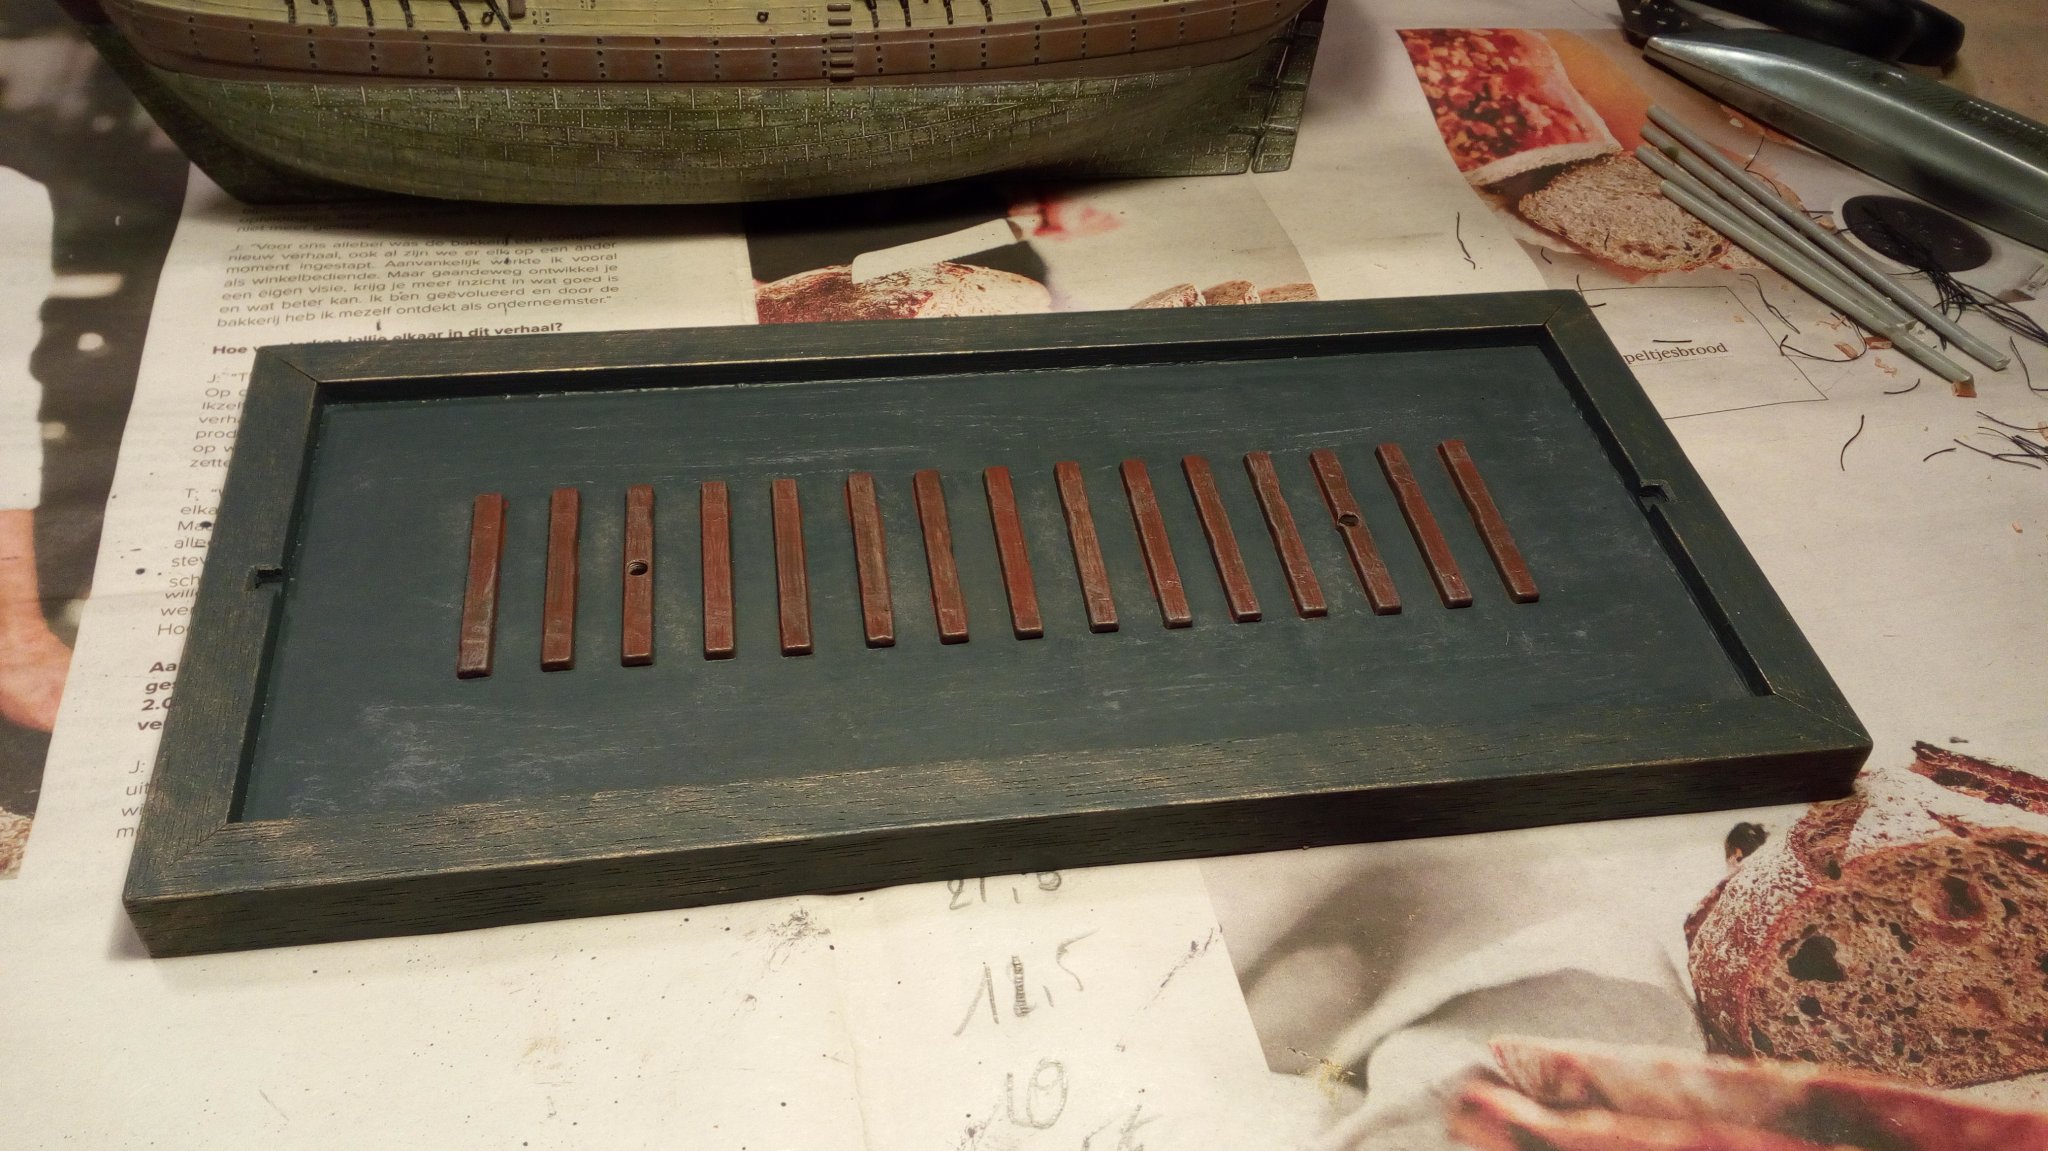
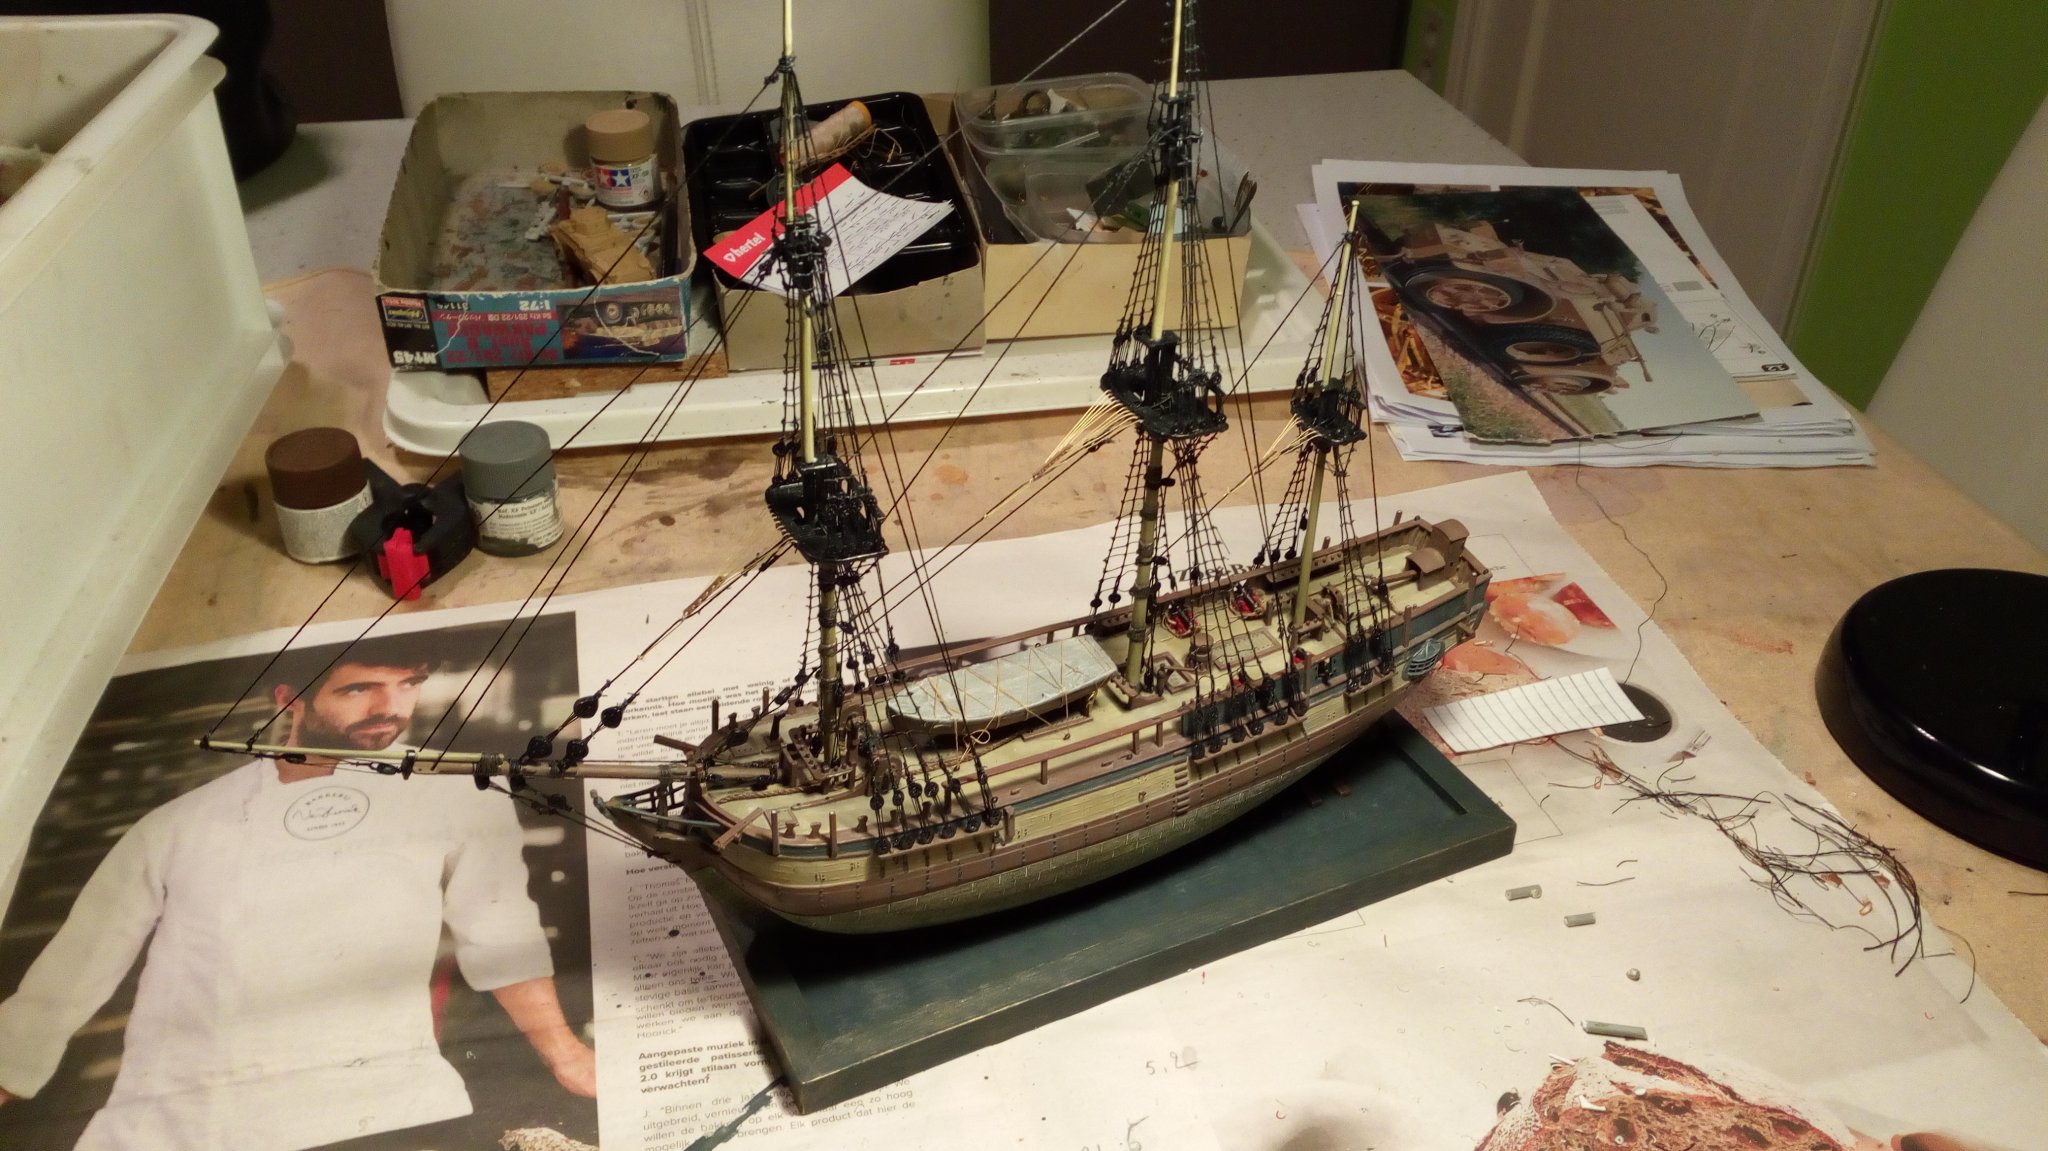
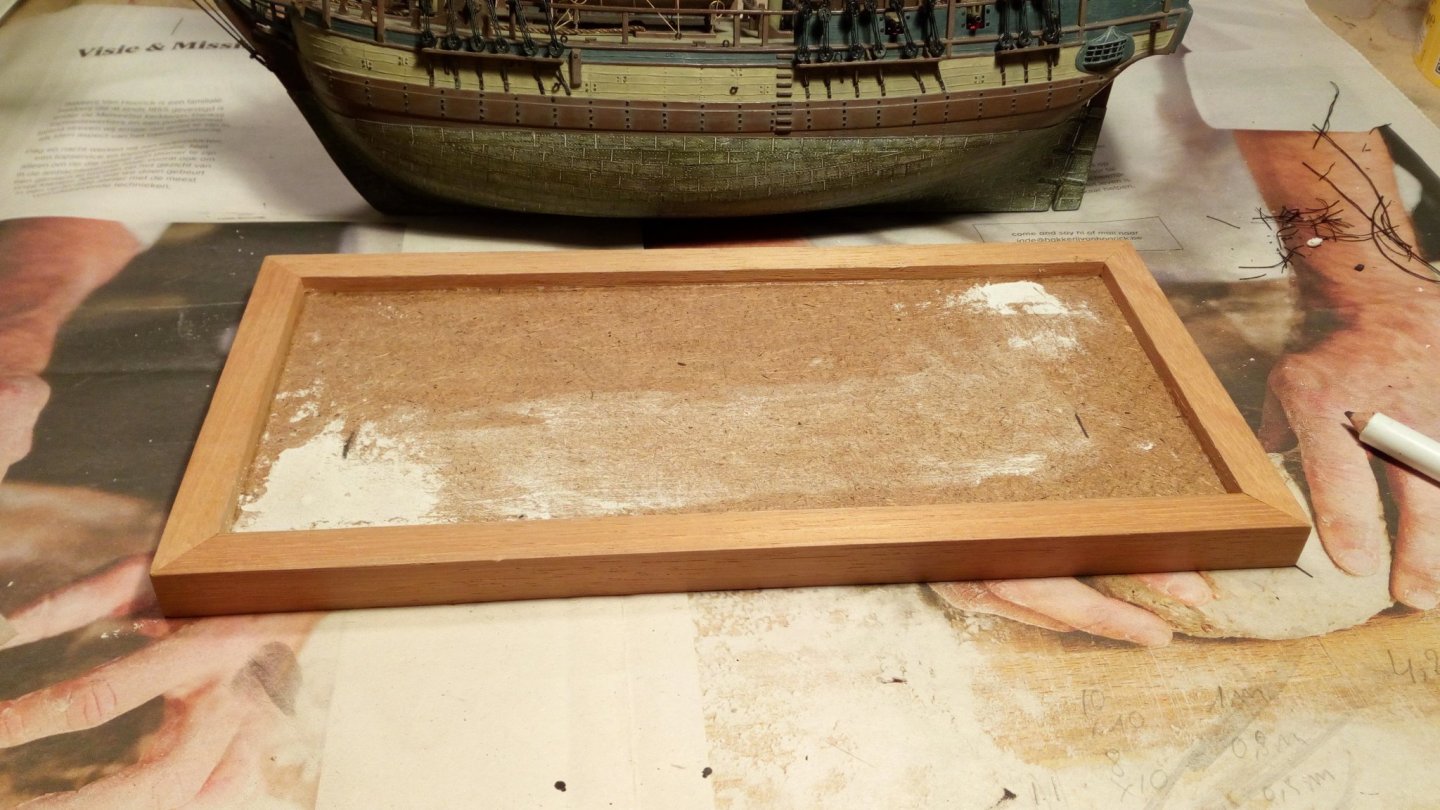
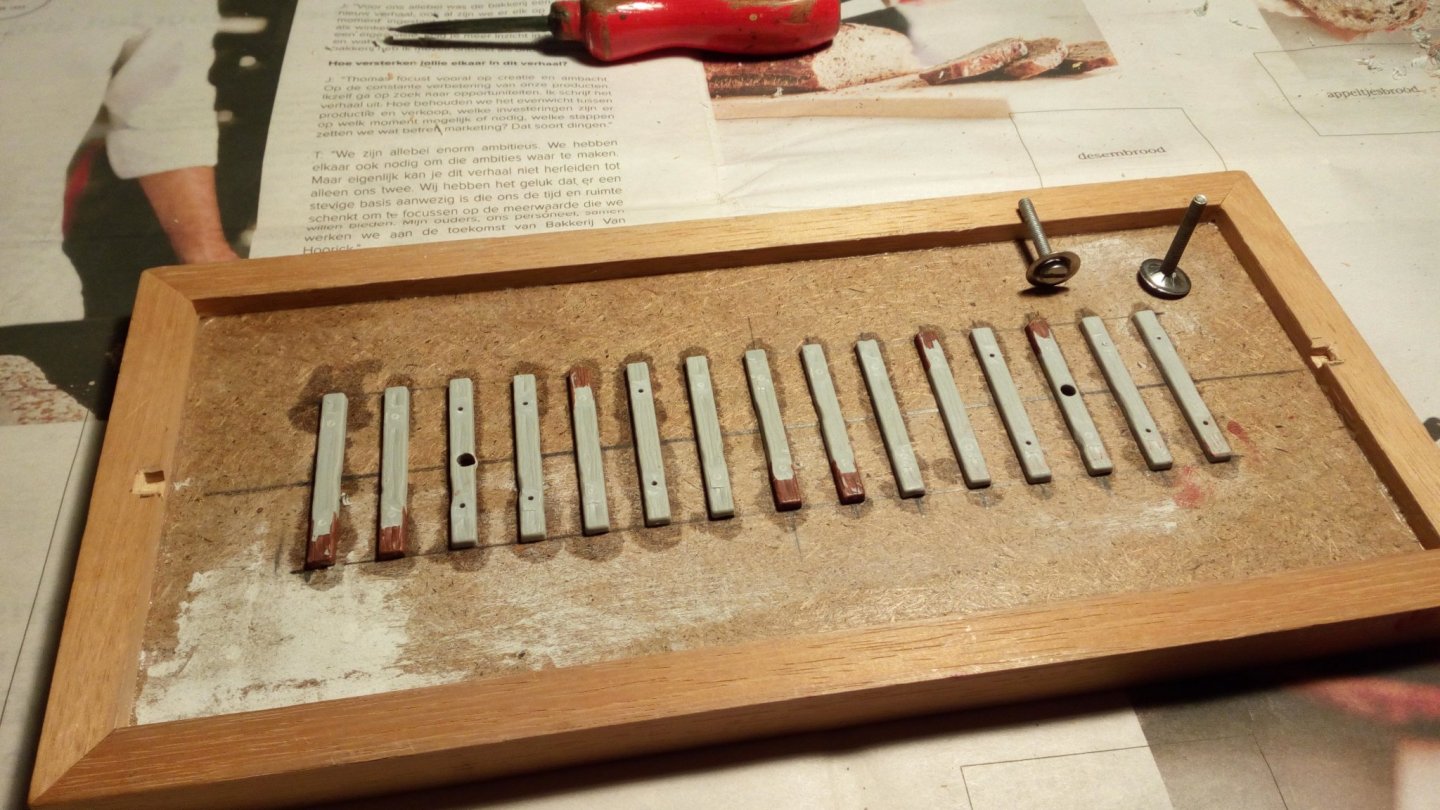
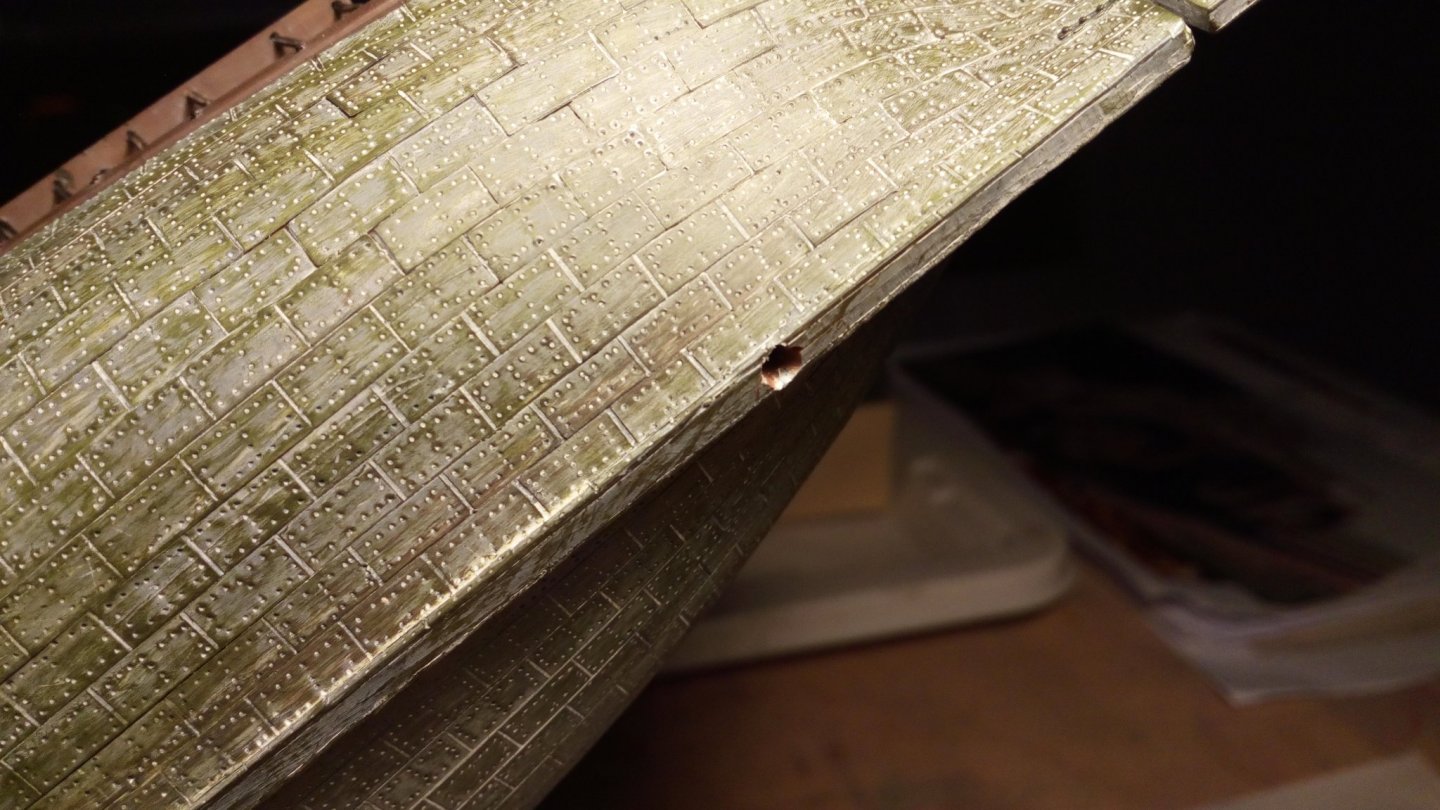
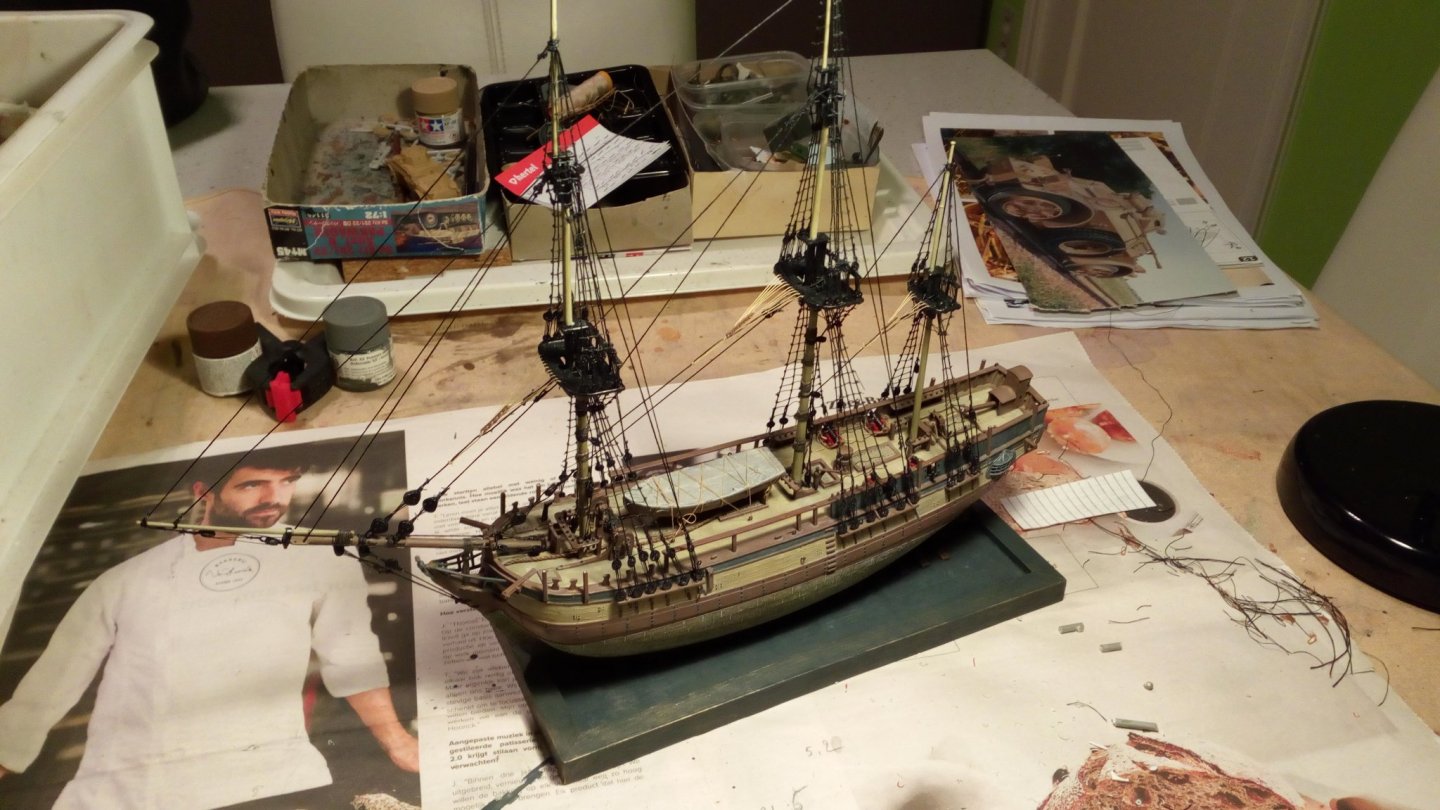
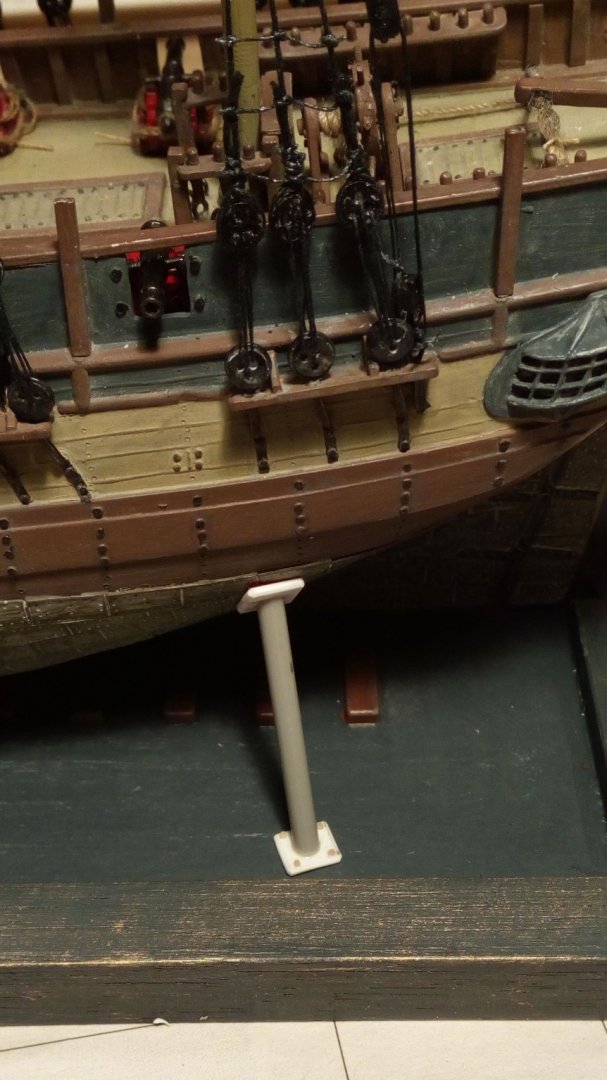
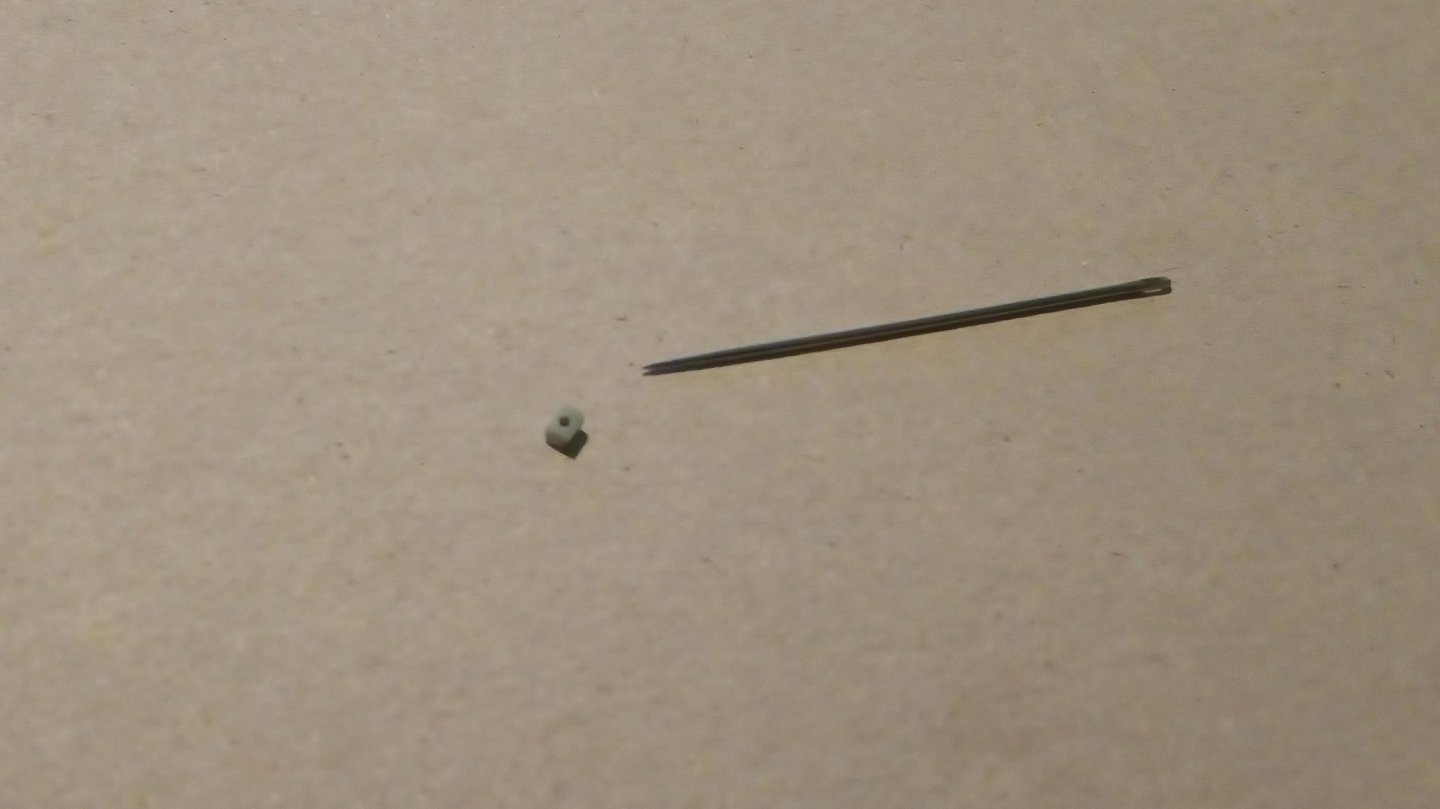
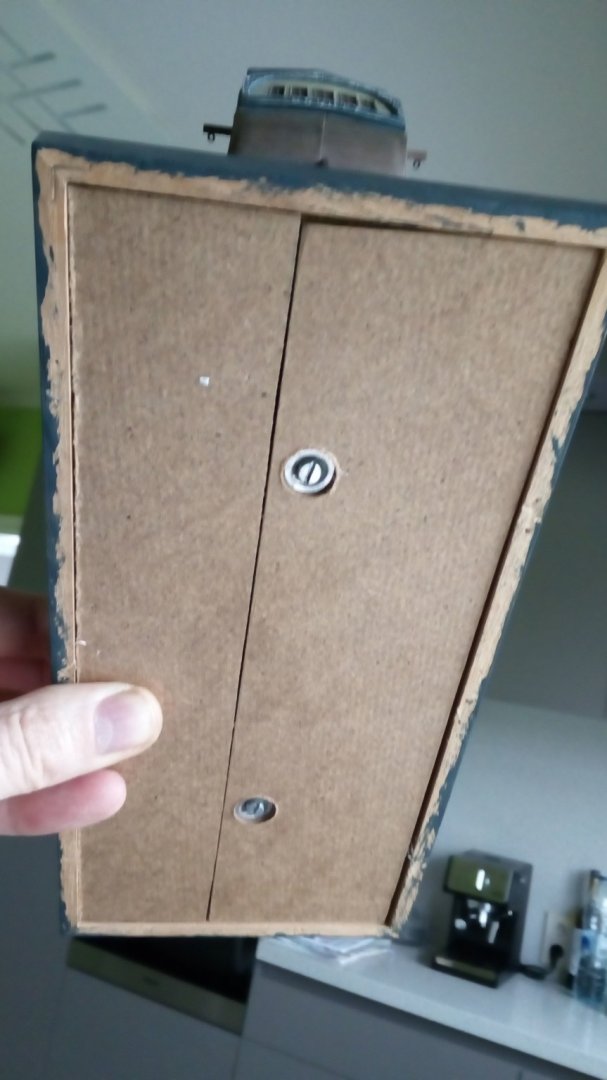
Thanks for the likes and positive comments. 1966, then I was 2 years old ... These Beagle and Bounty kits apparently recall a lot of memories for some of us. Meanwhile Hoera, Hoera. Standing rigging is finished. Started with the build of a base plate. An old photo frame that my wife wanted to throw away. The inside is filled with a wooden plate And no I don't build a railroad drilling holes for 2 screws Drilling holes in the keel. ( i should have done much earlier, this was a bit stressful) Painted And the model screwed onto the plate. Before screwing, liquid plastic glue has been put into the holes of the keel. This way the screw goes in easily and thread is "tapped" into the holes. There will be extra supports on the sides. 1 unpainted test model is ready The blocks that I have now (scale 1/100 of a Heller Soleyl Royal) are unfortunately too large for the running rigging. I have made 1 unpainted (test)block in plastic. The wooden blocks that you find in most wooden kits served as an example. The hole in the block is diameter 0.7 mm. Thanks for following


-
Welcome to MSW. Nice Vasa model