Baker
-
Posts
4,289 -
Joined
-
Last visited
Content Type
Profiles
Forums
Gallery
Events
Everything posted by Baker
-
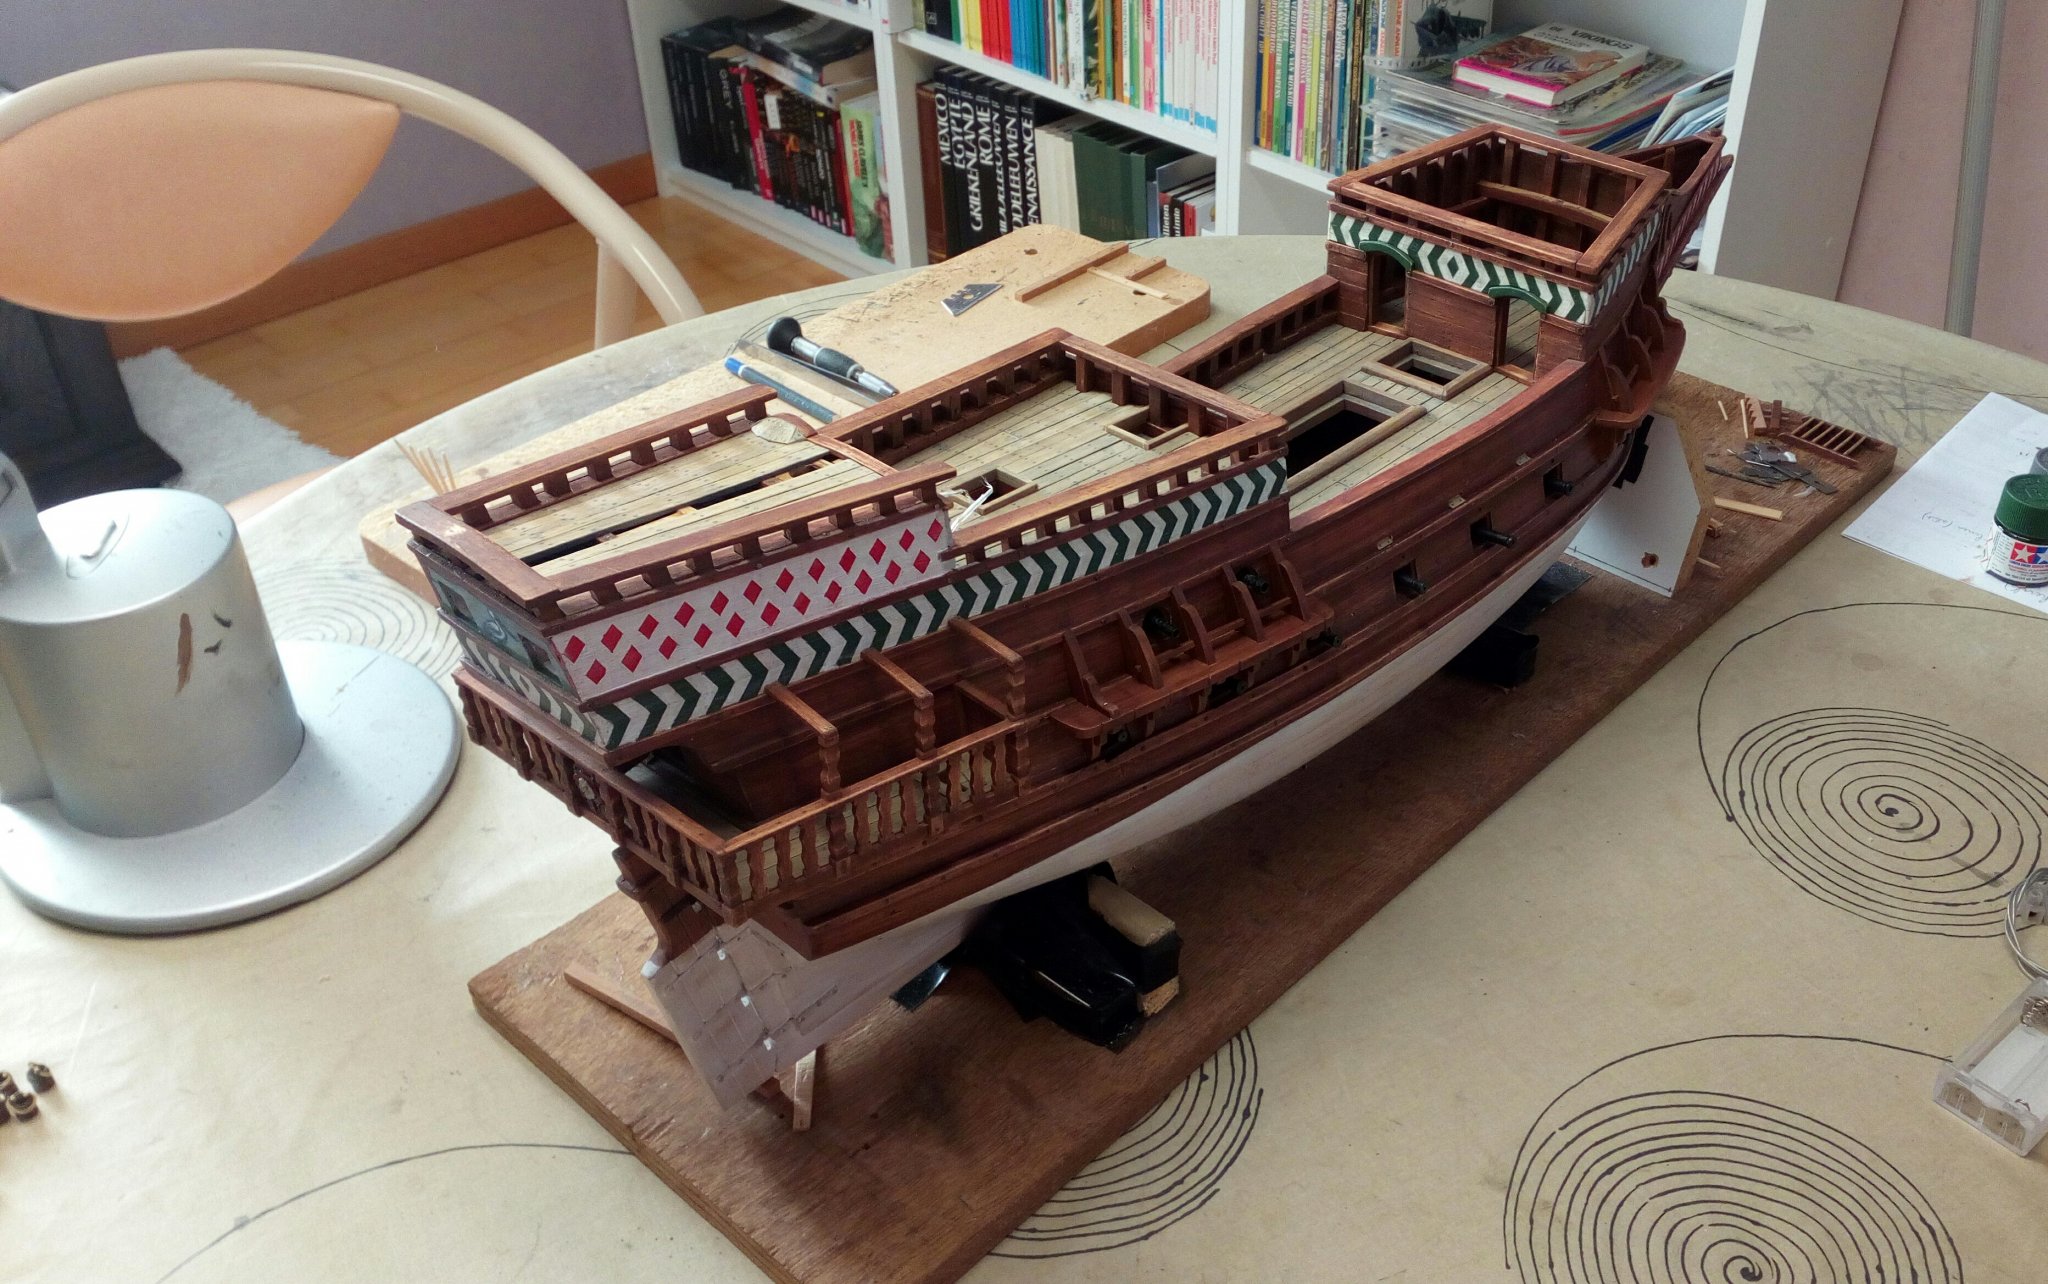
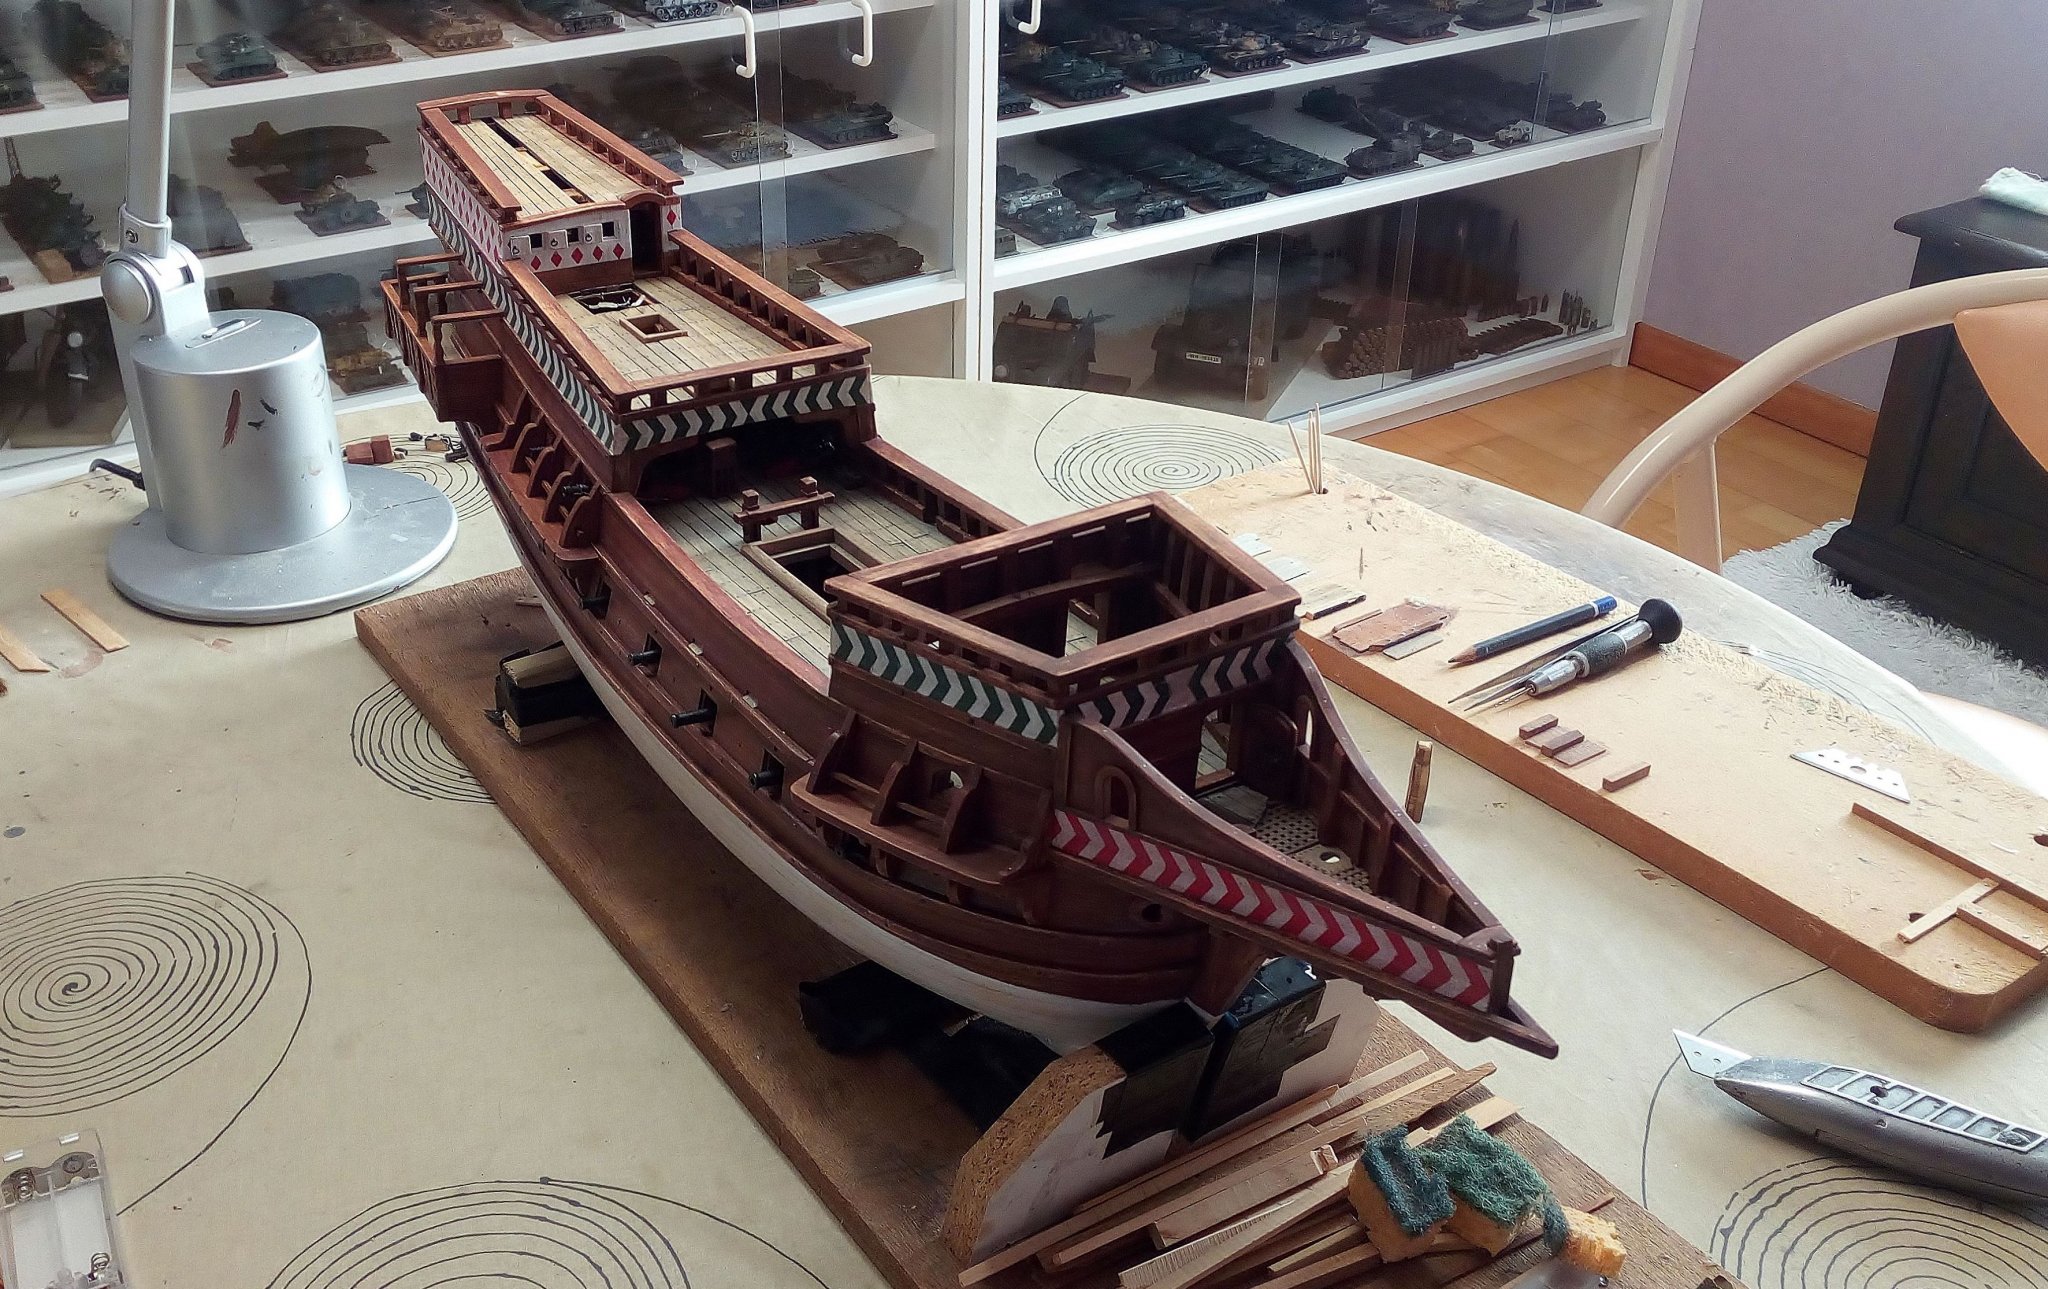
 Thanks Apxeos. Someone who has built more than 1400 military models. Is probably "a tankman". In the meantime this shipyard has been neglected in function of my little Bounty project. The only thing that happened the last months : The poop deck is largely planked and the LED lighting has been tested. Also, Through these months of silence at this shipyard. I'm thinking about changing the title of this log. Given the fact that making an exact copy of the Golden Hind is impossible. It might be better to delete this name from the title. Maybe "Pelican"- scale 1/45 - How an English armed merchant merchant from the 2nd half of the 16th century may have looked like. Merry Christmas and a happy 2020 to everyone
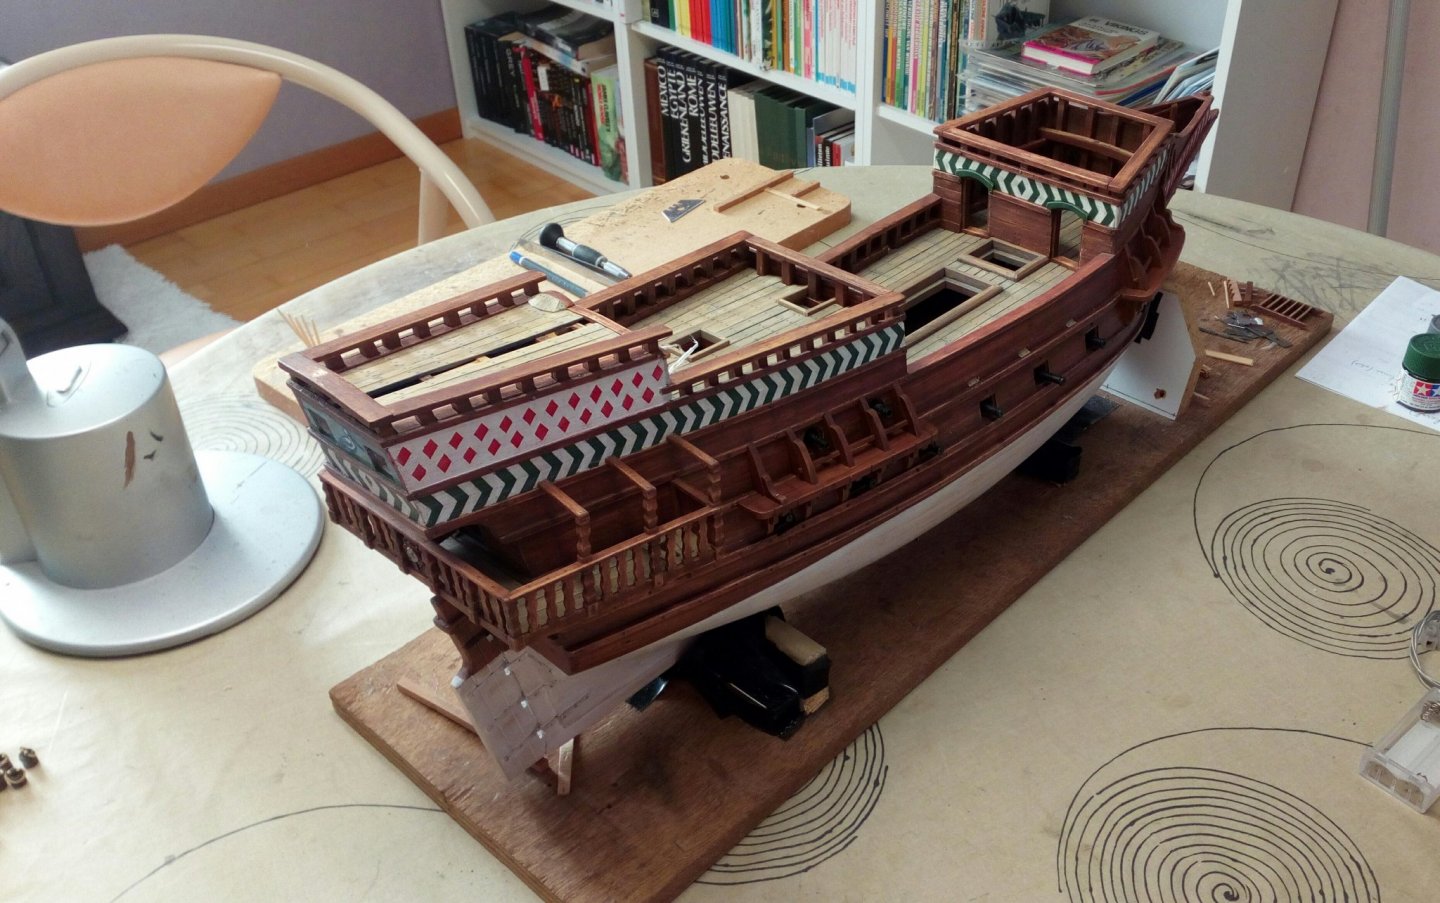


- 756 replies
-
- 16
-

-
- galleon
- golden hind
- (and 2 more)
-
Great work Despite all the luxury, Fluffy looks a little bit angry. A dog has masters A cat has servants Me and my wife are also the servants of a cat
-
The text on the hull of this model RAST . V . TER . WAPEN . GHY . CHRISTEN . SCHAPEN . WILT . STRYT . BEGINNEN ???? U TER WAPEN GIJ KRISTEN SCHAPEN WIL STRIJD BEGINNEN Something like : CHRISTIANS, AT ARMS. IF YOU WANT TO START THE BATTLE ( In my poor google english..) I expect the same problem with my Pelican /Golden Hind
-
Greetings, and
-
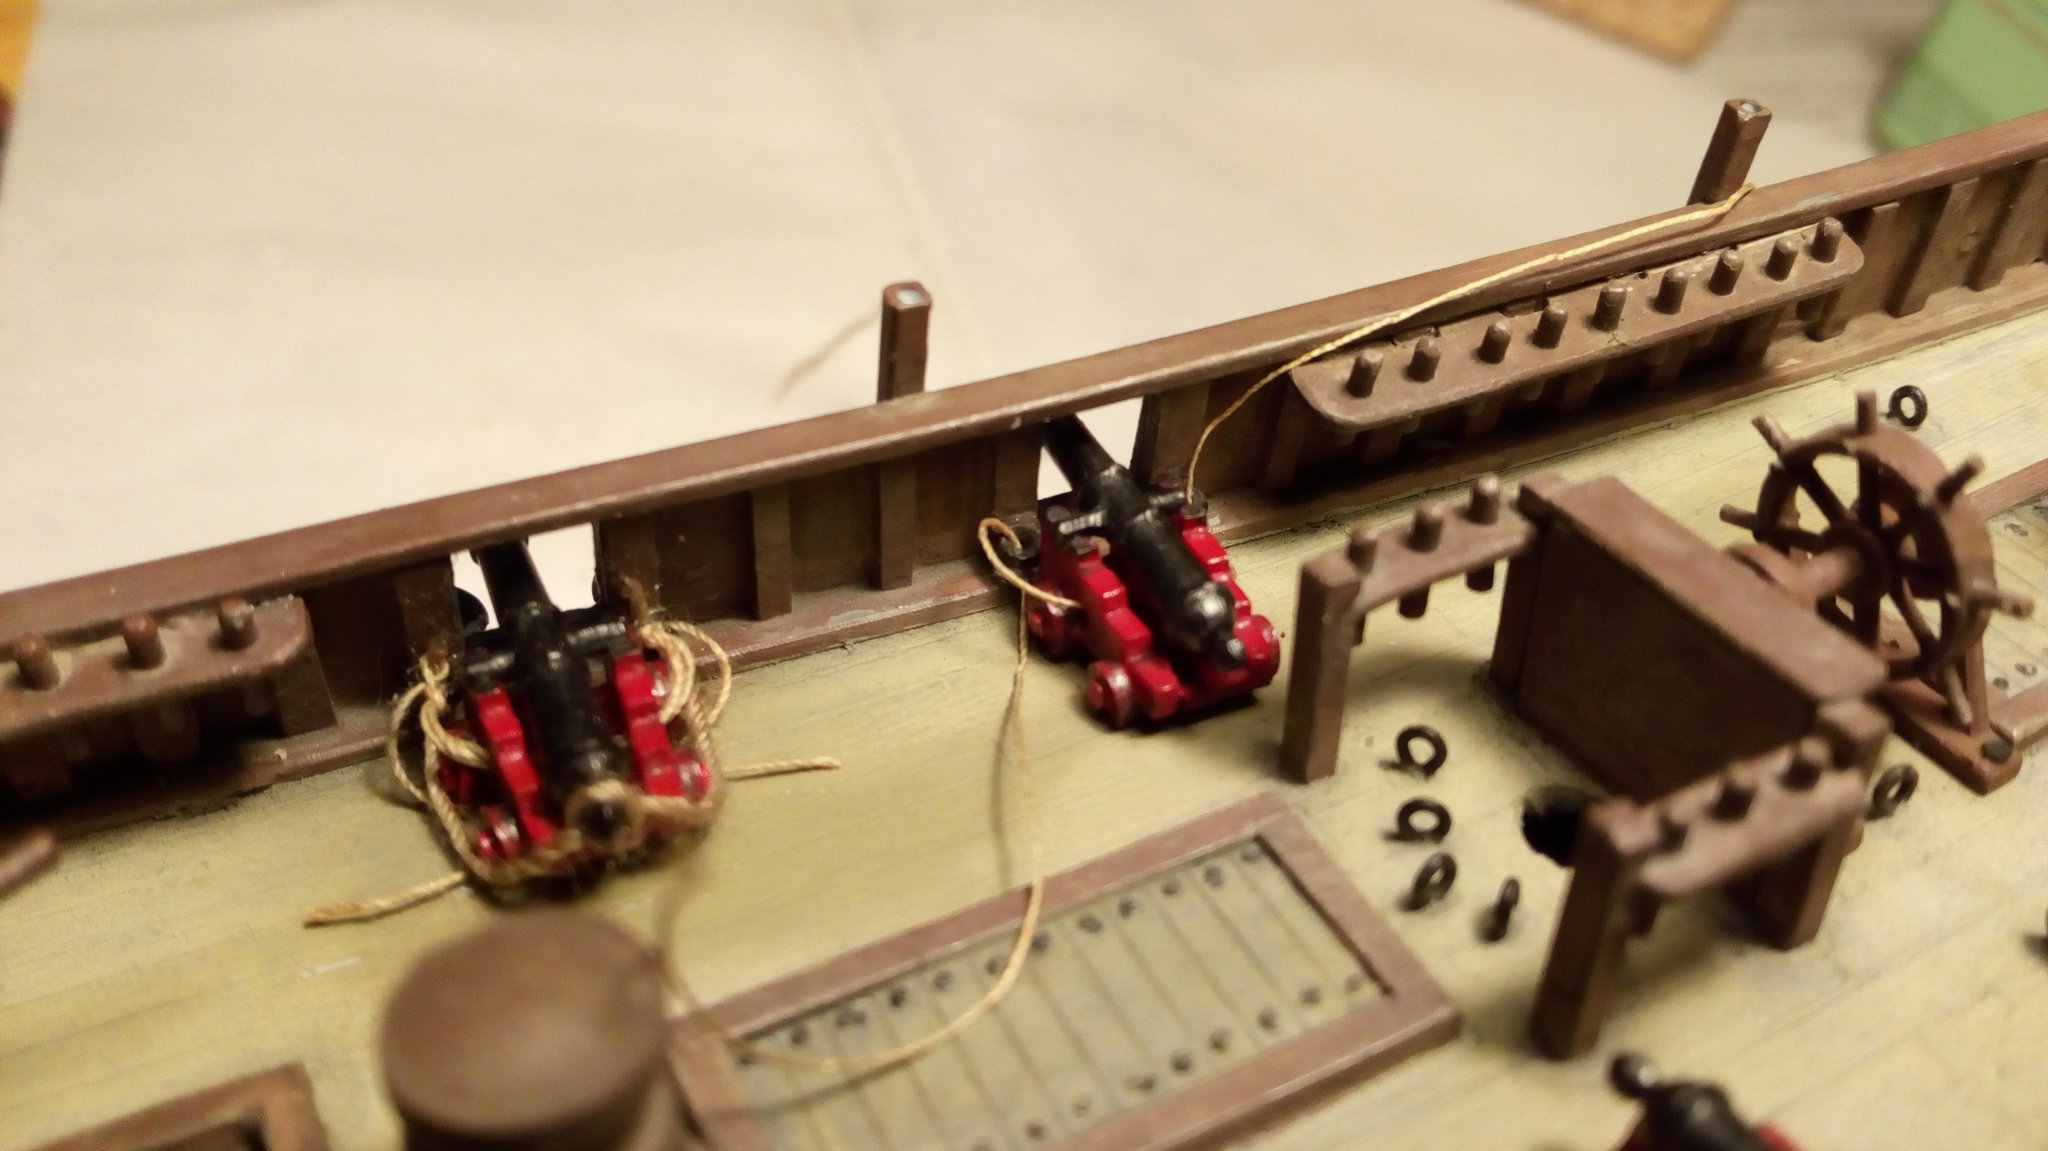
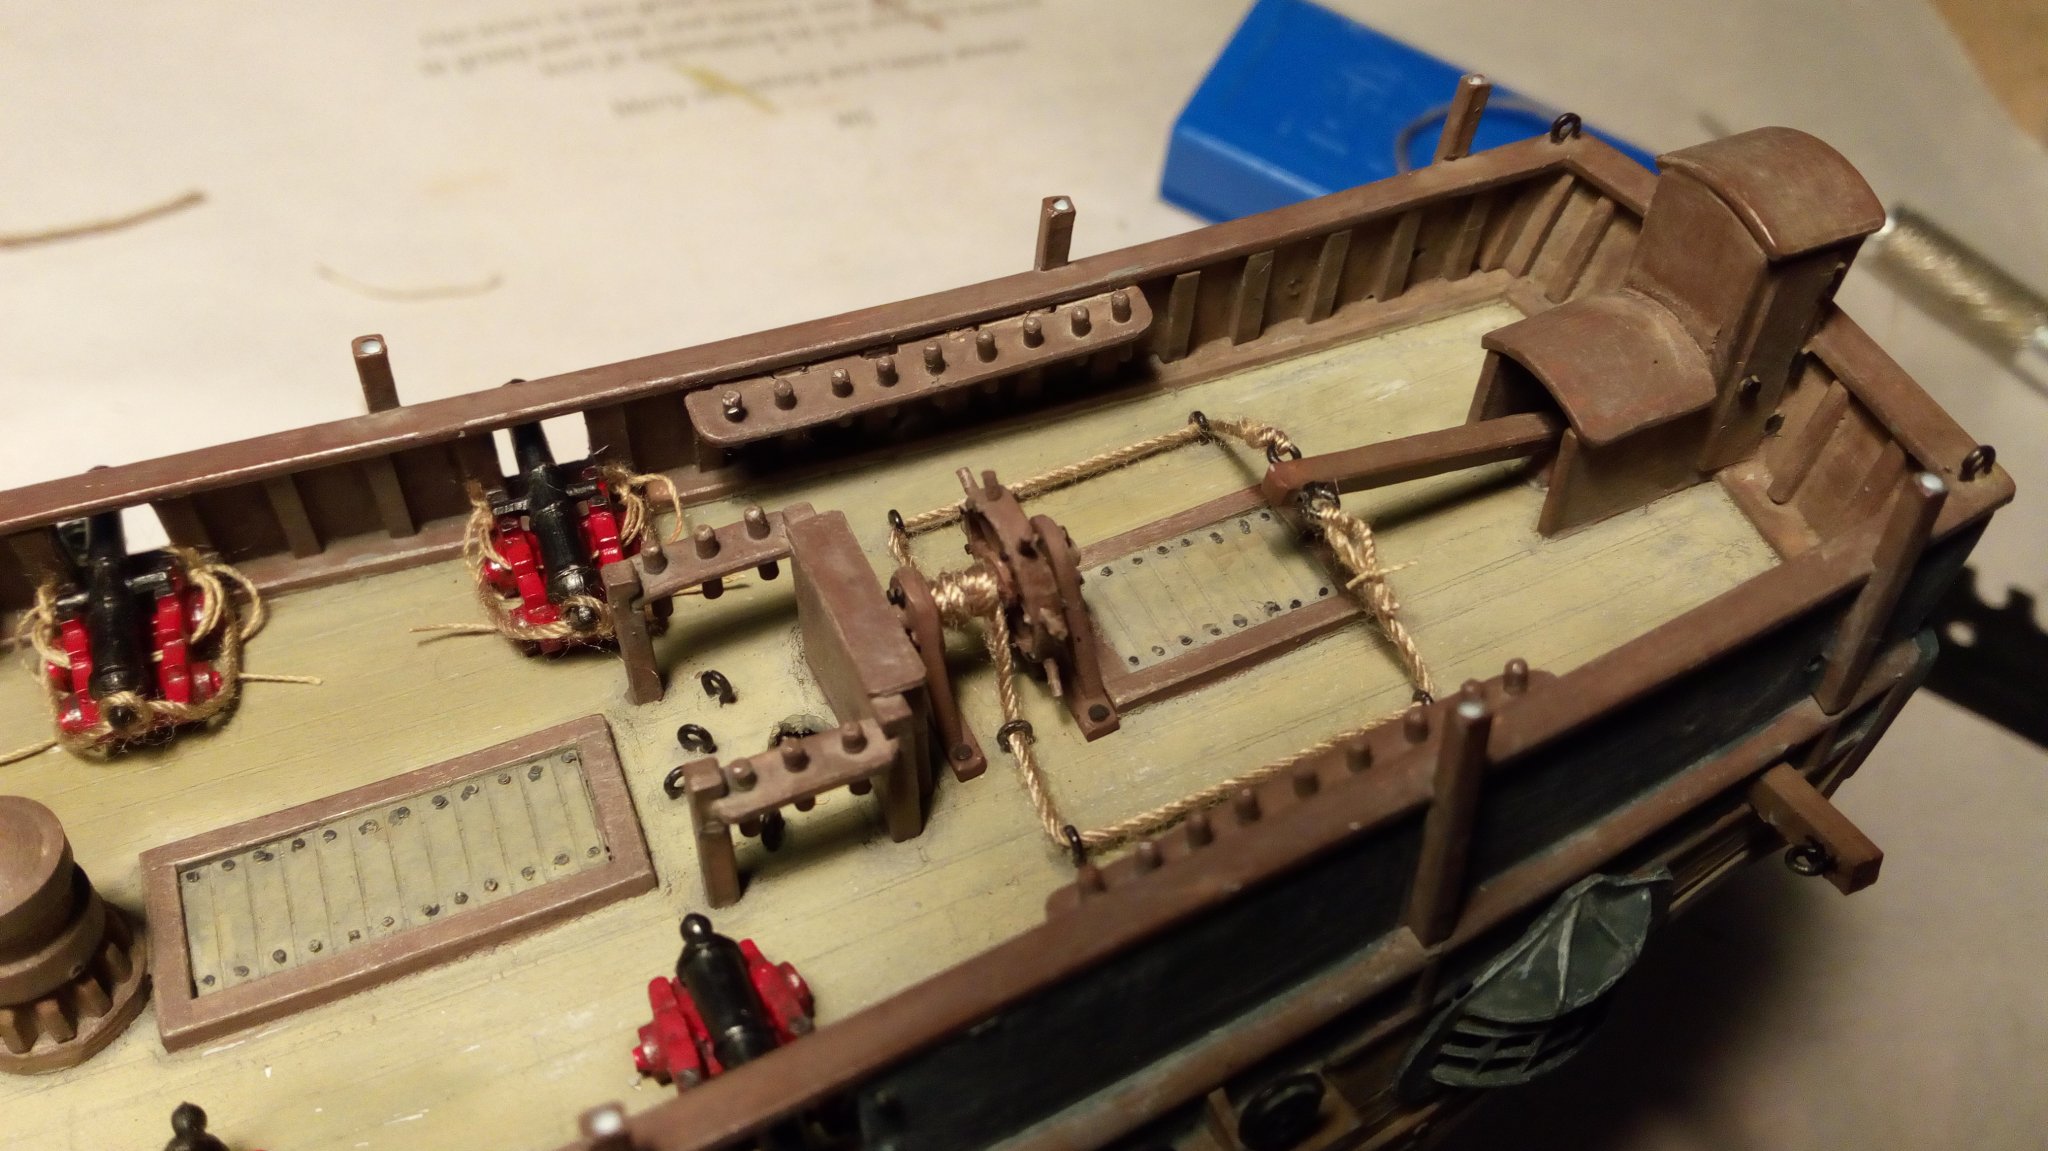
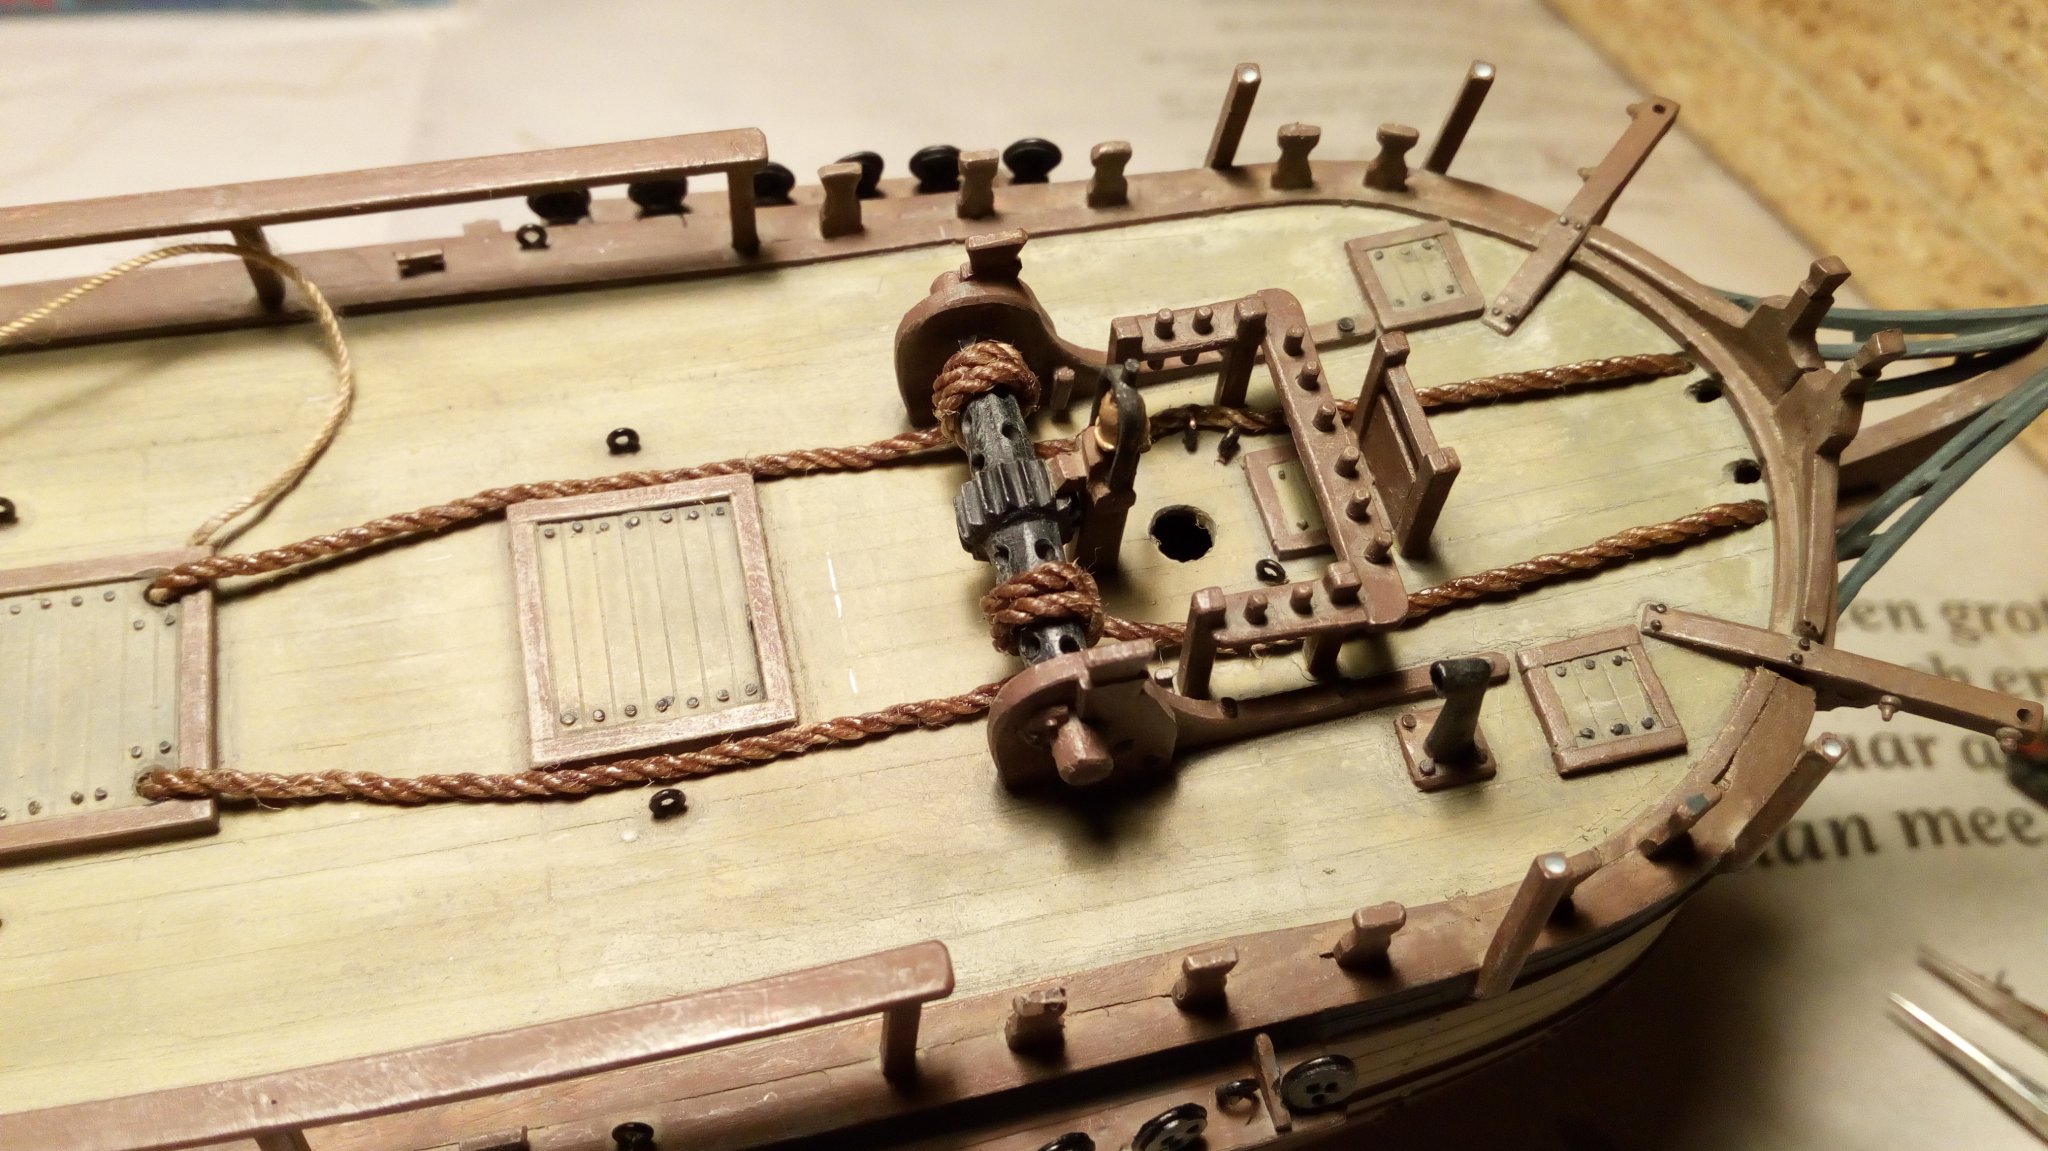
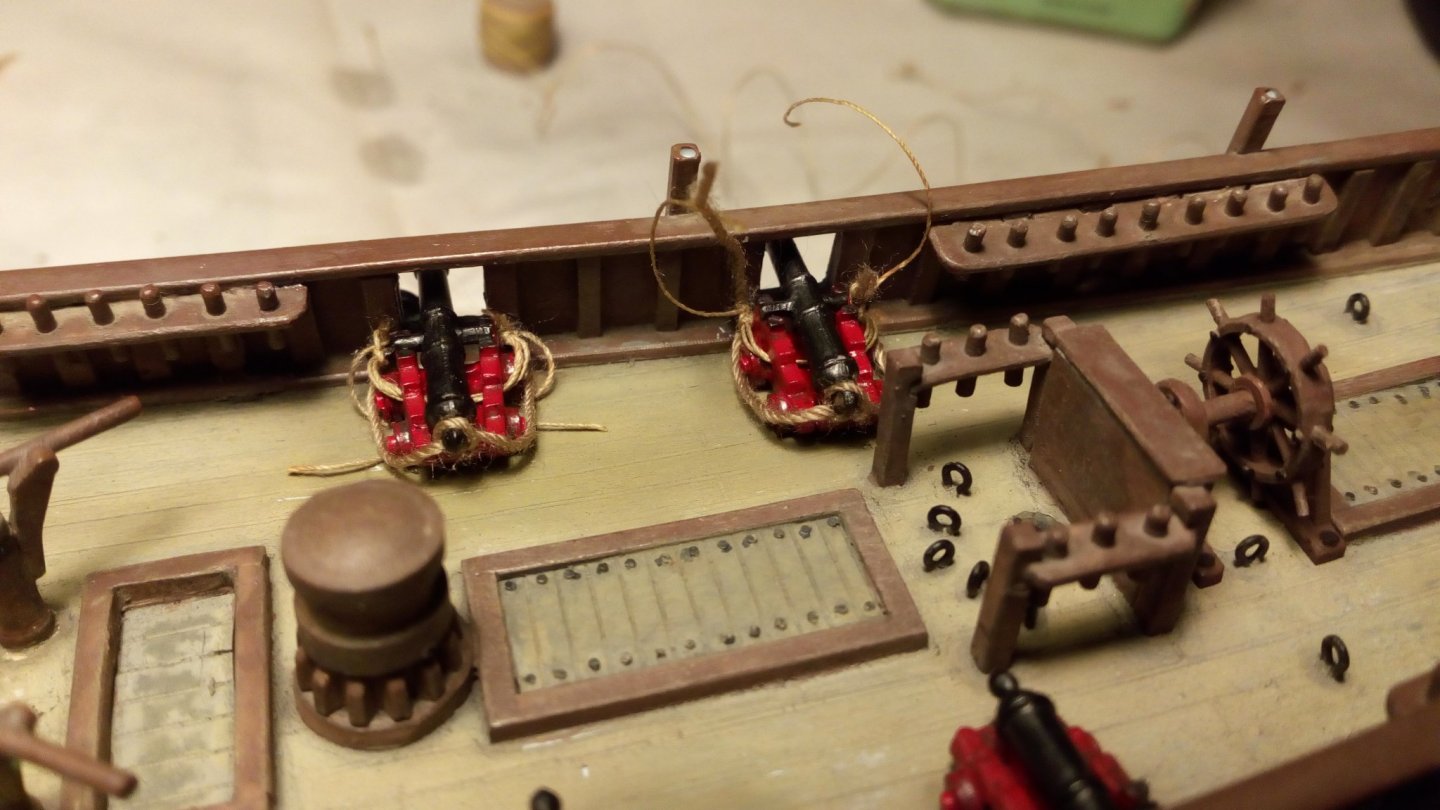
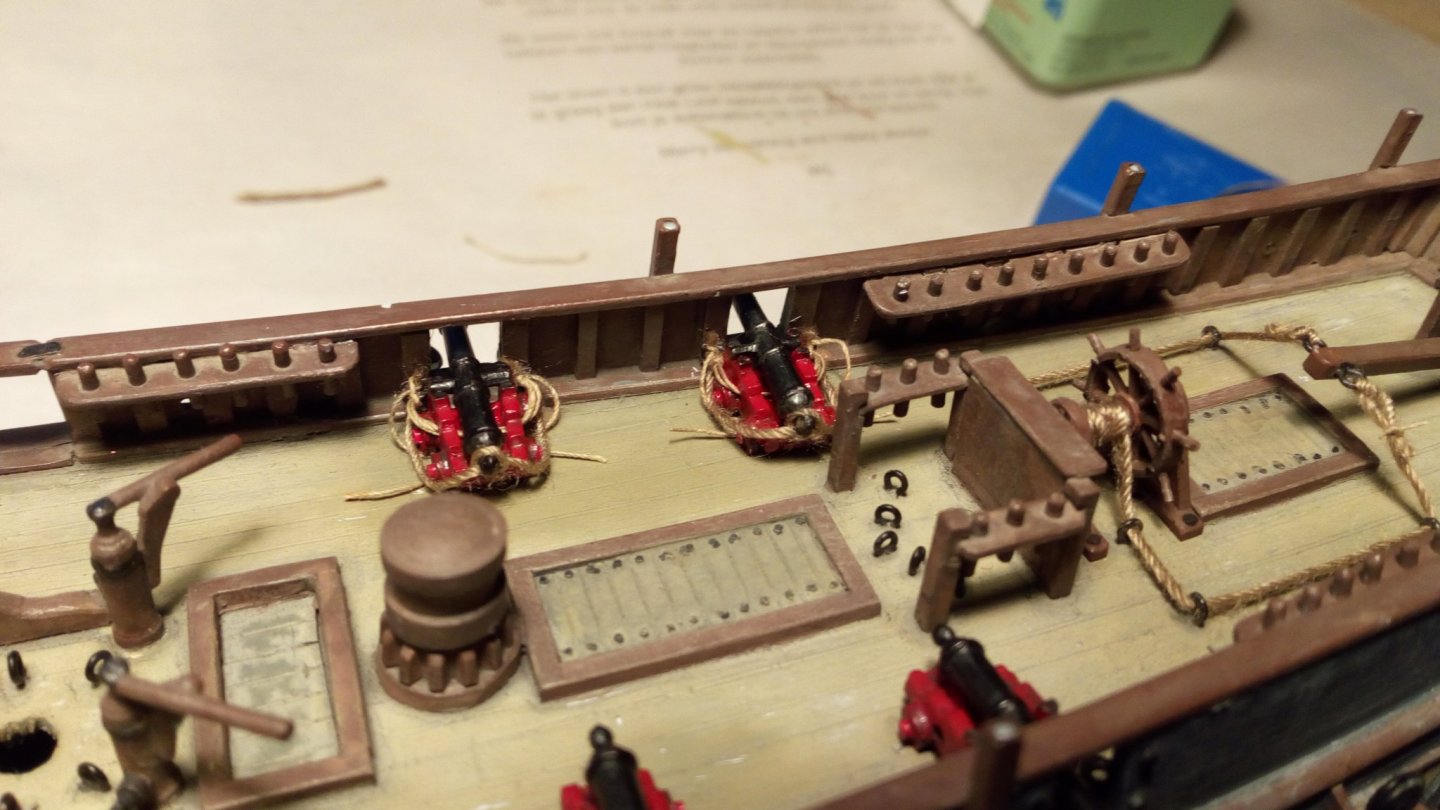
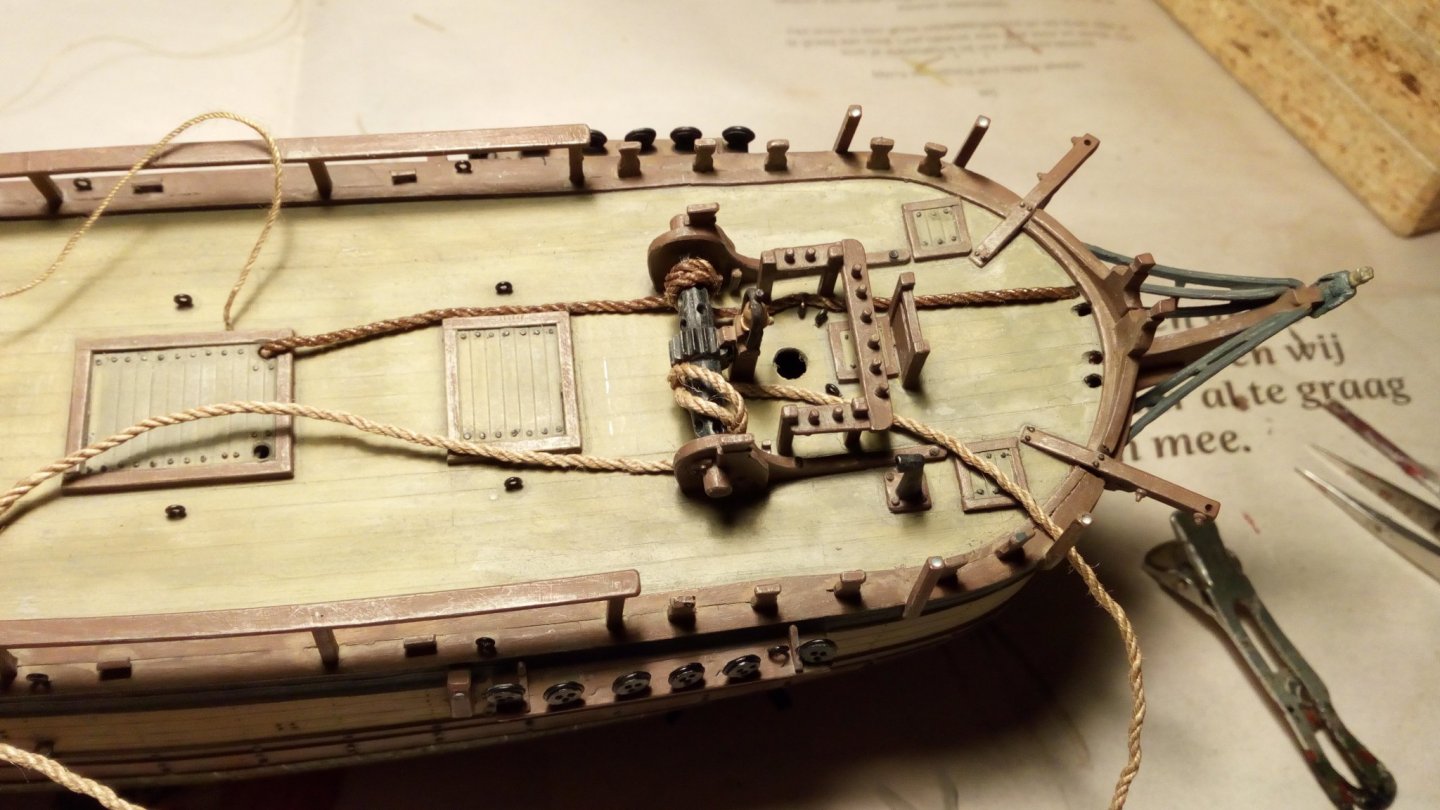
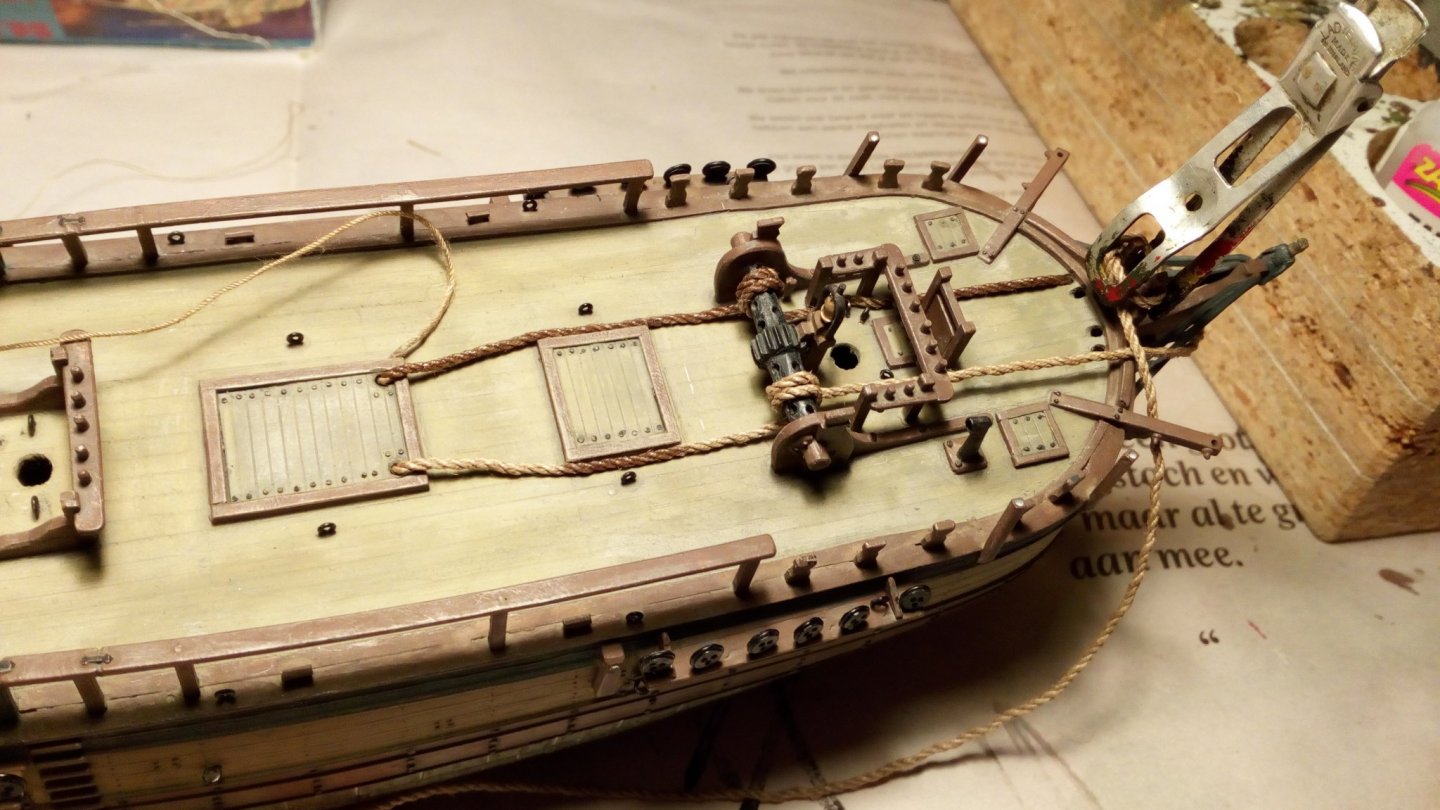
Rigging the cannnons, the helm and the anchor cables on the deck . Cannon rigging in a 1/110 scale... Stressful to me (in my opinion) it took me more then 1 hour for each cannon. The helm anchor cabels. To get these flat on the deck they are glued on deck with ca glue. Carefully applied to a toothpick. Thanks for following


- 173 replies
-
- 12
-
-
Nice work. Always pleasant to see a 16th century model with the fore mast in front of the fore castle.
-
HMS ROYAL KATHERINE 1664 by Doris - 1/55 - CARD
Baker replied to DORIS's topic in - Build logs for subjects built 1501 - 1750
Thank you for these fantastic updates- 1,035 replies
-
- 7
-
-
- royal katherine
- ship of the line
- (and 1 more)
-
Formula for Spars for Warships of Spain
Baker replied to Jeffrey Modell's topic in Masting, rigging and sails
There is not much (reliable) information about galleons in the 16th century. Simply because little was documented at that time. Maybe this book helps -
G.L. Hoed af voor uw technisch tekenen (I take my hat off for your drawing skills). Druxey, Thanks for the warning
-
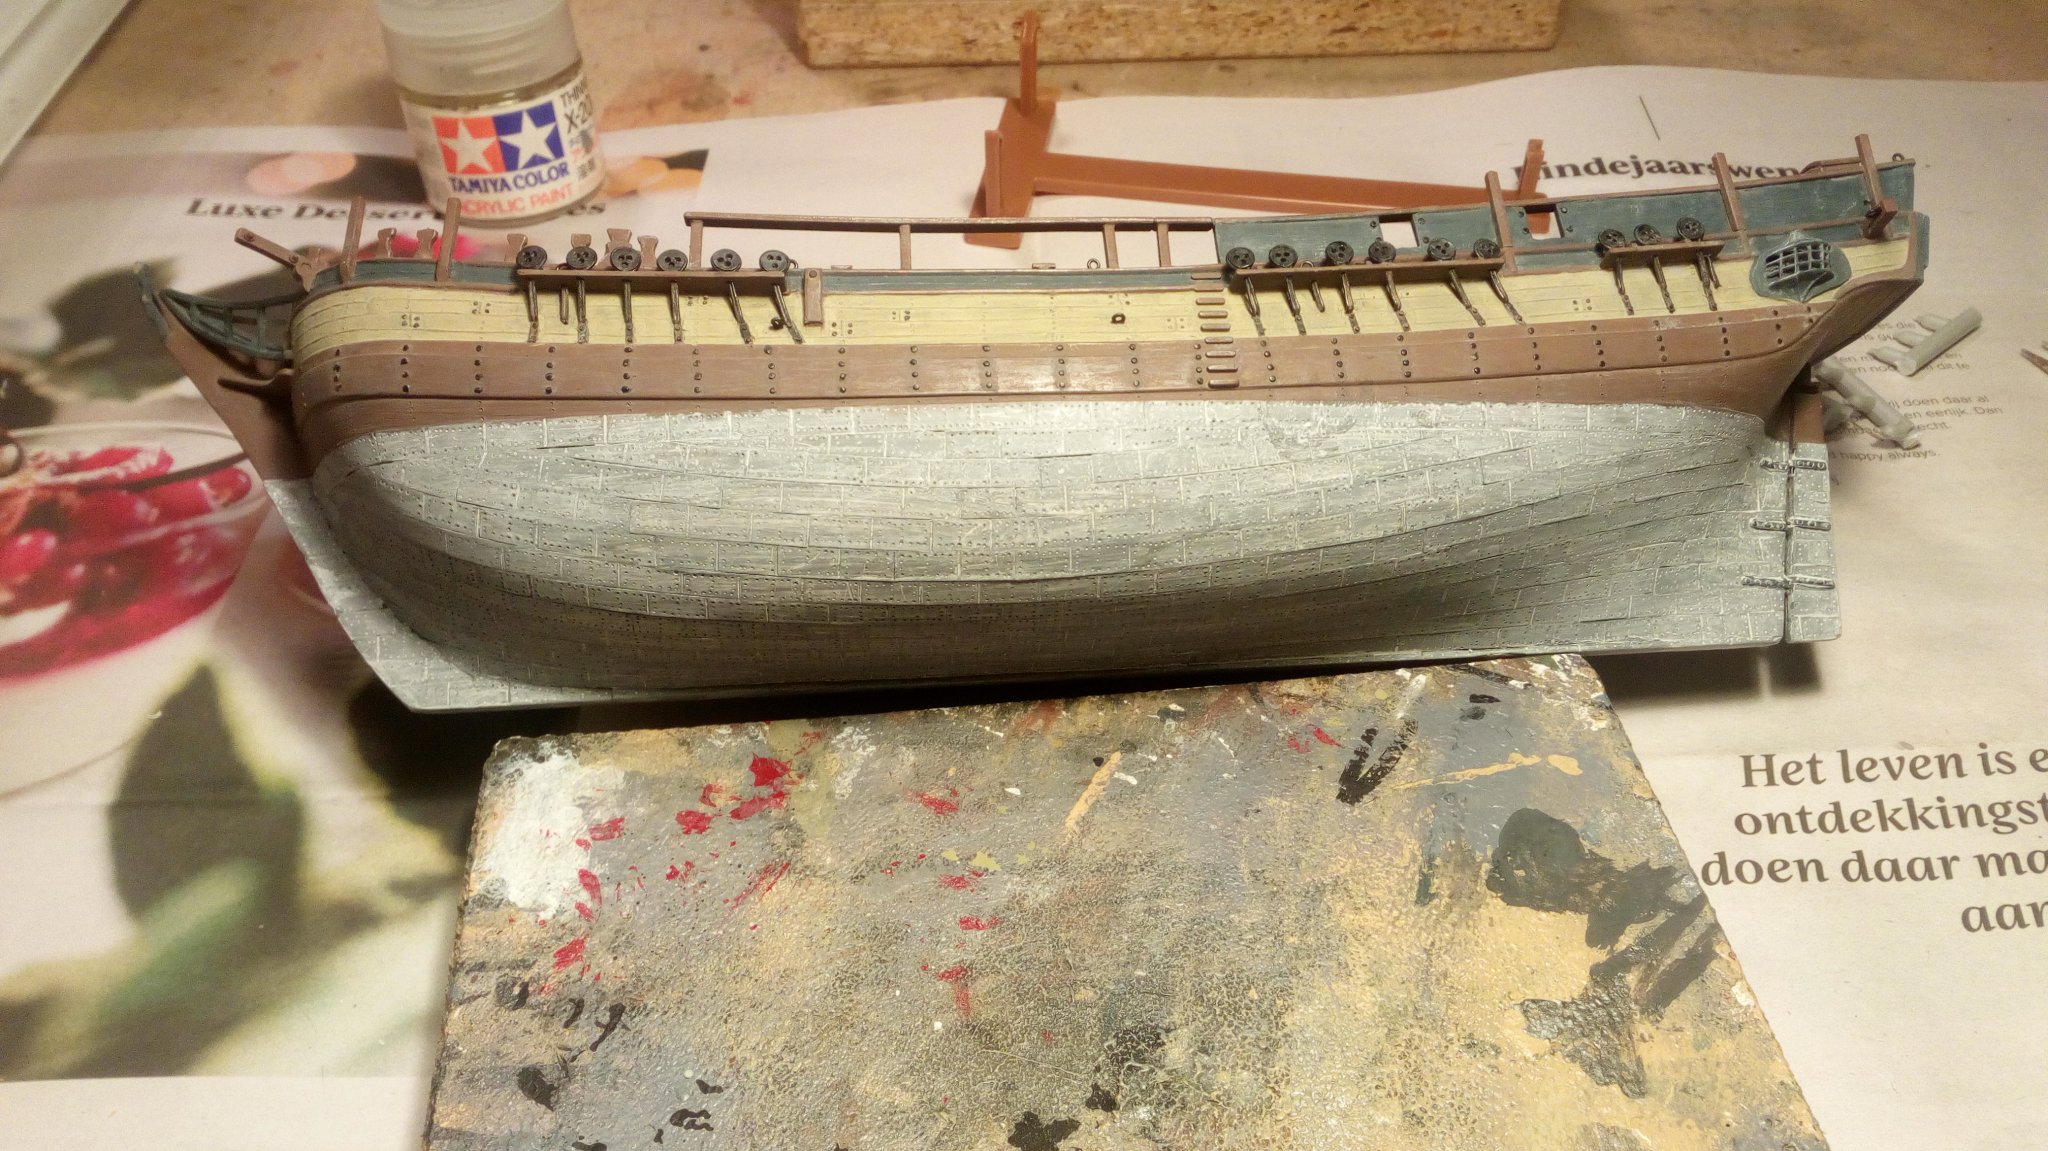
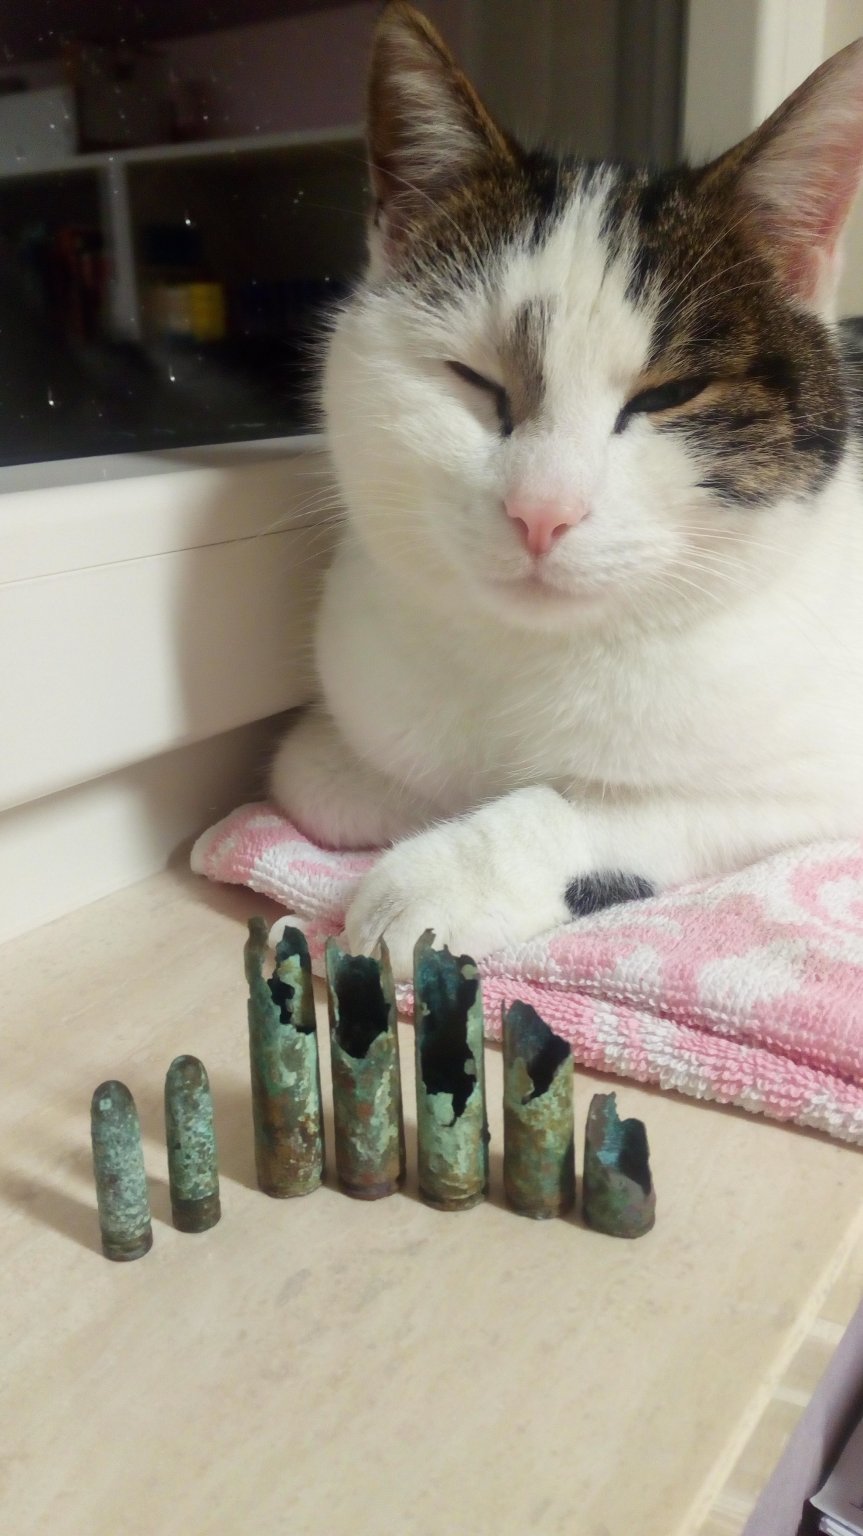
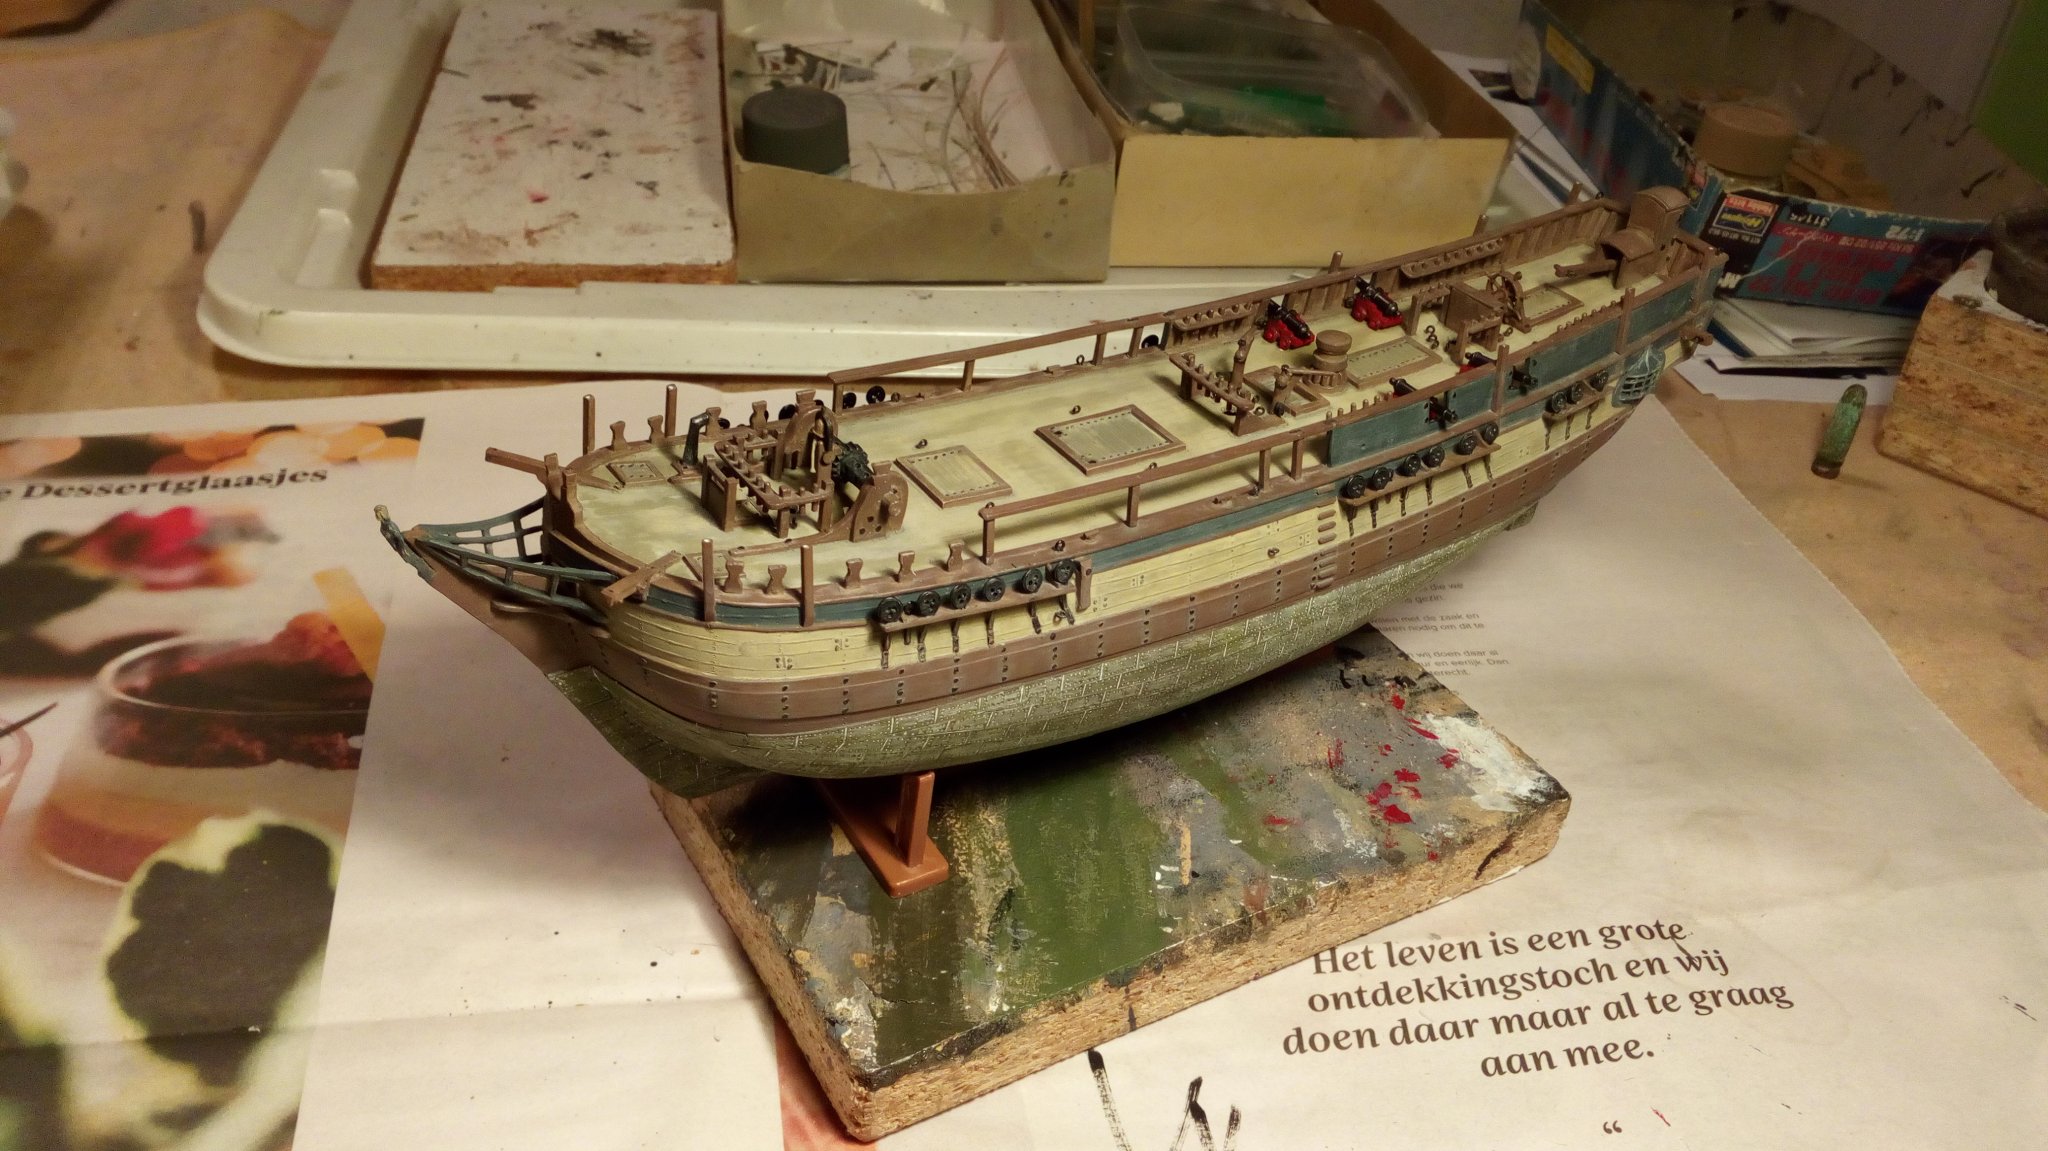
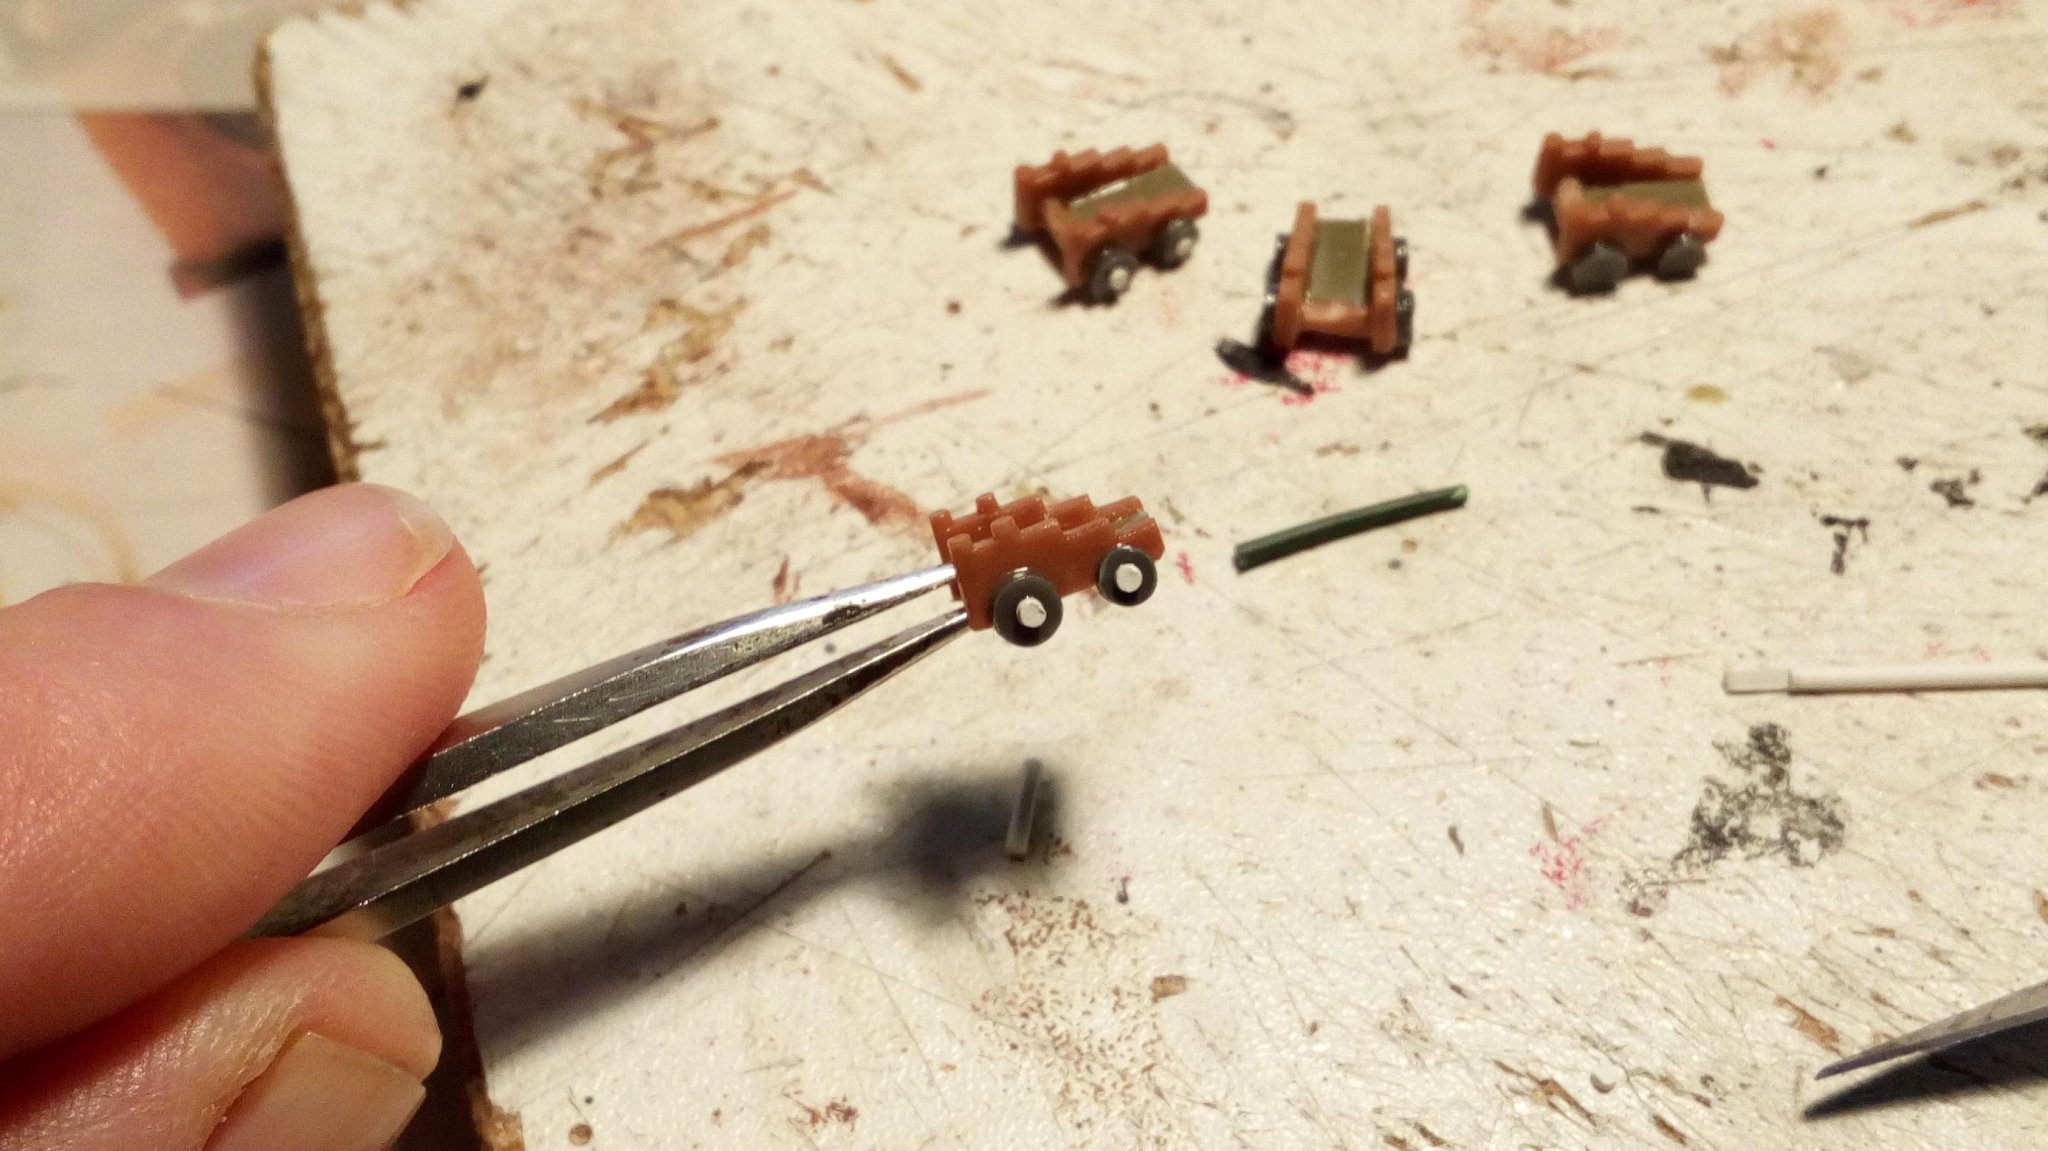
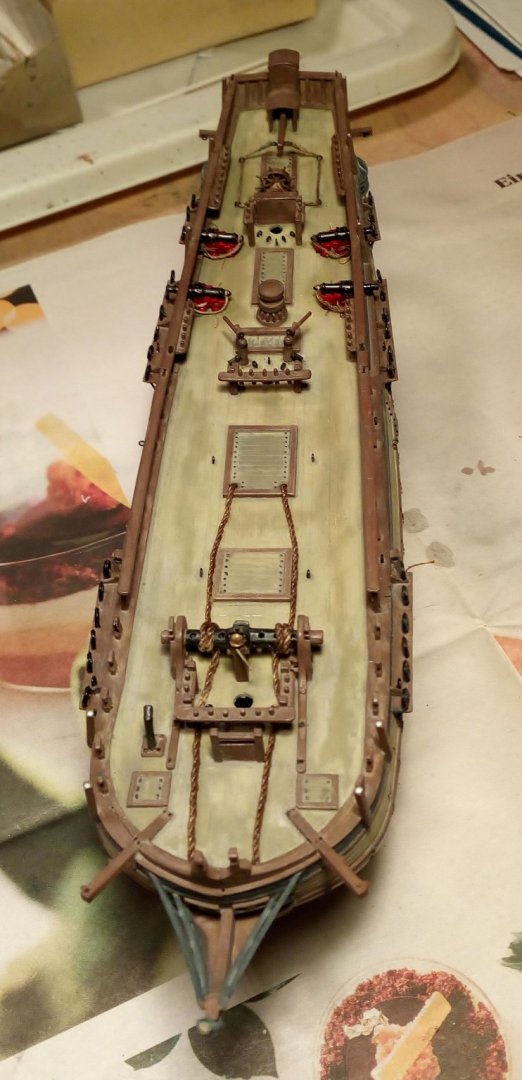
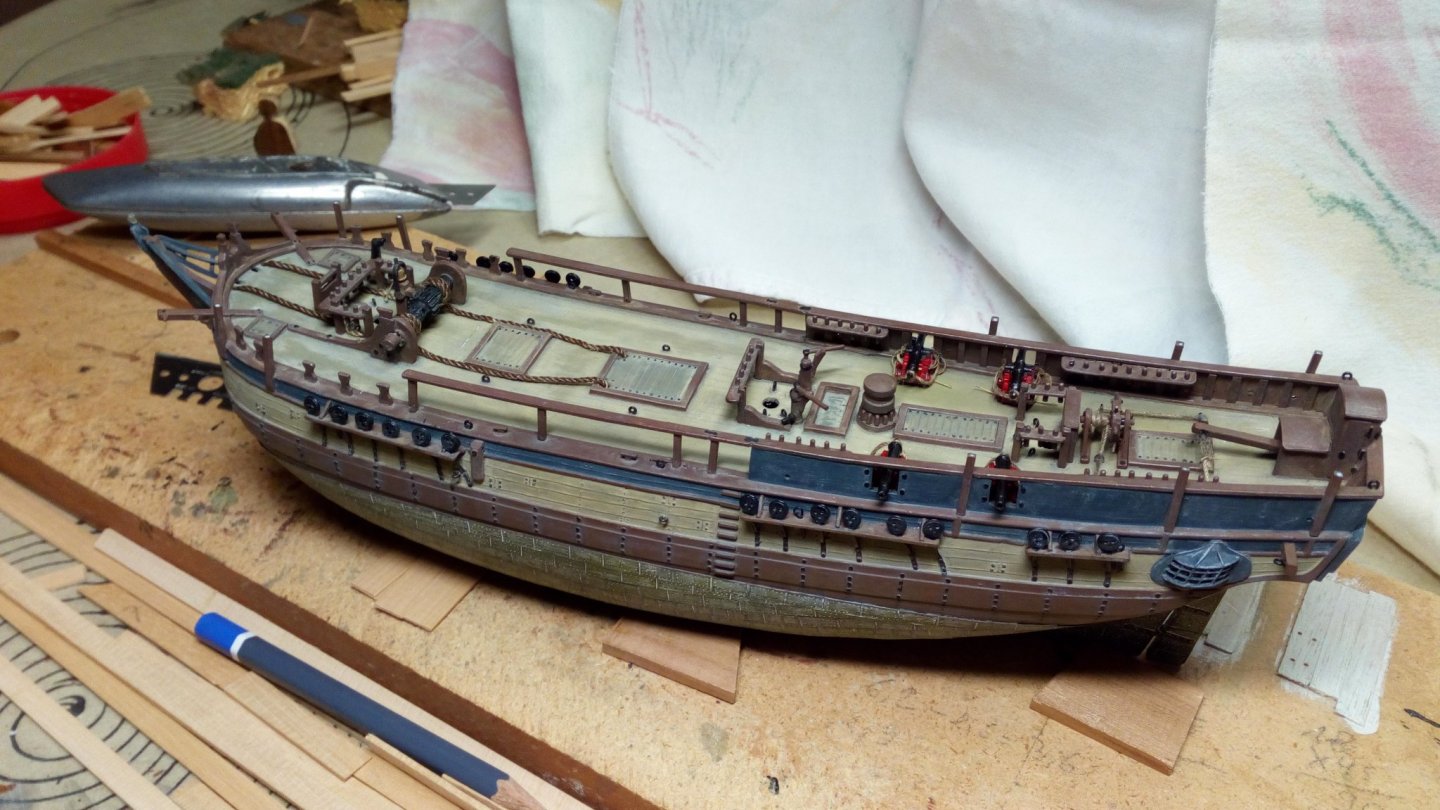
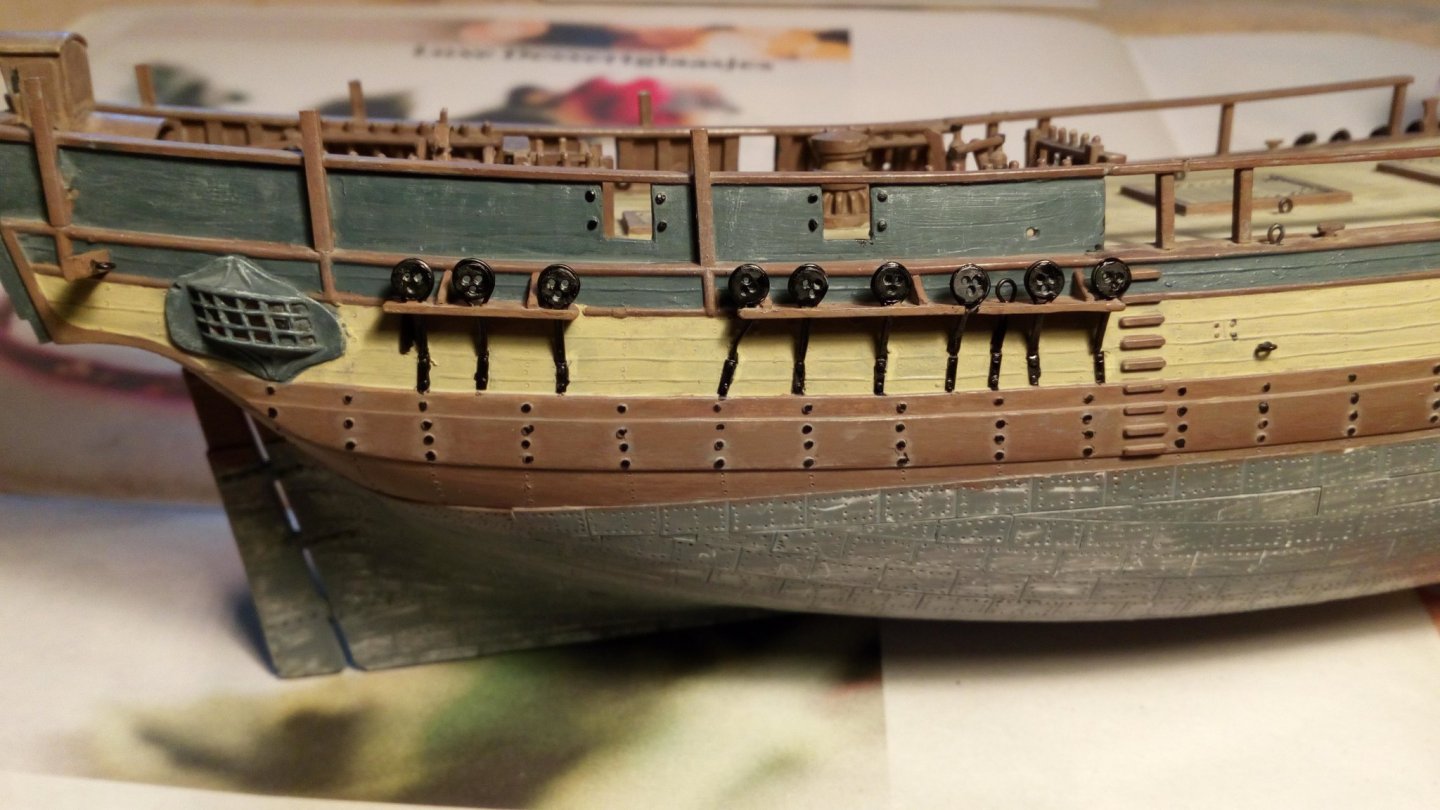
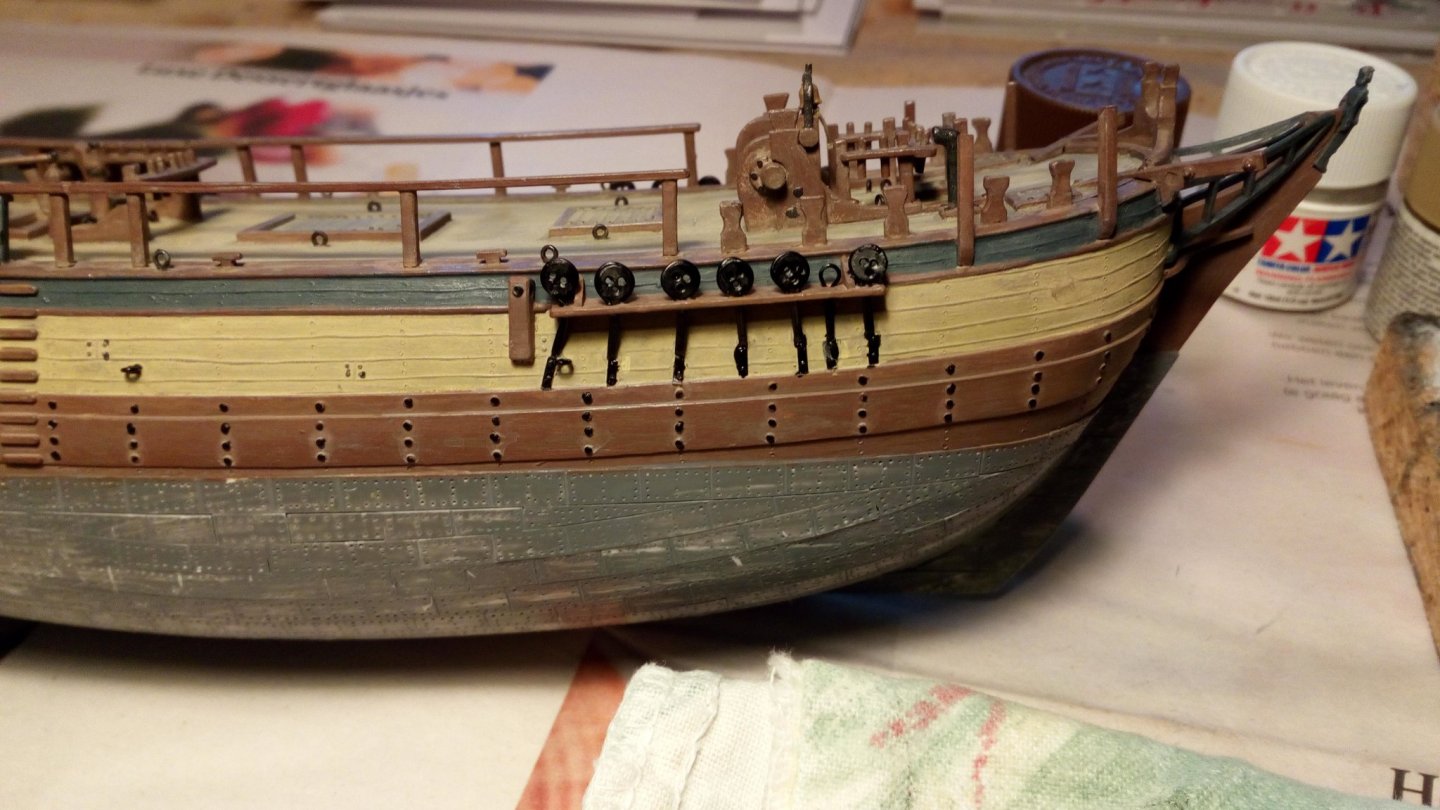
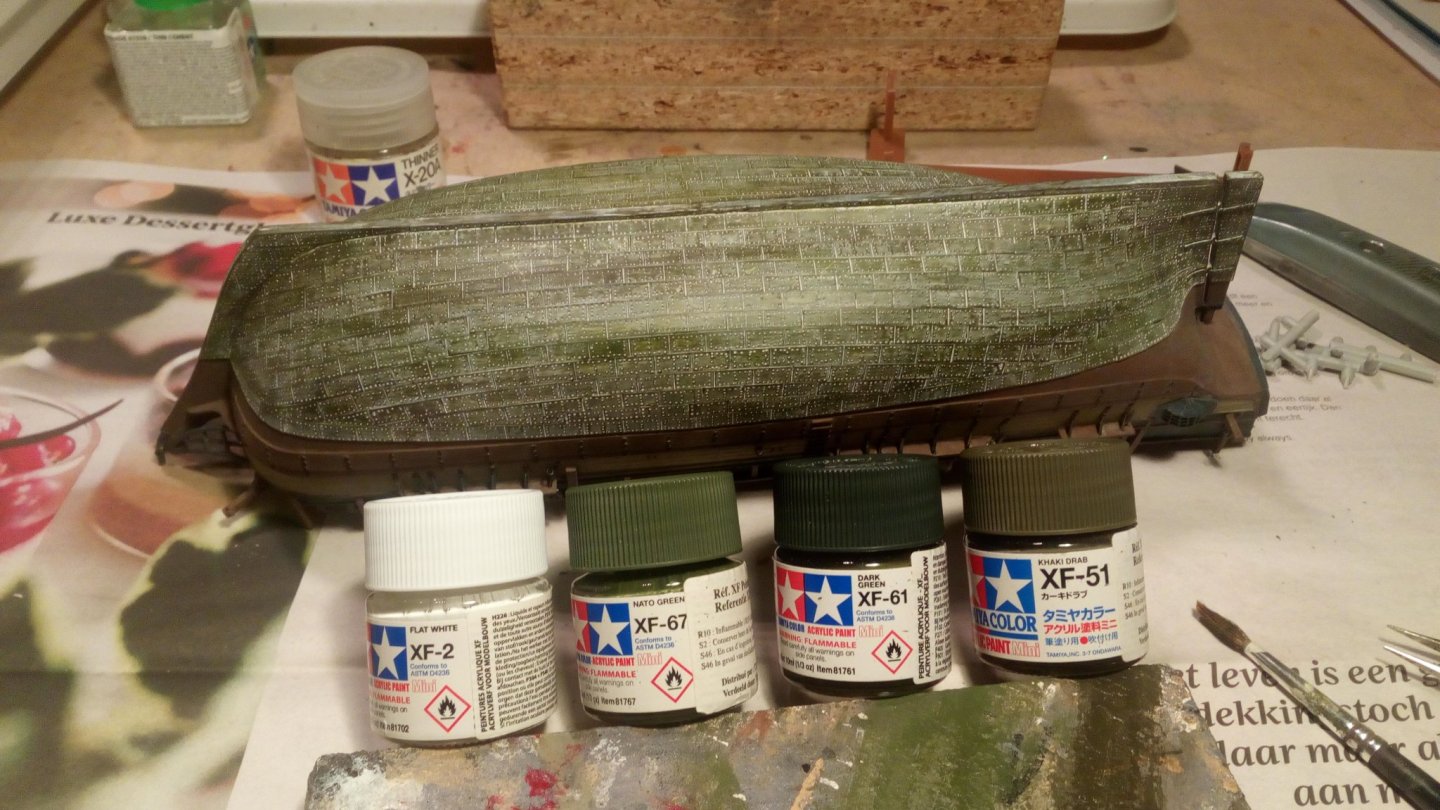
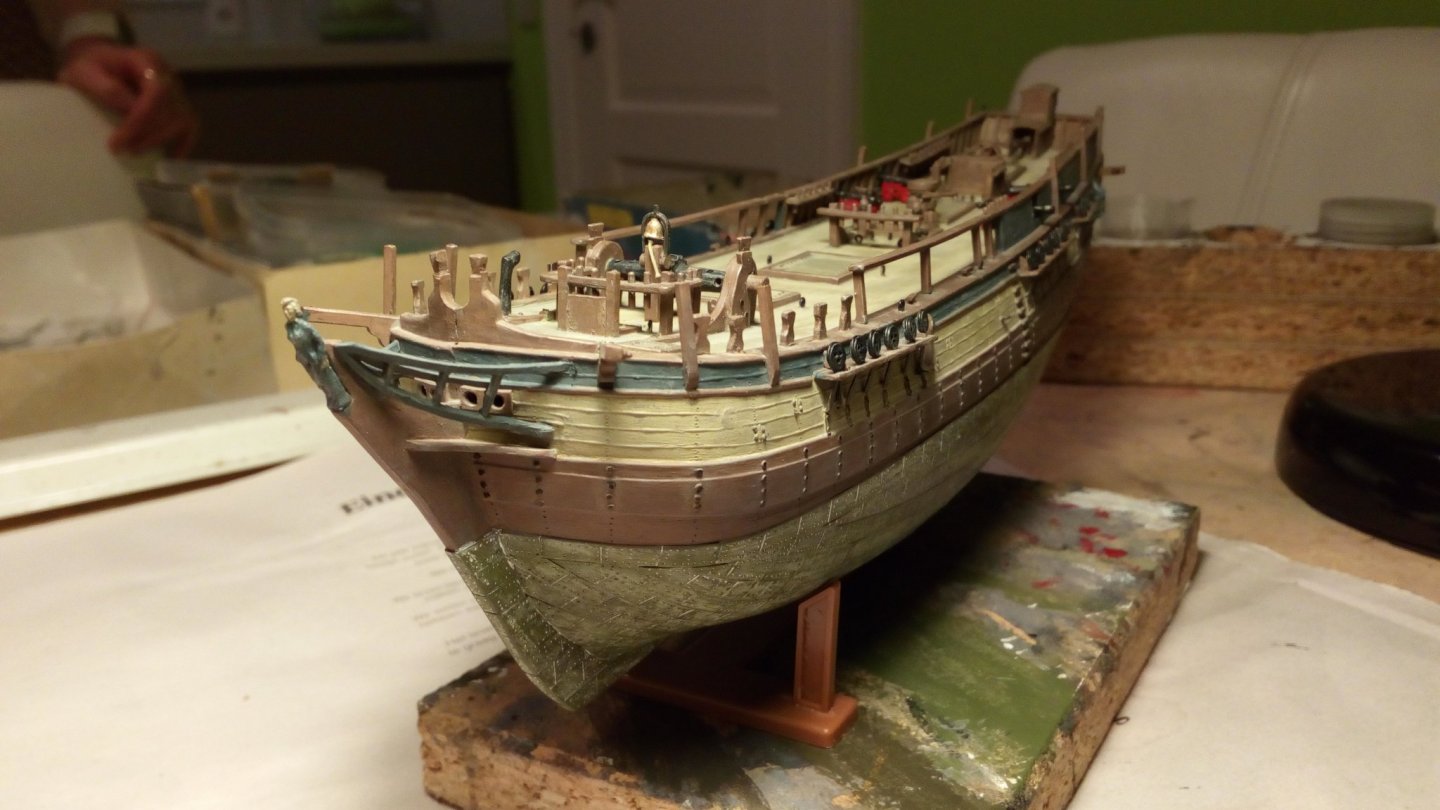
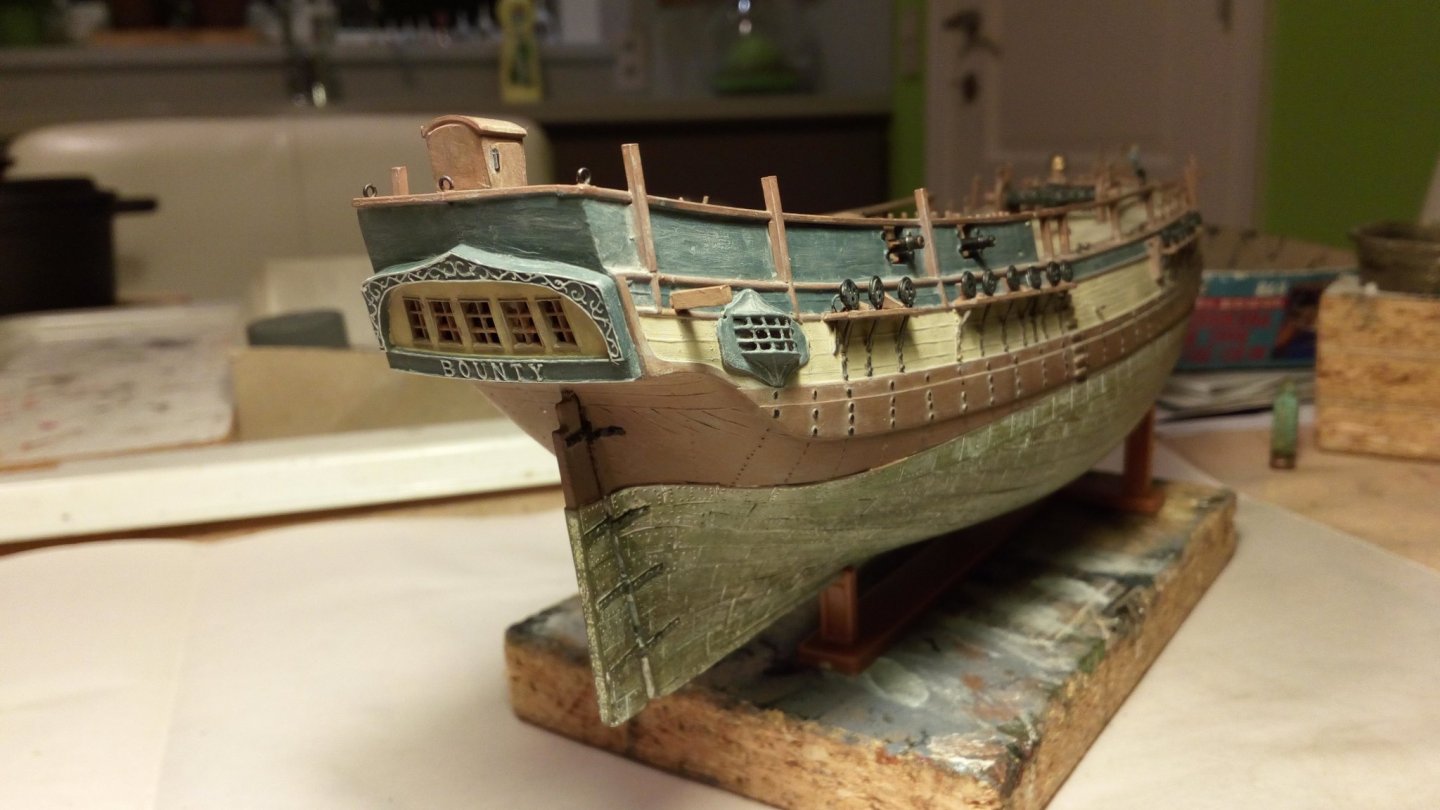
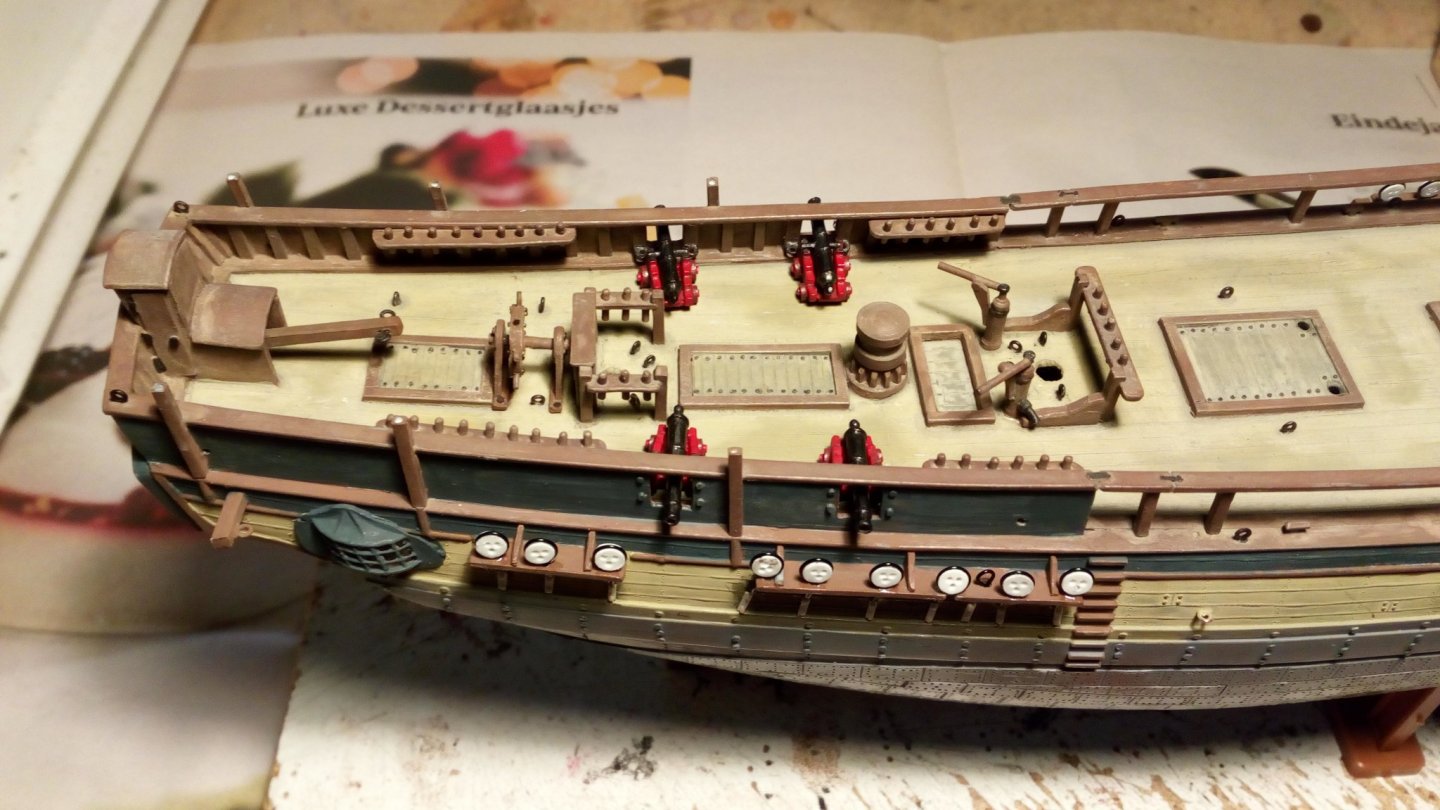
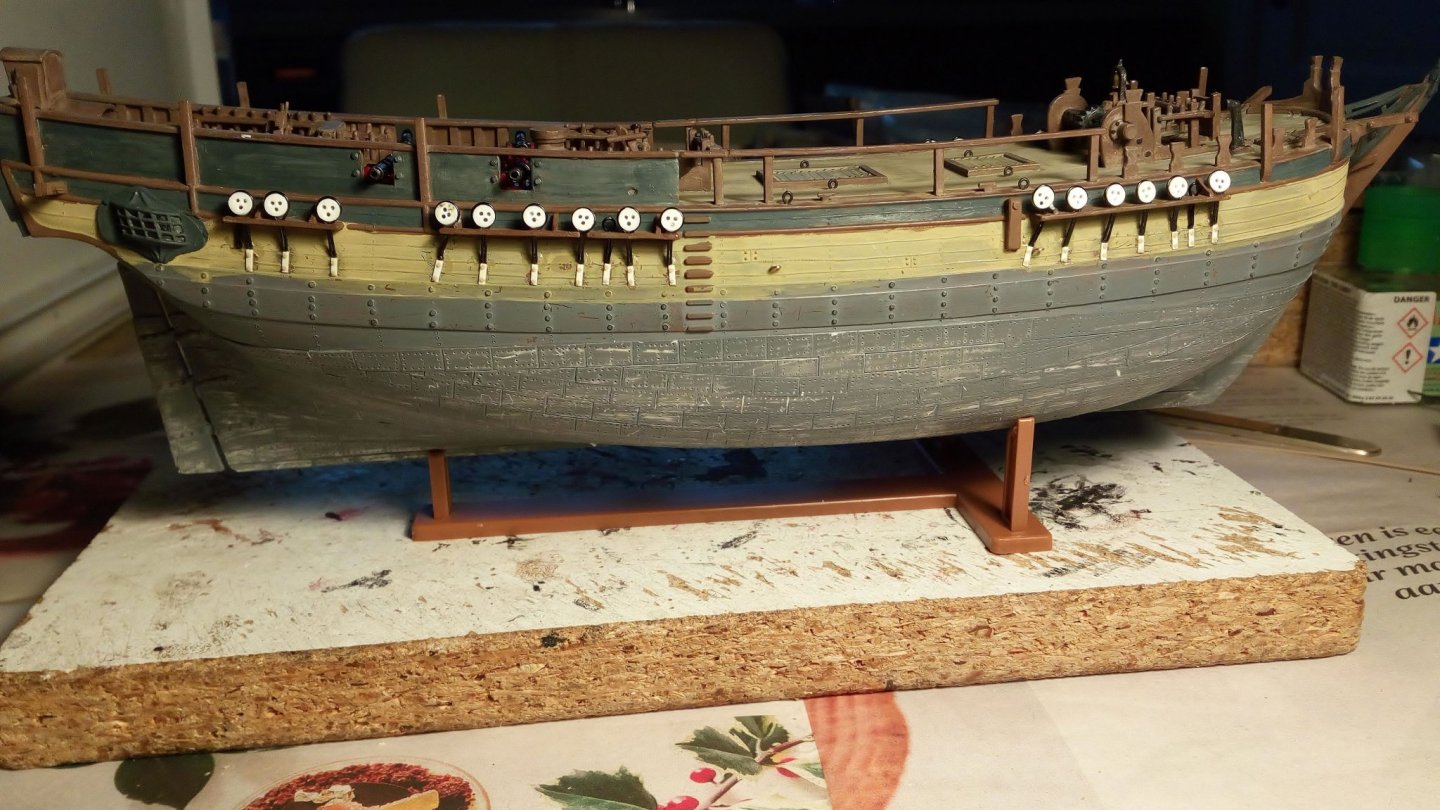
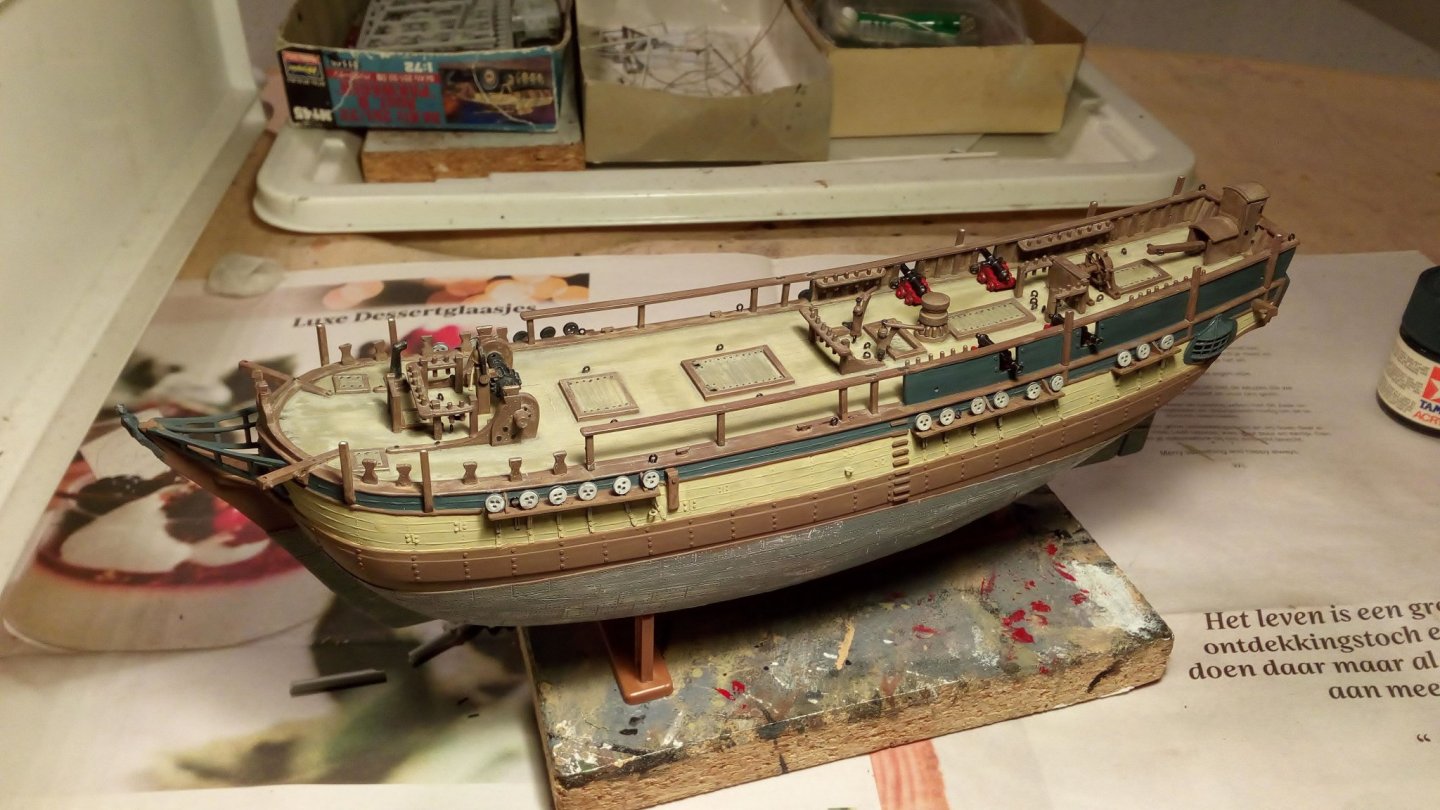
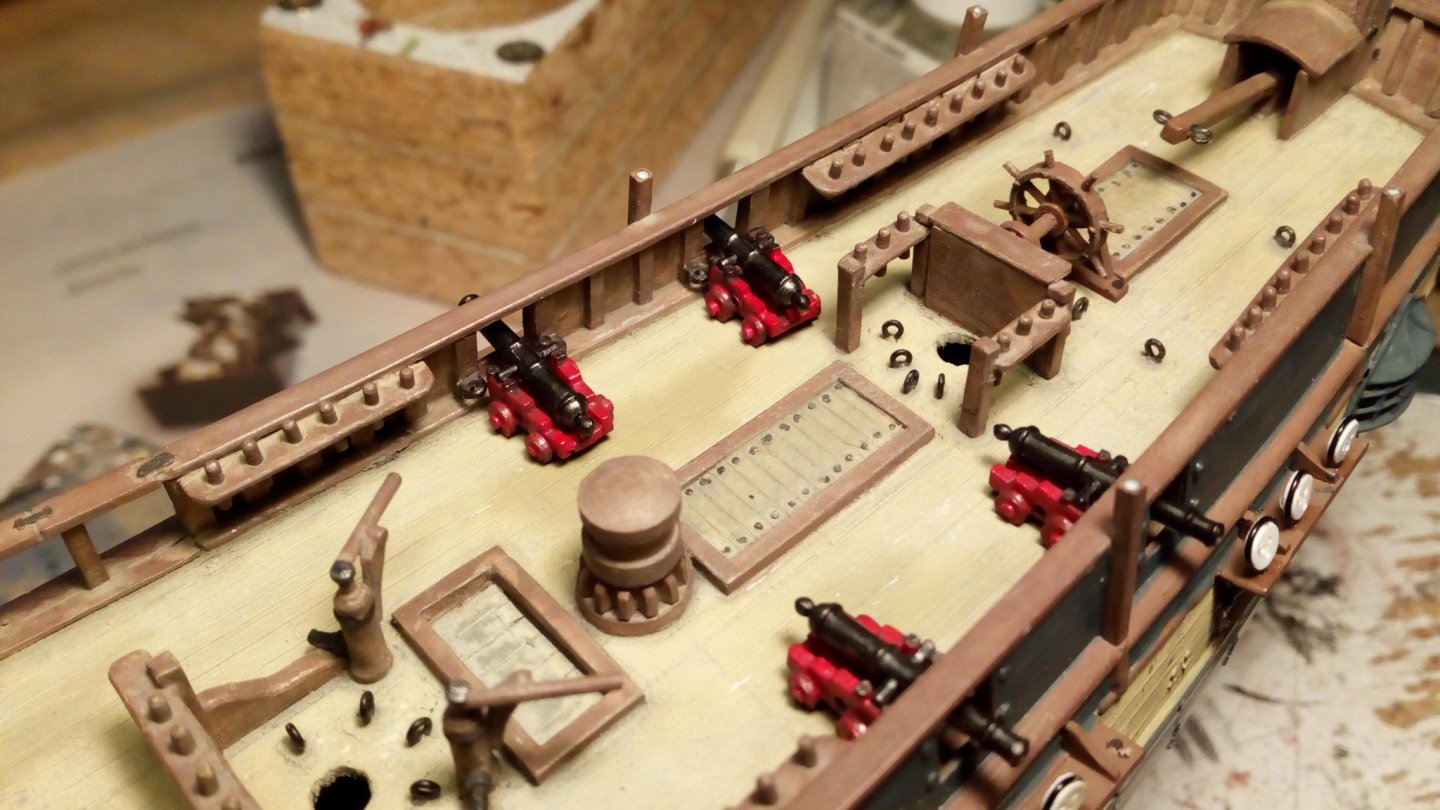
Painting and weathering of the hull. Painting the ded eyes and chains matt black washings with diluted light gray, some rust on the chains and a dry brushing of dark gray on the ded eyes. Given that the entire hull and deck are "weathered", the copper sheeting cannot be look new either. So, how does weathered red copper look like? No idea at first, then I remembered some rounds of ammunition that I once found near the house where I grew up. To make a small river deeper, mud had been dug out, and there lay a clip with 5 rounds Presumably remains of WW 1 or 2. Felix has no idea what's going on At first sight, It looks pretty much the same For now I leave the collor this way used paints : White wash And 3 green collors Cannons are glued on the deck A plastic plate is glued to the bottom. This is so the cannon is glued with the plate and not with the wheels on the deck. That way you won't see any glue residue on the deck. Hull painted Thanks for following


-
The fewer errors remain in your first layer. The easier it will be to apply your 2nd layer. It seems like a lot of unnecessary work now, but I don't think you will regret having done it
-
Very nice little cannons Steven. Acetone should work best.
- 740 replies
-
- 1
-
-
- Tudor
- restoration
- (and 4 more)
-
Goldfinch by amateur - FINISHED - Scherft - 1:1 - CARD
Baker replied to amateur's topic in Non-ship/categorised builds
A model kit of a bird, never seen this before. Nice work I'm bored. You can always send the bird to me. Greetings, Felix
-
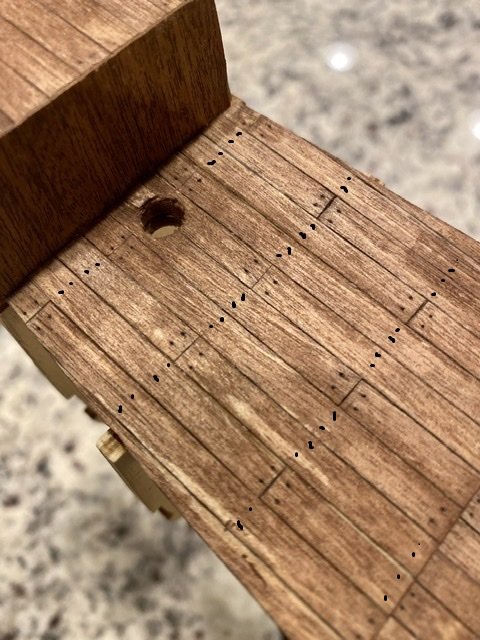
Nice deck planking. You have one more follower. You can always add extra "nails" If you do this with a pencil then this is not much extra work Greetings, Patrick
-
I just viewed your build a second time. Very educational. This is a model that really looks like an early galleon. Since the start of my Golden Hind, i have read a lot and did a lot of research for ships from this period. Have you ever encountered this on the internet? Not a real Spanish Galleon, but a Spanish whaler. Very interesting http://www.patrimoniocultural.gov.pt/media/uploads/trabalhosdearqueologia/18/22.pdf http://www.albaola.com/en/site/building-process https://www.flickr.com/photos/albaola/albums/72157648353383884
-
I follow This is 8 $ well spent
-
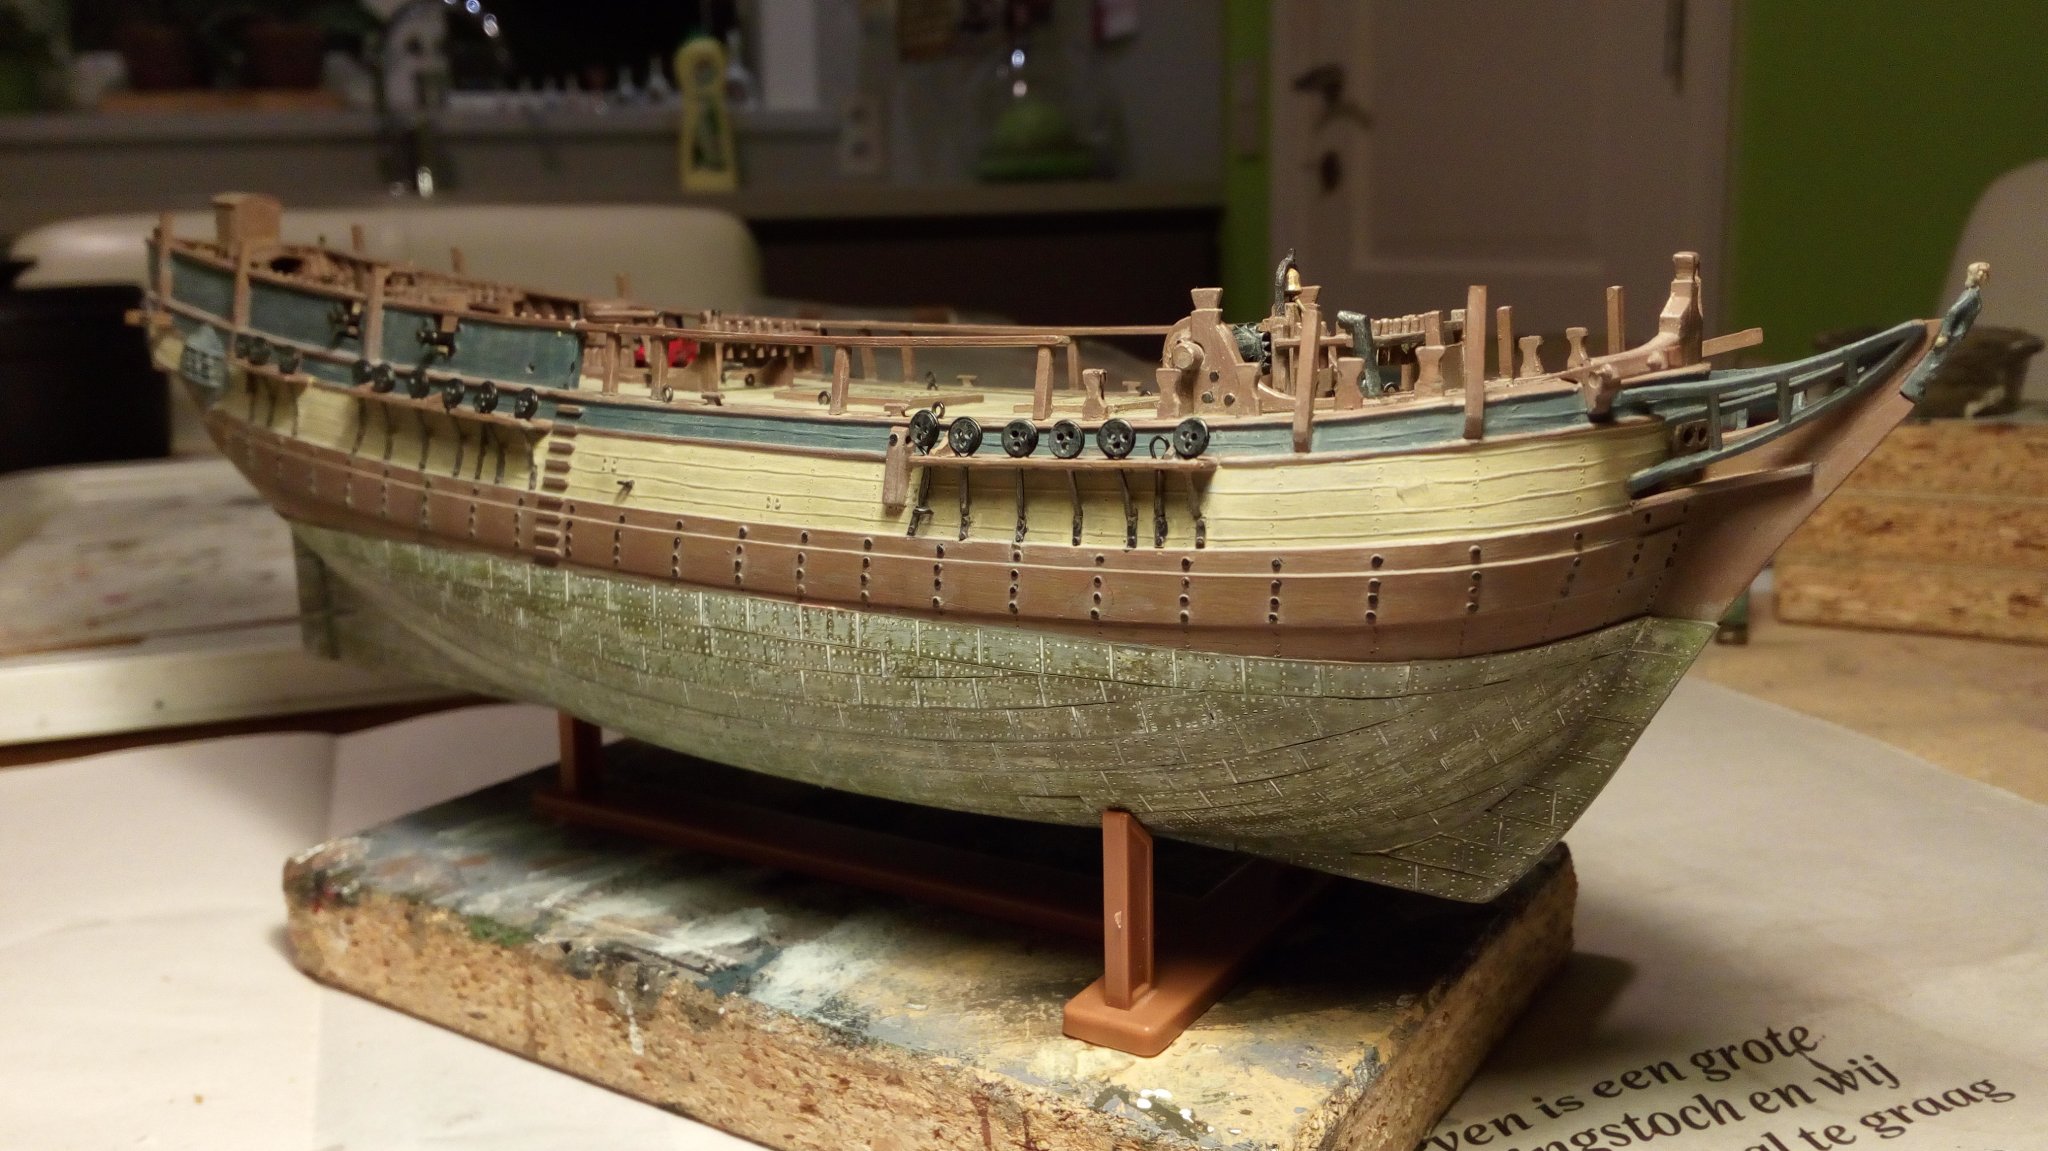
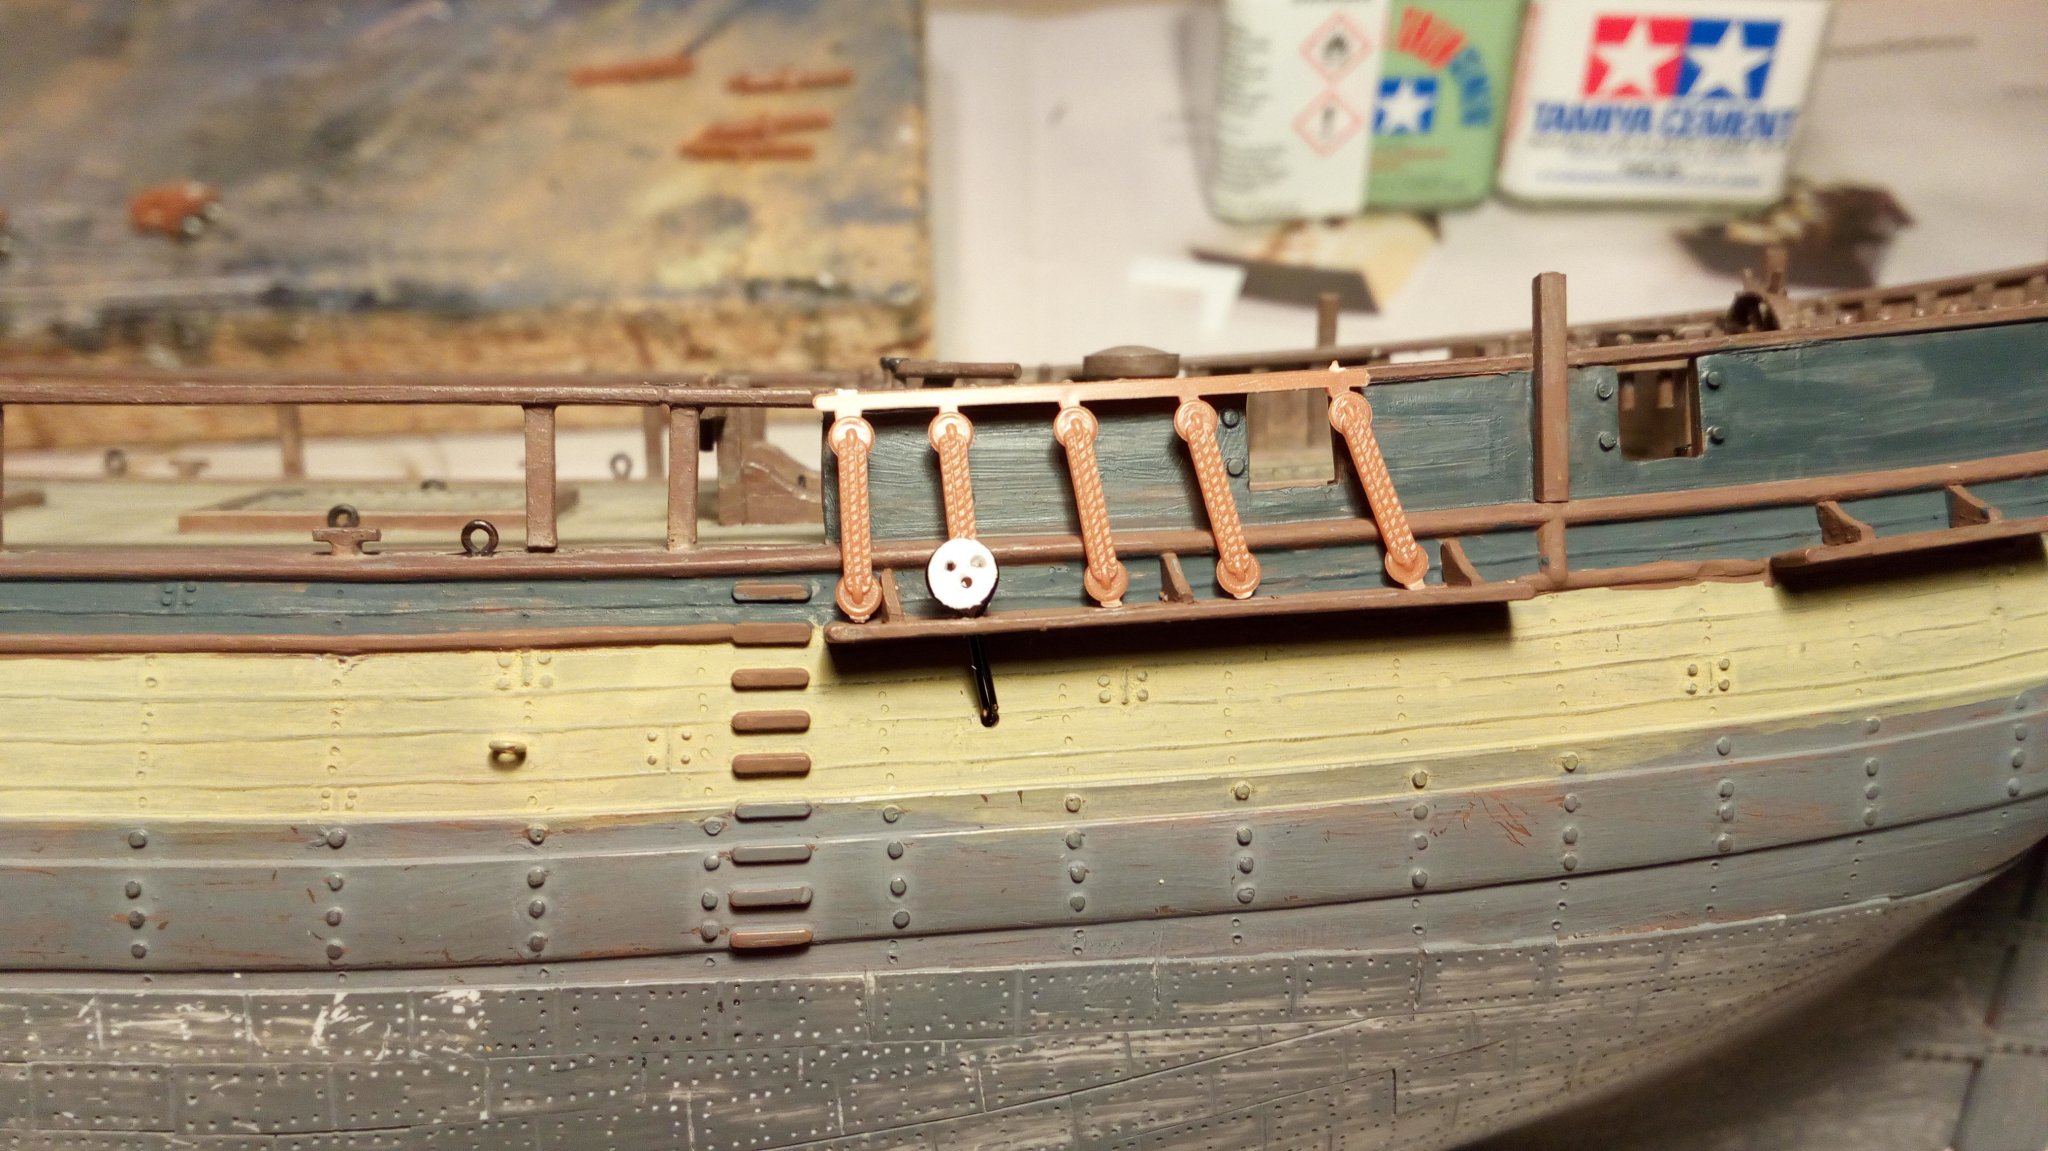
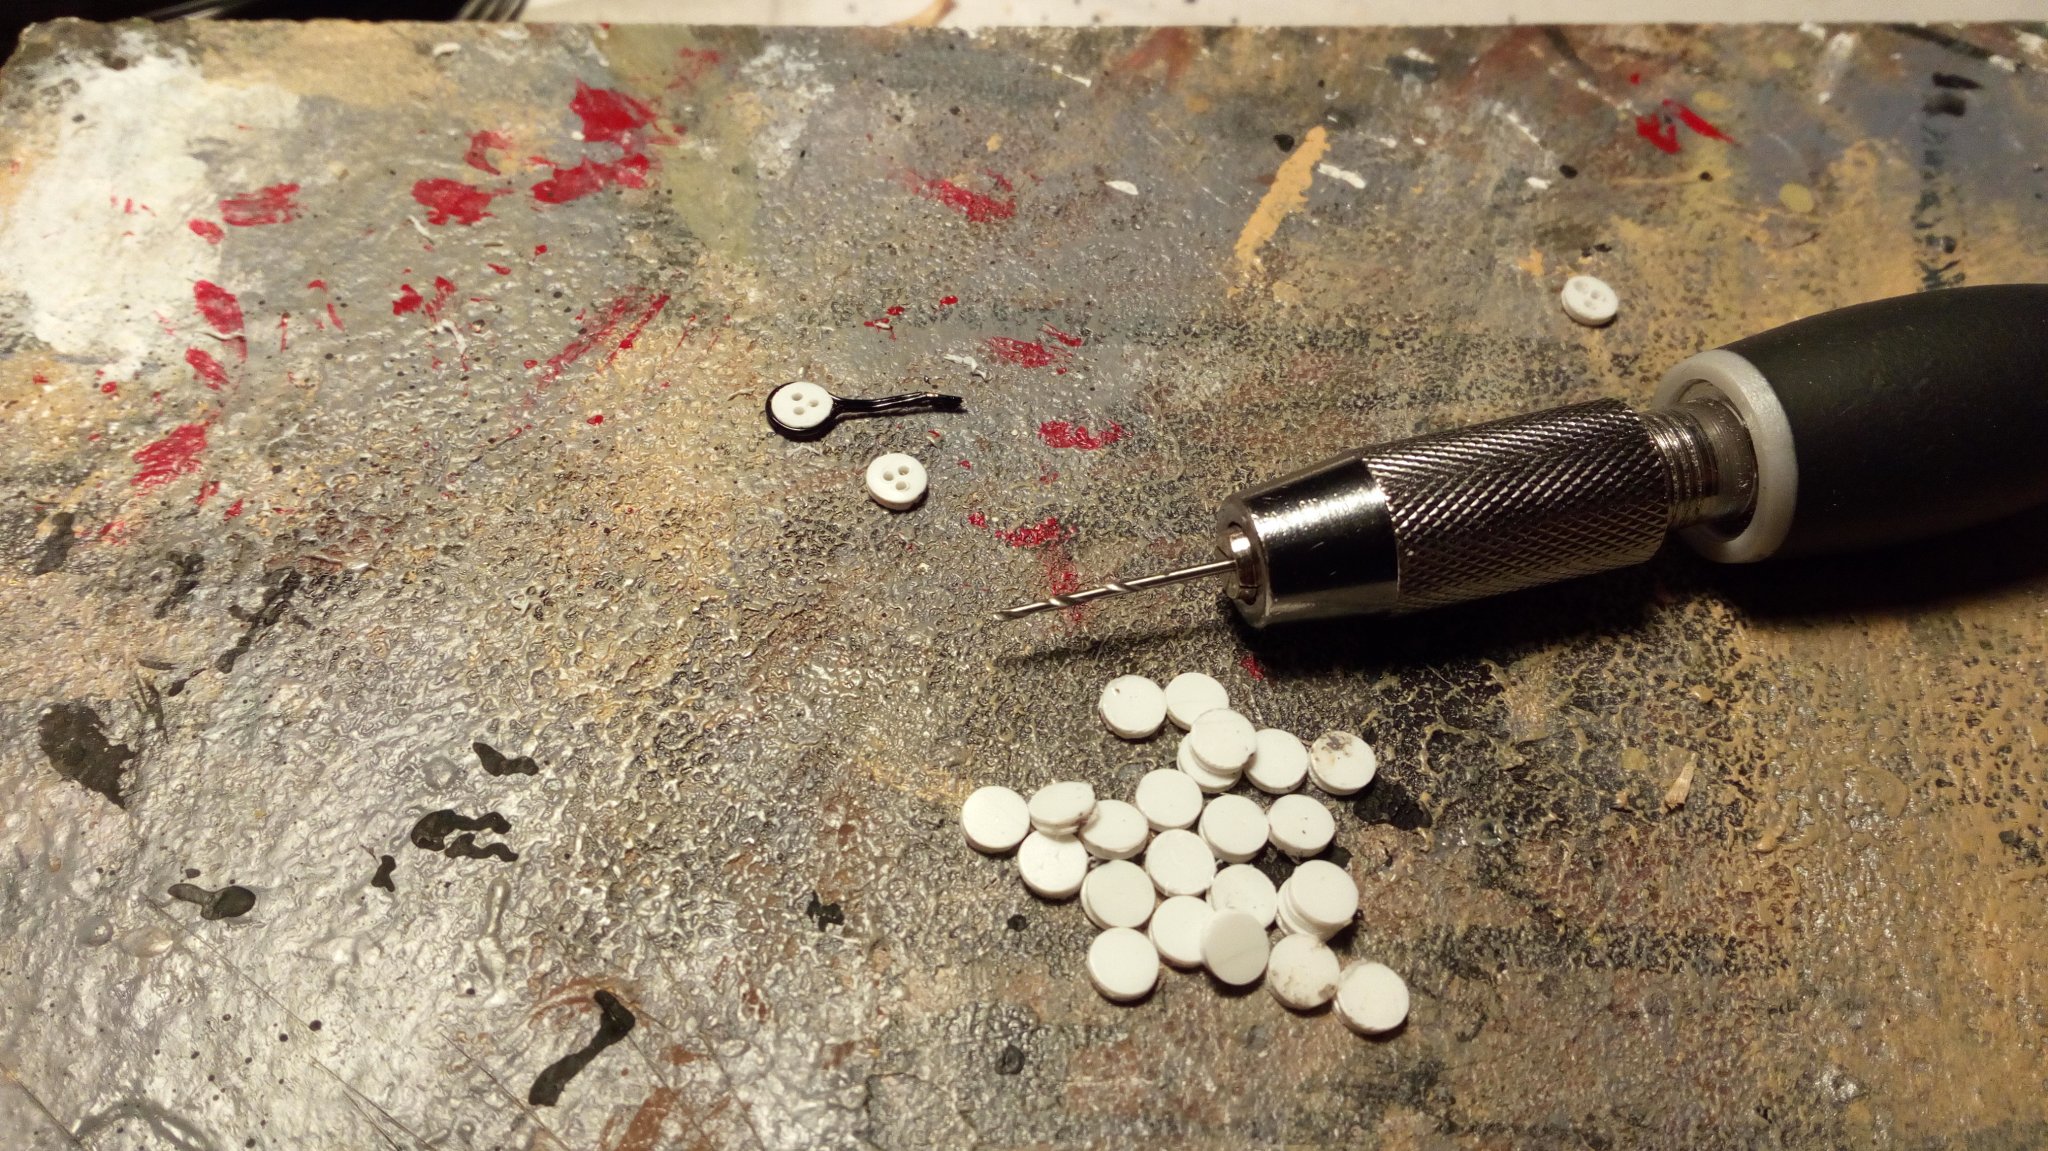
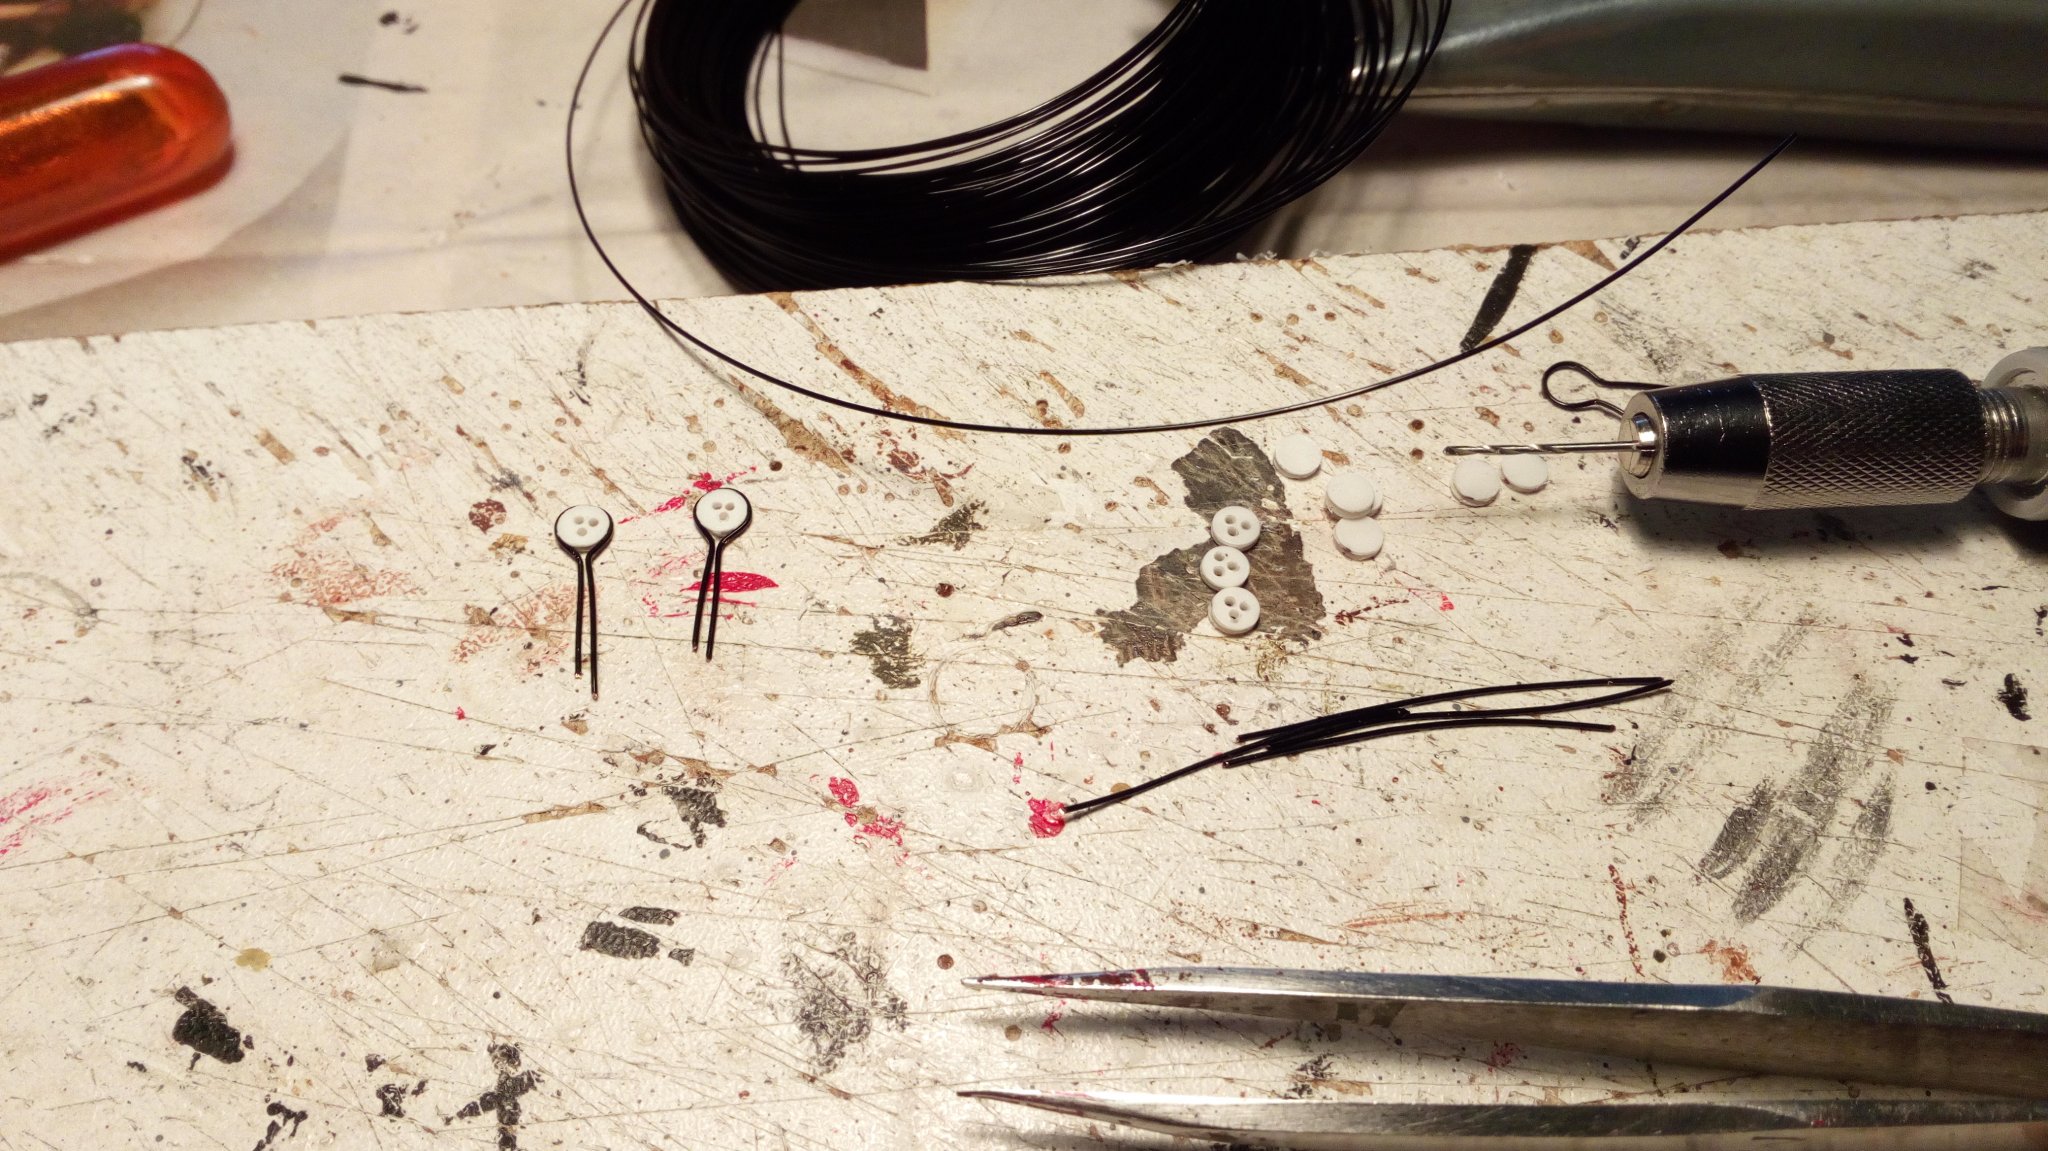
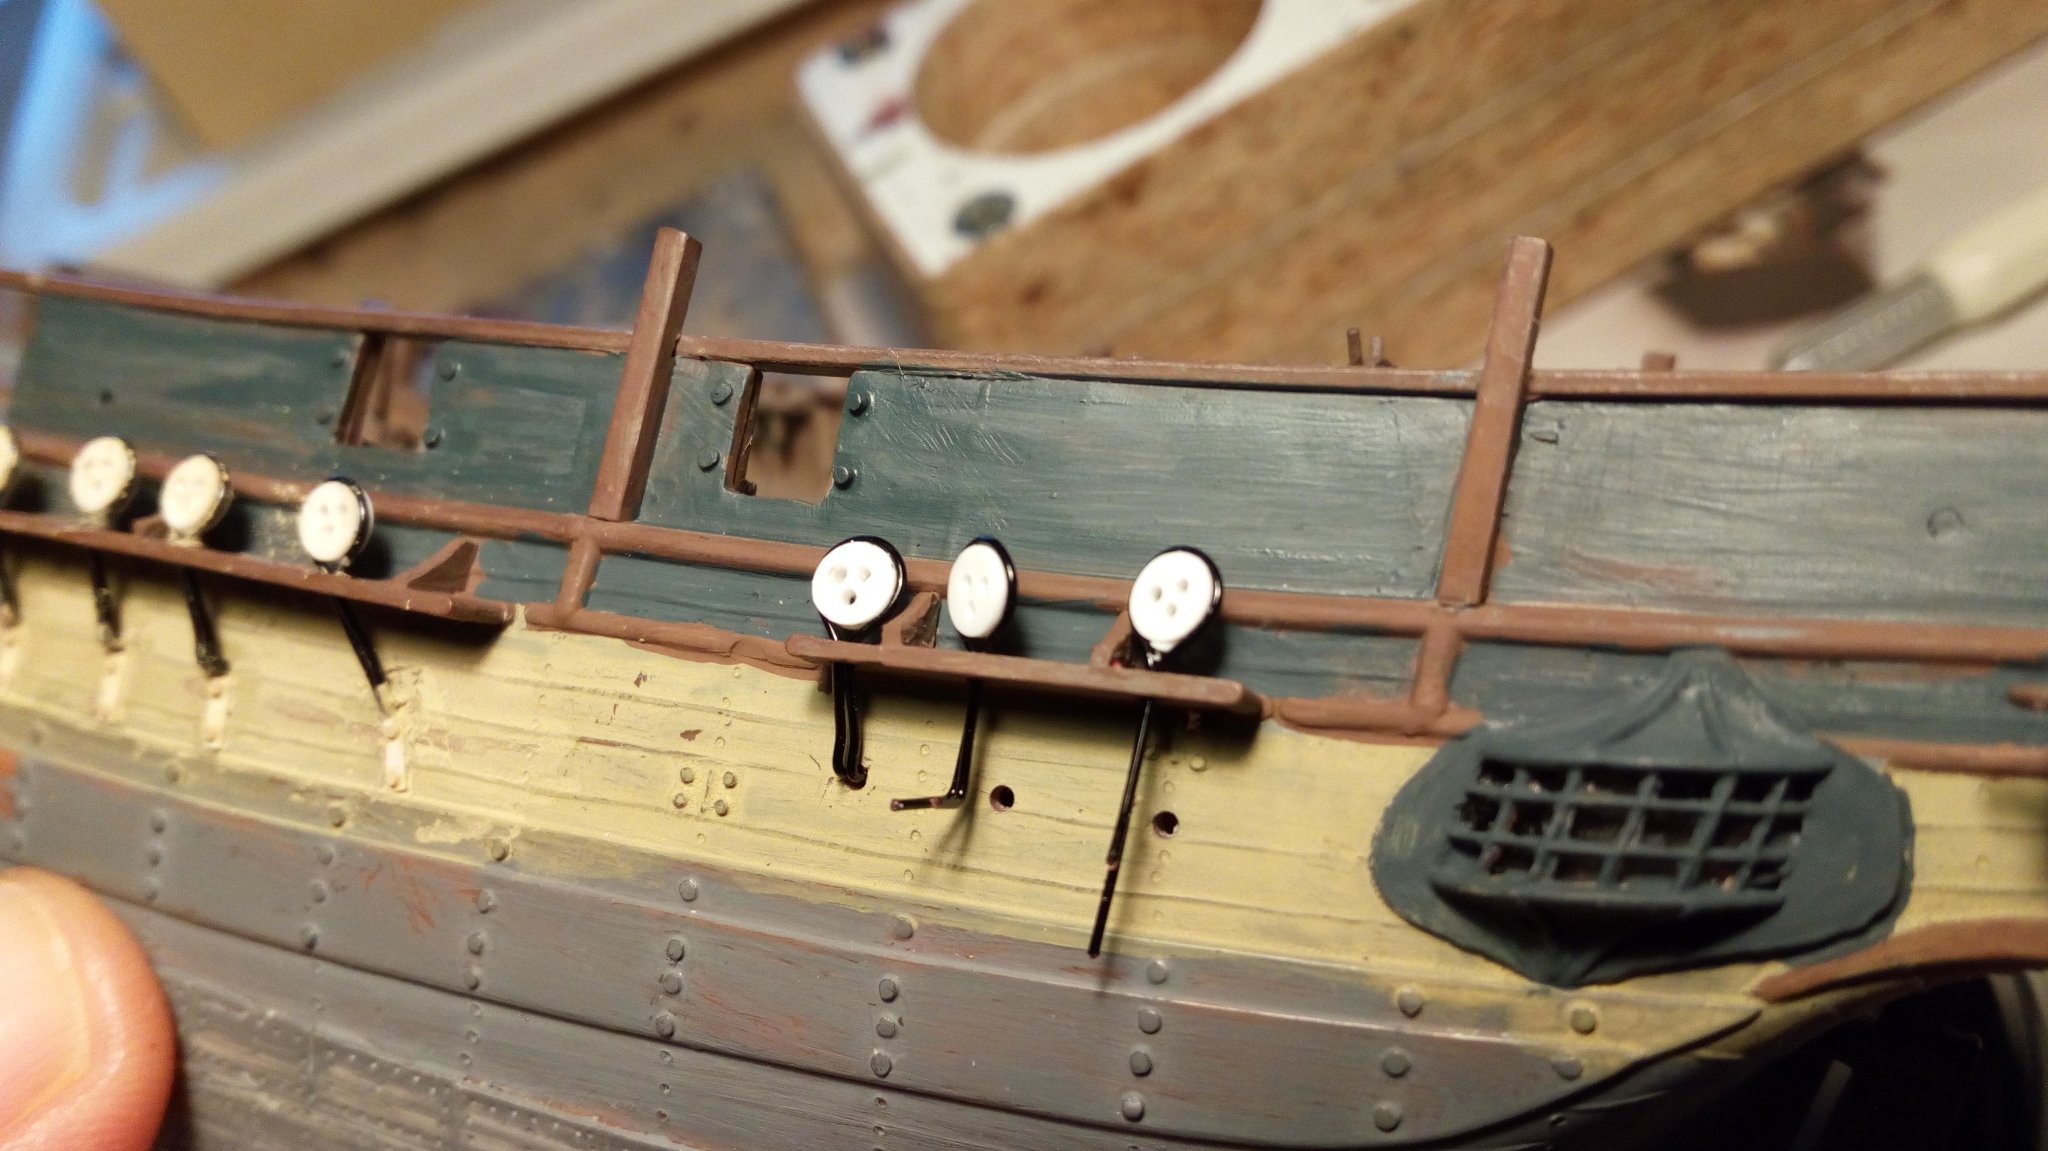
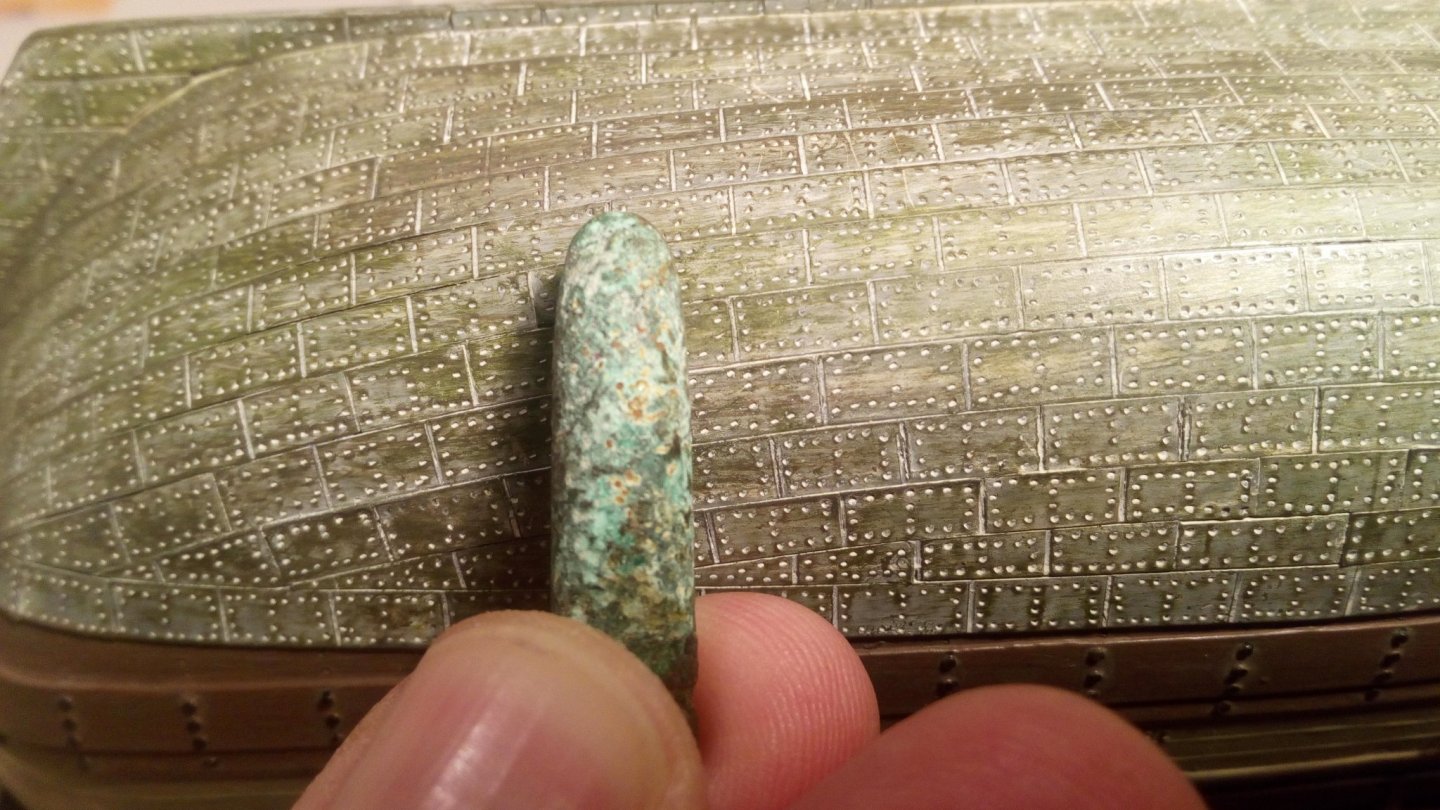
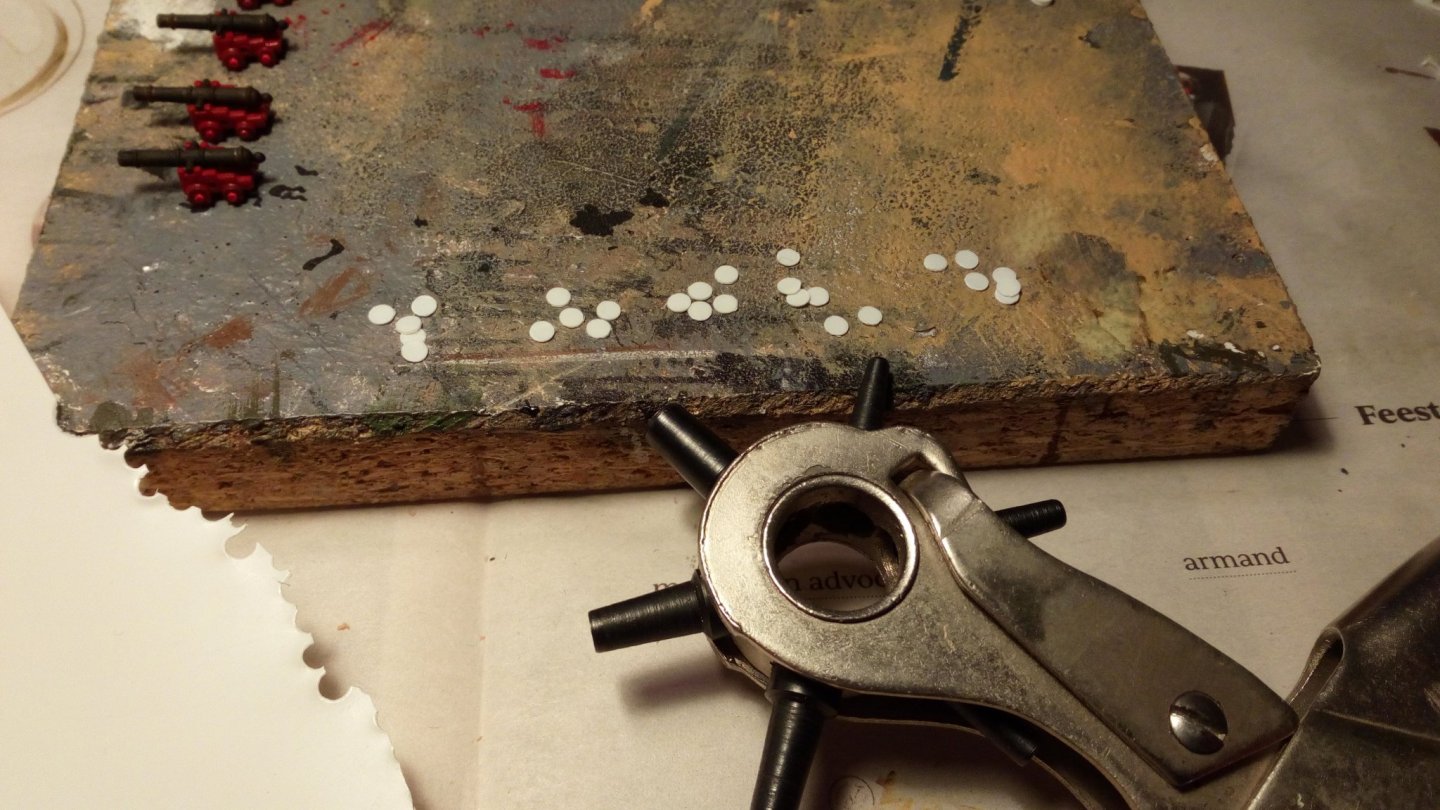
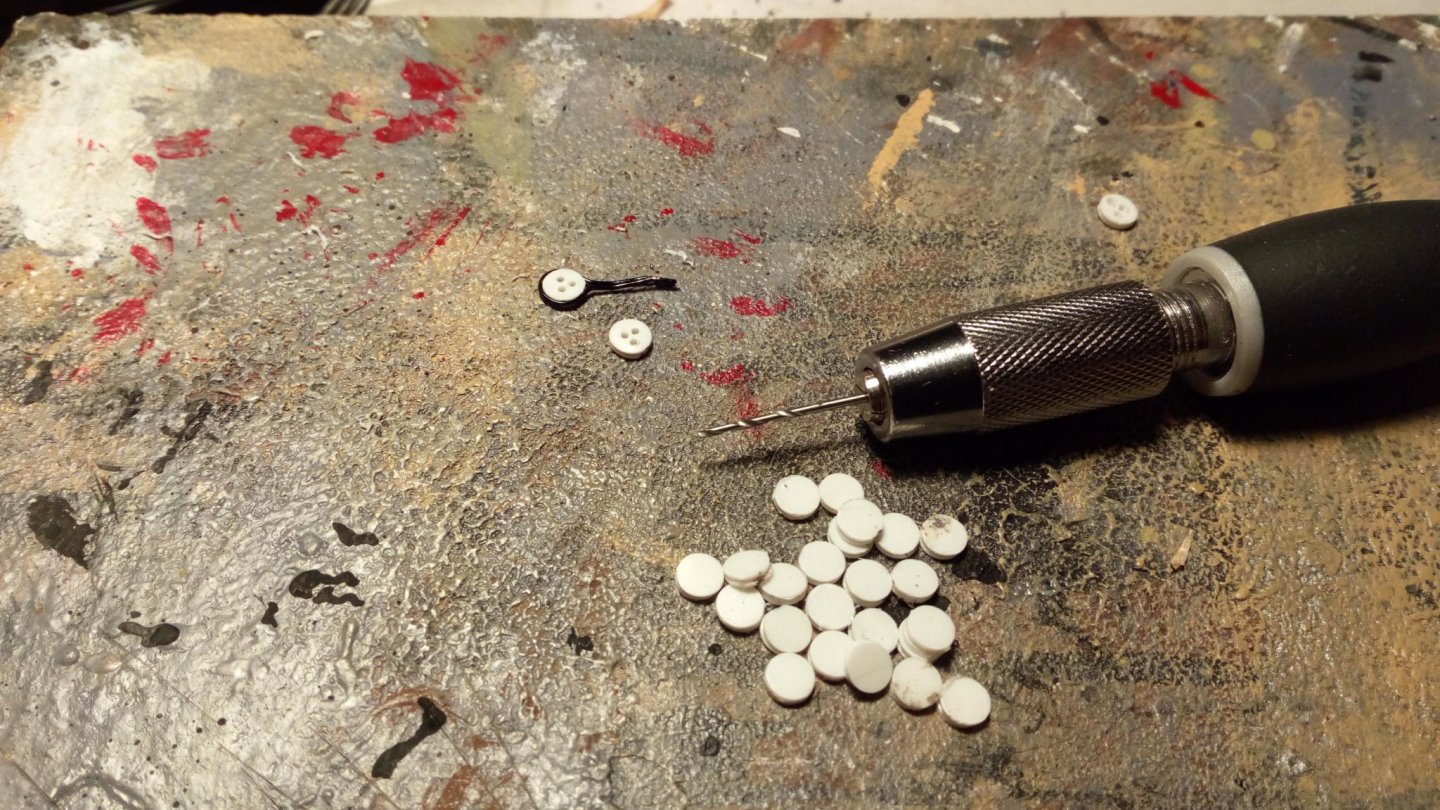
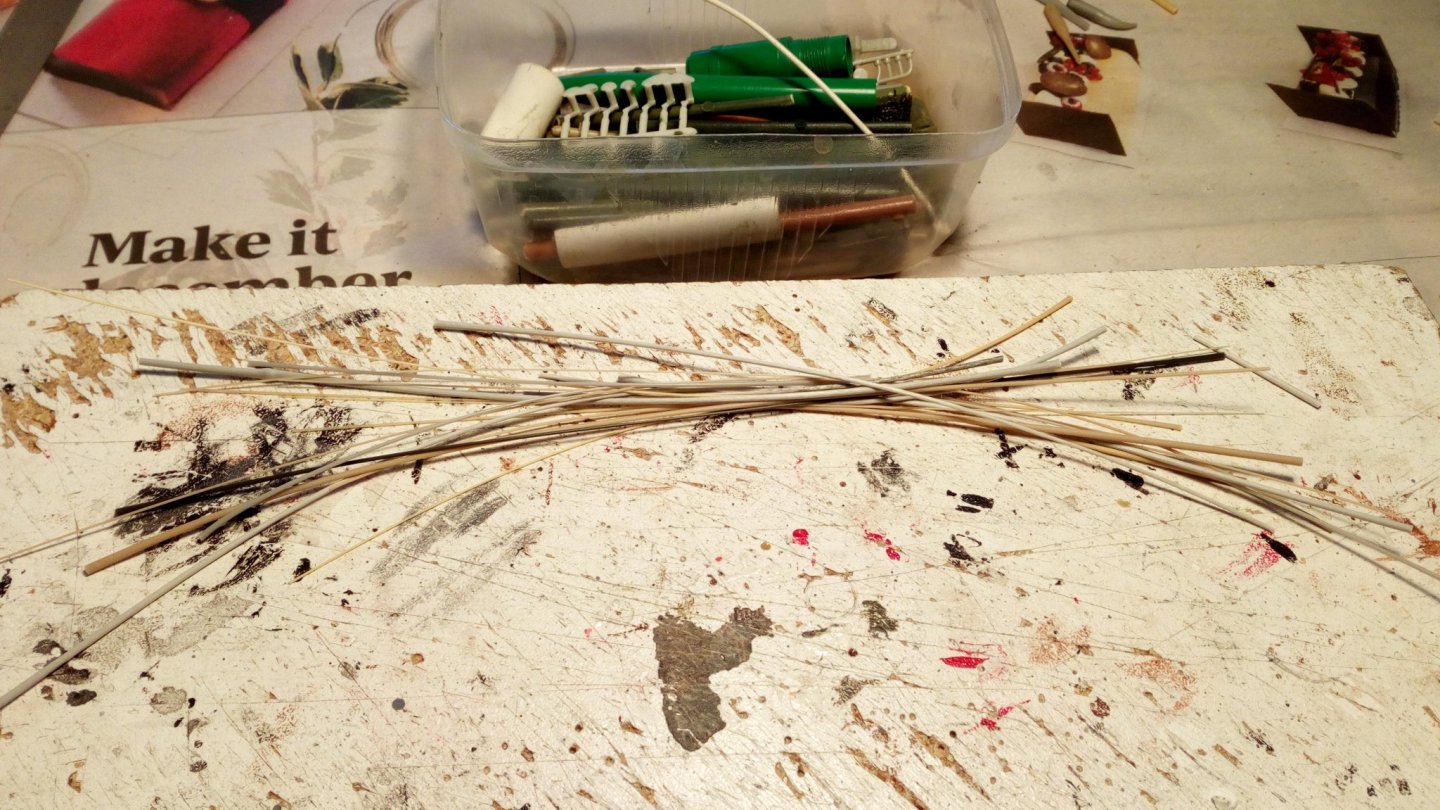
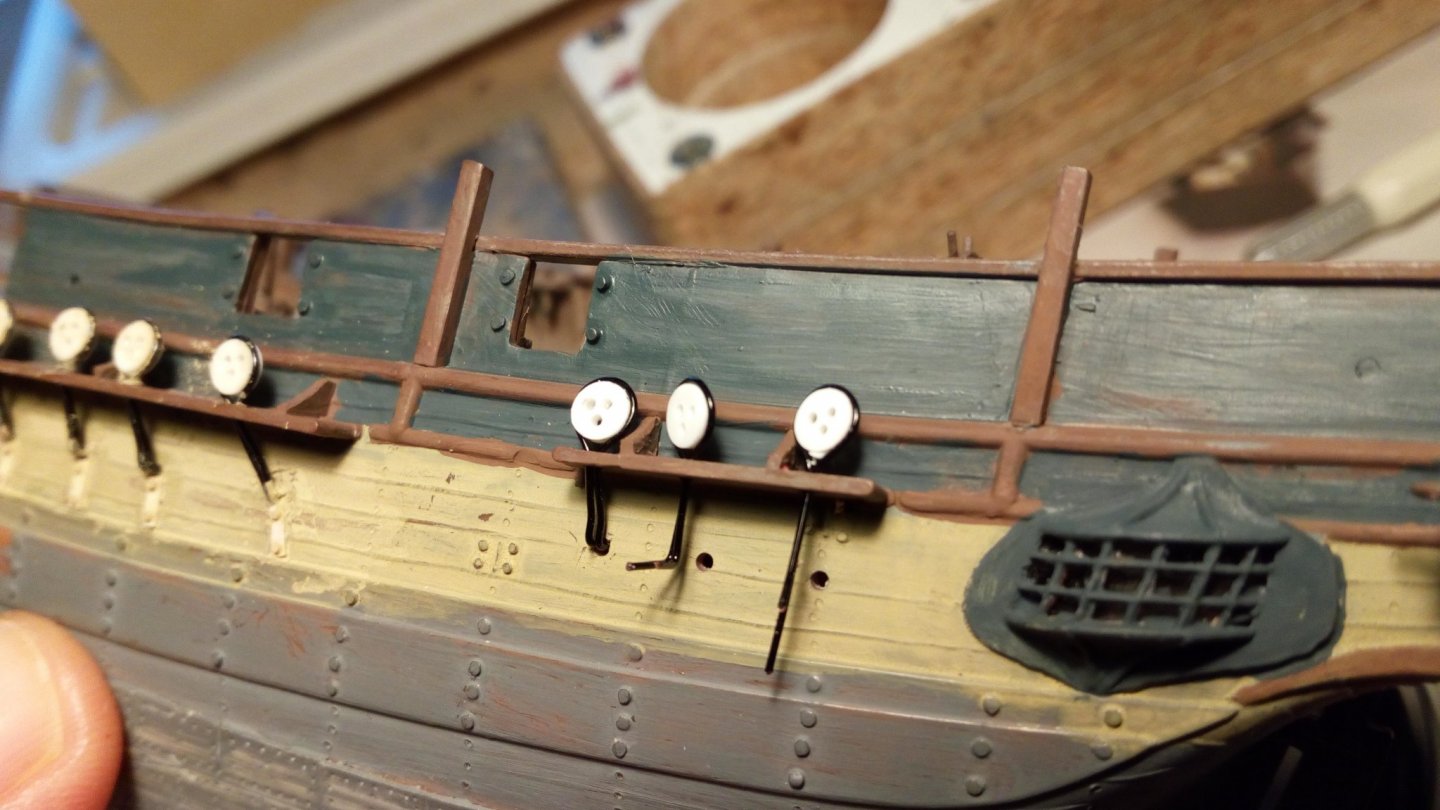
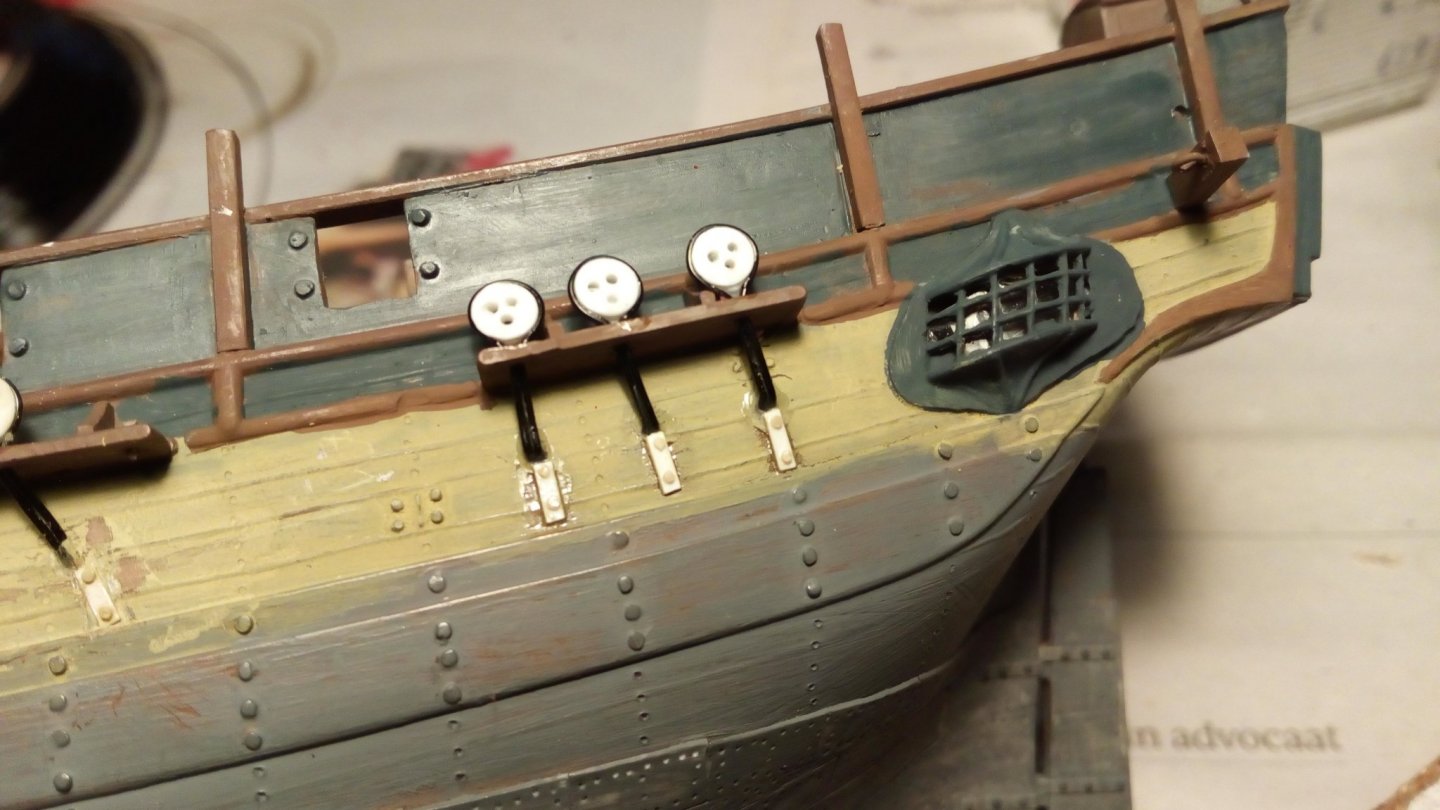
The dead eyes. I had 3 options : The one from the kit (bad idea). Buy new ones (cheating). Or, make them myself. A first prototype is made. (On this photo (left of the dedeye) is an error. One support of the railing is too short, this has now been restored) Making discs and glue them together (3 discs for each dedey). Drilling holes 0.7 mm and attach iron wire to them. And place them on the channels. Made some stretched sprue for the extra details. All dedeyes on the channels are ready Now the hull can be painted. Work in progress. Thanks for following


-
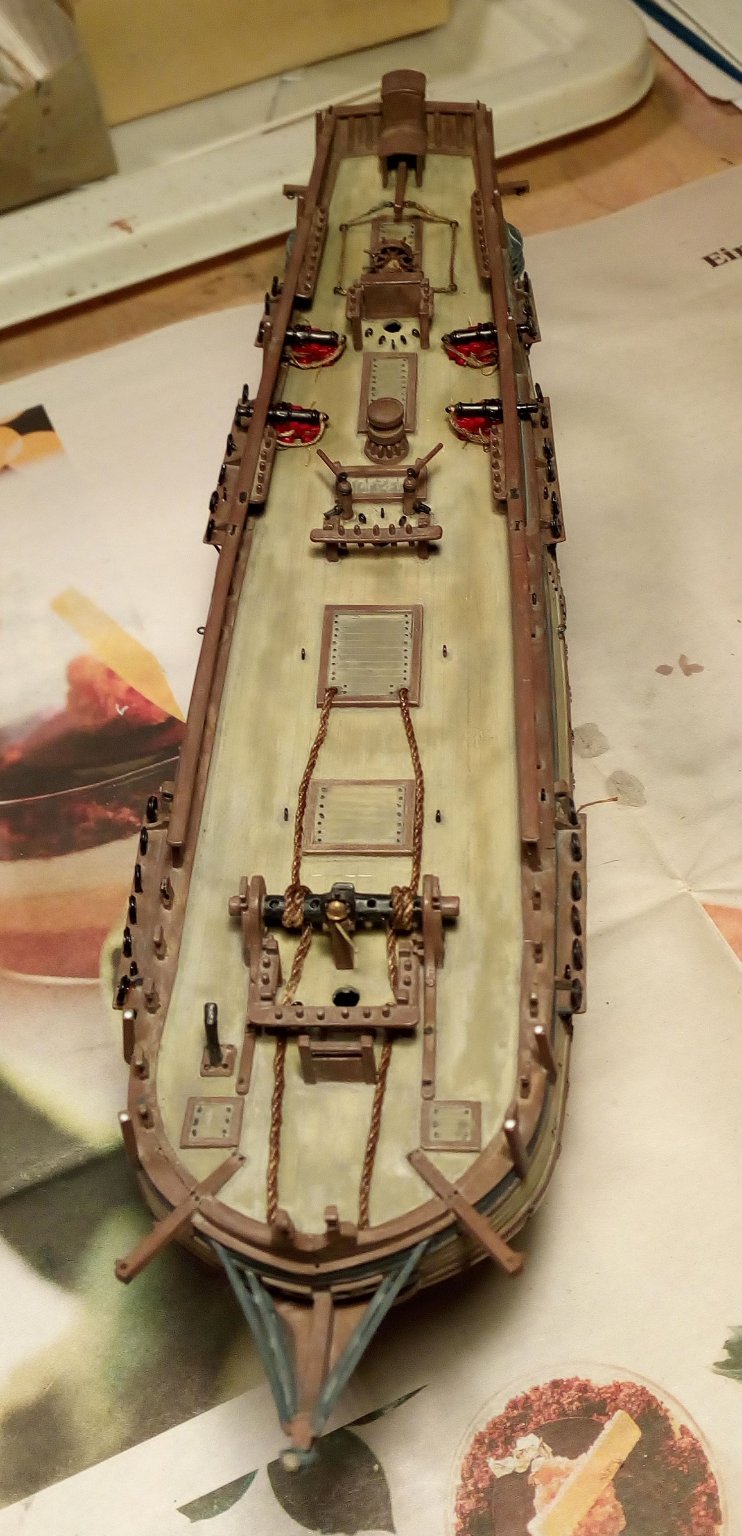
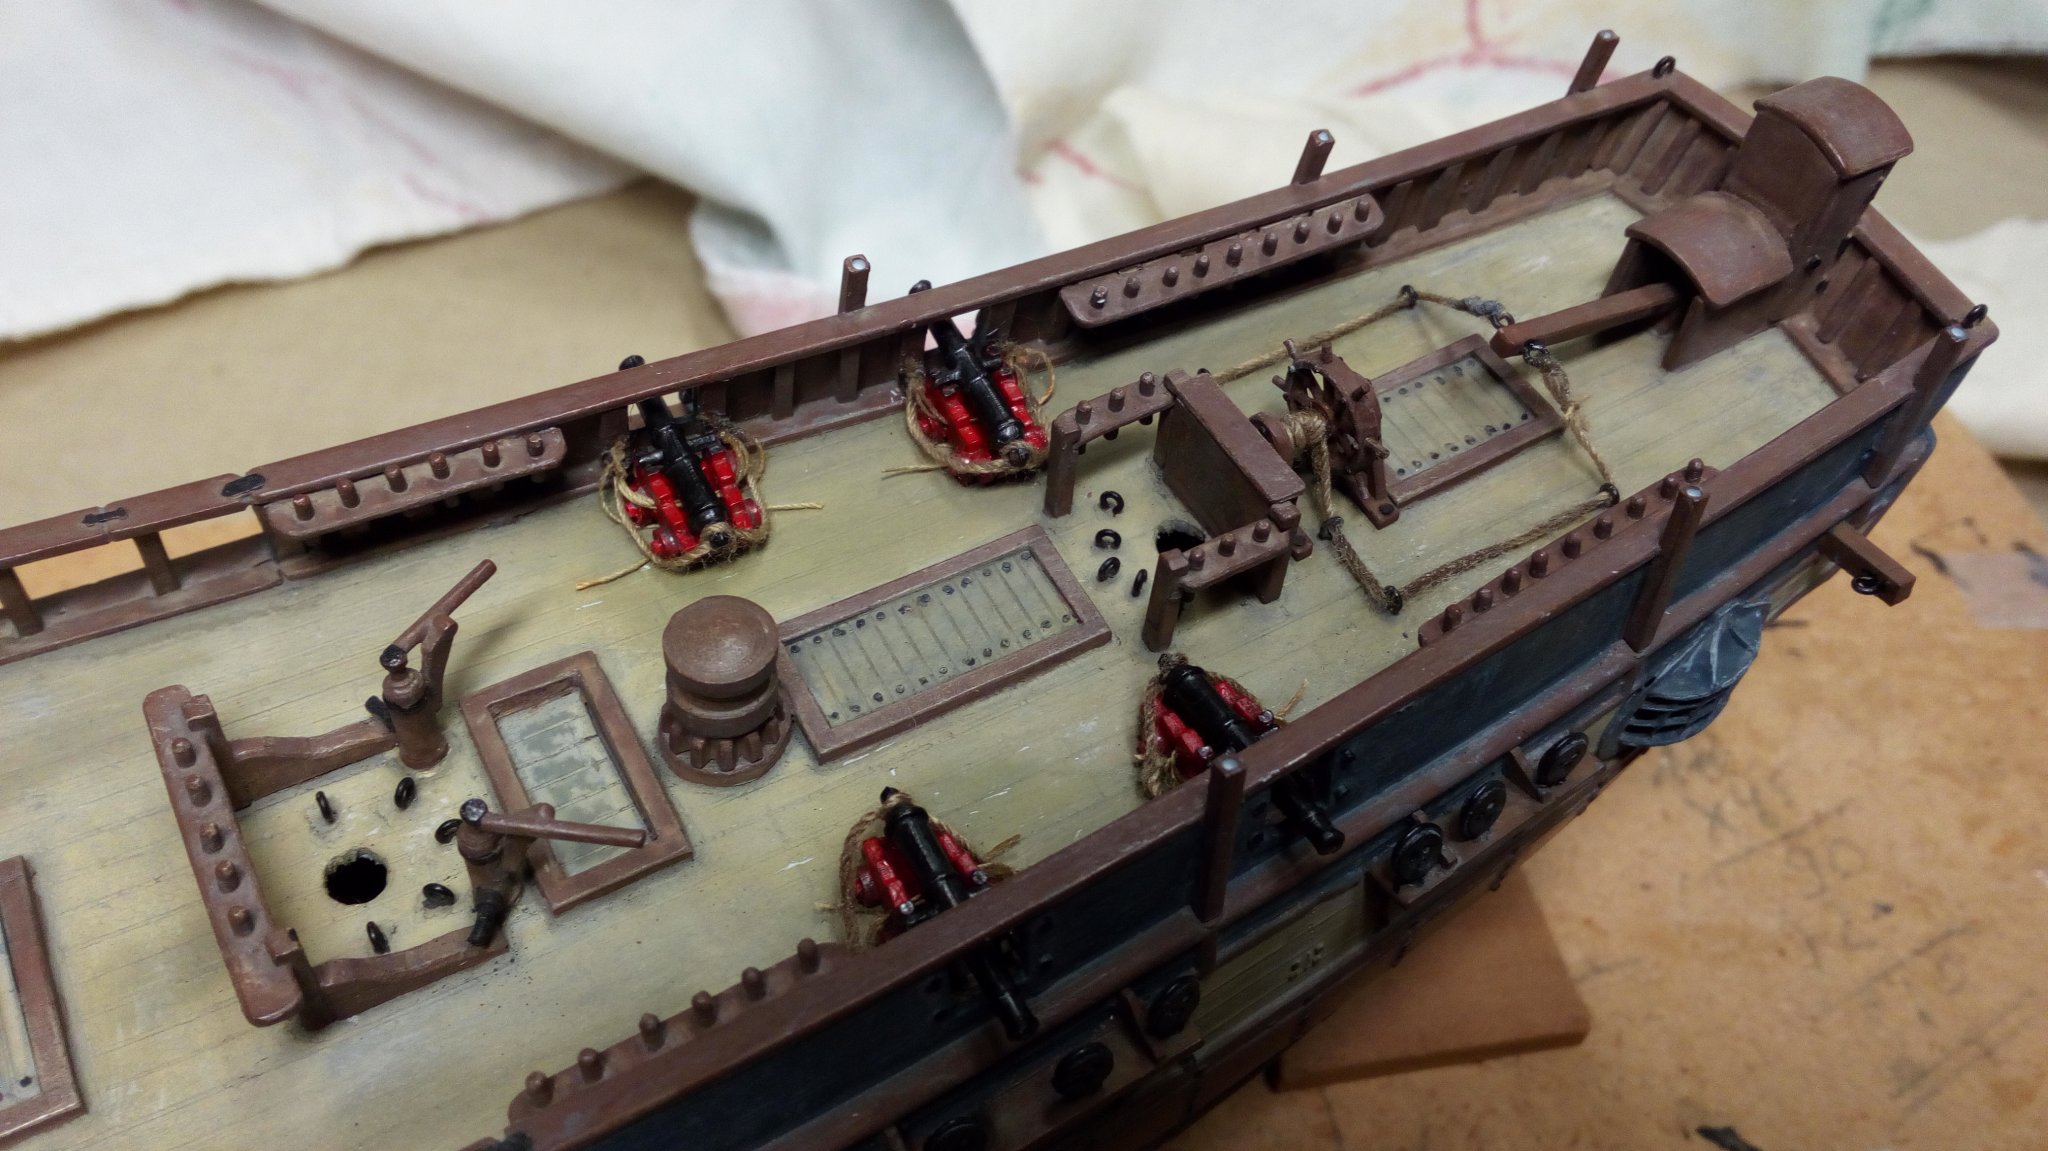
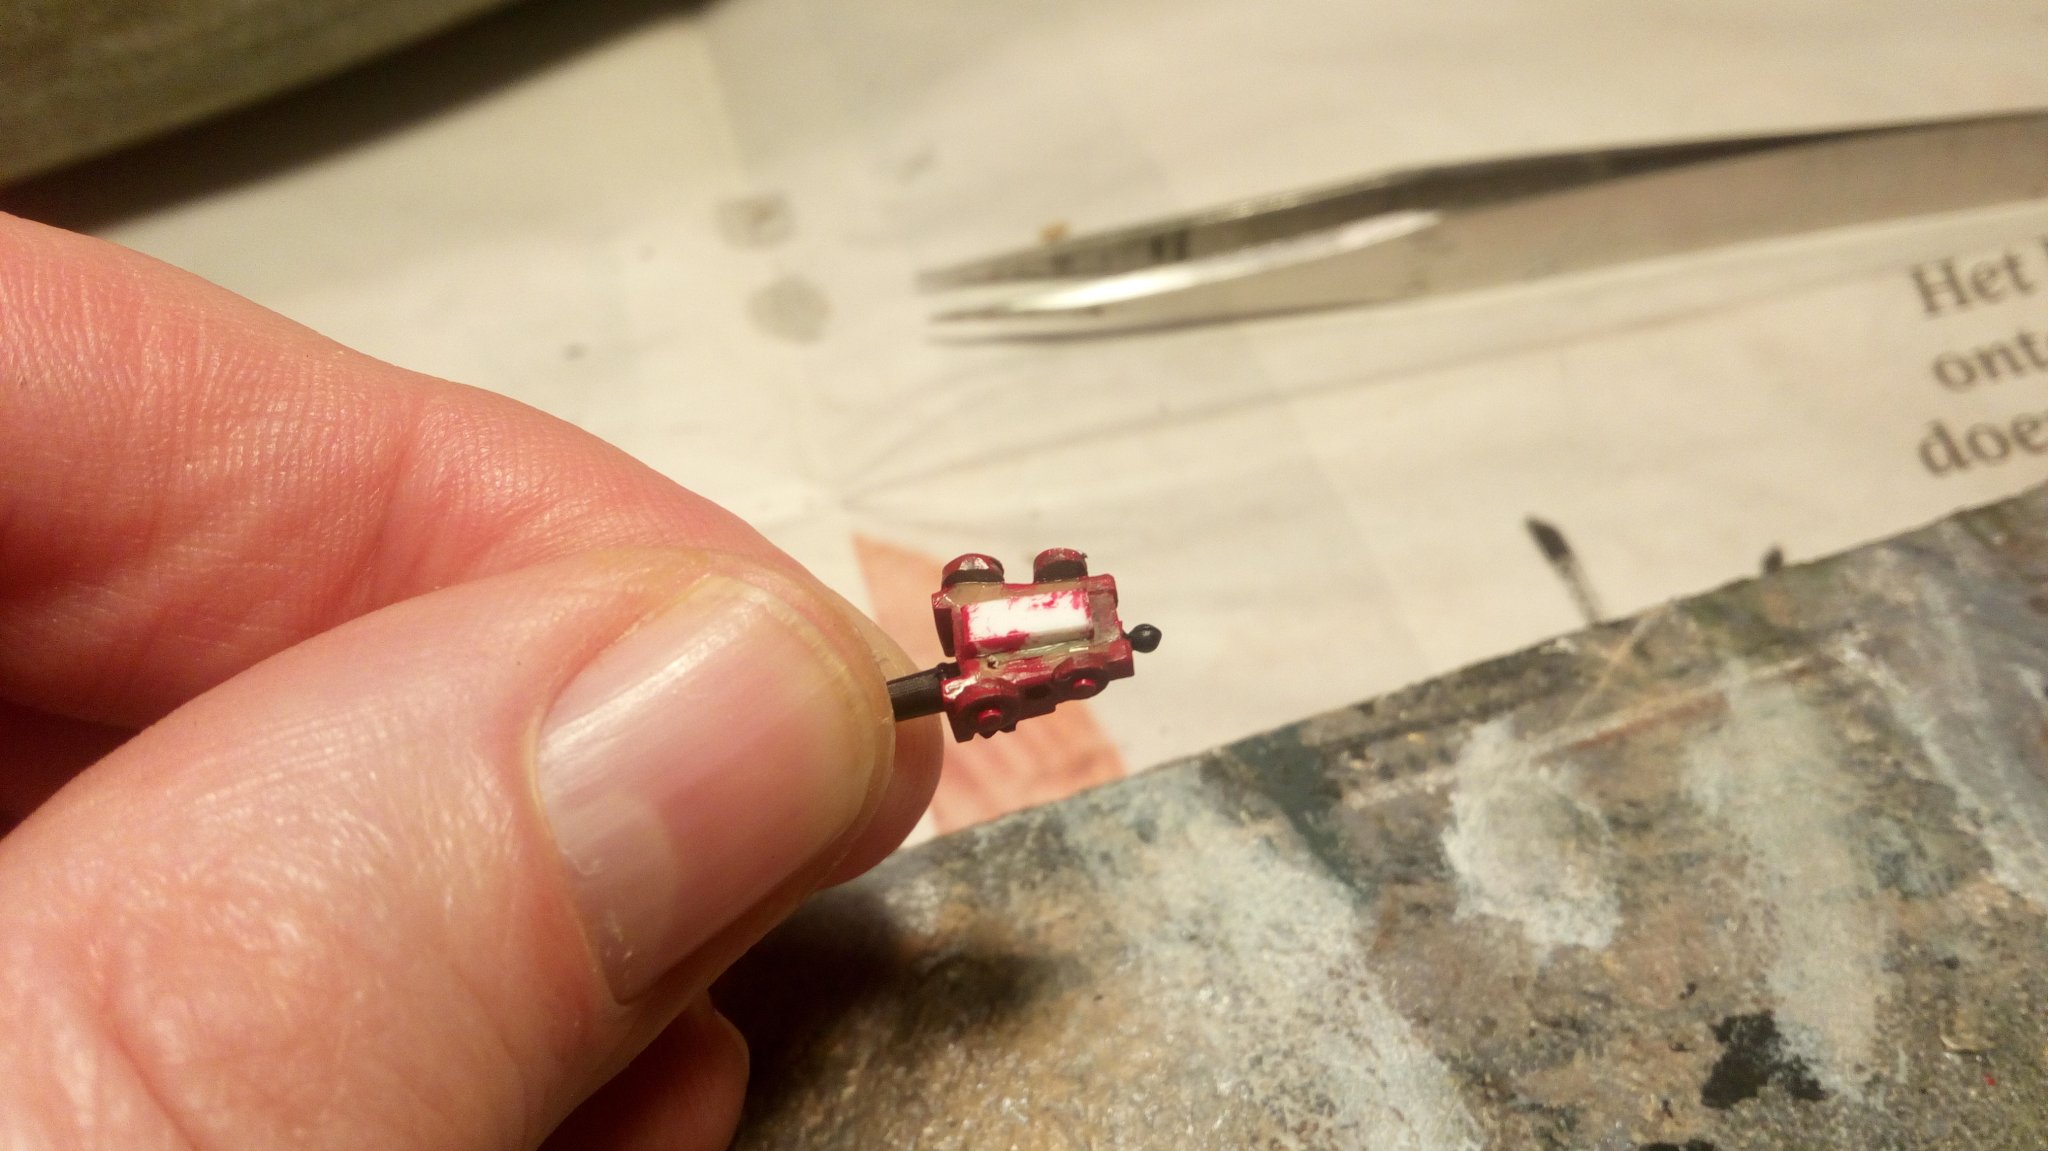
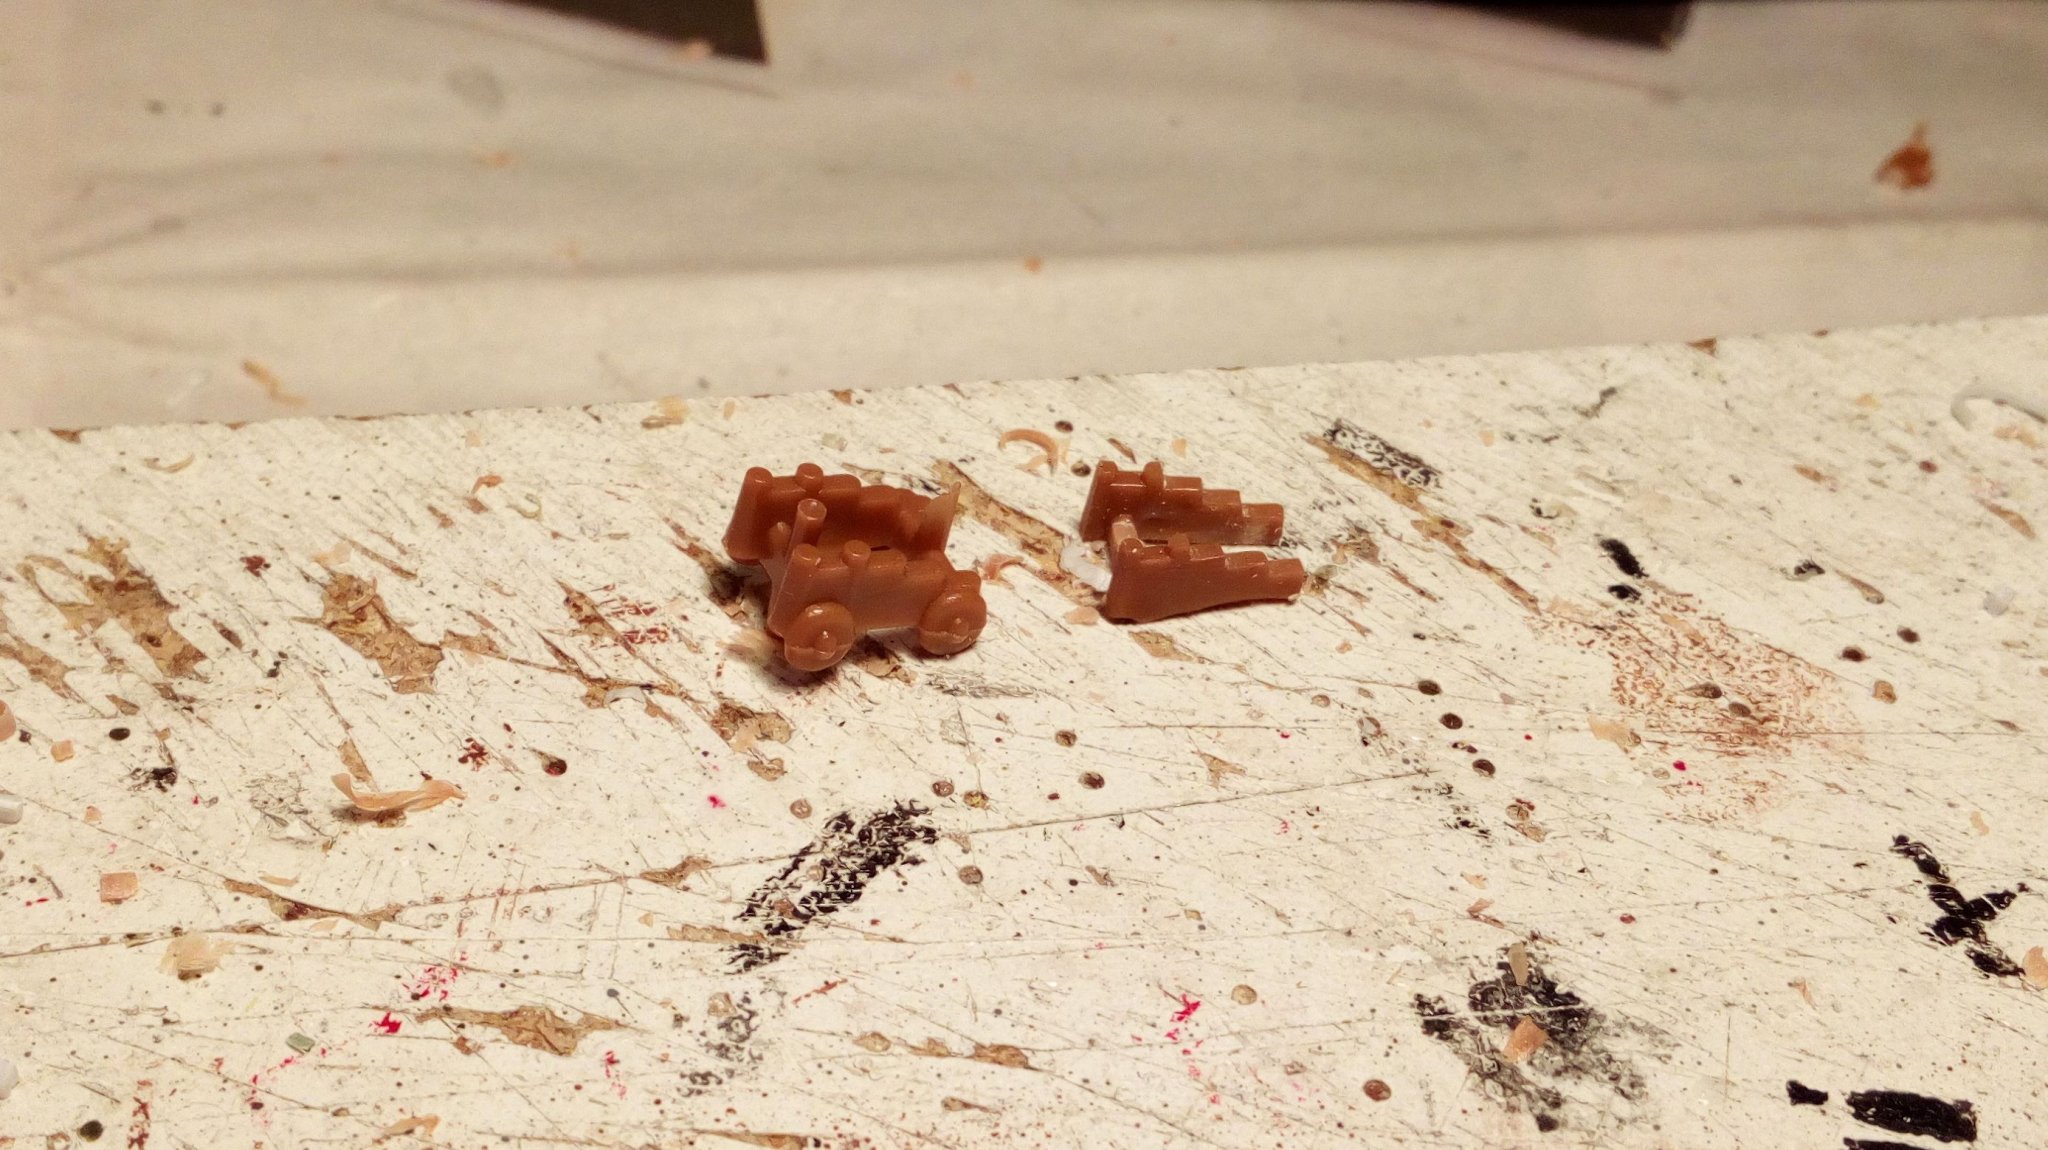
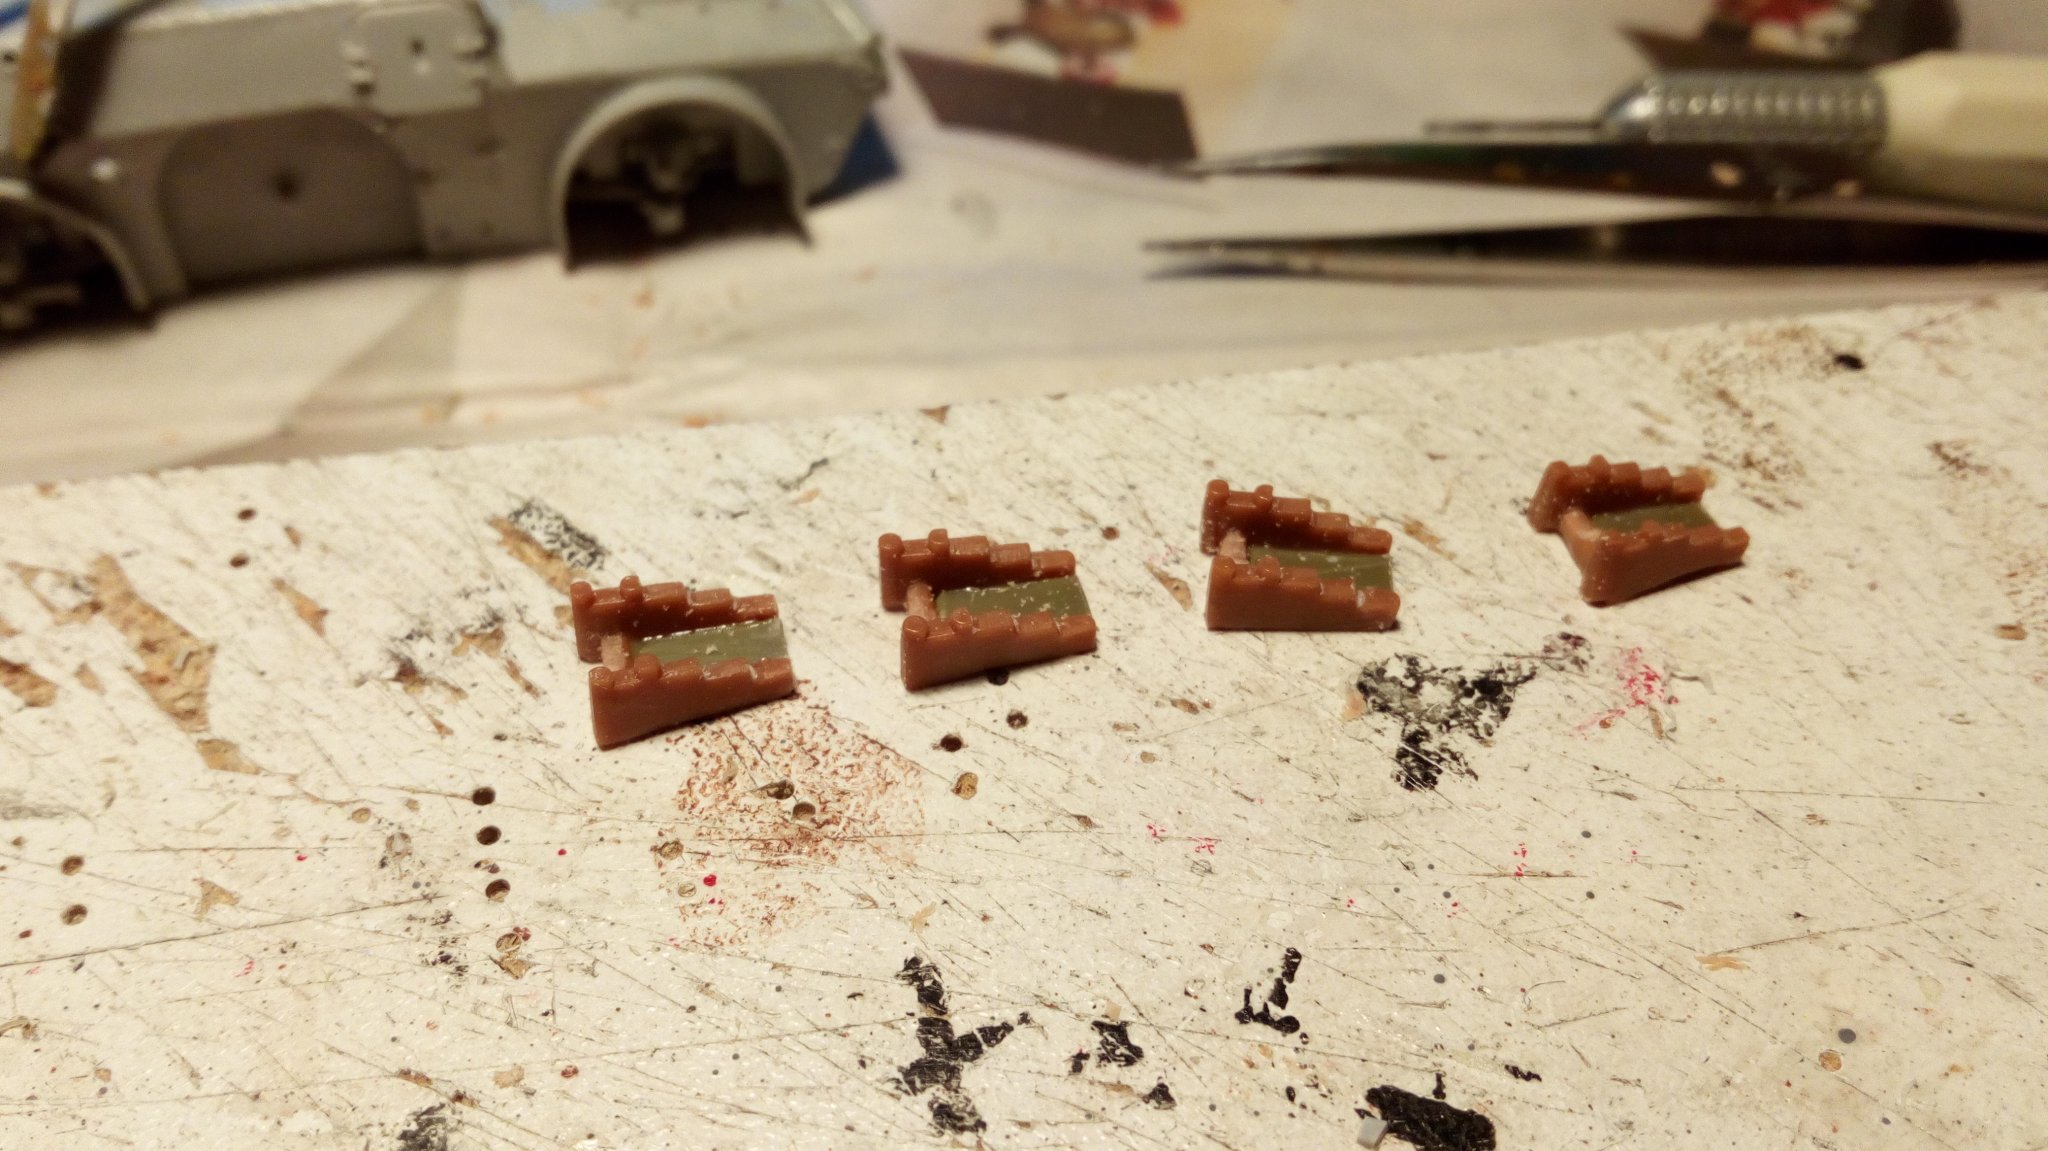
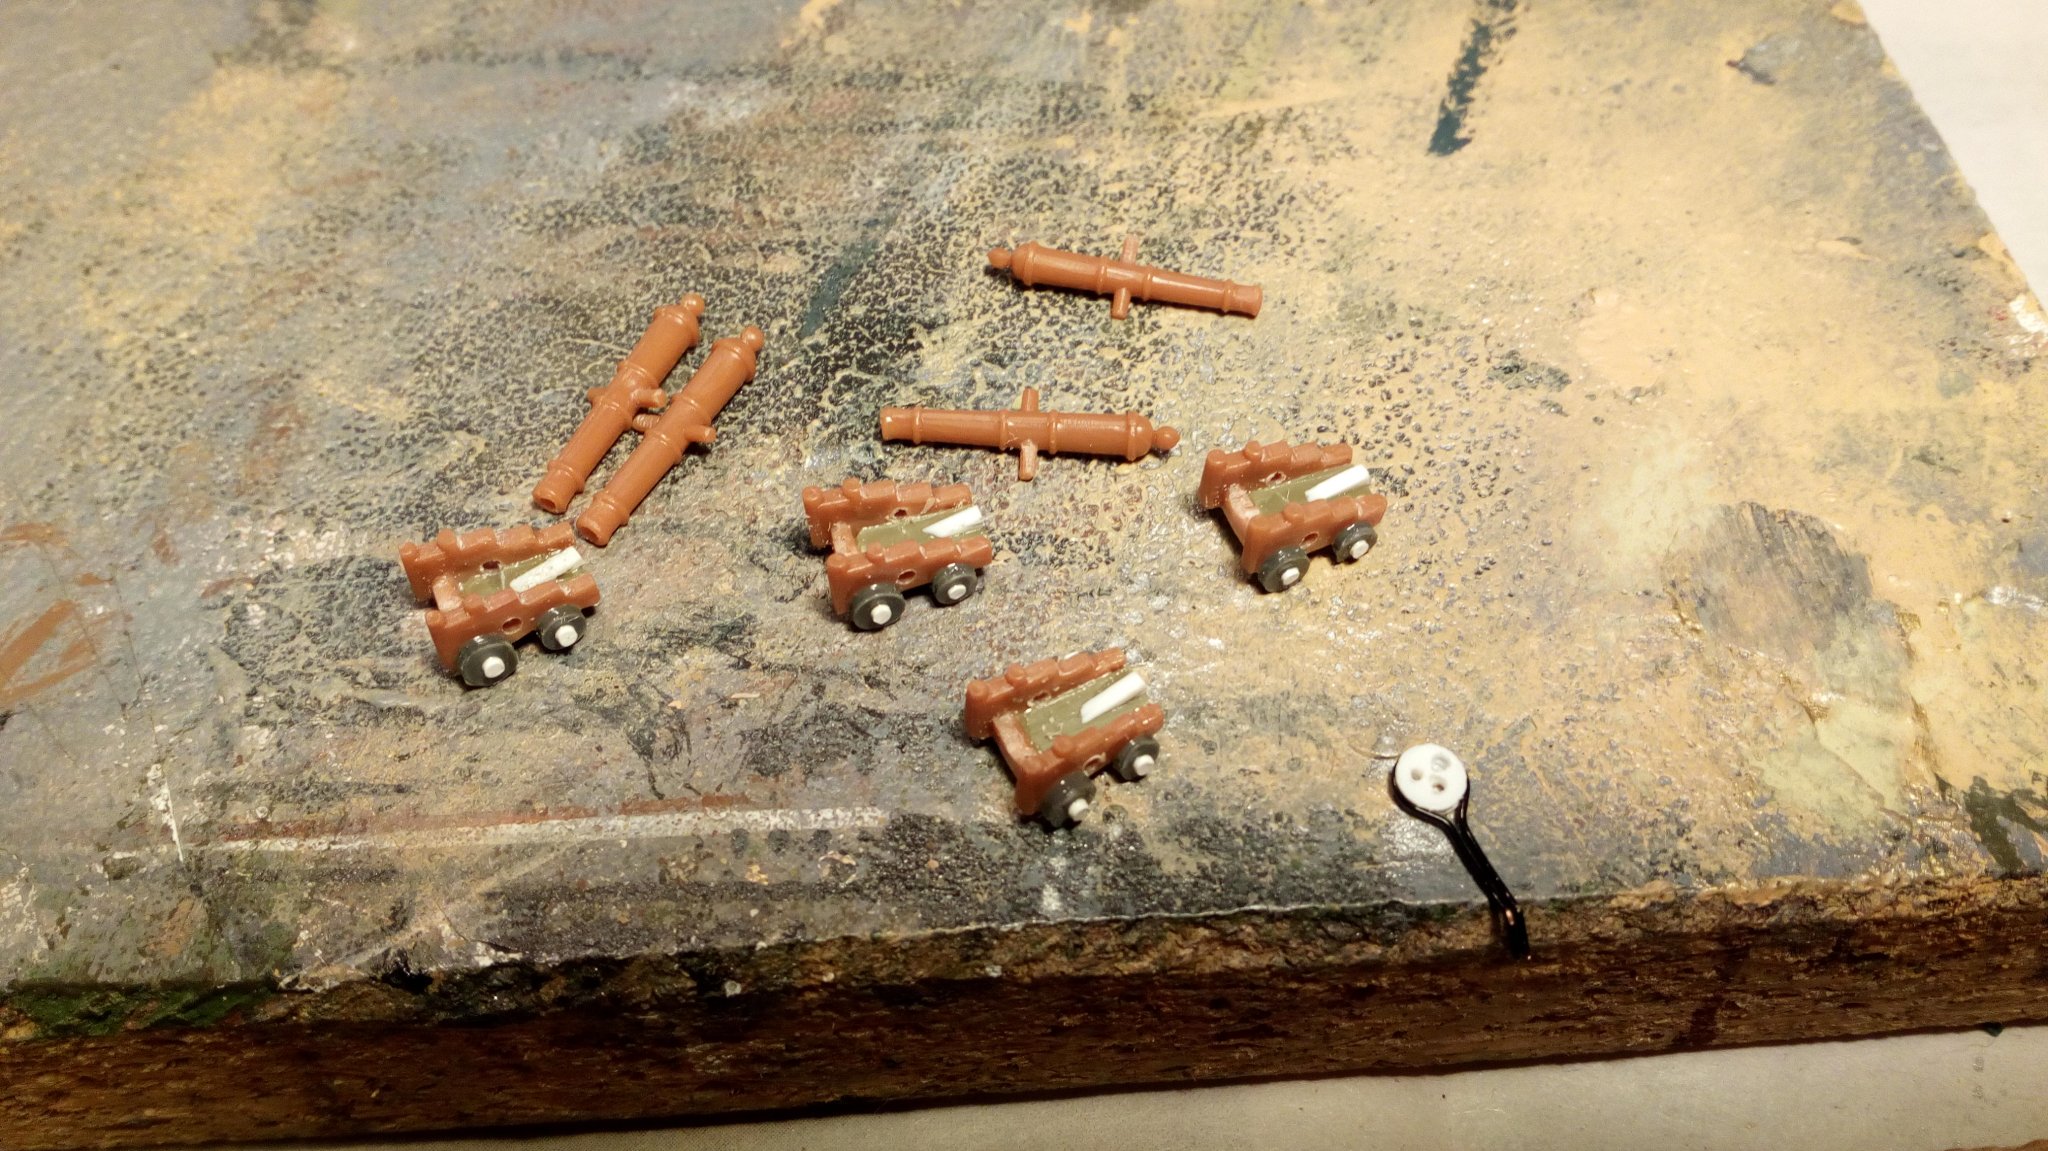
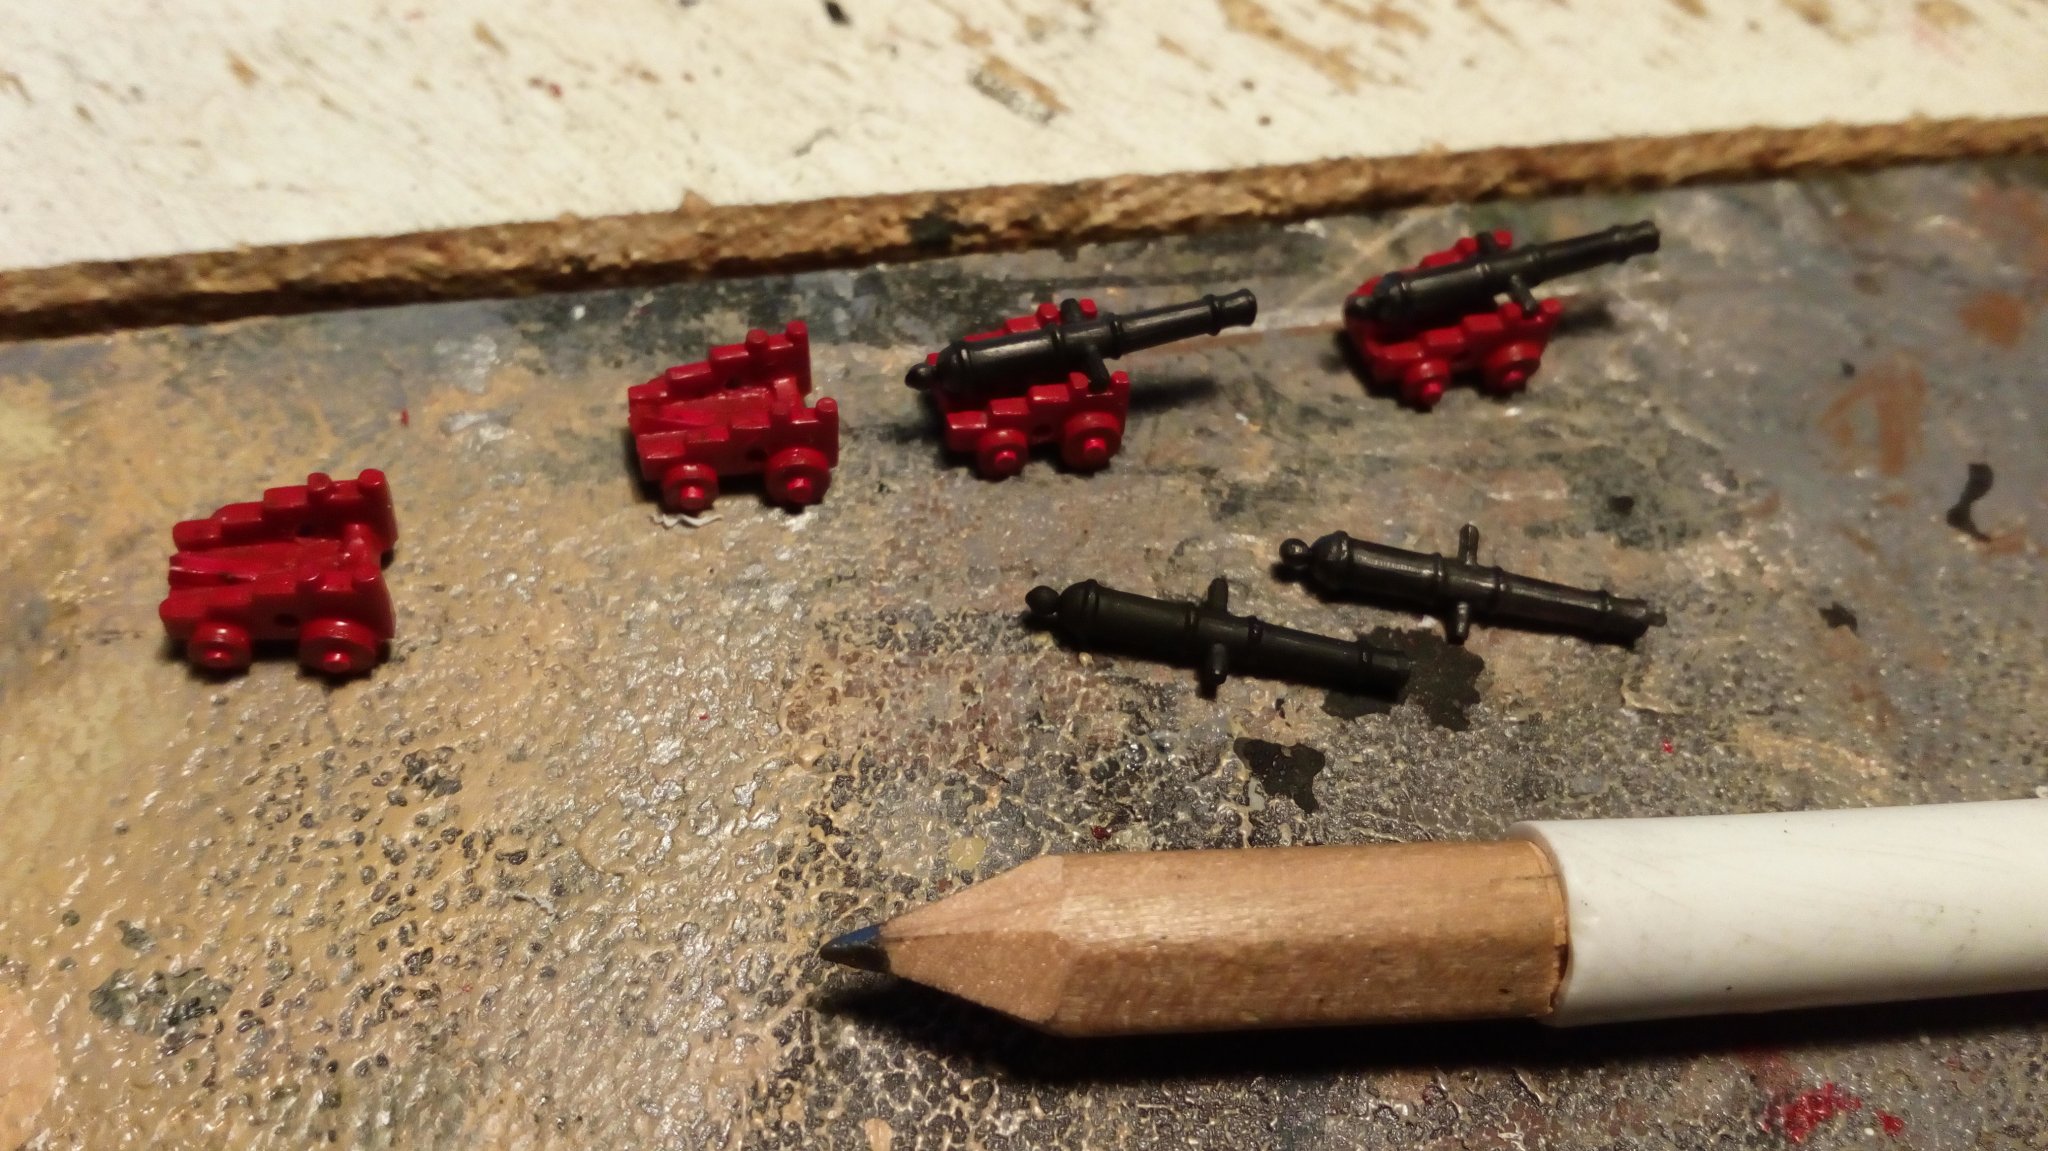
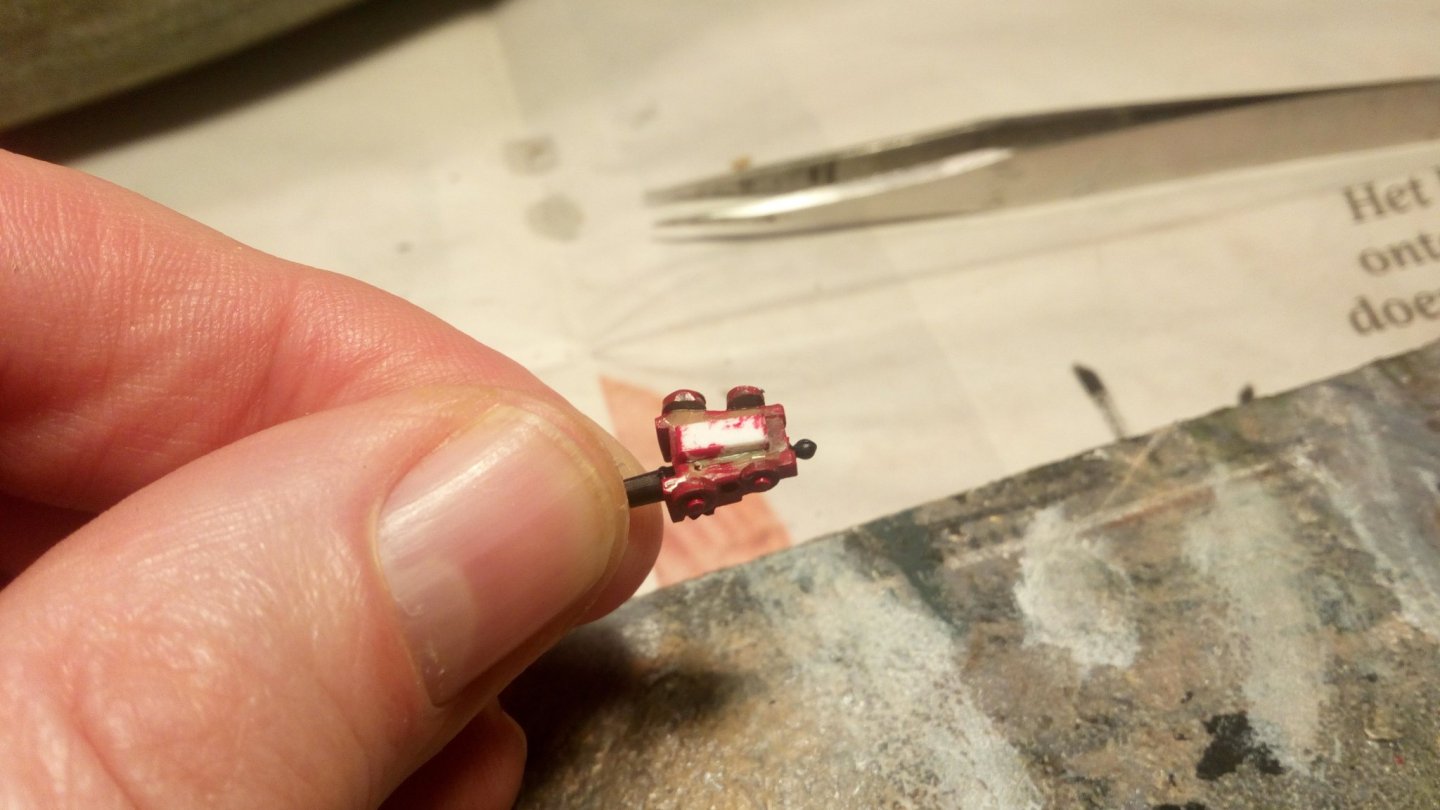
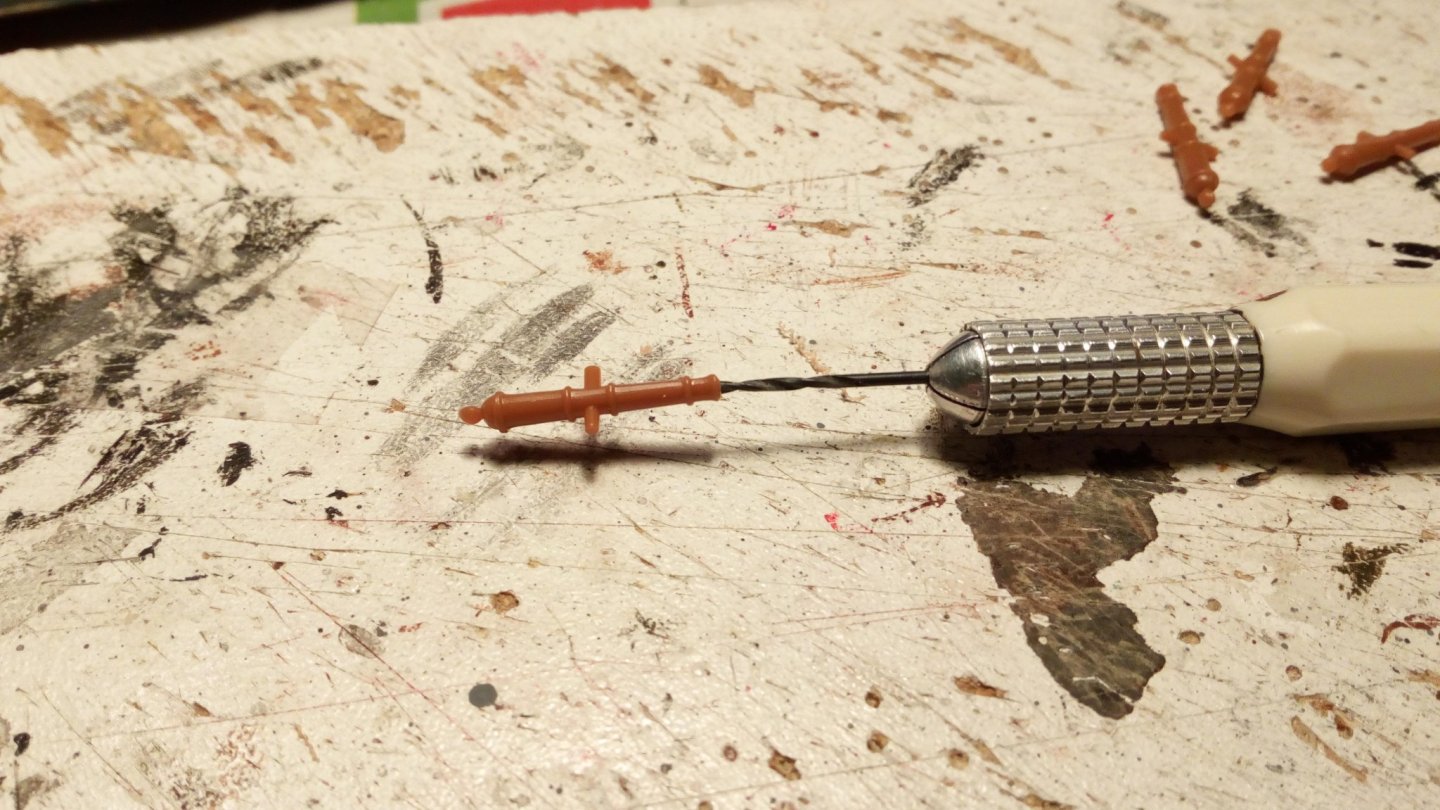
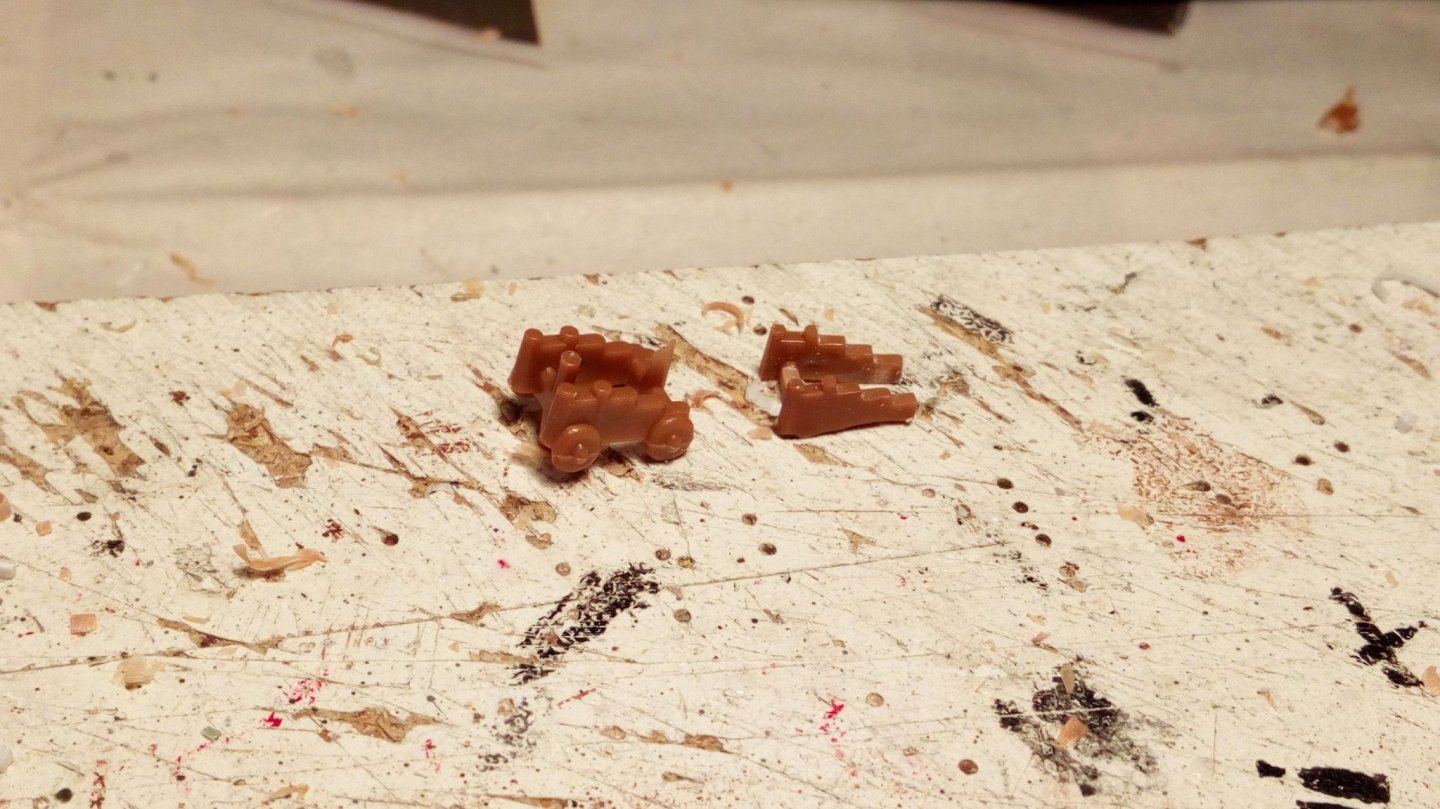
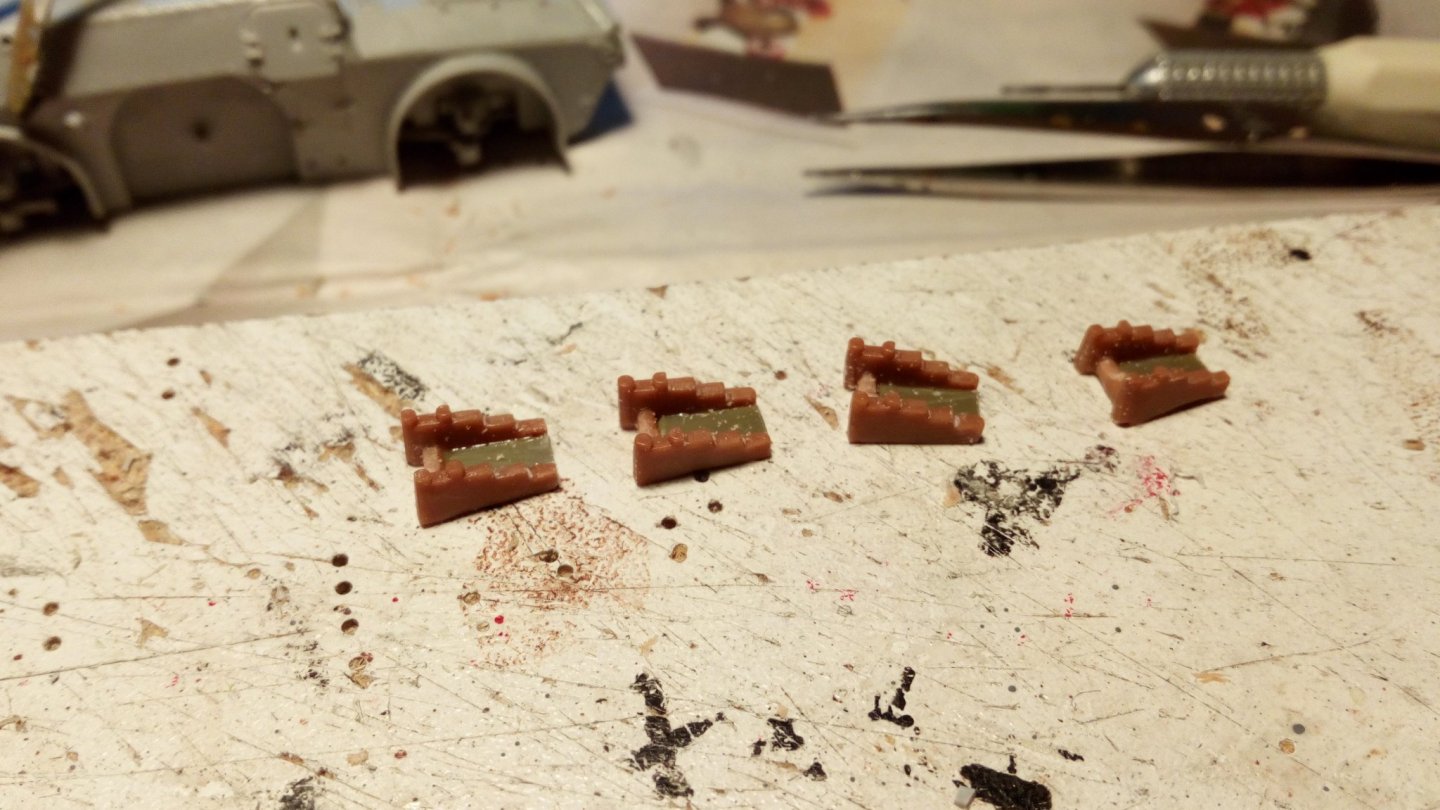
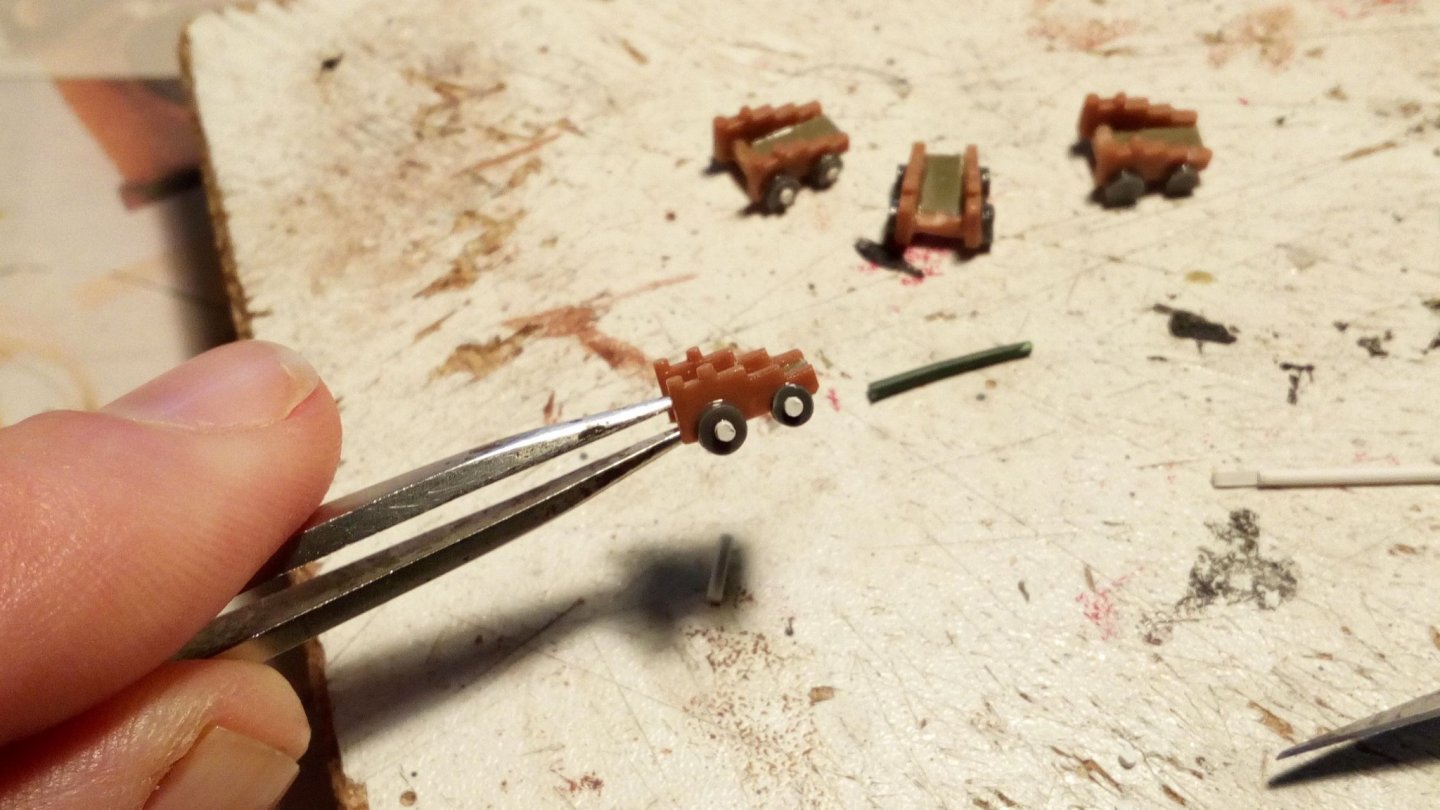
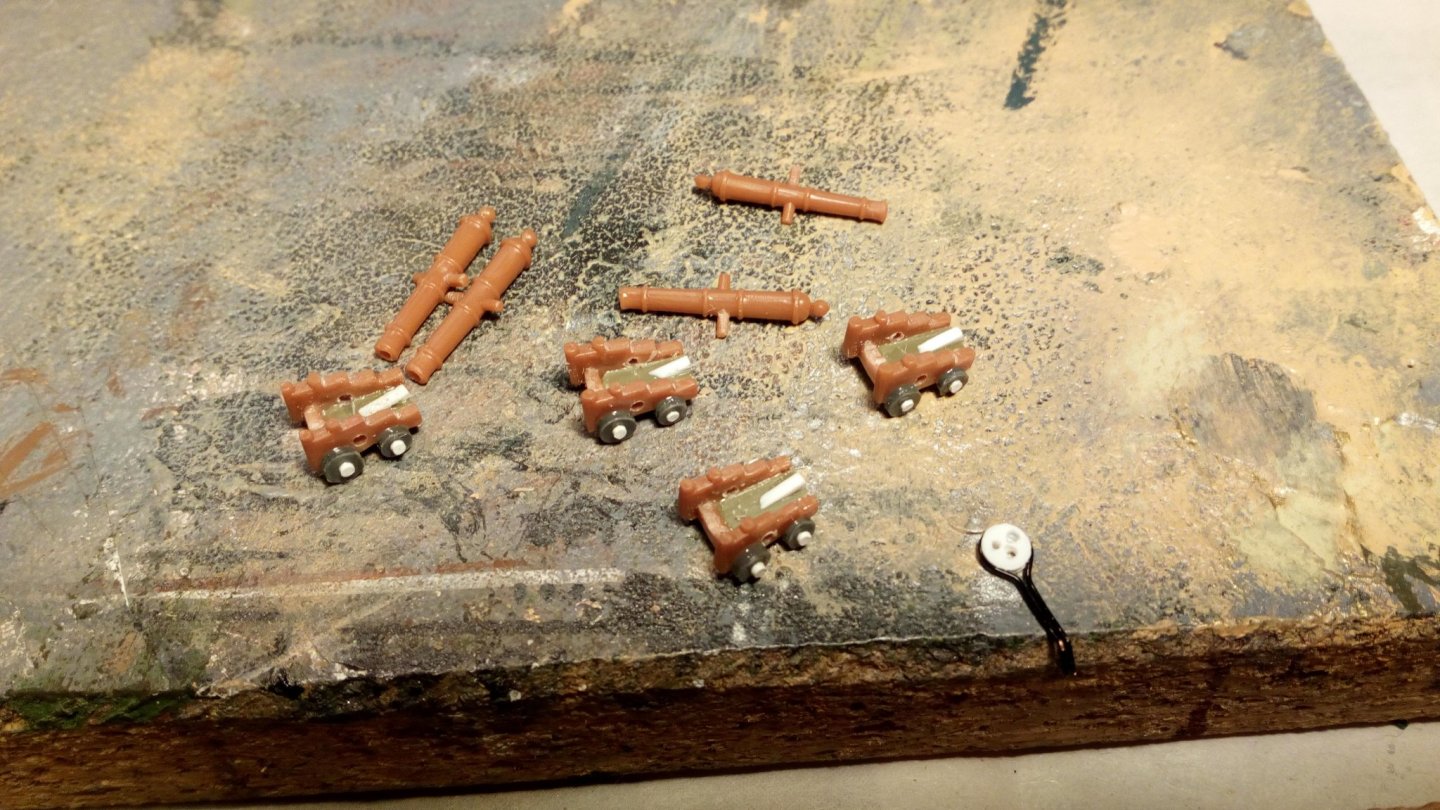
Thanks for the nice comments and likes. Building the 4 cannons. Drilling out the barrels Rebuilding the carriages Ready for painting. Carriages are in red, the barrels are mat black and pencil. ready, not glued on the deck.

-
Greetings, And Welcome to MSW.
-
Beautiful model Very educational build