

tlevine
-
Posts
1,960 -
Joined
-
Last visited
Content Type
Profiles
Forums
Gallery
Events
Posts posted by tlevine
-
-
-
-
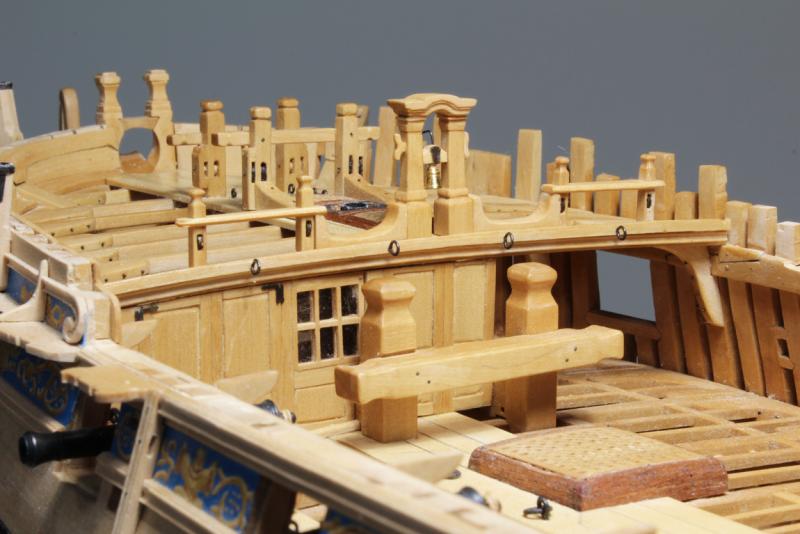
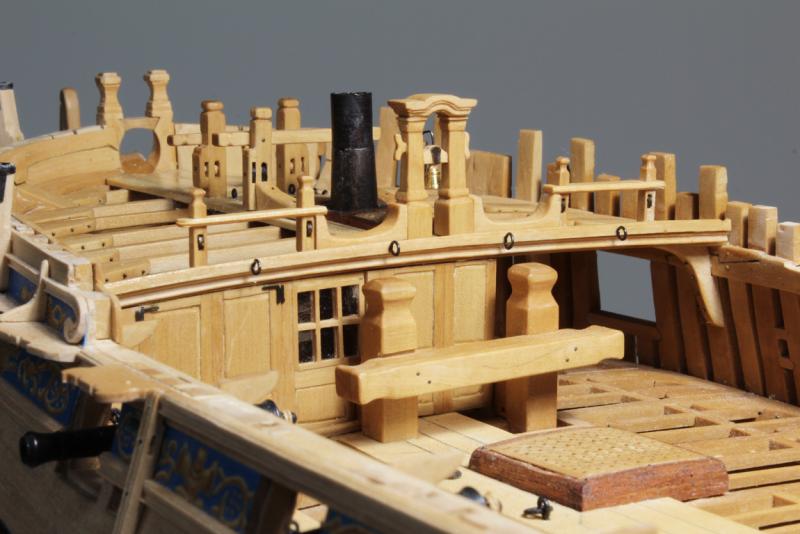
I cannot believe it has been so long since I posted. Amazing how life gets in the way. I was finally able to get some work done this weekend.
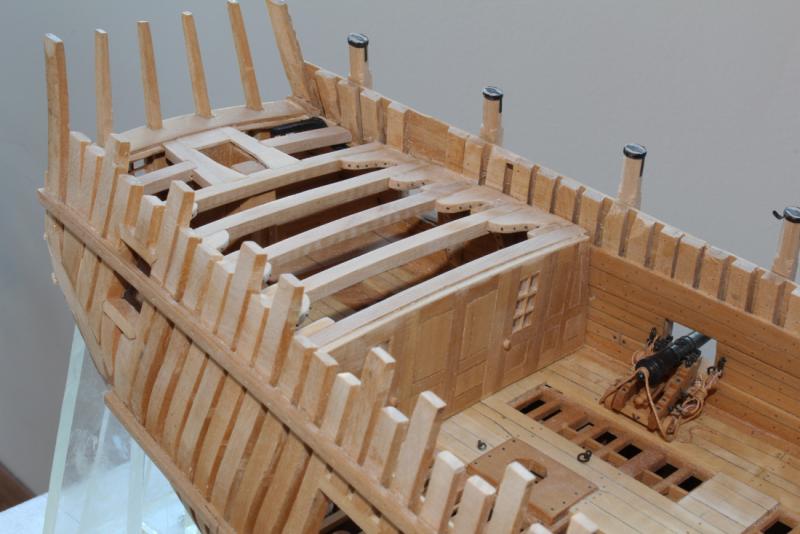
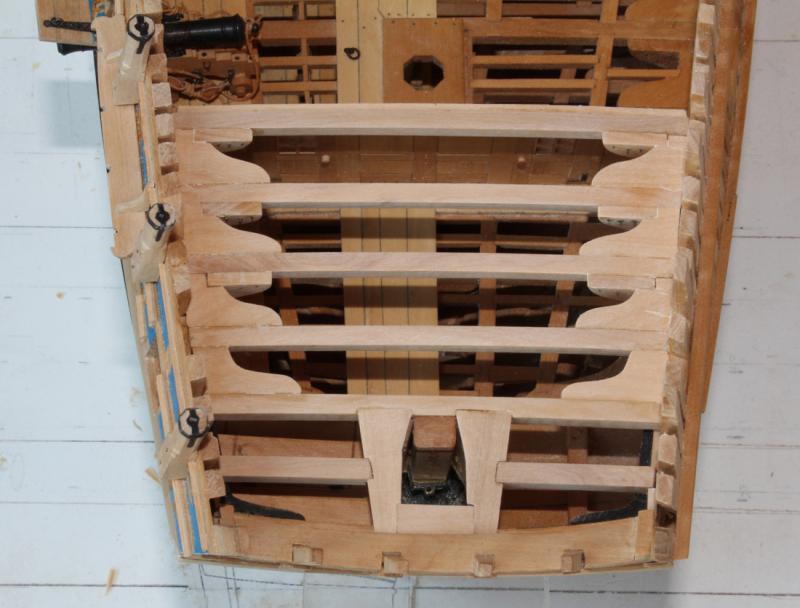
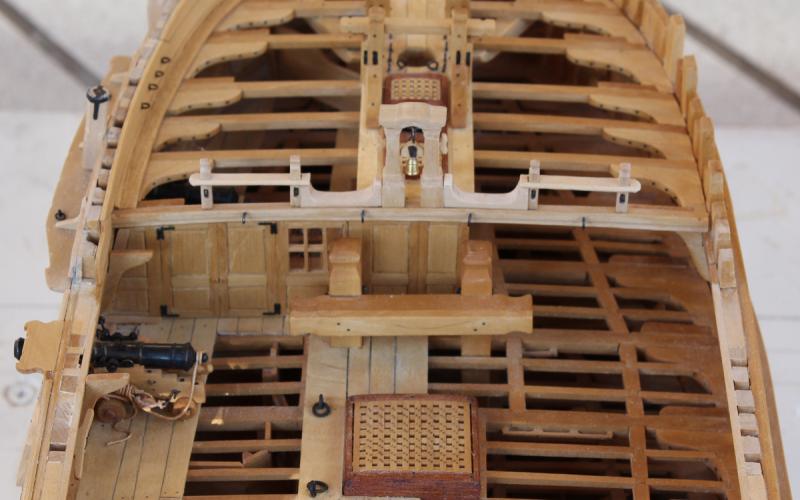
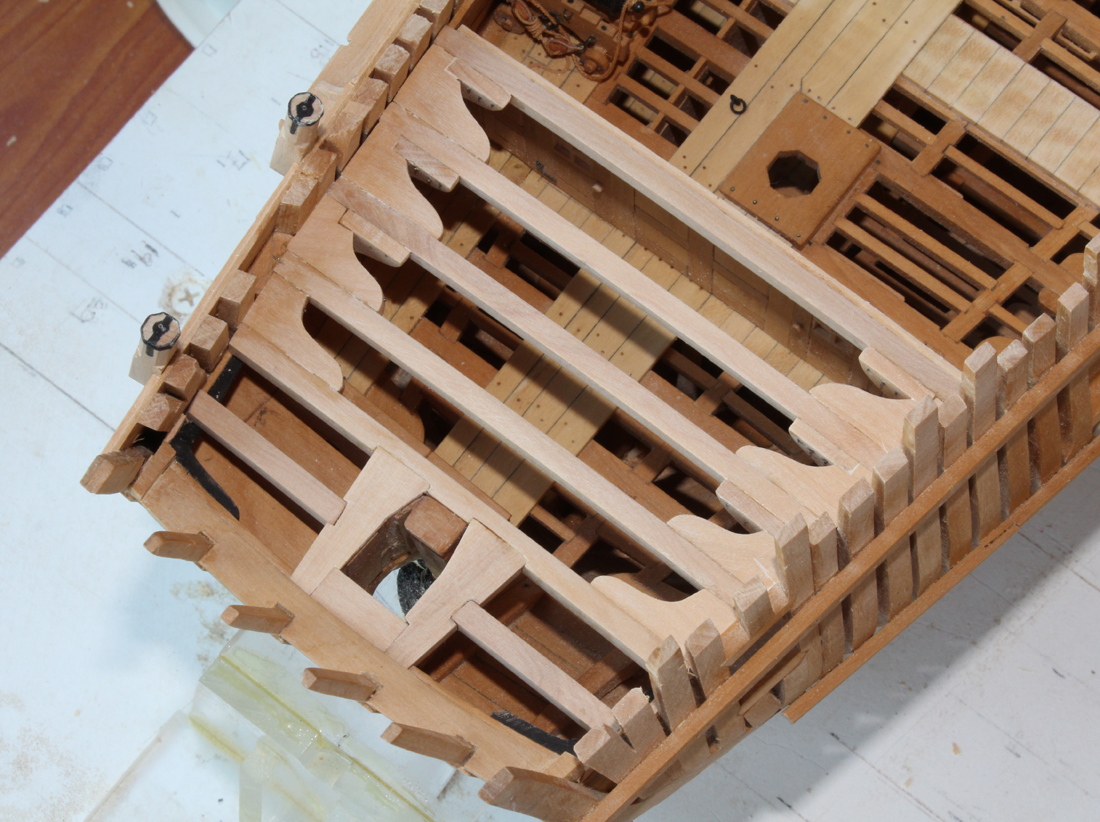
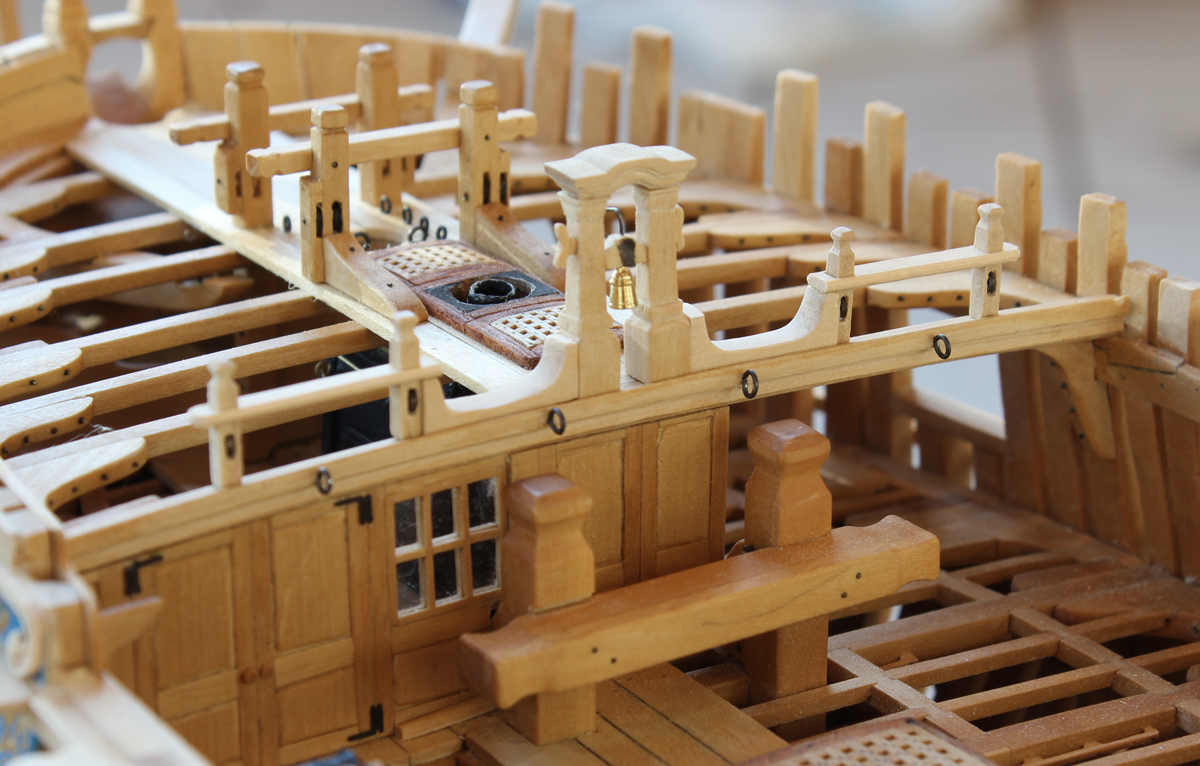
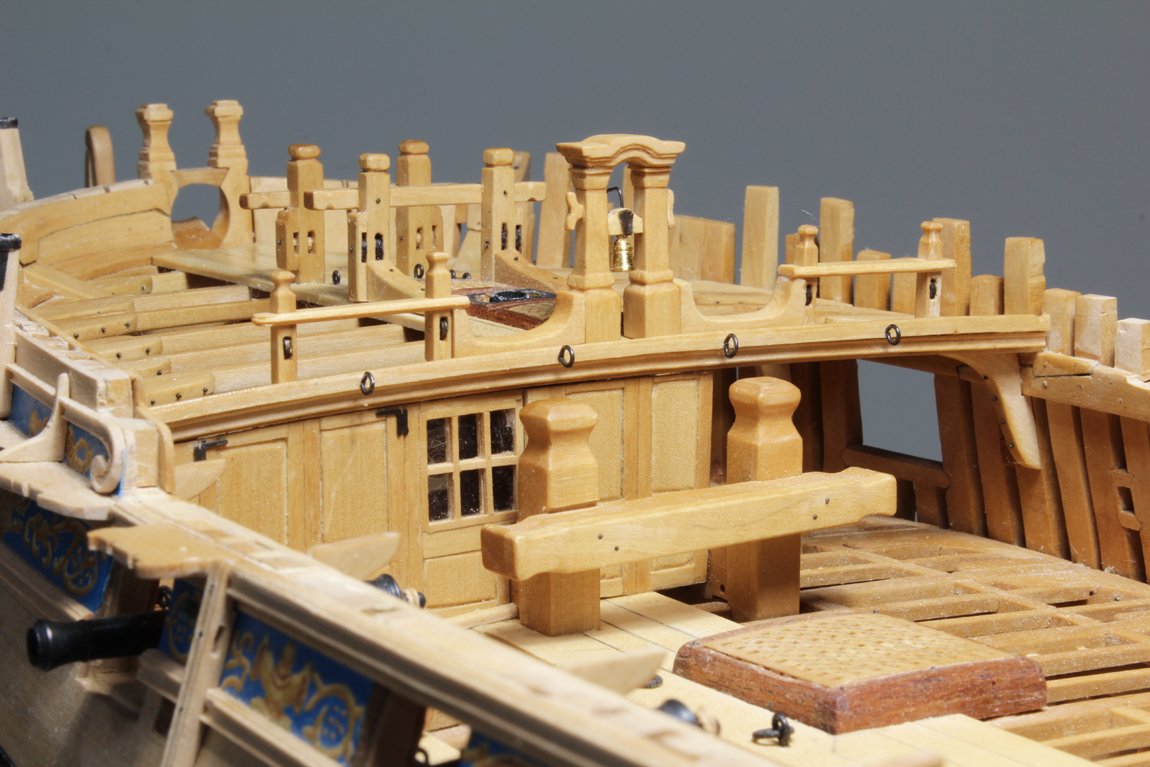
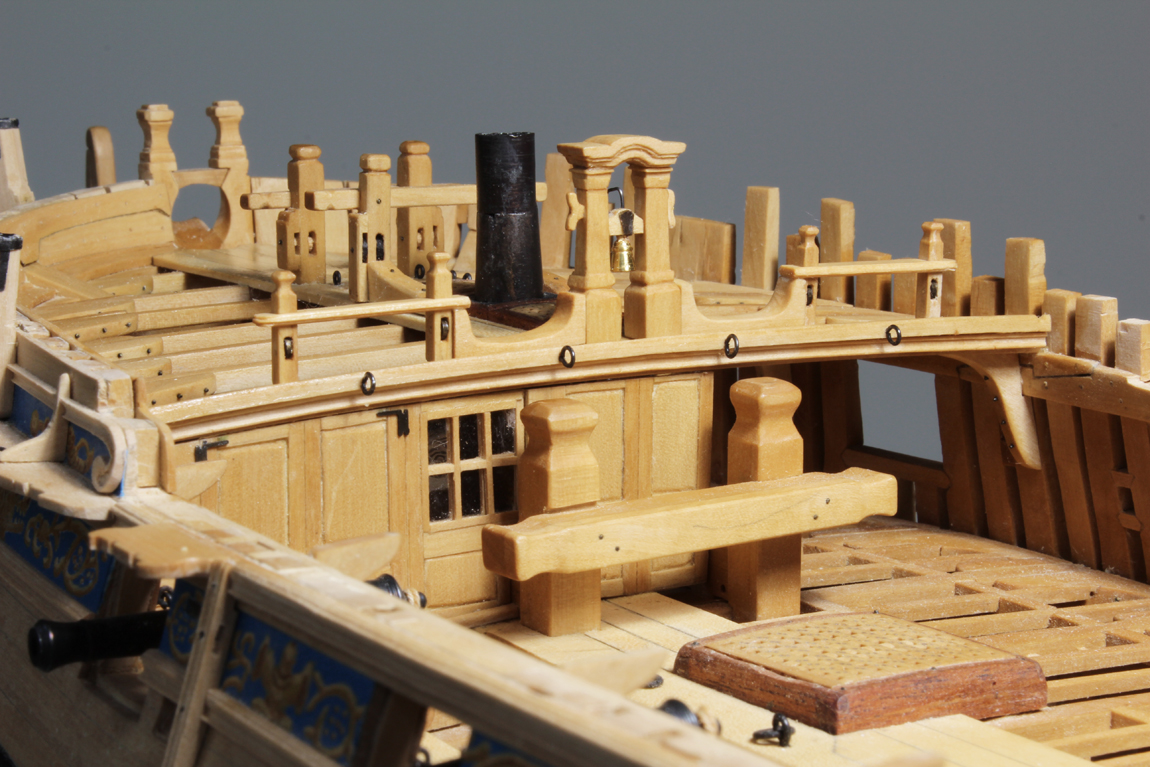
There is an iron knee connecting the transom with the inside of the hull. This is not a simple "L" shape. It needs to twist inferiorly to clear the undersurface of the quarterdeck half-beam. I made the knee out of castello and then painted it black. There is nothing unusual in the construction of the quarterdeck. There are no stanchions. The only carlings are related to the capstan step and the deck fenestrations. I find it easier to begin aft and work forward (ie narrow to wide) for better access. There are hanging and lodging knees for each beam except there is no hanging knee at beam 14 as this would have interfered with the quarter light.
The framing above the sternpost appears to be at a different angle than the rest of the deck in the last picture. This is an optical illusion. The plans show the bulkhead on the fore side of the beam, not underneath. Because this is a laminated structure I glued a thin shim on top so it would look neater.


- davec, giampieroricci, Martin W and 26 others
-
 29
29
-
Just be sure to "borrow" the stuff we want to replace with something nicer anyway!
- michael mott, Jack12477, mtaylor and 3 others
-
6
-
-
-
Beautiful figurehead. Tell us more how you designed and fabricated it.
- mtaylor, thibaultron and PeteB
-
3
-
Chuck, I would love to see something on polymer clay. I was considering making my figurehead with it (when that time ever comes).
There is also a regular #12 blade (aka tonsil knife) with the cutting surface only on the inside. Personally, I would rather load two scalpel handles to get the same effect as the #12D (#12 and #15 or #10). Much safer.
-
I want to be in your club! But then I'd have to move to Jersey...

- Canute, mtaylor, Stuntflyer and 3 others
-
6
-
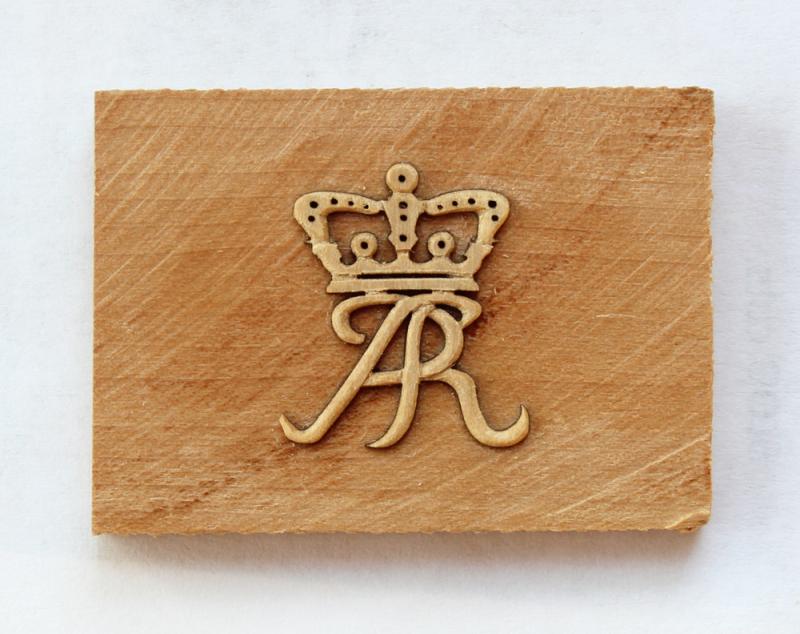
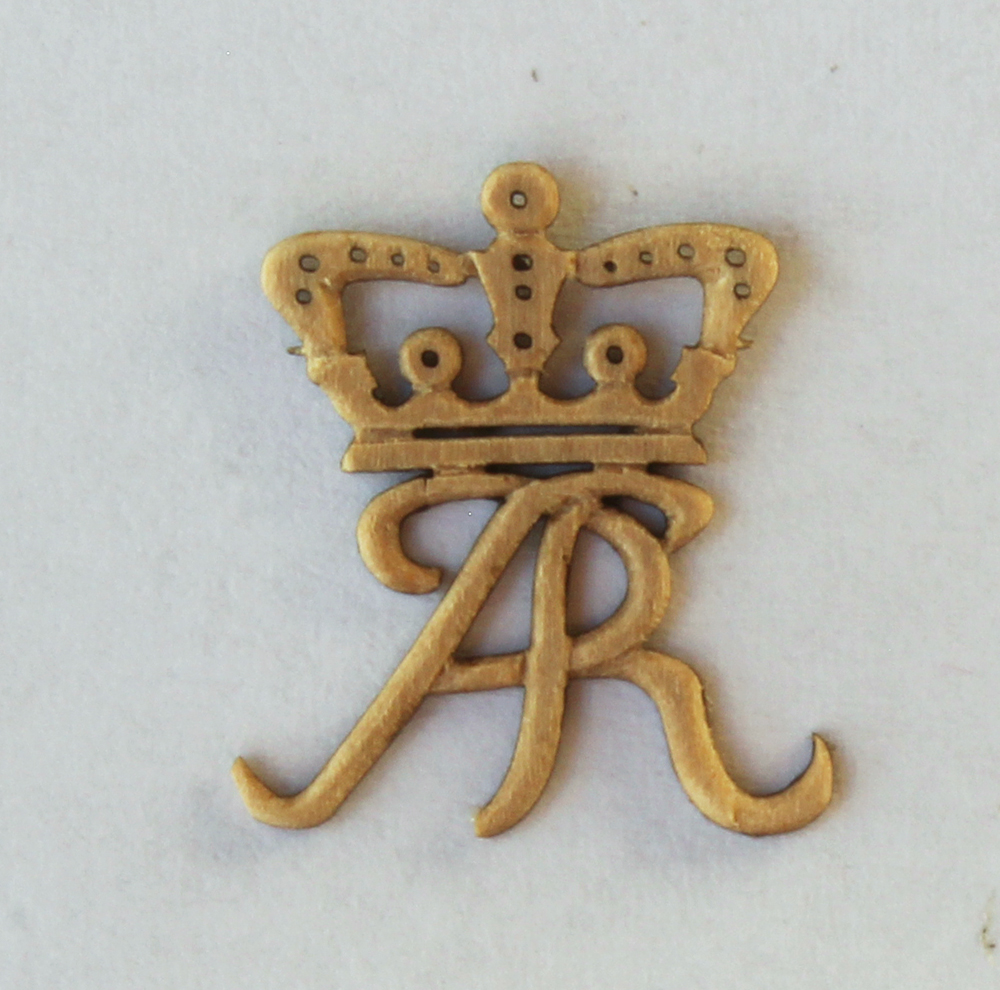
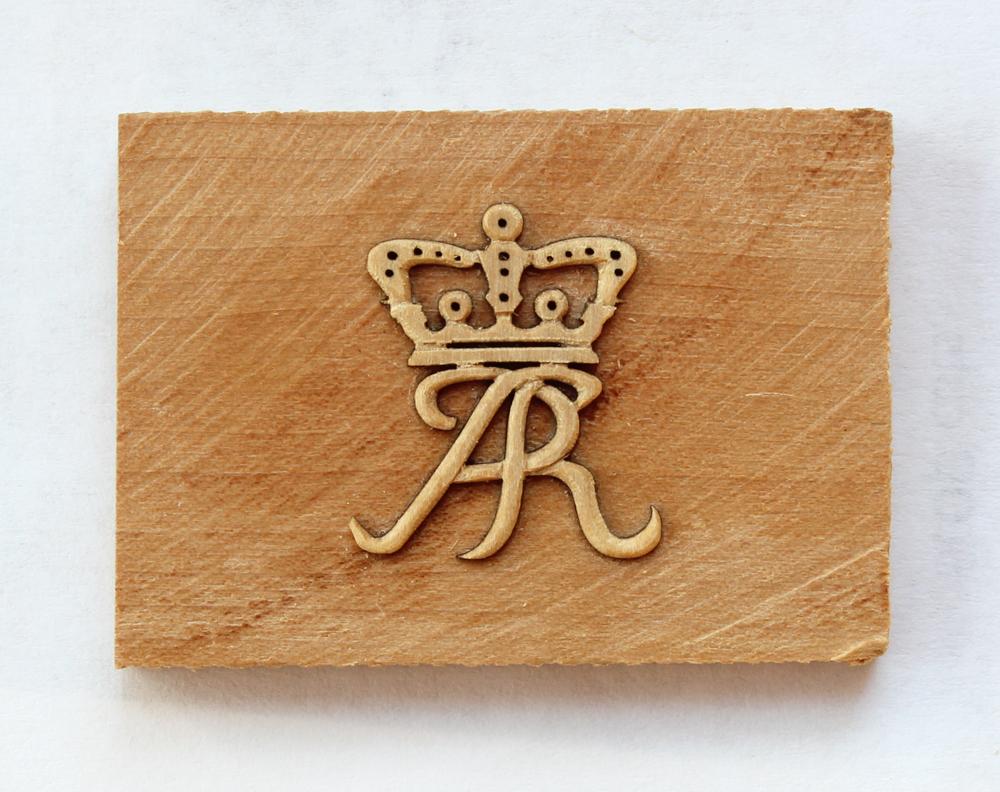
I cleaned up the carving with some 400 grit wet-dry sandpaper and removed the carving from the blank by soaking in isopropanol for an hour. As you can see, I lost the tip of the bottom of the "R".
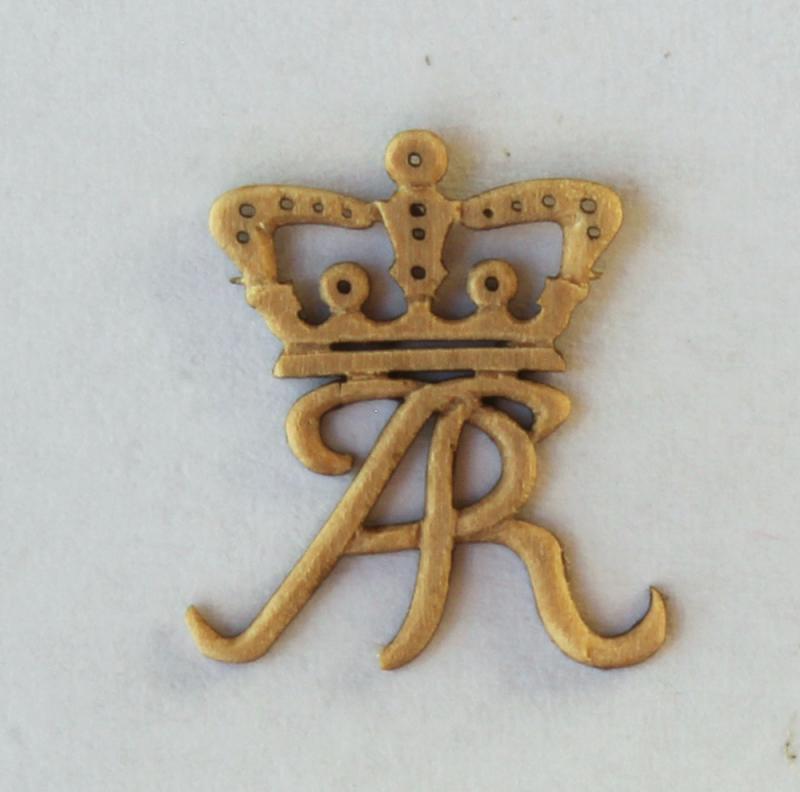
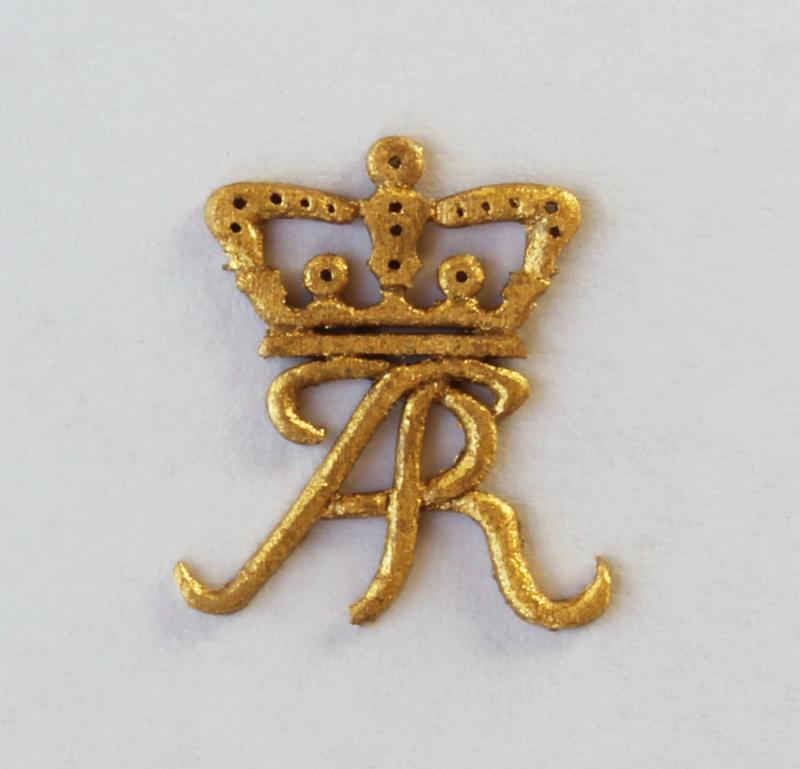
Next, I gold leafed it and applied a satin sealer. I'll try the other carving in a few weeks.
- mtaylor, CaptainSteve, Decko and 9 others
-
12
-
Chuck, I have not removed a gall bladder since 1982! Talk to me about tonsils or sinuses...

Once I burnish it (hopefully Thursday) I'll give it a good soak. I don't anticipate any problems.
- Chasseur, CaptainSteve, Jack12477 and 5 others
-
8
-
-
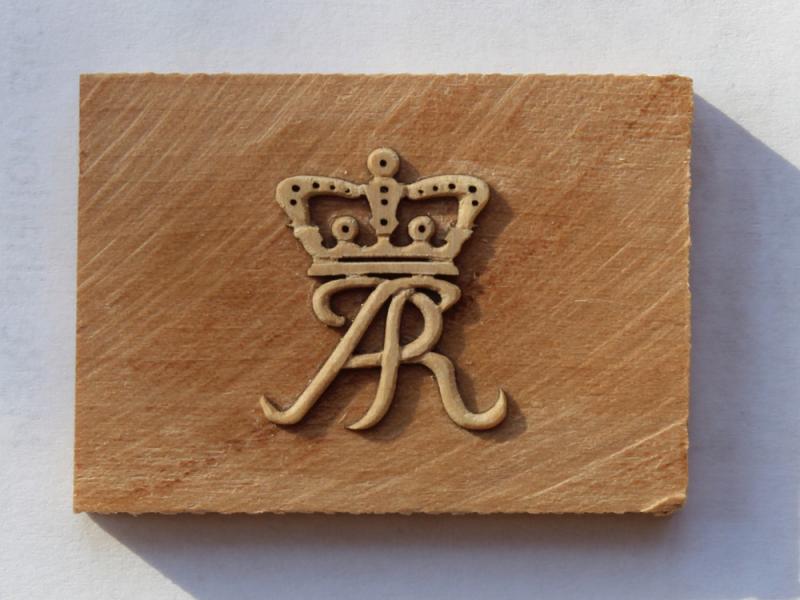
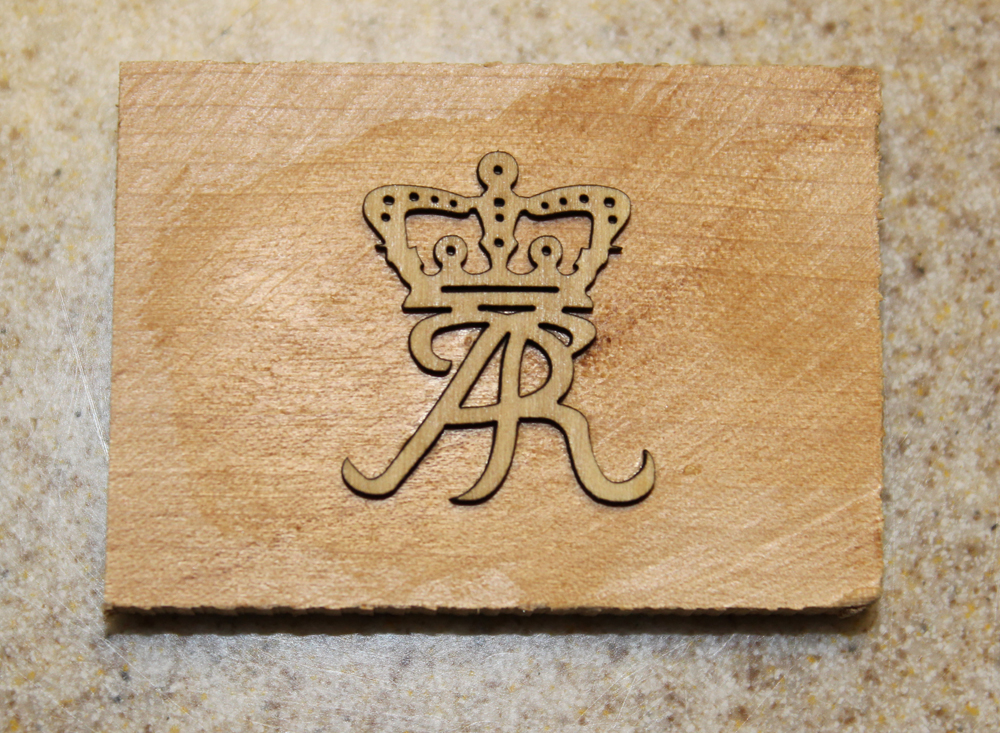
As I have never done any carving, I have decided to join this Group. I am using a combination of a #11 scalpel blade and a 1.5 mm micro-chisel.
My first step was to glue the blank onto a piece of scrap wood with yellow Elmer's. I clamped it in place for an hour before getting to work and then scraped off most of the laser char. As recommemded, my first task was to make the stop cuts. The key here is to only take off a tiny piece until one is happy with the effect. In addition to the red lines shown in Chuck's sketch, I added stop cuts on various spots of the crown, looking at what Chuck did for guidance. Finally, I have started to smooth down the corners. The last picture was taken to better illustrate the depth of the cuts.
Next, I will make up some 400 grit sanding sticks to improve the surface finish.

-
-
Mr. bigcreekdad everyone does stuff that they are unhappy with. It is part of the learning process, whether it is your first or 91st model. The key is to learn and enjoy the ride. You are lucky that it is easy at this point to rectify the problem by sanding and applying a new veneer of planking. Consider making a template of the deck and assemble the planks off the model. That way you can take a straight edge and align the treenails properly. Or leave them off completely because of the scale you are working in.
- Bill Hime, Chuck Seiler, Robin Lous and 3 others
-
6
-
You are right Bob, surgeons typically work at elbow height. But the reason for this is because the sterile field extends only between the surgeon's waist and shoulders. For certain operations, hand, ear and tonsil surgery for example, we usually are seated, with the patient still at relative elbow height for the same reason. It has nothing to do with ergonomics.
-
What scale are you building in? At 1:48 you would have holes approximately the size of a number 76 drill bit. If your scale is any smaller, you are best off either eliminating the pegs/trunnels/whatever-you-want-to-call-them or just make a shallow impression with a thin sewing needle and fill the impression with putty of the same color or slightly darker if that is the look you are trying to achieve.
- Bill Hime, Chuck Seiler, mtaylor and 2 others
-
5
-
Applying the finish made a big difference in their appearance. I wouldn't touch a thing. But if you want to fuss over your next set, I would suggest very narrow sanding sticks (320 or 400 grit) to use while they are still mounted on the backing board or a flexifile after they have been freed.
-
-
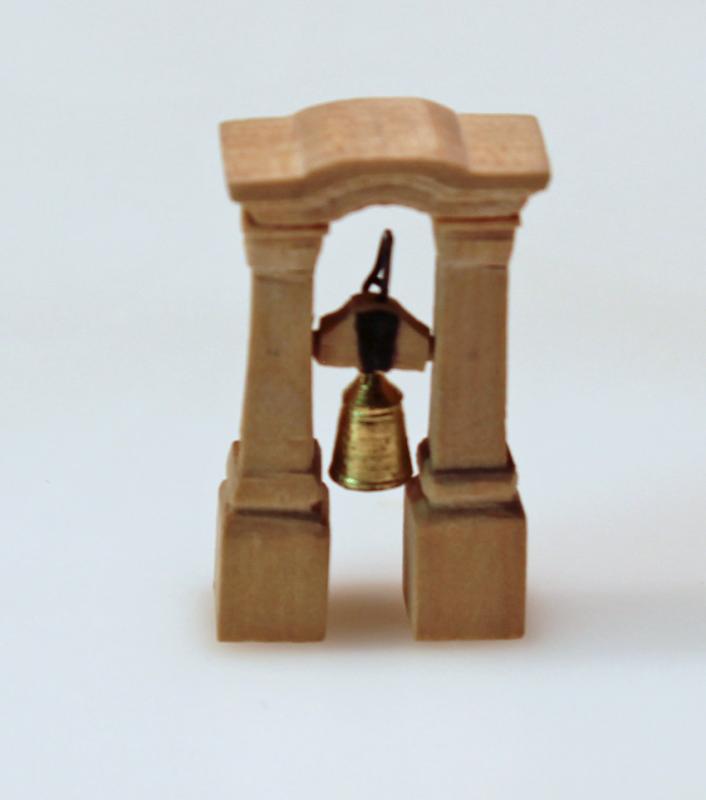
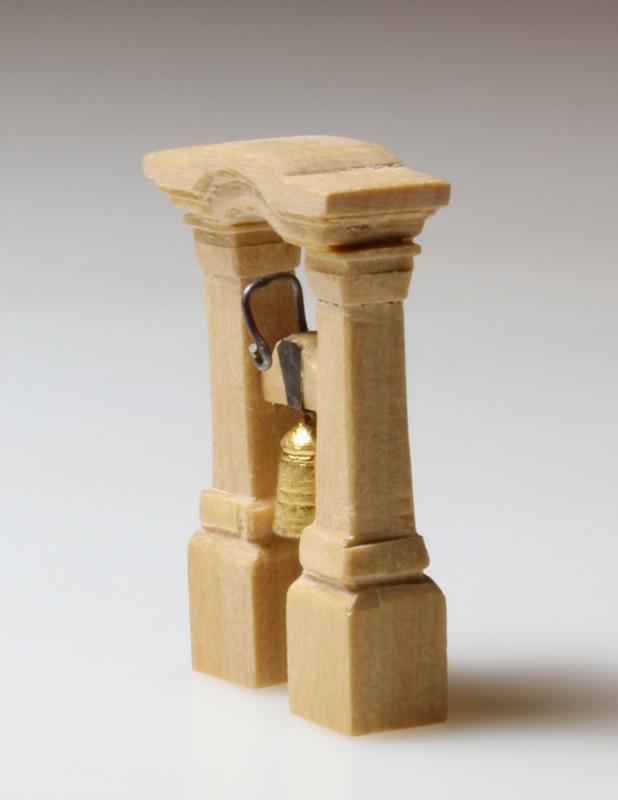
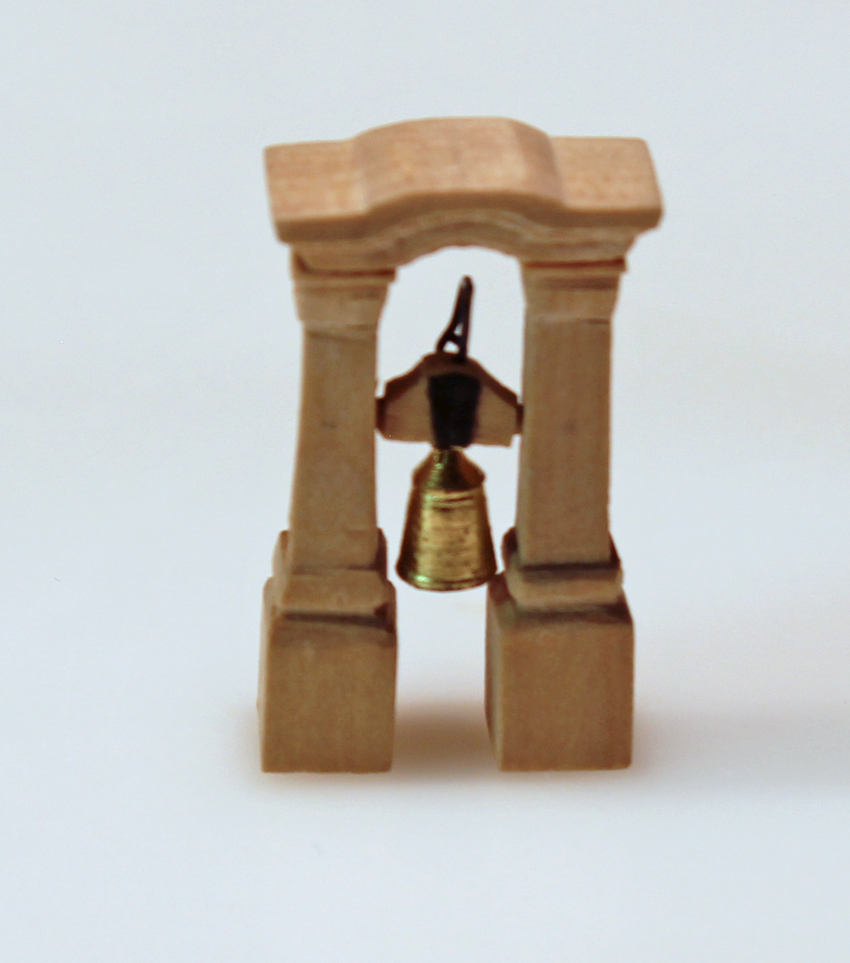
I have made a new bell and am much happier with it. It is in better proportion and I was able to get a smoother finish as well. Like the first one it is gold leafed. The first three pictures show the assembly before a finish was applied. The last two show things after a coat of Watco's.
- Elijah, Chuck Seiler, hexnut and 28 others
-
31
-
-
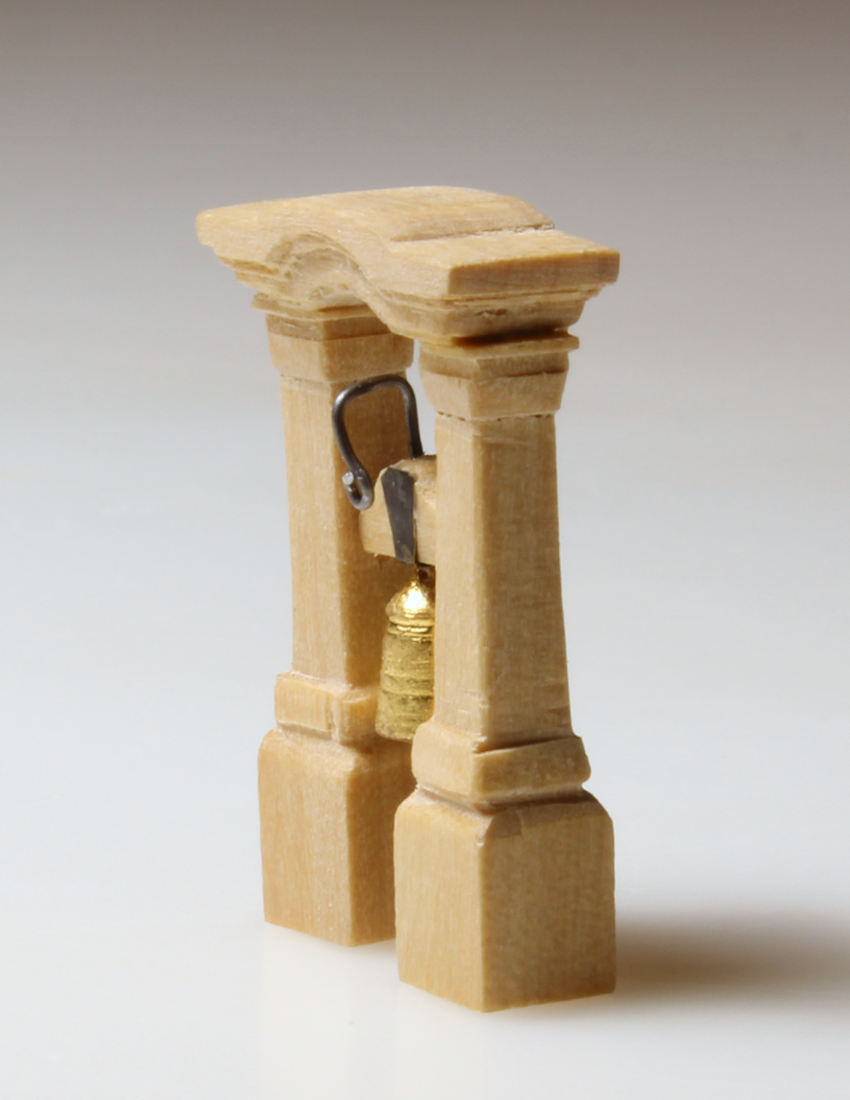
Magnified photos are our best friends and worst enemies. It looked good until I saw the pictures. Oh well, that was the easiest part of the belfry to make. Thank you for pointing it out to me. Take two will be much better!
-
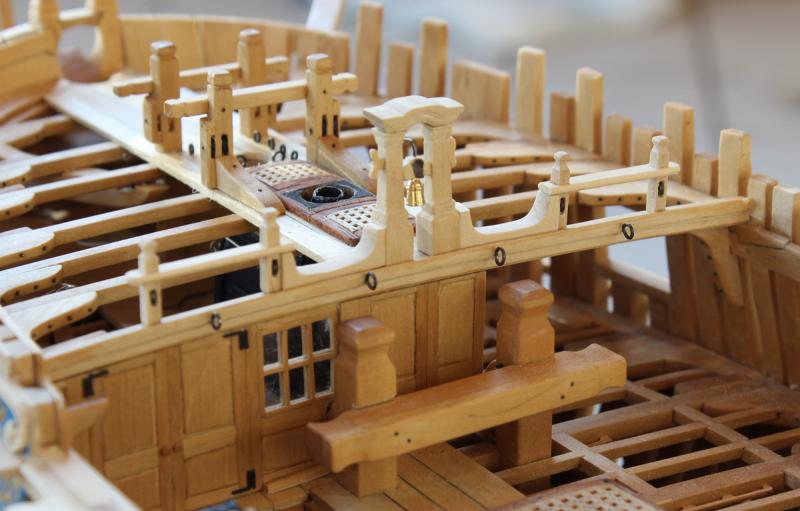
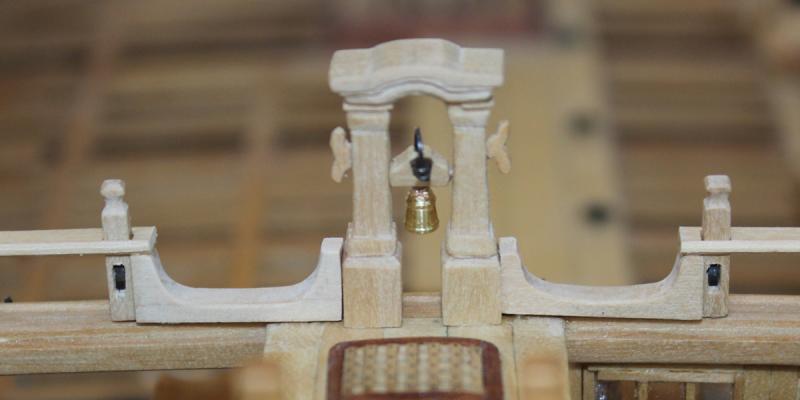
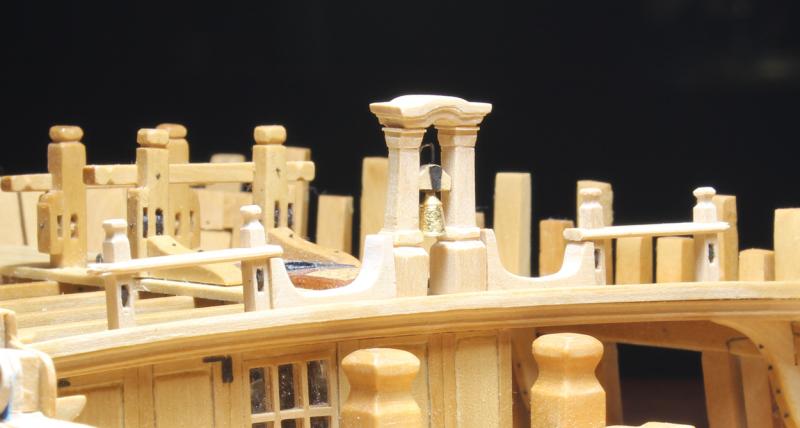
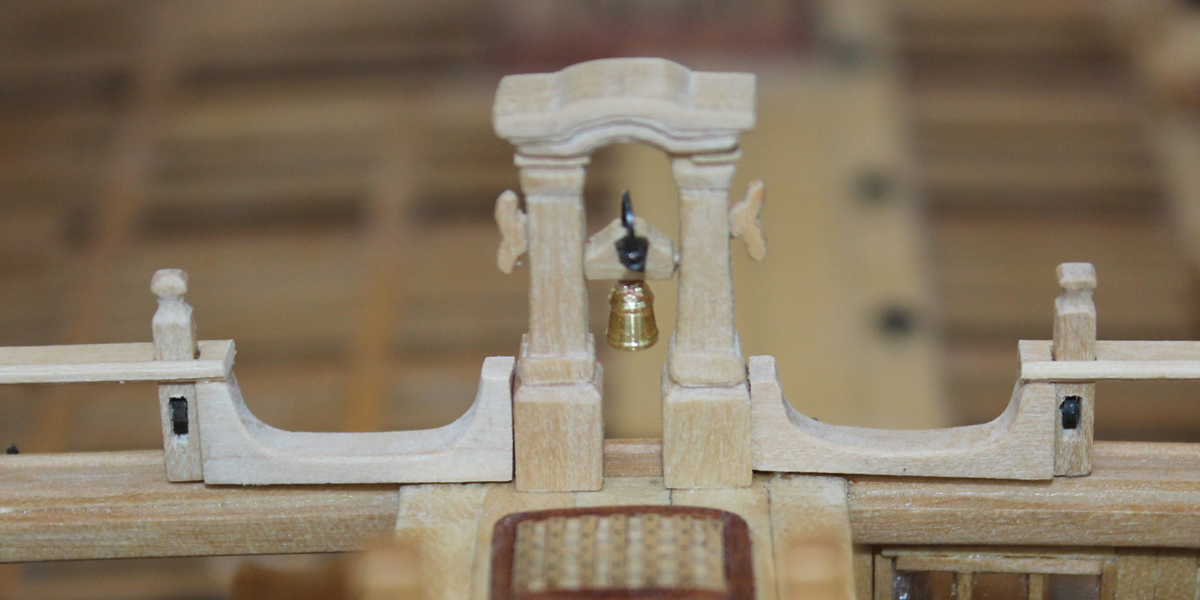
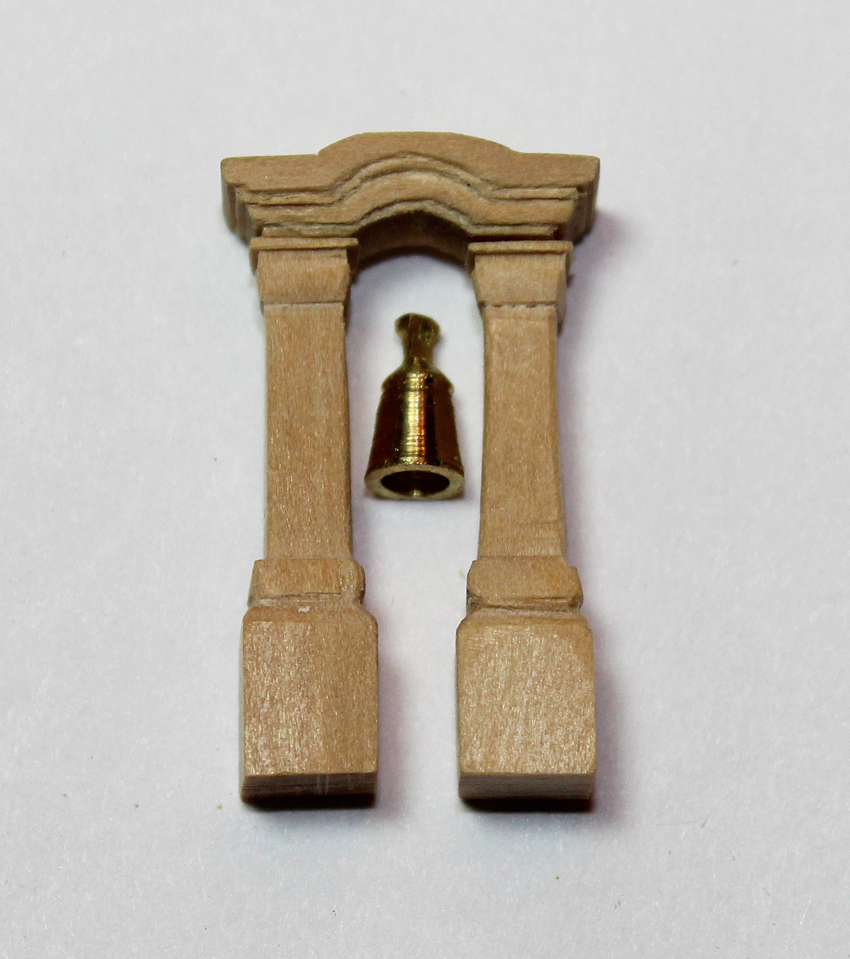
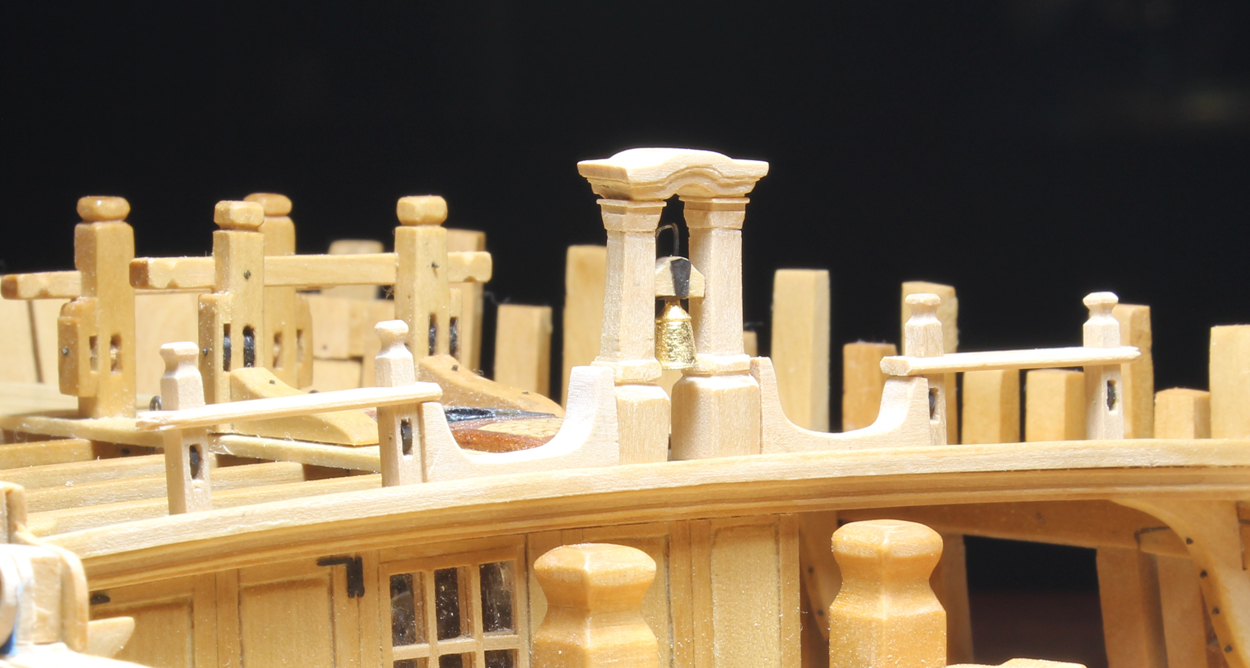
I finally have found a little time to work on Atalanta. For those of you who attended the Swan-Class Panel Discussion, you might remember we reinforced the need to follow the plan for the ship you are building and not blindly follow the book. This is a good case in point. The book shows a drawing for a typical belfry whose overall height is 36', width from the exterior of thestanchions 24" and width of the canopy 31.5". On Atalanta's plan the dimensions are overal height 48", width from the exterior of the stanchionrs 19.5" and extrapolated canopy width of 29". I measured the distance from the lateral edge of the forcastle rail to the bulwark and this only measures 30", the same as the width of a typical interior door. If I had ignored the plan I would have ended up with a distance of only 27" between the rail and the bulwark, too narrow a distance for two men to pass simultaneously.
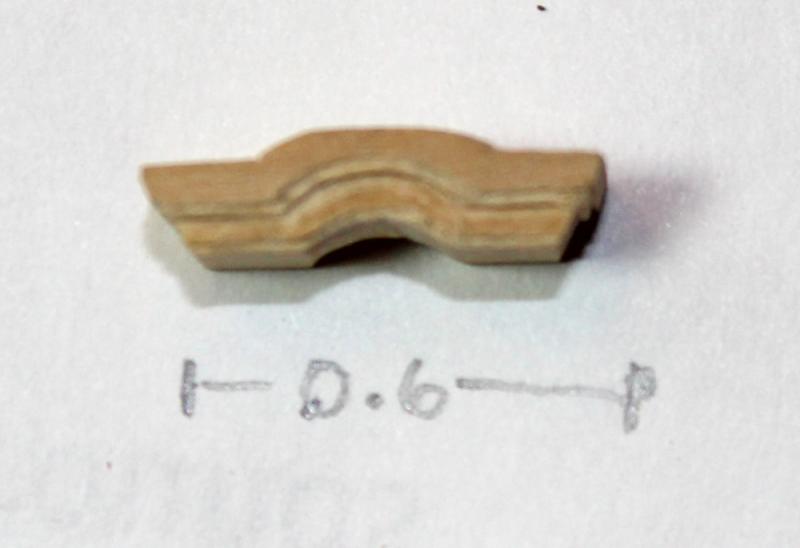
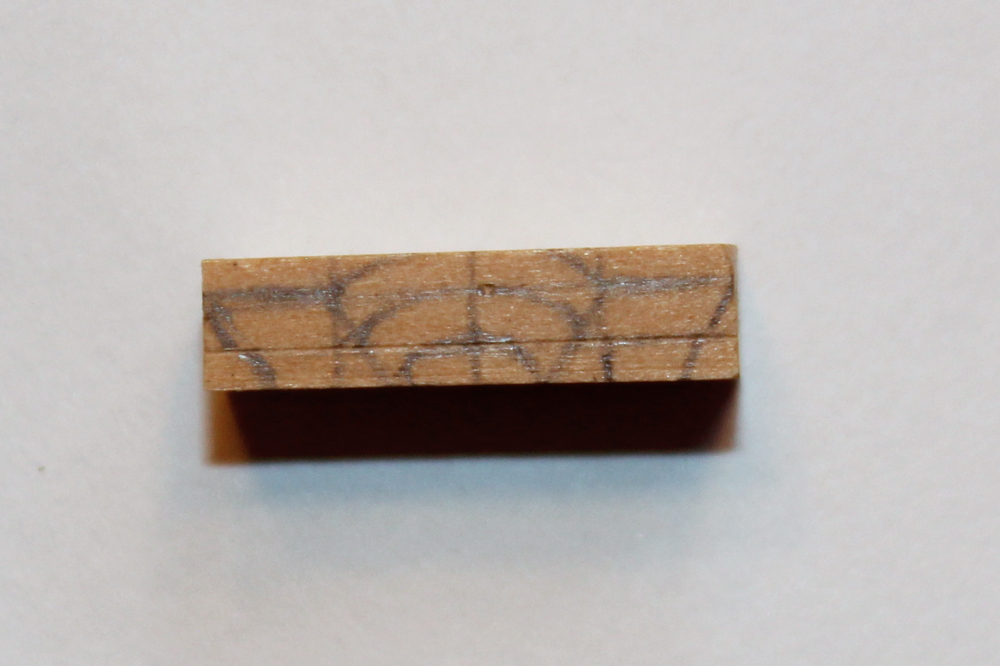
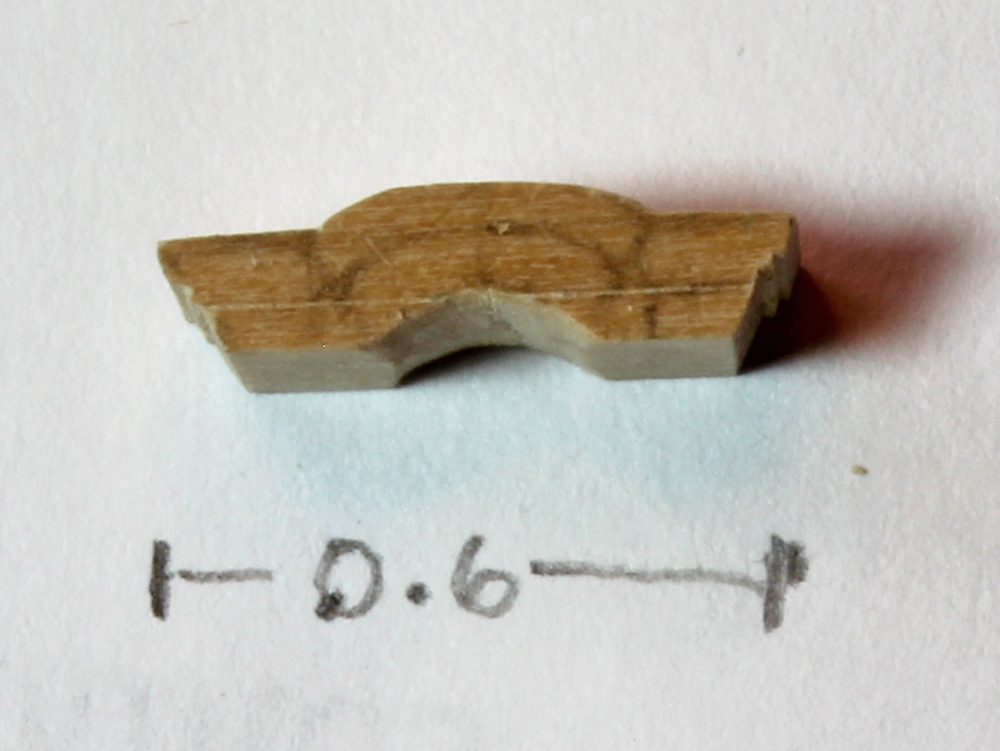
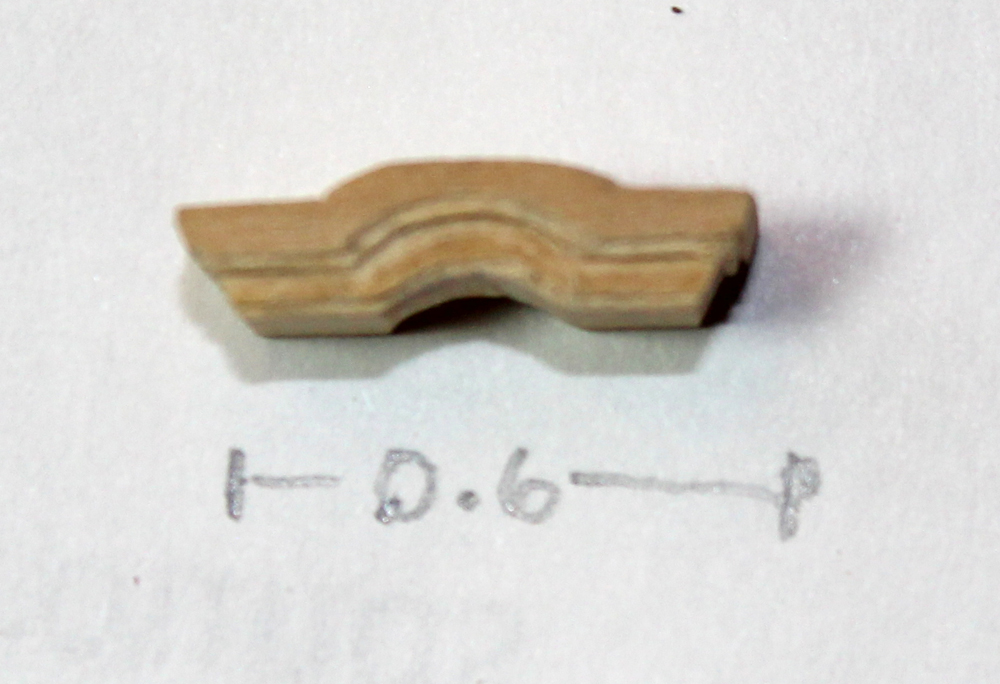
The canopy was made first. I traced the outline on a piece of castello, including the steps for the moldings. The exterior was rough finished top and bottom.
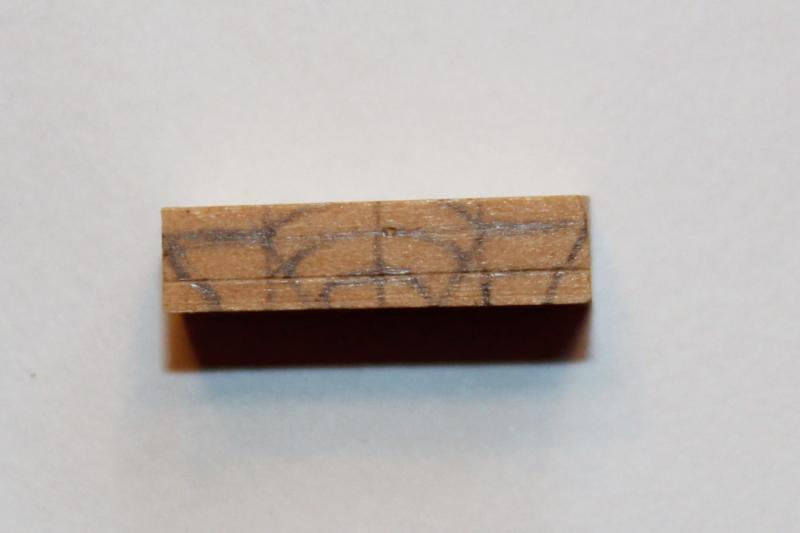

Using an 11 blade, I incised the edge for the first molded edge and used a micro-chisel to cut to that line. I did the same thing for the remaining molded edges.
On Atalanta the stanchionss are not tapered. The various depths were cut using the Preac. A blind hole was made internally to accept the tenon of the headstock.
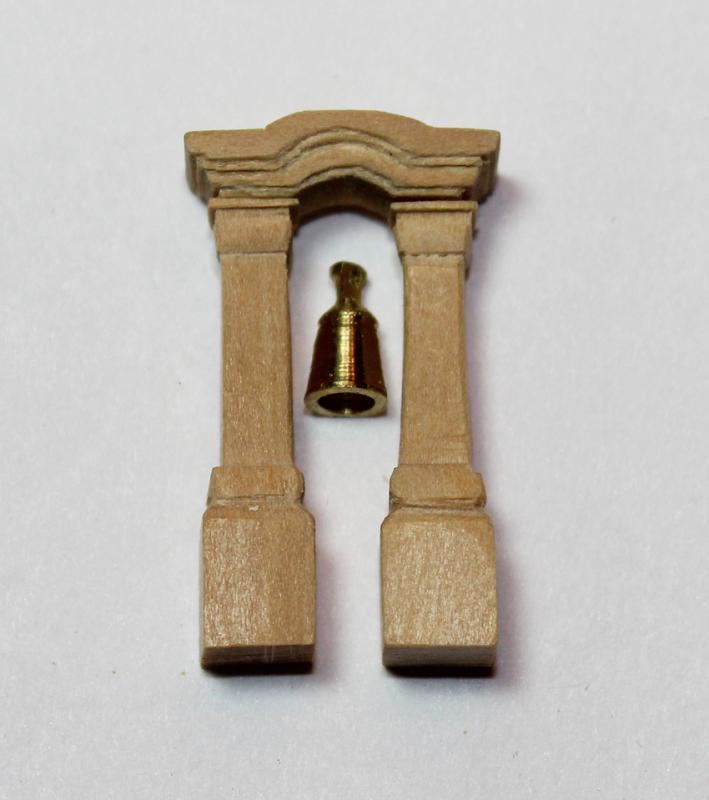
I drilled a hole into the headstock to accept the bell. A 28 gauge wire formed thecrank. The cleats have not been installed yet. The bell was turned from brass rod on the lathe and drilled out. No, there is not a clapper but the headstock does rotate. As this will be the only bright metal on the ship, it has been gold leafed.
The pictures show the forecastle rail and belfry temporarily positioned. I need to level the headstock and mate the surfaces between the rail and the stanchions.

- michael mott, rafine, Mike Y and 23 others
-
26
-
I bought one of these magic tools many years ago. It actually is useful for a down-n-dirty first planking with a soft wood such as basswood. But if you are careful with the tool and make many small impressions rather than a few large ones the outside of the plank should be reasonably smooth.


Beavers Prize 1777 by Mike Y - 1:48 - POF - Hahn style
in - Build logs for subjects built 1751 - 1800
Posted
In the past I have always stained the wale planks. Chuck uses several layers of thinned artist's acrylic paint on his models. I tried the same thing on Atalanta and am very pleased with the result. After fours coats of paint I burnished it with 4000 grit sand paper to make it stand out from the matte finish of the rest of the hull. What is very nice is that touch-ups are easily blended into the rest of the wale.